The Traveling Epicurean

Tortellini at The Gulla’s

Tortellini at The Gulla’s

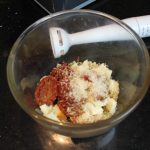
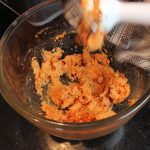
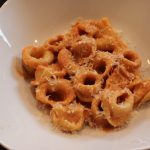
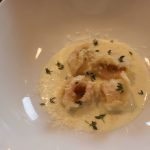
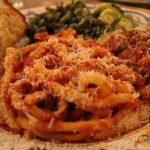
You know this labor of love is so worth the effort when you taste how tender and flavorful these homemade tortellini are! The delicate, circular shaped pasta are stuffed with a purée of sundried tomato, mozzarella, and Reggiano Parmesan and served in one of my all time favorites, a tomato-cream sauce.  I introduced Steve to another easy and scrumptious sauce, Gorganzola Dolce-Cream Sauce that’s garnished with fresh thyme and a drizzle of truffle oil! 

This past weekend I was at The Gulla’s house with Steve and his son Maximo making their homemade tortellini. Steve dedicates a few hours every Christmas Eve making these little gourmet bites for his family’s Christmas dinner. Making these tortellini is definitely a labor of love because you are creating each little amazing folded bundle of pasta by hand.

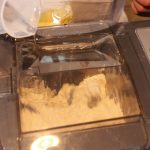
Having a Smart pasta machine like Steve’s really cuts down on the labor of making tortellini as the pasta comes out of the machine in long ready-made sheets in mere minutes. It’s a very cool process putting out smooth sheets of pasta in 3 minutes flat but you can also learn to make Steve’s tortellini using homemade pasta too if you don’t own an Smart pasta machine. I have a homemade pasta recipe below for all of us without a pasta machine who don’t want to miss out on learning how to make these incredible tortellini.

As Italian legend goes on how the shape of the tortellini came about dates back to the days when Venus, the Goddess of Love, was traveling to a small town in Italy between Modena and Bologna. She was staying at a tavern where the Innkeeper was so taken by her beauty he peeked thru the key to her room one night and got a glimse of her navel. He rushed to the kitchen and created a pasta in the likeness of her belly button. And that’s how the shape of the tortellini came about, the belly button pasta! Who Knew?

While you are working hard forming these wonderful tortellini you may need a little sip of something to get you through like a Metaxa Mojito! And for easy nibbles you can pick on some Mango Salsa, Sweet Potato Fries and Green Goddess Dip II,  Best Guacamole Ever or some delicious Mediterranean Layered Dip!
INGRDIENTS for making PASTA in The Smart Pasta Machine:

  • 3 parts flour
  • 1 part semolina
  • 180 ml OR 3/4 cup of water for 2 lbs flour in pasta machine
  • 1 egg and 1 tsp water whisked in a small bowl – set aside until ready to form tortellini

INGREDIENTS for Sun-dried Tomato FILLING:                                                                                         NOTE: THIS FILLING IS UNBELIEVEABLY DELICIOUS!…try it on crostini OR on crusty bread!

  • 1/2 cup sun dried tomatoes
  • 1/2 cup mozzarella – whole milk or part skim
  • 1/4 cup grated Reggiano Parmesan
  • 2-3 tbsp olive oil

Purée these ingredients with an immersion blender or add to food processor and pulse. Start with 2 tbsp of olive oil and add a little extra if needed to purée til smooth texture

DIRECTIONS FOR FORMING THE TORTELLINI WITH SHEETS OF PASTA MADE FROM THE PASTA MACHINE:

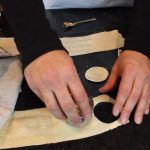
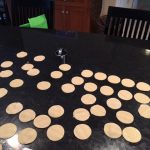
  1. Begin to cut 2″ circles with your cookie cutter out of the machine made sheets of pasta
  2. Brush top 1/2 of the circle edge with a whisked egg
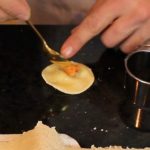
  3. Place 1/4 tsp of sun dried tomato filling in the middle of the circle pasta
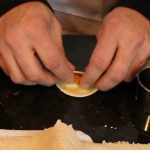
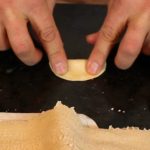
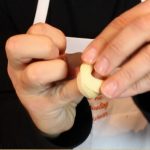
  4. Fold the circle in 1/2
  5. Press to SEAL the 1/2 circle of pasta…VERY IMPORTANT to SEAL this edge!
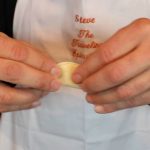
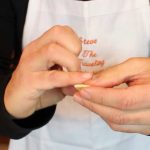
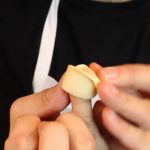
  6. Take 1/2 circle and wrap around your pinky having each end meet
  7. Press these two ends together to seal and form one continous circular shape
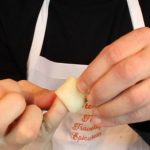
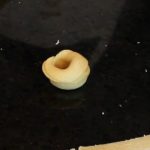
  8. Fold down top of circular pasta to form tortellini
  9. Place in a bowl as you finish each one until you gone thru all the pasta sheets
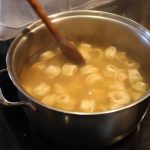
  10. Bring large pan of salted water to a boil and add fresh pasta
  11. Cook pasta for 8 minutes, test pieces of pasta for proper doneness
  12. Serve with tomato-cream sauce or Gorganzola Dolce-cream sauce, garnish with thyme and truffle oil … mmm!

INGREDIENTS FOR TOMATO-CREAM SAUCE:

  • 2 cloves finely chopped garlic
  • 1/2 tsp salt
  • 1/4 tsp dried oregano
  • 3 1/4 cup POMI “strained tomaotes” – 1 med box – 26 oz.
  • 2 cups heavy cream
  • 2 tbsp olive oil

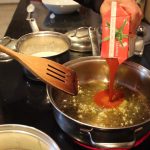
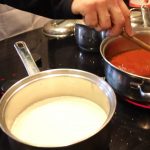
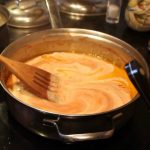
Sauté finely chopped garlic in 2 tbsp olive oil for 3 minutes, add in POMI strained tomatoes, salt & oregano and simmer for 15 minutes. Add in 2 cups of heavy cream to tomato sauce. Bring to a simmer for 15 miutes more. Serve with cooked tortellini, garnish with fresh thyme (and truffle oil.

INGREDIENTS FOR GORGANZOLA DOLCE-CREAM SAUCE:

  • 2 cups heavy cream
  • 1/4 cup Gorganzola Dolce cheese
  • 1/4 cup dry vermouth
  • fresh thyme leaves
  • truffle oil

Add heavy cream, Gorganzola, and vermouth to a small sauce pan and bring to a simmer. When it comes to a simmer whisk the melted cheese into the cream and simmer 10 minutes. Serve with tortellini, garnish with a sprinkle of fresh thyme leaves and a drizzle of truffle oil.

INGREDIENTS for Easy Homemade-Handmade Pasta- (Recipe from “Pasta at Vin’s“)

  • 2 1/2 cups all purpose flour
  • 1/4 cup olive oil
  • 4 1/2  – 5 lg eggs
  • 1/4 tsp salt

DIRECTIONS:

  1. Put the kneading attachment on your food processor and add the flour
  2. Add the salt and olive oil
  3. Turn on the food processor to slow
  4. Add in 1 tbsp of water
  5. Begin adding in 1 egg at a time with the processor still on slow
  6. Add in the rest of the eggs
  7. Keep the food processor going on medium speed to begin kneading the dough
  8. Let knead for about 8 minutes until the texture turns into a smooth consistency
  9. Remove the pasta dough and place onto the counter
  10. Knead briefly with your hands and let sit for 1/2 hr.
  11. NOTE: Vin does not cover his pasta dough while it sits for the 1/2 so it can begin to dry out  a little bit
  12. Sprinkle some flour onto the counter or work surface and cut pasta dough into 8 pieces
  13. Begin to roll out each piece of dough to your desired thickness, into long lasagna-like sheets
  14. Sprinkle more flour on top of each thinly rolled out pasta piece and begin to cut out 2″ circles with your cookie cutter
  15. Brush top 1/2 of the circle edge with a whisked egg
  16. Place 1/4 tsp of sun dried tomato filling in the middle of the circle pasta
  17. Fold the circle in 1/2
  18. Press to SEAL the 1/2 circle of pasta…VERY IMPORTANT to SEAL this edge!
  19. Take 1/2 circle and wrap around your pinky having each end meet
  20. Press these two ends together to seal and form one continous circular shape
  21. Fold down top of circular pasta to form tortellini
  22. Place in a bowl as you finish each one until you gone thru all the pasta sheets
  23. Bring large pan of salted water to a boil and add fresh pasta
  24. Cook pasta for 8 minutes, test pieces of pasta for proper doneness
  25. Serve with tomato-cream sauce or Gorganzola Dolce-cream sauce, garnish with thyme and truffle oil … mmm!


Pickled Eggplant at Nancy’s

Pickled Eggplant at Nancy’s

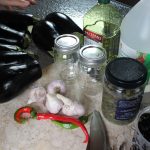
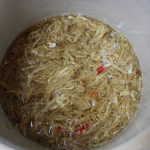
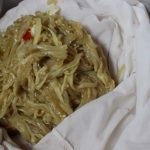
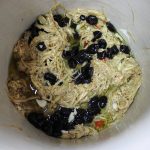
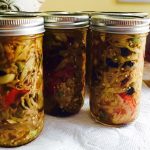
pickperfectThere’s nothing like homemade Pickled Eggplant with thinly sliced strands of eggplant delicately flavored by vinegar, garlic, red hot chili pepper’s, oil-cured black olives and capers all nestled in an olive oil bath. The oil-cured, black olives, add a burst of rich, meaty, sweetness and then there’s a little pucker from the capers. Similar to the oil-cured olives, the eggplant become’s sweet in the beginning of the pickling process when the salt pulls out all the moisture and bitterness.

When Nancy first gave me a jar of her delectable pickled eggplant I knew I would have to get the recipe. Not only is her pickled eggplant to die for but everything she cooks is of the same standard, absolutely delicious! Along with inspiring me in the kitchen, Nancy had the same effect on me on the golf course when I first started playing 8 years ago. She has such tenacity and determination when playing I call her the fiesty golfer! Considering how difficult the game of golf can be, she’s the perfect person to learn the game with.

I had so much fun at Nancy’s house last week making her pickled eggplant. It’s so worth the effort you put into making your own, a most rewarding process when you taste the final product. All of these incredible flavors come together to make an amazing eggplant appetizer like you’ve never had before! You just can’t buy this in the stores!

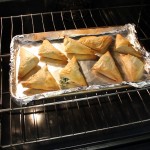
You may just want to turn your party into an anti-pasto party with other dishes to compliment your pickled eggplant like Guacamole Crostini, Roasted Garlic Bean Dip, Arancini Reubens Balls w/Homemade Thousand Island Dressing, Spanakopita w/Metaxa Mojito’s and, or Homemade Pesto w/Fresh Mozzarella & tomato Crostini! Yum! Hope to recieve an invite to your delectable party lol 🙂

IMG_7767 IMG_6722 030-300x225 cookedspan IMG_2026

img_8354 img_8357 pickslice pickstrips

img_8366 picksaltjpg img_8381 picksalt pickpillow pickwash img_8388 pickvinegar

img_8442 pickstir picegg

pickledegg pickledwash img_8458

pickelstir pickjar pickjarring

picklejar pickperfect

Ingredients:

  • 9 large eggplants
  • 10 cups distilled white vinegar – 3/4 of gallon jug
  • 10 cups water
  • 4 cups olive oil
  • approx 1/2 container of Mortons salt… use 1/3 cup per eggplant
  • 2 cups Italian black oil cured olives – seedless
  • 1 long hot red pepper
  • 2 tbsp capers
  • 8 lg garlic cloves coarsely chopped
  • 1 tbsp dried oregano OR 2 tbsp fresh oregano dried in the microwave
  • 1 large pickling crock
  • 2 clean white cotton pillow cases
  • 1 extra large bowl to tranfer wet eggplant in pillow cases back and forth from washing machine
  • a case of canning jars

Directions:

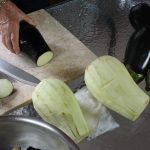
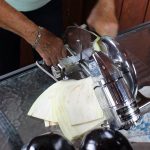
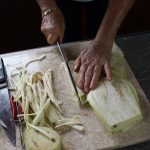
  1. Peel and slice all 9 eggplants into 1/8″ thick pieces
  2. Stack slices and cut into 1/8″ strips
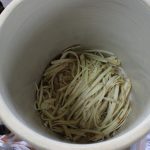
  3. Place cut up strips into large pickling crock
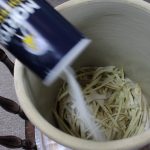
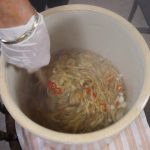
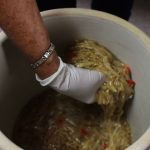
  4. After the addition of each cut up eggpant sprinkle in about 1/3 cup salt and mix strips around with salt by hand
  5. Go thru all 9 eggplant making sure to spinkle 1/3 cup salt after addition
  6. Place a small dish on top of all the sliced eggplant so that the dish fits into the crock
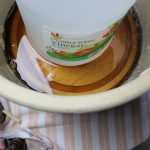
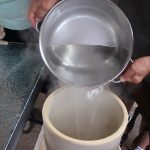
  7. Place the gallon jug of vinegar onto dish and let sit 2-3 hours
  8. Remove vinegar bottle weight and plate from crock – at this point there will be a lot of dark brown juice extracted from the eggplant
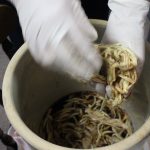
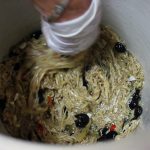
  9. Transfer eggplant to a clean pillow case a handful at a time leaving behind the brown juice
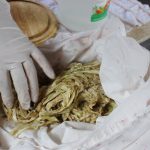
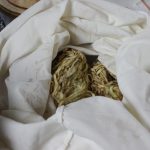
  10. Divide all the eggplant into 2 pillow cases and tie off the ends into knots so as the eggplant doesn’t come out when you “spin” it in the washer
  11. Rinse out the pickling crock
  12. Take the two pillow cases full of eggplant to the washer and put on “spin” cycle only – NO WATER
  13. After spin stops, remove eggplant from pillow cases & place back into crock (save pillow cases in a large bowl ready to use one more time before cleaning)
  14. Add in chopped garlic cloves and sliced hot pepper
  15. Bring 10 cups vinegar/10 cups water to a rapid boil
  16. Pour vinegar/water mix over eggplant strands in crock
  17. Stir breifly to mix and cover
  18. Let ferment until cooled approx. for 3 hours giving the eggplant a stir at 1 1/2 hour mark
  19. When the eggplant is cooled remove from crock back into pillow caeses
  20. Divide up the eggplant and place back into the same two pillow cases you used on first spin
  21. At this point run all the jars thru dishwasher – time it so they are hot ready to jar the pickled eggplant after 2nd spin (give it about 1/2 hour-depending on timing of your own dishwasher)
  22. Put all the tops to the canning jars in a pan of water, bring to a boil to sterilze as well
  23. Place the eggplant strands back in the washer on “spin” cylce only again – NO WATER
  24. Rinse crock
  25. Microwave fresh oregano in a microwave for 1 minute, crumble the oregano leaves off the stem and set aside
  26. Add spun pickled eggplant back into the clean crock, add in 4 cups olive oil, 2 cups oil-cured black olives, 2 tbsps of caper and 2 tbsp of fresh microwaved oregano
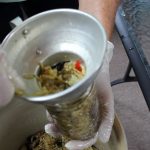
  27. Take hot jars out of the dishwasher and begin to fill with eggplant
  28. Top off the pickled eggplant in the jars with a drizzle of olive oil keeping 1/2″ from the top
  29. Wipe the top of the jars clean with a clean paper towel and seal with the hot tops you boiled on the stove – Be Careful Not To Burn yourself here
  30. Approx 5 hours after putting the tops on the jars, gently push down on the middle circle to hear a small pop and complete the “seal” – NOTE: they may pop down completing that last seal all on their own
  31. The pickled eggplant is done and will keep for months at room temp
  32. I keep an opened jar in the fridge and bring to room temperature when ever I serve it…YUM!


Fresh Garden Tomato Sauce

Fresh Garden Tomato Sauce

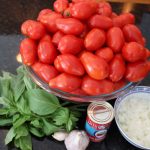
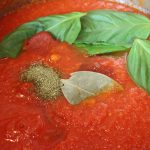
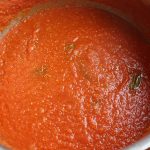
When the aroma from your fresh garden tomato sauce smells exactly like a tomato plucked right out of your garden on a sultry summer day you know you have the right recipe! With all the beautiful weather we have had this summer everyone has an abundance of produce coming out of their garden’s. What a better way to dive right in and try your hand at making your very own tomato sauce. And when you taste how delicious the puréed tomatoes are as a raw sauce you may just stop right there. After that first taste of the raw tomato sauce there might not be any left over to go to the next simmering step!

I was very excited when some friend’s of mine, Becky and Mike, offered up a large bag of their fresh garden plum tomatoes. I knew I wanted to make fresh garden tomato sauce with them right off the bat. This is a bit nastalgic for me because it reminds me of when my mother used to make fresh garden tomato sauce for us when I was young.

It’s really an easy process of peeling, seeding and then puréeing the tomatoes with some sautéed onions and garlic. The more tomatoes you have the longer it well take but it’s so worth it. The fact that you can freeze the sauce for a later date makes it all worth while! What I love about making this fresh garden tomato sauce, other then the fact that it smells utterly amazing, is it’s just as delicious eating it raw as cooked. In fact, when I make this I can’t decide which I like better so I continue on to make both cause it’s so darn simple to do that once you are in the process.

Once you see how easy to make your own sauce it may become a new family staple for you. You just might get inspired to make it a family affair having everyone join in to make homemade gnocchi or zucchini pasta too. Don’t forget the gourmet Caesar salad and then of course there’s an amazing ricotta pie or go for the death by chocolate meringue pie!

IMG_7868

zucspaghetti

DSCN4572-300x225

IMG_7641

IMG_8098


img_8165 fresh-core freshboil

freshice freshskin freshseeds

img_8215 freshpuree img_8249

img_8258 img_8240 img_8241

Ingredients:

  • 91 fresh garden tomatoes OR as many as you have
  • 1 tbsp sea salt, LESS if you have a smaller amount of plum tomatoes
  • 1/4 tsp finely ground pepper
  • 5 lg fresh basil leaves
  • 1 lg dried bay leaf
  • 1 tbsp sugar
  • 1/3 cup red wine – for the simmered sauce
  • 1 tsp finely ground Italian seasoning
  • 1 small Vadalia onion finely chopped
  • 4 extra lg OR 6 medium size garlic cloves
  • 1 tbsp tomato paste
  • 1/4 cup white wine to de-glaze the sautéed onions and garlic

Directions:

  1. Bring a large pot of water to a boil adding in 1 tbsp of salt
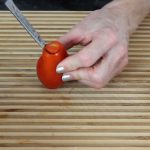
  2. Core the stem side of all your tomatoes
  3. Get a large bowl of ice water ready to put the tomatoes in after you blanch them
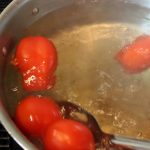
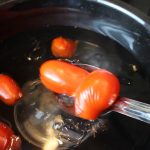
  4. Add plum tomatoes to boiling water, 25-30 at a time and blanch for 30-45 seconds, it’s totally fine if it goes past 45 seconds cause it’s going to take you a minute or two to scoop the tomatoes out
  5. Remove the tomatoes from the boiling water and submerse into the ice water
  6. Repeat until you have gone thru all your tomatoes
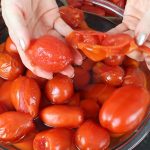
  7. Begin to remove the loosened skins from the tomatoes then placing into another bowl as you go
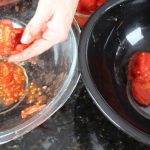
  8. Cut or tear tomatoes in half with your hands and remove most of the seeds putting pulp in one bowl and tomato flesh in another
  9. Spoon off any excess water that rises to the top of the bowl with all the tomato flesh
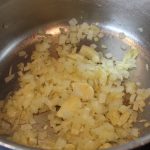
  10. Sauté chopped onion and garlic cloves til tranlucent
  11. De-glaze onions and garlic with 1/4 cup white wine
  12. Let the alcohol burn off and reduce slightly
  13. Begin to purée tomatoes and sauteed onions in the food processor in batches
  14. Add the puréed tomatoes/onions back into the large pan that you blanched the tomatoes in as you go along
  15. When done puréeing add salt and pepper to taste and voilà there is your raw sauce
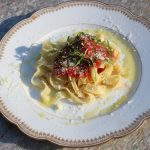
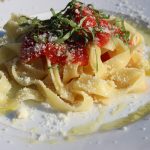
  16. FOR RAW SAUCE: top pasta with raw sauce and sprinkle some fresh julienned basil, Parmesan and a drizzle of extra virgin olive oil
  17. FOR COOKED SAUCE: Put the pot of puréed tomatoes/onion back on the stove and add in the 5 extra lg fresh basil leaves, bay leaf, sugar, Italian spices, red wine and simmer for 1-2 hours…mangia mangia!!

Green Goddess Sauce ll

Green Goddess Sauce ll

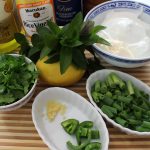
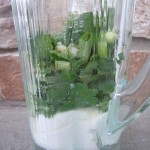
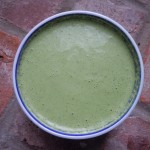
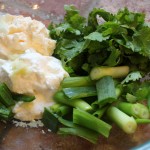
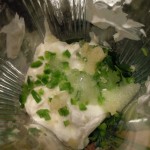
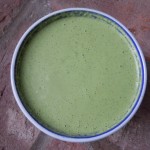
Having my green goddess sauce ll at your next party will be sure to turn heads. It’s kind of like wearing a new party dress! This green goddess sauce is made in mere minutes in a blender. It’s a blend of Greek yogurt, mayo, fresh mint leaves and cilantro, garlic, green onion, lemon juice, olive oil and rice wine vinegar.  You don’t even have to waste time chopping finely because it all get puréed anyways!

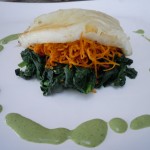
Decorating your party plates with my green goddess sauce will make for a lovely presentation, a more formal one, but having a bowl or pouring cup of the sauce on the table will do the trick quite nicely! In fact, the latter might be better since there’s a good possibility your guest’s will be going back for seconds.

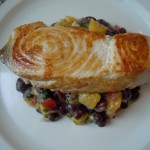
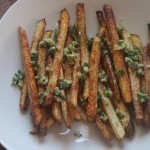
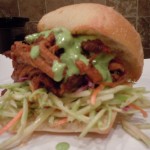
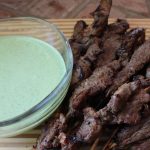
This green goddess sauce is so versatile because it literally goes with all foods! It’s heavenly on seared scallops…all fish for that matter, swordfish, rack of lamb, pulled beef tacos, Sweet Potato Fries , Baked Crispy Fries, or Baked Coconut Shrimp and even cut veggies!

027 IMG_3234 IMG_0672 IMG_0668 iphone pictures 447

IMG_6920 iphone pictures 1167 iphone pictures 1168

iphone pictures 1191 iphone pictures 331 iphone pictures 316

IMG_6956 IMG_6962 IMG_0672

Ingredients:

  • 1 cup plus 2 tbsp Greek yogurt
  • 1/4 cup mayo (I use Hellman’s)
  • 1/2 cup packed mint leaves (1 cup loose)
  • 1 cup packed fresh cilantro
  • 1 garlic clove put thru garlic press
  • 1/2 jalapeño diced
  • 4 lg stalks, 6 small of green onion chopped coarsely
  • 1 tbsp fresh lemon juice
  • 1 tbsp extra virgin olive oil
  • 1 Tbsp “seasoned” rice wine vinegar
  • 1 tsp sugar  – (NOTE: I forgot to add this in the show, but it really needs this for balance 🙂
  • s & p
  • If it’s not hot enough with the jalapeno add a dash of Siracha

Directions:

  1. Place all of the ingredients into a blender an purée for 10 seconds…be patient – you may need to stop and stir everything to get it going but do NOT add any more liquid
  2. Stop blender and scrap down sides to get the larger leaf pieces and blend for 5 more seconds and violà!
  3. Taste here and add salt and pepper
  4. Add a dash of Siracha – you need to taste the sauce first, sometimes a jalapeño can be super hot and other times it can be a mellow hot
  5. This sauce gets even better if you can pop it into the fridge for an hour and let the flavors mingle, the sauce will thicken up a little too!
  6. Make this ahead of time and keep sauce in a plastic container and refrigerate.  It stays nicely for days in frig.
  7. This green sauce is absolutely delicious on so many things…be creative.

Lobster Mac & Cheese at David & Eileen’s

Lobster Mac & Cheese at David & Eileen’s

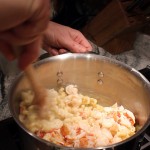
With this homemade gourmet lobster mac & cheese at David & Eileen’s you get the best of both worlds! Two of my very favorite things to eat all in the same dish! What more could you ask for? What, did someone say “smoked Gouda, please”? The Lobster goes with out saying and for those of you who appreciate that slightly salty, yet sweet and rich in every meaty bite know what I’m talking about. Then to add this succulent lobster to pasta that’s covered in a delicate, smokey, cheesy sauce put’s it right over the top!

When my dear friends David and Eileen suggested making lobster mac & cheese for my cooking show it was like bells went off. I thought it was a great idea. David had discussed the idea with our other foodie friend, Marco, who offered up his recipe to David. Marco and his wife, Sheryl, own an Inn near by called Lathrop Manor where Marco cooks up a five course gourmet breakfast if you’re a guest there.  Marco was also the chef in my “Salmon BLT Sliders at Marco’s Show” from this past summer. Needless to say, our group here loves to cook, eat and have fun. Even frequenting the Farm and Vine Dinner’s at The Ocean House together. 

Sharing family recipes, like Dave and Laurie did with their yummy “Caruso Salad” and the amazing lobster mac & cheese recipe between Marco and David is what brings friends together. Cooking, eating, laughing and enjoying each other’s company is the foundation of life in all cultures around the world . I am grateful to have such wonderful family and friends to do this with.

I hope you enjoy this homemade “Lobster Mac & Cheese at David & Eileen’s” show as much as we did making it! Have fun with this recipe. You may also want to check out my Caesar Salad for a side dish or some Arancini Reuben Balls, stuffed mushrooms ,or baked asparagus wrapped in Prosciutto for an appetizer. Although , we don’t have David’s incredible chocolate meringue pie recipe yet, you could check out a chocolate pecan pie recipe that’s to die for.

DSCN4575 030 iphone pictures 1441 iphone pictures 572 wholepiepecan

ingredlob IMG_5287 IMG_5289

IMG_5291 thumbsauce IMG_5304

lobmac lastthumbolb IMG_5305

IMG_5309 IMG_5314 IMG_5317

baked IMG_5373

Ingredients for Lobster Mac & Cheese at David and Eileen’s:

  • 2 Lobsters – meat from 2 – 1 1/2 lb. steamed lobsters
  • 3 tbsp butter
  • 3 tbsp flour
  • 2 small onion finely chopped (1/2 cup)
  • 3 1/2 cups whole milk
  • 2 cups heavy cream
  • 1/4 cup Dry Sherry -OPTIONAL
  • 2 tsp lobster base OR Lobster SHELLS- OPTIONAL it gives a wonderful flavor to the dish… we did forget to add the base in the show and the lobster mac & cheese was still delicioso!
  • 2 bay leaves
  • 1 1/2 cups smoked Gouda
  • 1 1/2 cups white Cabot cheddar
  • 1 cup mozzarella (I added in the mozzarella)
  • 1/4 cup grated Parmesan
  • 1 lb. cellentani pasta or elbow
  • s&p
  • 2 tbsp rm temp butter for coating the baking dish

Topping Ingredients:

  • 1/4 cup panko breadcrumbs
  • 1/2 cup grated Parmesan
  • 1/4 tsp garlic granules
  • 1/4 tsp onion granules
  • 1 tbsp olive oil
  • 1 tbsp melted butter
  • 4 pieces cooked and chopped bacon – Bacon OPTIONAL  (DO NOT use Maple Flavored Bacon)

Directions for Lobster Mac & Cheese at David and Eileen’s:

  1. Per-Heat oven to 350º on CONVECTION (convection helps to toast the bread crumbs without overbaking and curdling the cheese sauce)
  2. Coat the baking dish with 2 tbsp rm temp butter and set aside
  3. Cook Pasta til firm in salted water, al-dente, 5 minutes
  4. Drain and rinse to cool pasta and set back in the same pan
  5. Melt butter in sauté pan
  6. Sauté the chopped onion until soft and translucent
  7. Add a s&p
  8. Add flour to onions to make a roux
  9. Continue on stove stirring mixture for 1 minute to cook out raw flour flavor
  10. Slowly add milk & cream to roux while continuing to whisk so as not to get lumps
  11. Add in bay leaves
  12. Cook over medium heat while stirring until sauce thickens
  13. Taste here to see if you need more salt and pepper
  14. Add in 1/4 cup Dry Sherry
  15. OPTIONAL:  Add in lobster base OR LOBSTER SHELLS and simmer for 10 minutes
  16. Remove the shells if you added them and discard
  17. Turn heat to low and add in smoked Gouda, cheddar & mozzarella while whisking for 30 seconds ONLY, then remove from heat immediately and continue to whisk until all the cheese is melted
  18. Sauce should have consistency of heavy cream
  19. Stir lobster meat into the sauce to infuse flavors
  20. Then pour lobster sauce over al-dente pasta and mix until combined
  21. Transfer to an oven safe baking dish
  22. Sprinkle in 1/4 cup Parmesan and mix gently
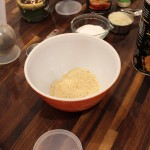
  23. Make the breadcrumbs by combining breadcrumbs, parmesan, onion and garlic granules, olive oil & butter and bacon
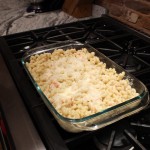
  24. Mix with your hands or a spoon and sprinkle evenly over the lobster mac & cheese
  25. Bake in a 350º oven for 25-30 minutes until slightly bubbly on the edges
  26. NOTE: DO NOT OVER BAKED OR CHEESE SAUCE WILL CURDLE!!!!
  27. NOTE: The pasta will absorb a lot of liquid in the beginning when you first mix it, AND then when you bake it, AND as it sits, AND then as it cools, so it’s a good thing to have a little extra sauce in the beginning …it will keep absorbing -you don’t want a dry lobster mac and cheese sauce 🙂

Happy Roasted Chic Peas!

Happy Roasted Chic Peas!

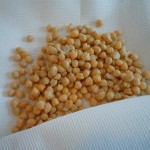
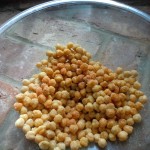
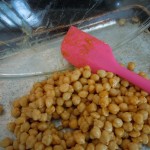
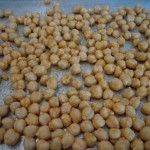
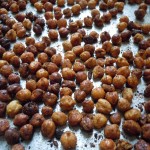
iphone pictures 970These roasted chick peas are a tasty and healthy treat that will definitely put a smile on your face. My daughter, Bella, thought it only logical that the name should be “happy” roasted chic peas if they make you smile like that and “because they are just happy”… lol

It’s amazing how this creamy bean can turn into this delicious crunchy snack. You are going to love them as much as I do. After being pleasantly surprised by the full flavored crunch you get with this roasted bean you’ll be back for seconds! A golfing friend of mine, Lisa, turned me on to these roasted chick peas a few years back. I’ve been happily making them ever since.

These roasted chic peas are wicked easy to make and a great on the go healthy snack. What’s so fun about making these happy roasted chic peas is you can totally change up the spices making them as spicy and flavorful as you want. Add in a 1/4 tsp of smoked paprika, chipotle pepper, or go for some Indian spices like a coriander/cumin combo, or one of my all time favorite spice’s garam masala. Garam masala differs depending on what region it’s from but basically it’s a combination of black pepper, mace, cinnamon, cloves, cardamons and nutmeg so you’ll get a big burst of flavor from that one alone!

After you happily roast these chic peas you may find yourself wanting to make my baked asparagus wrapped in prosciutto, zucchini torta or even some baked coconut shrimp.

iphone pictures  iphone pictures 953  iphone pictures 954

iphone pictures 956  iphone pictures 957  iphone pictures 958

iphone pictures 959  iphone pictures 960  iphone pictures 968

Ingredients:

  • 2 cans chick peas
  • 3 Tbsp olive oil
  • 1/2 tsp garlic granules
  • 1/2 tsp onion granules
  • 1/4 tsp cayenne pepper OR 1/4 tsp finely ground blk pepper for flavorful but not spicy
  • 1/4 tsp cumin
  • OPTIONAL: a few dashes of Siracha for a little extra spice
  • 1/2 tsp fine sea salt -1/4 before baking and 1/4 after they are roasted

Directions:

  1. Pre-heat oven to 450º.
  2. Drain and rinse 2 cans of chick peas.
  3. Gently rub and pat dry with paper towels.
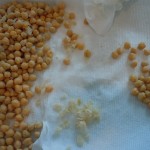
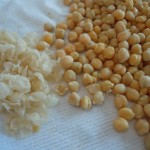
  4. This action will loosen the skins off of the chick peas (you don’t have to get off every single chick peas skin..this just naturally happens as you are patting them dry).
  5. Put the chick peas into a medium bowl and add olive oil and spices.
  6. Mix and turn out onto a cookie sheet.
  7. Put them into the oven and bake for approx. 35 minutes.
  8. Shake the pan rolling around the chick peas every 10 minutes…at 25 minutes, 15 minutes and DEFINITELY at 5 minutes
  9. They will burn quickly at the end so you need to keep an eye on them especially during the last 5 minutes.
  10. Remove the chic peas from the oven and sprinkle with the other 1/4 tsp salt and let cool on tray

Homemade Pasta at Vin’s

Homemade Pasta at Vin’s

Homemade pasta is something you have to try at least once in your life! You’ll see how satisfying it is when you taste the tender, slightly chewy texture of the fresh pasta. Making pasta has been a part of my life ever since I was young making homemade manicotti with my mother for the holidays. At my Aunt Pasqualina’s, the counters were always covered with fresh pasta drying out on dish towels.

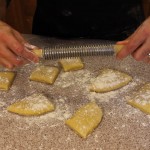
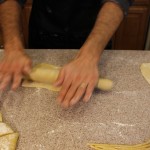
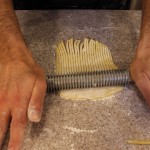
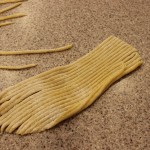
This past weekend, my friends Lisa and Vin, graciously agreed to share their grandfather’s secret family pasta recipe with me. I had the opportunity to try out, first hand, a pasta tool that belonged to Vin’s grandfather which he called the “trucal iron”. It’s a special pasta cutting tool, a roller, made years ago from medal and wood that was eventually passed on down to Vin. The center spiral part of this “trucal Iron”, made of medal, does the cutting as you roll out the pasta. It has Wooden handles which he said his grandfather glued back on a couple of times. Vin also has a newer version of this “trucal iron”, one made of all wood but the wood spirals have begun to chip away from wear and tear. They don’t make some things like they used to. Vinnie also shared some precious memories of his grandfather and father making this homemade pasta for Sunday dinners growing up where his grandfather would creatively hang the pasta noodles from atop the kitchen cabinet doors to dry out.

There’s nothing like an evening with special friends making homemade pasta! This night of homemade pasta making at Lisa and Vin’s reminded me of how much I really love to do this. Everyone has their own way of making pasta and that’s part of what makes this experience so fun. Now as for this “trucal iron”, there are other pasta tools out there that mimic what Vin’s special pasta tool does like the ones below from Amazon. I have to say, I haven’t used any of those tools from Amazon because I use my KitchenAid pasta attachment which is another great option for cutting the kneaded pasta dough. You could even cut your thinly rolled out pasta into strips by hand with a sharp knife to get the stands of fettuccine, spaghetti, or what ever thickness you might like.

iphone pictures 448 iphone pictures 572 DSCN4572 025  ita

Appetizers like baked coconut shrimp, baked asparagus wrapped in prosciutto, and, or a nice homemade Caesar Salad might be just what you are looking for to go with this homemade pasta of Vin’s! If you are looking for a meat sauce to go on this homemade pasta you should try my bolognese sauceOf course, there are other options like my Italian beef meatballsor Italian turkey meatballs. Hope you enjoy the show 😉

IMG_4244 eggpasta dough

pastdough kneadpasta trucalpasta

IMG_4283 ppasta IMG_4287

cookpastajpg IMG_4327

INGREDIENTS:

  • 2 1/2 cups all purpose flour
  • 1/4 cup olive oil
  • 4 1/2  – 5 lg eggs
  • 1/4 tsp salt

DIRECTIONS:

  1. Put the kneading attachment on your food processor and add the flour
  2. Add the salt and olive oil
  3. Turn on the food processor to slow
  4. Add in 1 tbsp of water
  5. Begin adding in 1 egg at a time with the processor still on slow
  6. Add in the rest of the eggs
  7. Keep the food processor going on medium speed to begin kneading the dough
  8. Let knead for about 8 minutes until the texture turns into a smooth consistency
  9. Remove the pasta dough and place onto the counter
  10. Knead briefly with your hands and let sit for 1/2 hr.
  11. NOTE: Vin does not cover his pasta dough while it sits for the 1/2 so it can begin to dry out  a little bit
  12. Sprinkle some flour onto the counter or work surface and cut pasta dough into 8 pieces
  13. Begin to roll out each piece of dough to your desired thickness
  14. Sprinkle more flour on top of each thinly rolled out pasta piece and use the roll cutter below or a sharp knife or a KitchenAid Pasta attachment to get desired pasta strips
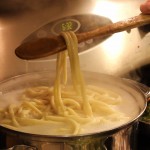
  15. Bring large pan of salted water to a boil and add fresh pasta
  16. Depending on the thickness, cook pasta for 4-8 minutes, test pieces of pasta for proper doneness
  17. Serve with sauce and mangia, mangia!


Sweet Potato Fries & Green Goddess Dip lll

Sweet Potato Fries & Green Goddess Dip lll

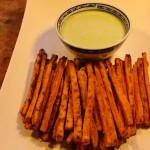
IMG_3827The colors orange and green were stuck in my head for this Halloween episode and that’s why I decided to share my sweet potato fries & green goddess dip recipes with you! These baked sweet potato fries are so delicious all on their own but wait until you dip them into the green goddess sauce you’ll want to put green goddess dip on EVERYTHING! I make this dipping sauce when I cook up swordfish, shrimp, tuna, chicken and steaks also. Being able to make a homemade gourmet sauce like this in 5 minutes, in a blender is basically a no-brainer for me. I can’t wait until you taste this sauce. And here I go again, making my dipping sauce with Greek yogurt to balance out the mayo giving it yet another layer of flavor and tangy richness.  I do this also with my pink remoulade sauce too.
Baking the sweet potato fries is definitely healthier then frying and a lot less work!  Now if you don’t have cornstarch in the cabinets don’t let it keep you from making these fries because they will still be delicious. Dusting the raw sweet potatoes fries with a couple of tablespoons of cornstarch helps with the moisture content and gives them a little extra crunch.
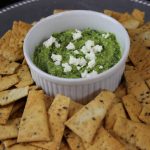
I hope you enjoy making the sweet potato fries and green goddess dipping sauce and that they will become part of your go to appetizer list. You may want to venture off and some other appetizer’s like my Feta-Basil Pesto Dip,  Crab CakesSpanakopita Triangle’s, or some yummy Homemade Hummus! You can end with my Chewy ChocolateChip Cookies!
img_8565 cookedspan IMG_5076 IMG_6064 DSCN4521

IMG_3880 IMG_3943  IMG_3885

IMG_3895  IMG_3966  IMG_3862

iphone pictures 1167  iphone pictures 1156  iphone pictures 1169

IMG_3806  IMG_3808  IMG_3827

Ingredients and Directions for Sweet Potato Fries:

  • 3 extra lg sweet potatoes ONLY need 2 but I like to have an extra just in case
  • 1/4 cup extra virgin olive oil
  • 1/2 tsp salt
  • 2 tbsp corn starch
  • 1 tsp garlic granules
  • 1 tsp onion granules
  1. Pre-heat the oven to 425º.
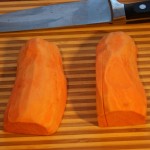
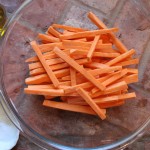
  2. Peel and Slice sweet potatoes in 1/4″ sticks -CUT ENDS FLAT so they don’t burn
  3. Dab with paper towels to dry excess sweet potato moisture
  4. Drizzle with 1/4 cup olive oil and sprinkle with 1 tsp garlic granules,  1 tsp onion granules  and 1/2 tsp salt
  5. Mixed with hands and then spread out into even layer on cookie sheet
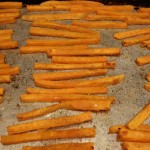
  6. Bake for 15 minutes then flip and back into the oven for 8-10 more minutes
  7. BE SURE TO keep an eye on them at this point so they don’t BURN 🙂

Ingredients and Directions for Green Goddess Dip lll:

  • 3/4 cup Greek yogurt
  • 1/3 cup mayo (I use Hellmans)
  • 1 cup fresh cilantro
  • 1 garlic clove put thru press
  • 1/2 jalapeño diced
  • 4 green onion stalks
  • 1 tsp. grated vadalia onion ( or yellow onion)
  • 1 tbsp ( 1/2) fresh lime juice
  • 1 tbsp “seasoned” rice wine vinegar ( “oops” – I accidentally said red wine vinegar in the show but it’s rice wine vinegar)
  • s & p
  • Optional: dash of Siracha (Siracha is a hot chili sauce sold next to Tabasco at the store)
  1. Place all of the ingredients into a blender an purée and you will probably need to stop and stir everything a couple of times to get it going but do not add any more liquid (you will see that once it gets going it will be just right).
  2. You can make this ahead of time and keep sauce in a plastic container and refrigerate.  It  gets thicker as it sits in the fridge chilling and stays nice for a few days…  Yum!

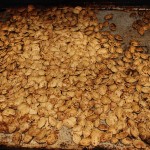
Ingredients and Directions for Roasted Pumpkin Seeds:

  • Pumpkin Seeds for 2 pumkins
  • 1 tsp garlic granules
  • 1 tsp onion granules
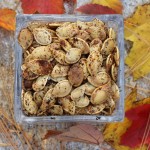
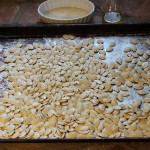
  • 1/2 sea salt (plus a sprinkle at the end for a pinch more seasoning)
  • 2 tbsp olive oil
  1. Pre-heat oven at 425º.
  2. Wash pumpkins seeds to remove pulp.
  3. Dry between paper towels and leave on cookie tray to dry further over night (can roast right away if you don’t have time – just by sure to completely dry seeds)
  4. Drizzle olive oil over seeds and sprinkle all of seasonings and toss to evenly mix
  5. NOTE: you can add in cumin, cayenne, chili powder … add your favorite seasonings
  6. Roast for 10 minutes, take out and stir seeds, put back in oven for approx. 4 more minutes – Keep an eye on them at this point so they don’t burn


Pulled Beef Taco’s & Mango Salsa


Pulled Beef Taco’s & Mango Salsa

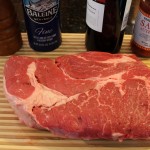
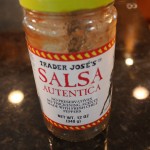
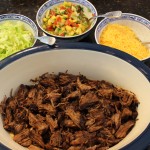
Just wait until you taste the flavors in this pulled beef taco dish that ONLY uses three ingredients! Yes, that’s right we only use three ingredients… red wine, Trader Joe’s Autentica Salsa and a chuck roast that braises in the oven for two and a half hours with the cover off. I almost feel like we are cheating here by only using these three items because it seems as though something this amazing in taste, similar to Boeuf Bourguignon, should involve way more effort and ingredients. I think it’s important here to use the oven instead of a crock pot because the dry heat helps to caramelize the beef really building on all those layers of flavors.

This is the perfect dish for having groups of friends over because it’s a total make ahead dish. You can even make my mango salsa the day before. If you are really in a pinch for time you could always buy fresh made salsa at the store. I personally like to make this homemade pulled beef the morning of the party so that the house fills with all the aromas of the braising chuck roast, red wine and tomatoes. Really gets the juices flowing!
You can use your favorite hard taco shells to serve up the homemade pulled beef, corn and flour tortilla’s or even serve it on a bed of lettuce with shredded cheddar cheese and my mango salsa! I would also offer sour cream and Siracha in the side fixin’s and just let people go to town making their own creations. How fun is that?
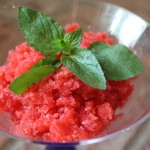
You may just want to make my decadent Hershey’s Perfectly Chocolate Chocolate Cake for dessert! You won’t believe how EASY it is to make! You could also try my Chocolate Crackle Cookies that melt in your mouth. Then there always Fresh Berry Granita or Berries in a Dreamy Cream for dessert too. You’ll be able to actually relax and have lots of fun with your family and friends.
IMG_2793 IMG_3663 IMG_2375 IMG_2201

IMG_3110  IMG_3140  IMG_3127

IMG_3132  IMG_3135  IMG_3173

IMG_3223  IMG_3234  IMG_3144

mangosalsa

Ingredients for the Pulled Beef Taco’s:

  • 3 1/2 lb. beef chuck roast (look for some good marbling)
  • 1 bottle of red wine – Cabernet Sauvignon
  • 1 bottle Trader Joe’s Salsa – Autentica
  • 3 tbsn olive oil

Directions:

  1. Pre-heat the oven to 350º
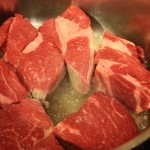
  2. Slice  the chuck roast into 6 pieces
  3. Salt and pepper the pieces
  4. Add 3 tbsn of olive oil to a large pan on med/high heat and begin to add the beef pieces
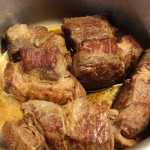
  5. Turn up the heat to high and quickly sear all sides til browned – this takes 10 minutes
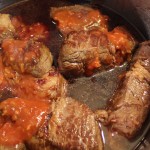
  6. Add in 3/4 of the bottle of red wine (be careful of steam here) and the whole jar of salsa
  7. Bring to a simmer and pop into the oven for 2 1/2 hrs.
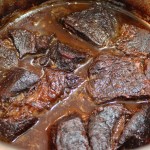
  8. Every hour turn the beef pieces over so the other sides can caramelize
  9. At 2 1/2 hours take the braising meat out of the oven and begin to remove the beef to a dish wear you can start to pull apart the beef pieces
  10. Tilt the braising pan to the side so that you can skim off the fat that rendered out of the meat
  11. Pour the left over juice onto the pulled beef and serve with taco shells and my mango salsa…enjoy!

Ingredients for the Mango Salsa:

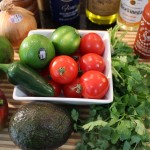
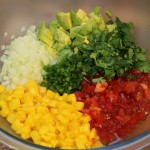
  • 2 lg mangoes chopped 1/4″ cubed – (about 1 1/2 cups)
  • 1 avocado chopped 1/4″ cubed (1 cup)
  • 2 med/lg size tomato’s or 5 small tomato’s chopped 1/4″ cubed (1 cup)
  • 1/2 Vidalia onion (or yellow) FINELY chopped (1/2 cup)
  • 1 FINELY chopped jalapeno (2-3 tbsn)
  • juice from 1 lime
  • 2 Tbsp olive oil
  • 1 Tbsp rice wine vinegar
  • 1/2 cup coarsely chopped cilantro
  • a dash of Siracha (optional)
  • S & P

Directions:

  1. Add all of the ingredients to a large bowl and mix thoroughly.
  2. We really love to eats this salsa with blue chips too
  3. I have also served this salsa up on the tips of endive leaves, and or with a cooked shrimp on top of that ….yum!
  4. I must warn you this salsa is highly addictive……consume at your own risk! LOL

iphone pictures 718  iphone pictures 732  iphone pictures 721

iphone pictures 722  iphone pictures 724  iphone pictures 738

iphone pictures 739  iphone pictures 740

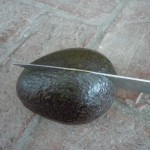
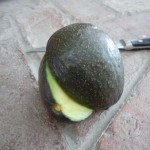
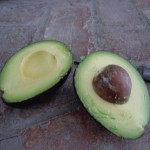
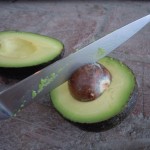
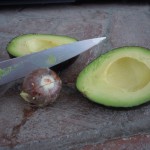
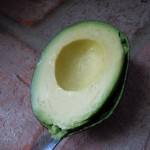
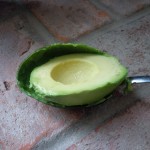
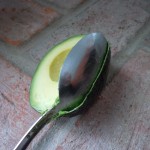
TIP:  There is an easy way to get the pit out of a avocado which I have displayed in the pictures above.  After running the knife around the flesh of the avocado against the edges of the inside pit… put the knife down and twist the avocado halves and pull apart. Then stick the knife into the pit and do the same thing holding on to the knife with one hand and carefully twist the avocado pit and it will pop right out.  Then knock the pit off onto the board away from your hands.  This can be a little tricky the first time so I would advise that this would be for an adult to try.   Finally, Insert a large spoon and scoop the avocado along the edge of the avocado skin to remove avocado flesh.

Zucchini Spaghetti at Jaynee’s

Zucchini Spaghetti at Jaynee’s

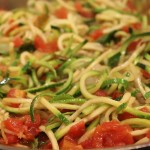
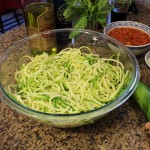
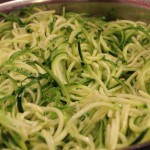
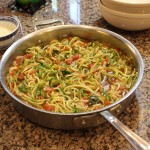
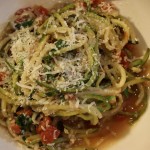
Wow! Zucchini spaghetti…who would have ever thought? A gluten free dish full of nutrients that taste’s amazing and looks as gorgeous as does is the perfect path to healthy eating! Bringing you this zucchini spaghetti simmering with tomato, basil and red wine at Jaynee’s has inspired me to put together future recipes and shows like this one.

Jaynee and I cook the zucchini spaghetti in this recipe so that it’s al dente. For those of you who might not know what Al dente means it’s an Italian term meaning to have some tooth or bite to it where the texture isn’t too soft. This is kind of ironic because that’s exactly how I like to cook my wheat pasta. I can’t think of anything worse than pasta that is fully cooked to a soft texture.

It is really exciting all the different things you can do with these creative veggie noodles! From Thai themes where raw zucchini noodles are dressed with a citrus dressing made from puréed mangoes, cilantro, fresh lime juice, and avocado’s to tahini sauce puréed with green onions, coconut meat, ginger and fresh lemons. Not only are these dressings packed with anti-oxidants and exotic flavors but the citrus partially cooks the zucchini getting results similar to ceviche. The citrus actually softens the texture of the vegetable giving you a softer mouth feel crunch rather than a harsh raw bite.

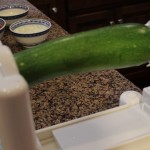
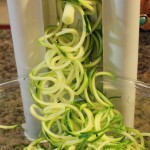
It couldn’t get any easier to make these spiral veggie noodles with the new-fangled devices available out there. I purchased my Spiralizer at William Sonoma Outlet in Westbrook on a 30% off sale with an additional 20% off if I gave them my email. Can’t go wrong there. Here is the Spiralizer Amazon link offering a great deal too! Can’t wait for you to venture off into veggie noodle land. You will be amazed how fun and delicious it is to make this recipe. Hope you enjoy the show and keep a look out for future veggie noodle recipes 🙂

IMG_2403  intro  IMG_2416

IMG_2418  IMG_2422  IMG_2430

zucspaghetti  IMG_2442  IMG_2446

Ingredients: Need “Spiralizer” or similar to make zucchini spaghetti

  • 4 med/lg zucchini
  • 1 small vadalia (sweet) onion chopped
  • OPTIONAL: 2 finely chopped garlic cloves – If you love garlic as I do
  • 1 14 oz. can of diced tomatoes flavored with onion, garlic, celery and or green peppers OR your favorite can of peeled tomatoes in your cabinet (just need to add in 1/4 cup chopped peppers in addition to the onion/garlic above – chop up the whole peeled tomatoes as well to add in after you sauté veggies)
  • NOTE: If you use “whole peeled” tomatoes DO NOT use the juice too, tomatoes only, because the zucchini renders out a lot of water all on its own.
  • 1/4 cup red wine
  • 3 tbsn olive oil
  • 1 bunch fresh basil
  • 1/2 tsp salt
  • S & P to taste
  • OPTIONAL: 1 small container of fresh ricotta to garnish at the end with the Parmesan

Directions:

  1. Spiralize all 4 zucchini and place in a lg bowl
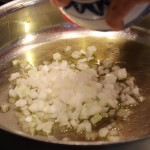
  2. Add chopped onion to 3 tbsp olive oil in a large fry pan on medium heat
  3. Sauté for 5 minutes til soft
  4. Add in Spiralized zucchini with 1/2 tsp salt and sauté 5 minutes on med/high heat- Make sure to stir a couple of times to help it from not sticking.  Sautéing on med/high will help to evaporate some of that liquid rendering out of the zucchini while sautéing– (If you saute on low it will just simmer in all the water, you will then have to drain a little of the water out of the pan)
  5. Add in tomatoes, red wine, s & p to taste and simmer 5 more minutes
  6. Plate up and top with your favorite grated Parmesan cheese
  7. OPTIONAL: Top with dollops of fresh ricotta and grated Parmesan