The Traveling Epicurean

CT Style Making Braciole with Ryan Kristafer & Teresa Dufour!

CT Style Making Braciole with Ryan Kristafer & Teresa Dufour!

Spring is in the air and family gatherings for graduations are right around the corner so I wanted to share my recipe for Italian Braciole on CT Style this week. It’s a great make ahead recipe allowing you more time with your guests and less time in the kitchen. As always, it was an amazing time with Ryan and Teresa. Not only are they true professionals making all their hard work appear easy but they are wonderful people too. I am fortunate to be able to continually work with such a great duo!

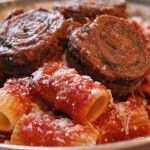
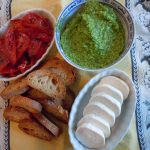
My Italian Braciole is made with thinly sliced flank steak stuffed with fresh and dried herbs, Reggiano Parmesan & Asiago cheeses, rolled up and sautéed, then simmered in tomato sauce for 2 hours. There are many different versions of braciole depending on your Italian family traditions. Some families put raisins in their braciole, others put sliced hard boiled eggs. That’s what makes this dish so fun, you can be creative and add what ever your heart desires. I do love the German version as well where the beef rouladens are stuffed with mustard, onion, pickles and bacon! Who wouldn’t love that?

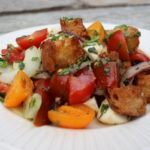
Italian Braciole is traditionally made with flank steak but you can also use top round or bottom sliced thinly and pounded out a little. Simmering these beef bundles in Tomato-Basil Sauce for a couple of hours makes for a very tender and flavorful braciole. I like to serve them with rigatoni pasta and a dollop of ricotta. I’m certain that Italian Braciole will become one of your favorite dishes too!

Thank you to A’s Unique Boutique for their endless selection of gorgeous dresses to wear on CT Style! If you haven’t been to the boutique yet I don’t know what you’re waiting for. They have an enormous selection of stunning designer dresses and help you through through the whole process.

If you are going for the Italian theme you might as well treat yourself to some of my appetizer’s like baked asparagus wrapped in Prosciutto, or crab cakes with a homemade remoulade sauce. Then you can really go for it with my SECRET manicotti recipe or homemade spaghetti that’s totally fun for the whole family and easy to make! Then end it all with some chocolate eclairs with the BEST vanilla custard you have ever had …enjoy! 🙂

iphone-pictures-572-300x225 DSCN45211-300x225 iphone pictures 2002 IMG_4328 IMG_6379

IMG_6413 slicingbraciole grated

tie wrap IMG_6444

IMG_6397 IMG_6453 IMG_6460

slicebraciole ricotta IMG_6487

Ingredients:

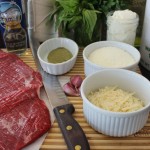
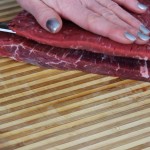
  • 2 lb flank steak cut in 1/2 then each piece sliced horizontally into 3 layers totaling 6 pieces
  • 1 cup grated Reggiano Parmigiano
  • 1 cup grated Asiago
  • 1 tbsp dried ground Italian seasonings
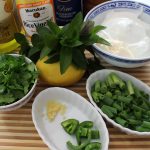
  • 1 bunch parsley
  • 1 bunch fresh basil
  • salt and pepper
  • olive oil
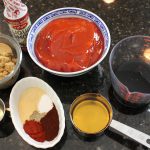
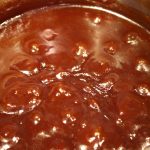
  • 1 recipe tomato-basil sauce but simmered for 1 1/2 – 2 hours
  • 1 cup ricotta
  • 1 cup red wine or white (I actually prefer to deglaze here with red)
  • 1 lb rigatoni

Directions:

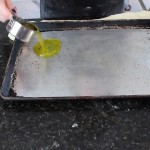
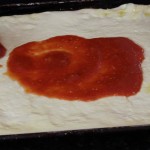
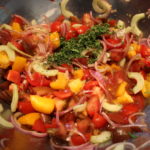
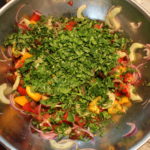
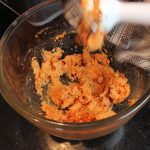
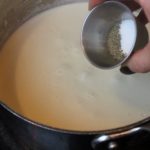
  • Start sautéing the veggies for the tomato-basil sauce and use the same pan for sautéing the braciole bundles
  • Slice your 2lb. steak in half
  • Then have your butcher slice each side into 3 horizontal layers
  • Now have 6 semi-equal pieces
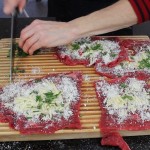
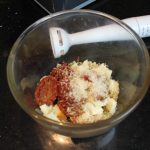
  • Sprinkle 1/2 tsp dried-ground Italian seasoning on each piece of flank
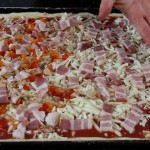
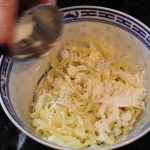
  • Sprinkle 1 tbsp each of Reggiano and Asiago on each piece
  • Lay whole basil leaves or chop basil and parsley and sprinkle onto flank slices
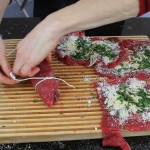
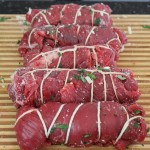
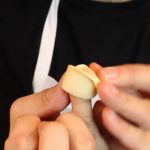
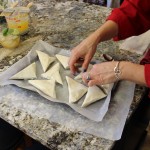
  • Roll up starting at the small end so that you are rolling up with the grain of the meat
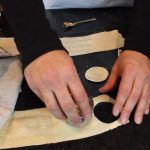
  • Cut approx 30″ of cotton string and tie a knot at one of the ends
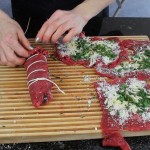
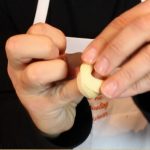
  • Then keep wrapping string all around the length of the rolled up flank til you are at the other end
  • Now come back tucking under each row of string going across like shown in the video til you get to the end and tie off a knot with the original piece of string you started with
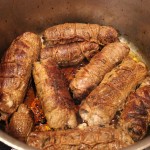
  • Add 2 tbsp of olive oil a large pan and a few large cloves of garlic kept whole for extra flavor and sauté 3 rolled up pieces of braciole at a time
  • Brown on all sides on medium/high heat about 3-4  minutes each side (remove the garlic coves when golden and smear on a baguette and dip into the tomato-basil sauce when you start to simmer with braciole…YUM!)
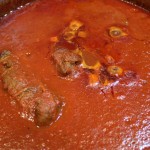
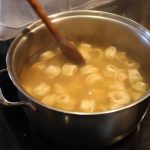
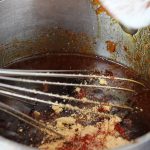
  • After browning the second batch of (3) braciole add back in the first 3 and de-glaze with red wine (I used white in the show but prefer to use red here)
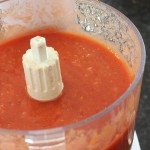
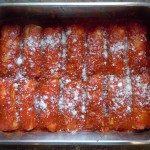
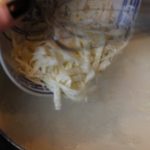
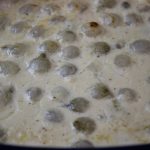
  • Add in puréed tomatoes and simmer for 1 1/2 – 2 hours
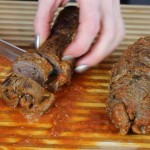
  • Take braciole rolls out, REMOVE the string with a kitchen scissors and slice 3/8″-1/2″ thick
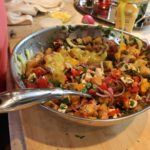
  • Serve with pasta (rigatoni) and a dollop of ricotta on top with a few slices of braciole and grated Reggiano…mangia, mangia.
  • PS- It’s even better re-heated the 2nd day! 🙂

Panzanella at Chef Marco’s

Panzanella at Chef Marco’s

Juicy heirloom tomatoes, creamy mozzarella and homemade golden croutons packed with garlic, purple onions, cucumbers and lots of fresh herbs make up this perfectly scrumptious summertime salad called Panzanella! Basil, parsley, oregano, thyme and a special dijon sauce really give this refreshing salad a delicious flavor and brightness.

I was recently able to coordinate schedules with my foodie friend Chef Marco so he could share his Panzanella recipe with you. Marco and his wife Sheryl, another big foodie, had this amazing dish at their house last summer and it still leaves a fresh impression on my mind. Probably because of all the fresh ingredients that come together with bursting flavor on your first bite.

Even though you can make this Panzanella all year long you couldn’t have a more perfect dish to make with the fresh summertime produce the local vendors offer at the farmers markets! Enjoy and make sure to check out Salsa 101, Salmon B.L.T. Slider’s, Lobster Mac N’ Cheese or Death by Chocolate Meringue Pie for your next get together!

You need to check out the WTNH Channel 8, “CT Style Morning Show” where I featured THIS recipe with Ryan Kristafer and Teresa Dufour! So much fun cooking with them!

Ingredients for the Panzanella Salad (NOTE: it always a good idea to toast croutons the day before if possible)

  • 1 loaf sour dough bread or ciabatta loaf – make croutons out of the whole loaf using 3 1/2 cups only for this Panzanella Salad, saving the rest of the croutons in a ZipLoc baggie in the freezer for future panzanella dishes!
  • 2 lbs assorted tomatoes, reds, yellow, tiger, heirlooms, etc. cut into 1″ pieces – Ratio is a little more tomatoes to bread
  • 1-2 cup fresh mozzarella cut into 1″ cubes
  • 1/2 cup thinly sliced European cucumber, sliced in 1/2 and seeded…run a small spoon down the center of the cucumber to remove inner seeds
  • 1/2 cup thinly slice purple onion
  • 2 tsp garlic puree -put thru garlic press (1 tsp is for the special dressing below, 1 tsp for Panzanella)
  • 1/4 tsp each salt and pepper
  • fresh herbs: 1/2 cup chopped basil, 1 tsp chopped oregano, 1/2 tsp thyme, 1/4 cup parsley…all finely chopped
  • 1/4 cup olive oil
  • 1 special sauce recipe below

Directions for the Salad:

  1. Pre-heat Covection oven to 400º
  2. Make special sauce recipe below and set aside
  3. Cut up sour dough or ciabatta loaf into 1″ cube and place on cookie tray lined with foil
  4. Drizzle 1/4 cup olive oil all over the cubed up bread pieces and sprinkle with s & p
  5. Bake the bread until deep golden , about 12 minutes …keep an eye on it not to burn
  6. Let croutons cool completely
  7. Cut up tomatoes and fresh mozzarella into approx. 1 ” cubed pieces
  8. Cut cucumber in 1/2 length wise
  9. Peel and seed cucumber running a small spoon down the center to remove seeds then thinly slice cucumber half moons
  10. Cut 1 purple onion in 1/2 and thinly slice
  11. Put garlic thru garlic press
  12. Add tomatoes, cucumbers, onions, garlic puree, herbs and mozzarella to a large bowl
  13. Then add in the croutons, drizzle 1/3 cup of special sauce over salad
  14. Toss and serve immediately…MMM!
  15. NOTE: Add in everything but the croutons and special sauce until right before you are ready to enjoy the Panzanella salad! ENJOY!

Ingredients for ther Special Dressing:

  • 1 heaping tbsp dijon mustard
  • 1 tsp garlic puree
  • 1/4 tsp each salt and pepper
  • 1 tbsp red wine vinegar
  • 1 tbsp seasoned rice wine vinegar
  • 1/4 cup exta-virgin olive oil

Directions for dressing:

  1. Add first 4 ingrdients to a small bowl and slowly drizzle in while continuously whisking 1/4 cup olive oil (the dijon will help to emusify dressing)

CT Style in The Bender Kitchen with Teresa & Ryan Making Manicotti!

CT Style in The Bender Kitchen with Teresa & Ryan Making Manicotti!

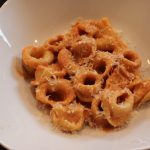
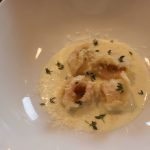
With Easter right around the corner I was excited to be back on CT Style in The Bender Kitchen with Ryan and Teresa so I could share with you my family’s secret recipe for homemade manicotti. These delicate pasta crepes are the lightest manicotti you’ll ever have. They are oozing with mozzarella, covered in tomato-basil sauce and topped with grated Pecorino Romano cheese and are sure to turn heads at the dinner table!

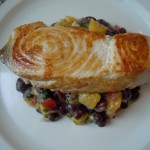
Italian tradition always includes a yummy side dish to go along with the ham, leg of lamb, turkey, salmon or tenderlion like manicotti, lasagna, eggplant rollatini or parmesan. Comfort food bringing it all together, an Italian side dish makes such a nice compliment to what ever meat or fish you choose.

This homemade manicotti recipe is a poured crepe-like batter and in my opinion it’s a whole lot easier then making a tradition rolled out pasta. Making the pasta crepe is like making pancakes or French crepes. On my manicotti recipe page I show you detailed pictures of how to make them. The YouTube “Manicotti Show” that’s embeded there also includes very detailed instruction on how to make these walking you thru each step making it very easy for you to follow and learn.

I love cooking for everyone on the CT Style set who seemed to love the manicotti because there weren’t any left over…makes the chef very happy! The lettuce wedges with Roasted Blue Cheese & Buttermilk Dressing (stay tuned for an up and coming show on that one) and crumbled bacon were a big hit too and lets not forget those Chewy Chocolate Chip Cookies! 

Once you introduce these delectable homemade manicotti into your family’s holiday dinner you’ll find it becoming part of your tradition too! Other wonderful side dishes you could add into your dinner, my Creamed Onions, Steak House Creamed Spinach or zucchini torta! Don’t forget about Ricotta Pie or Greek Baklava both crowd pleasers at parties! Enjoy and Happy Holidays! 🙂

Tortellini at The Gulla’s

Tortellini at The Gulla’s

You know this labor of love is so worth the effort when you taste how tender and flavorful these homemade tortellini are! The delicate, circular shaped pasta are stuffed with a purée of sundried tomato, mozzarella, and Reggiano Parmesan and served in one of my all time favorites, a tomato-cream sauce.  I introduced Steve to another easy and scrumptious sauce, Gorganzola Dolce-Cream Sauce that’s garnished with fresh thyme and a drizzle of truffle oil! 

This past weekend I was at The Gulla’s house with Steve and his son Maximo making their homemade tortellini. Steve dedicates a few hours every Christmas Eve making these little gourmet bites for his family’s Christmas dinner. Making these tortellini is definitely a labor of love because you are creating each little amazing folded bundle of pasta by hand.

Having a Smart pasta machine like Steve’s really cuts down on the labor of making tortellini as the pasta comes out of the machine in long ready-made sheets in mere minutes. It’s a very cool process putting out smooth sheets of pasta in 3 minutes flat but you can also learn to make Steve’s tortellini using homemade pasta too if you don’t own an Smart pasta machine. I have a homemade pasta recipe below for all of us without a pasta machine who don’t want to miss out on learning how to make these incredible tortellini.

As Italian legend goes on how the shape of the tortellini came about dates back to the days when Venus, the Goddess of Love, was traveling to a small town in Italy between Modena and Bologna. She was staying at a tavern where the Innkeeper was so taken by her beauty he peeked thru the key to her room one night and got a glimse of her navel. He rushed to the kitchen and created a pasta in the likeness of her belly button. And that’s how the shape of the tortellini came about, the belly button pasta! Who Knew?

While you are working hard forming these wonderful tortellini you may need a little sip of something to get you through like a Metaxa Mojito! And for easy nibbles you can pick on some Mango Salsa, Sweet Potato Fries and Green Goddess Dip II,  Best Guacamole Ever or some delicious Mediterranean Layered Dip!

INGRDIENTS for making PASTA in The Smart Pasta Machine:

  • 3 parts flour
  • 1 part semolina
  • 180 ml OR 3/4 cup of water for 2 lbs flour in pasta machine
  • 1 egg and 1 tsp water whisked in a small bowl – set aside until ready to form tortellini

INGREDIENTS for Sun-dried Tomato FILLING:                                                                                         NOTE: THIS FILLING IS UNBELIEVEABLY DELICIOUS!…try it on crostini OR on crusty bread!

  • 1/2 cup sun dried tomatoes
  • 1/2 cup mozzarella – whole milk or part skim
  • 1/4 cup grated Reggiano Parmesan
  • 2-3 tbsp olive oil

Purée these ingredients with an immersion blender or add to food processor and pulse. Start with 2 tbsp of olive oil and add a little extra if needed to purée til smooth texture

DIRECTIONS FOR FORMING THE TORTELLINI WITH SHEETS OF PASTA MADE FROM THE PASTA MACHINE:

  1. Begin to cut 2″ circles with your cookie cutter out of the machine made sheets of pasta
  2. Brush top 1/2 of the circle edge with a whisked egg
  3. Place 1/4 tsp of sun dried tomato filling in the middle of the circle pasta
  4. Fold the circle in 1/2
  5. Press to SEAL the 1/2 circle of pasta…VERY IMPORTANT to SEAL this edge!
  6. Take 1/2 circle and wrap around your pinky having each end meet
  7. Press these two ends together to seal and form one continous circular shape
  8. Fold down top of circular pasta to form tortellini
  9. Place in a bowl as you finish each one until you gone thru all the pasta sheets
  10. Bring large pan of salted water to a boil and add fresh pasta
  11. Cook pasta for 8 minutes, test pieces of pasta for proper doneness
  12. Serve with tomato-cream sauce or Gorganzola Dolce-cream sauce, garnish with thyme and truffle oil … mmm!

INGREDIENTS FOR TOMATO-CREAM SAUCE:

  • 2 cloves finely chopped garlic
  • 1/2 tsp salt
  • 1/4 tsp dried oregano
  • 3 1/4 cup POMI “strained tomaotes” – 1 med box – 26 oz.
  • 2 cups heavy cream
  • 2 tbsp olive oil

Sauté finely chopped garlic in 2 tbsp olive oil for 3 minutes, add in POMI strained tomatoes, salt & oregano and simmer for 15 minutes. Add in 2 cups of heavy cream to tomato sauce. Bring to a simmer for 15 miutes more. Serve with cooked tortellini, garnish with fresh thyme (and truffle oil.

INGREDIENTS FOR GORGANZOLA DOLCE-CREAM SAUCE:

  • 2 cups heavy cream
  • 1/4 cup Gorganzola Dolce cheese
  • 1/4 cup dry vermouth
  • fresh thyme leaves
  • truffle oil

Add heavy cream, Gorganzola, and vermouth to a small sauce pan and bring to a simmer. When it comes to a simmer whisk the melted cheese into the cream and simmer 10 minutes. Serve with tortellini, garnish with a sprinkle of fresh thyme leaves and a drizzle of truffle oil.

INGREDIENTS for Easy Homemade-Handmade Pasta- (Recipe from “Pasta at Vin’s“)

  • 2 1/2 cups all purpose flour
  • 1/4 cup olive oil
  • 4 1/2  – 5 lg eggs
  • 1/4 tsp salt

DIRECTIONS:

  1. Put the kneading attachment on your food processor and add the flour
  2. Add the salt and olive oil
  3. Turn on the food processor to slow
  4. Add in 1 tbsp of water
  5. Begin adding in 1 egg at a time with the processor still on slow
  6. Add in the rest of the eggs
  7. Keep the food processor going on medium speed to begin kneading the dough
  8. Let knead for about 8 minutes until the texture turns into a smooth consistency
  9. Remove the pasta dough and place onto the counter
  10. Knead briefly with your hands and let sit for 1/2 hr.
  11. NOTE: Vin does not cover his pasta dough while it sits for the 1/2 so it can begin to dry out  a little bit
  12. Sprinkle some flour onto the counter or work surface and cut pasta dough into 8 pieces
  13. Begin to roll out each piece of dough to your desired thickness, into long lasagna-like sheets
  14. Sprinkle more flour on top of each thinly rolled out pasta piece and begin to cut out 2″ circles with your cookie cutter
  15. Brush top 1/2 of the circle edge with a whisked egg
  16. Place 1/4 tsp of sun dried tomato filling in the middle of the circle pasta
  17. Fold the circle in 1/2
  18. Press to SEAL the 1/2 circle of pasta…VERY IMPORTANT to SEAL this edge!
  19. Take 1/2 circle and wrap around your pinky having each end meet
  20. Press these two ends together to seal and form one continous circular shape
  21. Fold down top of circular pasta to form tortellini
  22. Place in a bowl as you finish each one until you gone thru all the pasta sheets
  23. Bring large pan of salted water to a boil and add fresh pasta
  24. Cook pasta for 8 minutes, test pieces of pasta for proper doneness
  25. Serve with tomato-cream sauce or Gorganzola Dolce-cream sauce, garnish with thyme and truffle oil … mmm!


Creamed Onions

Creamed Onions

Creamed Onions, inspired by my Grandma Reilly, are put together in mere minutes then baked in the oven until bubbly making for the perfectly saucey side dish. My secret ingredient in the creamed onions offers a suble flavor bringing together the heavy cream, half and half, white wine, chicken broth, and mild Emmentaler Swiss cheese.

The secret addition in these creamed onions that give’s this dish that extra special something is evaporated milk. A small amount of Emmentaler is the other delicate flavor. Emmentaler is a very mild swiss cheese with remarkable melting qualities usually found in fondue recipe’s. I never got the recipe from my Grandma but thru many yummy test runs figured it out and have been making this recipe for over 15 years.

I began reminiscing about my Grandma’s Reilly’s holiday dishes when Pem McNerney, Living Editor, for The Source and other Shoreline newpapers recently sent me an email with a list of questions pertaining to Thanksgiving asking me if I wanted to elaborate, I was happy to oblige. Look for the hyper-links below the creamed onion recipe to help with your Thanksgiving Dinner!

img_9378 img_9393 creamo

creamwine creamchix creamsandp

creamcorn creamemment

creambake img_9419 img_9450

Ingredients for Creamed Onions:

  • 2 frozen bags (approx 2 lbs.) of white pearls onions 14 – 16 oz each bag
  • 1 cup heavy cream
  • 1/2 cup half and half
  • 1/2 cup white wine- chardonay
  • 1/2 chicken broth
  • 1 small can evaporated milk (the 5 oz can)
  • 1/2 cup grated Emmentaler Swiss cheese or Gruyere
  • 1 tbsp corn starch
  • 3/4 tsp sea salt
  • 1/4 tsp finely grated blk pepper OR white pepper

Directions for Creamed Onions:

  1. Bring a pot of water to a boil and add frozen white pearl onions
  2. Bring back to a simmer, and keep simmering for 20 minutes
  3. Mix corn starch and Emmentaler cheese in a small bowl, set aside
  4. Remove simmering pearl onions to the baking dish with a slotted spoon
  5. Drain water from sauce pan
  6. Using SAME pan (no need to clean) add heavy cream, half and half, evaporated milk, chix broth, and salt and pepper and bring to a low bubbling simmer
  7. Whisk in Emmentaler cheese-corn starch mixture until combined, 20 seconds…keep whisking until melted in and then…
  8. Remove from heat immediately and pour over onions in baking dish
  9. Stir to even coating onions and bake for 35 minutes on 350º until bubbly, it will be golden around the egdes
  10. Note: Grilled ribeye or Filet Mignon, creamed onions and a drizzle of truffle oil is OUTRAGEOUS! Enjoy! 🙂
  11. NOTE: These creamed onions get even better when re-heated because the onions break down a little and melt into the sauce…MMM!

breads

iphone pictures 2419

iphone pictures 410

IMG_2658

blupie


Thanksgiving Memories

When I think of Thanksgiving many nostalgic memories come rushing in. It’s easy to do with all the aroma’s of this festive season.  The first fond memories I had of Thanksgiving were going to Grandma Reilly’s house having her homemade pies and creamed onions! The blueberry pie with a crispy, flaky crust and oozing sweet blueberries was my favorite. Her lemon meringue pie at a very close second. Not that her creamed onions didn’t leave a huge impression on me. Unfortunately, I never did get her pie crust recipes but have spent many hours fooling with pie crusts until I got it right, my “perfect pie crust in 5 minutes” with a “blueberry pie” filling to emulate her’s! –  https://thetravelingepicurean.com/perfect-pie-crust-in-5-minutes/  and  https://thetravelingepicurean.com/best-blueberry-pie/ .

The hard thing about Thanksgiving is there are so many dishes to make it can be exhausting. There’s the dilemma of which one’s are tradition, which one’s your favorite and can I eliminate any of them? The best answer is don’t be a control freak or a kitchen hog and have everyone join in doing their part, laughing, mixing, tasting, working along side of you. It’s ok to delegate out some of those tasks. Then it doesn’t seem like work at all! This being said, one Thanksgiving in particular comes to mind. Years ago while living in San Francisco my dear friends Lisa, Bobby, Pam and John came out West with their children and parents to visit more family and invited us to stay with them as well.  

This was a grand occasion, not only was I excited to be with my nostalgic East coast friend’s for this Thanksgiving holiday but they rented out The Historic Spreckels House in Sonoma, CA. It was breathtaking! We went wine tasting, played football on the grounds, and read lots of storybook’s to the little ones. The lasting impression for me here was all the fun we had in the kitchen. We all pitched in together to make a gourmet Thanksgiving dinner that could have been a scene from a Norman Rockwell painting. My contribution to the dinner were my “Easy Icebox Dinner Rolls” that I dredged in chopped green onion and fresh rosemary. Nothing like adding to the aroma’s of roasted turkeys then with that of fresh baked breads. – https://thetravelingepicurean.com/easy-icebox-dinner-rolls-2/

The great thing about these icebox rolls is you can make the dough 4 days ahead. I call that brilliant! It’s key to staying sane on a holiday like Thanksgiving. These rolls have turned into tradition for me and my family, a dish that everyone asks about when ever they arrive. My friend Laura, and loyal Traveling Epicurean follower from Carmel, California will text me pictures of her “easy icebox rolls” every Thanksgiving. She writes, “it’s a family tradition and traditions create memories that last for generations.”

The most important thing about preparing for a holiday like Thanksgiving is timing. For instance, the pie crusts can easily be made a month ahead and put into the freezer. Take them out two days before to thaw. Roll them out, get them into your pie dish and back into the fridge until the night before when you can put together filling’s and bake.

Roasting the brussel sprouts on a cookie tray with chopped garlic, a drizzle of olive oil and a sprinkle of salt and pepper is another time saver. Set aside after roasting in a heat proof serving dish and warm right before sitting down. This is the most delicious way I have ever had brussel sprouts. Once you try this way you’ll be hooked. – https://thetravelingepicurean.com/best-brussel-sprouts-ever/

My tip of the day: “Wondra flour” for your gravy is a God send! Don’t waste your time fussing with a roux! Is it too lumpy, will it dissolve, is it too thick, did the raw flour taste cook out? Forget about it… Wondra dissolves immediately and gives your gravy a luscious sheen in mere minutes. Yeah!

It’s funny because most of my friends who came out to stay with me when I was living in San Francisco knew they were to bring a tub of Mashmallow Fluff and a shrunk-wrapped pizza from Modern Apizza in New Haven. A couple of my favorite’s that you couldn’t get out there. Yet, the side dish that baffle’s me the most on Thanksgiving is the marshmallow’s on sweet potatoes. It’s something i just can’t wrap my brain around. The fact is, my confusion of why someone want’s marshmallow’s baked on sweet potatoes doesn’t really matter because this dish has been around since the early 1900’s. It is a tradition for many family’s on Thanksgiving. That to me say’s it all. Now nuts in cranberry sauce? I won’t even go there.

How I love this holiday and sharing other friend’s traditions with my children. Last year my kids and I had a blast on Thanksgiving meeting my family out at  an early Thanksgiving brunch, then it was off to my friend’s Marco and Sheryl’s Lathrop Manor in Norwich, CT, where they also reside. At dinner time we sat down with a house full of their relatives and friends to Marco’s gourmet dinner. His buttery mashed potatoes were over the top!. Conversation at dinner had my kids learning about Benedict Arnold and Connecticut history. Come to find out Arnold actually lived in this Lathrop Manor in the seventeenth century working as an apprentice to the Lathrops, the first apothecary in Connecticut…in this part of the world! Their Lathrop Manor is being remodeling right now but you can check out this very cool house in one of The Traveling Epicurean shows called “Salmon B.L T’s at Marco’s” – https://thetravelingepicurean.com/gourmet-salmon-b-l-t-sliders-at-marcos/

This Thanksgiving I am looking forward to going to my parents house early. Having them spend time with my children, seeing my brother and his family, then off to dear friends for a second round of festivities later on! Making more fun memories unique to each one of us! Family, friends and food bringing us all together once again. May you be thankful for having the chance to spend precious time with your family and friend’s this 2016 Thanksgiving Holiday!!

Warm Holiday Wishes,                                                                                                                               The Traveling Epicurean                                                                                                                             Michel Vejar

Thanksgiving Pictures of The Spreckles House in Sonoma, California

img_3486-1 img_3477 img_3479-1

img_3475-1 iphone pictures 702 img_3485-1

img_3487-1 img_3482-1 img_3498-1

spreck sprecgof img_3495

Feta-Basil Pesto

Feta-Basil Pesto

No doubt about it once you try this feta-basil pesto you will be hook! The creamy, French sheep’s milk feta pushes this pesto into a whole new arena! Combined with the fresh, floral basil leaves, Italian Reggiano Parmeggiano, extra-virgin olive oil and garlic are a creation that’s just born to go together! Done in mere minutes in a food processor there’s no excuse not to make this delectable sauce bursting with flavor every chance you get!

Making fresh feta-basil pesto can’t be any easier then the convenience of your food processor! There’s no need whatsoever lugging out the ole mortar and pestle making a huge project out of something that literally take’s 2 minutes to make. No cooking, no baking, no washing, NO FUSS, just load up the food processor and pulse. Voilà, you have a gourmet sauce that turns around any dish you add it to into gourmet.

One of the appetizer’s I like to make with feta-basil pesto are Crostini with Fresh Mozzarella and Roasted tomatoes. Let’s not forget to try the feta-basil pesto on seared Scallops, Swordfish or even Sweet Potato Fries! And then there’s the obvious, top EASY PEASY pasta or Zucchini spaghetti with the feta-basil pesto and you feel like a king. Any way you look at it this feta-basil pesto is a no brainer, a win-win situation! So get on it! lol … xoxo

IMG_7288 027 IMG_0668 fetapesto IMG_2418

img_8522 fetagar fetapulsejpg

fetareggiano fetafeta fetapulsejpg

fetahot img_8558 img_8565

pestcrostini IMG_2026 IMG_6818

Ingredients:

  • 1/2 sheep’s milk feta cheese – from local cheese shop if you can! It’s the star of the show!
  • 2 packed cups – fresh basil leaves
  • 1/4 packed Reggiano Parmasan – freshly grated if you can
  • 1 extra lg OR 2 medium garlic cloves put thru garlic press
  • 1/4 cup PLUS 1 tbsp extra-virgin olive oil
  • salt and pepper to taste
  • a few dashes of your fav hot sauce

Directions:

  1. Place 2 packed cups of basil, 2 tbsp of olive oil, garlic thru garlic press, a sprinkle of s & p in food processor and pulse 6x
  2. Scrape down sides and add in Reggiano Parmesan and sheep’s milk feta and pulse 4x more
  3. Scrape down sides and add in a few dashes of hot sauce
  4. Drizzle in thru top opening of food processor 3 more tbsp of extra-virgin olive oil and pulse 3x more …voila you have feta-basil pesto! It’s as easy as that! 🙂
  5. Add this feta-basil to Crostini with Fresh Mozzarella & Roasted Tomatoes for an appetizer that’s sure to turn heads!
  6. OR EASY PEASY …Add the feta-basil pesto to some sautéed shrimp and pasta! YUM!

BBQ Sauce – BEST Homemade Sweet & Tangy!

BBQ Sauce – BEST Homemade Sweet & Tangy!

It’s like BBQ sauce candy! My Homemade BBQ Sauce is the perfect balance of sweet, tangy and a little spicy! This recipe is one of my versions of a classic “Kansas City” style sauce, meaning it is a tomato based sauce with a sweetener and a vinegar. Ketchup, dark Molasses, brown sugar, cider vinegar and spices are the core ingredient’s that make up this delicious blend of barbecue sauciness. It’s not too sweet or too tangy and it has just a pinch of heat to remind you that it’s a BBQ sauce. It really can’t get any easier to make BBQ sauce then this here recipe. It will definitely make it hard for you to go back to the bottle stuff with the high fructose corn syrup. In fact, I guarantee that you will find yourself dipping that spoon back into the pot to get one more lick of this homemade sassy sauce!

One of my favorite things to do with this sauce is adding a couple tablespoons of bourbon in the last 5 minutes of simmering.  Everyone will be asking you for the recipe for sure! If you have a mix of adults and children spilt the sauce into 2 portions, keeping one with bourbon and one with out.

Using the liquid smoke, which is simple to find at your local grocer now a days, is ideal for emulating that smokiness you would get with outdoor barbecuing. I have you adding in chipolte chile powder and a Spanish smoked paprika too which gives off a delicate flavor to the sauce without being too overbearing.

The 3 basic BBQ sauce type’s out there are a tomato based, a vinegar based and a mustard based. Believe it or not, there actually is a mayo based as well. The “Kansas City” style is the tomato based and probably the most popular through out the U.S. There’s a “Memphis” style similar to Kansas City with the tomato base but a thinner, more vinegar type sauce. The actual vinegar and mustard type sauce’s are quintessential to the Carolina’s. South Carolina being partial to the mustard type sauce and North Carolina to the vinegar type sauce. Then there’s that white BBQ sauce that’s mayo based, a signature sauce of Big Bob Gibson out of Alabama.

Once you see how easy it is to make your own delicious, sassy BBQ sauce I have a feeling there will be no stopping you! Enjoy your summer with this introductory BBQ sauce recipe! You might want to tag team all this barbecuing with some crab cakes, zucchini spaghetti, or spanakopita, and end with my amazing blueberry pie made with my perfect pie crust in 5 minutes!!

DSCN45211-300x225

zucspaghetti

IMG_5156

blupie

blueberrypie


IMG_7047

bbqspices

IMG_7069


IMG_7071

IMG_7092

IMG_7091


Ingredients:

  • 2 cups Ketchup
  • 2/3 cup light brown sugar
  • 1/2 cup dark molasses
  • 1/2 cup cider vinegar
  • 2 tbsp canola oil
  • 2 tsp liquid smoke
  • 1/2 tsp garlic granules
  • 1/2 tsp onion granules
  • 1/2 tsp chipolte chile powder (If you can’t find “chipolte” chile powder just use chile powder it will still be wonderful)
  • 1/2 tsp Spanish smoked paprika
  • 1/2 tsp salt
  • 1/4 tsp finely ground black pepper
  • 2 dashes of Wocestershire sauce
  • 2 tbsp of Bourbon – If you are a party of adults …it’s AMAZING!

Directions:

  1. Put all above ingredients into medium sauce pan and whisk to combine
  2. Bring to a low simmer 20 minutes
  3. The sauce will be delicious in only 5 minutes – delvelops more depth of flavor by simmering longer!
  4. Basting your grilling meats in the last 3-5 minutes with BBQ is deal so as not to burn and oven cooking meats in the last 10 minutes (the sugars in the BBQ Sauce will burn if you put it on too early)


Green Goddess Sauce ll

Green Goddess Sauce ll

Having my green goddess sauce ll at your next party will be sure to turn heads. It’s kind of like wearing a new party dress! This green goddess sauce is made in mere minutes in a blender. It’s a blend of Greek yogurt, mayo, fresh mint leaves and cilantro, garlic, green onion, lemon juice, olive oil and rice wine vinegar.  You don’t even have to waste time chopping finely because it all get puréed anyways!

Decorating your party plates with my green goddess sauce will make for a lovely presentation, a more formal one, but having a bowl or pouring cup of the sauce on the table will do the trick quite nicely! In fact, the latter might be better since there’s a good possibility your guest’s will be going back for seconds.

This green goddess sauce is so versatile because it literally goes with all foods! It’s heavenly on seared scallops…all fish for that matter, swordfish, rack of lamb, pulled beef tacos, Sweet Potato Fries , Baked Crispy Fries, or Baked Coconut Shrimp and even cut veggies!

027 IMG_3234 IMG_0672 IMG_0668 iphone pictures 447

IMG_6920 iphone pictures 1167 iphone pictures 1168

iphone pictures 1191 iphone pictures 331 iphone pictures 316

IMG_6956 IMG_6962 IMG_0672

Ingredients:

  • 1 cup plus 2 tbsp Greek yogurt
  • 1/4 cup mayo (I use Hellman’s)
  • 1/2 cup packed mint leaves (1 cup loose)
  • 1 cup packed fresh cilantro
  • 1 garlic clove put thru garlic press
  • 1/2 jalapeño diced
  • 4 lg stalks, 6 small of green onion chopped coarsely
  • 1 tbsp fresh lemon juice
  • 1 tbsp extra virgin olive oil
  • 1 Tbsp “seasoned” rice wine vinegar
  • 1 tsp sugar  – (NOTE: I forgot to add this in the show, but it really needs this for balance 🙂
  • s & p
  • If it’s not hot enough with the jalapeno add a dash of Siracha

Directions:

  1. Place all of the ingredients into a blender an purée for 10 seconds…be patient – you may need to stop and stir everything to get it going but do NOT add any more liquid
  2. Stop blender and scrap down sides to get the larger leaf pieces and blend for 5 more seconds and violà!
  3. Taste here and add salt and pepper
  4. Add a dash of Siracha – you need to taste the sauce first, sometimes a jalapeño can be super hot and other times it can be a mellow hot
  5. This sauce gets even better if you can pop it into the fridge for an hour and let the flavors mingle, the sauce will thicken up a little too!
  6. Make this ahead of time and keep sauce in a plastic container and refrigerate.  It stays nicely for days in frig.
  7. This green sauce is absolutely delicious on so many things…be creative.

Drunk Blondies & Bourbon Caramel Sauce

Drunk Blondies & Bourbon Caramel Sauce

IMG_6622
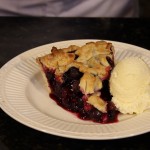
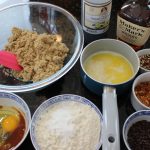
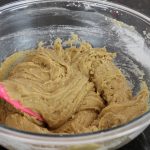
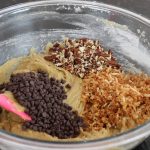
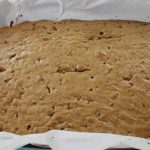
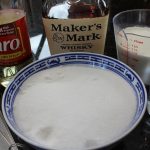
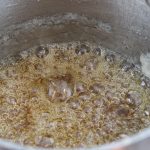
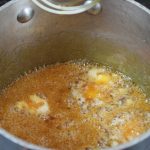
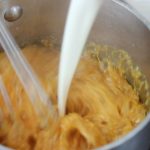
Drunk blondies are a dessert that will have you and your guest’s reminiscing for days! These drunk blondies are a buttery, chewy cookie bar made with bourbon, butter, toasted coconut, pecans and semi-sweet chocolate chips…could it get any better then that! They get even more decadent when you serve them with vanilla ice cream, homemade bourbon caramel sauce, whipped cream and extra toasted coconut to top it off. In fact, I wouldn’t serve them any other way. You will feel like you are in dessert ecstasy!

The recipe for these mouth watering cookie bars actually originates from the Back in the Day Bakery CookBook by Cheryl and Griffith Day. I Found this recipe on a fellow food blogger, Adam Robert’s website, called Amateur Gourmet. I haven’t had a chance myself to buy this cookbook but it’s high on my list! Adam serves up these drunk blondies with a bourbon caramel sauce from Food and Wine but I have my own which I love that I share below.

The Drunk Blondie bars couldn’t get any easier to make. You don’t even need a kitchen aid or electric mixer to make these just a large bowl and spatula or wooden spoon! It literally take’s all of a few minutes to combine the brown sugar, eggs, vanilla, bourbon, toasted coconut, pecans, chocolate chips and flour mixture. Then off into a baking dish lined with parchment for easy removal.

This is a great dessert if you entertain a lot because is it’s a total make ahead project. You can make the drunk blondies up to 3 days ahead and the bourbon caramel sauce up to a week ahead. The toasted coconut you want to make the same day or night before. You may burn the toasted coconut on your first try because that cooks faster then you think and you only have 6 minutes of toasting time. Don’t worry, just toss out the first round and throw in a second batch. You will be that much more knowledgeable and ready for the toasty quickness in the next round! Be sure to toast up extra coconut too, because it makes for an incredible addition at the end to sprinkle on top of your drunk blondie sundae’s!

As for my bourbon caramel sauce I have you heat up the heavy cream. This is a necessary step that some recipes don’t even mention.  It’s important to do this because adding cold cream into a boiling sugar mixture will most likely seize up and get temporarily lumpy.  There’s no worries here though. If this does happen just put the pan back on the stove, keep whisking and it will become a smooth caramel sauce in a matter of seconds!

Hope you enjoy the amazing drunk blondie sundae’s with ice cream, bourbon caramel sauce and toasted coconut. If you are putting together a whole meal you could start with an appetizer like crab cakes, spanakopita triangles, my famous Caesar salad, salmon BLT sliders, or move right to a main course like my bolognese sauce right from Urbino, Italy made with homemade spaghetti!

DSCN45211-300x225 cookedspan DSCN4572-300x225 IMG_2624 IMG_4327

IMG_6501 IMG_6540 IMG_6542

IMG_6550 IMG_6561 IMG_6622

Ingredients for Drunk Blondies – Makes 12 – 24 bars 

  • 2 cups all purpose flour
  • 1 teaspoon baking powder
  • 1/4 teaspoon fine sea salt
  • 2 sticks unsalted butter – melted
  • 2 cups packed light brown sugar
  • 2 large eggs room temp
  • 2 teaspoons pure vanilla extract
  • 3 tablespoons Bourbon
  • 1/4 cup chopped pecans
  • 1 cup (1/2 cup is for sprinkling over the dessert at the end) sweetened flaked coconut, toasted in a 350º oven on a cookie sheet until fragrant and golden brown – about 5 minutesNOTE: you need to stir every 2 minutes with a spatula and then shake the tray to distribute evenly ….watch it carefully- it burns easily
  • 1/4 cup mini semisweet chocolate chips

 Directions – Pre-Heat Oven to 350º:

  1. Position a rack in the middle of the oven and preheat the oven to 350 degrees F
  2. Grease a 9-by-13-by-2-inch baking pan and line with parchment, allowing the ends of the paper to hang over two opposite edges of the pan
  3. In a medium bowl, whisk together the flour, baking powder, and salt; set aside
  4. Put the butter and brown sugar in a large mixing bowl and stir with a spoon until smooth
  5. Add the eggs, vanilla, and bourbon, and mix until thoroughly combined
  6. Stir in the flour mixture, followed by the pecans, coconut, and chocolate chips
  7. Pour the batter into the prepared pan and smooth the top with an offset spatula. Bake for 20-25 minutes, until the top is golden brown
  8. Remove the pan from the oven and let cool completely on a wire rack
  9. Cut the blondies into bars
  10. The blondies will keep in an airtight container at room temperature for up to 3 days.

Tip: The easiest way to toast coconut is in the oven. Position a rack in the lower third of the oven and preheat the oven to 350º. Spread the coconut on a baking tray and bake for 6 minutes, tossing every couple of minutes. Keep a close eye on the coconut, because it can burn easily.

IMG_6569 IMG_6579 IMG_6583

IMG_6598 IMG_6603 blonide

IMG_6607 IMG_6622

Ingredients for Bourbon Caramel Sauce:

  • 1 3/4 cups sugar
  • 1/2 cup water
  • 1 tablespoon light corn syrup
  • 2 tbsp butter
  • 1/3 cup bourbon
  • 1 1/2 cups heavy cream HEATED – If you don’t warm up the cream the temperature change will temporarily seize up the boiling water-sugar mixture…BUT don’t fret because all you need to do if this happens is put the pan back on the stove while whisking CONTINUOUSLY and it will all come back to a nice smooth sauce!

Directions for Bourbon Caramel Sauce:

    1. In a medium saucepan, bring the sugar, water and corn syrup to a boil over high heat
    2. You can stir the sugar-water mixture at first just to combine then DO NOT STIR after
    3. Cook until the sugar is dissolved washing down the sides of the pan with a wet pastry brush…just once
    4. Continue cooking without stirring until an amber caramel forms – from 5-8 minutes
    5. When it turns the pretty light amber color add in the butter and keep whisking
    6. BE CAREFUL NOT TO GET BURNED HERE because the mixture will rise up a little here at the butter/cream stages
    7. Remove from the heat and carefully stir in 1/2 the cream while STILL WHISKING – it will foam up here quite a bit so whisk it down slightly, then add in the rest of the cream and butter
    8. if it seizes up NO WORRIES all you need to do if this happens is put the pan back on the stove while whisking CONTINUOUSLY and it will all come back to a nice smooth sauce!
    9. Let cool for 1 minute and then stir in the bourbon
    10. Put the pan back on the stove and TURN DOWN the heat to medium and simmer any where from 3-15 minutes…how ever thick you like the sauce (it won’t get any darker at this point either just thicker)
    11. Let the caramel sauce cool slightly and serve warm or at room temperature
    12. NOTE: as the sauce cools it will thicken anyways
    13. The caramel sauce can be refrigerated for up to 1 week.

Homemade Pan Pizza

Homemade Pan Pizza

Homemade pan pizza made with different themed toppings from clams casino, to Hawaiian and Greek make for perfect party hors d’ oeuvres! Everyone seems to find their favorite flavors. When the sizzling pan pizza comes out of the oven heads turn especially when the aromas from the garlic, clams, bacon, onions and peppers fill the air!

The wonderful thing about all the different themed toppings for your pan pizza is you don’t need much in terms of quantity. The dough you make the day before, but if you forgot or didn’t have time it will still work if you make it the same day. If you make the dough the same day you don’t put it into the frig but let it proof for an hour and a half in a warm spot to develop some of that texture and flavor. The whole idea behind the “proofing in the refrigerator” is it let’s you do other things while the dough slowly rises developing a killer texture and flavor like in my delicious “Icebox Dinner Rolls”. So take advantage of this refrigerator method, you will be happy you did. 

As for my pizza sauce, it couldn’t get any easier because it’s puréed only, not cooked. If you go into a pizza place and inquire about their sauce the majority will tell you the tomato sauce is raw. I know because I have done just this, but they don’t always like to give away their pizza secrets so easily. To the raw, whole peeled tomatoes I add a garlic clove that I put thru the press, salt, pepper and some Italian seasonings and then it’s puréed. Keeping the tomatoes raw really compliments all those other strong flavors from the toppings yet not seeping into the background still being a pertinent player in the pizza game!

Have some fun with these pizza’s and customize those toppings on your homemade pan pizza! My favorite is the clams casino pizza because you have the best of both world’s, flavor’s and crispy, chewy edges. You can’t beat the garlic, clams, bacon and pepper combo. Drizzling on the extra clam juice not only makes it taste that much better but it let’s the crust get a little crispy while keeping the toppings moist enough so not to burn. With that in mind make sure to pour on any of the extra juices from what ever you are cutting up as when you are slicing up the cherry tomatoes. Another very important tip is to keep all the toppings, including the sauce and mozzarella, in the cold refrigerator until the last minute. This helps the toppings to cook properly giving the crust time to crisp up.

Enjoy the show and definitely think about some appetizer’s to go with these sizzling homemade pan pizza’s like my Caesar Salad, Crab Cakes, Baked Asparagus wrapped in Proscuitto, Spanakopita or my Roasted Chic Peas. All will bring a smile to your face I promise! 🙂

DSCN4572-300x225 DSCN45211-300x225 iphone-pictures-572-300x225 cookedspan iphone pictures 989

IMG_6226 IMG_6105 IMG_6123

IMG_6127 IMG_6170 rolldough

oilpan dougpan sran

IMG_6133 IMG_6145 piz

moz feta clams

IMG_6257 IMG_6258 IMG_6204

Ingredients for 1 Sheet Pan Pizza Dough – 12.5″ x 17.5″ x 1″ tray:

  • 4 cups all purpose flour
  • 1 1/2 cup warm water 105º-110º
  • 1/2 tsp sugar
  • 1 packet yeast or 2 1/4 tsp – not rapid rise
  • 1 tbsp salt
  • 3 tbsp extra virgin olive oil for the pizza dough
  • 1/3 extra virgin olive oil for the sheet pan
  • Plus more olive oil to drizzle on top of the pizza’s before baking

My Pizza Sauce – Enough for 2 Sheet Pan Pizza’s:

  • 1 can of whole peeled tomatoes (drained if the pulp is watery) pureed with 1 tsp salt, 1/2 finely ground Italian seasonings, 1/4 tsp pepper and 1 lg garlic clove put thru garlic press

Ingredients For The Toppings From The Show for 2 Trays of Pizza:

  • Clams Casino Pizza – (for 1/2 the pizza) 1-2 cans 1 cup of Snows canned clams drained except 3 tbsp of clam juice per can to drizzle over pizza,  1/4 cup of chopped peppers, 3/4 cup sliced thick cut bacon, 1 garlic clove thru press, 1 tsp chopped sweet onions
  • Greek Pizza – 3/4 cup sliced cheery tomatoes, 3/4 cup sheep’s milk feta, 1/4 cup sliced sweet onion, 1/2 cup sliced kalmata or canned black olives, 1/3 cup chiffonade basil
  • Bacon Pizza – 1 cup thick sliced bacon (for 1/2 of the pizza)
  • Hawaiian Pizza – 1 cup sliced ham, 1/2 cup chopped pineapple, 1/2 cup sliced green onions with whites too

Directions – (Pre-heat the oven to 450º right before the pizza dough has it’s final proof and make sure the rack is in the lowest possible position):

  1. Warm the stainless steel mixing bowl with warm water for 5 minutes
  2. Empty out warm water and add packet of yeast to mixing bowl
  3. Add in 1 1/2 cups of water at 105º-110º to the yeast
  4. Add in 1/2 tsp sugar and let the yeast proof for 10 nminutes
  5. Tour on knead hook and begin to add in 3 tbsp olive oil, flour and salt
  6. Keep mixing and knead with hook after it forms a dough ball for 10 minutes
  7. Take dough off of hook and onto a floured counter
  8. Knead by hand for 2 minutes and place into a large oiled bowl
  9. Cover with saran wrap and refrigerate for 18-24 hrs.
  10. When you are ready to make the pizza make sure to take out of the frig and let the cold dough sit for approx. 2 hrs. – this will make it easier to work with
  11. When the dough has sat for 2 hrs. turn out onto floured surface and begin to roll out and stretch to the size of the cookie tray
  12. Pour 1/3 cup of olive oil onto cookie tray and place the rolled out pizza dough onto olive oil
  13. Cover with plastic wrap and let sit 30 minutes
  14. Remove plastic wrap and stretch the dough if needed to the edges of the pan and using your thumb press the egde of the dough into the edges of the cookie tray to form a crust – this will become a crispy and chewy egde that you will love! 
  15. Spoon pureed tomatoes onto the dough and sprinkle mozzarella
  16. Add you desired topping and give a drizzle of olive oil across the top of the pizza and put into a 450º oven for 16-20 minutes.
  17. Definitely check at the 15 minute mark as all oven are different
  18. You want  the edges dark golden and the middle is sizzling
  19. Take out and let sit for 5 minutes
  20. Using a large spatula remove the pizza in one piece to a large cutting board and slice, or slice in the cookie tray