CT Style in The Bender Kitchen with Summertime Recipes!
Back on CT Style in The Bender Kitchen with Ryan Kristafer and Teresa Dufour this past Thursday morning! I feel so fortunate to be working with such a wonderful group of people at WTNH Channel 8 who make it so fun to share The Traveling Epicurean recipes with all of you.
My goal for this segment was to show you a couple of creative and really delicious ideas for all your summertime produce. Panzanella and Berries in Dreamy Cream came to mind.
One of the wonderful things about making these dishes is the abundance and variety you have to choose from at the farmers markets in the summer. The incredible flavors in this Panzanella recipe go without saying. All the aroma’s from the fresh herbs, basil, parsley, thyme & oregano to the fresh vegetables like the heirloom tomatoes, garlic, cucumbers, red onions really get you salavating. The creaminess from the fresh mozzarella and the crunchy from the homemade croutons balance it all out.
As for the Berries in Dreamy Cream, you can whip this one up in a matter of minutes as well. I’ve been making this sauce for over 20 years and always get the same delightful response from guests after their first bite. You would never think that melting Fluff and cream cheese together could make such a delectable sauce on fresh berries. It’s a sensation you have to treat your self to and then you’ll know what I’m talking about.
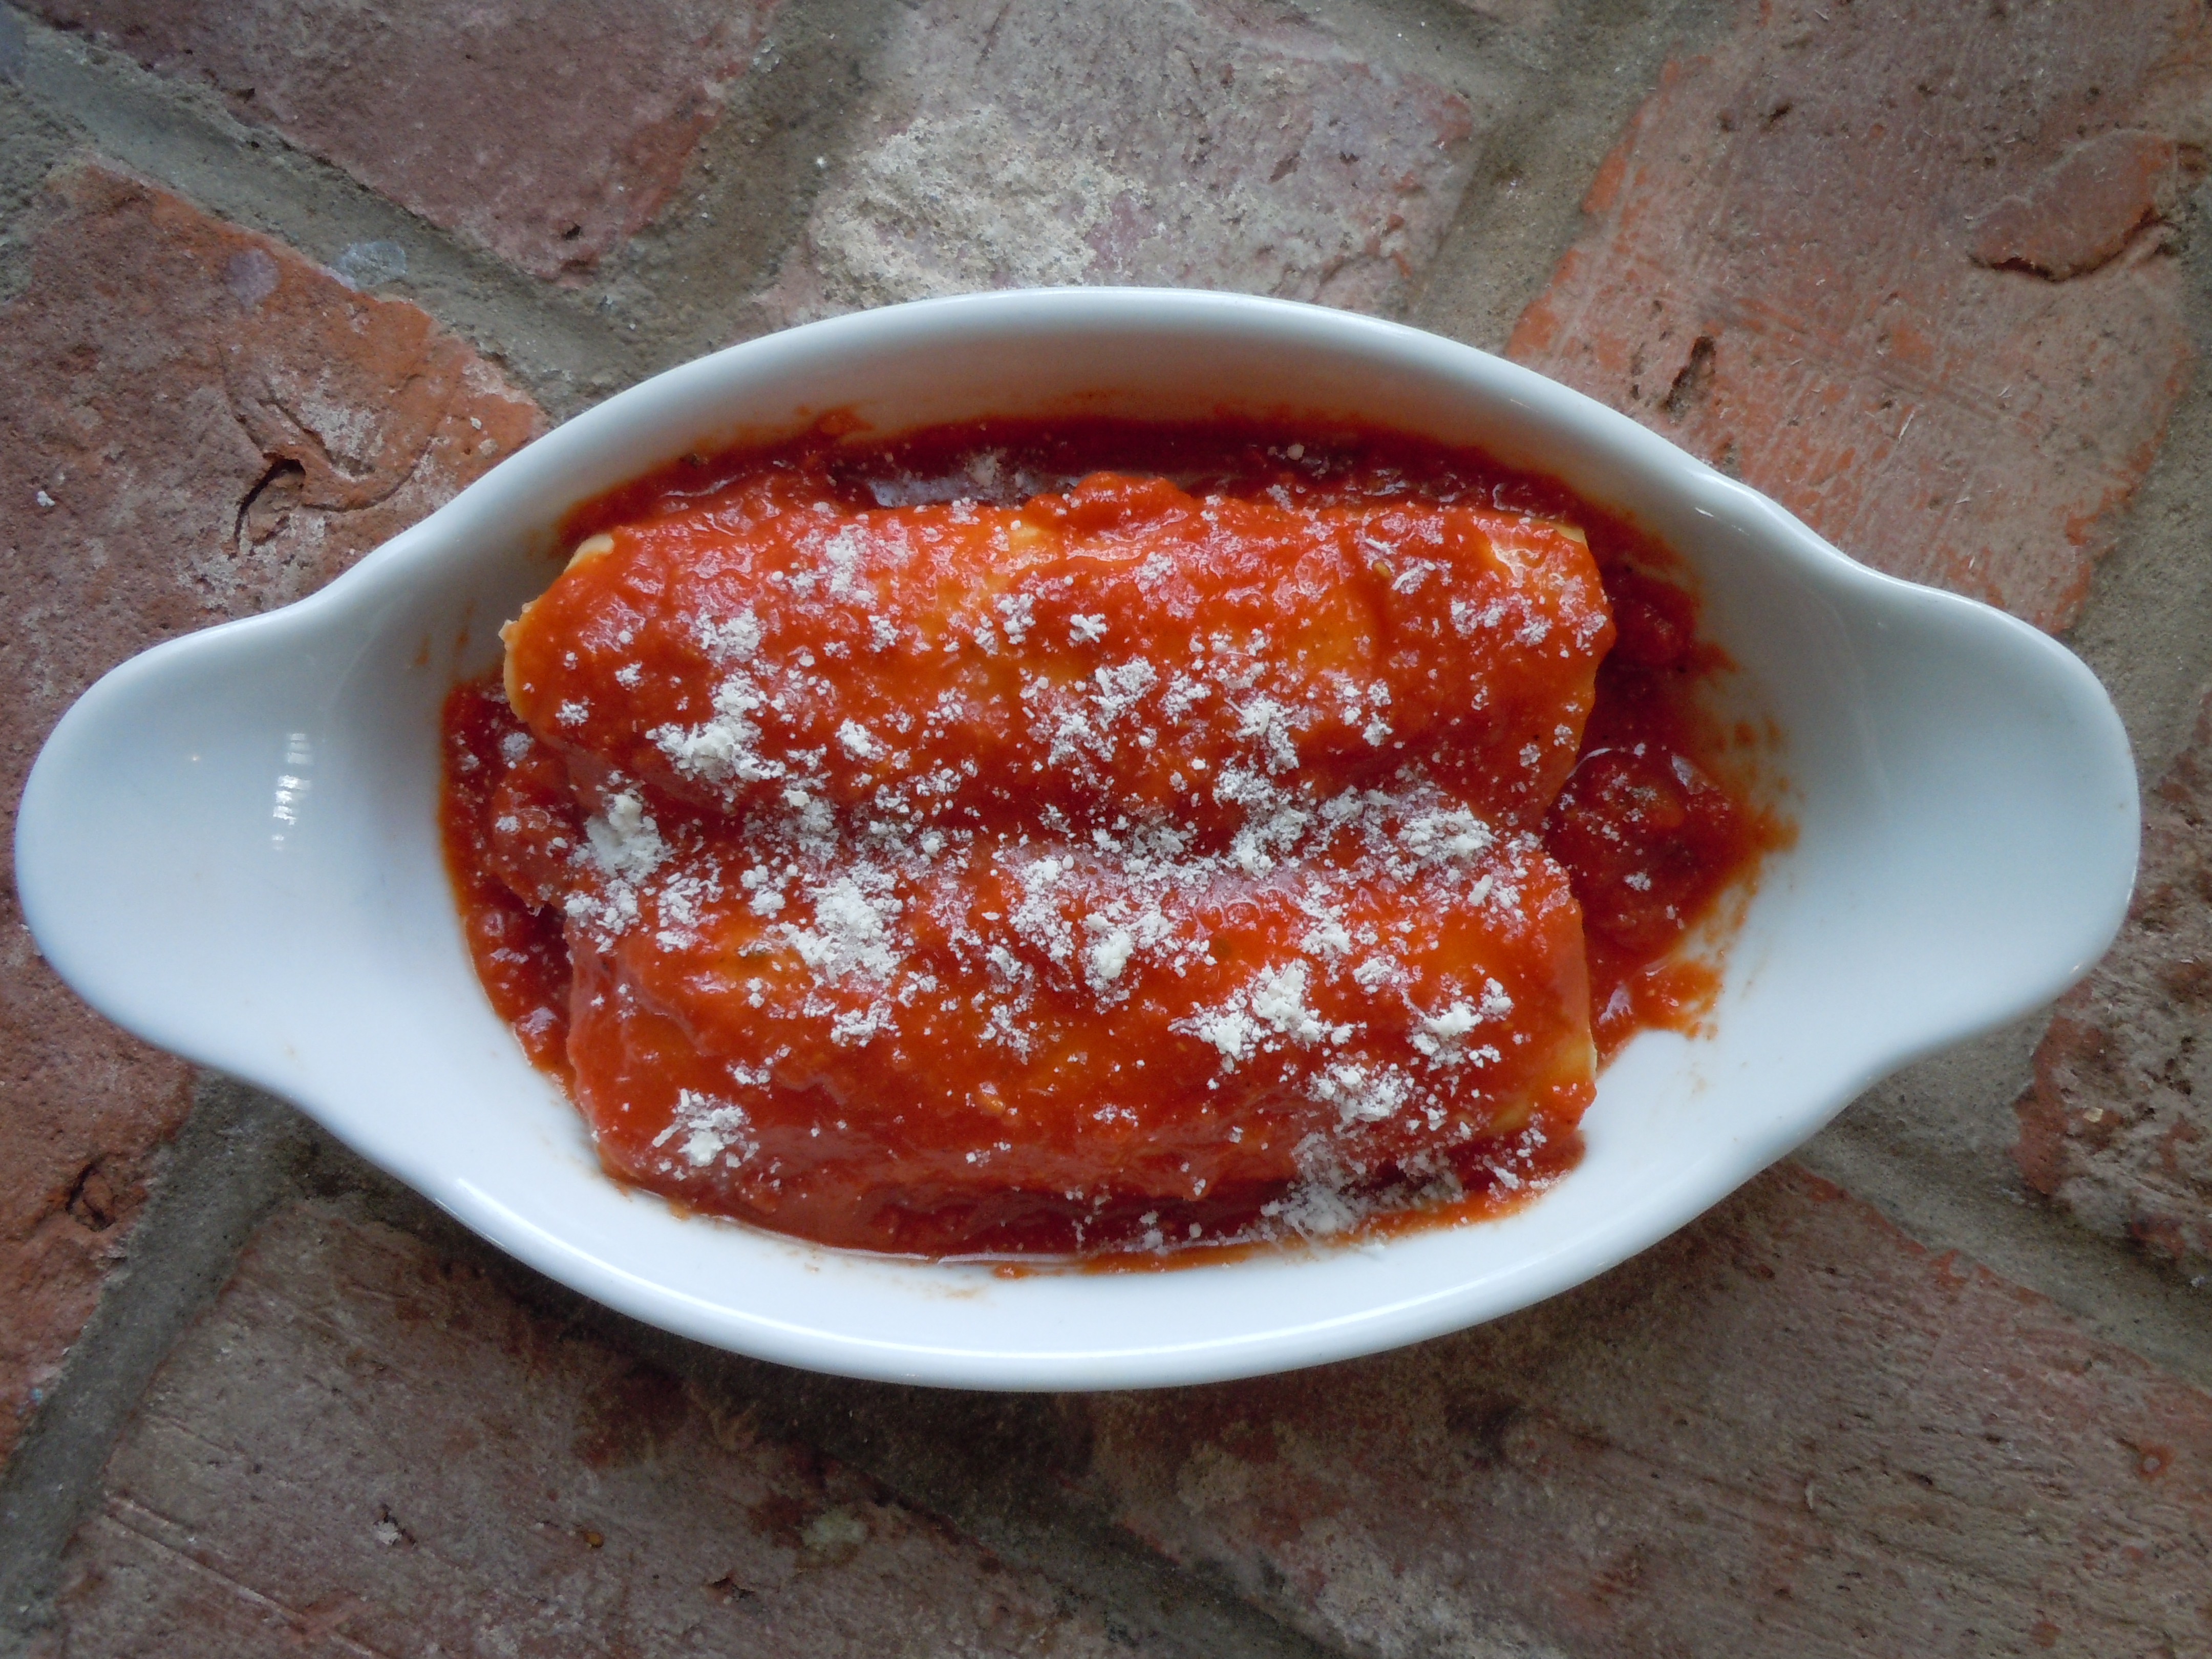
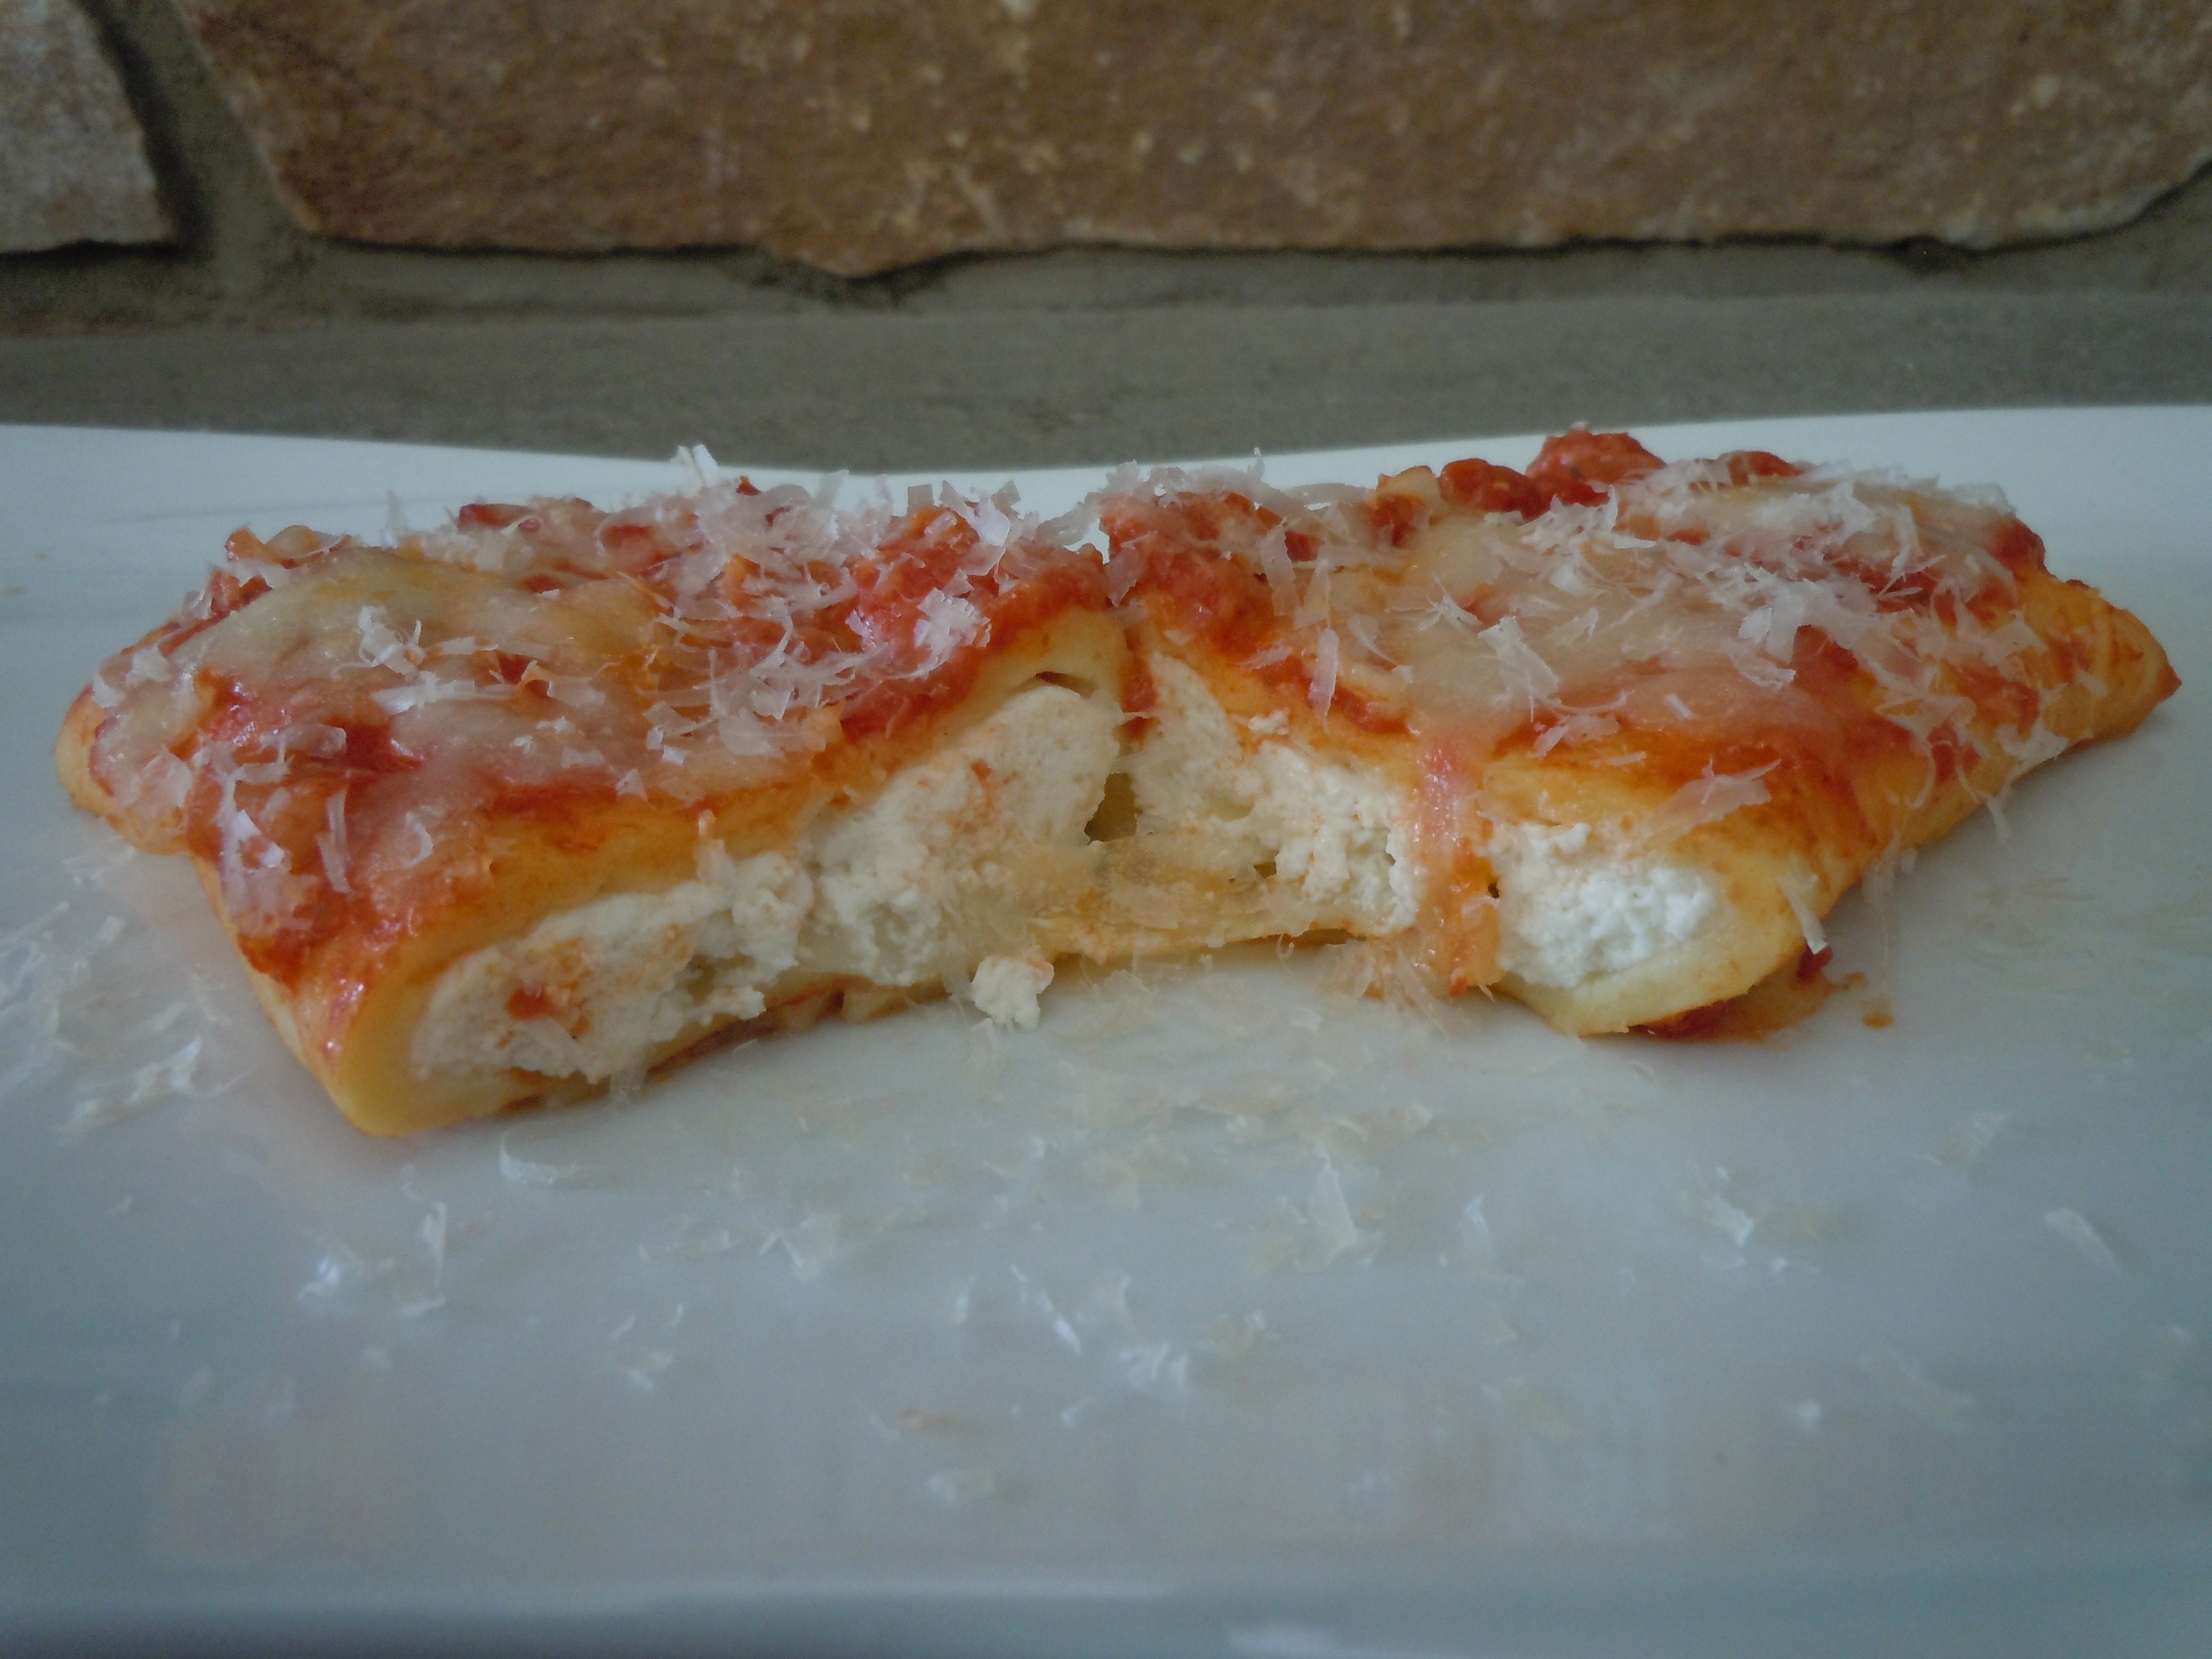
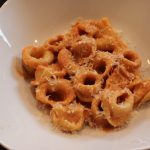
You know this labor of love is so worth the effort when you taste how tender and flavorful these homemade tortellini are! The delicate, circular shaped pasta are stuffed with a purée of sundried tomato, mozzarella, and Reggiano Parmesan and served in one of my all time favorites, a tomato-cream sauce. I introduced Steve to another easy and scrumptious sauce, Gorganzola Dolce-Cream Saucethat’s garnishedwith fresh thyme and a drizzle of truffle oil!
This past weekend I was at The Gulla’s house with Steve and his son Maximo making their homemade tortellini. Steve dedicates a few hours every Christmas Eve making these little gourmet bites for his family’s Christmas dinner. Making these tortellini is definitely a labor of love because you are creating each little amazing folded bundle of pasta by hand.
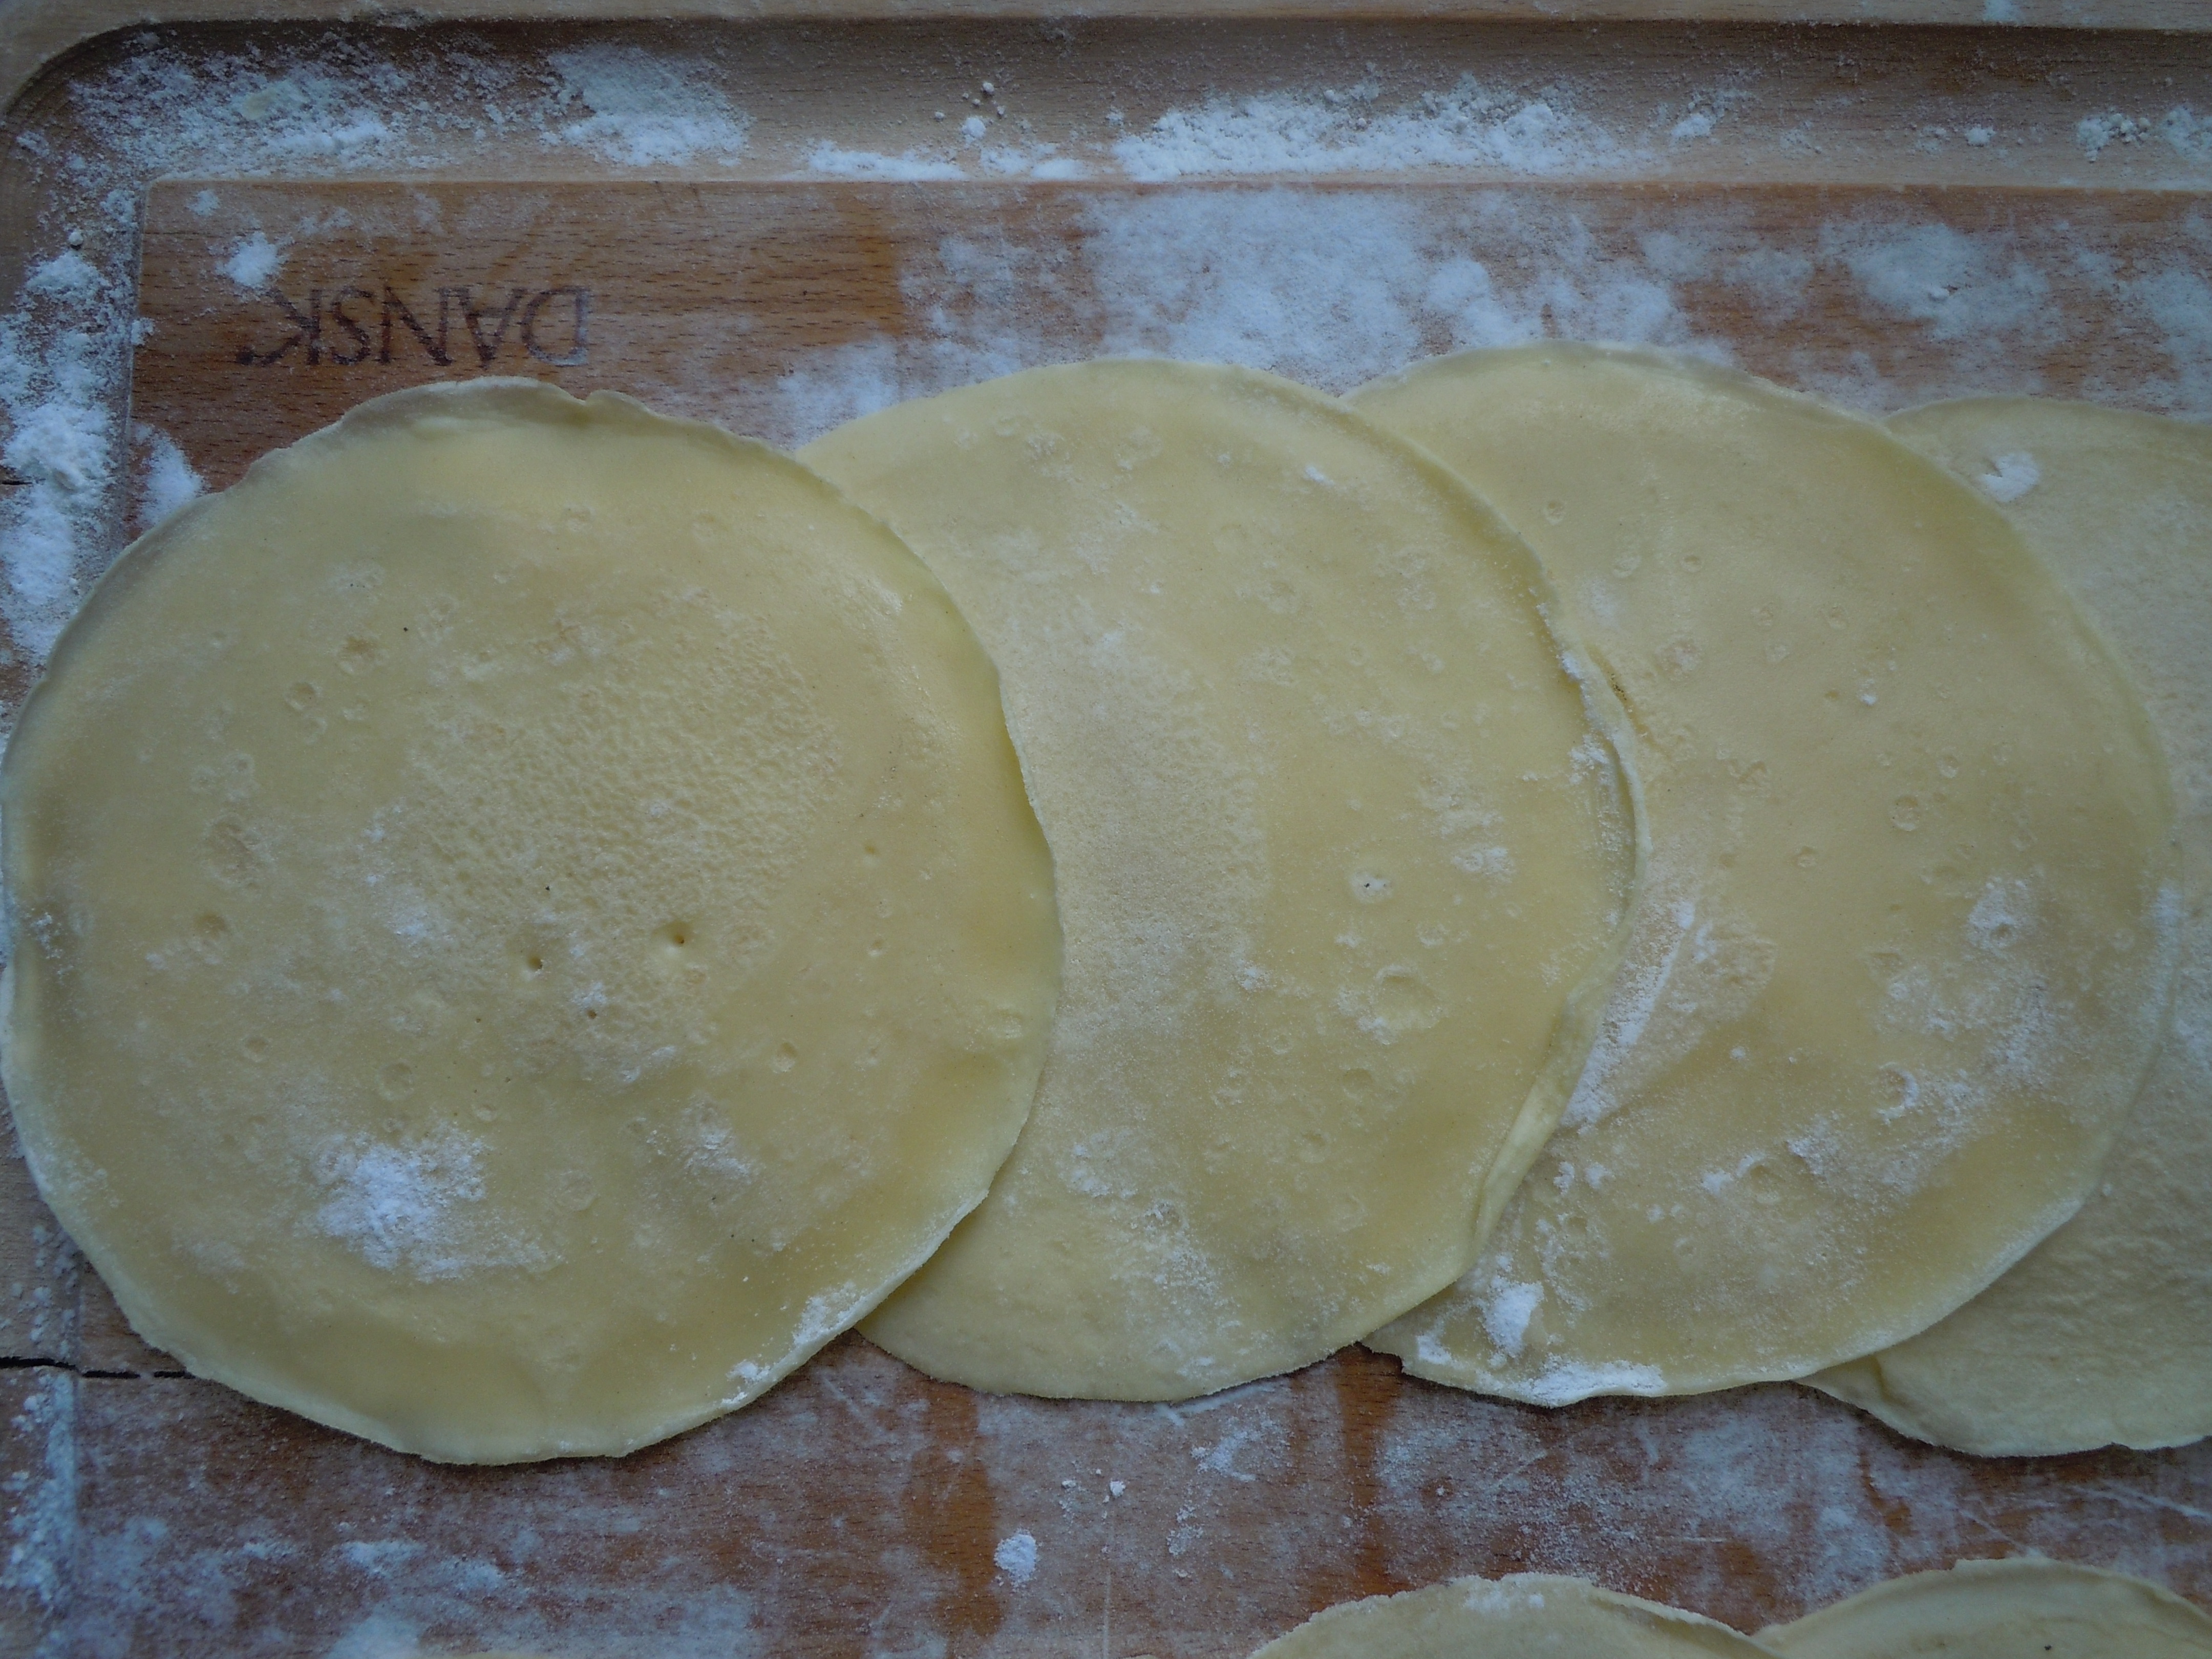
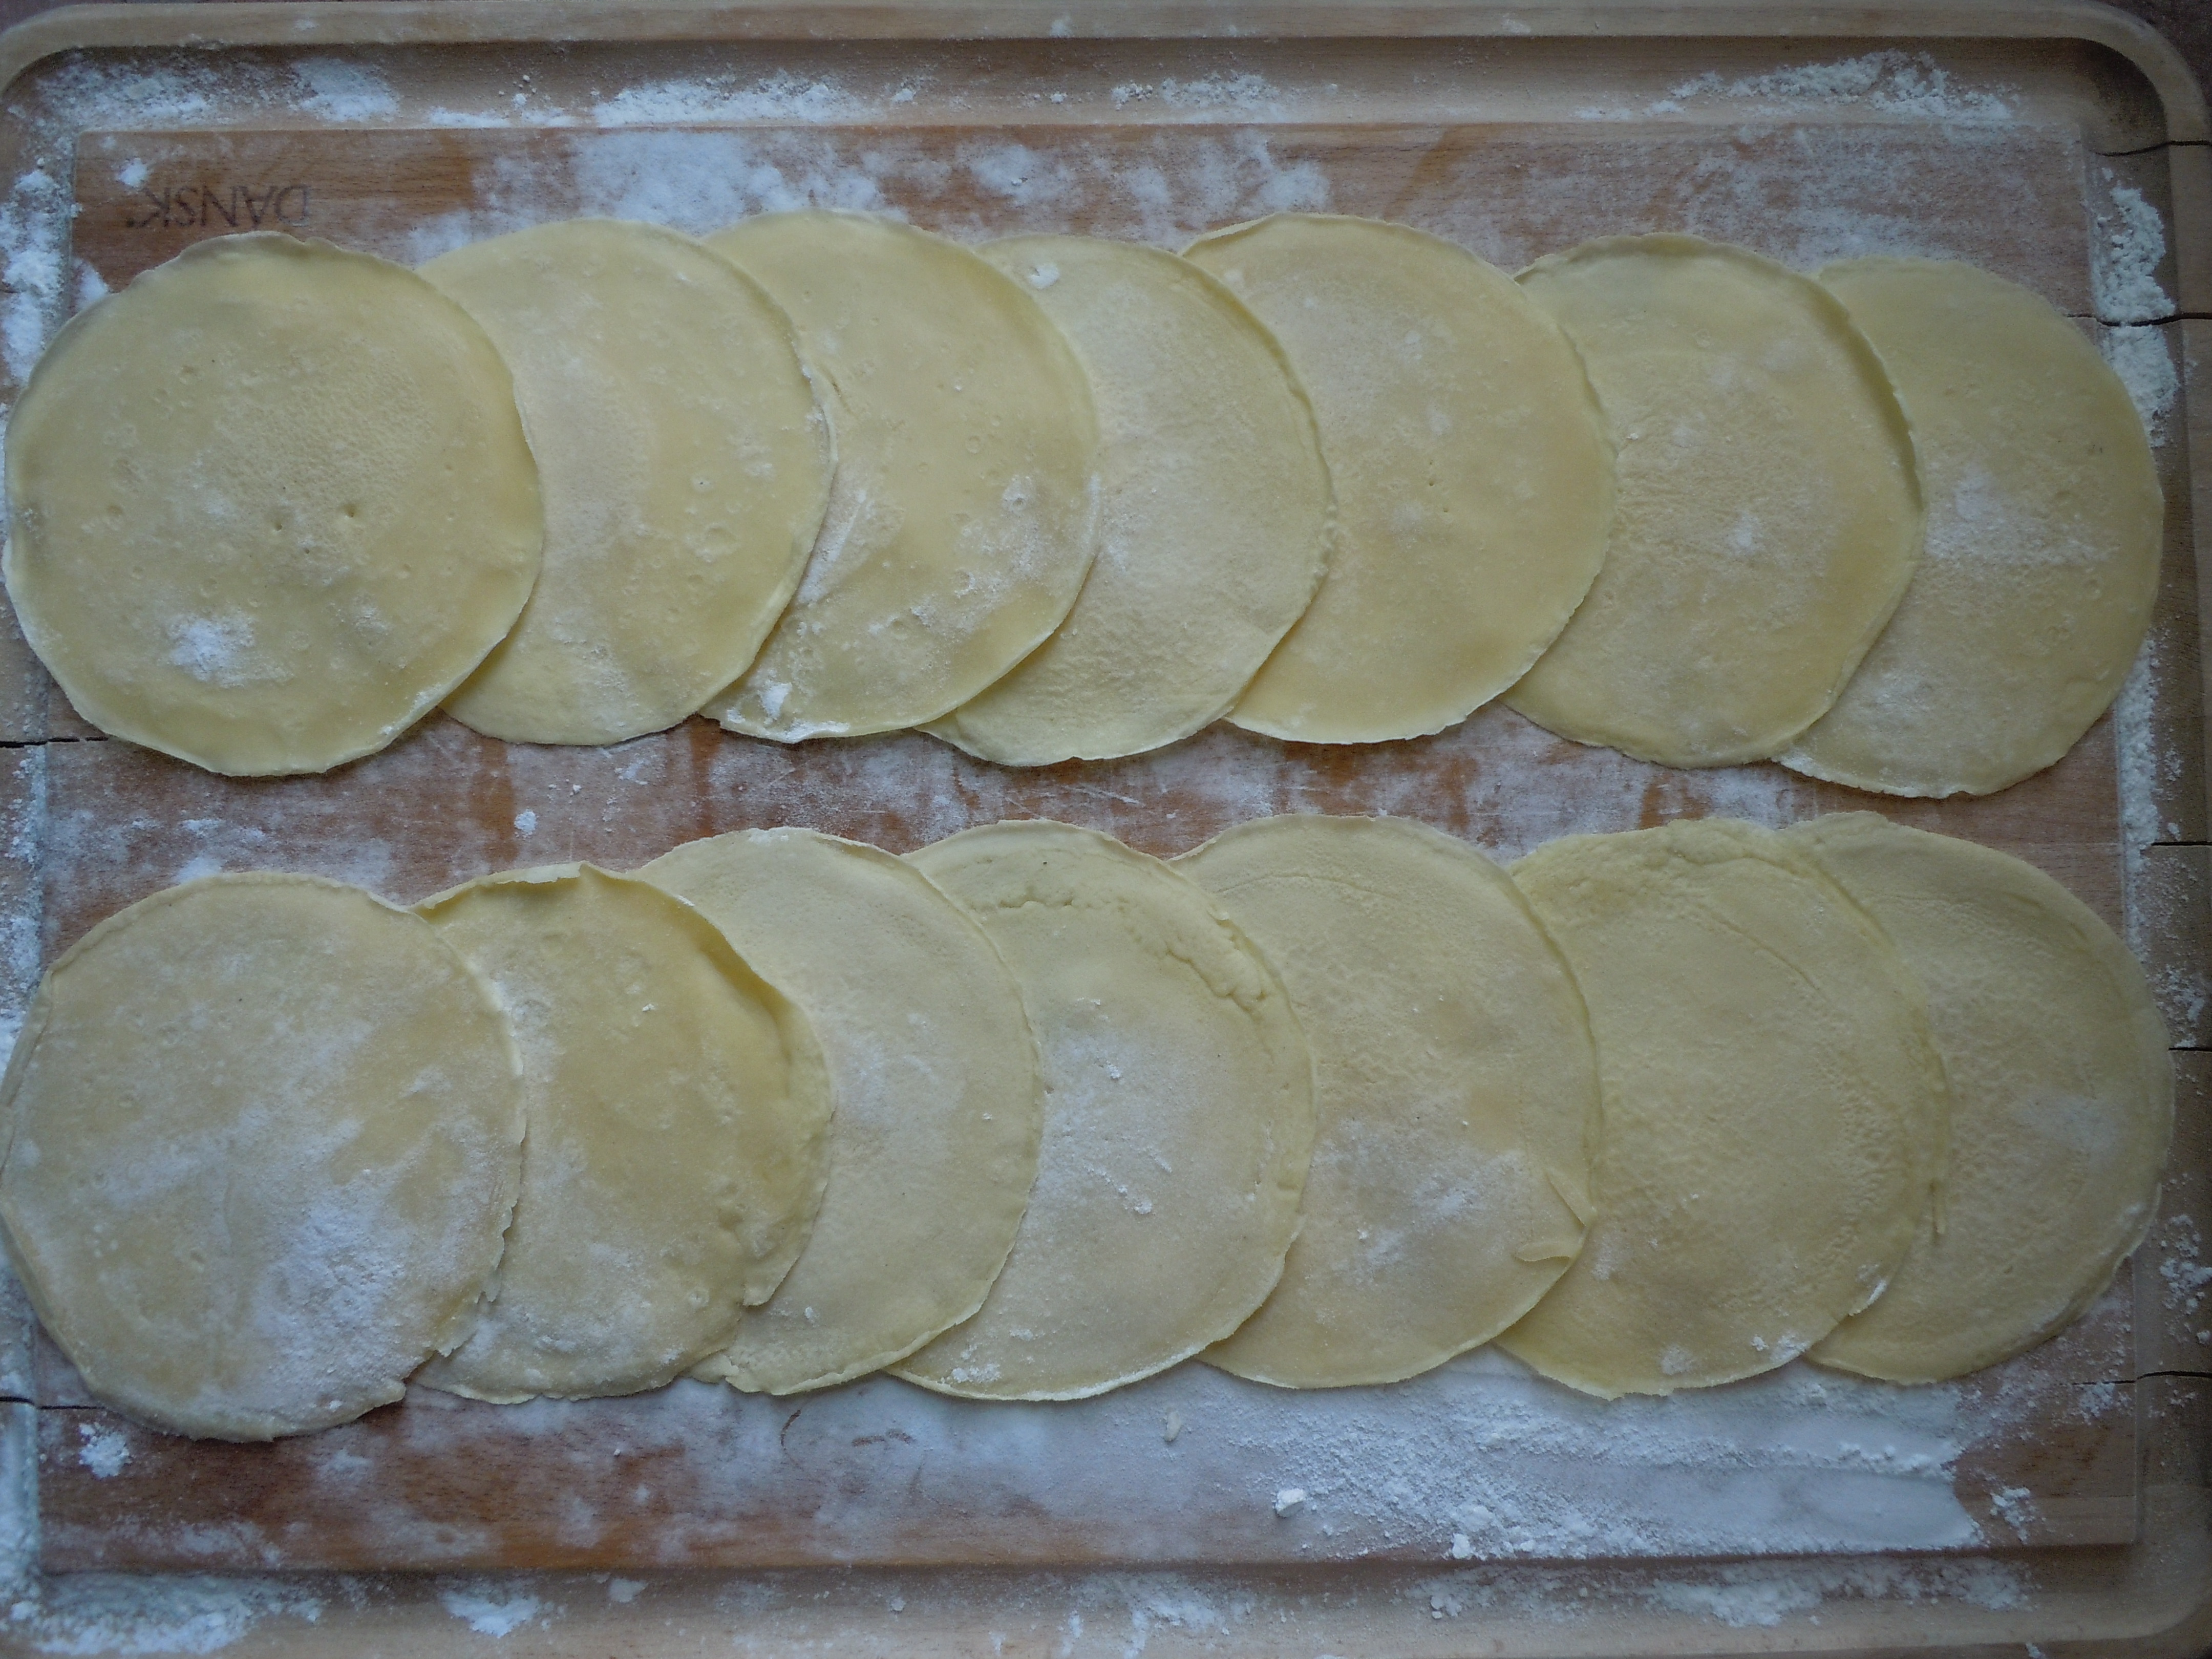
Having a Smart pasta machine like Steve’s really cuts down on the labor of making tortellini as the pasta comes out of the machine in long ready-made sheets in mere minutes. It’s a very cool process putting out smooth sheets of pasta in 3 minutes flat but you can also learn to make Steve’s tortellini using homemade pasta too if you don’t own an Smart pasta machine. I have a homemade pastarecipe below for all of us without a pasta machine who don’t want to miss out on learning how to make these incredible tortellini.
As Italian legend goes on how the shape of the tortellini came about dates back to the days when Venus, the Goddess of Love, was traveling to a small town in Italy between Modena and Bologna. She was staying at a tavern where the Innkeeper was so taken by her beauty he peeked thru the key to her room one night and got a glimse of her navel. He rushed to the kitchen and created a pasta in the likeness of her belly button. And that’s how the shape of the tortellini came about, the belly button pasta! Who Knew?
INGRDIENTS for making PASTA in The Smart Pasta Machine:
3 parts flour
1 part semolina
180 ml OR 3/4 cup of water for 2 lbs flour in pasta machine
1 egg and 1 tsp water whisked in a small bowl – set aside until ready to form tortellini
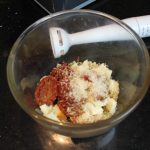
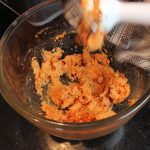
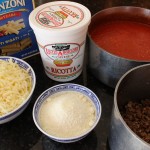
INGREDIENTS for Sun-dried Tomato FILLING: NOTE: THIS FILLING IS UNBELIEVEABLY DELICIOUS!…try it on crostini OR on crusty bread!
1/2 cup sun dried tomatoes
1/2 cup mozzarella – whole milk or part skim
1/4 cup grated Reggiano Parmesan
2-3 tbsp olive oil
Purée these ingredients with an immersion blender or add to food processor and pulse. Start with 2 tbsp of olive oil and add a little extra if needed to purée til smooth texture
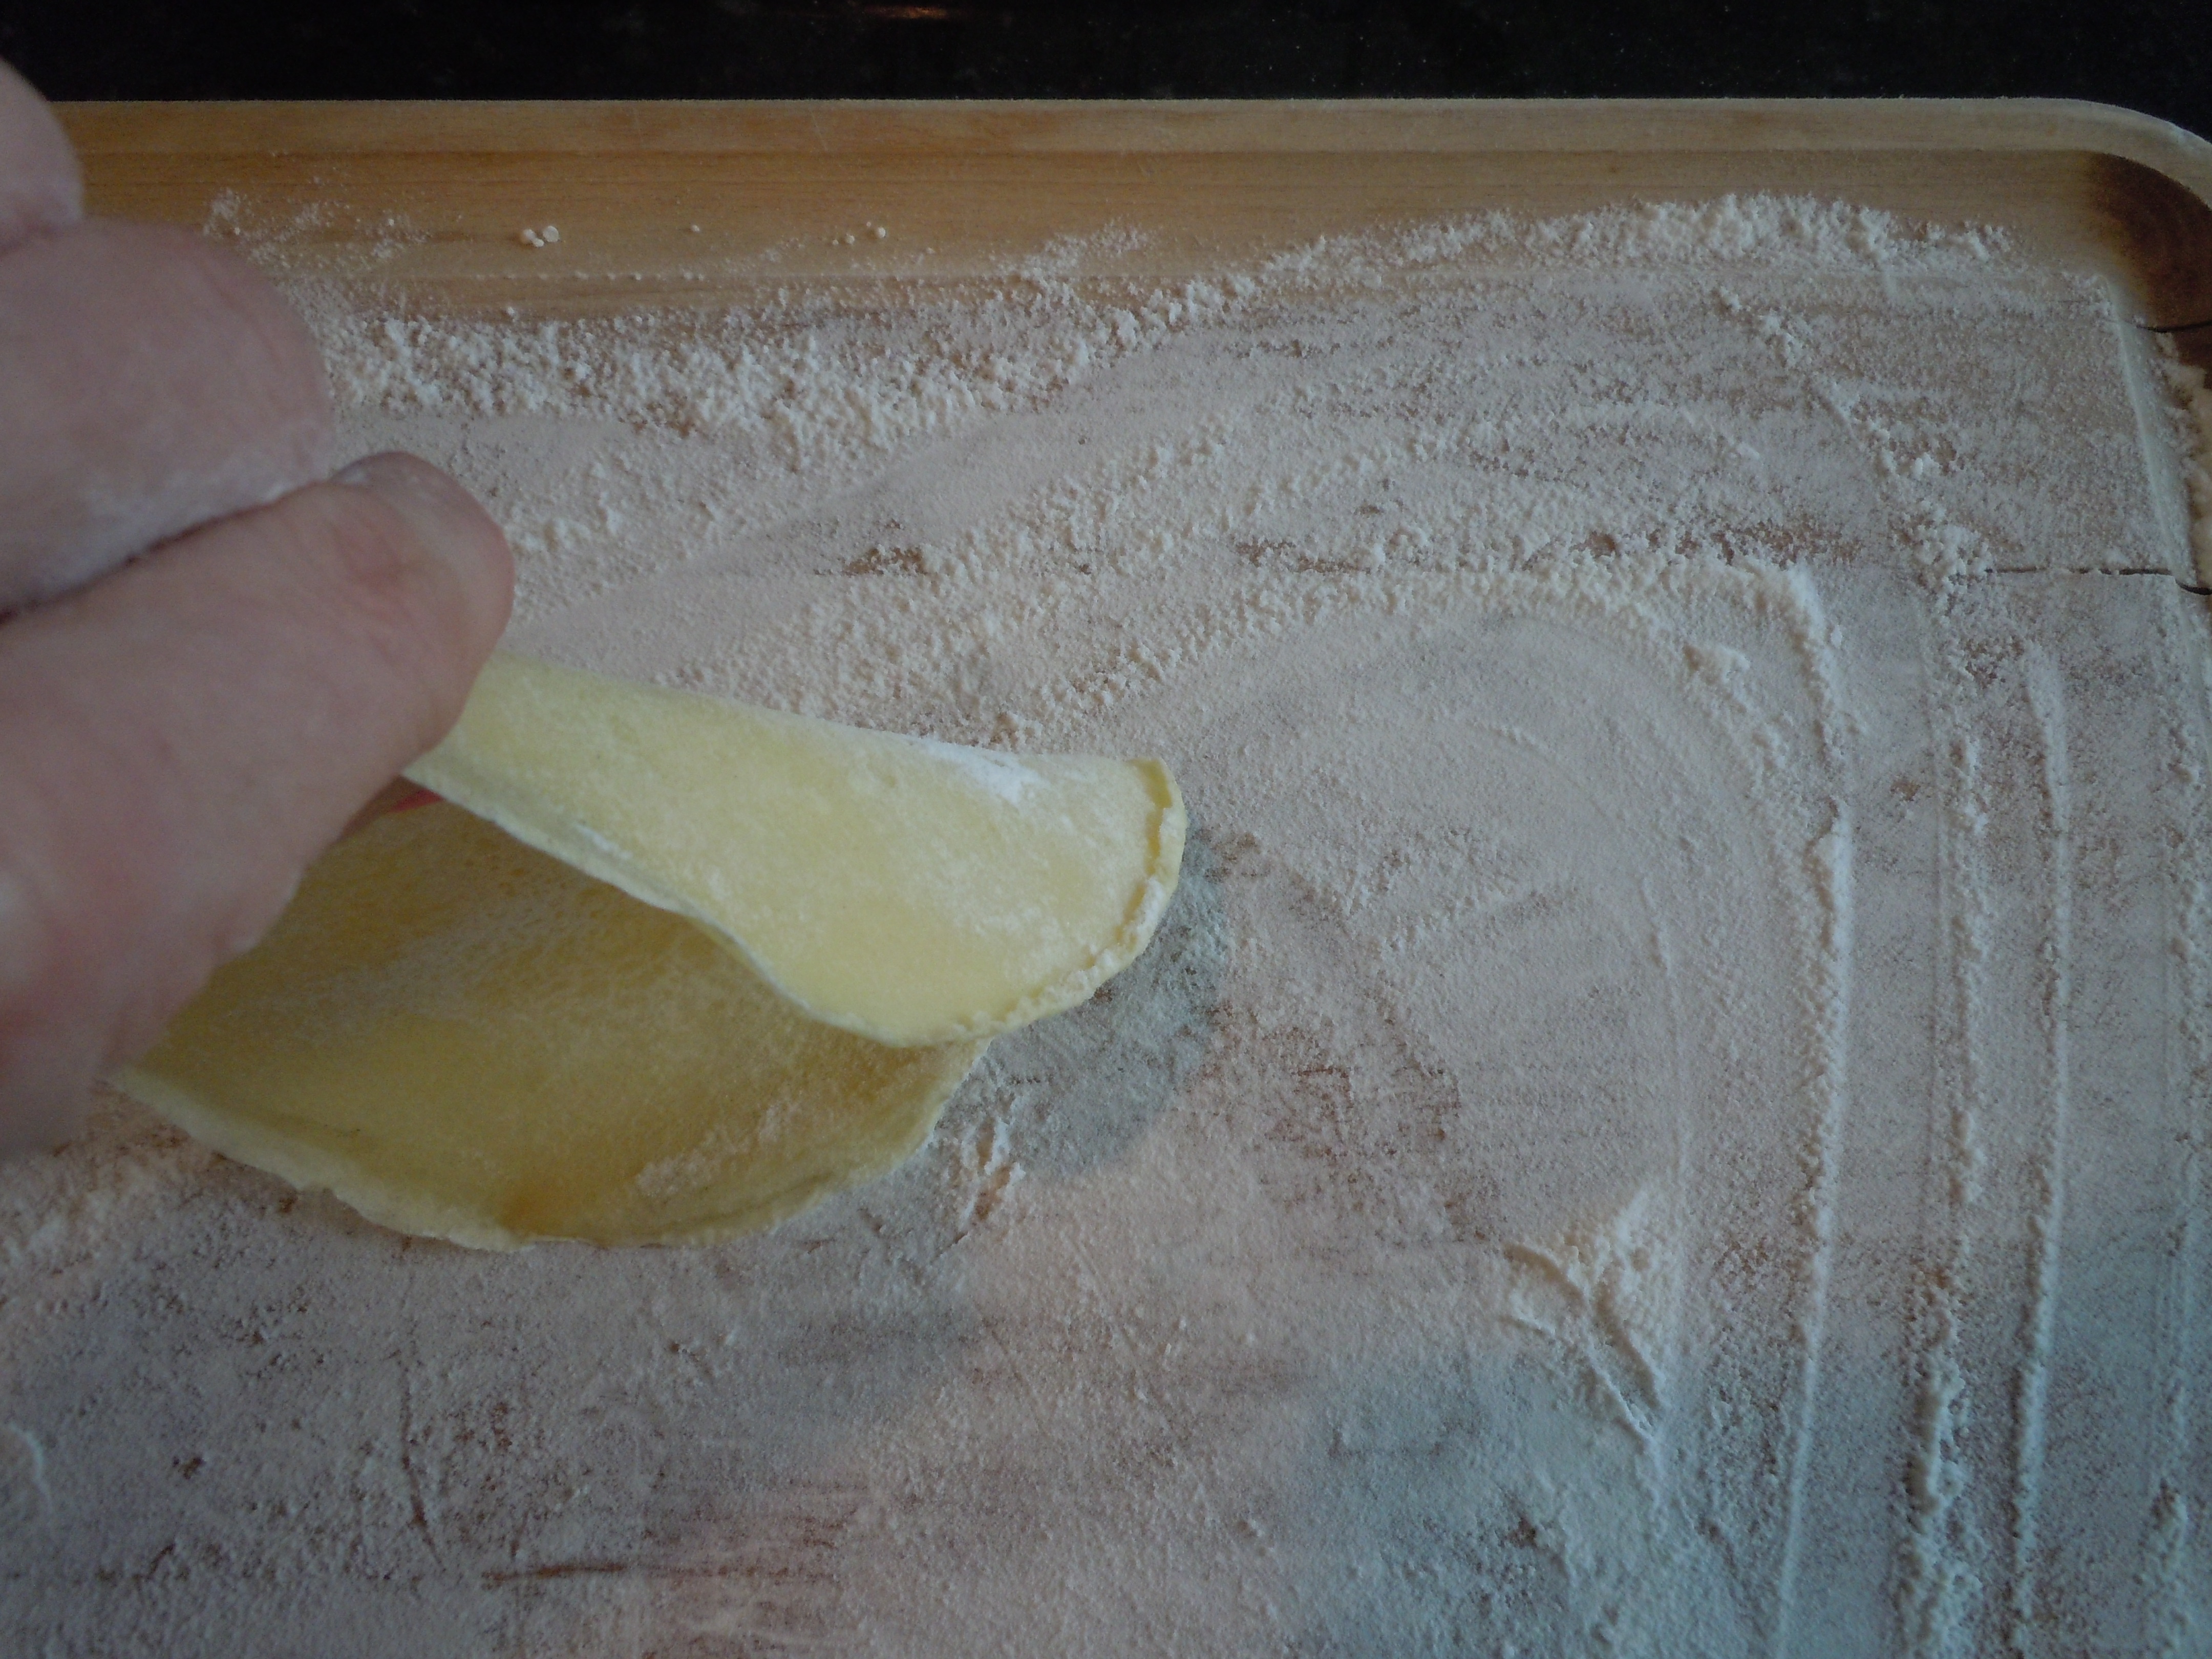
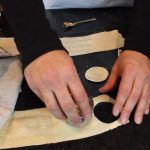
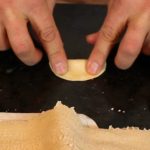
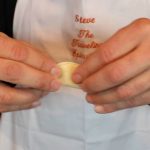
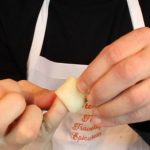
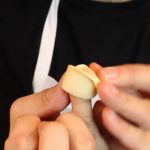
DIRECTIONS FOR FORMING THE TORTELLINI WITH SHEETS OF PASTA MADE FROM THE PASTA MACHINE:
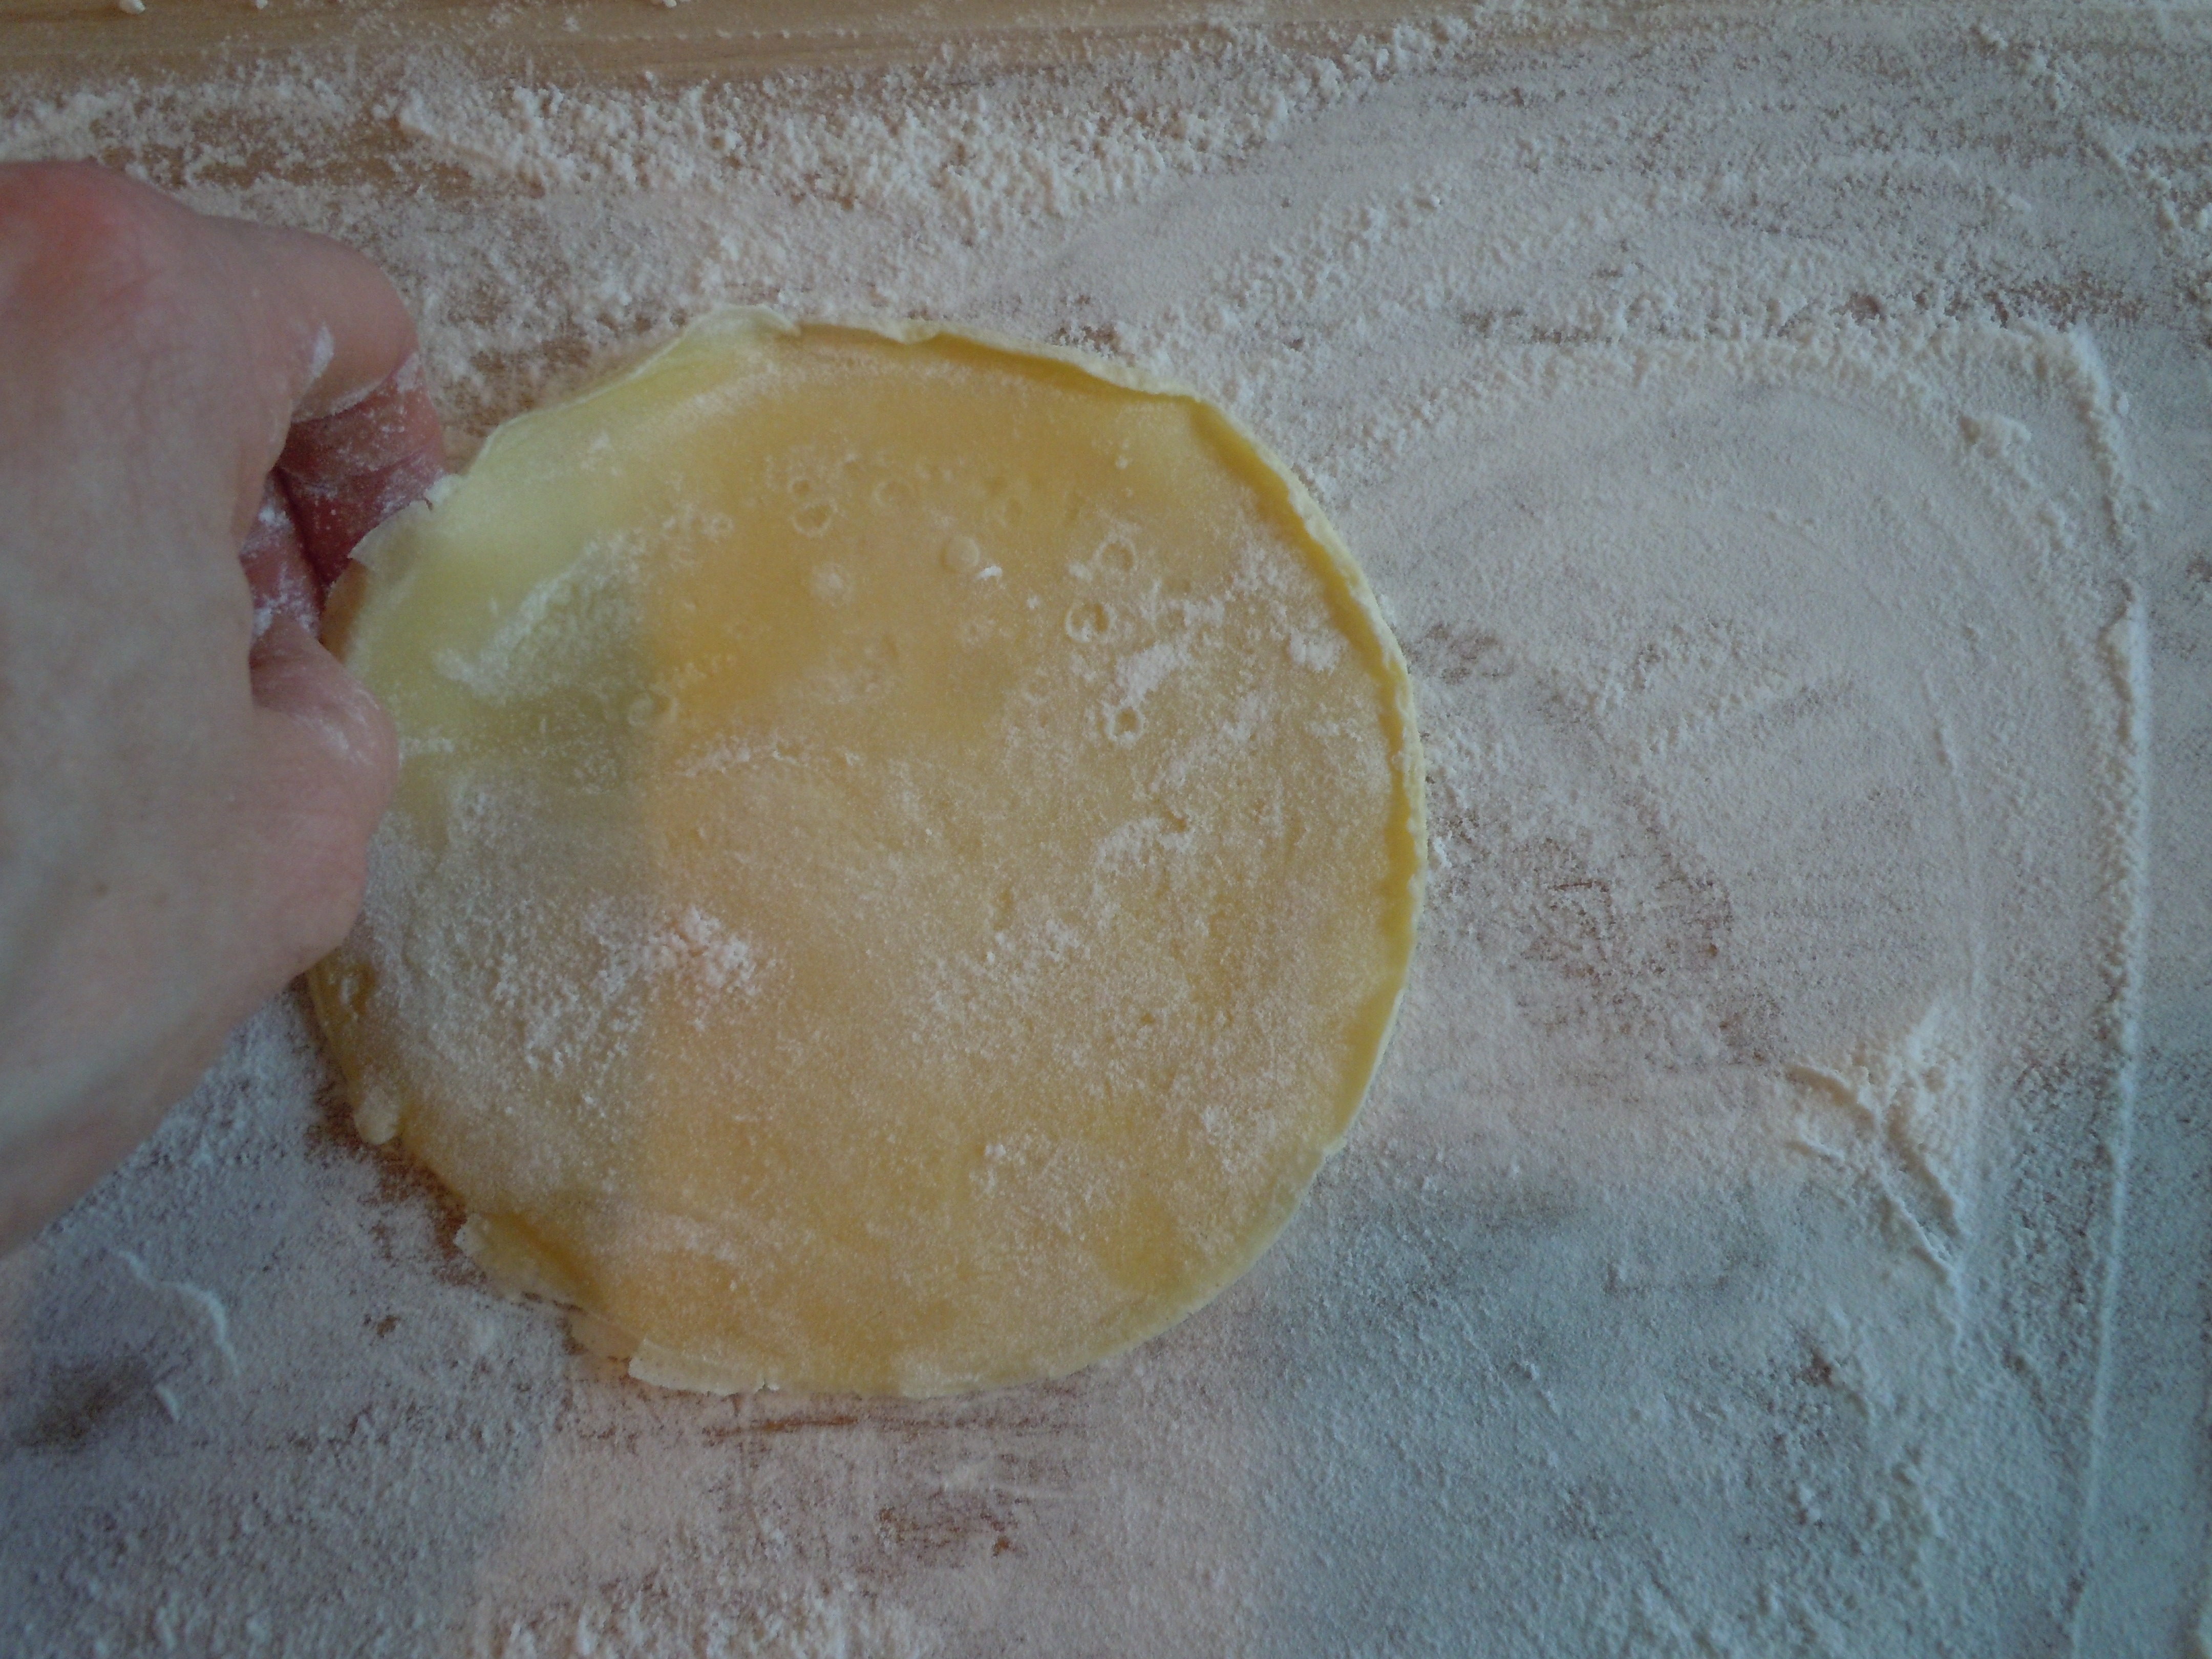
Begin to cut 2″ circles with your cookie cutter out of the machine made sheets of pasta
Brush top 1/2 of the circle edge with a whisked egg
Place 1/4 tsp of sun dried tomato filling in the middle of the circle pasta
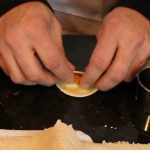
Fold the circle in 1/2
Press to SEAL the 1/2 circle of pasta…VERY IMPORTANT to SEAL this edge!
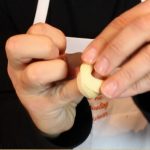
Take 1/2 circle and wrap around your pinky having each end meet
Press these two ends together to seal and form one continous circular shape
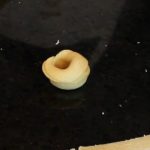
Fold down top of circular pasta to form tortellini
Place in a bowl as you finish each one until you gone thru all the pasta sheets
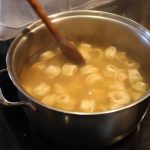
Bring large pan of salted water to a boil and add fresh pasta
Cook pasta for 8 minutes, test pieces of pasta for proper doneness
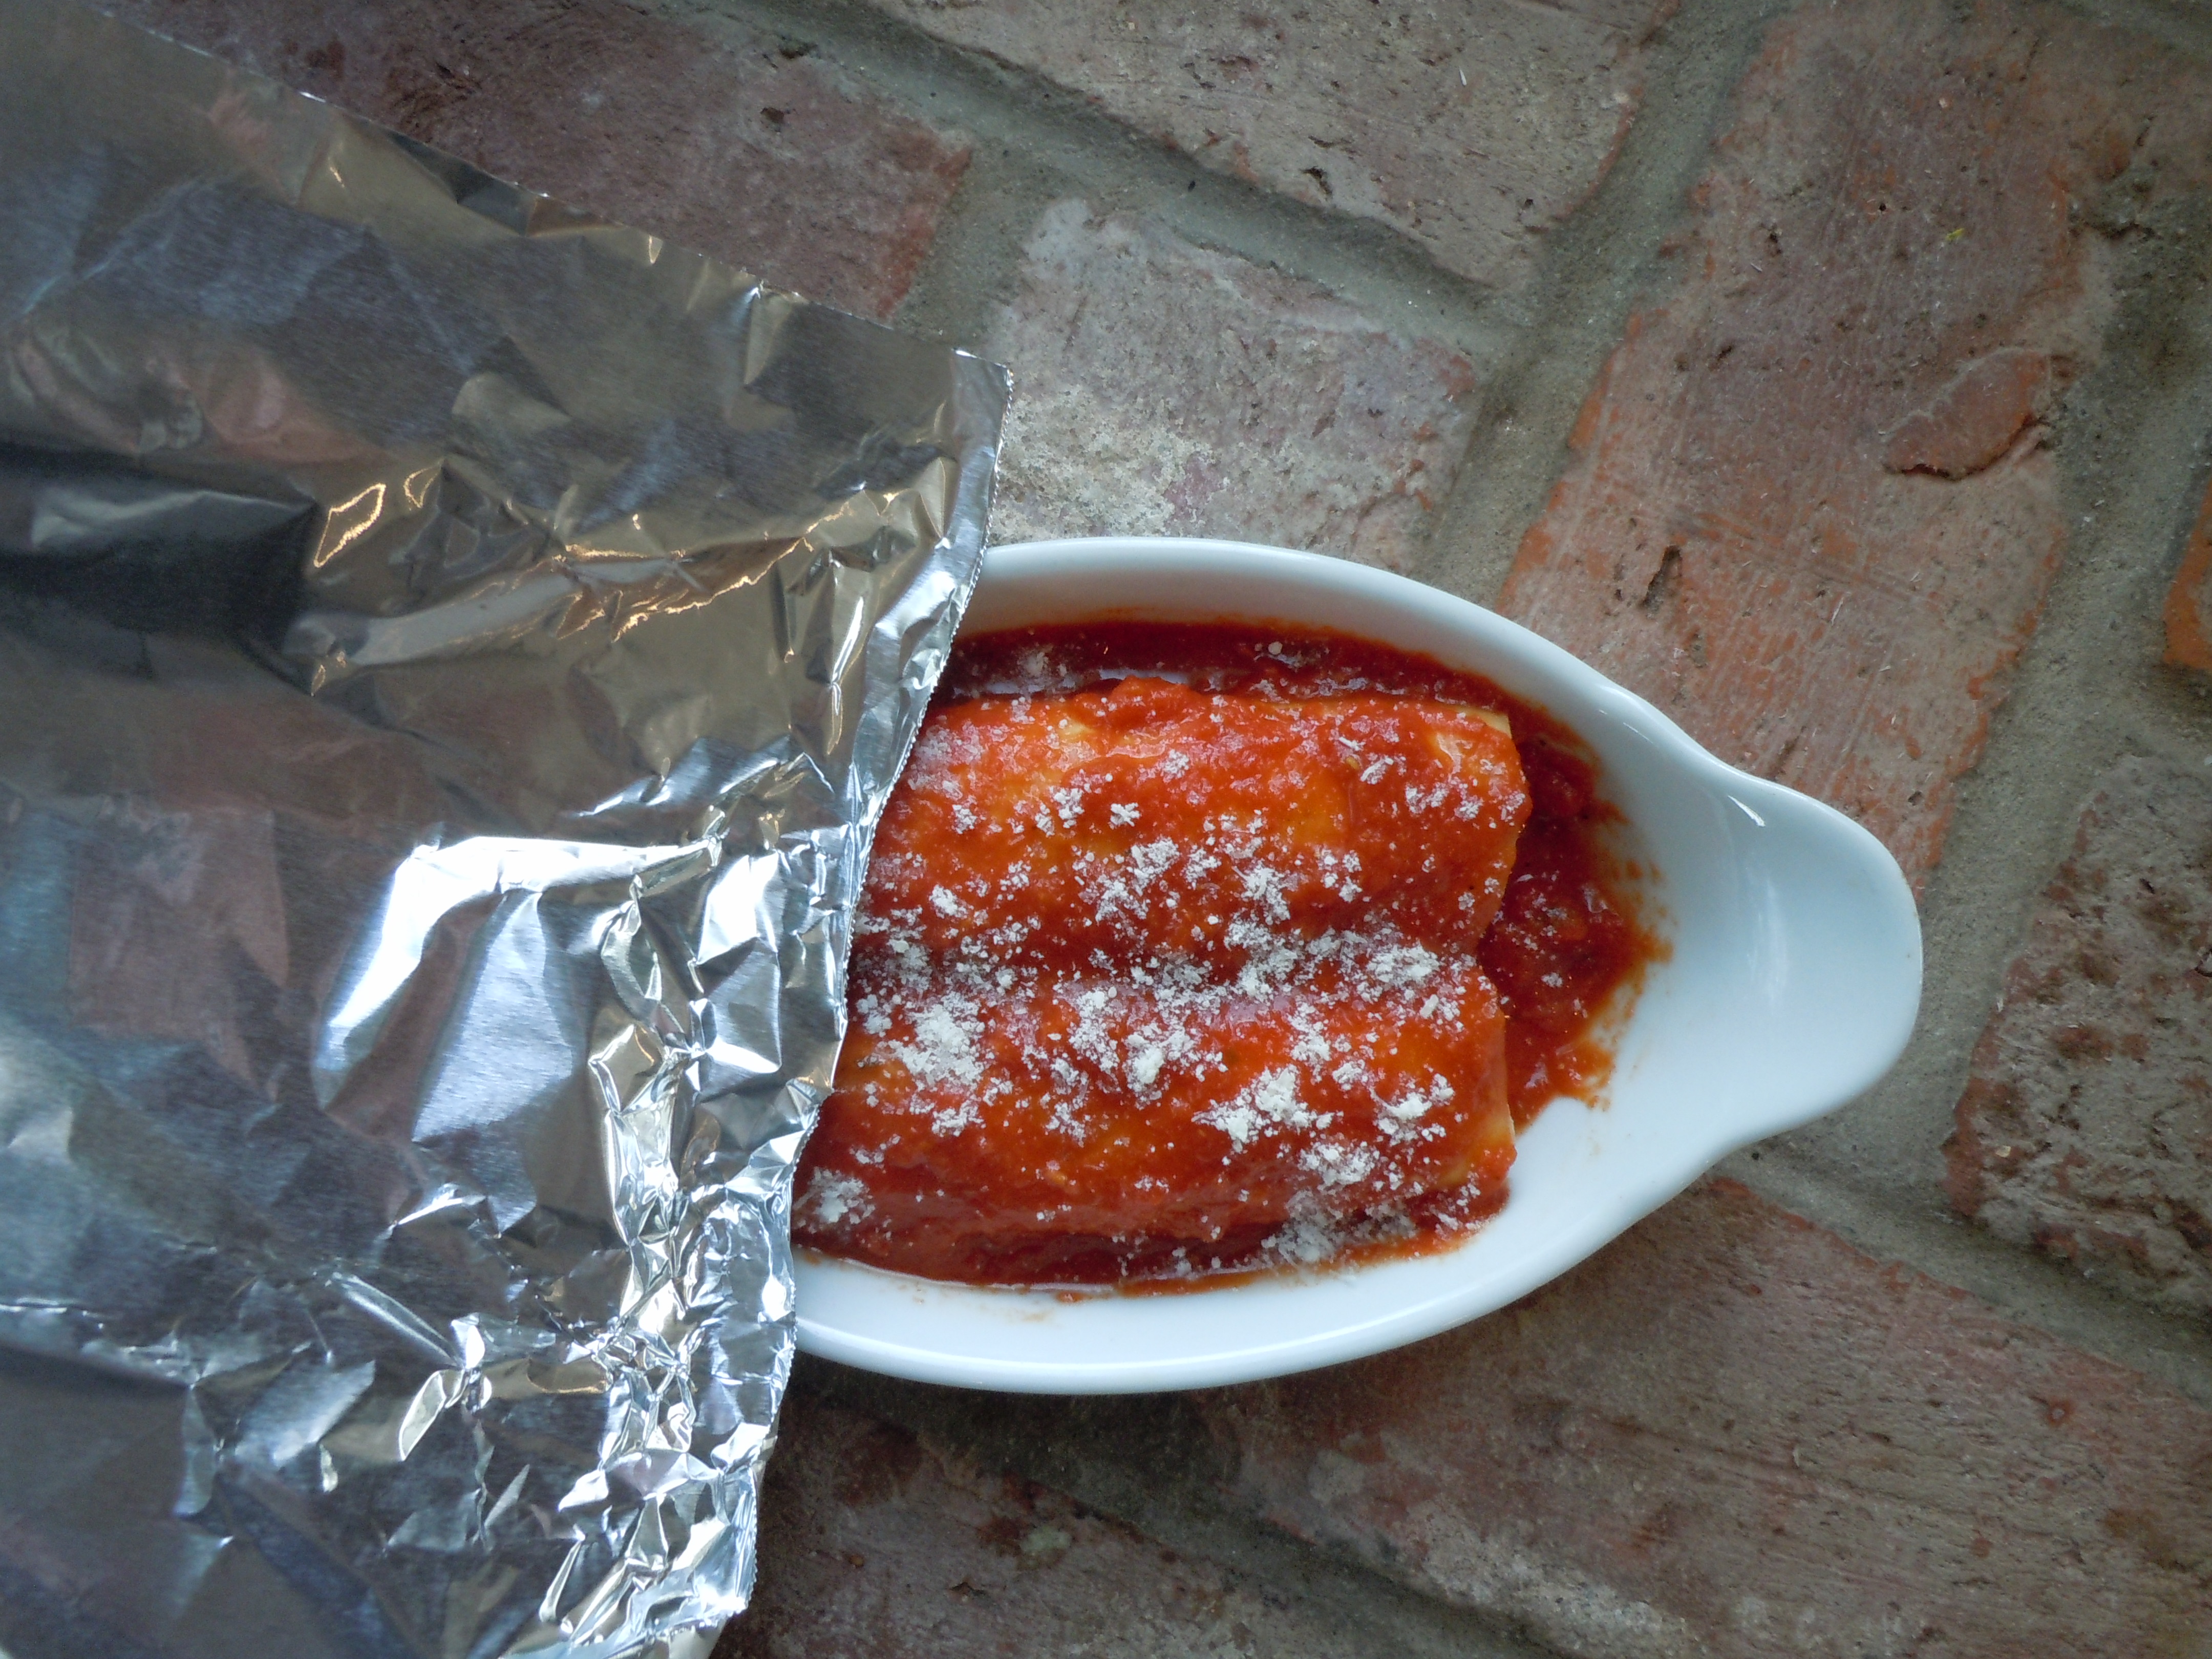
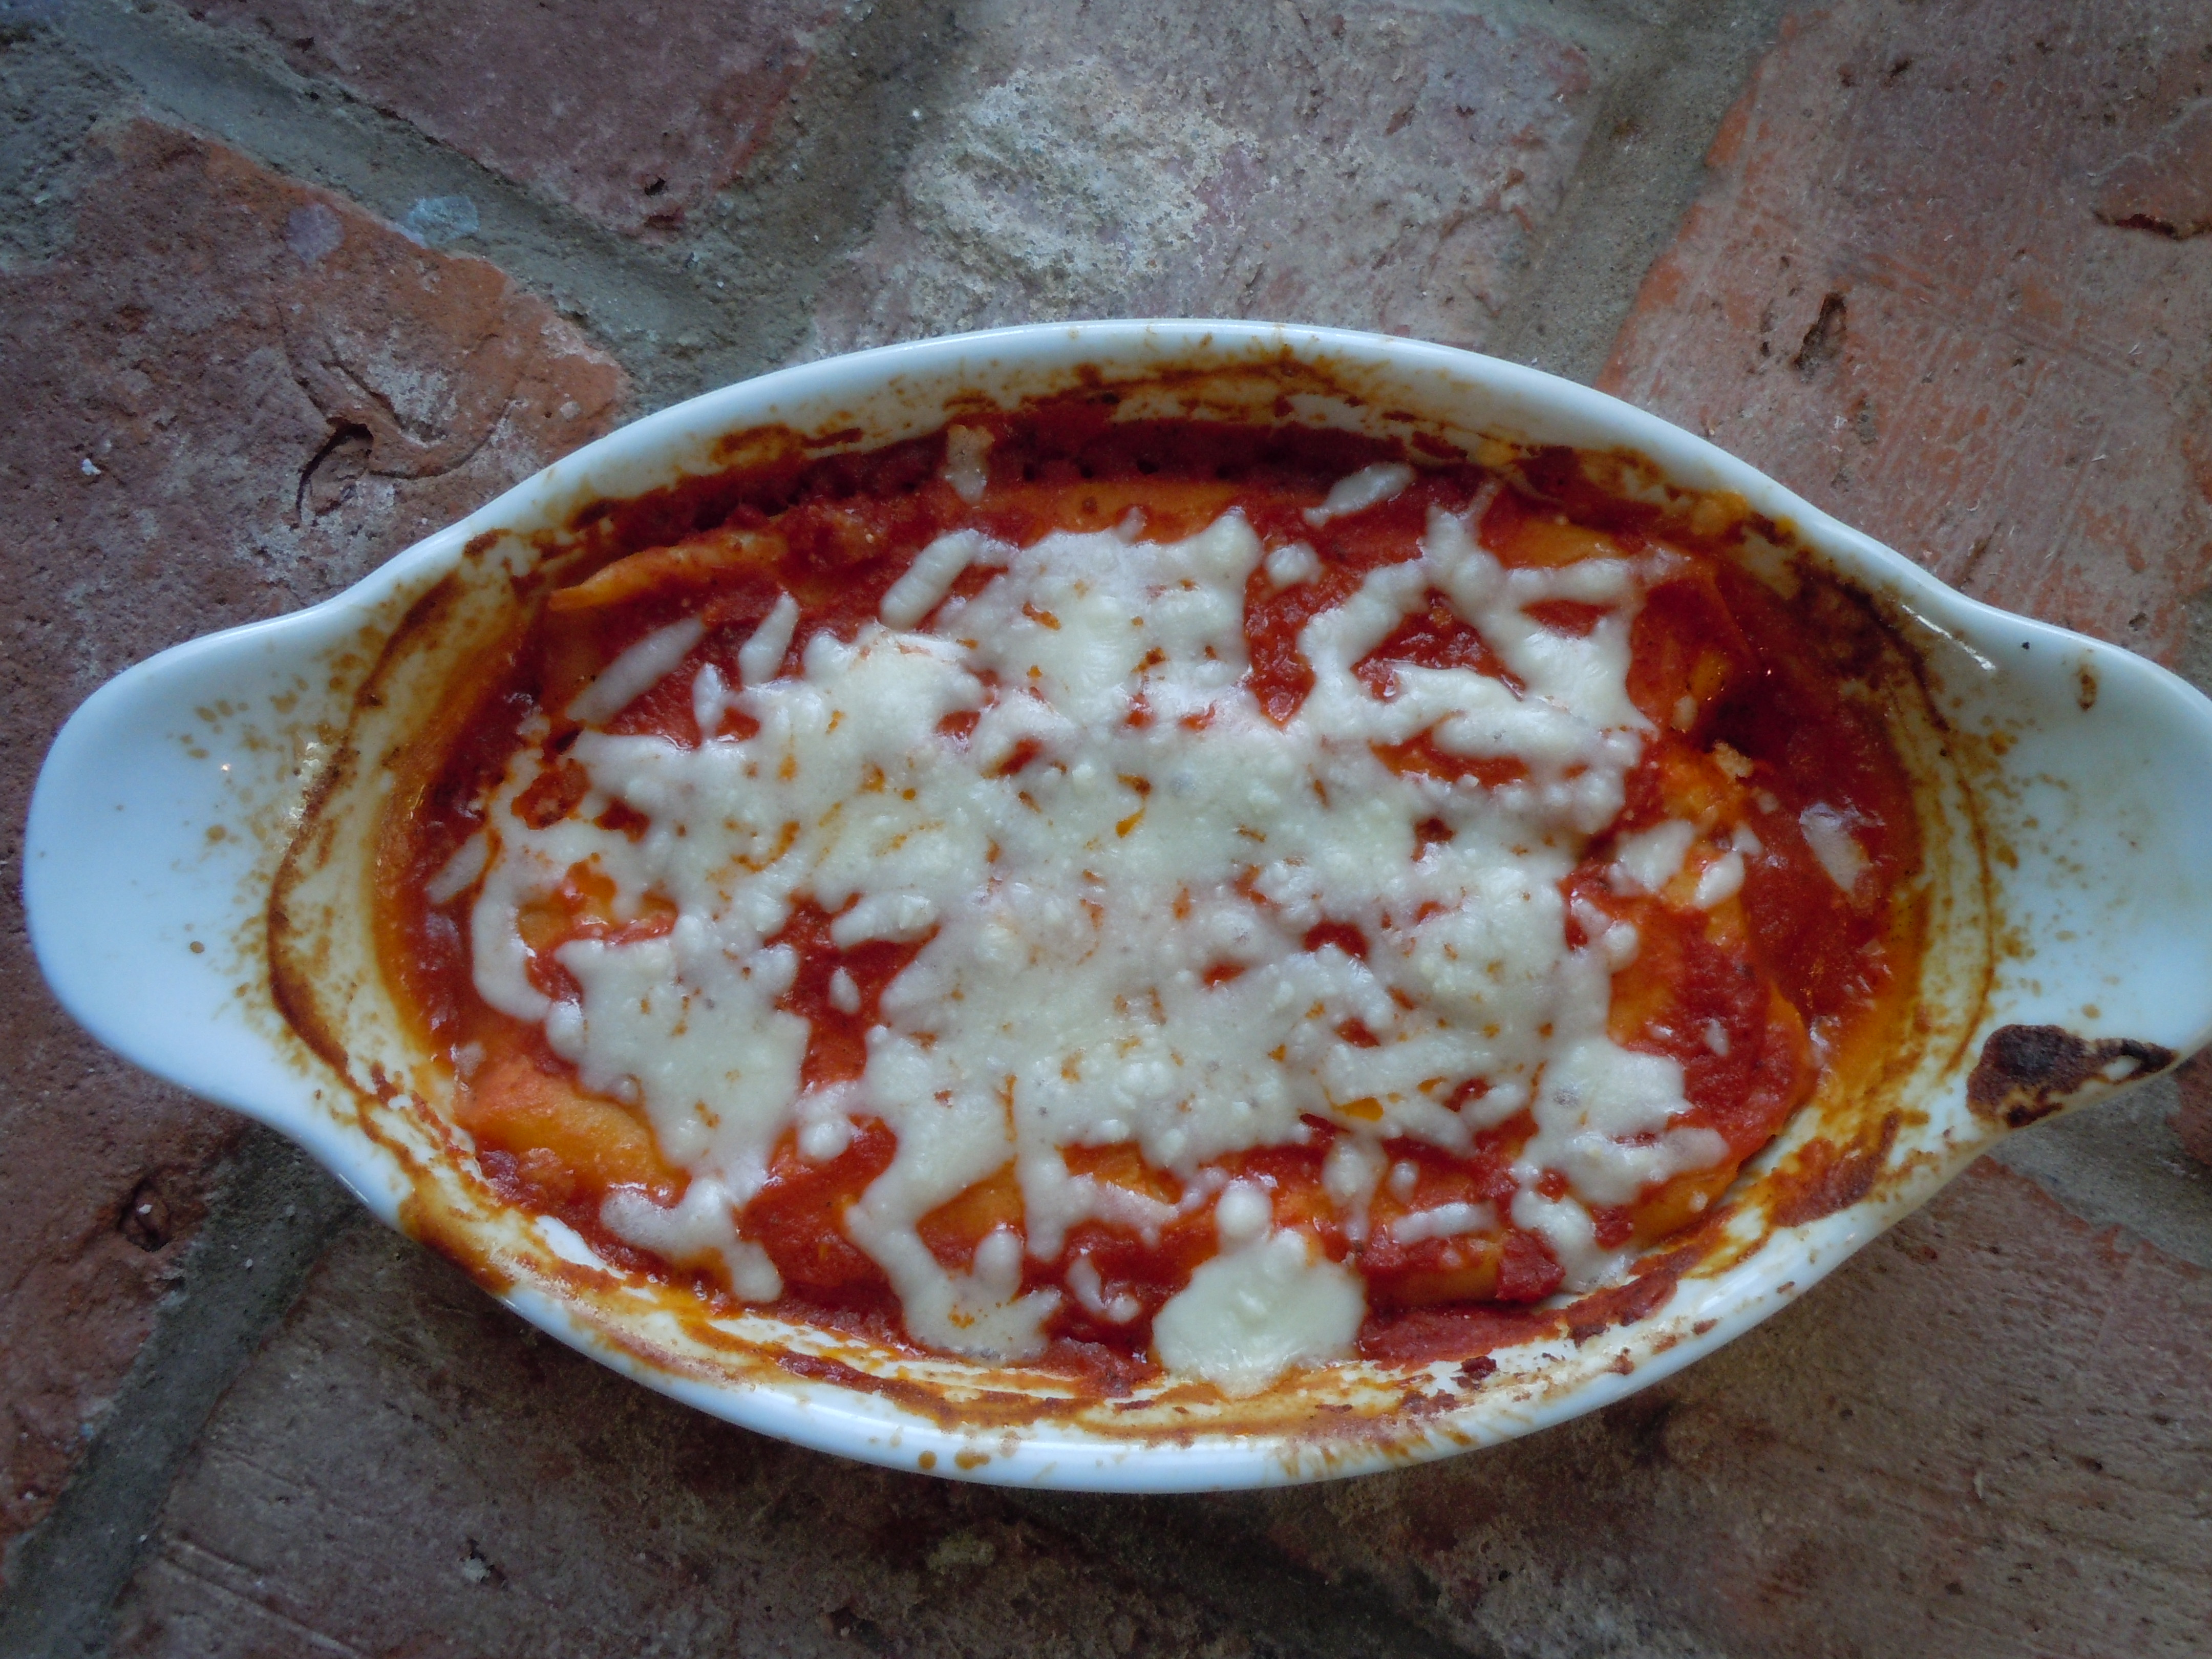
Serve with tomato-cream sauce or Gorganzola Dolce-cream sauce, garnish with thyme and truffle oil … mmm!
INGREDIENTS FOR TOMATO-CREAM SAUCE:
2 cloves finely chopped garlic
1/2 tsp salt
1/4 tsp dried oregano
3 1/4 cup POMI “strained tomaotes” – 1 med box – 26 oz.
2 cups heavy cream
2 tbsp olive oil
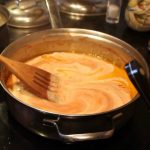
Sauté finely chopped garlic in 2 tbsp olive oil for 3 minutes, add in POMI strained tomatoes, salt & oregano and simmer for 15 minutes. Add in 2 cups of heavy cream to tomato sauce. Bring to a simmer for 15 miutes more. Serve with cooked tortellini, garnish with fresh thyme (and truffle oil.
INGREDIENTS FOR GORGANZOLA DOLCE-CREAM SAUCE:
2 cups heavy cream
1/4 cup Gorganzola Dolce cheese
1/4 cup dry vermouth
fresh thyme leaves
truffle oil
Add heavy cream, Gorganzola, and vermouth to a small sauce pan and bring to a simmer. When it comes to a simmer whisk the melted cheese into the cream and simmer 10 minutes. Serve with tortellini, garnish with a sprinkle of fresh thyme leaves and a drizzle of truffle oil.
INGREDIENTS for Easy Homemade-Handmade Pasta- (Recipe from “Pasta at Vin’s“)
2 1/2 cups all purpose flour
1/4 cup olive oil
4 1/2 – 5 lg eggs
1/4 tsp salt
DIRECTIONS:
Put the kneading attachment on your food processor and add the flour
Add the salt and olive oil
Turn on the food processor to slow
Add in 1 tbsp of water
Begin adding in 1 egg at a time with the processor still on slow
Add in the rest of the eggs
Keep the food processor going on medium speed to begin kneading the dough
Let knead for about 8 minutes until the texture turns into a smooth consistency
Remove the pasta dough and place onto the counter
Knead briefly with your hands and let sit for 1/2 hr.
NOTE: Vin does not cover his pasta dough while it sits for the 1/2 so it can begin to dry out a little bit
Sprinkle some flour onto the counter or work surface and cut pasta dough into 8 pieces
Begin to roll out each piece of dough to your desired thickness, into long lasagna-like sheets
Sprinkle more flour on top of each thinly rolled out pasta piece and begin to cut out 2″ circles with your cookie cutter
Brush top 1/2 of the circle edge with a whisked egg
Place 1/4 tsp of sun dried tomato filling in the middle of the circle pasta
Fold the circle in 1/2
Press to SEAL the 1/2 circle of pasta…VERY IMPORTANT to SEAL this edge!
Take 1/2 circle and wrap around your pinky having each end meet
Press these two ends together to seal and form one continous circular shape
Fold down top of circular pasta to form tortellini
Place in a bowl as you finish each one until you gone thru all the pasta sheets
Bring large pan of salted water to a boil and add fresh pasta
Cook pasta for 8 minutes, test pieces of pasta for proper doneness
Serve with tomato-cream sauce or Gorganzola Dolce-cream sauce, garnish with thyme and truffle oil … mmm!
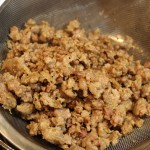
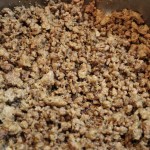
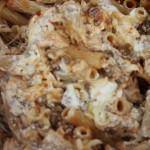
This world’s best lazy-man’s lasagna is the ultimate pasta dish because there is no fussing, layering or baking. It has all the ingredients and flavors of a traditional lasagna but without all the work! It’s done all-in-one pot and takes two minutes to put together after the ground meat is browned. It’s made with a tomato-basilsauce, homemade or store bought for convenience, rigatoni pasta, ricotta, mozzarella and a sautéed ground meat of your choice. The hardest part here is browning the meat, then it’s easy peasy from there on in.
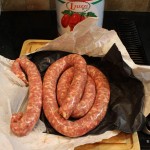
When I first had this lazy-man’s lasagna it was made with ground beef. That’s the beauty of this pasta dinner you can customize it by browning up what ever your favorite meat is. I’ve actually made it with ground turkey, beef, Italian sausage and even a meatloaf mix of meats. What ever you decide I promise you it’s going to be delicious! In the show I used my favorite sweet Italian fennel sausage from Liuzzi Cheeses in North Haven, CT. I took the the sausage out of the casing and then browned it.
Usually, I serve up this lazy-man’s lasagna immediately after I combine all those yummy ingredients. Although, you can easily pour it out into a baking dish and top with one cup of shredded mozzarella to bake immediately or cover with foil and into the frig until you are ready. Granted, I do love to put together a tray of layered lasagna for the holidays but for those in between days when you want those gourmet flavors but don’t want to go through all the work this world’s best lazy-man’s lasagna is your dream come true.
You can check out my Live TV Cooking Segment on “CT STYLE”, WTNH – Channel 8 where I make Lazy-Man’s Lasagna in The Bender Kitchen with hosts Teresa Dufour and Ryan Kristafer!
2 lbs ground meat OR 3 cups after browned of: ground beef, turkey, veal, pork, meatloaf mix, or sweet fennel sausage (Liuzzi makes my favorite sweet and spicy Italian fennel sausage)
1 lb. whole milk ricotta (really easy to make your OWN HOMEMADE – check it out!)
2 cups shredded mozzarella – 2 cups to mix into the lazy-man’s lasagna plus additional 1 cup to sprinkle on top if you are going to put the pasta into a baking dish to bake later
grated Parmesan
fresh basil
Directions:
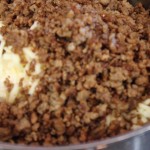
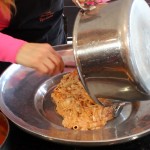
Brown the ground meat in a sauce pan on medium high heat
Drain the meat to remove excess oil in a small strainer over a bowl
Put the meat back into the pan on medium high heat add 1/3 cup of red wine to de-glaze the sauce pan scrapping up the little brown bits stuck the bottom of the pan
Keep the browned meat on warm
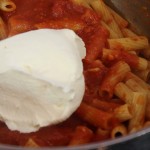
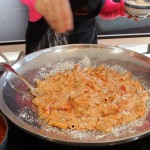
Heat tomato-basil sauce through – you want it hot to melt the mozzarella
Cook the pasta in salted water until al dente …(Having a pinch of firmness to it so it’s not overly cooked)
Drain the pasta and put it back into the same pan
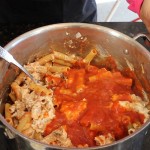
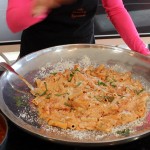
Immediately add 2 cups of hot tomato-basil sauce, 1 lb. of ricotta, 2 cups of mozzarella, 3 cups of browned meat and begin to stir
Add another 1-1 1/2 cups of tomato-basil sauce
Mix ingredients until combined and pour out into a serving platter
Sprinkle with Parmesan and julienne fresh basil…mangia mangia 🙂
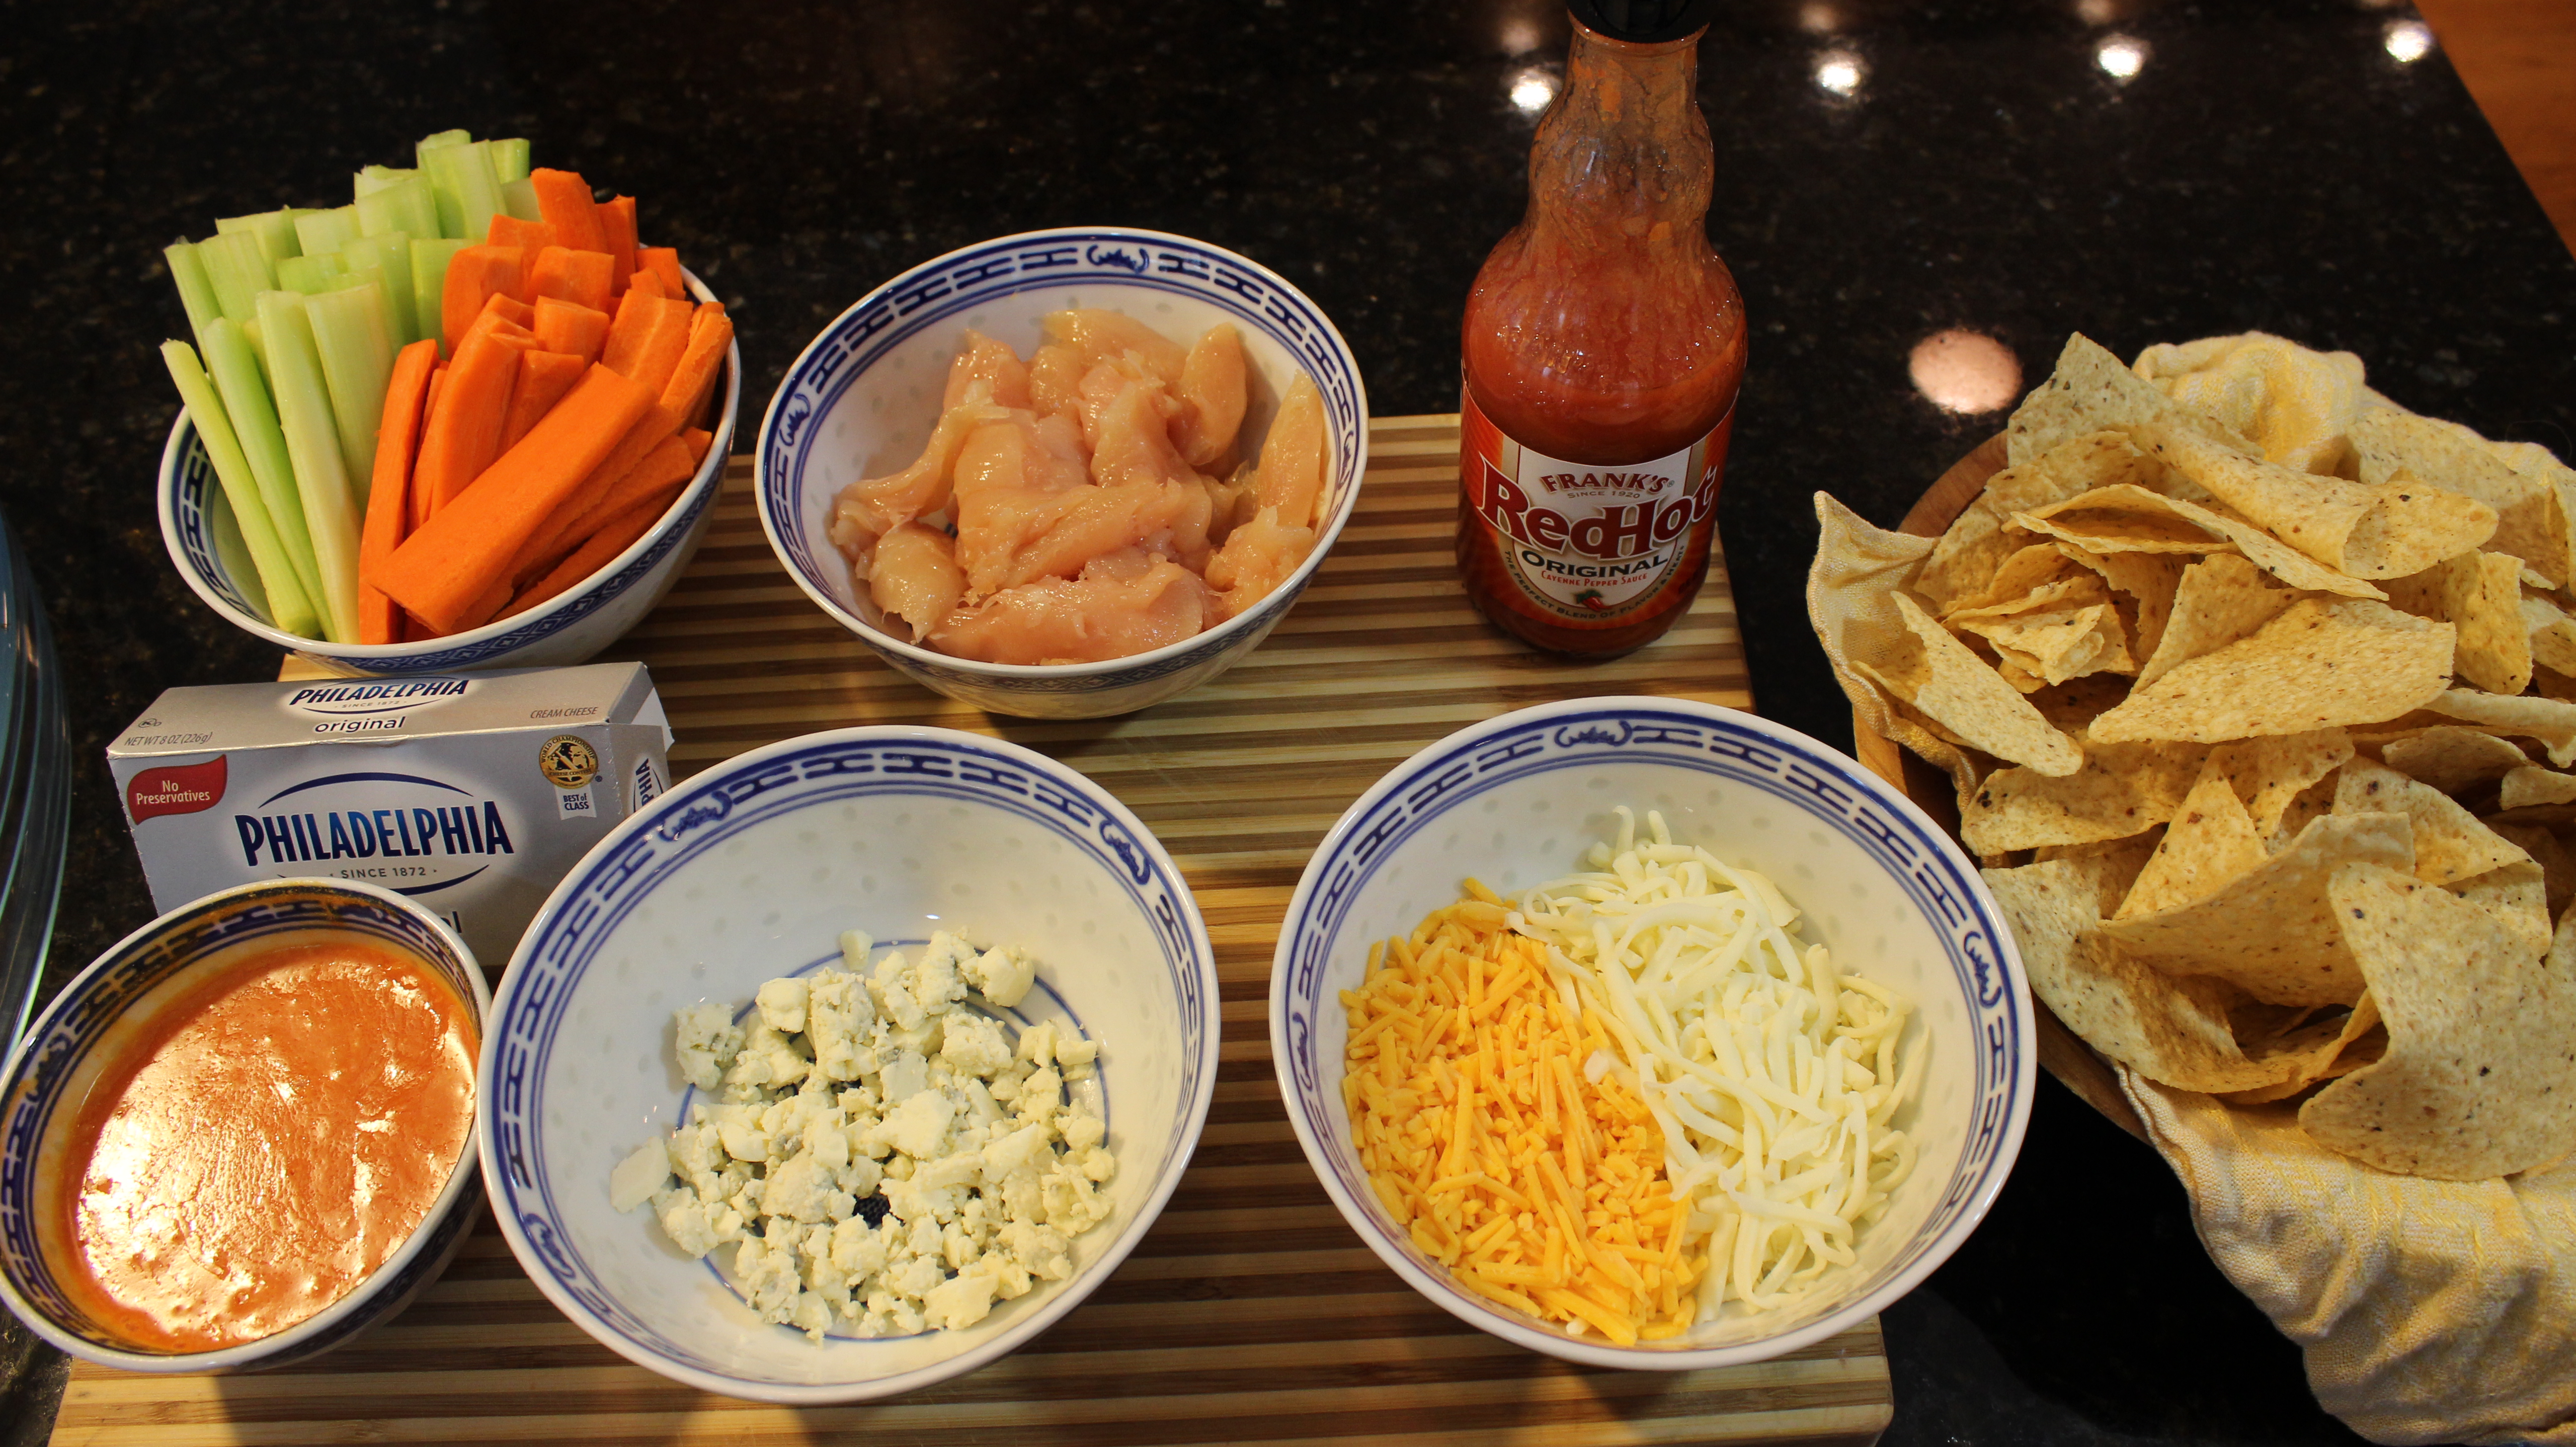
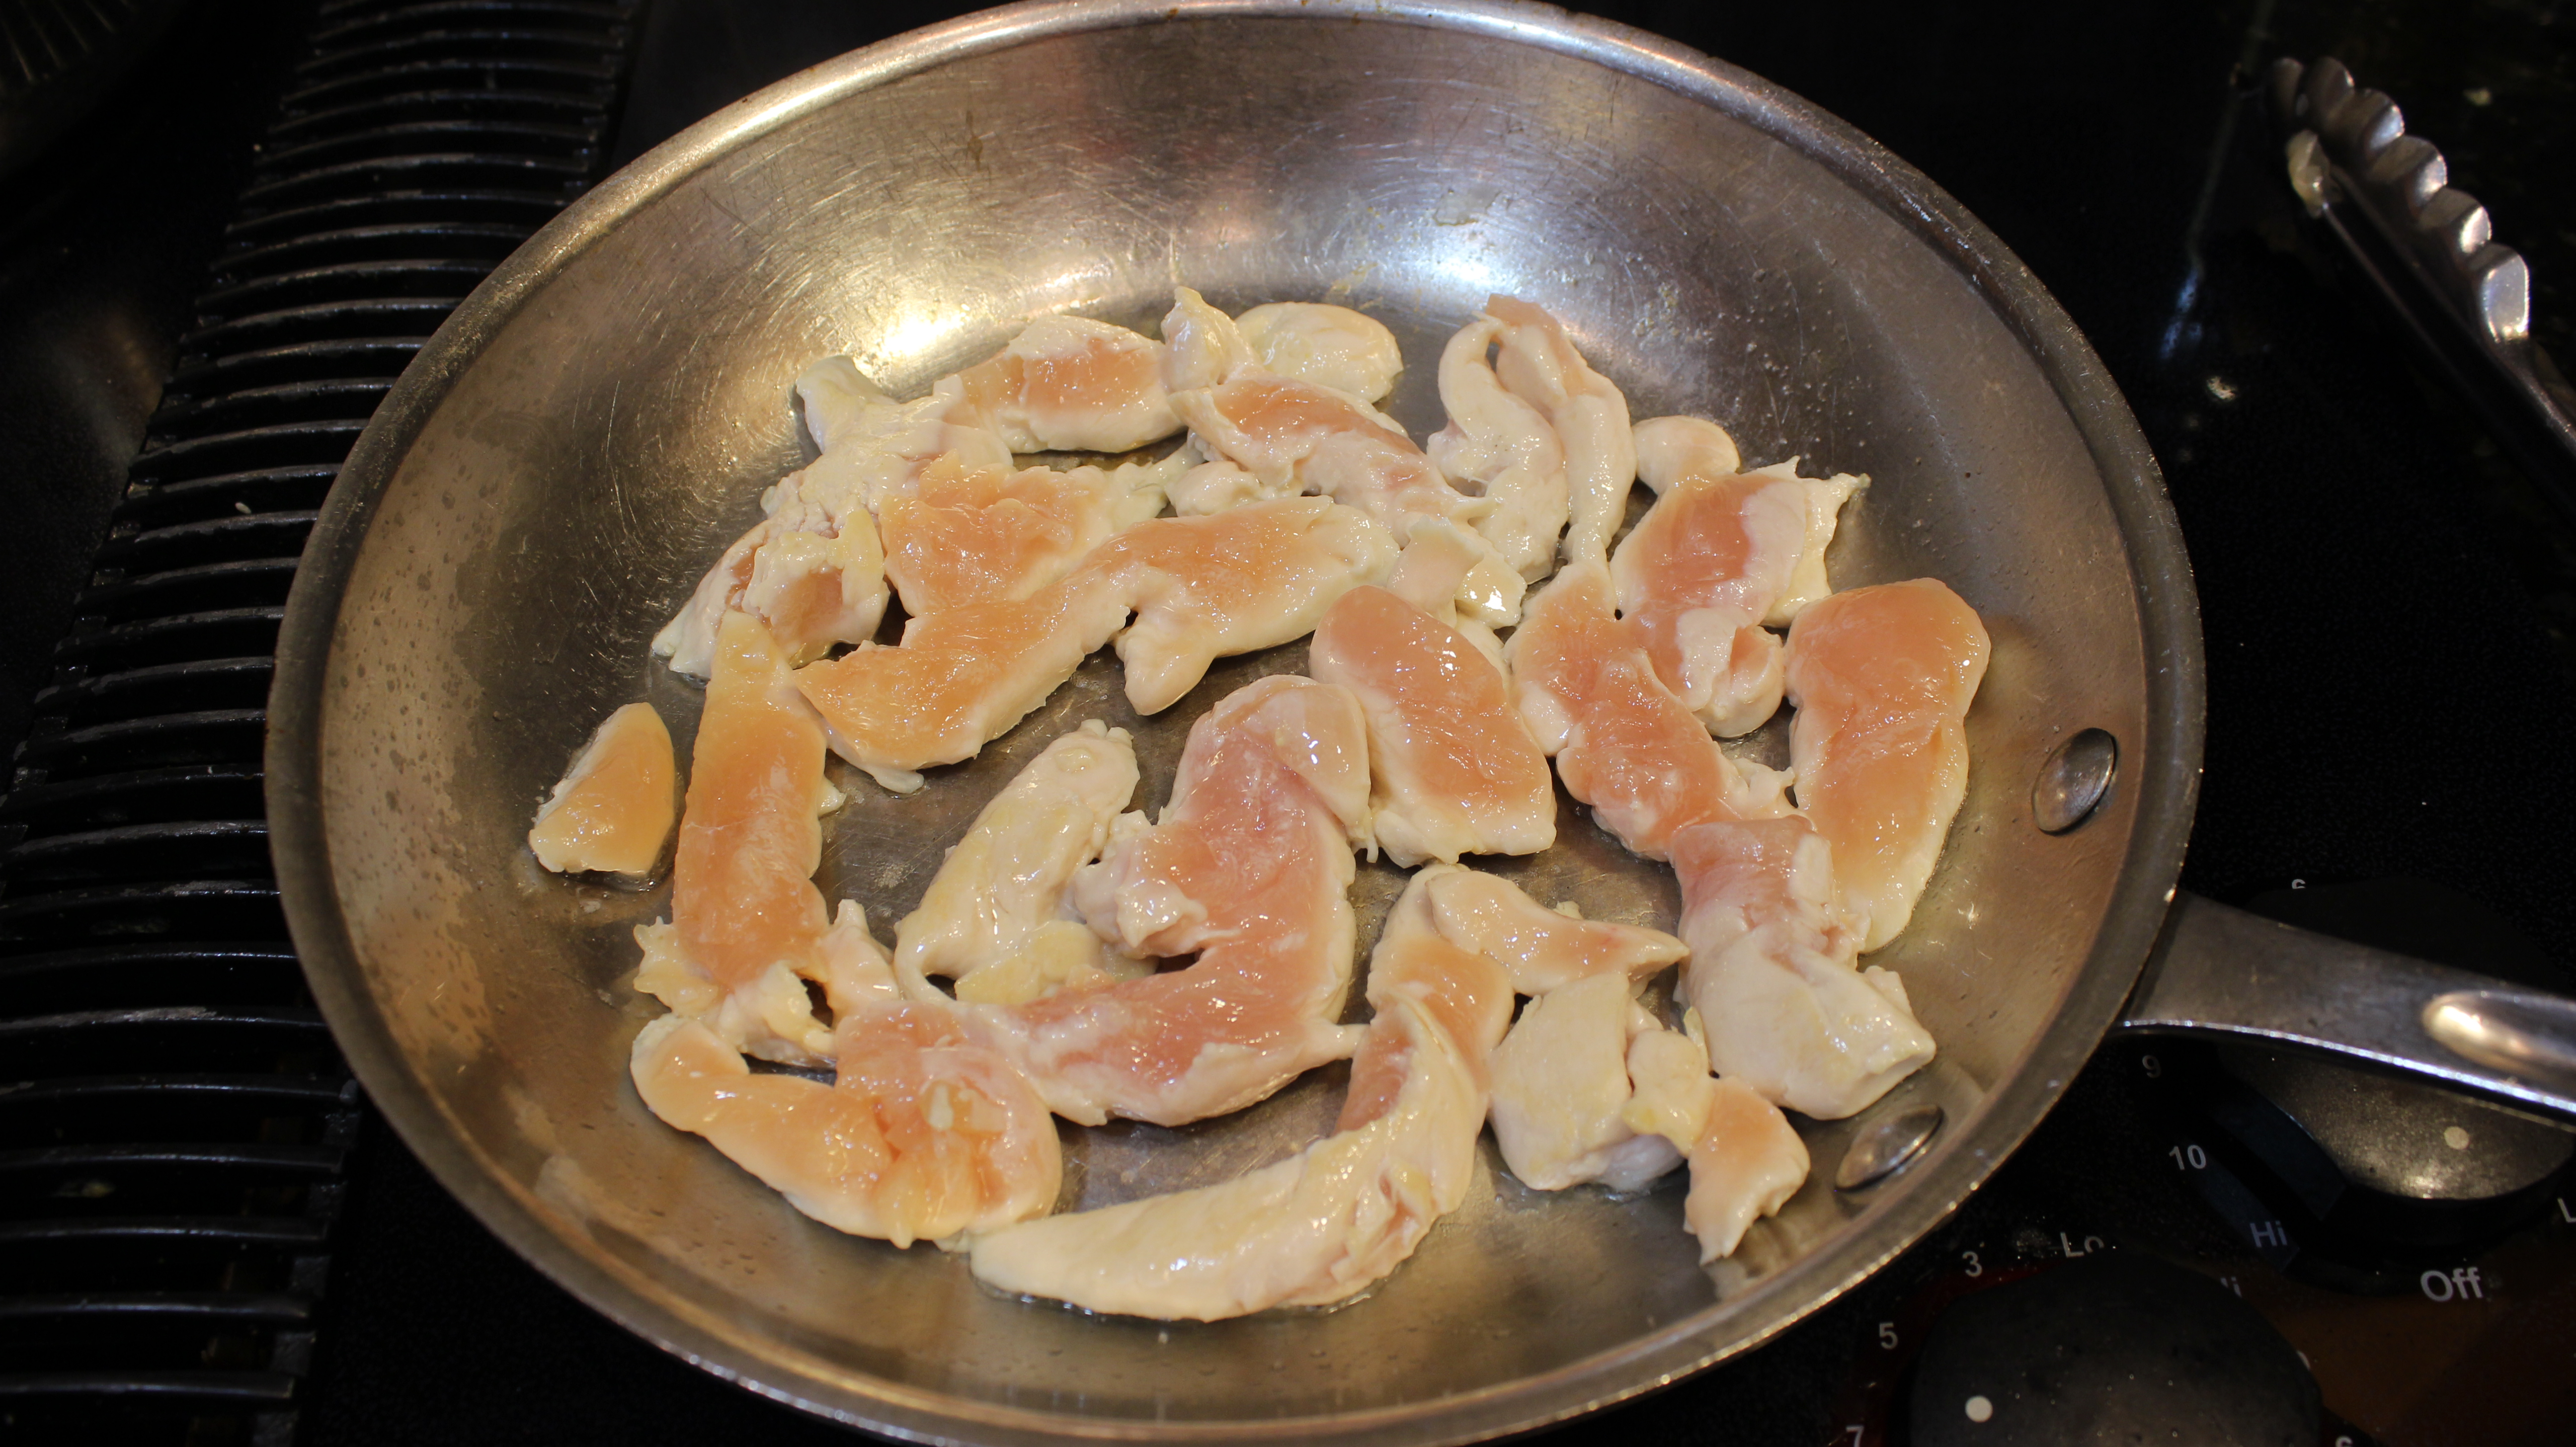
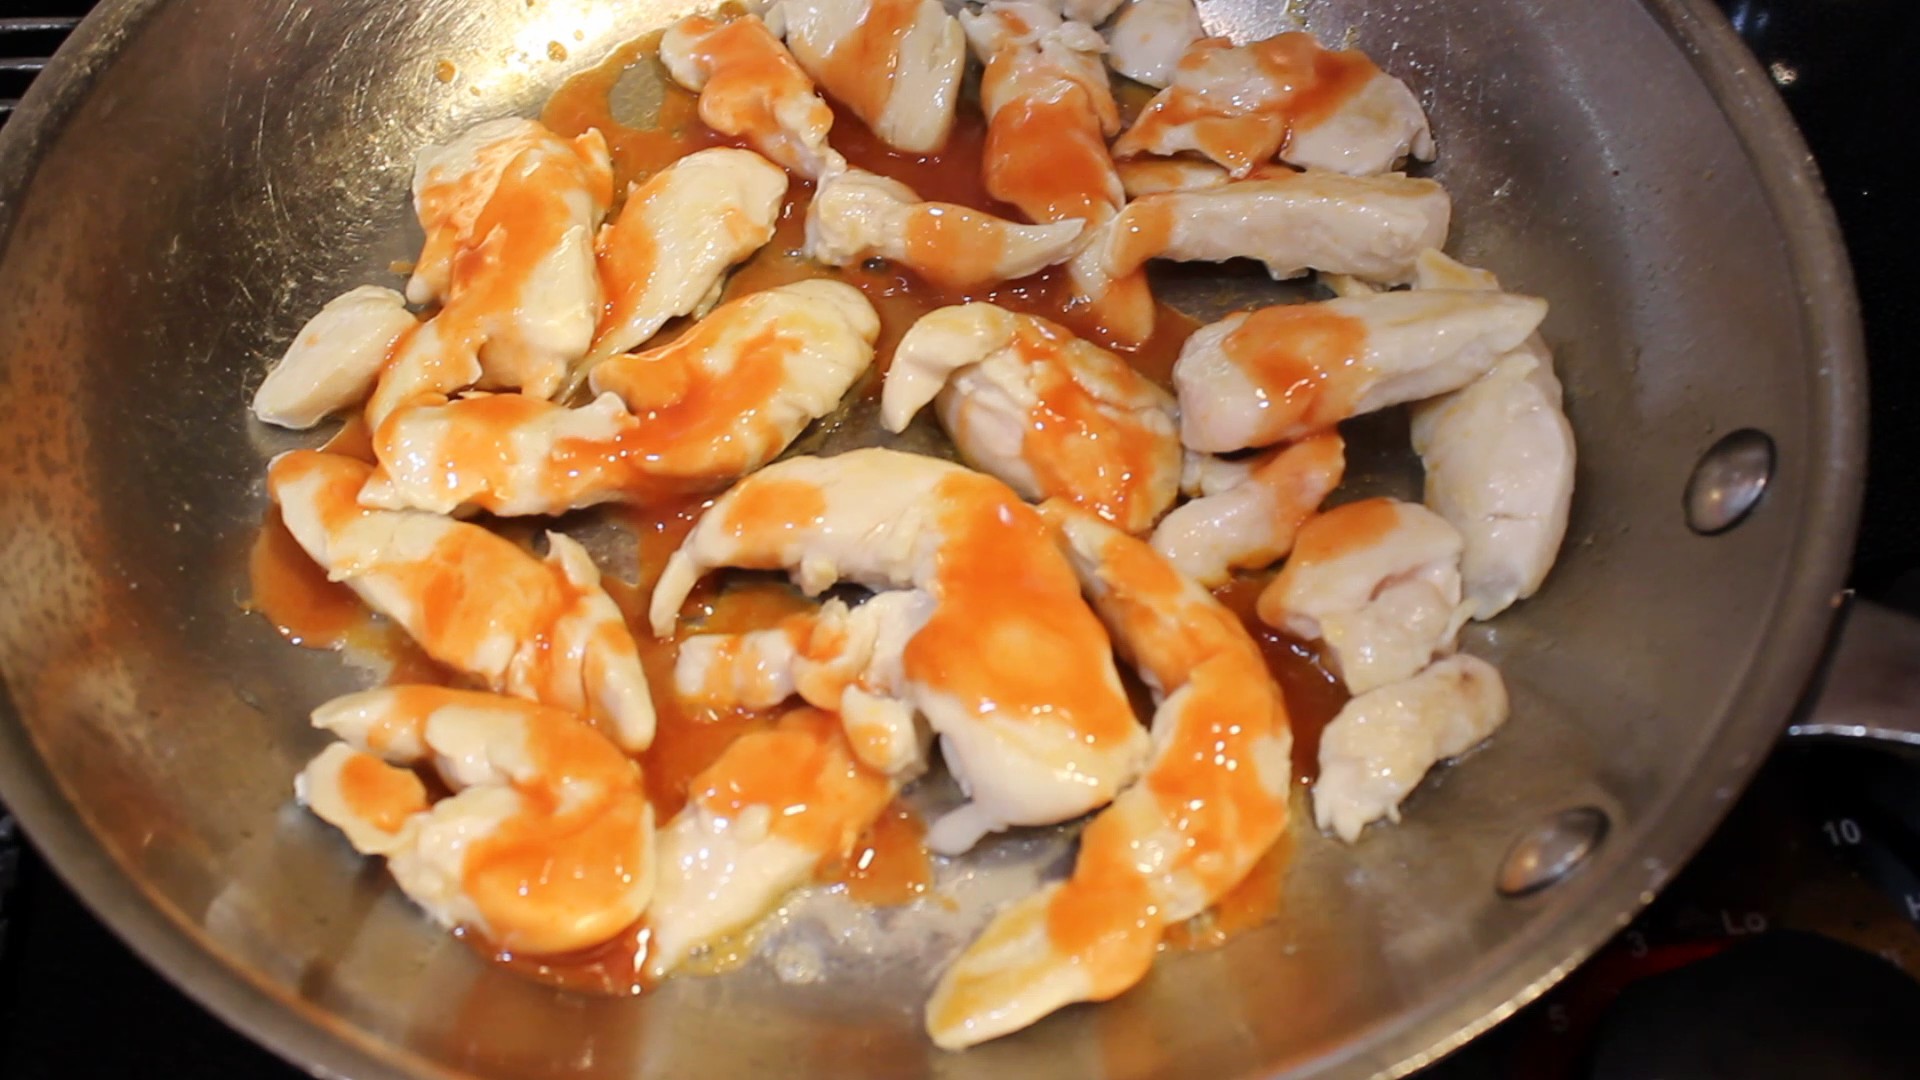
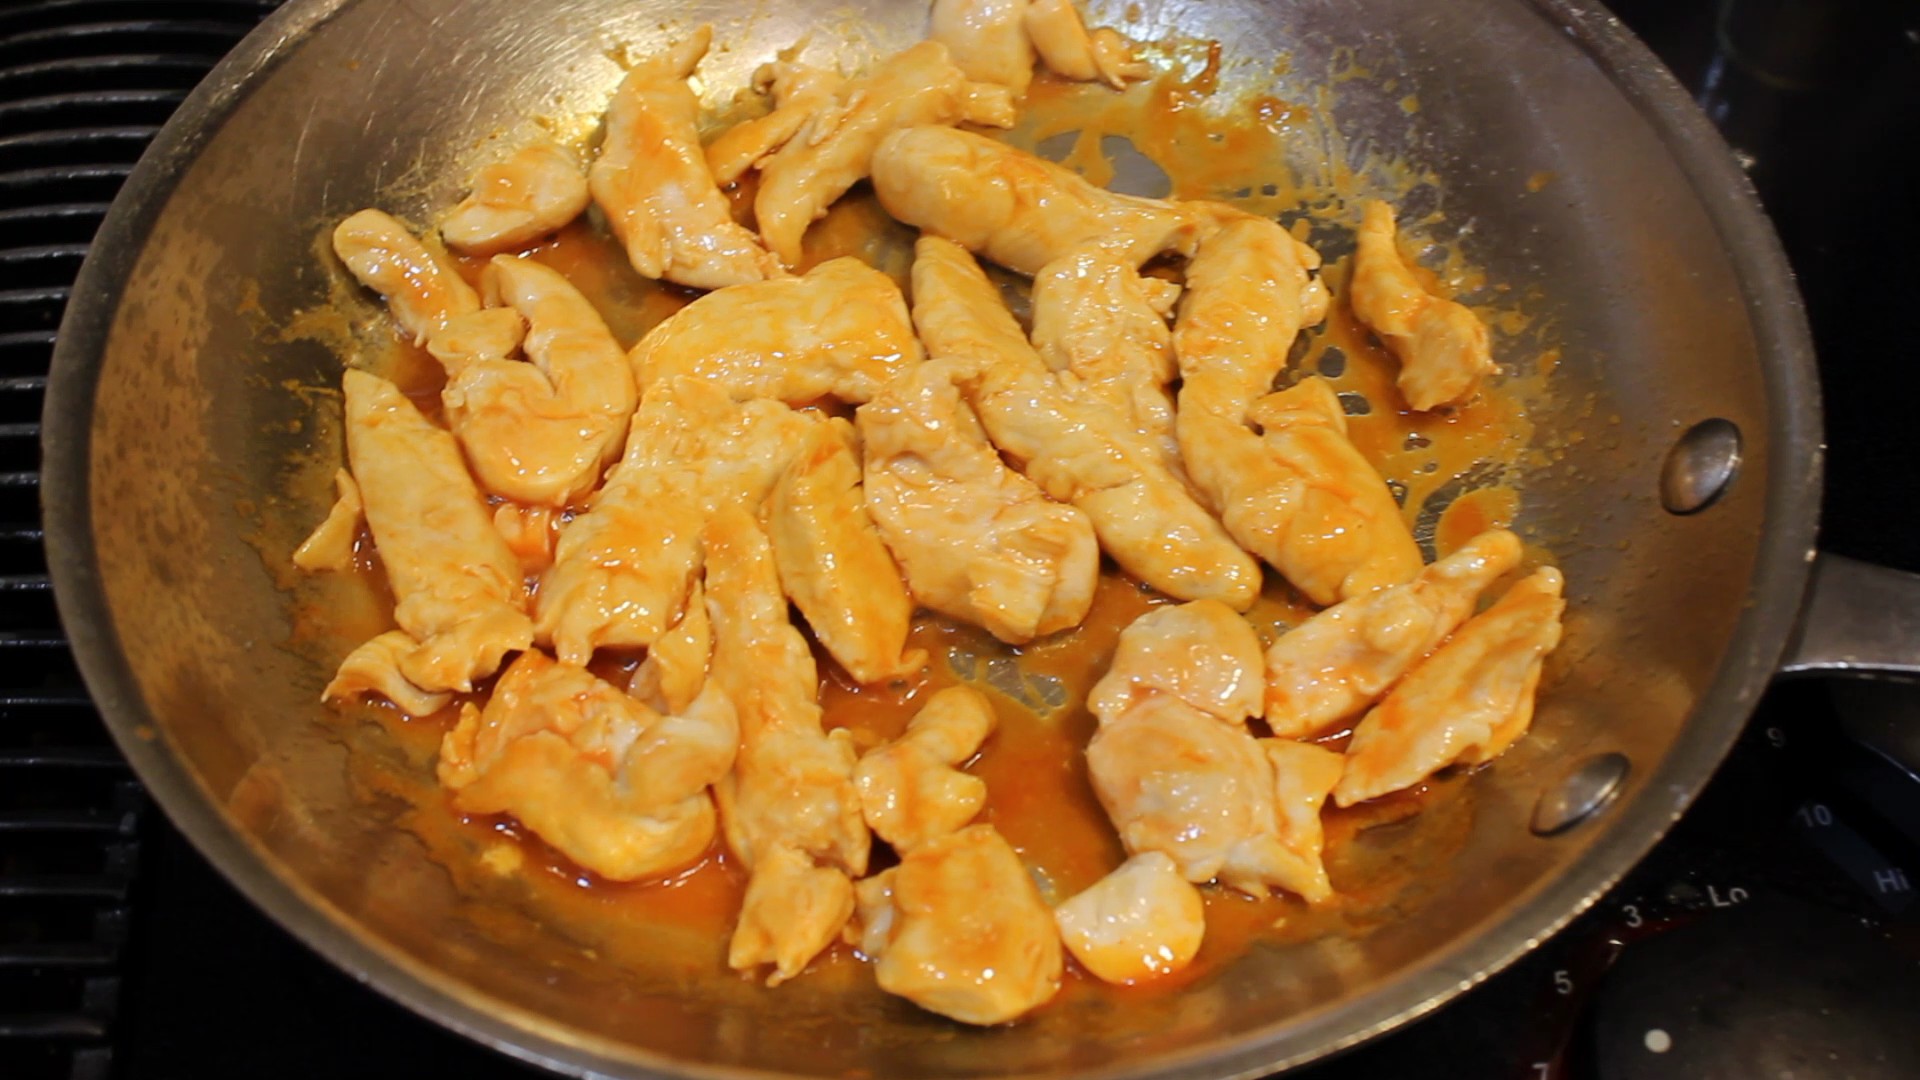
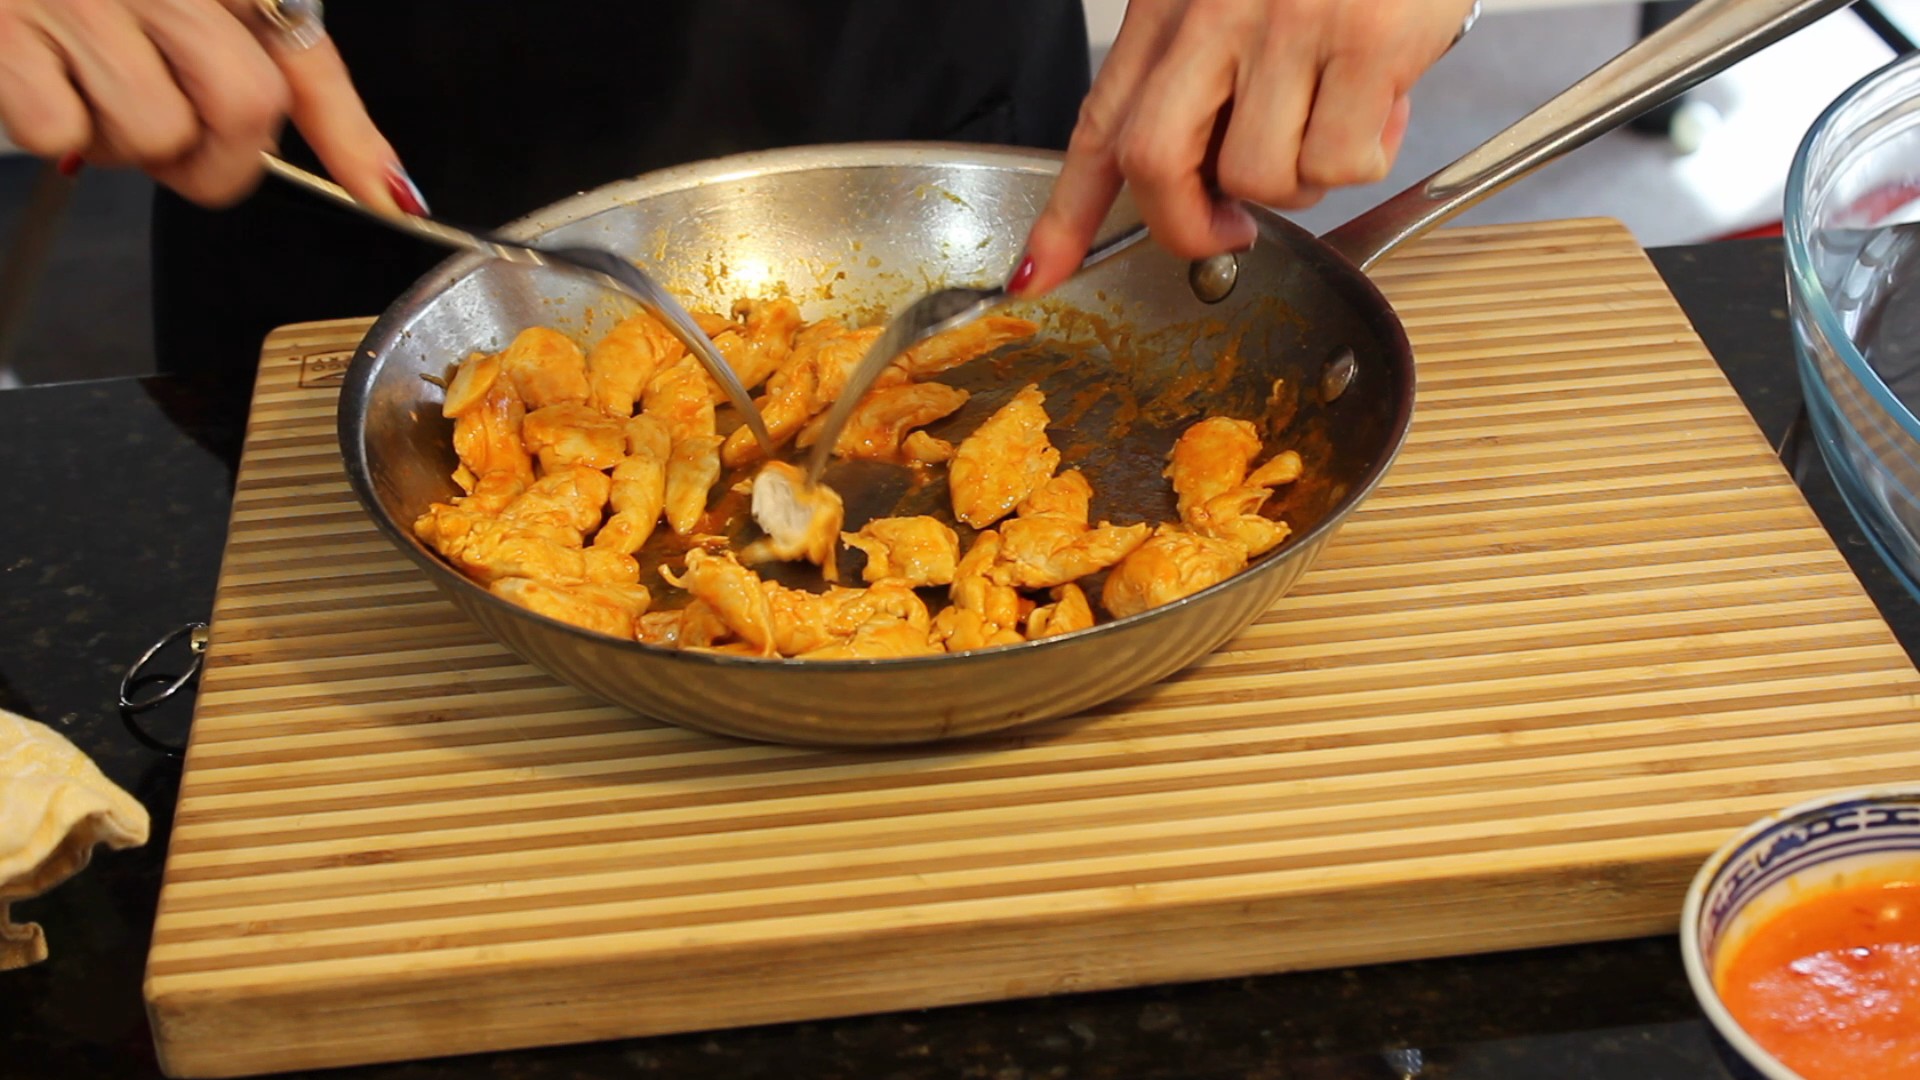
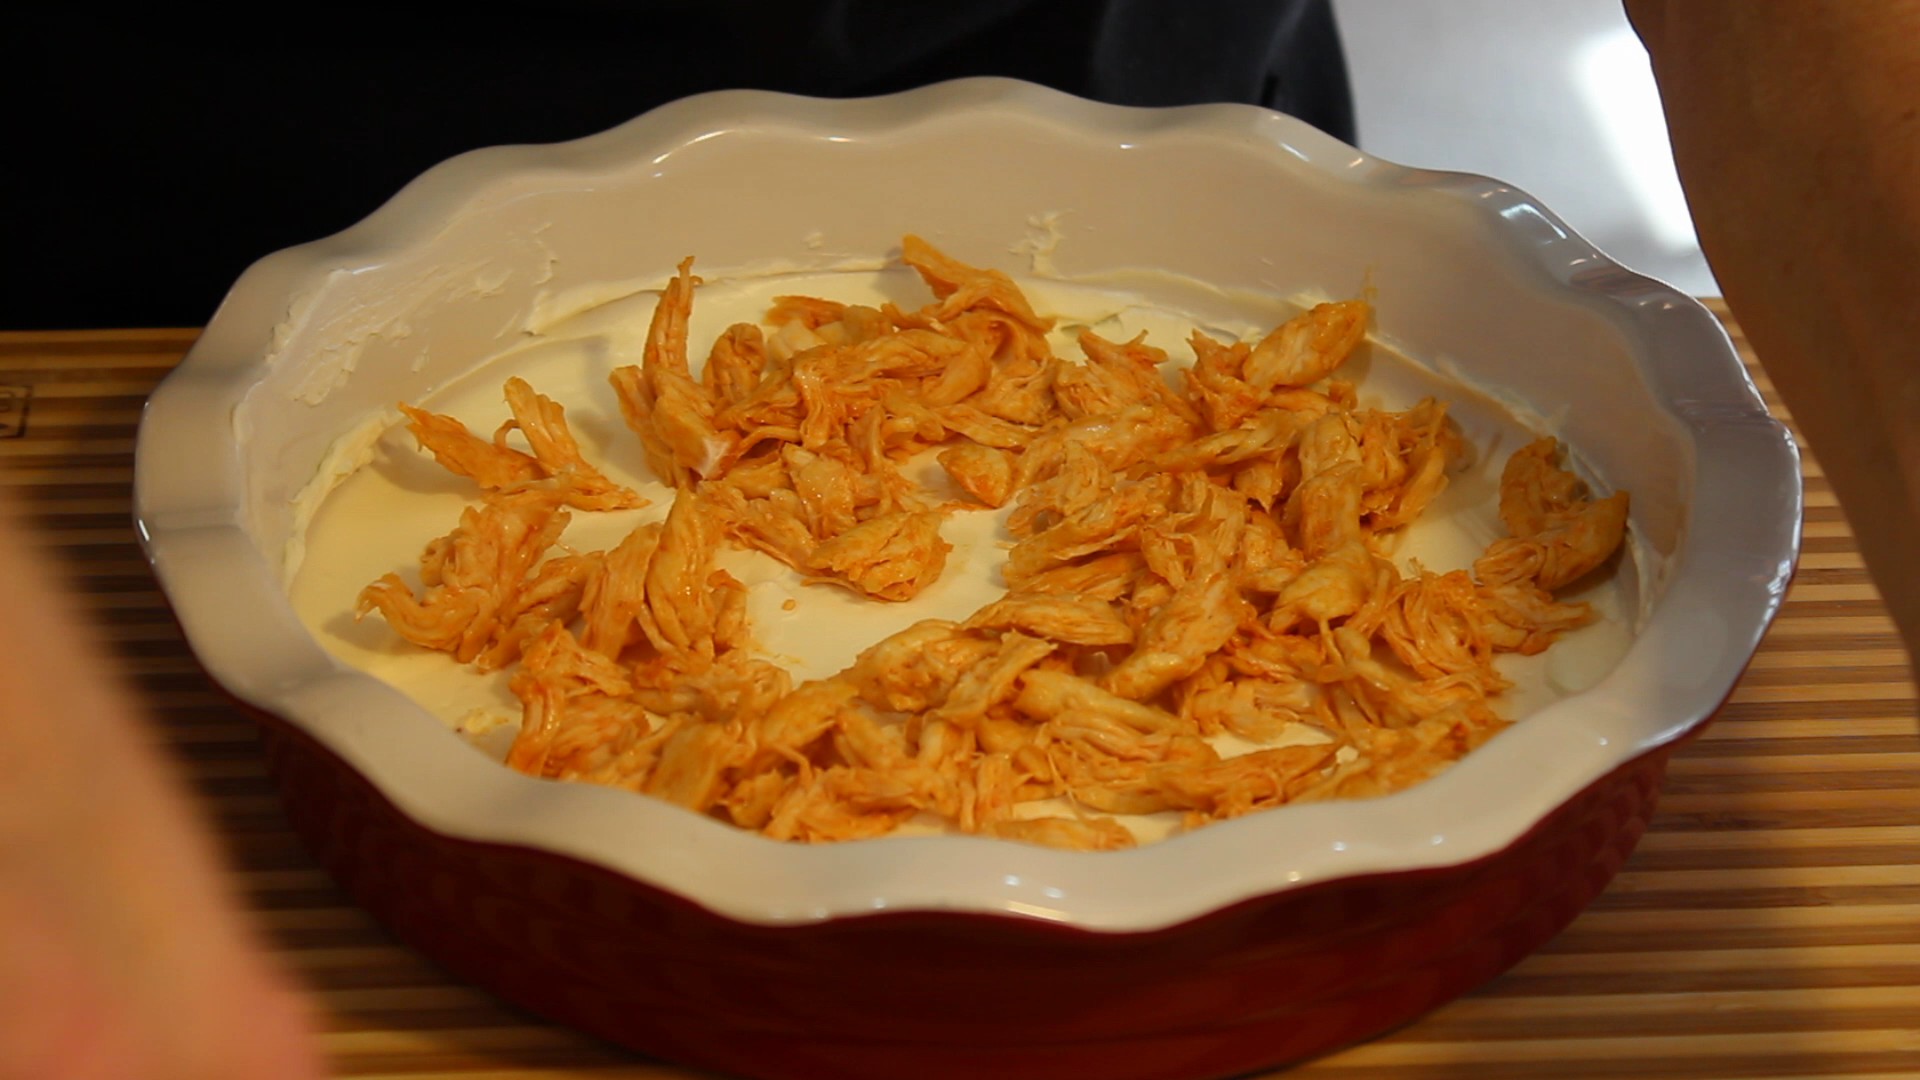
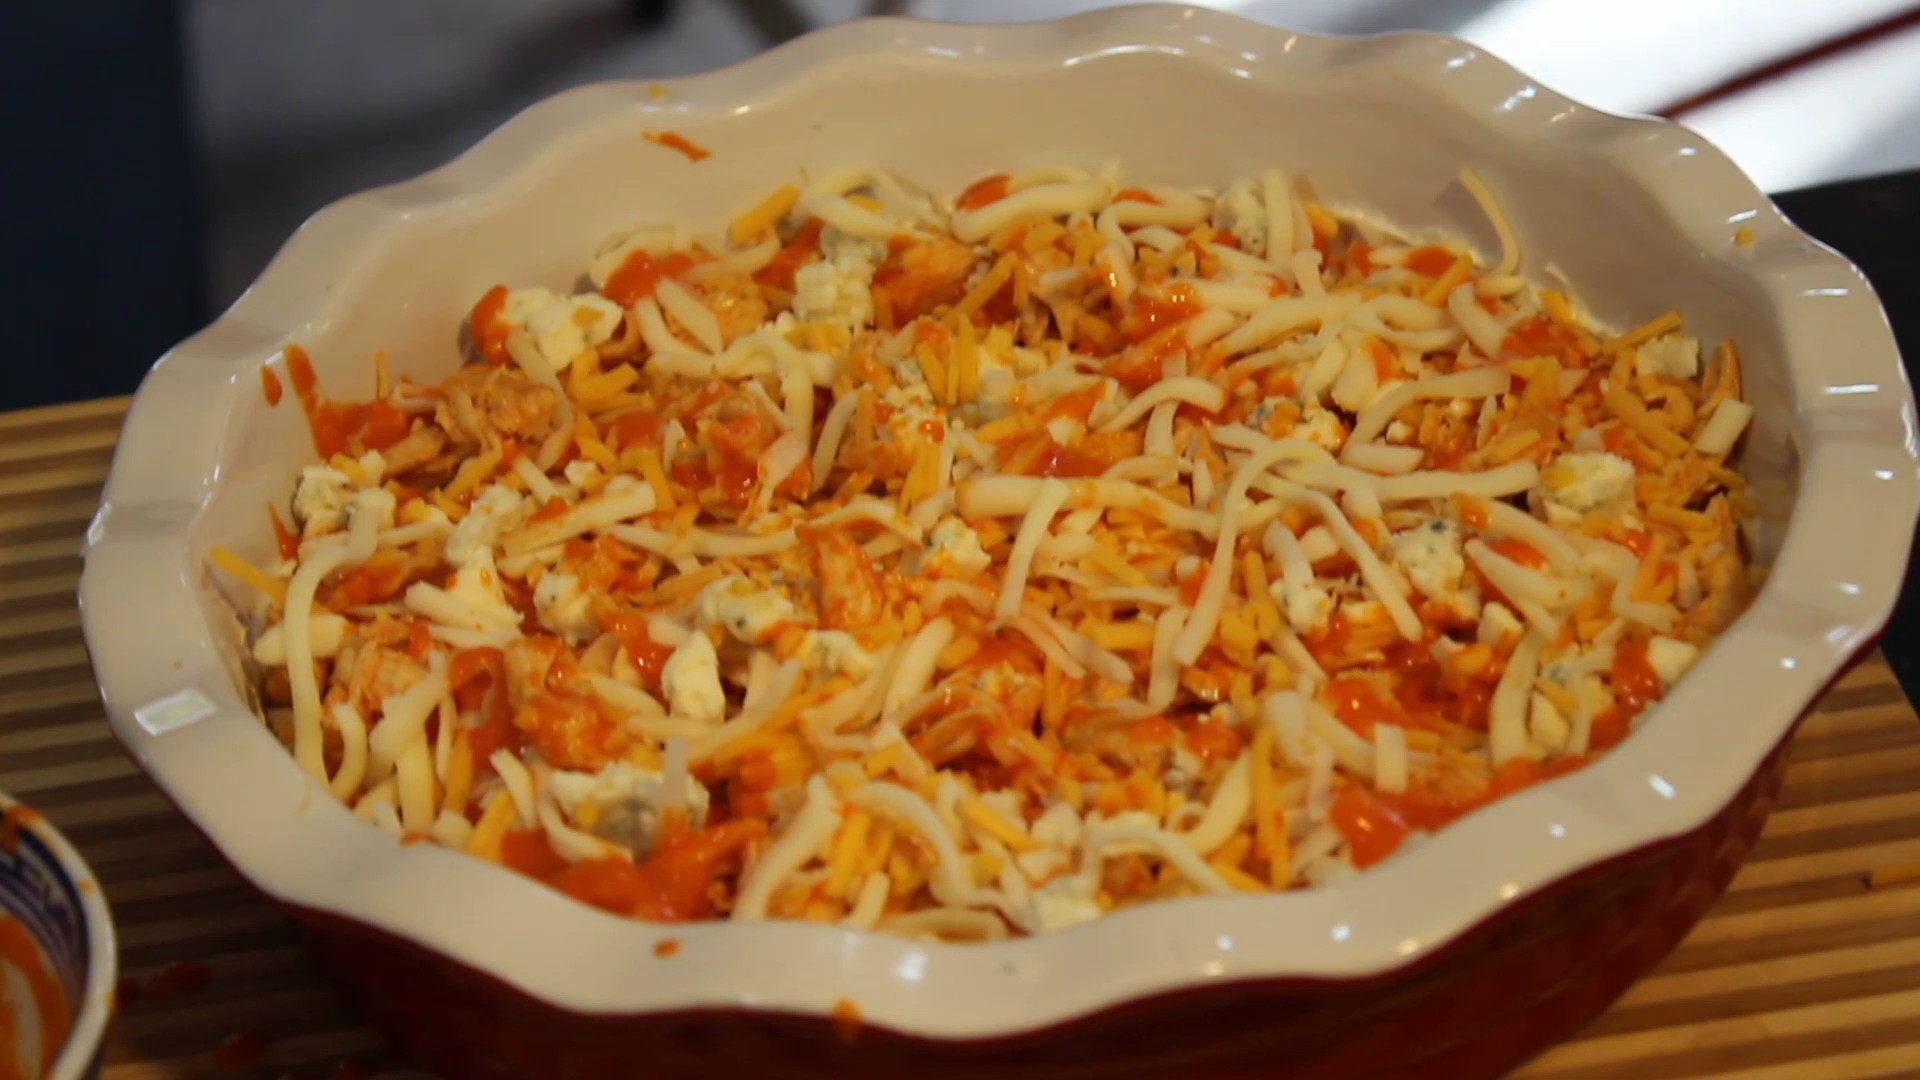
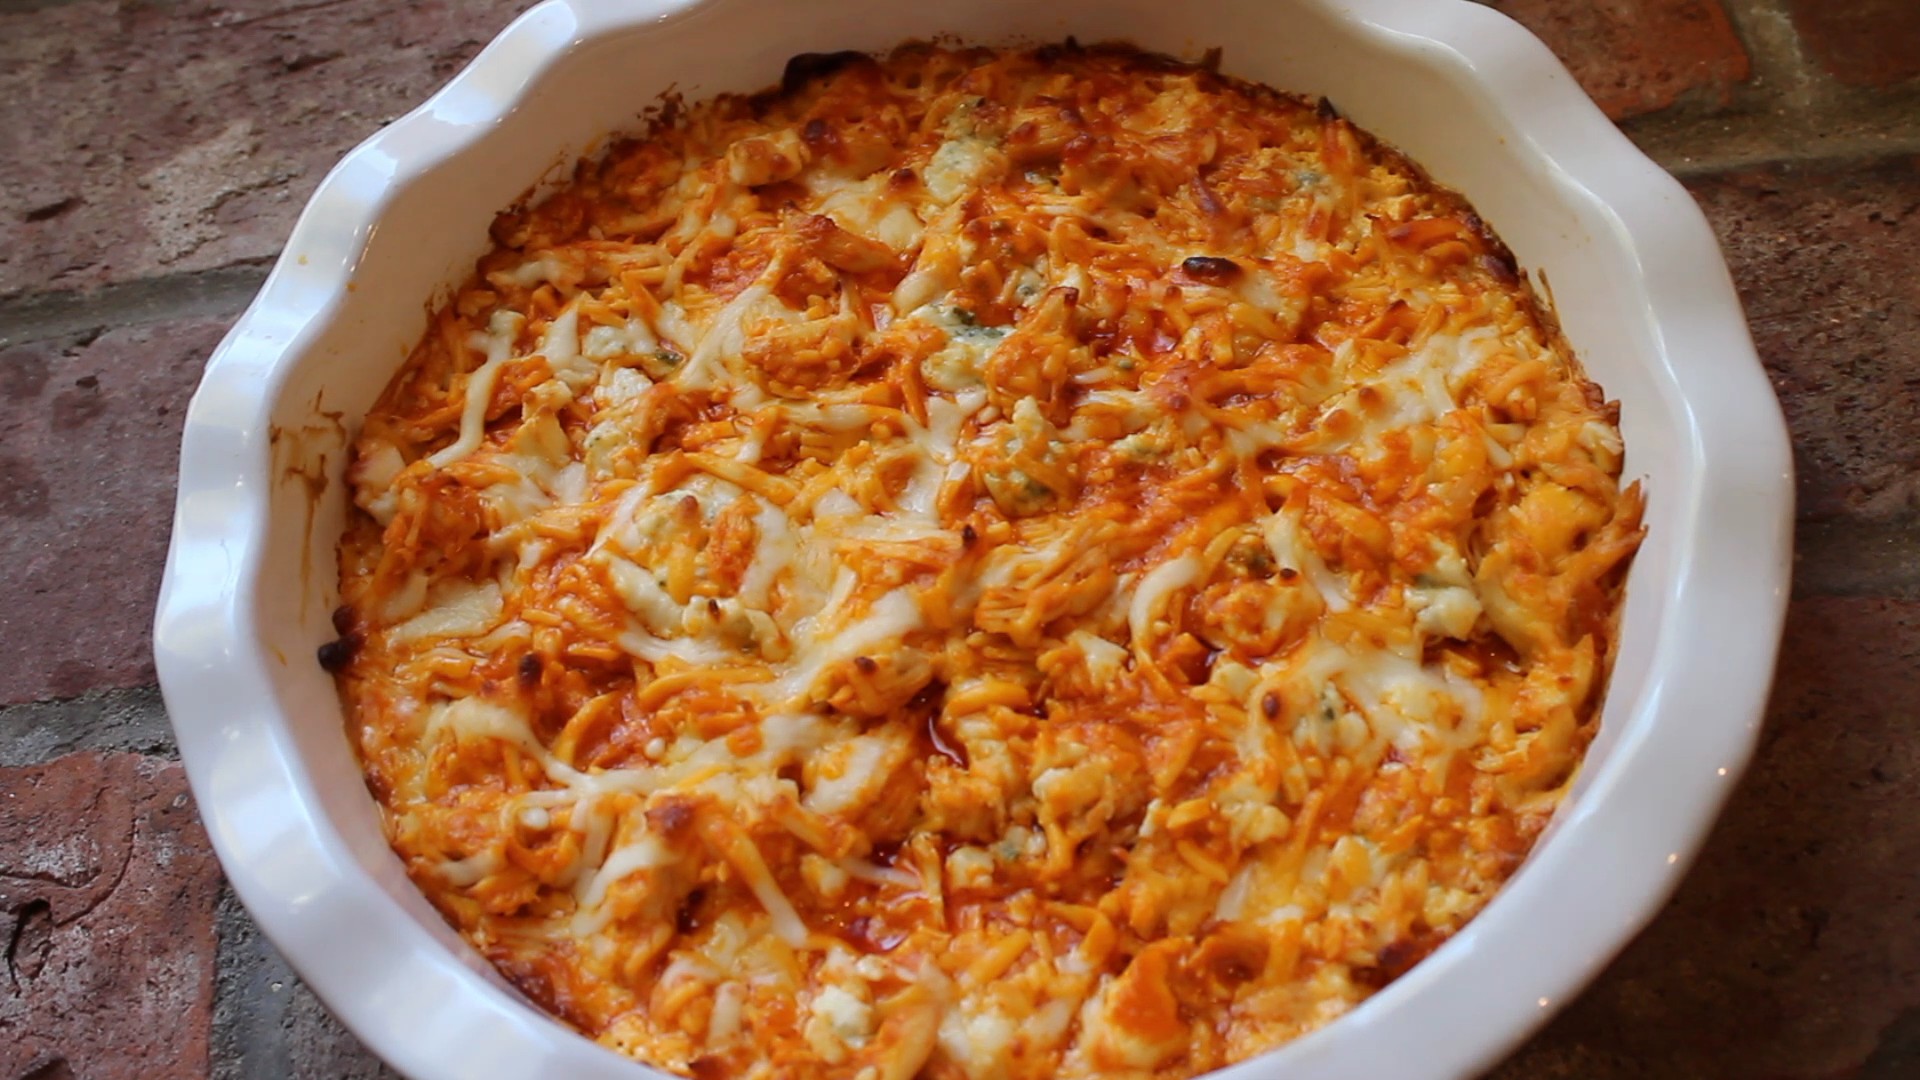
This delicious buffalo chicken dip is my top viewed recipe on my YouTube Channel at 160,704 views and climbing! It takes center stage every time! You may find yourself not straying too far in fear that it will be devoured. The layers start with room temperature cream cheese, chicken tenderloins sautéed in Franks Hot Sauce, a drizzling of homemade buffalo sauce, and finally a sprinkle of crumbled blue cheese, sharp cheddar and mozzarella. It bake’s in the oven until bubbly and served with tortilla chips. I also like to serve this appetizer with carrots, celery and cucumber slices on the side.
I have a secret for you! I’ve been using rotisserie chicken instead! It comes out just as good as sautéing the tenderloin and it saves time! Just toss the rotisserie chicken pieces with some of the butter whisked with the Frank’s Red sauce, and begin to layer. You can also bake chicken wings at 400° for 40 minutes and then toss with this butter-Frank’s Red Hot sauce and you’ll have amazing Buffalo wings!
The Buffalo chicken dip gives all the amazing flavors of that typical “buffalo wings and blue cheese” with out all the work! I am very particular about my blue cheese dressing so I highly recommend my easyhomemade blue cheese dressingrecipe!
This buffalo chicken dip recipe came from my friend Lisa who just recently made it for a party we were at and it didn’t last very long! I make this dish all year round not to mention how totally awesome it is for football season.
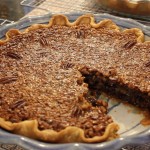
I think this buffalo chicken layered dip is a win win for you and your party. Everyone will be asking you for the recipe. I hope you enjoy this “BEST Buffalo Chicken Dip” recipe and the show too! Don’t miss the “Behind the scenes bloopers” included at the end of the show. And if you want to make an amazing desert that will get you lots of oohs and ahhs try the Pavlovaor the“Death by Chocolate Meringue Pie”! Don’t forget a Homemade Caesar Salad and an entré of Lobster Mac n’ Cheese or Eggplant Ballswith pasta or Zucchini Spaghetti!
Ingredients:NOTE: You can use ROTISSERIE Chicken!
3/4 lb chicken tenderloins raw OR 1/2 of a ROTISSERIE Chicken
1 tbsp olive oil (NOTE: this is only if sautéing up the tenderloins)
Sprinkle of salt (only if sautéing up the tenderloins)
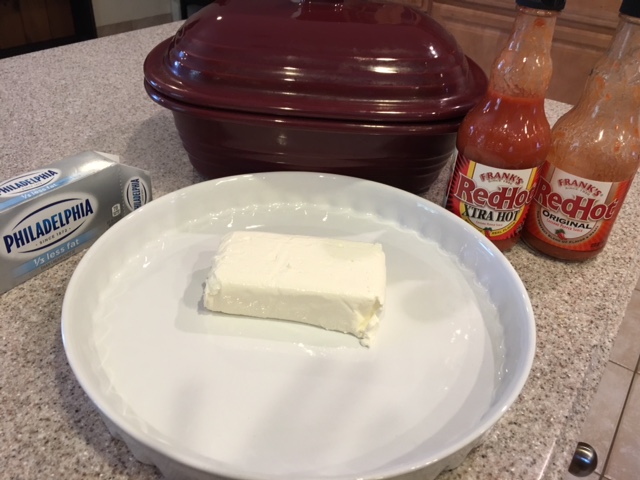
1 -8 oz pkg Philadelphia Cream Cheese
Frank’s Hot Sauce
Buffalo sauce: 1/4 cup (1/2 stick) butter (Kerrygold or favorite) & 1/3 cup Franks Hot Sauce
1/4 cup Blue cheese crumbles
1/4 cup sharp cheddar cheese
1/4 cup mozzarella
(1) 9″ Deep-dish baking pie plate
Directions:
Pre-heat oven to 375º
Melt 1/2 stick of butter in microwave, then add 1/3 cup of Frank’s Red Hot Sauce, whisk until combined – this is the “homemade buffalo sauce” – set aside
Add 1 tbsp. olive oil on medium heat
Add in the chicken tenderloin pieces to a pan on med. high heat, sprinkle with a pinch of salt begin to sauté for 3 minutes
Flip chicken pieces over and sauté another 3 minutes
Once they start to golden slightly add 2 tbsp. Franks hot sauce and let reduce on low 1-2 minutes
Remove from heat and shred or cut up
OR toss ROTISSERIE CHICKEN meat from 1/2 of a chicken, cut up or pulled apart to bite-size pieces with enough Frank’s Red Hot/butter sauce mixture to coat
Begin the layering on top of the cream cheese
Smear 8 oz. of room temperature cream cheese in bottom of your bake dish
Then add the shredded chicken for the layer next
Drizzle homemade buffalo sauce over the chicken (save some to drizzle after the layer of cheeses)
Sprinkle 1/4 cup crumbled blue cheese
Then Sprinkle 1/4-1/3 cup cheddar and mozzarella each – if using 9″ baking dish go with 1/4 cup, if using 12″ baking dish you could use 1/3 cup if you want a little extra
OPTIONAL – Drizzle more buffalo sauce over the cheeses
Bake for 20 minutes until bubbly and serve with tortilla ships, carrots and celery
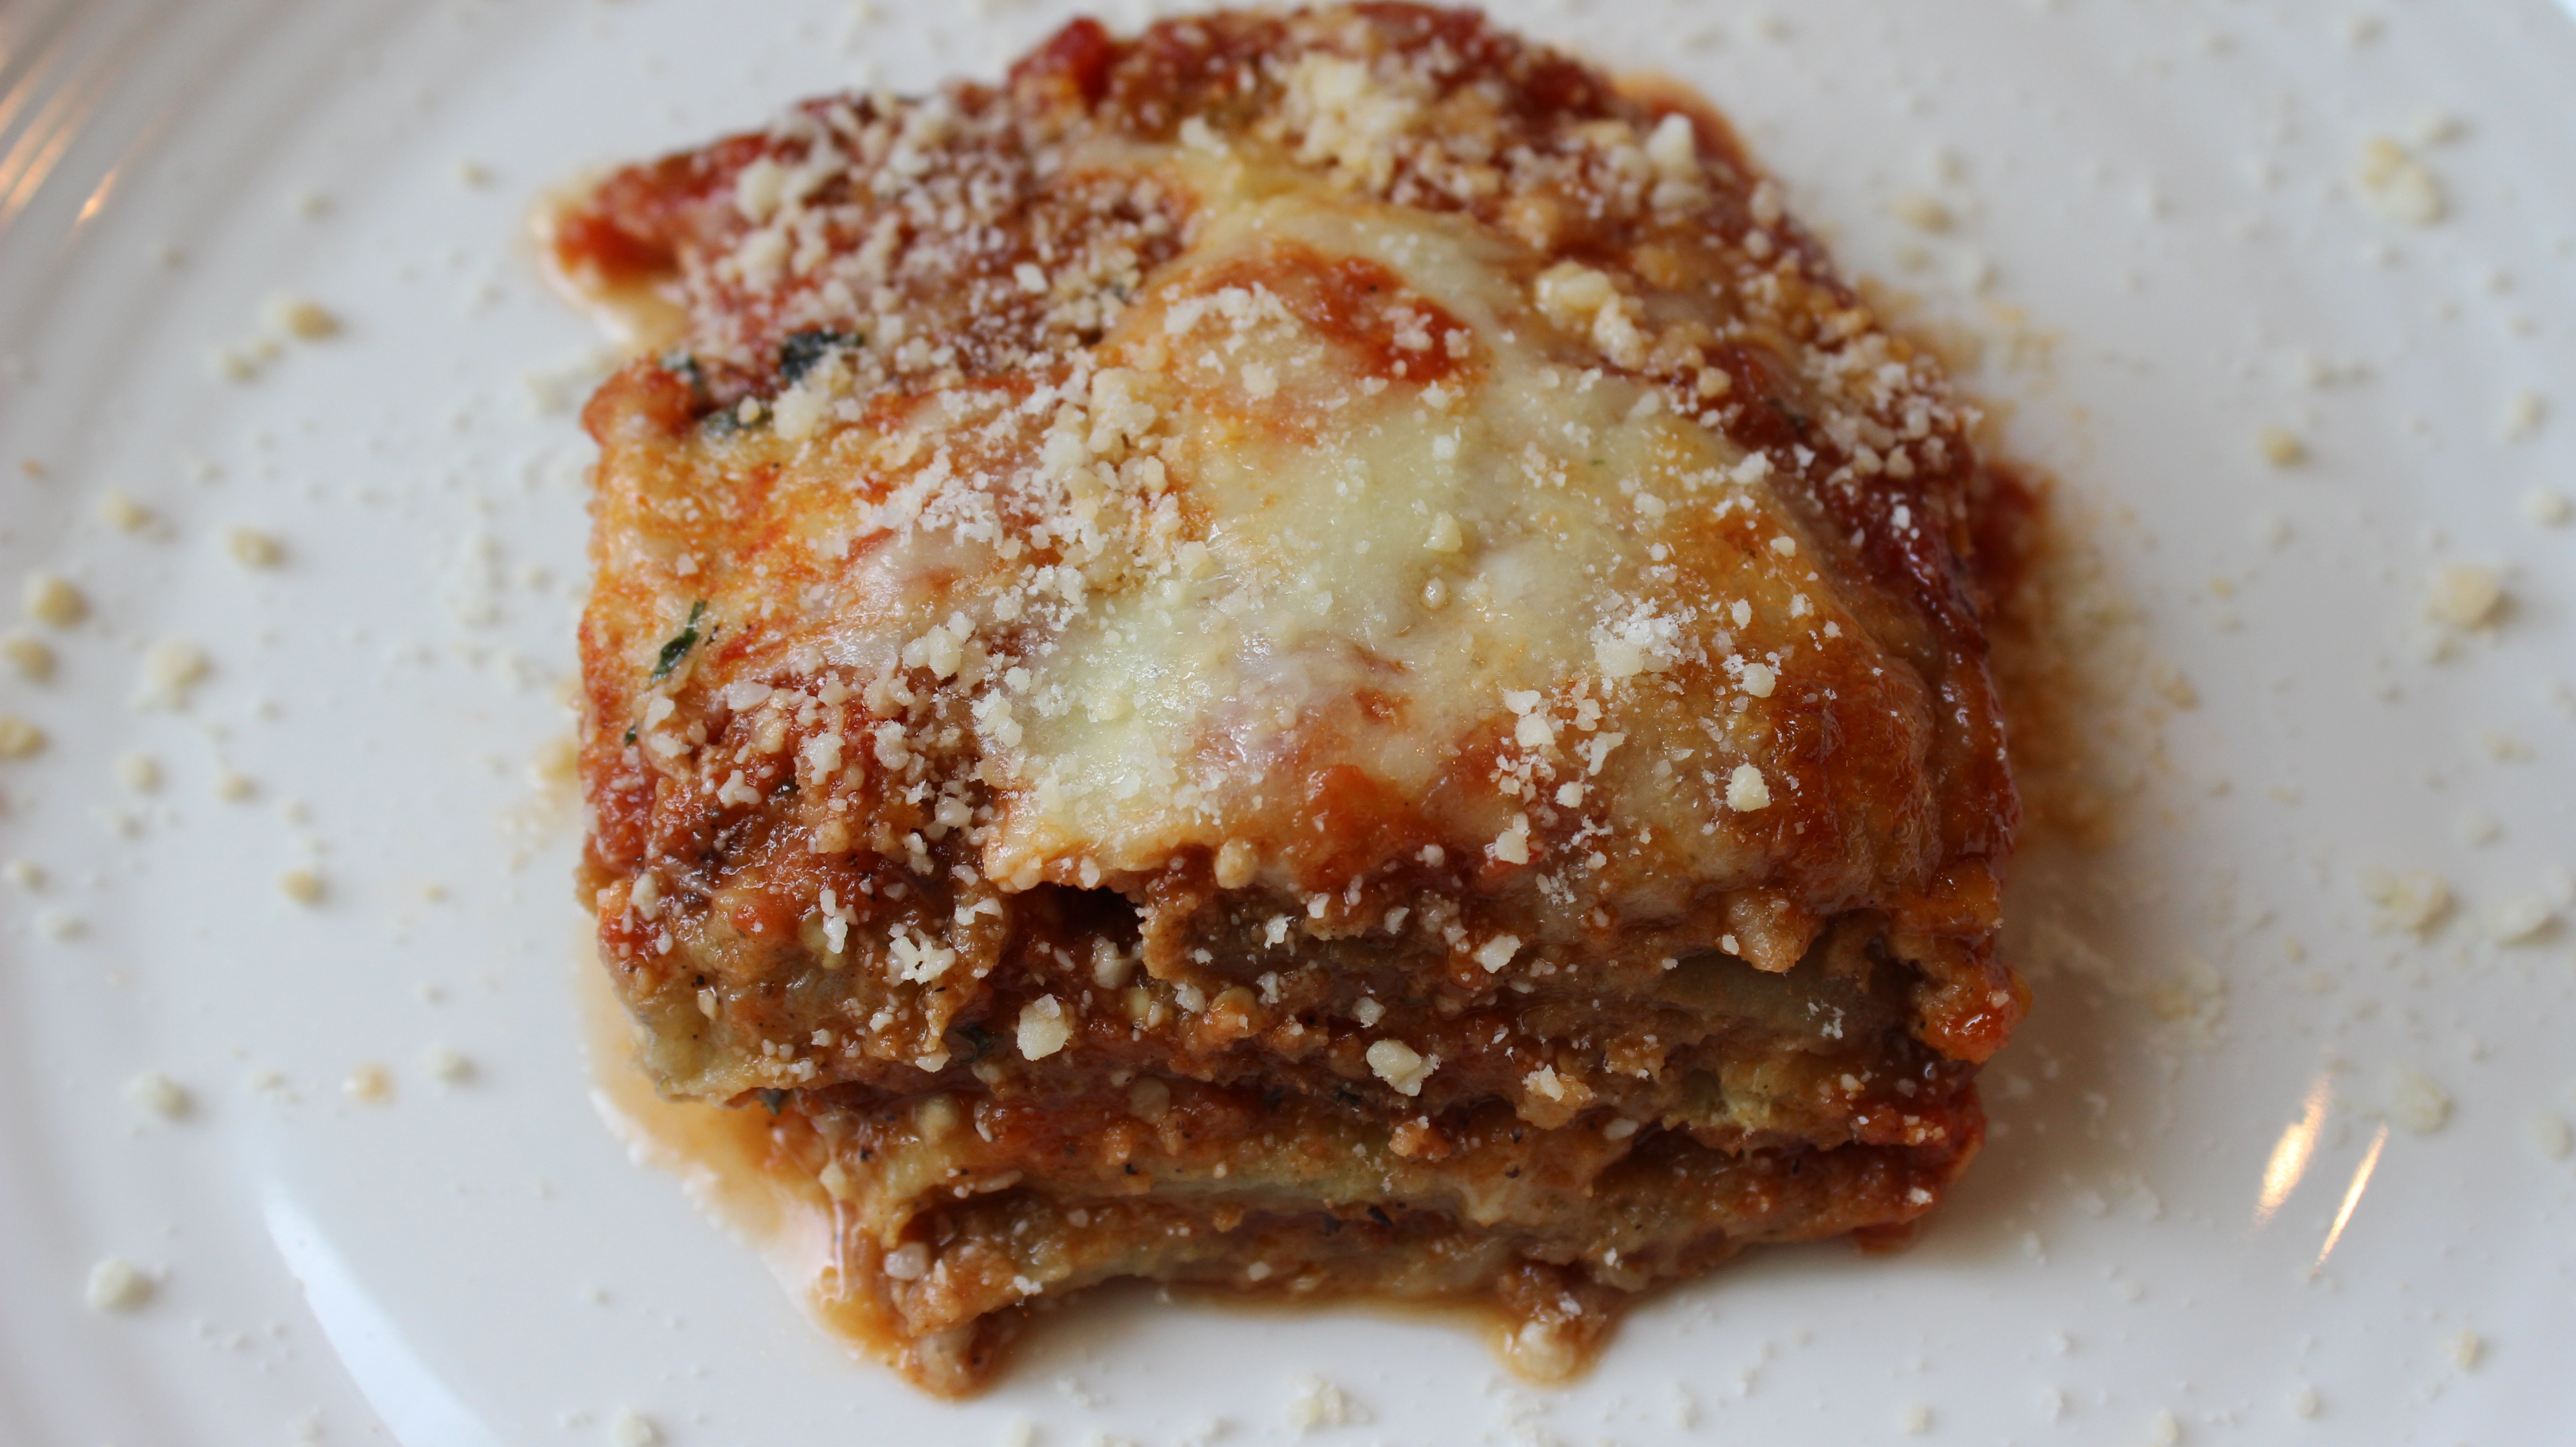
My easy gourmet eggplant Parmesan is sweet, saucy and oozing with mozzarella getting even better the next day when it’s re-heated if that’s even possible! Eggplant Parmesan one of my very favorite things to make. I used to watch my mother fry eggplant when I was young and I have been making this homemade eggplant Parmesan for 30 years now. Eggplant Parmesan is one of those delicious Italian comfort foods that can be a little bit of work to prepare so I show you how to keep the process simple by spreading out the steps.
The secret to sweet eggplant Parmesan is slicing , lightly salting and weighting down the eggplant letting it sit in the refrigerator for 2 hrs to overnight preferably to remove the bitter purple juice making my homemade baked eggplant Parmesan as sweet as ever. This is a simple but ingenious way that’s been in my family for generations.
It will be much easier to try and fry up only one eggplant if it’s your first time just to get the hang of it. If you have gone through the frying process before I would suggest cooking up two or three large eggplants. I like to fry up 3 eggplants because I freeze the slices I don’t use right away when they are completely cooled in between layers of thick durable Bounty paper towels in freezer Ziploc baggies. This way all your base work is done for you and you are able to pull them out of the freezer and whip up an eggplant rollatini, eggplant Parmesan, or even eggplant lasagna. When you take them out of the freezer they pop apart easily thawing in minutes too ready for what ever dish you may have in mind.
I recommend making my quick and easy tomato-basil pasta sauce or even my slow cooked pasta sauce to baked this easy gourmet eggplant Parmesan dish. I love the fact that it can totally be made days ahead, even weeks ahead and put into the freezer ready to thaw when you need it.
If you’re feeling ambitious you may want to venture off and try my homemade eggplant rollatini with vodka sauce and, or my homemade ricotta which you can also make the day before or just treat yourself and buy Liuzzi Cheese ricotta or your favorite store brand for the rollatini. Planning is sometimes the name of the game for taking the labor out of scrumptious food like this where if you get it done in steps it makes everything go so smoothly.
6-9 extra large eggs whisked (approx. 3 eggs per 1 extra-large eggplant)
3 cups seasoned Italian bread crumbs – (use “seasoned breadcrumbs” then you don’t have to add that in)
salt
1 16 oz. block of part-skim or whole milk mozzarella shredded or sliced thinly
3 1/2-4 cups canola oil for frying
fresh basil leaves
grated Parmesan for garnish
Cookie racks
1 whole roll of Bounty Paper Towels (it’s important to get quality paper towel so they will absorb the oil properly and won’t fall apart)
Candy thermometer to keep oil at 300º
Directions – Pre-heat oven to 350º:
Slice the ends off the eggplants
Using a potato peeler peel off all the skin of the eggplants
Slice up eggplants on a slight bias (on a little bit of an angle) into 1/4″ slices (1/4″ for rolling up for eggplant rollatiniBUT you can cut them a little thicker 3/8″ for eggplant parm!
NOTE: If i plan on freezing the left over fried eggplant slice’s for future dinners (eggplant rollatini) I cut them length wise so as to have enough length to roll up with ricotta in the middle BUT if I’m just making enough for parm I cut the eggplant on a slight bias because I don’t need the length…I try to cut them all the same so cooking time is constant.
Layer the eggplant slices in a large glass bowl
In between each layer sprinkle 1/4 Tsp of salt, and keep layering eggplant, salt, eggplant, salt…
Cover with Saran wrap and place a small plate on top and then some heavy fry pans or large tomato can to weight down the eggplant and into the frig for 1-2 hours up to 1 day
Drain the purple juice from the bowl
Take the eggplant and pat them dry in layers between Bounty paper towels
Whisk eggs
Get your line-up of bowls in order: eggplant slices – whisked eggs – bread crumbs
Add 3 1/2 – 4 cups canola oil to a large sauce pan and begin to heat up on medium/high heat
The oil needs to get to about 300º …The temperature will go down a little when you start filling the pan with breaded eggplant slices so start with the heat on med/high then after you start to fry you will have to turn it up a little to maintain the 300º
Lay out 2-3 cookie racks covered with layers of paper towels to absorb oil for frying
Add slices of eggplant to the egg bowl in batches – only add in the 4 or 5 slices that are going next into the oil and ready to go into the bread crumbs
Then dip into the bread crumbs and into the heated oil
Put 4 or 5 slices of breaded eggplant into the oil at a time…
They will fry for about 2-3 minutes per side til golden then flip the slice over
While the 1st batch is frying get the 2nd batch ready to fry dipping into the egg and then into the bread crumbs and let them sit there on the bread crumbs til they are ready to go into the oil
Once the eggplant are golden place onto cookie racks with paper towels and dab them with fresh paper towels, flip and do the same to the other side to remove all excess oil
Throw away oily paper towels and re-place with a new set of paper towels for the next and replace with each batch there after
Then place the eggplant onto the wire cookie racks with out paper towels to cool
Finish frying the rest of the eggplant going thru the same procedures
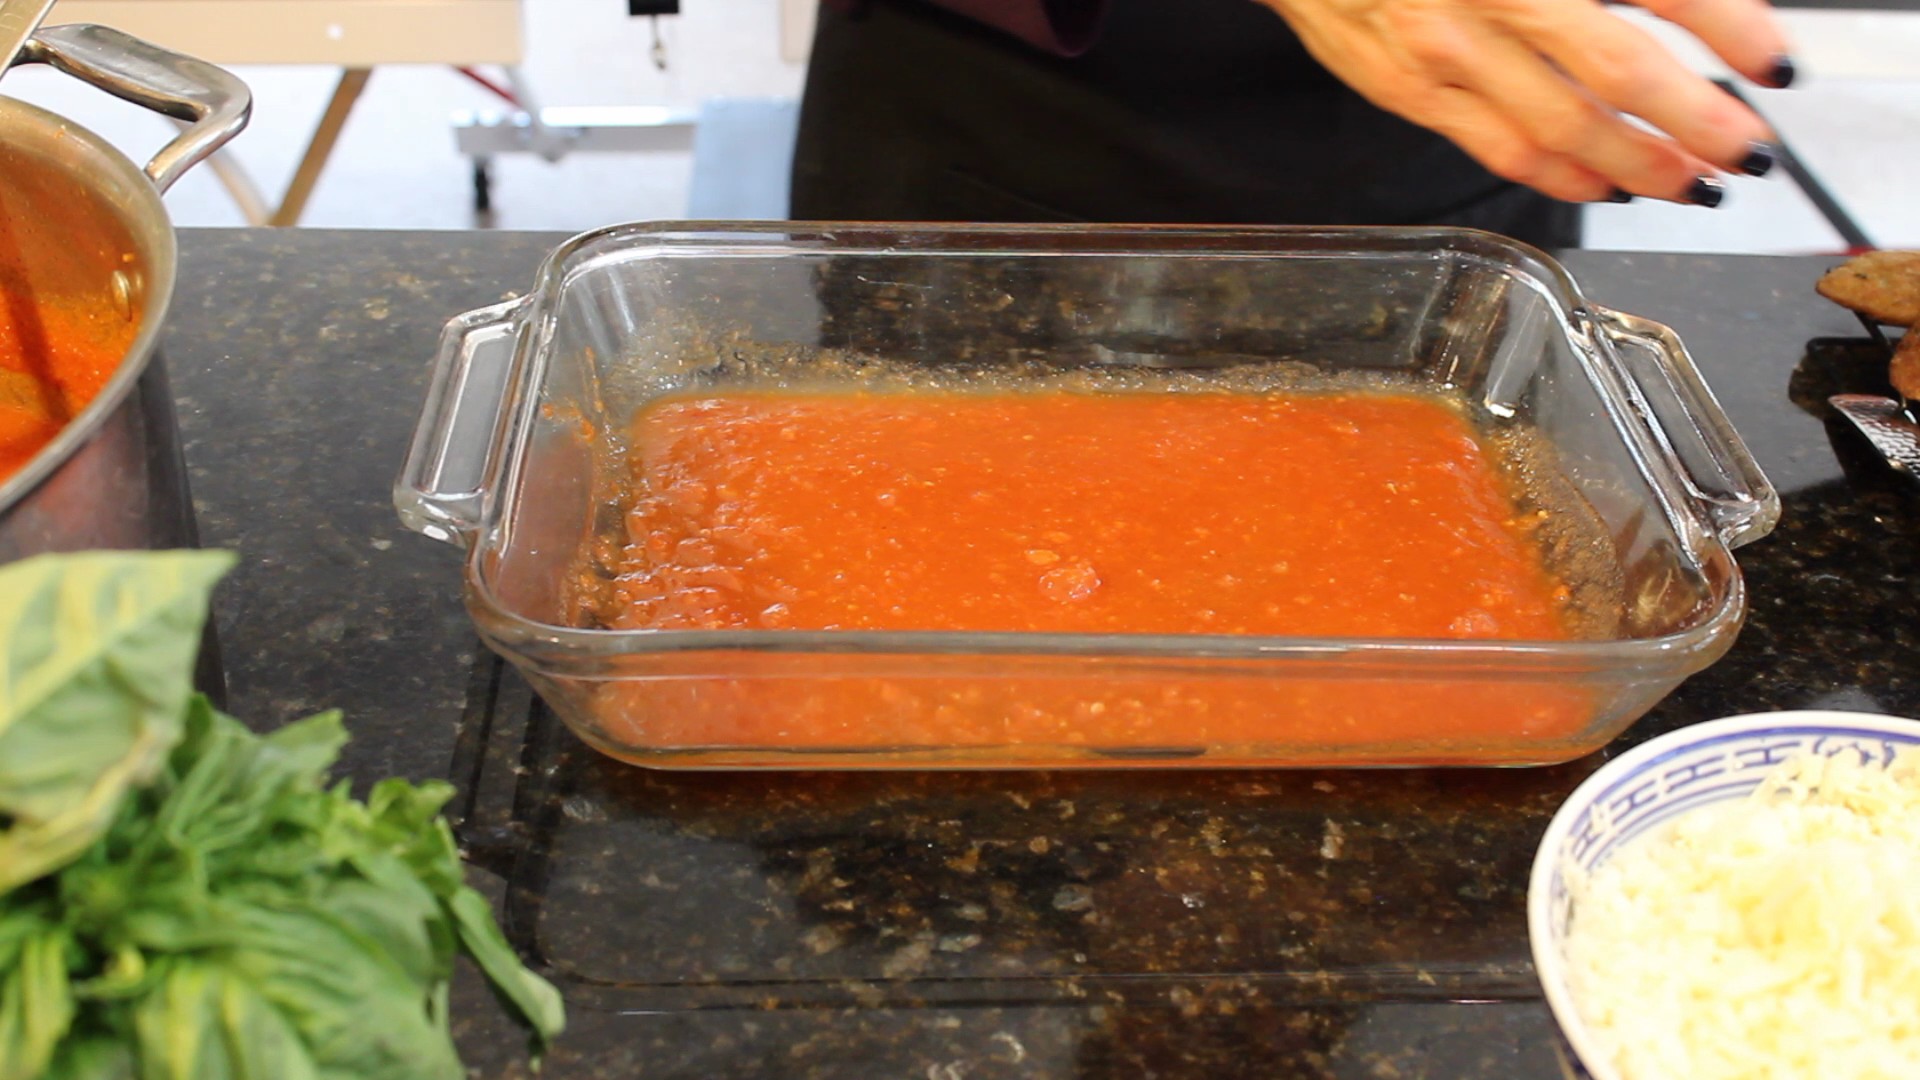
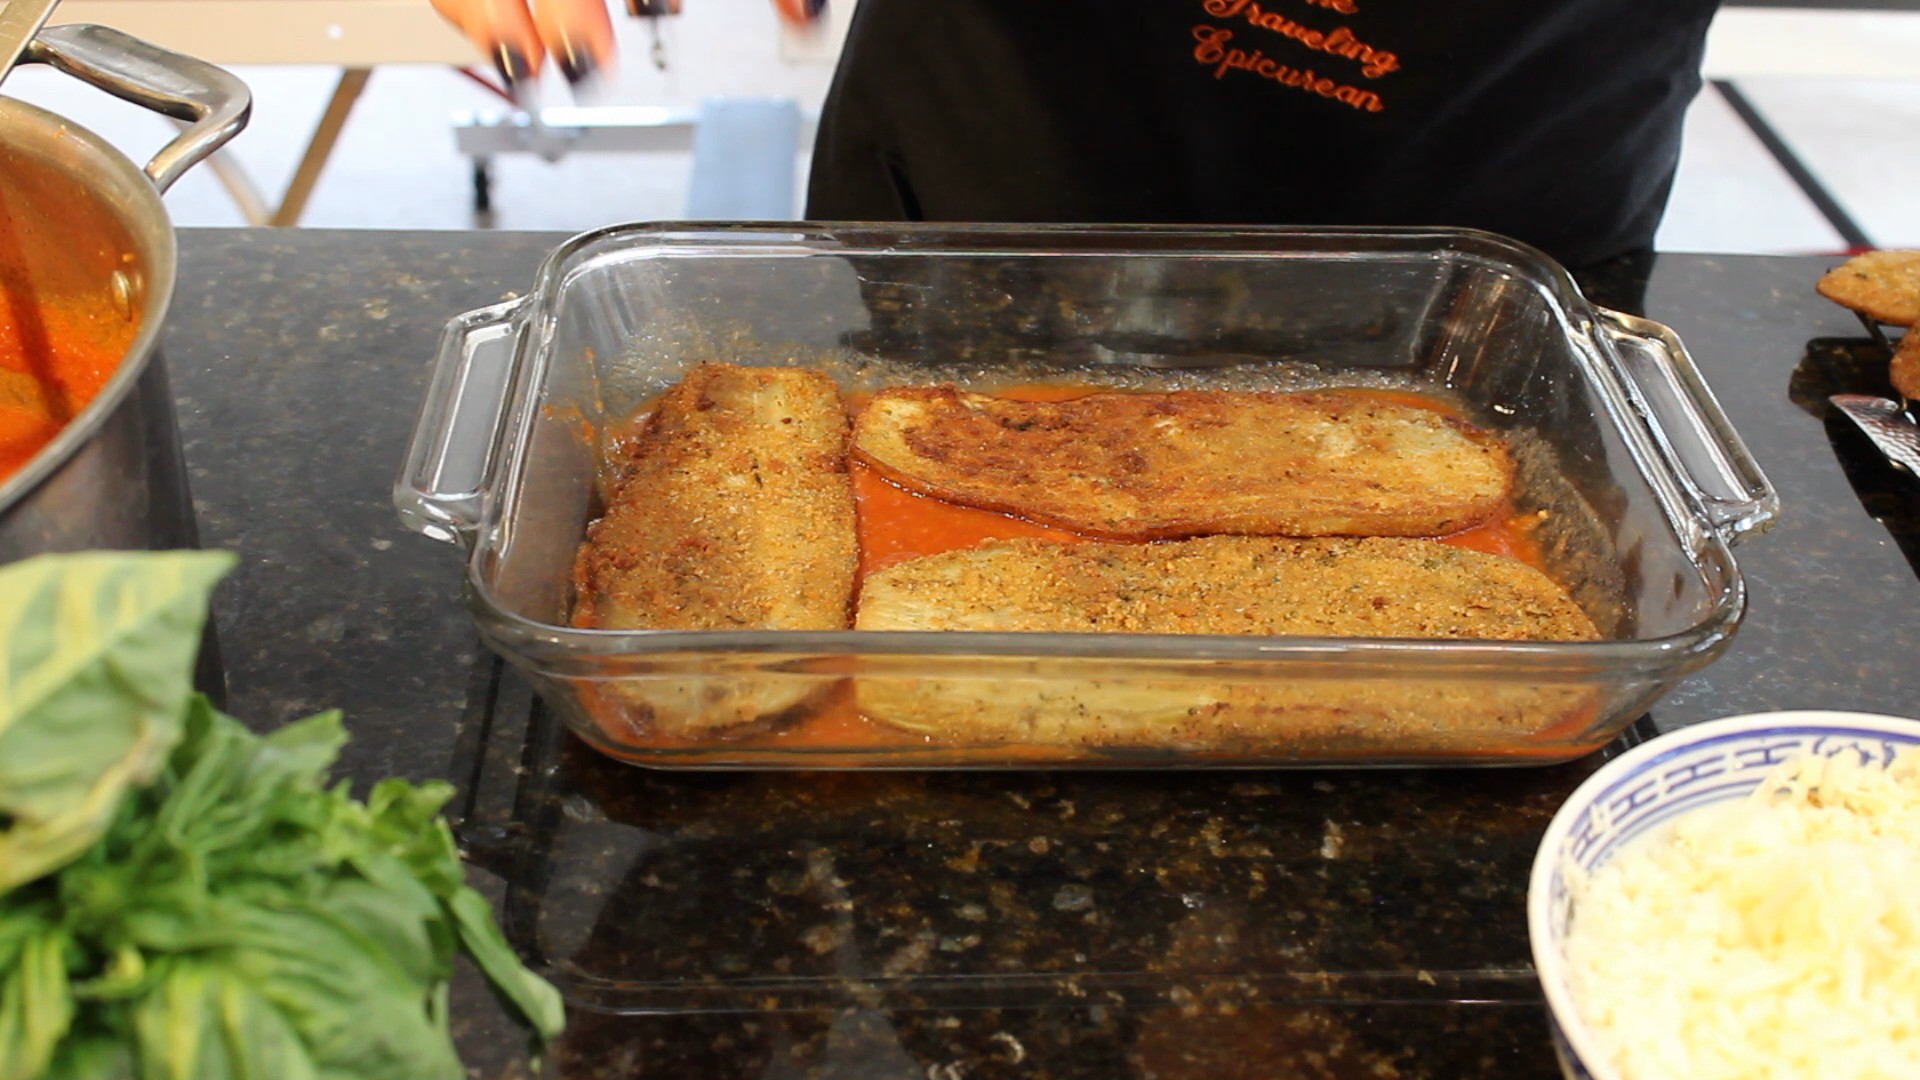
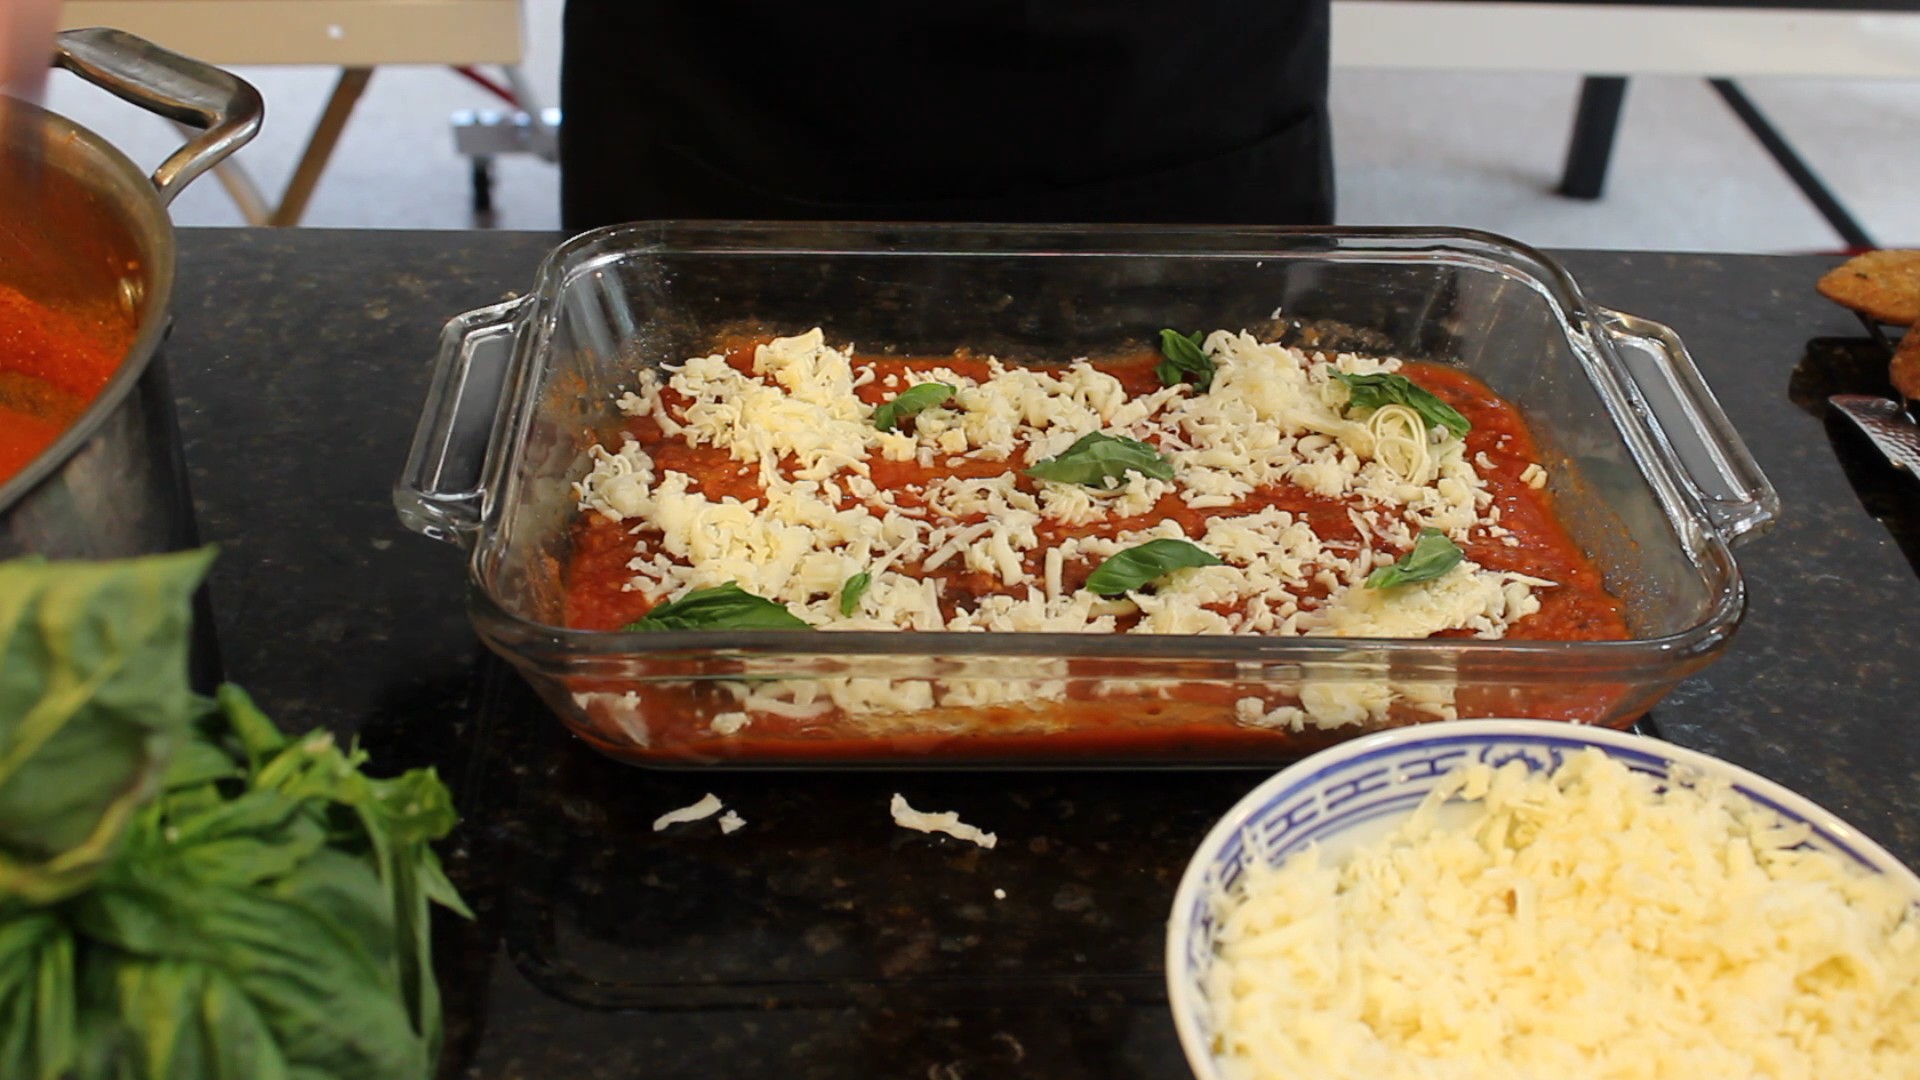
Get out your favorite baking dish and cover the bottom with sauce
Begin to layer sauce, eggplant, mozzarella and some fresh basil leaves til you are 1″ from the top
Cover with foil and bake for 50-55 minutes appox. with foil til sides are bubbling and bake another 5-10 with out foil so mozzarella can get bubbly
FREEZING TIPS: I love, love, love to freeze my fried eggplant slices because all the work is done for you the next time you want to make parm or rollatini. BEST way to freeze your eggplant slices: let all the fried slices COMPLETELY cool on a cookie rack, then layer as many slices in between BOUNTY (need a durable paper towel) paper towels. Layer enough slices to fit a SINGLE layer in between each sheet of Bounty in a FREEZER ZIP-LOC baggie. Begin with a sheet of Bounty in the Zip-Loc, then slices of eggplant-single layer, then another sheet of Bounty, then another layer of eggplant slices and so on until you can barely close baggie. Lay flat in you freezer and Voilà! Freezes great 4-5 months!
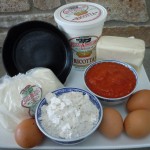
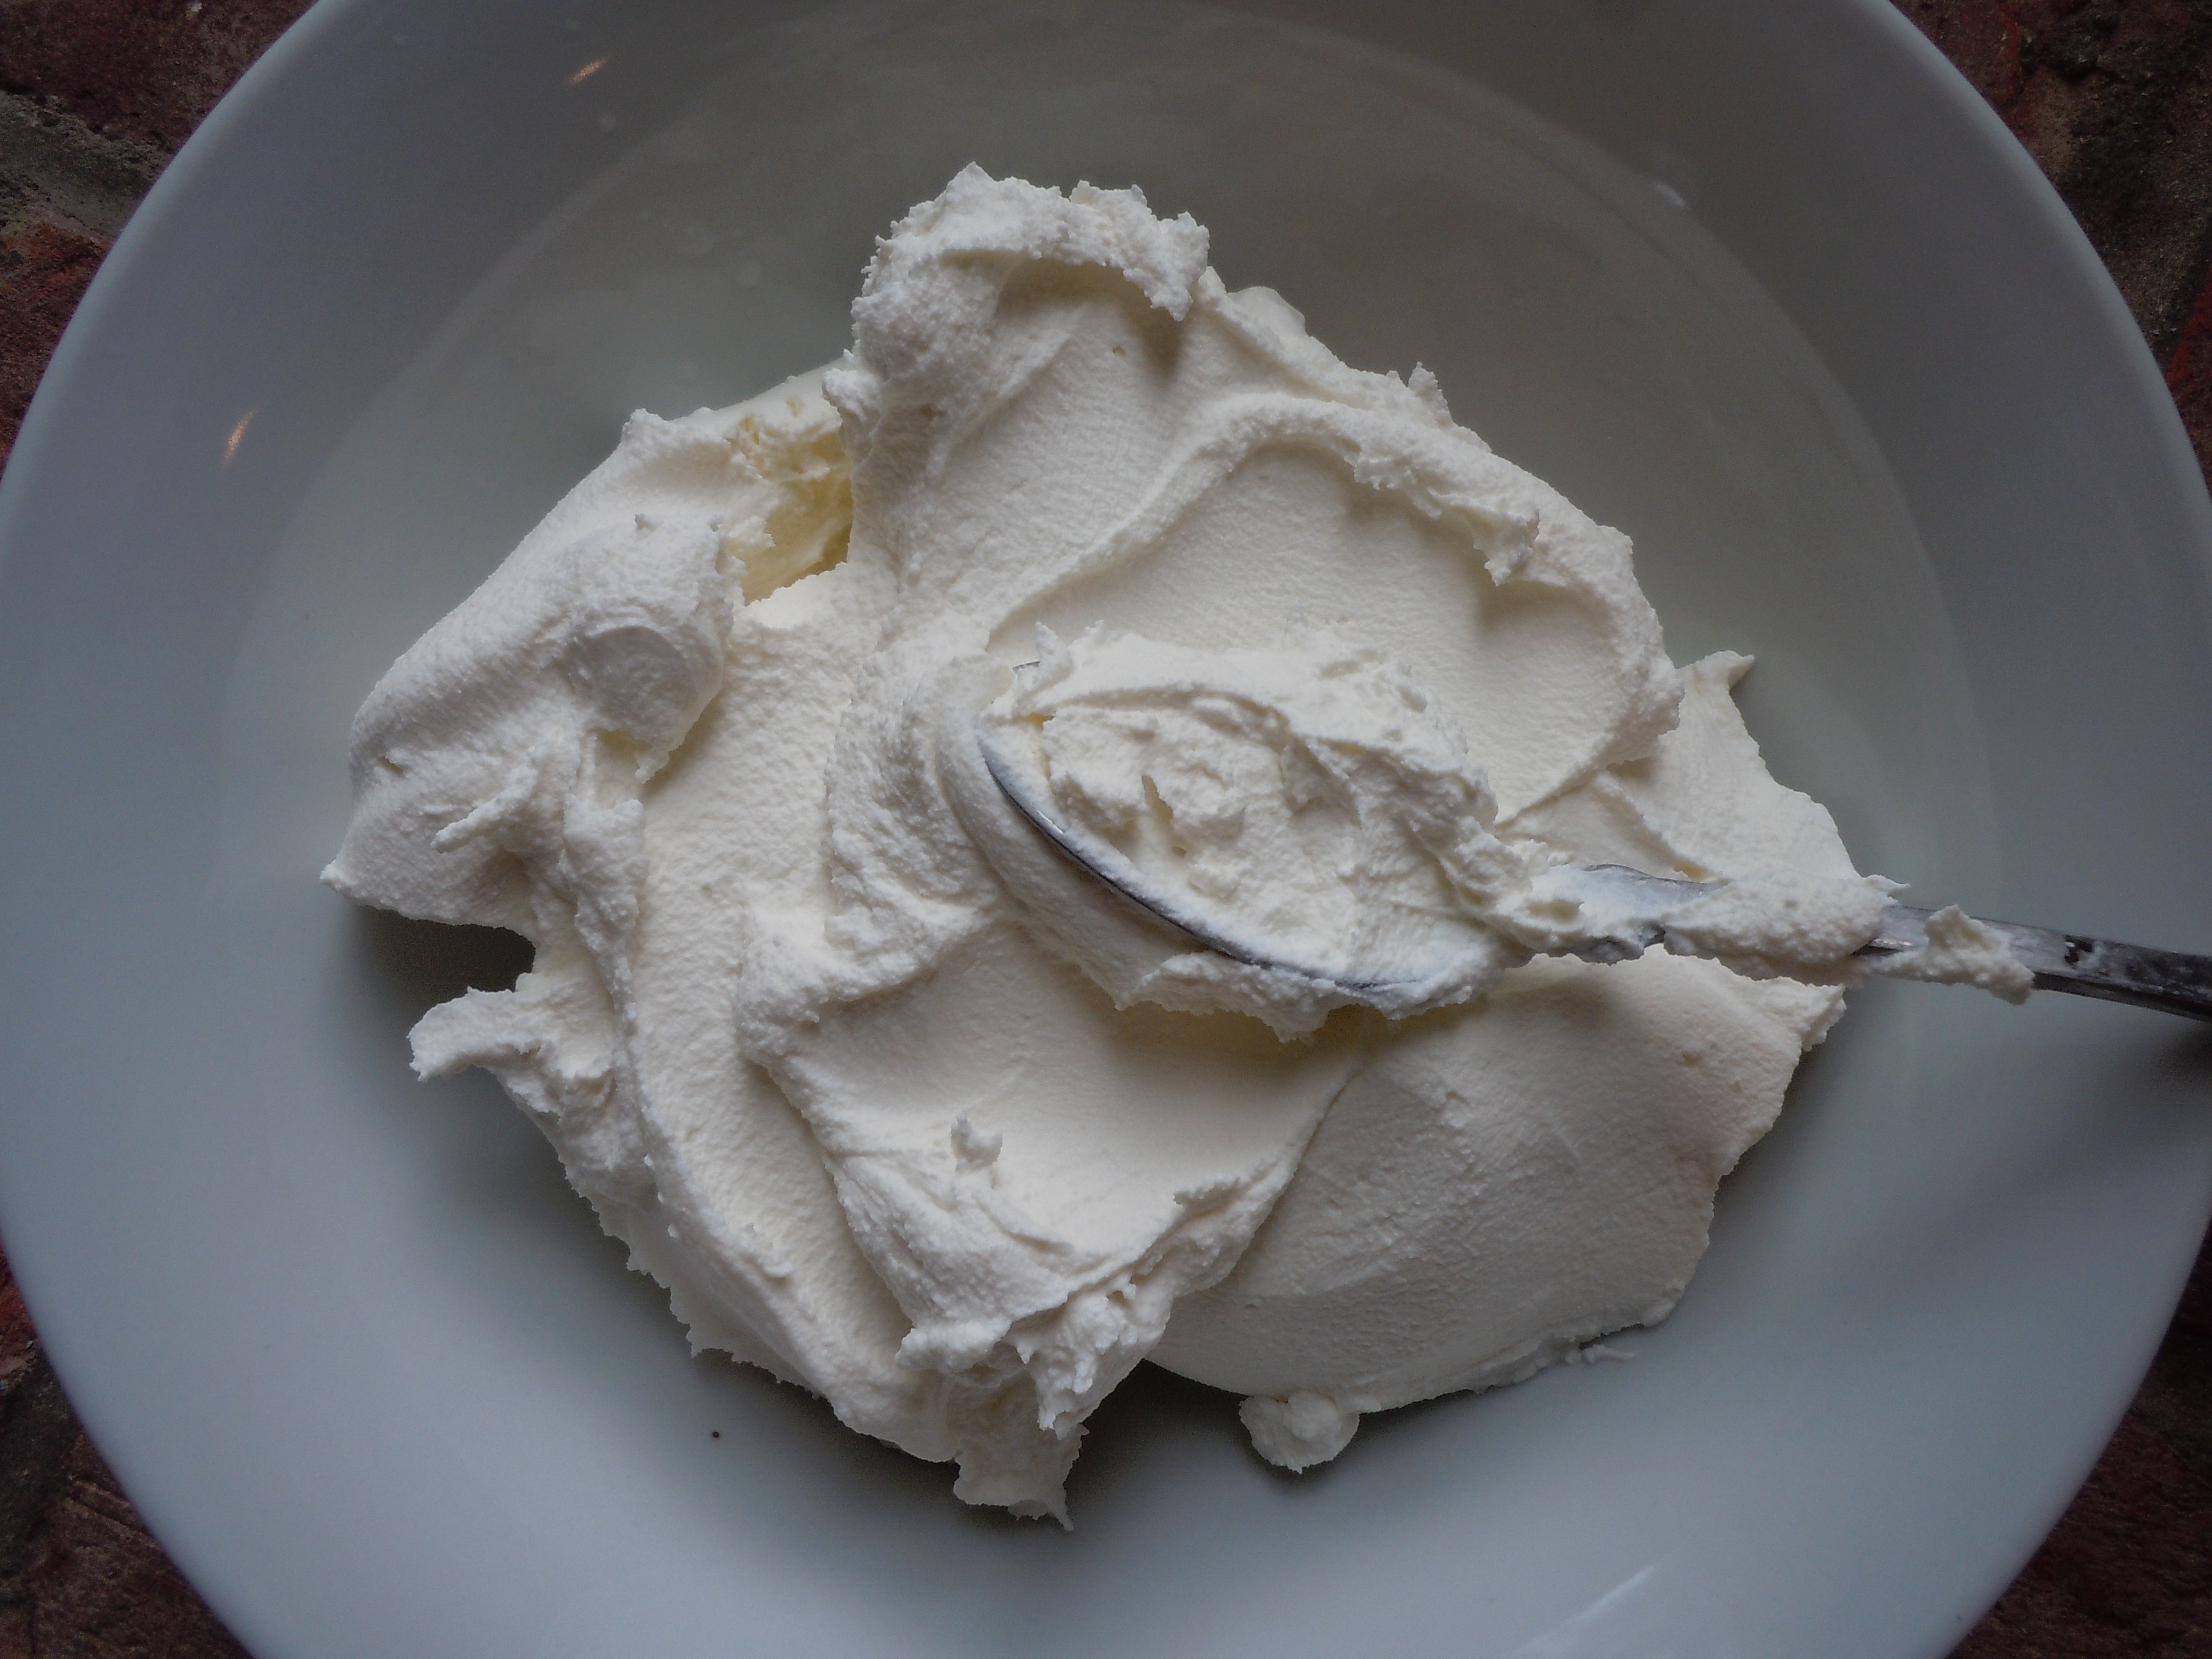
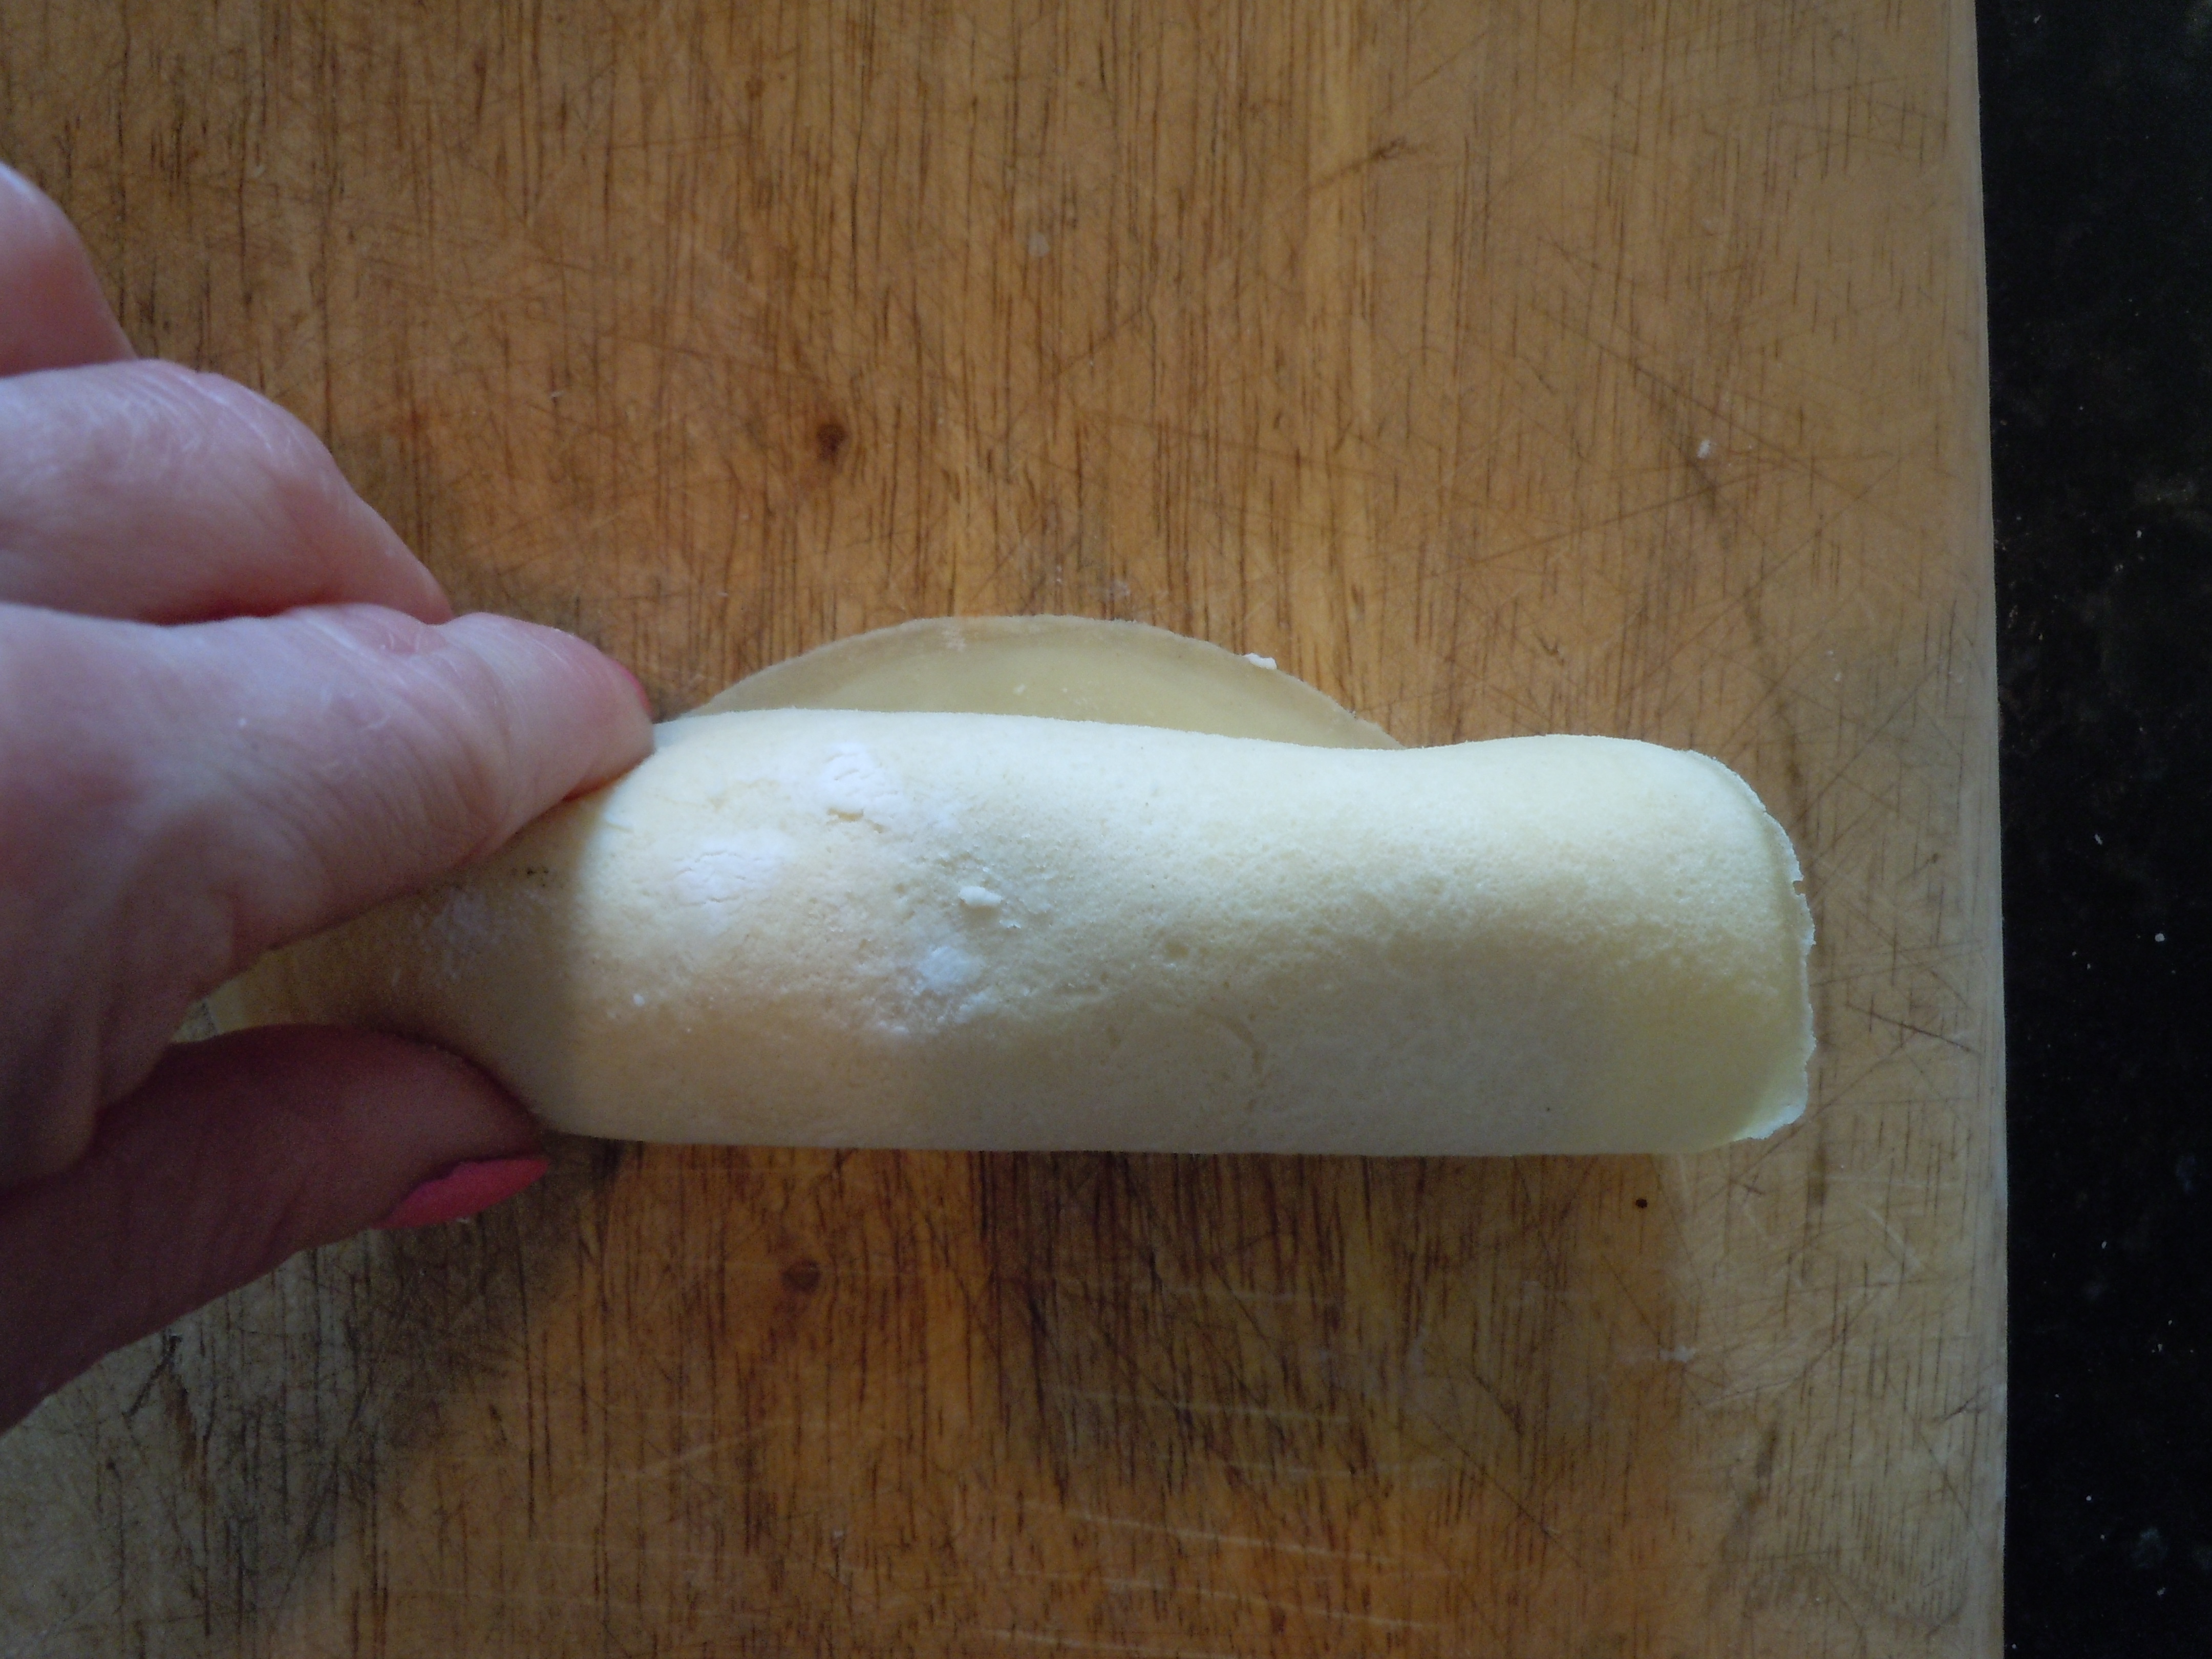
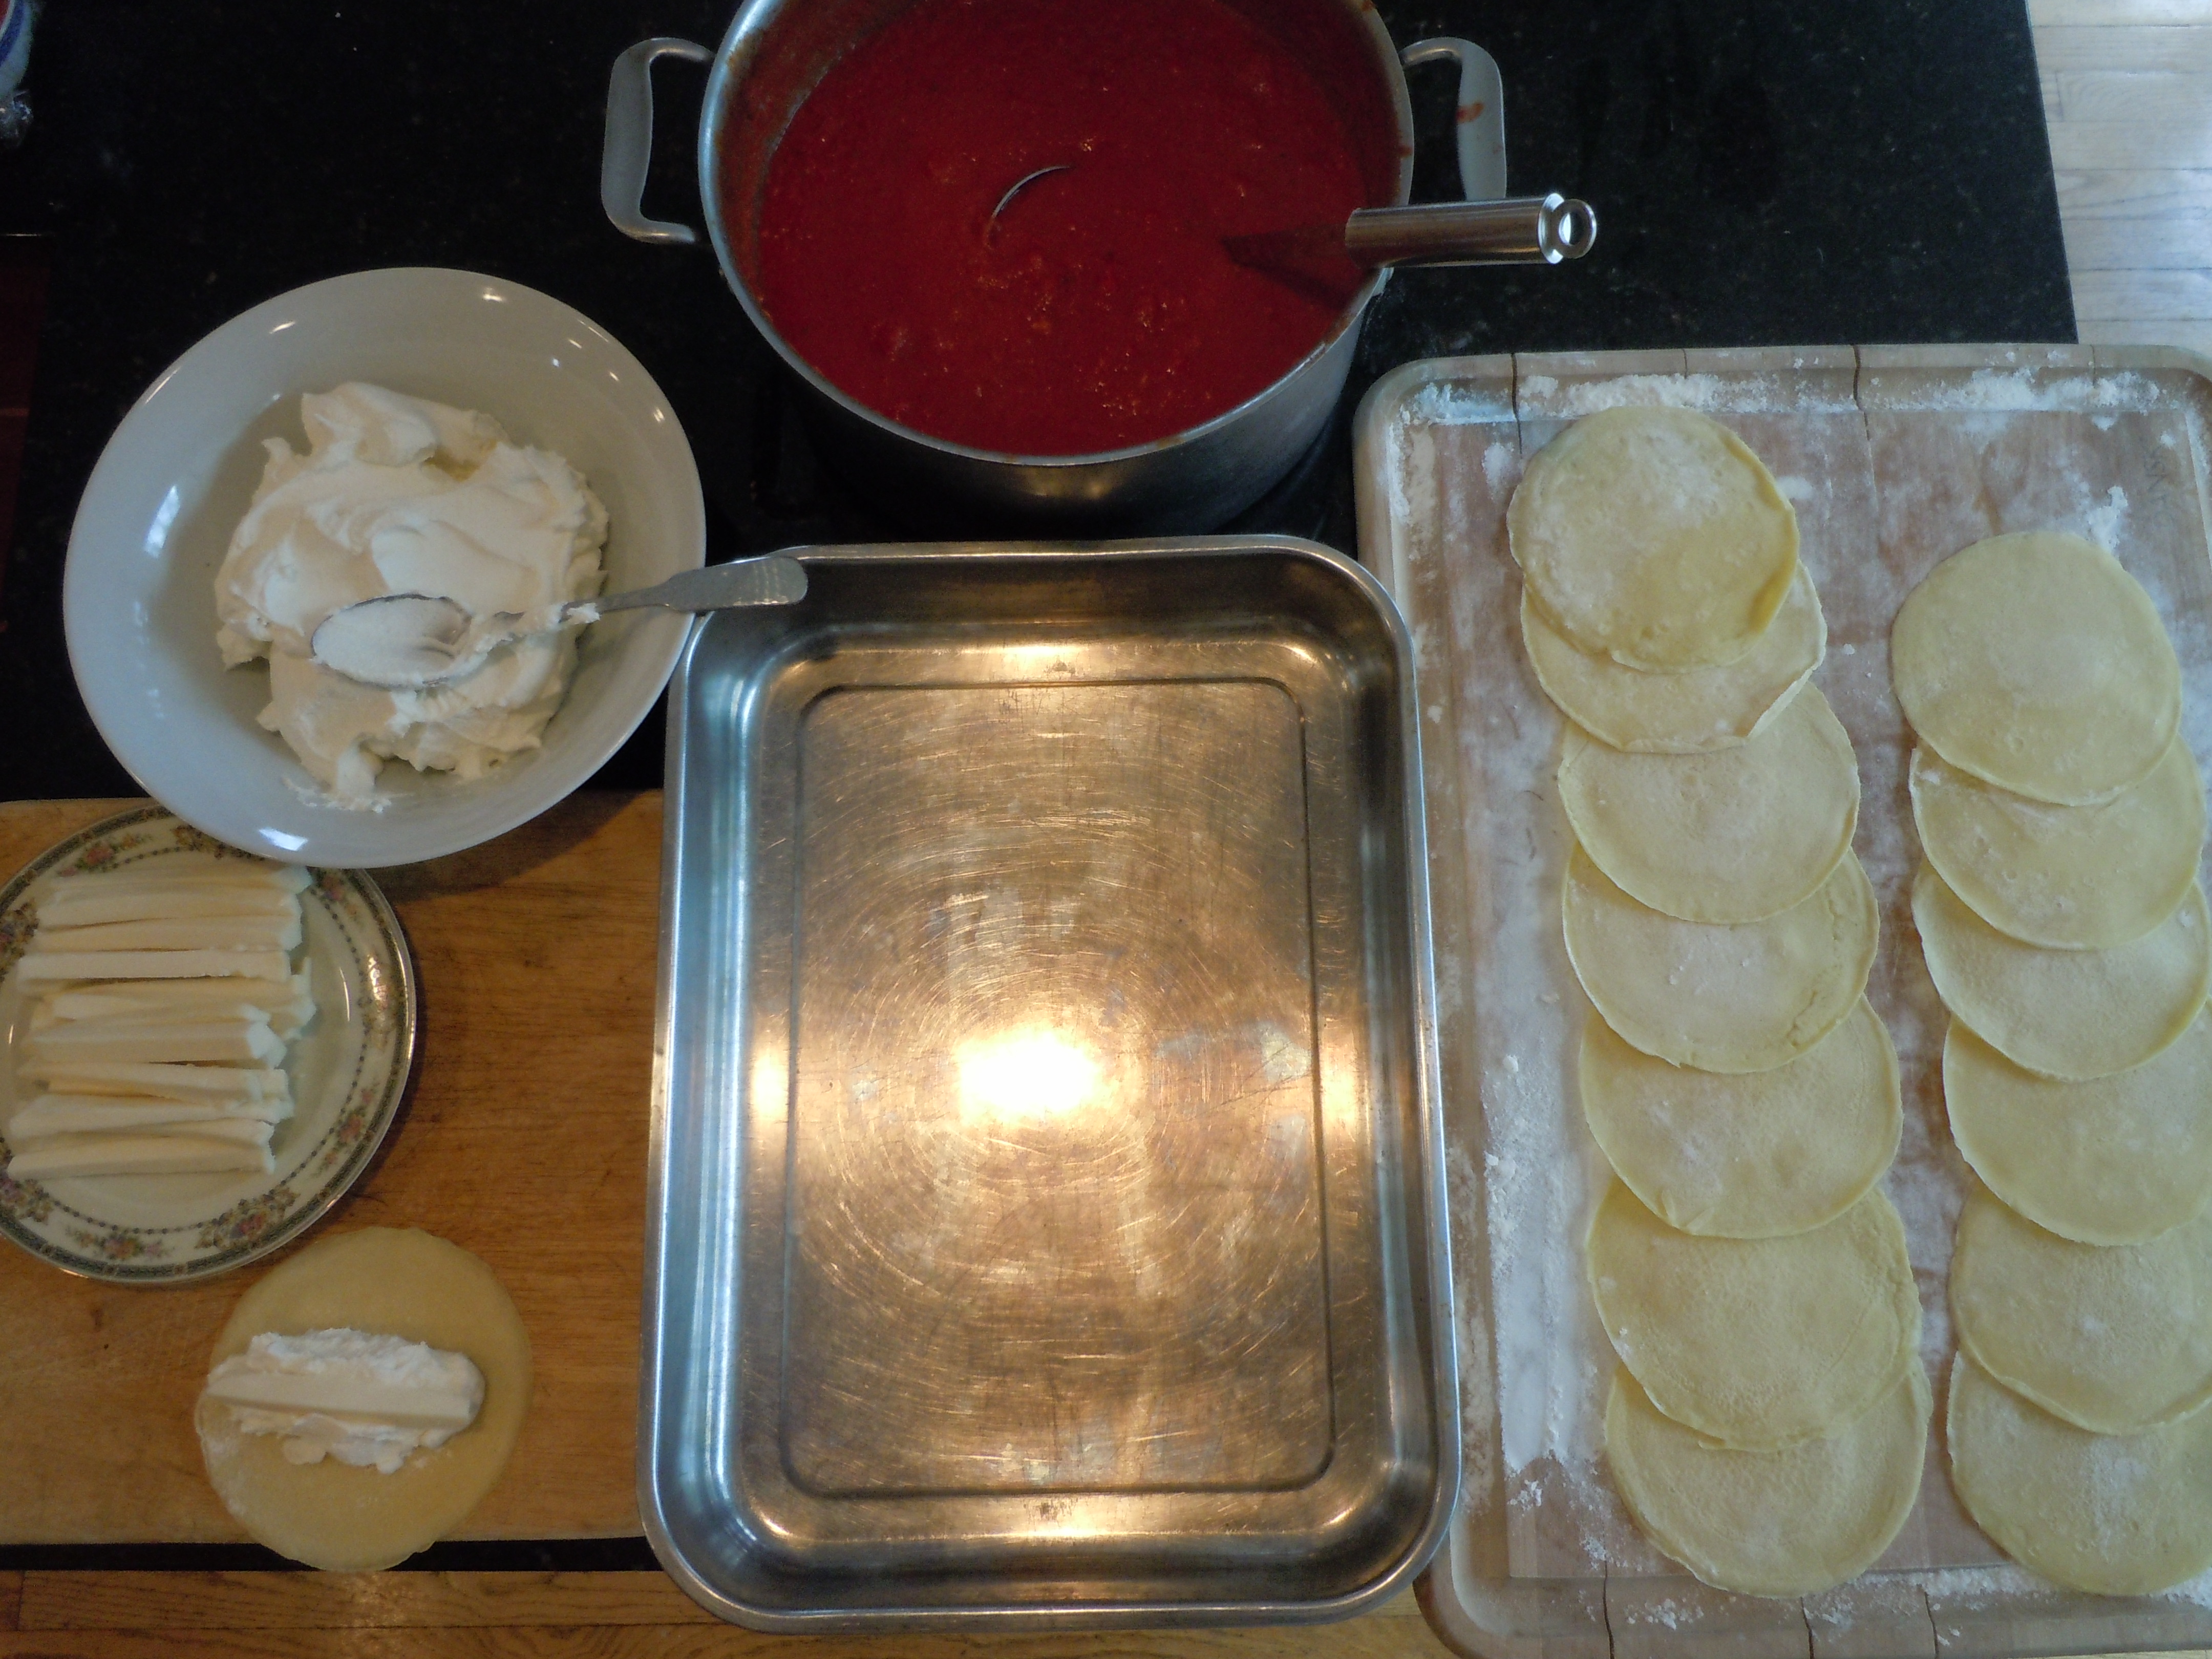
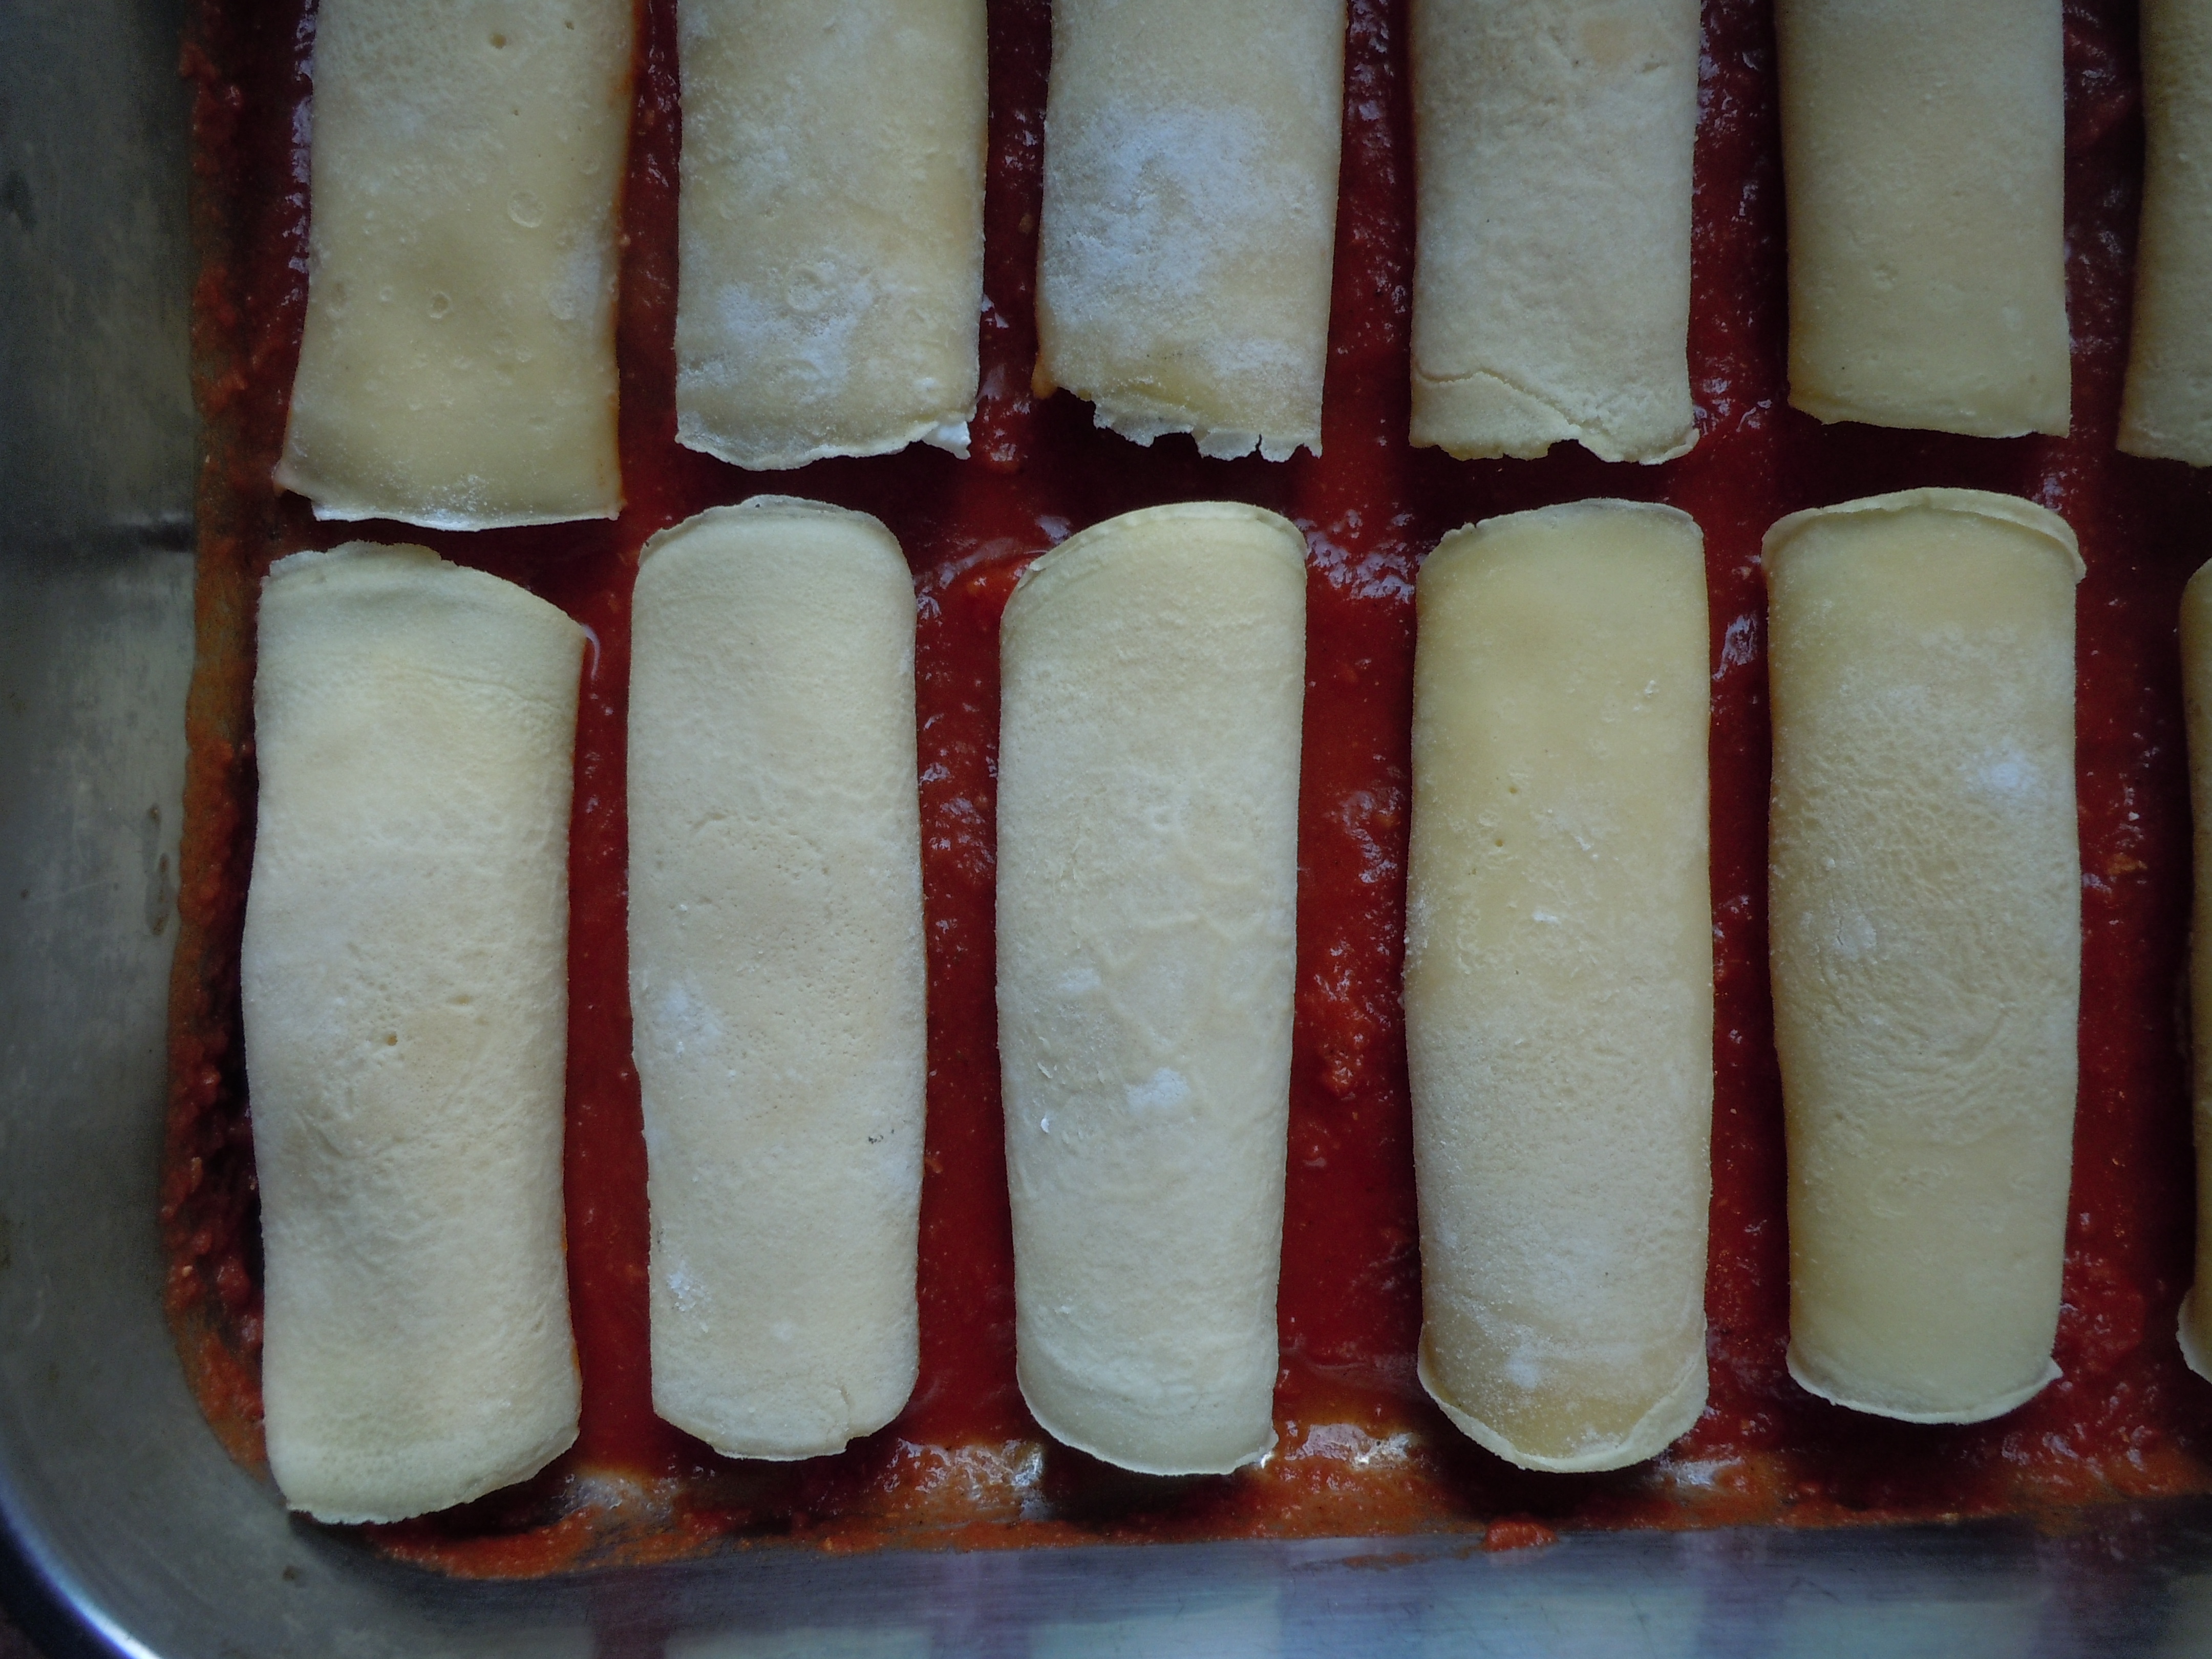
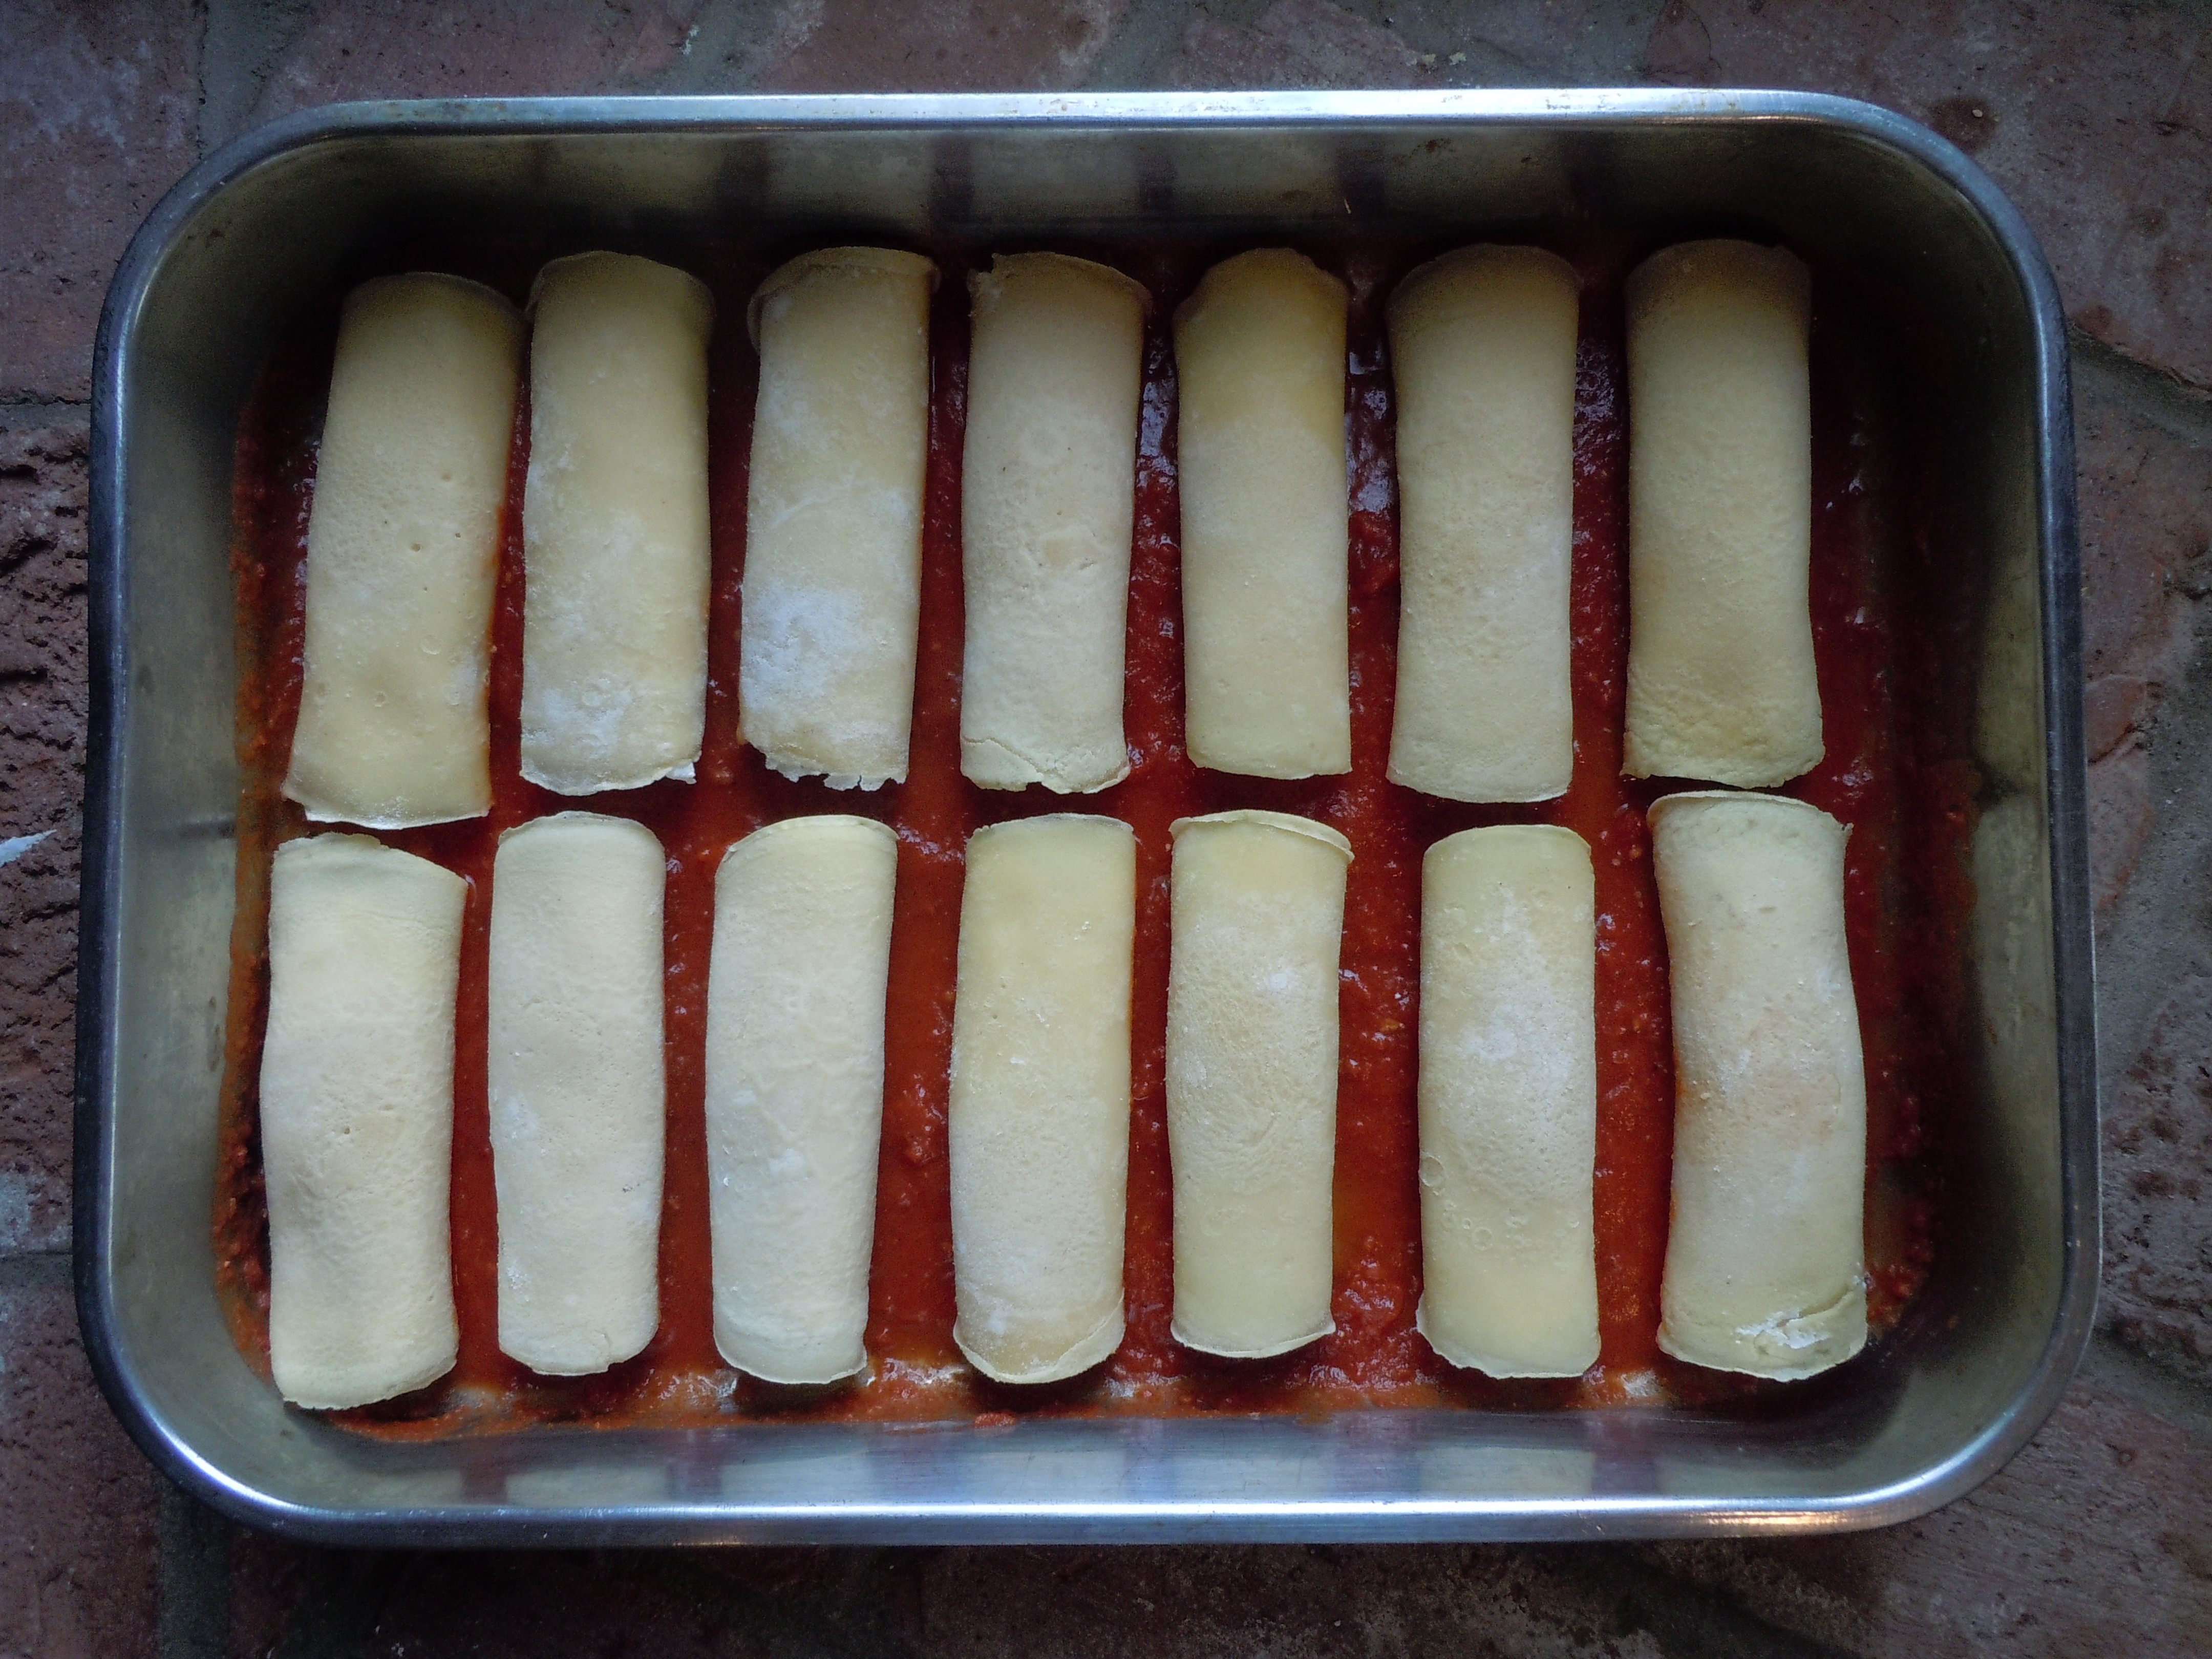
Yes, I am giving up the good’s on this one and I know you will appreciate it because this is one of my very favorite secret recipes that has been in our family for generations! My mother Maria taught me how to make these homemade gourmet manicotti when I was young and now I am thrilled to pass this very special dish on to you.
These are the BEST homemade manicotti I have EVER tasted and I know you will love them too. They are a poured pasta, a crêpe so to speak and are light and fluffy. I’m partial to Liuzzi’s homemade whole milk ricotta, and I user a mix of mozzarella’s from Scamorza, which is a slightly salted/dryer mozzarella to whole milk and skim milk mozzarella. I start off with either mytomato-basil pasta sauceor mypasta sauce 101 for the homemade manicotti. These are an especially festive and a special dish to make for the holidays.
This manicotti batter is poured like a crêpe. It’s light and airy like a crepe but definitely different in texture. The texture of the crêpe is a pasta texture, creamy and soft. These manicotti shells (crêpes) are truly gourmet and you’ll will appreciate how delicate a dish this really is when you make them for your own family and friends. My turkey meatballs would go great with this holiday dish also. A spread of spiral ham or roasted lamb with gourmet manicotti and turkey meatballs …who’s better than you?!
3 lbs. Liuzzi whole milk or “fina style” (a finer ricotta), or your favorite
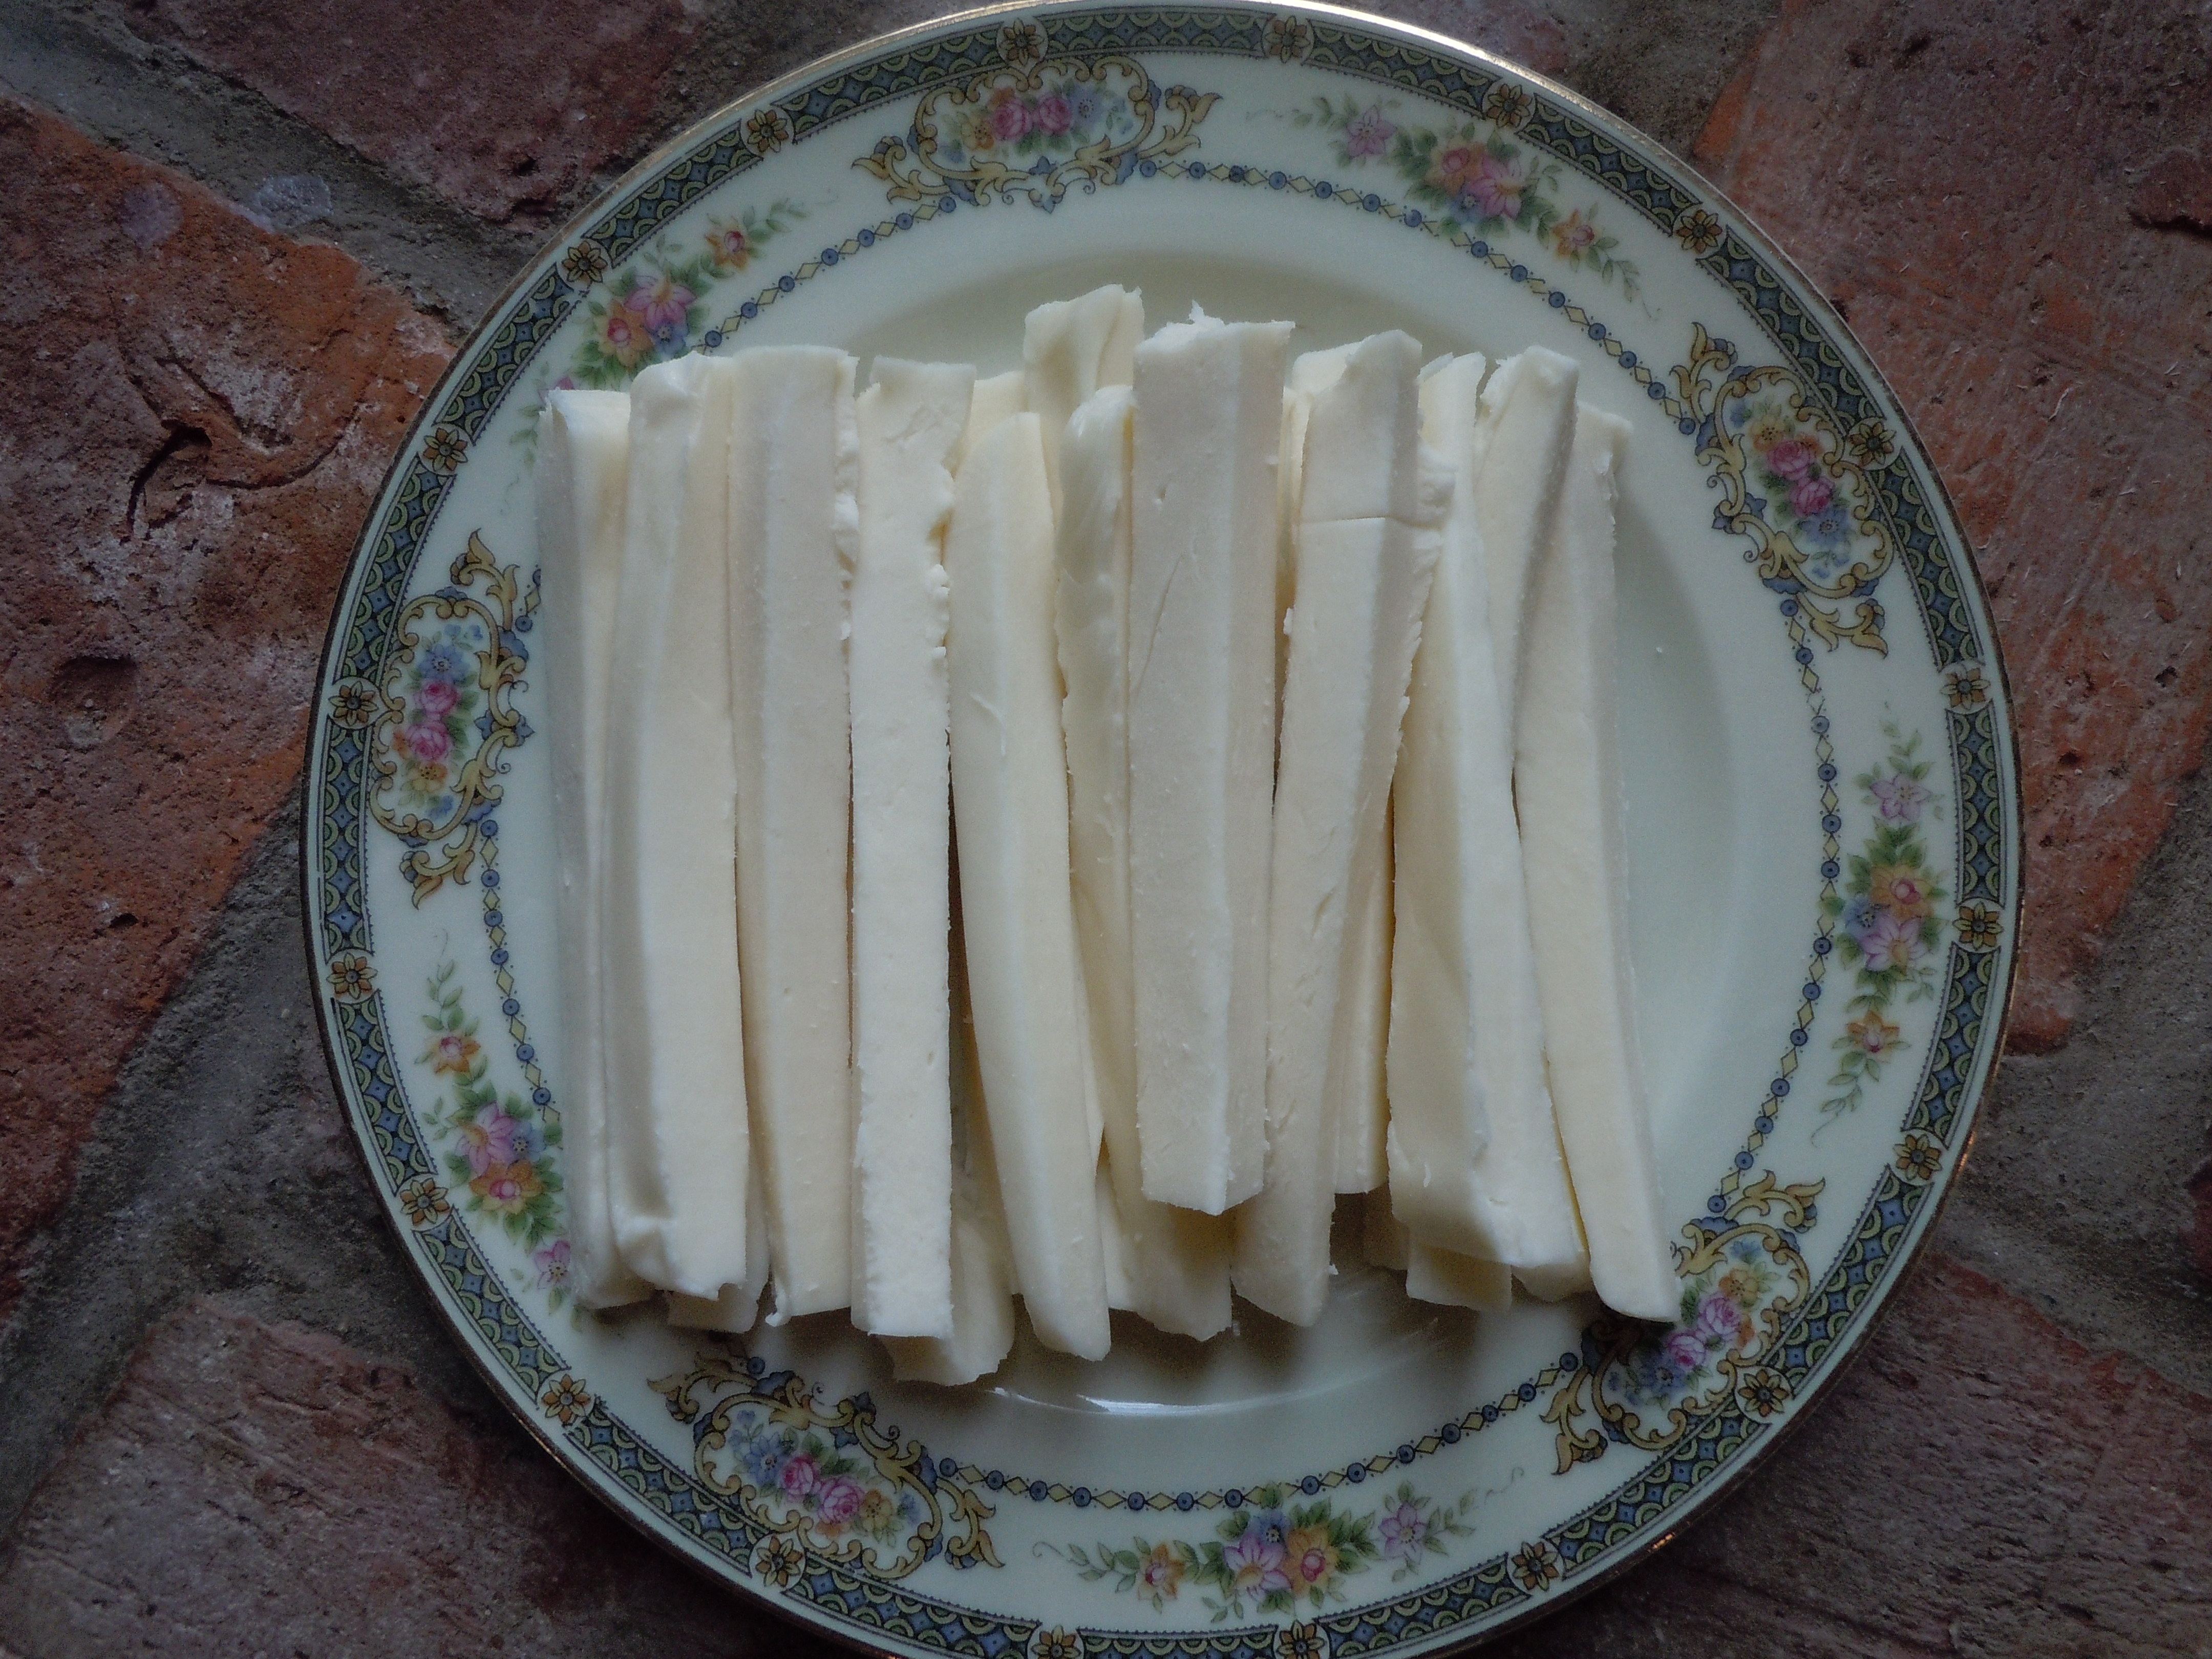
5 0z. shredded whole milk, 5 oz. park skim and 5 oz. Scamorza mozzarella mixed together
(you can also do 8 oz. whole milk and 8 oz. part skim shedded and mixed)
5″ cast iron pan or 5″ non-stick pan
Baking pan approx. 11″ x 16″
Recipe forTomato-Basil Pasta Sauce Recipestarting the sauce off by sautéing pork chops with or with out the bone…bone adds more flavor. (Tomato-Basil Pasta Sauce recipe is a 20-30 minute simmer but for manicotti simmer sauce for 1-2 hours if possible)
You could also use my slow cooked Pasta Sauce 101 recipe instead
Directions:
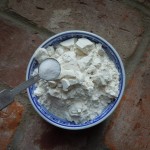
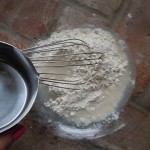
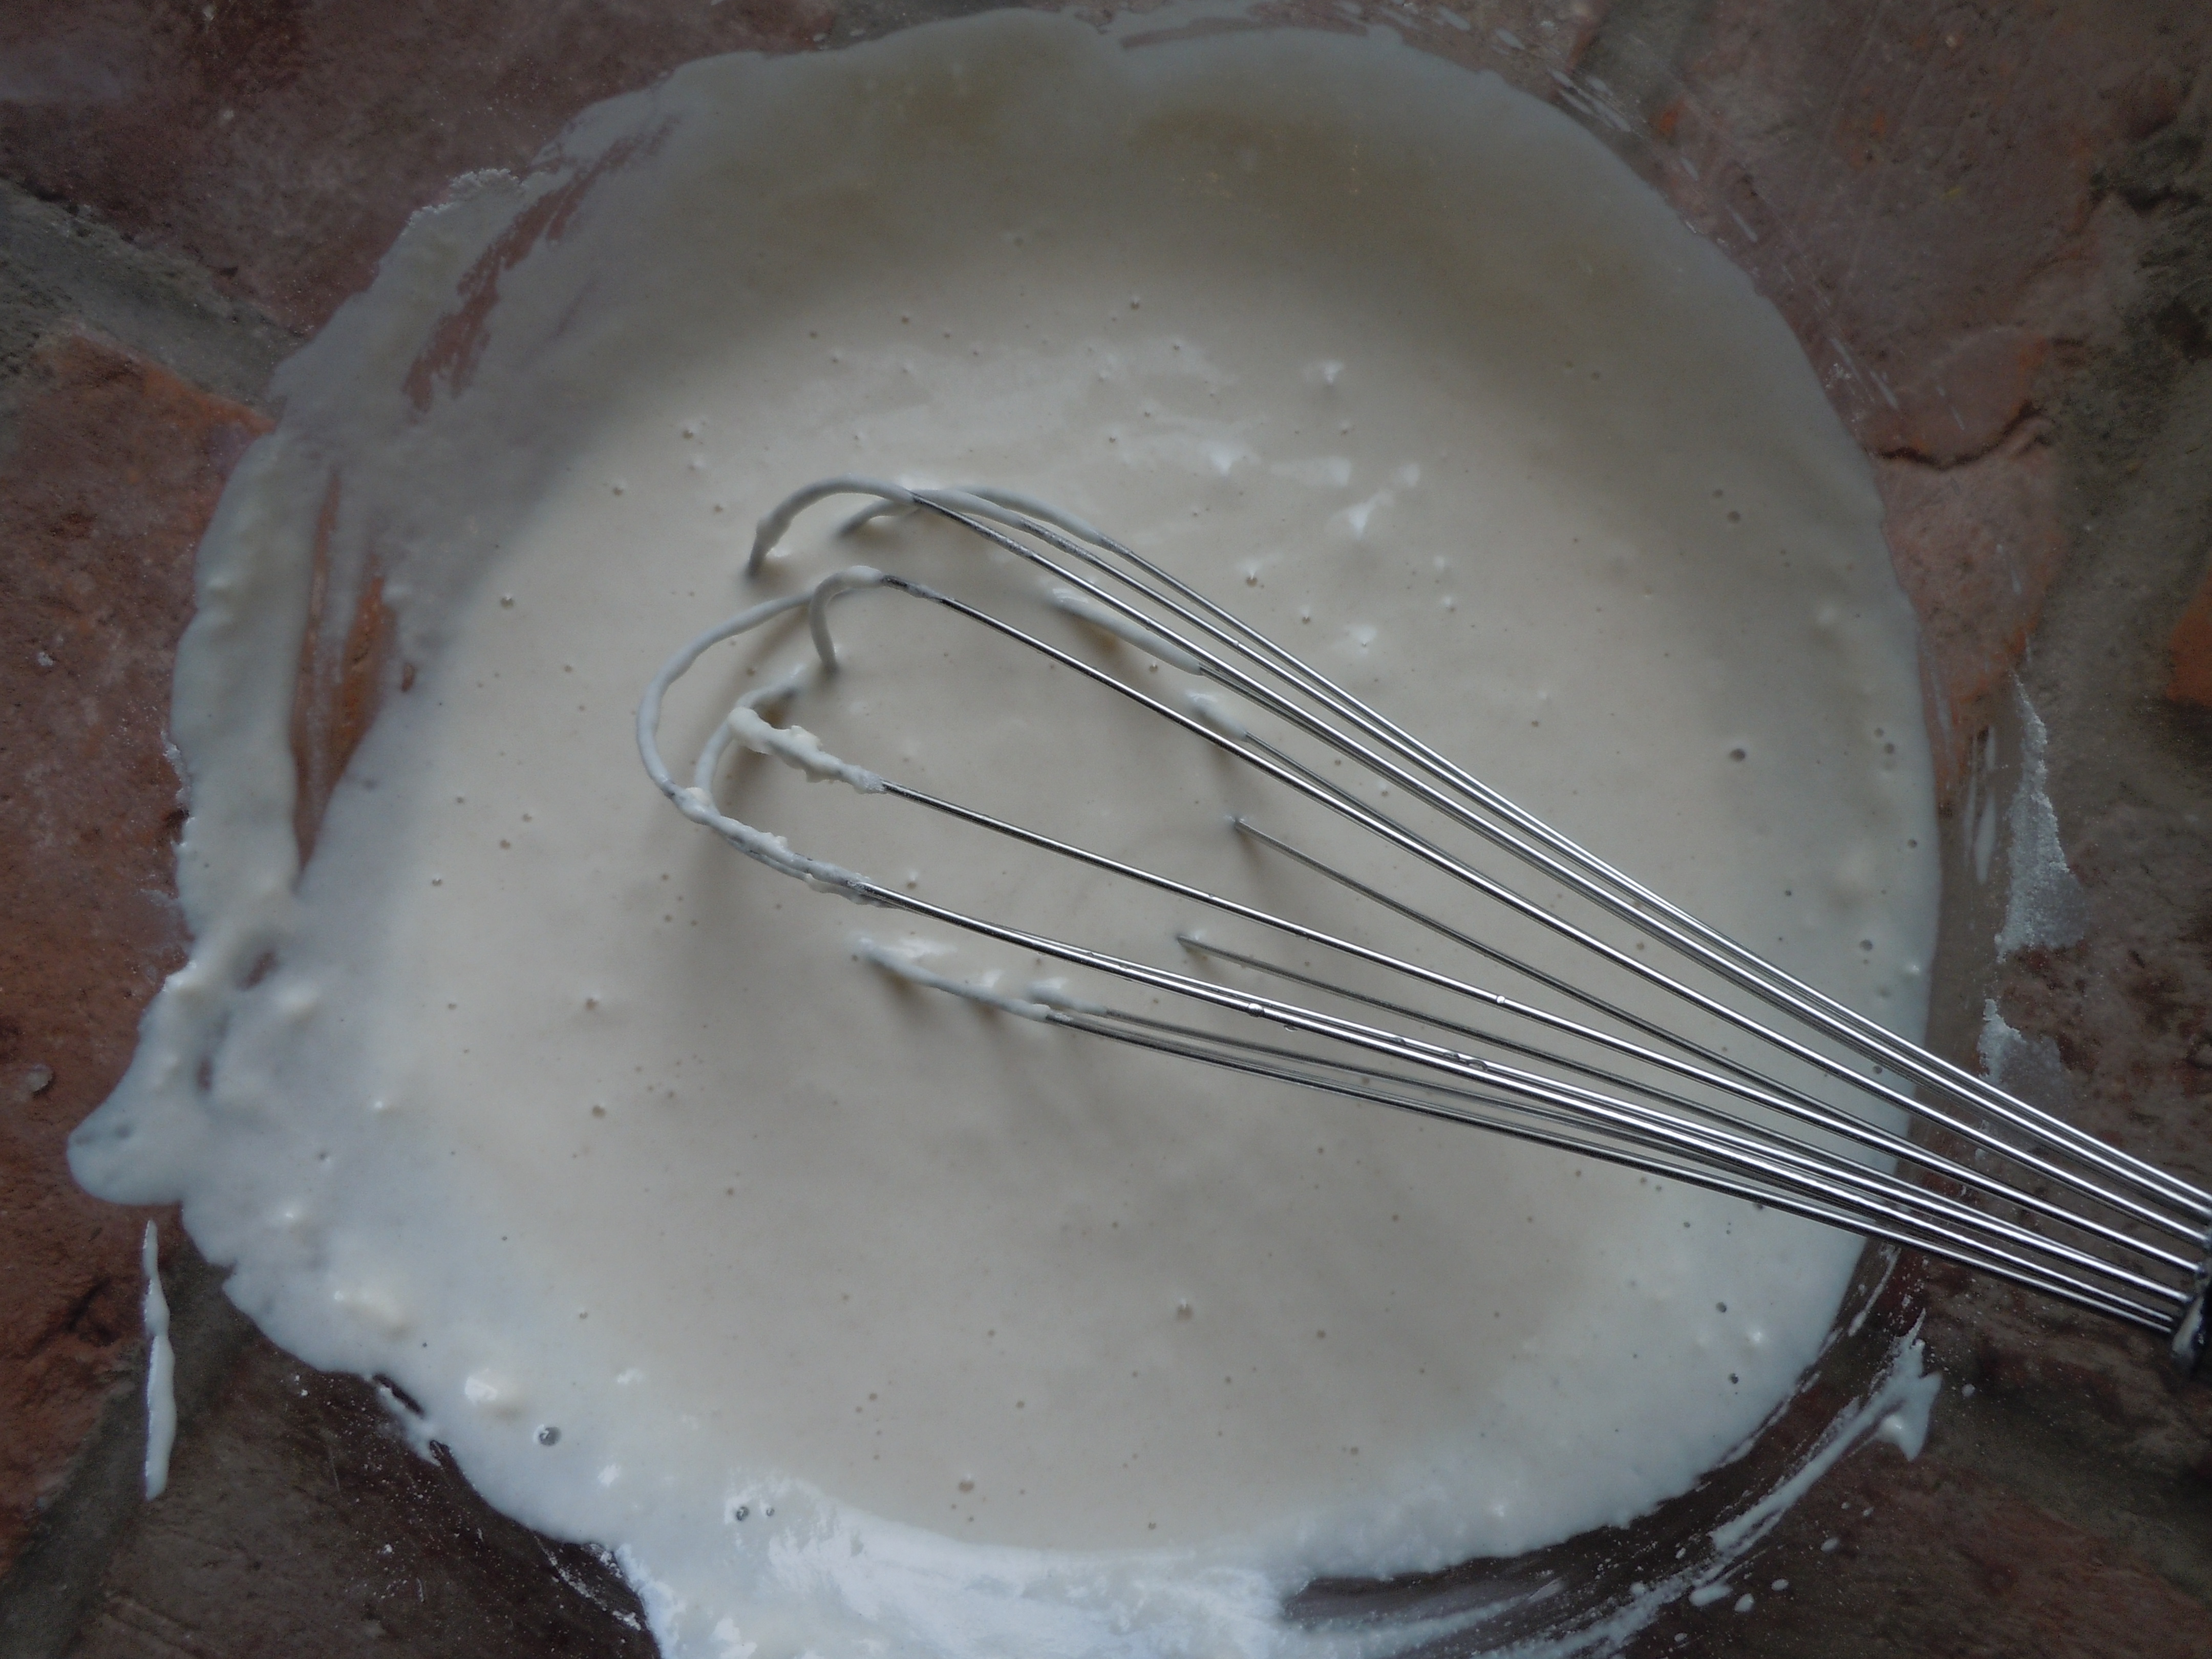
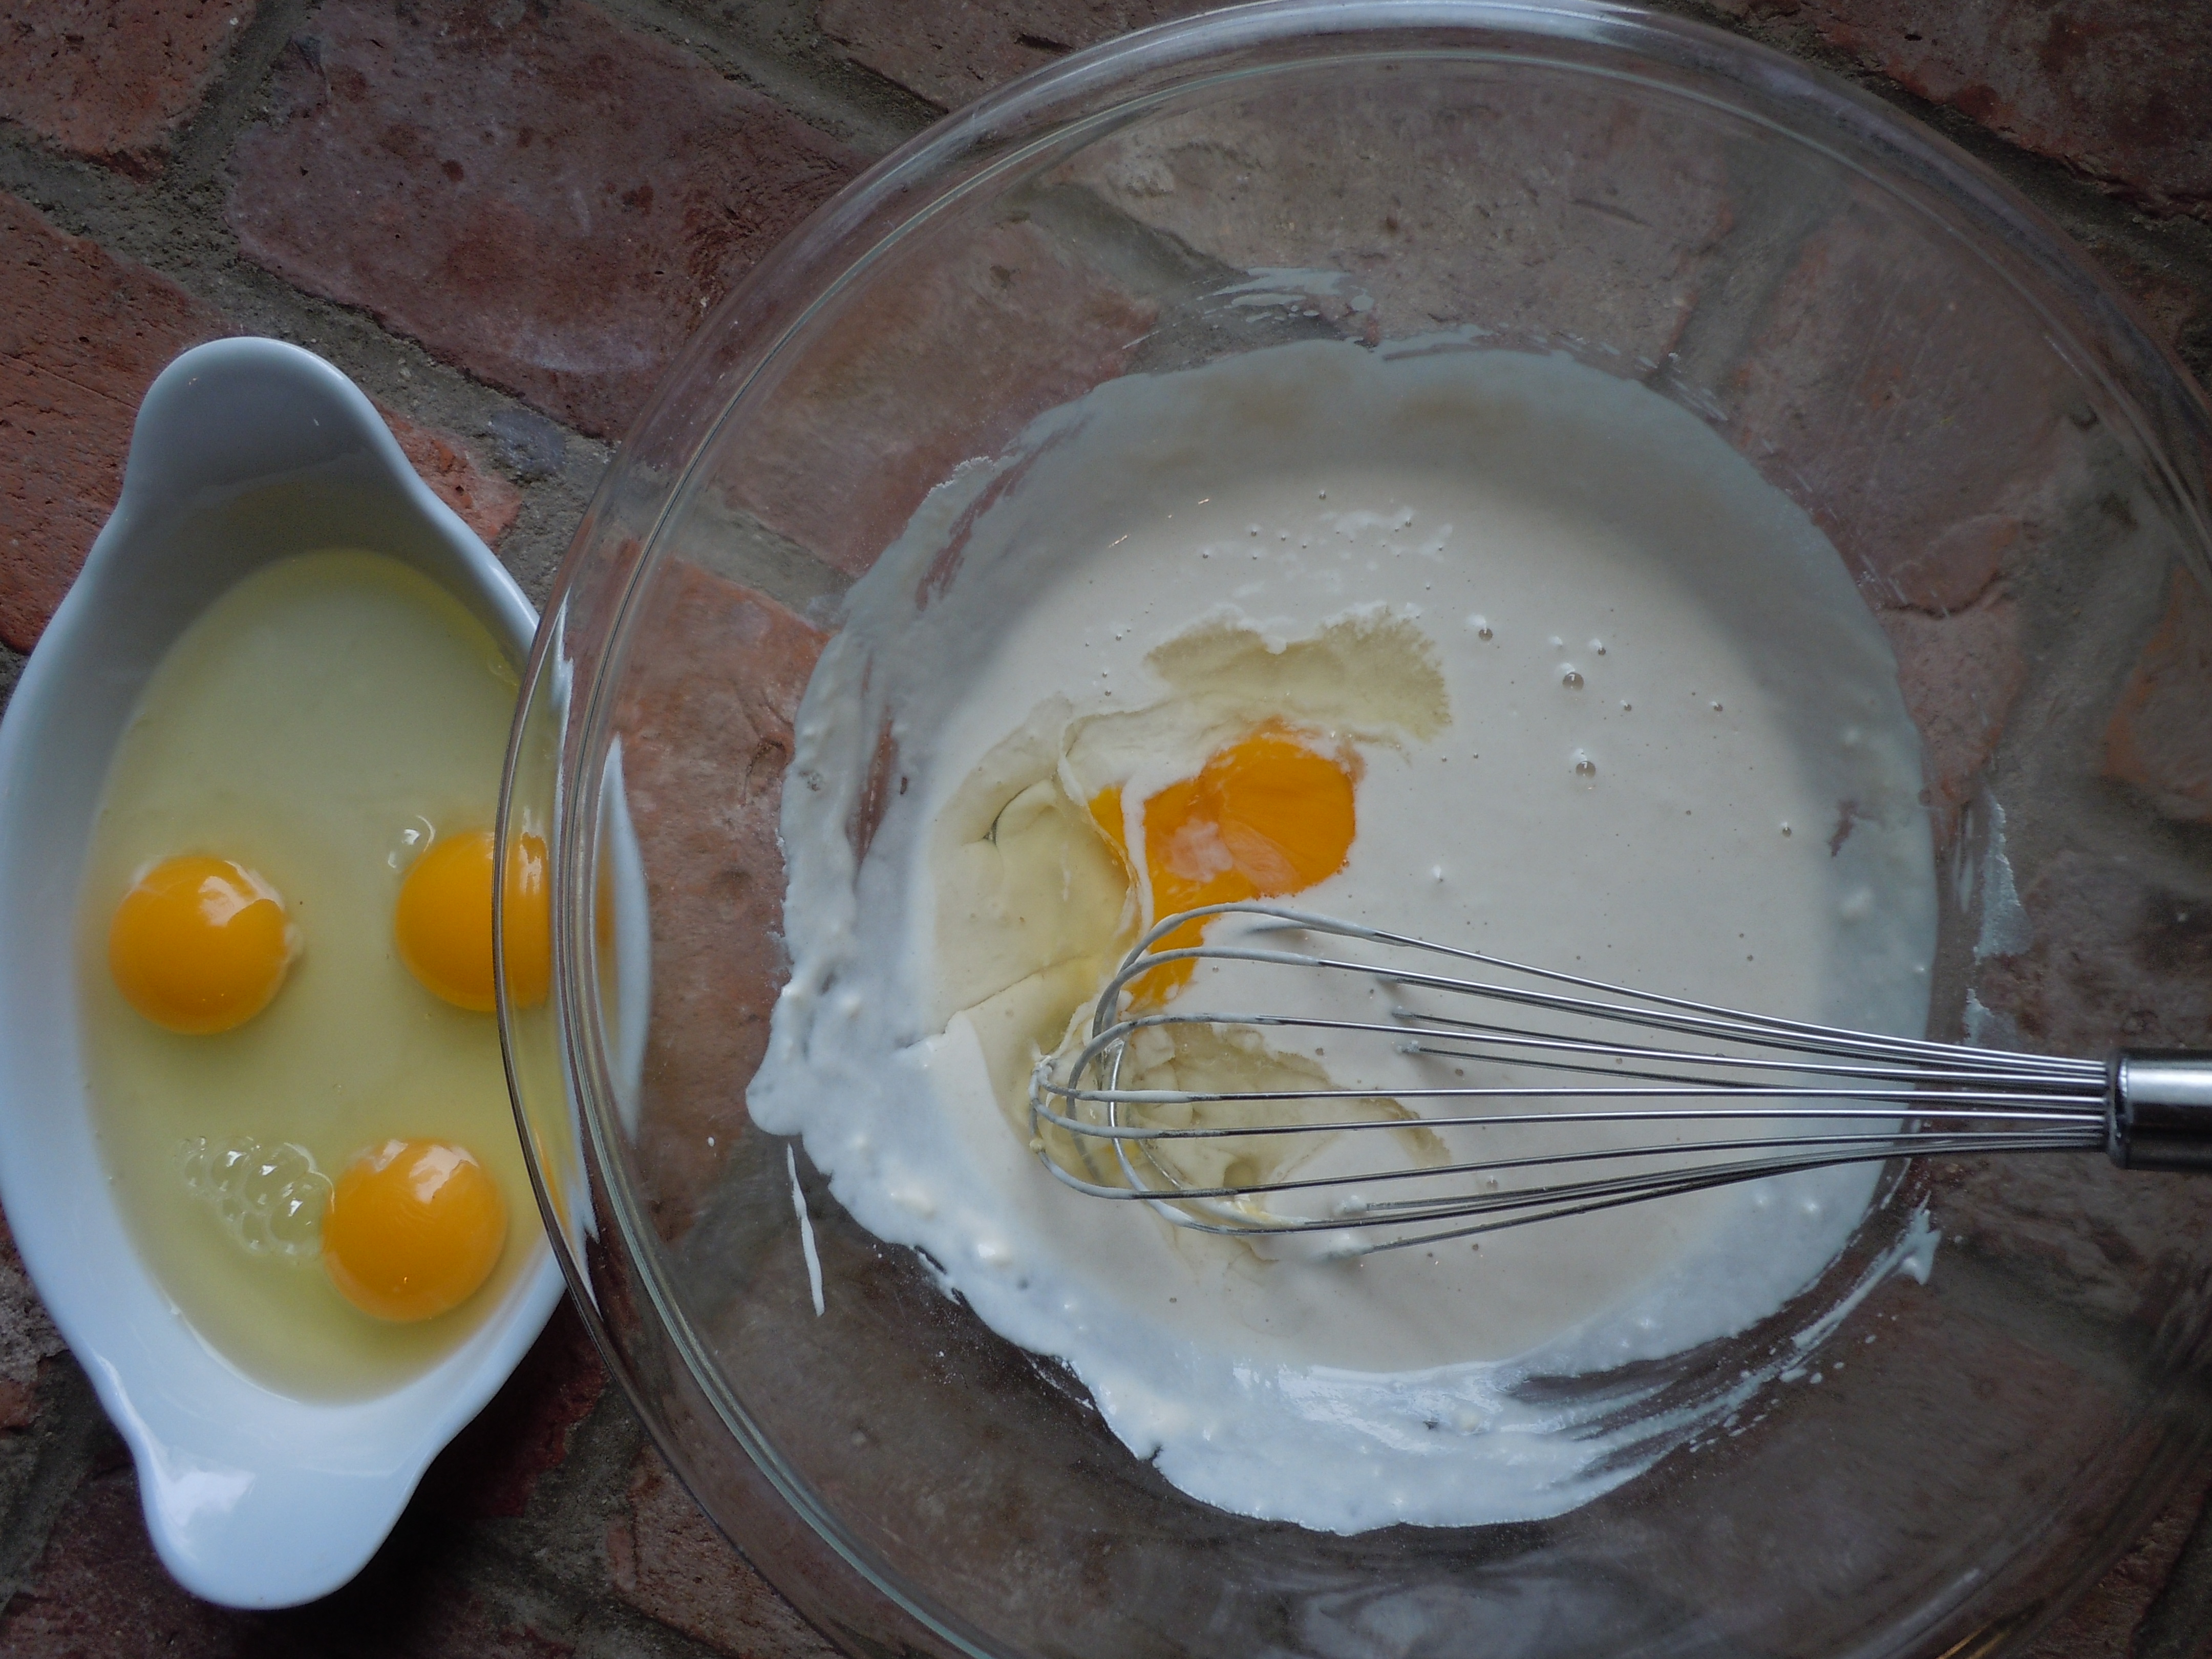
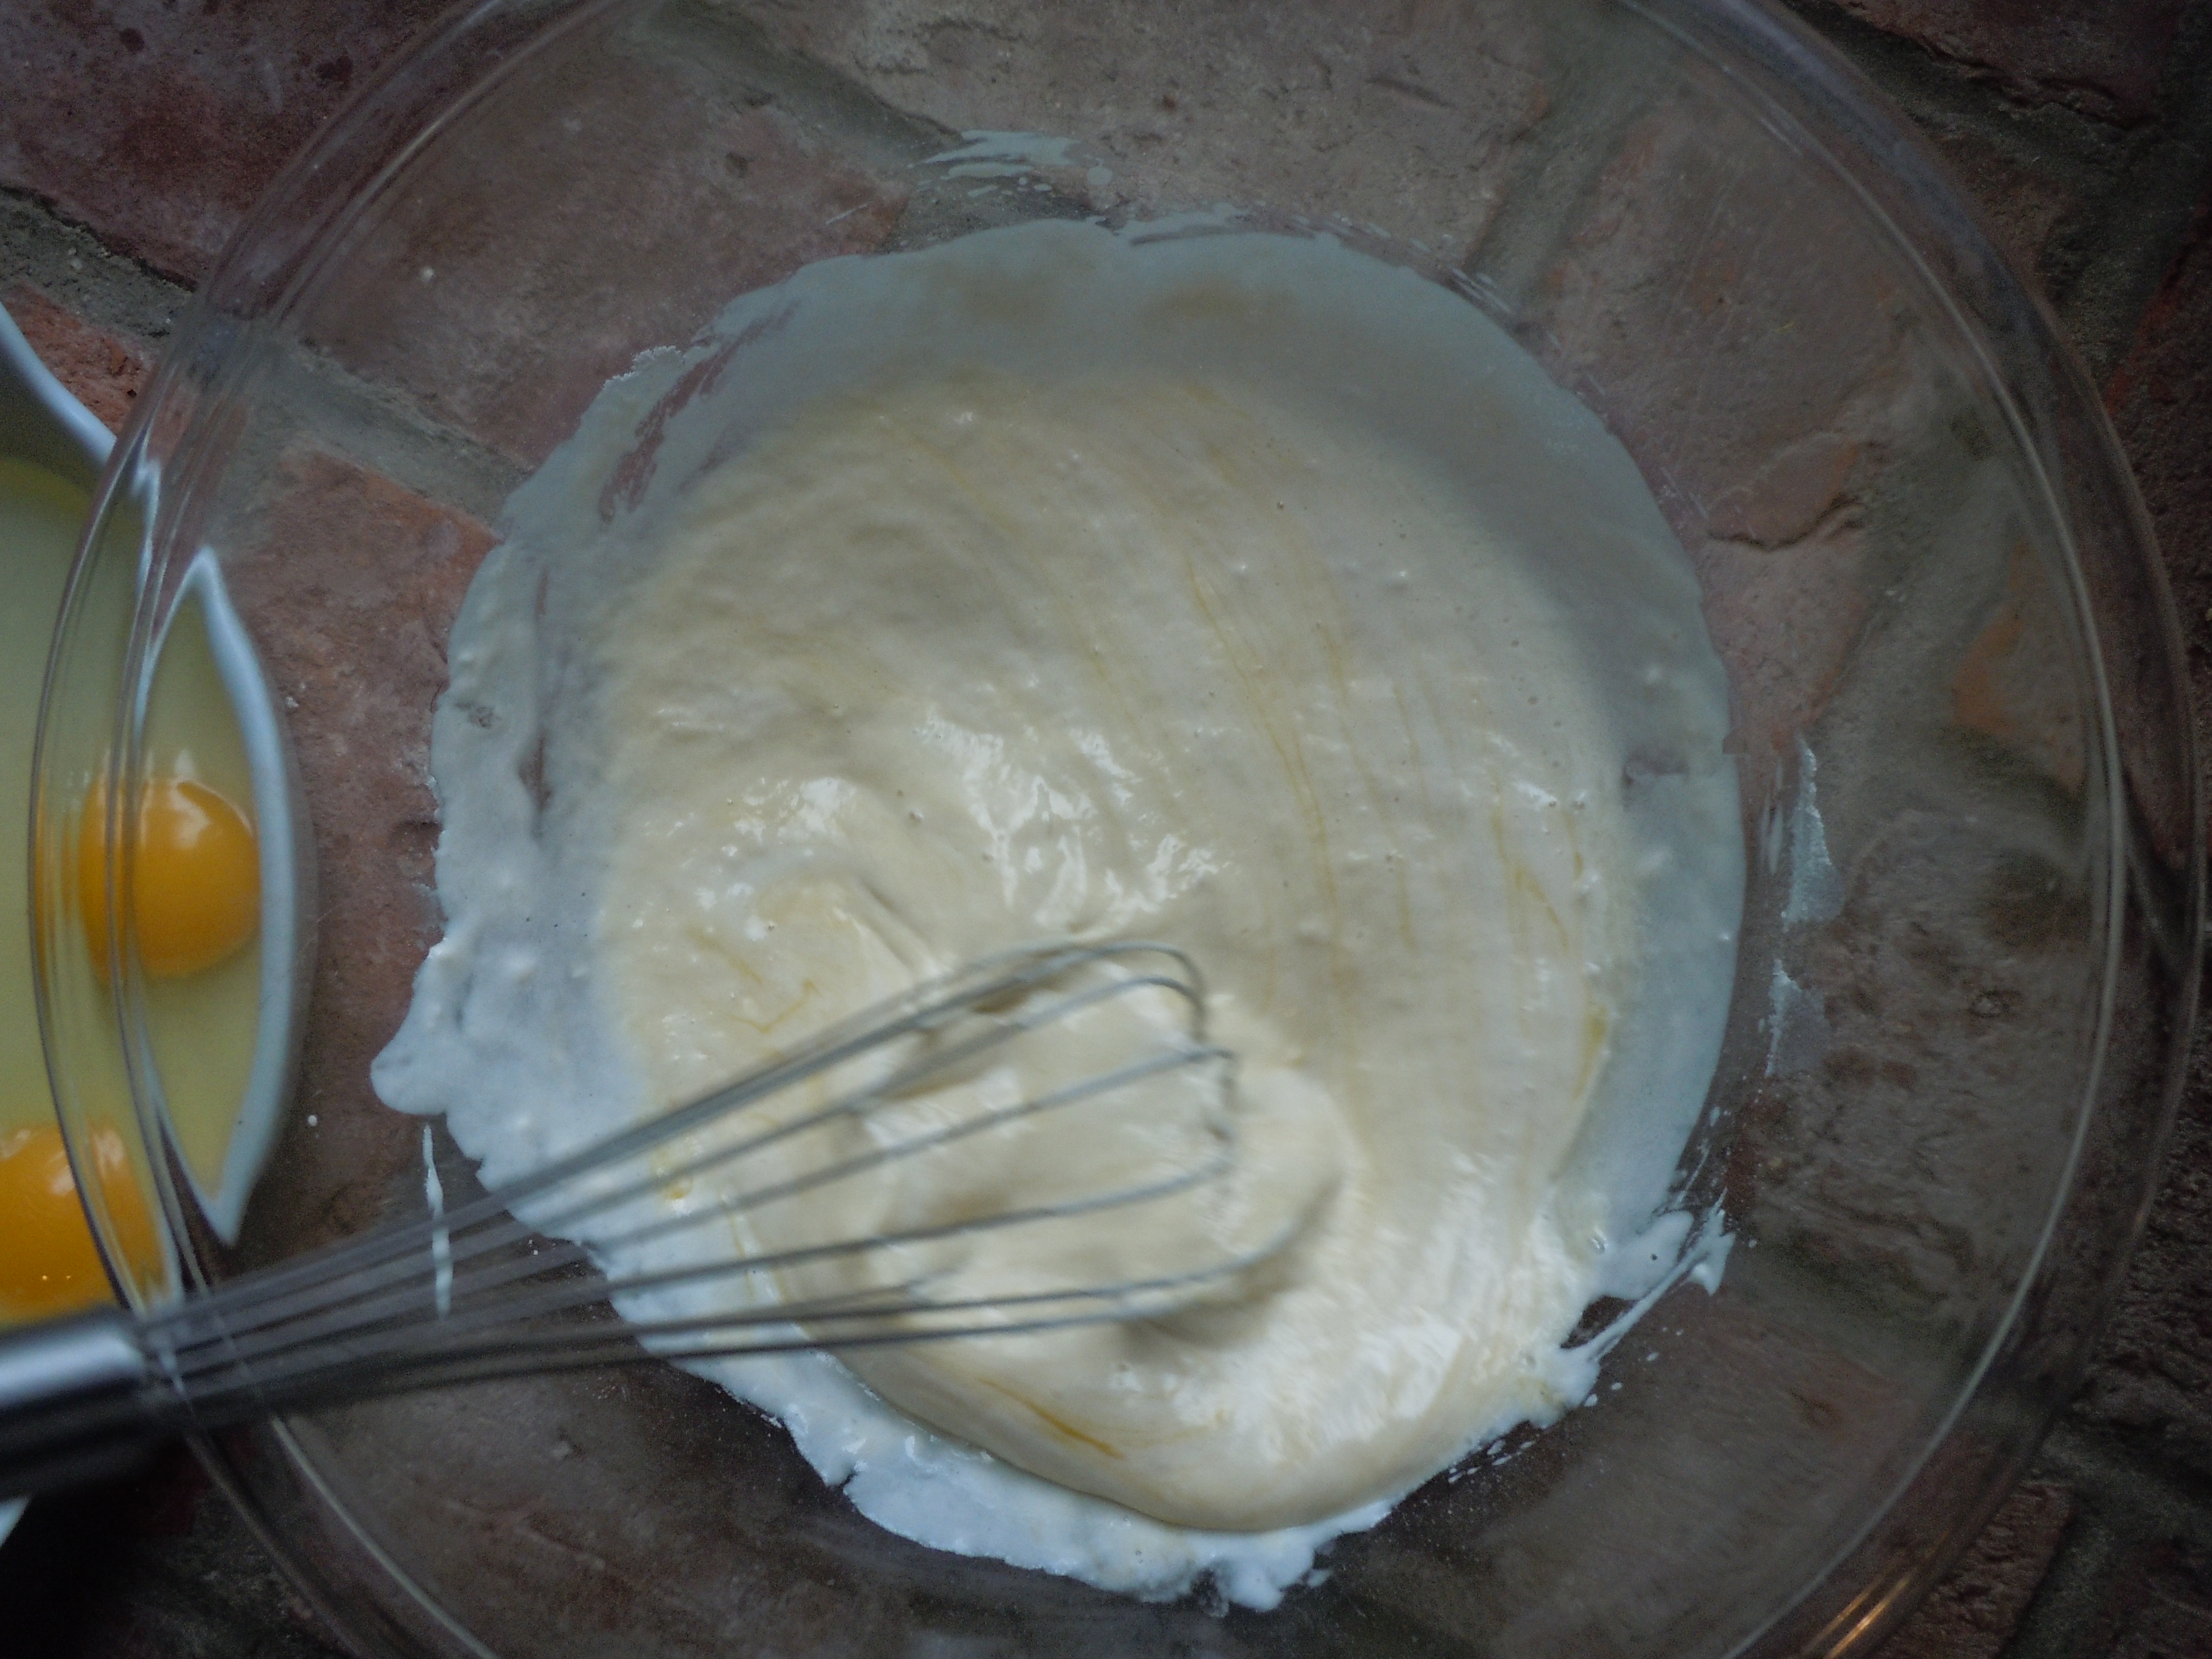
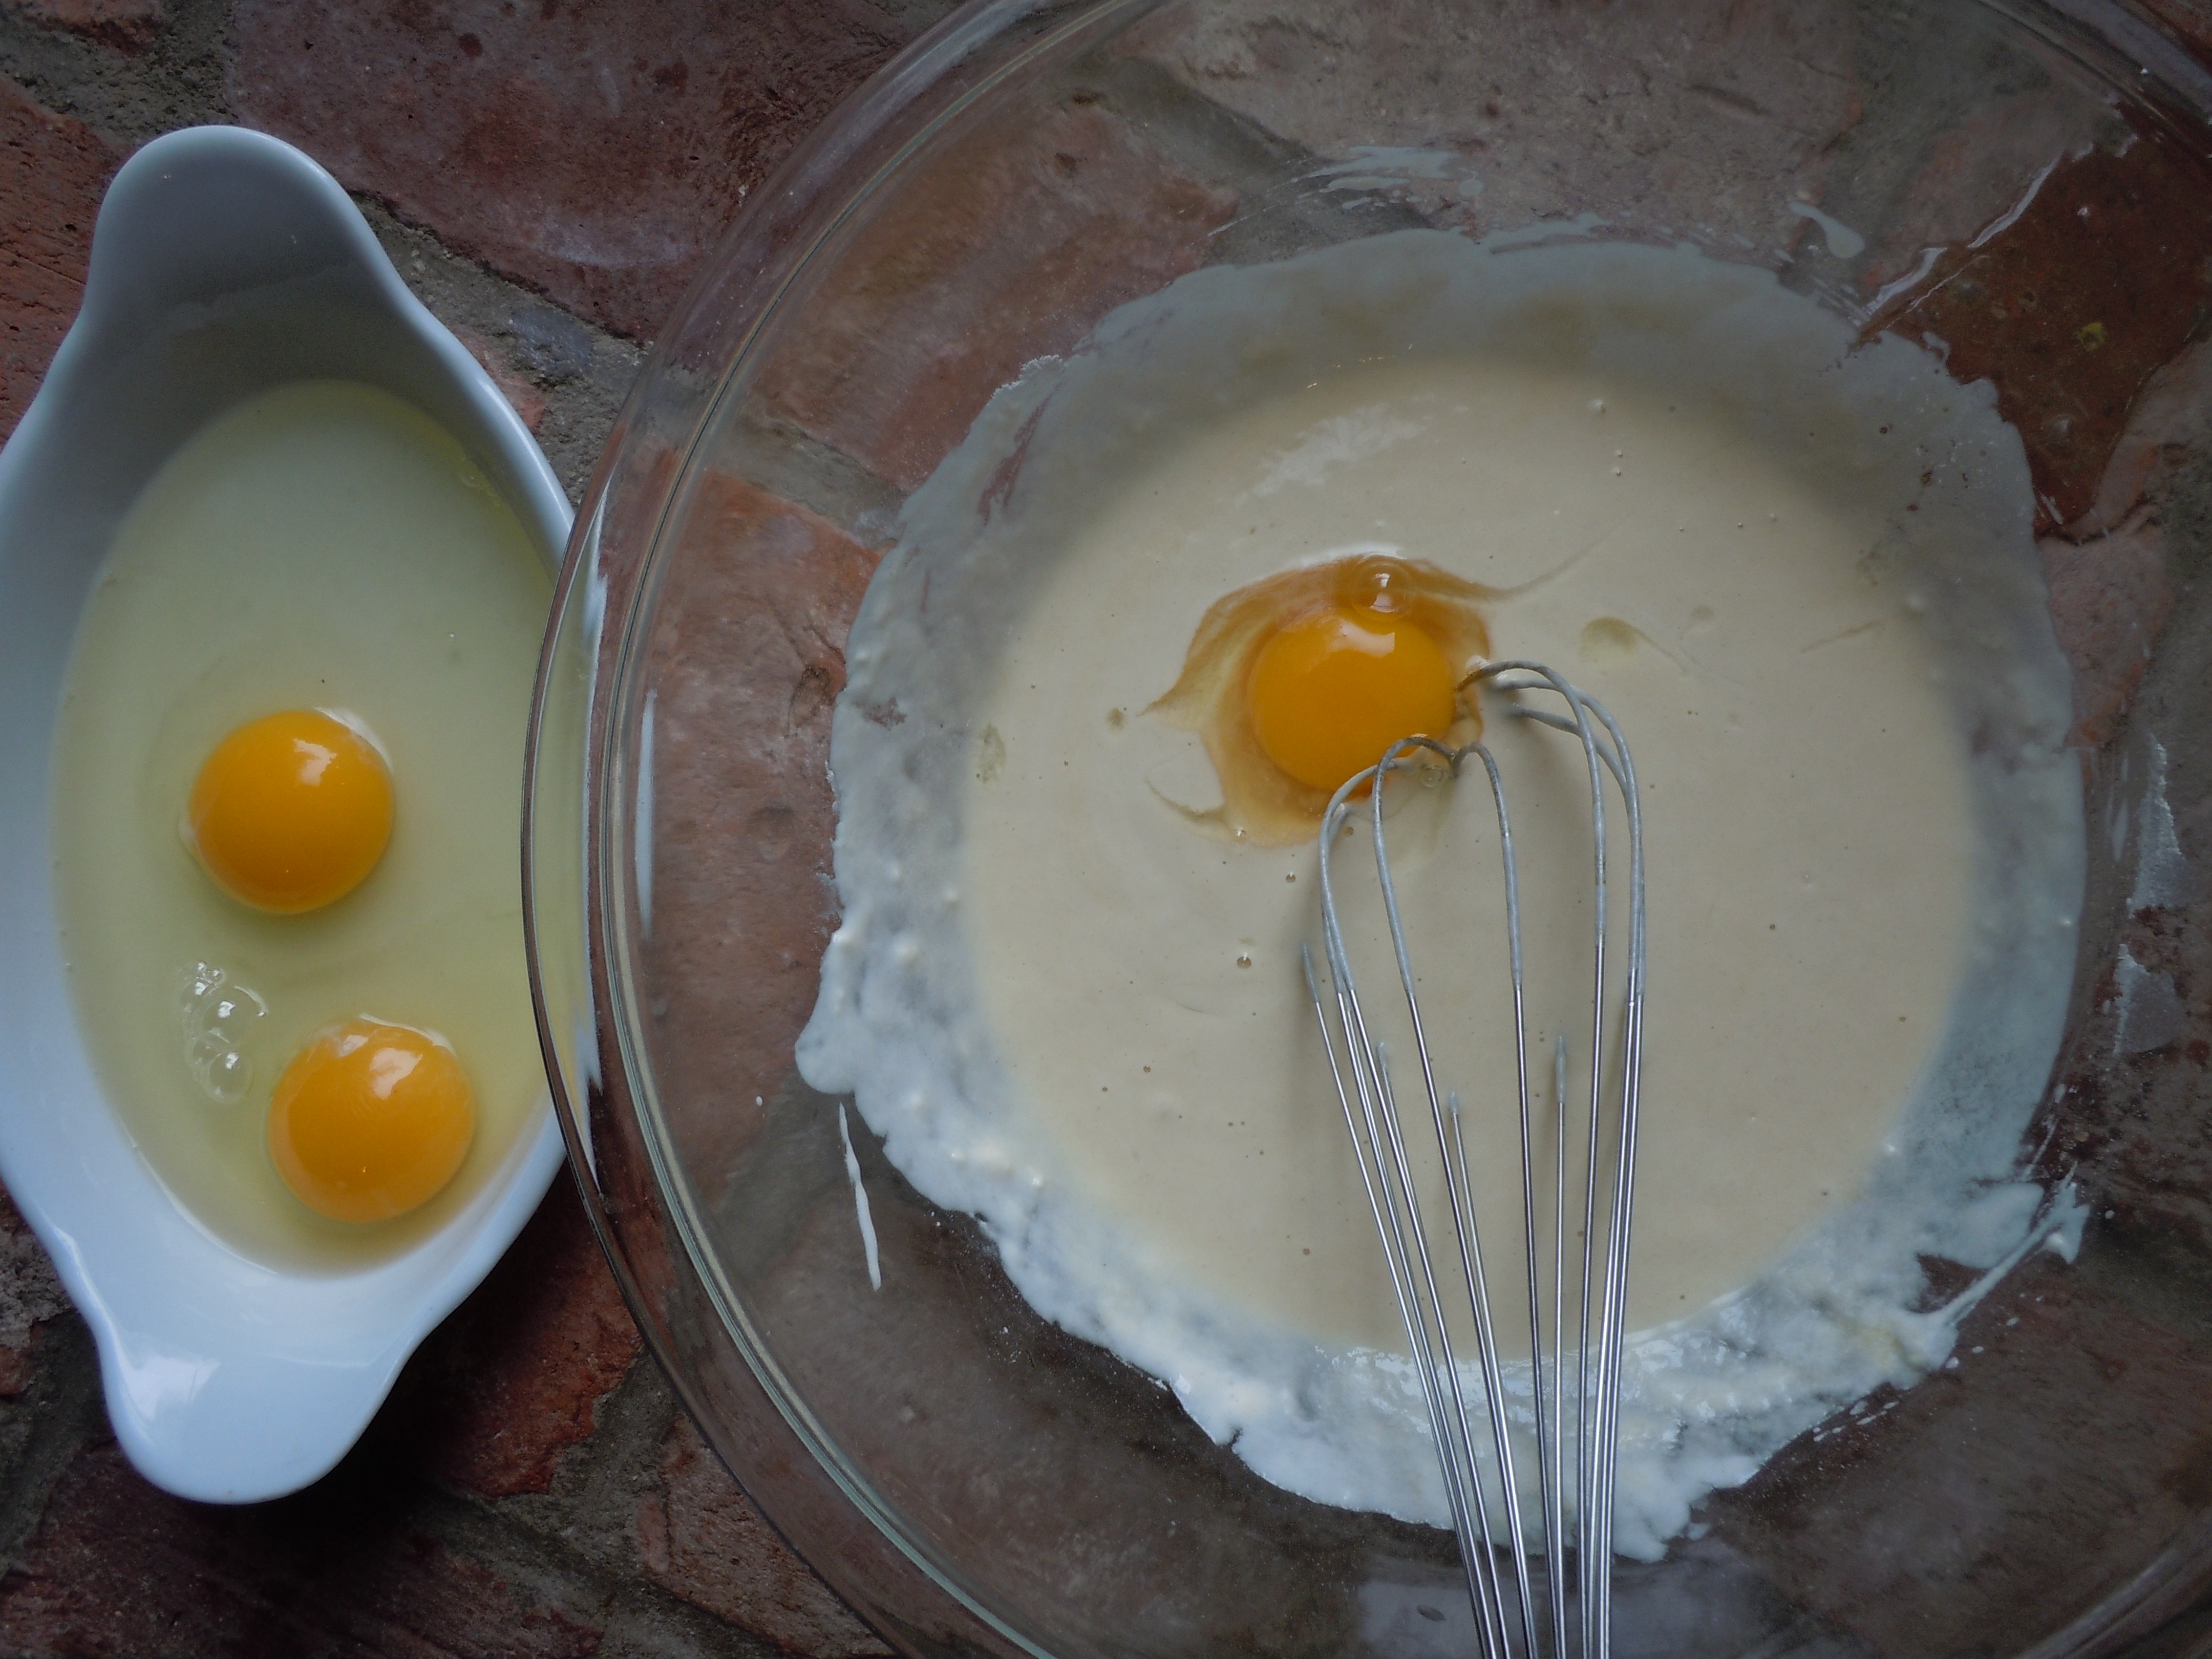
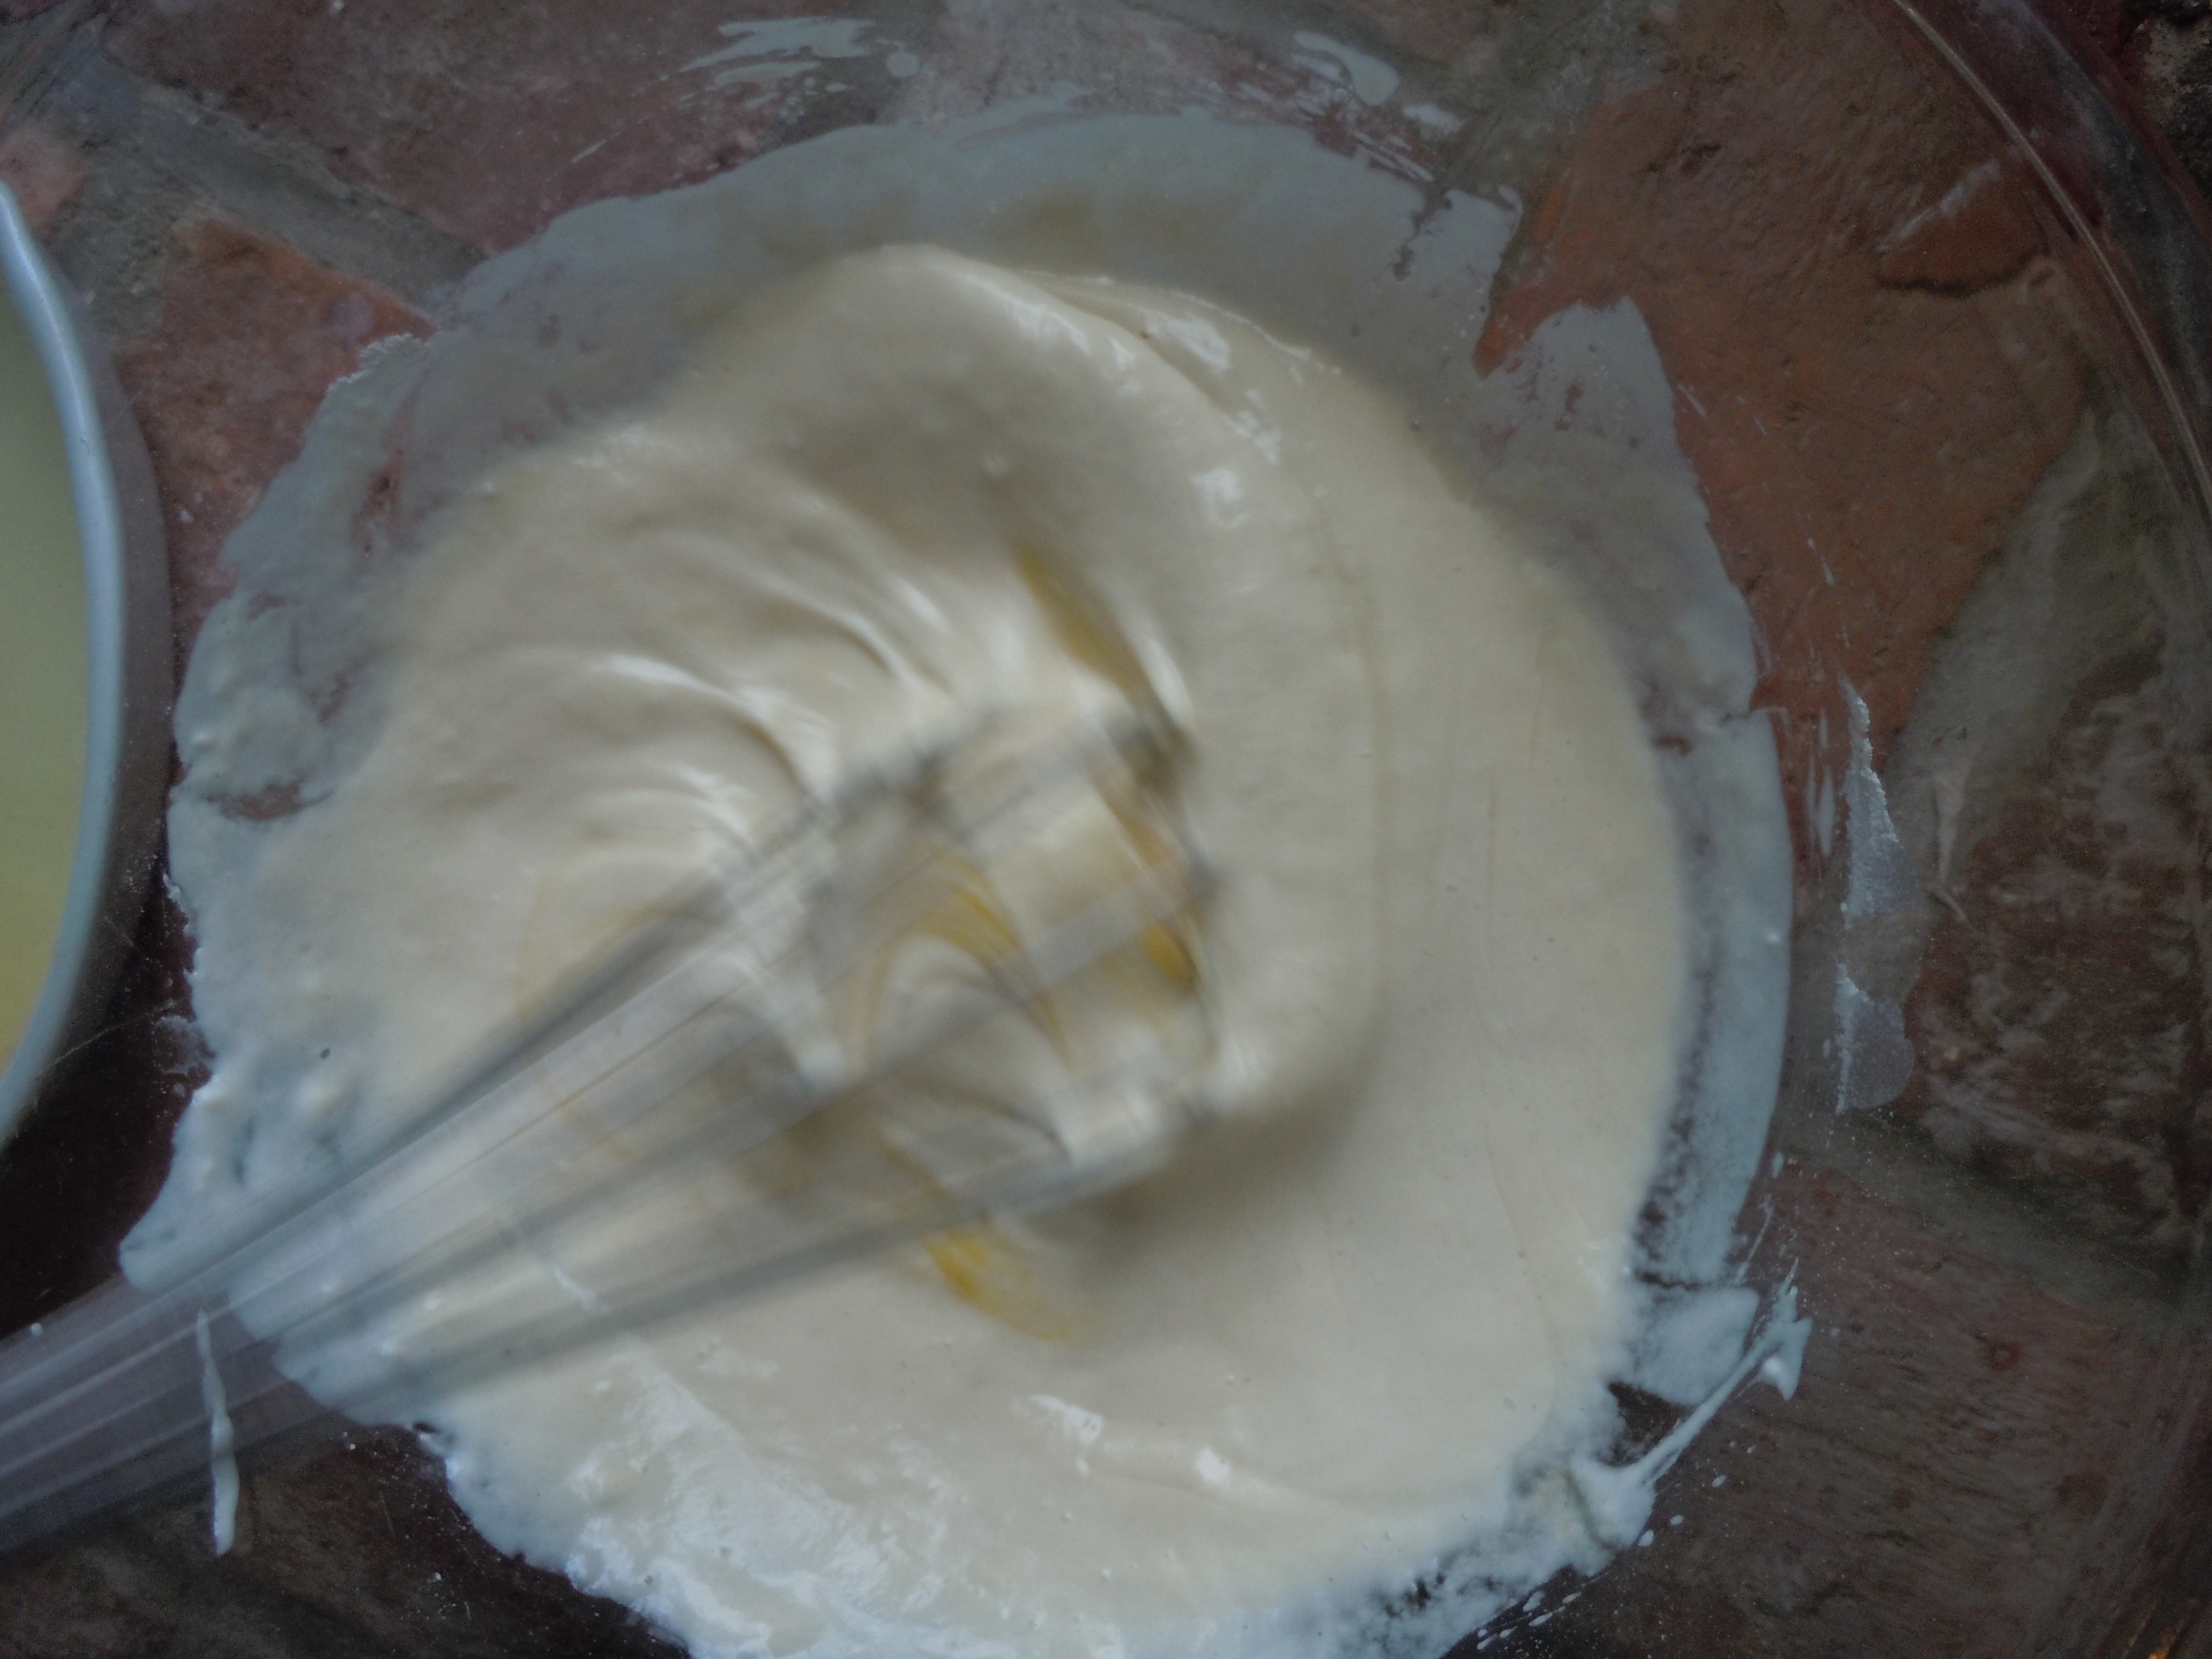
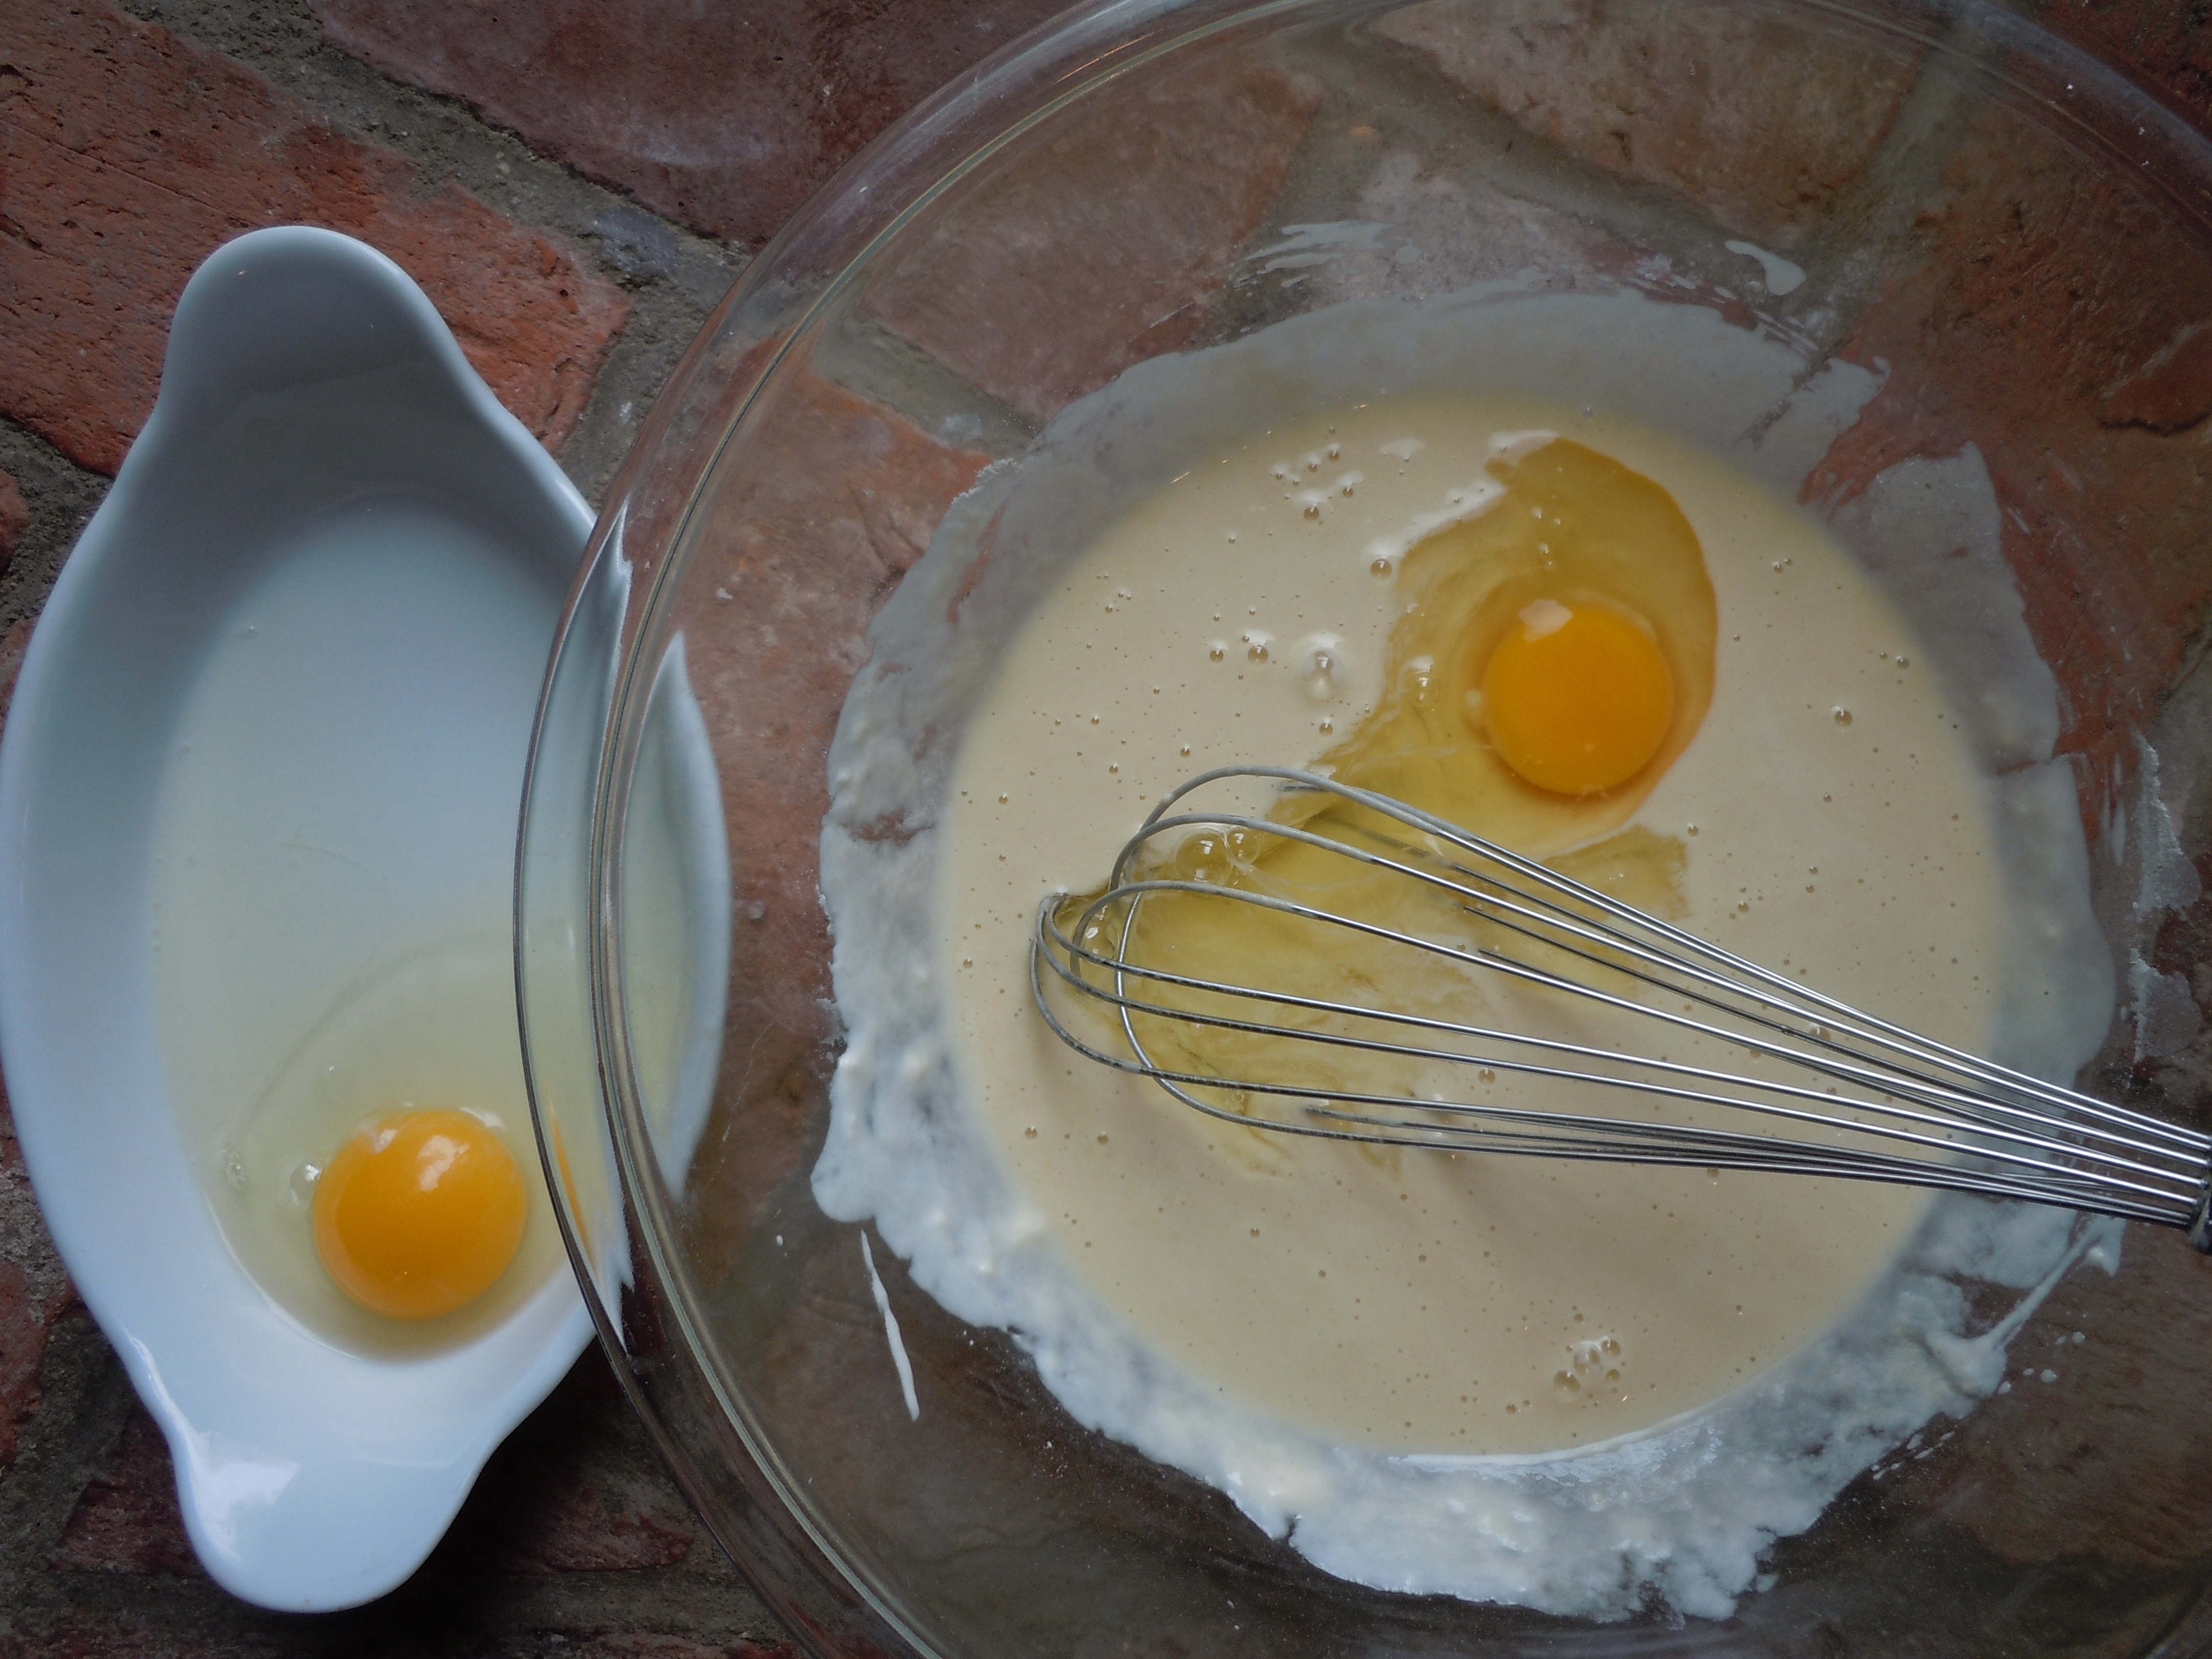
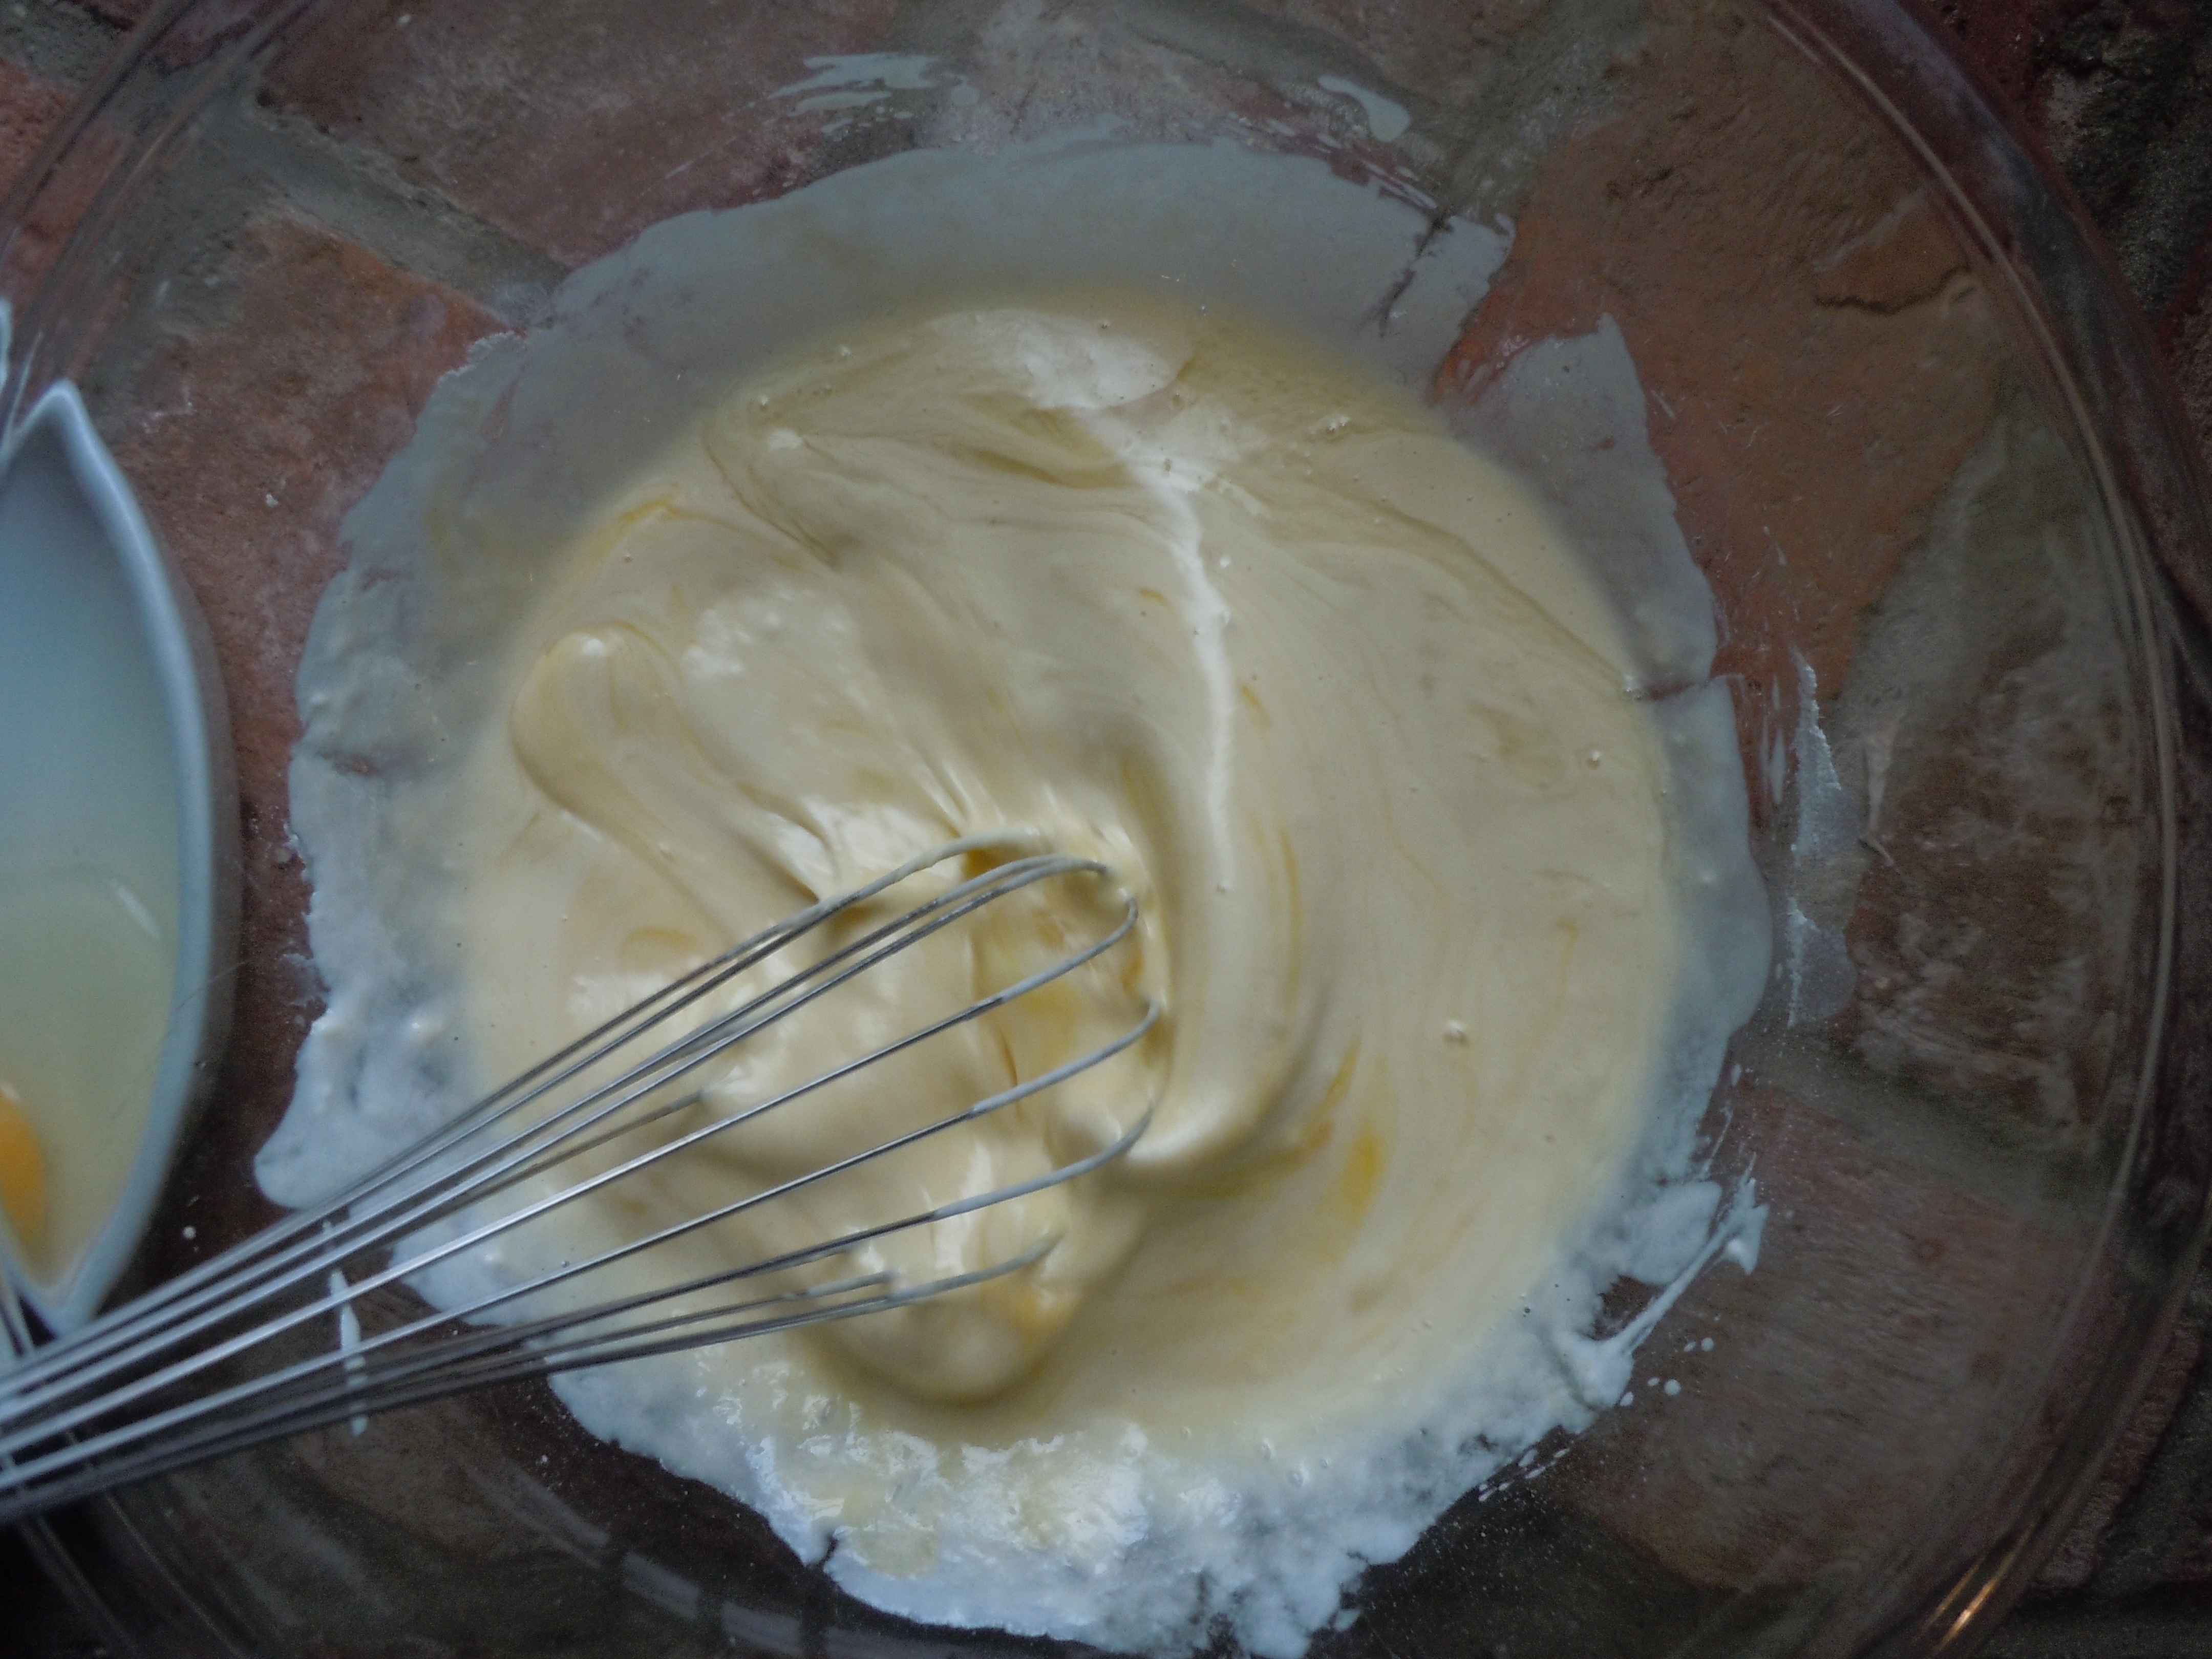
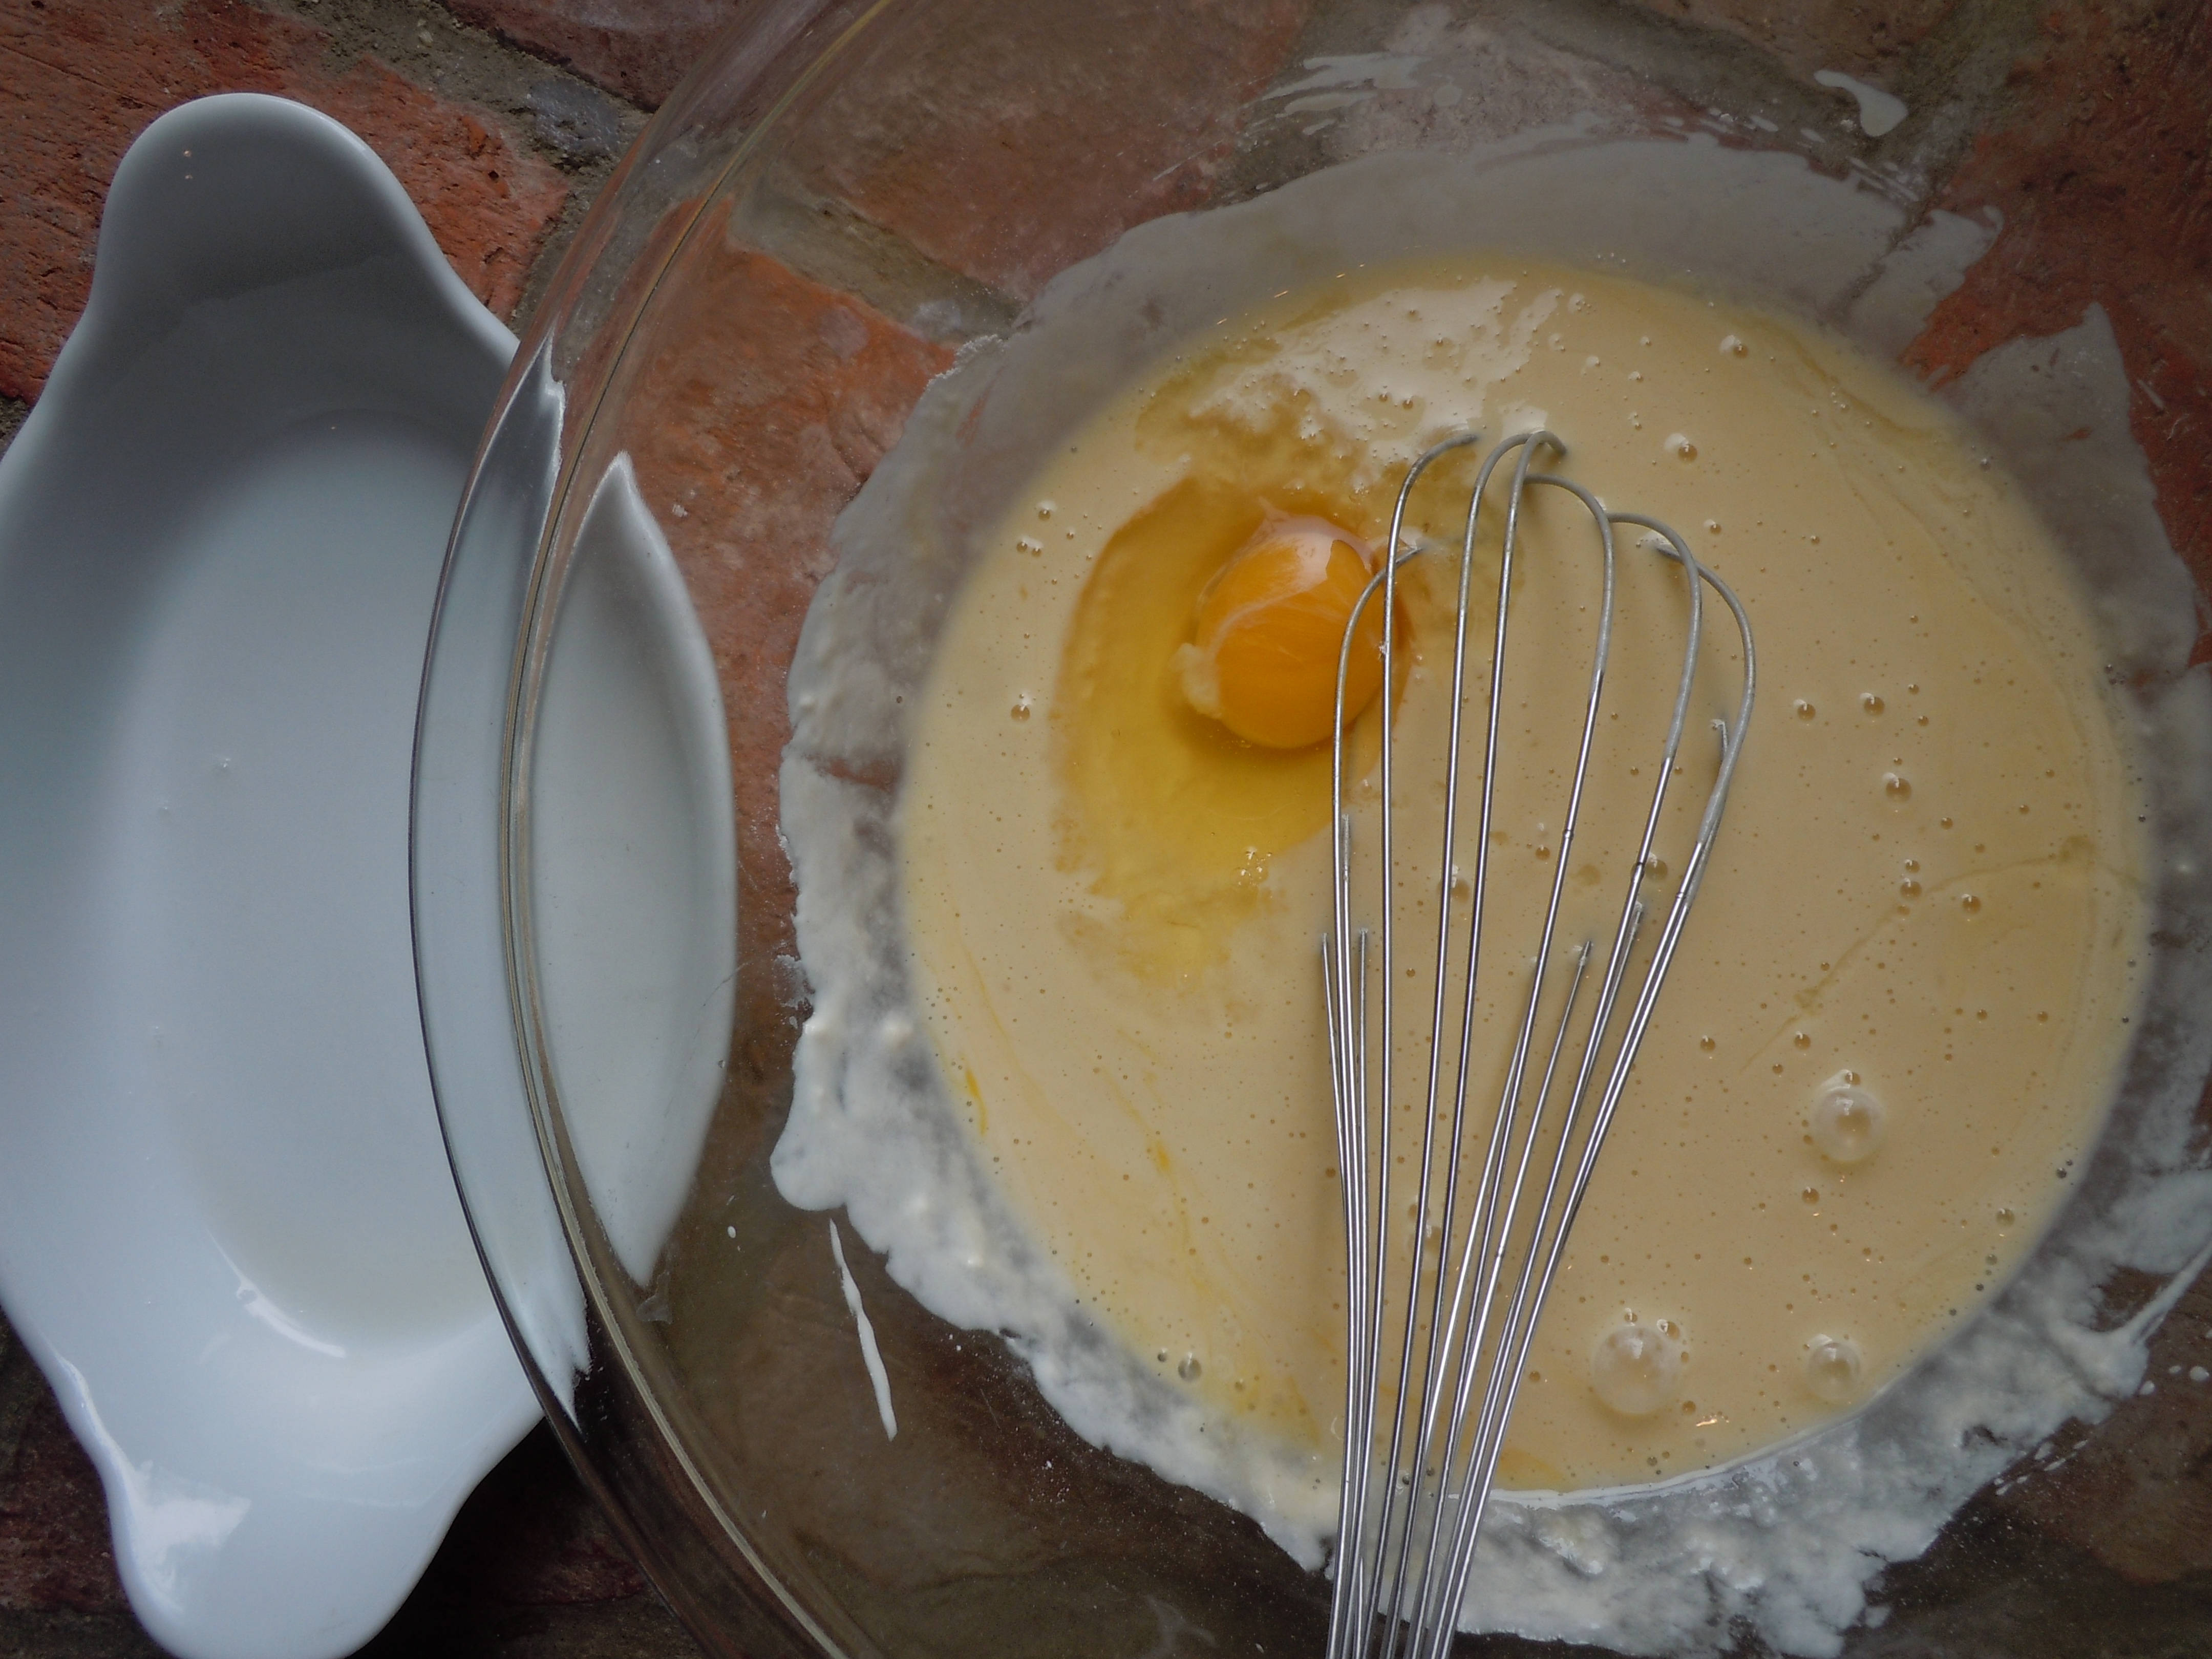
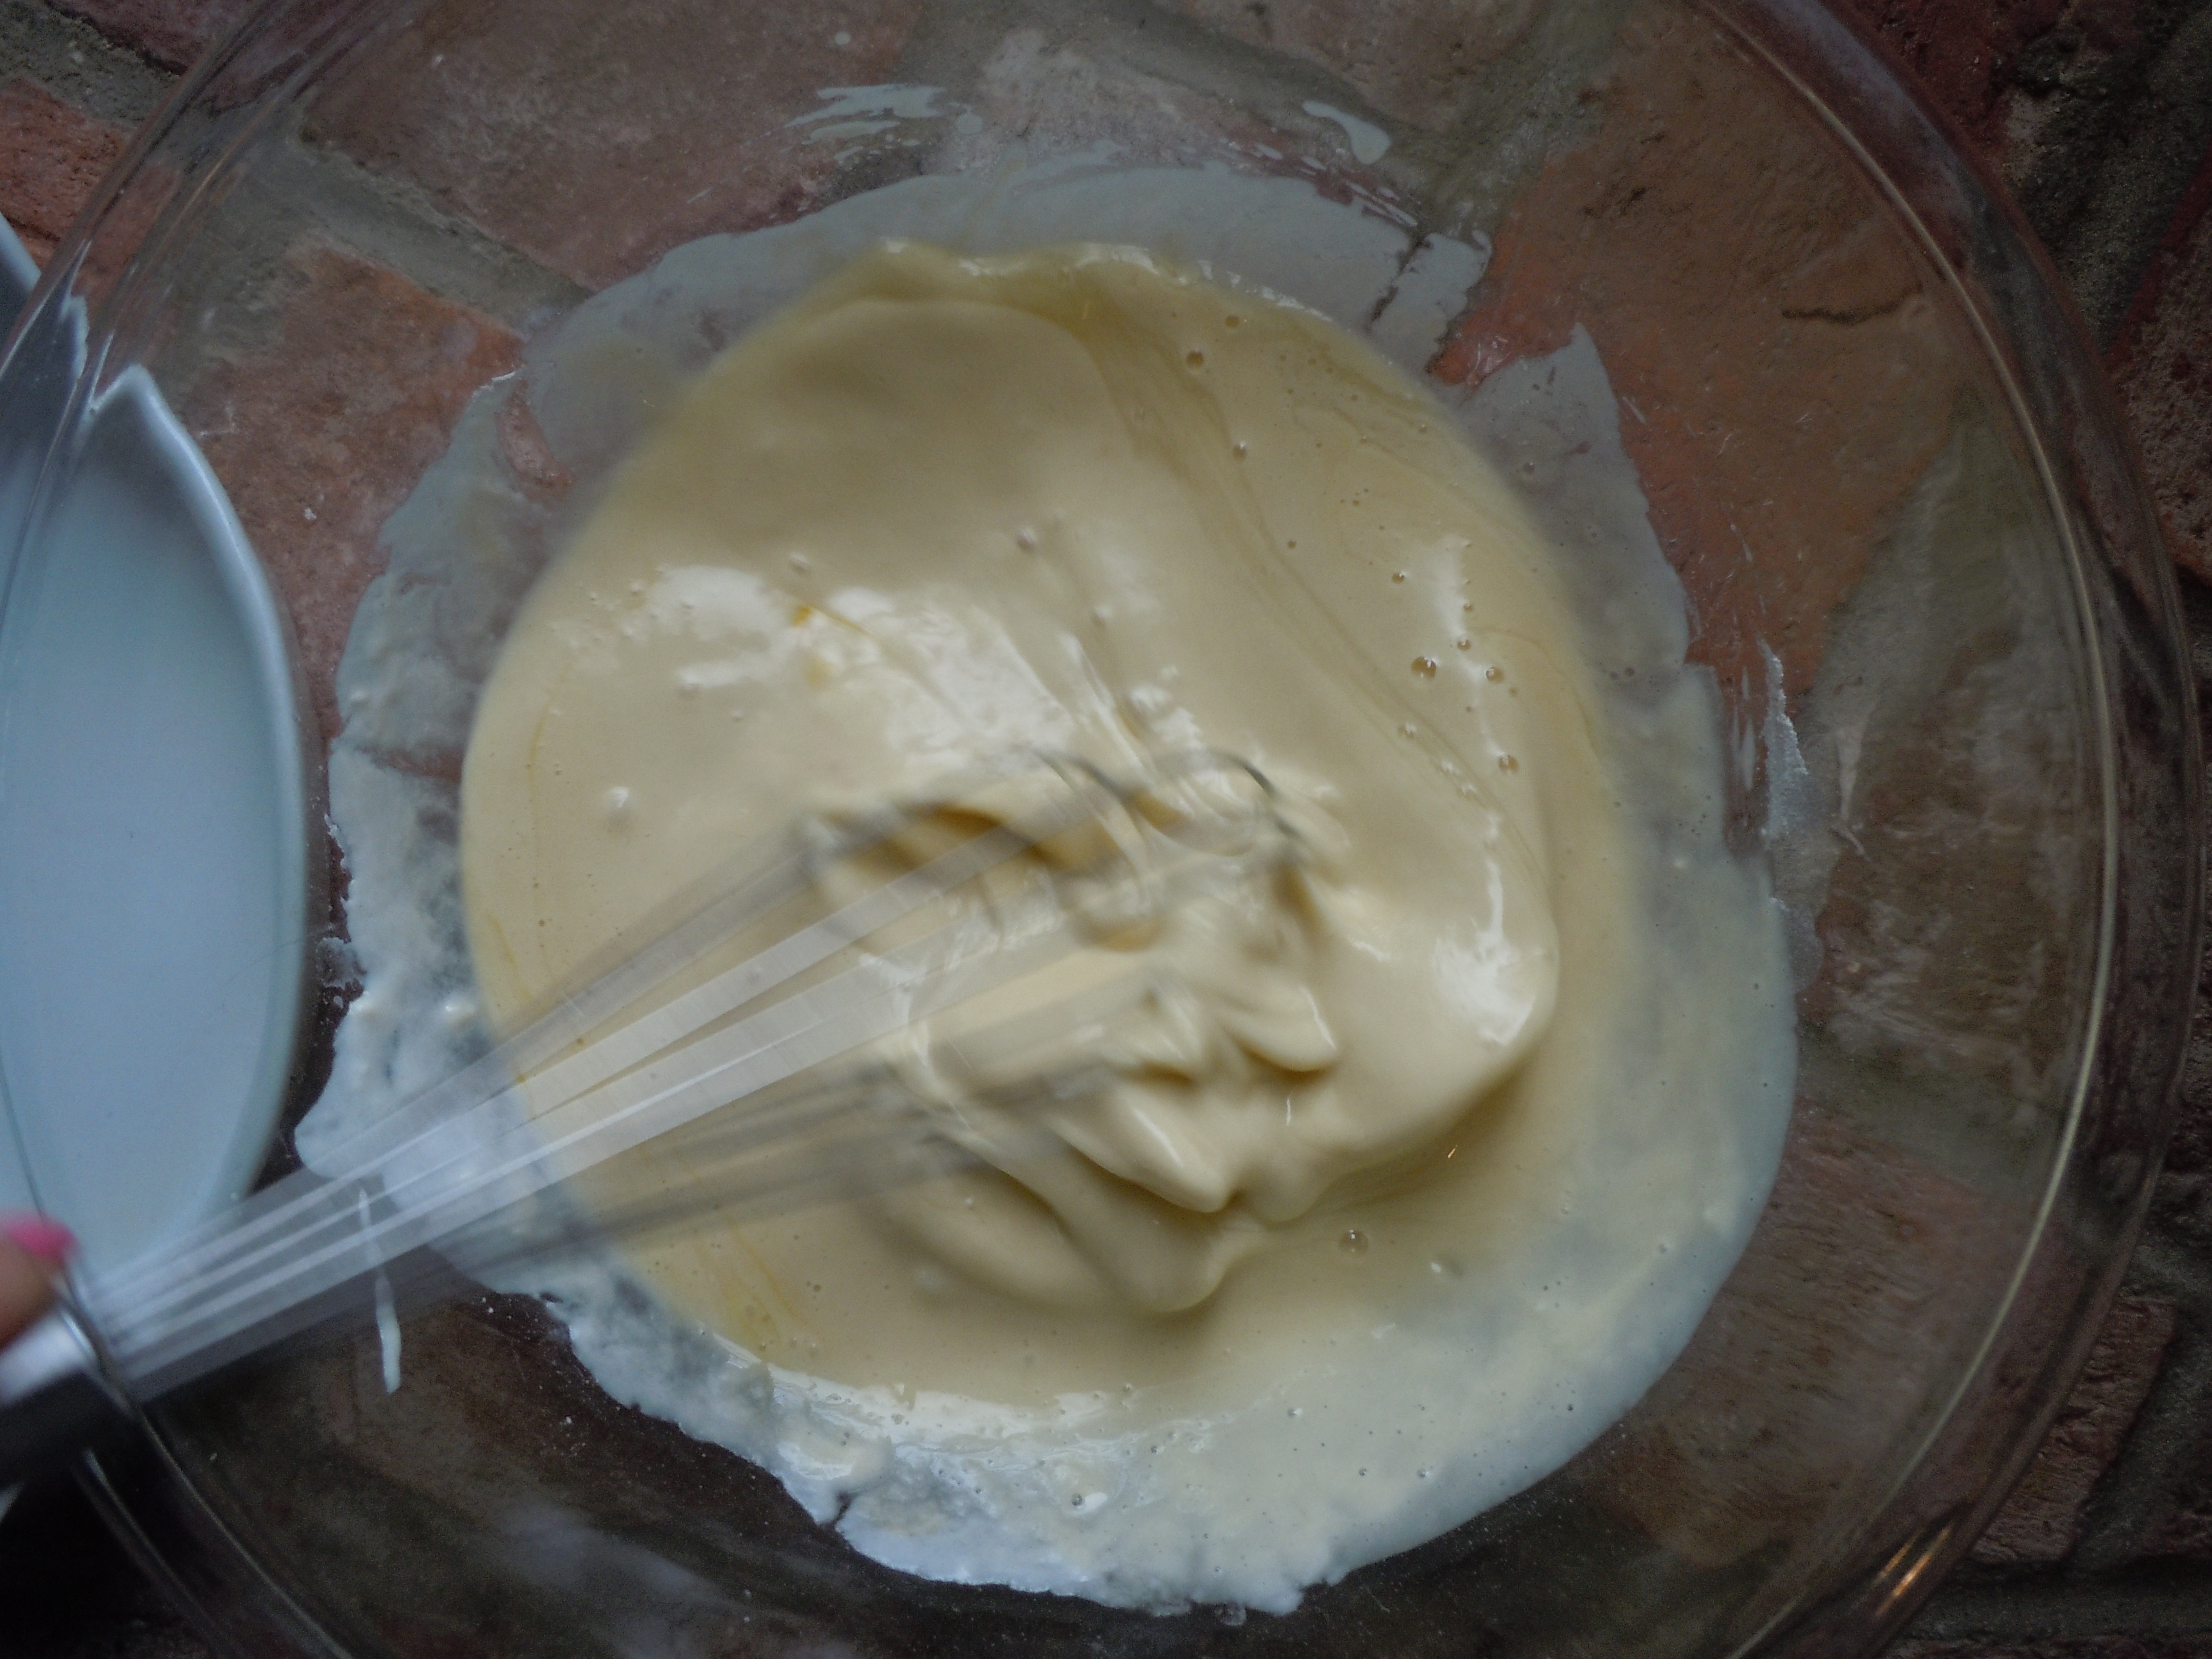
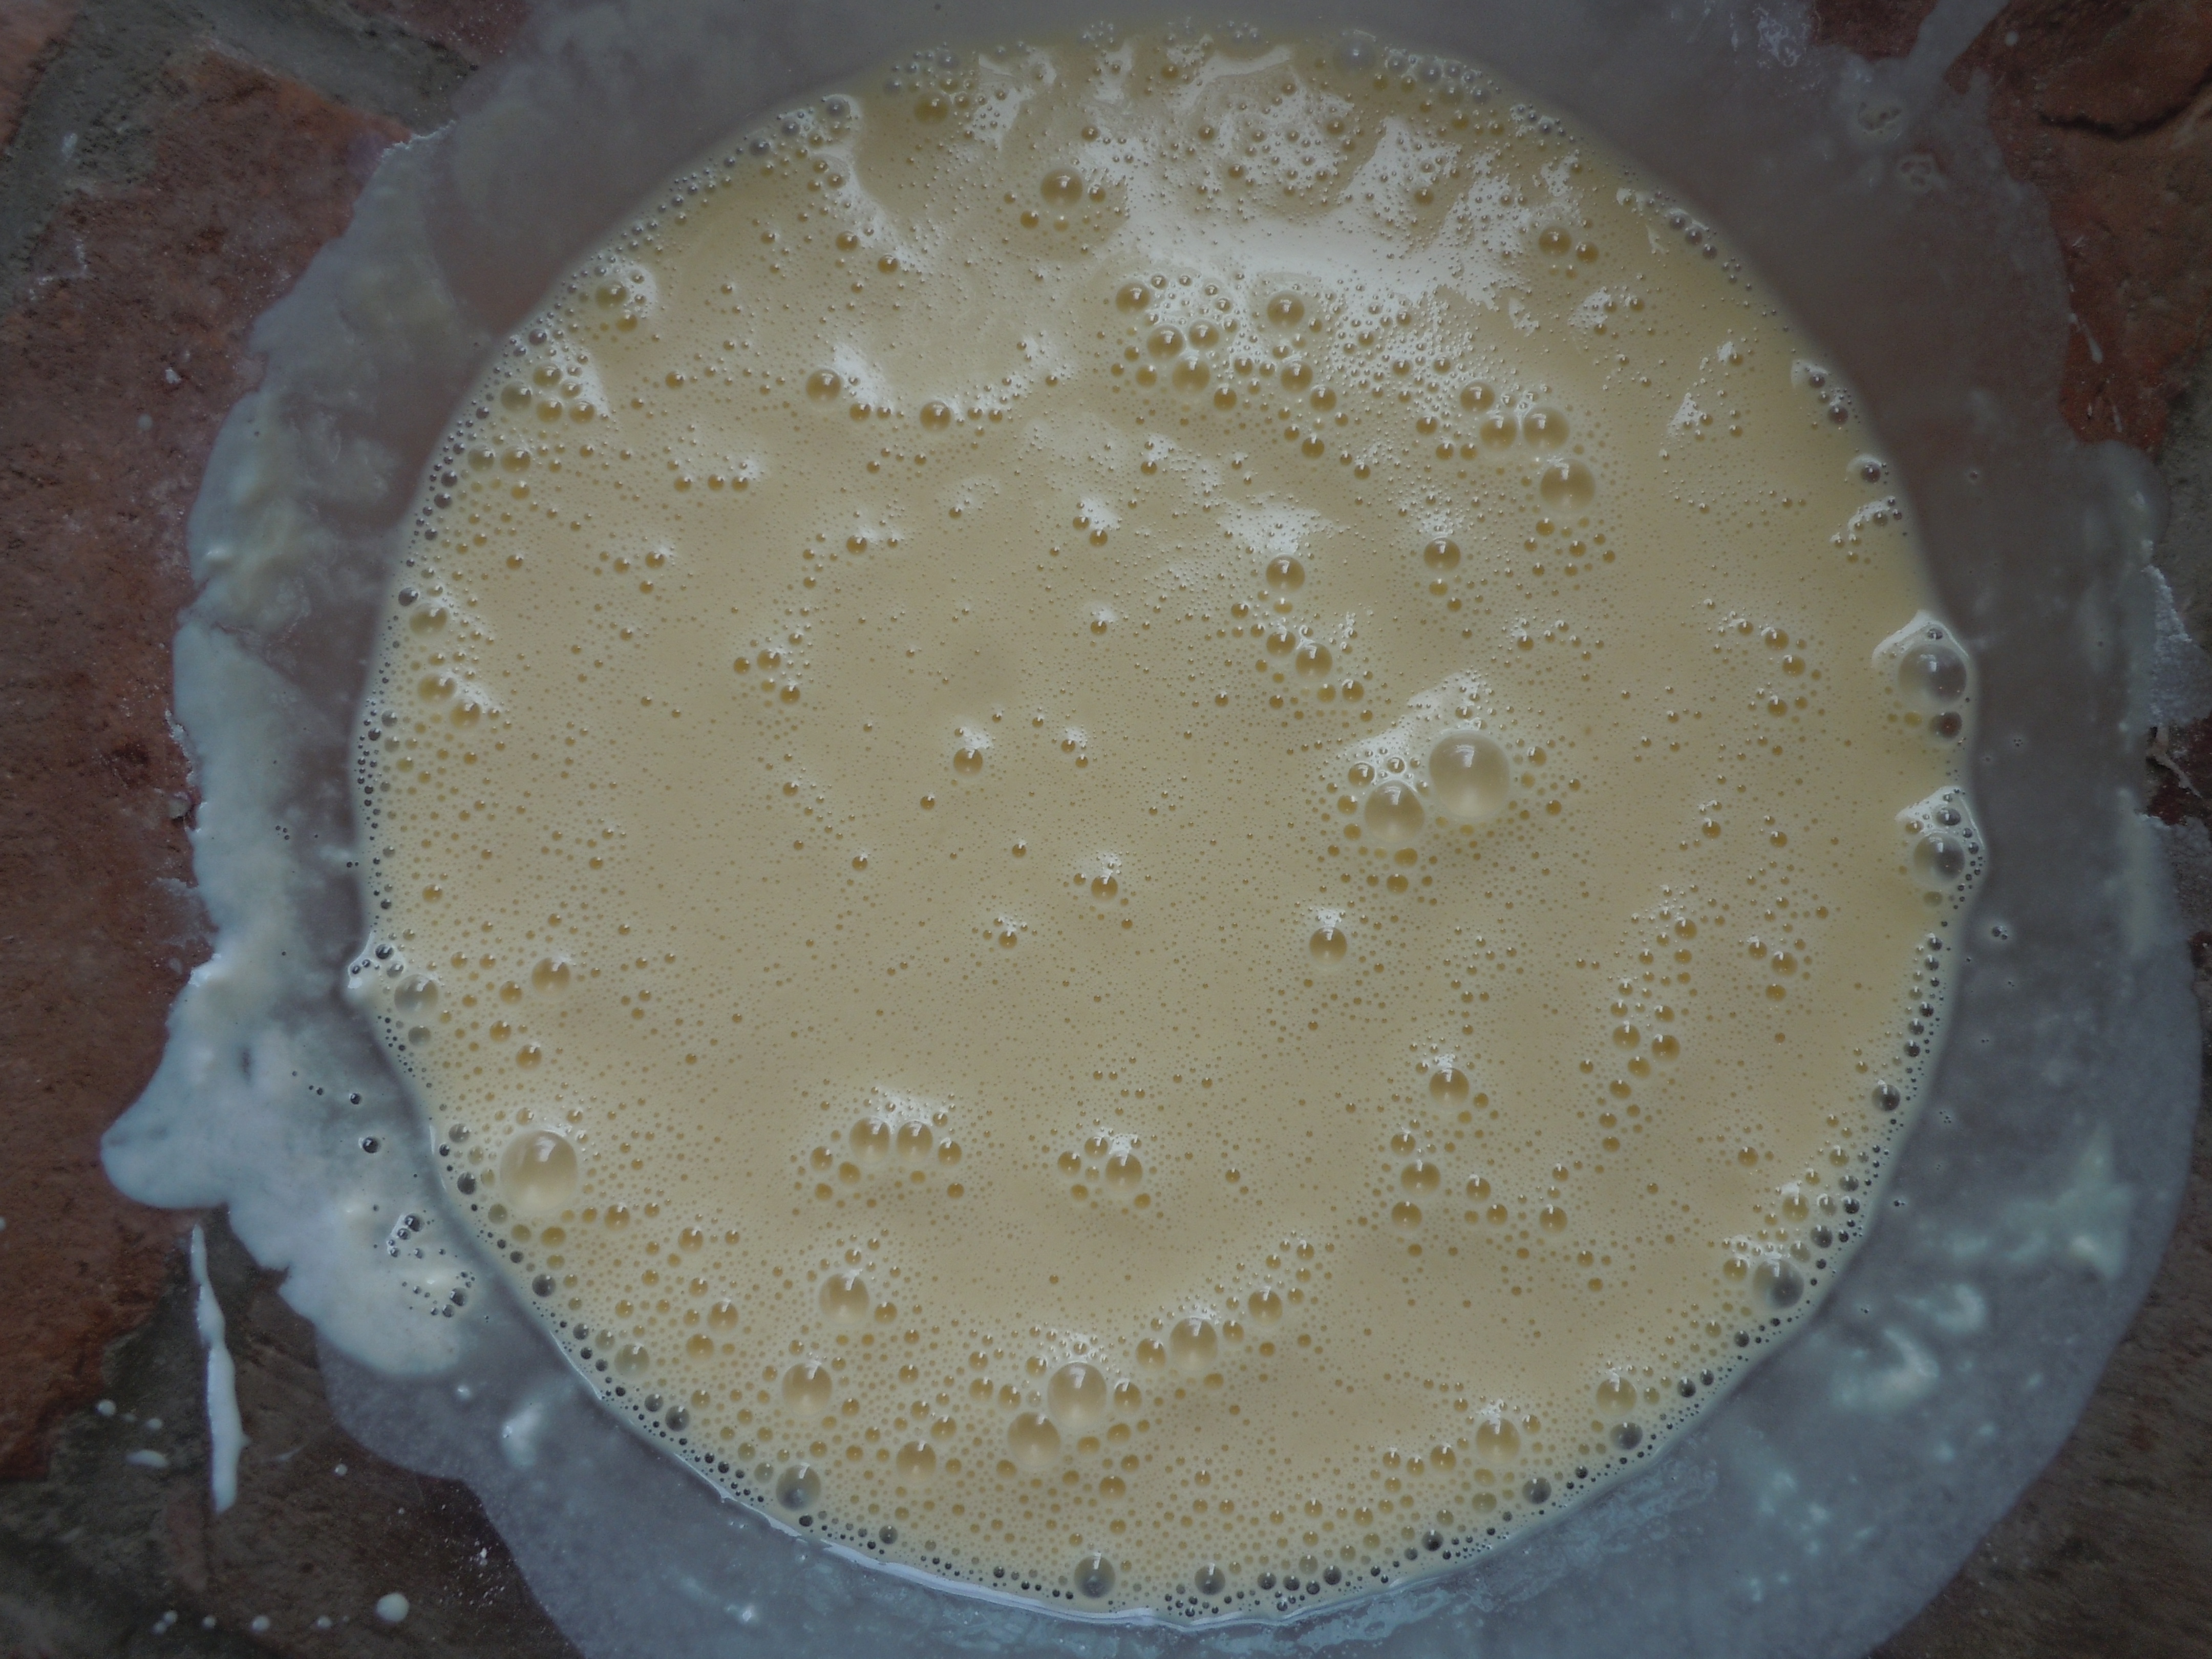
In a large bowl whisk 1 cup flour, 1/4 Tsp salt with 1 cup water (approx. 20 whisks)
Add in 1 egg at a time and whisk about 5 whisks per egg
Put cast iron pan on stove on medium/high heat (a 7 out of an 11)
Put a couple of Tbsp of olive oil in a bowl with a paper towel
Rub pan with olive oil-saturated paper towel in between cooking poured pasta batter
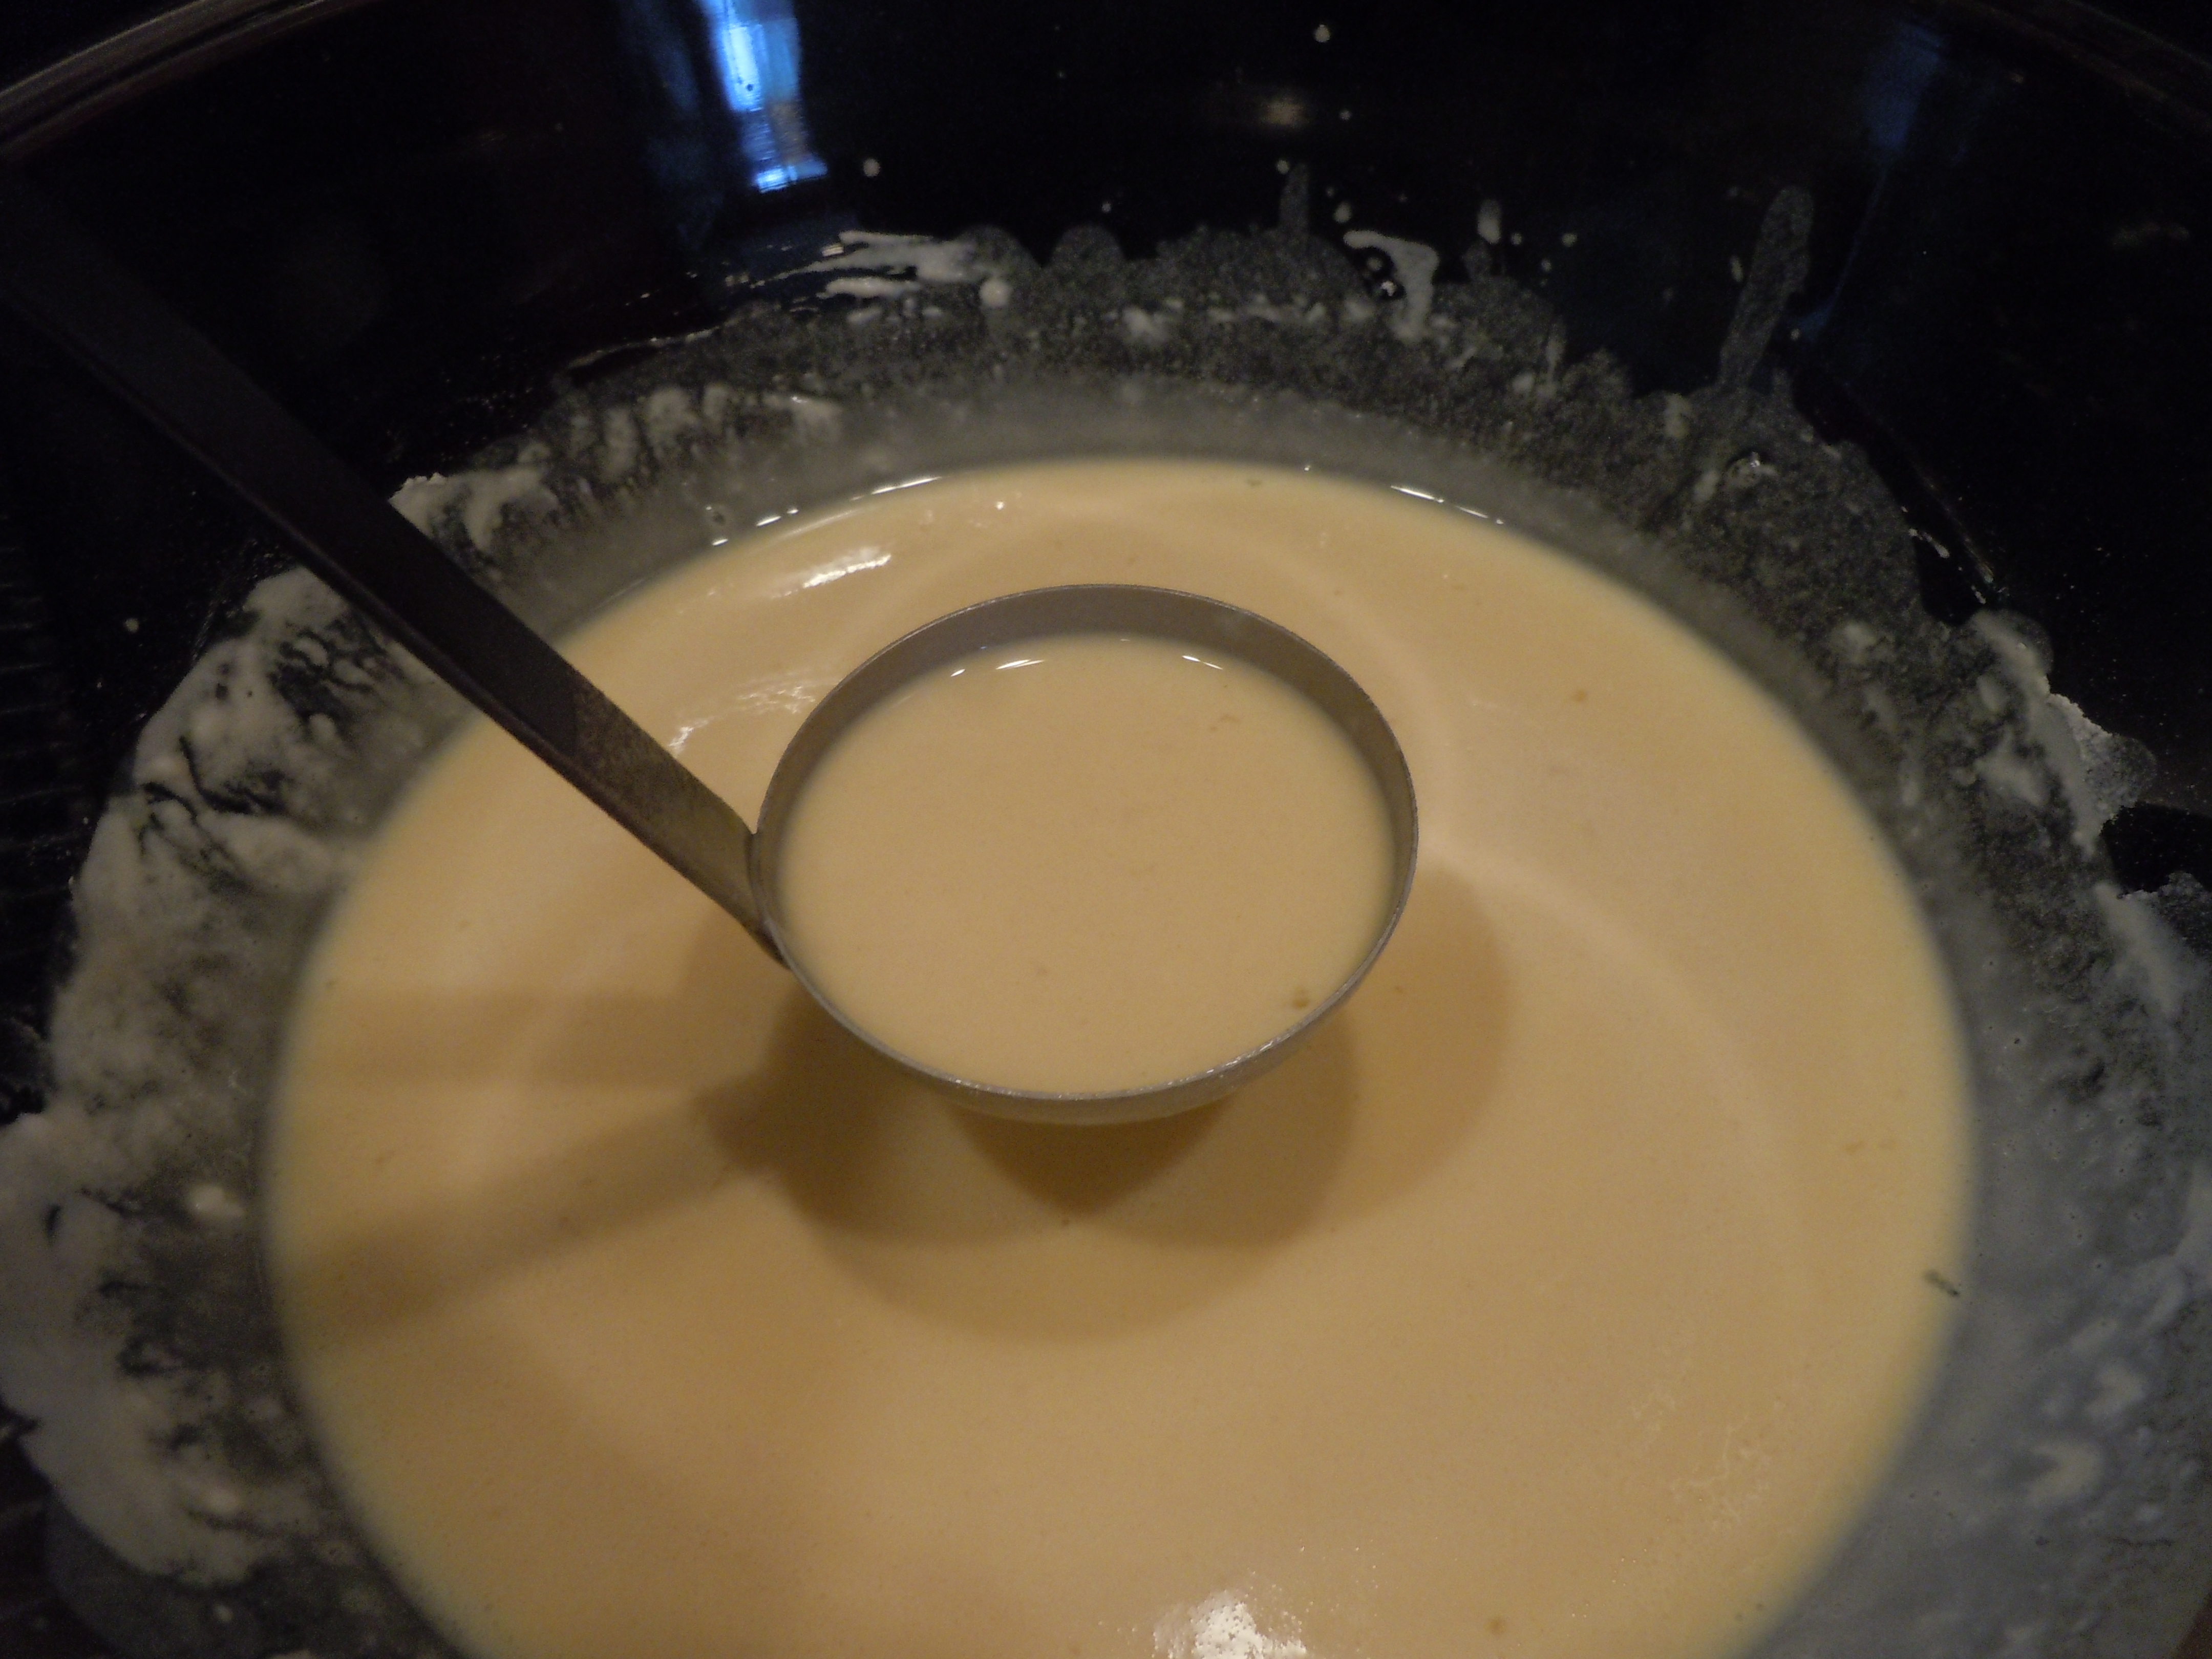
Pour in a ladle of batter into hot pan, approx. a little less than 1/4 cup laddle
Pick up pan and swirl around 3 times and place back down onto stove
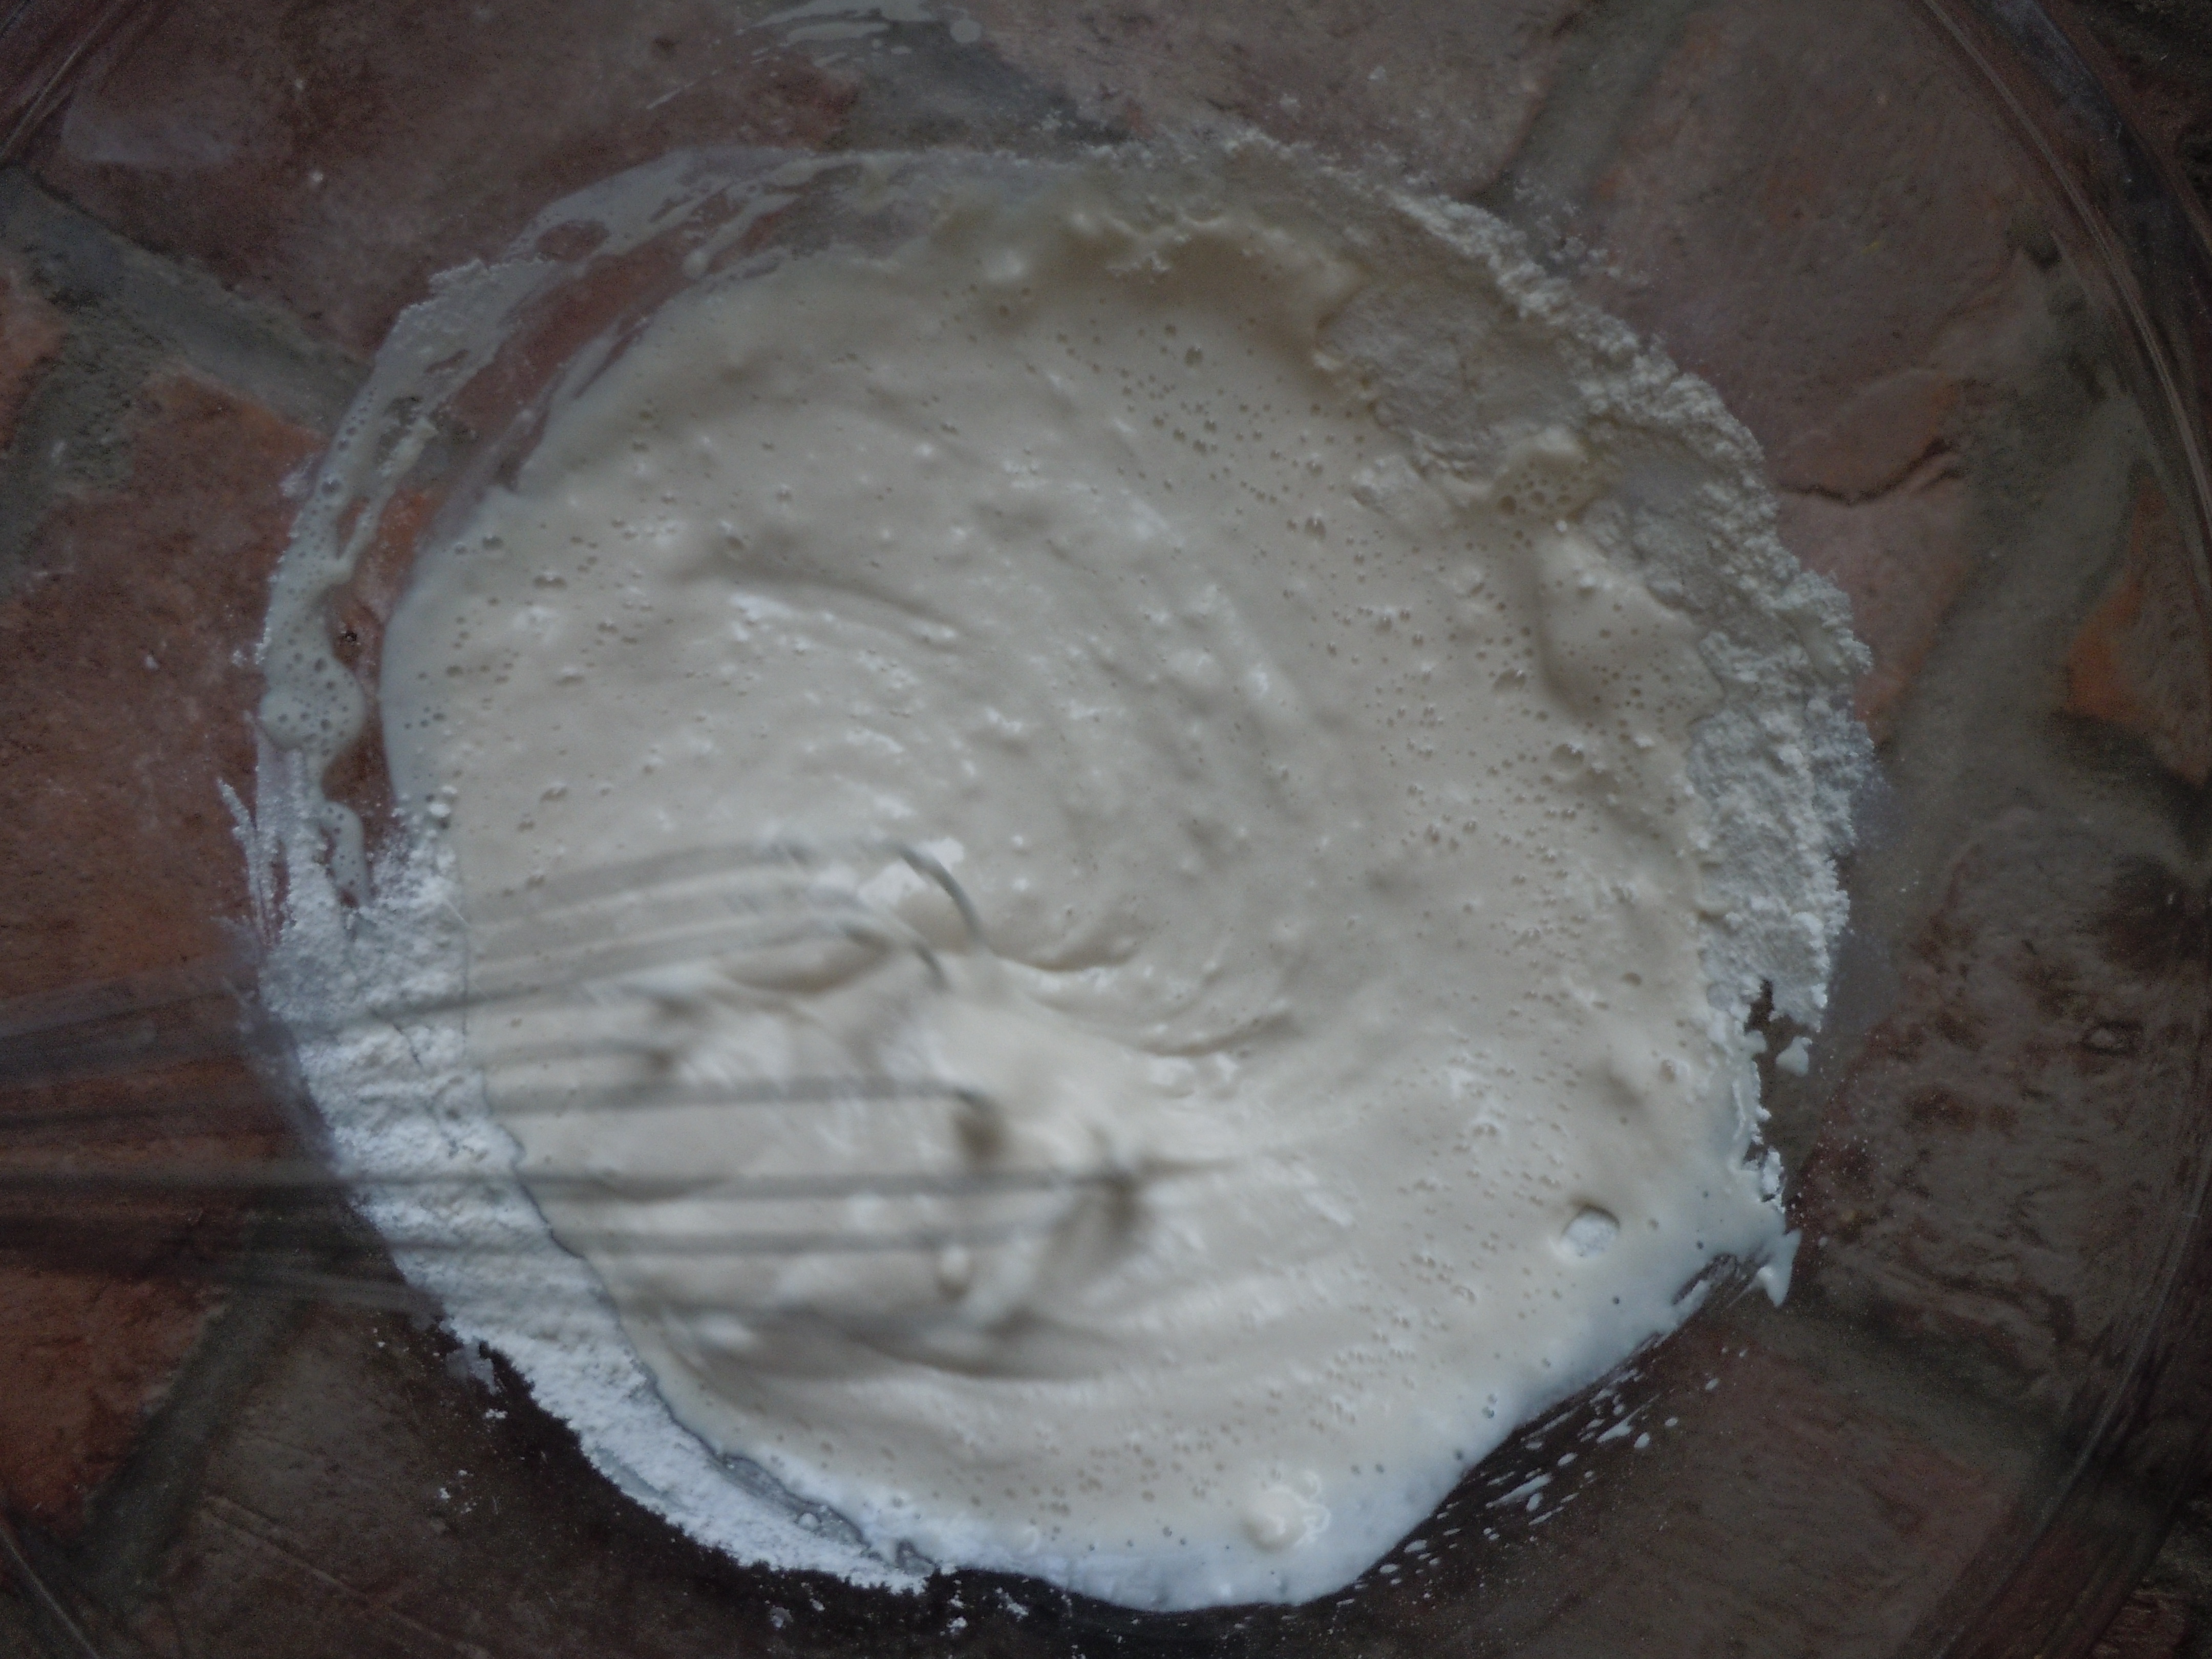
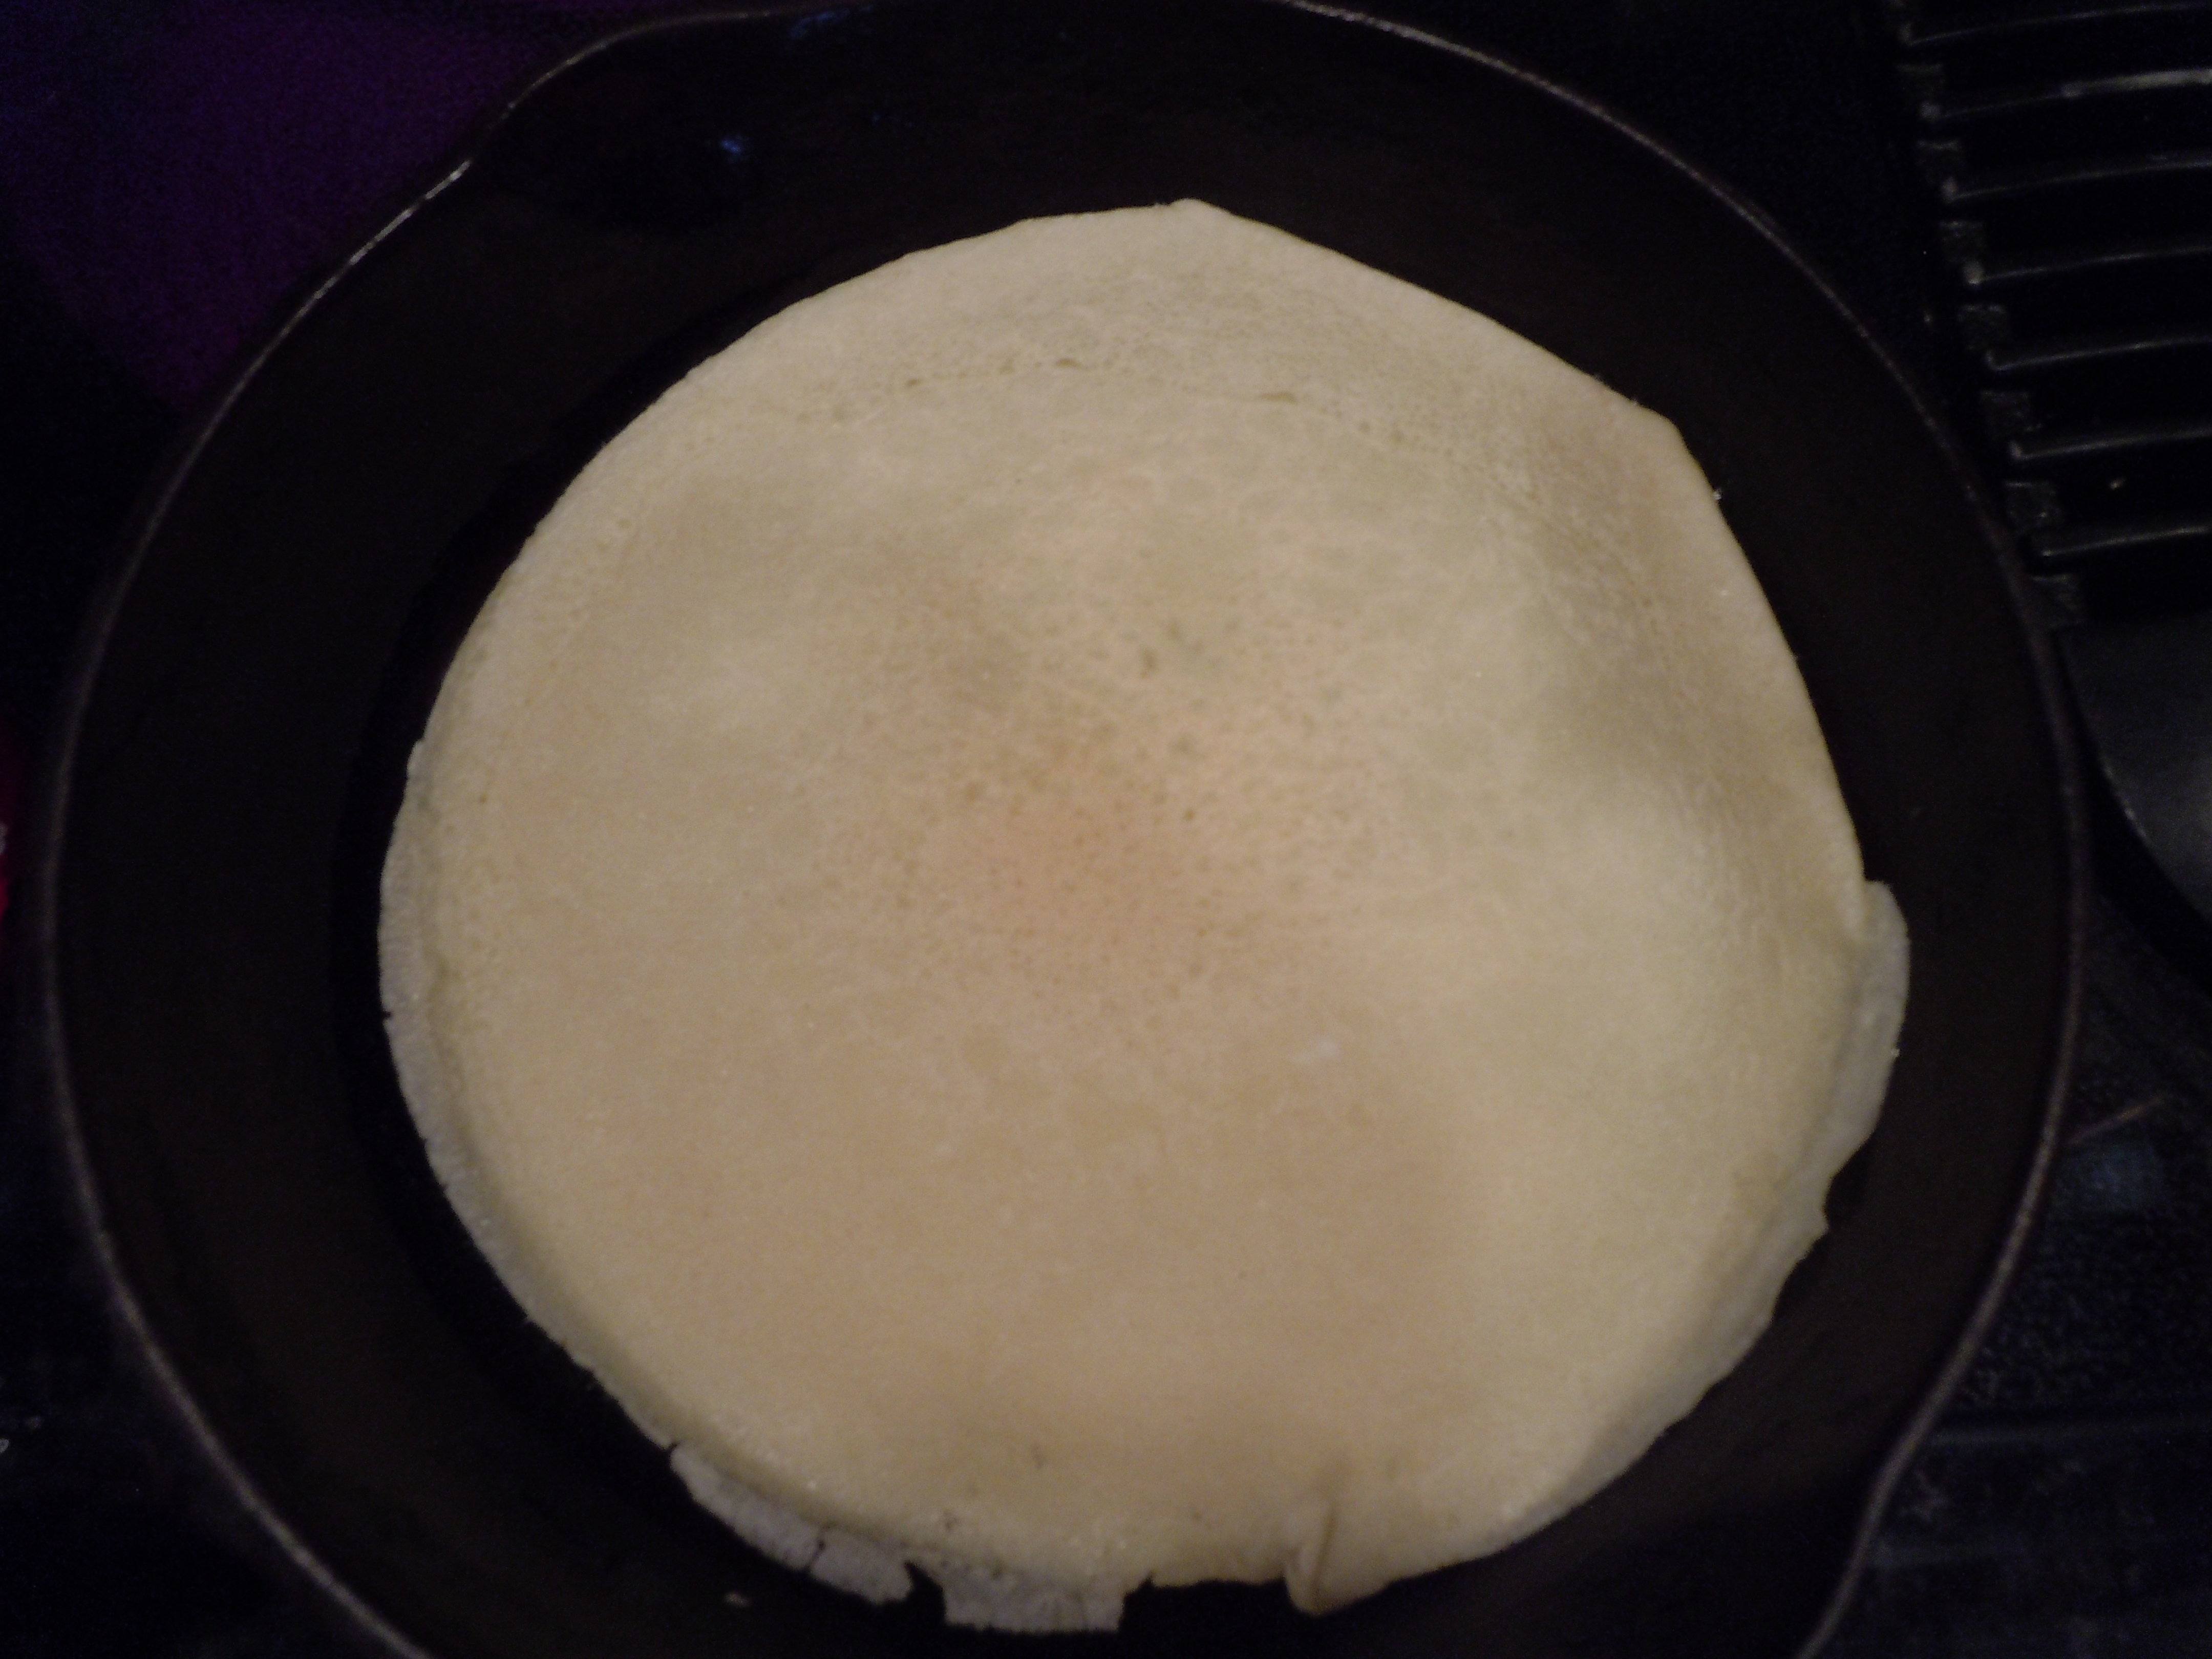
Wait about 25 seconds and flip pasta crepe over, you can use a flexible pastry knife to help you get under it…it will be easy to flip and will not ever be stuck
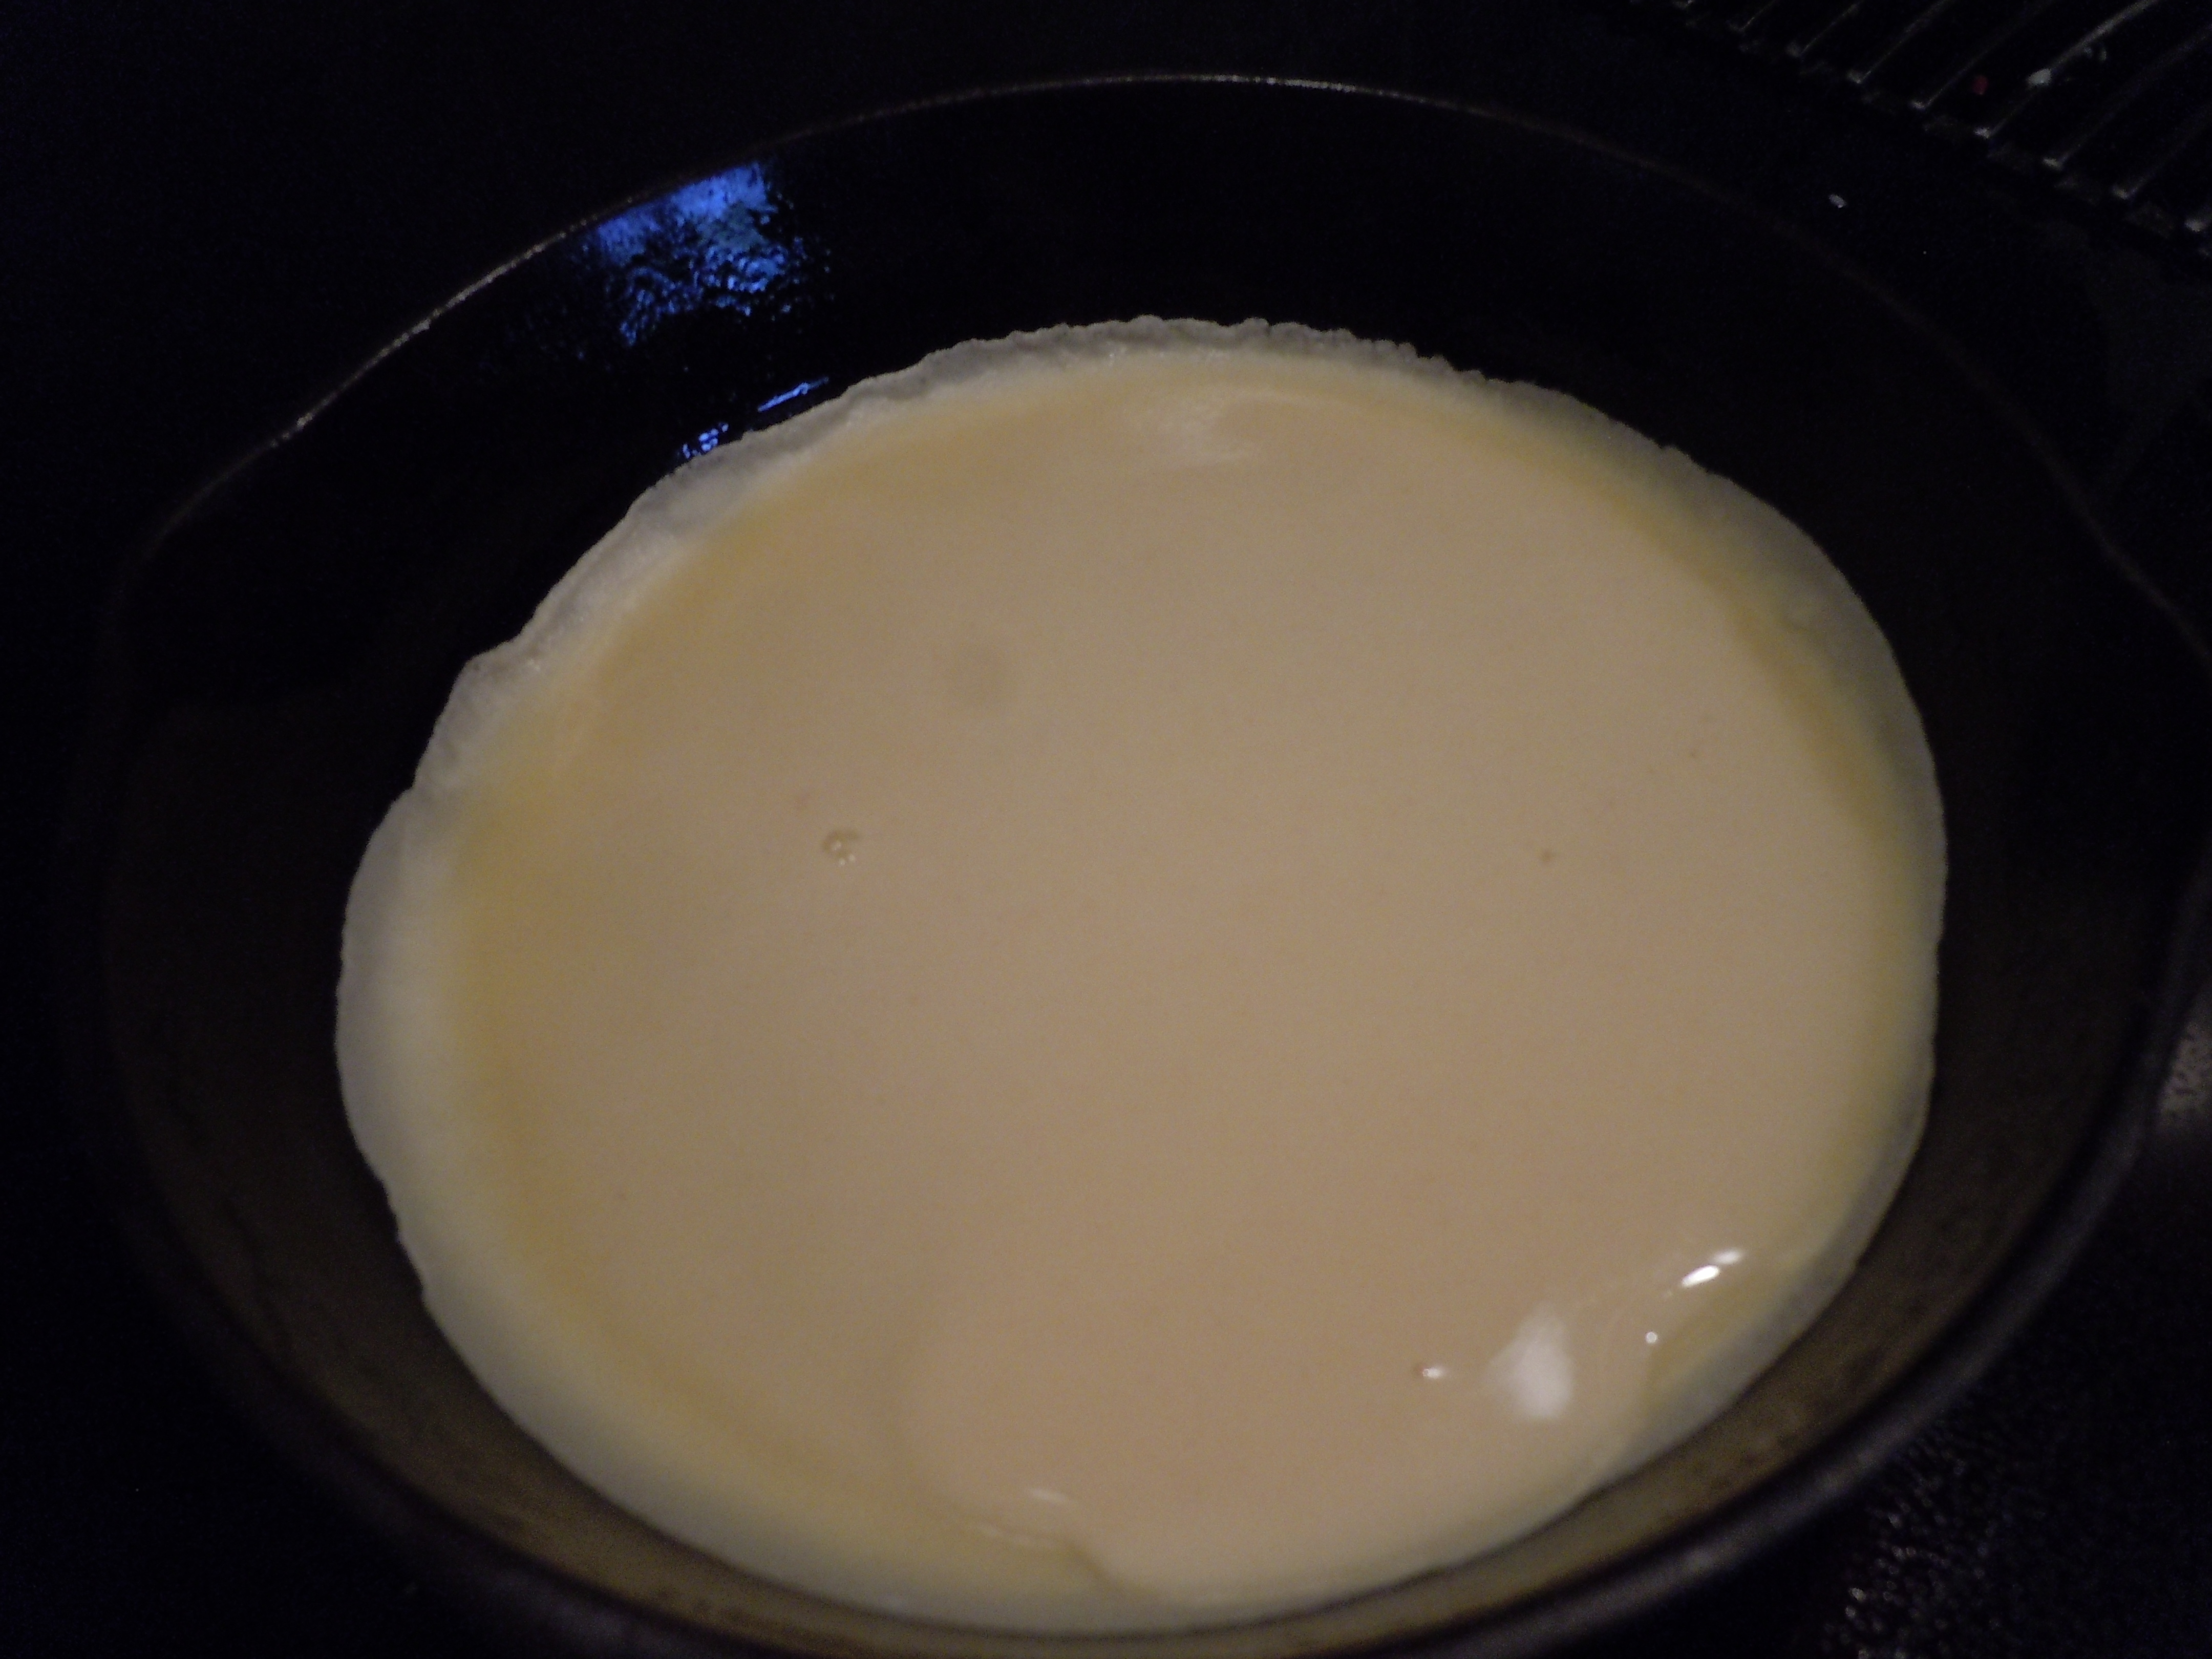
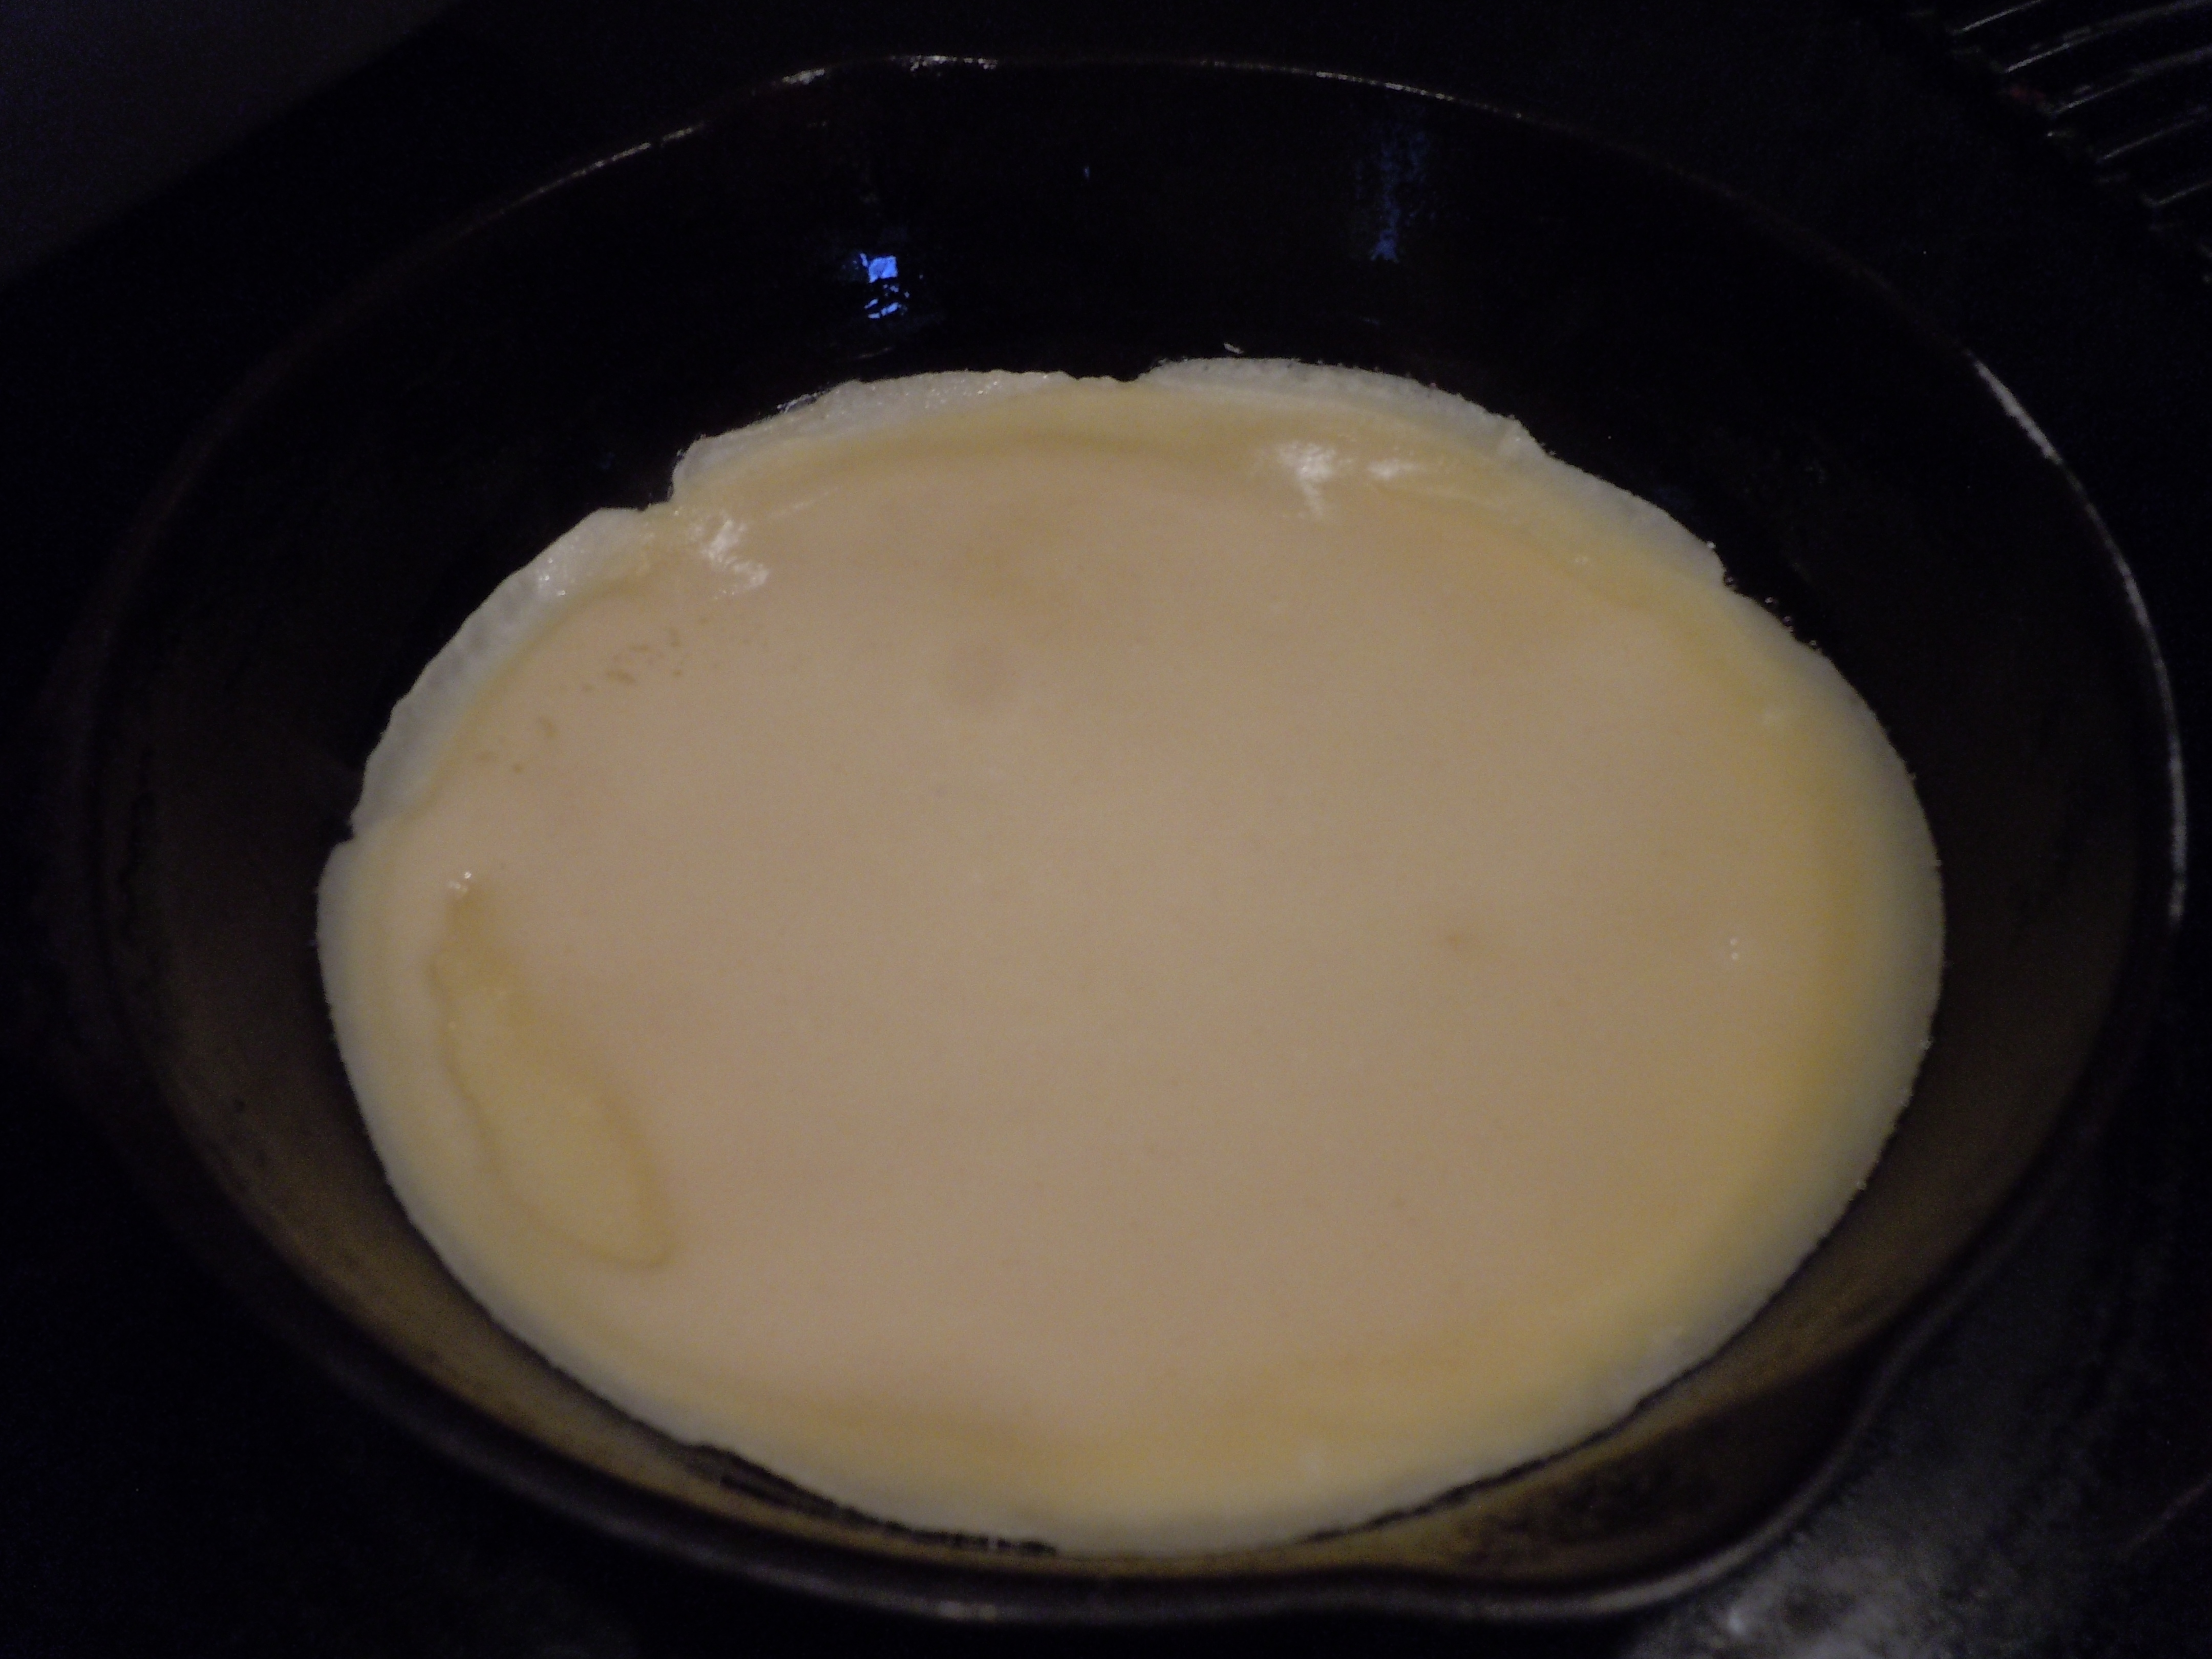
You never want the pasta crepe to be golden on the edges-that would be over cooking them…they should look like the photo above light in color
Immediately flip over onto floured board and flip a couple of times to cool a little
Repeat dredging saturated paper towel into pan to coat and then pour another 1/4 cup ladle of batter into pan.
Repeat this over and over until you run out of batter…this amount will make 16 manicotti
When you are done lay out a work board to roll manicotti’s on
Put ricotta in a bowl so it’s easy to work with
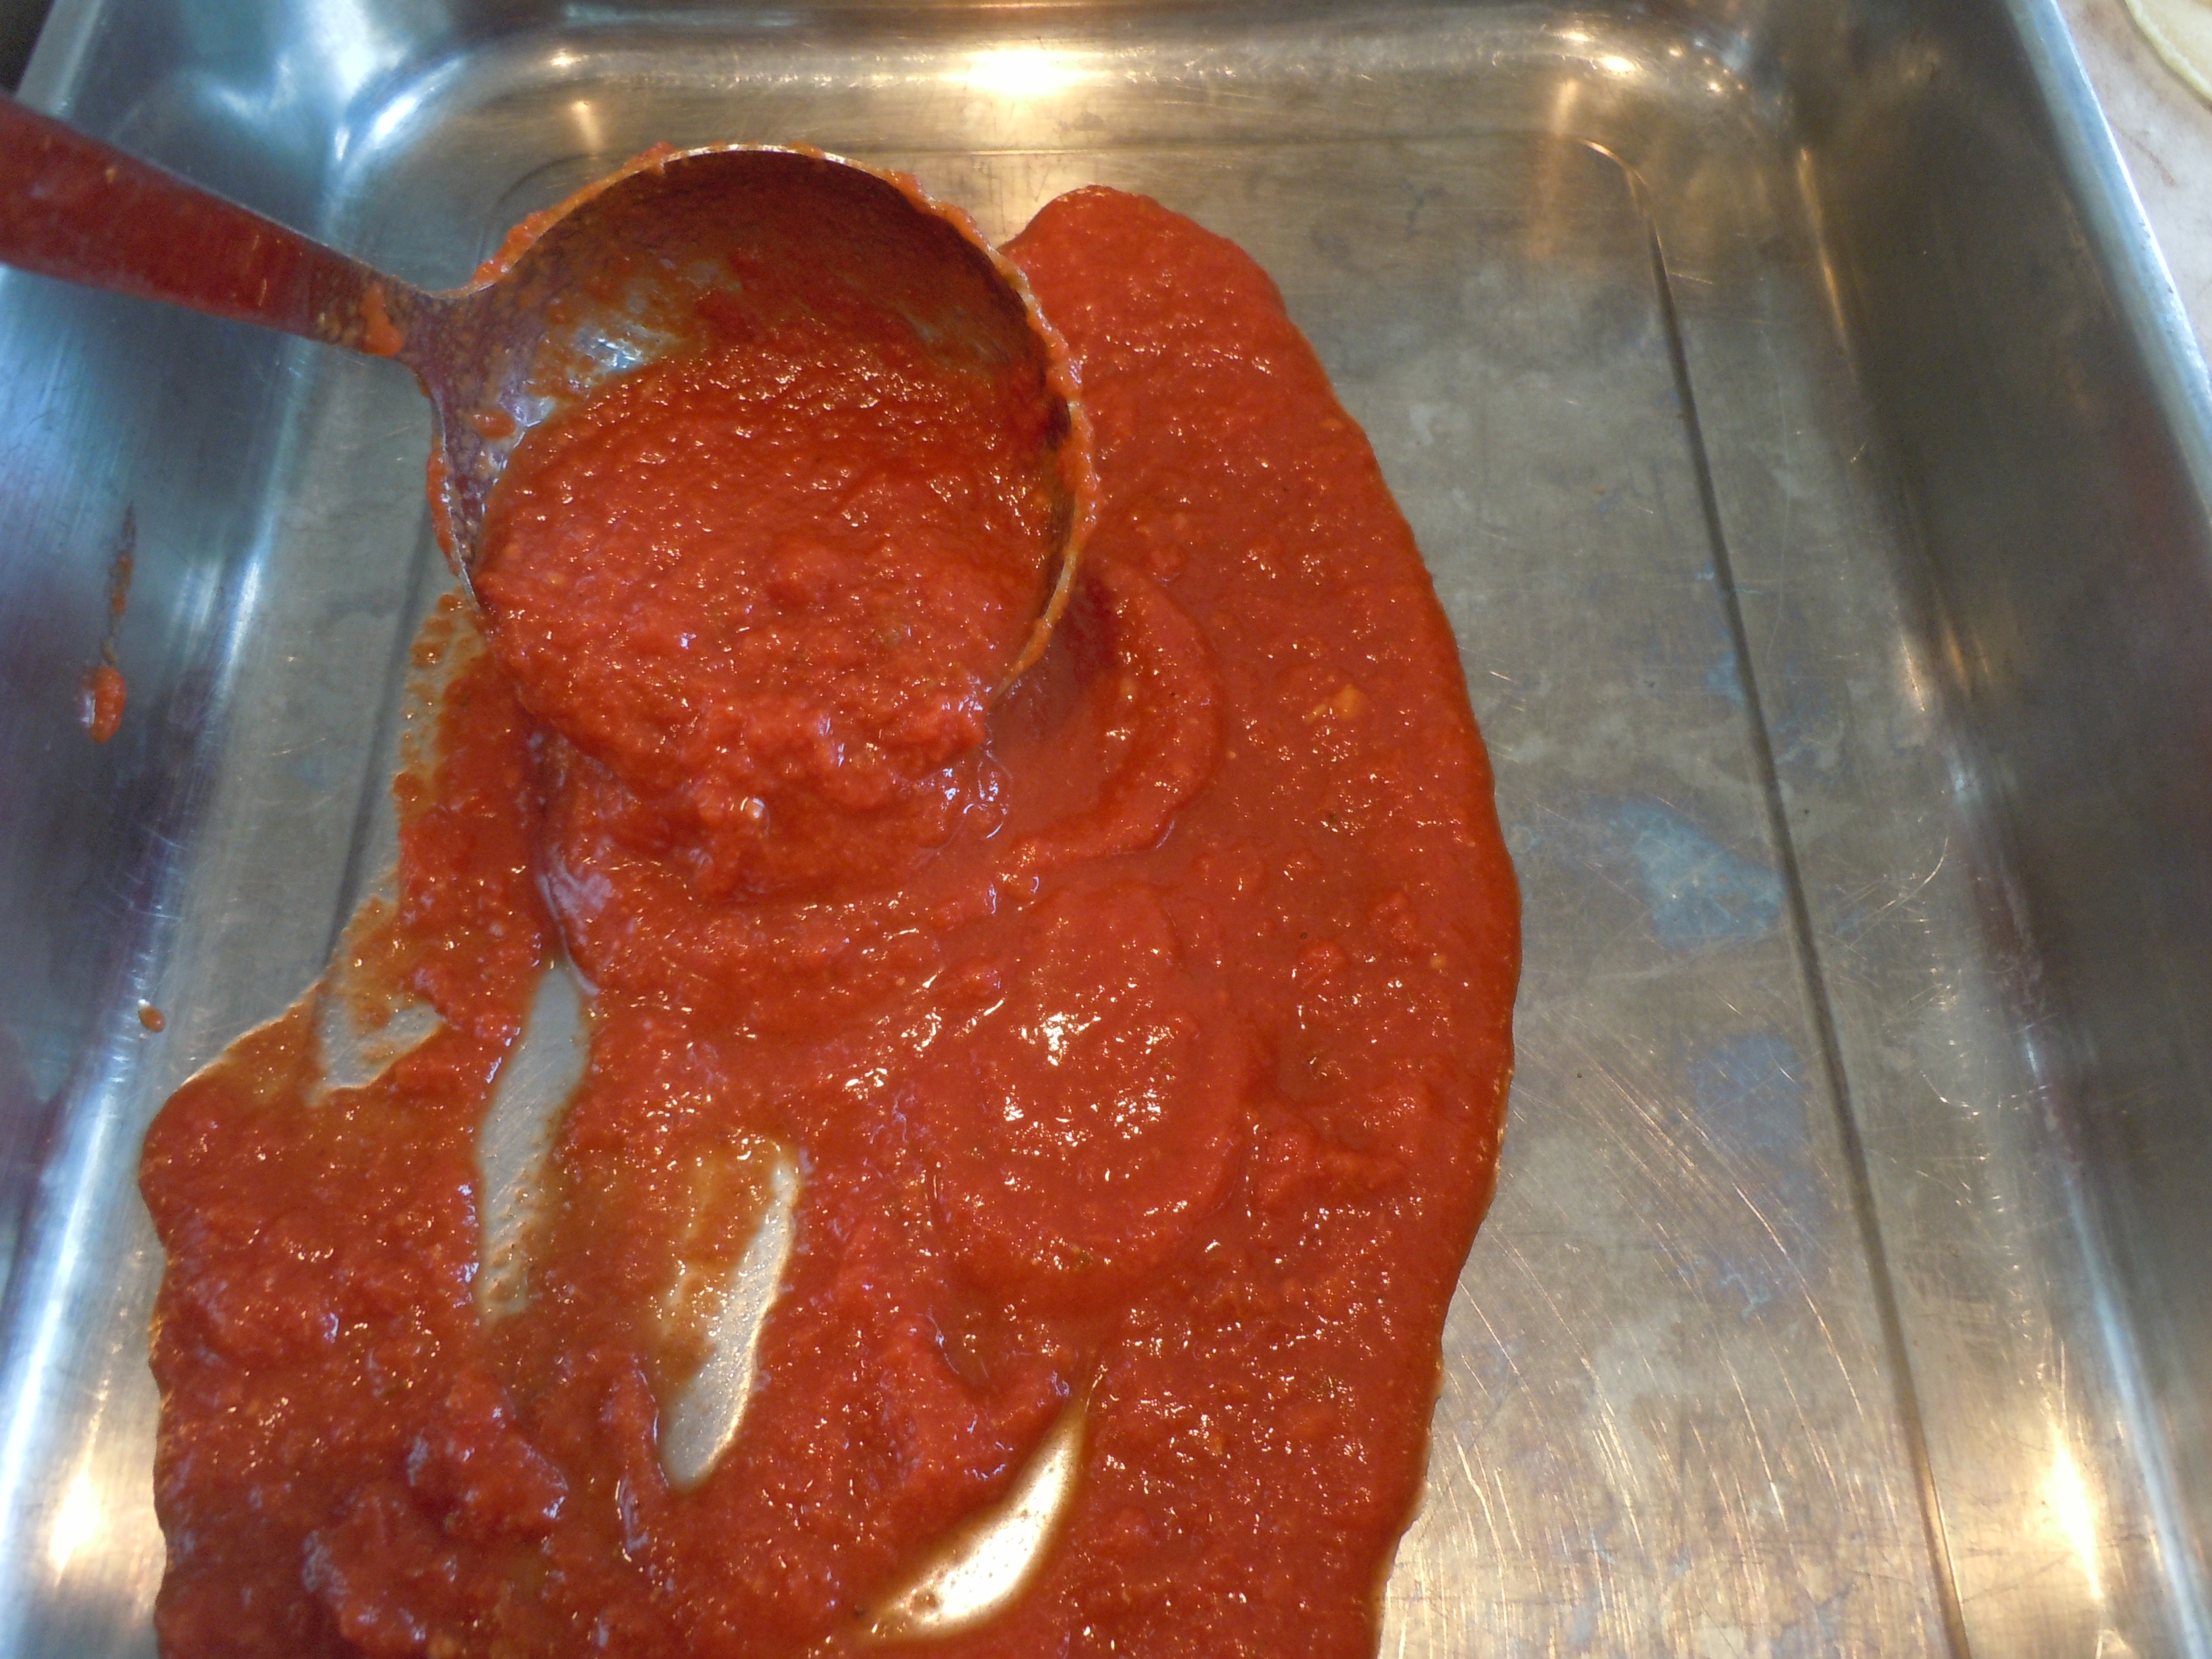
Pour about 2 cup of tomato sauce into the baking pan
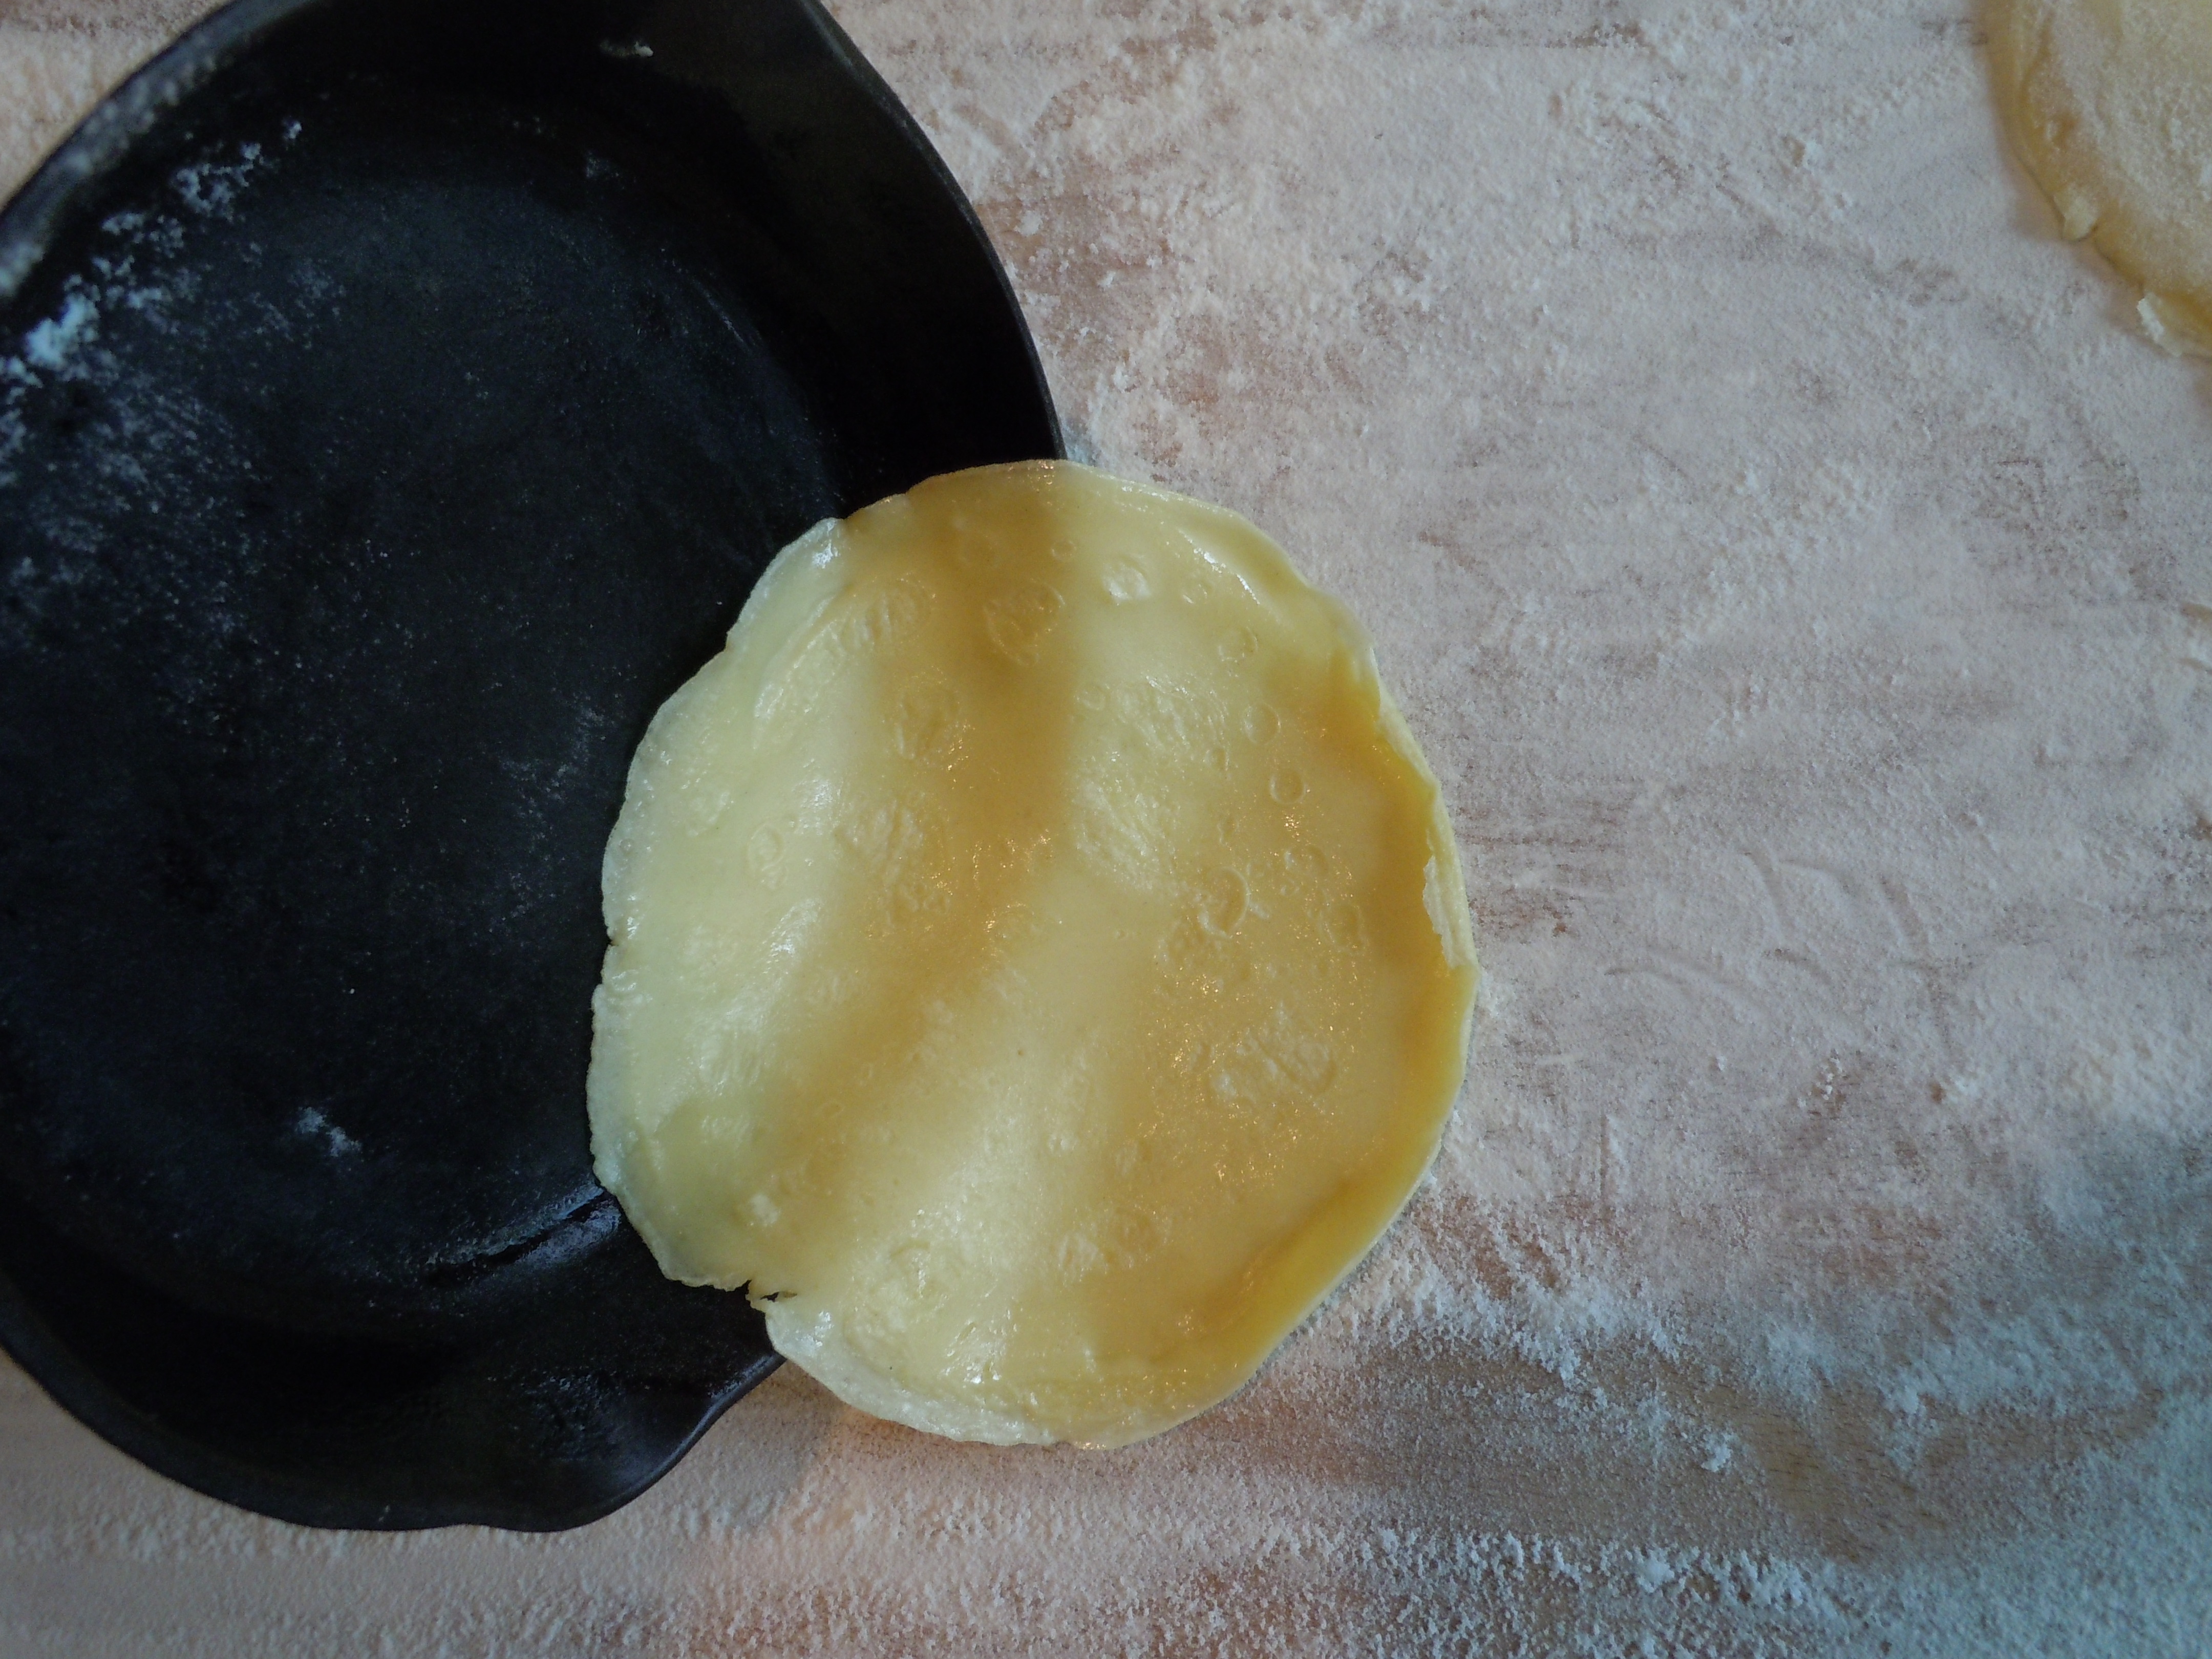
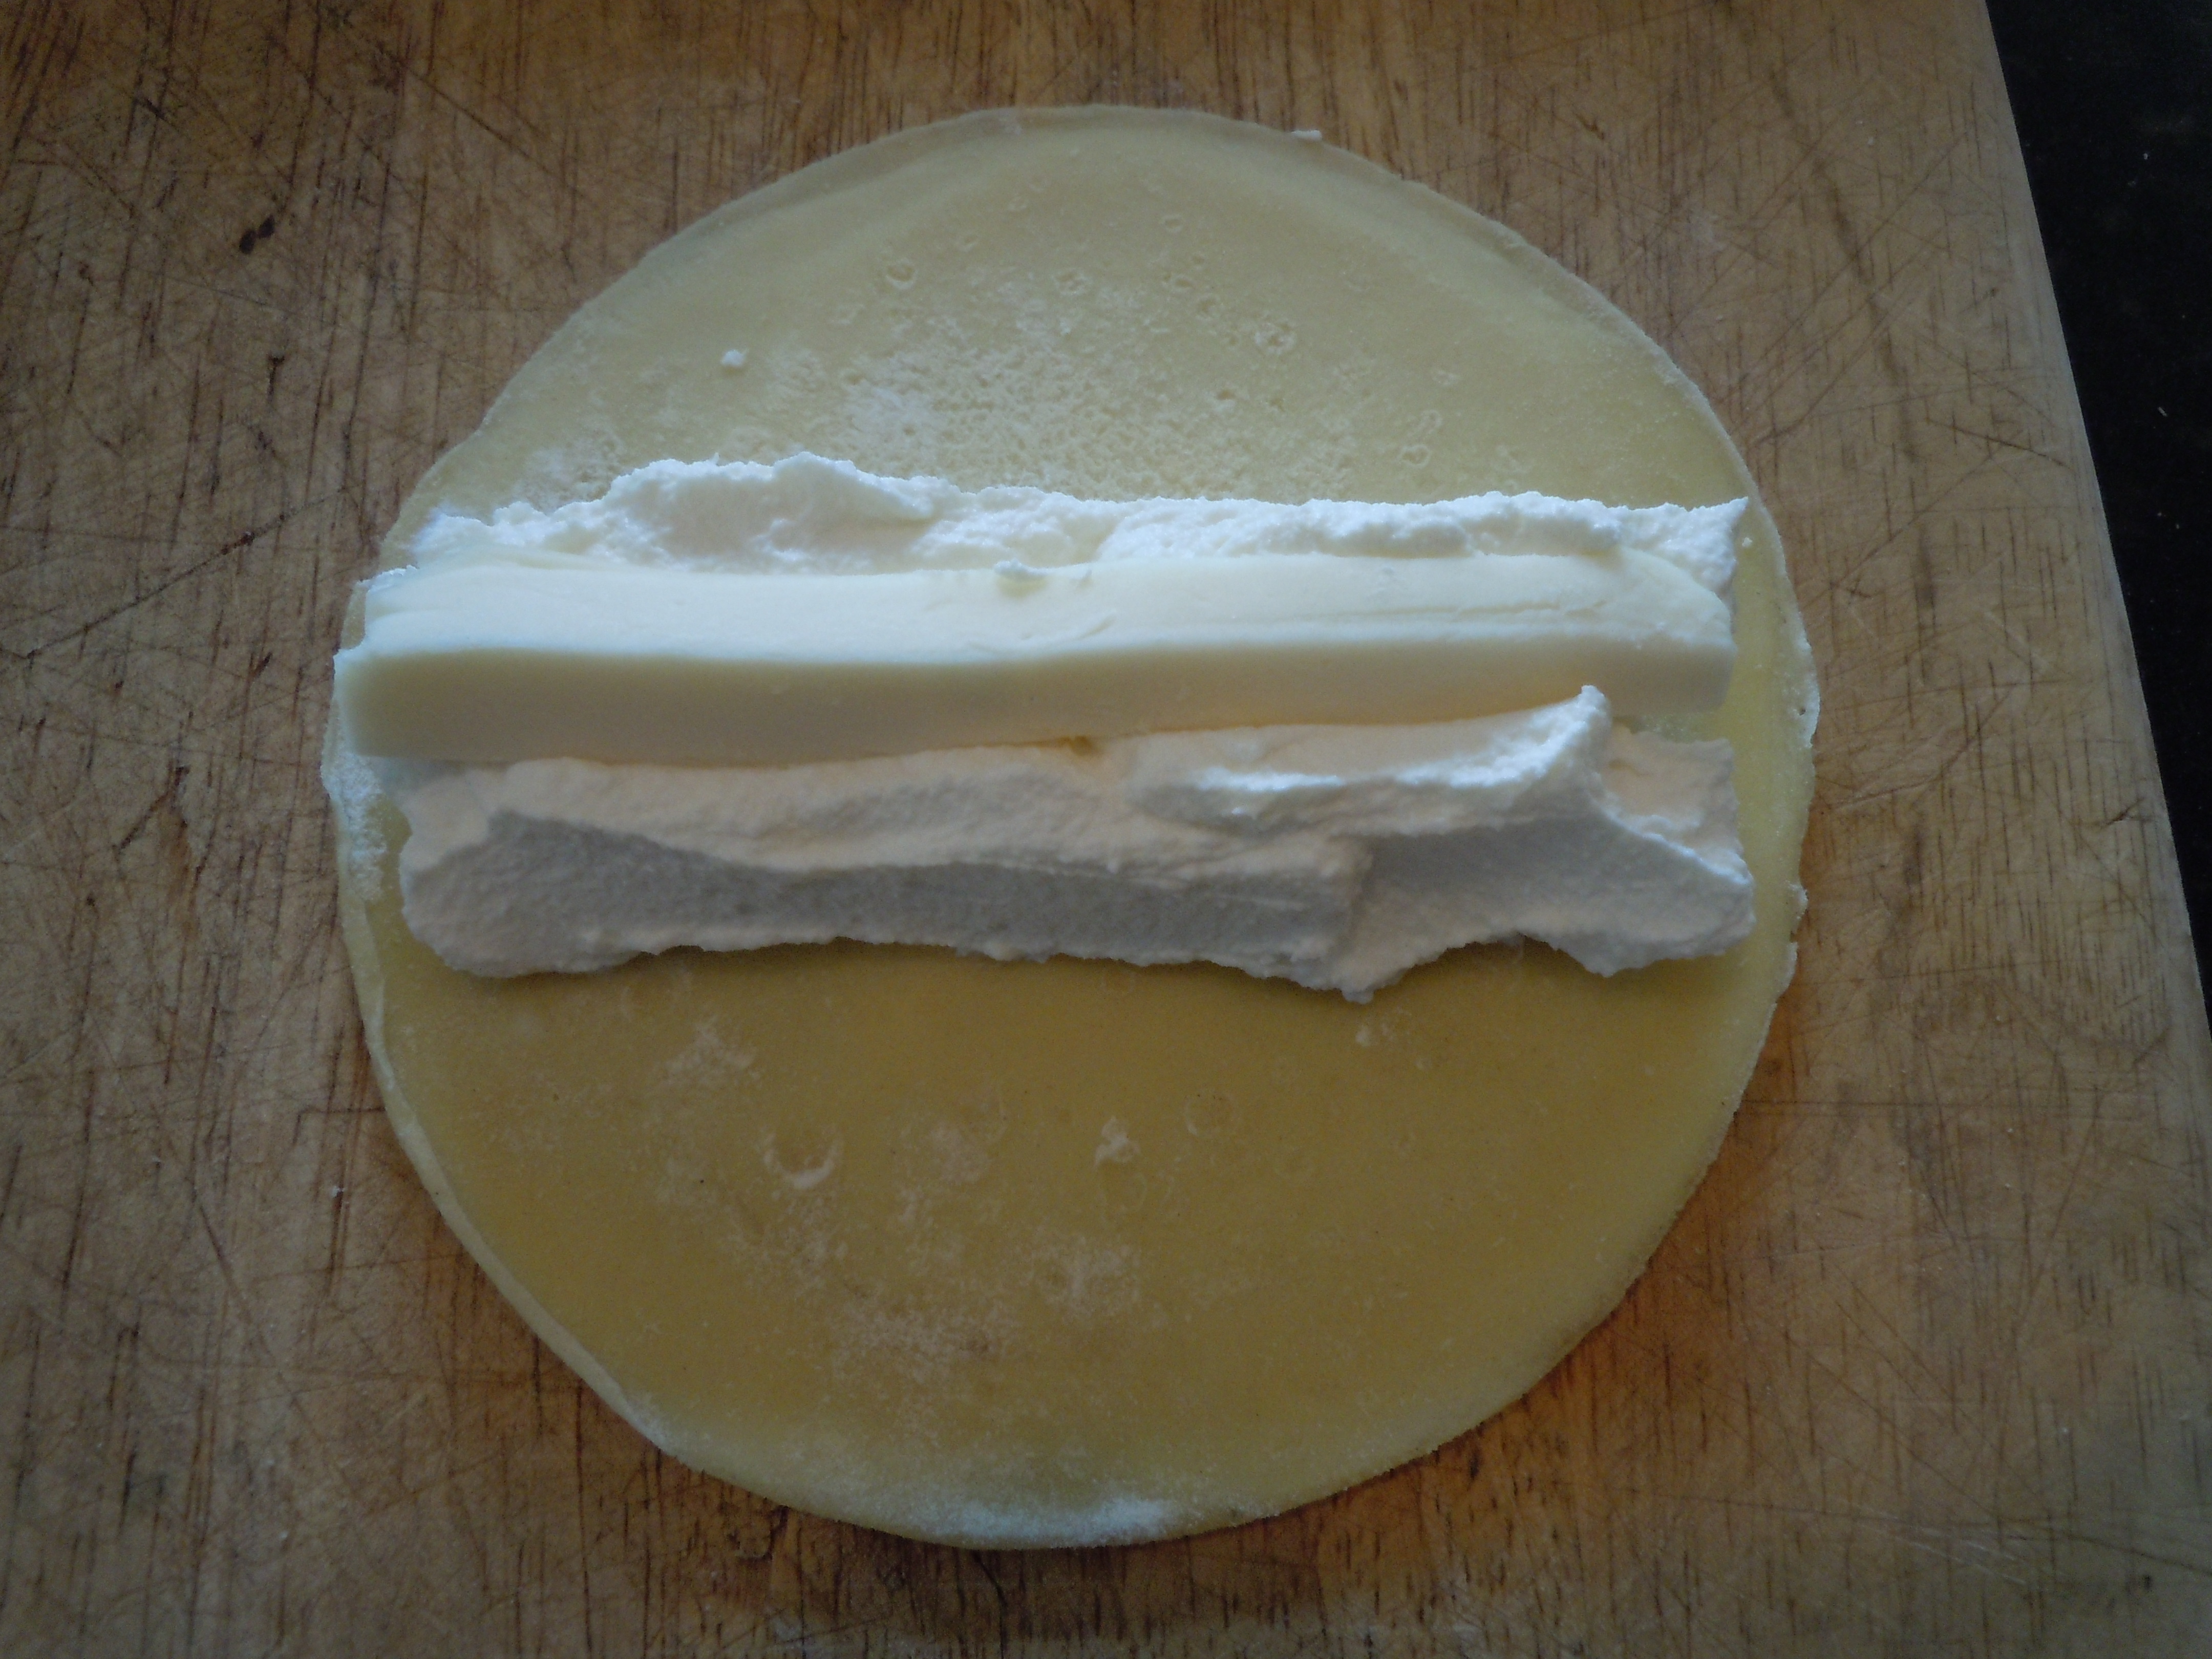
Lay out manicotti crepe and scoop 1/4 cup ricotta going across the center of the circle as shown in the photo
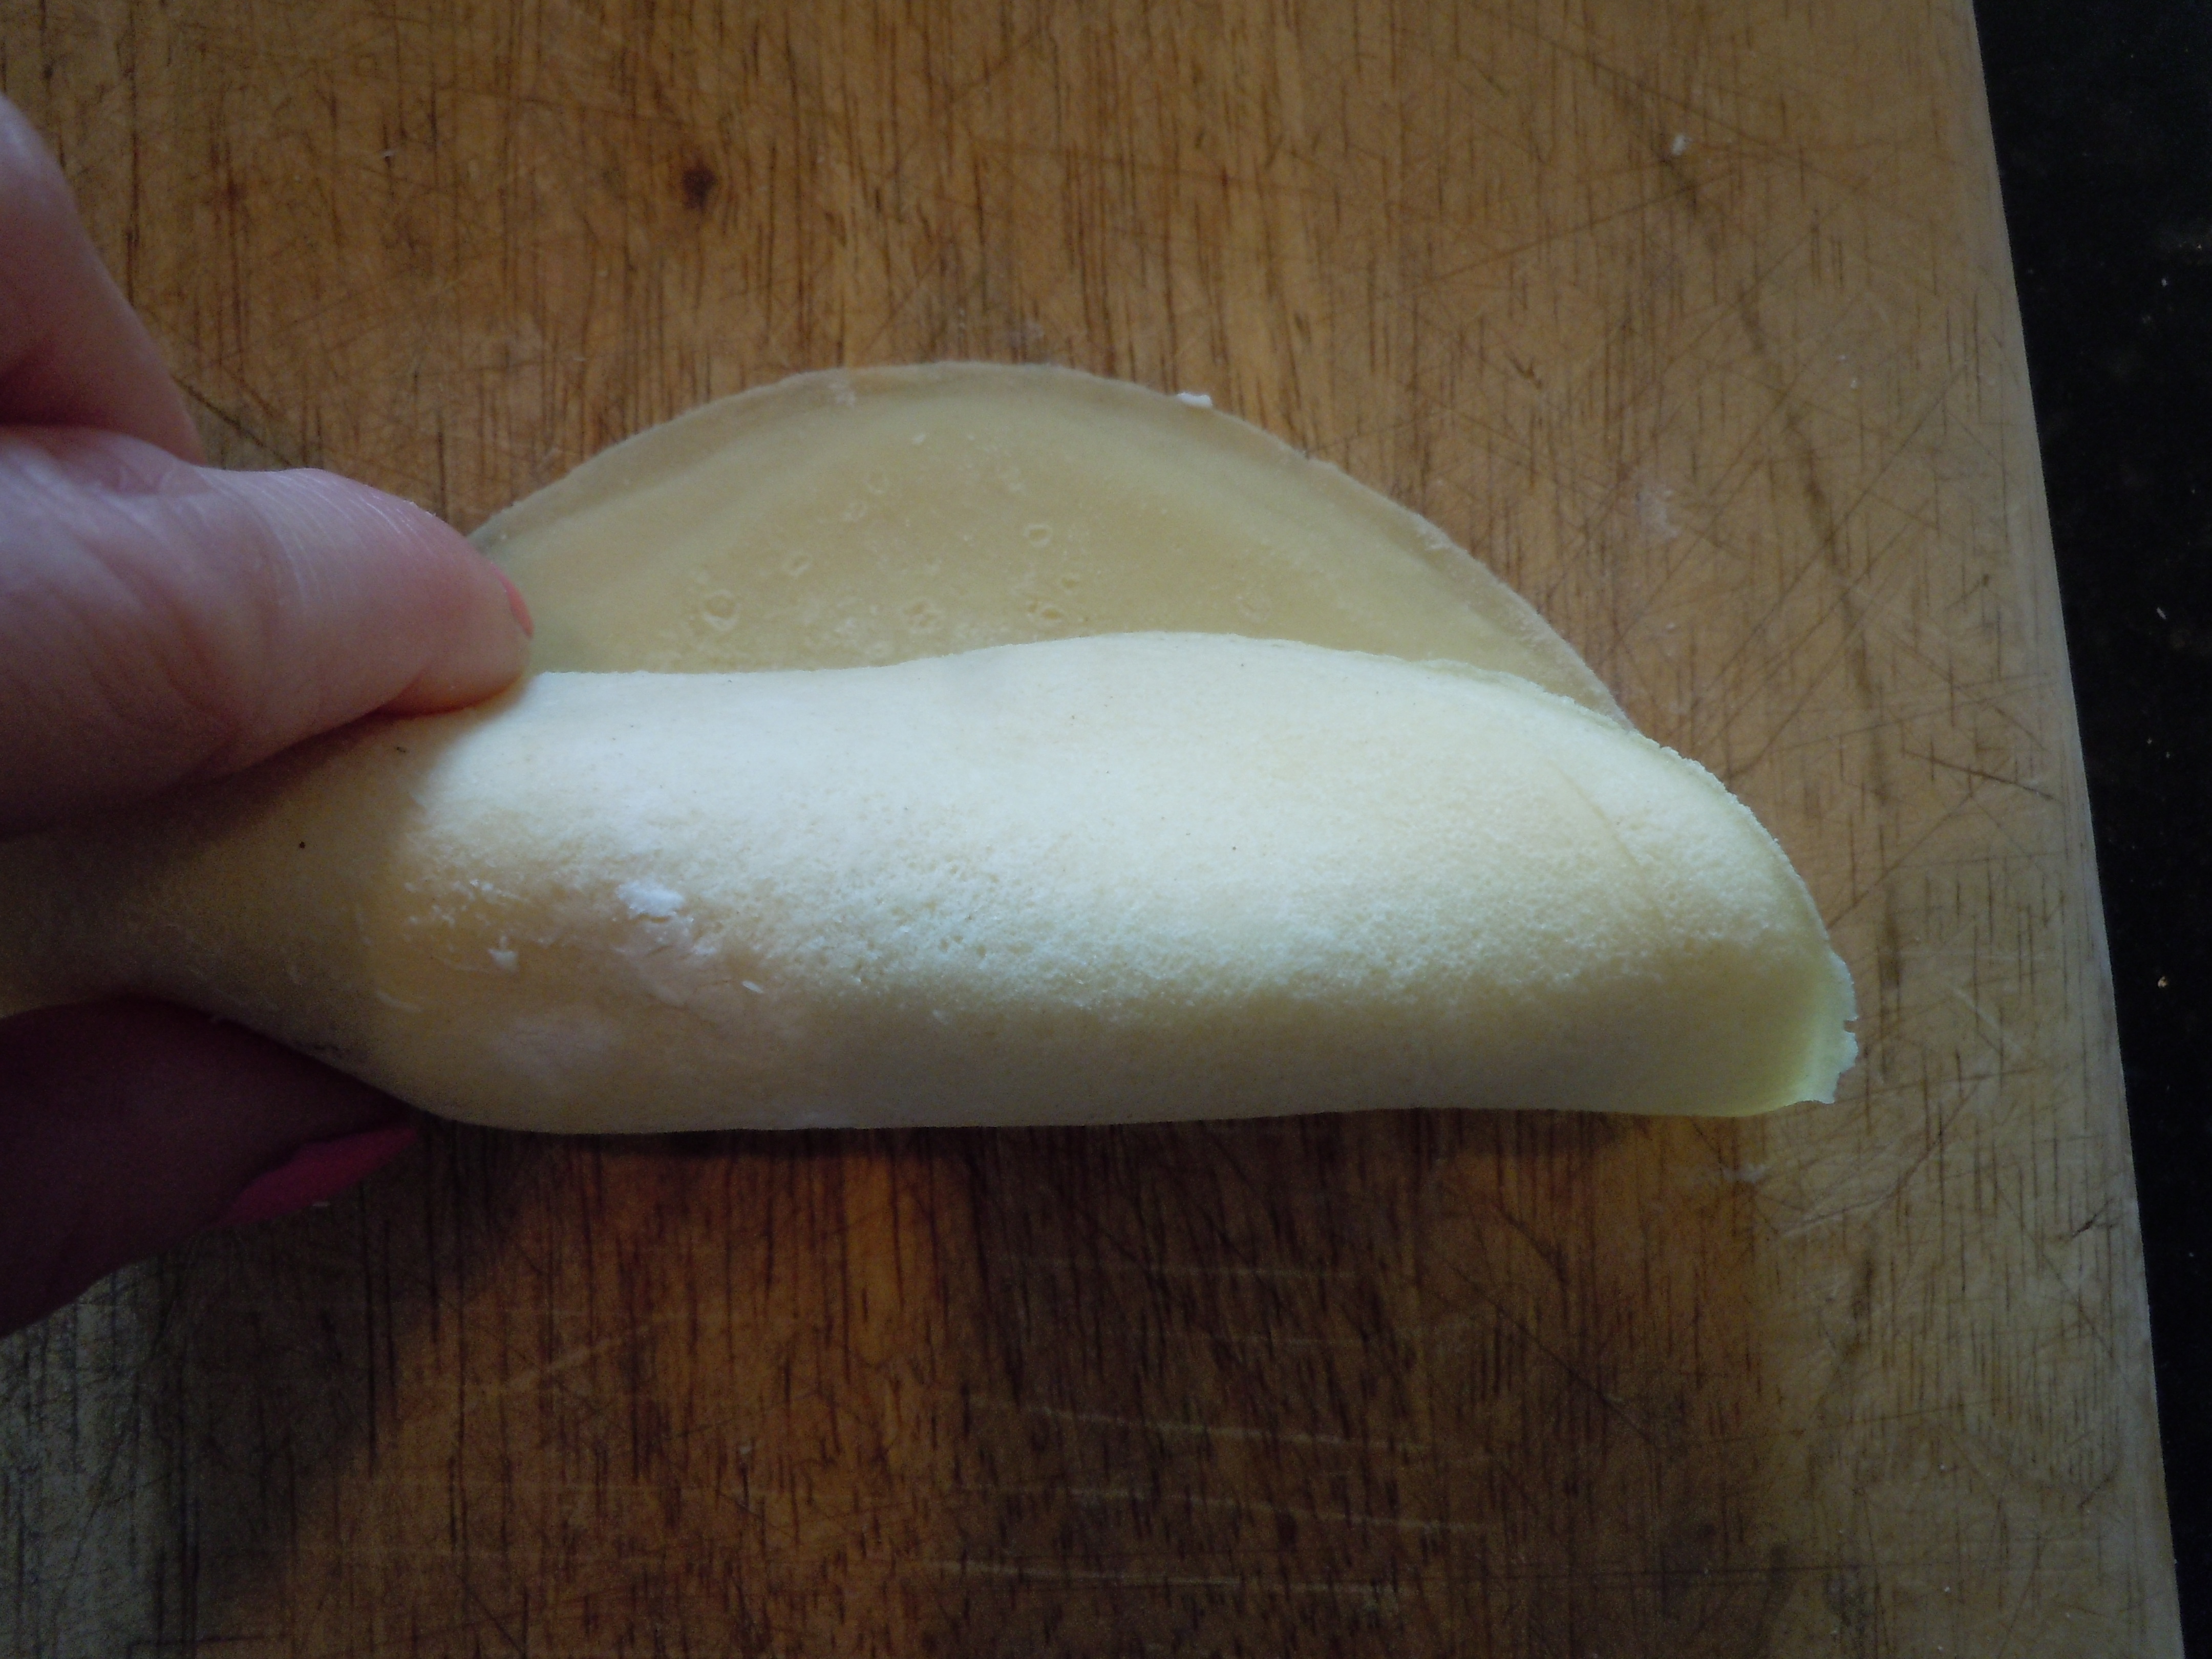
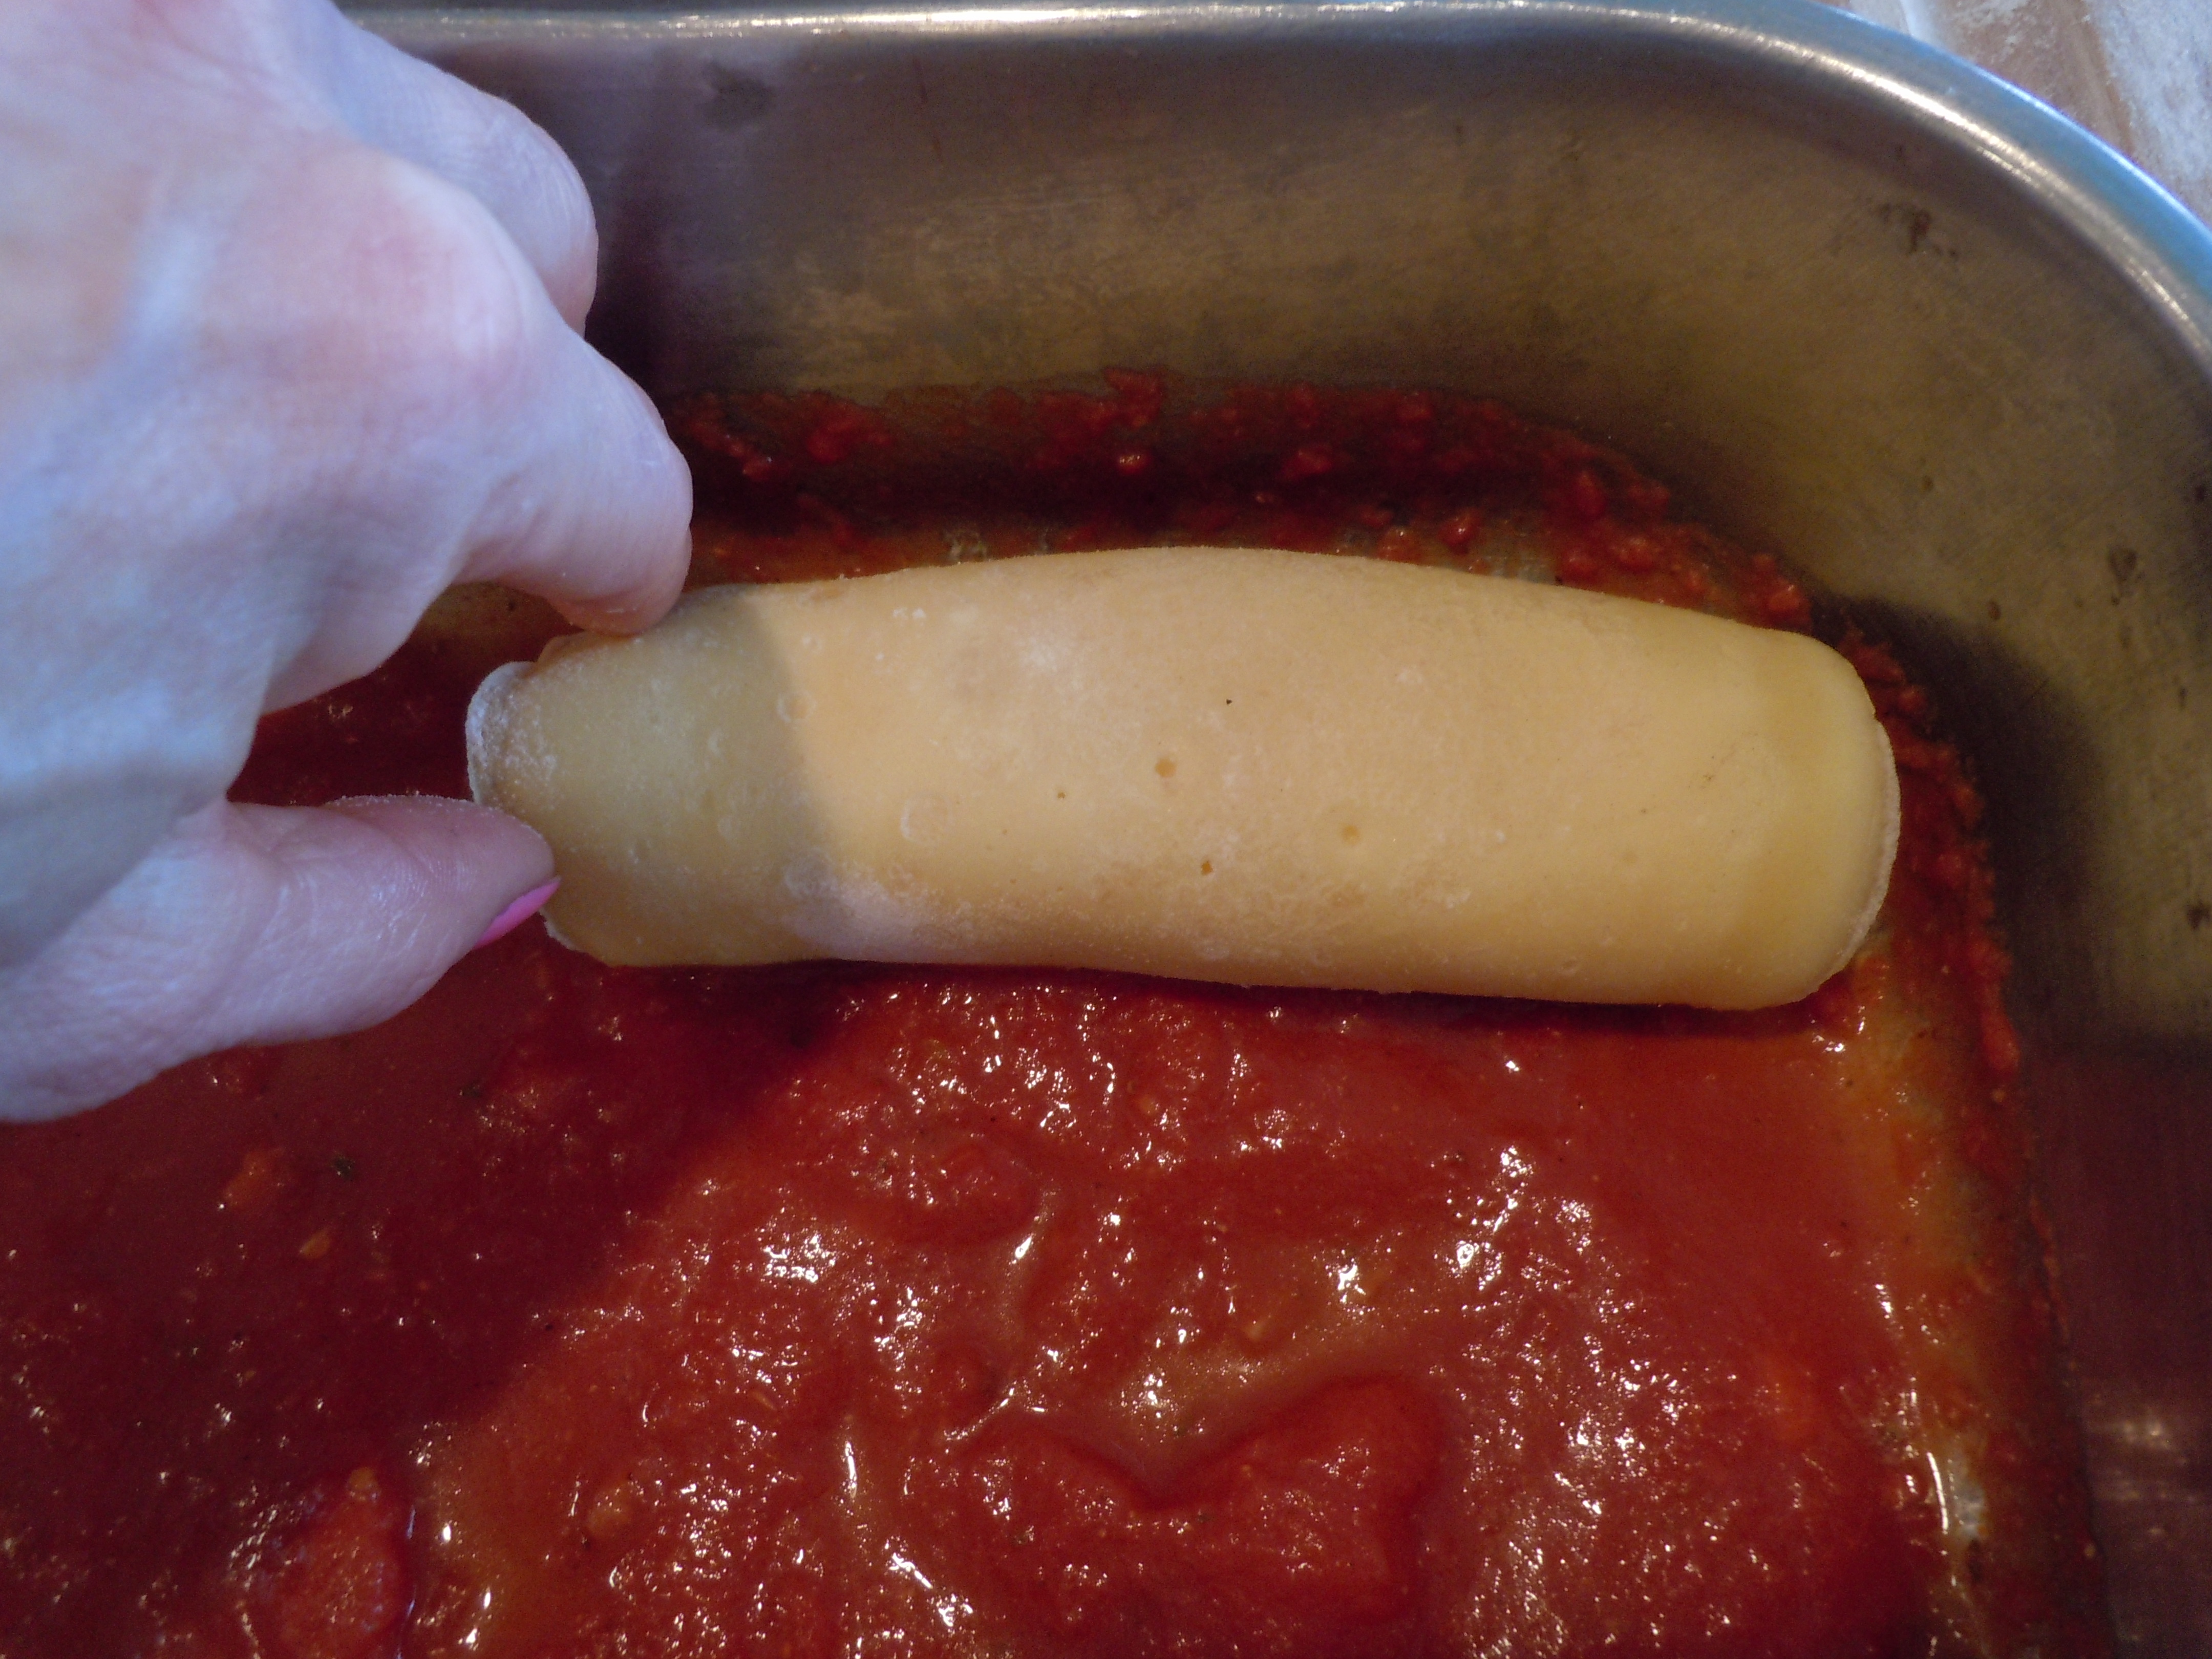
Lay a piece of mozzarella in the center and roll up manicotti
Place rolled manicotti on top of sauce in pan and continue on until all the pasta crepes are done
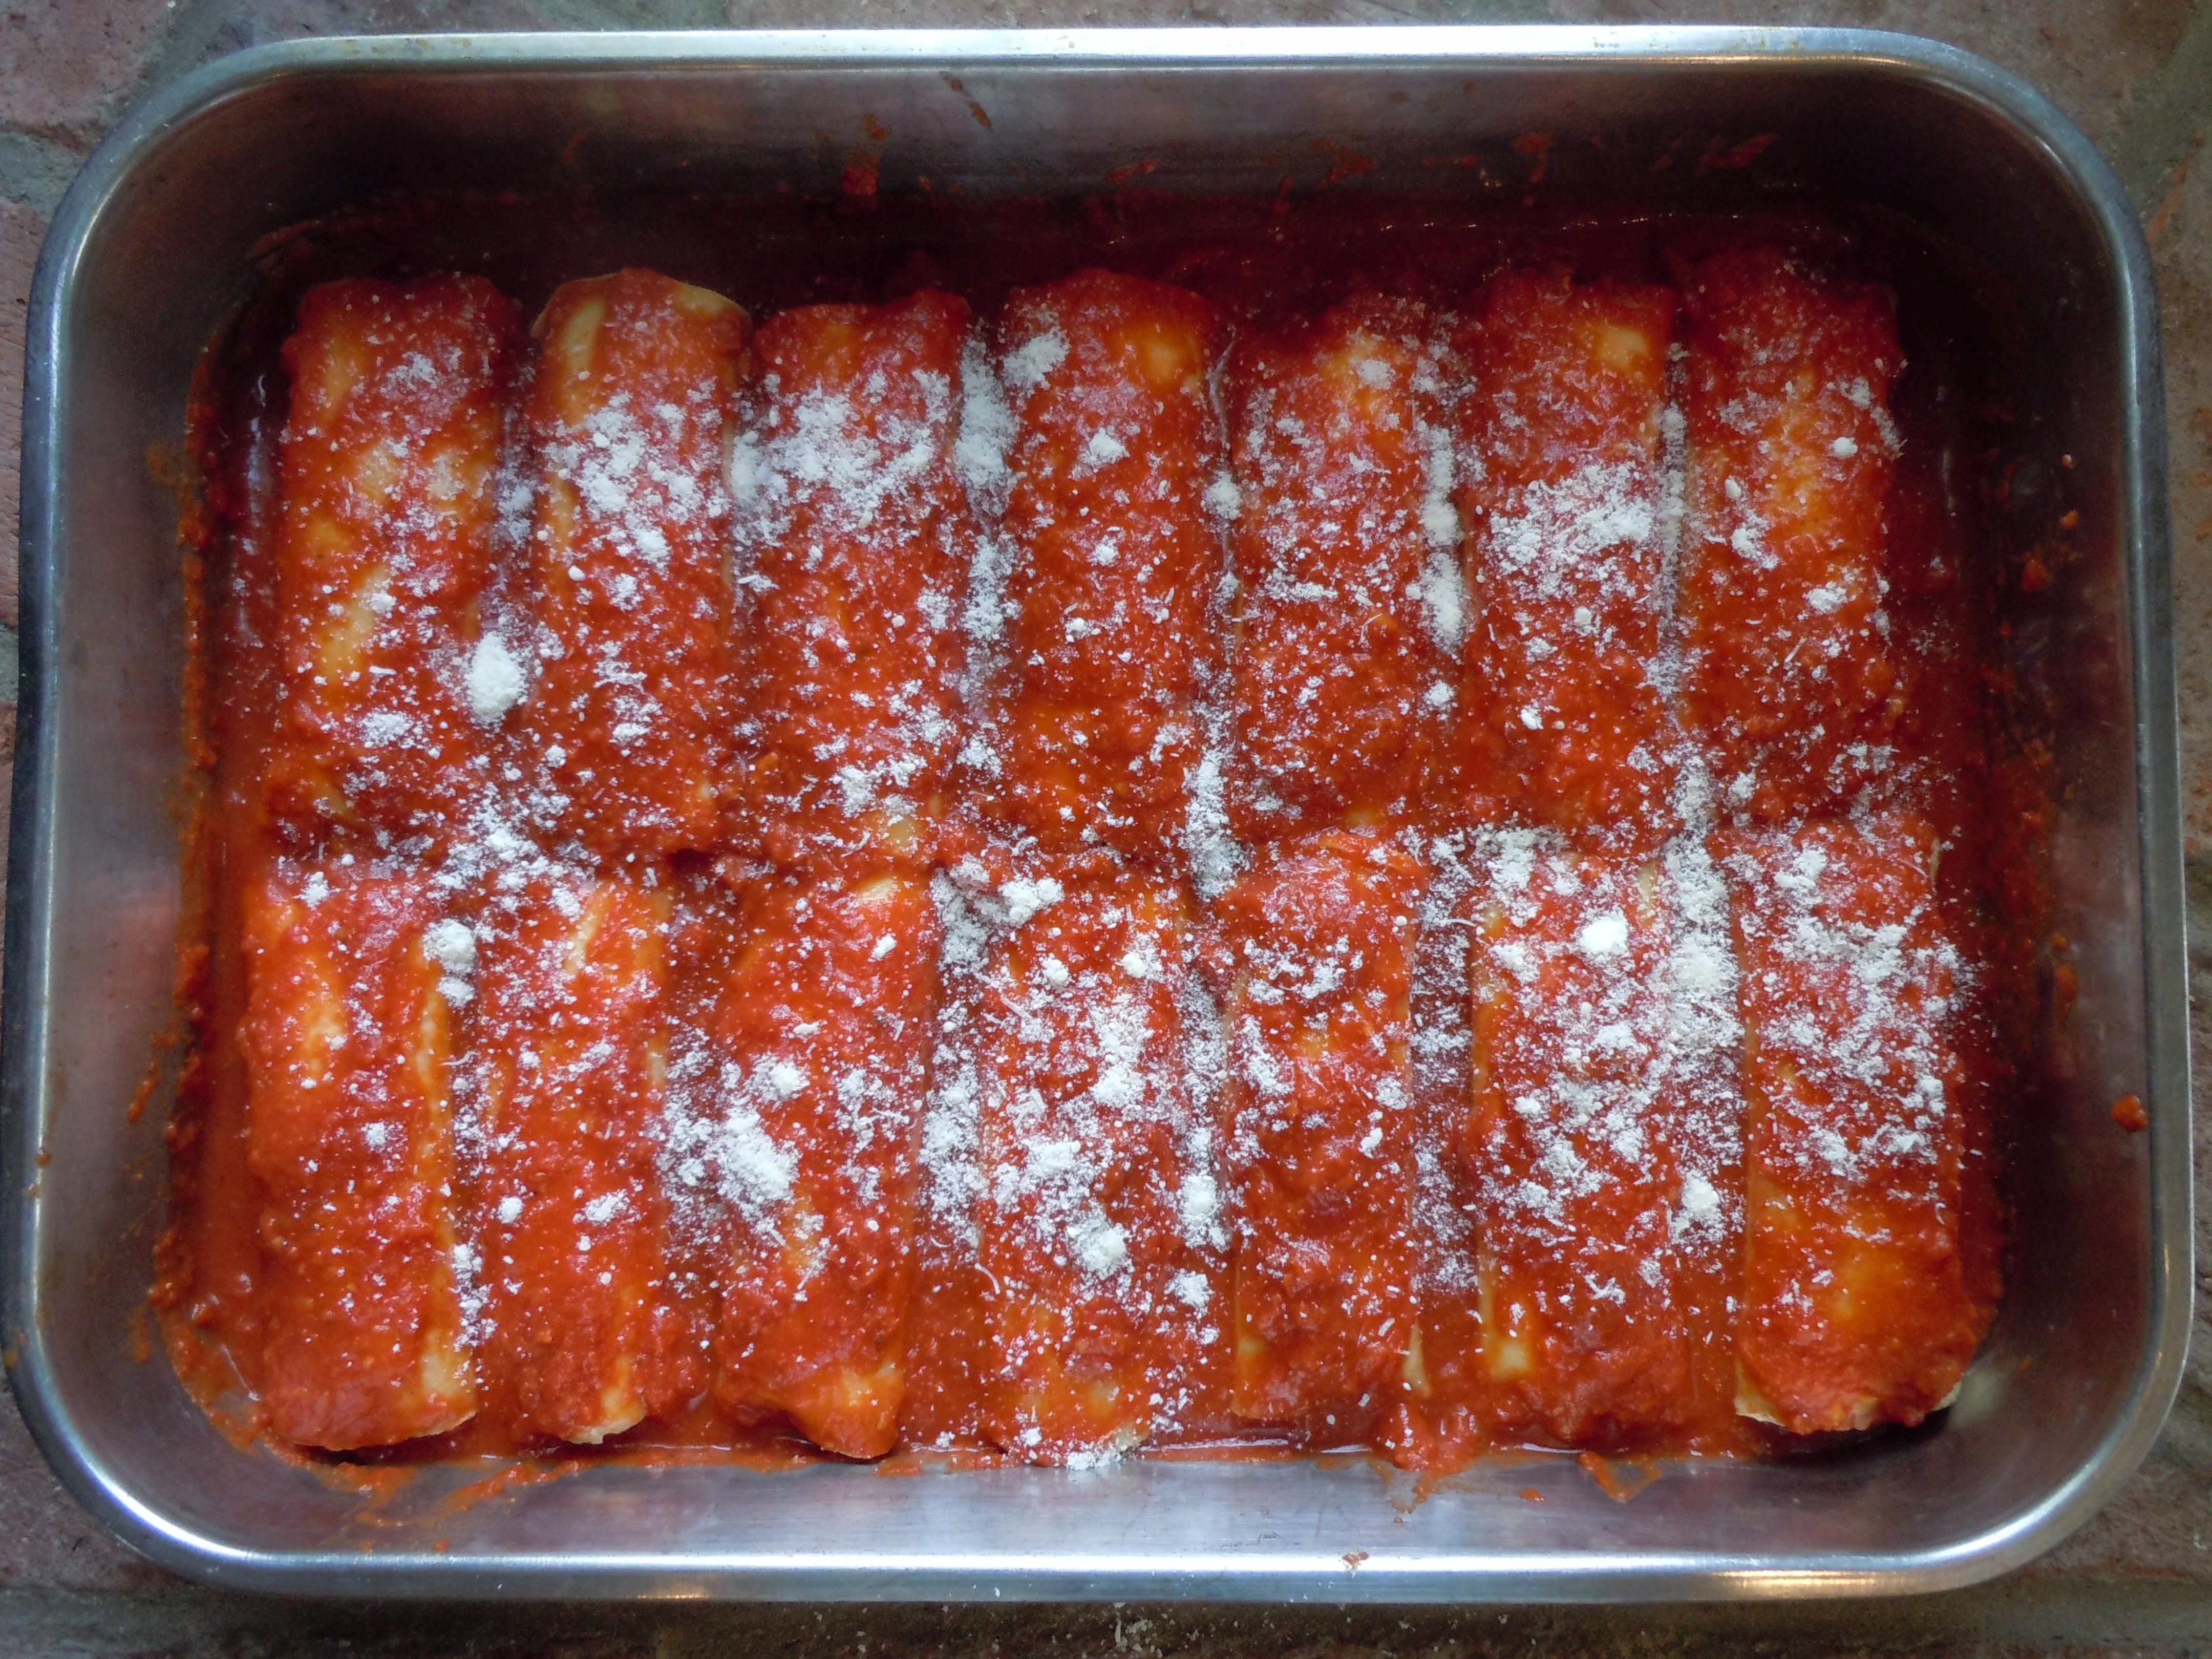
Pour another 2-2 1/2 cups of sauce on top of roll manicotti’s, sprinkle with parmesan and cover with foil
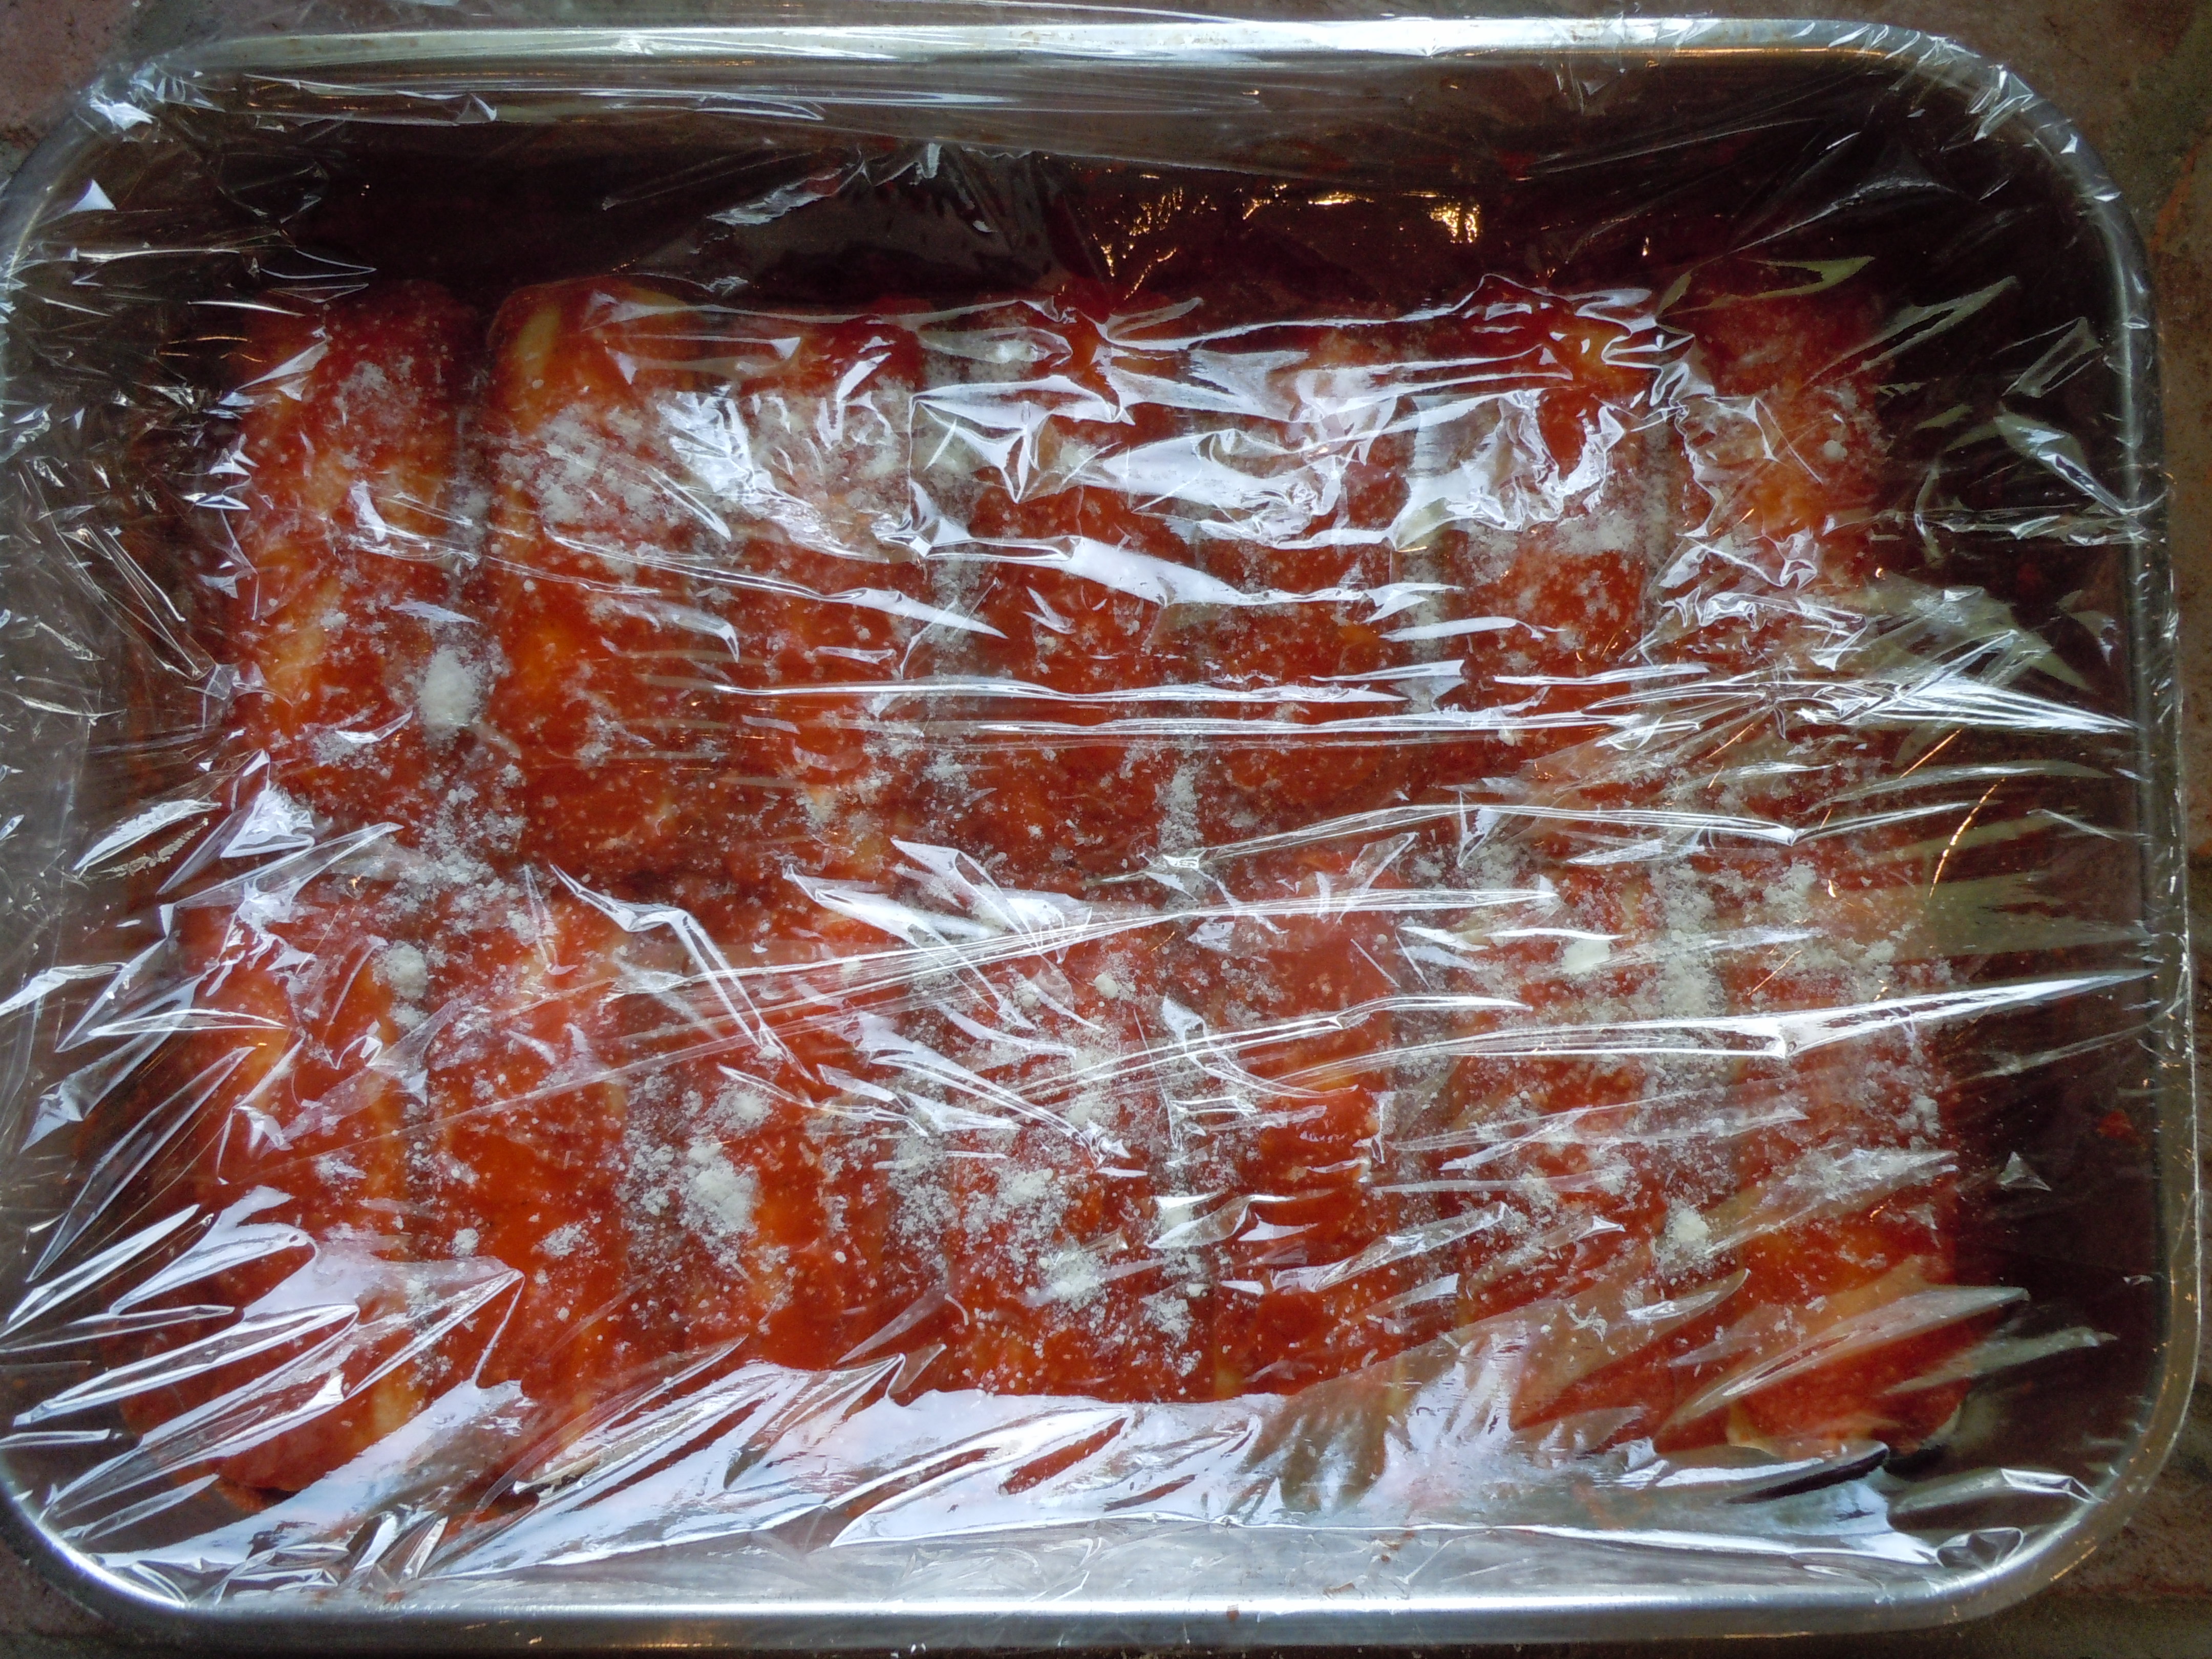
Place in frig until you are ready to bake
Or cover with saran and then foil and put into the freezer until your event is near and then pull out two nights before and put into the frig to thaw
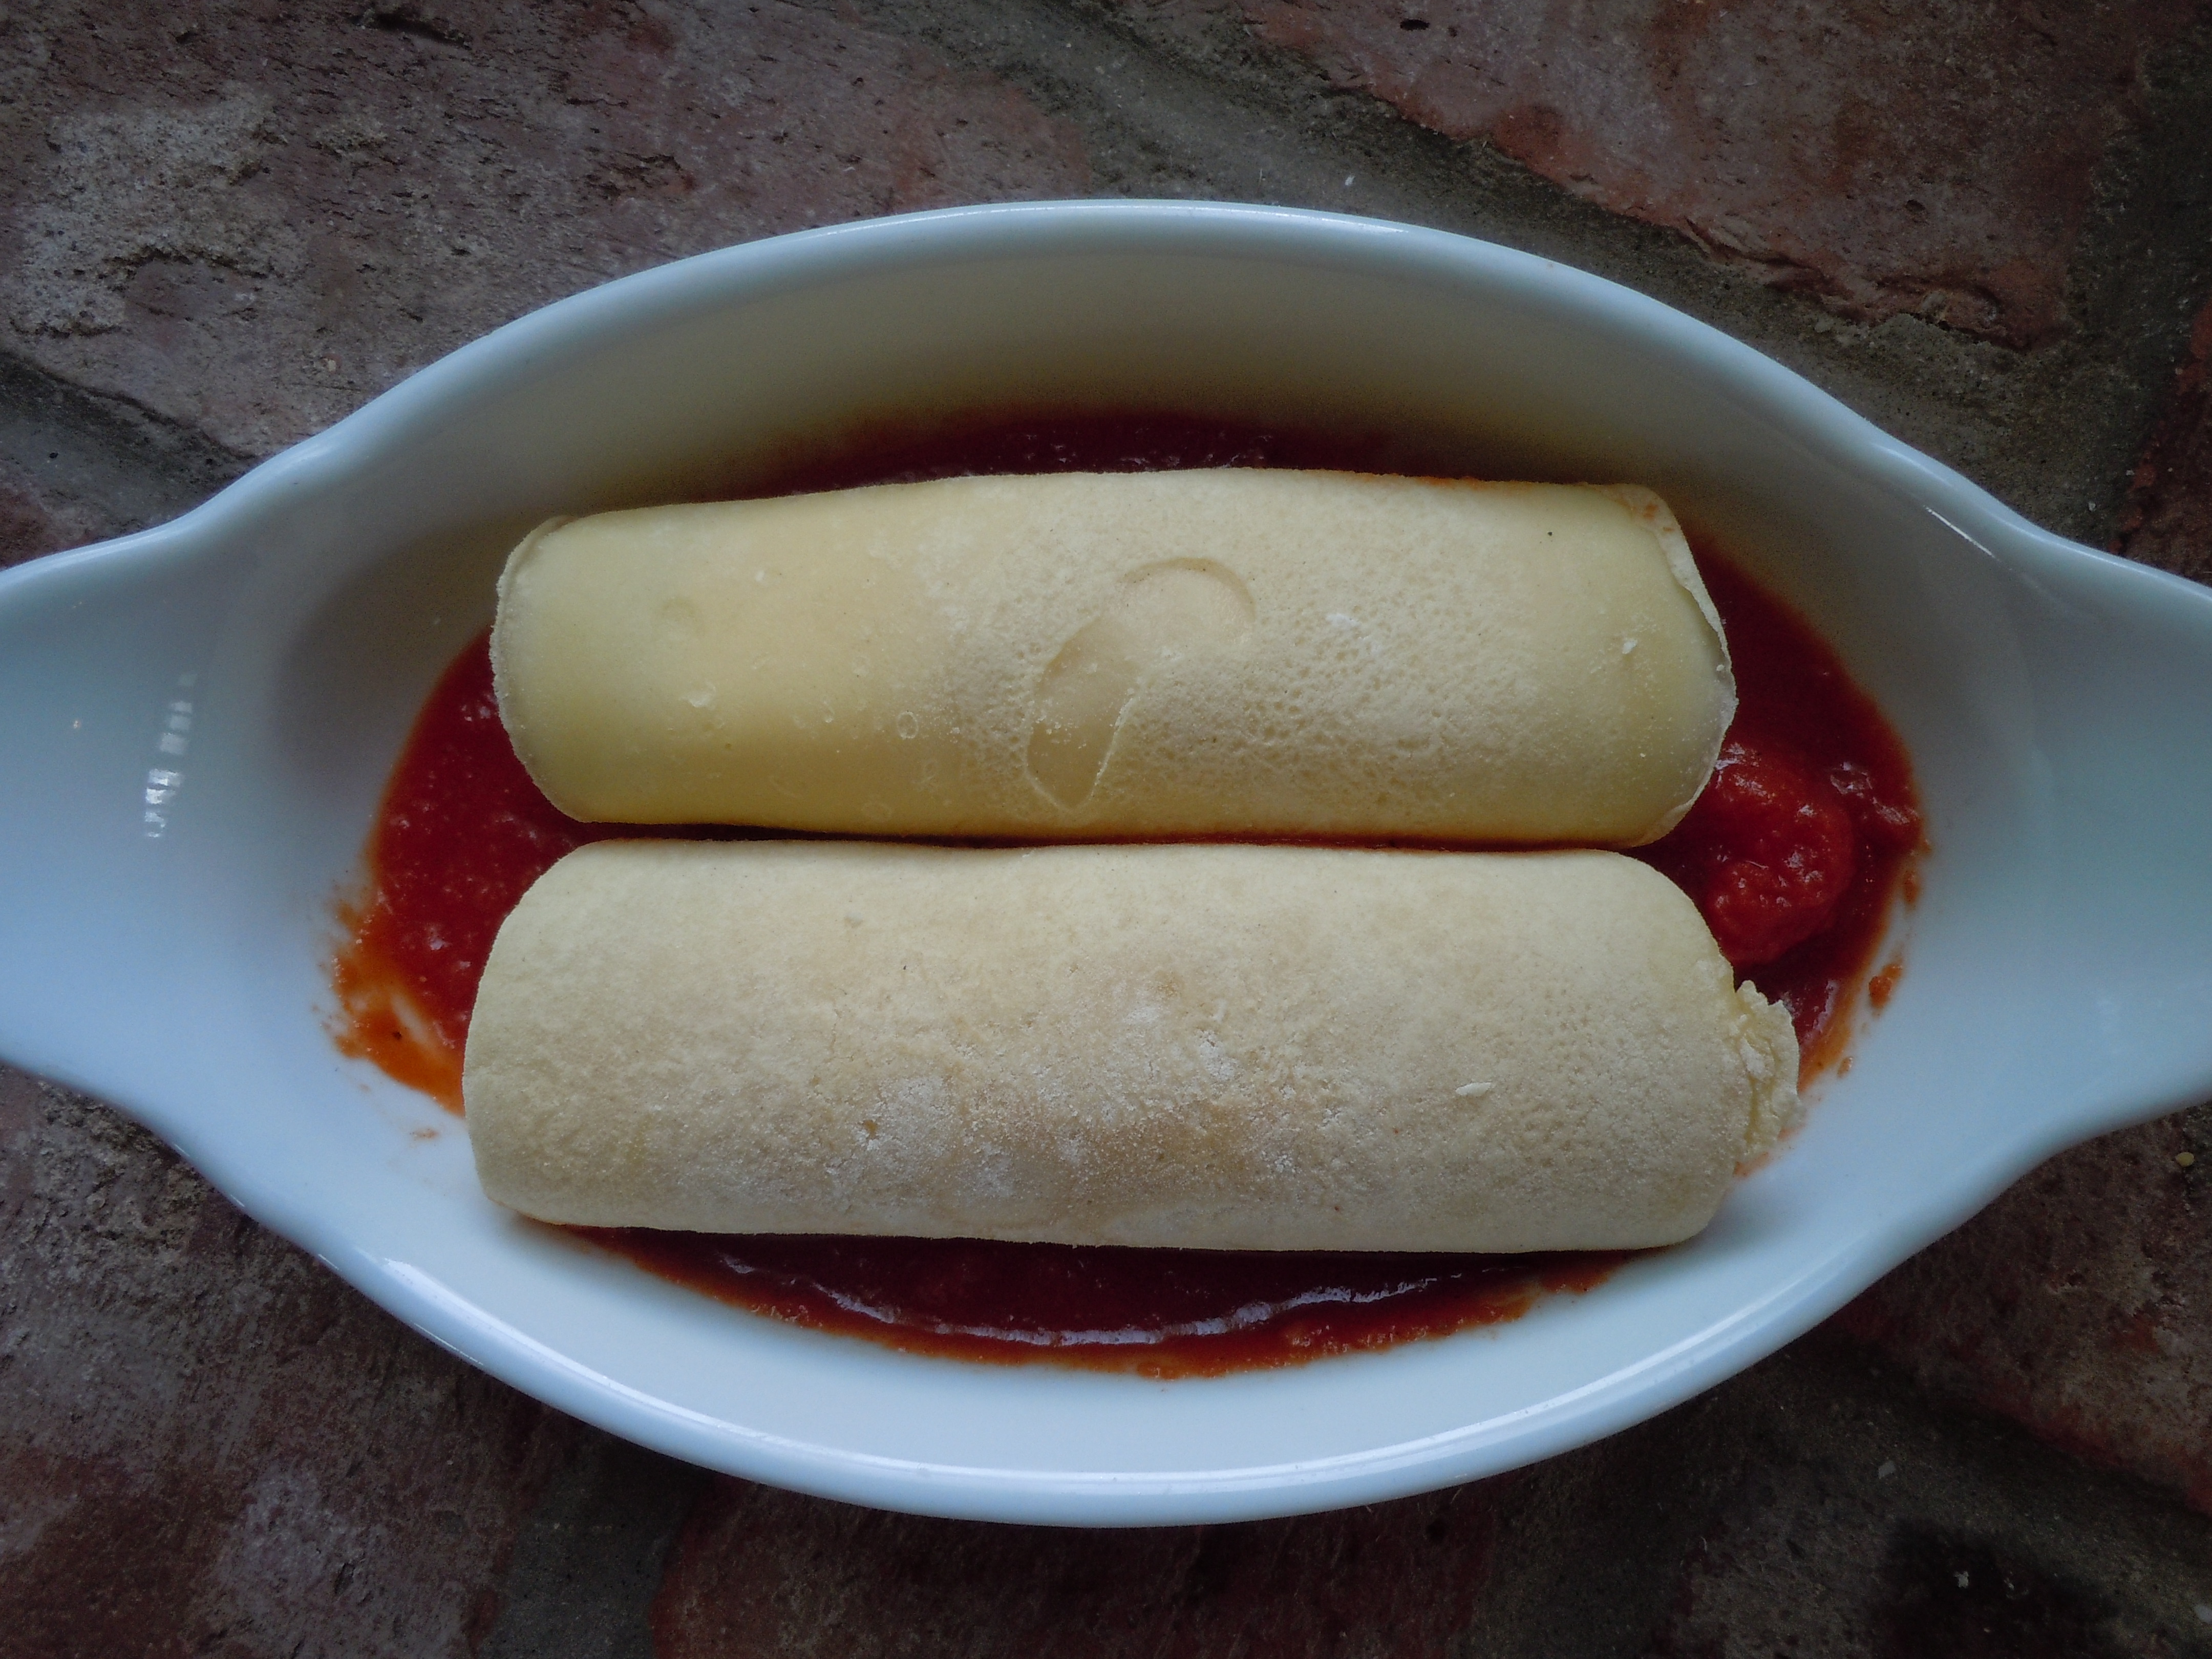
When you are ready to bake your manicotti put into a 350º oven and bake for 45 minutes
The manicotti will be bubbly when you take it out of the oven and need to rest for 5 minutes before serving
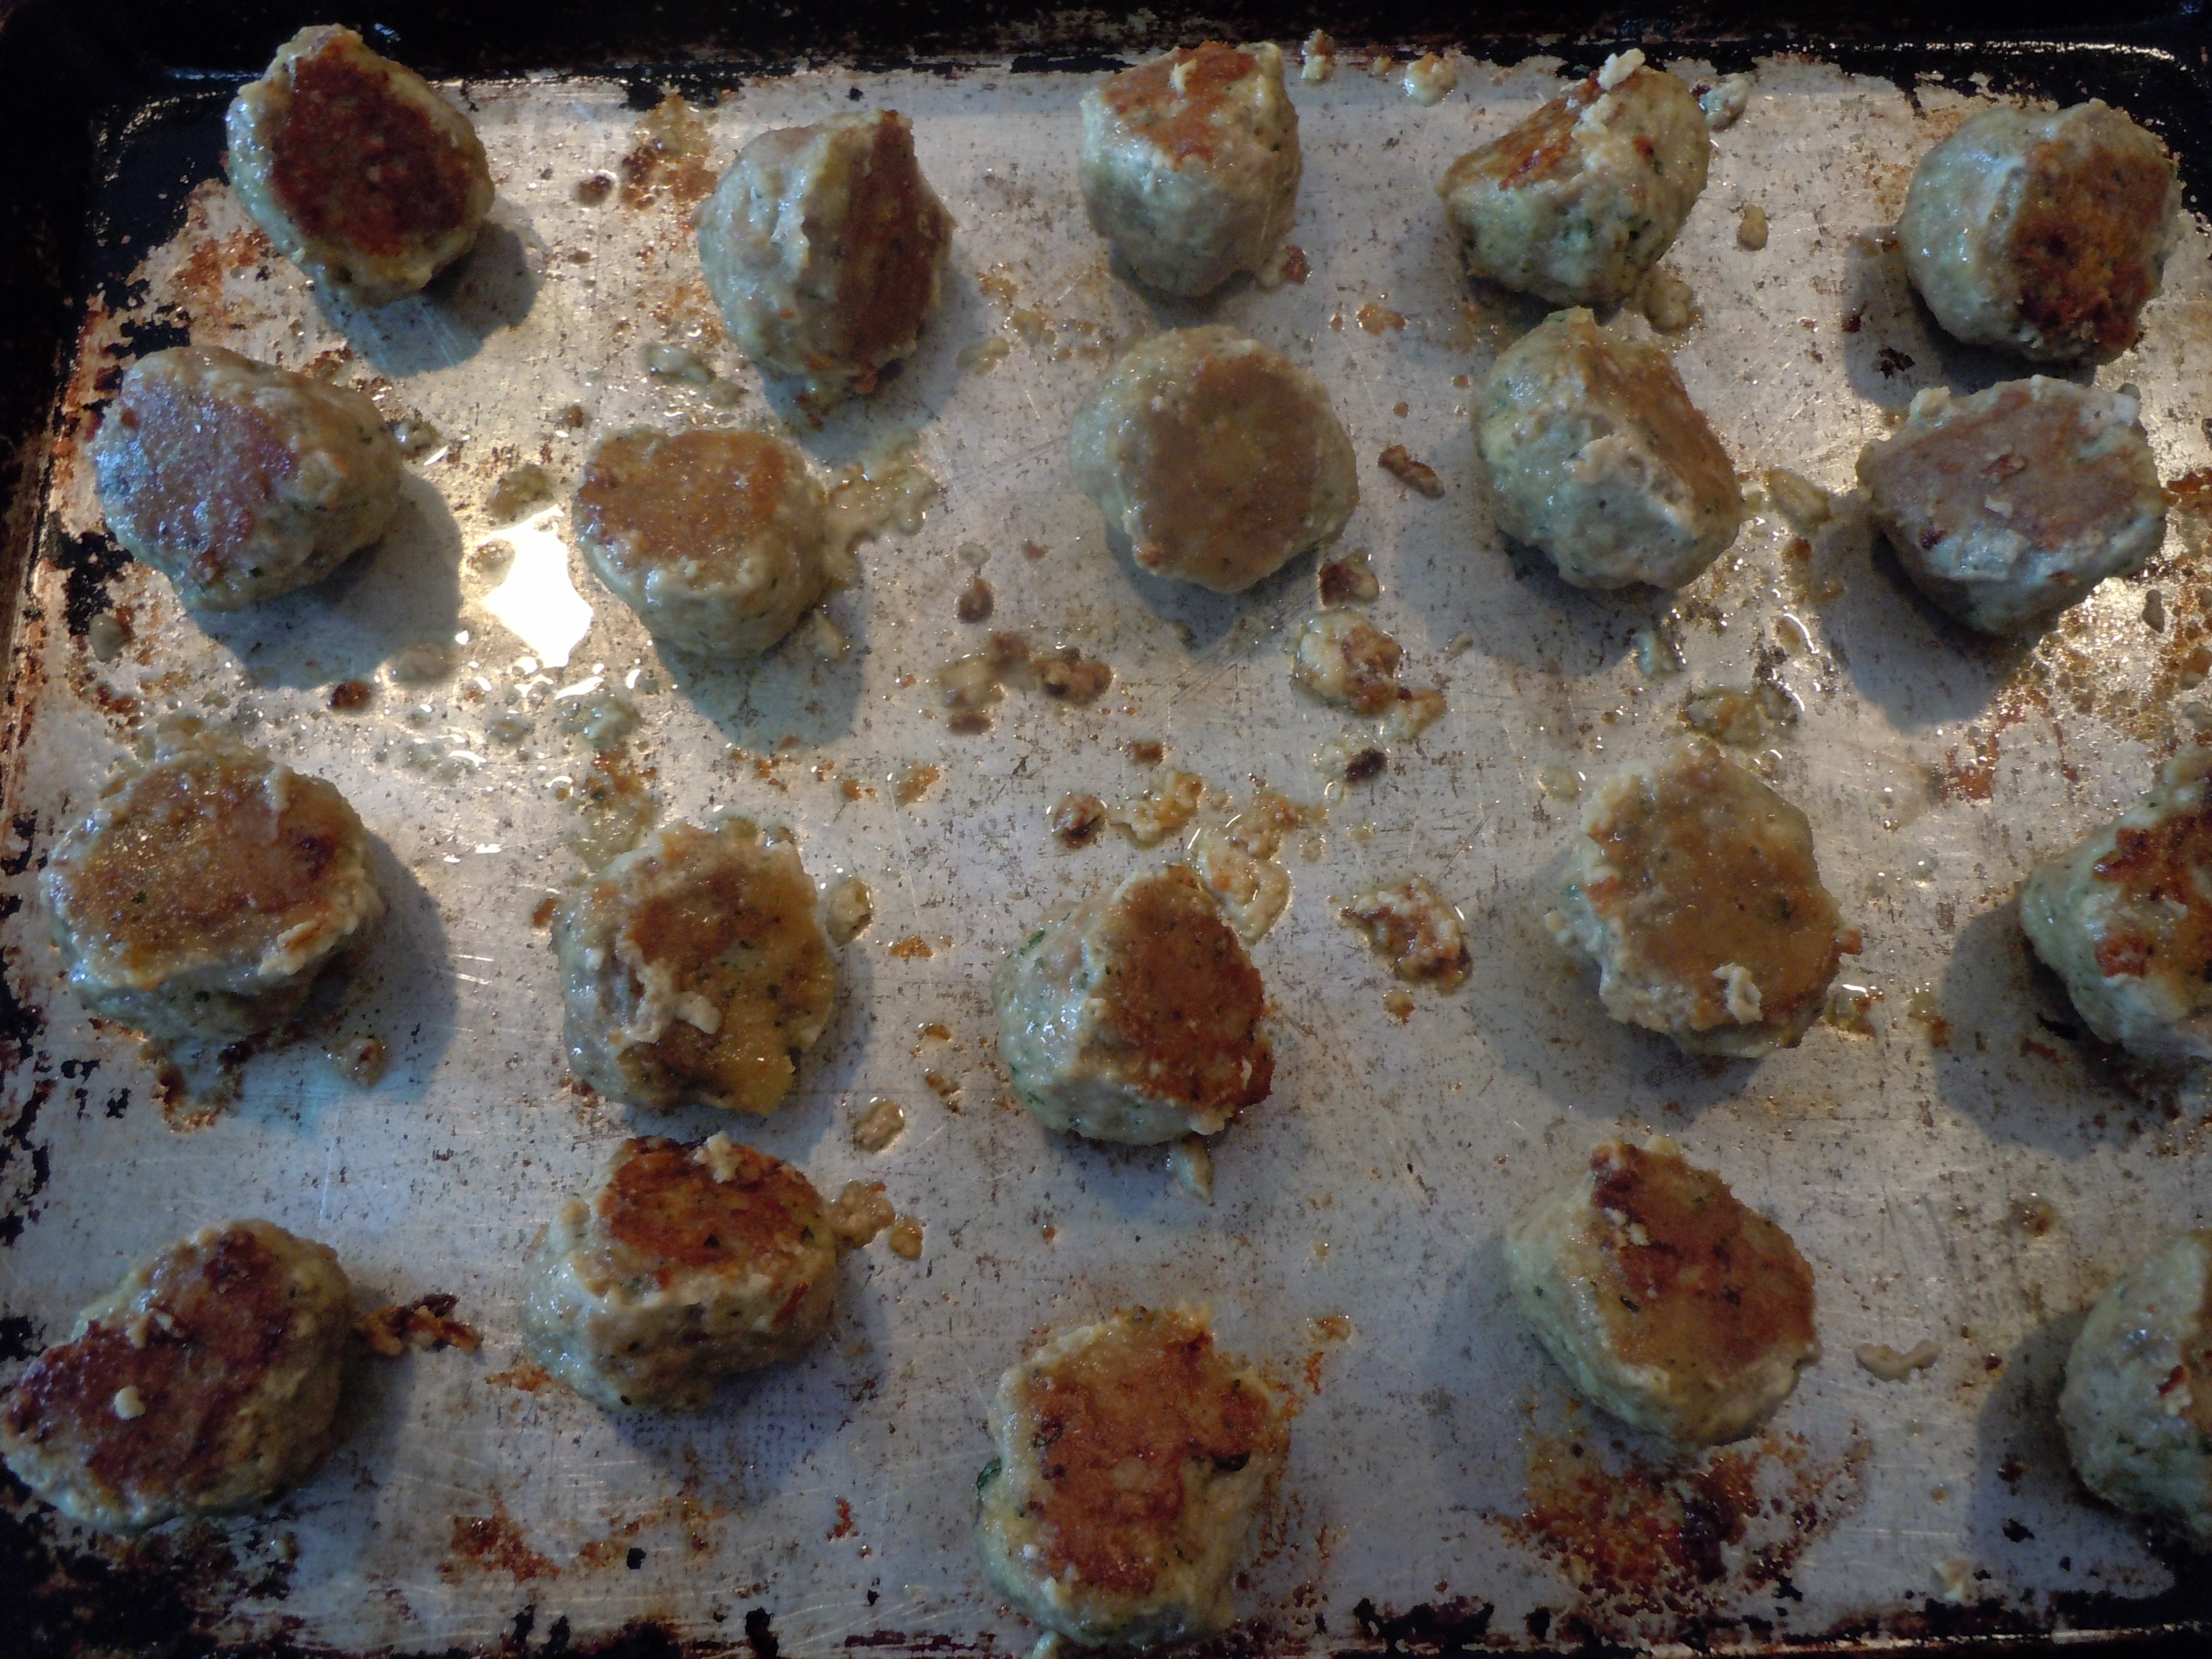
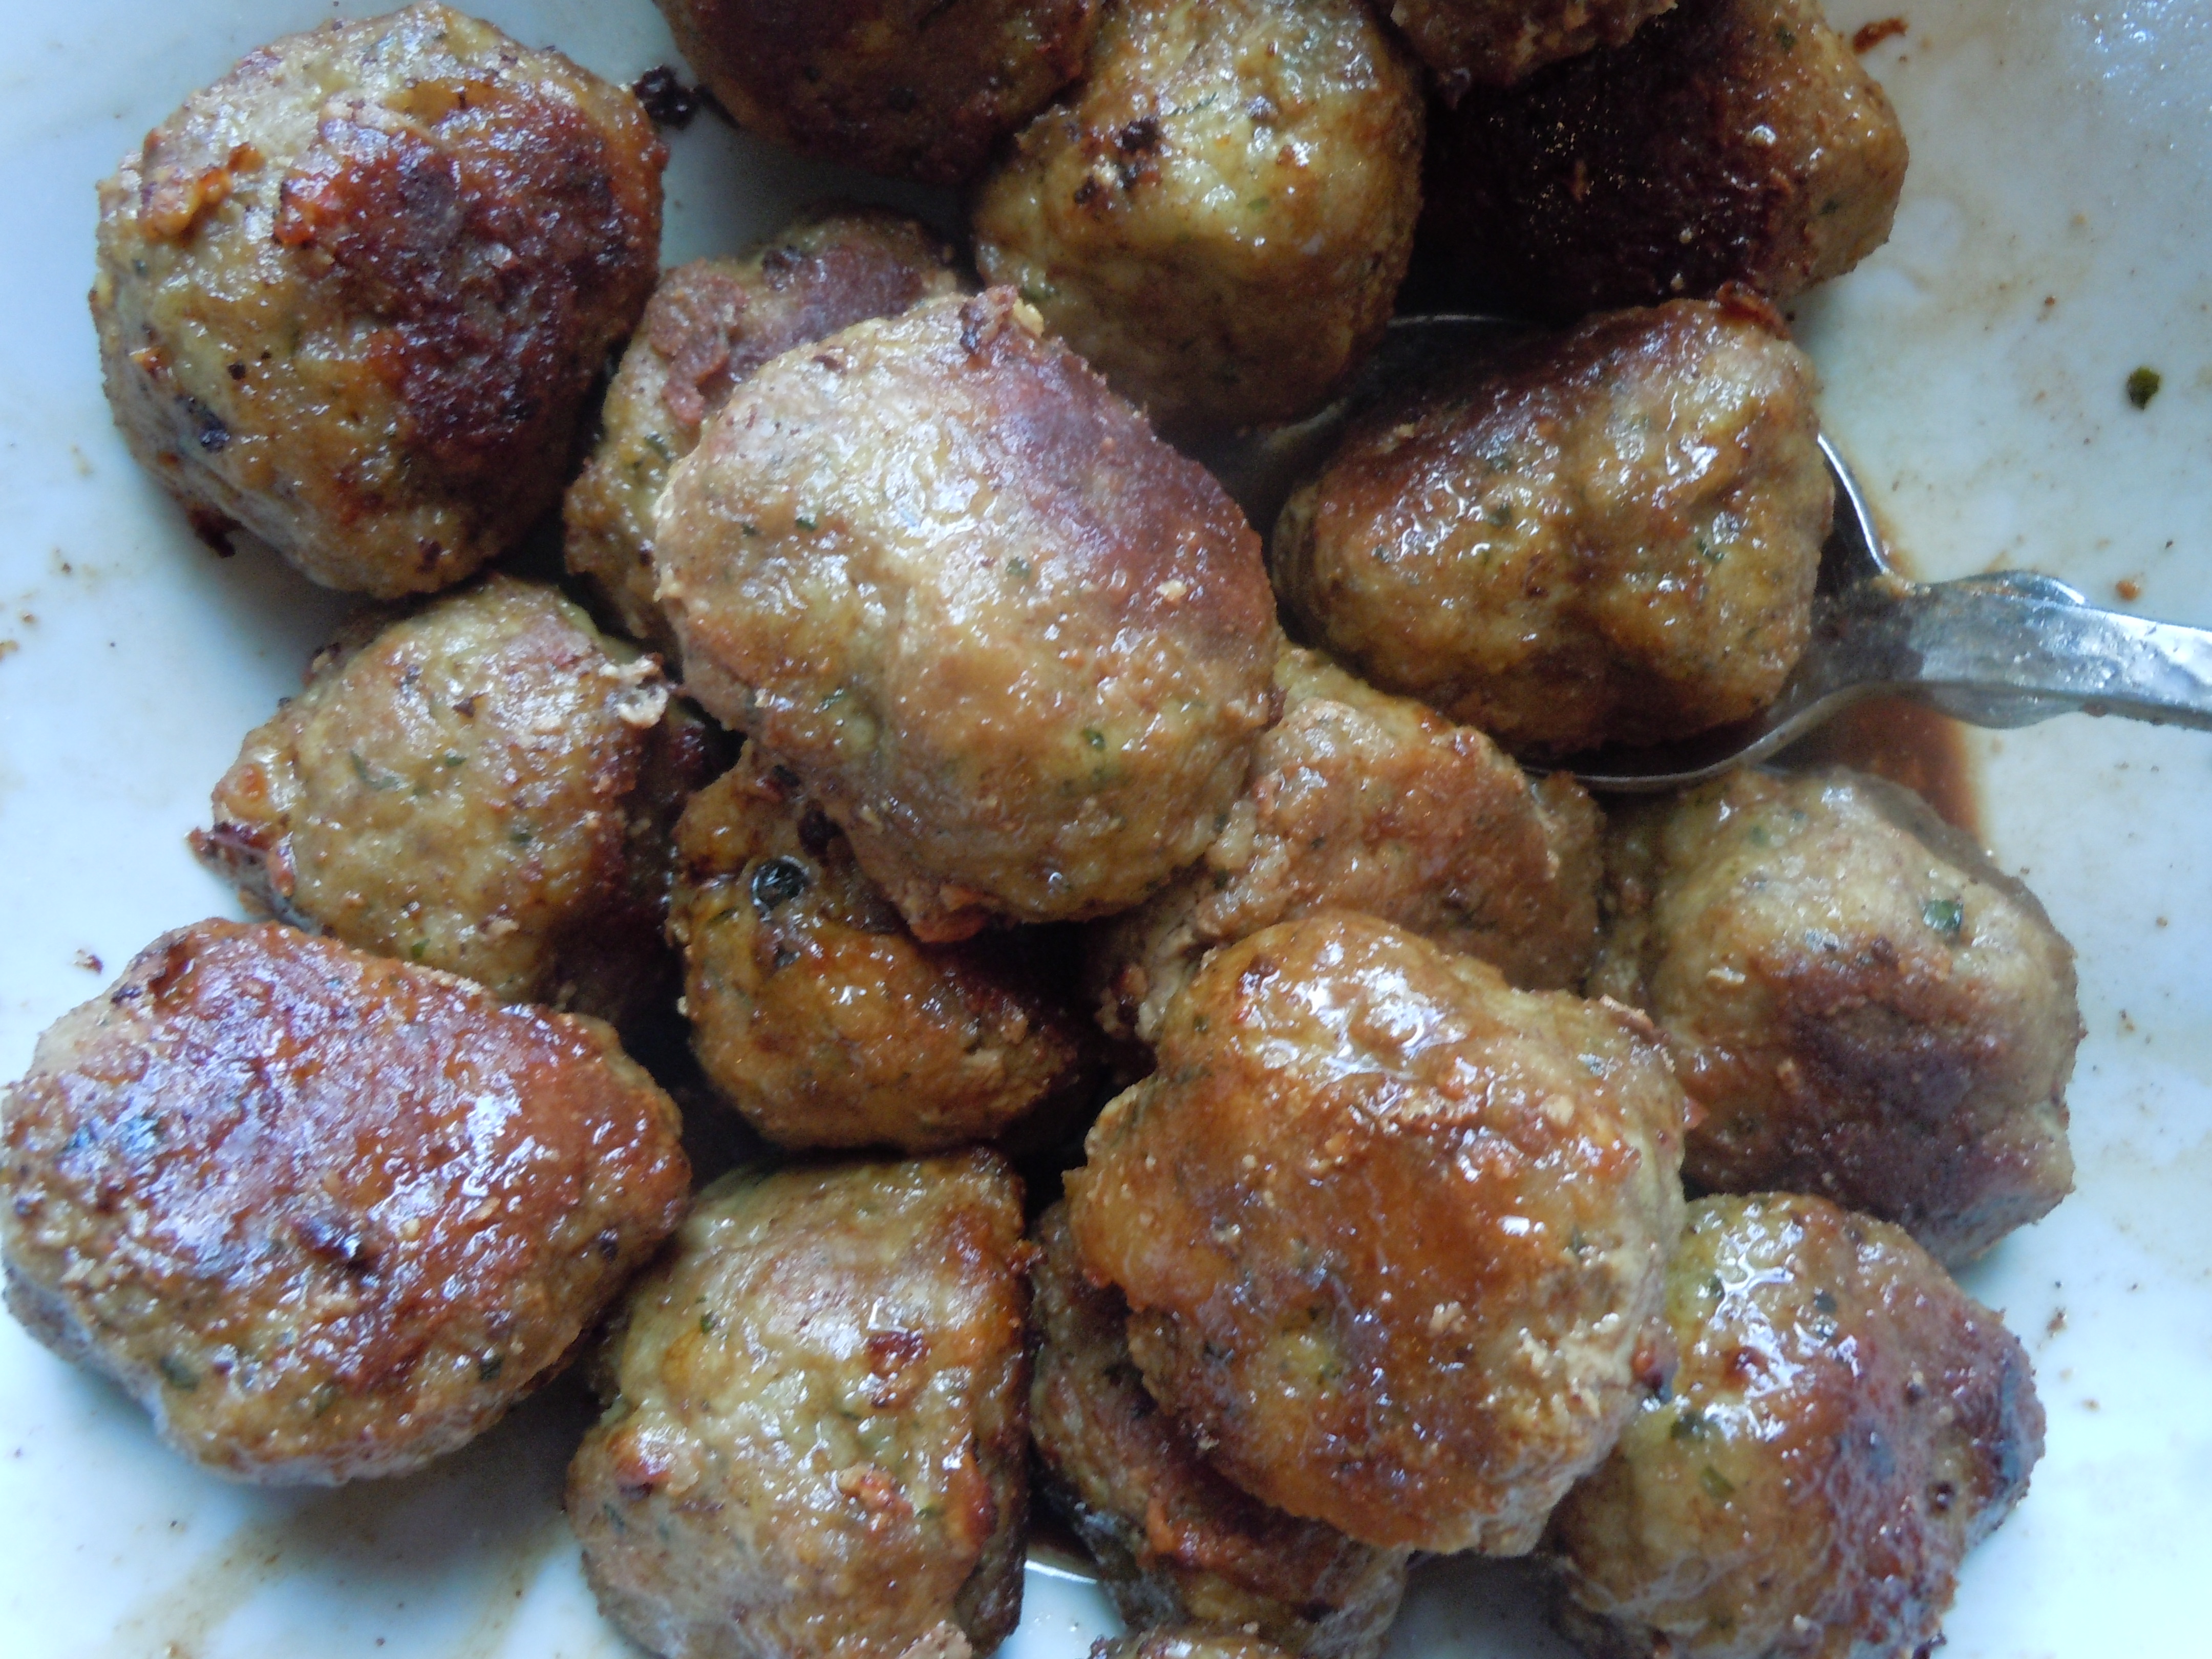
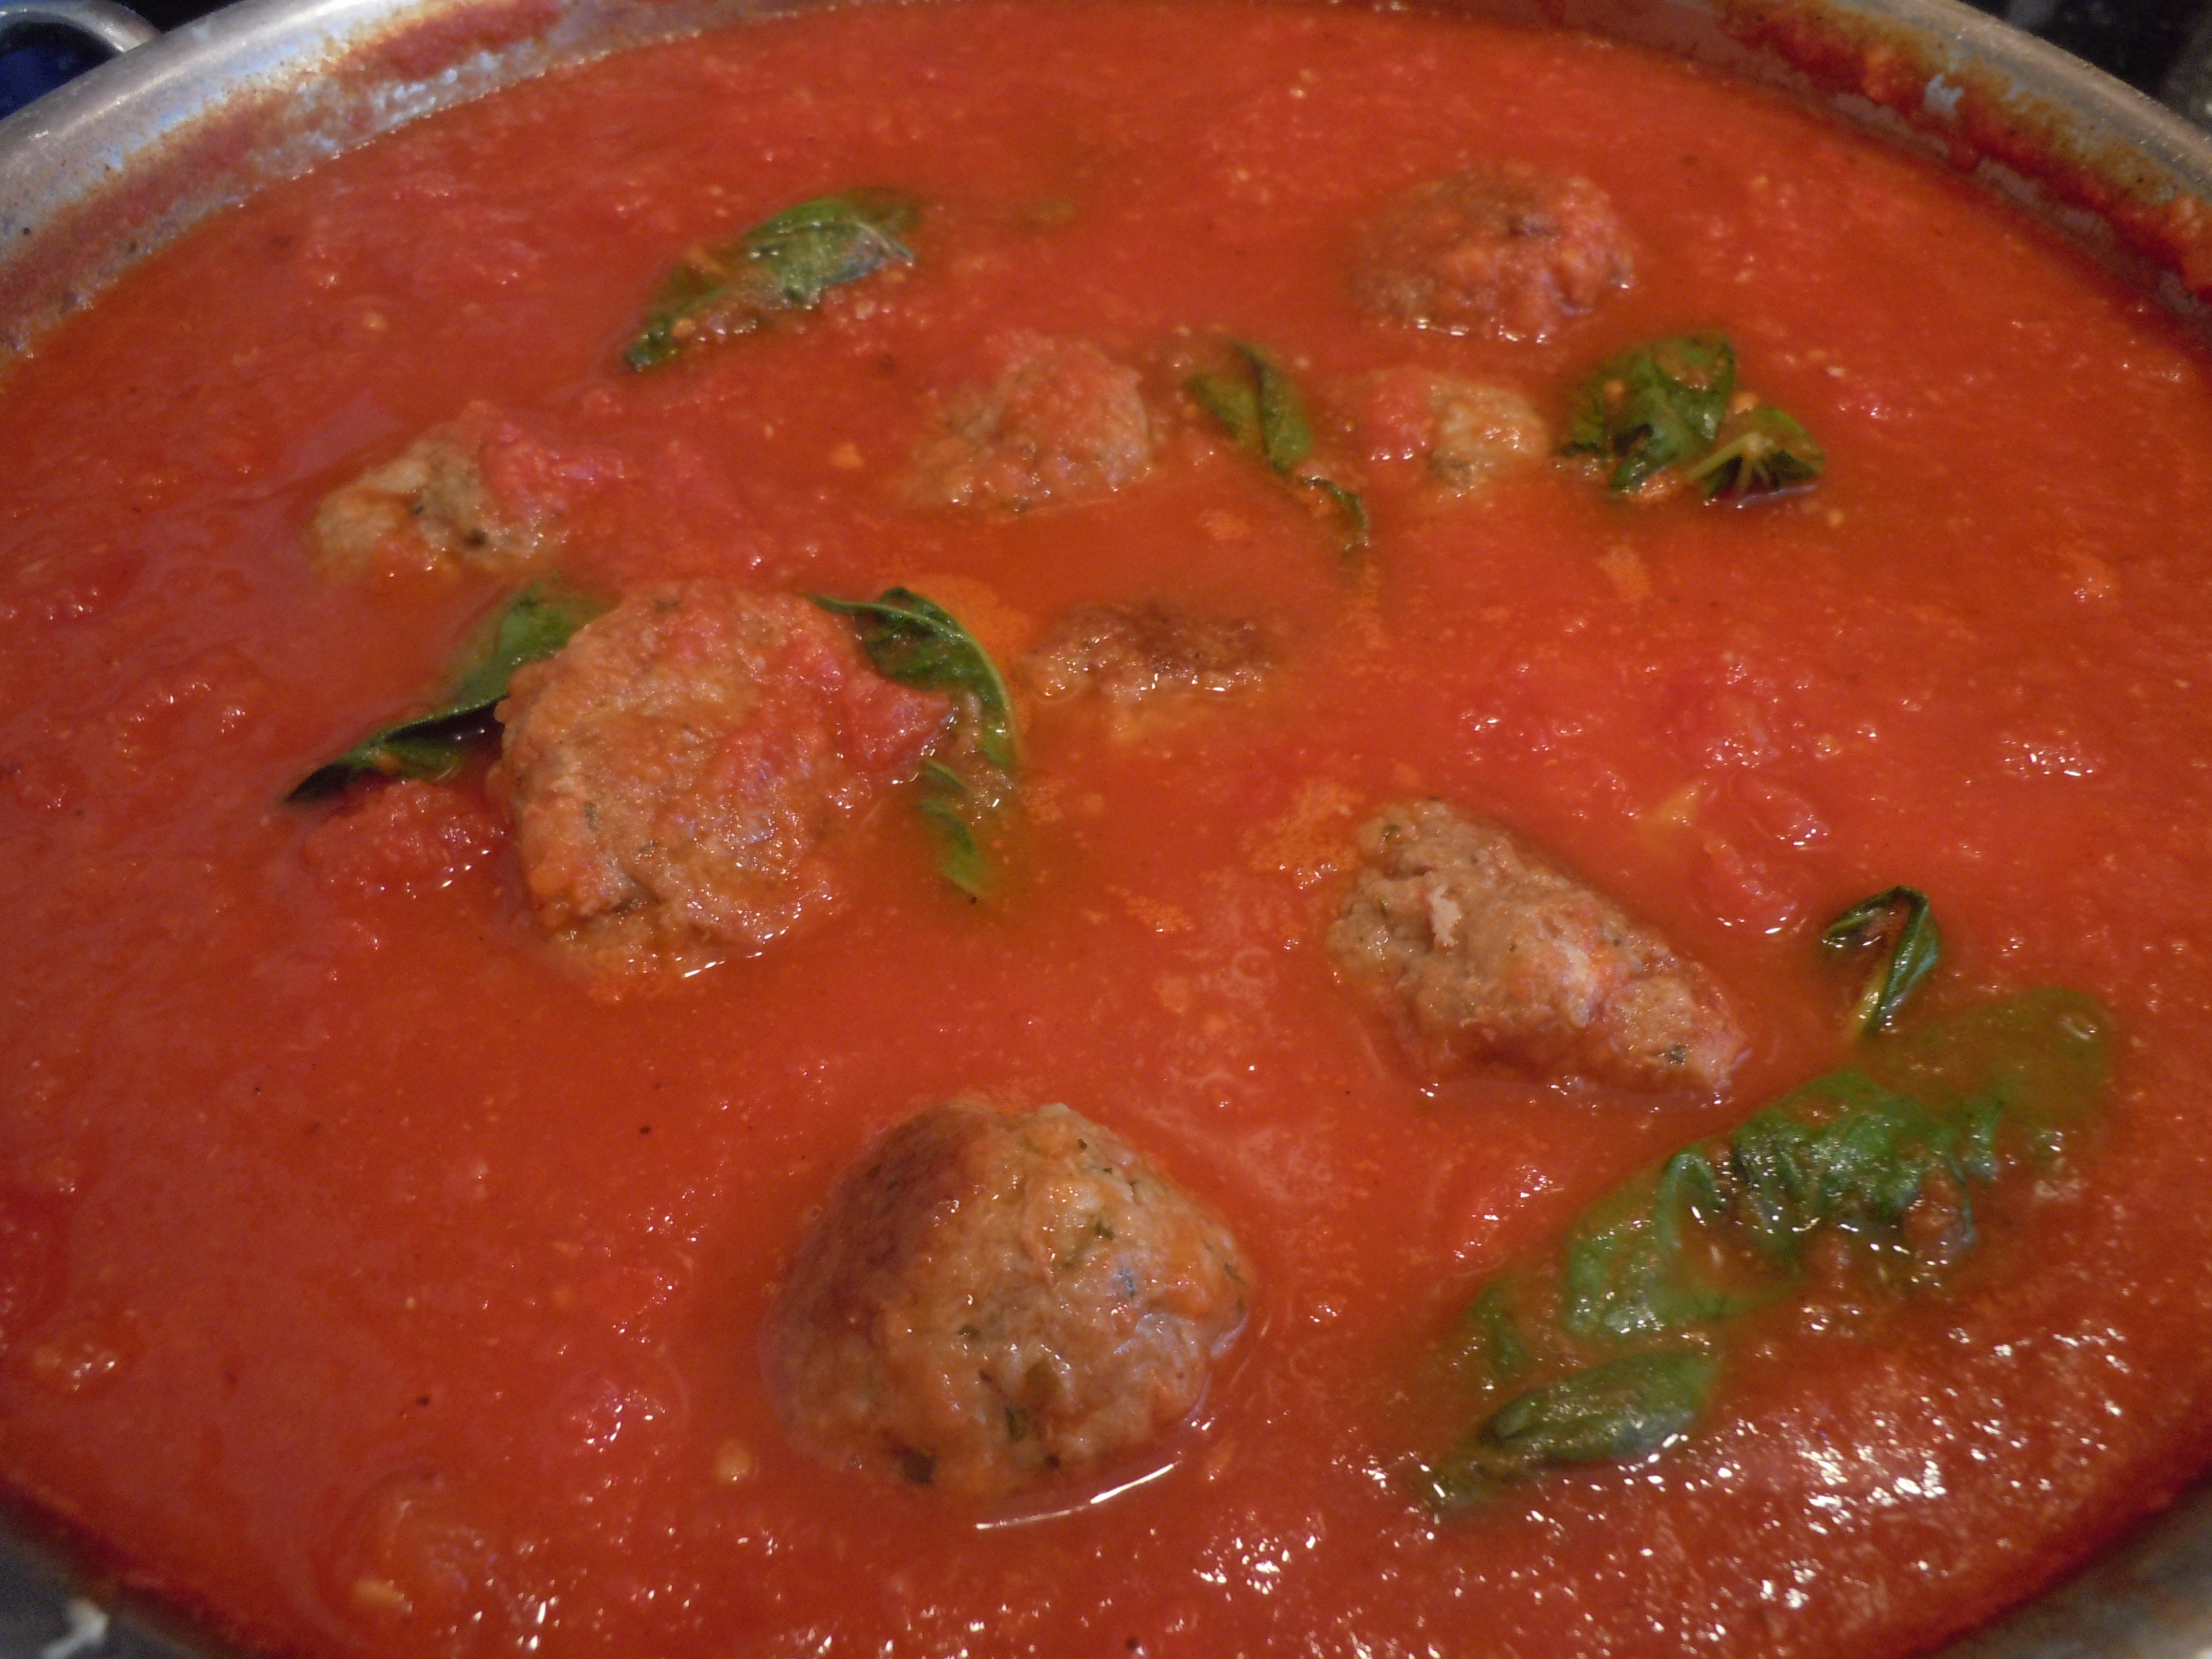
OK, I know you are probably saying “where’s the beef” but just give these light and flavorful turkey meatballs a chance. They are meaty, garlicky, cheesy, moist and melt in your mouth after simmering in mytomato-basil pasta sauce for 2 hrs. Wait until you try these gourmet turkey meatballs in tomato basil sauce on a crusty sub that’s baked with oozing mozzarella and a julienne of fresh basil …do I have your attention now? That’s what I’m talking about 🙂
Good ole meatball subs are just one of those all american comfort foods that I have always adored. Although, I think the word “sub” referring to a “sandwich” is represented differently through parts of the US. It threw me a little when I first moved to California because when I would asked for a “sub” they had no idea what I was talking about because they use the term “hoagie” there. Another little play on words which would totally crack me up when I living in California was asking for the location of their nearest package store and they would send me to a mailing facility!
Anyhow, I am excited for you to make these homemade turkey meatballs because even though they are made exactly like my 100% Angus meatballs these aren’t as heavy. I have been substituting out a lot of ground beef for turkey and it’s has really given me a new lease on cooking, a new avenue so to speak on the whole meat situation. To enjoy a meaty meal with the same herbs and spices but making it a lighter meal in the end.
I actually started making my lasagna with ground turkey instead of ground beef and it’s amazing! Once again using the turkey makes the lasagna a lighter dish then if it were made with beef. I brown the ground turkey and de-glaze it twice with a nice Cab (Cabernet) and by the time I’m done the color even looks like beef lol. My very picky daughter Bella, who loves my lasagna didn’t even know I had switched some time ago to turkey until I recently told her. She loves the taste of the lasagna so much that she’s totally OK with this…I call that a home run!
Enjoy watching my “how to ” video on making these homemade gourmet turkey meatballs in an Italian meatball sub. And if you need something sweet and refreshing, easy to make and out of this world check out my Pavlova recipe!
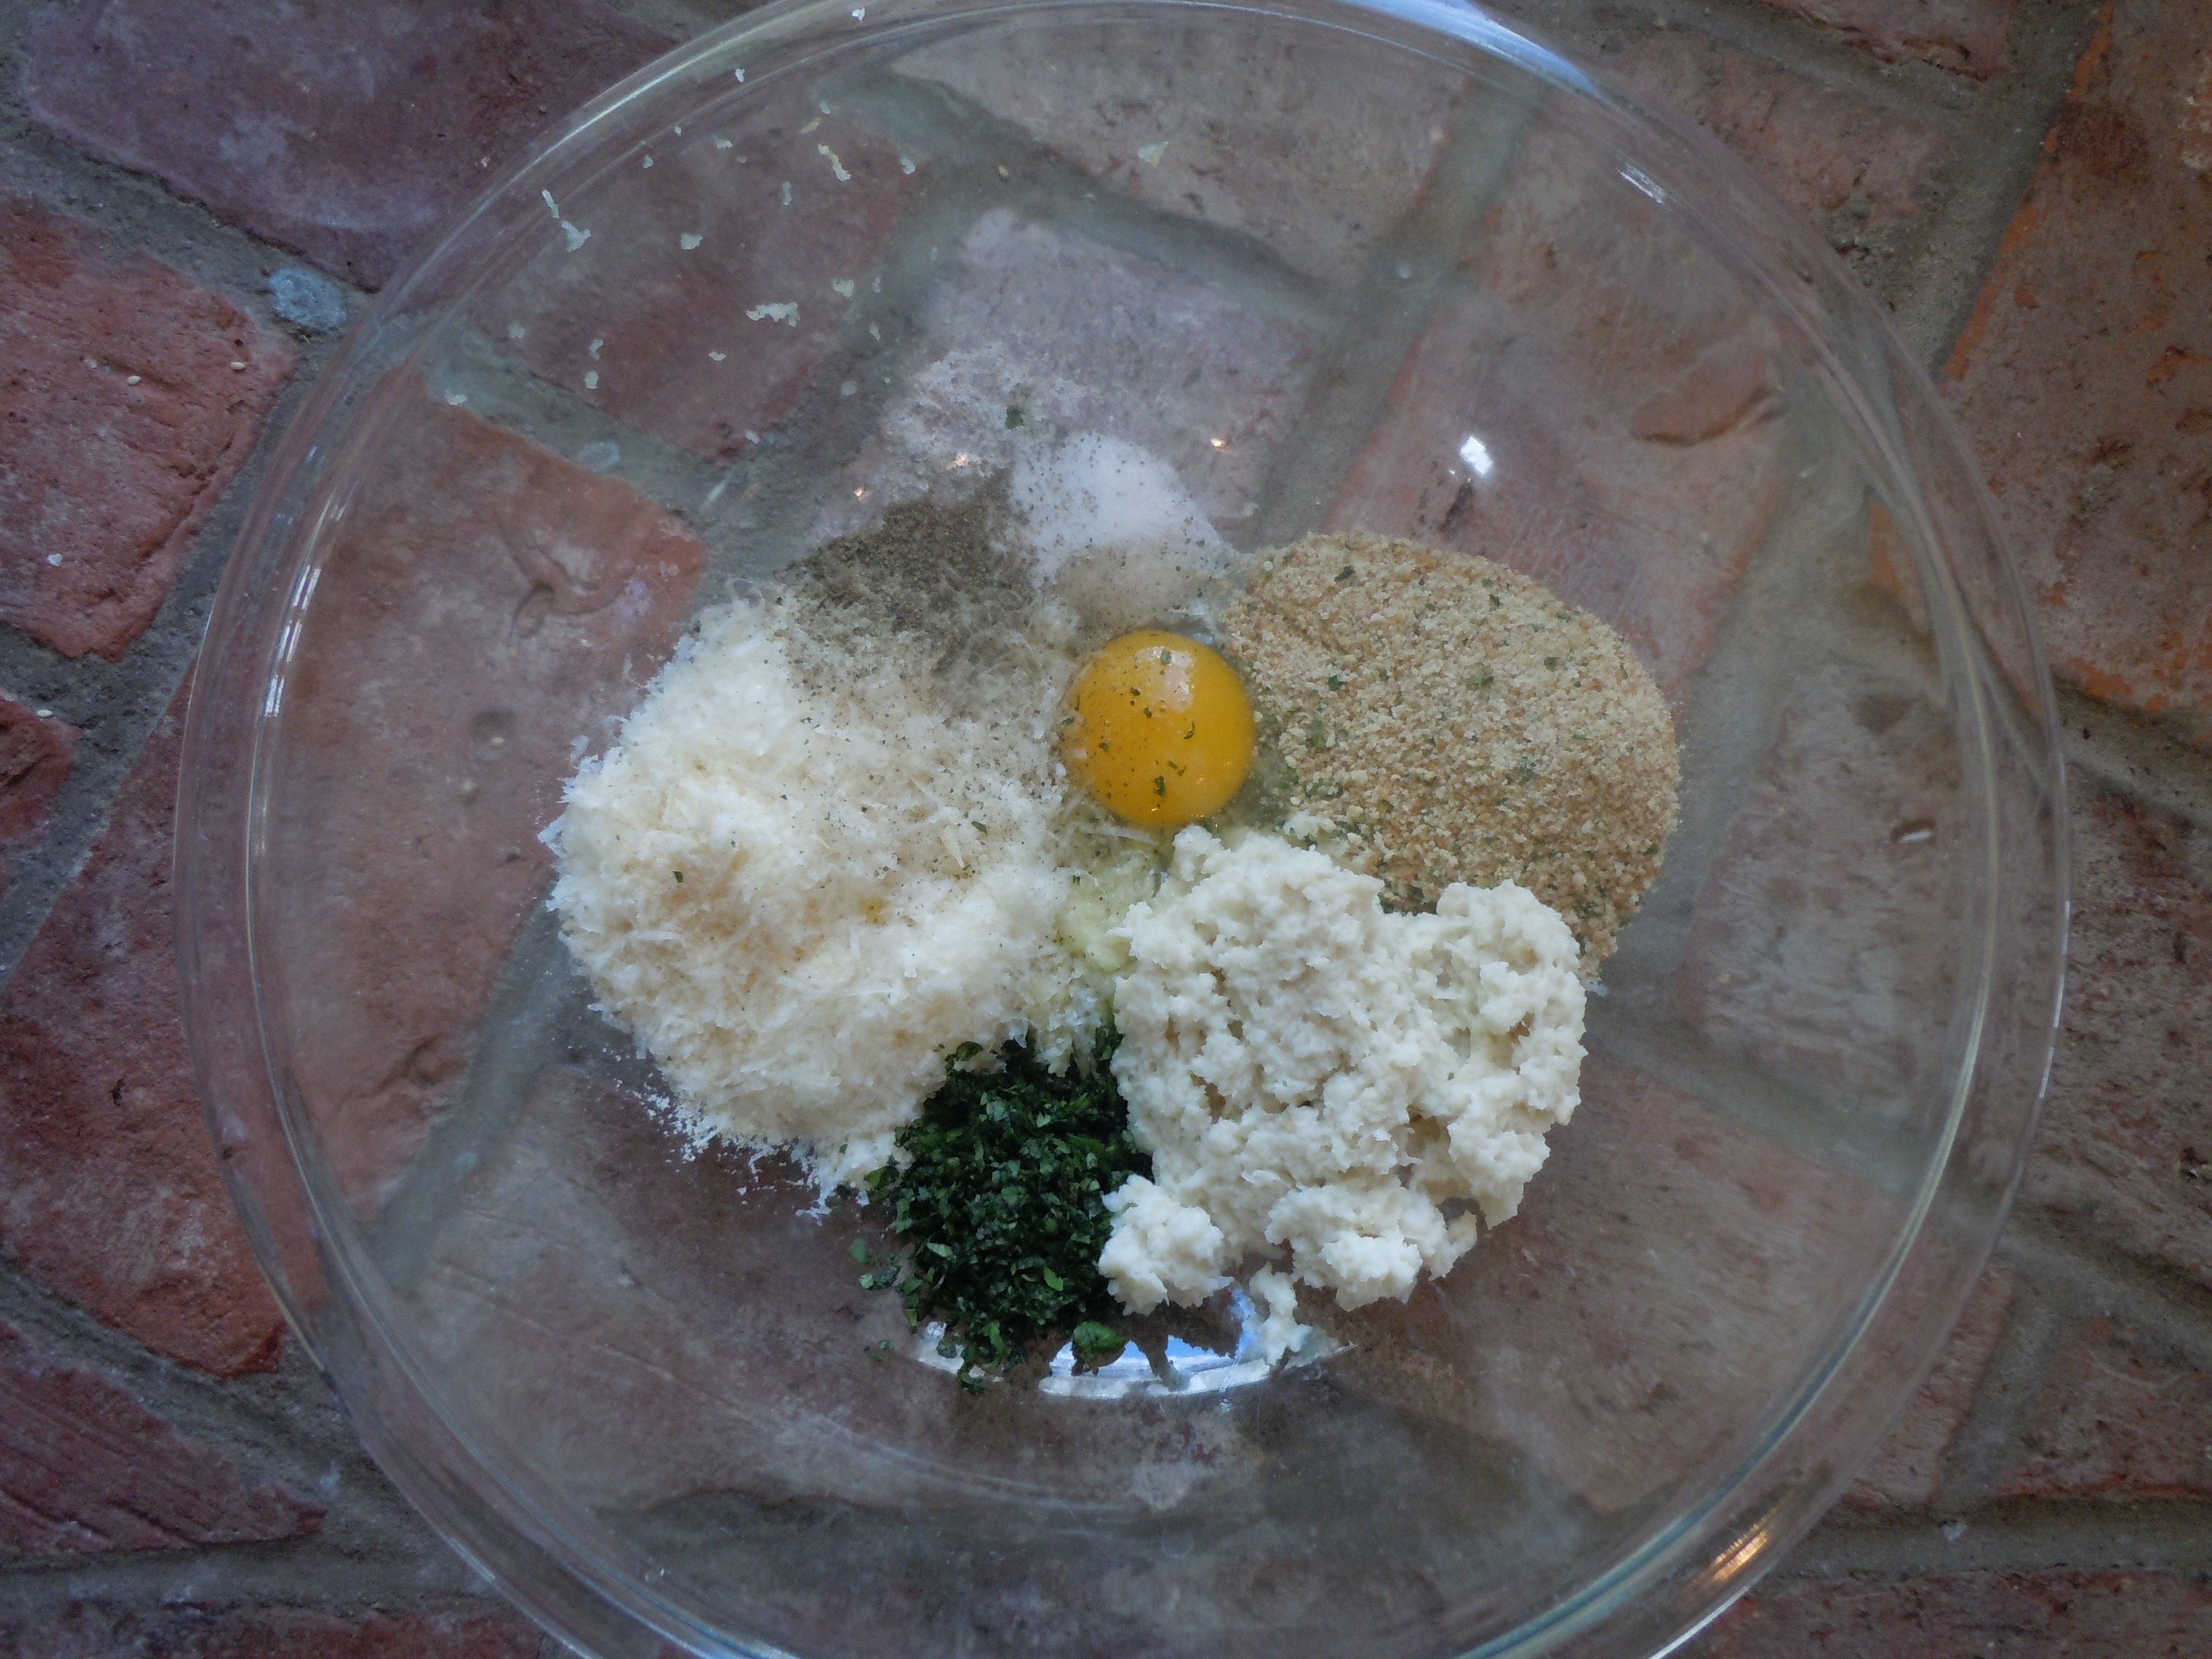
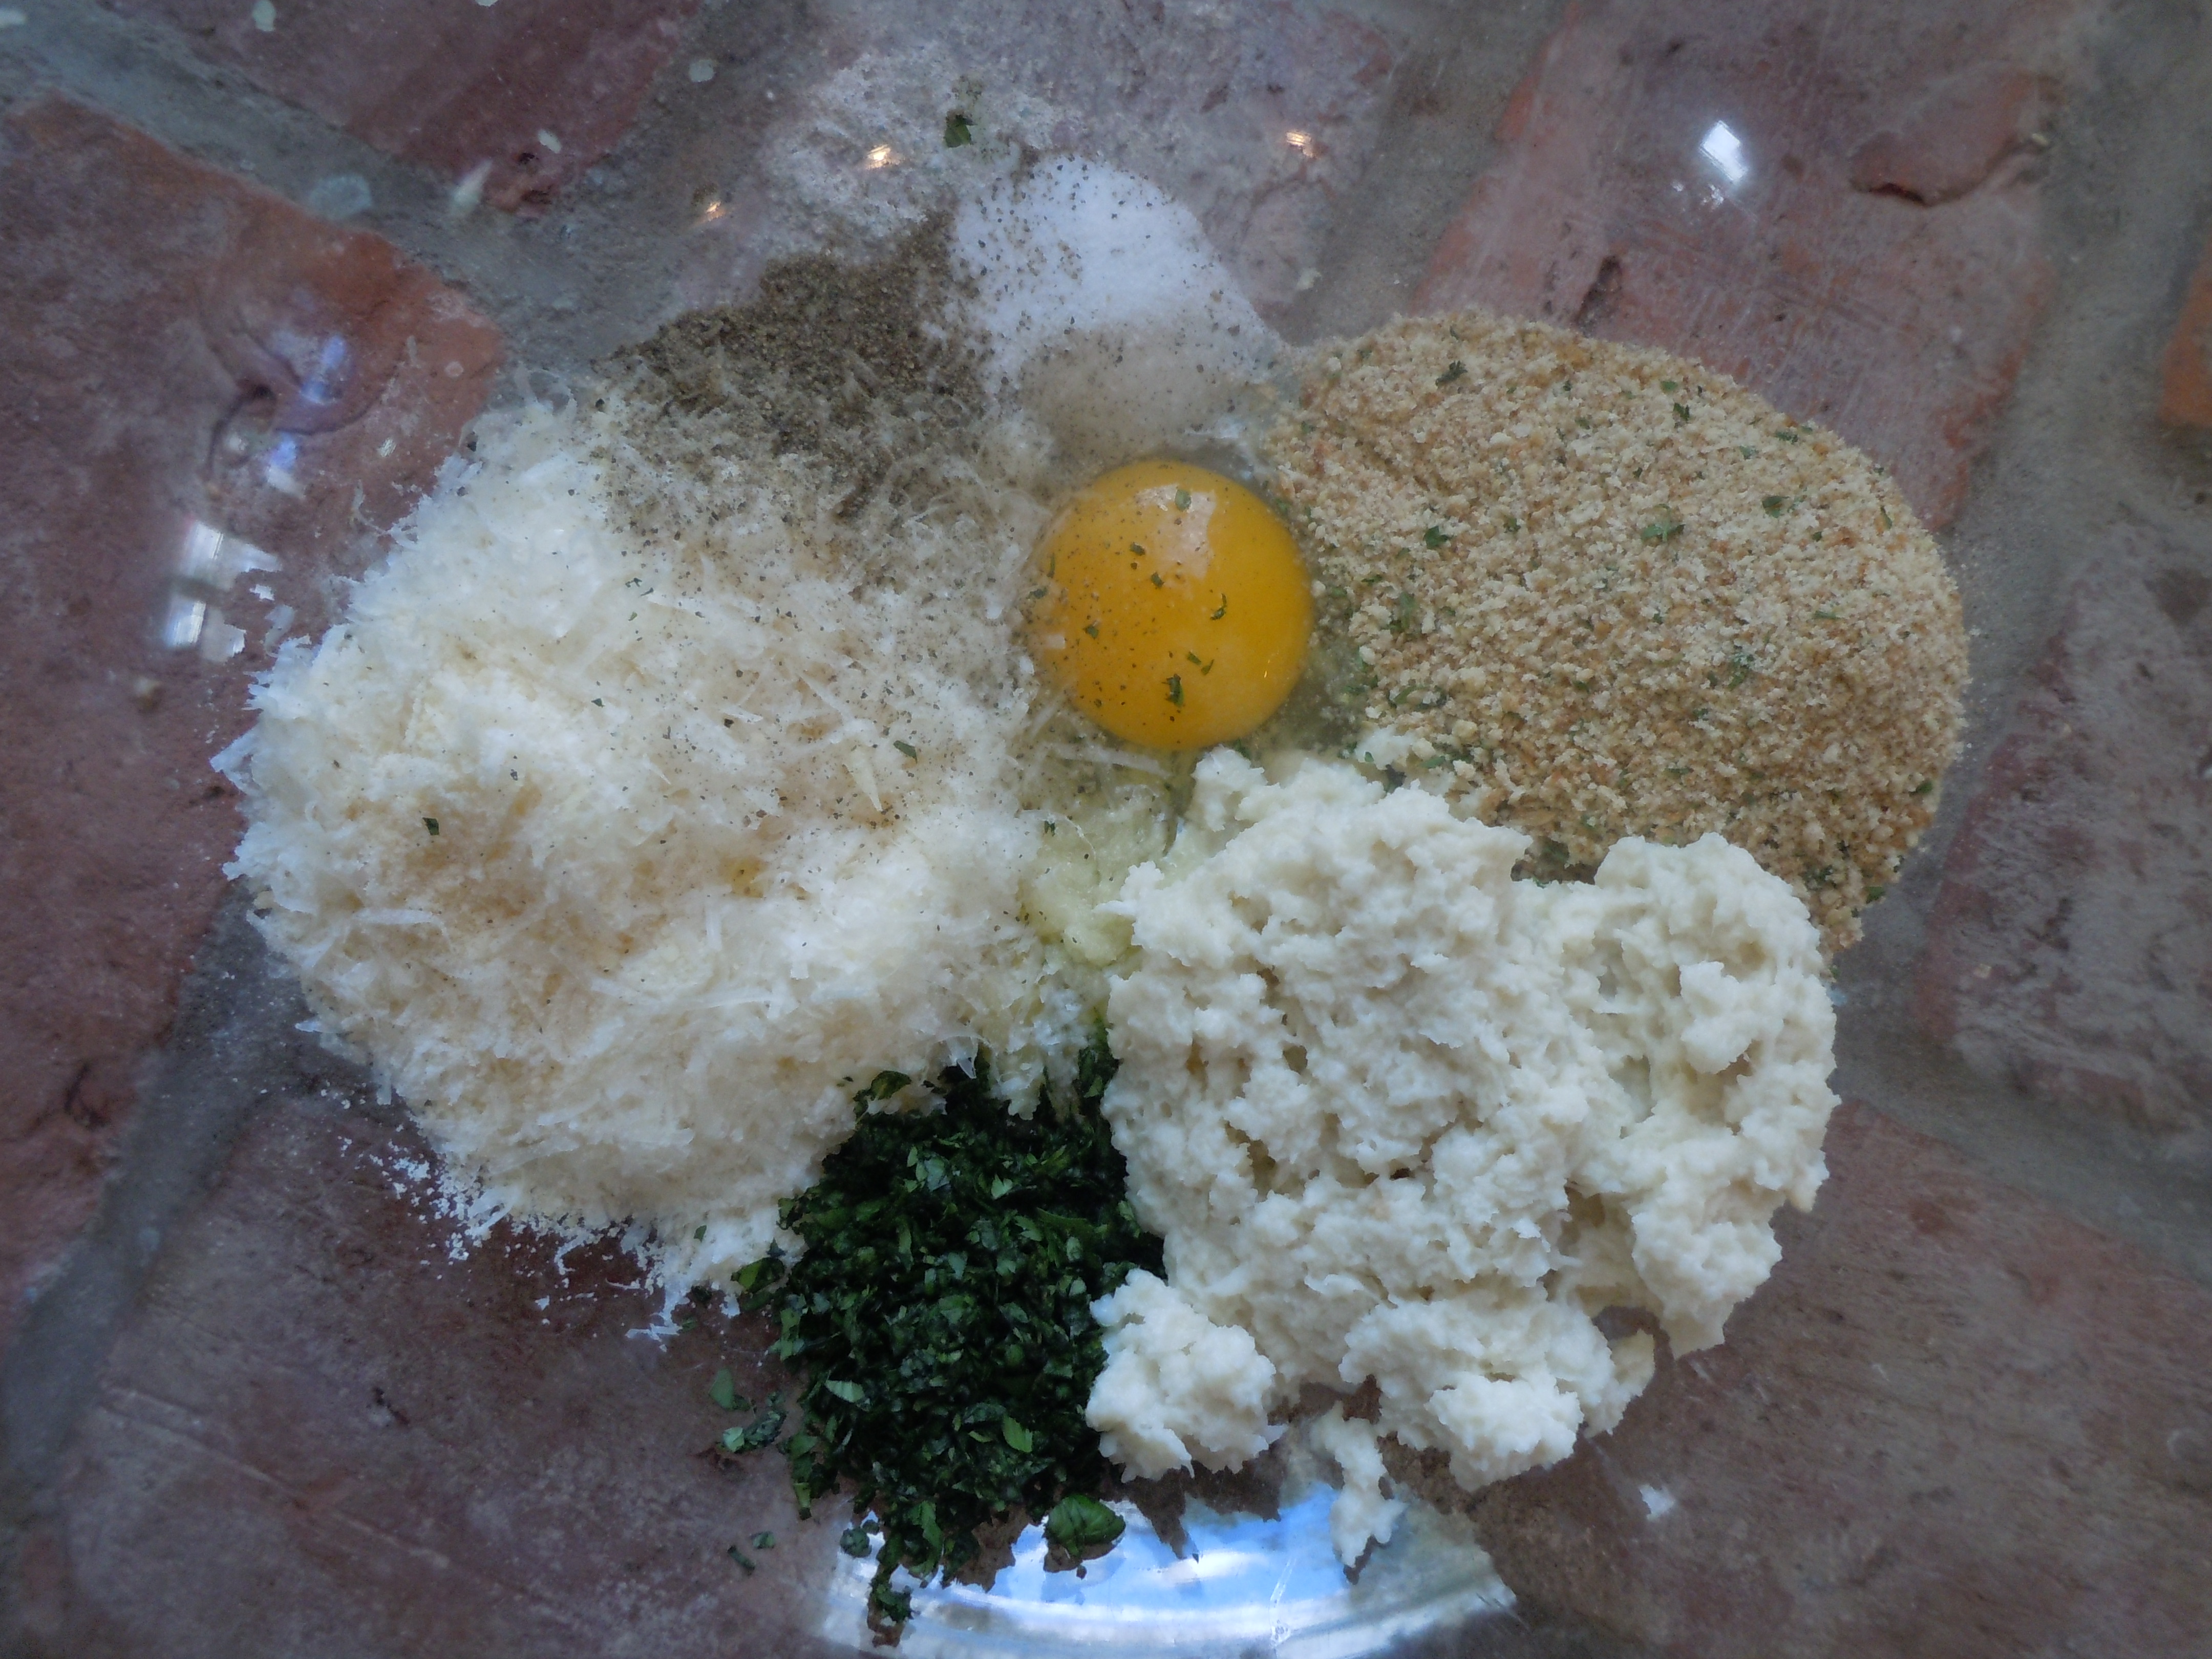
INGREDIENTS for Homemade Turkey Meatballs In An Italian Meatball Sub – (Makes 21 Small Meatballs):
1 lb. ground turkey
1 extra-large egg (rule of thumb …1 egg per 1 lb. of meat)
1/2-3/4 cup after soaked in milk – (1/2 loaf of 2 day old Italian bread soaked in 1 cup milk)
Break up a 1/2 loaf of 2 day old Italian bread and place into a large bowl as shown in photo
Pour 1 cup milk over bread and let it absorb for 10 minutes
Wash, spin, dry and finely chop parsley, set aside
Discard outer crusts from soaking Italian bread
Begin to break soaking bread pieces apart with your fingers…if you feel any gooey pieces throw those away (if it sat out for a couple of days it won’t get gooey)…the bread should just fall apart easily
Take 1/2-3/4’s cup of this soaking bread and add to a large mixing bowl
NOTE: with turkey being as moist as it is you should squeeze a little more of the milk out (you don’t do this with beef because it’s drier)
To this bowl add in Parmesan, chopped parsley, garlic clove thru garlic press, salt and pepper and 1 egg
Whisk til just combined
Add in 1 lb. of ground turkey and begin to mix gently with your hands…DON’T over work the meatballs you don’t want it to look fully combined like a meatloaf
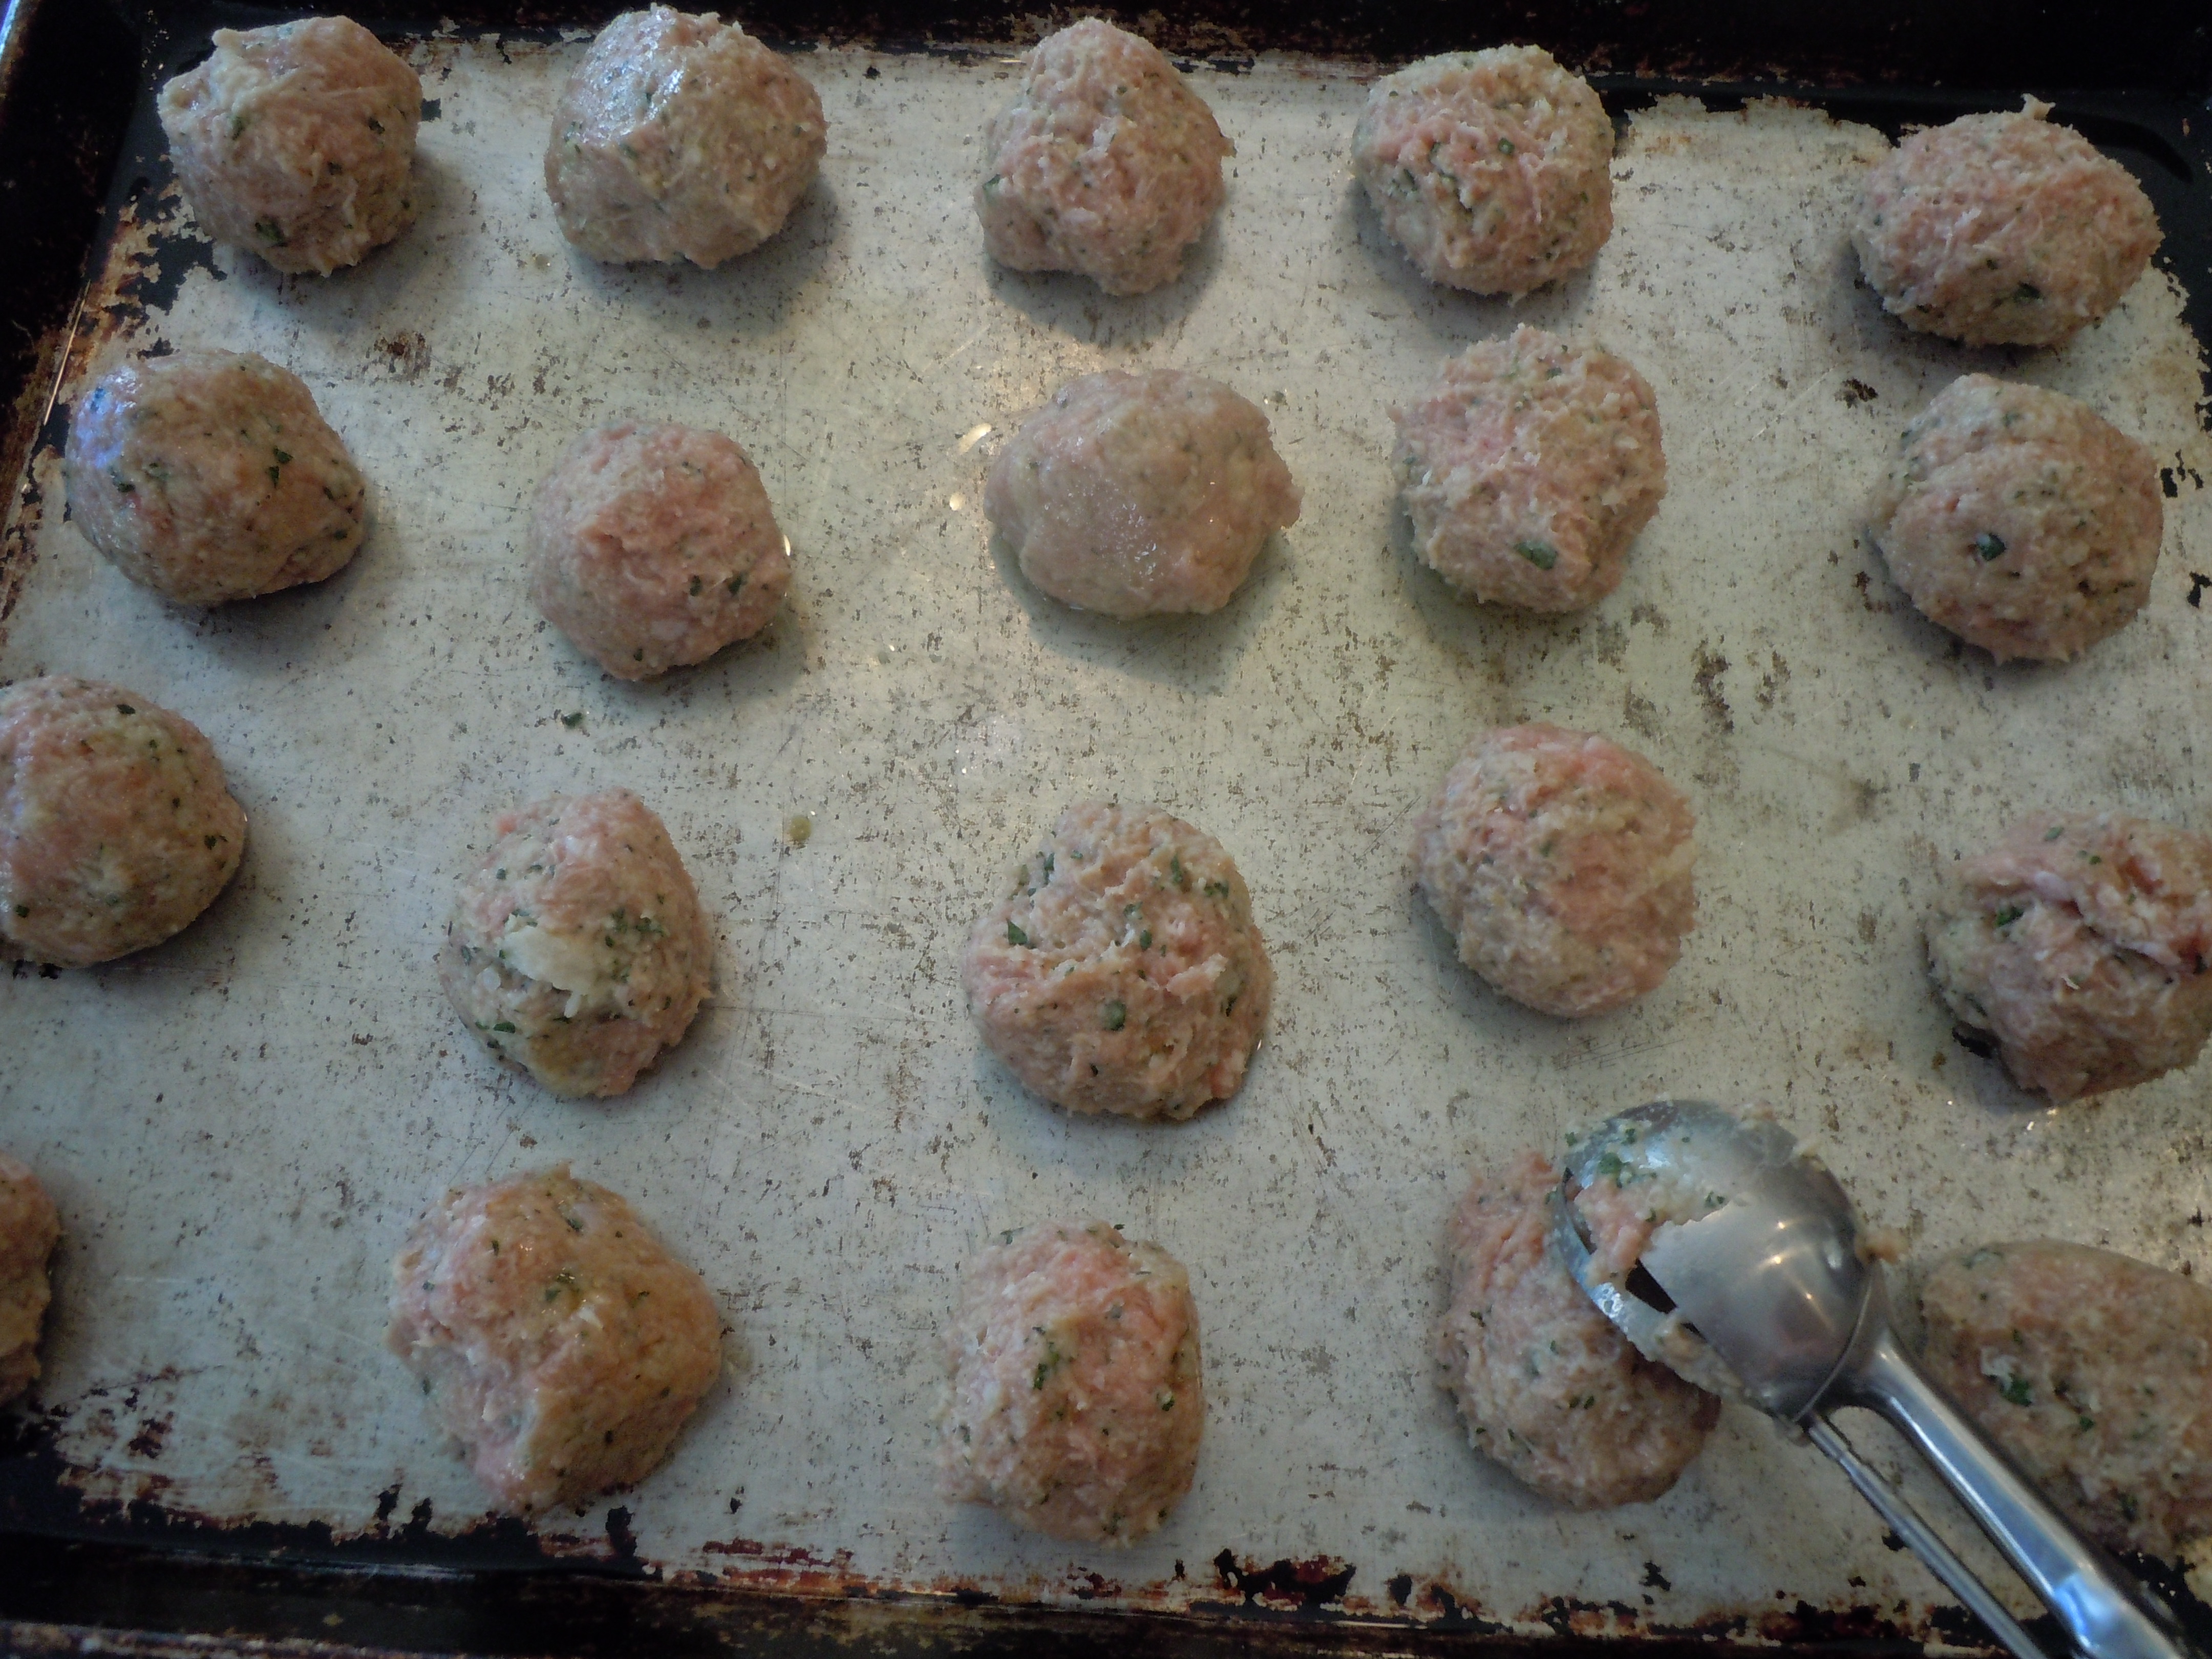
Using a cookie scooper begin to shape and roll mixture with your hands – they will be small about 1 1/2″…have a small bowl of water to the side to keep hands damp not wet (this makes it easier to rolls meatballs)
Spray cookie tray with Pam canola oil and give a drizzle of olive oil for flavor
Place 21 shaped meatballs onto the cookie tray and spray the tops of the meatballs
Place them into the oven for 17 minutes
Take out the turkey meatballs and set aside in a bowl, meanwhile add 1/2 cup red wine the cookie sheet (as long as the cookie sheet has 1″ sides) and scrape browned left over turkey meatball bits and pour this along with meatballs into tomato basil sauce
Add turkey meatballs and wine with bits to my Tomato Basil Pasta Sauce and simmer for 1 1/2 – 2 hrs.
Spoon tomato sauce onto baguette(s), then add turkey meatballs and top with mozzarella
Bake in a 400º oven for 10 minutes or until cheese is melted, then add a julienne of fresh basil and slice up for several servings or keep whole…good luck and make sure to have plenty of napkins!
My homemade Arancini Reuben Balls are absolutely gourmet. Arancini balls, also called risotto balls, are an Italian appetizer made with left over risotto, stuffed with mozzarella and prosciutto, then breaded and deep fried! Oh boy, they are out of this world. They are crispy on the outside, and creamy and cheesy on the the inside. You can eat them plain or serve them with a tomato sauce.
My homemade Arancini Reuben Balls are made with risotto, diced corned beef, Swiss cheese, cream cheese and sautéed jalapeño’s to incorporate that “popper” flavor! I serve them with my gourmet thousand island dressing which I make with Greek yogurt and a creamy horseradish to compliment the corned beef. The flavors of the risotto balls paired up with the thousand island dressing are outstanding!
Do you remember having poppers? You know, those deep fried jalapeno’s stuffed with cream cheese? Wow, I used to love those little morsels and I haven’t had them in ages so that’s why I thought it would be fun to put a twist on my Risotto Reuben Balls. It was a great idea too because the cream cheese lightens up the risotto balls and the jalapeno’s give it that something extra special!
You’ll be so happy when you make these homemade gourmet Arancini Reuben Balls with your left over St. Patrick’s Day corned beef. They freeze up really well too which will make for a nice little treat at a later date although I highly doubt you’ll have any left behind.
Risotto Ingredients and Directions – Total time to make approx. 30 minutes:
I halved my recipe specifically for the Arancini Reuben Balls but I usually make full a full recipe, double the amount below
1 cup Arborio Rice
3/4 cup finely chopped sweet onion
2 tbsp butter and a drizzle of olive oil
1/3 cup white wine
4 cups hot chicken broth – homemade or store bought
1/2 cup grated Reggiano Parmesano
Directions:
In small pot heat 4 cups chicken stock til simmering
Add onion to medium size pot to 1 tbsp. butter & sauté on low til soft
Stir in 1 cup Arborio rice and sauté til the rice looks chalky
Add in 1/3 cup white wineat a time, keep stirring, when wine is absorbed begin to add in 4 cups of simmering chicken stock ONLY 1/2 cup at a time-it will be approx 4 minutes for each addition
ONLY add in chicken stock when previously addition is completely absorbed while STIRRING all the time
Stir in 1 tbsp butter and 1/2 cup Reggiano Parmesano after the last of the chicken stock is absorbed, then let cool to make Arancini Reuben Balls.
Ingredients- Makes 20 – 1 1/2″ Arancini Balls:
1 1/4 cup diced into 1/4″ pieces of corned beef
2 cups cooked risotto (see below for recipe my recipe for risotto)
4 oz. softened cream cheese
1/4 cup grated and packed Jarlsberg swiss cheese
1/4 cup grated and packed mozzarella cheese
2 jalapeno’s finely diced and sauteed just til barely softened 2 minutes
1/4 tsp salt
1/4 tsp pepper
2 lg eggs
1 cup seasoned bread crumbs
Directions for Arancini Reuben Balls:
Put all of the above ingredients into a large bowl and stir with spatula til mixed
Use cookie scoop and from balls, roll in hands after scooping to get nice and round
Whisk eggs in a med. bowl
Add bread crumbs to another and begin the dip formed risotto balls into egg and them into bread crumbs and place on dish
Put breaded risotto Reuben balls in frig for 20-30 minutes
When the Reuben balls are chilled heat 1/2″ vegetable oil in medium size pan and begin to heat on low for 5 minutes and then turn up to med/high to 350º
Add in Arancini Reuben Balls in 2 batches into hot oil
Fry for about 2 minutes and then turn over for another 2 minutes til golden
Remove to cookie rack covered with paper towels to absorb excess oil
Plate up Arancini Reuben Balls with my homemade gourmet thousand island recipe below 🙂
This Thousand Island Dressing is great on Reuben Wrapsalso
INGREDIENTS FOR THOUSAND ISLAND DRESSING:
1/2 cup Greek yogurt
2/3 cup Hellman’s mayonnaise
1/2 cup ketchup
1 Heaping tbsp finely chopped cornichons
1/3 cup sweet relish
1 Heaping tbsp grated sweet onion
1 Heaping tbsp finely chopped fresh parsley
3 tbsp creamy horseradish
1 tbsp olive oil
1 tbsp “seasoned” rice wine vinegar
1-3 dashes of Siracha
DIRECTIONS:
Put all ingredients into a large bowl and whisk til combined
Yes, I am giving up the good’s on this one and I know you will appreciate it because this is one of my very favorite secret family recipes…mama Maria’s homemade manicotti! These are the BEST homemade manicotti I have ever had and I know you will love them too. They are a poured pasta and are light and fluffy even with Liuzzi’s homemade whole milk ricotta and mozzarella inside. I use my tomato-basil pasta sauce or my slow cooked pasta sauce 101 for the homemade manicotti. These are really festive and a special dish to make for the holidays. It’s nice to serve a refreshing salad with pasta like my fennel and citrus with tangerine dressingand sides likezucchini torta, roasted beet salad with mint and feta. A light pavlova dessert with fresh pineapple and berries would make the perfect end for this manicotti dinner.
INGREDIENTS:
1 cup all purpose flour
1 cup water
1/4 Tsp salt
4 extra large eggs
2-3 Tbsp olive oil
3 lbs. Liuzzi whole milk ricotta or your favorite
5 0z. shredded whole milk, 5 oz. park skim and 5 oz. Scamorza mozzarella mixed together ( can also do 8 oz. whole milk and 8 oz. part skim shedded and mixed)
In a large bowl whisk 1 cup flour, 1/4 Tsp salt with 1 cup water (approx. 20 whisks)
Add in 1 egg at a time and whisk about 5 whisks per egg
Put cast iron pan on stove on medium/high heat (a 7 out of an 11)
Put a couple of Tbsp of olive oil in a bowl with a paper towel
Rub pan with olive oil-saturated paper towel in between cooking poured pasta batter
Pour in a ladle of batter into hot pan, approx. 1/4 cup ladle
Pick up pan and swirl around 3 times and place back down onto stove
Wait about 25 seconds and flip pasta crepe over, you can use a flexible pastry knife to help you get under it…it will be easy to flip and will not ever be stuck
You never want the pasta crepe to be golden on the edges-that would be over cooking them…they should look like the photo above light in color
Immediately flip over onto floured board and flip a couple of times to cool a little
Repeat dredging saturated paper towel into pan to coat and then pour another 1/4 cup ladle of batter into pan.
Repeat this over and over until you run out of batter…this amount will make 16 manicotti
When you are done lay out a work board to roll manicotti’s on
Put ricotta in a bowl so it’s easy to work with
Pour about 2 cup of tomato sauce into the baking pan
Lay out manicotti crepe and scoop 1/4 cup ricotta going across the center of the circle as shown in the photo
Lay a piece of mozzarella in the center and roll up manicotti
Place rolled manicotti on top of sauce in pan and continue on until all the pasta crepes are done
Pour another 2-2 1/2 cups of sauce on top of roll manicotti’s, sprinkle with parmesan and cover with foil
Place in frig until you are ready to bake
Or cover with saran and then foil and put into the freezer until your event is near and then pull out two nights before and put into the frig to thaw
When you are ready to bake your manicotti put into a 350º oven and bake for 45 minutes
The manicotti will be bubbly when you take it out of the oven and need to rest for 5 minutes before serving
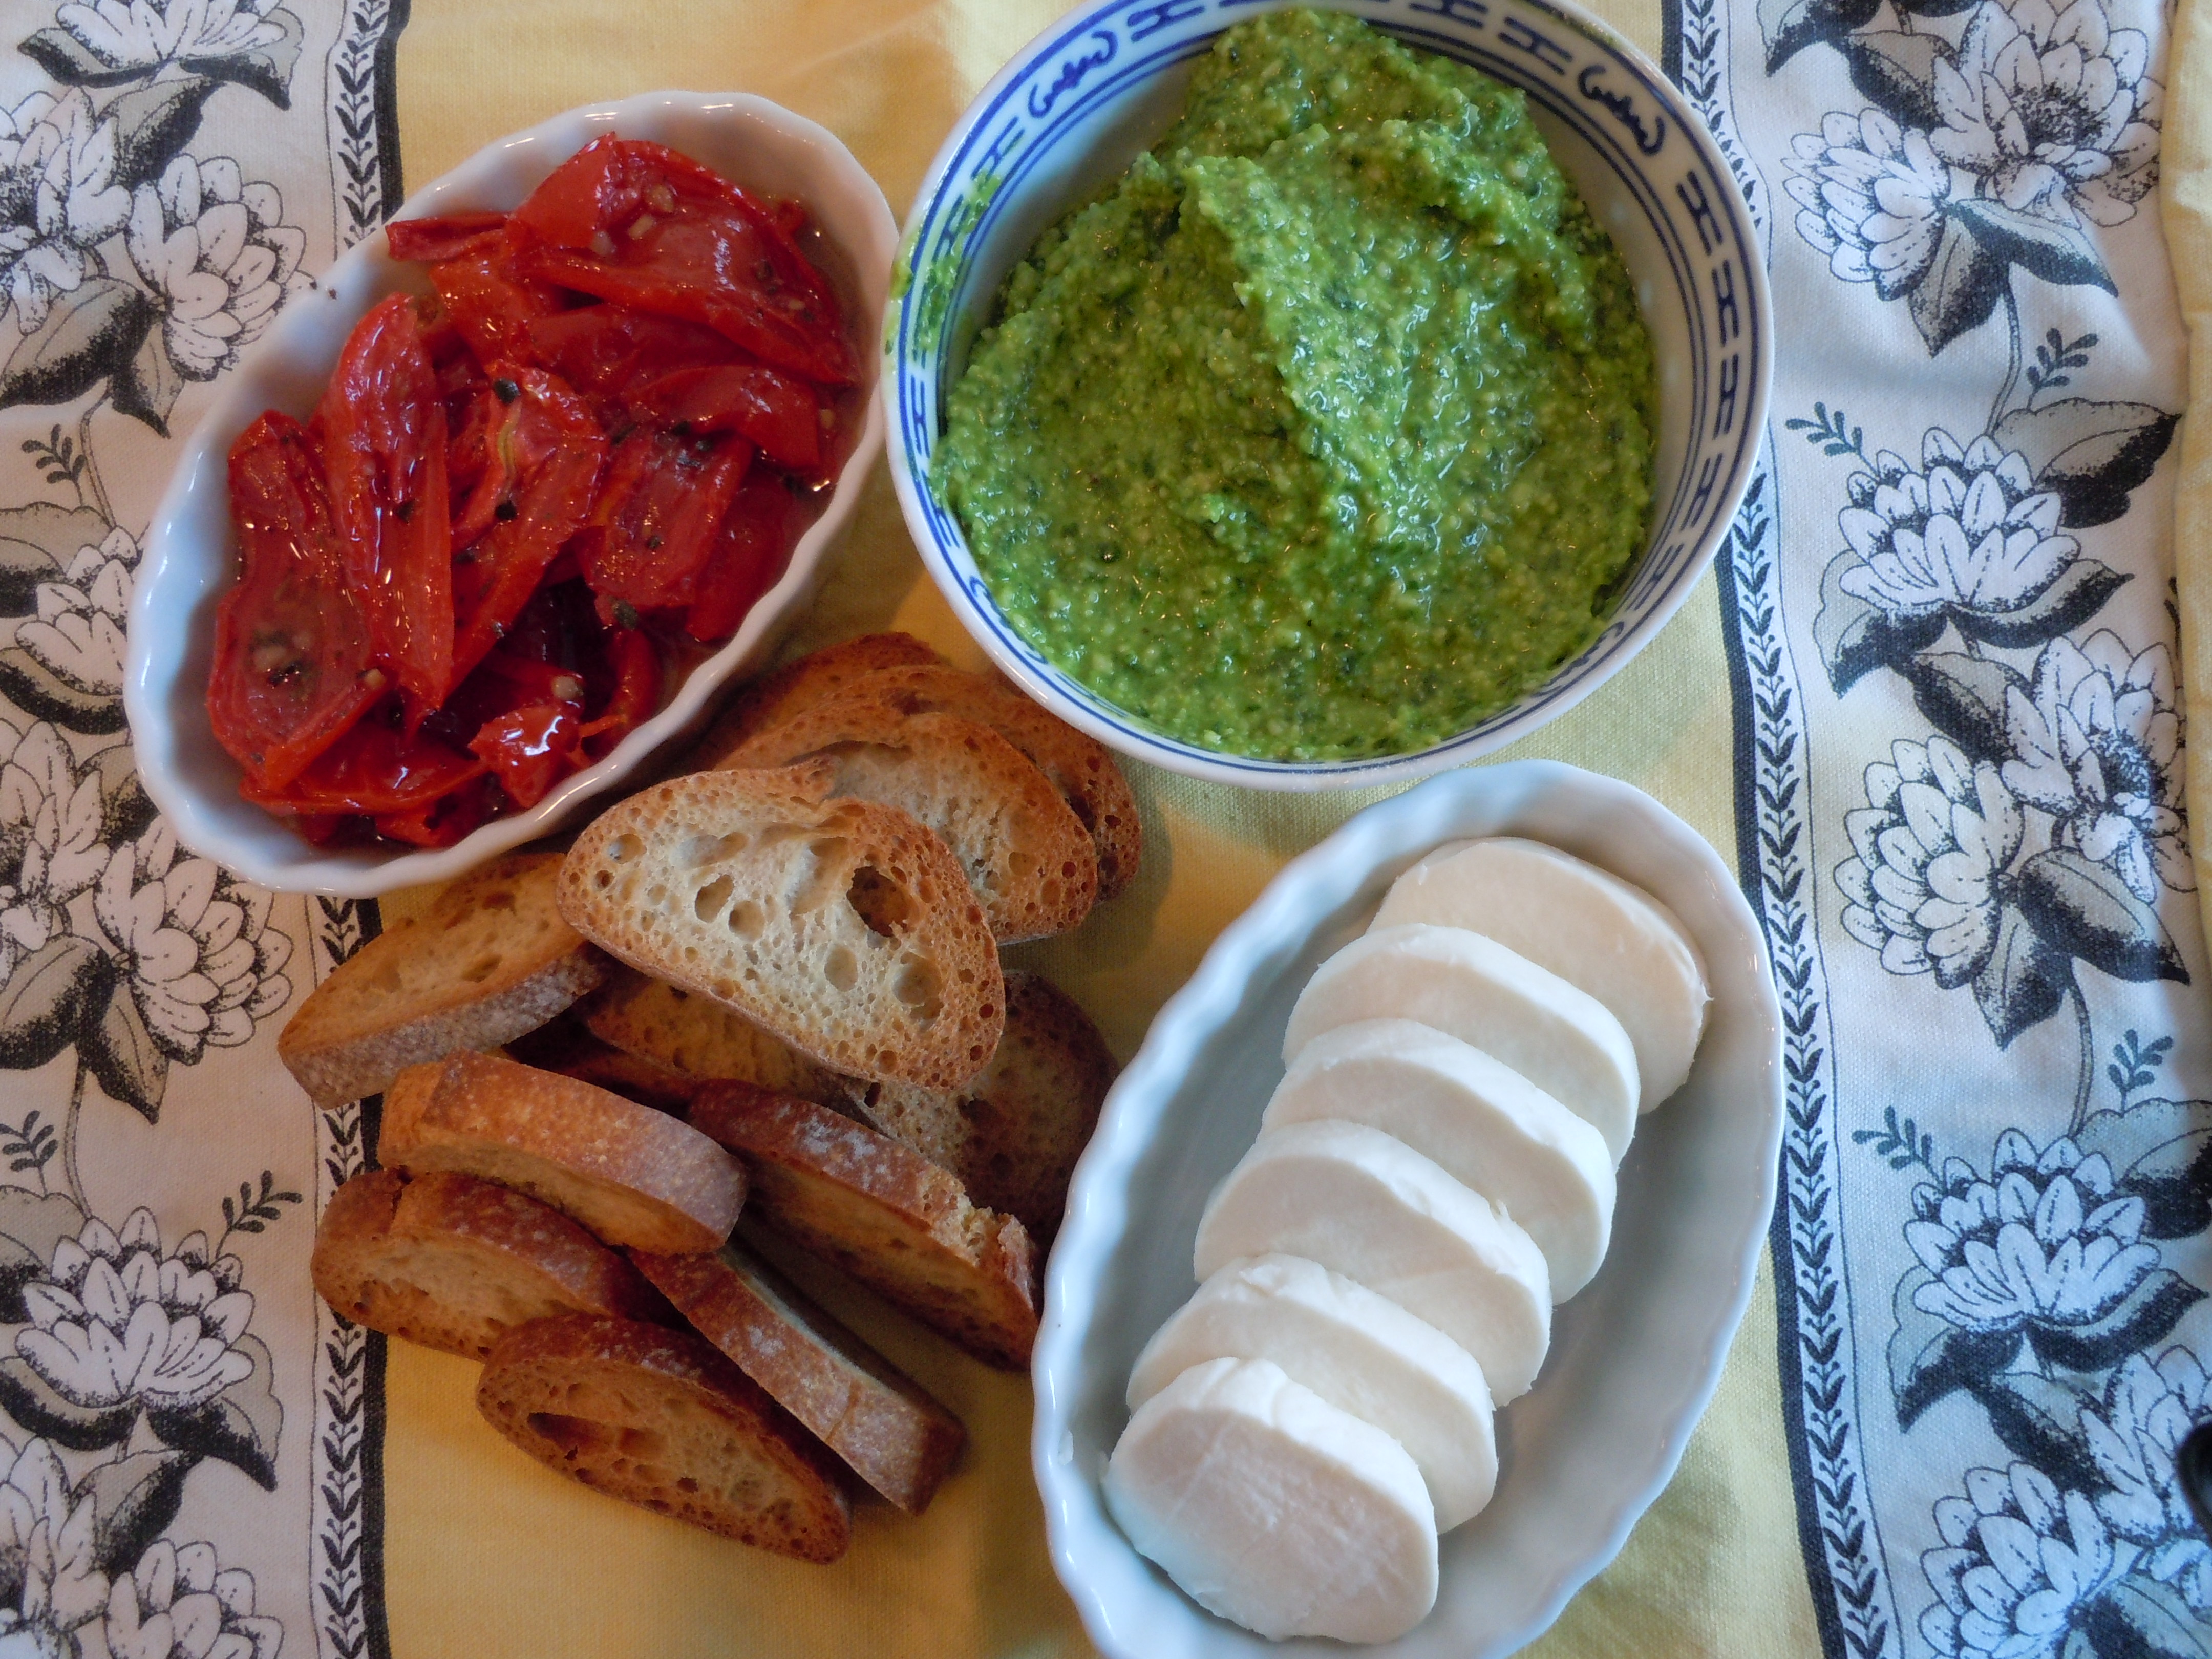
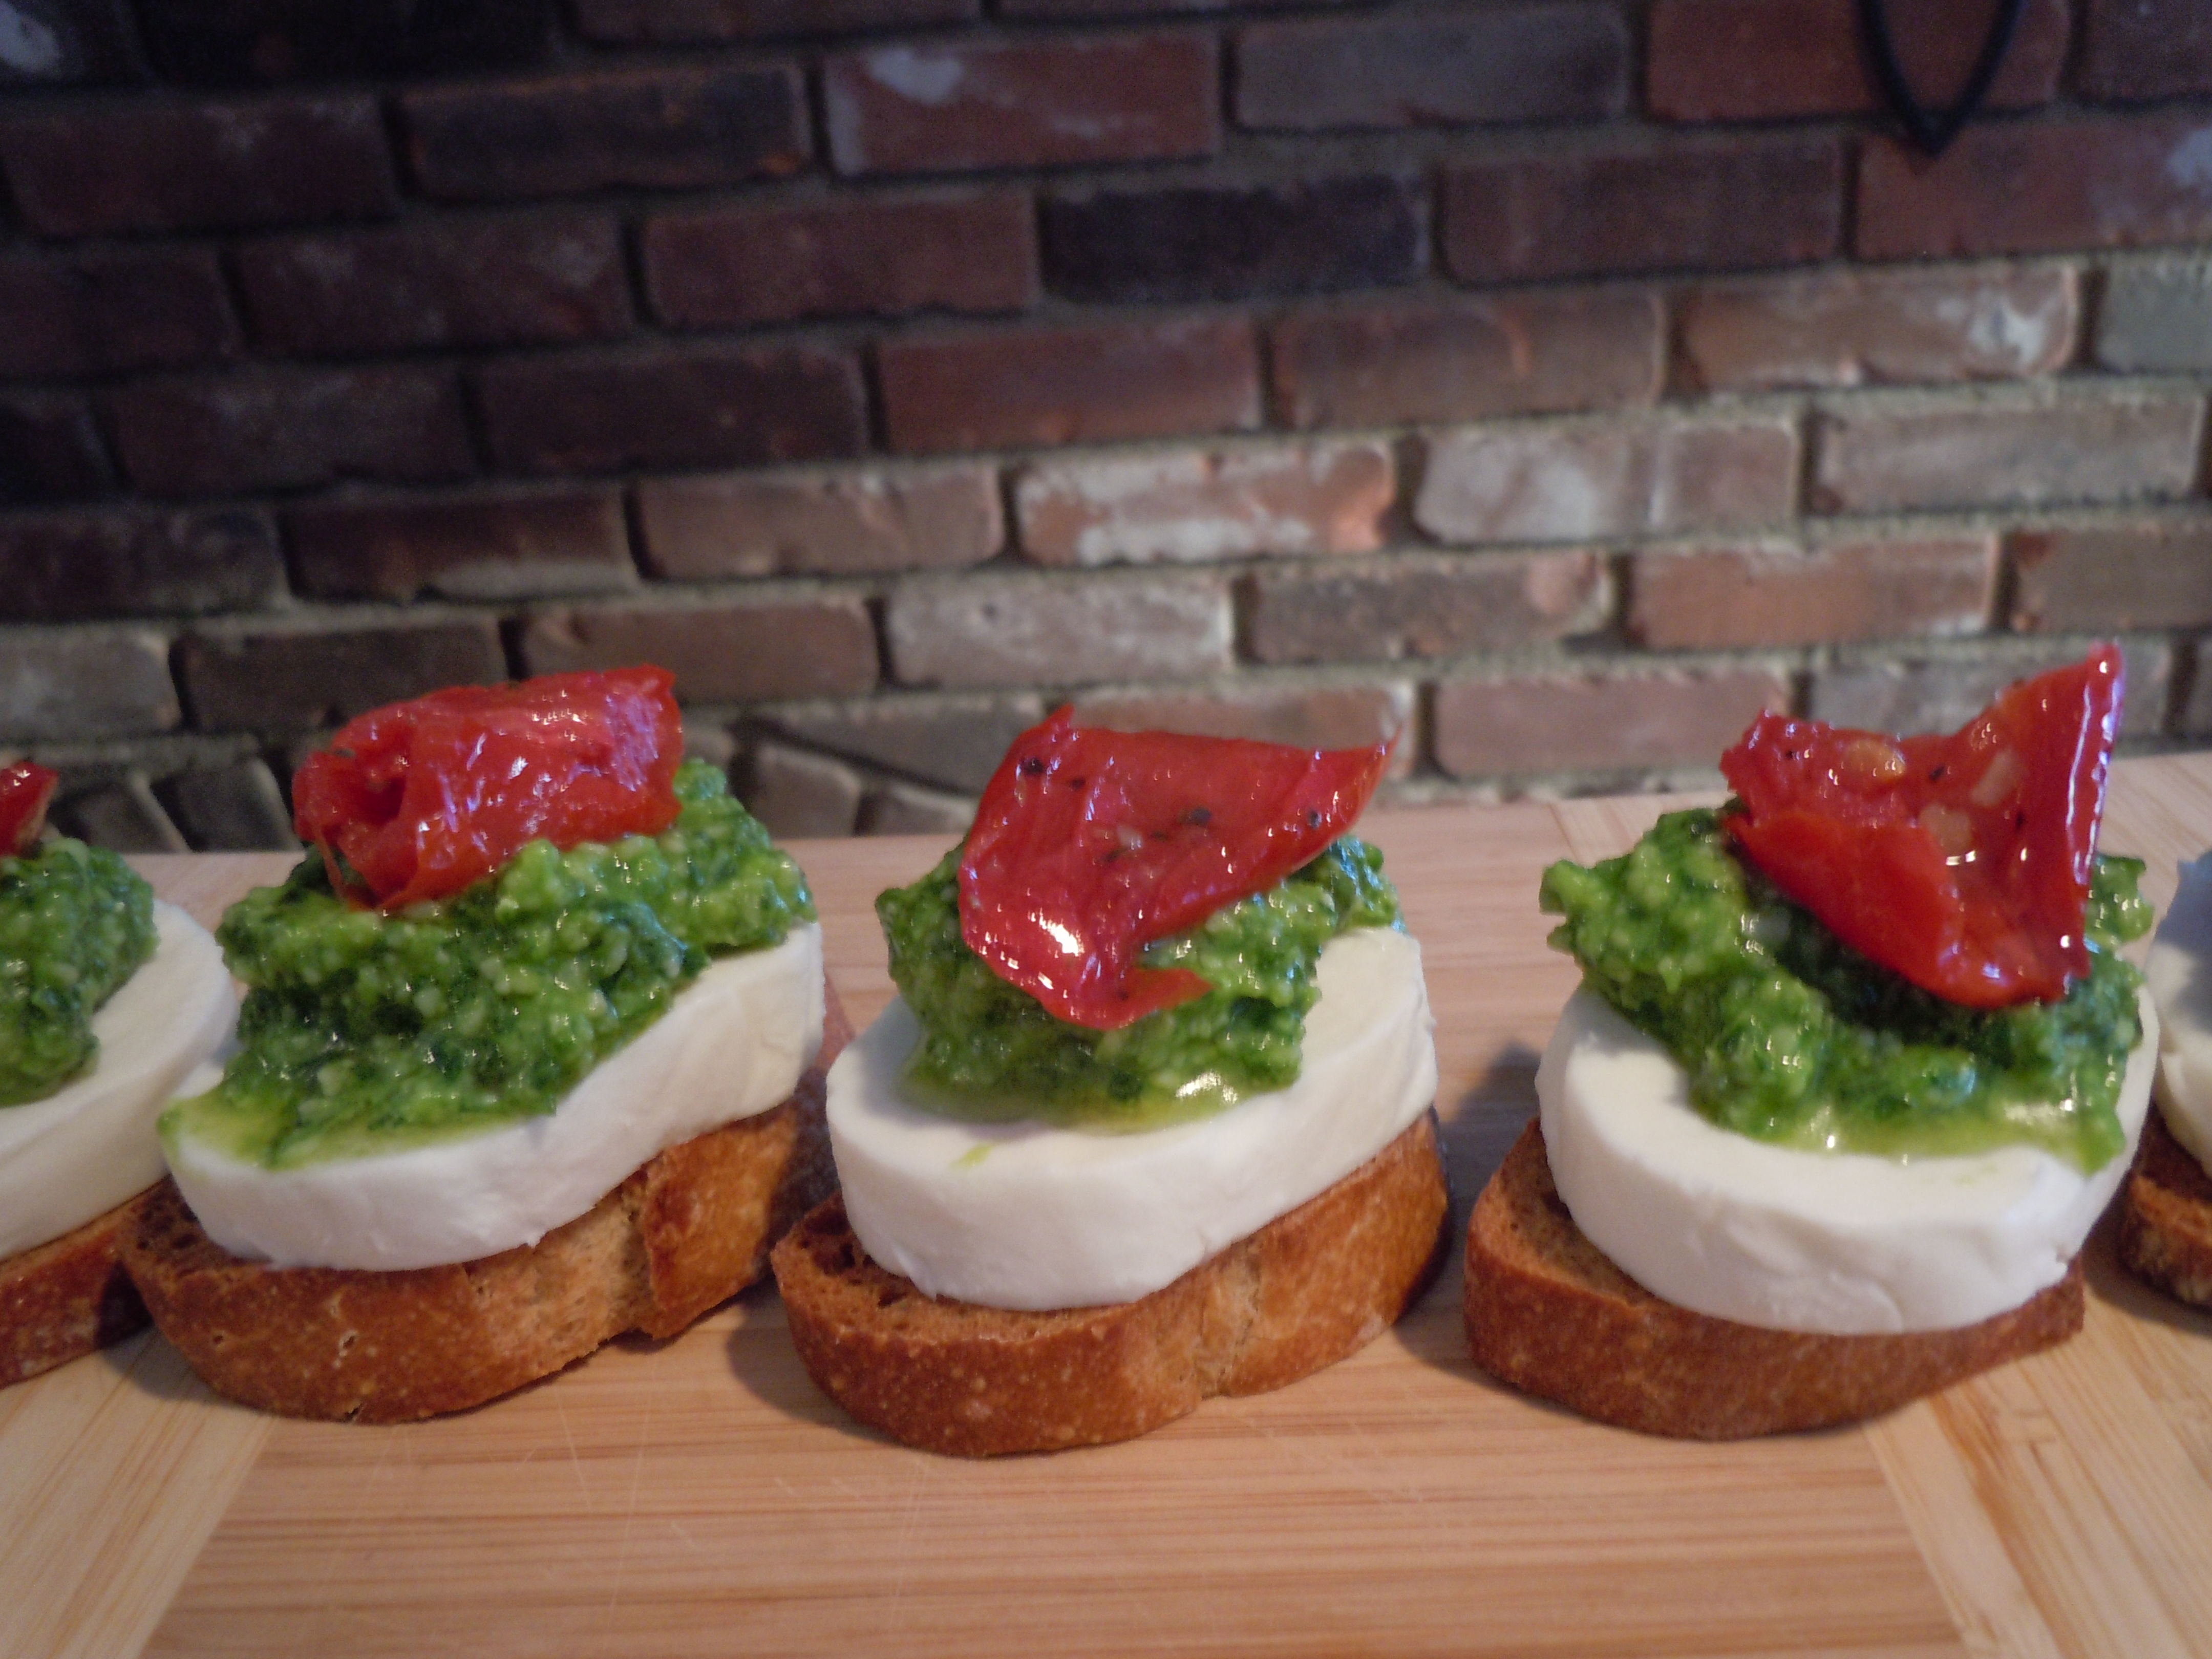
Fresh Mozzarella, Pesto, and Roasted Tomato on Crostinis
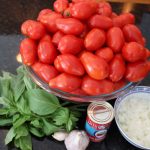
This crostini with fresh mozzarella, pesto and roasted tomato appetizer is absolutely delicious and is totally a make ahead dish! The Crostinis you can make a week before, they’ll taste no different if you made them that day and the pesto you can make a day or two before. As for the fresh mozzarella you can either buy the fresh balls if you have a nice cheese shop near by or you can even get the mozzarella logs that are packaged in water to keep fresh and soft and are even pre-sliced! I like to buy my roasted tomato’s from Foxglove & Madison Cheese Shop. It’s not difficult to roast your own tomatoes but it is time consuming and the roasted tomato’s available at the cheese shop are packed with intense flavor, a gorgeous deep red color and all the work is done for you. They also have fresh and creamy mozzarella balls there as well. If it’s not possible to find or roast your own tomatoes improvise and put a 1/8″ slice of a sweet cherry or grape tomato on top of the pesto. The pesto has so much flavor the freshness of the sliced cherry or grape tomato will balance out nicely with it. It’s all good ….just enjoy!
1 container roasted tomatoes (can use a 1/8″ slice of a fresh cherry or grape tomato to improvise if with out the roasted)
Directions:
Cut the roasted tomato pieces in half.
It’s packed with a lot of rich flavor and 1/2 of a piece is perfect on top of the pesto.
Place a slice of mozzarella onto the crostini then add a dallop of fresh pesto on top of that and place a piece of the roasted tomato on the pesto, plate and serve……Mangia!
TIP: You can make the pesto texture thicker so it stands up nice and plump on the crositni by adding a little more parmesean


 One of the wonderful things about making these dishes is the abundance and variety you have to choose from at the farmers markets in the summer. The incredible flavors in this Panzanella recipe go without saying. All the aroma’s from the fresh herbs, basil, parsley, thyme & oregano to the fresh vegetables like the heirloom tomatoes, garlic, cucumbers, red onions really get you salavating. The creaminess from the fresh mozzarella and the crunchy from the homemade croutons balance it all out.


 I think this buffalo chicken layered dip is a win win for you and your party. Everyone will be asking you for the recipe. I hope you enjoy this “BEST Buffalo Chicken Dip” recipe and the show too! Don’t miss the “Behind the scenes bloopers” included at the end of the show. And if you want to make an amazing desert that will get you lots of oohs and ahhs try the


![DSCN4361[1]](https://thetravelingepicurean.com/wp-content/uploads/2014/04/DSCN43611.jpg)
![DSCN4362[1]](https://thetravelingepicurean.com/wp-content/uploads/2014/04/DSCN43621.jpg)
![DSCN4364[1]](https://thetravelingepicurean.com/wp-content/uploads/2014/04/DSCN43641.jpg)
![DSCN4367[1]](https://thetravelingepicurean.com/wp-content/uploads/2014/04/DSCN43671.jpg)
![DSCN4369[1]](https://thetravelingepicurean.com/wp-content/uploads/2014/04/DSCN43691.jpg)
![DSCN4372[1]](https://thetravelingepicurean.com/wp-content/uploads/2014/04/DSCN43721.jpg)
![DSCN4374[1]](https://thetravelingepicurean.com/wp-content/uploads/2014/04/DSCN43741.jpg)
![DSCN4376[1]](https://thetravelingepicurean.com/wp-content/uploads/2014/04/DSCN43761.jpg)
![DSCN4378[1]](https://thetravelingepicurean.com/wp-content/uploads/2014/04/DSCN43781.jpg)
![DSCN4382[1]](https://thetravelingepicurean.com/wp-content/uploads/2014/04/DSCN43821.jpg)
![DSCN4385[1]](https://thetravelingepicurean.com/wp-content/uploads/2014/04/DSCN43851.jpg)
![DSCN4386[1]](https://thetravelingepicurean.com/wp-content/uploads/2014/04/DSCN43861.jpg)
![DSCN4391[1]](https://thetravelingepicurean.com/wp-content/uploads/2014/04/DSCN43911.jpg)
![DSCN4393[1]](https://thetravelingepicurean.com/wp-content/uploads/2014/04/DSCN43931.jpg)
![DSCN4395[1]](https://thetravelingepicurean.com/wp-content/uploads/2014/04/DSCN43951.jpg)
![DSCN4399[1]](https://thetravelingepicurean.com/wp-content/uploads/2014/04/DSCN43991.jpg)
![DSCN4405[1]](https://thetravelingepicurean.com/wp-content/uploads/2014/04/DSCN44051.jpg)