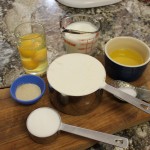
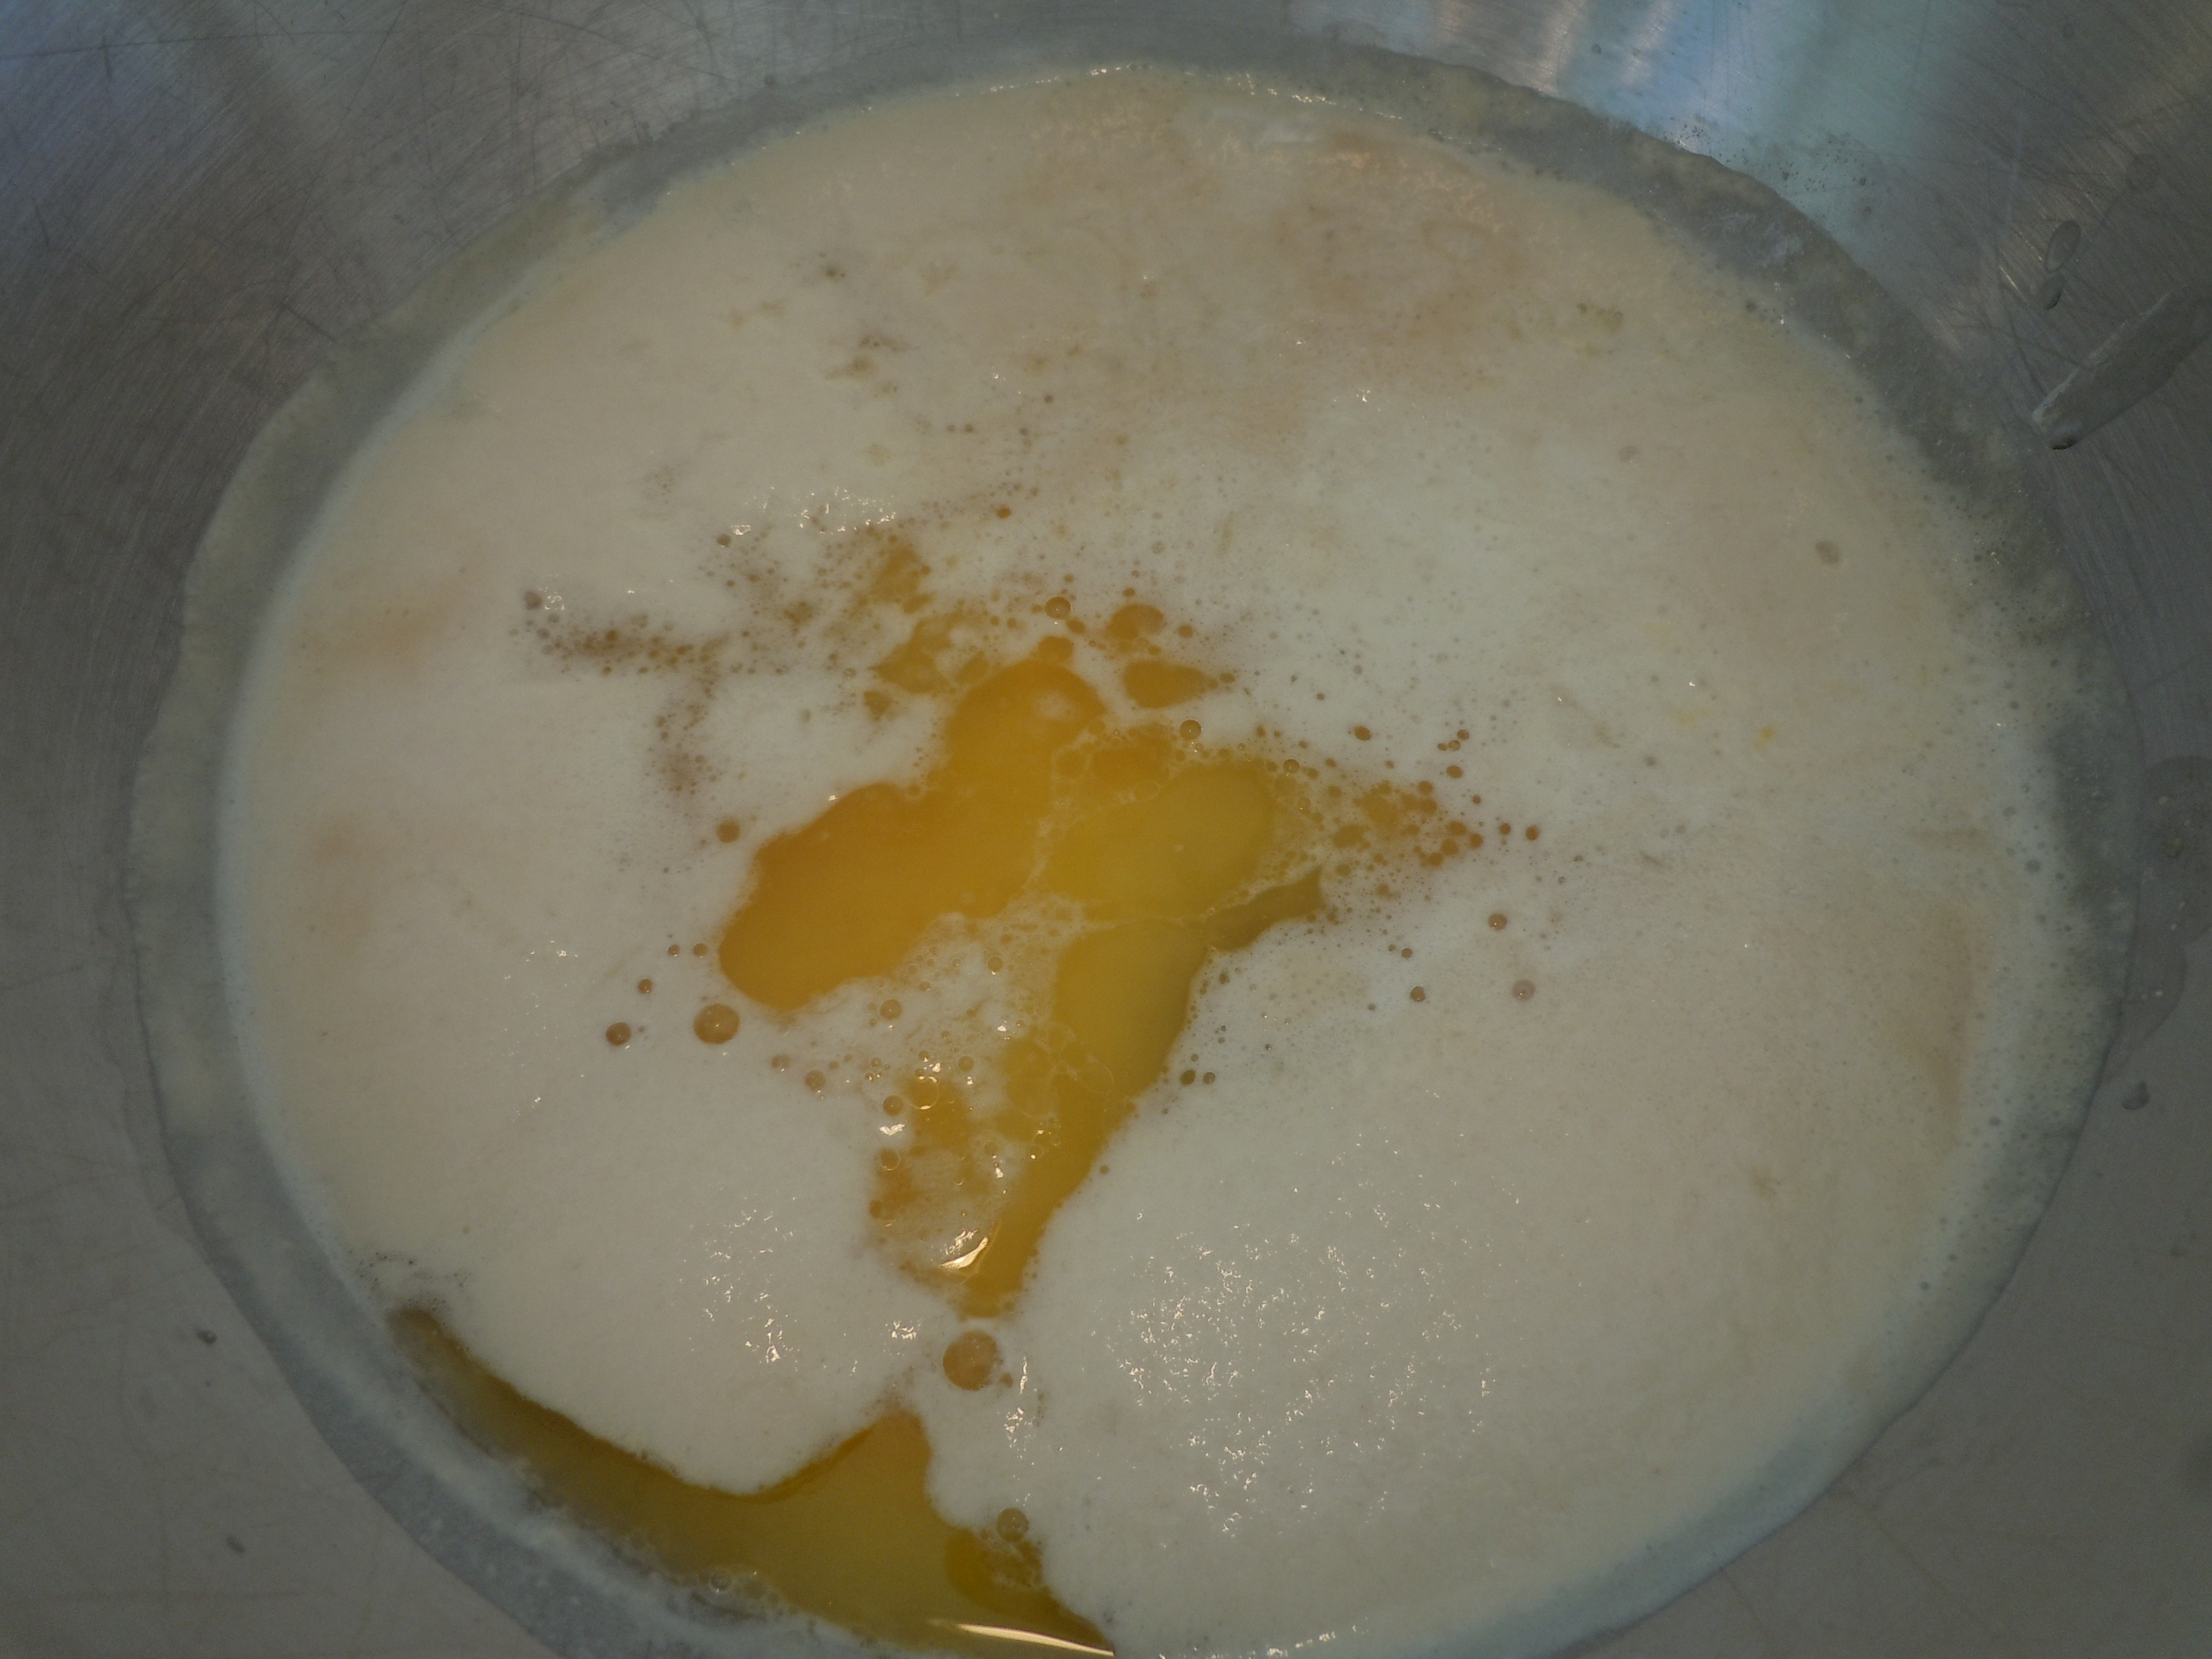
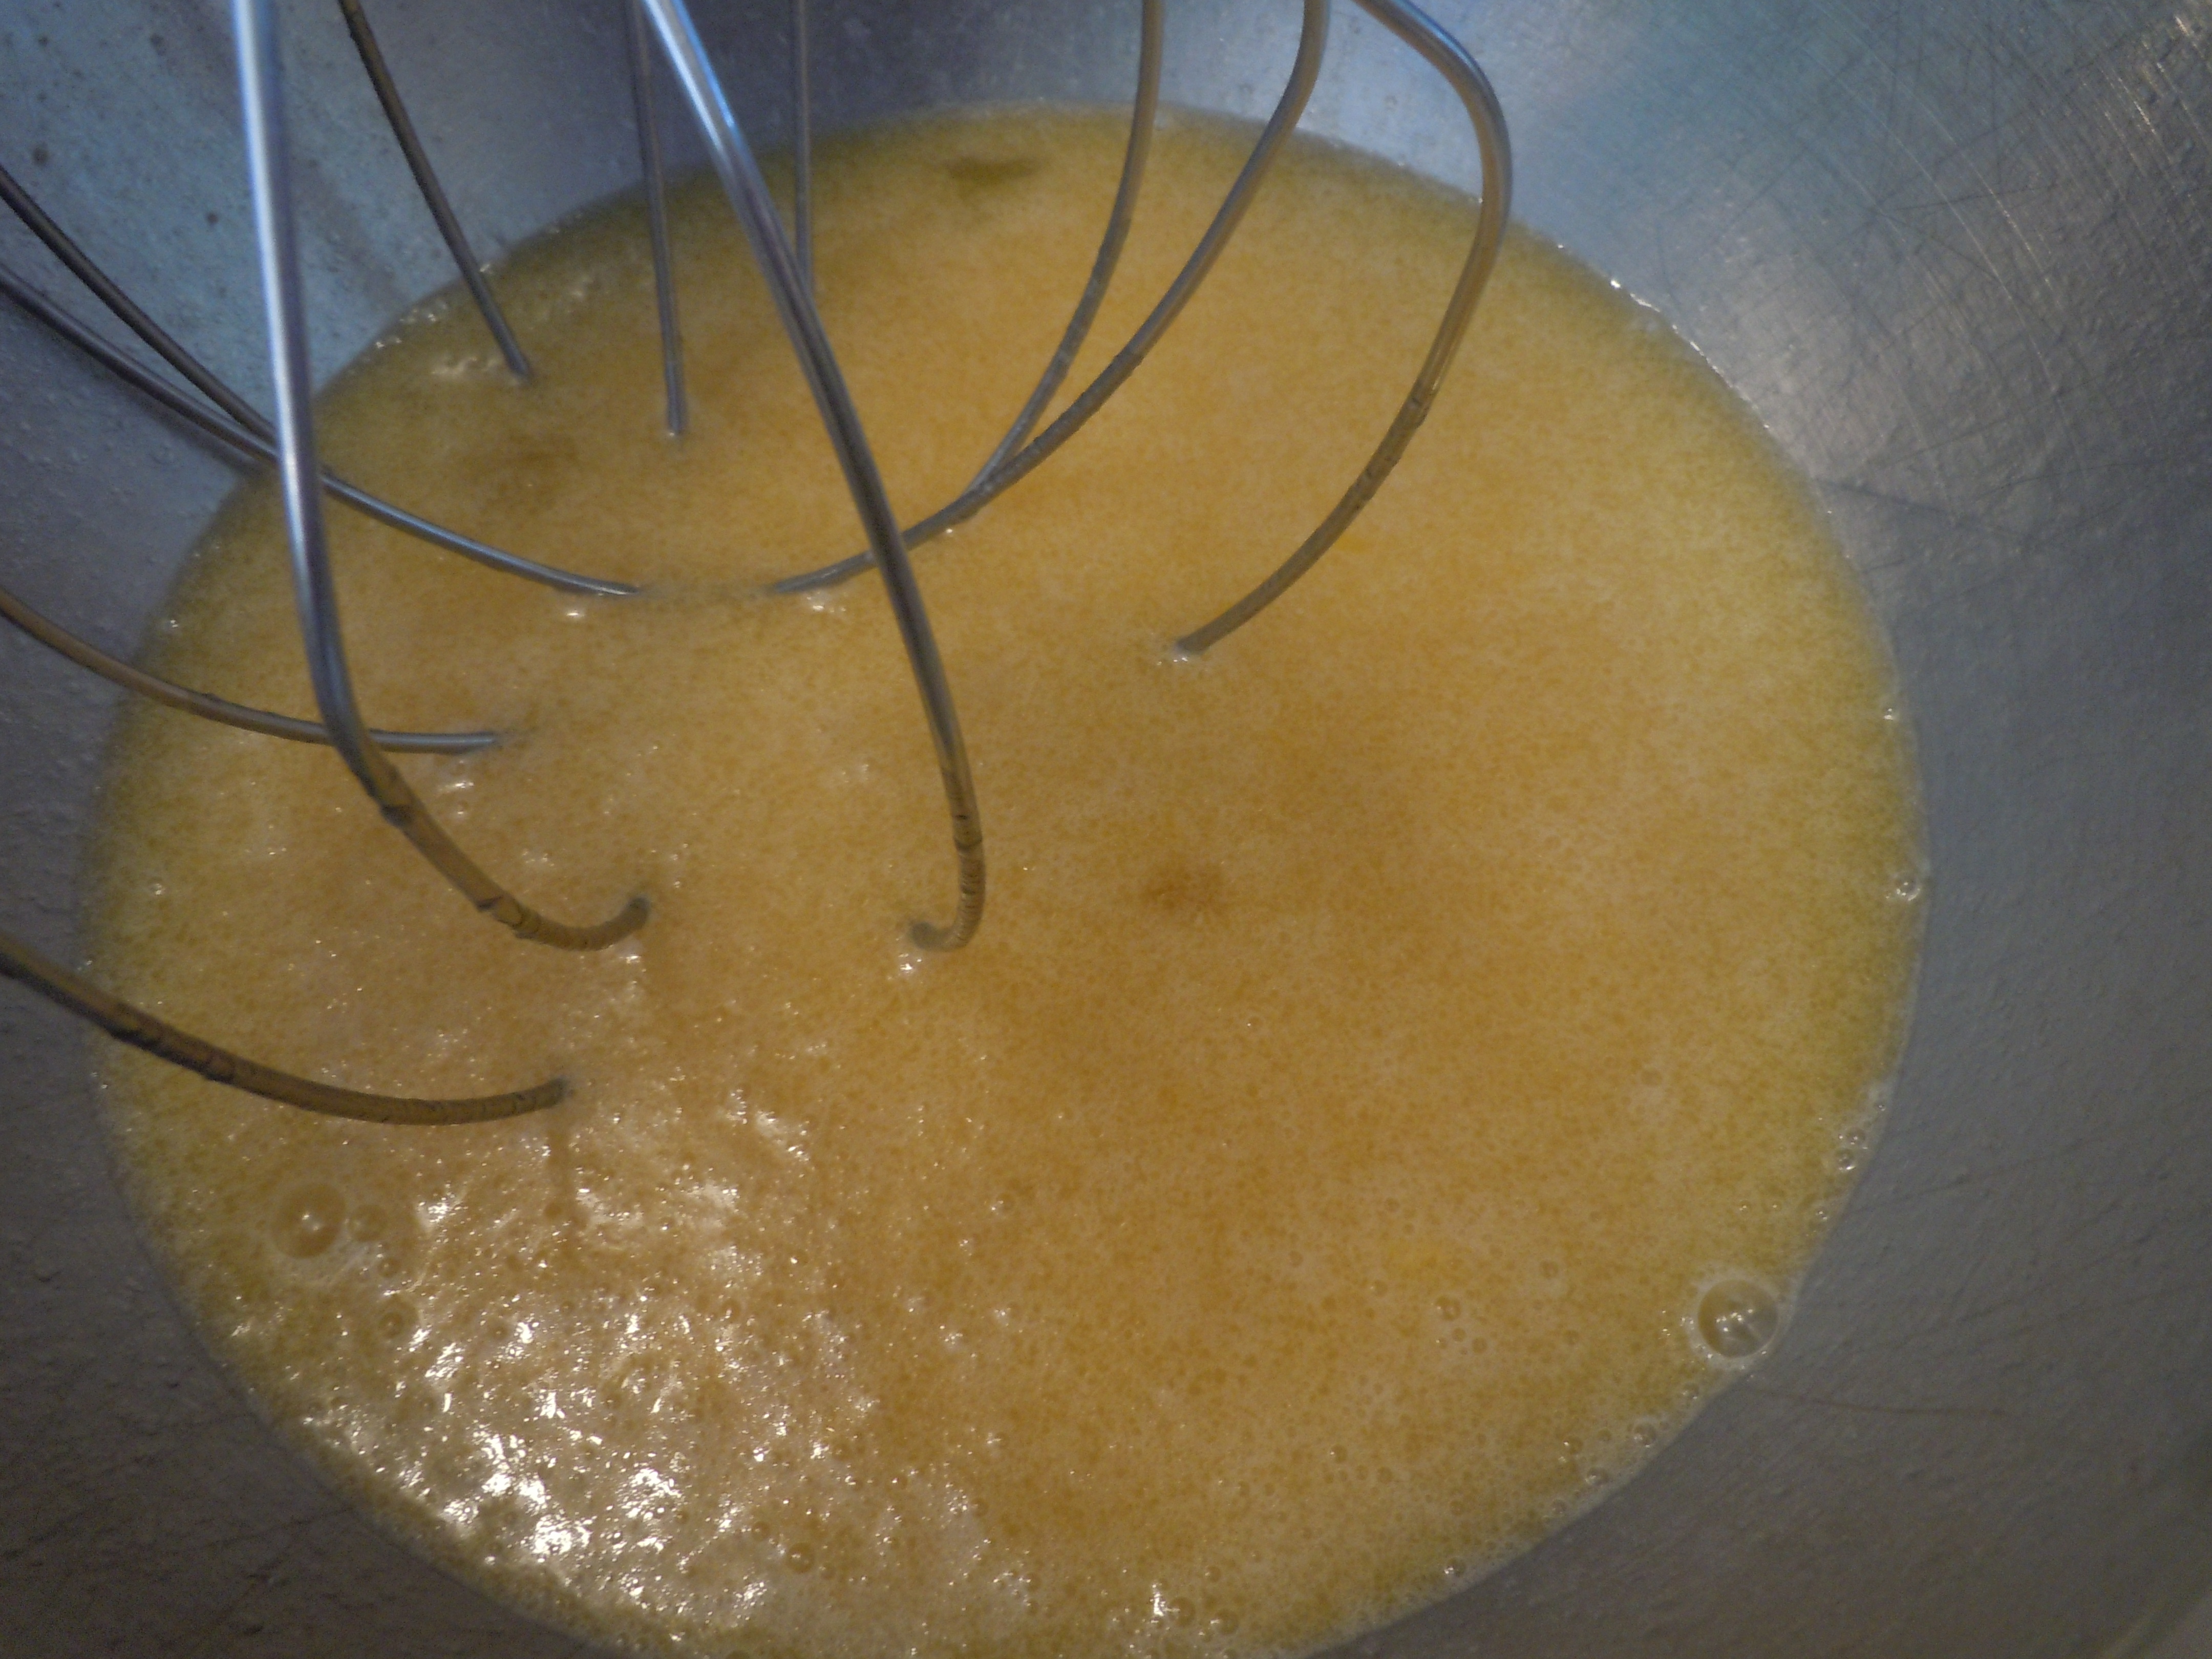
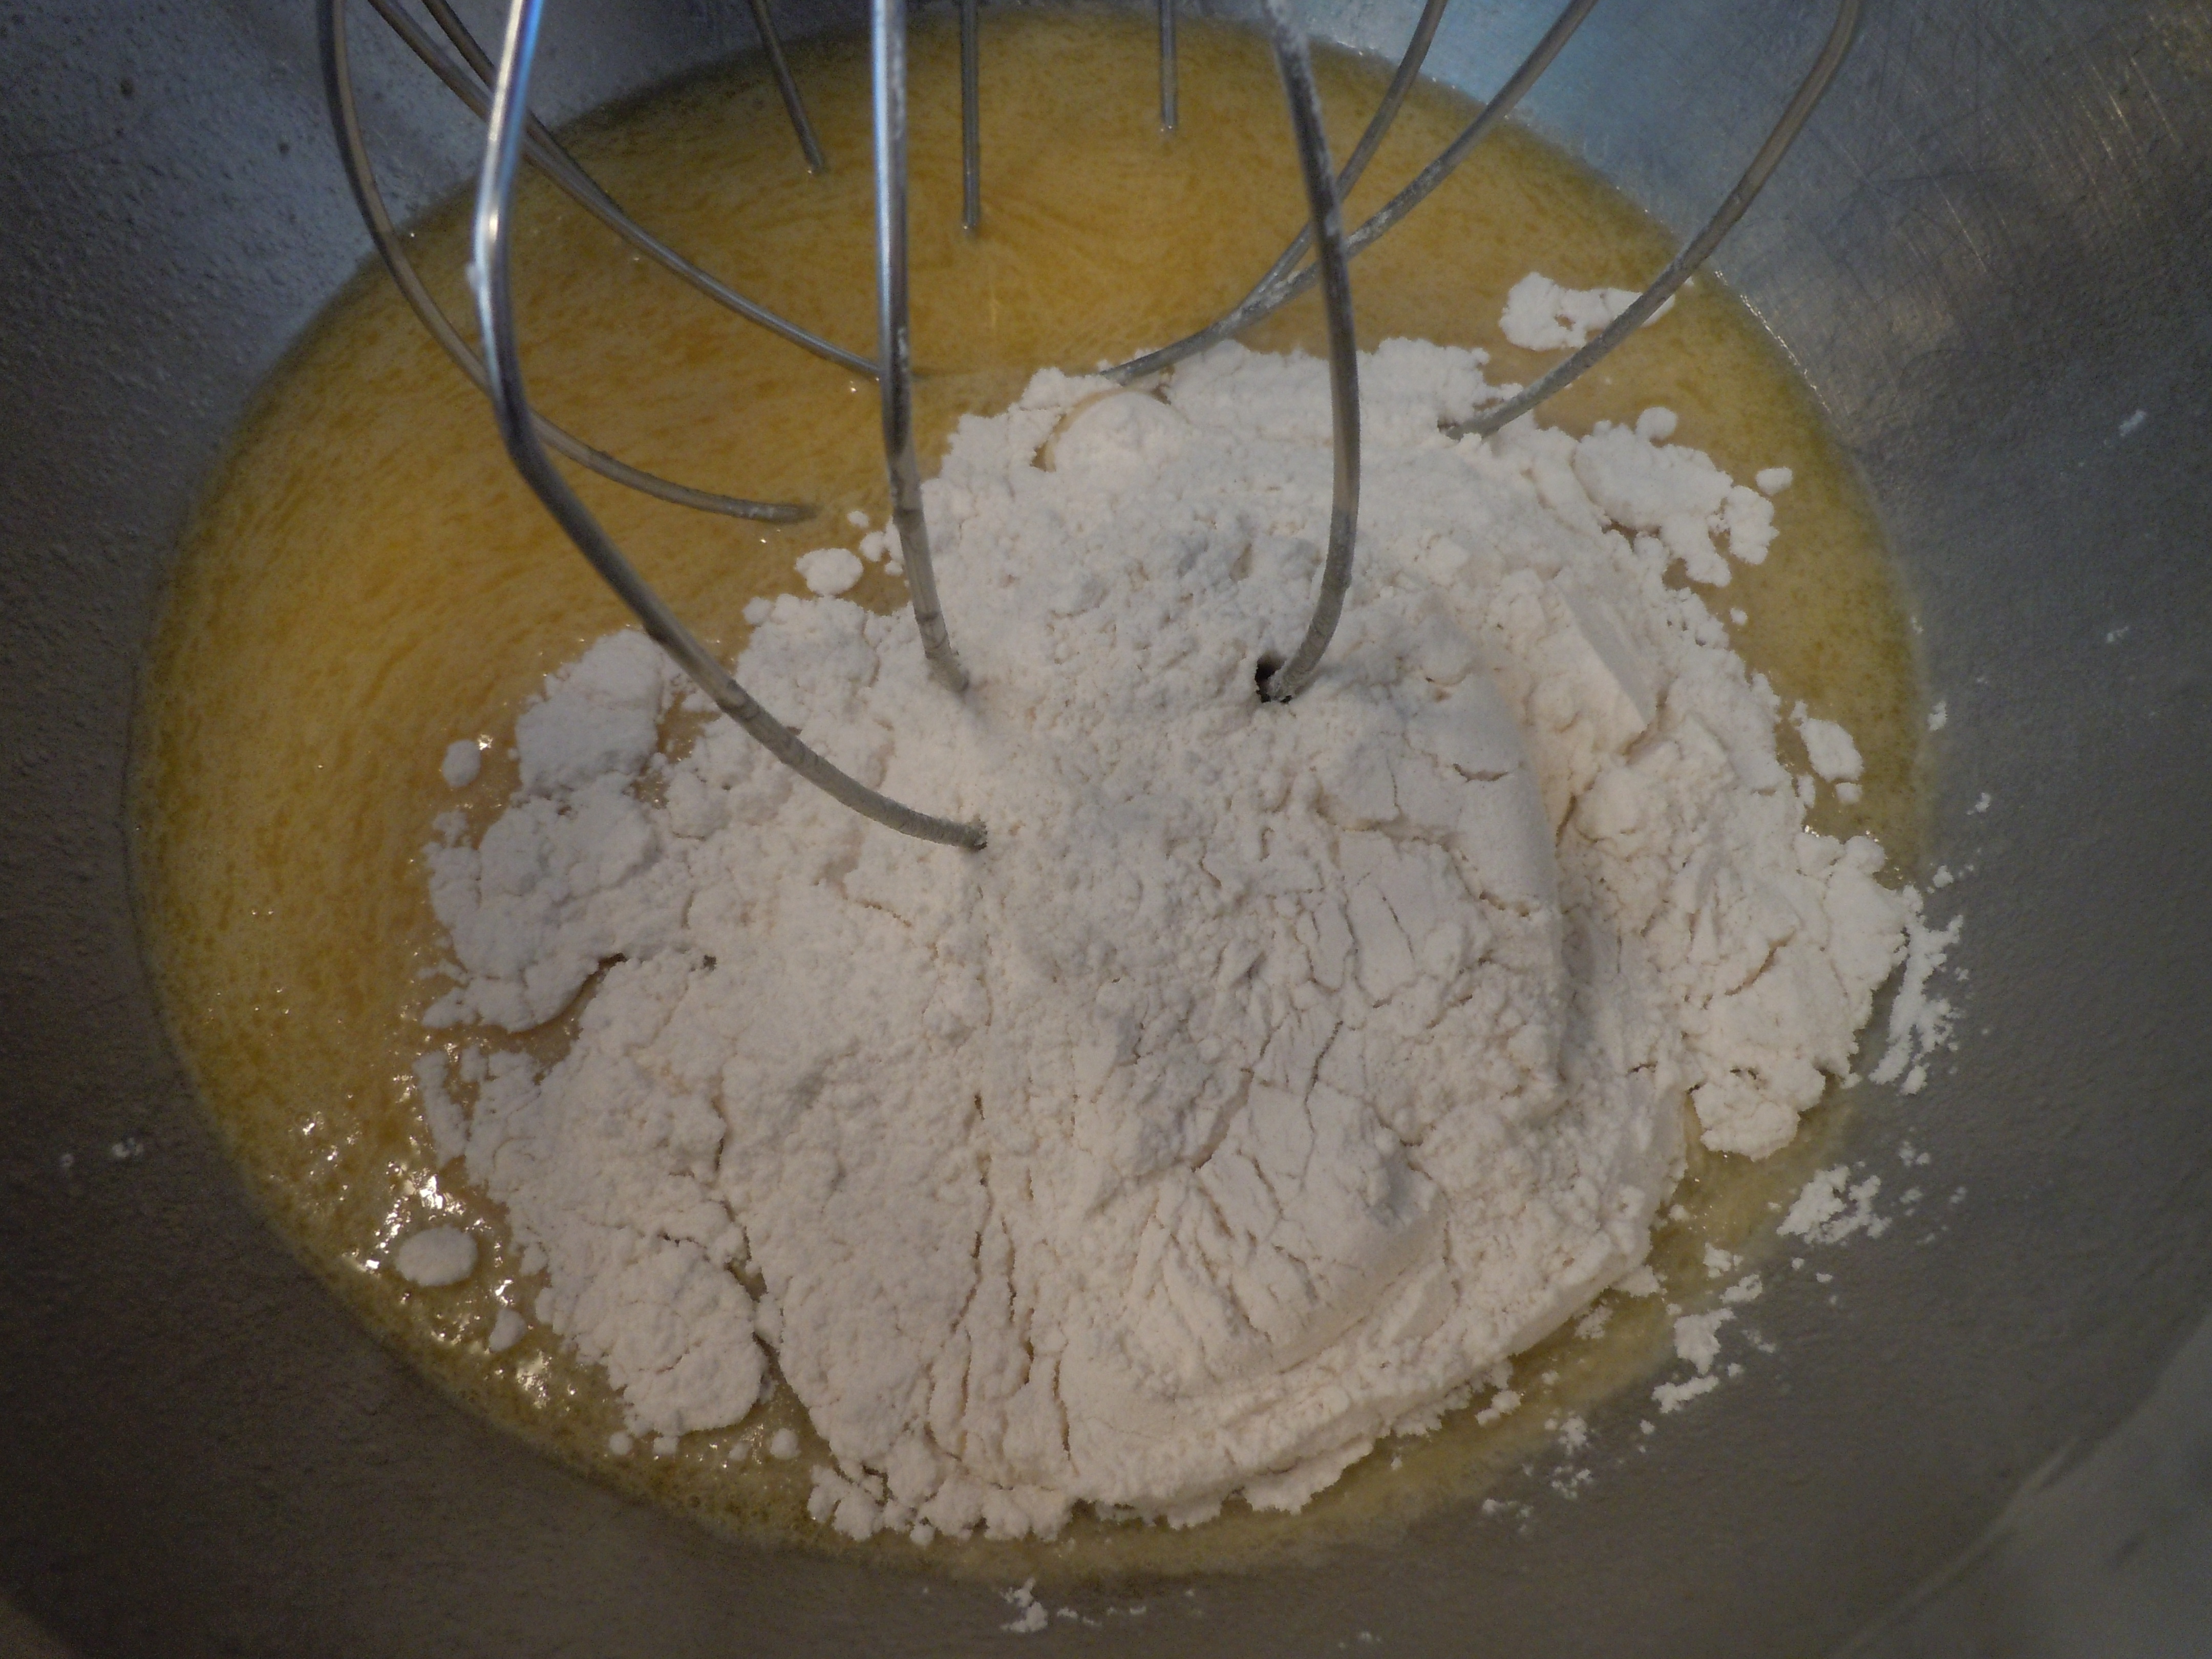
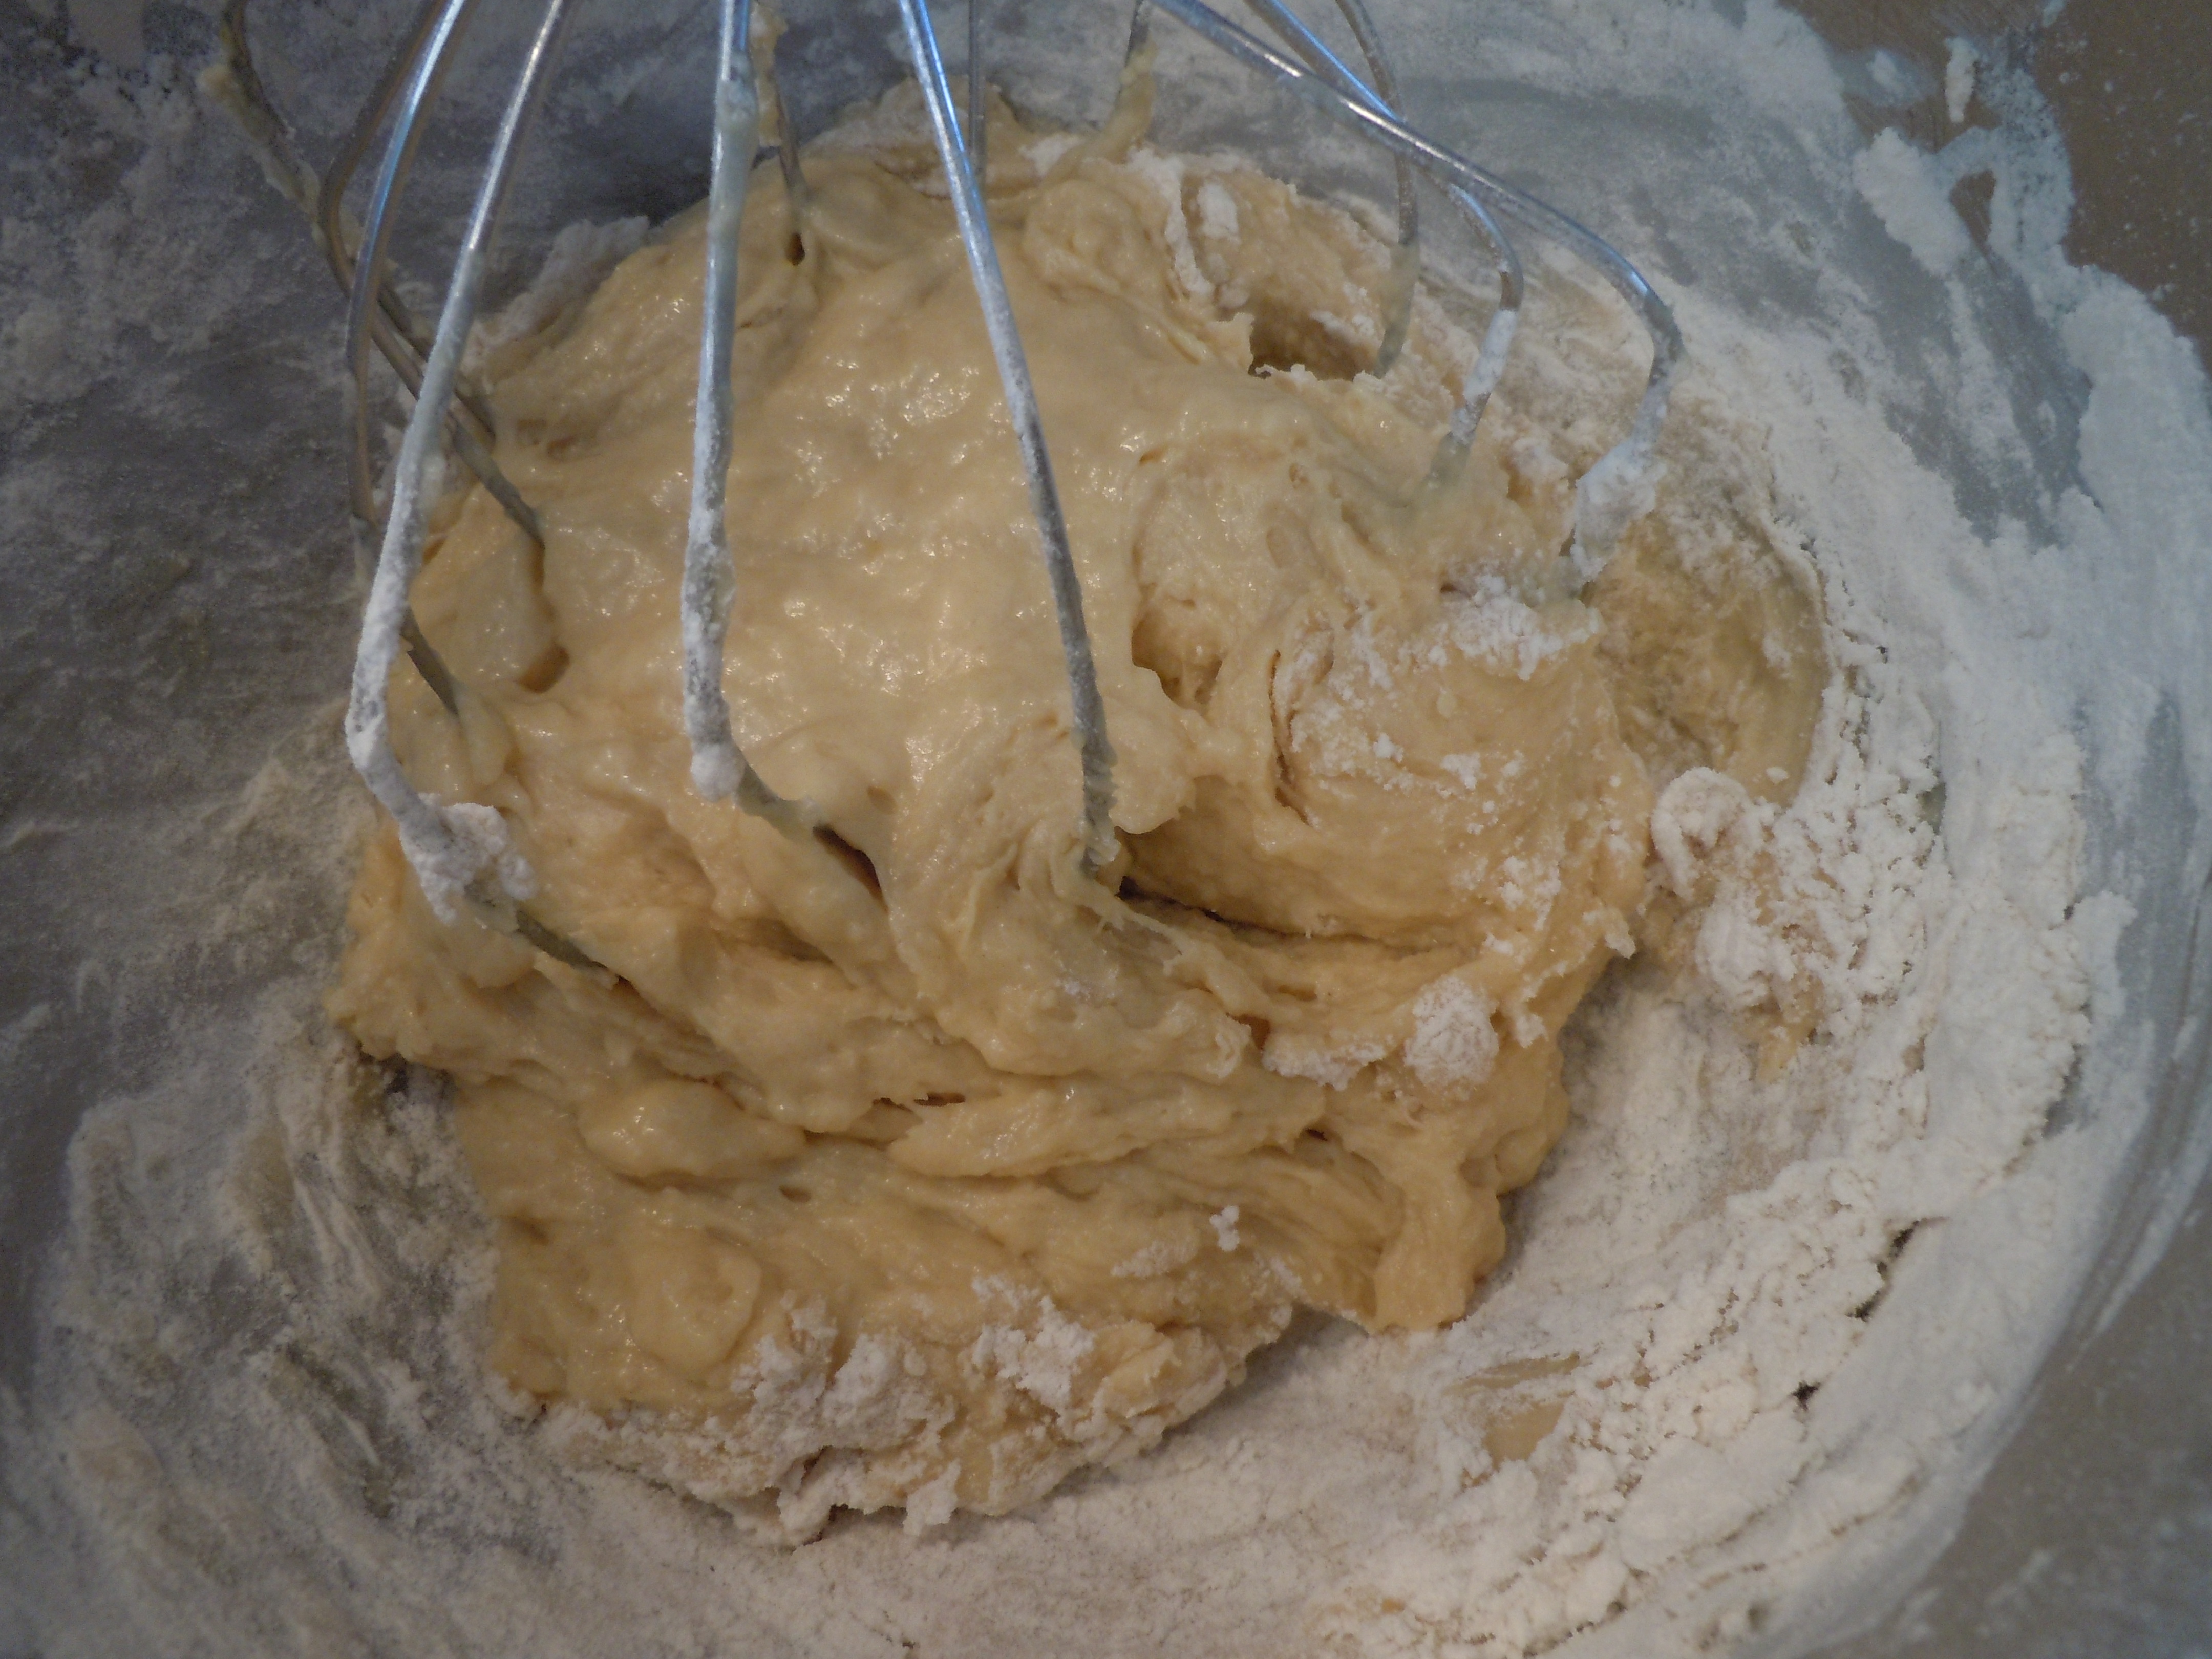
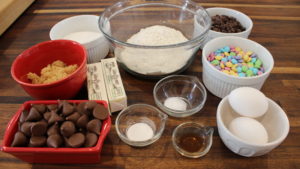
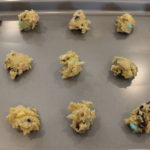
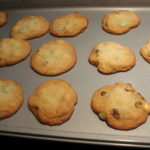
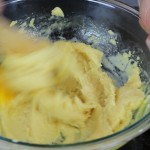
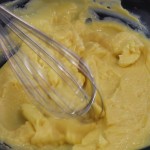
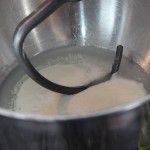
Eileen’s Famous Chocolate Chip Cookie will undoubtedly become one of your favorite cookie recipes after first bite! This scrumptious cookie has 3 kinds of chocolate, stands tall and is slightly chewy in the middle. The recipe makes 30 plus cookies and believe me, you’ll be lucky to have any left over if you’re making these for a party.
My kids and I have been devouring Eileen’s cookies for years and getting you this recipe was on my bucket list! Eileen herself, receives cookie requests throughout the year for parties, benefits, fundraisers and backyard BBQ’s. This is an easy and uncomplicated recipe as you saw in the “how to” video above where Eileen’s daughter, Molly, has mastered the recipe!
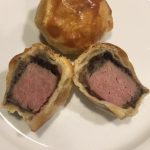
Mini Beef Wellington’s for the Oscars on CT Style!
Making Mini Beef Wellington’s for the Oscar’s on CT Style yesterday was a blast! What’s more fun then cooking in the kitchen with friends and family? Well, that’s how it is with Ryan Kristafer and Teresa Dufour! I feel like I’m with my siblings, me being the elder of the trio, as we joke and banter back and forth. I can’t describe to good feeling I get when I leave the WTNH studio at Channel 8. Every single one of them are such great people.
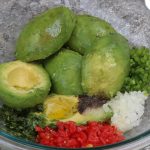
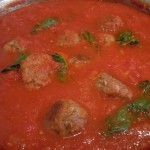
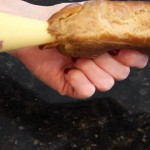
This Mini Beef Wellington recipe is very easy to make and tastes like a bite of heaven! A piece of filet mignon topped with a mushroom reduction, called Duxelles, Truffle Mousse Paté, pastry dough, brushed with egg yolk and baked until golden…mmm! I make Beef Wellington, a bit more work, but the mini’s are like taking a short-cut to the same perfection! I have had these mini’s served at gala events years ago in San Francisco and forgot how amazing they are until my friend Chef Marco made them for New Years Eve. When he and his wife, Sheryl, served these Mini Beef Wellington’s at their New Years Eve party I new right away that I needed to show everyone how to make them on CT Style!
Heat large sauté pan on med/high and season filet with s&p
Add olive oil to the pan and sear whole filet pieces on all sides for 1 minute total
Remove and set aside to completely cool, then cut into 1” approx. cubes
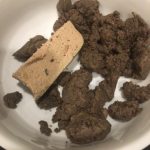
To make Duxelles add mushrooms and shallots to food processor, pulse until very fine mash
Add butter, mushroom mixture, thyme & sherry to the same lg. sauté pan & sauté for 50-60 minutes on med/low to remove moisture until you get more of a crumbly texture
Set aside mushroom mixture to cool completely (you can do this the day before)
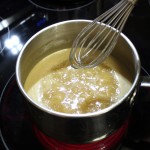
Simmer ¼ cup Italian Blue Cheese with 2/3 cup heavy cream in a small sauce pan
Whisk to get to a smooth consistency as the cheese melt then keep on a low simmer to thicken slightly
When duxelles is cooled, add ½ at a time to a small bowl, then mix in 2 tbsp. pate
NOTE: you can freeze this wonderful Mushroom Duxelles mixture without the paté for future use so only mix ½ at a time
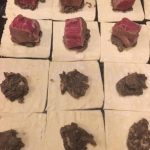
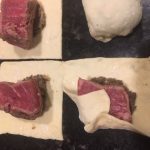
Put 1 tbsp. flour down and roll out to thin pastry dough a little, then cut 2 1/2 “ squares with a knife
Put 1 tsp. Duxelle/pate mixture in the middle of each square, then place a cube of filet on top
Begin to pull up the sides wrapping the filet cube like a present
Put seem side down on cookie tray and brush the tops with egg yolk mixture
Then bake on Convection 425˚ for 10 minutes until golden
Pour the warmed blue cheese sauce onto a platter and then place golden Mini Beef Wellington nuggets on top and serve…yummmm!
CT Style with Ryan Kristafer & Sarah Cody Getting Ready for Thanksgiving!
It was a special day on CT Style with Ryan Kristafer and Sarah Cody sharing one of my favorite childhood dishes in memory of my Grandma Reilly. I never did get her recipe for her Creamed Onions or pies but she was the inspiration behind my recipe that I have been making for over 20 years now. Cooking in The Bender KItchen, hanging out with Ryan and Sarah was the perfect way to start my Thanksgiving holiday this year!
Thanksgiving is one of those holidays that can truly drive you crazy if you don’t do any planning because there are just too many side dishes to make. Needless to say, a little planning goes a long way!
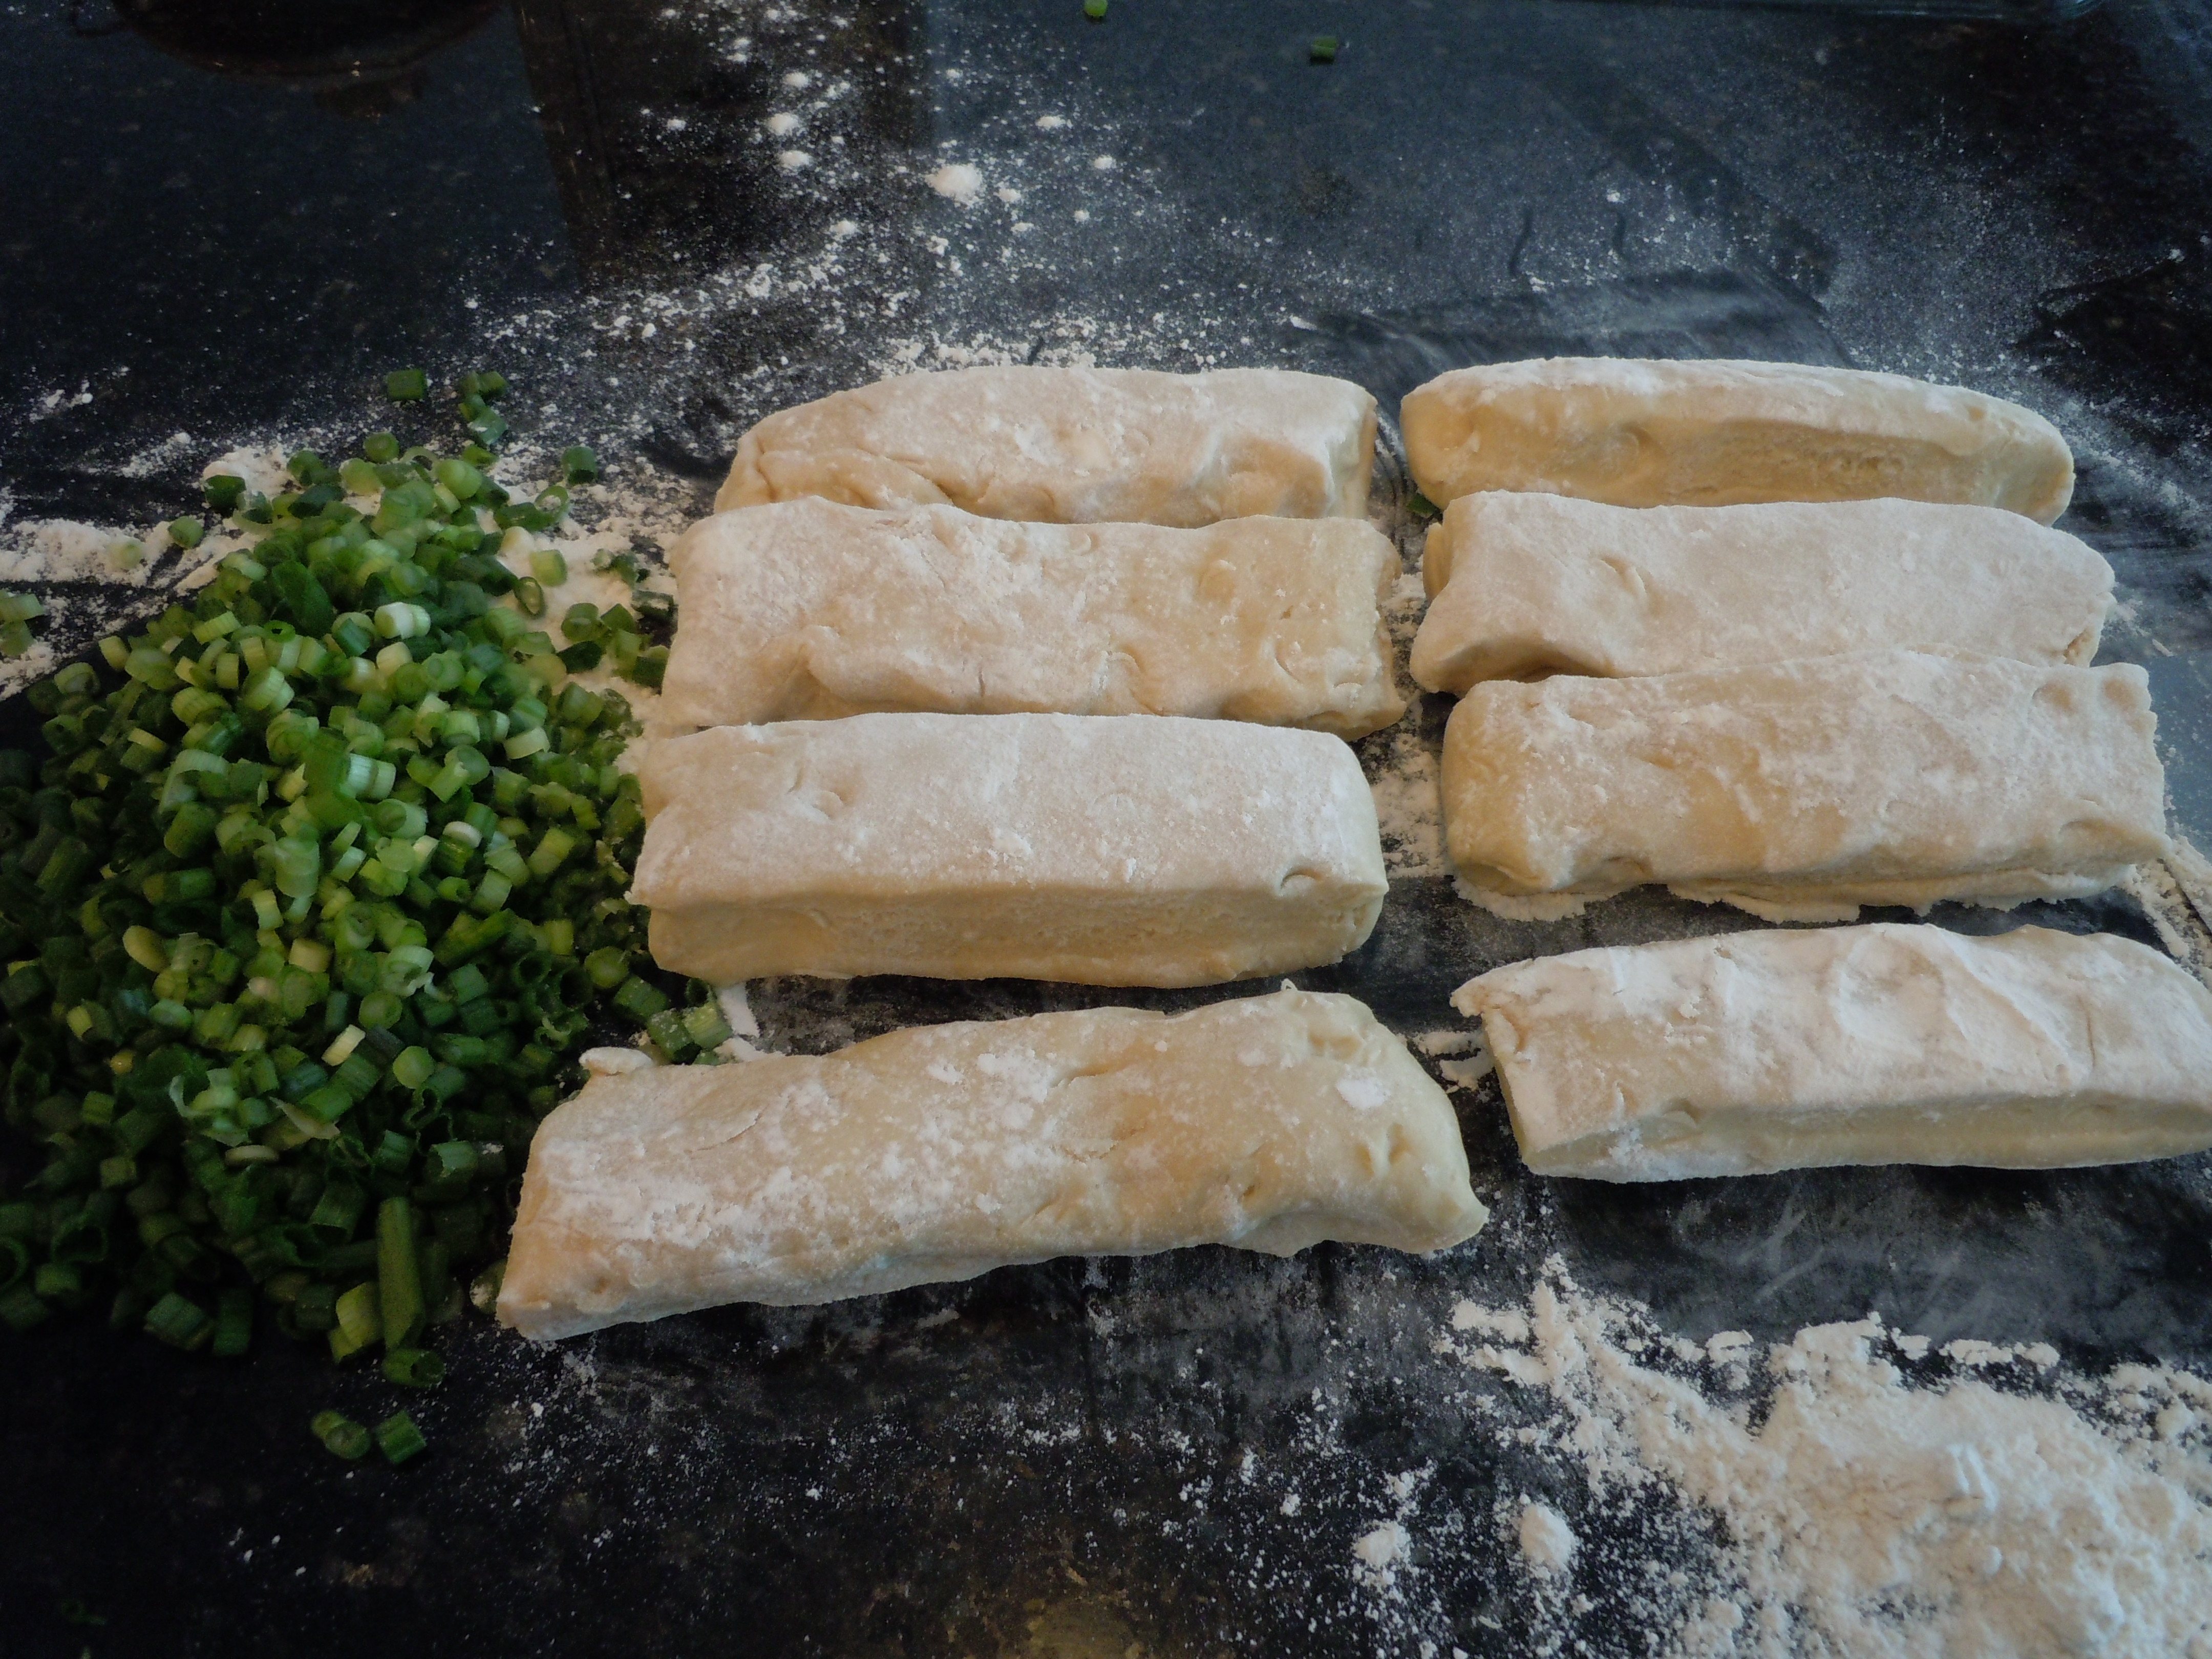
On CT Style I wanted to show you some of the dishes that are total time savers for this Thanksgiving. My Icebox-rolls dough can be made 4 days ahead, shape and rolling out the rolls, dredging in green onions the day before. These icebox dinner rolls are then ready to pop into the oven when your guests arrive giving your house a warm and fuzzy feeling with aromas of homemade baked bread!
The yummy Best Brussel Sprouts Ever are drizzled with olive oil, chopped garlic and roast for only 25 minutes on 350º without any flipping or fussing. These can be made the night before because the sprouts keep their bright green color and crispness when re-heated the next day!
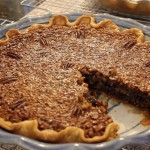
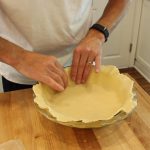
My Perfect Pie Crust in 5 Minutes is to die for and can be made 1 month ahead, put into the freezer and thawed in the frig 2 days before you need it! Roll out the pie dough the night before Thanksgiving and then bake your delectable Chocolate Pecan Pie the night before and violà! Not to mention, the Chocolate Pecan Pie recipe is a melt in your mouth gourmet recipe …it may just be the hit of your holiday!
Finally, there was talk of a Creamed Onion competition recently at Page Hardware in Guilford with owner Andrew Page when we were discussing future cooking demos at Page in the new year! So there just may be a “Creamed Onions” competition coming as well! Page has quite the array of high tech steam ovens, stoves and so much more…it’s almost difficult to pay attention to conversation surrounded by all the beautiflul stainless steel! You really have to check them out. I will keep you all posted on The Traveling Epicurean Cooking Demos and the “competition” in their amazing kitchens at Page in January of 2018!
I want to wish everyone a Happy Thanksgiving! Let me know how your recipes turned out and about any new ones that you tried! xxoo
CT Style in The Bender Kitchen with Teresa & Ryan Making Manicotti!
With Easter right around the corner I was excited to be back on CT Style in The Bender Kitchen with Ryan and Teresa so I could share with you my family’s secret recipe for homemade manicotti. These delicate pasta crepes are the lightest manicotti you’ll ever have. They are oozing with mozzarella, covered in tomato-basil sauce and topped with grated Pecorino Romano cheese and are sure to turn heads at the dinner table!
Italian tradition always includes a yummy side dish to go along with the ham, leg of lamb, turkey, salmon or tenderlion like manicotti, lasagna, eggplant rollatini or parmesan. Comfort food bringing it all together, an Italian side dish makes such a nice compliment to what ever meat or fish you choose.
This homemade manicotti recipe is a poured crepe-like batter and in my opinion it’s a whole lot easier then making a tradition rolled out pasta. Making the pasta crepe is like making pancakes or French crepes. On my manicotti recipe page I show you detailed pictures of how to make them. The YouTube “Manicotti Show” that’s embeded there also includes very detailed instruction on how to make these walking you thru each step making it very easy for you to follow and learn.
I love cooking for everyone on the CT Style set who seemed to love the manicotti because there weren’t any left over…makes the chef very happy! The lettuce wedges with Roasted Blue Cheese & Buttermilk Dressing (stay tuned for an up and coming show on that one) and crumbled bacon were a big hit too and lets not forget thoseChewy Chocolate Chip Cookies!
Once you introduce these delectable homemade manicotti into your family’s holiday dinner you’ll find it becoming part of your tradition too! Other wonderful side dishes you could add into your dinner, my Creamed Onions, Steak House Creamed Spinach or zucchini torta! Don’t forget about Ricotta Pie or Greek Baklava both crowd pleasers at parties! Enjoy and Happy Holidays! 🙂
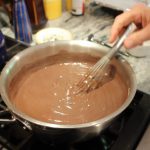
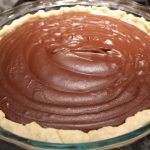
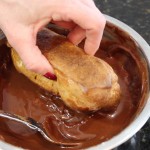
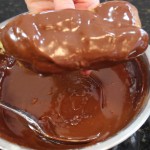
“Death by Chocolate Meringue Pie” is the perfect title for this recent cooking show taped at my foodie friend’s, David and Eileen’s house. When you taste this most chocolatey mousse-like filling topped with fluffy peaks of meringue you will think you have died and gone to heaven! This wonderful chocolate meringue pie recipe came from David’s mother, Alice, and has always been a family favorite for the holidays! With four boys in his family growing up, David said his mother was always welcome to the idea of having more cooks in the kitchen. You could only imagine that with four boys you’re going to need more then just one pie. David and his brothers happily learned at an early age how to pitch in and get this task done.
David uses the “chocolate fudge” flavor of Jello brand, the cook and serve, not the instant. Come to find out, this “chocolate fudge” flavor can be a difficult category to find. But using Jello brand’s “chocolate” flavor is the next best thing, so don’t fret. Make sure to keep an eye out for the “chocolate fudge” flavor next time you are at the store and shoot me an email if you strike “fudge”!
What takes this Jello cook and serve chocolate fudge pudding to a completely different universe, into a rich, chocolate mousse-like texture is the addtion of egg yolks, sugar, butter and pure vanilla extract. You will find yourself eating each bite of chocolate meringue pie very slowly just to savour every luscious bite. Part of this decadence comes from the rich, flaky crust made with a special lard David gets from Firefly Farmers in Stonington, CT. You can purchase their products at the Stonington, Waterford and Bozrah Farmers Markets. It definitely makes a difference in your pie crust to use both butter and lard like in my Perfect Pie Crust in 5 Minutesbut using this lard that David use’s really puts the crust over the top!
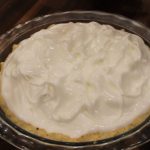
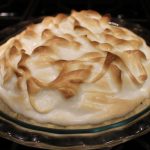
Last but not least is the meringue that tops this incredible chocolatey filling and brings the whole pie together. Whipping the egg whites to soft peaks is important to achieve the elegant curly cues you can create when dipping a spatula gently into the surface of the meringue. Then off to the oven briefly until those beautiful peaks turn golden.
This wonderful chocolate meringue pie recipe could have easily remained a family secret but David and his mother were gracious enough to share it with us. The only option I see here is for you to get busy and make this luscious dessert for your next holiday! Don’t forget to share the YouTube link to the show 🙂 ENJOY xxoo
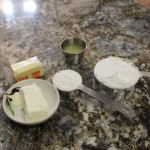
Ingredients for David’s Pie Crust – 1 Crust for lg Deep Dish Pie Plate (measurements below are 3/4 of full recipe):
1 1/2 cups flour
1/4 cup lard frozen, grated
1/4 cup butter refigerated, grated
3/4 tsp salt
approx. 2-3 tbsp ice cold water
FULL PIE CRUST RECIPE – 2 Crusts:
2 cups flour
1/3 cup lard or crisco
1/3 cup butter
1 tsp salt
3-4 tbsp ice cold water
Directions for Pie Crust – Pre-Heat Oven to 400º :
Measure lard or crisco and put into freezer
Grate lard or crisco and butter and place in separate bowls back in the frig til you are ready
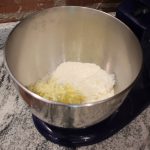
Add flour, salt, lard or crisco, and butter to food processor or mixer and begin to mix with paddle attachment slowly
Then slowly add in 1 tbsp at a time while mixing, you may need to add another tbsp of water to have dough come together
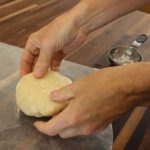
When dough comes together in 1-2 minutes turn dough onto wax paper forming into a disc shape and place into the freezer for 15 minutes
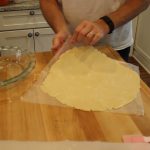
Begin to roll out dough between wax paper until its large enough to fit pie plate
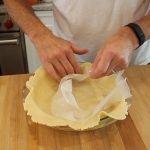
Gently peel over top layer of wax paper flipping over into pie dish
Gently push edges in all around and remove the other piece of wax paper
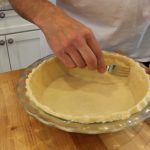
Scallop the edges of pie crust
Prick inside walls and bottom of crust with a fork
Place into a 400º oven and bake 10-15 minutes until slightly golden around the edges
Let pie crust cool and begin to make the chocolate filling
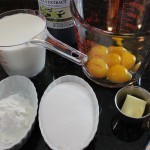
Ingredients for Chocolate Filling:
2 boxes COOK and SERVE Jello brand “chocoate fudge” or “chocolate” pudding – NOT INSTANT
NOTE: I can only find “chocolate” so I mix “bittersweet chocolate chips & semi sweet chocolate chips heaping 1/4 cup of each and this tastes exactly like “chocolate fudge” brand of Jello 🙂
4 egg yolks
3 1/2 cups WHOLE milk
1/2 heaping cup semi-sweet chocolate chips
2 tbsp sugar
2 tbsp butter
1 tsp pure extract vanilla
1 pre-baked pie crust cooled
Directions for Chocolate Filling:
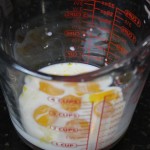
Separate 4 egg yolks from whites and place into separate bowls (yolks for filling and whites for meringue)
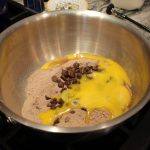
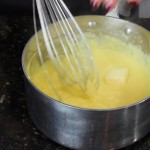
Add 2 boxes of chocolate fudge pudding mix to medium size sauce pan
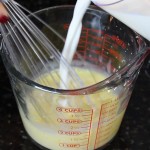
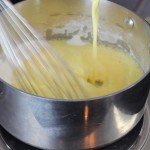
Add in chocolate chips, 4 egg yolks, sugar, 3 1/2 cups of milk over medium heat
Continue to whisk while bringing ingredients to a boil, it will thicken quickly
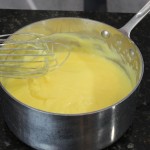
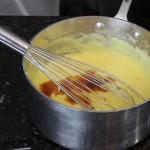
When it thickens take off of heat
Whisk in 3 tbsp of butter and 1 tsp vanilla
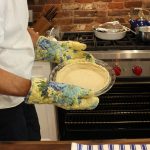
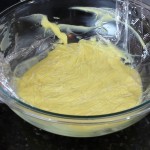
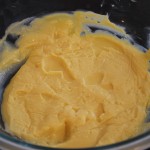
Pour into the cooled pre-baked pie crust and let cool just a bit to a warm TEMP but NOT COLD– DO NOT put into the fridge because you DON’T want to put whipped meringue on a COLD pie, it will cause meringue to weep 🙂
Ingredients for Meringue:
4 egg whites
8 tbsp sugar – 2 tbsp per egg white
1/8 tsp cream of tartar
Directions for Meringue – Pre-Heat Oven to 375º :
Whisk egg whites until soft peak begin to form then start to add sugar 1 tbsp at a time
Keep whisking unitl you get soft – stiff peaks – in between peaks – NOT STIFF
Pour onto WARM chocolate pie filling
Begin to smooth meringue over to touch edges of the pie crust making sure meringue seals all along the edge of the pie crust
Once the meringue completely covers the chocolate filling begin to dip spatula in and out of meringue creating curly cue peaks
Place chocolate meringue pie into 375º oven until peaks are golden approx 10-15 minutes – if the meringue is undercooked the it will weep
Take out and let meringue cool, slice and mangia mangia!
MERINGUE TIP: Do not put whipped meringue on a COLD pie, a warm filling is better than COLD. Be sure to cook meringue through because undercooked meringue will weep 🙂
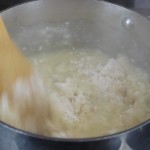
Making Chocolate eclairs with The French Club this week made for an incredibly fun afternoon! The Chocolate eclair shells made from pâte à choux, a french pastry dough, is a cinch to make and so delicious you may find your self wanting to make them this weekend.
The method I use to make the pastry cream is simplistic and straight forward. This method for making the pastry cream I got from one of Martha Stewart’s chefs, Thomas Joseph. I wanted to show you an easier way to prepare the custard then your traditional tempering of the eggs method, especially if you have never tried to make this before. The actual recipe for the pastry cream is from my own collection and playing around with recipes over the years.
As for the pâte à choux dough, what can I say, but wow! Although, this is a French dough with French ties it is also noted that Catherine de Medici left Florence in 1533 to marry the Duke of Orleans who later became Henry II, King of France. She brought with her the entire court which included her chefs! Smart woman is all I can say. A few years later her head chef, Panterelli, invented a hot paste-like dough and called it pâte à Panterelli. Of course, the recipe has evolved some what since then and with a couple of names changes too but with the same idea. It’s a dough with a paste like texture that use’s heat and moisture-steam for a raising agent instead of the baking powders that we use so much today.
These chocolate eclair’s are easy to follow and so worth the effort. You should really give it the ole college try because your family and friends will be thanking you! In between making the pastry cream and the pâte à choux you may want to prepare some other great dishes like lobster mac & cheese, pulled beef taco’s and mango salsaor some homemade pastaandTurkey meatballsthat are simpler then you think! And for a nice salad you could check out my Caesar salad with homemade croutons …that’s always a crowd pleaser!
Ingredients for the Pâte à Choux: :
1 stick of unsalted butter
1 cup water
1 cup flour – all purpose
1 tsp sugar (only for desserts) (not for gougeres)
1/2 tsp salt
4 lg eggs
1 egg + 1 1/2 tsp water whisked together – for egg wash
Directions for the Pâte à Choux:
Preheat the oven to 400º degrees
Line a cookie tray with a piece of parchment paper – when you are done making the pate a choux squeeze out 4 dime size pieces of dough on each corner of the cookie tray, then place parchment over that – to hold in paper in place while you form eclairs
Bring the water, butter, salt and sugar to a rolling boil over medium-high heat in a medium size sauce pan
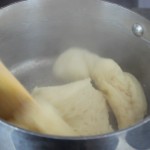
Stir in all of the flour and continue to stir vigorously with a wooden spoon for about 1 1/2 minutes – which will start to make a film on the bottom of the pan
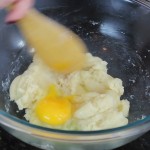
Turn out flour-egg mixture into a large glass bowl and stir to cool for 1 minute
Crack eggs into a bowl to make sure there are no shells
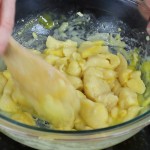
Begin to add one egg at a time into the dough and keep mixing with a wooden spoon
The mixture will look broken up at first but no worries because it comes back together
After each egg is absorbed into the flour mixture ADD another egg and repeat stirring
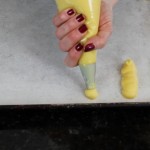
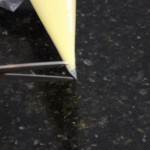
Spoon the Pate a Choux dough into a pastry bag … I don’t even use a tip here
Cut about 3/4″ off the end of the pastry bag
Twist down the open end of the bag a little to keep dough enclosed and to put pressure on the cut off end
Squeeze out 3-4″ x 3/4″ rows of Pate a Choux dough to form eclairs making sure they are about 2″ apart
Brush with egg wash and smooth with your finger if needed to smooth any bumps
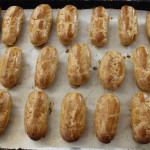
Put into 400º oven for 15 minutes
Turn down to 350º for another 25 minutes
Turn oven off and open door 5″ but leave eclairs in the oven to dry out another 10 minutes
Ingredients for the Pastry Filling:
2/3 cup granulated sugar
1/4 cup cornstarch
Pinch of salt
2 cups half and half room temperature
6 lg eggs yolks room temperature
2 tablespoons unsalted butter
1 teaspoons pure vanilla extract
Directions for the Vanilla Custard Filling:
In a medium sauce pan add sugar and corn starch and whisk to combine
In a medium bowl whisk milk and egg yolks until combined
Whisk in milk and egg mixture into sugar and corn
Turn heat to medium and bring to a bubbling simmer, so the mixture can begin to THICKEN
As soon as it begins to thicken whisk 5 SECONDS more and TAKE OFF HEAT continually whisking, after 5 seconds put BACK ON heat for 5 SECONDS and IMMEDIATELY take off heat
DO NOT BOIL ON HEAT FOR MORE THAN 10 SECONDS after this point or the texture will become grainy
Add in butter and vanilla while still whisking
Strain the custard into a glass bowl
Stir to cool slightly and cover directly onto custard saran wrap OR Pour into a prepared tart shell, then into the frig and when cooled and thickened top with fresh sliced fruit and voilà another dessert! …just saying 🙂
Place into the frig for atleast 2 hours up to 3 days
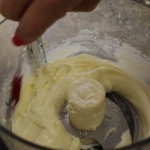
Take the thick pastry cream out of frig and whisk til smooth -5 seconds and the texture will become smooth and ready to place in the pastry bag to pipe
Ingredients for the Chocolate Dipped Toppping:
4 oz. semisweet chocolate chips
1/2 cup heavy cream
1 cup confectioners sugar to desired thickness
Directions:
Heat the cream to a small sauce pan and bring to a boil
Pour the hot cream over the chocolate chips and vanilla in a medium size bowl and let it melt the chocolate for 2 minutes
Whisk the cream and chocolate until smooth
With a whisk slowly add in confectioners sugar while whisking until smooth
If the chocolate gets cooled and too thick to dip heat for a minute over double boiler
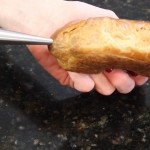
Dip the tops of the eclairs in the warm chocolate glaze
Set on a cookie tray
Place into the frig uncovered for at least 1 hour to set the glaze
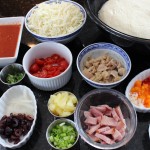
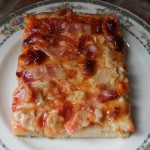
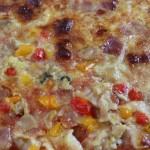
Homemade pan pizza made with different themed toppings from clams casino, to Hawaiian and Greek make for perfect party hors d’ oeuvres! Everyone seems to find their favorite flavors. When the sizzling pan pizza comes out of the oven heads turn especially when the aromas from the garlic, clams, bacon, onions and peppers fill the air!
The wonderful thing about all the different themed toppings for your pan pizza is you don’t need much in terms of quantity. The dough you make the day before, but if you forgot or didn’t have time it will still work if you make it the same day. If you make the dough the same day you don’t put it into the frig but let it proof for an hour and a half in a warm spot to develop some of that texture and flavor. The whole idea behind the “proofing in the refrigerator” is it let’s you do other things while the dough slowly rises developing a killer texture and flavor like in my delicious “Icebox Dinner Rolls”. So take advantage of this refrigerator method, you will be happy you did.
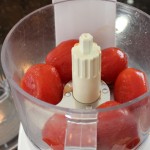
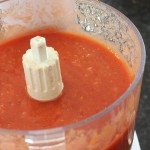
As for my pizza sauce, it couldn’t get any easier because it’s puréed only, not cooked. If you go into a pizza place and inquire about their sauce the majority will tell you the tomato sauce is raw. I know because I have done just this, but they don’t always like to give away their pizza secrets so easily. To the raw, whole peeled tomatoes I add a garlic clove that I put thru the press, salt, pepper and some Italian seasonings and then it’s puréed. Keeping the tomatoes raw really compliments all those other strong flavors from the toppings yet not seeping into the background still being a pertinent player in the pizza game!
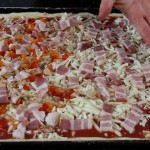
Have some fun with these pizza’s and customize those toppings on your homemade pan pizza! My favorite is the clams casino pizza because you have the best of both world’s, flavor’s and crispy, chewy edges. You can’t beat the garlic, clams, bacon and pepper combo. Drizzling on the extra clam juice not only makes it taste that much better but it let’s the crust get a little crispy while keeping the toppings moist enough so not to burn. With that in mind make sure to pour on any of the extra juices from what ever you are cutting up as when you are slicing up the cherry tomatoes. Another very important tip is to keep all the toppings, including the sauce and mozzarella, in the cold refrigerator until the last minute. This helps the toppings to cook properly giving the crust time to crisp up.
Ingredients for 1 Sheet Pan Pizza Dough – 12.5″ x 17.5″ x 1″ tray:
4 cups all purpose flour
1 1/2 cup warm water 105º-110º
1/2 tsp sugar
1 packet yeast or 2 1/4 tsp – not rapid rise
1 tbsp salt
3 tbsp extra virgin olive oil for the pizza dough
1/3 extra virgin olive oil for the sheet pan
Plus more olive oil to drizzle on top of the pizza’s before baking
My Pizza Sauce – Enough for 2 Sheet Pan Pizza’s:
1 can of whole peeled tomatoes (drained if the pulp is watery) pureed with 1 tsp salt, 1/2 finely ground Italian seasonings, 1/4 tsp pepper and 1 lg garlic clove put thru garlic press
Ingredients For The Toppings From The Show for 2 Trays of Pizza:
Clams Casino Pizza – (for 1/2 the pizza) 1-2 cans 1 cup of Snows canned clams drained except 3 tbsp of clam juice per can to drizzle over pizza, 1/4 cup of chopped peppers, 3/4 cup sliced thick cut bacon, 1 garlic clove thru press, 1 tsp chopped sweet onions
Greek Pizza – 3/4 cup sliced cheery tomatoes, 3/4 cup sheep’s milk feta, 1/4 cup sliced sweet onion, 1/2 cup sliced kalmata or canned black olives, 1/3 cup chiffonade basil
Bacon Pizza – 1 cup thick sliced bacon (for 1/2 of the pizza)
Hawaiian Pizza – 1 cup sliced ham, 1/2 cup chopped pineapple, 1/2 cup sliced green onions with whites too
Directions – (Pre-heat the oven to 450º right before the pizza dough has it’s final proof and make sure the rack is in the lowest possible position):
Warm the stainless steel mixing bowl with warm water for 5 minutes
Empty out warm water and add packet of yeast to mixing bowl
Add in 1 1/2 cups of water at 105º-110º to the yeast
Add in 1/2 tsp sugar and let the yeast proof for 10 nminutes
Tour on knead hook and begin to add in 3 tbsp olive oil, flour and salt
Keep mixing and knead with hook after it forms a dough ball for 10 minutes
Take dough off of hook and onto a floured counter
Knead by hand for 2 minutes and place into a large oiled bowl
Cover with saran wrap and refrigerate for 18-24 hrs.
When you are ready to make the pizza make sure to take out of the frig and let the cold dough sit for approx. 2 hrs. – this will make it easier to work with
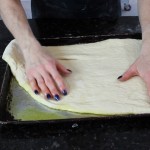
When the dough has sat for 2 hrs. turn out onto floured surface and begin to roll out and stretch to the size of the cookie tray
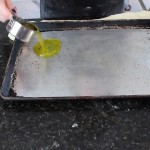
Pour 1/3 cup of olive oil onto cookie tray and place the rolled out pizza dough onto olive oil
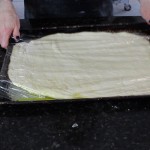
Cover with plastic wrap and let sit 30 minutes
Remove plastic wrap and stretch the dough if needed to the edges of the pan and using your thumb press the egde of the dough into the edges of the cookie tray to form a crust – this will become a crispy and chewy egde that you will love!
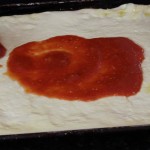
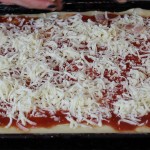
Spoon pureed tomatoes onto the dough and sprinkle mozzarella
Add you desired topping and give a drizzle of olive oil across the top of the pizza and put into a 450º oven for 16-20 minutes.
Definitely check at the 15 minute mark as all oven are different
You want the edges dark golden and the middle is sizzling
Take out and let sit for 5 minutes
Using a large spatula remove the pizza in one piece to a large cutting board and slice, or slice in the cookie tray
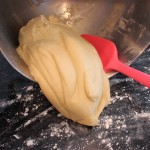
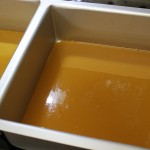
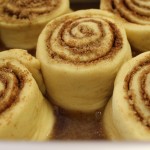
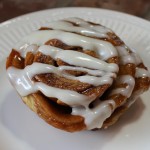
Wait until you taste these decadent sticky buns first hand! Such an easy recipe to follow making these homemade gourmet sticky buns that melt in you mouth! PERFECT for VALENTINE’S DAY morning or any occasion for that matter. The dough is light and chewy. The glaze is soft and caramel like and the cream cheese icing is the best I have ever had. The cream cheese icing has a tablespoon of lemon juice giving it the perfect balance. If you don’t have lemons you can always substitute the citrus with pineapple juice. It’s nice to have the different options with these two toppings to offer to your family and guests.
The dough recipe for these homemade gourmet sticky buns couldn’t get any easier. You can literally make it in 8 minutes including the five minutes of kneading with the dough hook. Although, you do have to wait for eggs and buttermilk to come to room temperature. There isn’t any worrying about activating the yeast in a 105º-110º because we use RAPID RISE yeast.
These sticky buns are so easy to make. The most time spent here comes with the first 2 1/2 hour proofing. The glaze and cream cheese frosting could be made a day or two ahead. Once you make these for your family and friends you will become the honorary sticky bun chef!
1 pkt of INSTANT – RAPID RISE yeast or 2 1/2 tsp if measuring
1/4 cup granulated sugar
1 1/4 tsp salt
6 tbsp unsalted butter melted and cooled until WARM – not hot and not cold
4 1/4 cup all purpose flour
Directions for the Dough:
Crack eggs into a bowl and whisk gently with a fork
With paddle attachment add the eggs to a Kitchen Aid mixer and begin to mix
Add in the buttermilk and mix to combine
Then add in the yeast and sugar
Mix in 2 cups of flour, butter and salt to combine
Switch the paddle attachment to kneading hook
Add in last 2 cups of flour and knead for 5 minutes
Turn out the dough onto a lightly floured counter
Briefly knead to form a dough ball – 1 minute
Spray a large glass bowl with Pam or similar
Place the ball of dough into the greased bowl, spray the top of the dough and cover with plastic wrap
Put in a warm place if available until it doubles – 2 1/2 hours
While the dough is rising make your glaze
Turn out risen dough onto a lightly floured counter
Begin to roll out dough into a lg rectangle with a rolling pin – approx 20″ x 15″ size
Sprinkle 1 3/4 cup of dk. brown sugar all over the rolled out dough leaving 1″ border around the edges
Spread sugar with your fingers for an even coating
Sprinkle the cinnamon over that – it may seem like a lot but it won’t be once you roll up the dough and bake it
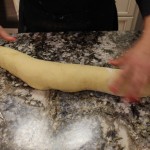
Begin to roll up the long edge of the dough keep a tight roll all the way
Lay rolled up dough with seem side down and begin to slice into rolls
Slice the dough roll with a serrated knife right down the middle, then slice each of the sides into 2 more equal patrs, then those into 2 to make a total of 8 equal – 2″ rounds
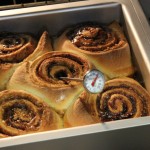
Place the rounds onto the pan or pans with 1/4″ glaze on the bottom and let proof for 45 minutes (no need to cover with saran)
After proofing I take a spoon to scoop up the glaze on the bottom and pour over all the sticky bun rounds before baking
Place into a 350º oven and bake for 20-25 minutes until a golden brown around the edges
Take out the buns and let rest in the pan(s) for 10 minutes
Run knife around the perimeters of the sticky buns
I do not invert the pan as we did in the show, I just remove sticky buns to a platter and cover the tops with the cream cheese frosting while warm so it melts slightly to give a nice coating
OPTIONAL: Sprinkle some with toasted pecans …enjoy 🙂
Ingredients for Glaze:
6 tbsp unsalted butter
3/4cup light brown sugar
3/4cupheavy cream
1/3cuphoney
1/4teaspoonkosher salt
OPTIONAL: 1 3/4cupschopped toasted pecans – Toast pecan halves on a cookie tray in a 375º oven for 8 minutes until fragrant and lightly toasted
Directions for Glaze:
Add all the ingredients into a medium sauce pan whisking to break up sugar on medium heat
Bring to a boil and immediately turn down and simmer for 4 minutes, the sauce should NOT be in a rapid boil, should have a tiny bubbles
Take off heat and pour 1/2 – 2/3’s of the glaze into the bottoms of your baking pans with 1/4″ coating
Place your rolled and cut up sticky bun rolls on top of the glaze and let proof 45 minutes
Then scoop some of the glaze on the bottom on top of the sticky bun rolls before baking
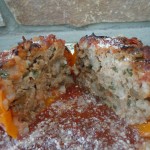
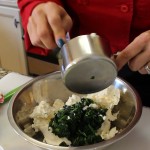
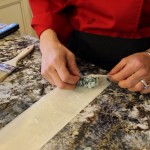
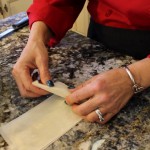
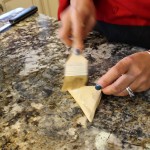
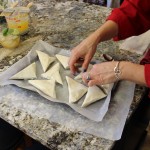
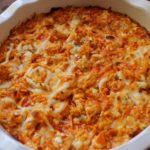
When you bite into the buttery, flaky pastry layers with the creamy sheep’s milk feta and ricotta-spinach filling you’ll agree that Spanakopita, a classic Greek dish, is so worth the effort. We neatly fold this delicate pastry dough, with a tablespoon of this amazing spinach mixture, into triangles for the perfect little appetizer shape that just melts in your mouth. The #4 fillo pastry dough becomes this delicate shell making for an elegant nibble.
This recipe came from my good friend, Dana, who happens to be a wonderful chef. In fact, Dana and her husband are opening up a restaurant in early spring at The Goodwin Golf Course called Birdie Cafe. Dana is half Greek and half Italian so this was family tradition for her growing up making these with her mother. My great grandmother was born in Crete making me one eighth Greek. So with a hint of Greek lineage in my blood I’m thinking that’s what drives my palate towards these Mediterranean flavors that I adore so much.
Spending the day in Dana’s kitchen with our other college friend, Lynn, making these spanakopita was ideal considering we were having so much fun it didn’t seem like work at all. We didn’t even realize how much we were accomplishing. Lynn, who manage’s Sam The Clam Pub & Grub in Southington, CT introduced us to a Greek Mojito with Metaxa, a Greek liquer, that was very delicious.
The fact that you can easily make these spanakopita triangles ahead of time which freeze so nicely for future dates is ideal for parties. So start making this spanakopita now for your Super Bowl get together! Invite over a few friends to make the spanakopita and the task goes really quickly and it’s a lot of fun. Add in our Greek Metaxa Mojito’s and I think you have yourself a pre-party to the party just like the one at Dana’s.
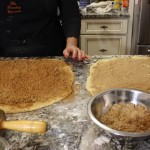
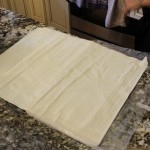
To cut down on the time and effort and not forgo making this delectable dish you could make one big tray of the spanakopita. In a 9 x 13 x 3 (or similar size) baking dish lay down 9 full sheets of phyllo pastry dough brushing in between each layer with butter of course. Next, lay in the entire bowl of spinach filling, then 9 more buttered layers of phyllo with a finishing buttered coating right on the top. If you are baking this one tray be sure to refrigerate the the spanakopita for twenty minutes before baking it. This will firm up the pastry dough so you can run a knife through the top layers of dough cutting in only about 1/4″ to give you pre-cut lines in the serving sizes you’ll want. It makes cutting the spanakopita much easier after it comes out of the oven. Of course, a tray this size will need to bake for about 55-60 on 350º instead of the 20 minutes the triangles take. The phyllo pastry dough is very forgiving. If your sheets are larger then the pan giving you extra dough on the sides when lining the baking dish just fold them over. You won’t notice that the sides may be folded over after it’s baked because it will be all flaky and puffed anyways and still taste incredible.
INGREDIENTS FOR Spanakopita – will make approx. 30 spankopita triangles :
1 pkg. #4 Phyllo Pastry dough or Fillo pastry dough put into frig over night if frozen
1 cup (1 pkg) thawed and fully drained (squeezed) frozen chopped spinach
2 cup whole milk ricotta
1 cup sheep’s milk feta cheese
1 lb. melted butter
3 scallions finely chopped white and green parts OR 2 tbsp finely chopped shallots
2 tbsp each chopped parsley and fresh chopped dill
1/4 tsp each nutmeg and black pepper
DIRECTIONS FOR Spanakopita:
Pre-heat oven to 350º
Take Phyllo dough out of the frig to bring to room temperature but still in the box
Drain and squeeze ALL the water from chopped thawed spinach
In a large bowl add 2 cup ricotta, 1 cup drained spinach, 1 cup sheep’s feta, scallions or shallots, parsley, dill, nutmeg and pepper – stir gently to mix and set aside
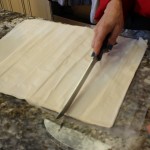
Unroll Phyllo on counter top
Cut the 15″ long pastry dough with a sharp knife into 3 3/4″ pieces getting 4 across
Start to lay out the strips 4 across a work surface – always keep a layer of saran wrap and a damp dish towel on top of the layers you’re not using
Brush thin coat of butter in between each layer til you have 3 layers down in each of the 4 rows
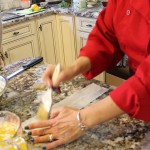
Put 1 tbsp of ricotta-spinach mixture in the right bottom corner of the phyllo sheet – you can use a sm. cookie dough scoop to help keep the tbsp all the same size – this will help you to move along quicker
Fold right corner over so the bottom edge lines up with the left side, like you are folding a flag
Continue on up until you are at the top and used up all the pastry dough – brush a little butter on the last fold to seal it
Put filled phyllo triangles onto a baking tray about 9 per tray
Bake each tray of spanakopita triangles for 20 minutes on 350º until golden
Be sure to let the spsankopita cool a little – the filling will be hot 🙂
You may have 1/2-3/4 cup of filling leftovers so freeze it, roll up in pounded-out chicken breasts, stuff bone-in chicken breasts under the skin with the filling and bake or just buy extra phyllo…enjoy 🙂
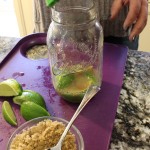
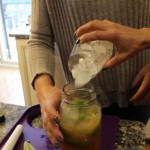
INGREDIENTS for the METAXA MOJITO’S:
1 cup Metaxa Greek Liquer
1 1/2 cups soda water
1 fresh lime cut into wedges
1 fresh lemon juiced = 1/4 cup lemon juice
2 tbsp light brown sugar
4 mint leaves or basil leaves
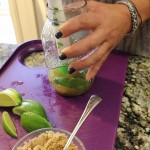
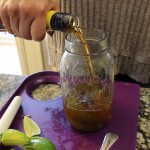
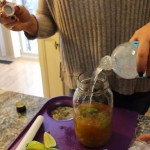
DIRECTIONS for making the Metaxa Mojito’s:
Mint leaves muddled with fresh lime wedges and light brown sugar in a glass cocktail mixer
Add fresh lemon juice, Metaxa, soda water and ice, shake and serve with mint or basil garnish…enjoy 🙂
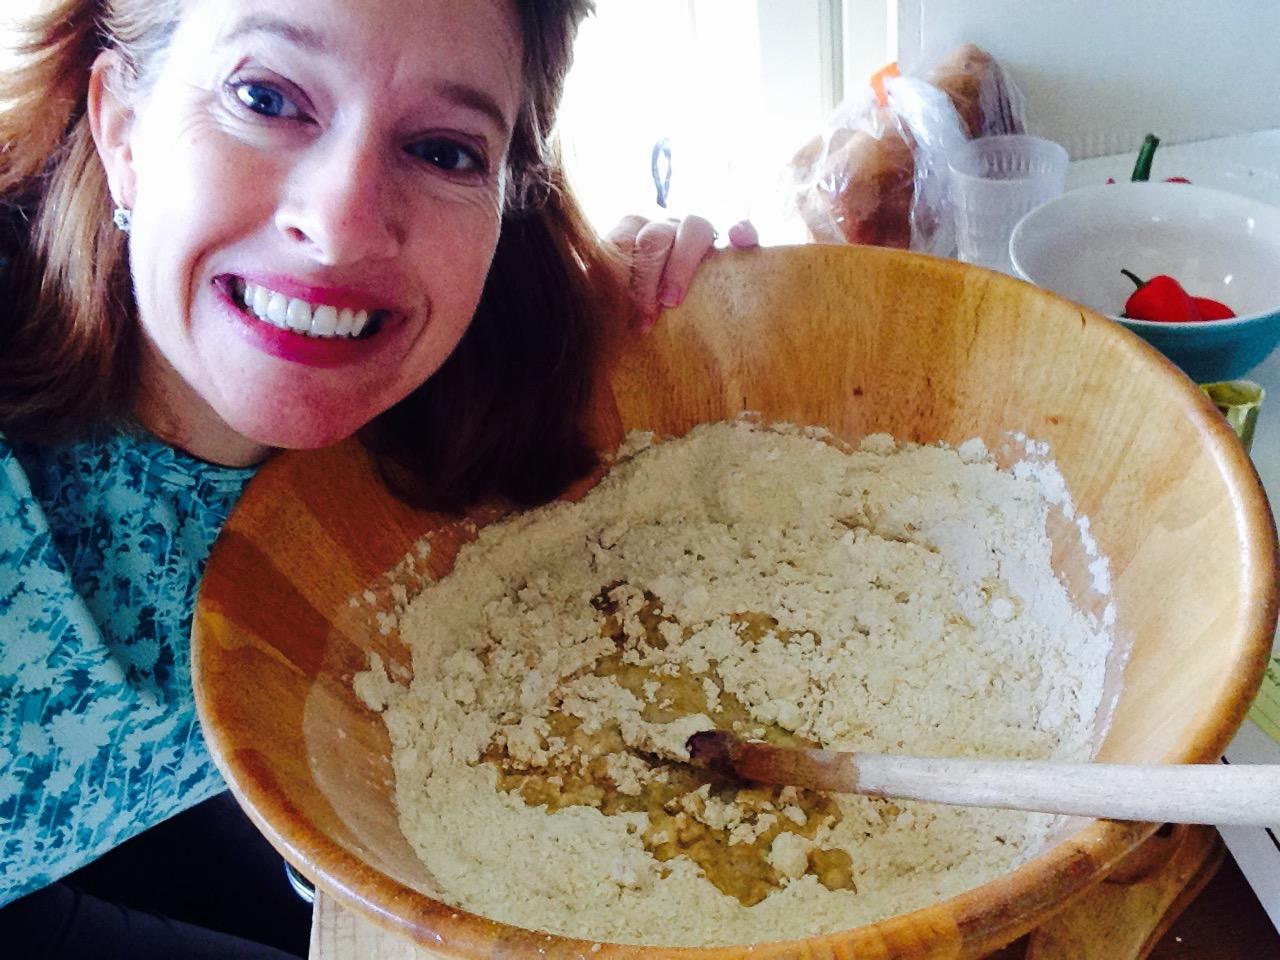
2014 – Laura, my loyal friend and follower making the icebox rolls for the holidays!
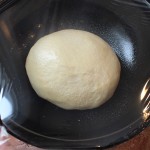
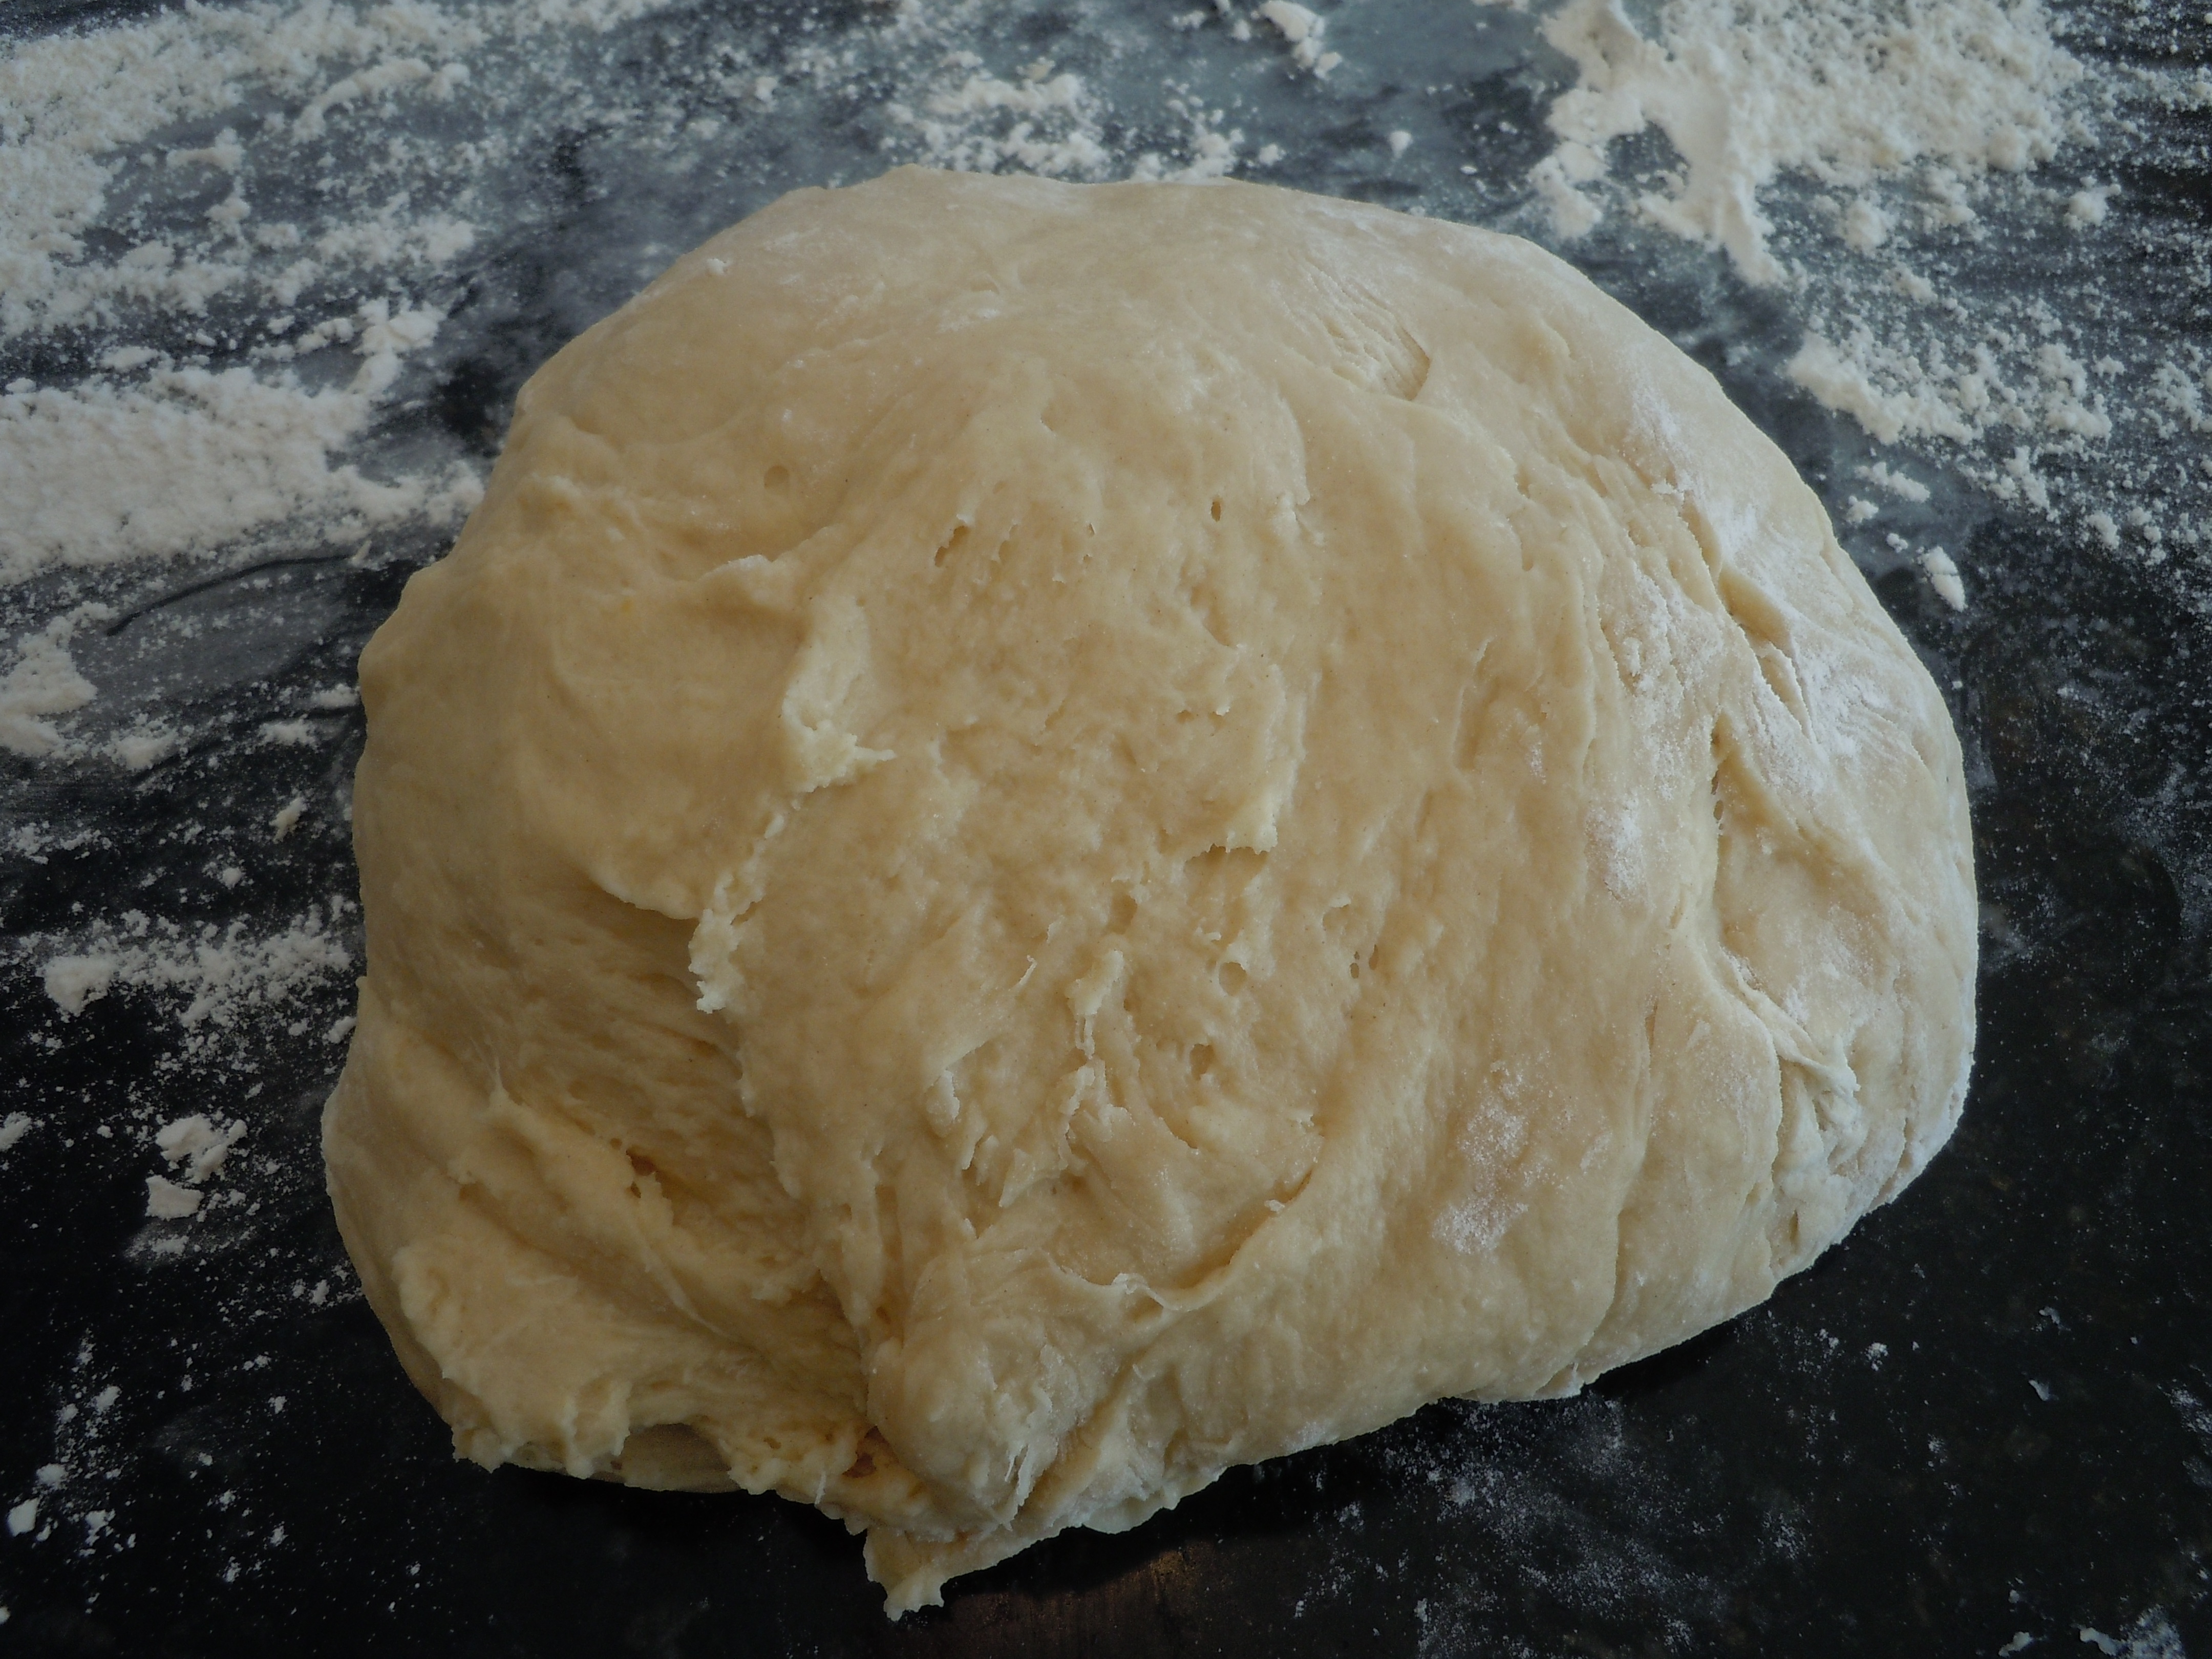
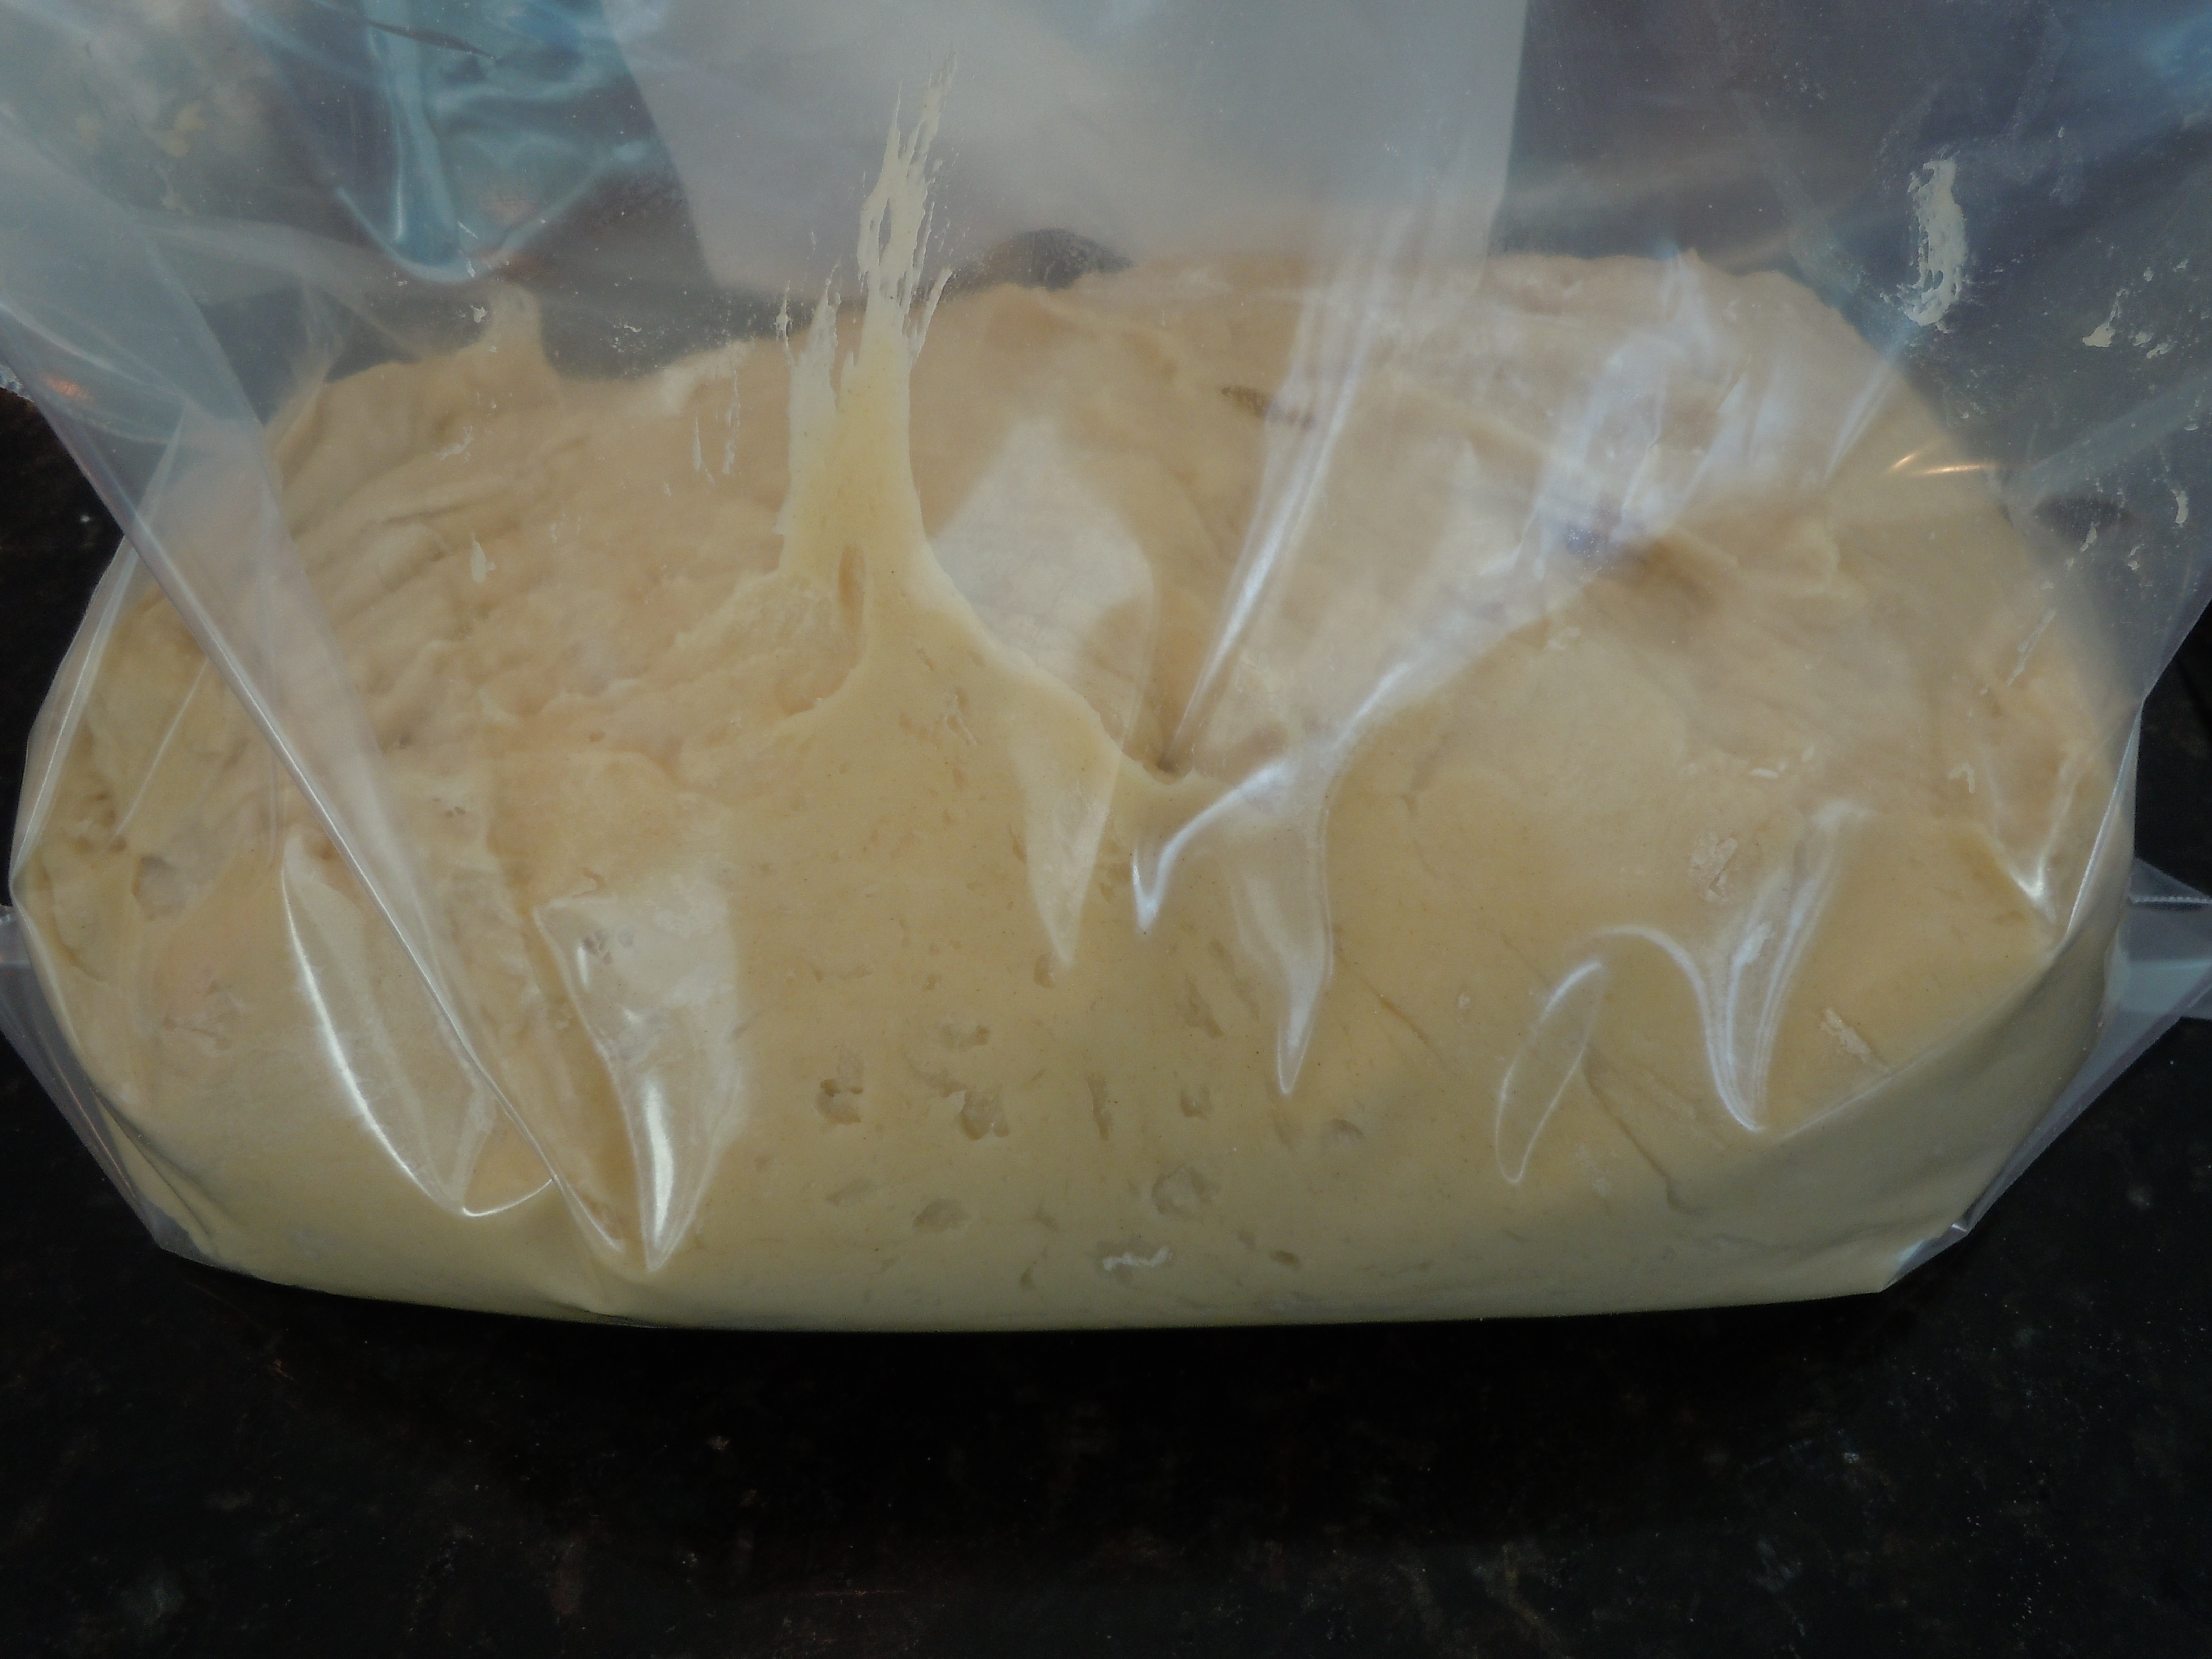
There’s nothing better than the aromas of homemade fresh baked bread, sweet onion and rosemary to wet the appetite! I was thrilled to find this icebox dinner roll recipe about fifteen years ago and have been making them ever since. The recipe card was from “easytobake” and I have tried to access their website but it doesn’t exist anymore. I have made many different bread dough’s in my life, kneading by hand, proofing, kneading again and it can all be exhausting. The whole idea behind icebox dough is that kneading is not necessary. The flavor and soft, tender texture develops as it proofs right in the refrigerator. Once you see how easy it is to make these melt in your mouth icebox dinner rolls you may never pick up store bought rolls again.
Laura making the icebox rolls for her 2015 Thanksgiving!
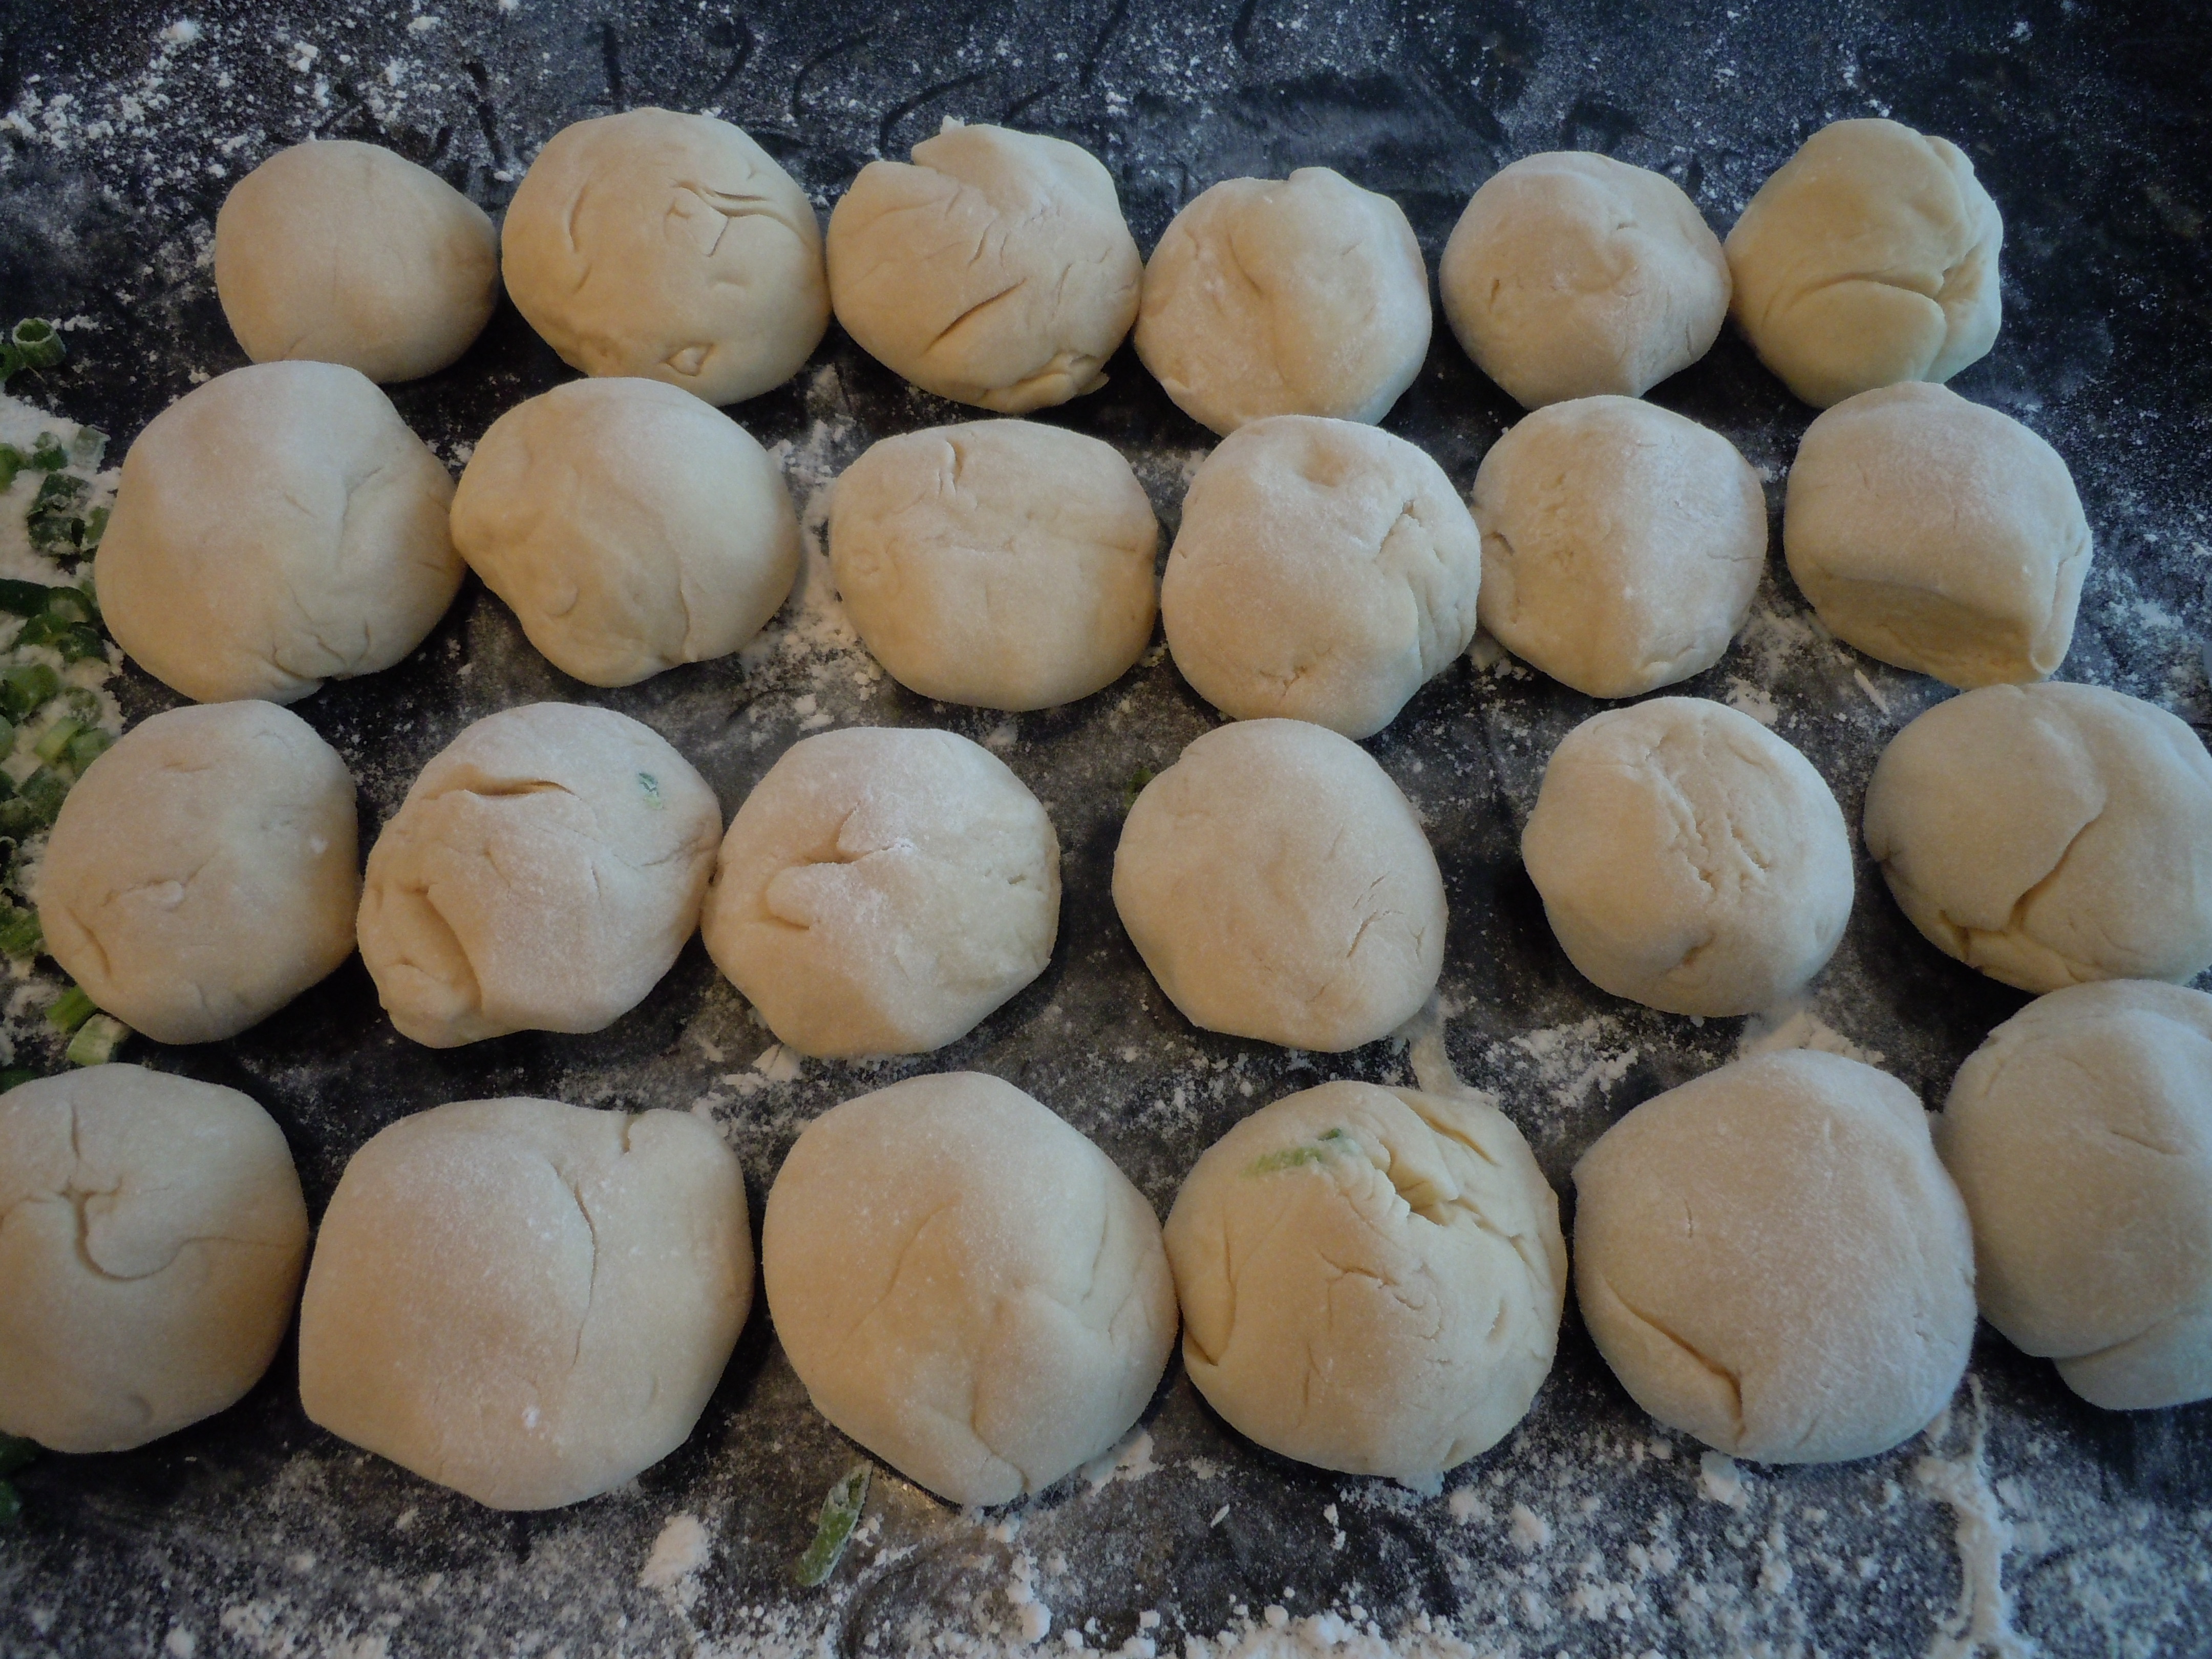
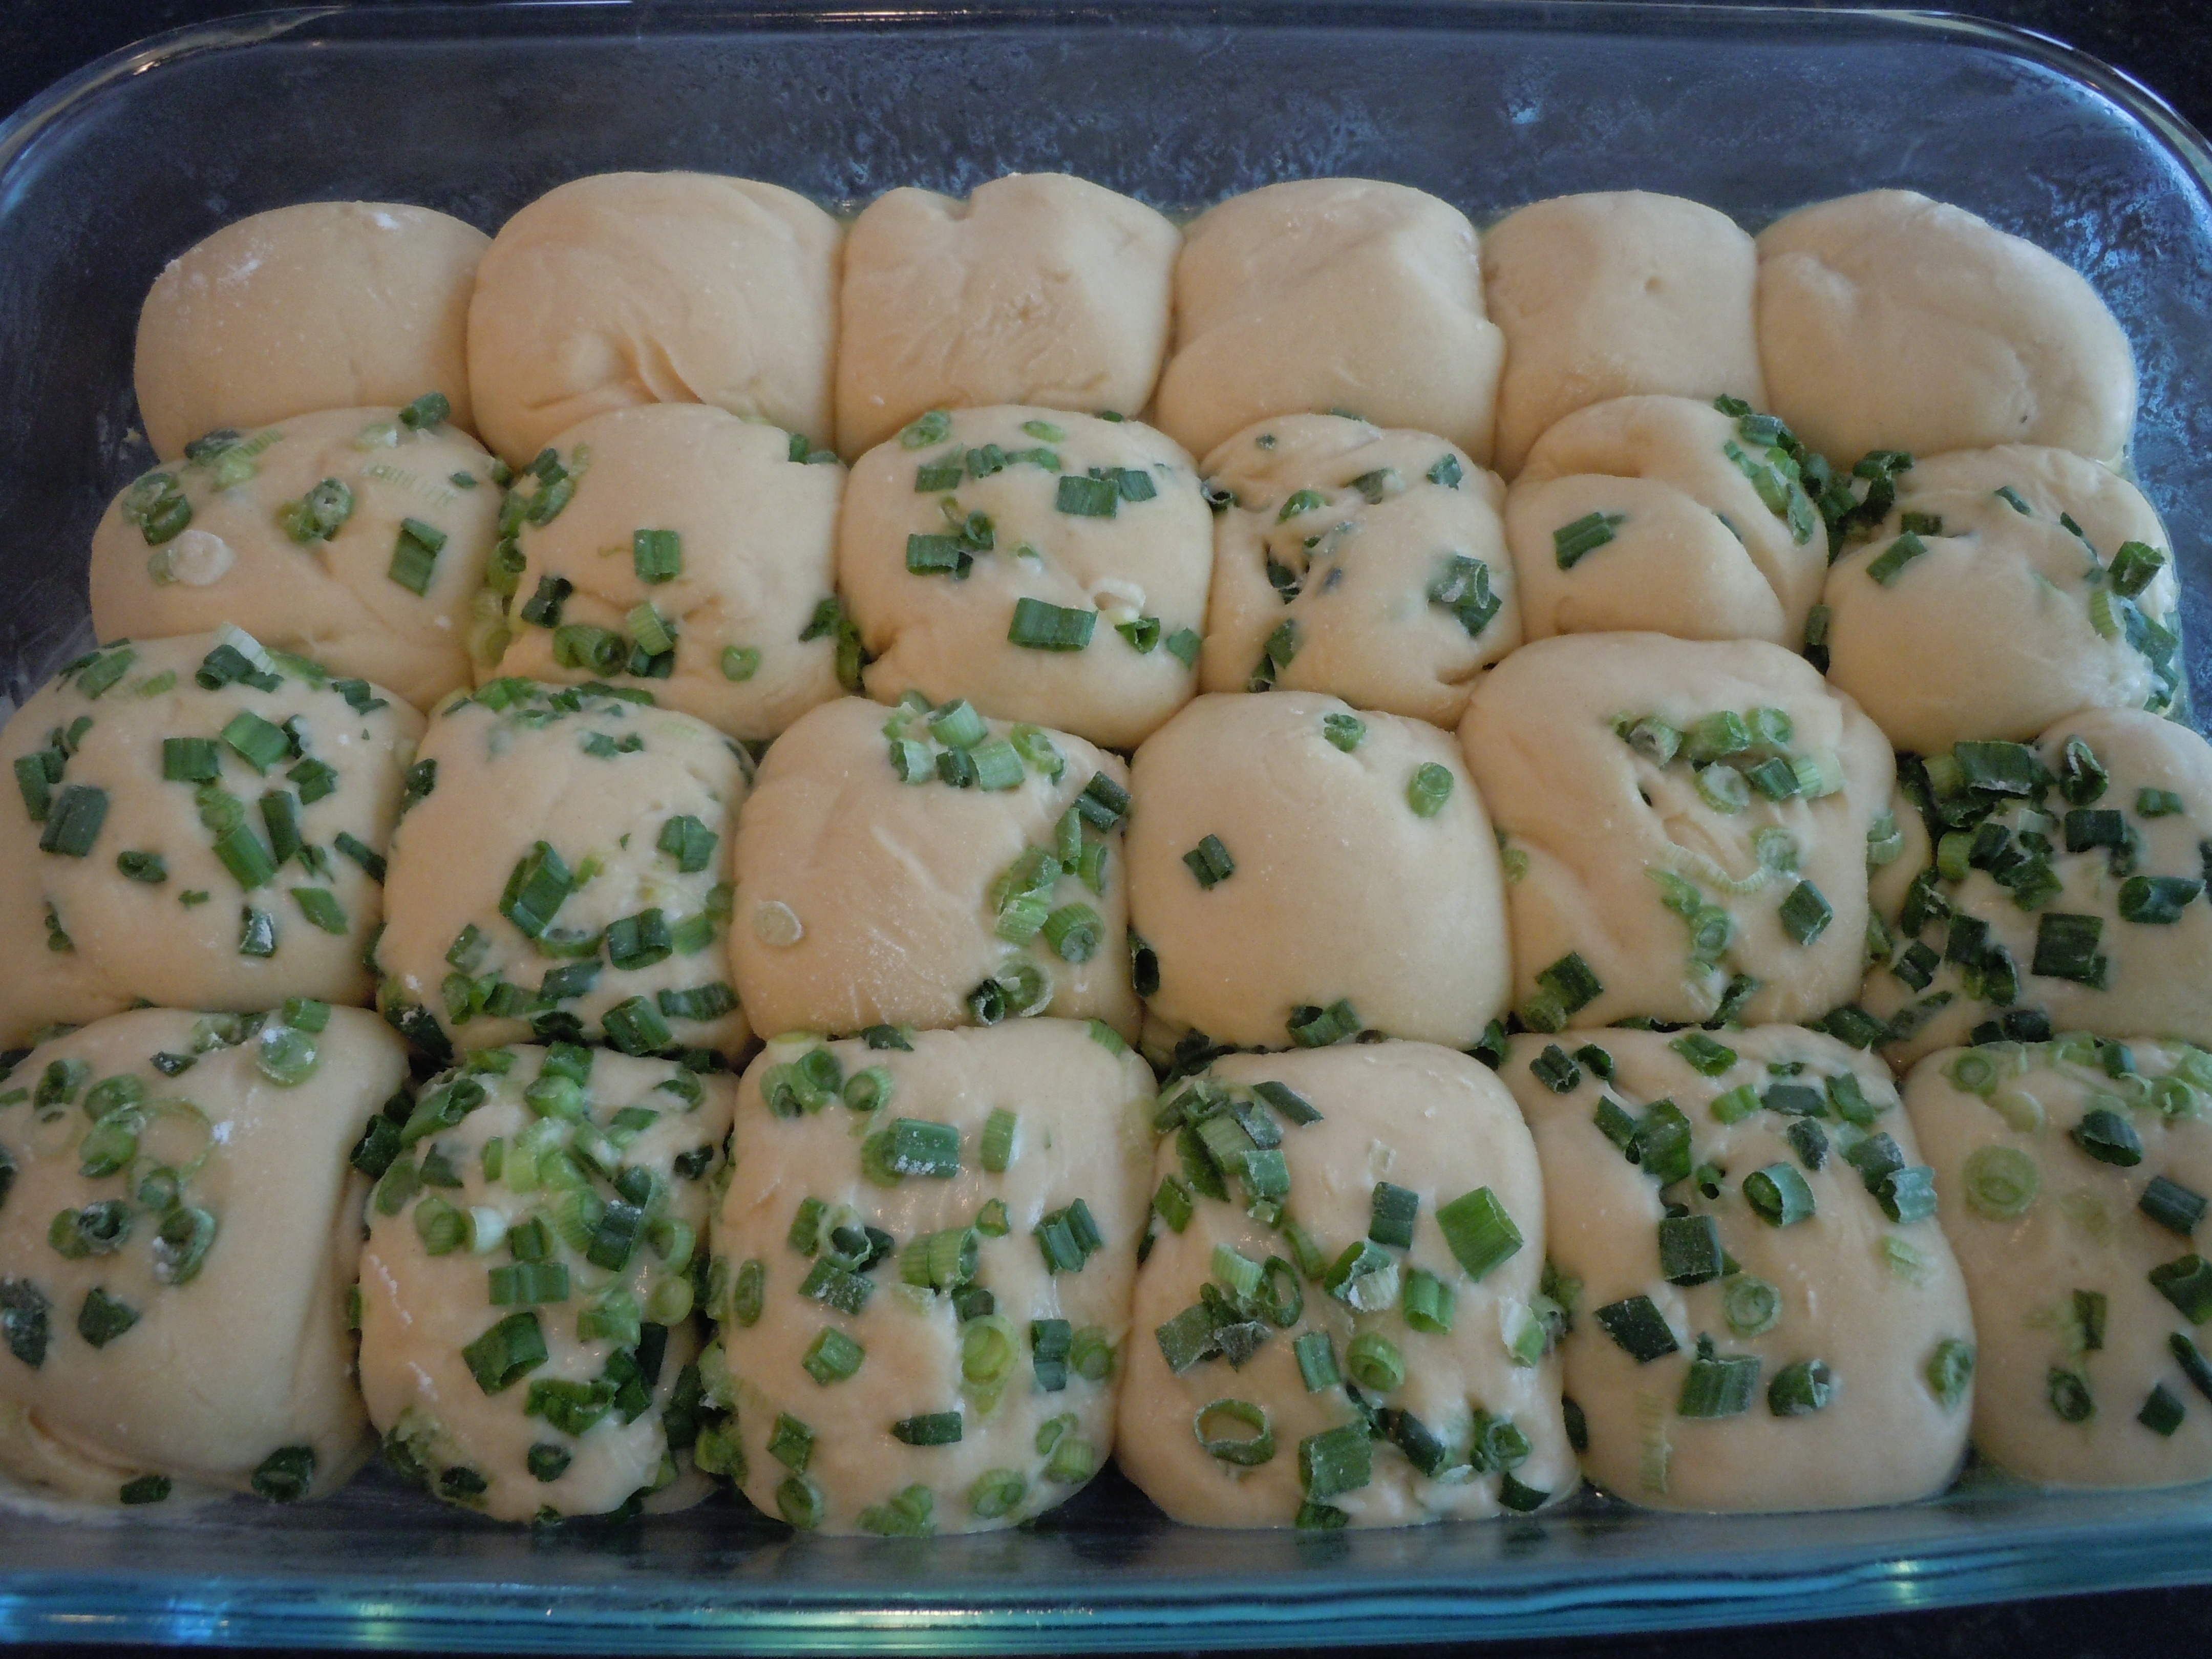
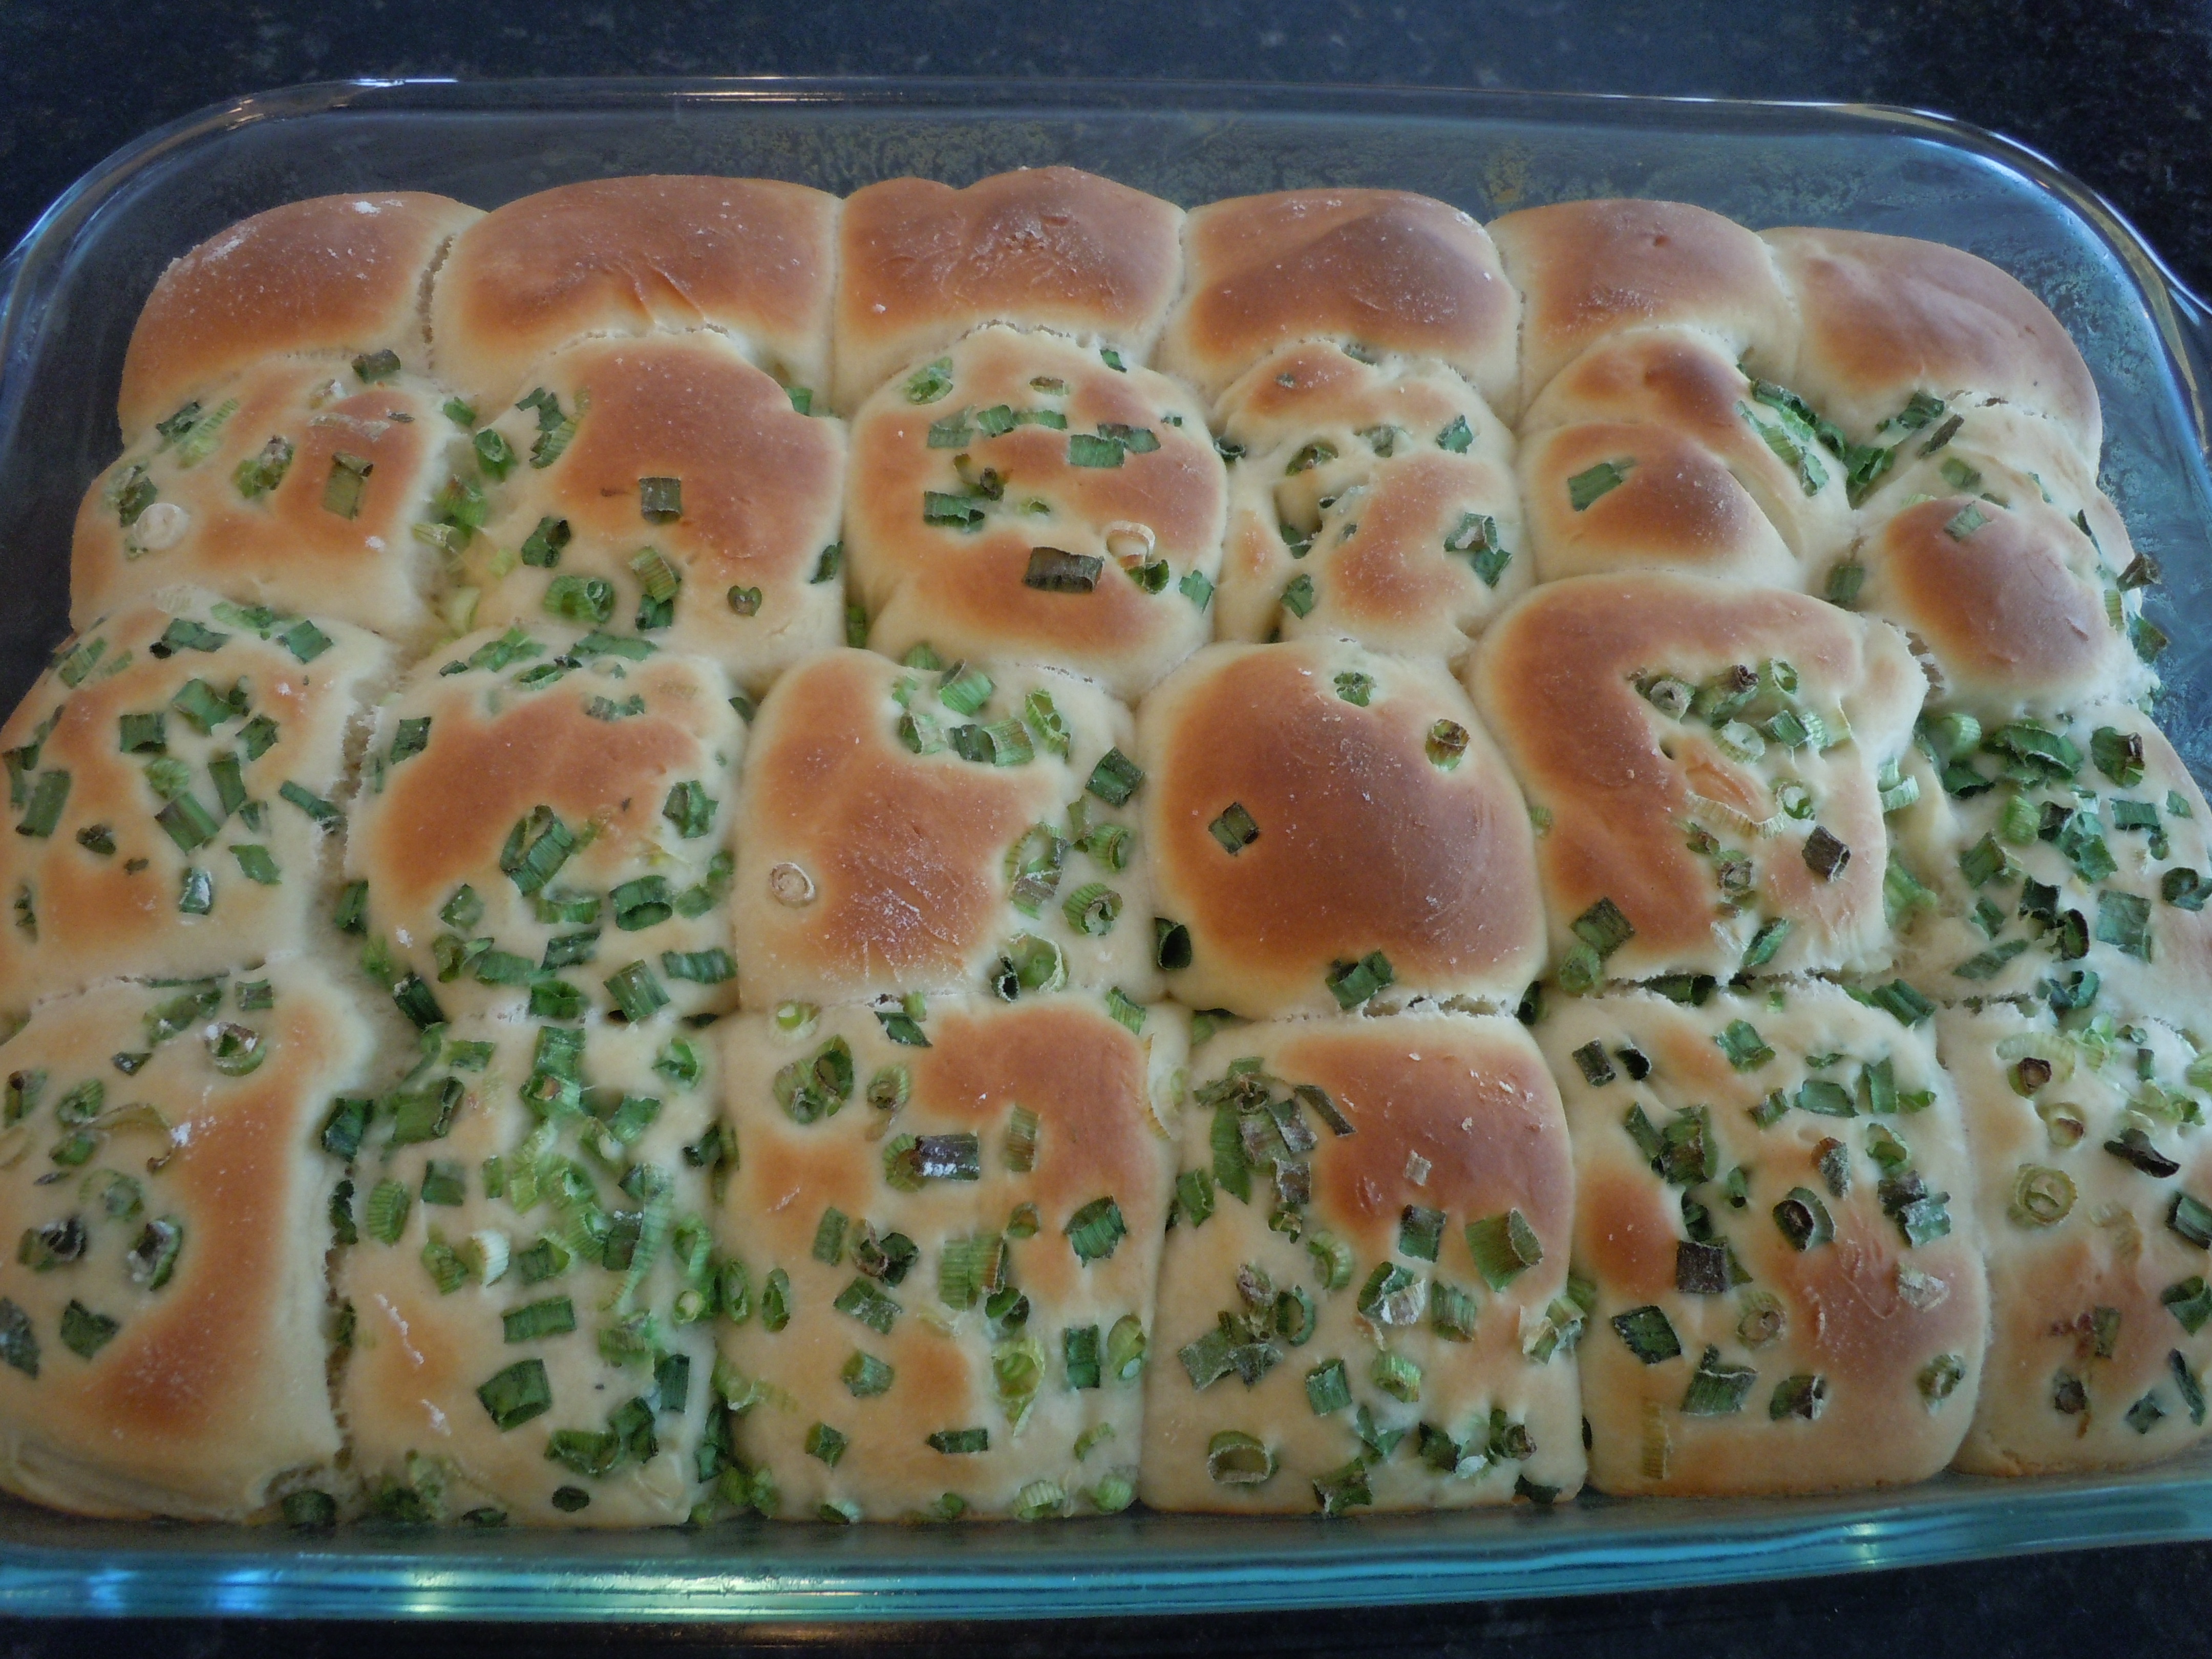
I have added lots of chopped green onion and fresh rosemary in my rolls but they are just as delicious plain too! It takes all of fifteen minutes to make this dough and can be made up to 4 days ahead. The dough stays in the refrigerator, hence the name “icebox” rolls. You take the dough out of the frig the morning of your dinner party. It get’s formed into dough balls mixing in chopped green onion and fresh rosemary. Then the rolls get lined up on a buttery baking tray and back into the frig. Two hours before you want to serve the homemade icebox dinner rolls you take them out of the frig and let them rise for an hour and a half to two hours. When they have doubled in size, give them an egg wash for a little shine, then bake.
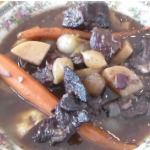
Hope you enjoy these scrumptious “easy icebox dinner rolls” as much as our family and friends do. They will be asking you for the recipe for sure! These homemade dinner rolls aren’t just for holidays they are great for any day. Try them with my turkey stuffed peppers where you can dunk them in the sauce and pepper juices, the Au Jus in myBoeuf Bourguignon, or Bolognese Sauce. After all this savoriness you may need a chocolate fix with my perfectly chocolate chocolate cakeor for a light and refreshing sweet try this amazingPavlova!
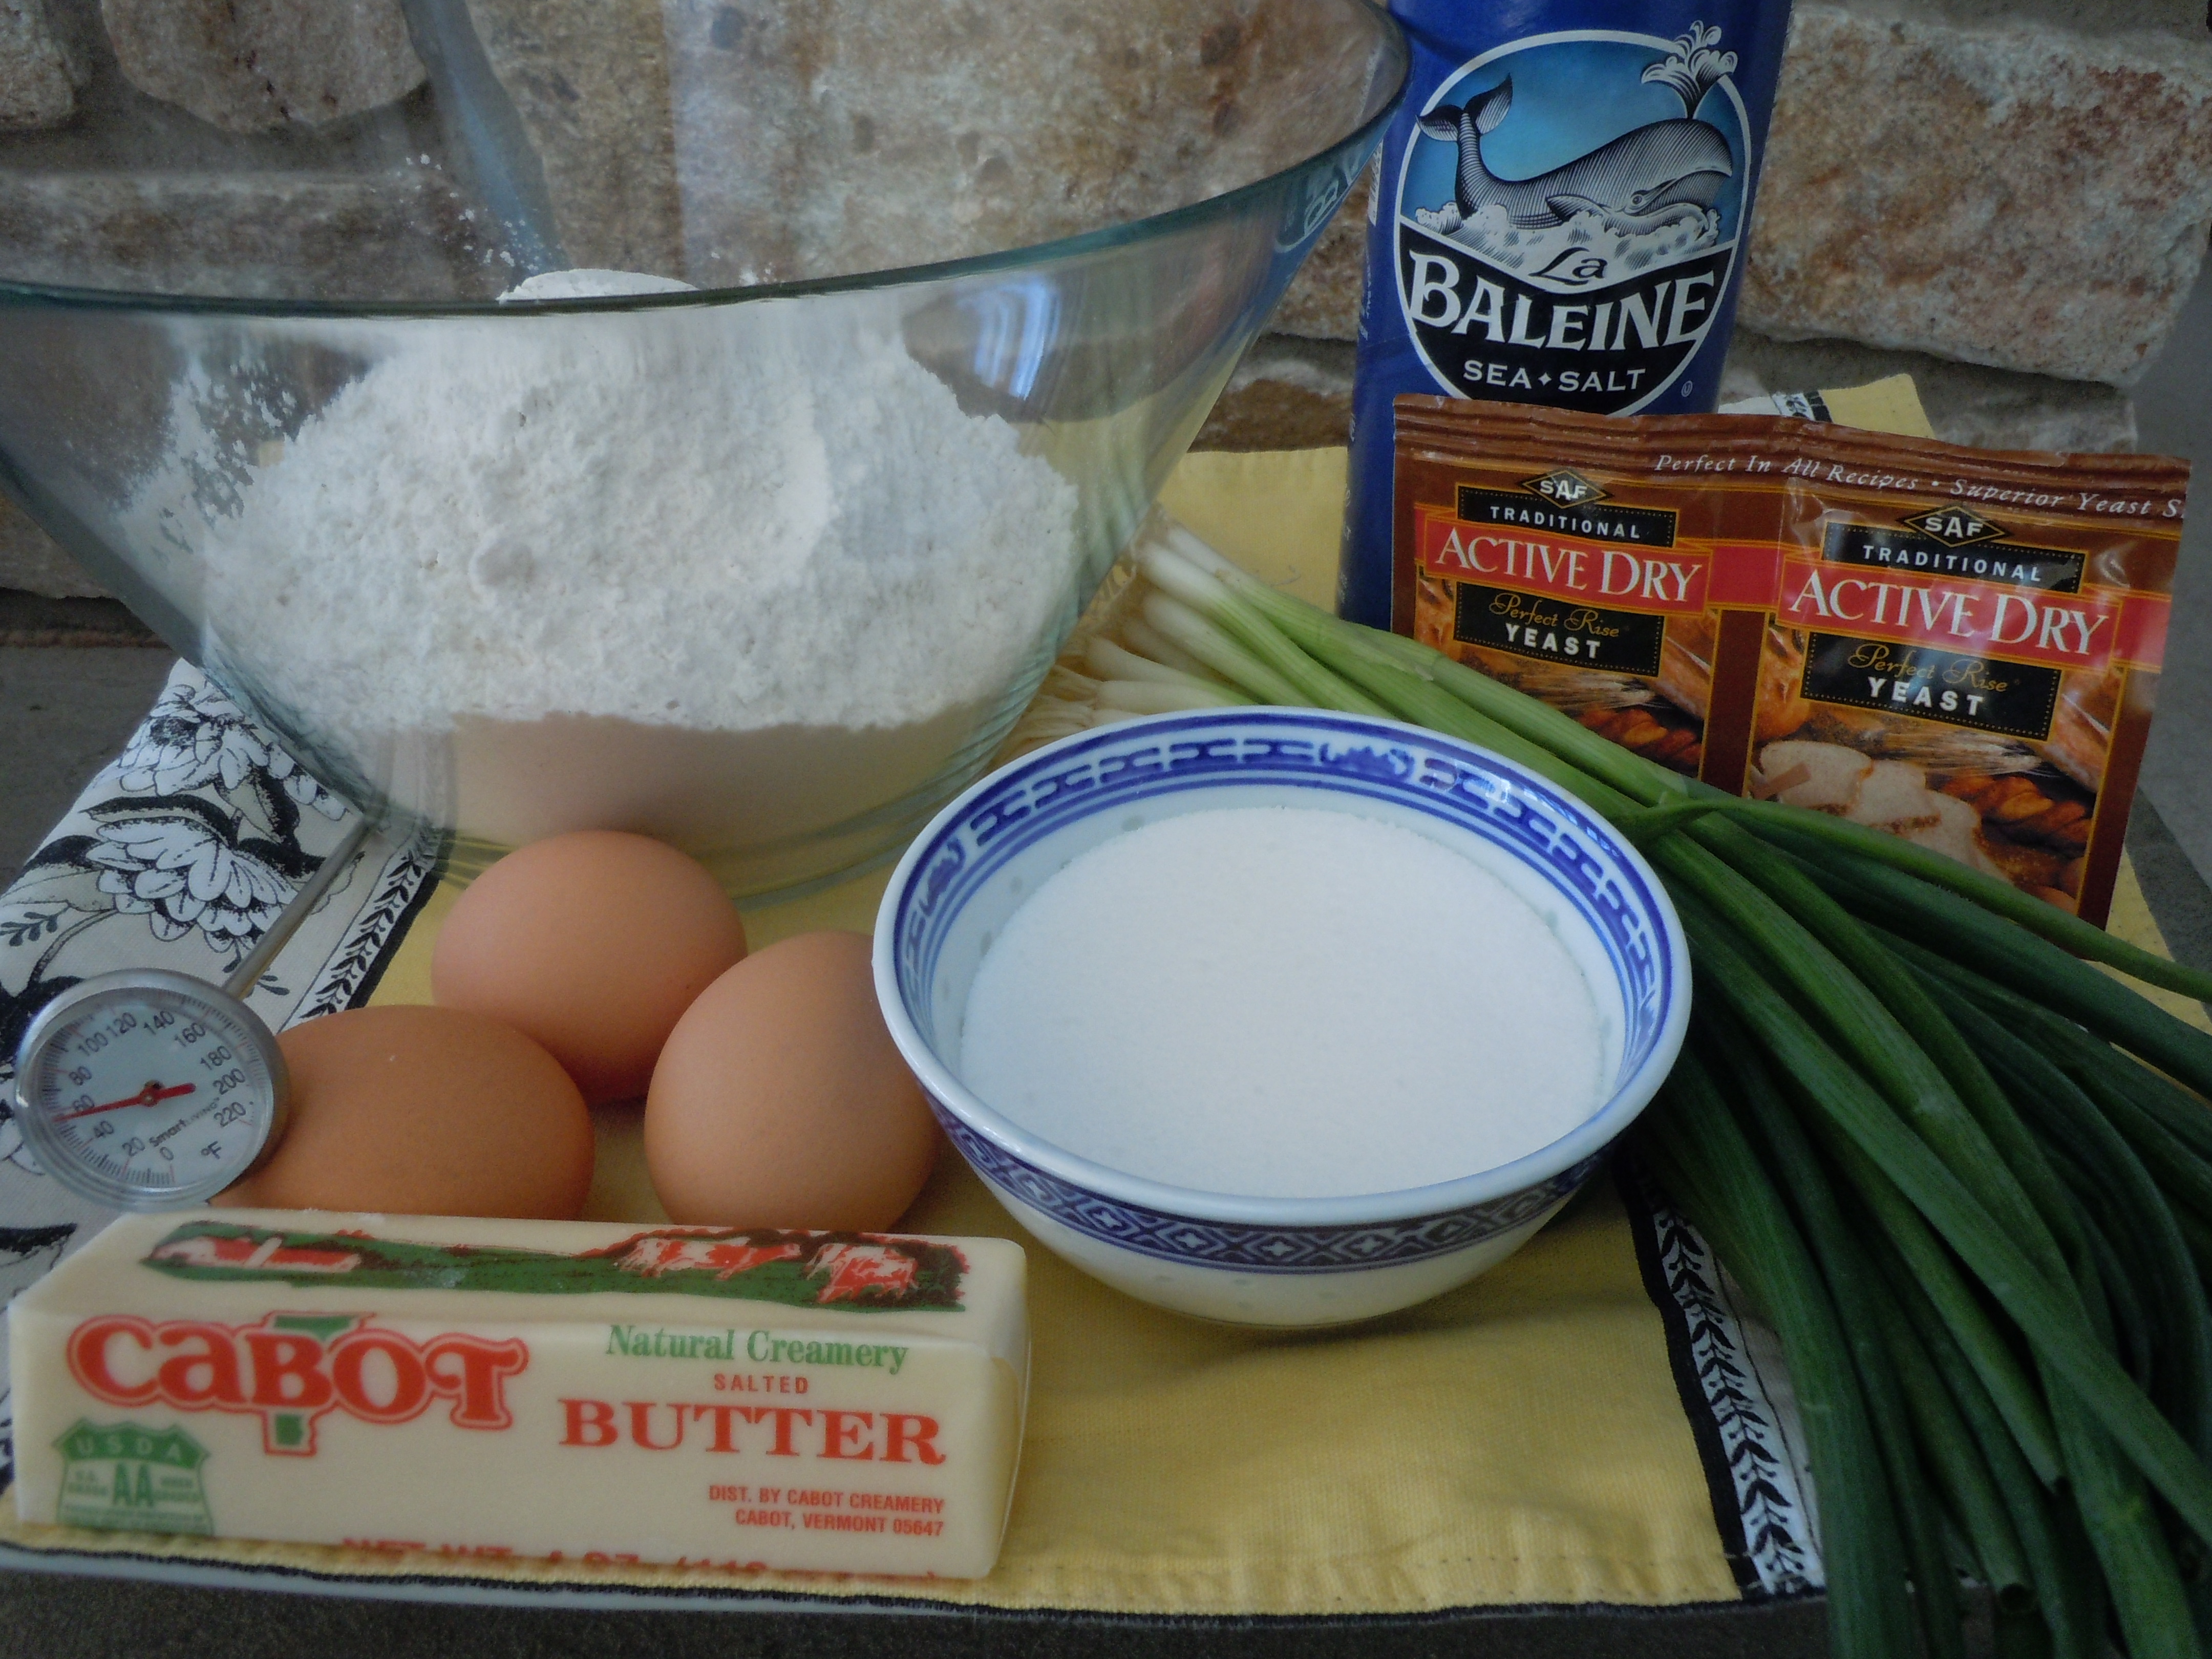
Ingredients: Makes 24 Dinner Rolls
4 1/2 cups all purpose flour
2 packets active dry yeast (NOT rapid rise)
1 cup warm water (105 -115 degrees)
3 lg eggs (if you use extra large eggs you will need to add a little more flour to compensate)
1/2 cup melted butter
1/2 cup sugar
1 Tsp salt
2 bunches of green onions chopped to 1/8″ pieces -(from white/greenish part to ends)
1/2 cup fresh chopped rosemary
1/3 stick room temp butter to coat the cookie tray or inside of the 10″x 15″ baking dish
Directions:
Using a KitchenAid mixer OR lg mixing bowl pour in the 2 packets of yeast then add in 1 cup of 105º – 110 º water.
Then add 1 Tbsp of sugar (from the 1/2 of cup of sugar that you add later) now because it feeds the yeast and really gets it activated.
Let this sit for about 5 minutes and you will see it get foamy.
Add in the eggs, melted butter, sugar, and salt and whisk- make sure the butter is not hot because it can kill the yeast if too hot
Begin to beat in a 1/2 cup of flour at a time using the whisk the whole time until the dough gets too stiff to mix.
Turn the dough out onto a lightly floured surface, place the big ball of dough into a large Ziploc baggy and put it into the refrigerator for 2 hours…. up to 4 days.
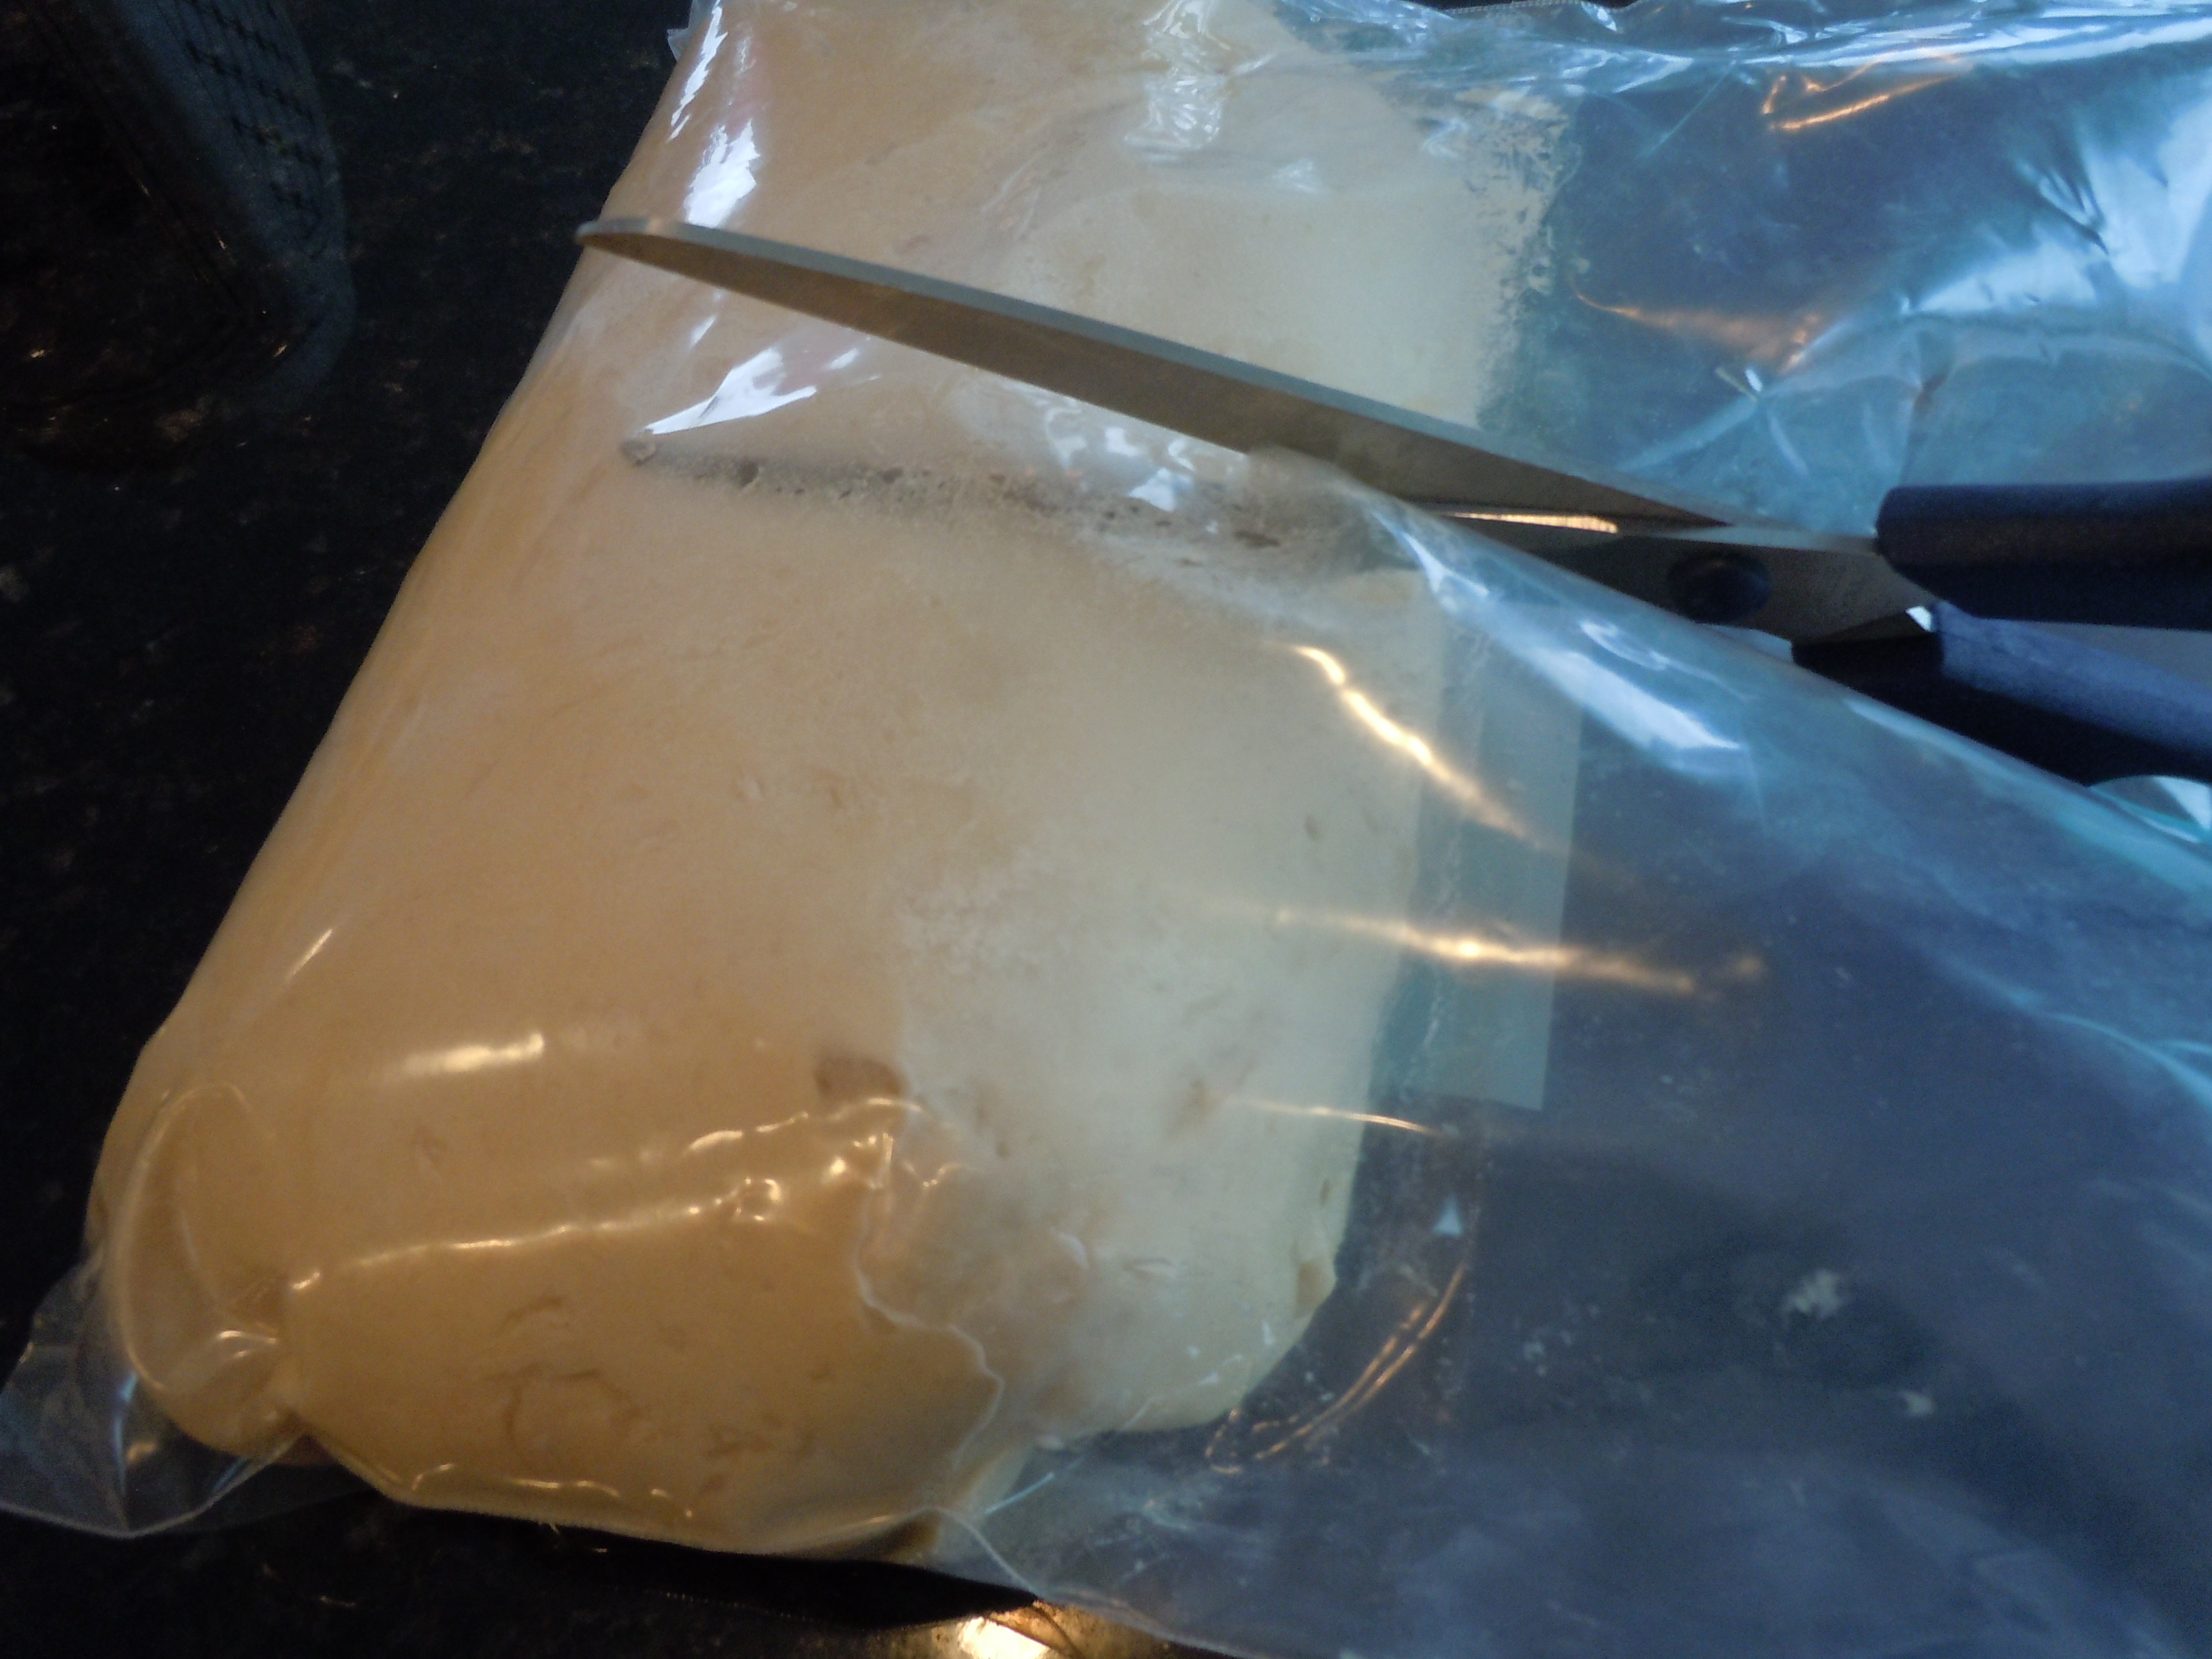
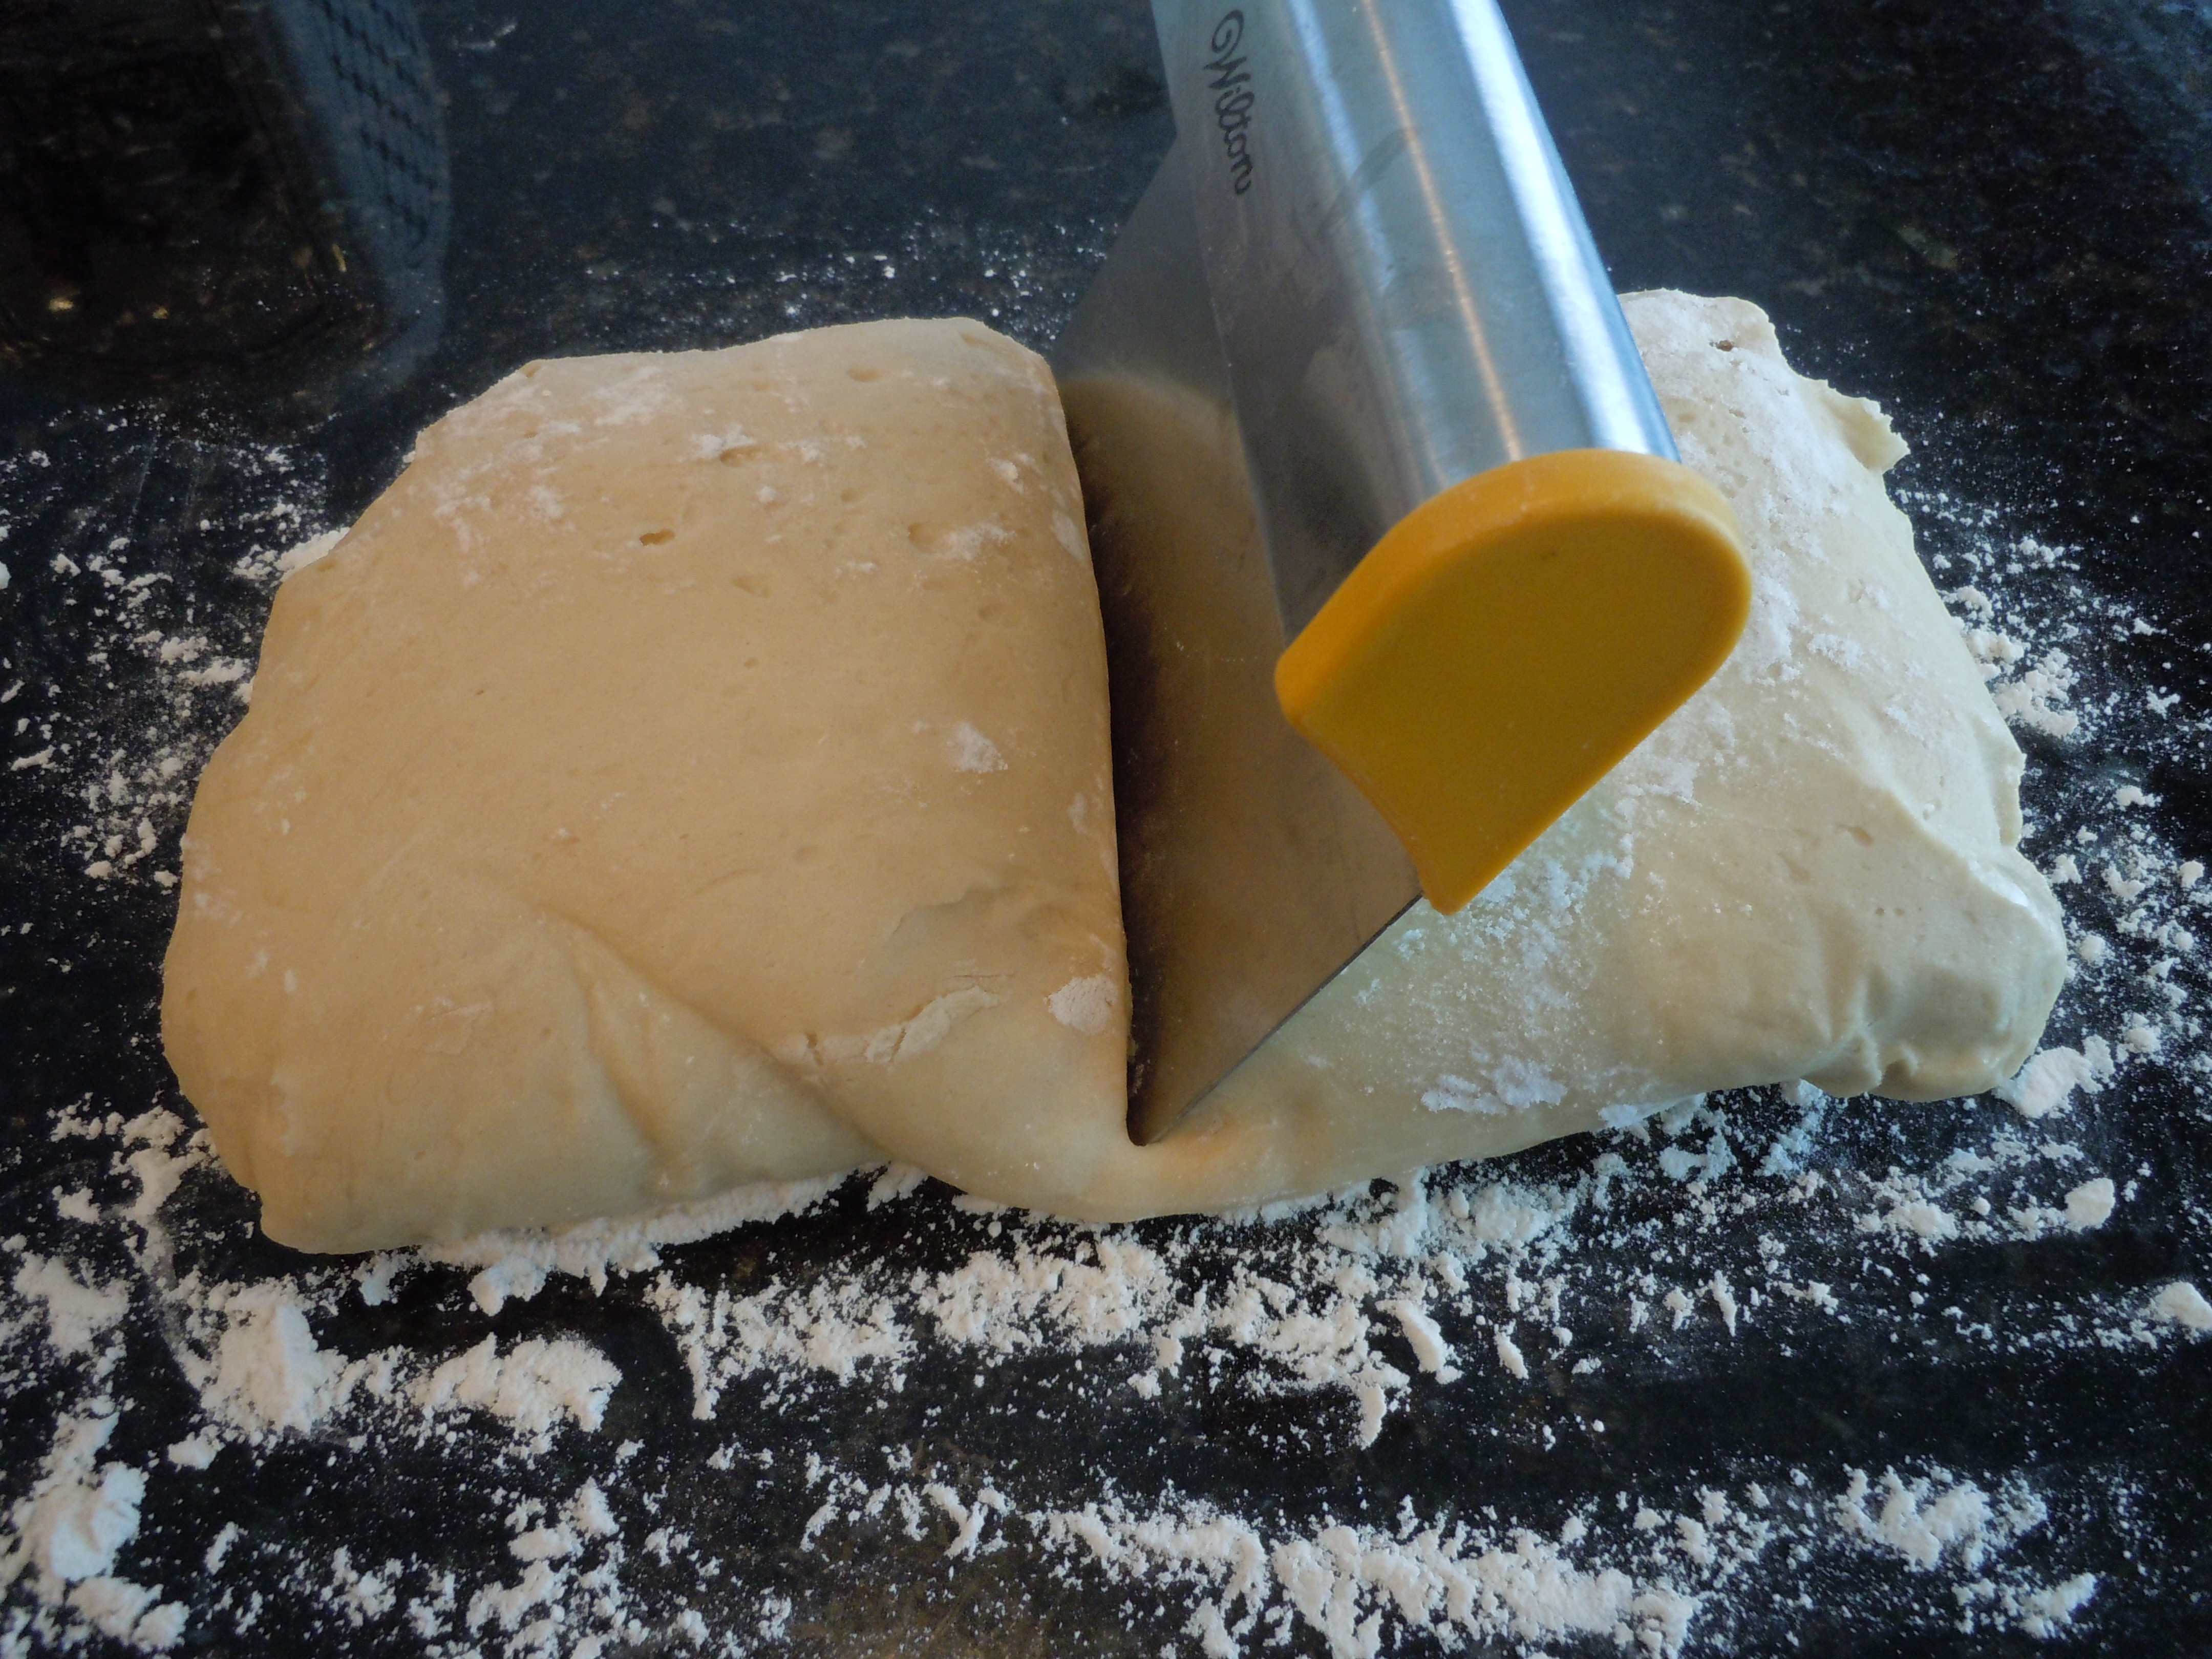
When you are ready to make the rolls just cut the dough right out of the zip lock with scissors nice and easy…..then turn out the chilled dough onto a floured work surface and divide equally into 24 pieces with a pastry scraper
Roll each piece into a ball then firmly push into the pile of chopped green onion and freshly chopped rosemary and re-roll into a ball again. You can keep some of the rolls plain.
Coat 4 Tbsp of softened butter all over a cookie tray with 1/2″ sides or a 10″ x 15″ baking dish for taller rolls
Place the dough balls into the buttered baking tray, cover with Saran wrap and let them rise for 1-2 hours depending how warm your kitchen is (they need to dbl in size) OR you can put them back into the frig until 1 1/2 hours before you need them then take them rolls back out of the frig and let them begin to rise and double in size
Pre-Heat the oven to 375º
Whisk 1 whole egg with 1 tbsp water and brush a good coating onto the rolls after they rise and before putting them into the oven
Bake for 13-18 minutes until a dark golden color…it depends how warm the rolls got while rising so you’ll need to peak at them to see if they’re golden yet.
TIP: It’s a good idea to warm the stainless steel mixing bowl by running hot water into it before you begin so the cold bowl doesn’t take the necessary temperature of the water down.


 Making Mini Beef Wellington’s for the Oscar’s on CT Style yesterday was a blast! What’s more fun then cooking in the kitchen with friends and family? Well, that’s how it is with Ryan Kristafer and Teresa Dufour! I feel like I’m with my siblings, me being the elder of the trio, as we joke and banter back and forth. I can’t describe to good feeling I get when I leave the WTNH studio at Channel 8. Every single one of them are such great people.
 This Mini Beef Wellington recipe is very easy to make and tastes like a bite of heaven! A piece of filet mignon topped with a mushroom reduction, called Duxelles


 It was a special day on CT Style with Ryan Kristafer and Sarah Cody sharing one of my favorite childhood dishes in memory of my Grandma Reilly. I never did get her recipe for her
  Thanksgiving is one of those holidays that can truly drive you crazy if you don’t do any planning because there are just too many side dishes to make. Needless to say, a little planning goes a long way!
 ready to pop into the oven when your guests arrive giving your house a warm and fuzzy feeling with aromas of homemade baked bread!
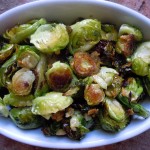
 more…it’s almost difficult to pay attention to conversation surrounded by all the beautiflul stainless steel! You really have to check them out. I will keep you all posted on The Traveling Epicurean Cooking Demos and the “competition” in their amazing kitchens at Page in January of 2018!
 With Easter right around the corner I was excited to be back on CT Style in The Bender Kitchen with Ryan and Teresa so I could share with you my family’s secret recipe for
  Italian tradition always includes a yummy side dish to go along with the ham, leg of lamb, turkey, salmon or tenderlion like manicotti, lasagna, eggplant rollatini or parmesan. Comfort food bringing it all together, an Italian side dish makes such a nice compliment to what ever meat or fish you choose.


 Making Chocolate eclairs with The French Club this week made for an incredibly fun afternoon! The Chocolate eclair shells made from pâte à choux, a french pastry dough, is a cinch to make and so delicious you may find your self wanting to make them this weekend.


 Wait until you taste these decadent sticky buns first hand! Such an easy recipe to follow making these homemade gourmet sticky buns that melt in you mouth! PERFECT for VALENTINE’S DAY morning or any occasion for that matter. The dough is light and chewy. The glaze is soft and caramel like and the cream cheese icing is the best I have ever had. The cream cheese icing has a tablespoon of lemon juice giving it the perfect balance. If you don’t have lemons you can always substitute the citrus with pineapple juice. It’s nice to have the different options with these two toppings to offer to your family and guests.