The Traveling Epicurean


Mediterranean Layered Dip with Christine & Lisa

Mediterranean Layered Dip with Christine & Lisa

Mediterranean layered dip is one of those dishes that you will love to have up your sleeve. It’s super easy, literally takes all of five minutes to make and tastes amazing! All you have to do is layer these wonderful Mediterranean ingredients in a clear serving dish. The reason it’s so quick to make is because you’re using prepared products from the market.  It will not only wow your guests with the presentation but with the fresh flavors too!

IMG_5076
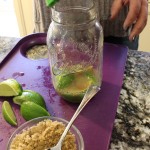
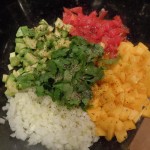
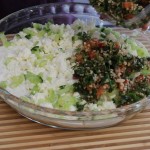
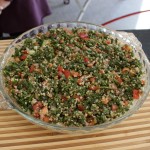
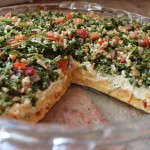
This Mediterranean dip starts off with a layer of hummus, and continue’s on with layer’s of Tzatziki, crumbled sheep’s milk feta, chopped up European cucumber’s, and finally a layer of Tabouleh. Scoop up this delicious dip with cucumber slice’s, and, or pita chip’s. Granted, if you have a little extra time on your hands you could make one or two of the layers that go into the dip IMG_1851
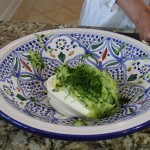
homemade like my best hummus ever, or Tzatziki sauce. Since I’m such a big cheese head I definitely suggest getting decent feta from your local cheese shop, Madison Cheese. The creaminess of a good sheep’s milk feta really add’s a nice touch to the dip.

The first time I had this Mediterranean layered dip was three months ago at a friends tennis party celebrating our kids going to Nationals in South Carolina. My friend, Lisa, brought this Mediterranean layered dip to the party along with a buffalo chicken dip. Boy, did I make out like a bandit! I featured Lisa’s buffalo chicken dip recipe on my show not too long after the party and it has been a big hit, calling it “Best Buffalo Chicken Dip Ever!”. What can I say, I love a good dip!

I then phoned Lisa excited about having her come on my show to share the Mediterranean dip with all of you. Lisa was going to do the show but there was one caveat, she wanted her friend Christine to come too. You see this Mediterranean layered dip recipe wasn’t her recipe. She borrowed it from Christine. So we went directly to the source and had Christine come over to do the show also! 

What fun we had making the Mediterranean layered dip. You can’t go wrong here especially when you have other things to make for your get together. As Lisa say’s in the show, she keeps the ingredients to the dip unopened in her refrigerator at all time’s, just in case! I hope you enjoy this dip many times over. If you need another easy appetizer you should make my baked sweet potato fries & Green Goddess Dip or just go straight to the desserts and try my chocolate crackle cookieschocolate avocado moouse, perfectly chocolate chocolate cake or an applesauce-caramel sundae that will knock your socks off! 

IMG_3966 IMG_3663 iphone pictures 755 IMG_2793 IMG_4085

IMG_5388 IMG_5416 tatzdip

fetadip cucumberdip tabdip

IMG_5422 IMG_5433

Ingredients:

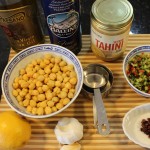
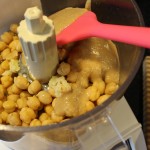
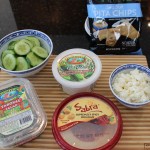
  • 1 container of prepared hummus OR my homemade best hummus ever – You can get the “spicy” BUT it’s very spicy in the prepared hummus so I like it better with the reg. hummus
  • 1 12 oz container of your favorite Tzatziki OR homemade tzatziki
  • 1 12 oz container of your favorite prepared tabouleh
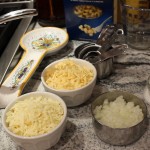
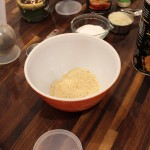
  • 1 cup crumbled sheep milk’s feta – you can it buy pre-packaged but good sheep’s milk feta from you local cheese shop is amazingly creamy 🙂
  • 1 cup chopped European cucumber- (1/2 of the cucumber sliced for dipping and the other 1/2 chopped for one of the layers)
  • 1 bag pita chips
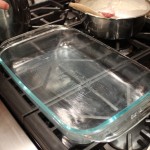
  • 8-10″ clear serving dish with 2″ sides

Directions:

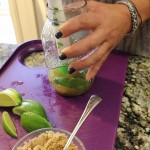
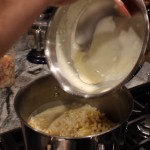
  1. Begin putting the layers into the clear serving dish
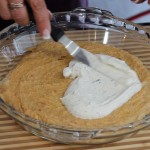
  2. Start with the hummus spreading evenly on the bottom
  3. Next, spread the layer of Tzatziki
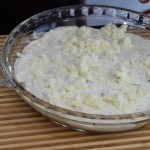
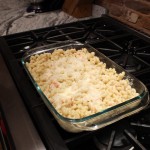
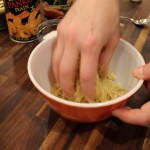
  4. Then crumble the sheep’s milk feta over the Tzatziki
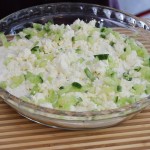
  5. Then a layer of chopped up cucumber
  6. Lastly, a layer of Tabouleh
  7. Serve with cucumber slices and pita chips
  8. You can keep the Mediterranean layered dip like this in the refrigerator for up to one day ahead … enjoy 🙂

Lobster Mac & Cheese at David & Eileen’s

Lobster Mac & Cheese at David & Eileen’s

With this homemade gourmet lobster mac & cheese at David & Eileen’s you get the best of both worlds! Two of my very favorite things to eat all in the same dish! What more could you ask for? What, did someone say “smoked Gouda, please”? The Lobster goes with out saying and for those of you who appreciate that slightly salty, yet sweet and rich in every meaty bite know what I’m talking about. Then to add this succulent lobster to pasta that’s covered in a delicate, smokey, cheesy sauce put’s it right over the top!

When my dear friends David and Eileen suggested making lobster mac & cheese for my cooking show it was like bells went off. I thought it was a great idea. David had discussed the idea with our other foodie friend, Marco, who offered up his recipe to David. Marco and his wife, Sheryl, own an Inn near by called Lathrop Manor where Marco cooks up a five course gourmet breakfast if you’re a guest there.  Marco was also the chef in my “Salmon BLT Sliders at Marco’s Show” from this past summer. Needless to say, our group here loves to cook, eat and have fun. Even frequenting the Farm and Vine Dinner’s at The Ocean House together. 

Sharing family recipes, like Dave and Laurie did with their yummy “Caruso Salad” and the amazing lobster mac & cheese recipe between Marco and David is what brings friends together. Cooking, eating, laughing and enjoying each other’s company is the foundation of life in all cultures around the world . I am grateful to have such wonderful family and friends to do this with.

I hope you enjoy this homemade “Lobster Mac & Cheese at David & Eileen’s” show as much as we did making it! Have fun with this recipe. You may also want to check out my Caesar Salad for a side dish or some Arancini Reuben Balls, stuffed mushrooms ,or baked asparagus wrapped in Prosciutto for an appetizer. Although , we don’t have David’s incredible chocolate meringue pie recipe yet, you could check out a chocolate pecan pie recipe that’s to die for.

DSCN4575 030 iphone pictures 1441 iphone pictures 572 wholepiepecan

ingredlob IMG_5287 IMG_5289

IMG_5291 thumbsauce IMG_5304

lobmac lastthumbolb IMG_5305

IMG_5309 IMG_5314 IMG_5317

baked IMG_5373

Ingredients for Lobster Mac & Cheese at David and Eileen’s:

  • 2 Lobsters – meat from 2 – 1 1/2 lb. steamed lobsters
  • 3 tbsp butter
  • 3 tbsp flour
  • 2 small onion finely chopped (1/2 cup)
  • 3 1/2 cups whole milk
  • 2 cups heavy cream
  • 1/4 cup Dry Sherry -OPTIONAL
  • 2 tsp lobster base OR Lobster SHELLS- OPTIONAL it gives a wonderful flavor to the dish… we did forget to add the base in the show and the lobster mac & cheese was still delicioso!
  • 2 bay leaves
  • 1 1/2 cups smoked Gouda
  • 1 1/2 cups white Cabot cheddar
  • 1 cup mozzarella (I added in the mozzarella)
  • 1/4 cup grated Parmesan
  • 1 lb. cellentani pasta or elbow
  • s&p
  • 2 tbsp rm temp butter for coating the baking dish

Topping Ingredients:

  • 1/4 cup panko breadcrumbs
  • 1/2 cup grated Parmesan
  • 1/4 tsp garlic granules
  • 1/4 tsp onion granules
  • 1 tbsp olive oil
  • 1 tbsp melted butter
  • 4 pieces cooked and chopped bacon – Bacon OPTIONAL  (DO NOT use Maple Flavored Bacon)

Directions for Lobster Mac & Cheese at David and Eileen’s:

  1. Per-Heat oven to 350º on CONVECTION (convection helps to toast the bread crumbs without overbaking and curdling the cheese sauce)
  2. Coat the baking dish with 2 tbsp rm temp butter and set aside
  3. Cook Pasta til firm in salted water, al-dente, 5 minutes
  4. Drain and rinse to cool pasta and set back in the same pan
  5. Melt butter in sauté pan
  6. Sauté the chopped onion until soft and translucent
  7. Add a s&p
  8. Add flour to onions to make a roux
  9. Continue on stove stirring mixture for 1 minute to cook out raw flour flavor
  10. Slowly add milk & cream to roux while continuing to whisk so as not to get lumps
  11. Add in bay leaves
  12. Cook over medium heat while stirring until sauce thickens
  13. Taste here to see if you need more salt and pepper
  14. Add in 1/4 cup Dry Sherry
  15. OPTIONAL:  Add in lobster base OR LOBSTER SHELLS and simmer for 10 minutes
  16. Remove the shells if you added them and discard
  17. Turn heat to low and add in smoked Gouda, cheddar & mozzarella while whisking for 30 seconds ONLY, then remove from heat immediately and continue to whisk until all the cheese is melted
  18. Sauce should have consistency of heavy cream
  19. Stir lobster meat into the sauce to infuse flavors
  20. Then pour lobster sauce over al-dente pasta and mix until combined
  21. Transfer to an oven safe baking dish
  22. Sprinkle in 1/4 cup Parmesan and mix gently
  23. Make the breadcrumbs by combining breadcrumbs, parmesan, onion and garlic granules, olive oil & butter and bacon
  24. Mix with your hands or a spoon and sprinkle evenly over the lobster mac & cheese
  25. Bake in a 350º oven for 25-30 minutes until slightly bubbly on the edges
  26. NOTE: DO NOT OVER BAKED OR CHEESE SAUCE WILL CURDLE!!!!
  27. NOTE: The pasta will absorb a lot of liquid in the beginning when you first mix it, AND then when you bake it, AND as it sits, AND then as it cools, so it’s a good thing to have a little extra sauce in the beginning …it will keep absorbing -you don’t want a dry lobster mac and cheese sauce 🙂

Happy Roasted Chic Peas!

Happy Roasted Chic Peas!

iphone pictures 970
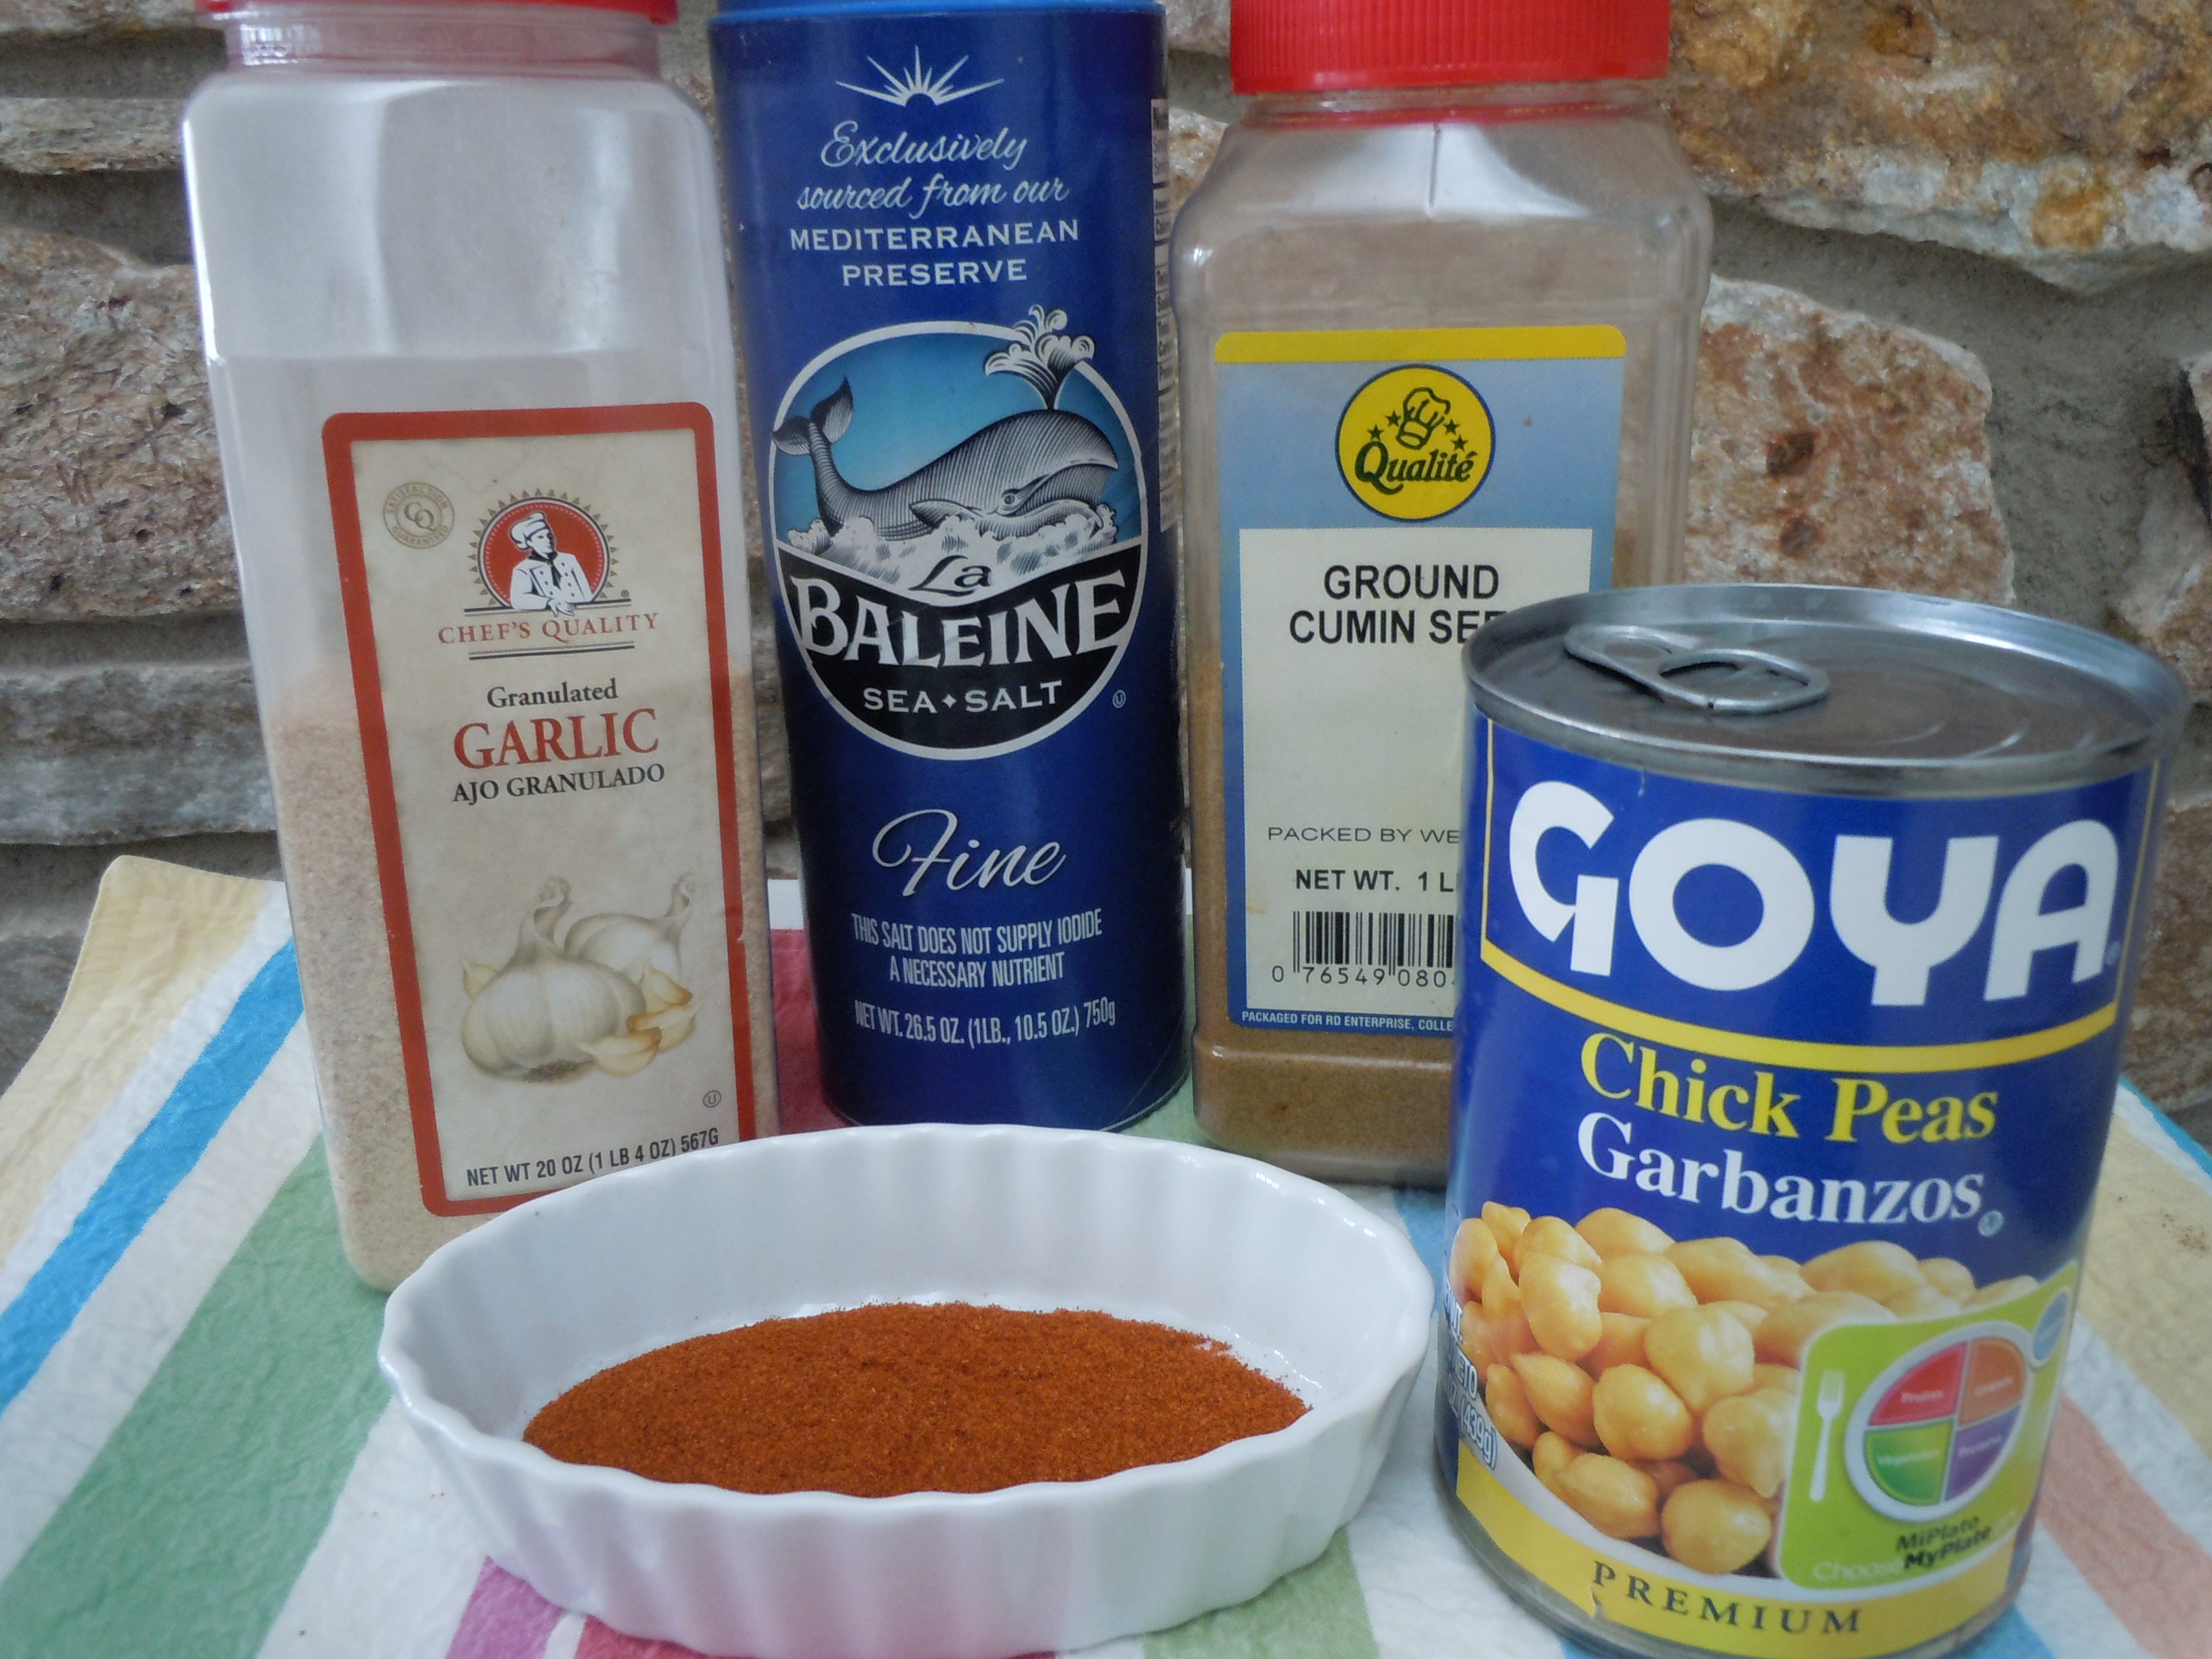
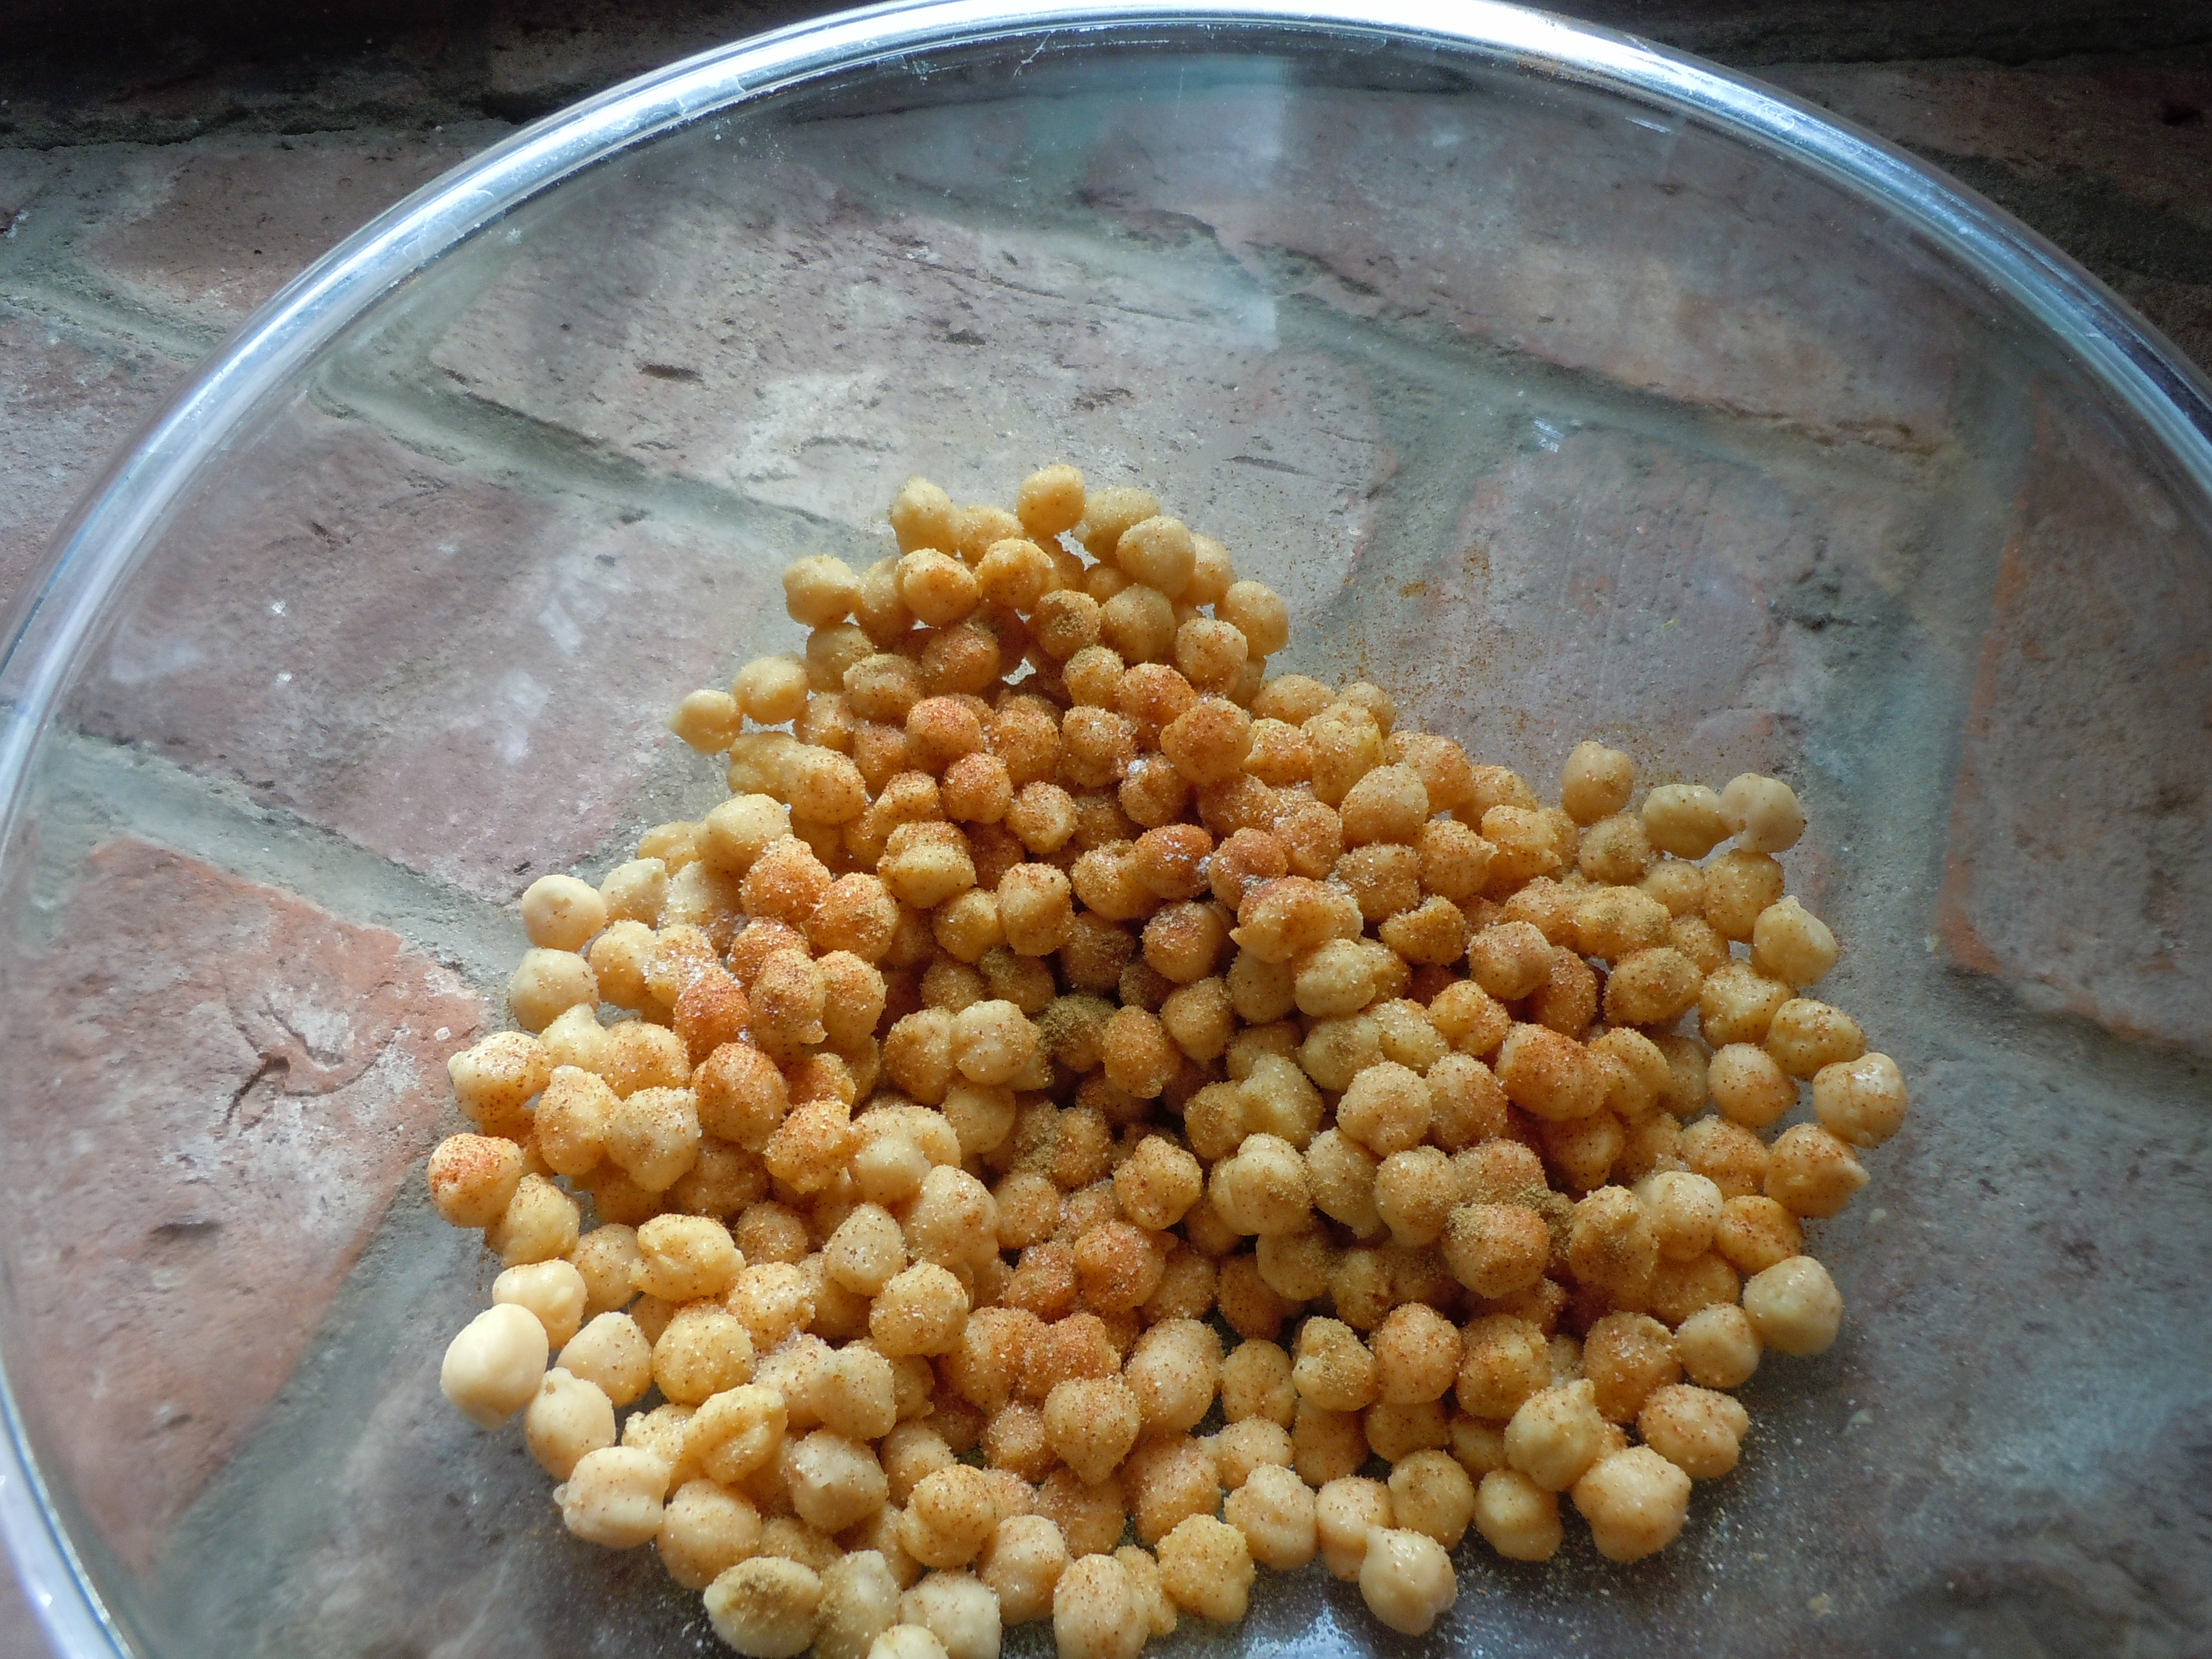
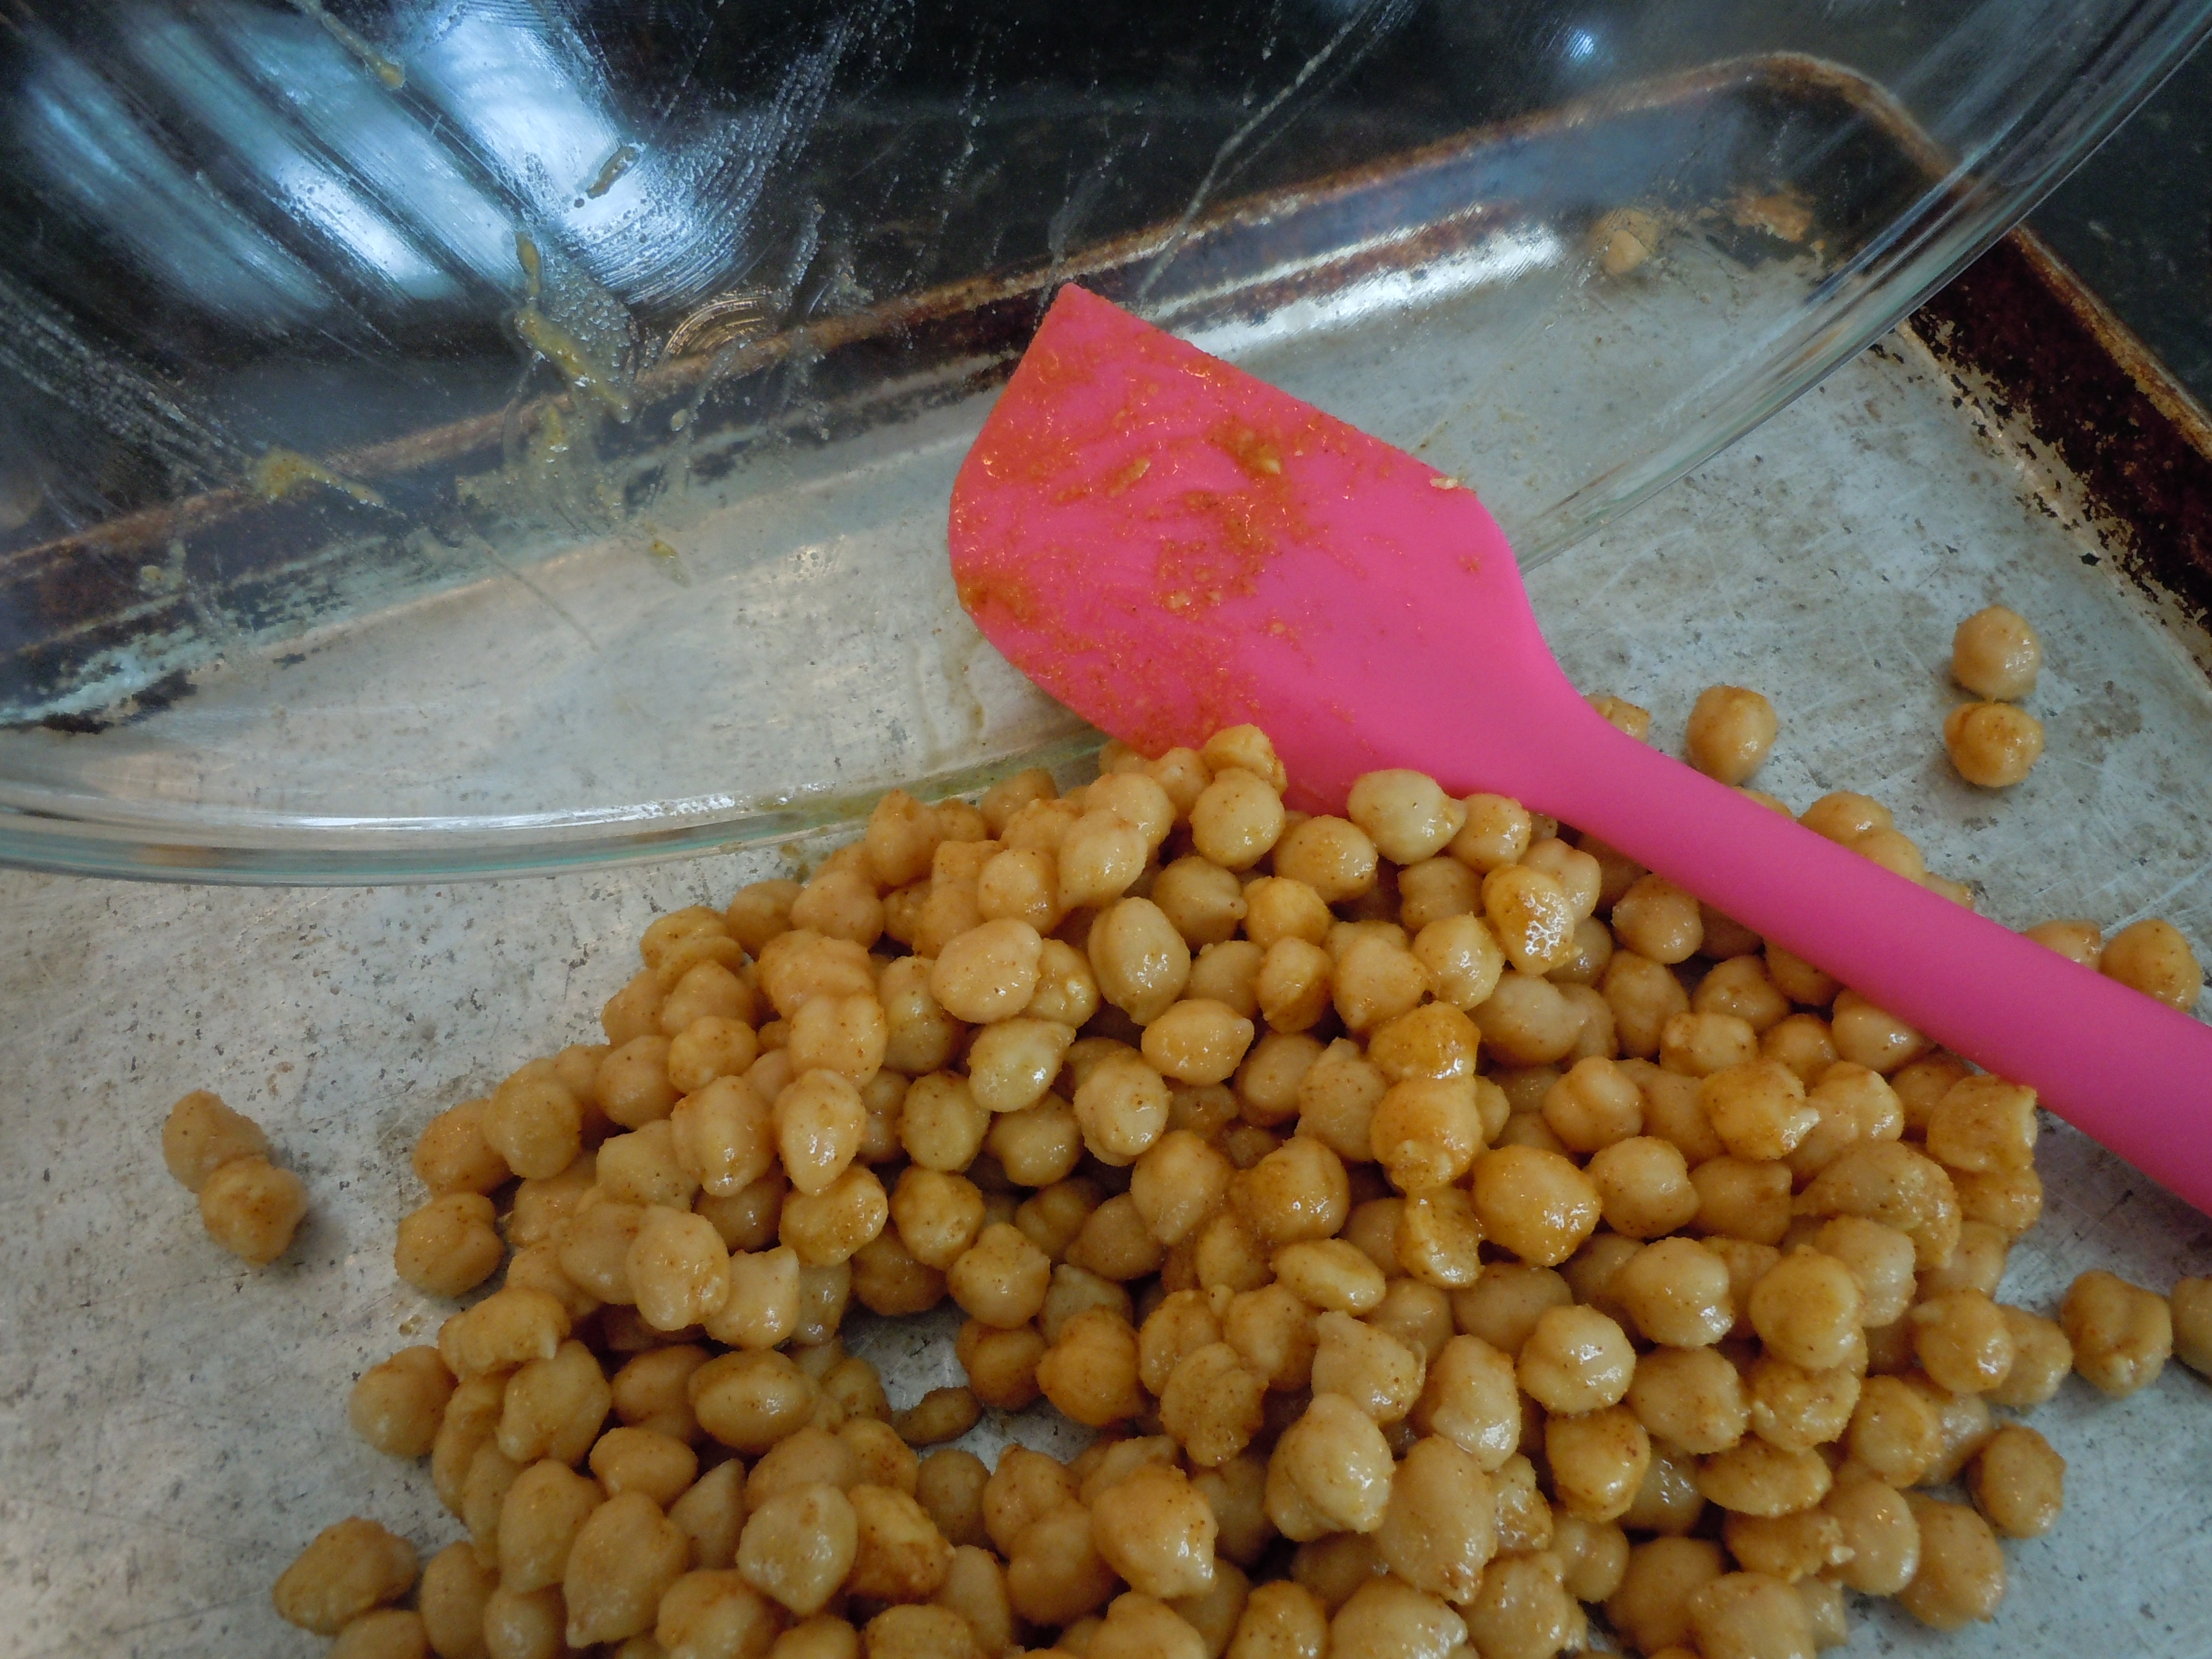
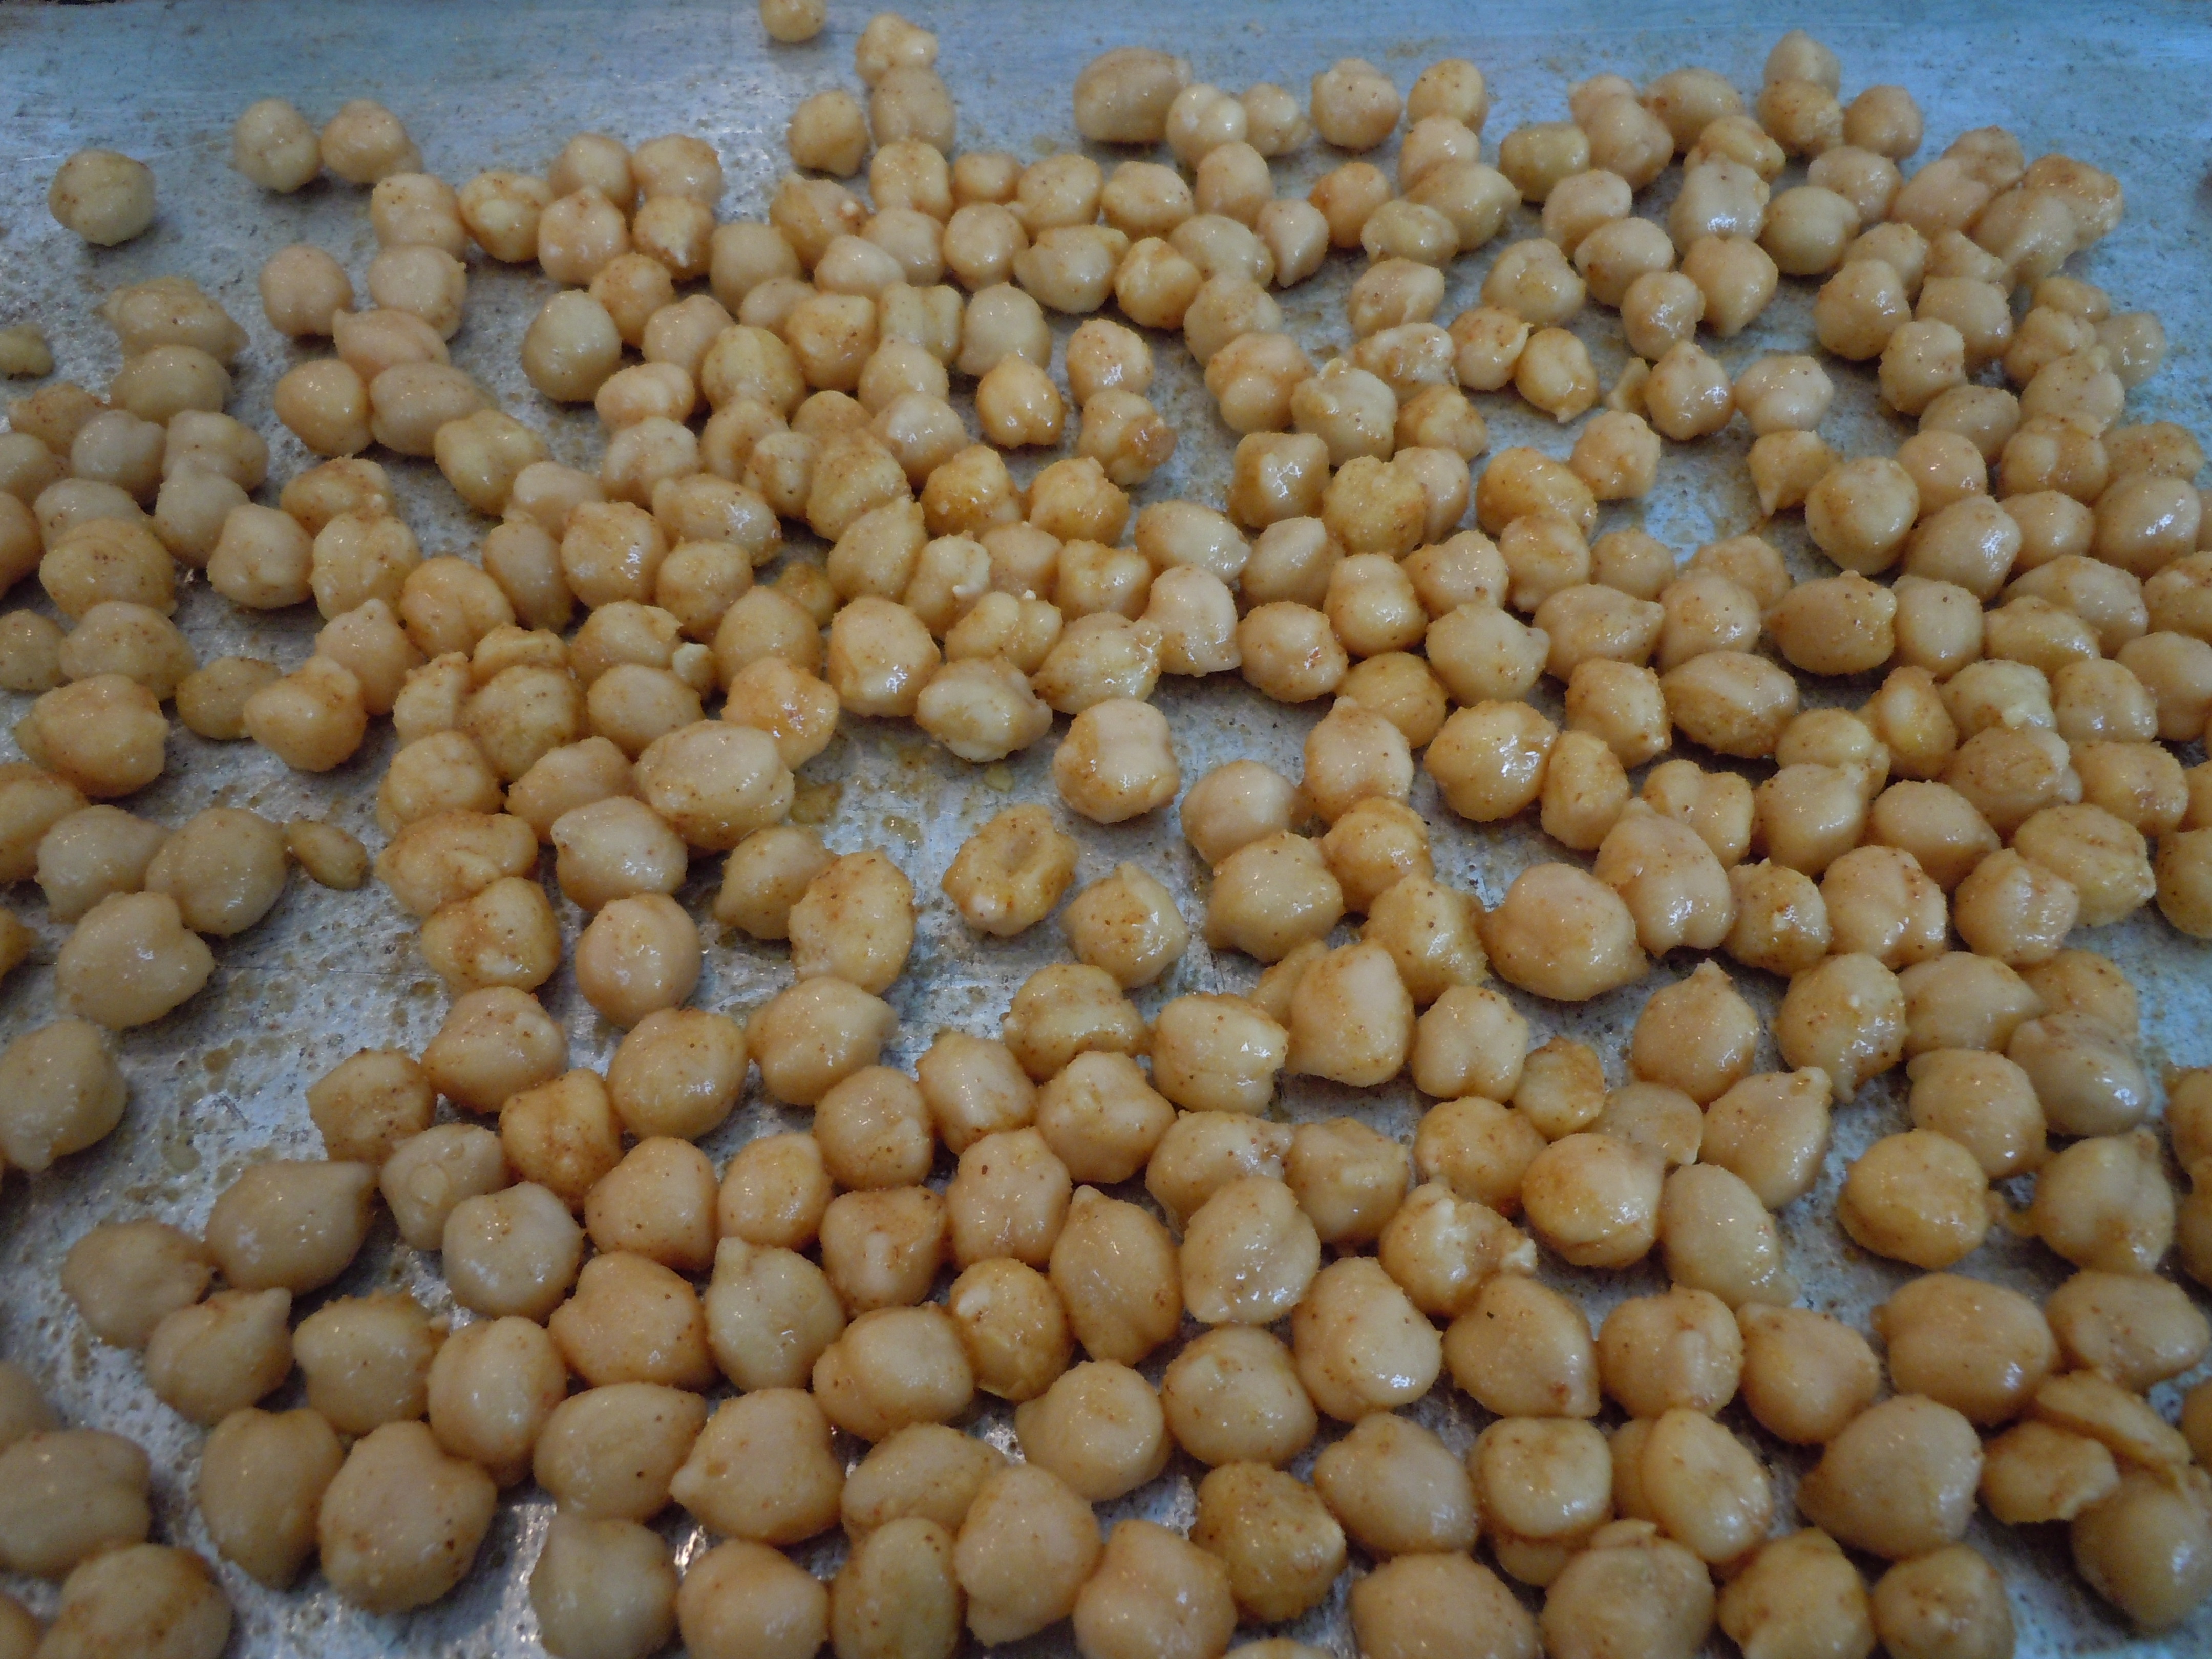
These roasted chick peas are a tasty and healthy treat that will definitely put a smile on your face. My daughter, Bella, thought it only logical that the name should be “happy” roasted chic peas if they make you smile like that and “because they are just happy”… lol

It’s amazing how this creamy bean can turn into this delicious crunchy snack. You are going to love them as much as I do. After being pleasantly surprised by the full flavored crunch you get with this roasted bean you’ll be back for seconds! A golfing friend of mine, Lisa, turned me on to these roasted chick peas a few years back. I’ve been happily making them ever since.

These roasted chic peas are wicked easy to make and a great on the go healthy snack. What’s so fun about making these happy roasted chic peas is you can totally change up the spices making them as spicy and flavorful as you want. Add in a 1/4 tsp of smoked paprika, chipotle pepper, or go for some Indian spices like a coriander/cumin combo, or one of my all time favorite spice’s garam masala. Garam masala differs depending on what region it’s from but basically it’s a combination of black pepper, mace, cinnamon, cloves, cardamons and nutmeg so you’ll get a big burst of flavor from that one alone!

After you happily roast these chic peas you may find yourself wanting to make my baked asparagus wrapped in prosciutto, zucchini torta or even some baked coconut shrimp.

iphone pictures  iphone pictures 953  iphone pictures 954

iphone pictures 956  iphone pictures 957  iphone pictures 958

iphone pictures 959  iphone pictures 960  iphone pictures 968

Ingredients:

  • 2 cans chick peas
  • 3 Tbsp olive oil
  • 1/2 tsp garlic granules
  • 1/2 tsp onion granules
  • 1/4 tsp cayenne pepper OR 1/4 tsp finely ground blk pepper for flavorful but not spicy
  • 1/4 tsp cumin
  • OPTIONAL: a few dashes of Siracha for a little extra spice
  • 1/2 tsp fine sea salt -1/4 before baking and 1/4 after they are roasted

Directions:

  1. Pre-heat oven to 450º.
  2. Drain and rinse 2 cans of chick peas.
  3. Gently rub and pat dry with paper towels.
  4. This action will loosen the skins off of the chick peas (you don’t have to get off every single chick peas skin..this just naturally happens as you are patting them dry).
  5. Put the chick peas into a medium bowl and add olive oil and spices.
  6. Mix and turn out onto a cookie sheet.
  7. Put them into the oven and bake for approx. 35 minutes.
  8. Shake the pan rolling around the chick peas every 10 minutes…at 25 minutes, 15 minutes and DEFINITELY at 5 minutes
  9. They will burn quickly at the end so you need to keep an eye on them especially during the last 5 minutes.
  10. Remove the chic peas from the oven and sprinkle with the other 1/4 tsp salt and let cool on tray

Spanakopita at Dana’s

Spanakopita at Dana’s

When you bite into the buttery, flaky pastry layers with the creamy sheep’s milk feta and ricotta-spinach filling you’ll agree that Spanakopita, a classic Greek dish, is so worth the effort. We neatly fold this delicate pastry dough, with a tablespoon of this amazing spinach mixture, into triangles for the perfect little appetizer shape that just melts in your mouth. The #4 fillo pastry dough becomes this delicate shell making for an elegant nibble.

This recipe came from my good friend, Dana, who happens to be a wonderful chef. In fact, Dana and her husband are opening up a restaurant in early spring at The Goodwin Golf Course called Birdie Cafe. Dana is half Greek and half Italian so this was family tradition for her growing up making these with her mother. My great grandmother was born in Crete making me one eighth Greek. So with a hint of Greek lineage in my blood I’m thinking that’s what drives my palate towards these Mediterranean flavors that I adore so much.

Spending the day in Dana’s kitchen with our other college friend, Lynn, making these spanakopita was ideal considering we were having so much fun it didn’t seem like work at all. We didn’t even realize how much we were accomplishing. Lynn, who manage’s Sam The Clam Pub & Grub in Southington, CT introduced us to a Greek Mojito with Metaxa, a Greek liquer, that was very delicious.

The fact that you can easily make these spanakopita triangles ahead of time which freeze so nicely for future dates is ideal for parties. So start making this spanakopita now for your Super Bowl get together! Invite over a few friends to make the spanakopita and the task goes really quickly and it’s a lot of fun. Add in our Greek Metaxa Mojito’s and I think you have yourself a pre-party to the party just like the one at Dana’s.

To cut down on the time and effort and not forgo making this delectable dish you could make one big tray of the spanakopita. In a 9 x 13 x 3 (or similar size) baking dish lay down 9 full sheets of phyllo pastry dough brushing in between each layer with butter of course. Next, lay in the entire bowl of spinach filling, then 9 more buttered layers of phyllo with a finishing buttered coating right on the top. If you are baking this one tray be sure to refrigerate the the spanakopita for twenty minutes before baking it. This will firm up the pastry dough so you can run a knife through the top layers of dough cutting in only about 1/4″ to give you pre-cut lines in the serving sizes you’ll want. It makes cutting the spanakopita much easier after it comes out of the oven. Of course, a tray this size will need to bake for about 55-60 on 350º instead of the 20 minutes the triangles take. The phyllo pastry dough is very forgiving. If your sheets are larger then the pan giving you extra dough on the sides when lining the baking dish just fold them over. You won’t notice that the sides may be folded over after it’s baked because it will be all flaky and puffed anyways and still taste incredible.

You may want to serve up some other appetizers like Prosciutto wrapped asparagus, a caesar salad with the spanakopita, turkey stuffed peppers are one of my very favorite or maybe something light like an Asian noodle & shrimp salad only to end with Pavlova or chocolate avocado mousse! To make a similar dressing to the one Dana makes in the show check out my amazing TANGERINE DRESSING here!

IMG_4768 DSCN4572 iphone pictures 1015 iphone pictures 1402 iphone pictures 1316

bowlspan IMG_5141 cutpastryh

butterpastryjpg spankopitathumb folder

butterfoldjpg IMG_5156 danaspankop

cookedspan

INGREDIENTS FOR Spanakopita – will make approx. 30 spankopita triangles :

  • 1 pkg. #4 Phyllo Pastry dough or Fillo pastry dough put into frig over night if frozen
  • 1 cup (1 pkg) thawed and fully drained (squeezed) frozen chopped spinach
  • 2 cup whole milk ricotta
  • 1 cup sheep’s milk feta cheese
  • 1 lb. melted butter
  • 3 scallions finely chopped white and green parts OR 2 tbsp finely chopped shallots
  • 2 tbsp each chopped parsley and fresh chopped dill
  • 1/4 tsp each nutmeg and black pepper

DIRECTIONS FOR Spanakopita:

  1. Pre-heat oven to 350º
  2. Take Phyllo dough out of the frig to bring to room temperature but still in the box
  3. Drain and squeeze ALL the water from chopped thawed spinach
  4. In a large bowl add 2 cup ricotta, 1 cup drained spinach, 1 cup sheep’s feta, scallions or shallots, parsley, dill, nutmeg and pepper – stir gently to mix and set aside
  5. Unroll Phyllo on counter top
  6. Cut the 15″ long pastry dough with a sharp knife into 3 3/4″ pieces getting 4 across
  7. Start to lay out the strips 4 across a work surface – always keep a layer of saran wrap and a damp dish towel on top of the layers you’re not using
  8. Brush thin coat of butter in between each layer til you have 3 layers down in each of the 4 rows
  9. Put 1 tbsp of ricotta-spinach mixture in the right bottom corner of the phyllo sheet – you can use a sm. cookie dough scoop to help keep the tbsp all the same size – this will help you to move along quicker
  10. Fold right corner over so the bottom edge lines up with the left side, like you are folding a flag
  11. Continue on up until you are at the top and used up all the pastry dough – brush a little butter on the last fold to seal it
  12. Put filled phyllo triangles onto a baking tray about 9 per tray
  13. Bake each tray of spanakopita triangles for 20 minutes on 350º until golden
  14. Be sure to let the spsankopita cool a little – the filling will be hot 🙂
  15. You may have 1/2-3/4 cup of filling leftovers so freeze it, roll up in pounded-out chicken breasts, stuff bone-in chicken breasts under the skin with the filling and bake or just buy extra phyllo…enjoy 🙂

IMG_5123 limemohito metaxa

seltzermojito icemohito shakemohito

drinksmohito

INGREDIENTS for the METAXA MOJITO’S:

  • 1 cup Metaxa Greek Liquer
  • 1 1/2 cups soda water
  • 1 fresh lime cut into wedges
  • 1 fresh lemon juiced = 1/4 cup lemon juice
  • 2 tbsp light brown sugar
  • 4 mint leaves or basil leaves

DIRECTIONS for making the Metaxa Mojito’s:

  1. Mint leaves muddled with fresh lime wedges and light brown sugar in a glass cocktail mixer
  2. Add fresh lemon juice, Metaxa, soda water and ice, shake and serve with mint or basil garnish…enjoy 🙂

Best Hummus Ever

Best Hummus Ever!

My Best Hummus Ever recipe is going to become a go to dish for you when you see how gosh darn easy it is to make it yourself! Chic peas, tahini paste, garlic, olive oil, fresh lemon juice, and salt in a food processor, purée until smooth and violà you have an amazing dip. Wait, there is one caveat to this best hummus ever recipe. My secret to a silky, smooth homemade hummus is removing the skins from the chic peas. This is actually a very easy task that will take you about five to ten minutes and it makes all the difference in the texture and taste for your hummus. It’s still quicker than taking that trip to the market for the already prepared hummus.

Hummus is such a versatile kind of dip where you can change it up in so many ways to get a new flavor. You can add a teaspoon of cumin to give it a bright, floral and lemony flavor. You could add in smoked paprika, hot sauce, or even throw in some roasted red peppers when you go to purée the chic peas for a beautiful reddish roasted pepper hummus. The options really are endless so don’t be afraid to have some fun here.

Biting the bullet and buying the jar of Tahini paste is totally worth it because it will last a long, long time and you will get many, many hummus dishes from this! For all you local followers I buy my jar of Tahini paste at FoodWorks Natural Market in Guilford, CT.

If you like this best hummus ever recipe you may want to try my Michigan Sauce, yogurt chicken kabobs and tzatziki beef bourguignon where you make an amazing Indian spiced tomato-cream dish on the 2nd day or Sea bass with green goddess sauce. Then you can end the meal with the cake that won’t last or an apple sauce-caramel sundae!

150150boeuf

iphone pictures 1194

iphone pictures 2345

IMG_4085

IMG_3072


IMG_5029

IMG_5056

IMG_5058


IMG_5076

IMG_5097


INGREDIENTS:

  • 1 can chic peas – garbanzo beans drained, rinsed and with skins removed (I used Goya)
  • 3 tbsp – In the show I said 1/4 cup but I actually think 3 tbsp is better (a little milder)… Tahini has a strong flavor.
  • Food Works in Guilford has Tahini Paste (note: this is a good investment because it will last a long, long time and you will get many, many hummus dishes from it 🙂
  • 1 tbsp fresh lemon juice
  • 1 ex-large garlic clove put thru press for a fine mash
  • 1/4 cup olive oil
  • 1/2 tsp sea salt – will add 1/4 tsp at a time
  • 1-3 tbsp water
  • a few dashes of Siracha or your favorite hot sauce (you can find Siracha near the Tabasco in the store)

DIRECTIONS:

  • Drain, wash and remove the skins from the chic peas by gently squeezing the peas between your fingers to loosen and remove the outer skins
  • Put the chic peas, tahini paste, a garlic clove put thru garlic press, olive oil and fresh lemon juice in the food processor and run for 1 minute
  • Stop and scrap down the sides of the processor
  • Add 1/4 tsp of sea salt, 1 tbsp of water and purée 1 minute
  • Stop and taste, you will probably need to add 1 tsp sea salt more and 1 tbsp water getting it to thin it out a bit (adding the water aerates the dip lightening it up)
  • Run the processor for 1 more minute
  • Check to make sure hummus is the thickness you want – you may want 1 tbsp more of water
  • Turn out hummus into a bowl and garnish with a drizzle of olive oil
  • And, OR Sprinkle with paprika, OR top with 2 tbsp chopped kalamata olives or cucumber salad in the center of the hummus
  • Serve with blue chips, pita or naan
  • CUCUMBER SALAD: 1/4 cup finely chopped European cucumber, 2 tbsp finely chopped cherry tomatoes, 1 tbsp finely chopped kalamata olive and red onion, 1 tsp olive oil, 1 tbsp finely chopped cilantro and a sprinkle of s & p – combine all ingredients in a sm bowl

Holiday Appetizer’s

Holiday Appetizer’s

iphone pictures 572The first holiday appetizer I have for you is my baked asparagus wrapped in Prosciutto that has a smear of a cream cheese, sweet onion and Parmesan spread on the Prosciutto. These Proscuitto wrapped Asparagus are one of my favorite appetizers and can be a topping to a salad or a pretty side vegetable to lunch or dinner. I first had these delicious little bundles at my sister-in-law’s, Anita’s house, twenty years ago.  She is an amazing chef who’s always cooking up a storm. They can totally be made a day ahead, placed on a cookie tray and stored in the frig until you need them. The asparagus is blanched and shocked in an ice bath to stop the cooking and to keep that vibrant green color before they are wrapped with Proscuitto. You want to make sure you buy “Proscuitto di Parma” for this holiday appetizer because it’s the best and most delicate in flavor.  There are other tasty Prosciutto’s out there but they won’t be as tender as the Parma and may get too salty or waxy after baking.

The second quick and easy, gourmet tidbit i have for you are my holiday crostinis with Gorgonzola, fresh chopped tomato, basil and garlic that bakes for seven minutes. These take the same amount of time as the asparagus-Prosciutto appetizer’s. How convenient is that? You can buy already crumbled Gorgonzola at the market in small plastic containers. A little chopping of cherry or grape tomatoes and basil and voilà! The crostinis are beyond simple to make and you can check out that recipe by the hyper-link.

The last wicked easy and delicious holiday appetizer I have for you is something a little sweet. It’s a dollop of goat cheese, fig jam, fresh chopped pear and a mint leave all in a pre-baked fillo shell. Yes, I said pre-baked!!! Can you believe that one? This one you serve at room temperature so all you need to do is thaw the pre-baked shells which takes all of two minutes. It just can’t get any easier than that.

You can totally be flexible with these perfect little holiday appetizer’s too. If you don’t like Gorgonzola switch it out with some cubed up fresh mozzarella to top the crostinis and tomato-basil mixture. As for the pre-baked phylo cups, you can always swap out the goat cheese for a slice of brie if that’s more your taste.

I hope these last minute holiday appetizer’s help you out for your party! I wish you all a joyous New Year! You can certainly swap out or add in other hors d’ oeurves if you are feeling ambitious like baked coconut shrimp, zucchini torta, roasted chick peas, or smoked salmon on crostinis with cream cheese-caper spread. Enjoy 😉

iphone pictures 448

iphone pictures 1063

iphone pictures 970

iphone pictures 777


Baked Asparagus Wrapped in Prosciutto

iphone pictures 538 iphone pictures 601 iphone pictures 529

iphone pictures 532 iphone pictures 534 iphone pictures 540

iphone pictures 544 iphone pictures 546 iphone pictures 545

iphone pictures 552 iphone pictures 554 iphone pictures 560

Ingredients:

  • 20 large asparagus (the bigger the better)
  • 1/4 lb Prosciutto di Parma sliced thinly
  • 4 oz cream cheese room temp (Philadelphia)
  • 1 Tbsp grated vidalia onion (yellow or white is fine too)
  • 1/2 cup grated Parmesan cheese
  • 1 Tsp fresh lemon juice

Directions:

  1. Pre-heat the oven to 400º.
  2. Hold the asparagus with your fingers in the middle and on the end and bend.
  3. The asparagus will break where it’s supposed to.
  4. Line them up and cut evenly across the bottom so they are all at a consistent length.
  5. Bring salted water to a boil and add in asparagus …Blanch 2 minutes
  6. Drain and put into a ice bath.
  7. Dry the asparagus with paper towels.
  8. At this point you can pop them into a zip lock and into the frig until you are ready for them.
  9. Mix together in a small bowl the room temperature cream cheese, grated onion, Parmesan and lemon juice just til combined
  10. Take a piece of Prosciutto and smear 1 Tbsp of the cream cheese mixture down the length of it.
  11. Place the asparagus on a bit of a diagonal (see photo) and roll up.
  12. Place onto an ungreased cookie sheet and bake for 7 minutes – you are heating thru only
  13. Use a spatula to remove from pan and be sure to flip them over when you plate them to see the lovely caramelization on the under side.
  14. Optional: Drizzle a little olive oil, a fresh squeeze of lemon and some shaves of Parmesan on top for a little extra!

iphone pictures 545

 TIP:  Using a micro-plane grater or rasp to grate the onion is a wonderful culinary tool which actually started out back in the day as a wood planer for woodworkers!


Baked Crostinis with Gorgonzola, Fresh Tomato, Basil & Garlic

gorgon mixgorgan crostitoma

withgorg gorgtray IMG_4768

Ingredients:

  • 1 french baguette sliced into 20 – 1/4″ pieces
  • Crostini Recipe
  • 1 cup chopped cherry or grape tomatoes
  • 2 tbsp fresh julienne basil
  • 1 garlic clove put thru garlic press
  • dash salt and pepper
  • 1 small container crumbled Gorgonzola cheese 4 oz. OR diced up fresh Mozzarella

Directions:

  1. Pre-heat oven to 400º
  2. Top crostini with tomato-basil mixture and a tsp of crumbled Gorgonzola OR Mozzarella
  3. Bake for 7 minutes

Goat Cheese, Fig Jam, Fresh Pear and Mint in Pre-Baked Fillo Cups

fillocup withjam endgoat

Ingredients:

  • 1-2 pkg of pre-baked fillo cups (if you can’t find these just buy pre-formed pastry cups that you can quickly bake)
  • 2 oz. goat cheese OR wedge of your favorite dbl cream brie…Saint Albray for example
  • fig jam
  • 1/2 cup fresh chopped pear
  • Wedge of fresh lemon
  • fresh peppermint leaves

Directions:

  1. Chopped the pear and give a squeeze of a wedge of lemon
  2. Thaw the pre-baked fillo cups
  3. Place fresh mint leaf into cups
  4. Place a dollop of goat cheese or slice of brie into the cup
  5. Top with 1/2 tsp of fig jam
  6. Then top with diced fresh pear
  7. Serve room temperature


Easy Icebox Dinner Rolls

Easy Icebox Dinner Rolls

Laura, my loyal friend and follower making the icebox rolls for the holidays!
2014 – Laura, my loyal friend and follower making the icebox rolls for the holidays!

There’s nothing better than the aromas of homemade fresh baked bread, sweet onion and rosemary to wet the appetite! I was thrilled to find this icebox dinner roll recipe about fifteen years ago and have been making them ever since. The recipe card was from “easytobake” and I have tried to access their website but it doesn’t exist anymore. I have made many different bread dough’s in my life, kneading by hand, proofing, kneading again and it can all be exhausting. The whole idea behind icebox dough is that kneading is not necessary. The flavor and soft, tender texture develops as it proofs right in the refrigerator. Once you see how easy it is to make these melt in your mouth icebox dinner rolls you may never pick up store bought rolls again.

Laura making the icebox rolls for her 2015 Thanksgiving!

I have added lots of chopped green onion and fresh rosemary in my rolls but they are just as delicious plain too! It takes all of fifteen minutes to make this dough and can be made up to 4 days ahead. The dough stays in the refrigerator, hence the name “icebox” rolls. You take the dough out of the frig the morning of your dinner party. It get’s formed into dough balls mixing in chopped green onion and fresh rosemary. Then the rolls get lined up on a buttery baking tray and back into the frig.  Two hours before you want to serve the homemade icebox dinner rolls you take them out of the frig and let them rise for an hour and a half to two hours. When they have doubled in size, give them an egg wash for a little shine, then bake.

iphone pictures 1015

150150boeuf

025

IMG_2793

IMG_2283


Hope you enjoy these scrumptious “easy icebox dinner rolls” as much as our family and friends do.  They will be asking you for the recipe for sure! These homemade dinner rolls aren’t just for holidays they are great for any day. Try them with my turkey stuffed peppers where you can dunk them in the sauce and pepper juices, the Au Jus in my Boeuf Bourguignon, or Bolognese Sauce. After all this savoriness you may need a chocolate fix with my perfectly chocolate chocolate cake or for a light and refreshing sweet try this amazing Pavlova!

iphone pictures 683  iphone pictures 686  iphone pictures 687

iphone pictures 688  iphone pictures 641  iphone pictures 643

iphone pictures 646  iphone pictures 692  iphone pictures 693

iphone pictures 694  iphone pictures 695  iphone pictures 697

iphone pictures 701  iphone pictures 702

Ingredients: Makes 24 Dinner Rolls

  • 4 1/2 cups all purpose flour
  • 2 packets active dry yeast (NOT rapid rise)
  • 1 cup warm water (105 -115 degrees)
  • 3 lg eggs (if you use extra large eggs you will need to add a little more flour to compensate)
  • 1/2 cup melted butter
  • 1/2 cup sugar
  • 1 Tsp salt
  • 2 bunches of green onions chopped to 1/8″ pieces -(from white/greenish part to ends)
  • 1/2 cup fresh chopped rosemary
  • 1/3 stick room temp butter to coat the cookie tray or inside of the 10″x 15″ baking dish

Directions:  

  1. Using a KitchenAid mixer OR lg mixing bowl pour in the 2 packets of yeast then add in 1 cup of 105º – 110 º  water.
  2. Then add 1 Tbsp of sugar (from the 1/2 of cup of sugar that you add later) now because it feeds the yeast and really gets it activated.
  3. Let this sit for about 5 minutes and you will see it get foamy.
  4. Add in the eggs, melted butter, sugar, and salt and whisk- make sure the butter is not hot because it can kill the yeast if too hot
  5. Begin to beat in a 1/2 cup of flour at a time using the whisk the whole time until the dough gets too stiff to mix.
  6. Turn the dough out onto a lightly floured surface, place the big ball of dough into a large Ziploc baggy and put it into the refrigerator for 2 hours…. up to 4 days.
  7. When you are ready to make the rolls just cut the dough right out of the zip lock with scissors nice and easy…..then turn out the chilled dough onto a floured work surface and divide equally into 24 pieces with a pastry scraper
  8. Roll each piece into a ball then firmly push into the pile of chopped green onion and freshly chopped rosemary and re-roll into a ball again. You can keep some of the rolls plain.
  9. Coat 4 Tbsp of softened butter all over a cookie tray with 1/2″ sides or a 10″ x 15″ baking dish for taller rolls
  10. Place the dough balls into the buttered baking tray, cover with Saran wrap and let them rise for 1-2 hours depending how warm your kitchen is (they need to dbl in size) OR you can put them back into the frig until 1 1/2 hours before you need them then take them rolls back out of the frig and let them begin to rise and double in size
  11. Pre-Heat the oven to 375º
  12. Whisk 1 whole egg with 1 tbsp water and brush a good coating onto the rolls after they rise and before putting them into the oven
  13. Bake for 13-18 minutes until a dark golden color…it depends how warm the rolls got while rising so you’ll need to peak at them to see if they’re golden yet.

 TIP:   It’s a good idea to warm the stainless steel mixing bowl by running hot water into it before you begin so the cold bowl doesn’t take the necessary temperature of the water down.

Amazing German Pancake!

Amazing German Pancake!

This amazing German pancake is an awesome dish to make for your holiday guests! It’s festive and quite spectacular when your guests see how your pancake has puffed to enormous heights when you take it out of the oven. Not only does it make for a wonderful presentation but it’s made with little effort and can be served for breakfast or as a dessert!

A German pancake is really a giant popover. “Dutch baby” is another name for this pancake and rumor has it that the reason behind this name came about when a chef’s young child couldn’t pronounce the German word for German, “Deutsche”. Supposedly, this mis-pronunciation lead German Pancakes to the alternative name “Dutch Babies”. A couple other names that this German pancake has been called are “Dutch puff” and “Bismark”.

My kids get very excited for that moment when this amazing German pancake comes out of the oven! It has a bit of a custard like texture inside yet very light. We love eating these pancakes and have come to the conclusion that they taste like something in between a pancake, french toast and a crêpe!

My Vermont friends turned me on to this recipe years ago and I have been making them ever since. It’s fun for me to play around with recipes and see what works best so to this recipe I have added another egg, some vanilla and a little cinnamon. You can add grated nutmeg instead if you prefer. Originally, these homemade pancakes were served with lemon and confectioners sugar. I like to served them with confectioners sugar, real maple syrup, fresh blue berries and a dollop of my favorite “Wild Blueberry Preserves” by Bonne Maman, a product of France (sold right in our local market at Stop and Shop). German pancakes are so easy to make, taking on the same amount of time as making ordinary pancakes. The wonderful thing here is you are not glued to the stove pouring batter every few minutes.

Using cast iron is the way to go here because it holds in the heat evenly distributing it throughout the pan but I have made them in other oven proof pans and it comes out great. Some recipes have you pre-heating the pan in the oven, pulling out the rack, pouring in the batter, then pushing the rack back into the oven and in my opinion, this is a disaster waiting to happen since the batter can easily swoosh over the sides causing the oven to smoke ! The easiest way to start these homemade German pancakes is heat the pan in the oven then add butter and whisked, warm batter. The finished product will make you will feel like a french pastry chef all day. This could also make for a great dessert to an impressive dinner with entrees like turkey stuffed peppers, pulled beef tacos & mango salsa or yogurt-chicken kabobs & tzatziki. Enjoy!

tur IMG_3234 iphone pictures 387 IMG_1897 IMG_1826

iphone pictures 1093  iphone pictures 1094  iphone pictures 1099

iphone pictures 1102  iphone pictures 1097  iphone pictures 1098

iphone pictures 1108  iphone pictures 1111  iphone pictures 1114

iphone pictures 1155 IMG_4539 iphone pictures 1118

Ingredients for Traditional German Pancake:

  • 5 extra LG eggs ROOM temperature eggs (place eggs in a bowl of warm water for 20 minutes or leave on counter for 1 hr)
  • 1 cup Milk – WARM the milk (not hot)
  • 1 cup all purpose flour
  • 1/2 Tsp. salt
  • 1/4 Tsp cinnamon
  • 1 Tsp. vanilla
  • 2 Tbsp melted butter (warm)
  • 3 Tbsp butter – cut up to add to pan before you pour in batter

Ingredients for savory German Pancake:

  • 5 extra LG eggs (or 6 large) ROOM TEMP.
  • 1 cup Milk – WARM
  • 1 cup all purpose flour
  • 1/2 Tsp. salt
  • 1/2 cup swiss cheese OR cheddar
  • 1/2 cup thin diced ham OR sauteed mushrooms
  • 1/3 cup green onion OR sauteed sweet onion
  • NOTE: If you are going the cheddar, sauteed mushroom & onion route add 1 cup fresh baby spinach too!
  • 3 Tbsp butter  -cut up into 4 Tbsp (1/2 stick) COLD

Directions:  

  1. Pre-heat oven to 425º
  2. Add the cast iron pan to the oven while pre-heating
  3. Whisk milk, vanilla, salt and flour first in a large bowl
  4. Then whisk in 1 egg at a time just until combined
  5. Whisk in melted butter, final mix of batter should be WARM not cold (you can microwave for 10 seconds at a time and stir in between to get to WARM temperature if need be, DO NOT go longer then 10 seconds at a time in the microwave or batter will cook
  6. Take heated pan out of the pre-heated oven and add in 3 tbsp butter, let melt
  7. Once the butter is melted pour in WARM batter (If making a savory pancake add veggies and cheese now on top of the poured batter)
  8. NOTE: A savory pancake or blueberry pancake will not puff as much a plain German pancake!
  9. Bake for 21 minutes until puffed
  10. Remove from oven and transfer to a plate or cutting board with a spatula and sprinkle with confectioners sugar.
  11. Slice into wedges and serve with maple syrup, warm fresh strawberry jam/sauce (Recipe BELOW) and whipped cream! …mmm!

Ingrediesnts and Directions for EASY STRAWBERRY JAM/SAUCE:

  • 1 lb. hulled and chopped fresh stawberries
  • 1 cup white sugar
  • 1/4 cup fresh sqeezed lemon juice
  1. Finely dice strawberries and add to a wide 8″ sauce pan with 1 cup sugar and lemon juice
  2. Over med/high heat bring to a rolling simmer
  3. Keep an eye on the mixture, keep simmering for 15 min. – make sure it doesn’t boil over
  4. Skim off white foam that accumulates around the edges while simmering as this will make the jam cloudy (its just air bubbles that form in the jamming process)
  5. Remove from heat and serve warm with German pancake
  6. Jar the remaining strawberry sauce and refrigerate as it will thicken into a jam as it cools! It will stay good for 2 weeks in the frig.


Best Blueberry Pie!

Best Blueberry Pie!

There’s nothing like fresh blueberries simmering in a buttery, flaky pie crust with aromatic fruit juices getting bubbly and syrupy. It’s tough to let this mouth watering concoction cool for three hours when all you really want to do is scoop some vanilla ice cream over a slice letting the cream melt onto the crispy crust and gooey berries submerging oneself into pie heaven! This might just be the perfect dessert bite!

There are recipes out there that have you use flour as a thickener in some fruit pies but with this best blueberry pie recipe I think it’s important to use cornstarch. Blueberries release so much juice the best one for the job is cornstarch. You can add orange zest or lemon zest to brighten up the flavors and then there’s always cinnamon or nutmeg. Blueberries happen to be one of my favorite fruits and I feel that they are already flavorful enough so I only add one tablespoon of fresh lemon juice to balance everything out. Blueberries are also considered to be one of the healthiest fruits out there offering up one of the highest levels of antioxidants of all fruits and vegetables so I think it’s a win-win here!

Cutting out decorative leaf shapes (or what ever shape you like) from the top sheet of pie crust is a no brainer for me because it’s so gosh darn easy to do, it looks like you spent all day on it and it’s very forgiving. When it bakes in the oven getting golden, crispy and slightly shiny from brushing on the egg wash it’s going to look and taste amazing no matter what!

This best blueberry pie recipe might just become your decadent dessert ritual for your holiday dinners! Making the “perfect pie crust in 5 minutes” a week or two ahead of time and popping it into the freezer until you need it is a great way to cut down on some of the work that’s involved in throwing a Thanksgiving dinner or any holiday feast for that matter. If you get ambitious you iphone pictures 2419can always add a chocolate pecan pie into the mix. To help save some time with the side dishes you might try these roasted brussel spouts. They are so delicious roasted like this you’ll never eat them any other way. Have fun and enjoy 🙂

IMG_4364  IMG_4363  IMG_4369

IMG_4383  piepie  piedou

IMG_4385  pieplate  crimp

IMG_4408  leafcutter  blupie

IMG_4420  IMG_4416  blueberrypie

INGREDIENTS:

  • 4 1/2 cups blueberries (that’s after you have sorted thru bad berries…start with 5 cups to have enough)
  • 1/2 cup sugar
  • 1/4 corn starch
  • 1/8 tsp salt
  • Juice from 1/2 lemon
  • 1 1/2 tbsp cut up cold butter
  • 1 egg
  • 1 tbsp heavy cream
  • “Perfect Pie Crust in 5 Minutes!” recipe
  • Parchment paper for rolling out pie dough
  • 1 1/2 ” – 2″ pie leaf cut outs or what ever shape cookie cutter you want to dress the top of the pie with instead of using a whole sheet of pie crust dough

DIRECTIONS:

  1. Trace the edge of the pie plate onto both pieces of parchment paper
  2. Roll out 1/2 of the pie crust at a time in between two pieces of parchment with circle drawing on the outside
  3. When the dough is rolled out to approx 1/8″ thick and the proper circle size flip pie dough over with parchment paper into pie plate
  4. Gently fit pie dough into dish without pushing down hard and place into the fridge
  5. Wash and dry blueberries, picking through them to remove any under and over ripe berries and stems
  6. Place berries in a large bowl and add 1/4 cup corn starch, 1/2 cup sugar, 1/8 tsp salt and juice from 1/2 lemon and toss until coated
  7. Put the bowl of blueberries into the fridge
  8. Roll out the other pie dough disc and cut out leaf shapes or what ever shape you want to be the top layer of the pie
  9. Lay down a piece of parchment on a cookie sheet with a sprinkle of flour and place leaf cut outs onto the cookie sheet
  10. Put leaf cut outs into the fridge
  11. Take out pie dish with pie dough from fridge and crimp edges
  12. Pour the blueberries into the pie dish and back into the fridge
  13. Whisk 1 egg with 1 tbsp of heavy cream
  14. Take the leaf cut-outs on the cookie sheet from the fridge and brush with the egg wash
  15. Take the blueberries in the pie dish out of the fridge and dot the pie with 1  1/2 tbsp of cut up cold butter
  16. Begin to place leaf cut-outs on top of the blueberries. Go along the edge of pie all around and then work your way in (you only need to gently push a couple of the edges of the leaf to crimped edges of the pie and to each leaf
  17. Put the pie back into the fridge for 15 minutes while you pre-heat oven to 400º
  18. Place blueberry pie on the cookie sheet that has a piece of parchment covering the bottom in case of spillage and pop into the oven for 30 minutes
  19. Turn the oven down to 350º and bake for another 40 minutes until a golden crust and juices are bubbly
  20. You must let cool 3 hours so the blueberry juicy can thicken properly
  21. Serve with your best vanilla ice cream and you will be one happy camper! 🙂


Homemade Pasta at Vin’s

Homemade Pasta at Vin’s

Homemade pasta is something you have to try at least once in your life! You’ll see how satisfying it is when you taste the tender, slightly chewy texture of the fresh pasta. Making pasta has been a part of my life ever since I was young making homemade manicotti with my mother for the holidays. At my Aunt Pasqualina’s, the counters were always covered with fresh pasta drying out on dish towels.

This past weekend, my friends Lisa and Vin, graciously agreed to share their grandfather’s secret family pasta recipe with me. I had the opportunity to try out, first hand, a pasta tool that belonged to Vin’s grandfather which he called the “trucal iron”. It’s a special pasta cutting tool, a roller, made years ago from medal and wood that was eventually passed on down to Vin. The center spiral part of this “trucal Iron”, made of medal, does the cutting as you roll out the pasta. It has Wooden handles which he said his grandfather glued back on a couple of times. Vin also has a newer version of this “trucal iron”, one made of all wood but the wood spirals have begun to chip away from wear and tear. They don’t make some things like they used to. Vinnie also shared some precious memories of his grandfather and father making this homemade pasta for Sunday dinners growing up where his grandfather would creatively hang the pasta noodles from atop the kitchen cabinet doors to dry out.

There’s nothing like an evening with special friends making homemade pasta! This night of homemade pasta making at Lisa and Vin’s reminded me of how much I really love to do this. Everyone has their own way of making pasta and that’s part of what makes this experience so fun. Now as for this “trucal iron”, there are other pasta tools out there that mimic what Vin’s special pasta tool does like the ones below from Amazon. I have to say, I haven’t used any of those tools from Amazon because I use my KitchenAid pasta attachment which is another great option for cutting the kneaded pasta dough. You could even cut your thinly rolled out pasta into strips by hand with a sharp knife to get the stands of fettuccine, spaghetti, or what ever thickness you might like.

iphone pictures 448 iphone pictures 572 DSCN4572 025  ita

Appetizers like baked coconut shrimp, baked asparagus wrapped in prosciutto, and, or a nice homemade Caesar Salad might be just what you are looking for to go with this homemade pasta of Vin’s! If you are looking for a meat sauce to go on this homemade pasta you should try my bolognese sauceOf course, there are other options like my Italian beef meatballsor Italian turkey meatballs. Hope you enjoy the show 😉

IMG_4244 eggpasta dough

pastdough kneadpasta trucalpasta

IMG_4283 ppasta IMG_4287

cookpastajpg IMG_4327

INGREDIENTS:

  • 2 1/2 cups all purpose flour
  • 1/4 cup olive oil
  • 4 1/2  – 5 lg eggs
  • 1/4 tsp salt

DIRECTIONS:

  1. Put the kneading attachment on your food processor and add the flour
  2. Add the salt and olive oil
  3. Turn on the food processor to slow
  4. Add in 1 tbsp of water
  5. Begin adding in 1 egg at a time with the processor still on slow
  6. Add in the rest of the eggs
  7. Keep the food processor going on medium speed to begin kneading the dough
  8. Let knead for about 8 minutes until the texture turns into a smooth consistency
  9. Remove the pasta dough and place onto the counter
  10. Knead briefly with your hands and let sit for 1/2 hr.
  11. NOTE: Vin does not cover his pasta dough while it sits for the 1/2 so it can begin to dry out  a little bit
  12. Sprinkle some flour onto the counter or work surface and cut pasta dough into 8 pieces
  13. Begin to roll out each piece of dough to your desired thickness
  14. Sprinkle more flour on top of each thinly rolled out pasta piece and use the roll cutter below or a sharp knife or a KitchenAid Pasta attachment to get desired pasta strips
  15. Bring large pan of salted water to a boil and add fresh pasta
  16. Depending on the thickness, cook pasta for 4-8 minutes, test pieces of pasta for proper doneness
  17. Serve with sauce and mangia, mangia!