CT Style with Ryan & Kat Making Mediterranean Chicken Kabobs!
I’m always thrilled to be back on CT Style and that’s where I was this past Friday with Ryan Kristafer & Kat Cosley sharing one of my favorite recipes, Mediterranean Chicken Kabobs made with Greek yogurt. This recipe originated from a show I taped at a beach house right here in Madison two years ago with my friend Maria. It’s delicious on the grill outside and I show on easy it is to grill indoors using my “Lodge” reversible cast iron grill-pan.
I had a wonderful time in The Bender Kitchen meeting Kat Cosley, and as always, with Ryan Kristafer’s quick wit sense of humor he takes it up a notch! Having two little ones of her own Kat totally gets the convenience of being able to make different versions of these flavorful Mediterranean meals which can be made ahead for a busy family,
The Mediterranean Yogurt Chicken Kabobs are one of my all time favorites because it’s such a simple process and just so good for you! Marinate, skewer and BBQ…thats it! This recipe oringially came from Epicurious but as I always do, I tweaked it a bit when it was given to me adding in Spanish smoked paprika, a mild, sweet yet smokey spice thats gives a wonderful addition to the recipe.
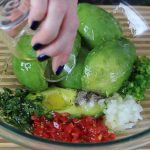
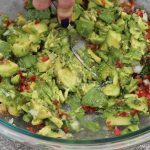
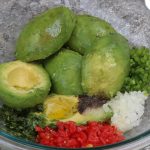
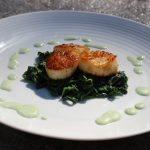
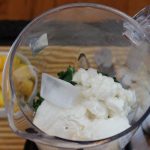
The sides that go with the kabobs, the homemade tzatziki, hummusand green goddess sauce can be a great compliment to grilled steaks, pork or veal chops, scallops or any fish! These flavors really brighten up any dish.
You can click on the links above to get to the recipe pages on my website that go with this live cooking segement on CT Style and they are also offered on the CT Style website as well.
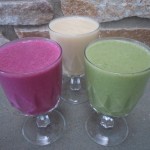
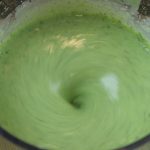
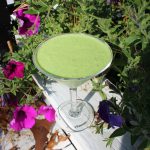
Giving my favorite “Mango-Kale Smoothie” demo for the staff and members at Funktion Fitness this past Thursday morning was tons of fun! The best part was seeing all their smiling faces after taking the first sip of my Mango-Kale Smoothie. They really loved how refreshing and fruity the smoothie was. Like I always say, if it wasn’t green you wouldn’t even know there was kale in it!
In my opinion, finding a balance is the key to everything in life. Getting my dose of endorphins thru spin class at my gym, Funktion Fitness, is just as important to me as having a healthy go to energy drink. And not just any old healthy energy drink but one that’s as delicious as my Mango-Kale Smoothie! The best thing is attaining these things and enjoying yourself to the point where it just doesn’t seem like work at all!
Having an awesome motivator, like my spin instructor Heather Theriault at Funktion Fitness, is half the battle. She has so much enthusiam for life and that work ethic of hers making your workout super tough but so gosh darn fun it goes by in a flash…can’t ask for anything better then that!
So it’s up to you to find some kind of exercise outlet that makes you happy, and gets you your weekly dose of mood boosters, endorphins. As for the healthy energy drinks, I’ve got you covered with my scrumptious smoothies to give you those weekly boosts helping you to keep powering thru your day with a smile…enjoy!
CLICK HERE TO FIND THE RECIPE, INGREDIENTS AND DIRECTIONS TO MY MANGO-KALE SMOOTHIE ! You can get really creative with your smoothies and I show you how in one of my other smoothie shows “My Energy Smoothies 101“. You’ll want to take a jump over to my Mango Salsa Recipe page as well and don’t forget to make my Best Guacamole Ever Recipe … never any left over where ever I take it!
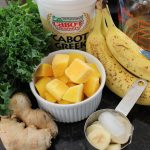
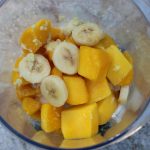
If you are wary of kale you won’t be after trying my scrumptious mango-kale smoothie! In fact, if you didn’t see that this mango-kale smoothie was green you would never know there was kale in it! It’s made from frozen mango chunks, fresh kale leaves, a pinch of banana and ginger, vanilla-bean Greek yogurt and light apple juice. The silky creaminess comes from using Cabot vanilla-bean Greek yogurt. And the “light” apple juice has the perfect amount of sweetness bringing it all together. The subtle flavors from the scant amounts of banana and ginger will have your guest’s trying to pinpoint exactly what they are. This most delicious concoction will have you licking your lips after the first sip!
My mango-kale smoothie is a real energy booster! I love that it’s super easy and convenient with store bought frozen mango chunks! My kitchen always has mangoes on the counter ripening for these mango-kale smoothie’s or my mango salsabut sometimes the timing isn’t right. That’s why I always have a bag of store bought frozen mango in my freezer. I can always depend on the the quality of the store bought frozen mango being deep orange in color offering a sweet mango flavor. Many times I cut up the ripened fresh mangoes using 1/2 cup fresh and 1 cup frozen in the mango-kale smoothie. Then I add any leftover fresh mango to the frozen mango bag and pop in back into the freezer for next time.
I make many different smoothies some of which you can find in my “Energy Smooties 101” but I think this is one of my fave’s because of the simpicity, delicious flavor and nutritional benefits. I add ginger in my mango-Kale smoothie for an immune system booster offering up anti-inflammatories and antioxidants. Kale is another antioxidant with more nutrients then spinach, if you can believe that one! It has calcium, potassium, vitamin C and B6 all helping to give you awesome looking skin & hair, and healthy bones & heart. Then there’s the mighty mango that’s known to help fight cancer with vitamin’s like A, C, E and B6!
This Mango-Kale Smoothie energy drink should be part of your weekly regimen. It’s a win-win for all us busy bees who just don’t have time for ailments! Enjoy 🙂 Now that I have you on a health craze you have to try my easy fresh salsa 101 that you can make 12 months of the year, or BEST guacamoleever. Don’t forget the Seared Sea Scallops, Salmon BLT Slider’sand how about ending it with someRicotta Pie!
Ingredients for Mango-Kale Smoothie makes 8 small glasses:
1 1/2 cups frozen mango chunks (I love Stop & Shop brand -bag of frozen mango)
You can change up fruit and swap out 1/2 cup mango for pineapple
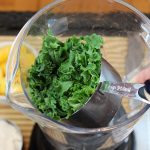
1 cup PACKED, about 5 lg fresh kale leaves with ribbing removed
3 1/2″ slices frozen banana, (fresh banana’s sliced, placed into baggies and freeze)
1 1/2 tsp fresh grated ginger
1 cup Cabot vanilla-bean Greek yogurt- “Cabot”
1 1/2 cup light or unsweetened apple juice…the perfect amount of sweet
NOTE: Make sure the liquid is 1″ down from top of fruit and kale level
1/2 cup water OR Muscle milk …..If you need more liquid you can just add water OR a protein powder like muscle milk -vanilla is my favorite
1/4 cup crushed ice …helps to purée the kale to a fine, smooth consistency
Directions:
Place the kale leaves into the blender first, followed by Greek yogurt, ice cube, frozen mango chunks and banana, zested fresh ginger and light apple juice
Purée for 1 minute til frothy and smooth
Pour into glasses and serve
NOTE: you can freeze any left over mango-kale smoothie in plastic container for future frozen “Italian ice” like snacks!
Add some vodka or rum to make delicious party cocktails!
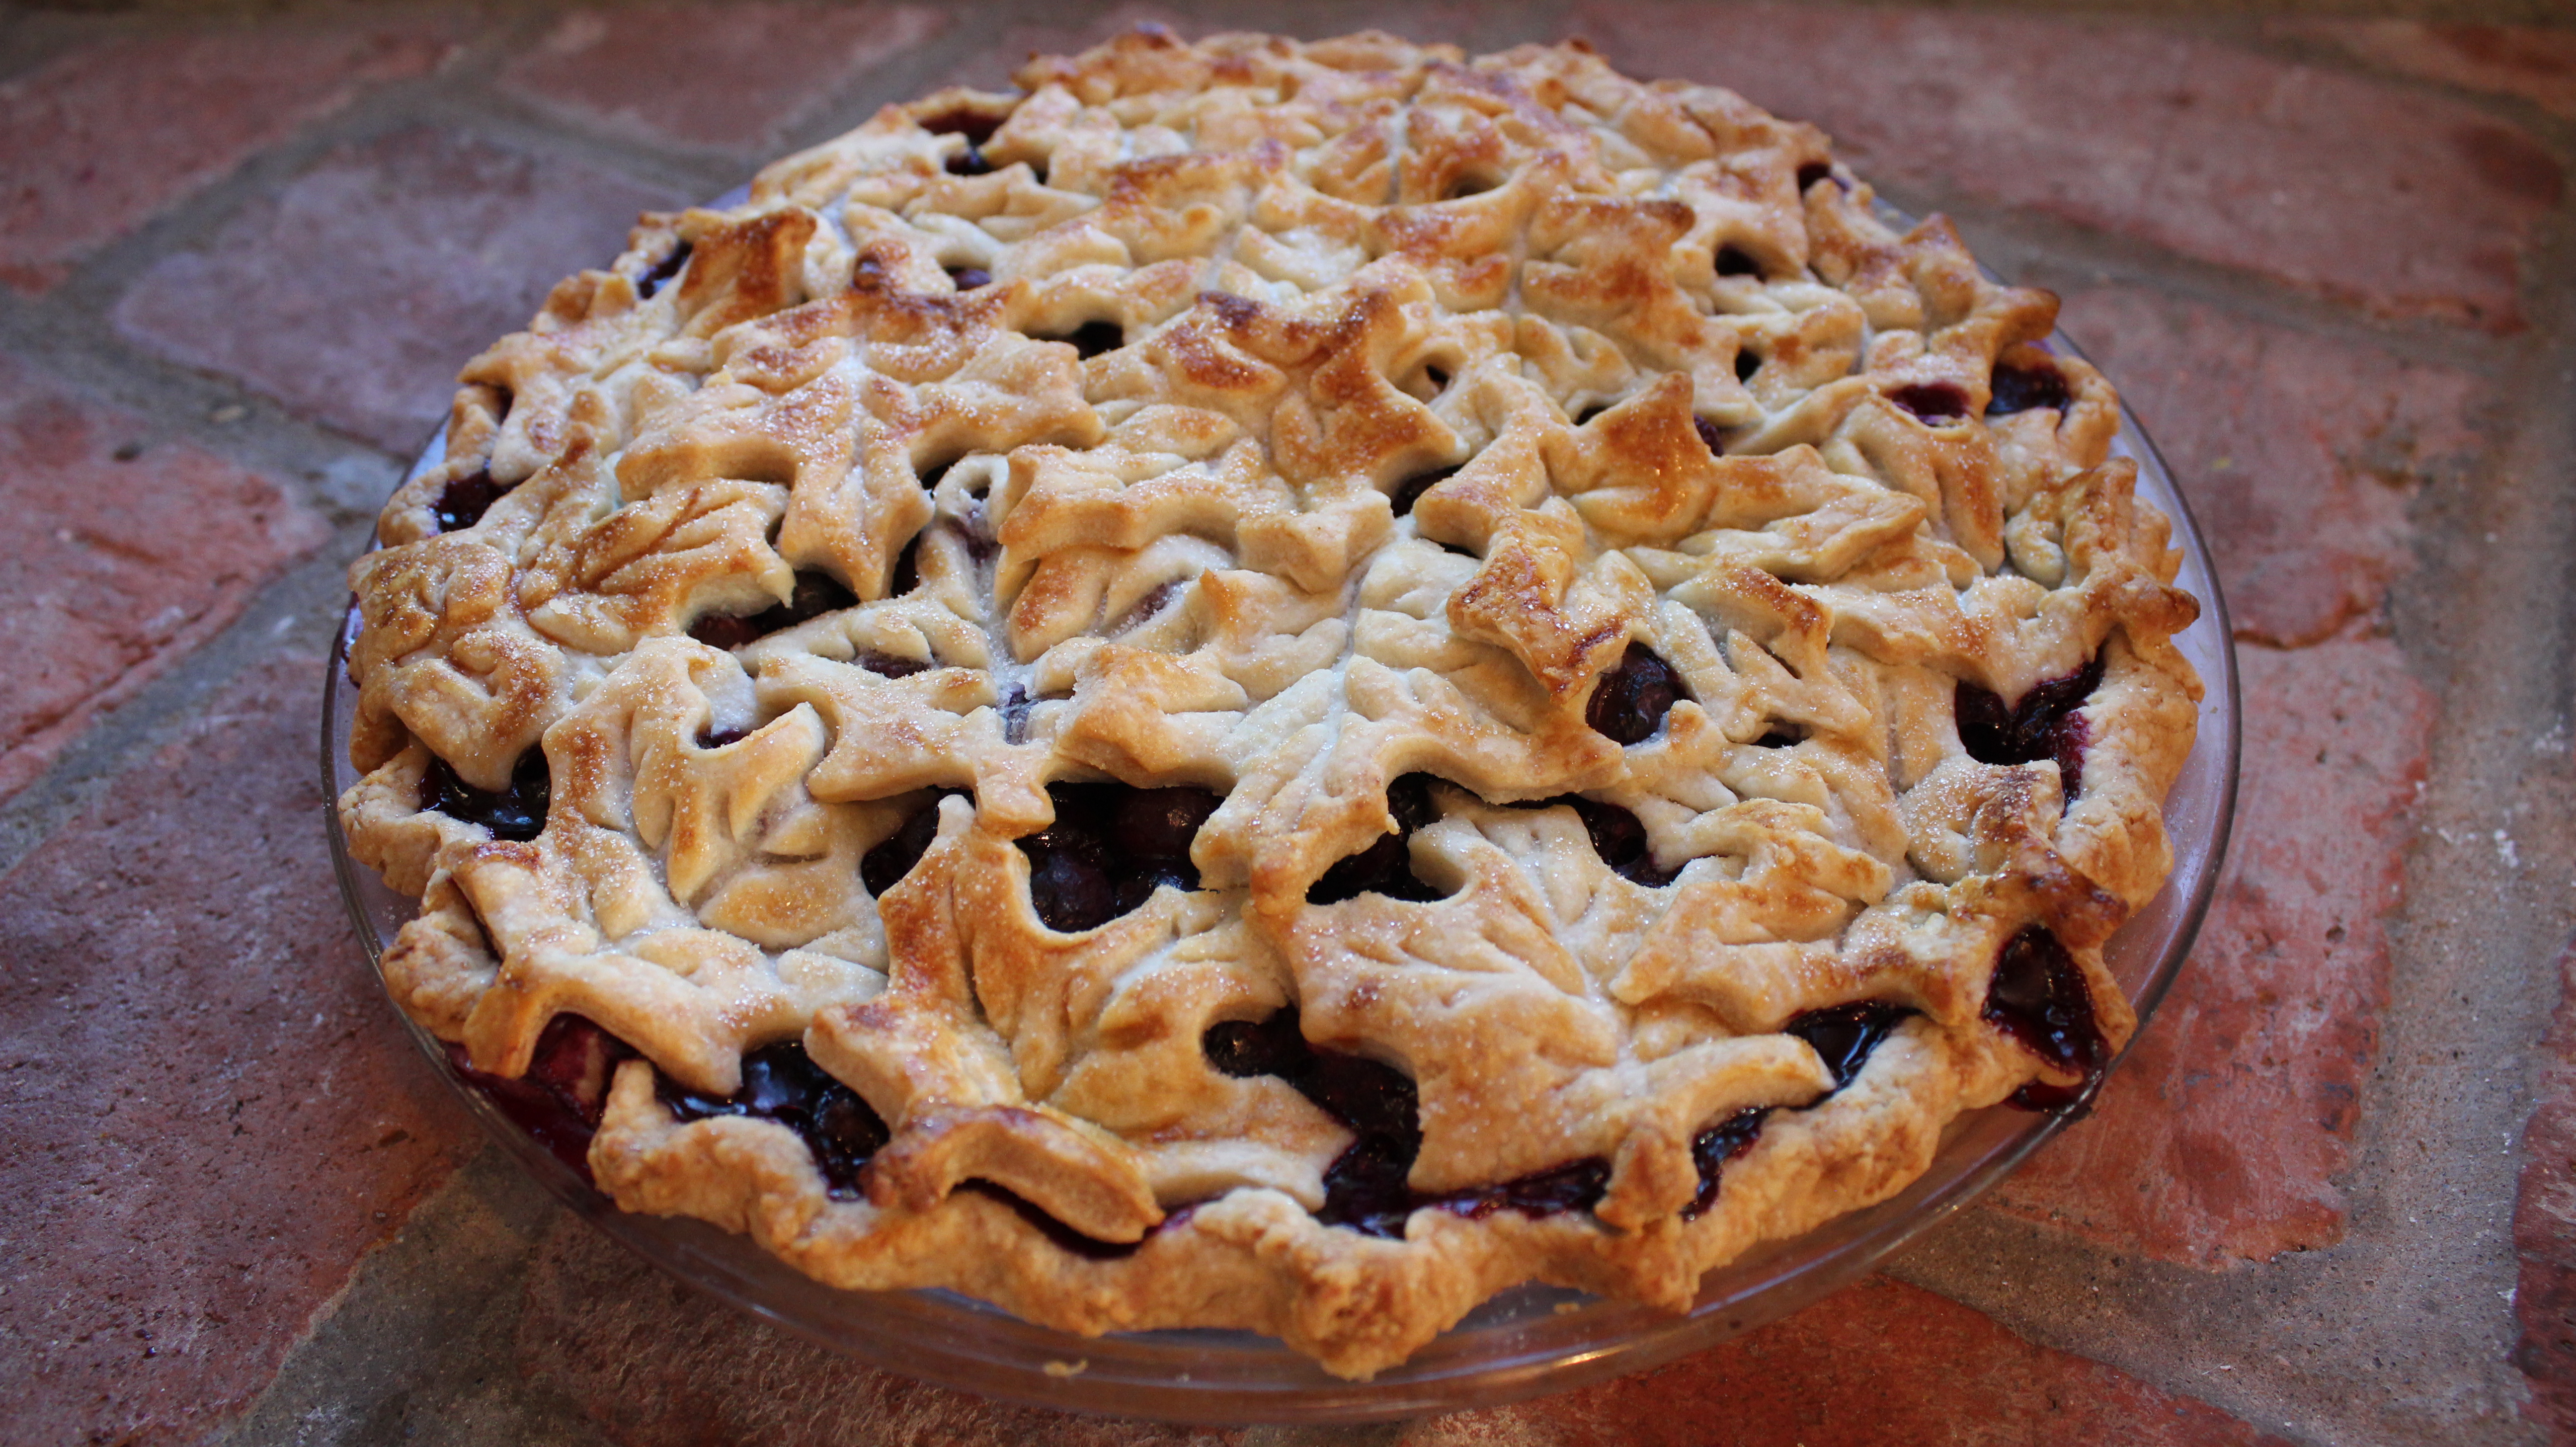
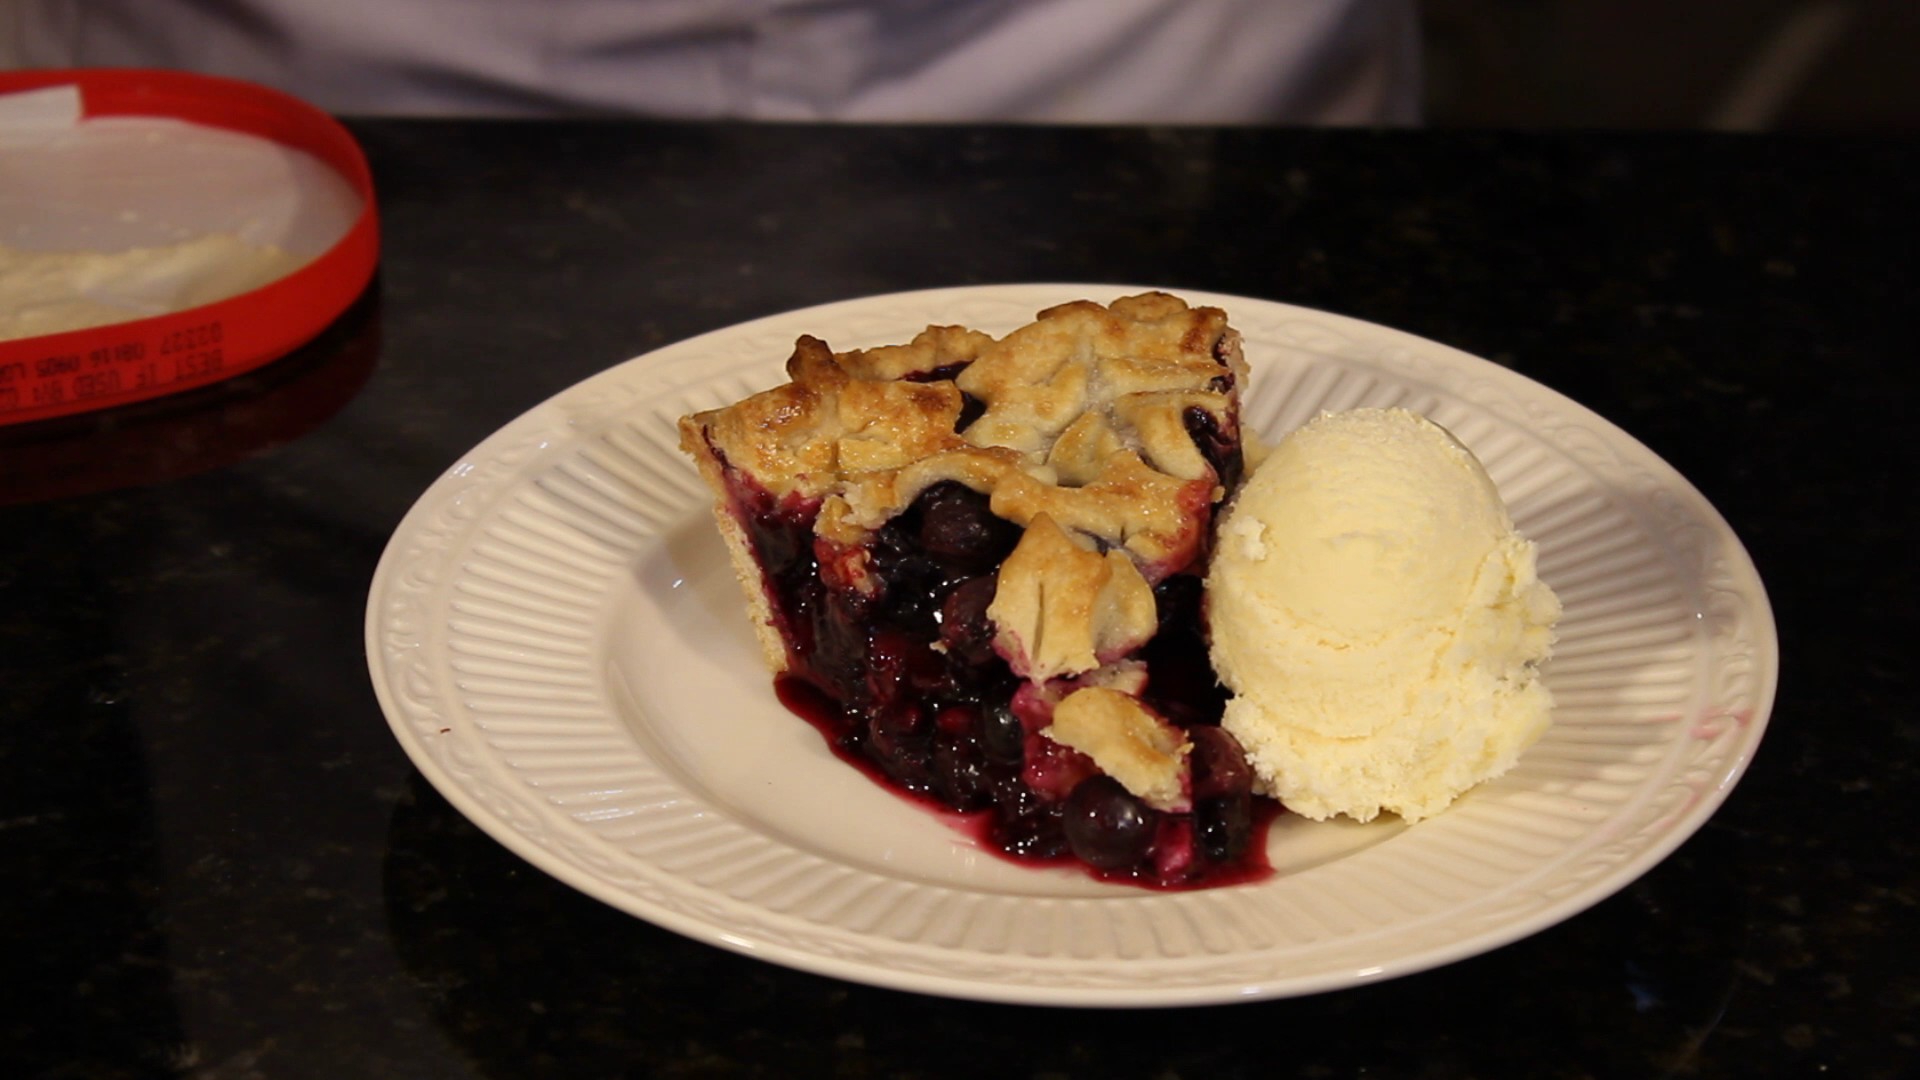
There’s nothing like fresh blueberries simmering in a buttery, flaky pie crust with aromatic fruit juices getting bubbly and syrupy. It’s tough to let this mouth watering concoction cool for three hours when all you really want to do is scoop some vanilla ice cream over a slice letting the cream melt onto the crispy crust and gooey berries submerging oneself into pie heaven! This might just be the perfect dessert bite!
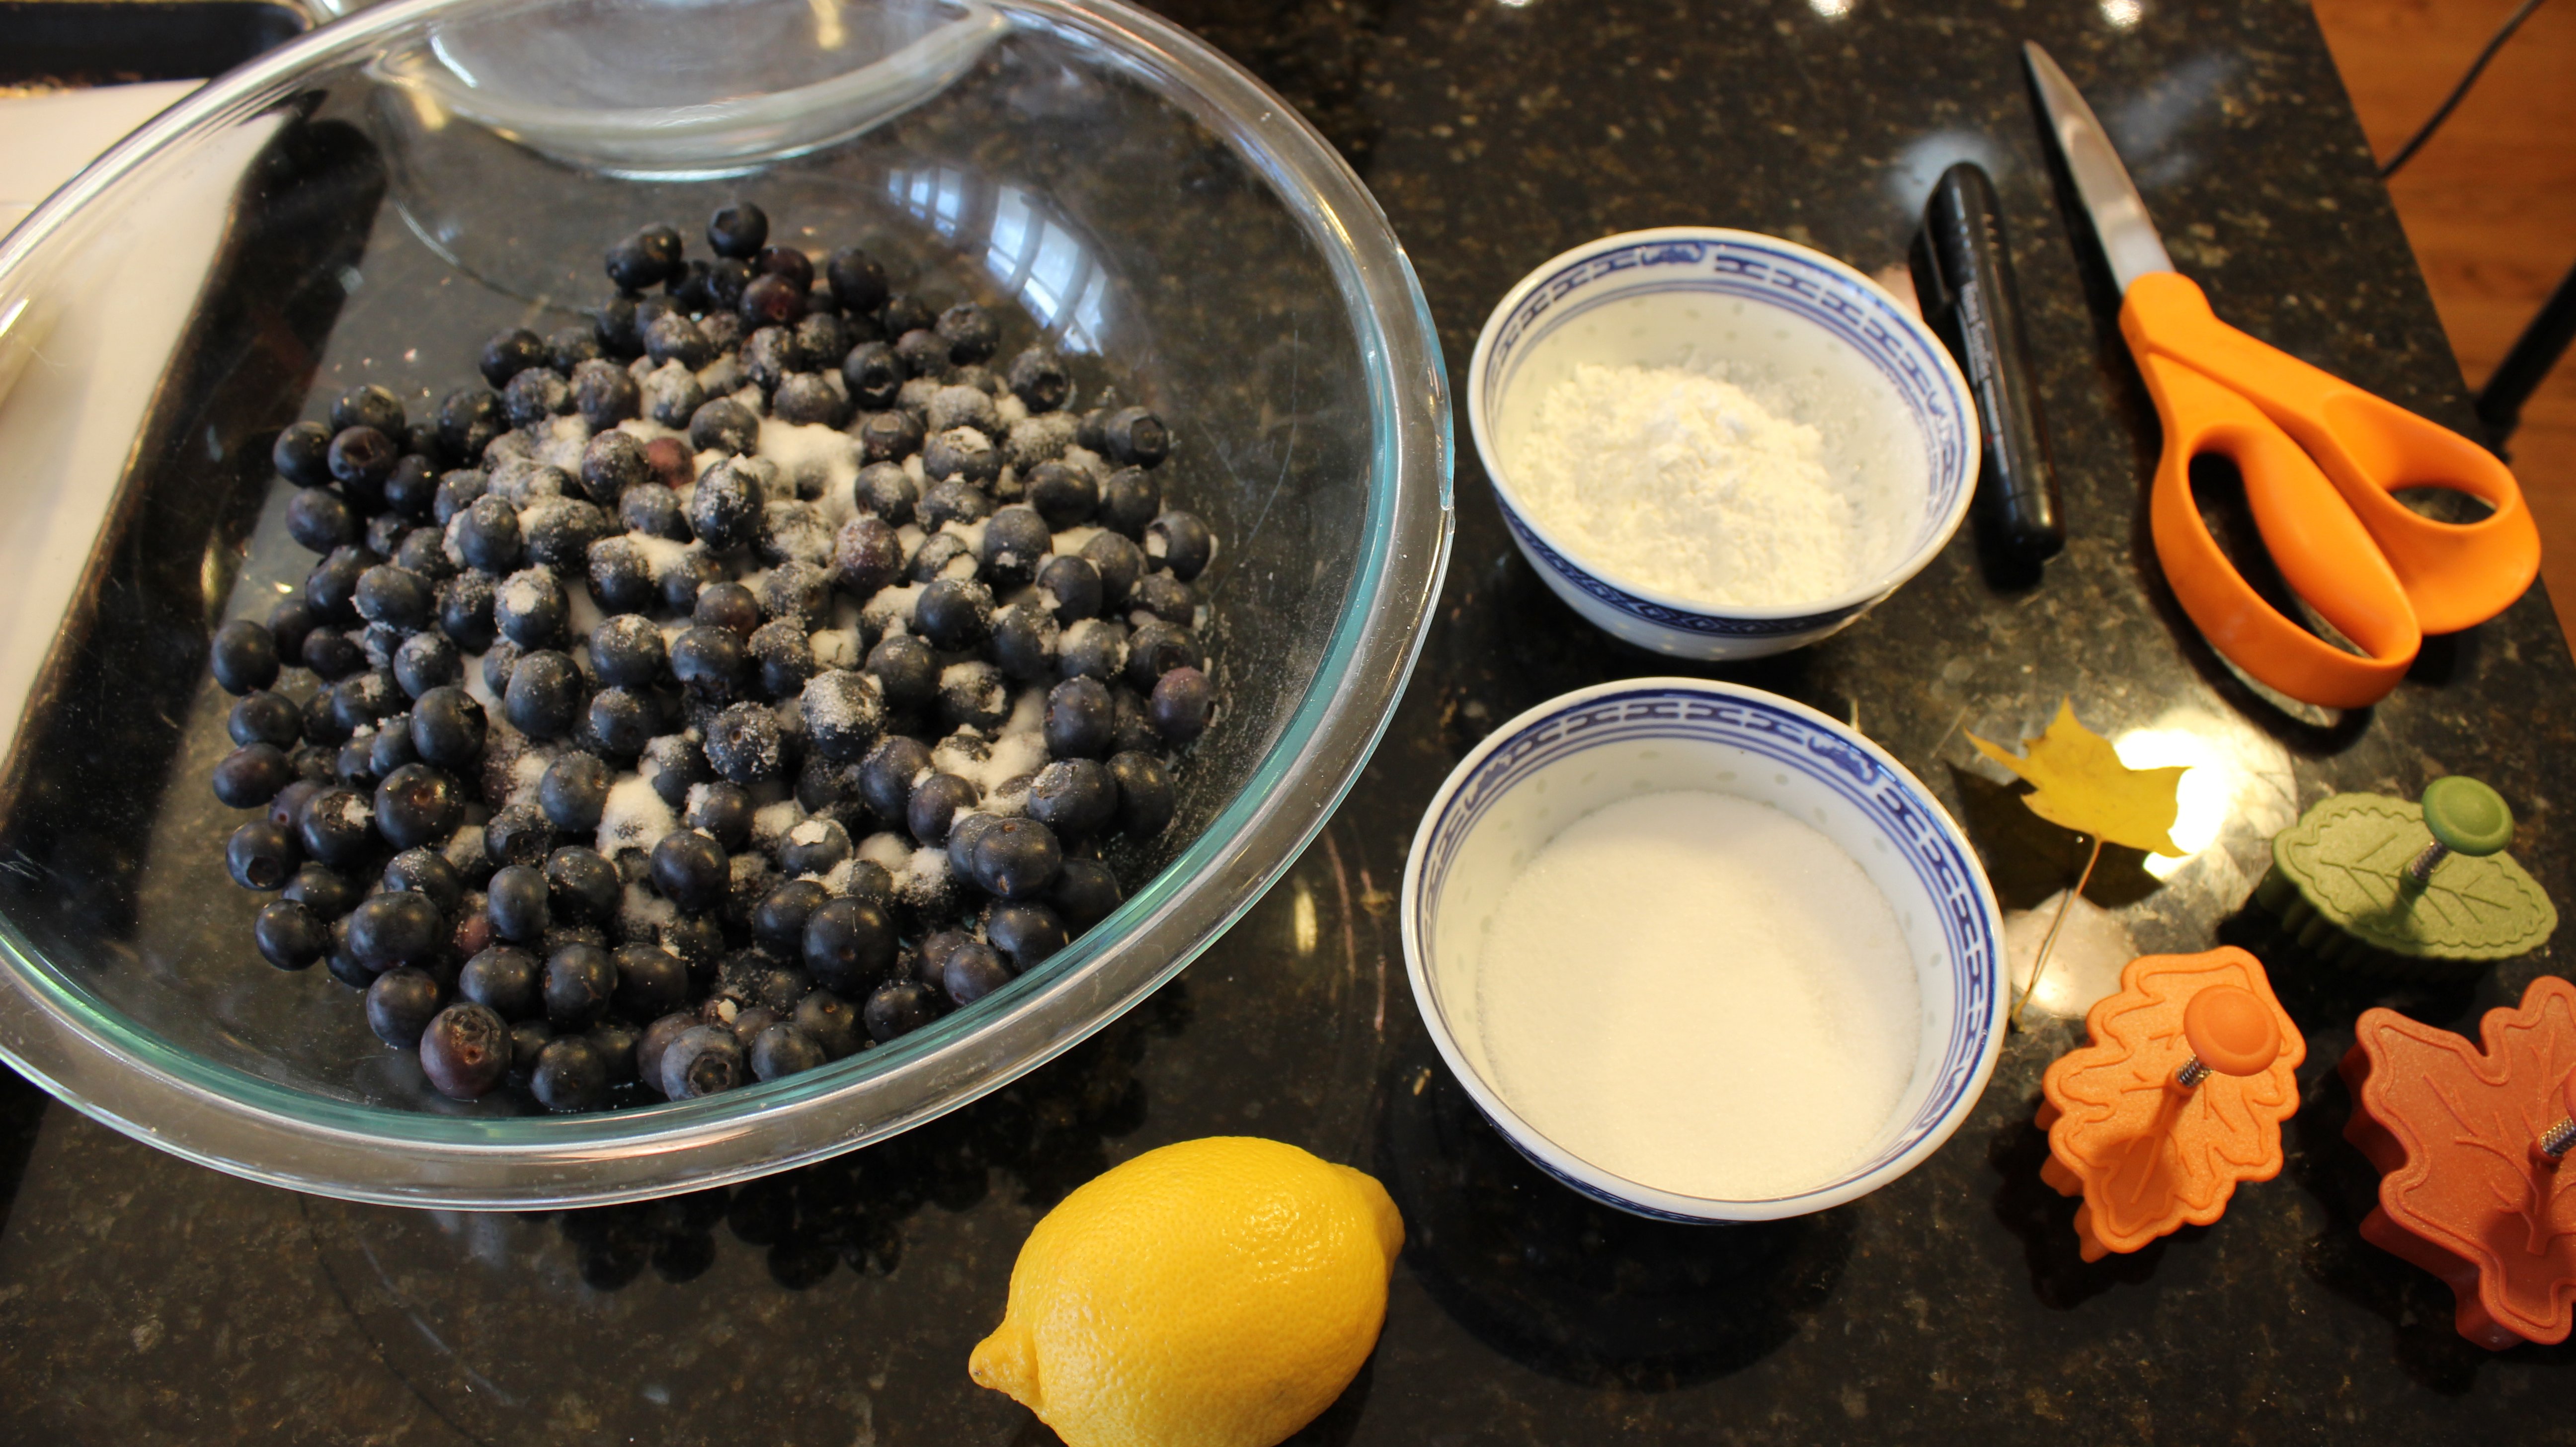
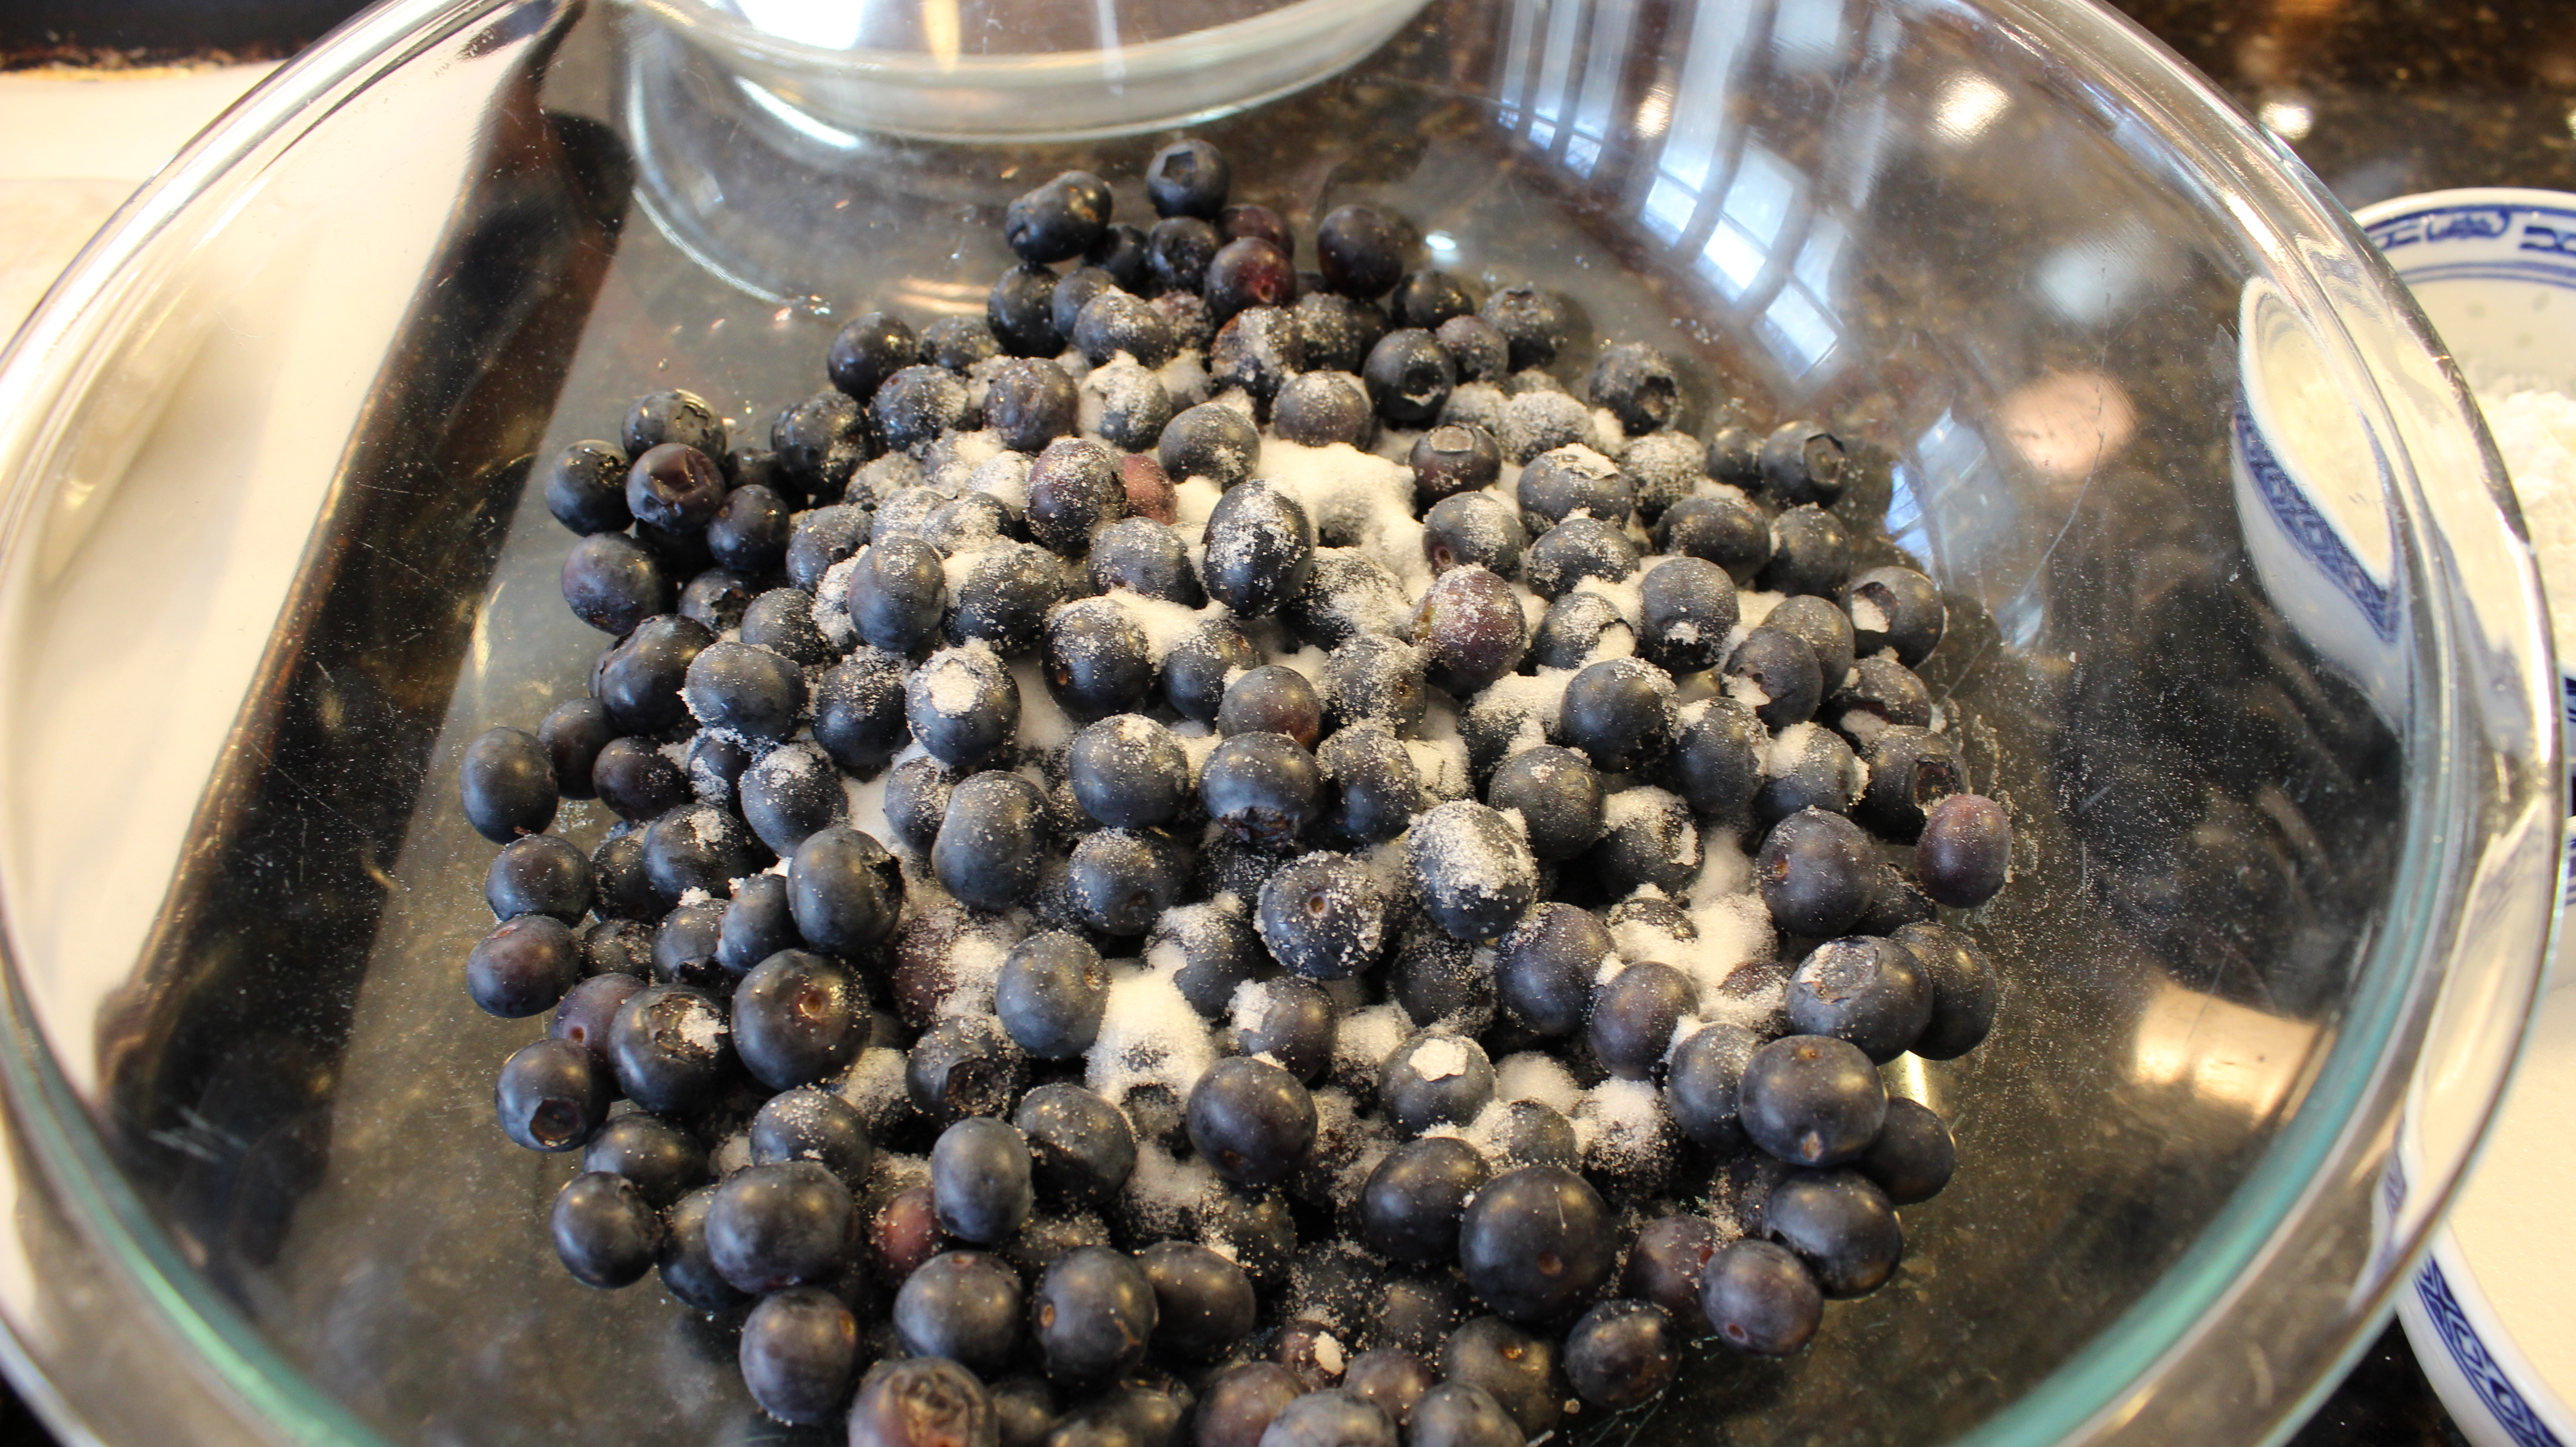
There are recipes out there that have you use flour as a thickener in some fruit pies but with this best blueberry pie recipe I think it’s important to use cornstarch. Blueberries release so much juice the best one for the job is cornstarch. You can add orange zest or lemon zest to brighten up the flavors and then there’s always cinnamon or nutmeg. Blueberries happen to be one of my favorite fruits and I feel that they are already flavorful enough so I only add one tablespoon of fresh lemon juice to balance everything out. Blueberries are also considered to be one of the healthiest fruits out there offering up one of the highest levels of antioxidants of all fruits and vegetables so I think it’s a win-win here!
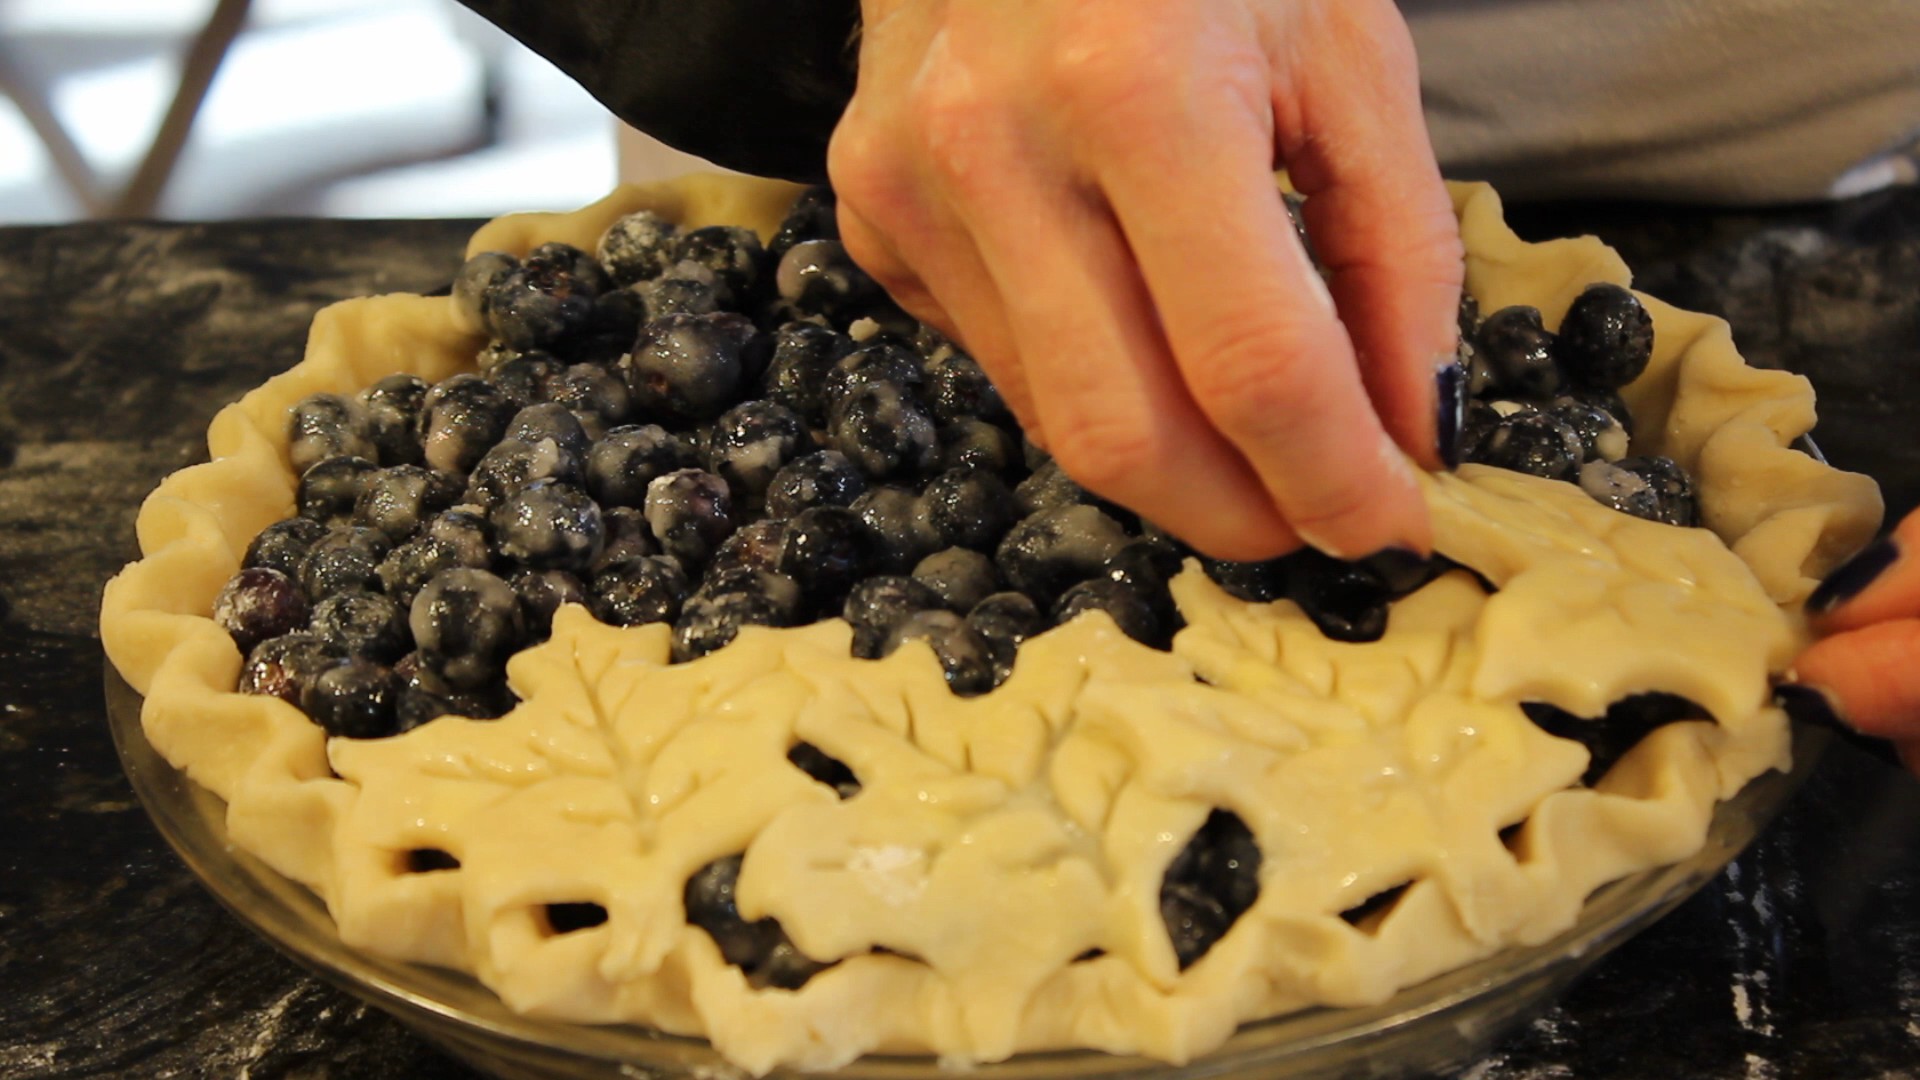
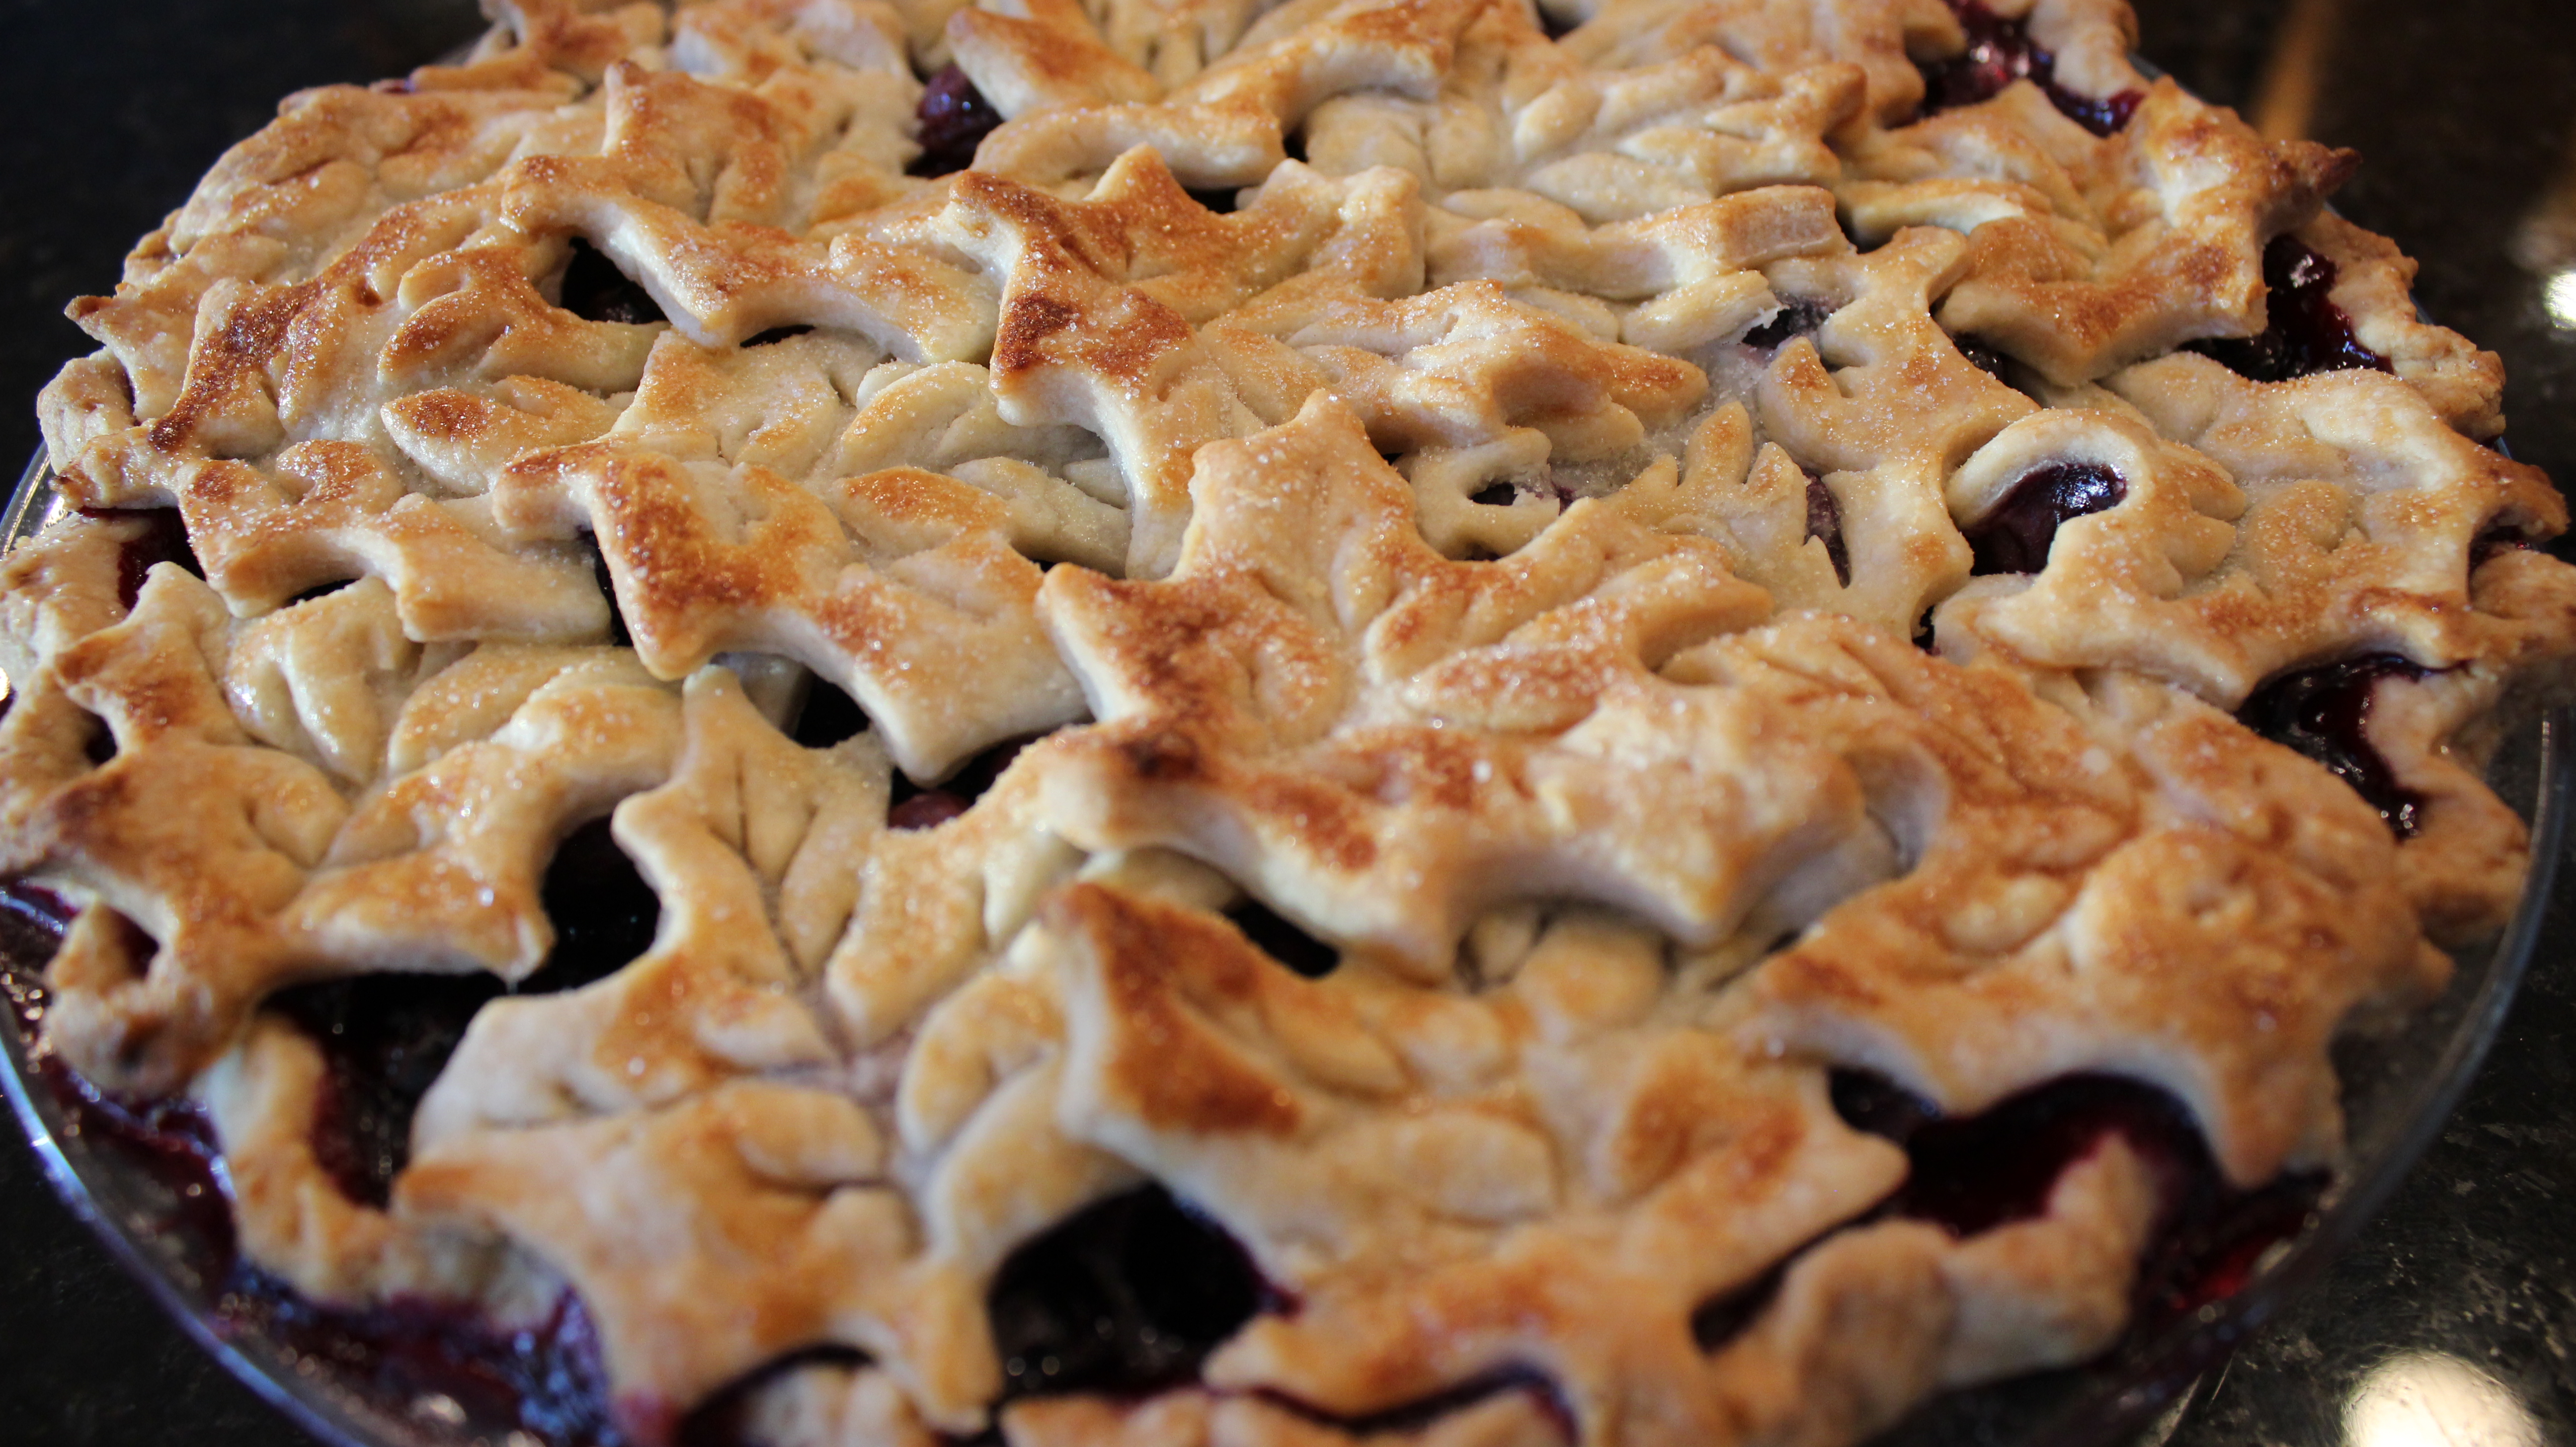
Cutting out decorative leaf shapes (or what ever shape you like) from the top sheet of pie crust is a no brainer for me because it’s so gosh darn easy to do, it looks like you spent all day on it and it’s very forgiving. When it bakes in the oven getting golden, crispy and slightly shiny from brushing on the egg wash it’s going to look and taste amazing no matter what!
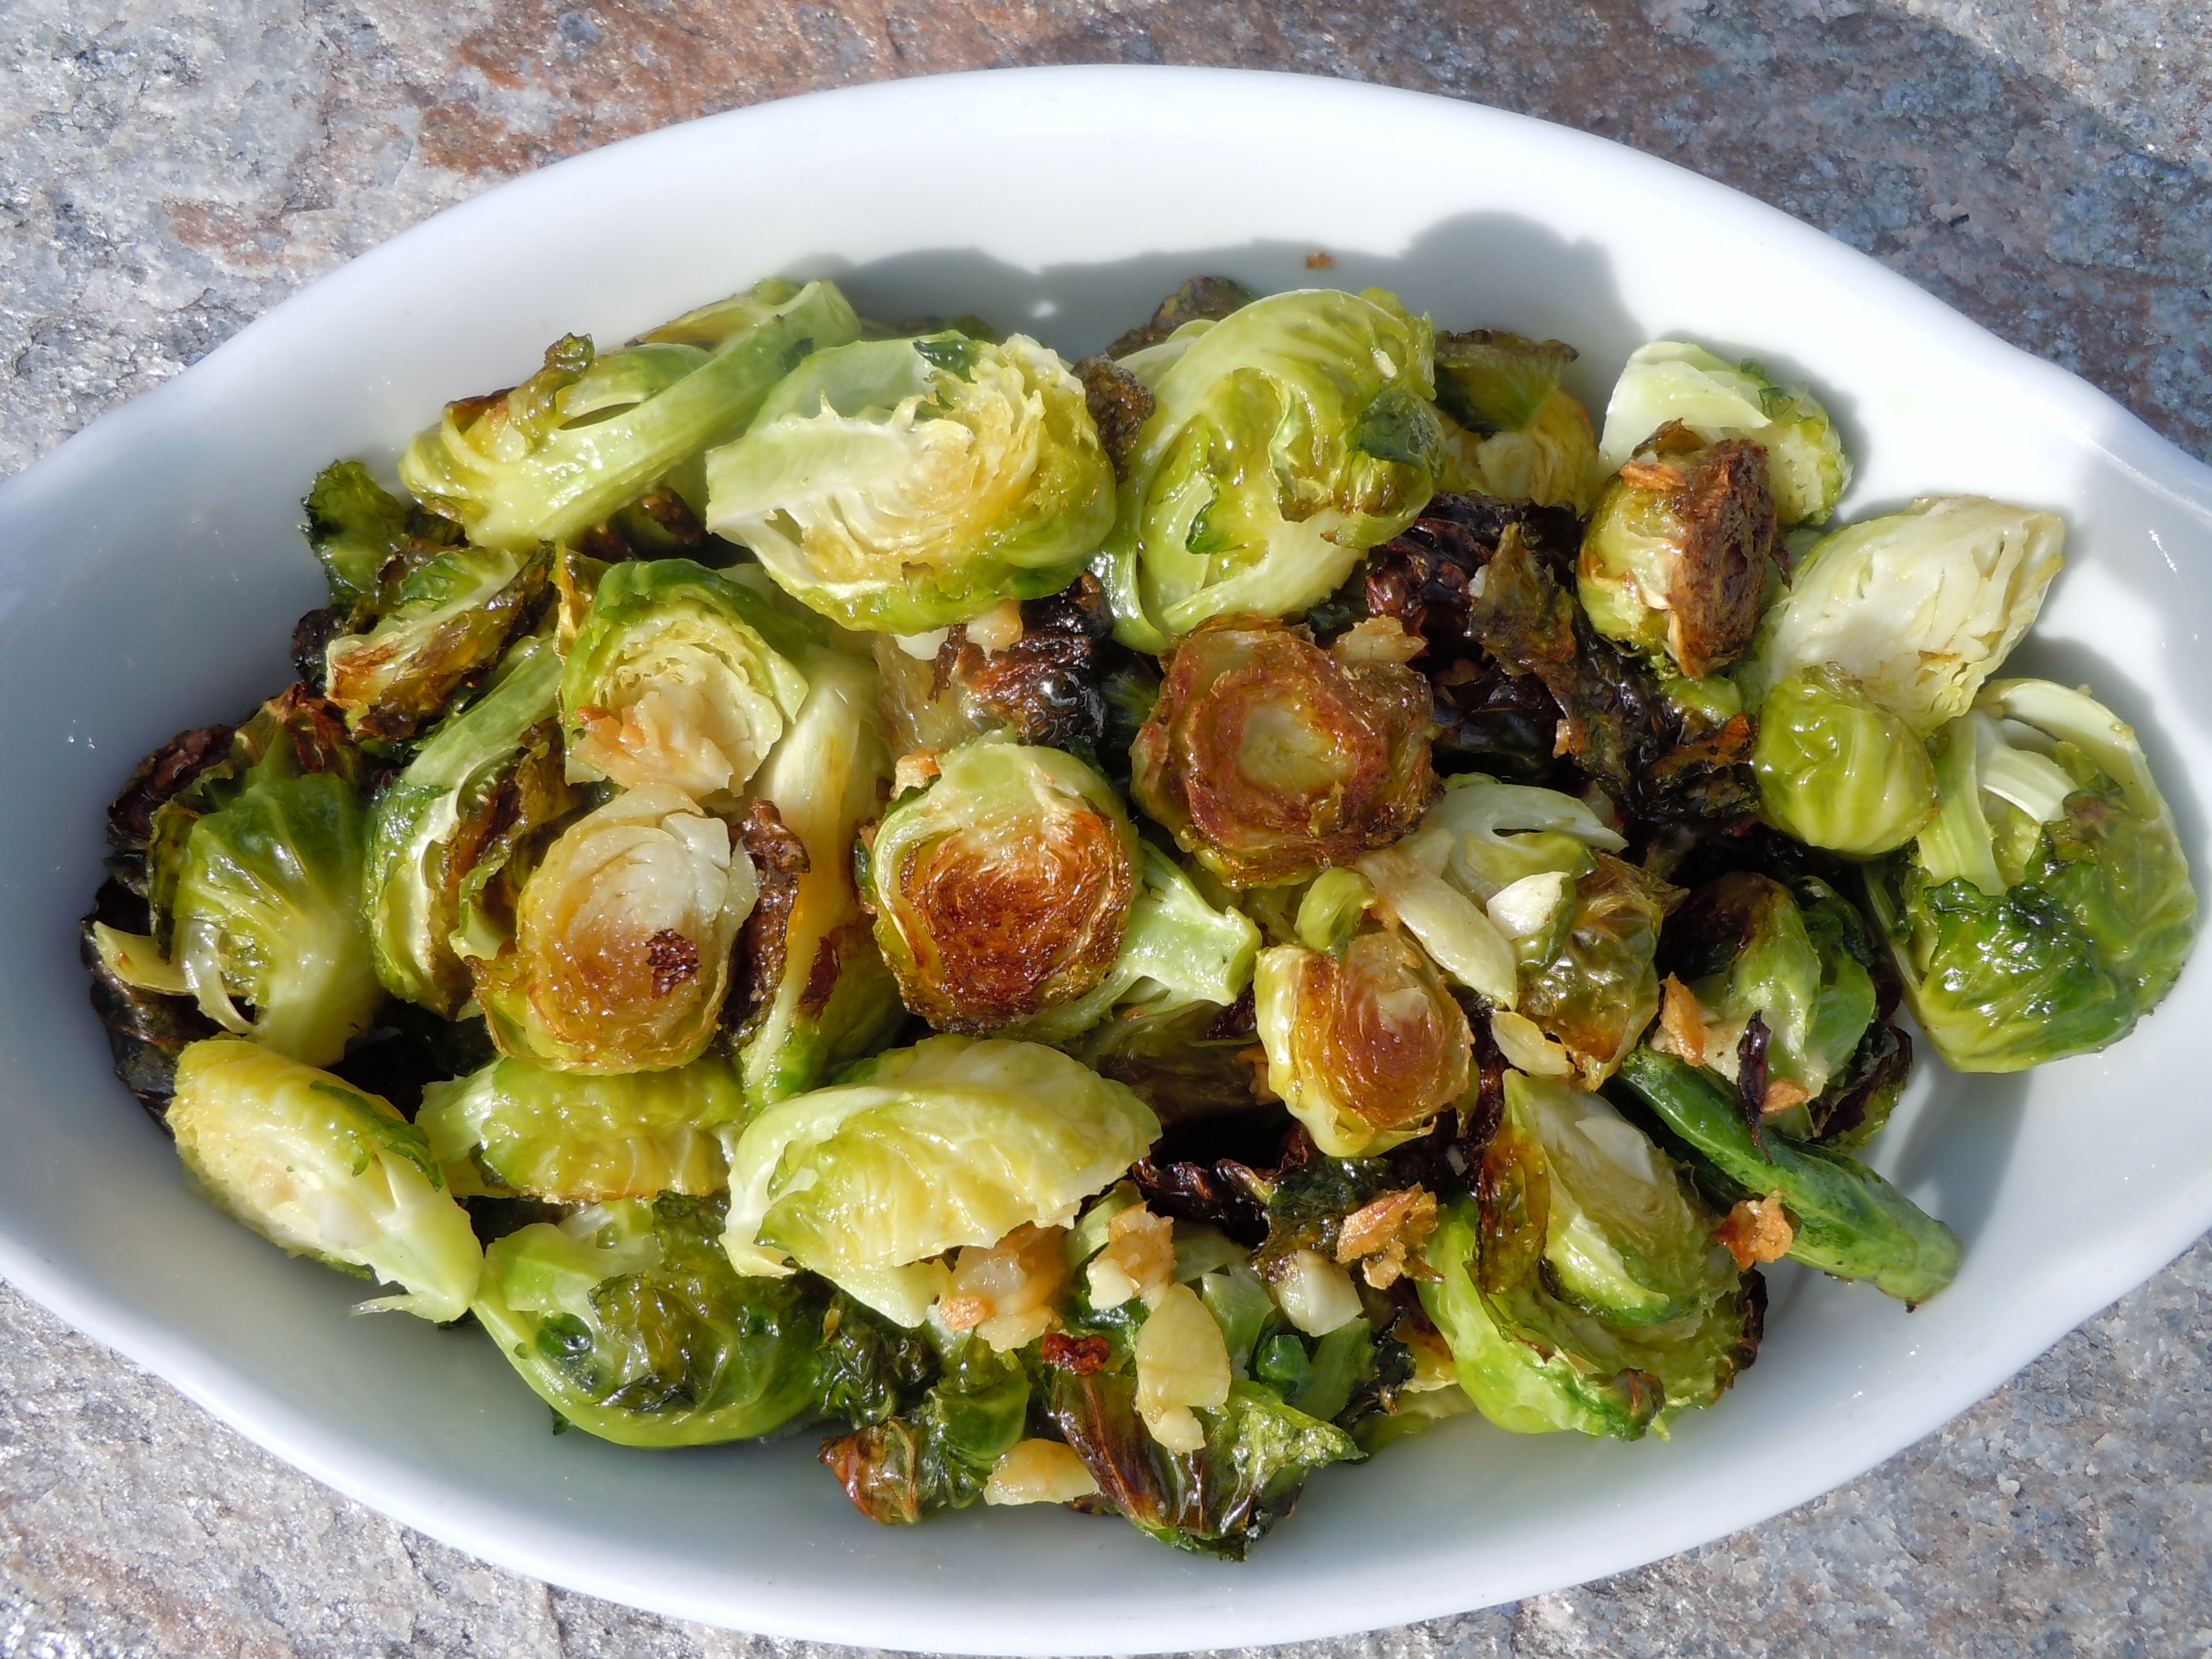
This best blueberry pie recipe might just become your decadent dessert ritual for your holiday dinners! Making the “perfect pie crust in 5 minutes”a week or two ahead of time and popping it into the freezer until you need it is a great way to cut down on some of the work that’s involved in throwing a Thanksgiving dinner or any holiday feast for that matter. If you get ambitious you can always add a chocolate pecan pieinto the mix. To help save some time with the side dishes you might try these roasted brussel spouts. They are so delicious roasted like this you’ll never eat them any other way. Have fun and enjoy 🙂
INGREDIENTS:
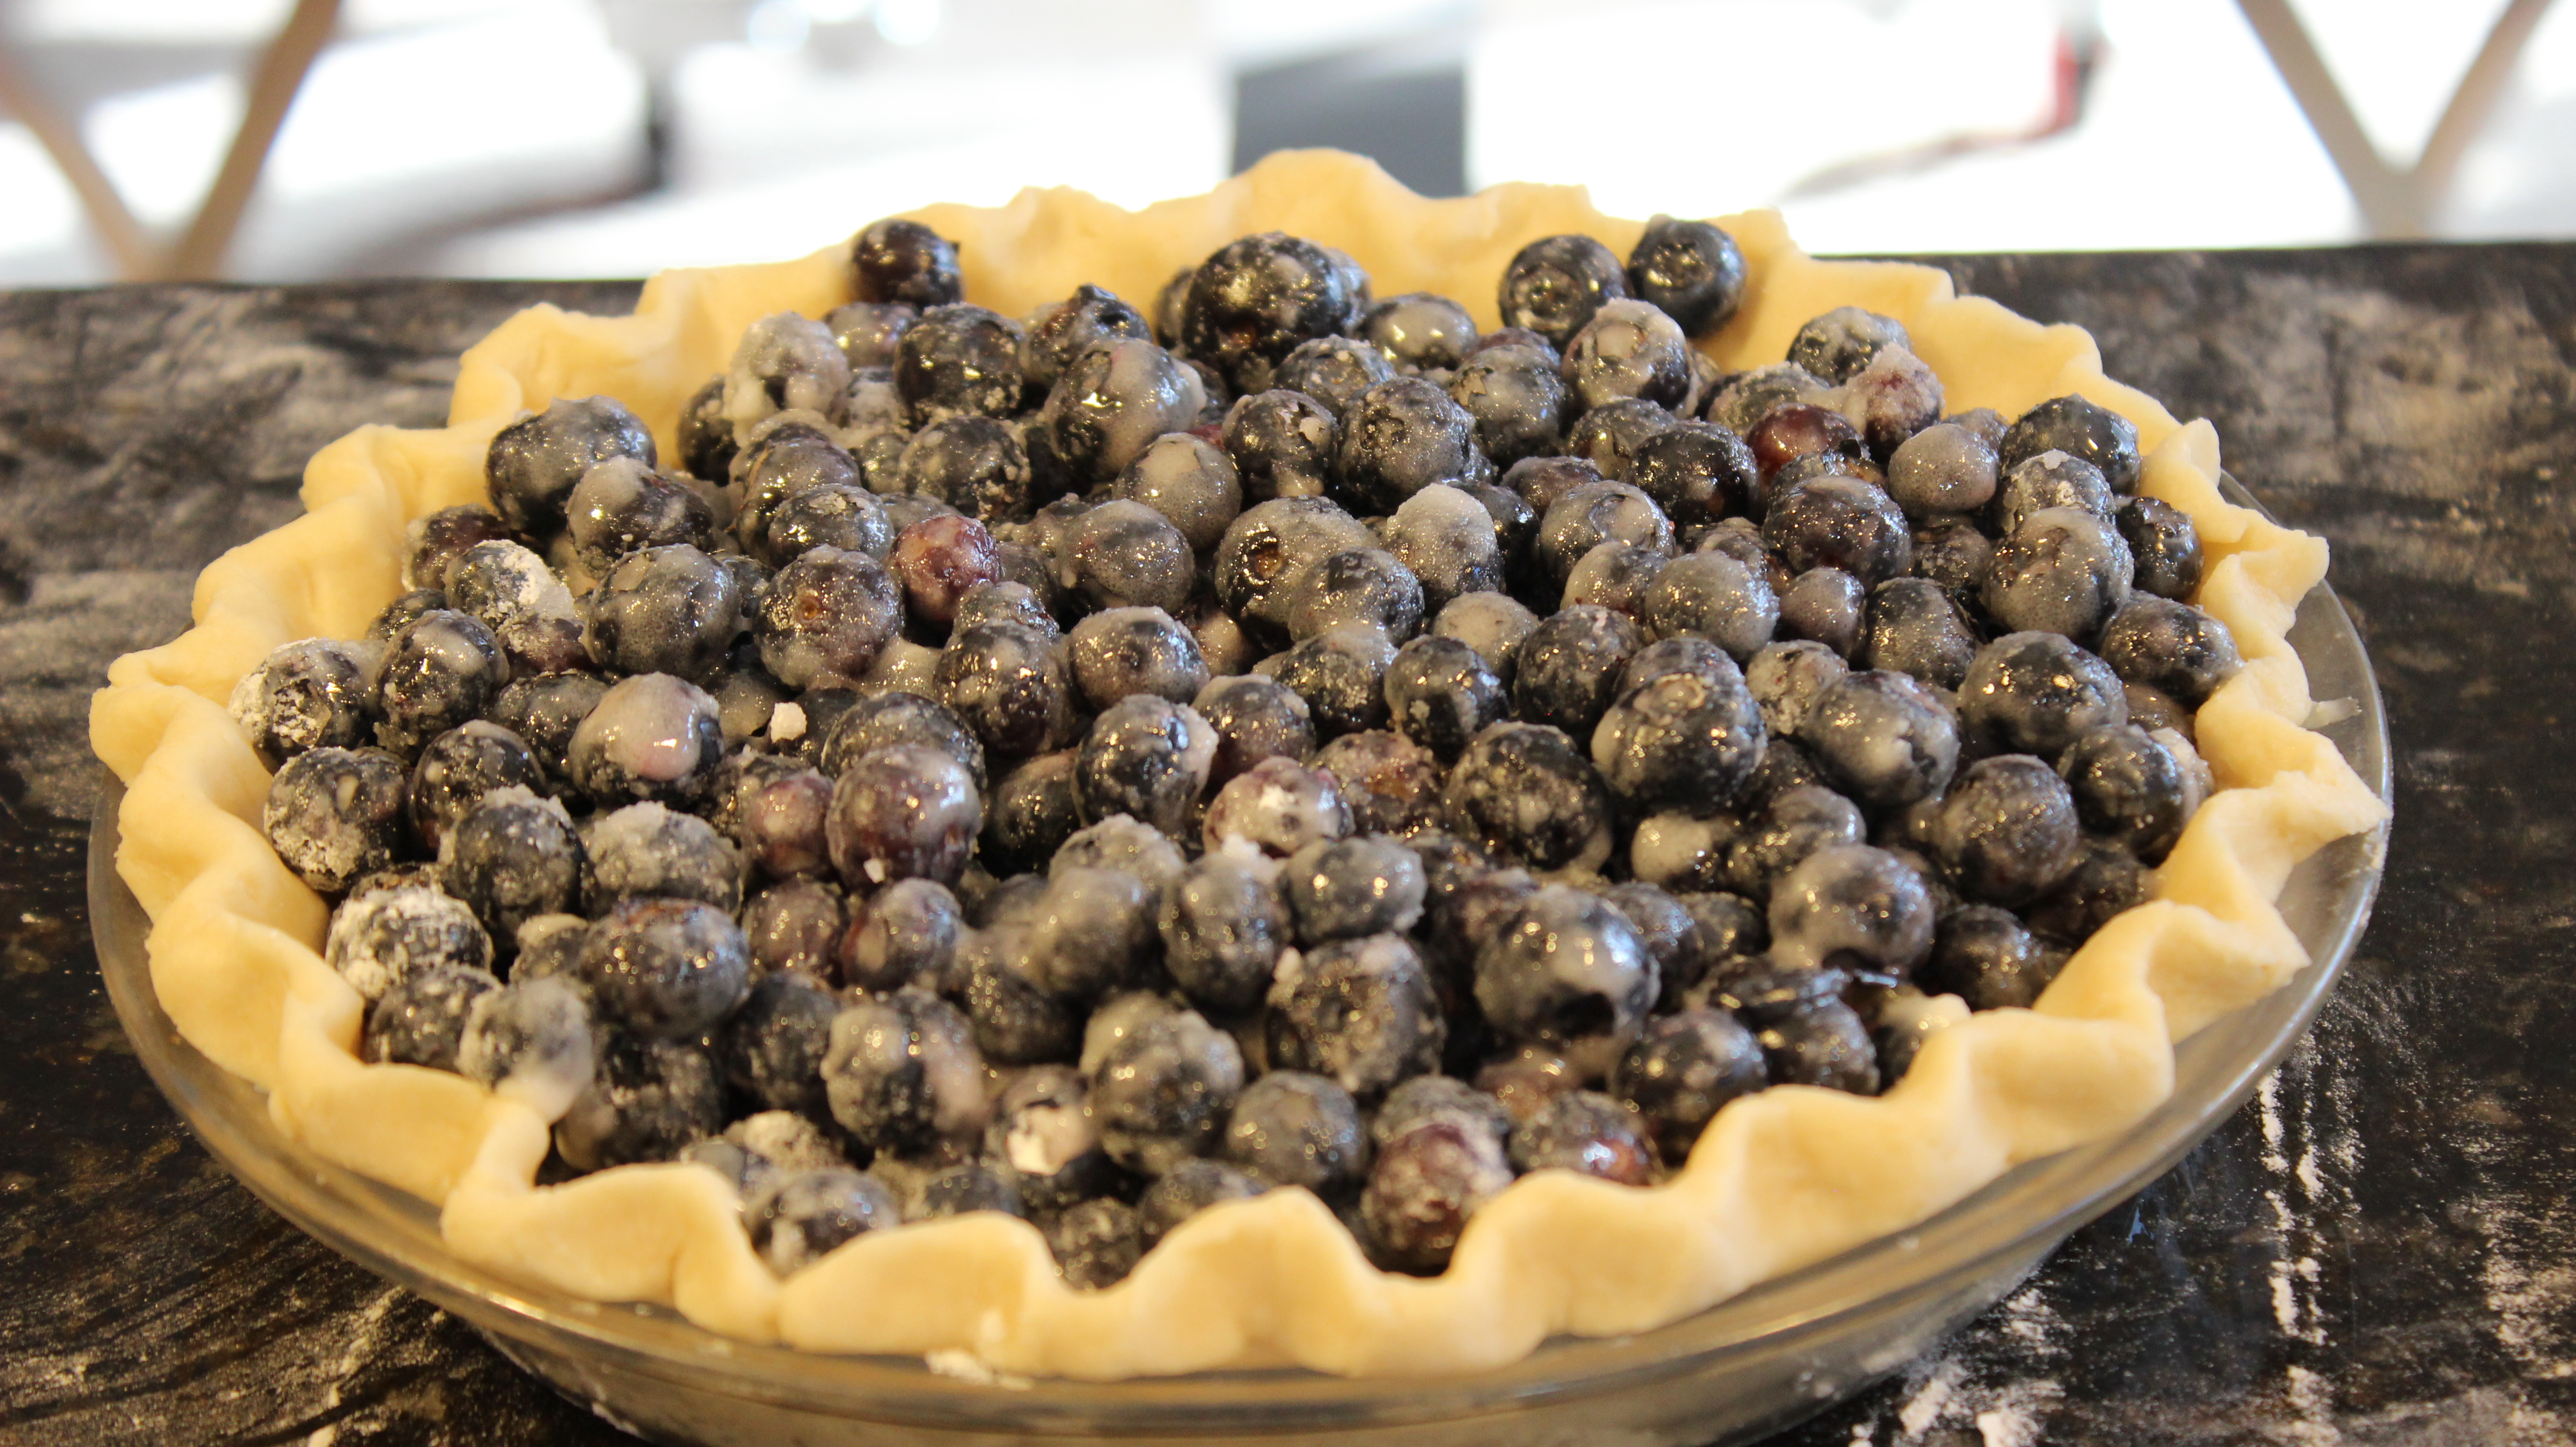
4 1/2 cups blueberries (that’s after you have sorted thru bad berries…start with 5 cups to have enough)
1 1/2 ” – 2″ pie leaf cut outs or what ever shape cookie cutter you want to dress the top of the pie with instead of using a whole sheet of pie crust dough
DIRECTIONS:
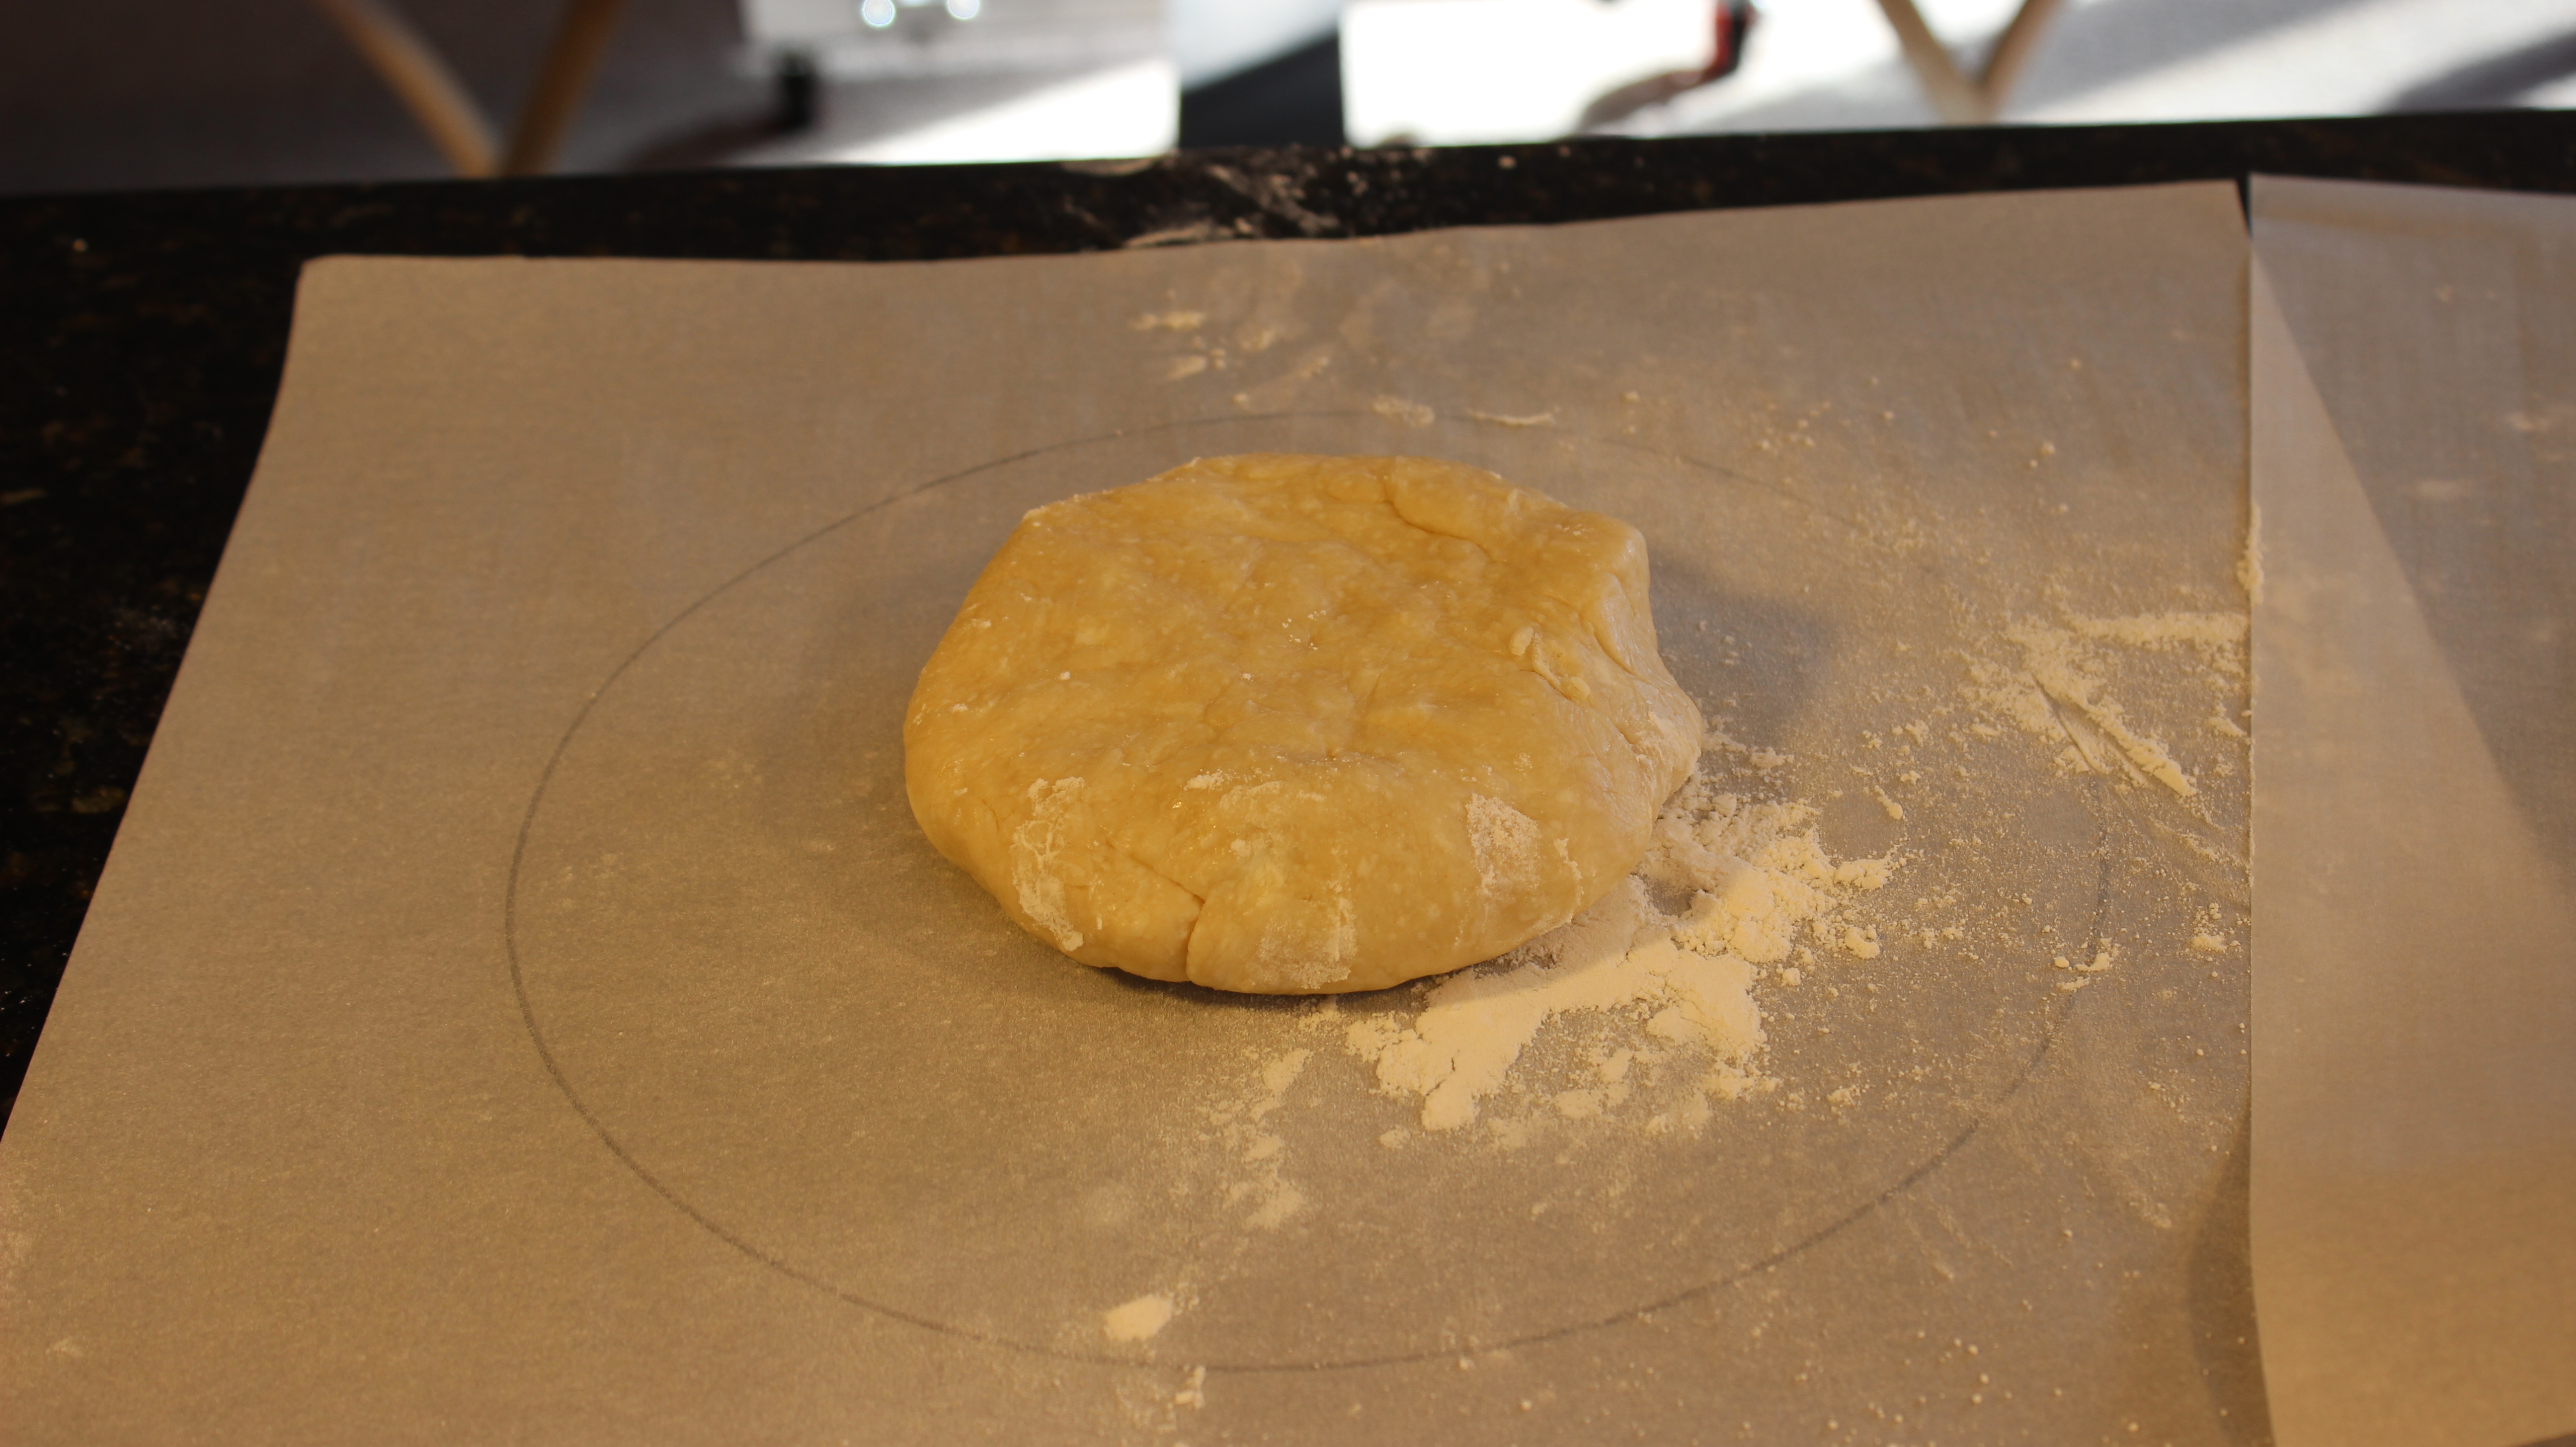
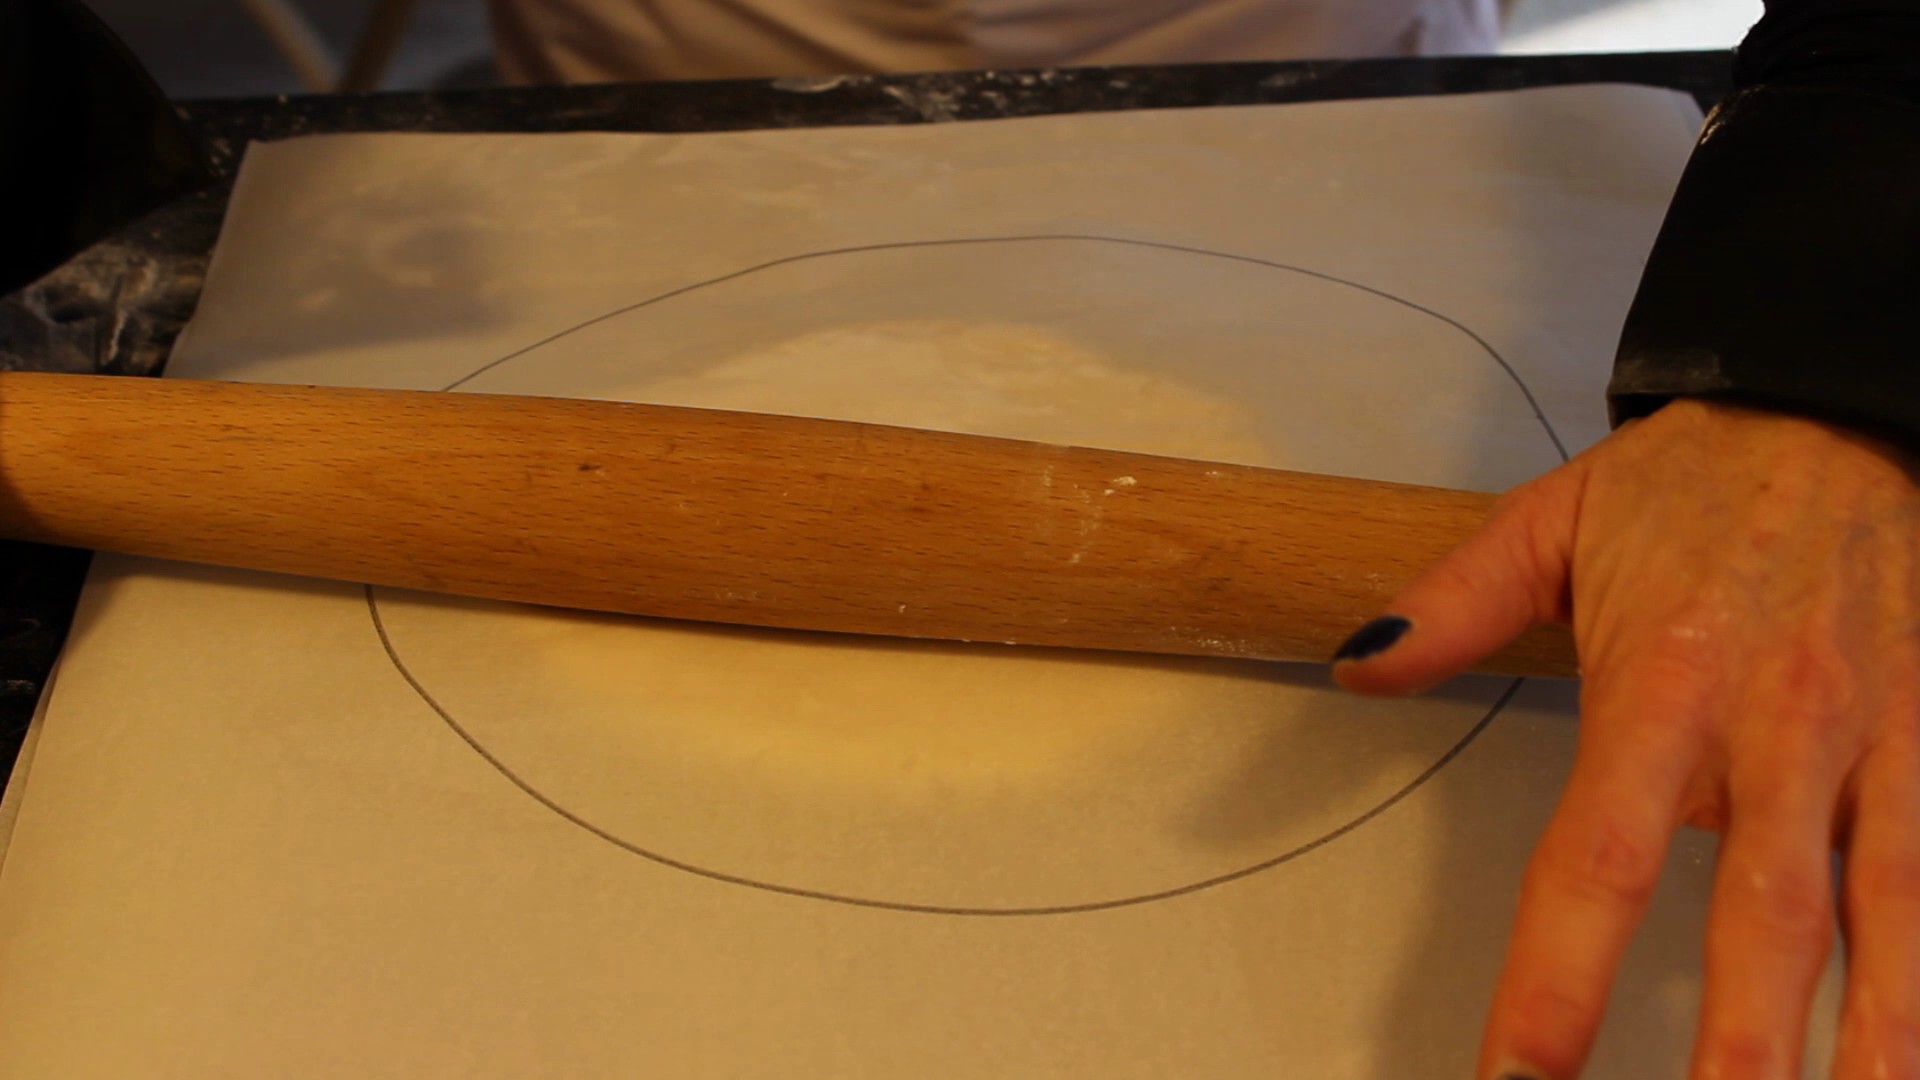
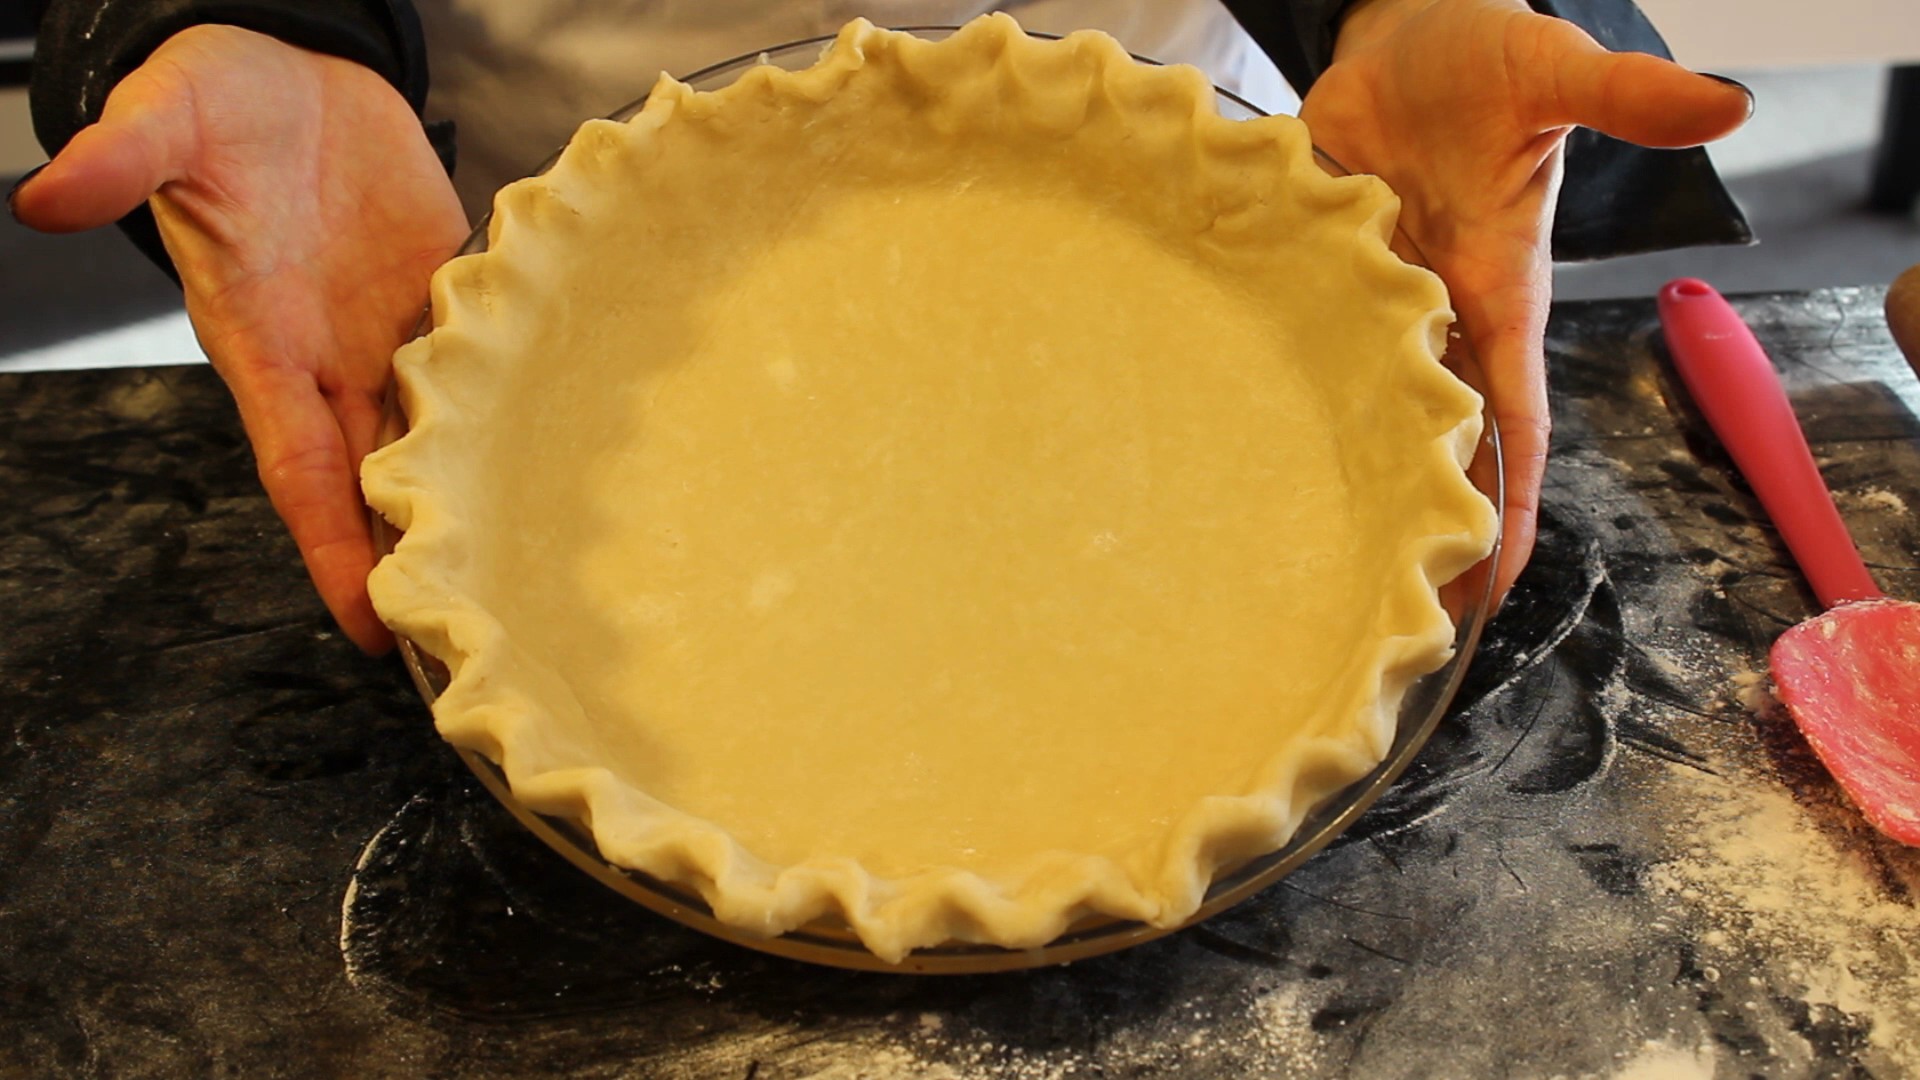
Trace the edge of the pie plate onto both pieces of parchment paper
Roll out 1/2 of the pie crust at a time in between two pieces of parchment with circle drawing on the outside
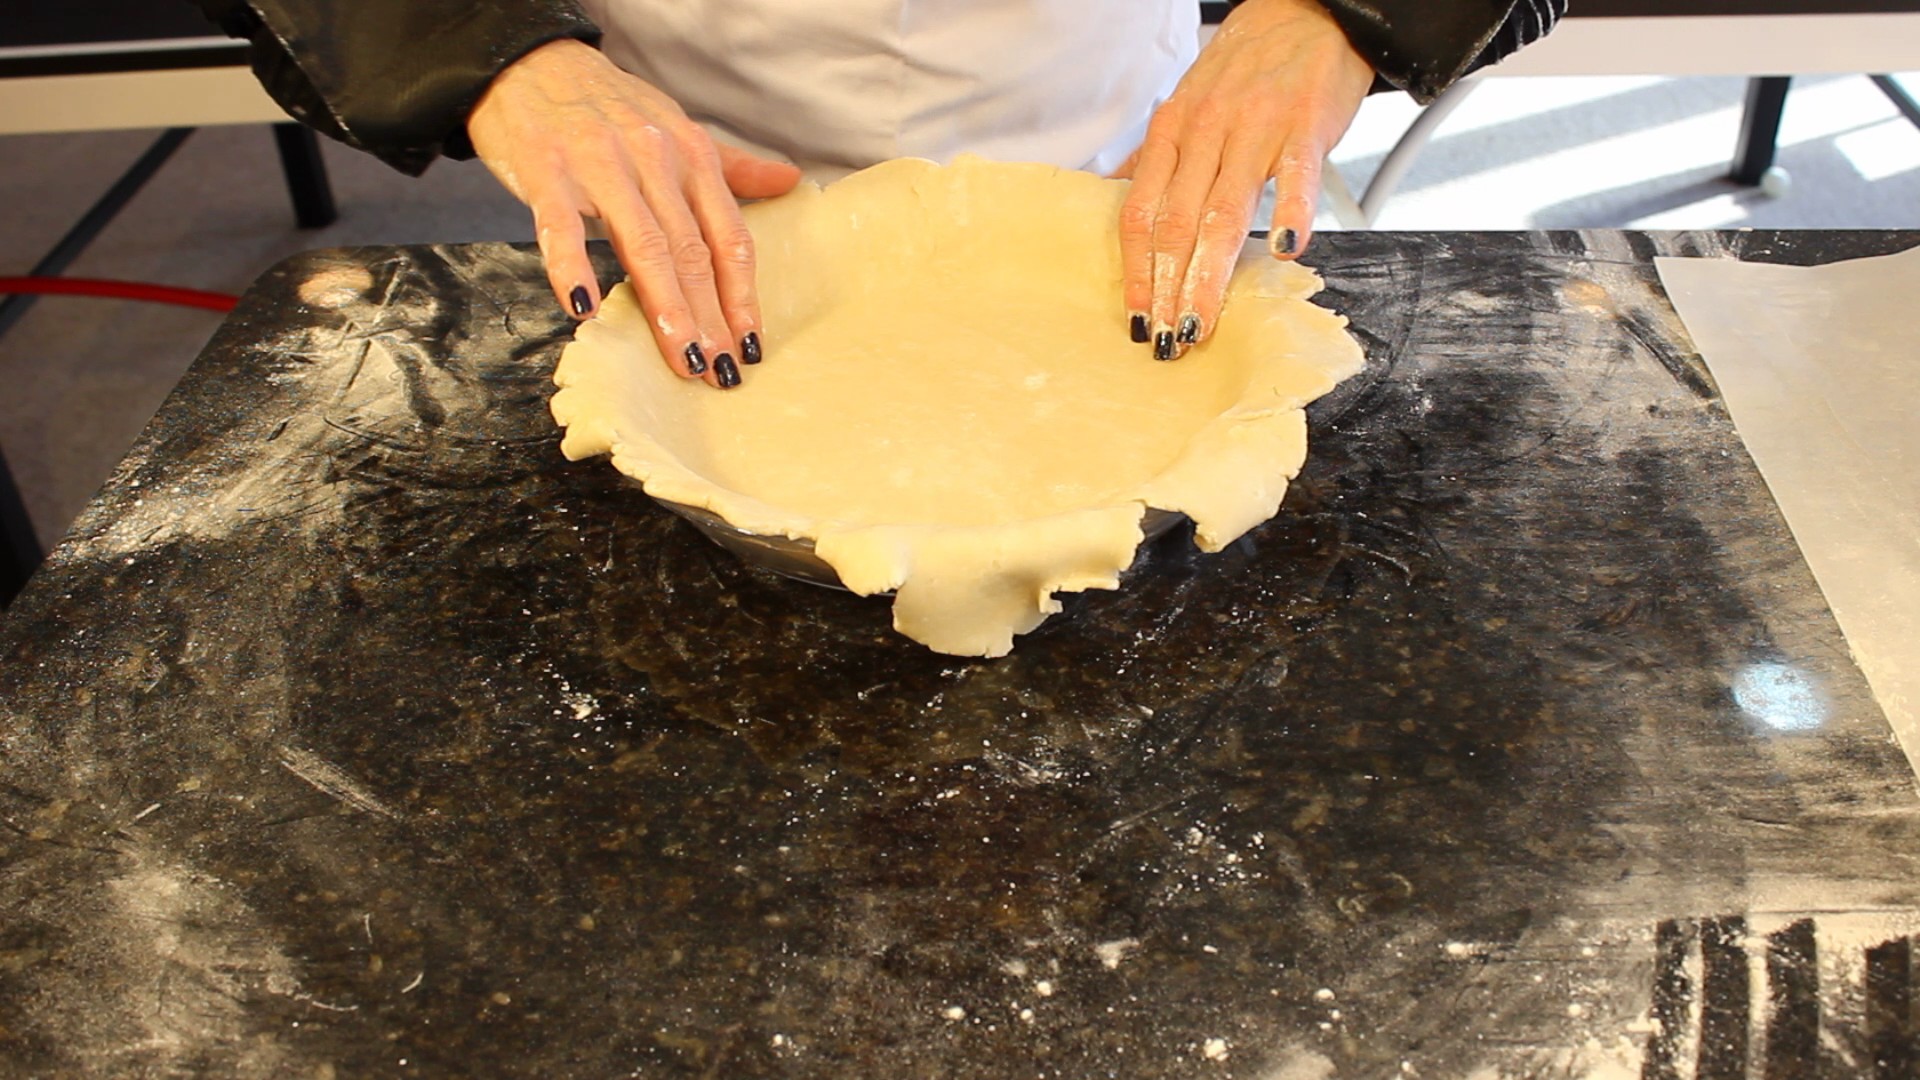
When the dough is rolled out to approx 1/8″ thick and the proper circle size flip pie dough over with parchment paper into pie plate
Gently fit pie dough into dish without pushing down hard and place into the fridge
Wash and dry blueberries, picking through them to remove any under and over ripe berries and stems
Place berries in a large bowl and add 1/4 cup corn starch, 1/2 cup sugar, 1/8 tsp salt and juice from 1/2 lemon and toss until coated
Put the bowl of blueberries into the fridge
Roll out the other pie dough disc and cut out leaf shapes or what ever shape you want to be the top layer of the pie
Lay down a piece of parchment on a cookie sheet with a sprinkle of flour and place leaf cut outs onto the cookie sheet
Put leaf cut outs into the fridge
Take out pie dish with pie dough from fridge and crimp edges
Pour the blueberries into the pie dish and back into the fridge
Whisk 1 egg with 1 tbsp of heavy cream
Take the leaf cut-outs on the cookie sheet from the fridge and brush with the egg wash
Take the blueberries in the pie dish out of the fridge and dot the pie with 1 1/2 tbsp of cut up cold butter
Begin to place leaf cut-outs on top of the blueberries. Go along the edge of pie all around and then work your way in (you only need to gently push a couple of the edges of the leaf to crimped edges of the pie and to each leaf
Put the pie back into the fridge for 15 minutes while you pre-heat oven to 400º
Place blueberry pie on the cookie sheet that has a piece of parchment covering the bottom in case of spillage and pop into the oven for 30 minutes
Turn the oven down to 350º and bake for another 40 minutes until a golden crust and juices are bubbly
You must let cool 3 hours so the blueberry juicy can thicken properly
Serve with your best vanilla ice cream and you will be one happy camper! 🙂
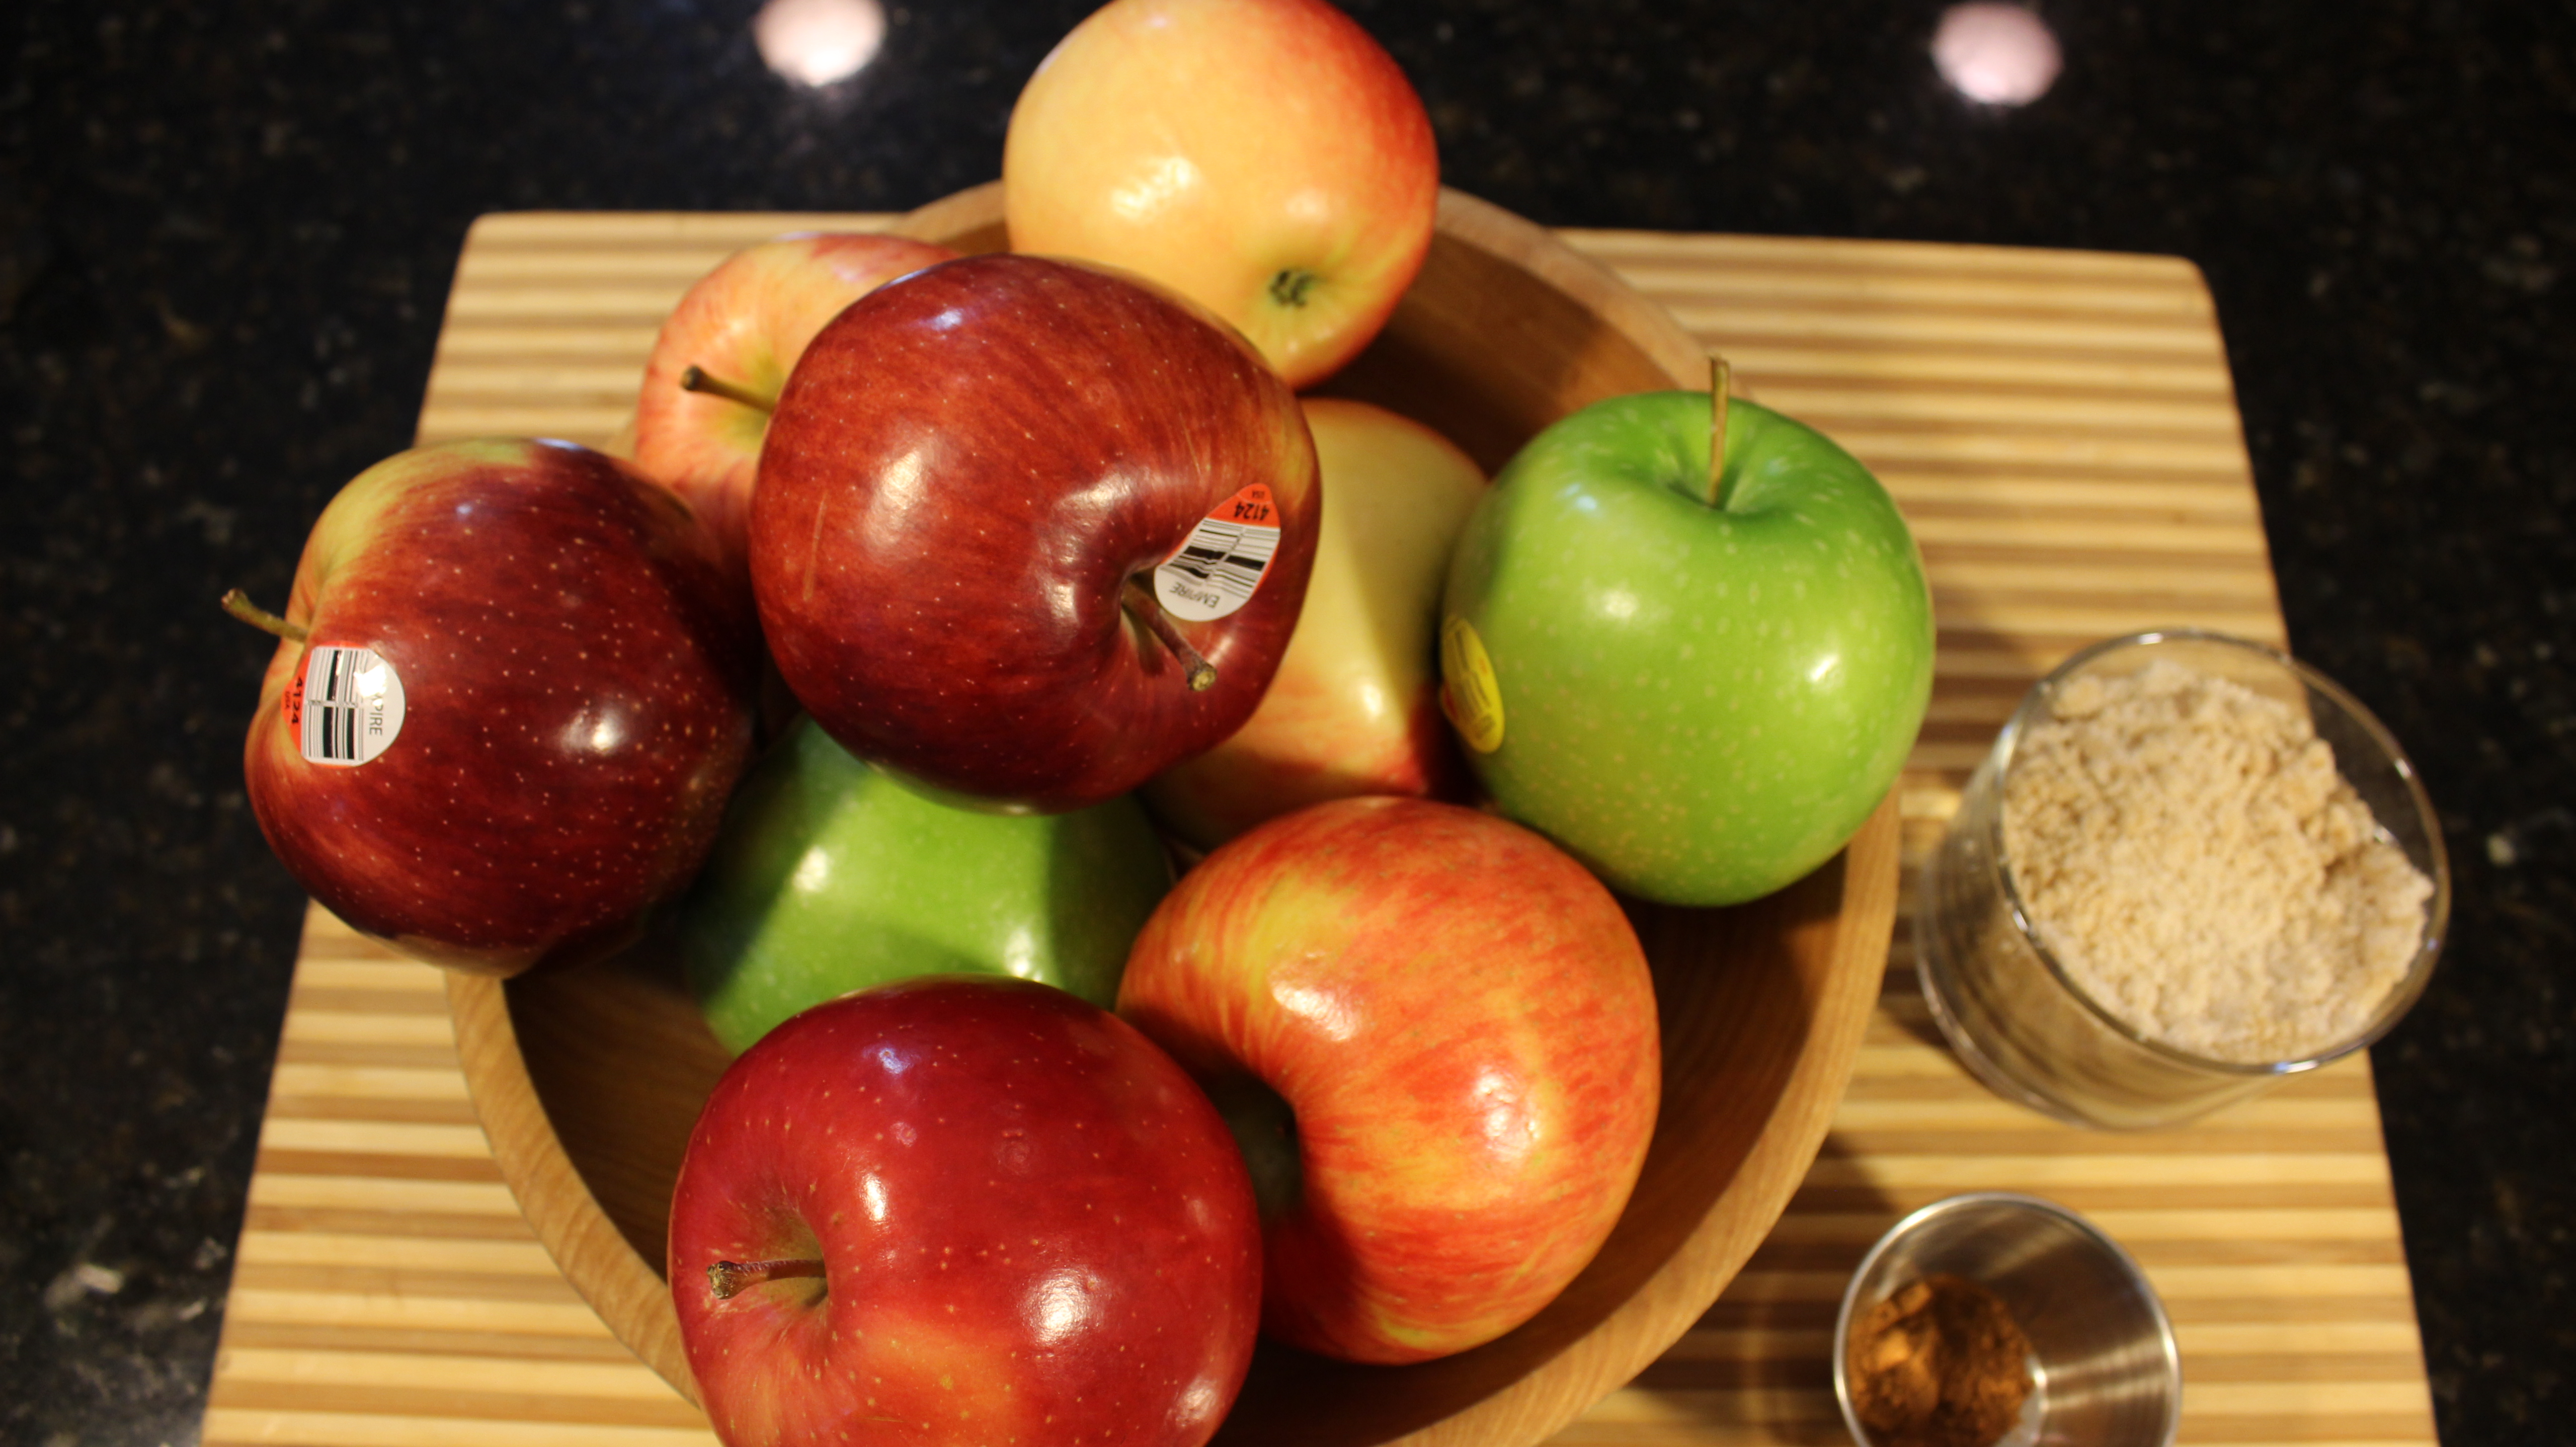
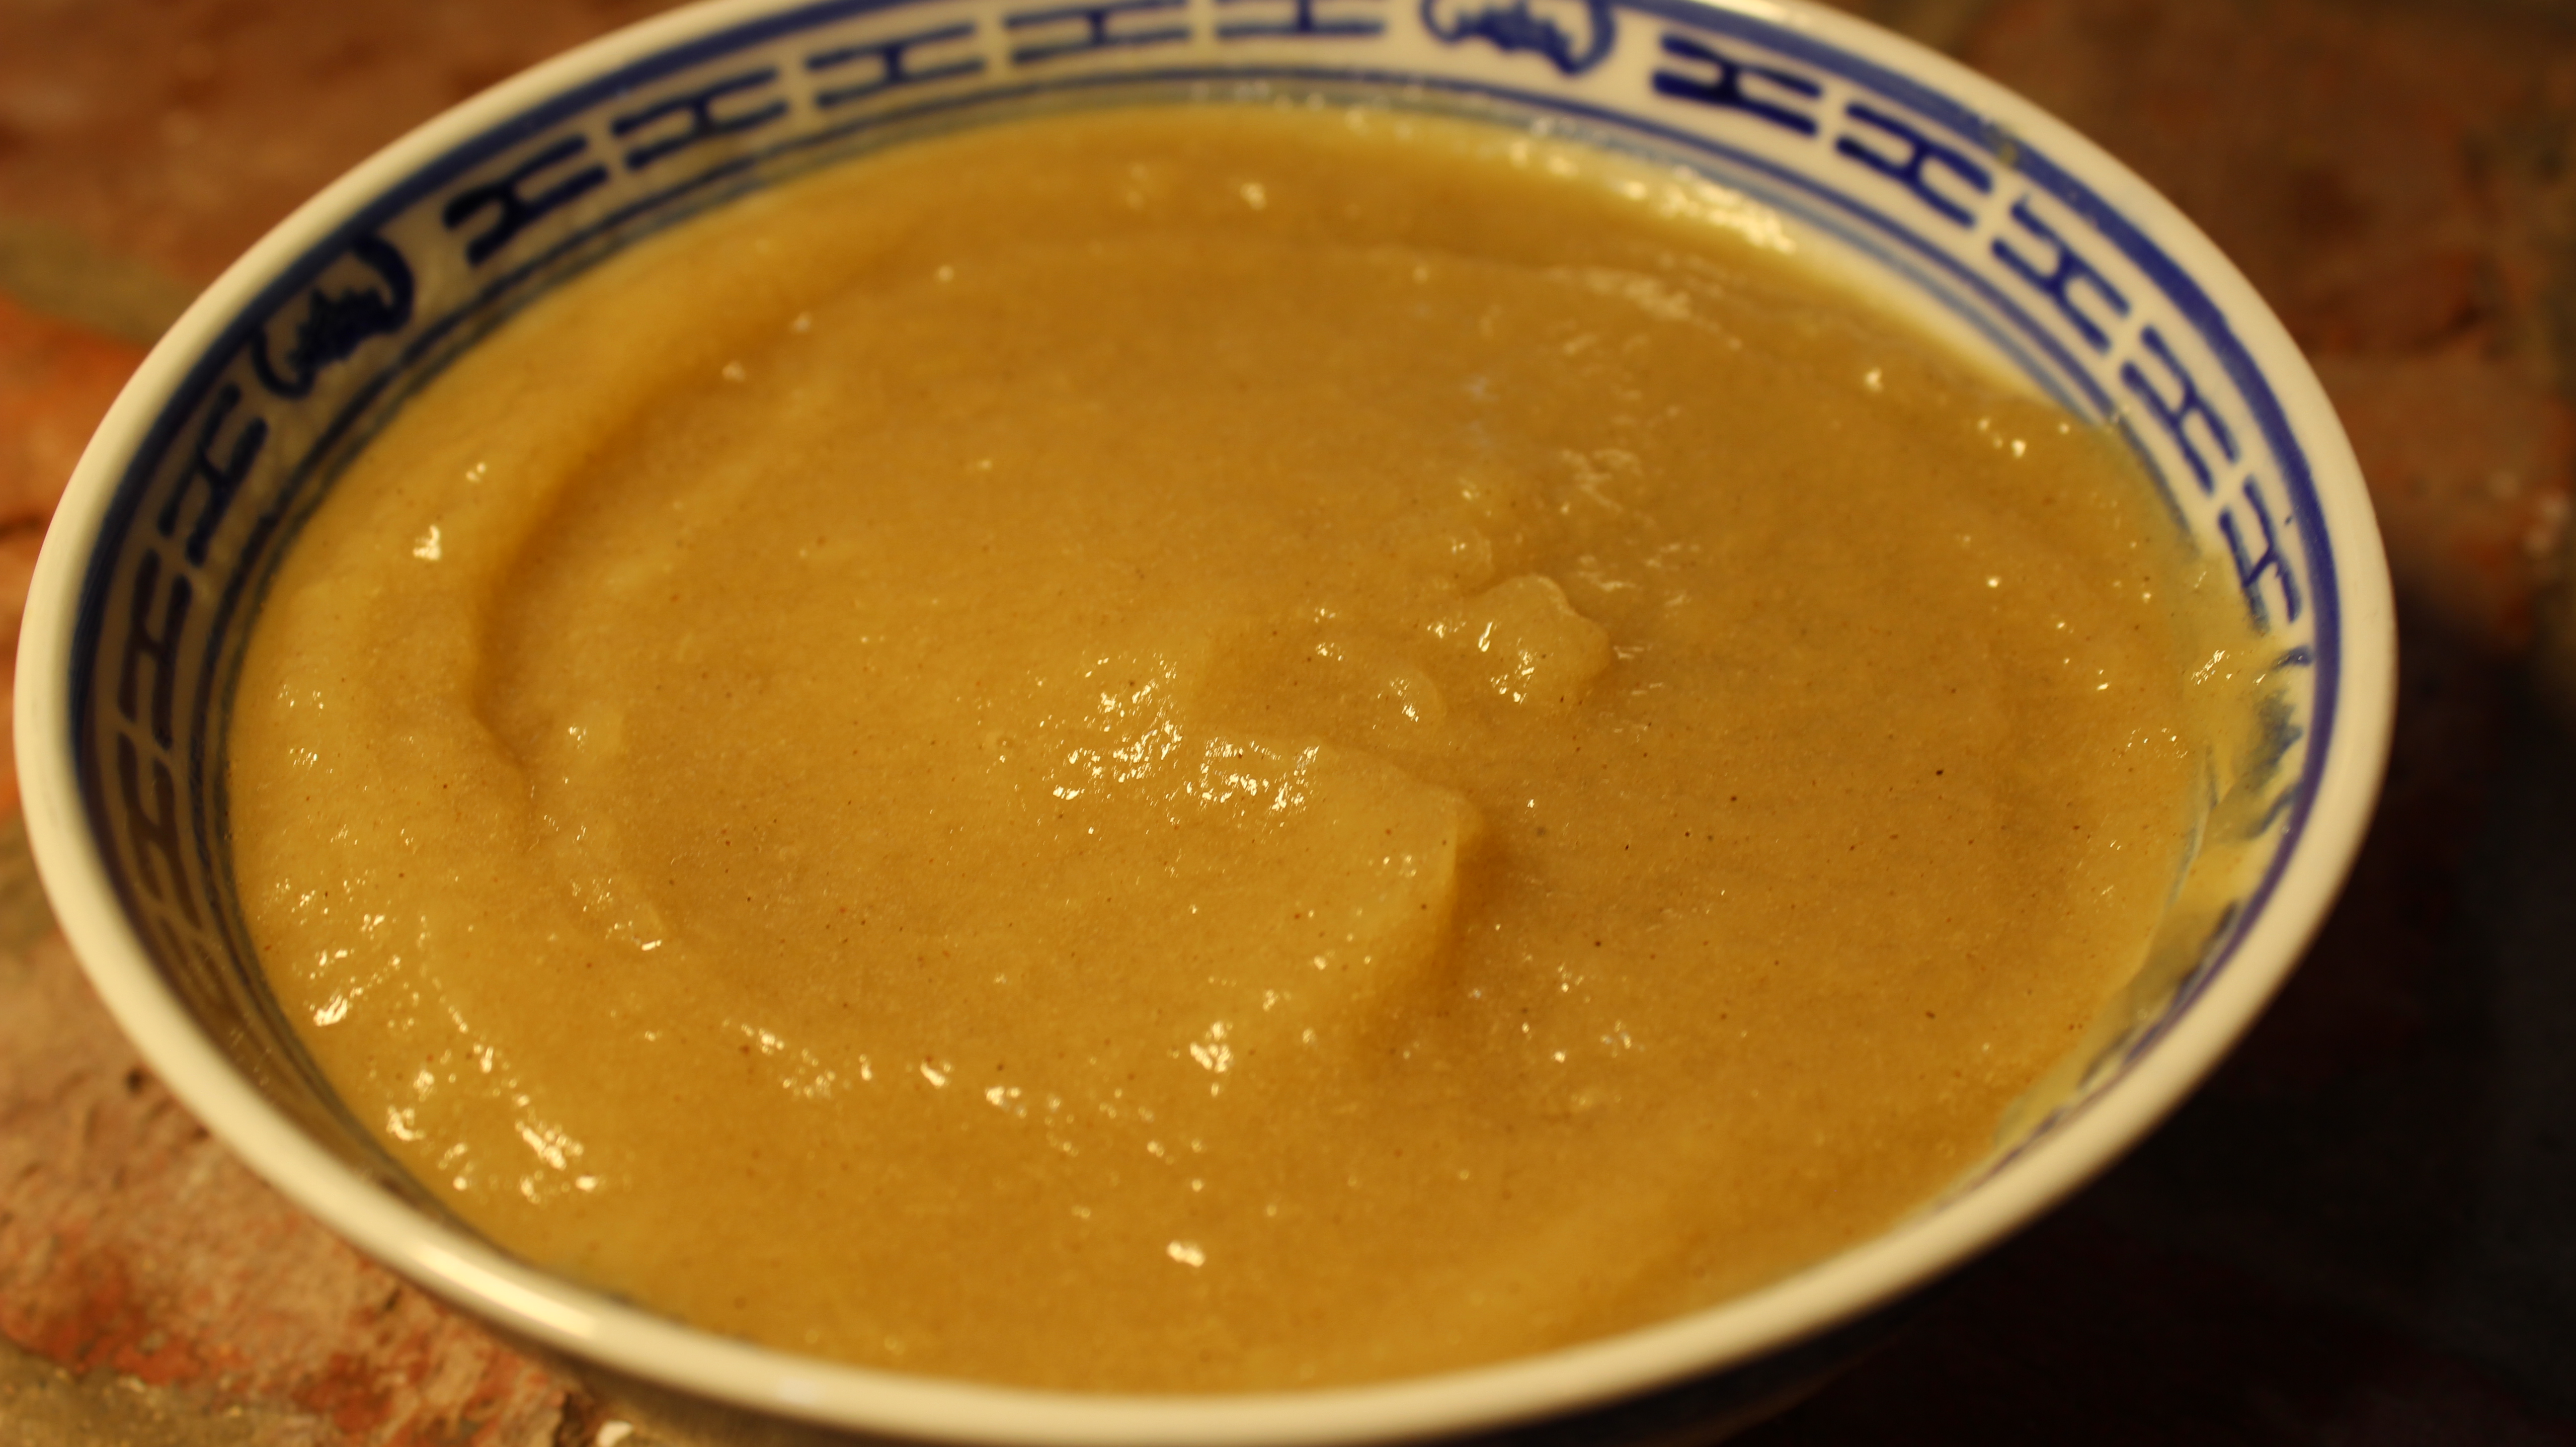
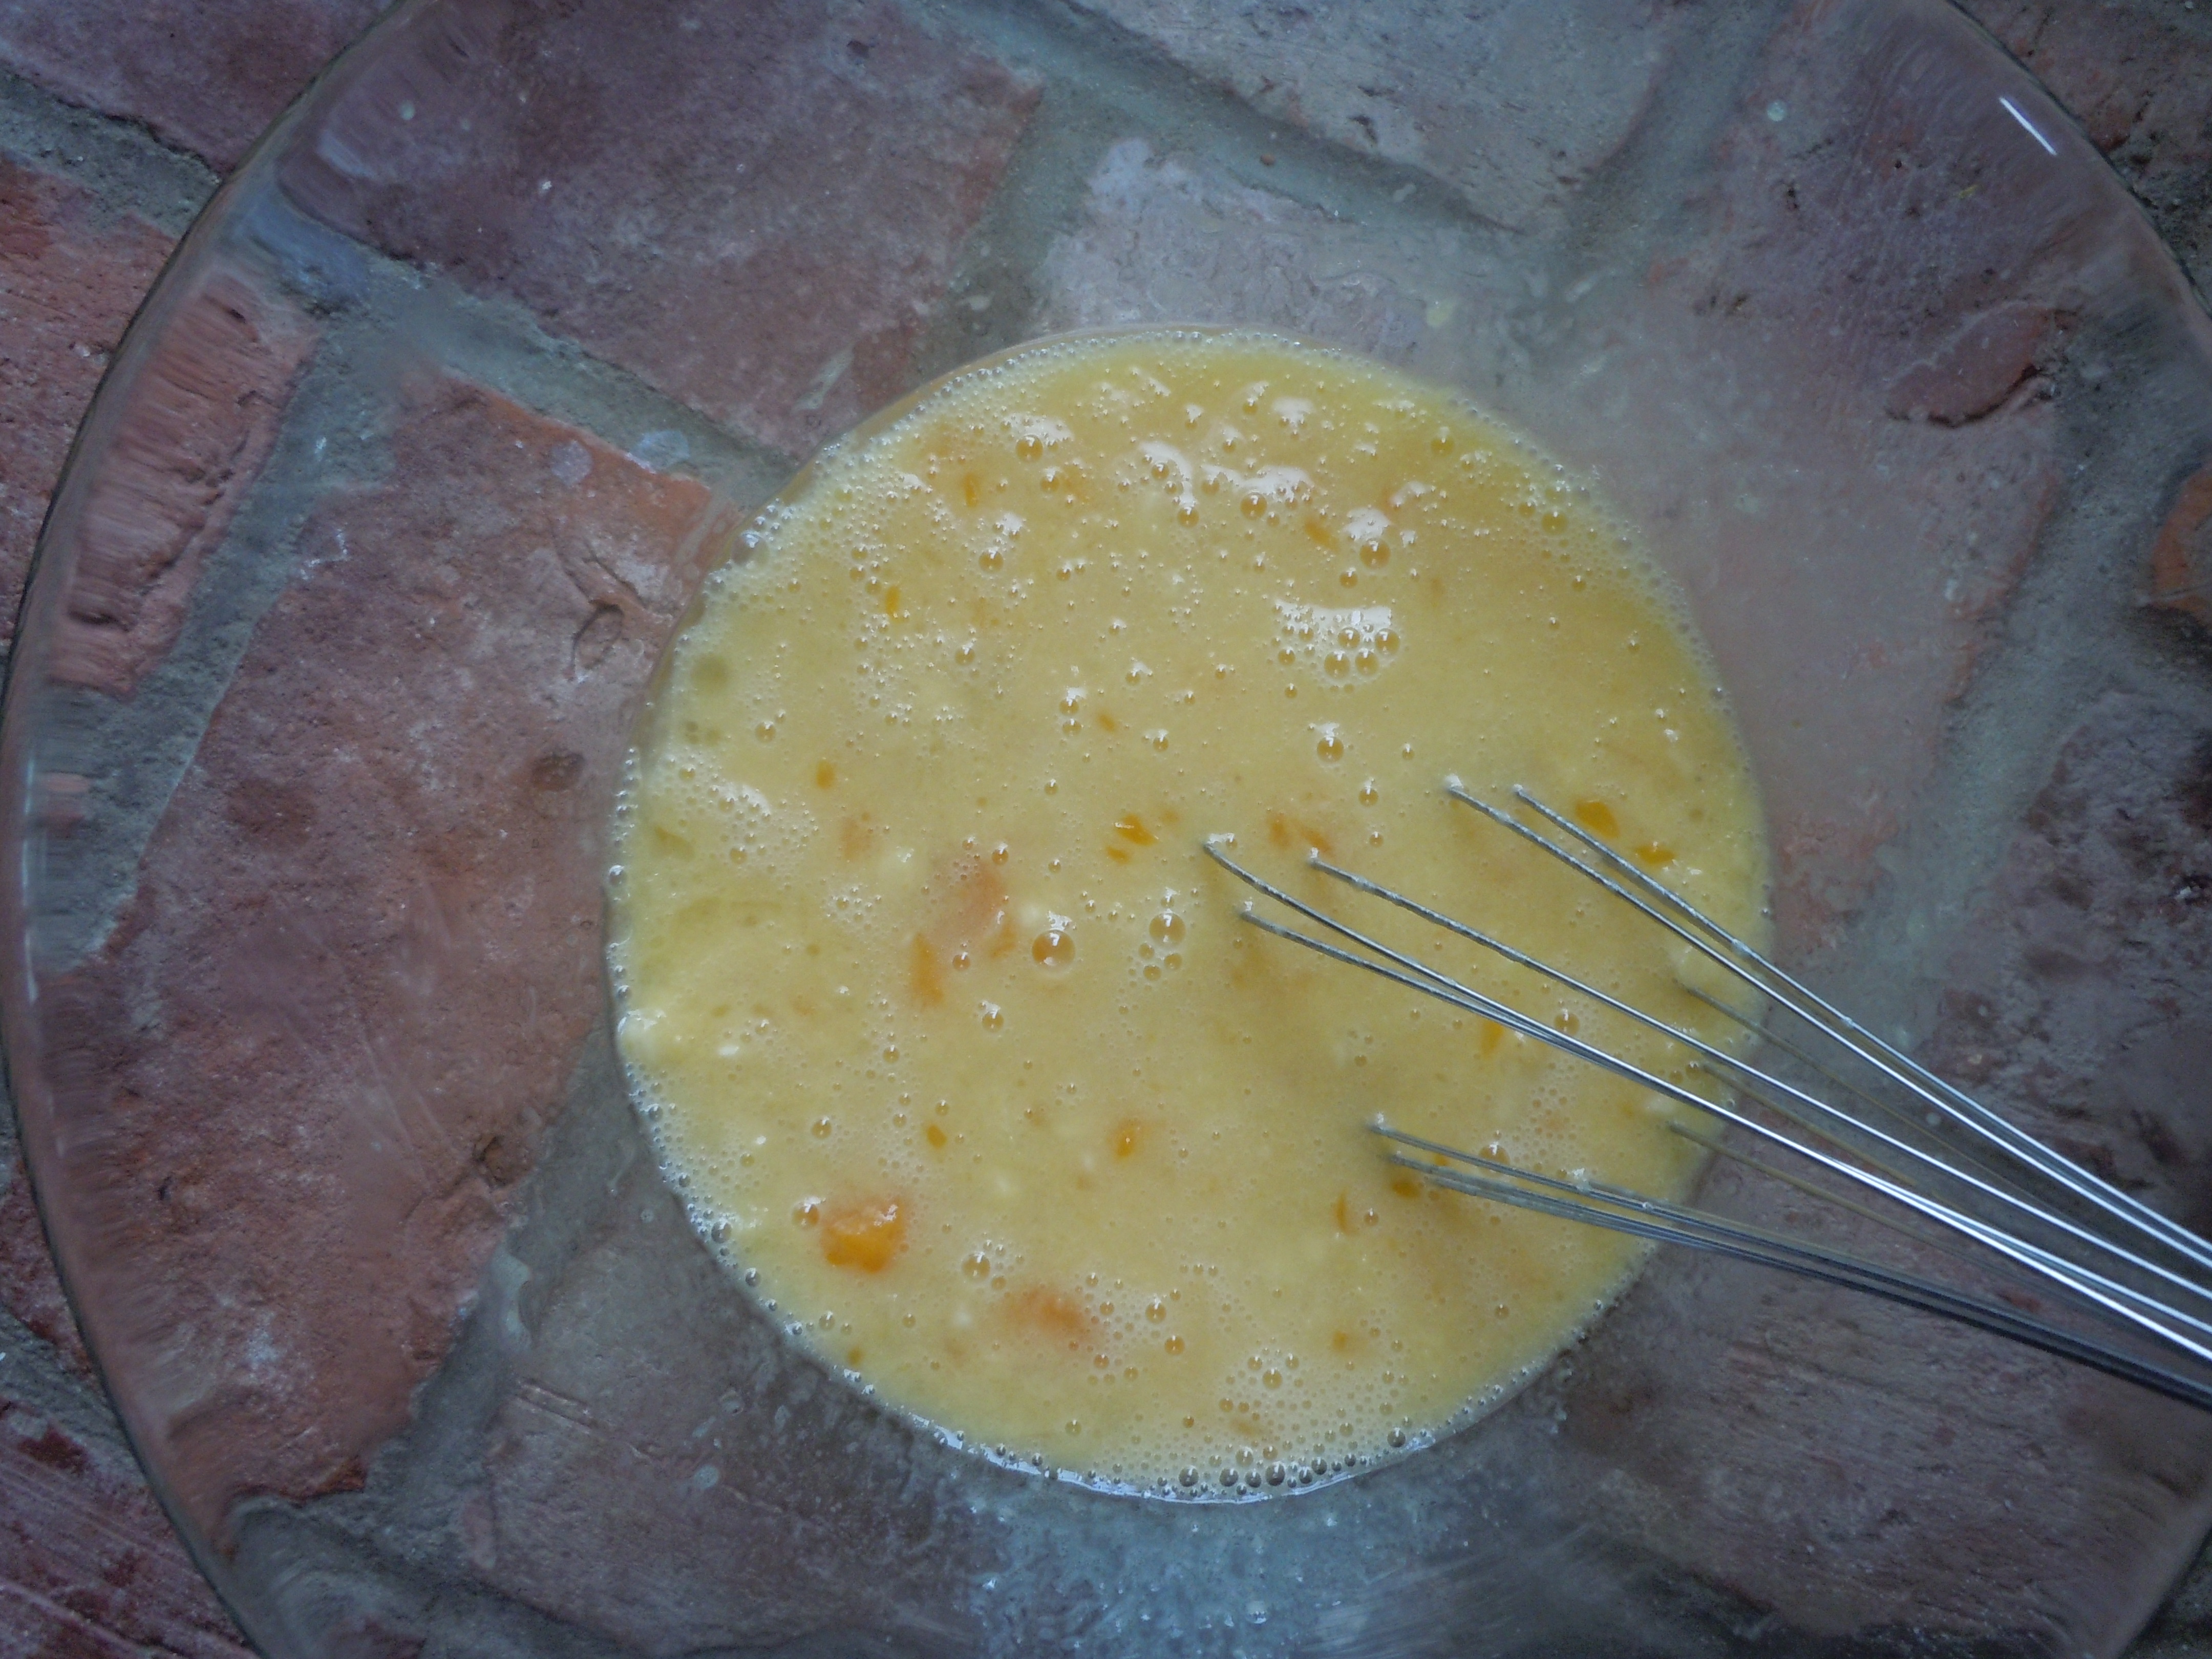
Playing at my childhood friend Karen’s house growing up and smelling her mom’s homemade applesauce simmering on the stove with aromas of apple and cinnamon in the fall air are one of those nostalgic memories that will stay with me my whole life. That’s where the inspiration for this show and recipe came from. I contacted my friend Karen about her mom’s recipe and she was happy to share.
Karen’s mom, Pat, used a food mill to pass the apples through smoothing out the consistency and removing the peels . For those of you who don’t have a food mill I am simplifying that process having you peel the apples prior to simmering. Even though the peel does offer a little extra flavor we will take the middle of the road for convenience purposes. For that smooth texture that I like I put the simmered apples in my food processor in small batches. You can skip this step completely by using a potato masher, whisk or even a fork to work out the lumps to your desired texture.
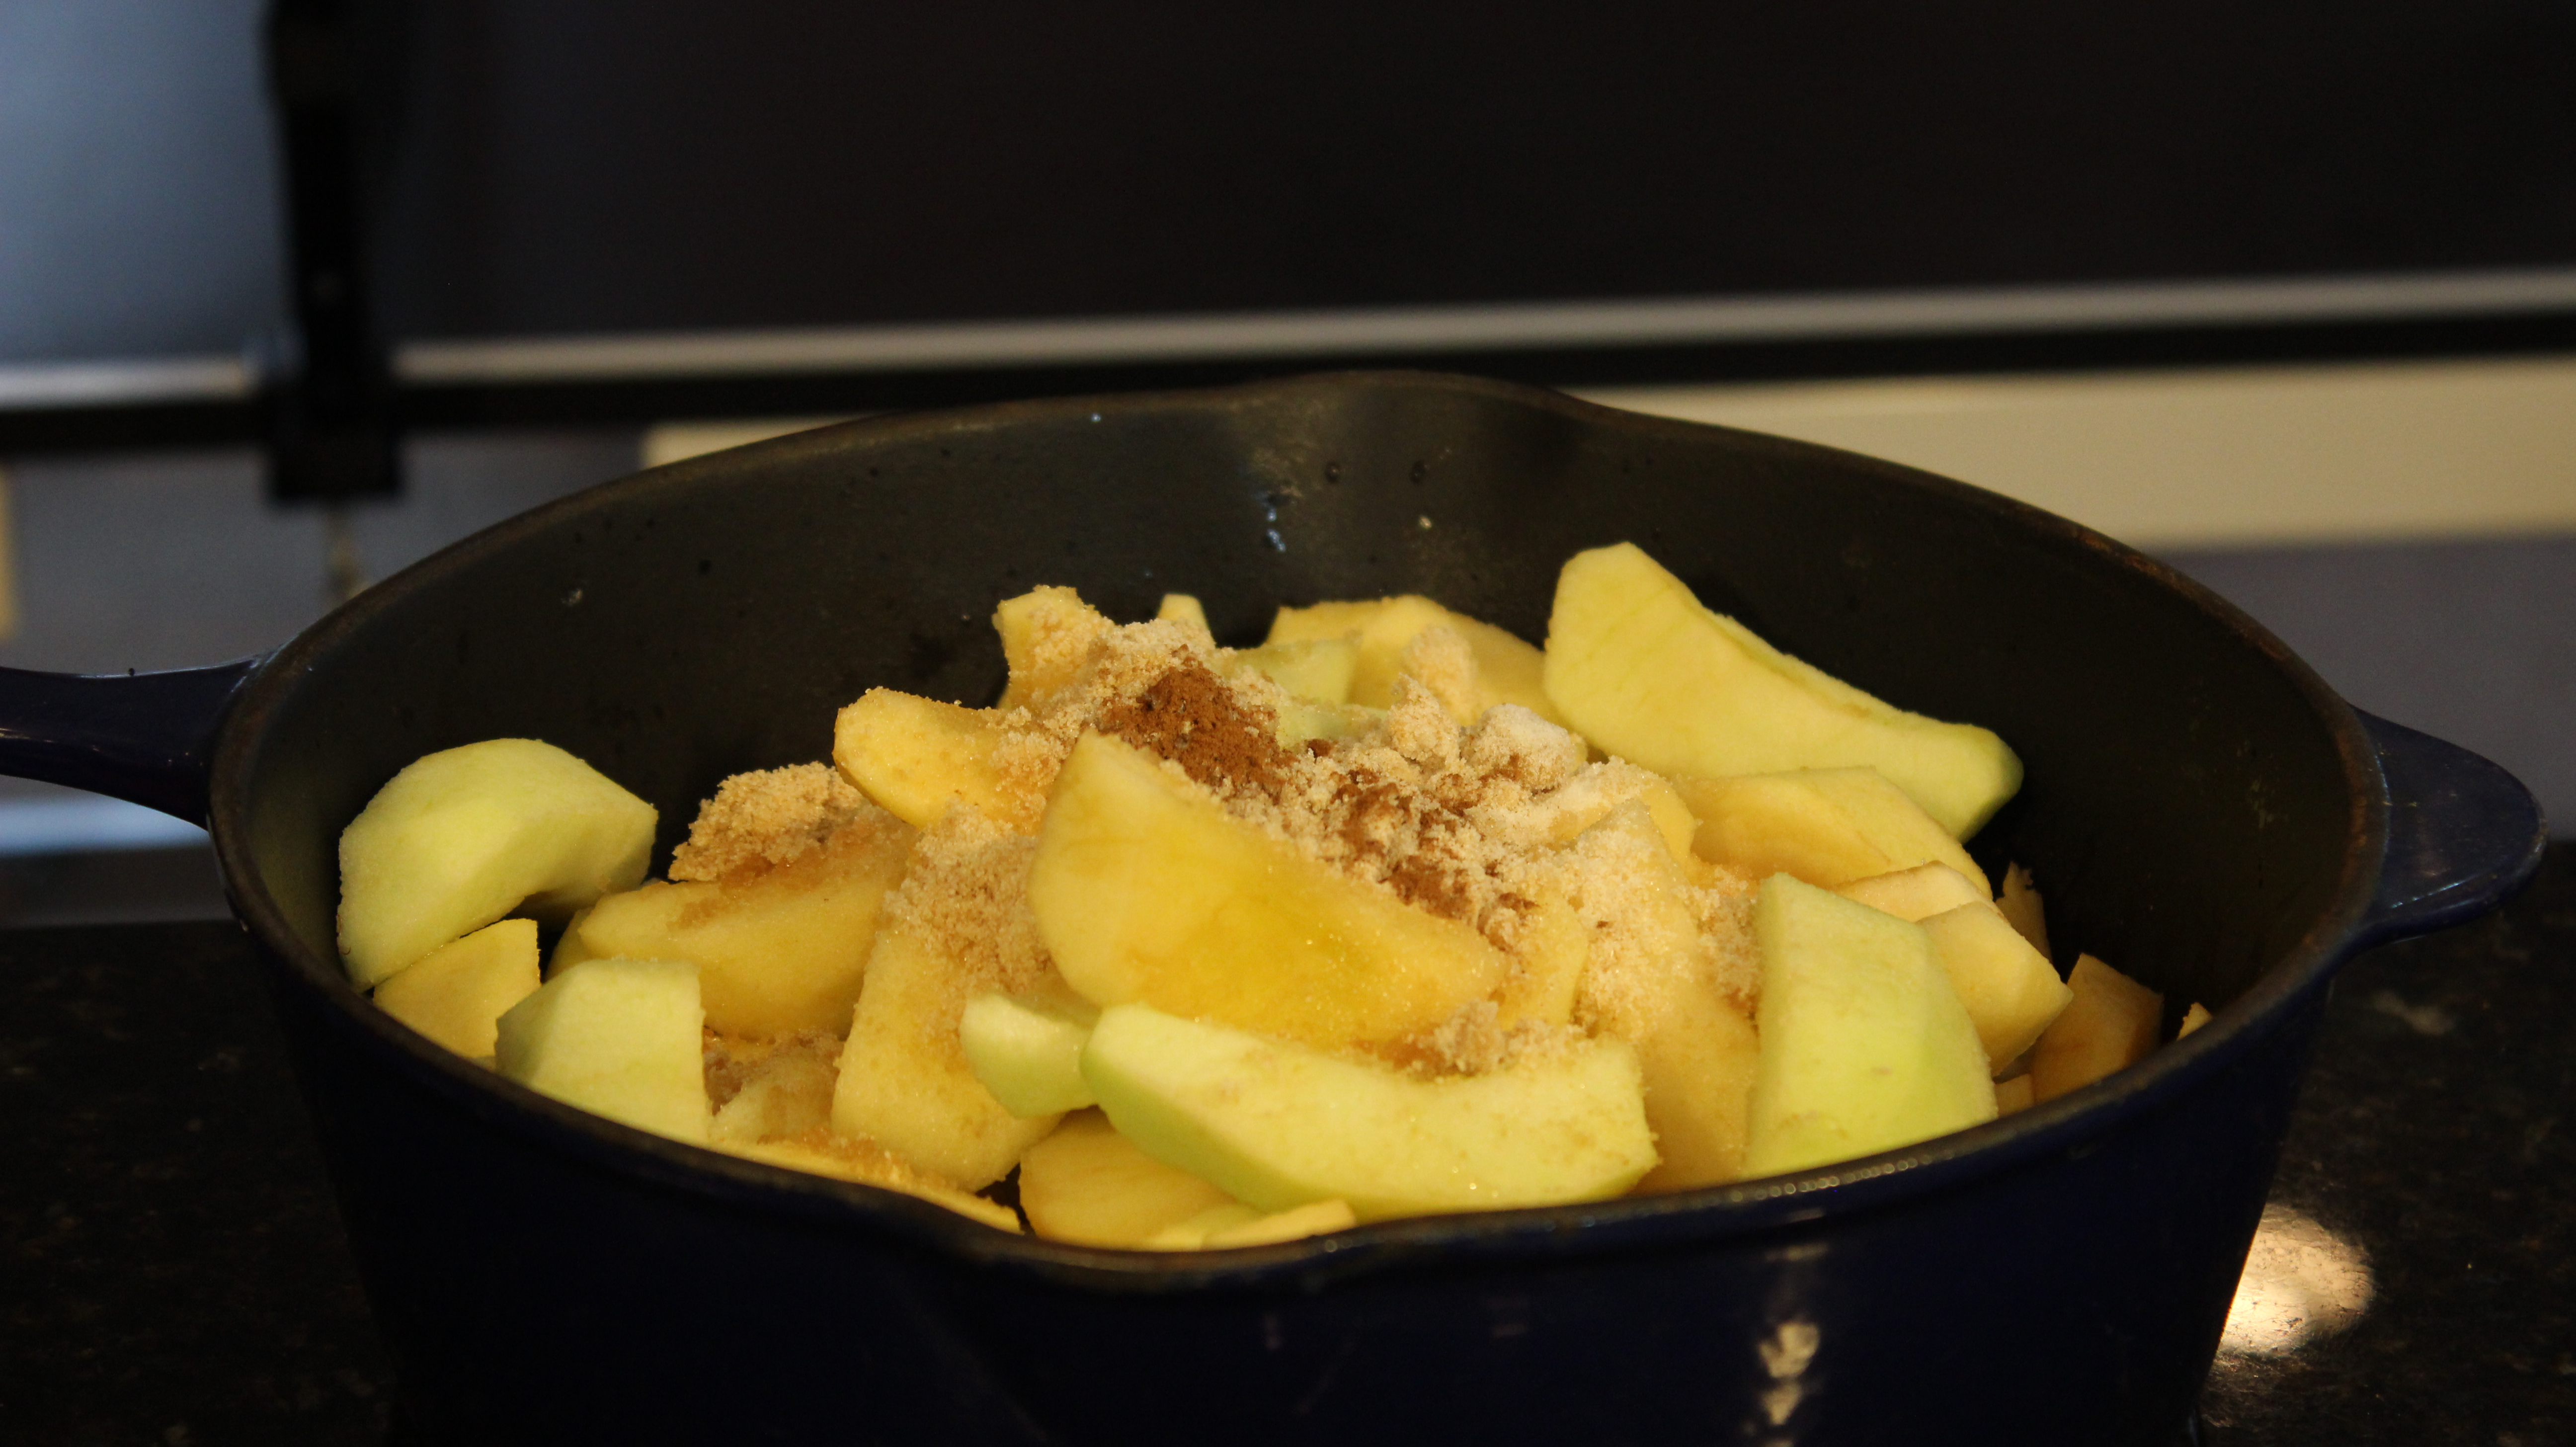
The only addition to Pat’s recipe is that I add in a couple of tablespoons of fresh squeezed lemon juice for a subtle brightness to the sauce balancing out the sweetness. Actually, I add the fresh lemon juice while I peel, core and slice the apples into eighths so they don’t turn brown. I want those cinnamon-apple aromas to permeate the house as soon as possible so I add her spices in the beginning of the simmering. Some recipes even add in orange or lemon peel when simmering the apples but I think that’s a matter of preference and you can get as creative as you want.
Making homemade applesauce is really easy to make filling your kitchen with so many wonderful seasonal aromas you may wonder why you don’t do it more often. You may find your self starting a crackling fire to get the full effect while your apples are simmering on the stove. Be careful if a window is open you may just find a neighbor or two dropping in to “borrow” a cup of sugar.
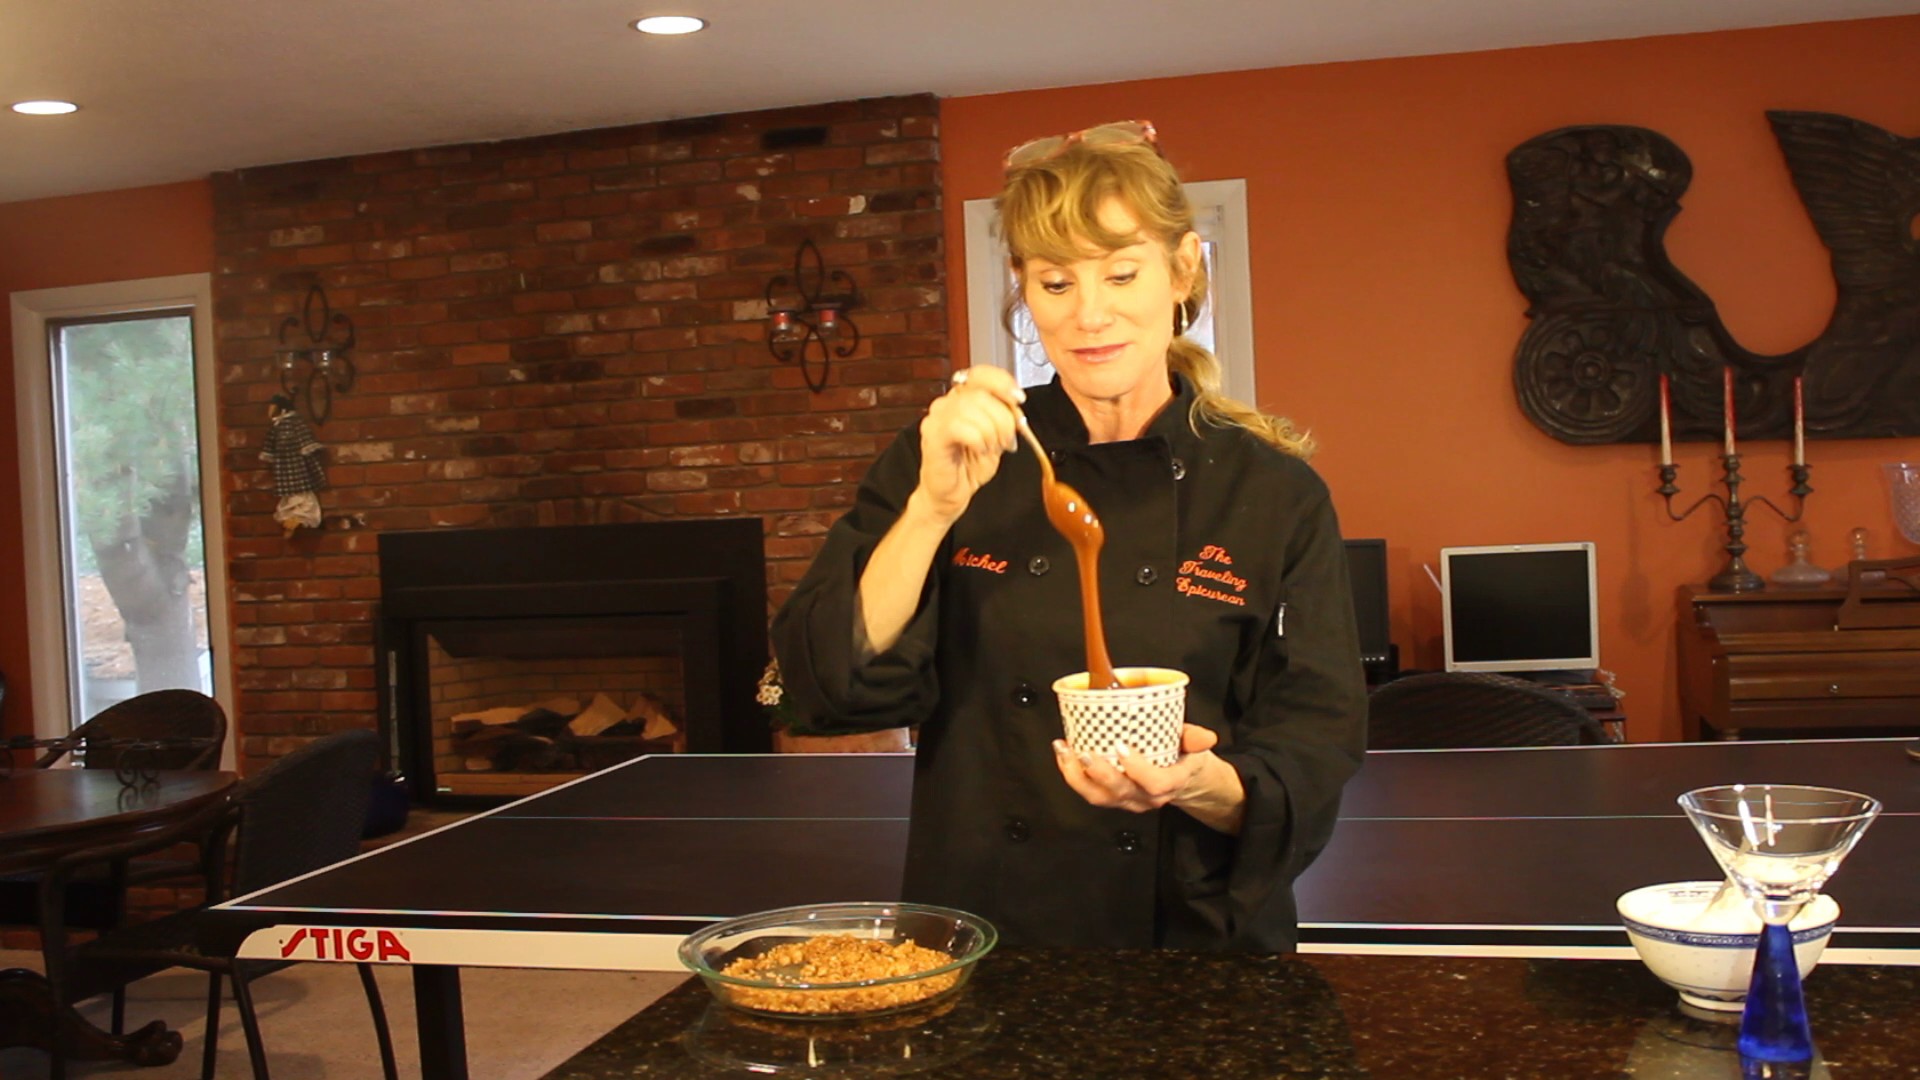
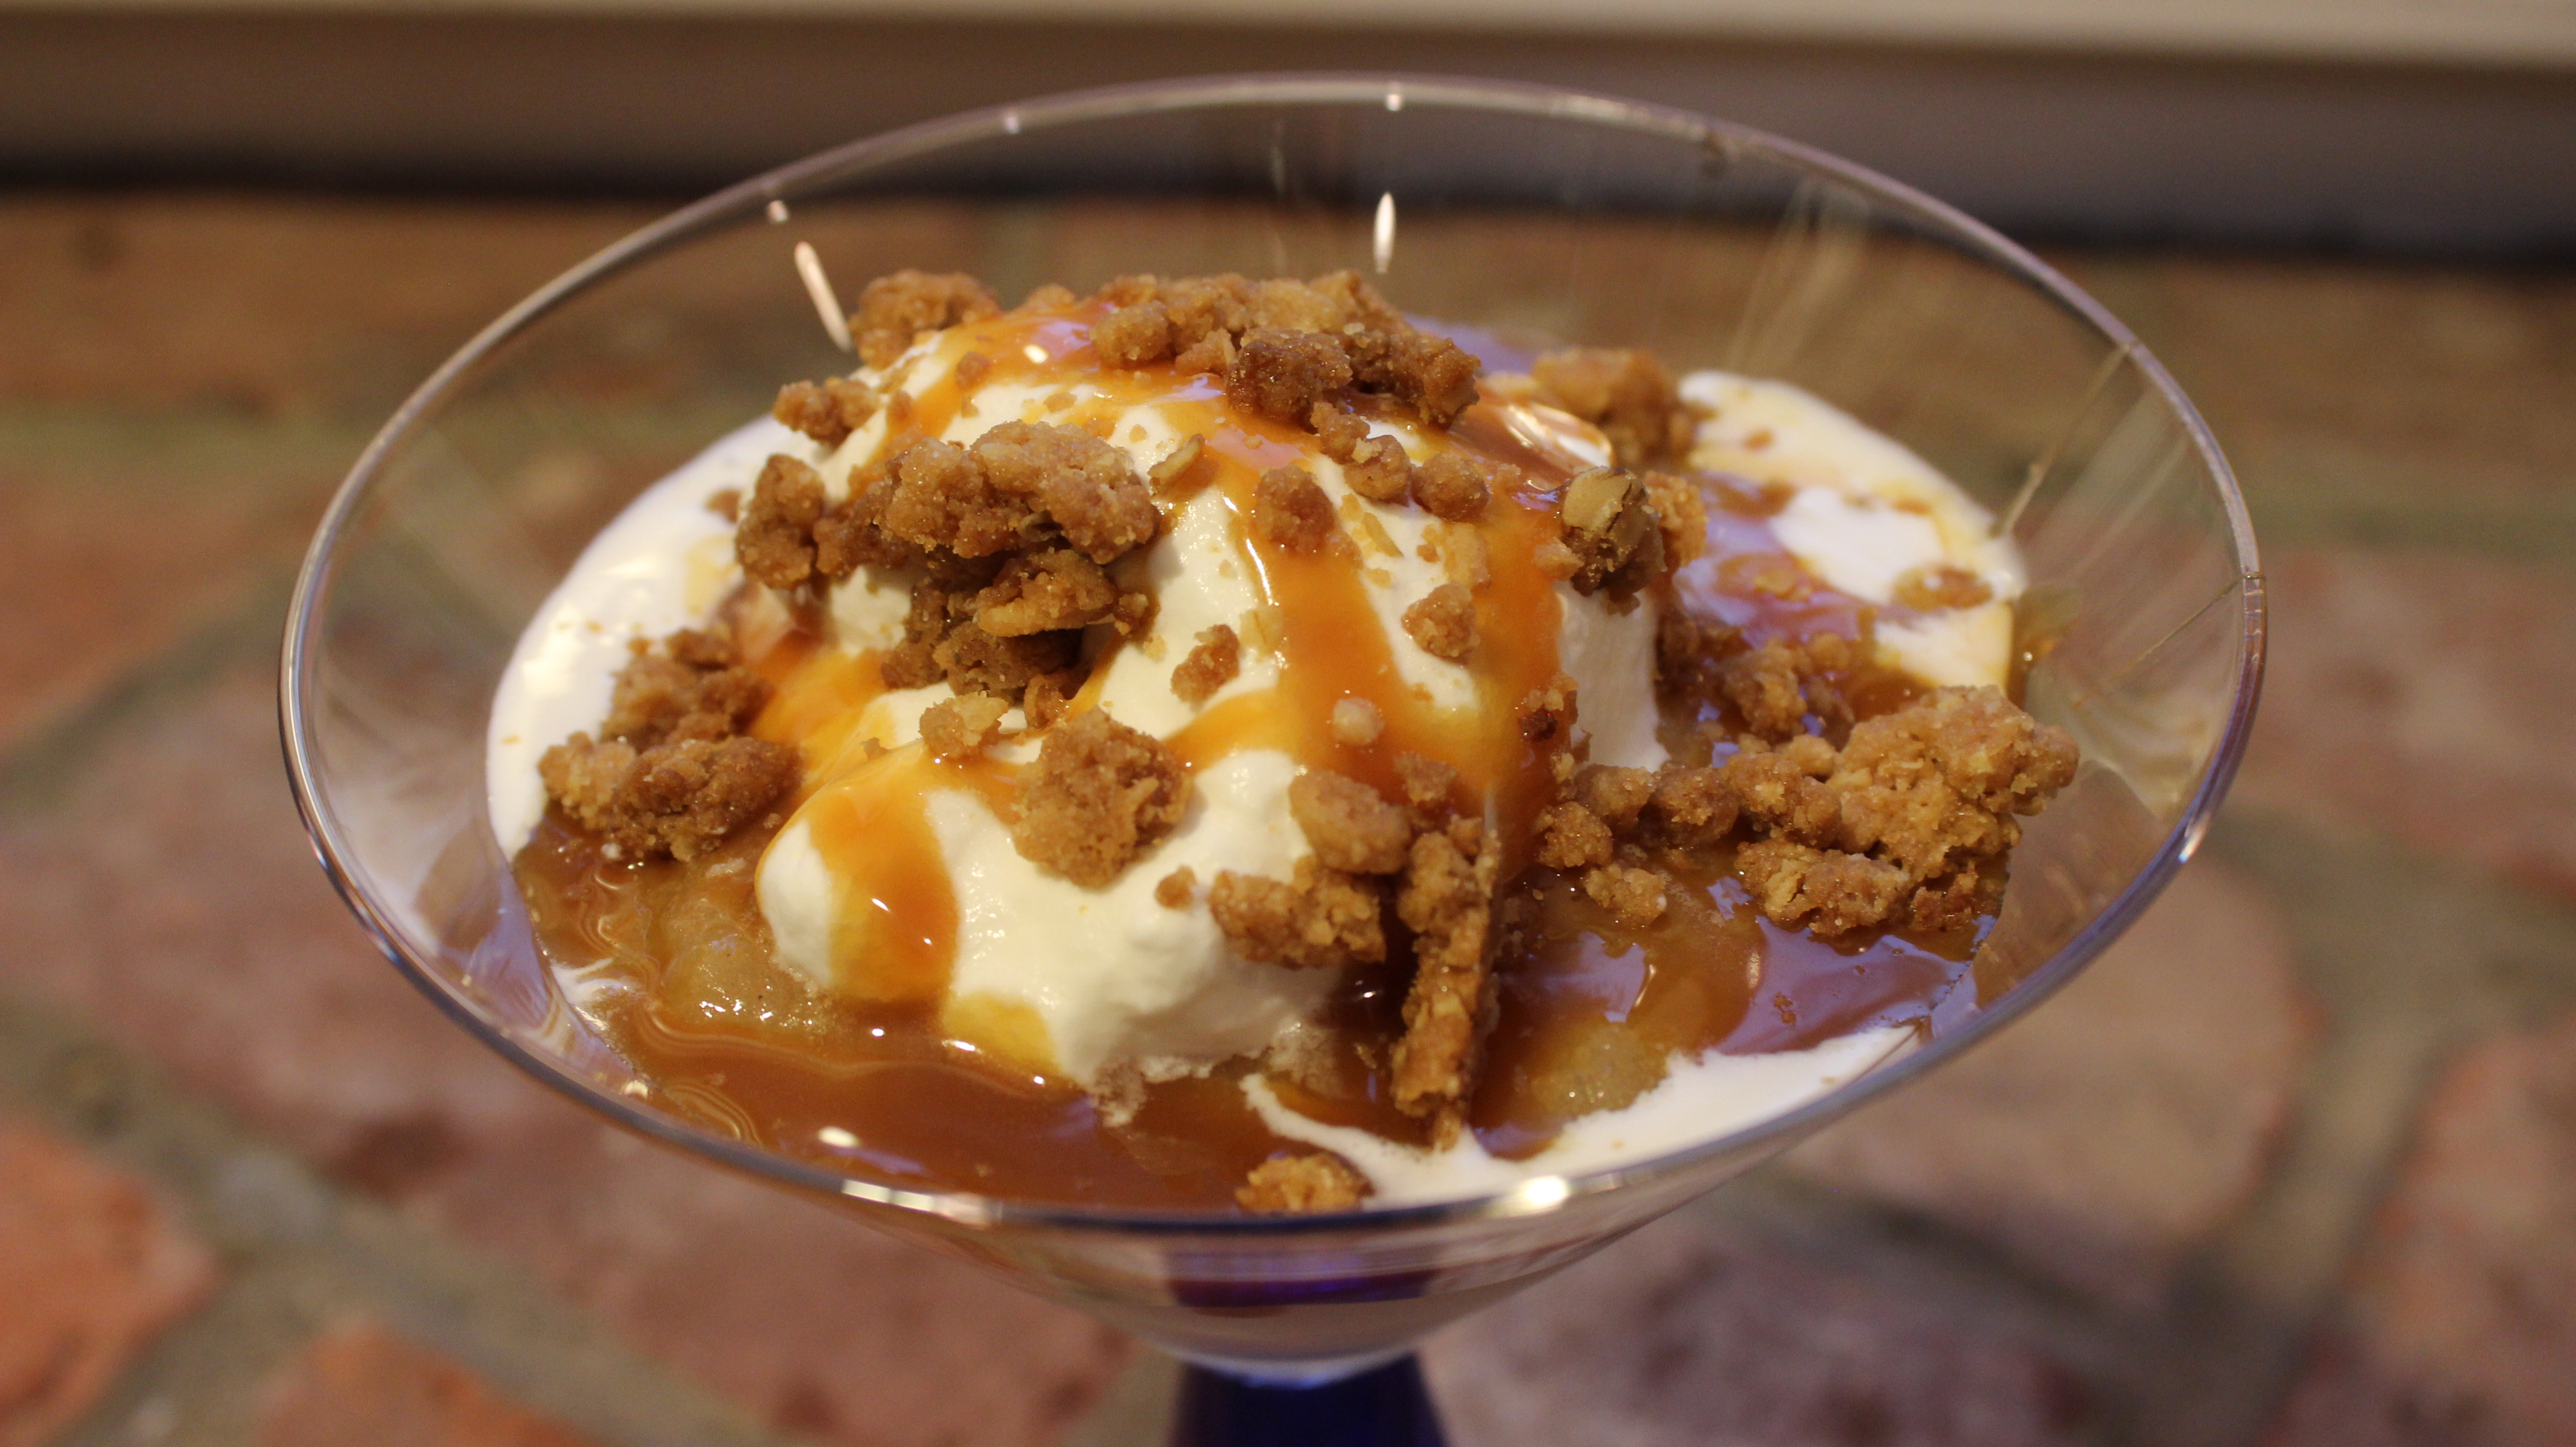
Fall is the perfect time to make this homemade applesauce with apples in abundance at the stores and local orchards. A wonderful thing about making applesauce is it stays well for months in your freezer. One of my favorite ways to have applesauce is with grilled pork chops, caramelized onions and a little crumbled Gorgonzola. For a simple, gluten-free dessert that’s out of this world you can top vanilla ice cream with this warm homemade applesauce, whipped cream, a drizzle of caramel sauce and a sprinkle of toasted apple crisp topping made with oats! This just may be my new favorite dessert! I buy our local Ashley’s vanilla ice cream and their caramel sauce when I make this incredible Applesauce-Caramel Sundae. So get into the holiday spirit and create those nostalgic memories for your kids, family and friends filling the house with simmering apples and cinnamon, a similar aroma to hot apple cider, that will stay with them forever. Hope you enjoy the show 🙂
Ingredients:
4 lbs. (10 apples) – an assortment of apples for well rounded flavors
3 tbsp brown sugar
3 tbsp white sugar
1/8 tsp salt
1 tsp cinnamon
1/4 tsp nutmeg
dash of cloves (optional)
1 1/4 cup water
2 tbsp fresh lemon juice
FOR Applesauce-Caramel Sundae:
Your favorite “apple crisp topping” recipe made with oats toasted up in the oven on 400º in a bake dish until golden
1 Quart of your favorite local Ice creamery Vanilla and 1/2 pint of their caramel sauce
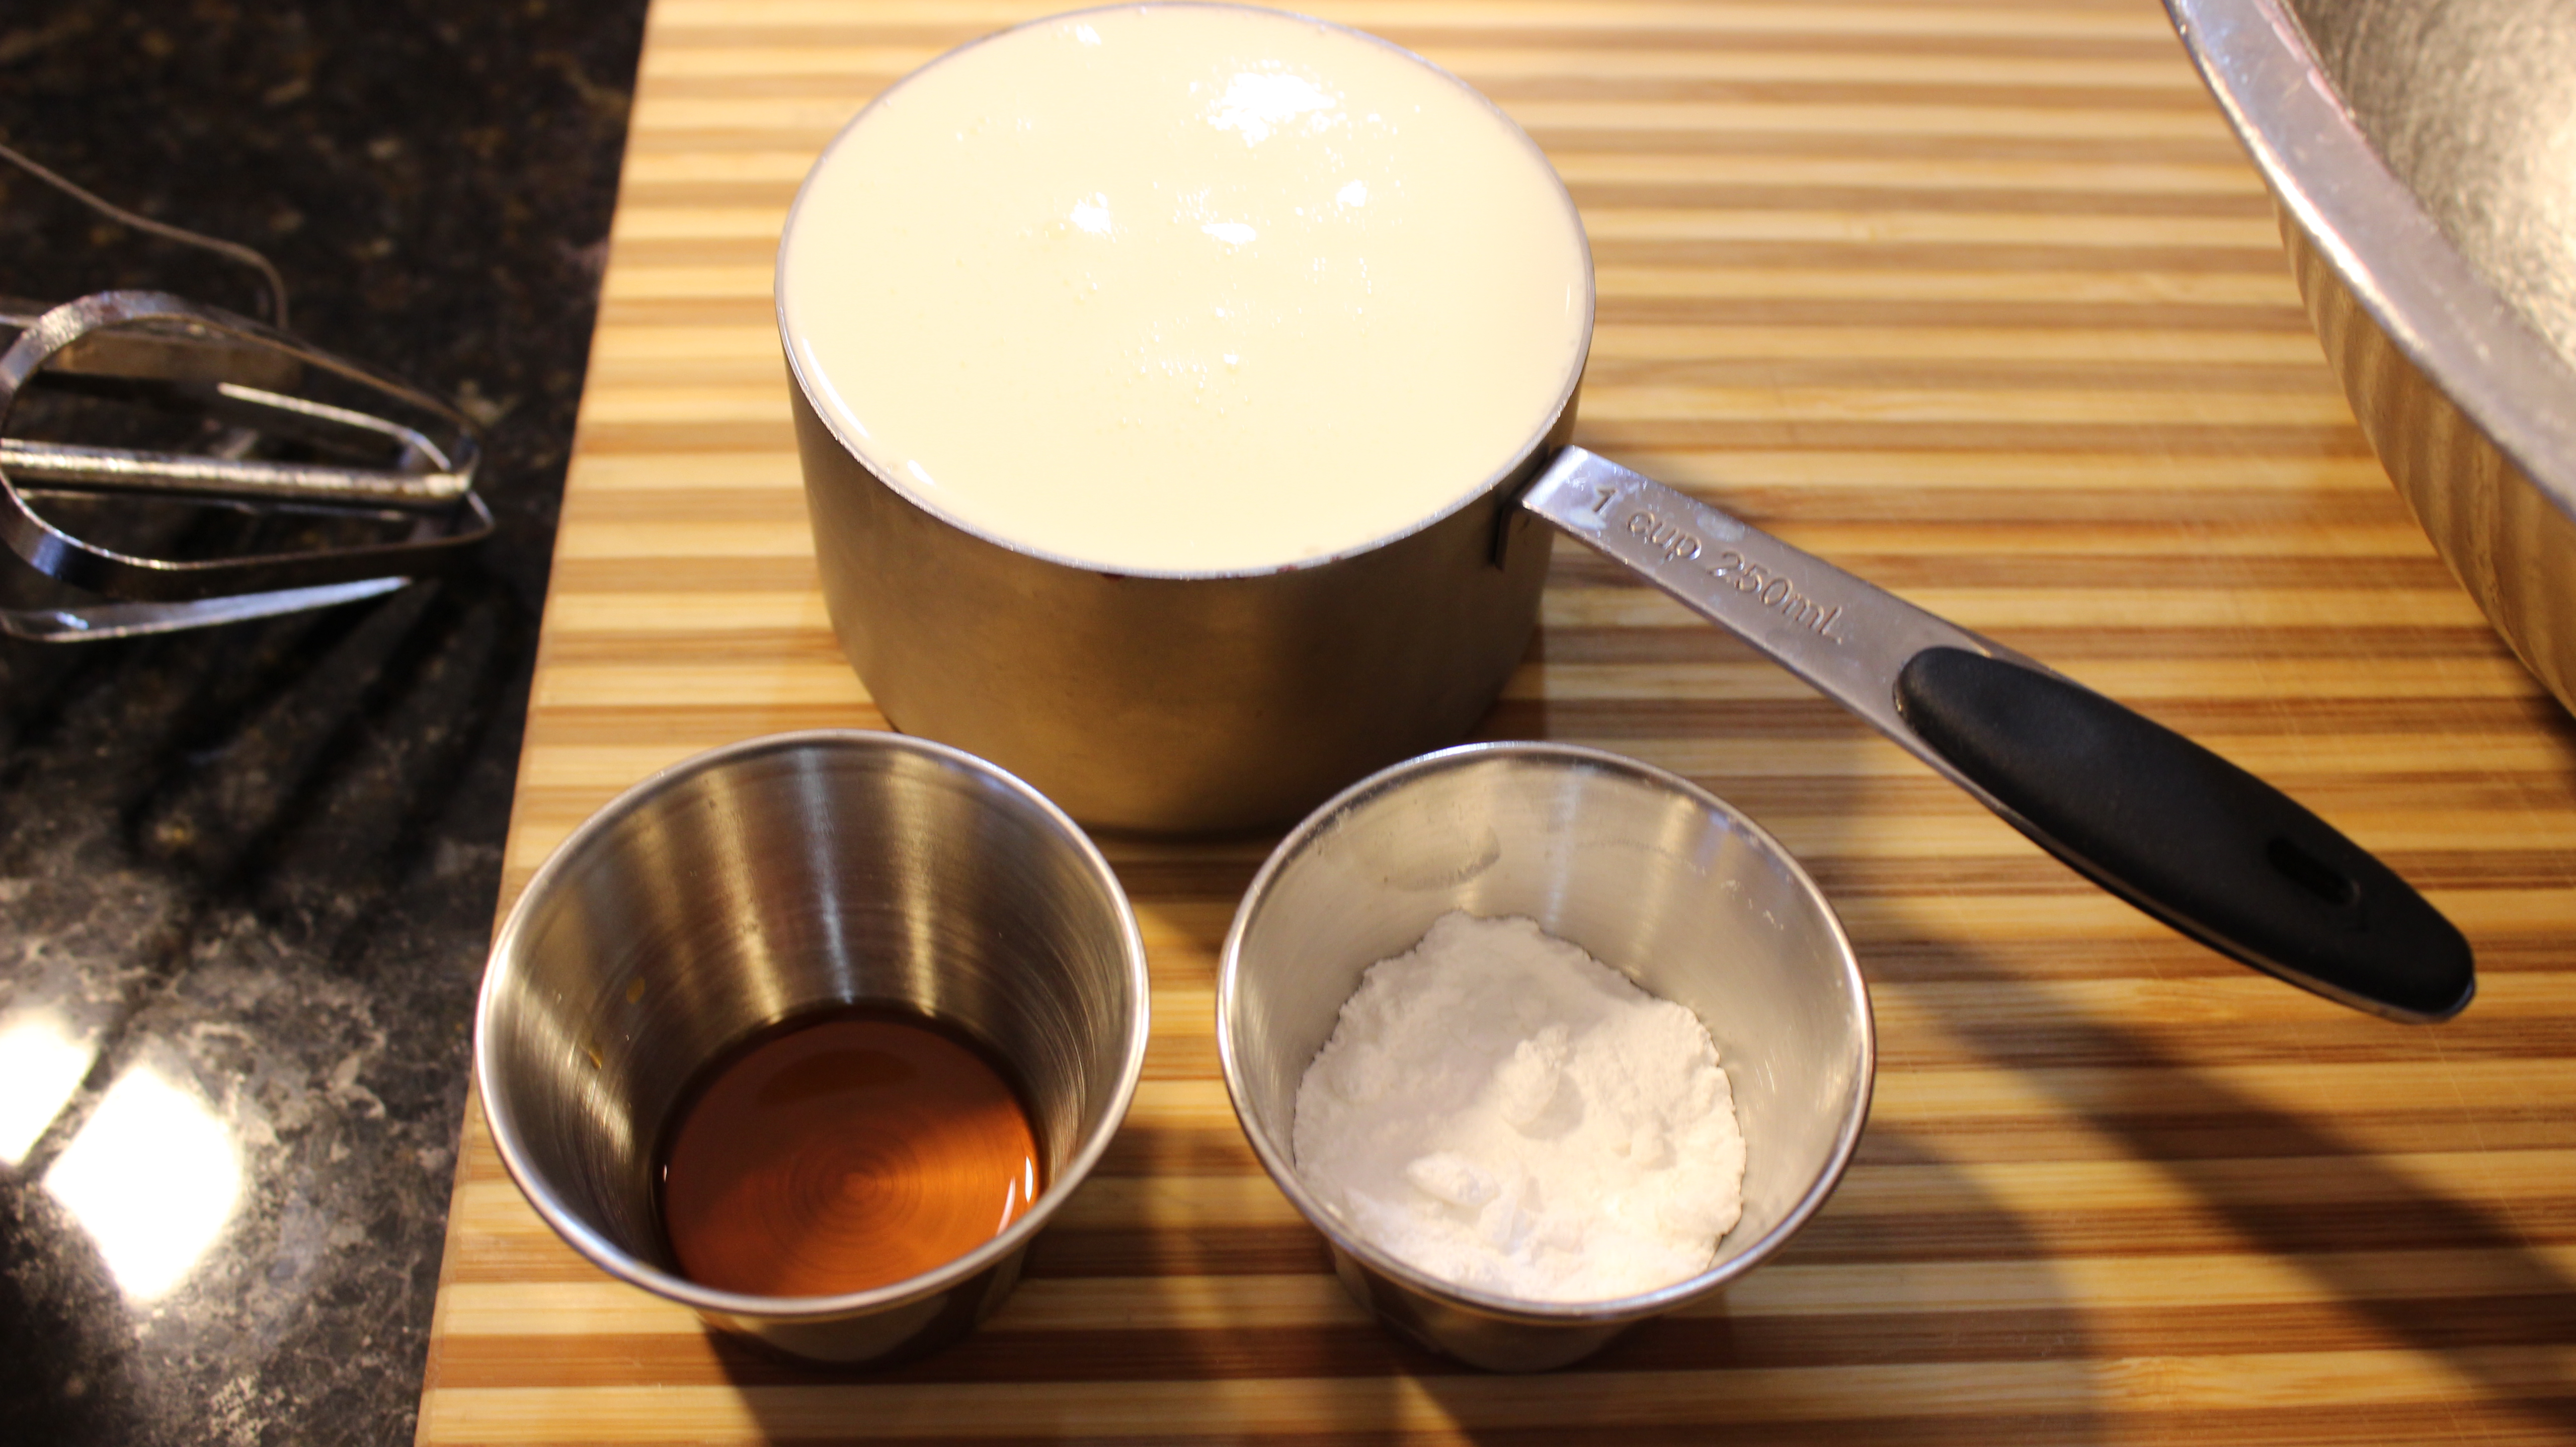
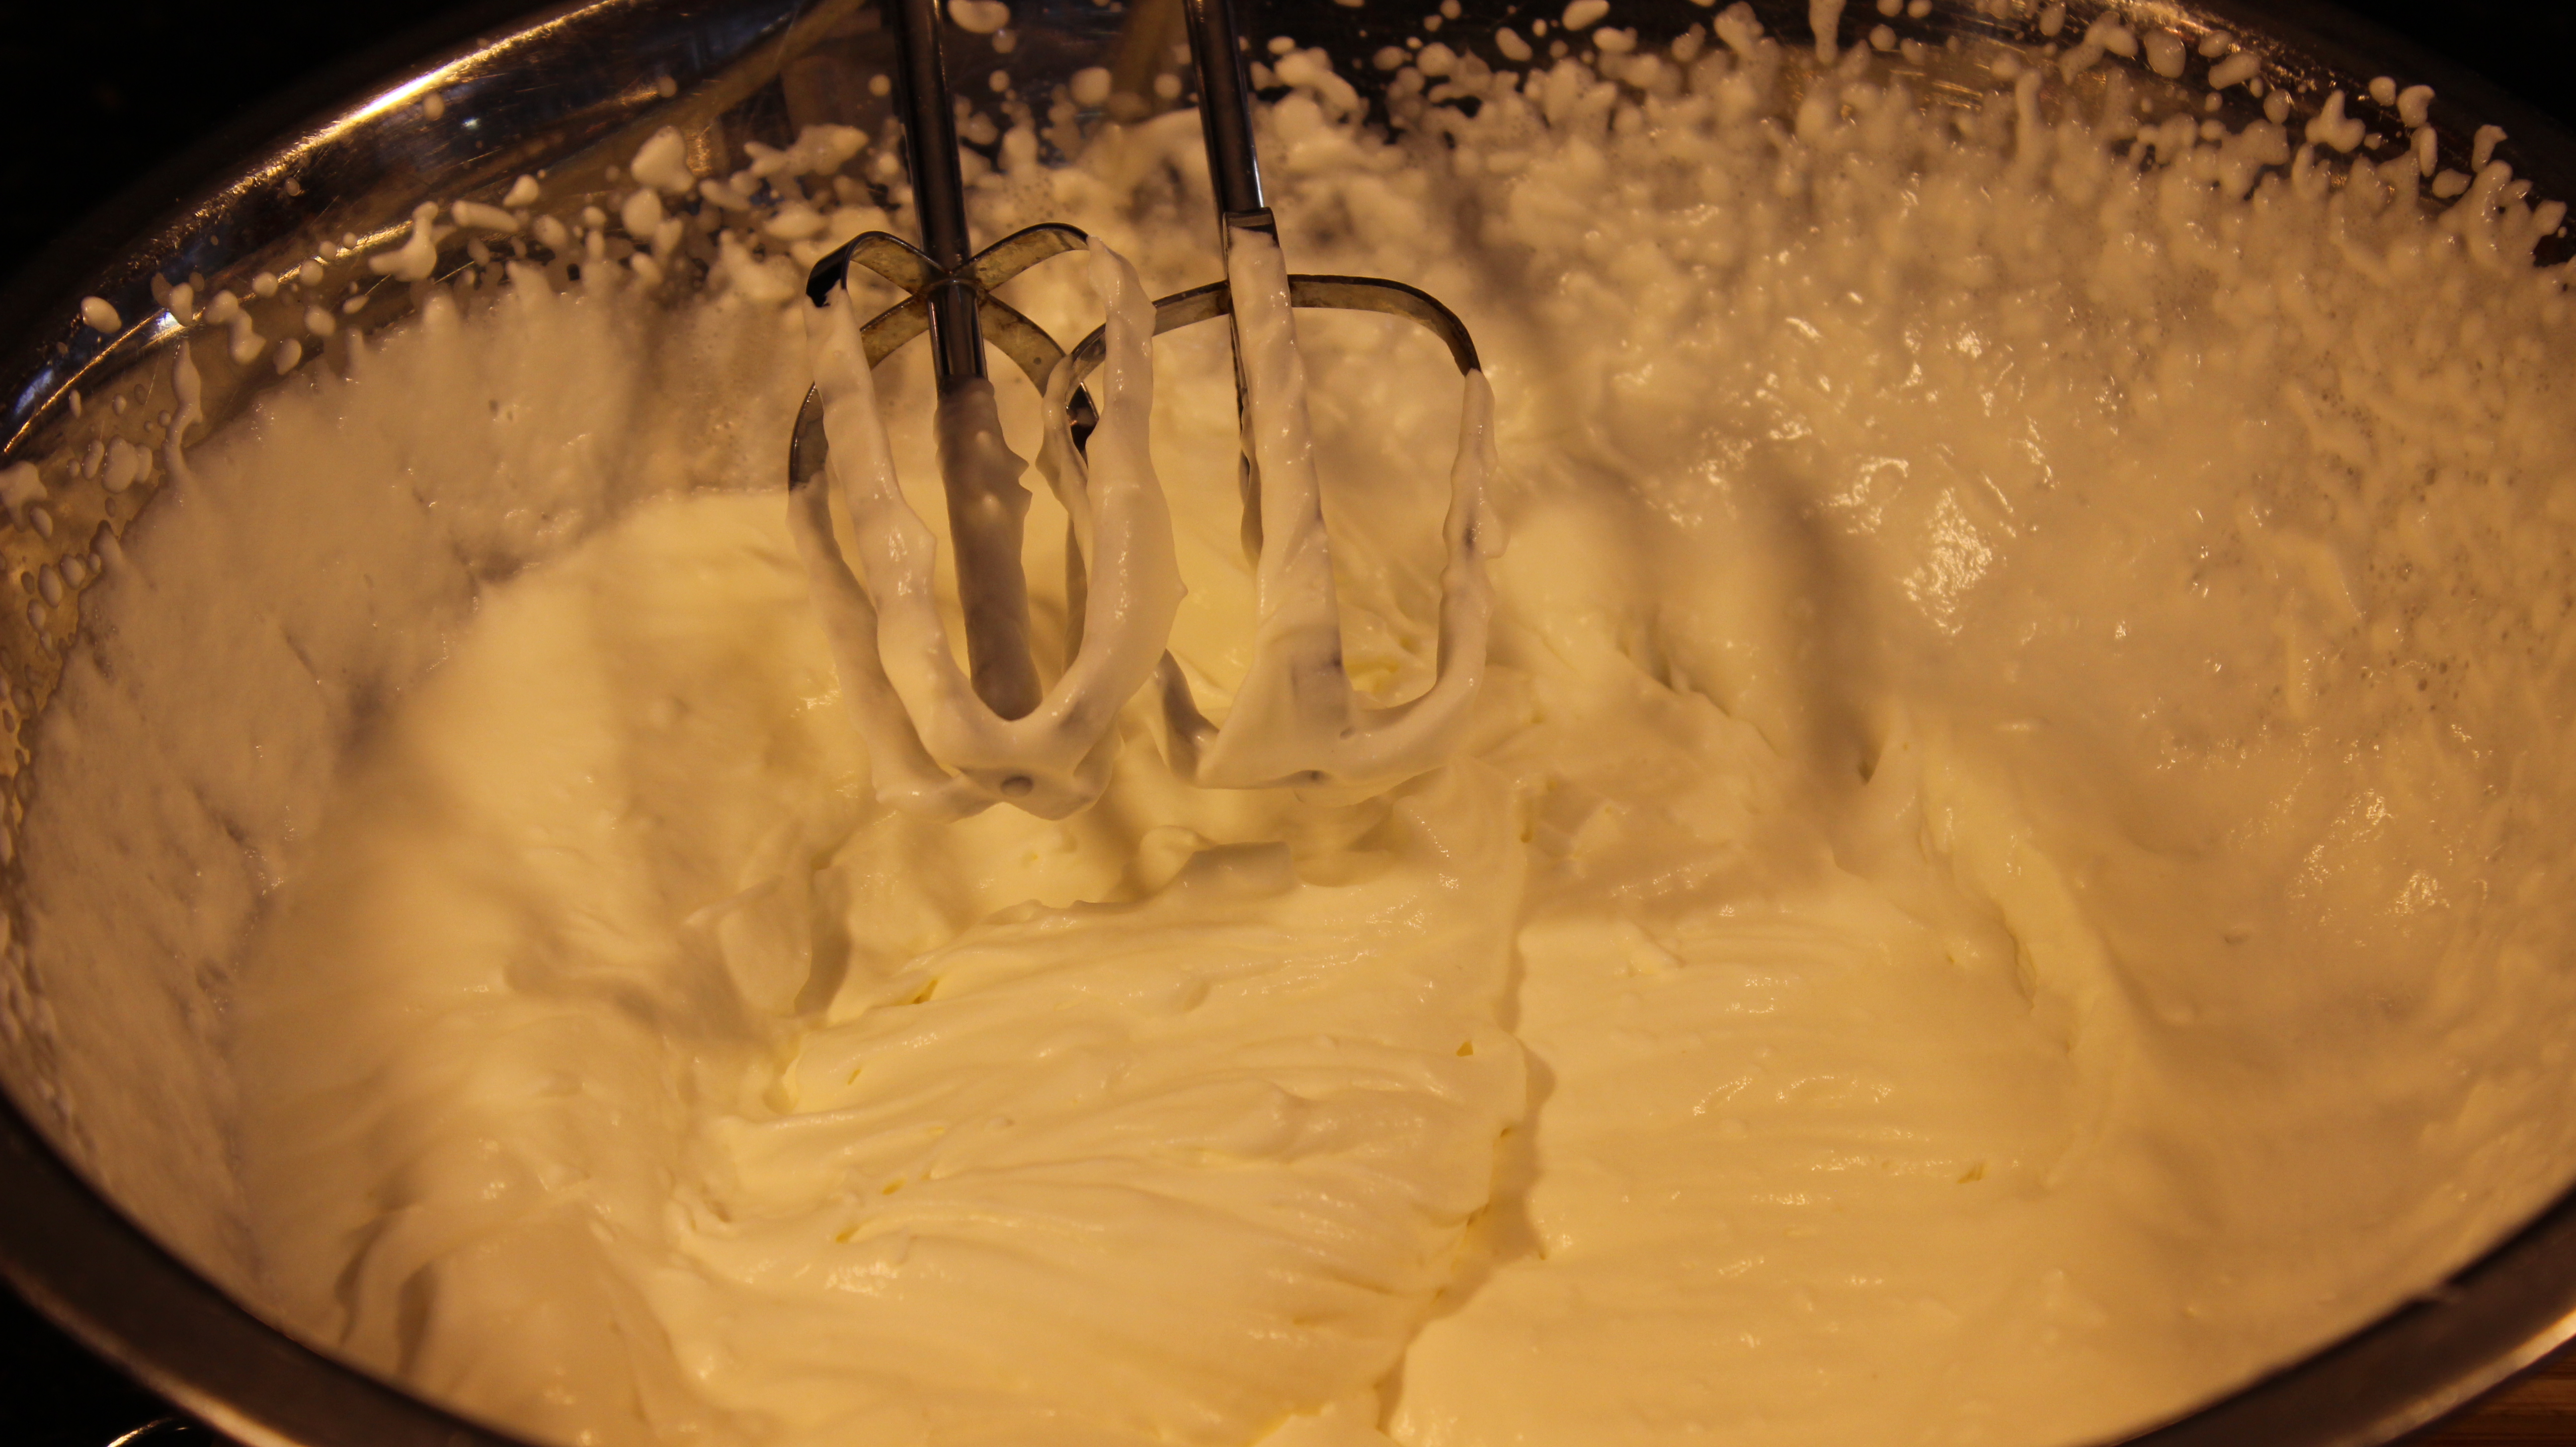
Whipped cream (1 cup heavy whipping cream, 1 tbsp confectioners sugar, 1 tsp vanilla, bourbon or whiskey)
Toasted apple crisp topping with oats
Directions:
Peel, core and slice apples into 8ths and place into large pan
Squeeze lemon juice on them slices as you go to prevent them from turning brown
Mix the brown and white sugar together
Sprinkle 1/2 the sugar on the apples
Add all of the cinnamon, nutmeg, (cloves -optional) salt and the water
Mix with a spoon and put on the stove over med/high bringing to a boil
Turn down and keep simmering for 20-25 minutes until softened
Taste and check sugar content, add the remaining sugar if you want sweeter
If you add the rest of the sugar simmer for a few more minutes til it melts
Remove from stove and let cool 5 minutes
Mash the apples with a potato masher, fork, whisk or add to food processor til you get the texture that you want – If you are using a food processor only fill 1/2 way then puree
Serve with a big grilled pork chop, topped with caramelized onions, and crumbled Gorgonzola or do up dessert with the Applesauce-Caramel Sundae…enjoy! 🙂
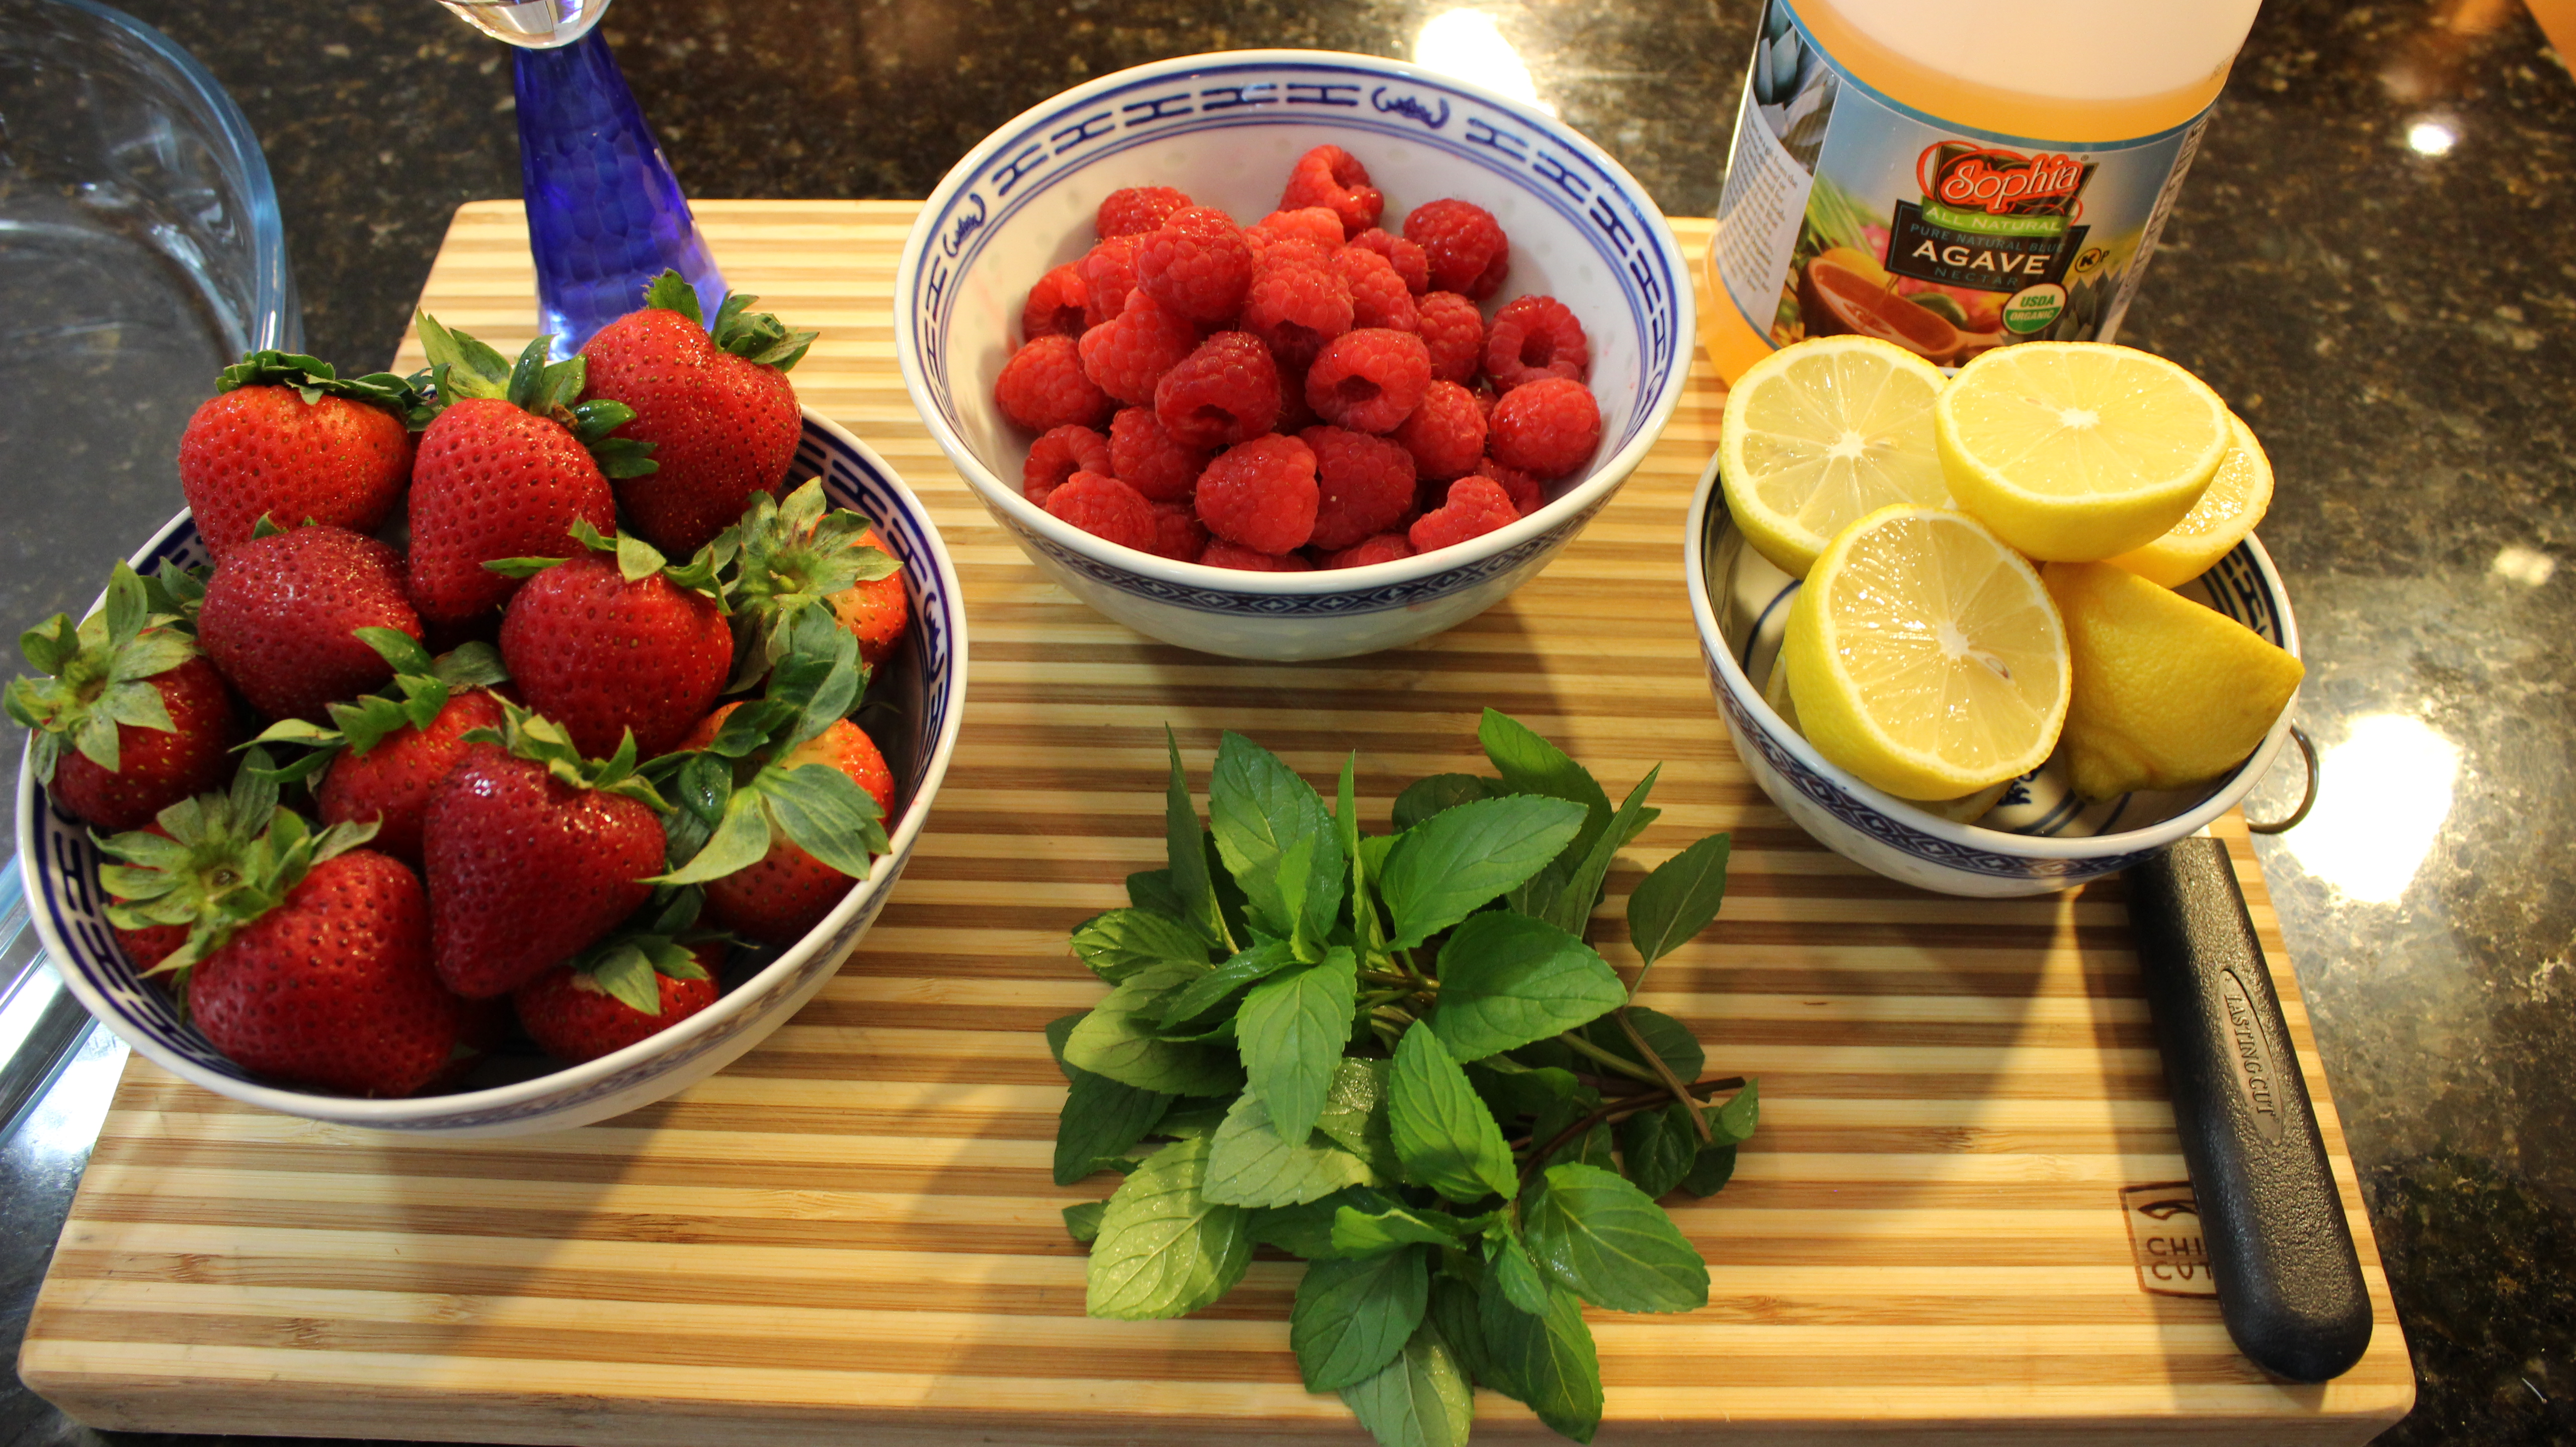
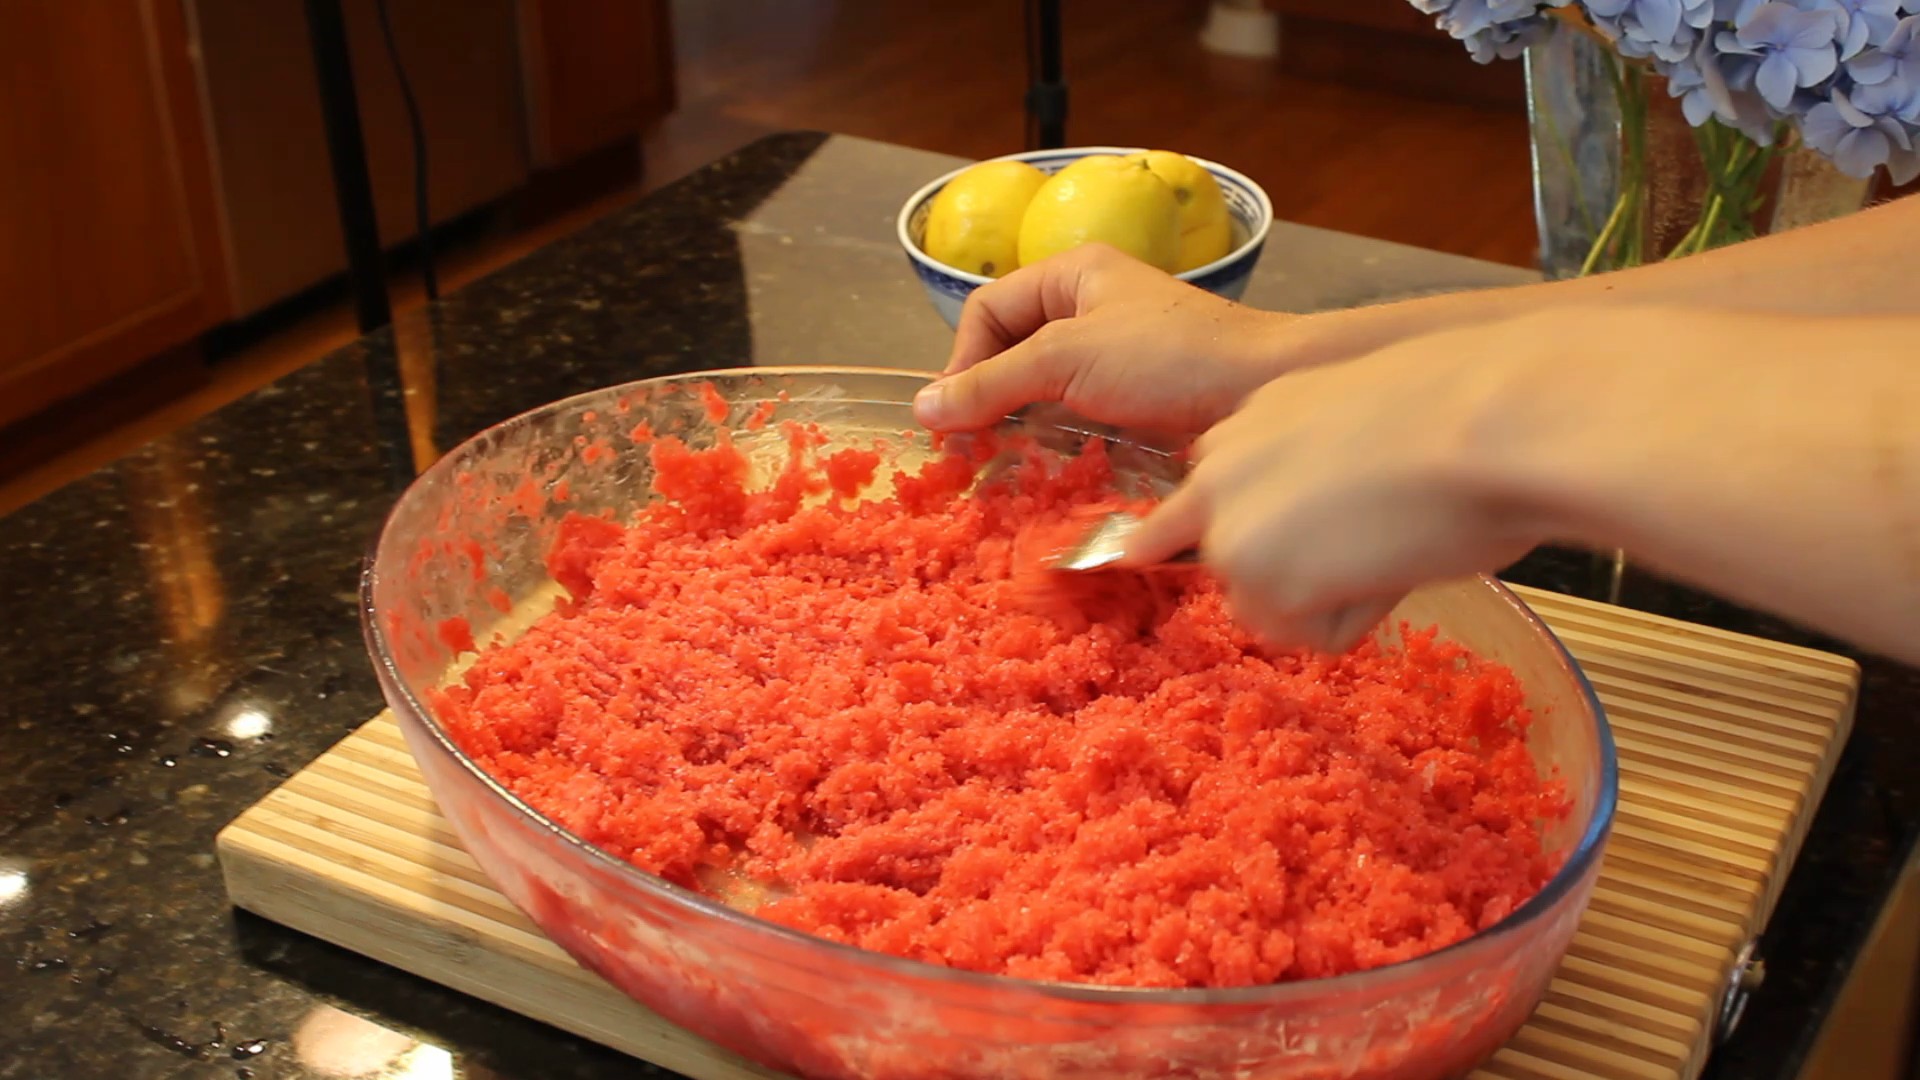
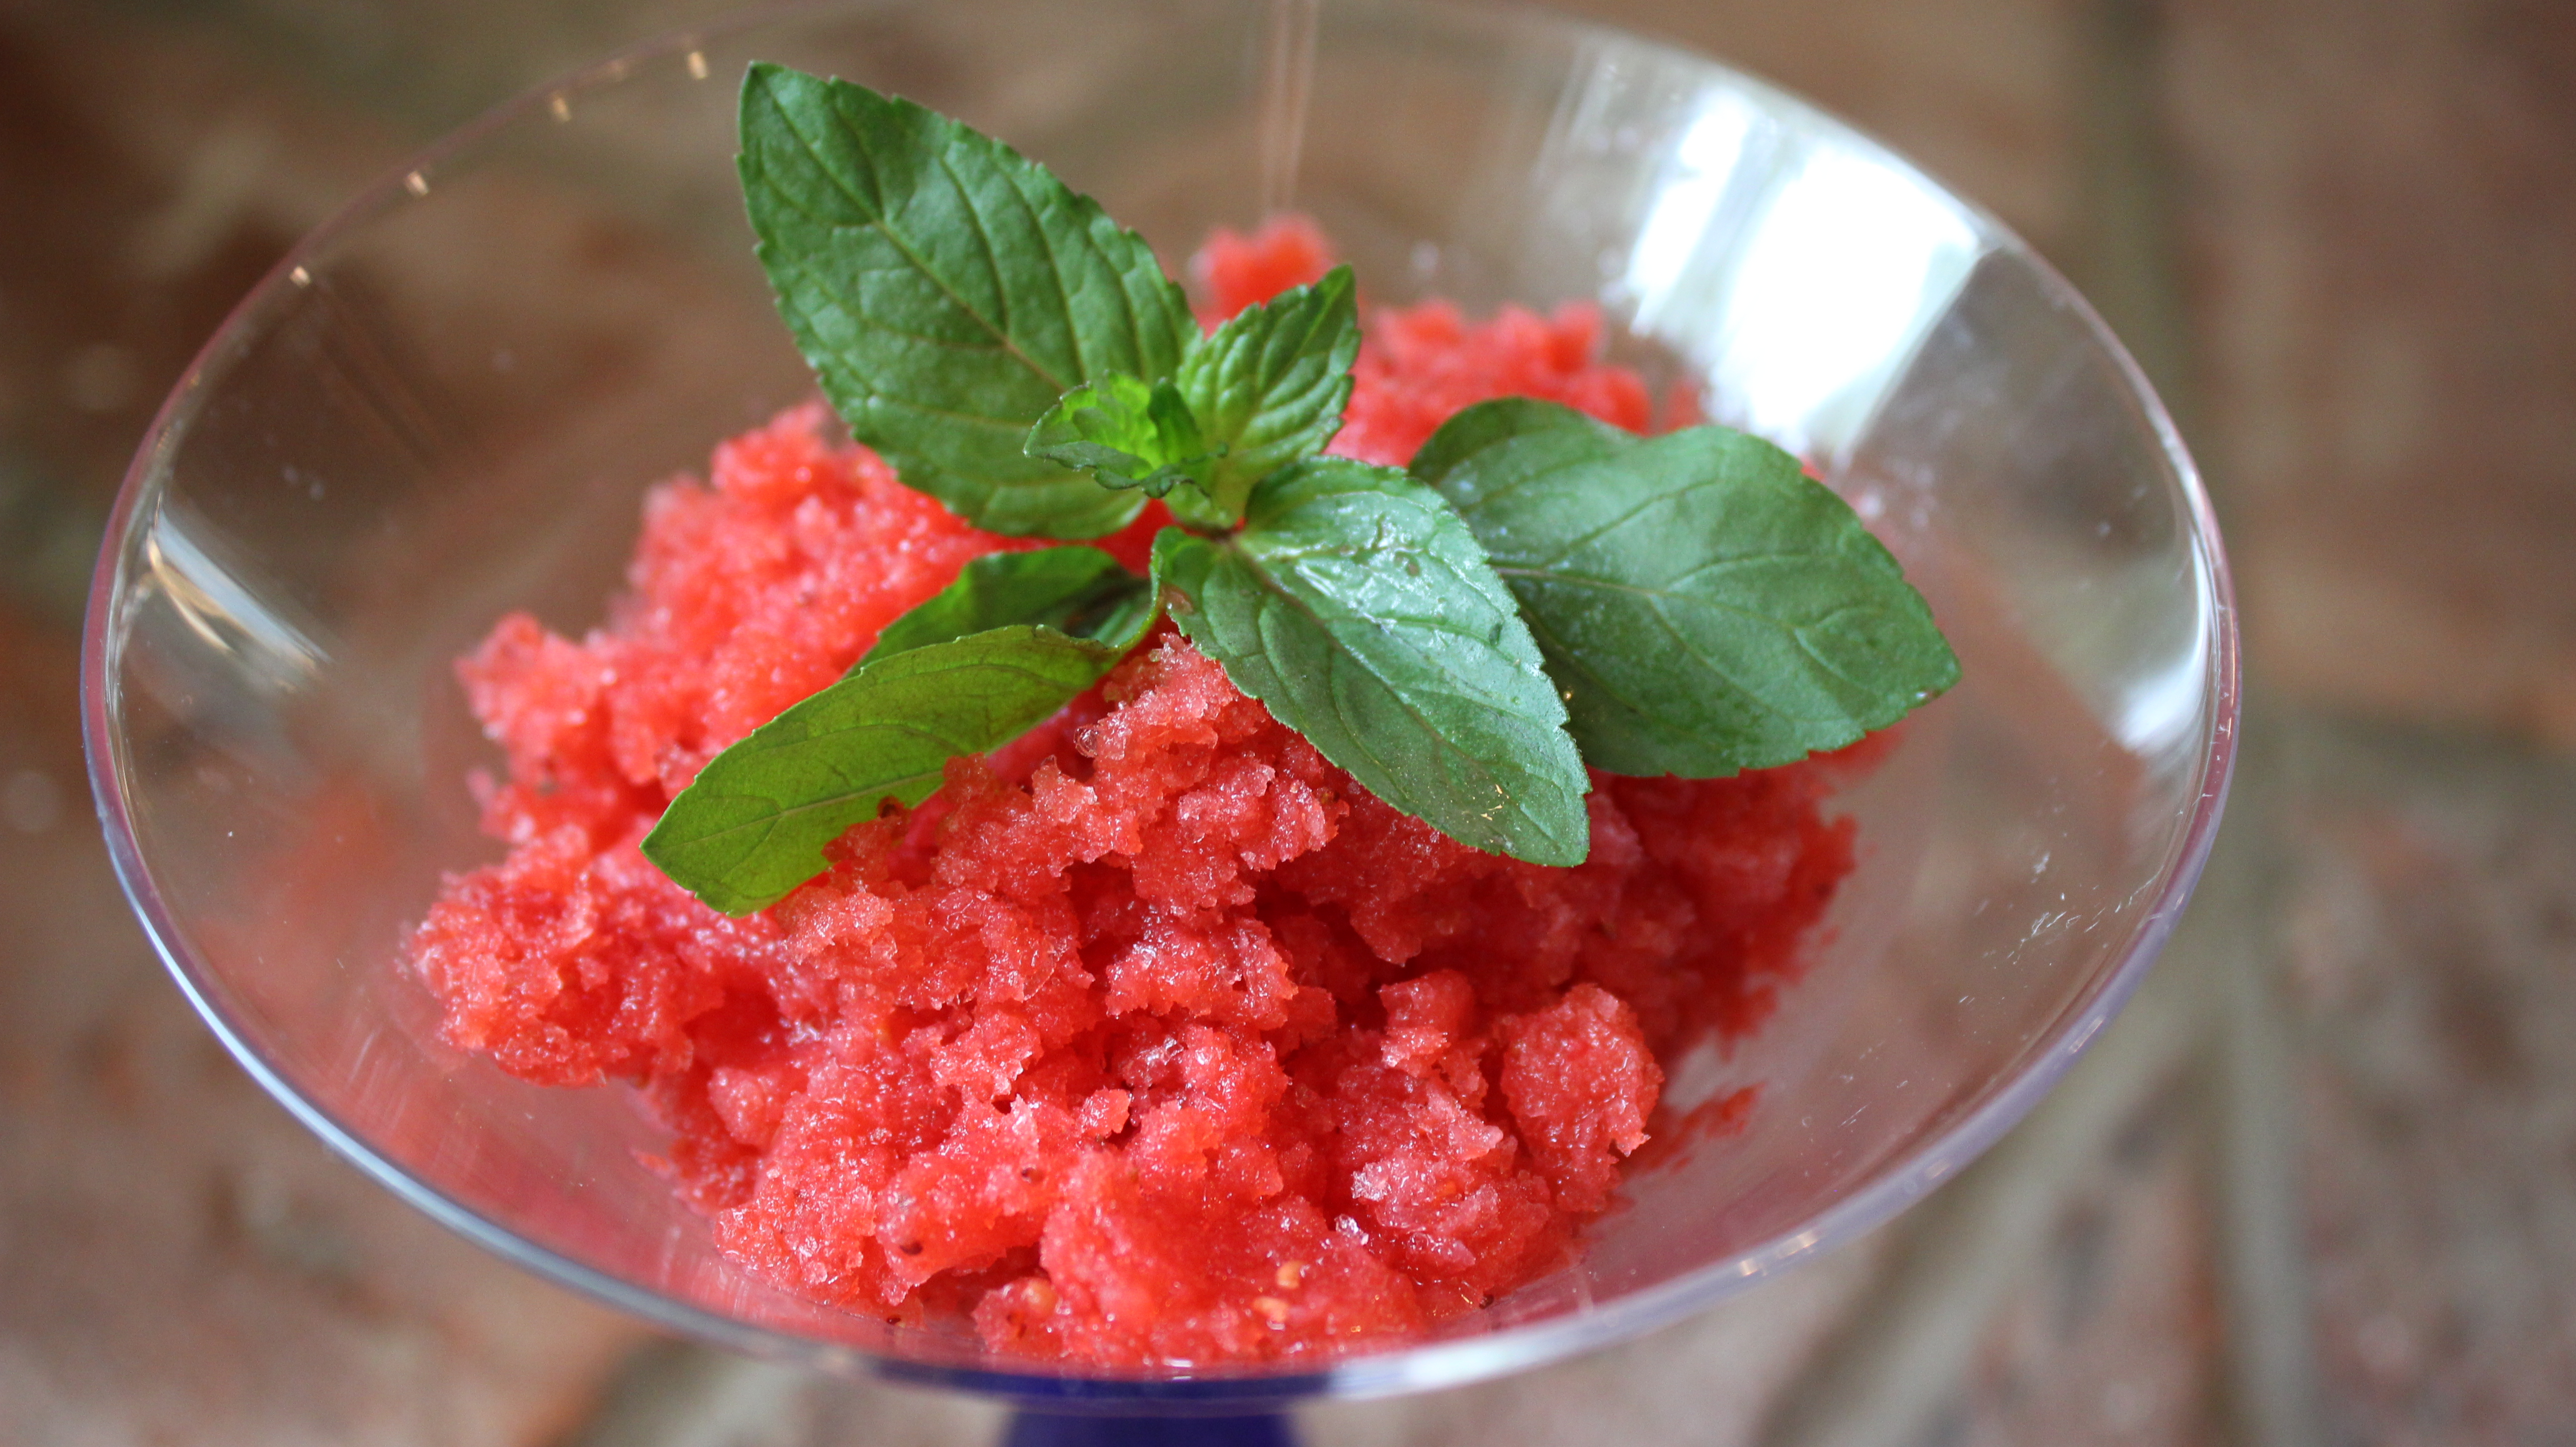
Homemade berry granita is similar to a sorbet or an Italian ice and gives you the same happy feeling as eating ice cream but can be made with out all that hard work. Granita is made in three simple steps – purée, freeze and scrape. How simple is that? Most recipes for granita have you making a simple syrup by boiling the water and melting the sugar but I find that unnecessary. Instead, I substitute the sugar with Agave Nectar this way you add it right to the berries in the blender! Yeah!
Granita actually originated in Sicily and is a frozen treat made all over the world. In Quebec they call it a slushy or a slurry. This frozen treat can also be made into a after dinner dessert for adults by adding in a jigger or two of rum to give it a little kick. Another great idea is serving granita between meals as a palate cleanser to clear the taste buds for next course as an elegant presentation to your dinner party.
In my homemade granita recipe I have also simplified the freezing steps. Instead of scraping with a fork every 45 minutes just wait the three hours or so until the entire dish is frozen and then scrape with a fork at the end like we do in the show. This way it’s less time consuming and a smoother, easier surface to work with all awhile still coming out fluffy and delicious! I think you and your family and friends will really enjoy the simplicity of this delicious frozen treat.
Ingredients:
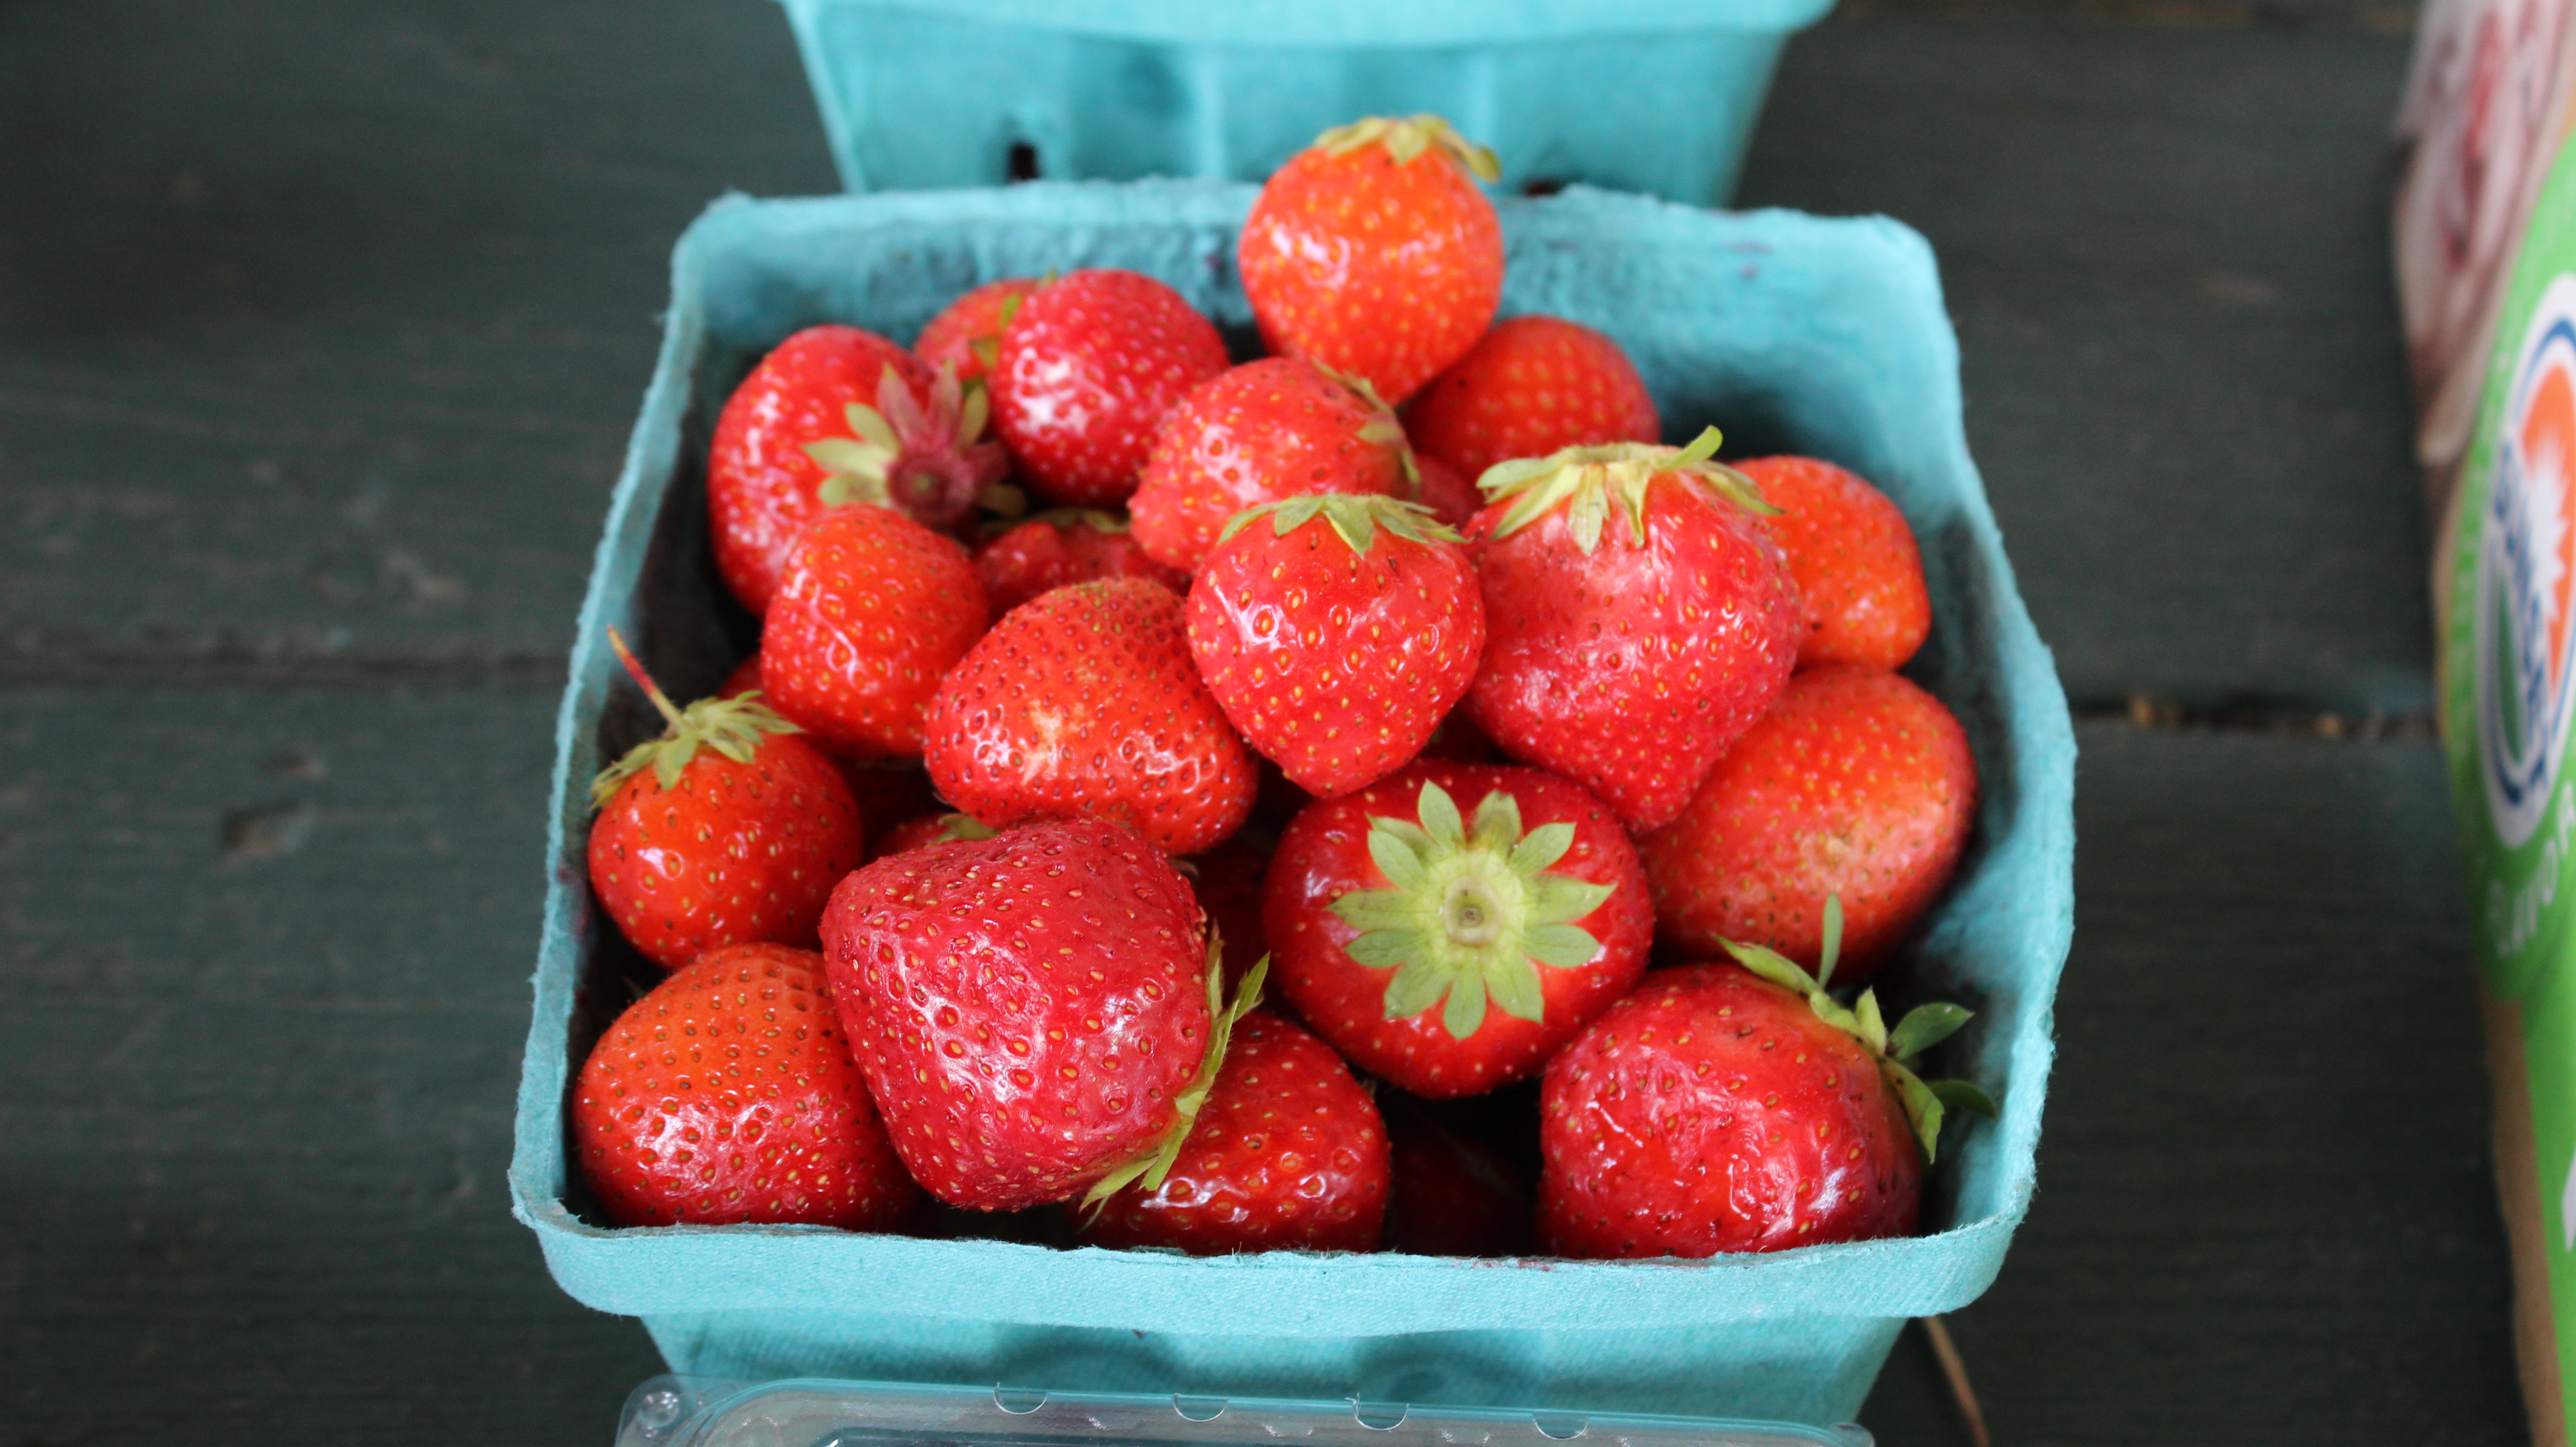
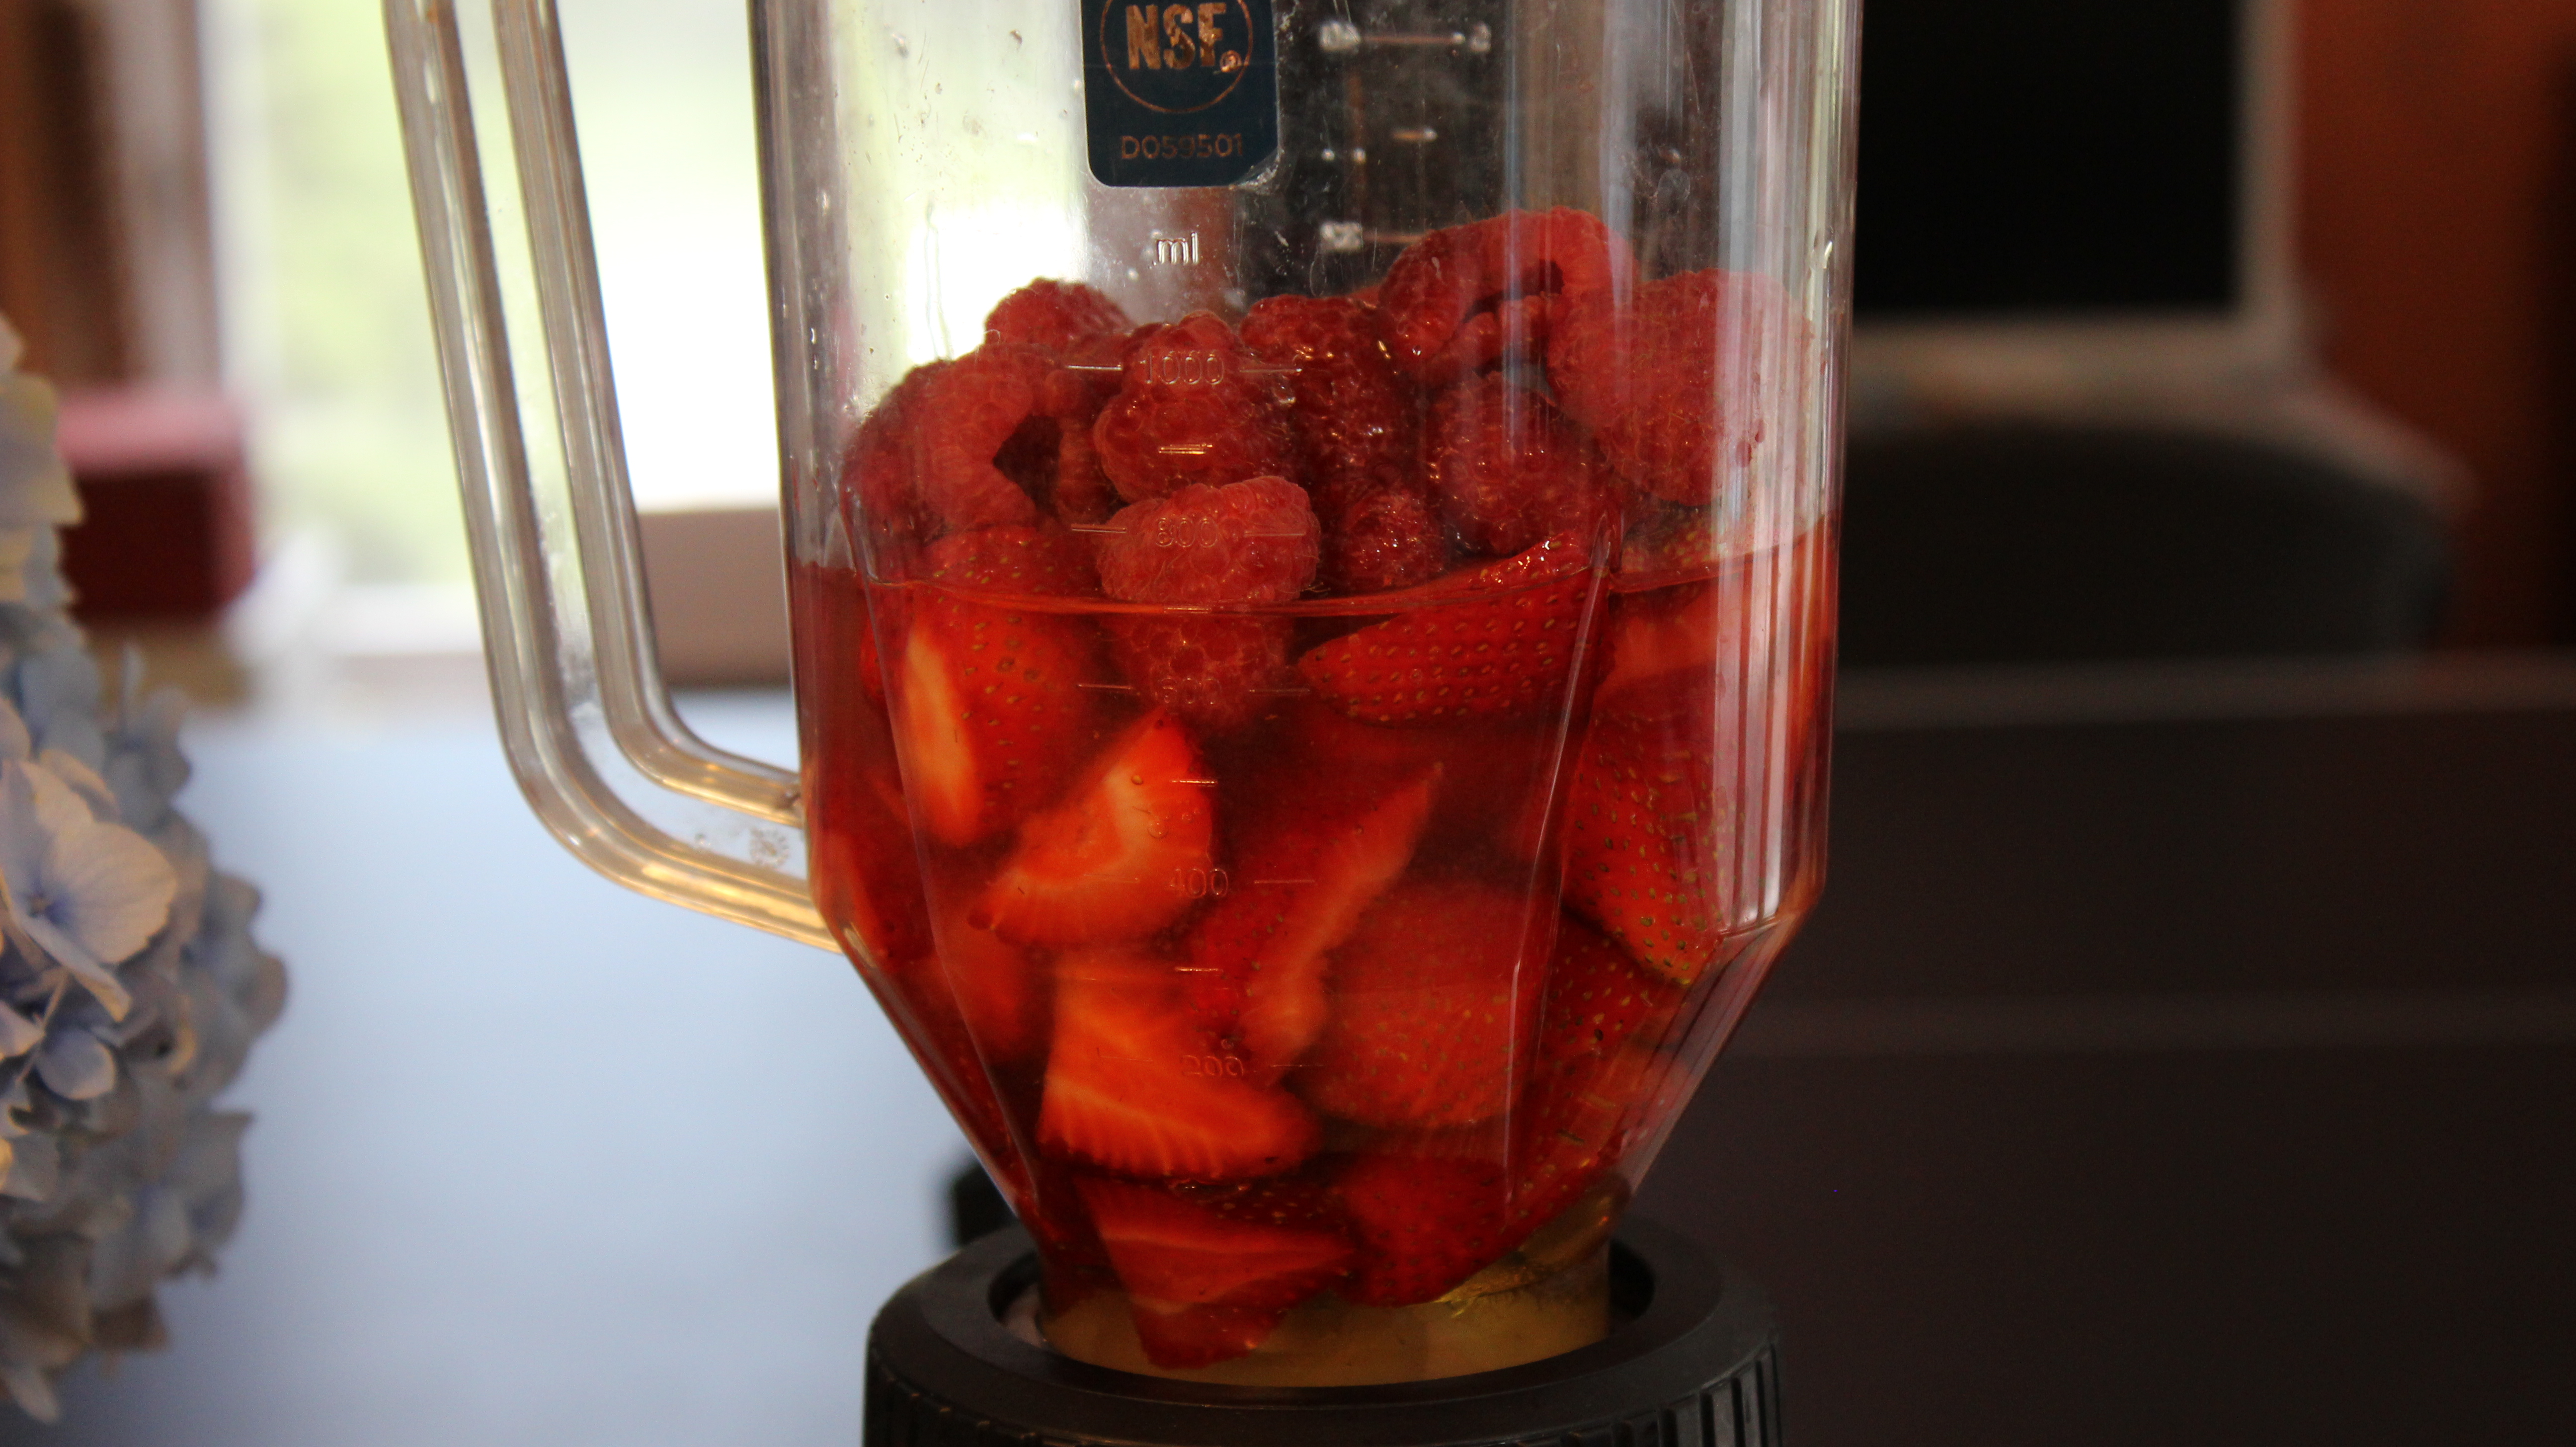
2 cups fresh strawberries
1 cup fresh raspberries
1 cup cold water
2 tbsp agave nectar or honey (Optional)
1/4 cup sugar
1/4 cup fresh squeezed lemon juice
Juice from 1 lime
1 bunch fresh peppermint leaves
Directions:
Wash and dry fruit
Squeeze juice from lemons and lime
Hull strawberries and slice in half
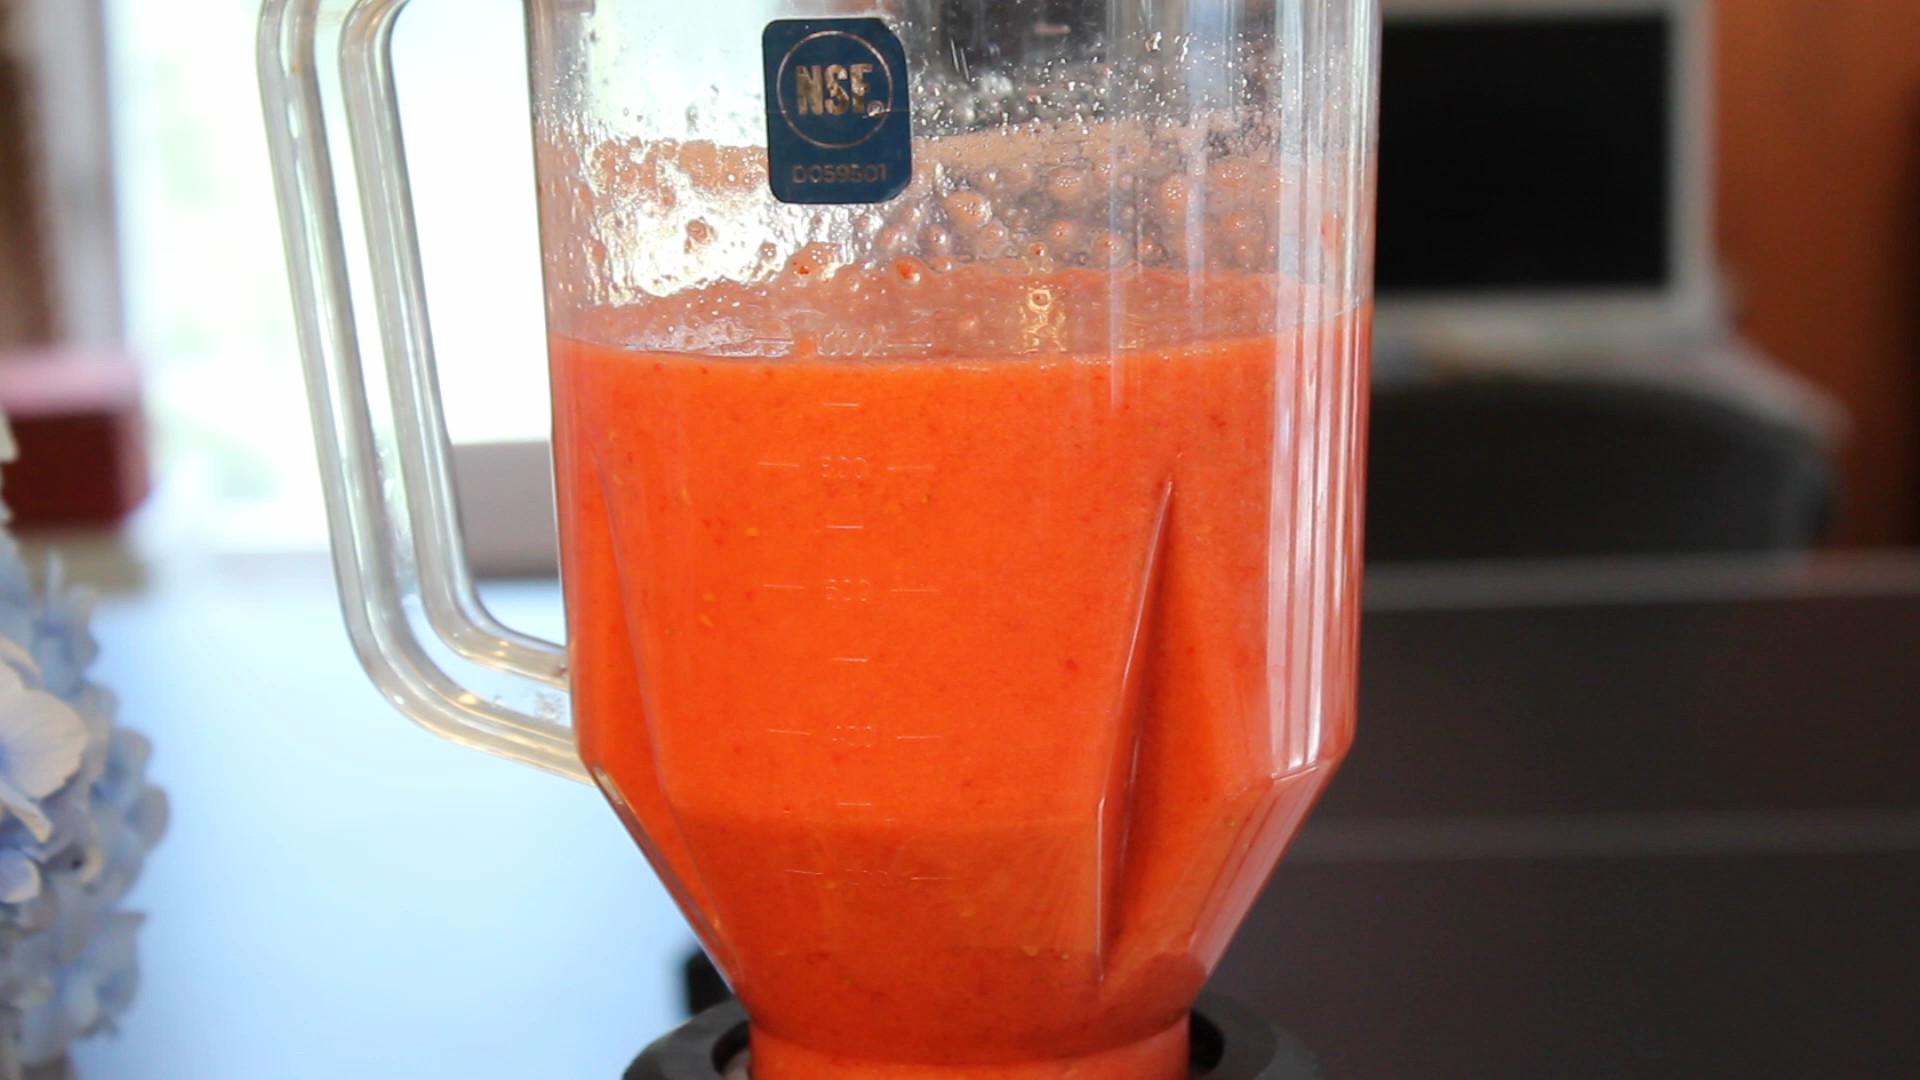
Place all berries into blender
Add citrus, H20 and agave
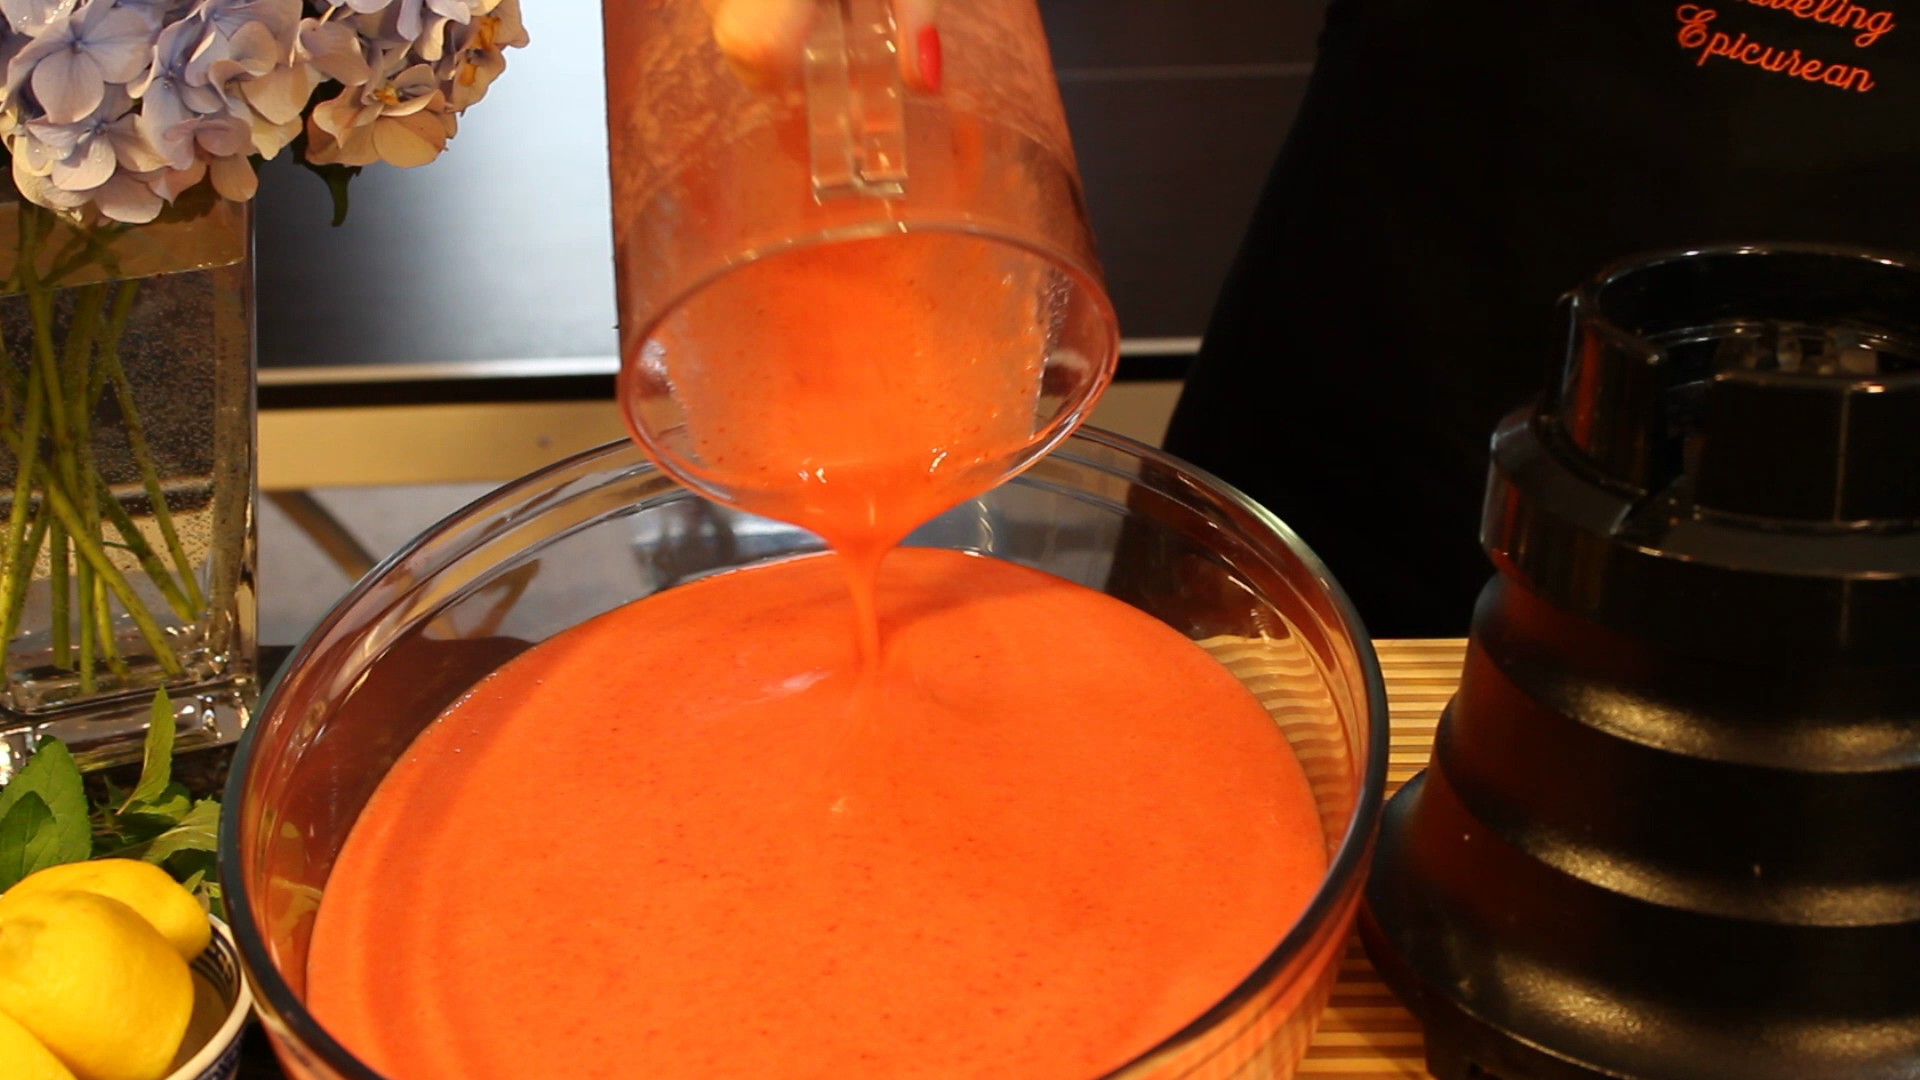
Blender for 20 seconds til pureed
Pour into a Pyrex dish
OPTIONAL: Add in 1-2 jiggers of rum, stir and freeze
OPTIONAL: You can give a stir before its frozen around the 45 minute mark BUT this is not a necessary step (as you see in the show we did not get around to this)
Freeze for approx. 3 hours
Pull out from freezer and begin to scrape with a fork until fluffy
Spoon into martini glasses and top with fresh mint
Making homemade smoothies is such an ideal way to get so many wonderful nutritients into one beverage and not compromise on taste! These gourmet energy smoothies are absolutely scrumptious! Who doesn’t love a smoothie and now with all the high tech appliances available out there just for puréeing vegetables into drinks you can’t go wrong. Those juicers can get a little pricey though and an average Waring blender can get the job done too! So don’t feel like you can’t join in if you’re a novice to all this and start making your own homemade gourmet energy smoothies if you haven’t spent the dough…no pun intended 🙂 Yes, you can make your own!
My energy smoothies 101 recipes and video start you off with some basics on how to create these delicious energy smoothies. I make it easy for you with a proven lists of ingredients that taste incredible and help your body to feel good too. Granted, there’s always that afternoon cup of joe that you can grab for a boost and let me tell you I do love my caffeinated beverages! Standing by my coffee pot in the morning in anticipation of pouring that first cup is how I begin my day. Then there’s mid-afternoon when we all seem to need that extra zing to keep us going and that’s when I usually go for my cup of tea which has sentimental reasons for me as well reminding me of my Grandmother and I having tea and crackers together when I was very little. BUT when I add an energy smoothie into my day I definitely feel the difference with more of a long lasting energy and good feeling surge!
Making these energy-power smoothies will give you that “feel good” energy surge and when we are feeling up it puts us in a good mood! There are studies that show an anti-inflammatory diet that is high in protein really does have an effect on our moods and increases our stamina… who doesn’t need that!
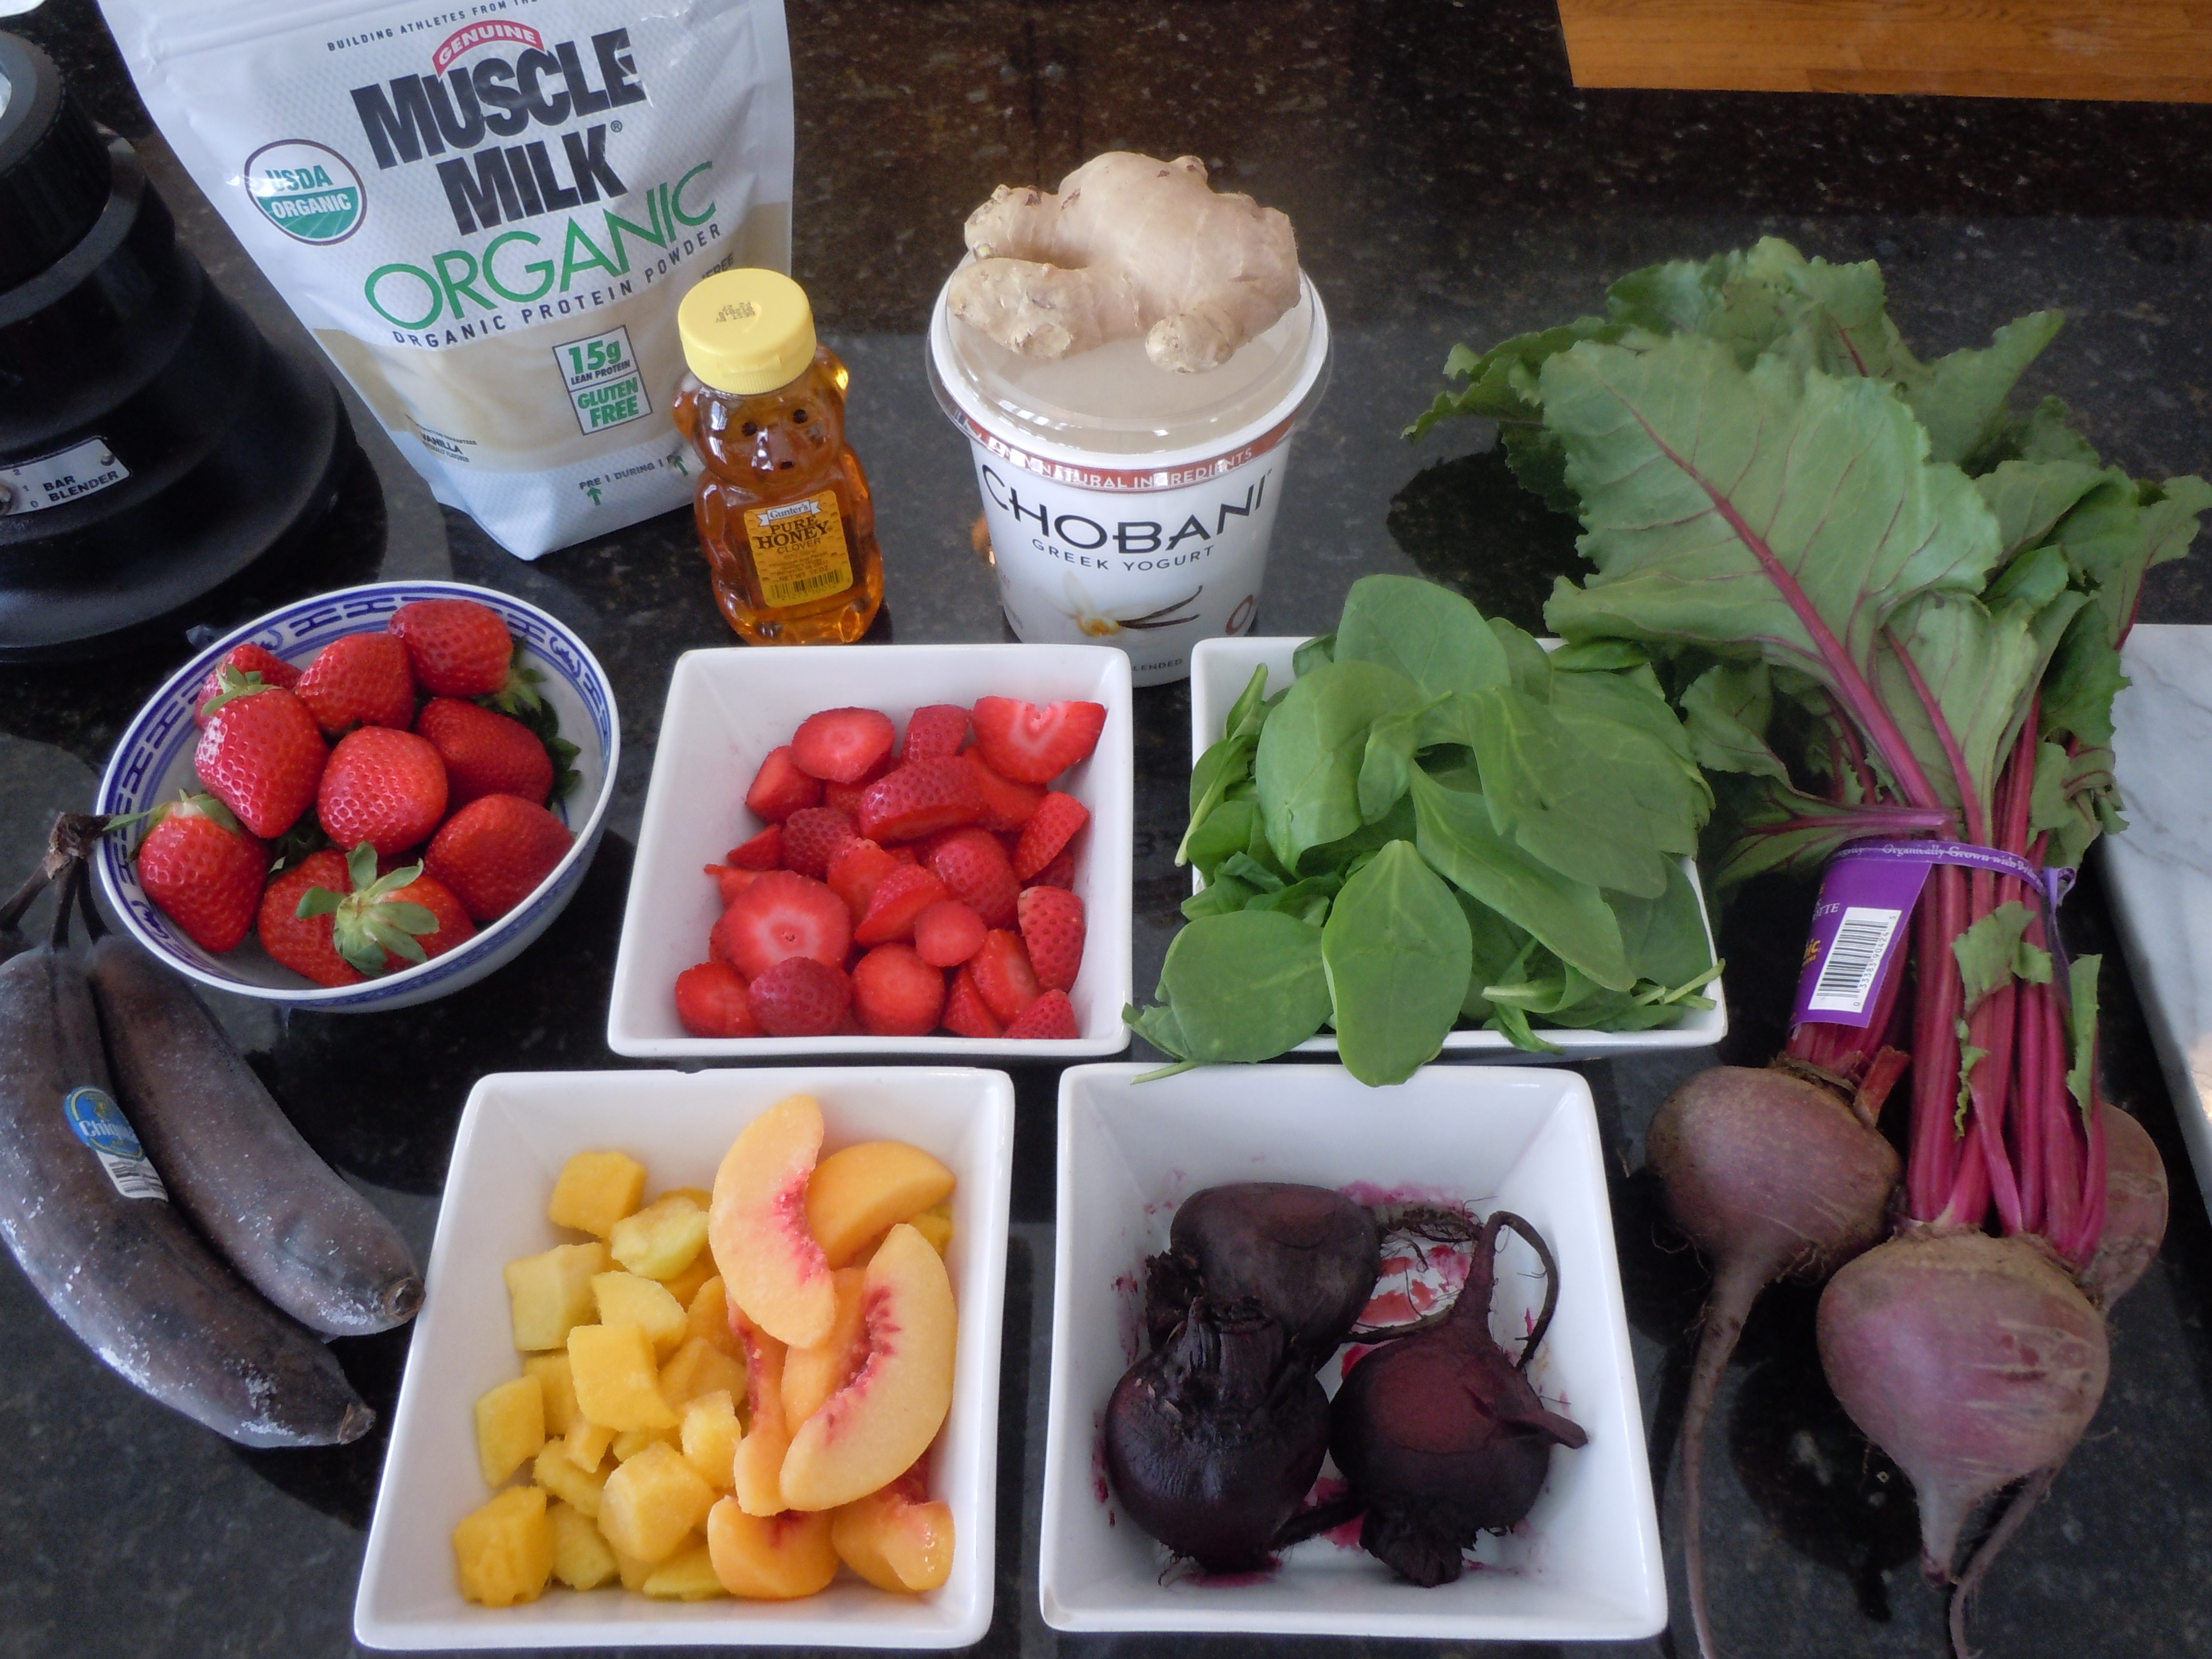
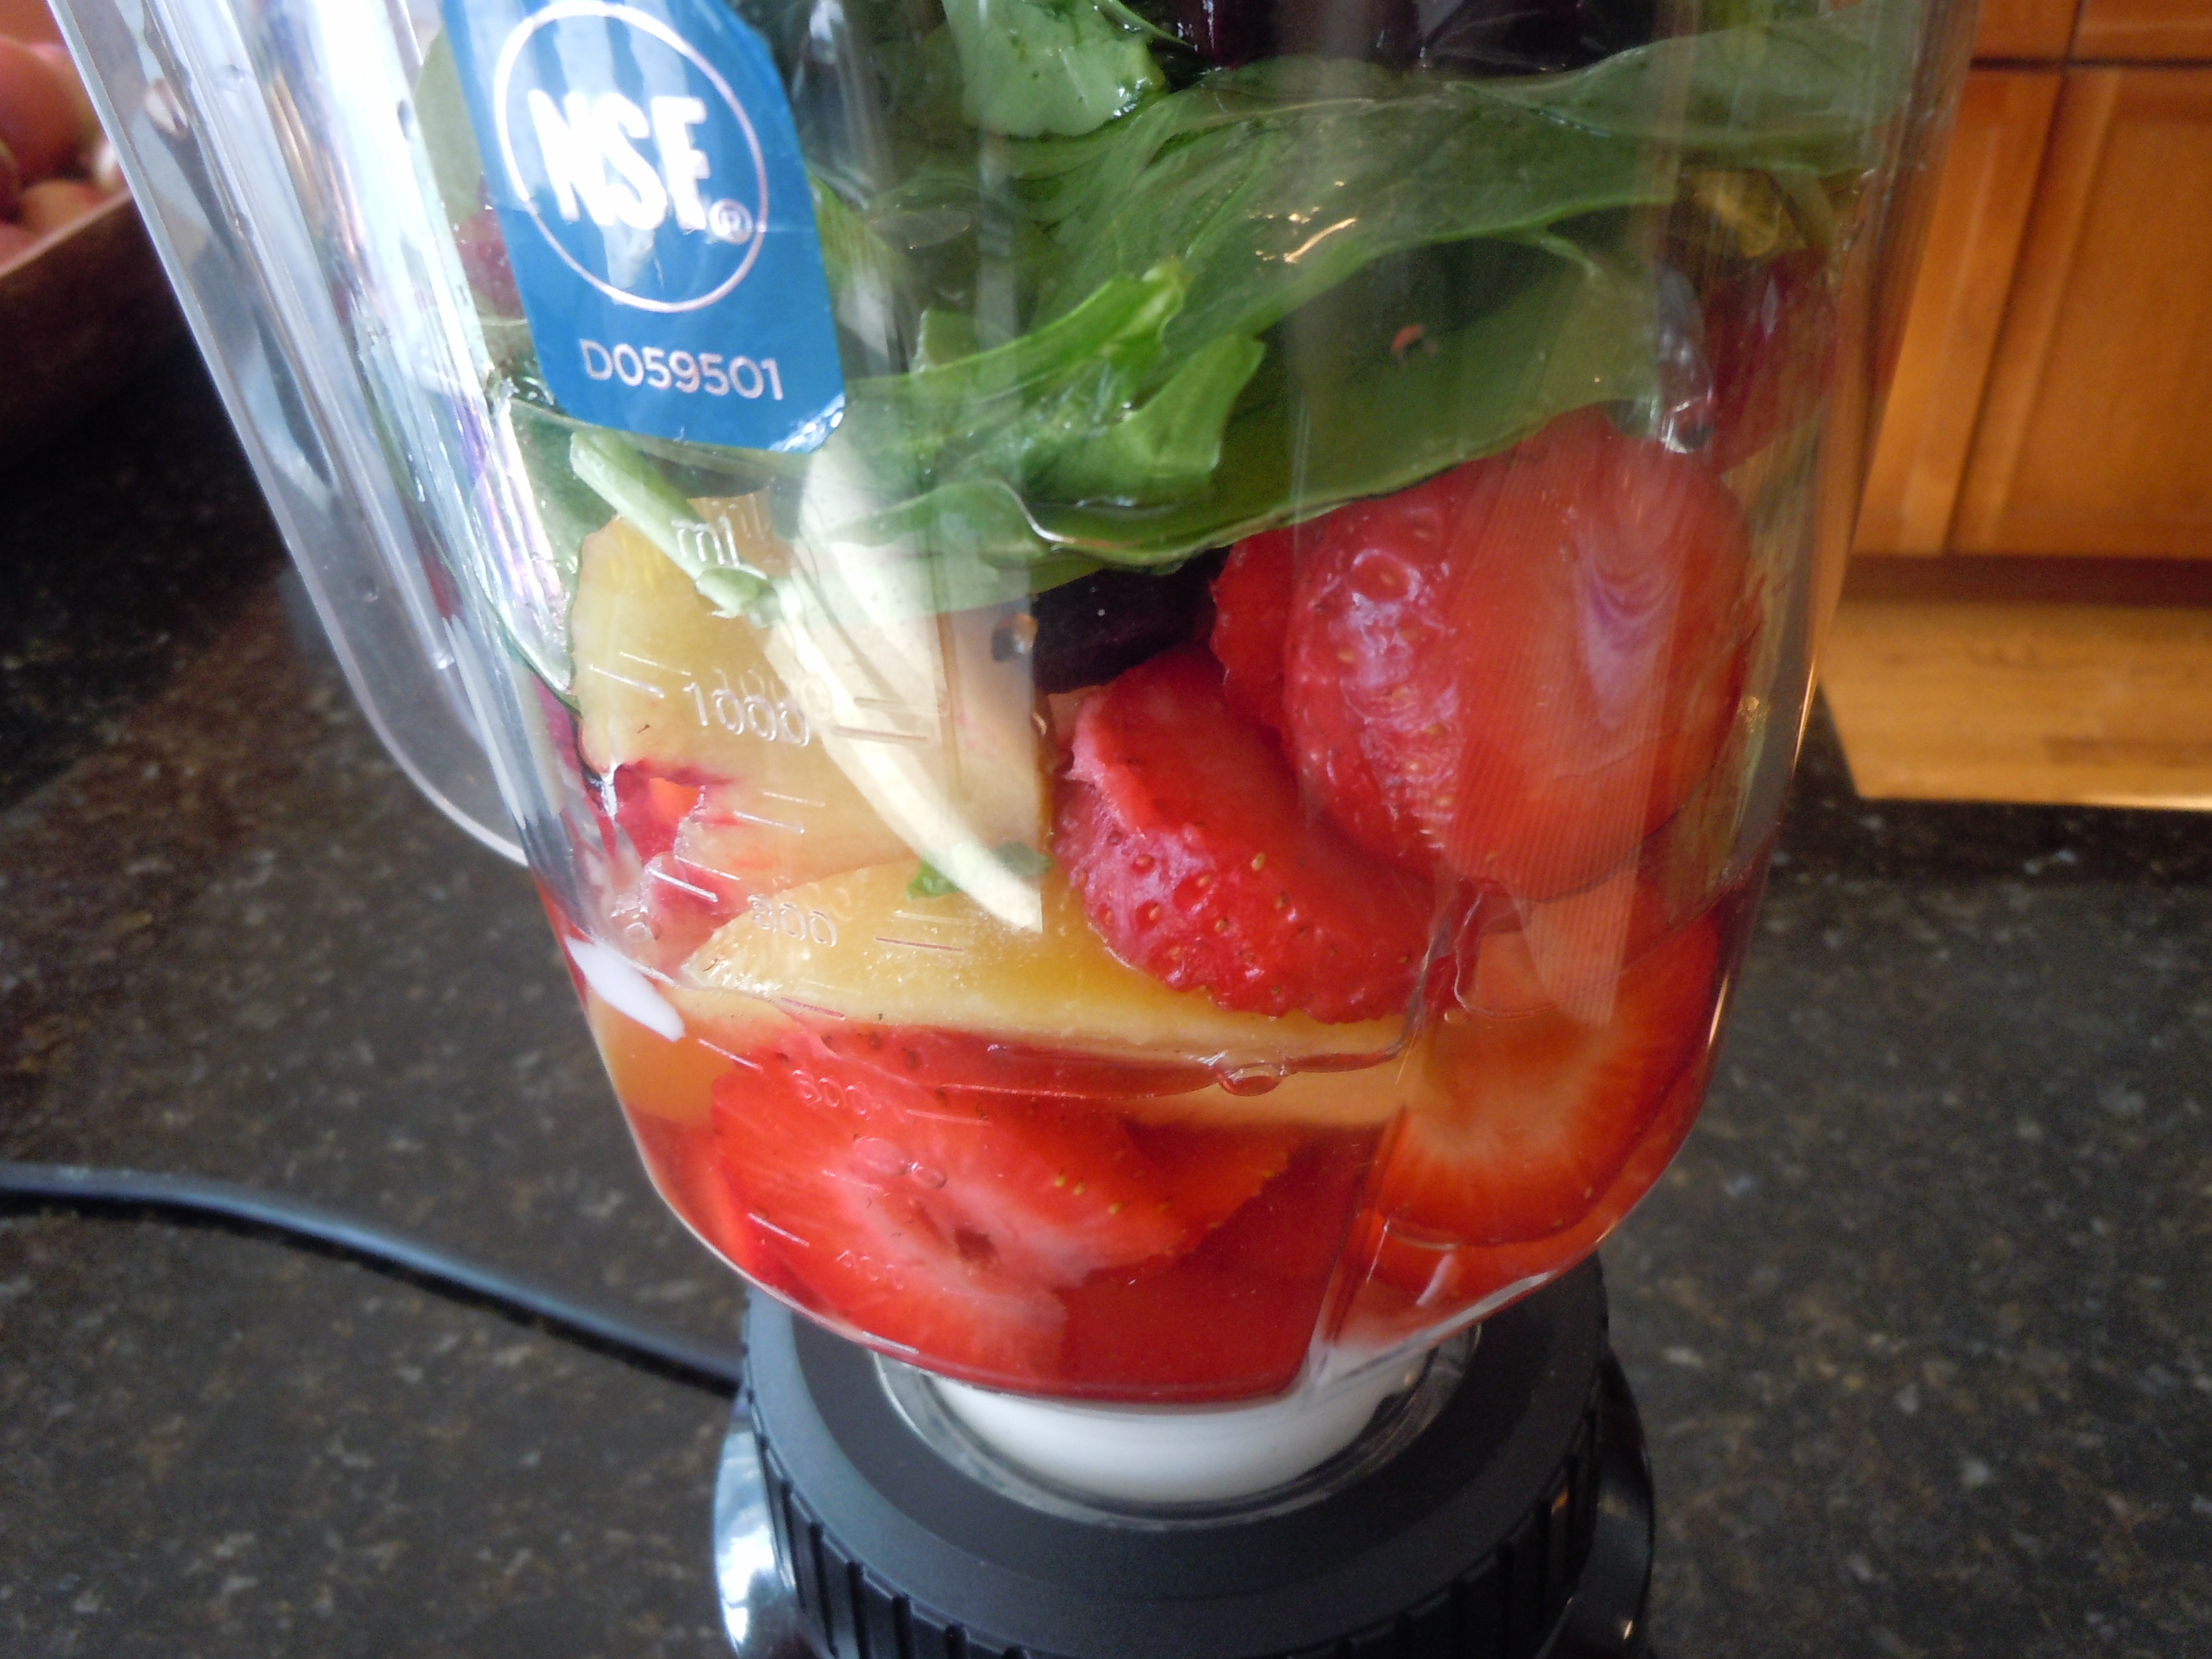
While doing some research on high protein and anti-inflammatory diets I was recently turned on to Muscle Milk. Muscle Milk is a product that a lot of athletes use because it’s great for after work out recovery. It’s also formulated for people who are lactose sensitive, it’s gluten free and they do carry a line of Muscle Milk Light too. Best of all, while offering up all that great protein it taste scrumptious in my first “tropical vanilla energy smoothie”! The vanilla Muscle Milk compliments the vanilla Greek yogurt making for a creamy tropical flavor. It’s truly a tropical vanilla flavor that’s luscious.
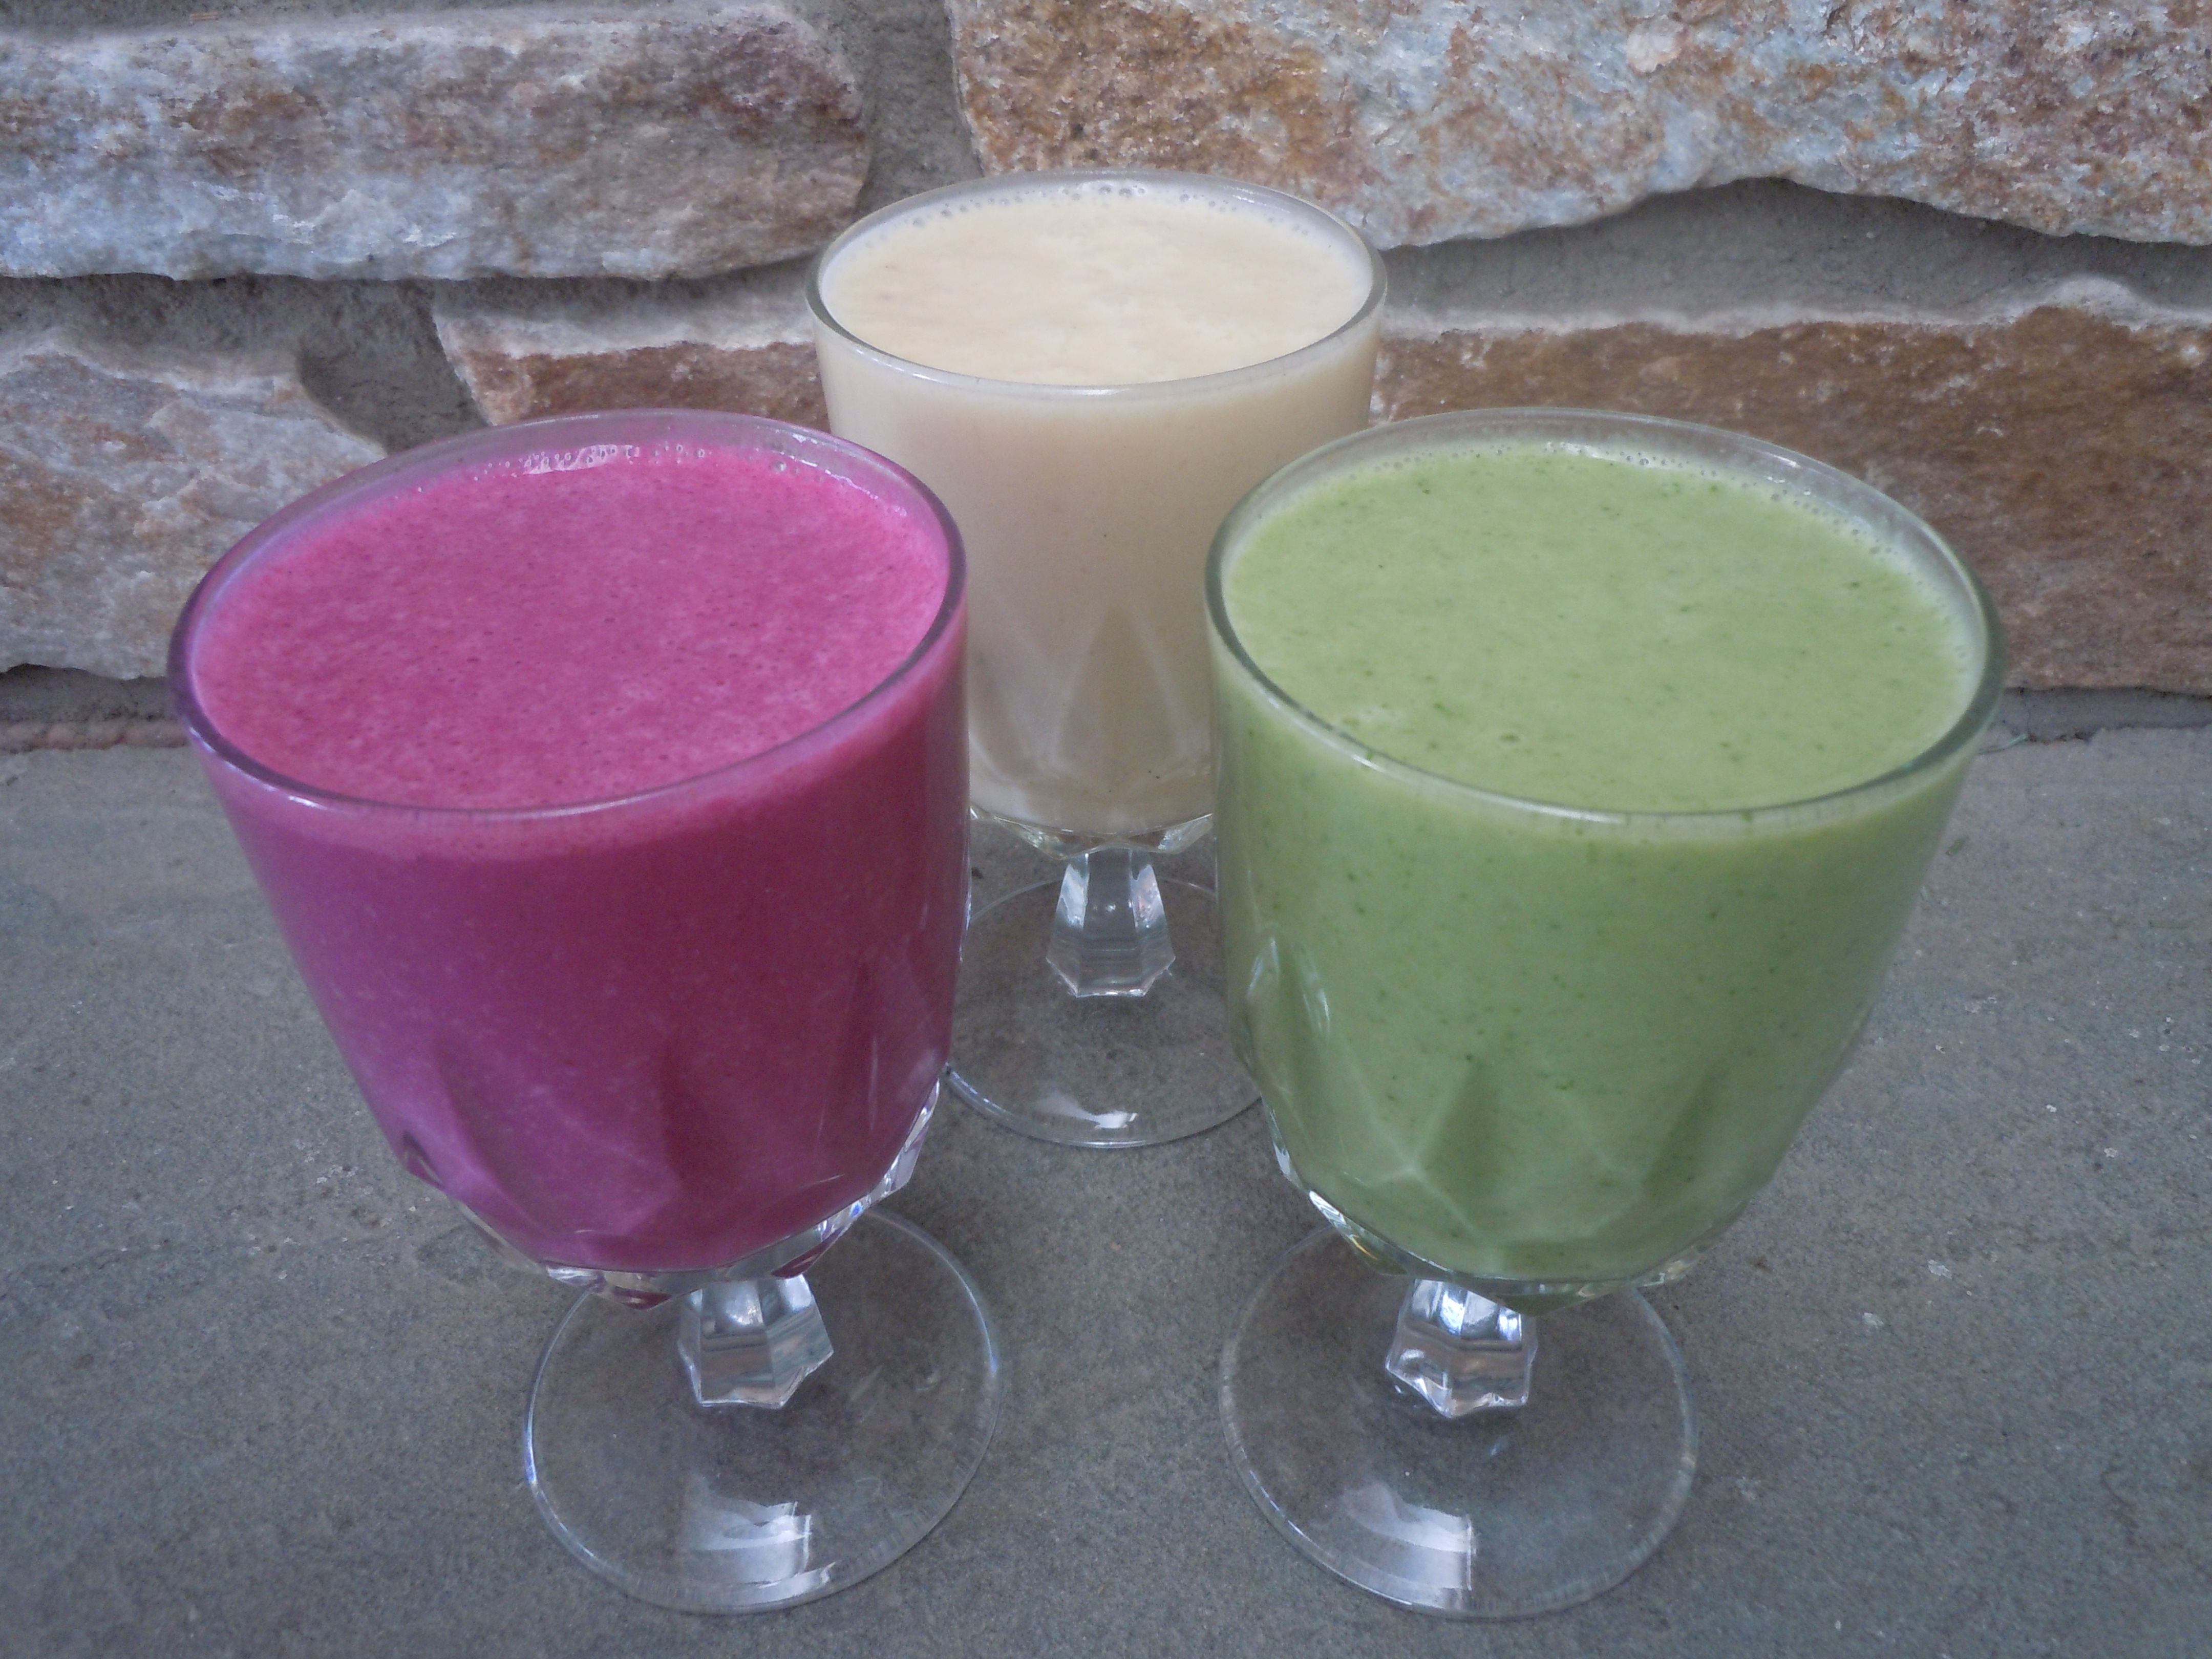
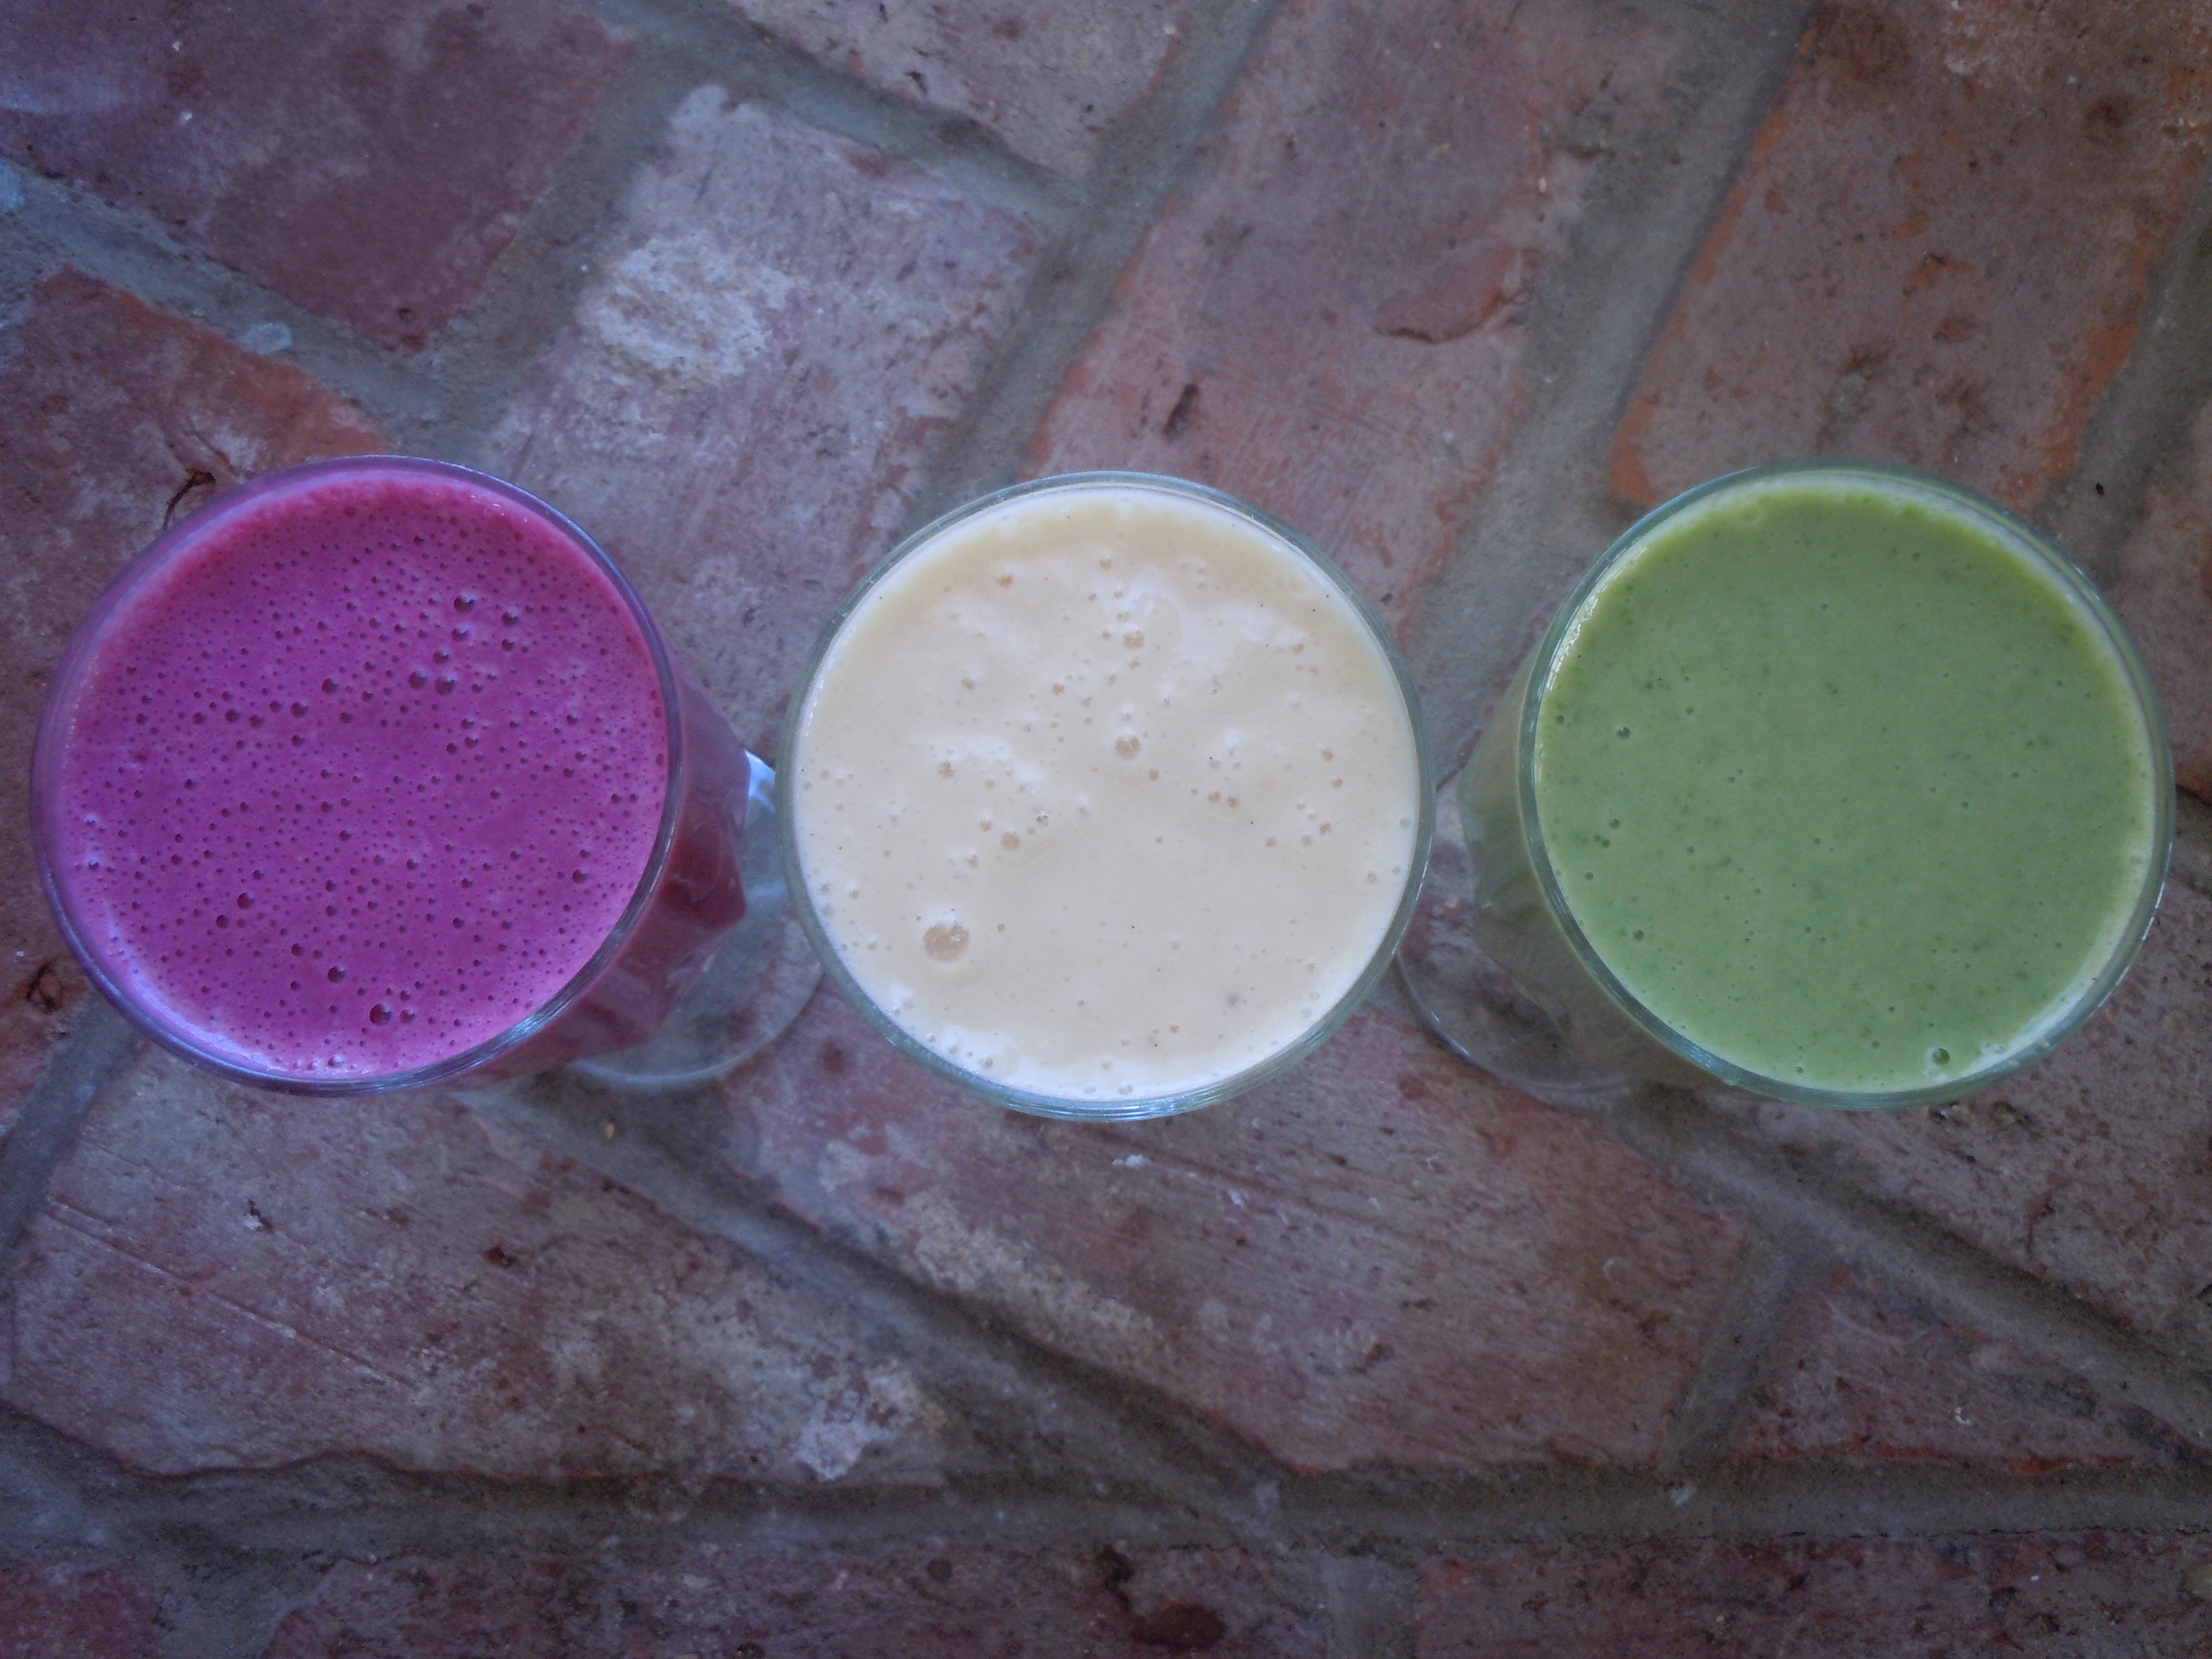
My second smoothie is called the “green zinger” because the spinach turns it green and the fresh grated ginger gives it that underlying needed zing. This may me one of the most unique and delicious smoothies I have come up with. Maybe it’s because I absolutely adore the taste of fresh ginger and honey together and if you haven’t had this combo yet please put it on your bucket list! Fresh grated ginger and honey with a little squeeze of lemon will send your tea through the roof in flavor…please try it 🙂
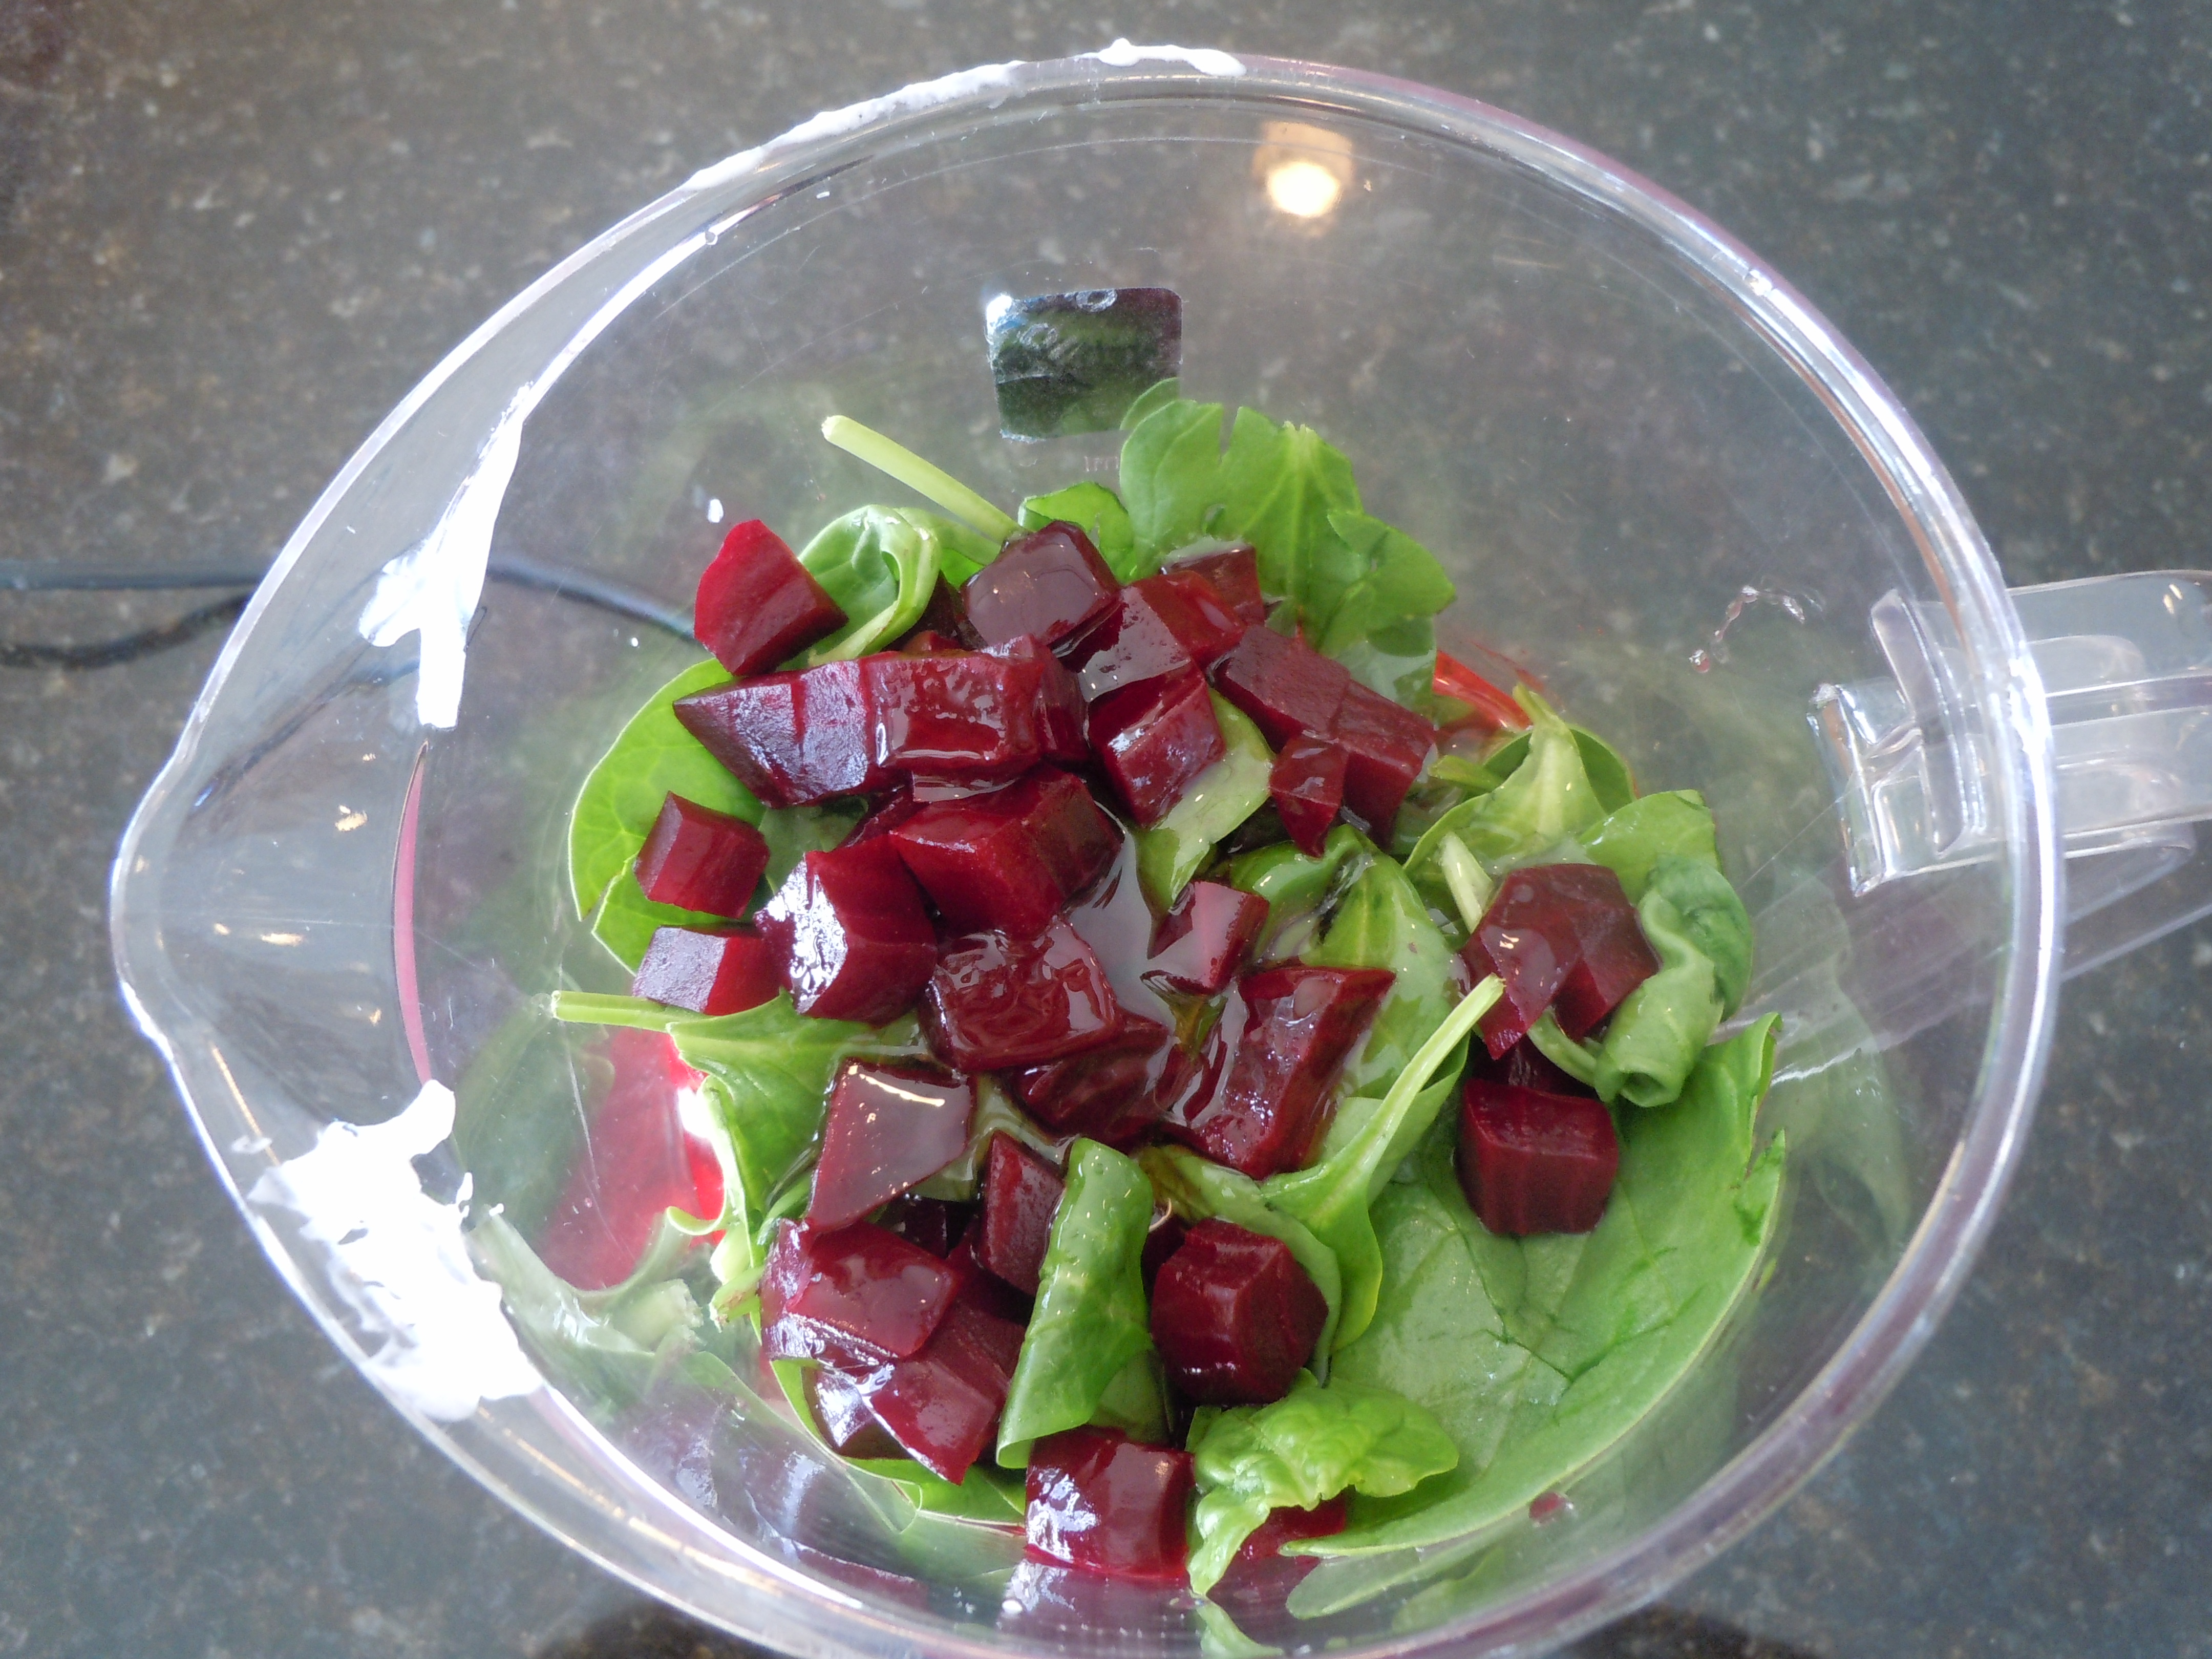
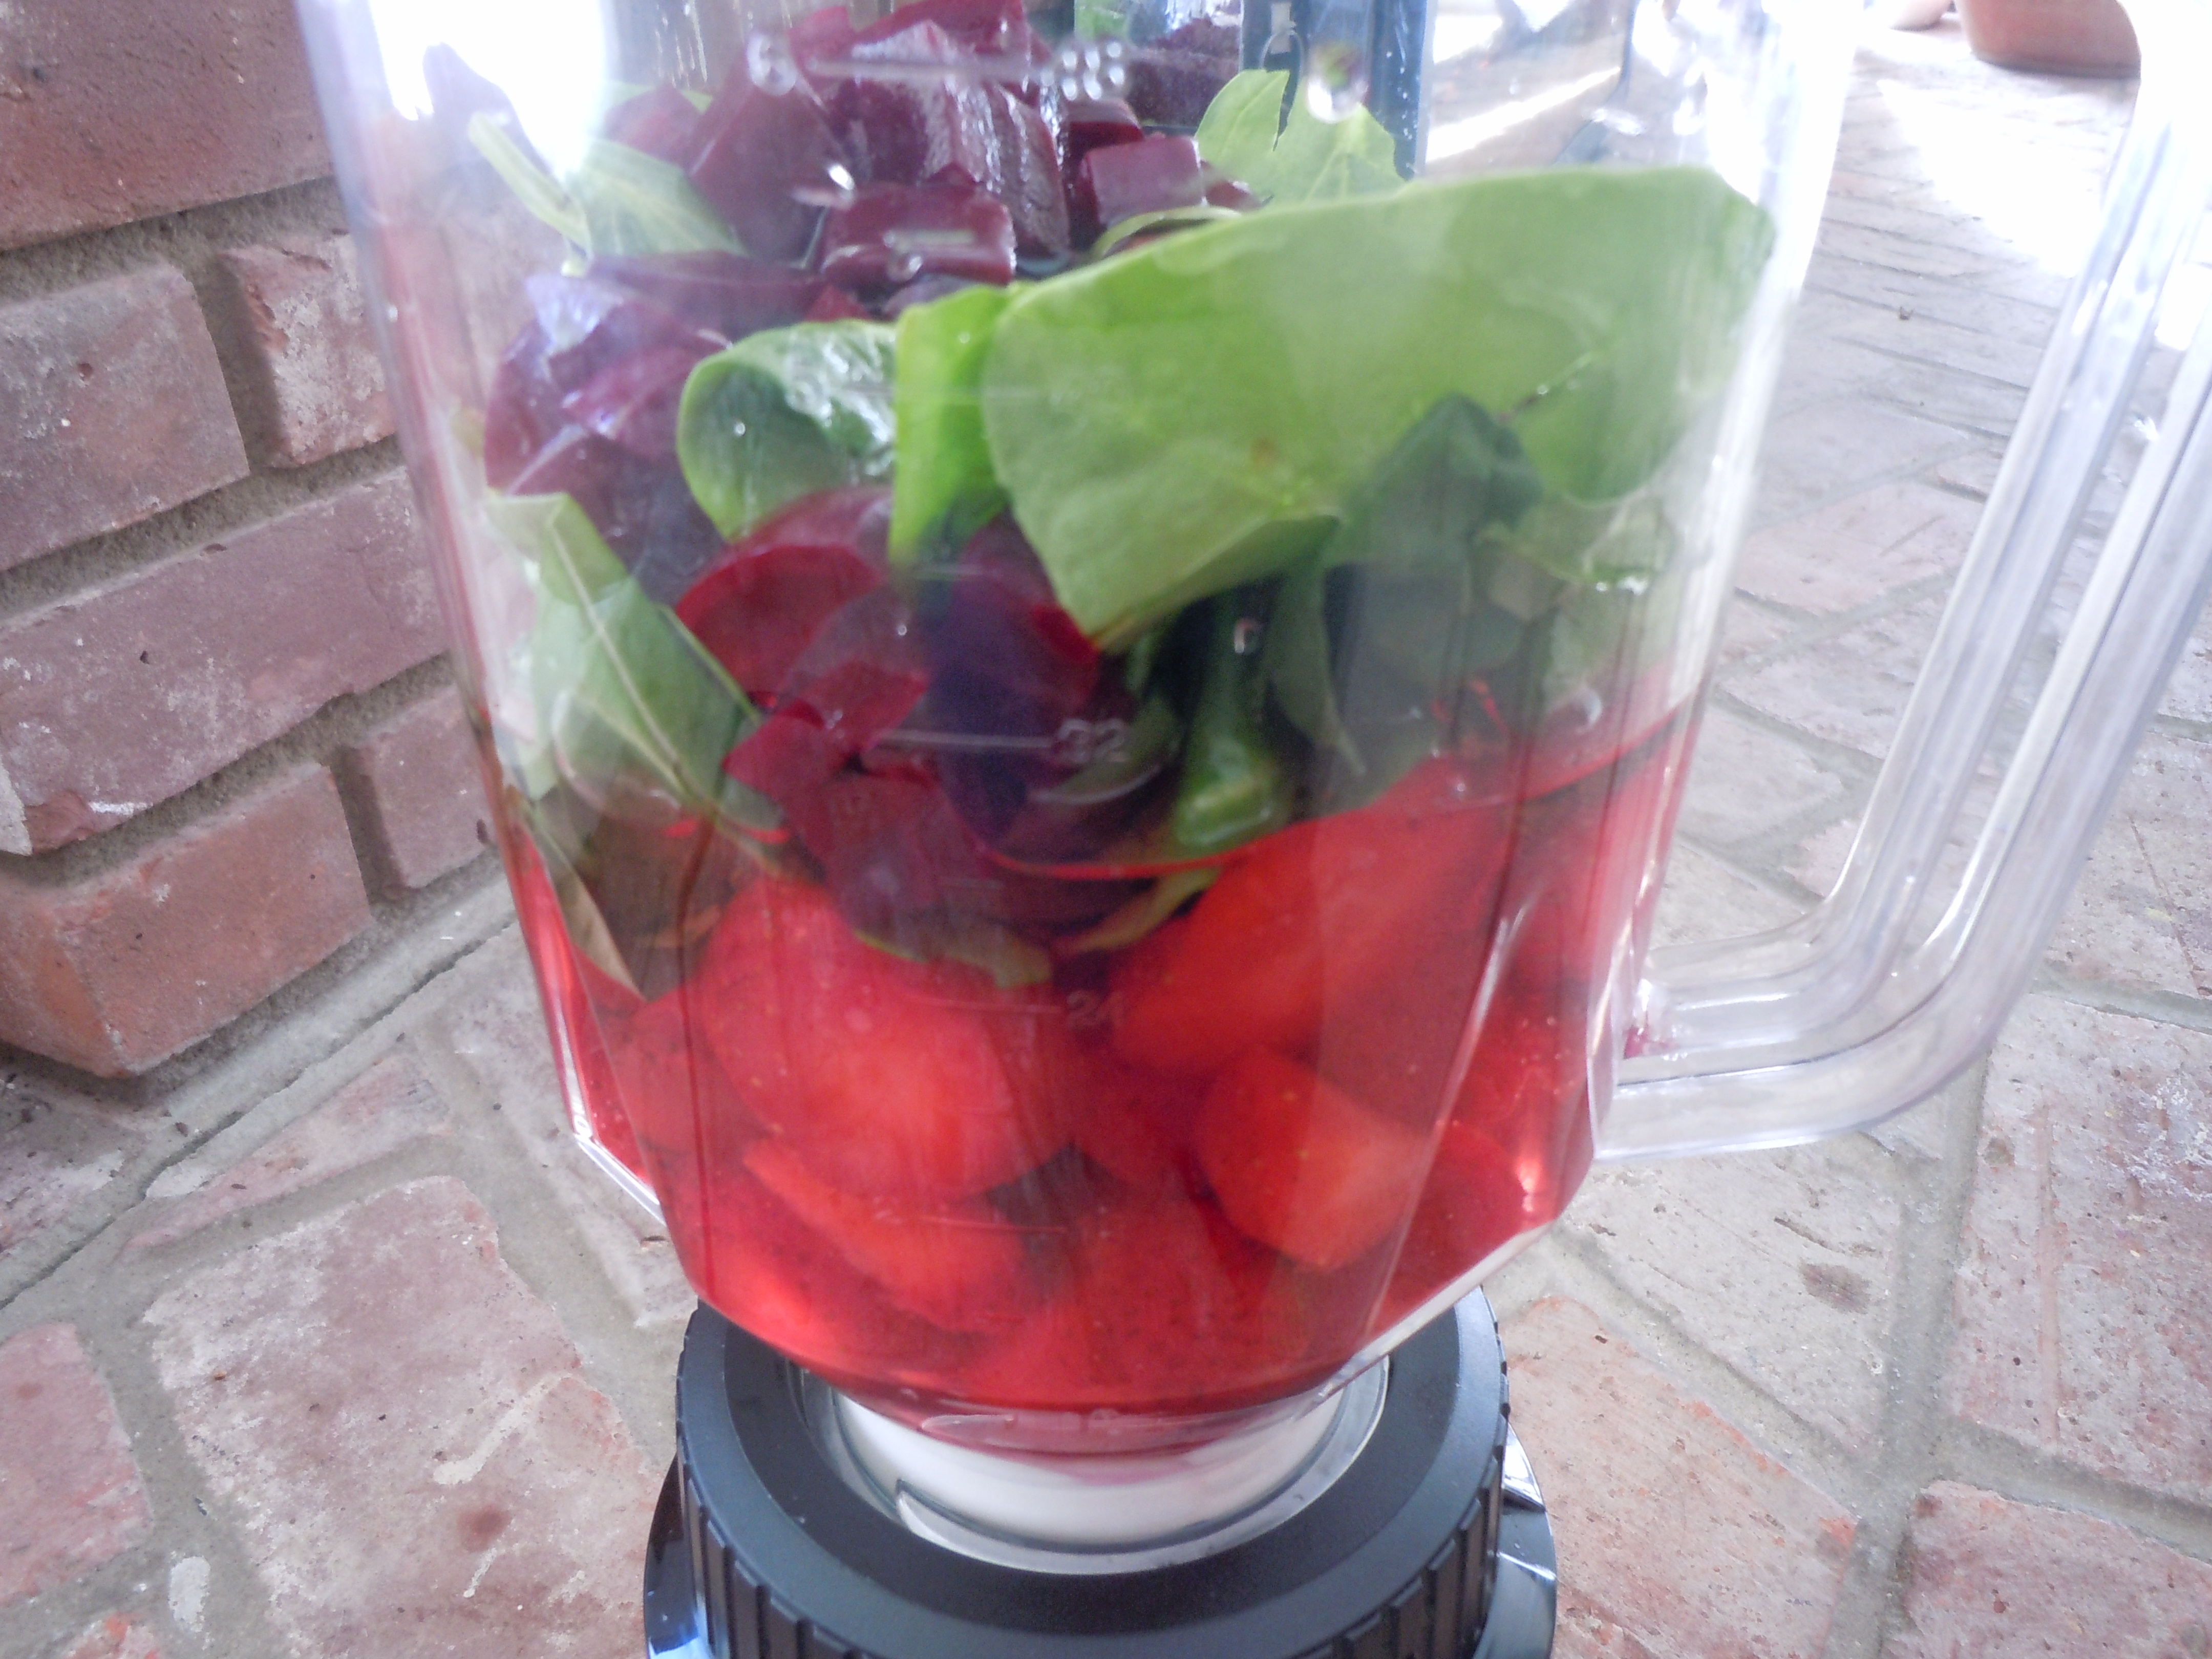
And last but not least is my third smoothie called “the berry-beta bomb” where the color alone is enough to make you smile. There is a small amount of beets in this smoothie which give you a unique source of that wonderful nutrient called betaine. Betaine is like a power nutrient that protects our cells from stress which help fight inflammation and at the same time caring more iron than even spinach…woo hoo I say who’s better that you! I have you baking the beets for a no fuss way to cook them. If you are not big on beets try the golden beets or chioggia striped beets which you can find at Whole Foods or our local Bishop Orchards because they are definitely milder in flavor and it’s important to have them in this smoothie.
When you make your homemade batch of smoothies don’t forget to freeze a small amount in containers. That’s take some of the work out of your next round and makes for refreshing little energy snacks in the afternoon. I take them right out of the freezer and eat them like an Italian ice. Make sure to watch my show on how to make these babies! Enjoy and stay healthy!
INGREDIENTS FOR THE TROPICAL VANILLA SMOOTHIE W/ MUSCLE MILK:
1 cup Muscle Milk
1 cup vanilla Greek yogurt
1 cup unsweetened apple juice
1 cup frozen cut-up mangoes
1 cup frozen cut-up peaches
2/3 cup frozen cut-up bananas
3 tbsp honey
INGREDIENTS FOR THE GREEN ZINGER SMOOTHIE:
1 cup vanilla Greek yogurt
2 cups unsweetened apple juice
2 cups baby spinach leaves
1 cup frozen cut-up mangoes
1 cup frozen cup-up peaches
2/3 cup frozen cut-up bananas
1 heaping tbsp fresh zested ginger
3 tbsp honey
INGREDIENTS FOR THE BERRY-BETA BOMB SMOOTHIE:
1 1/2 cups vanilla Greek yogurt
1 1/2 cups unsweetened apple juice
1 1/2 cups baby spinach leaves
1/4 cup roasted beet – diced up (If you are not a big beet lover use lighter colored beets like golden beets, or Chioggia beets – the striped beets because they are more mellow in flavor
TO COOK BEETS: Cut stems off of beets 1/2″ up on stem from actual base of beet, wash and dry the beets, place them in a small shallow baking dish like a pie plate, cover with foil snugly and bake for 1 hr. When beets are done, let them cool and then peel off skin with your fingers.
2 cups frozen strawberries
1 cup frozen cut-up peaches
3 tbsp honey
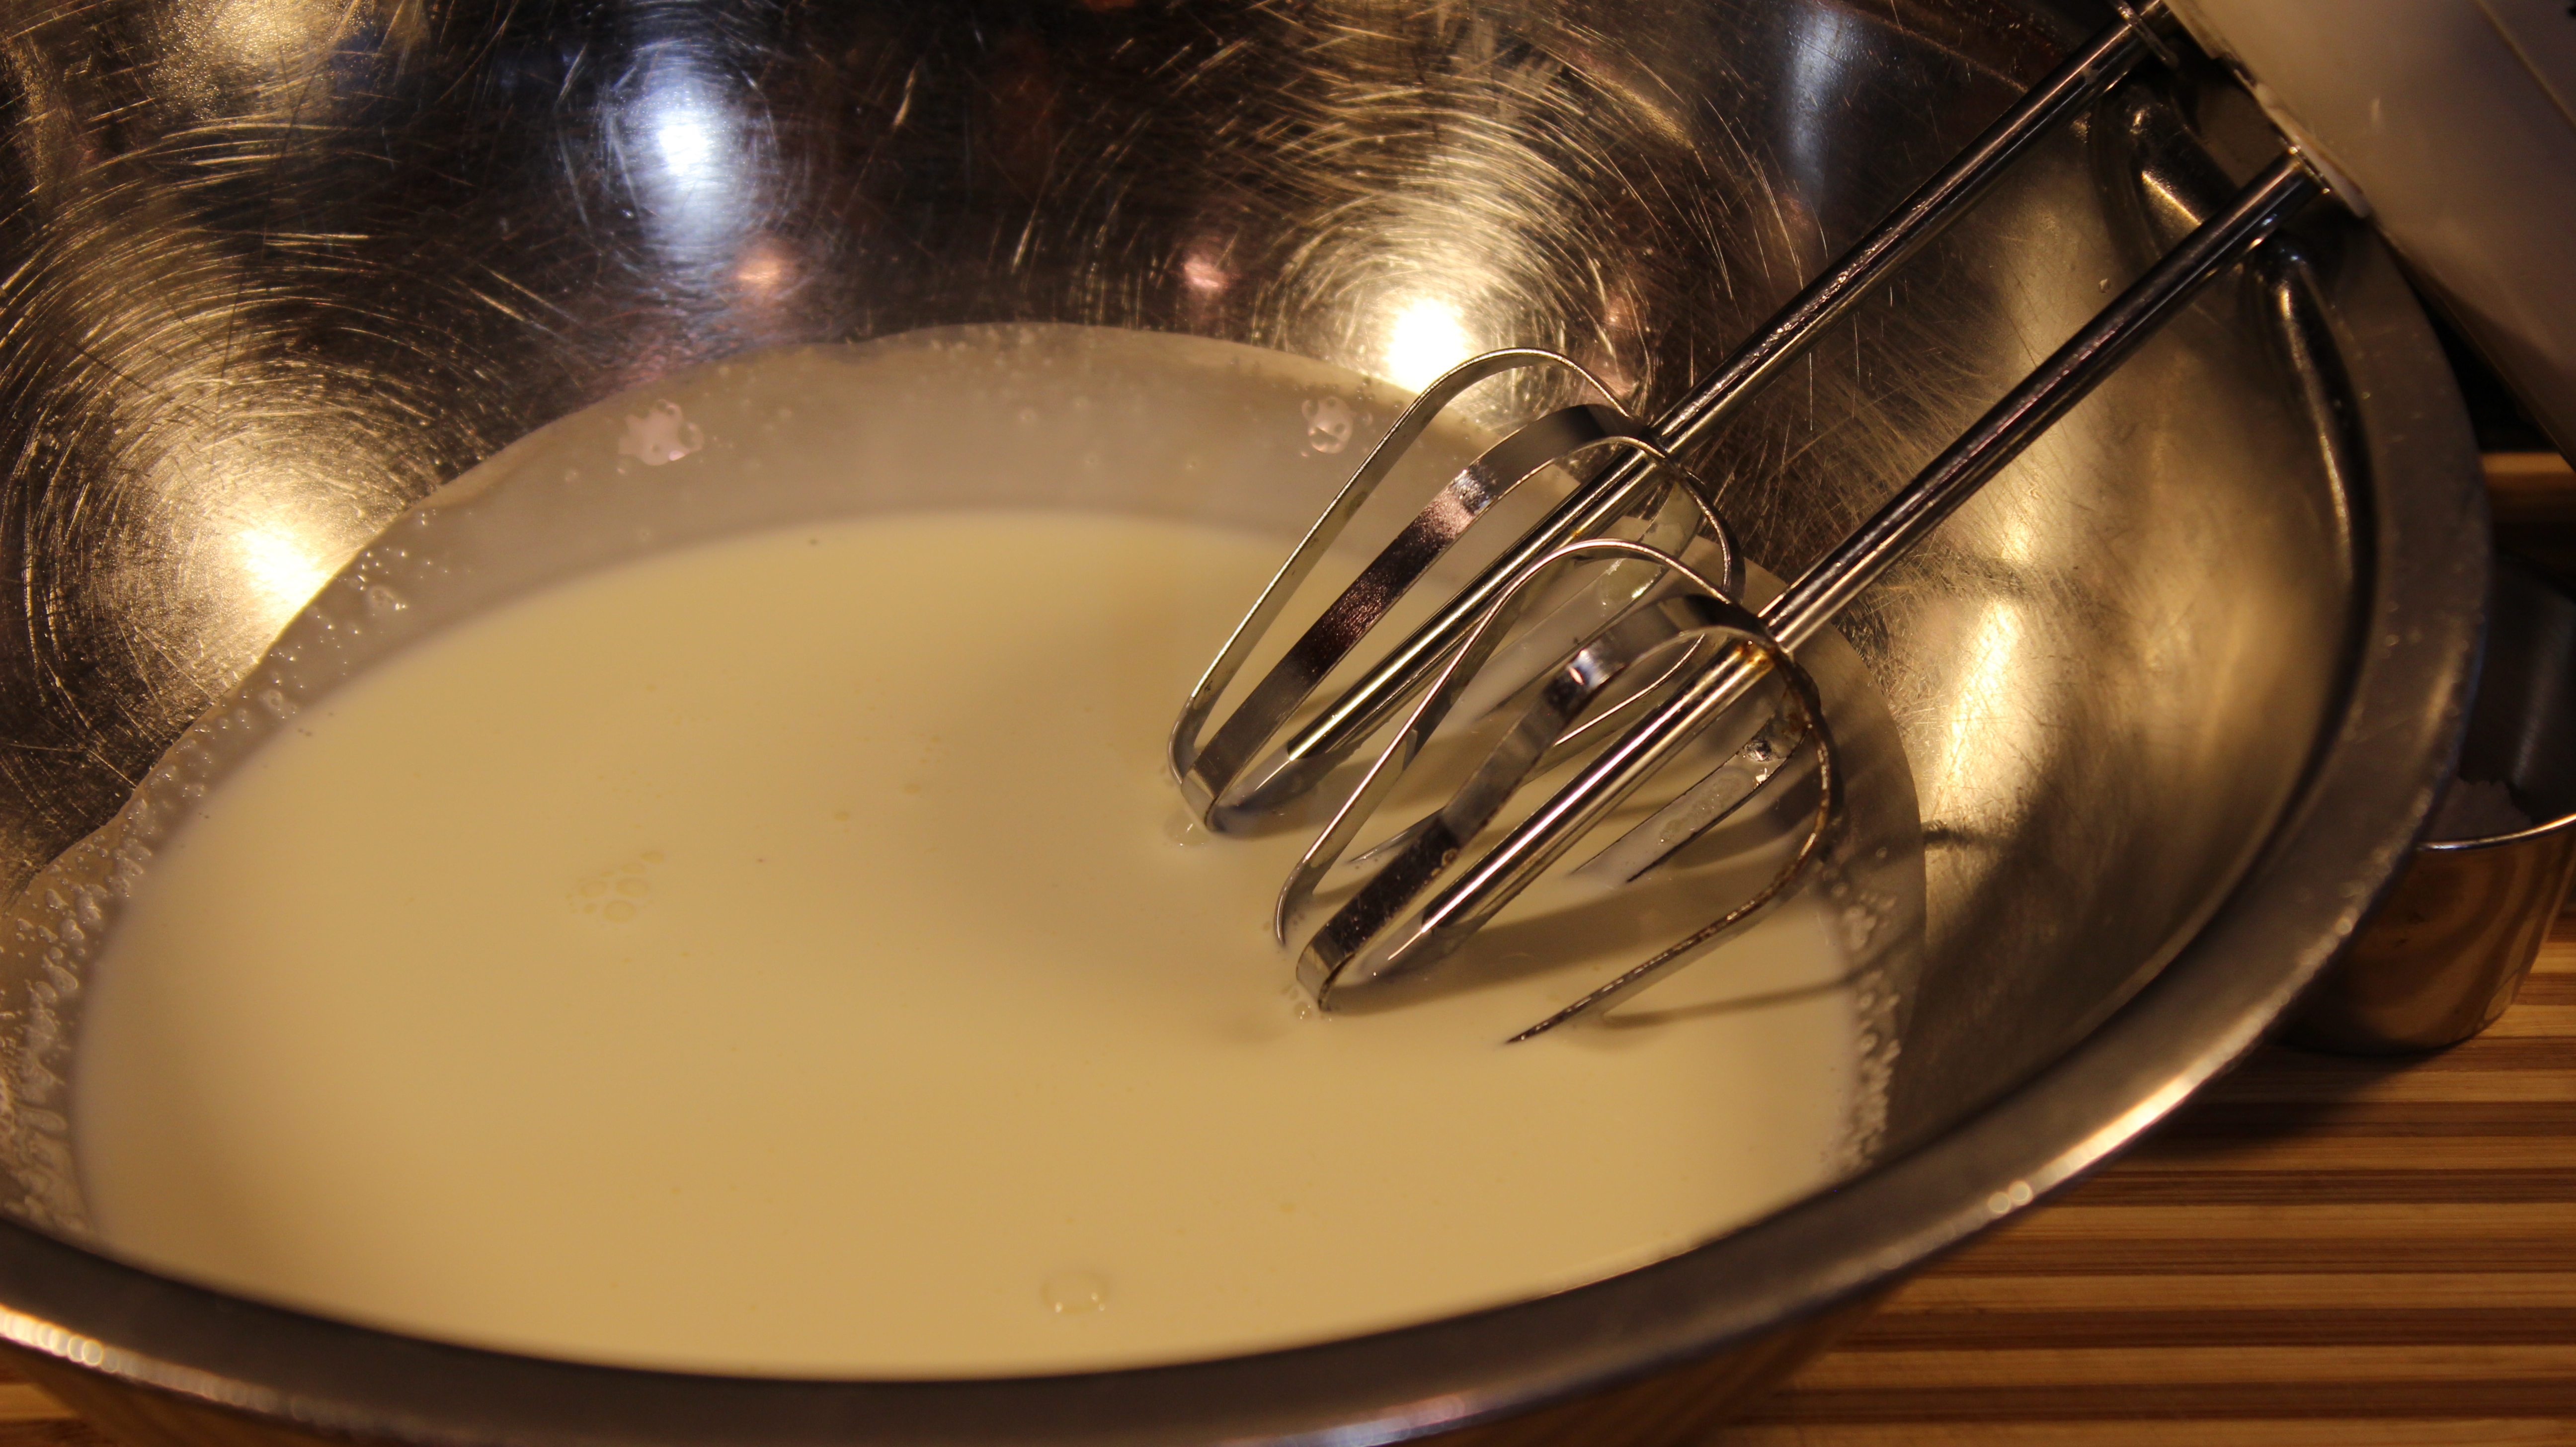
DIRECTIONS FOR ALL SMOOTHIES:
Place ingredients into blender and puree til smooth.
You use frozen fruits in these energy smoothie 101 recipes but feel free to add crushed ice as well to add in volume and help keep them frosty.
Keep in the frig if you are drinking right away or put into several small containers and freeze to have at a later time.
If you do freeze them in containers just take out from freezer when ready and let it sit on the counter for 15 minutes and stir to drink or eat them right out of the frigerator scrapping with a spoon like an Italian ice! Enjoy!
(Note: Muscle Milk is not a paid sponsor at this time I just happen to really like the product 🙂
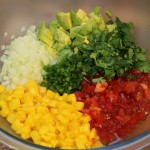
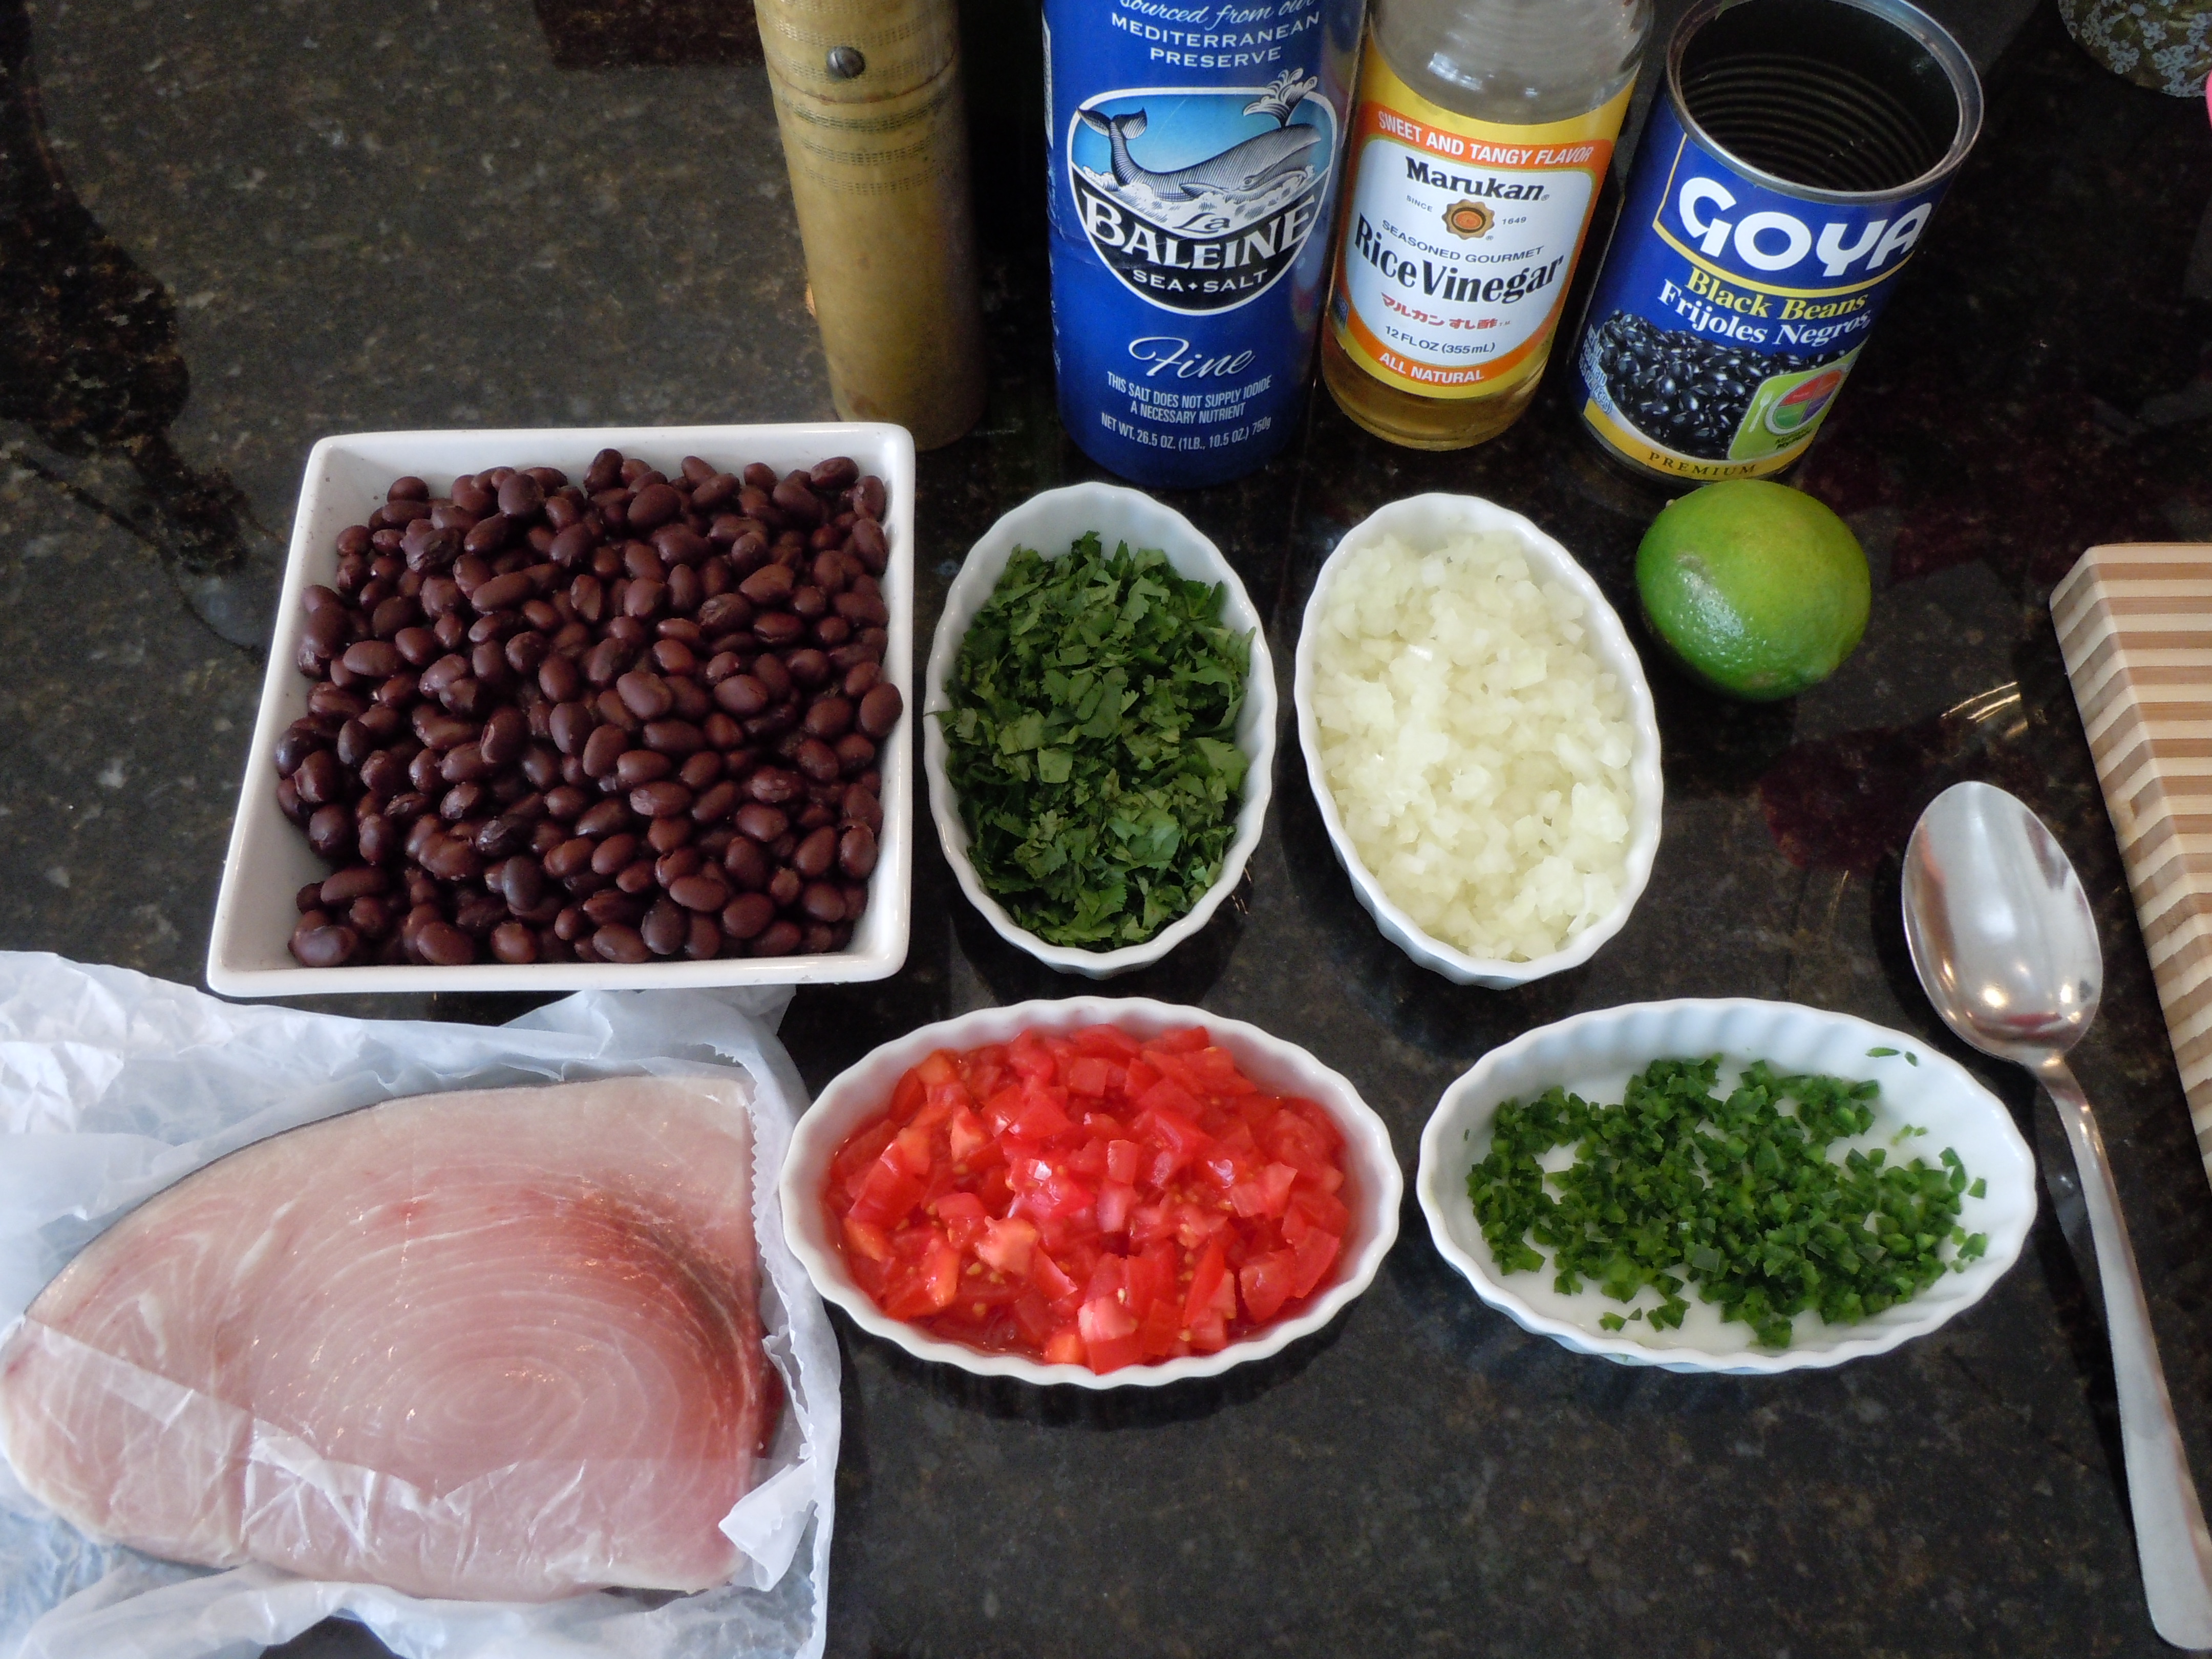
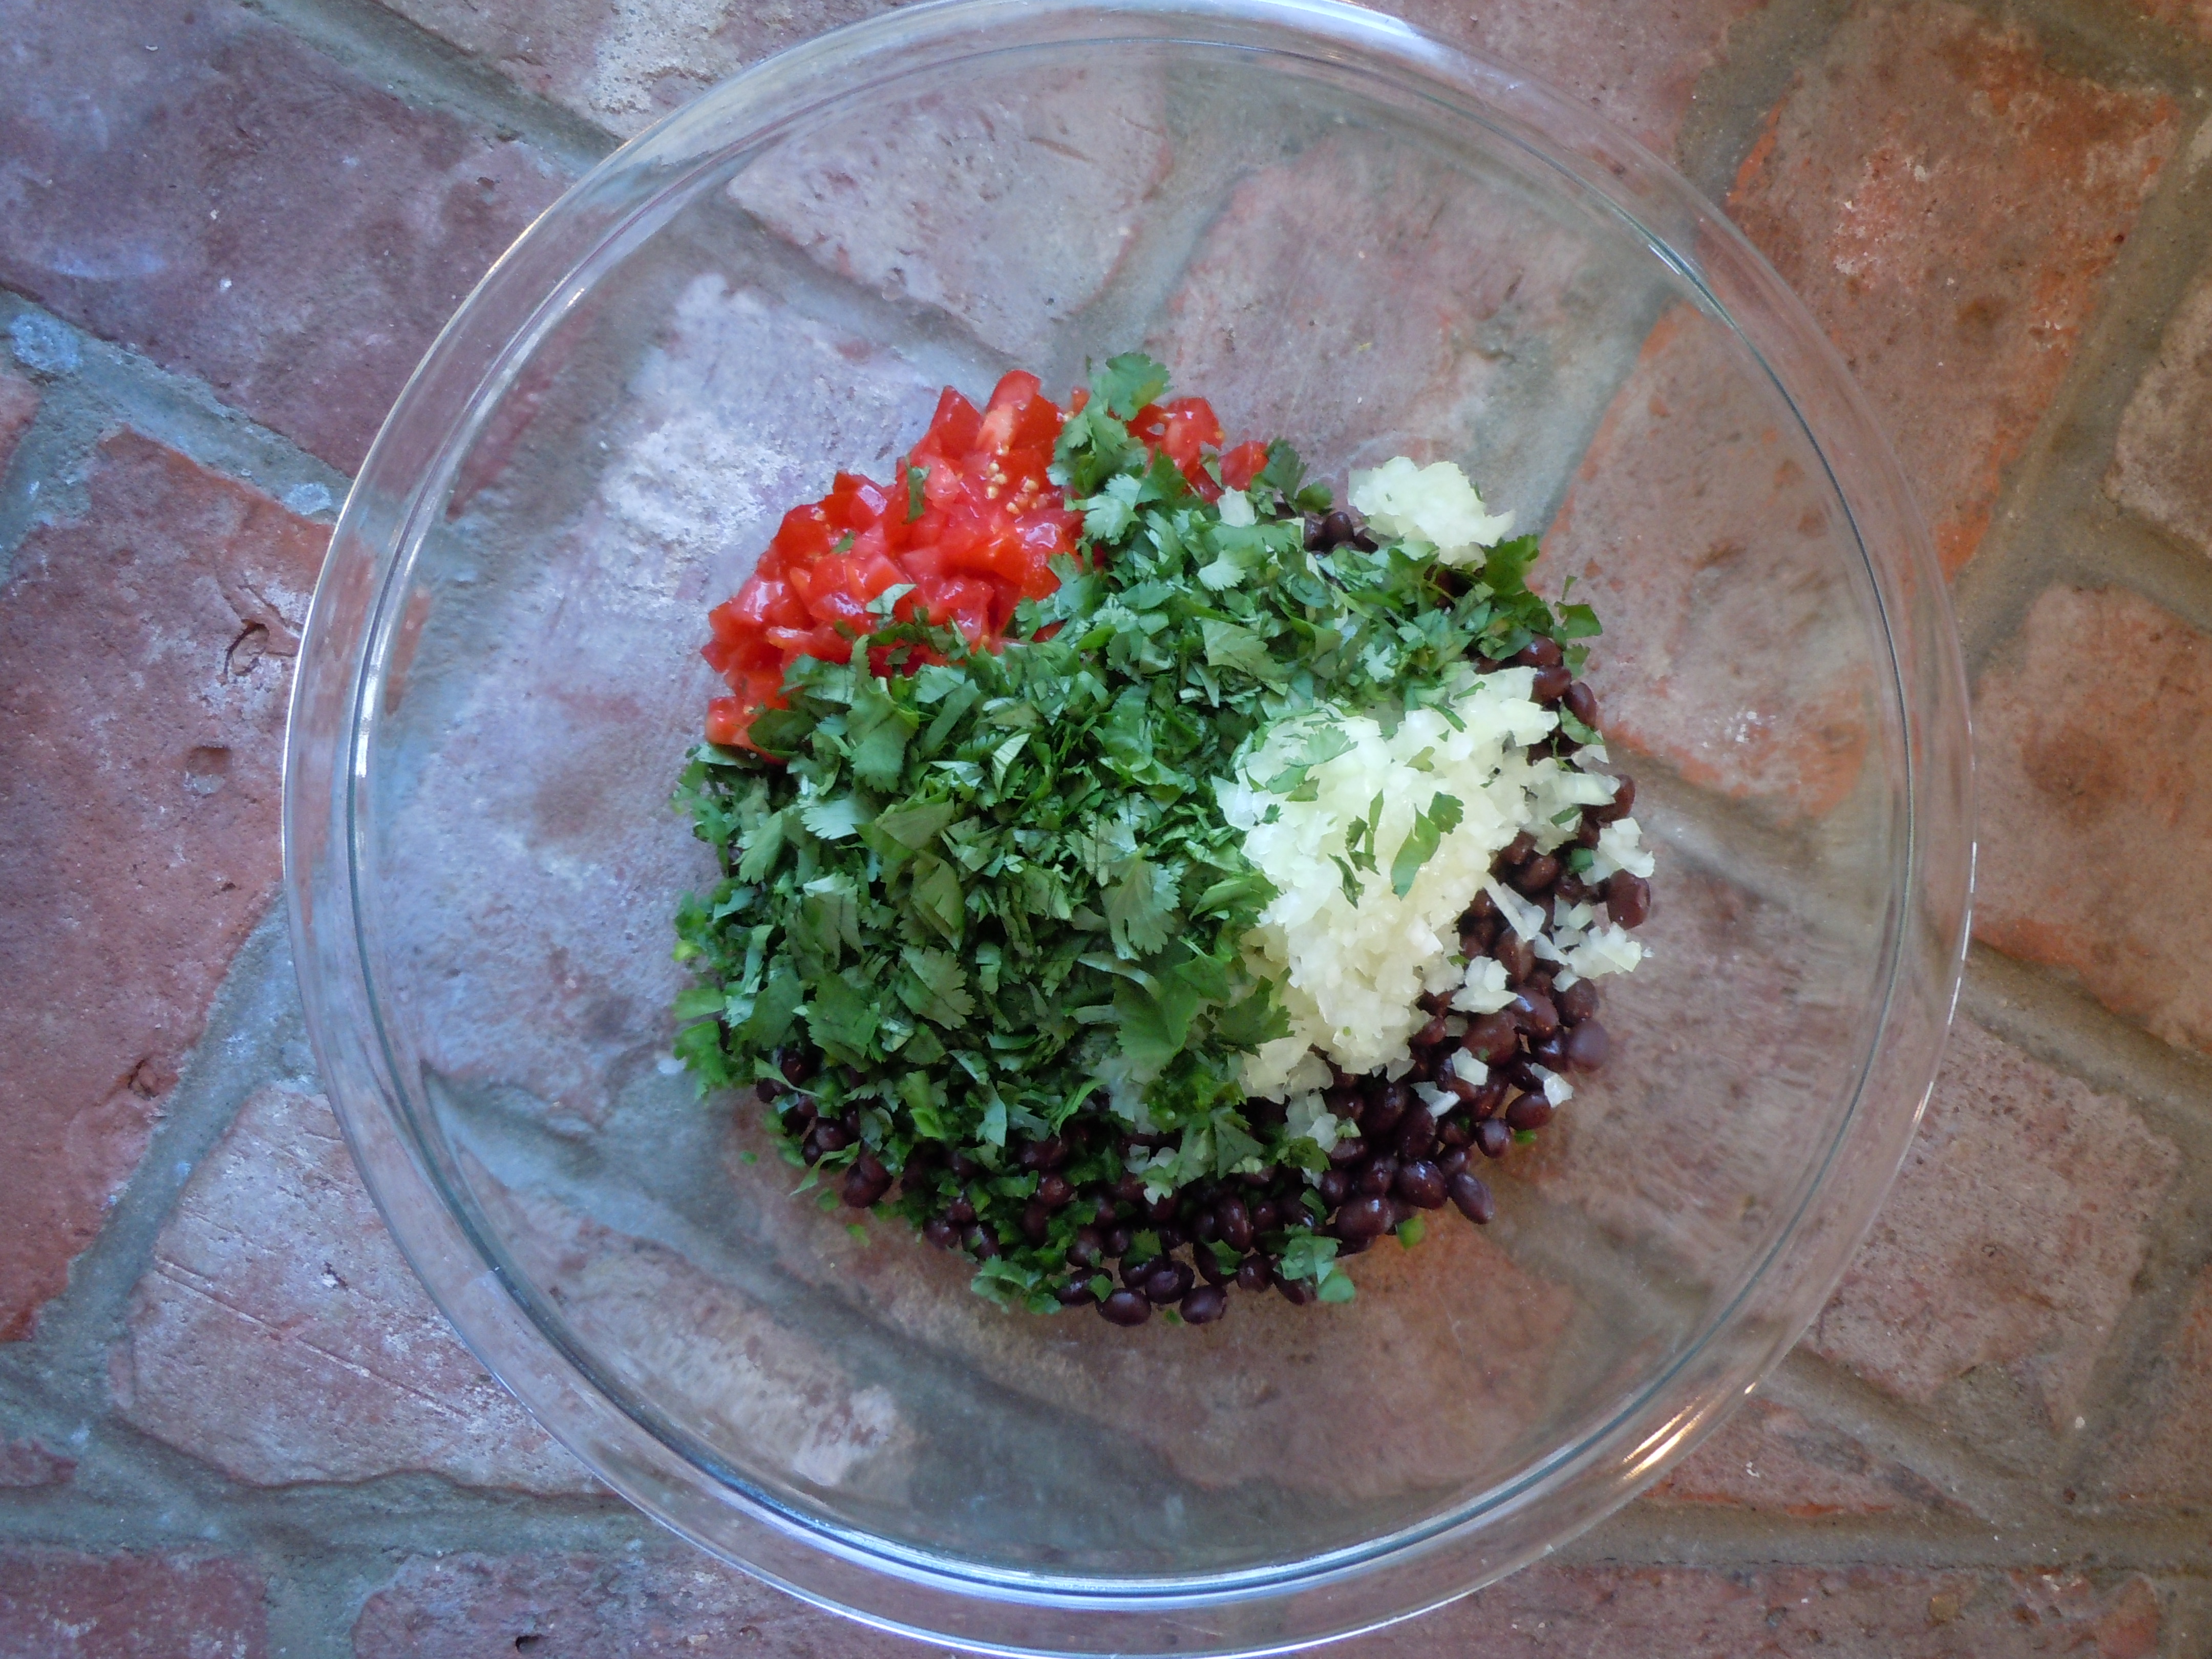
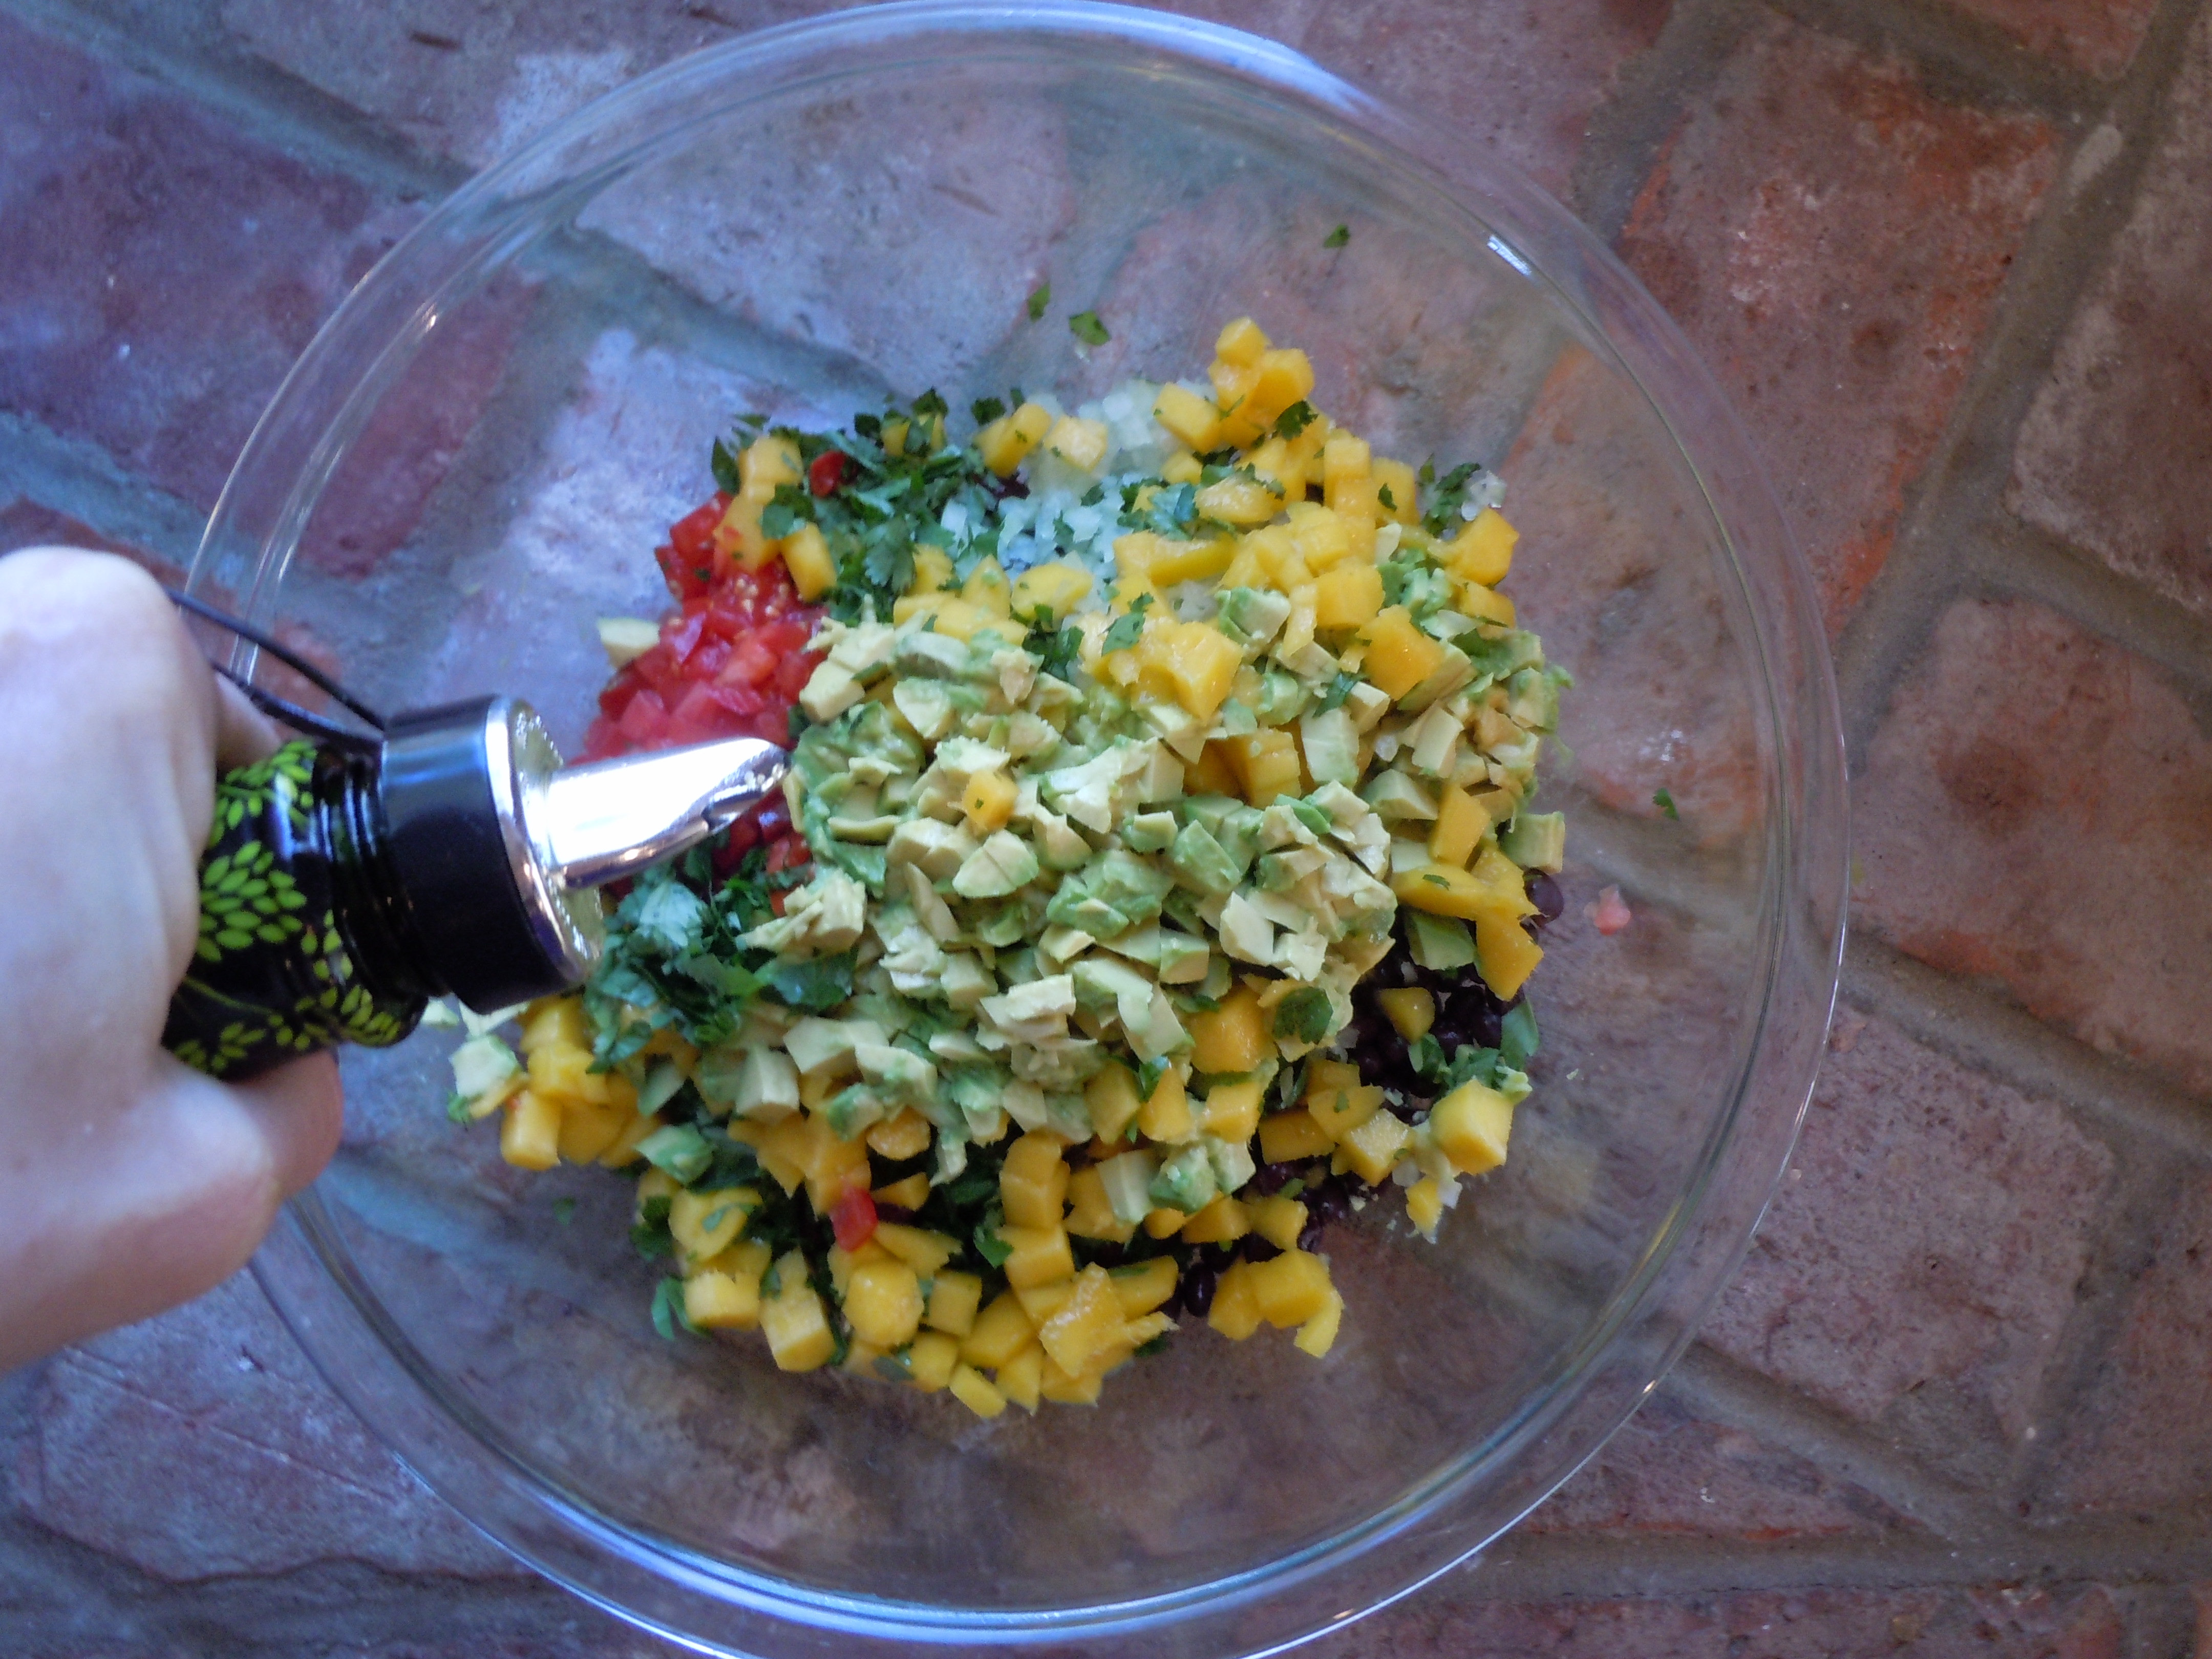
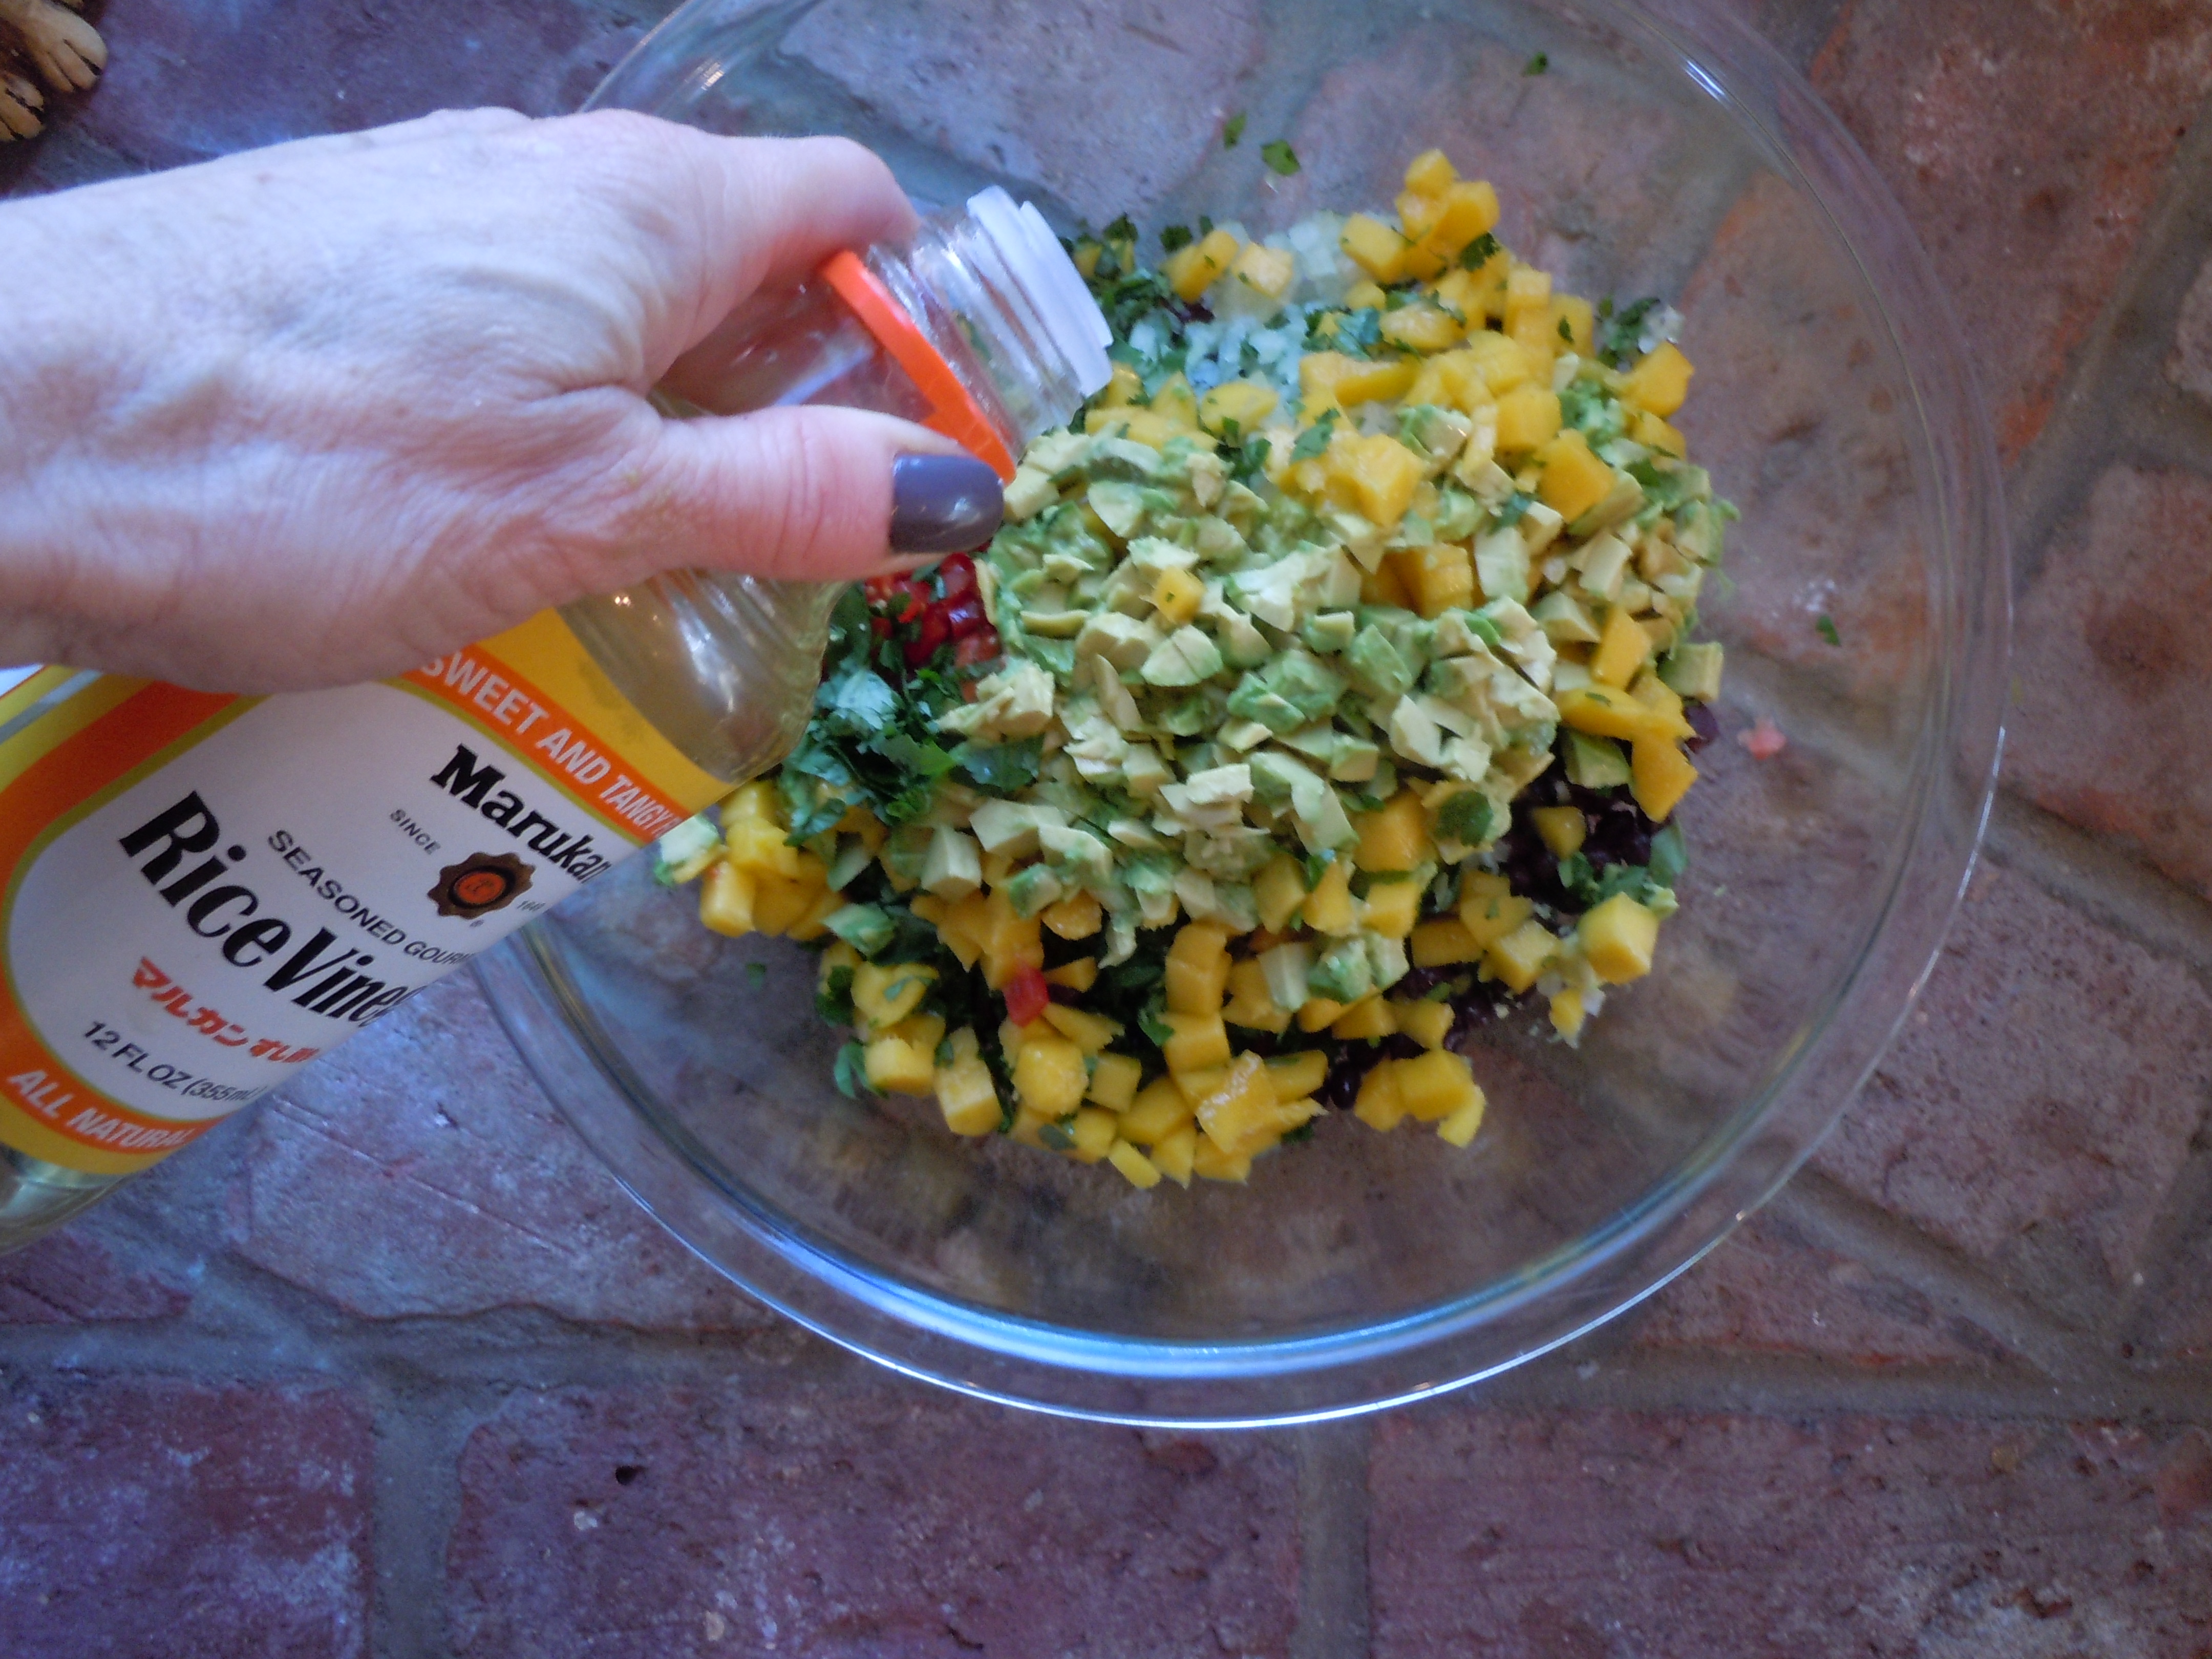
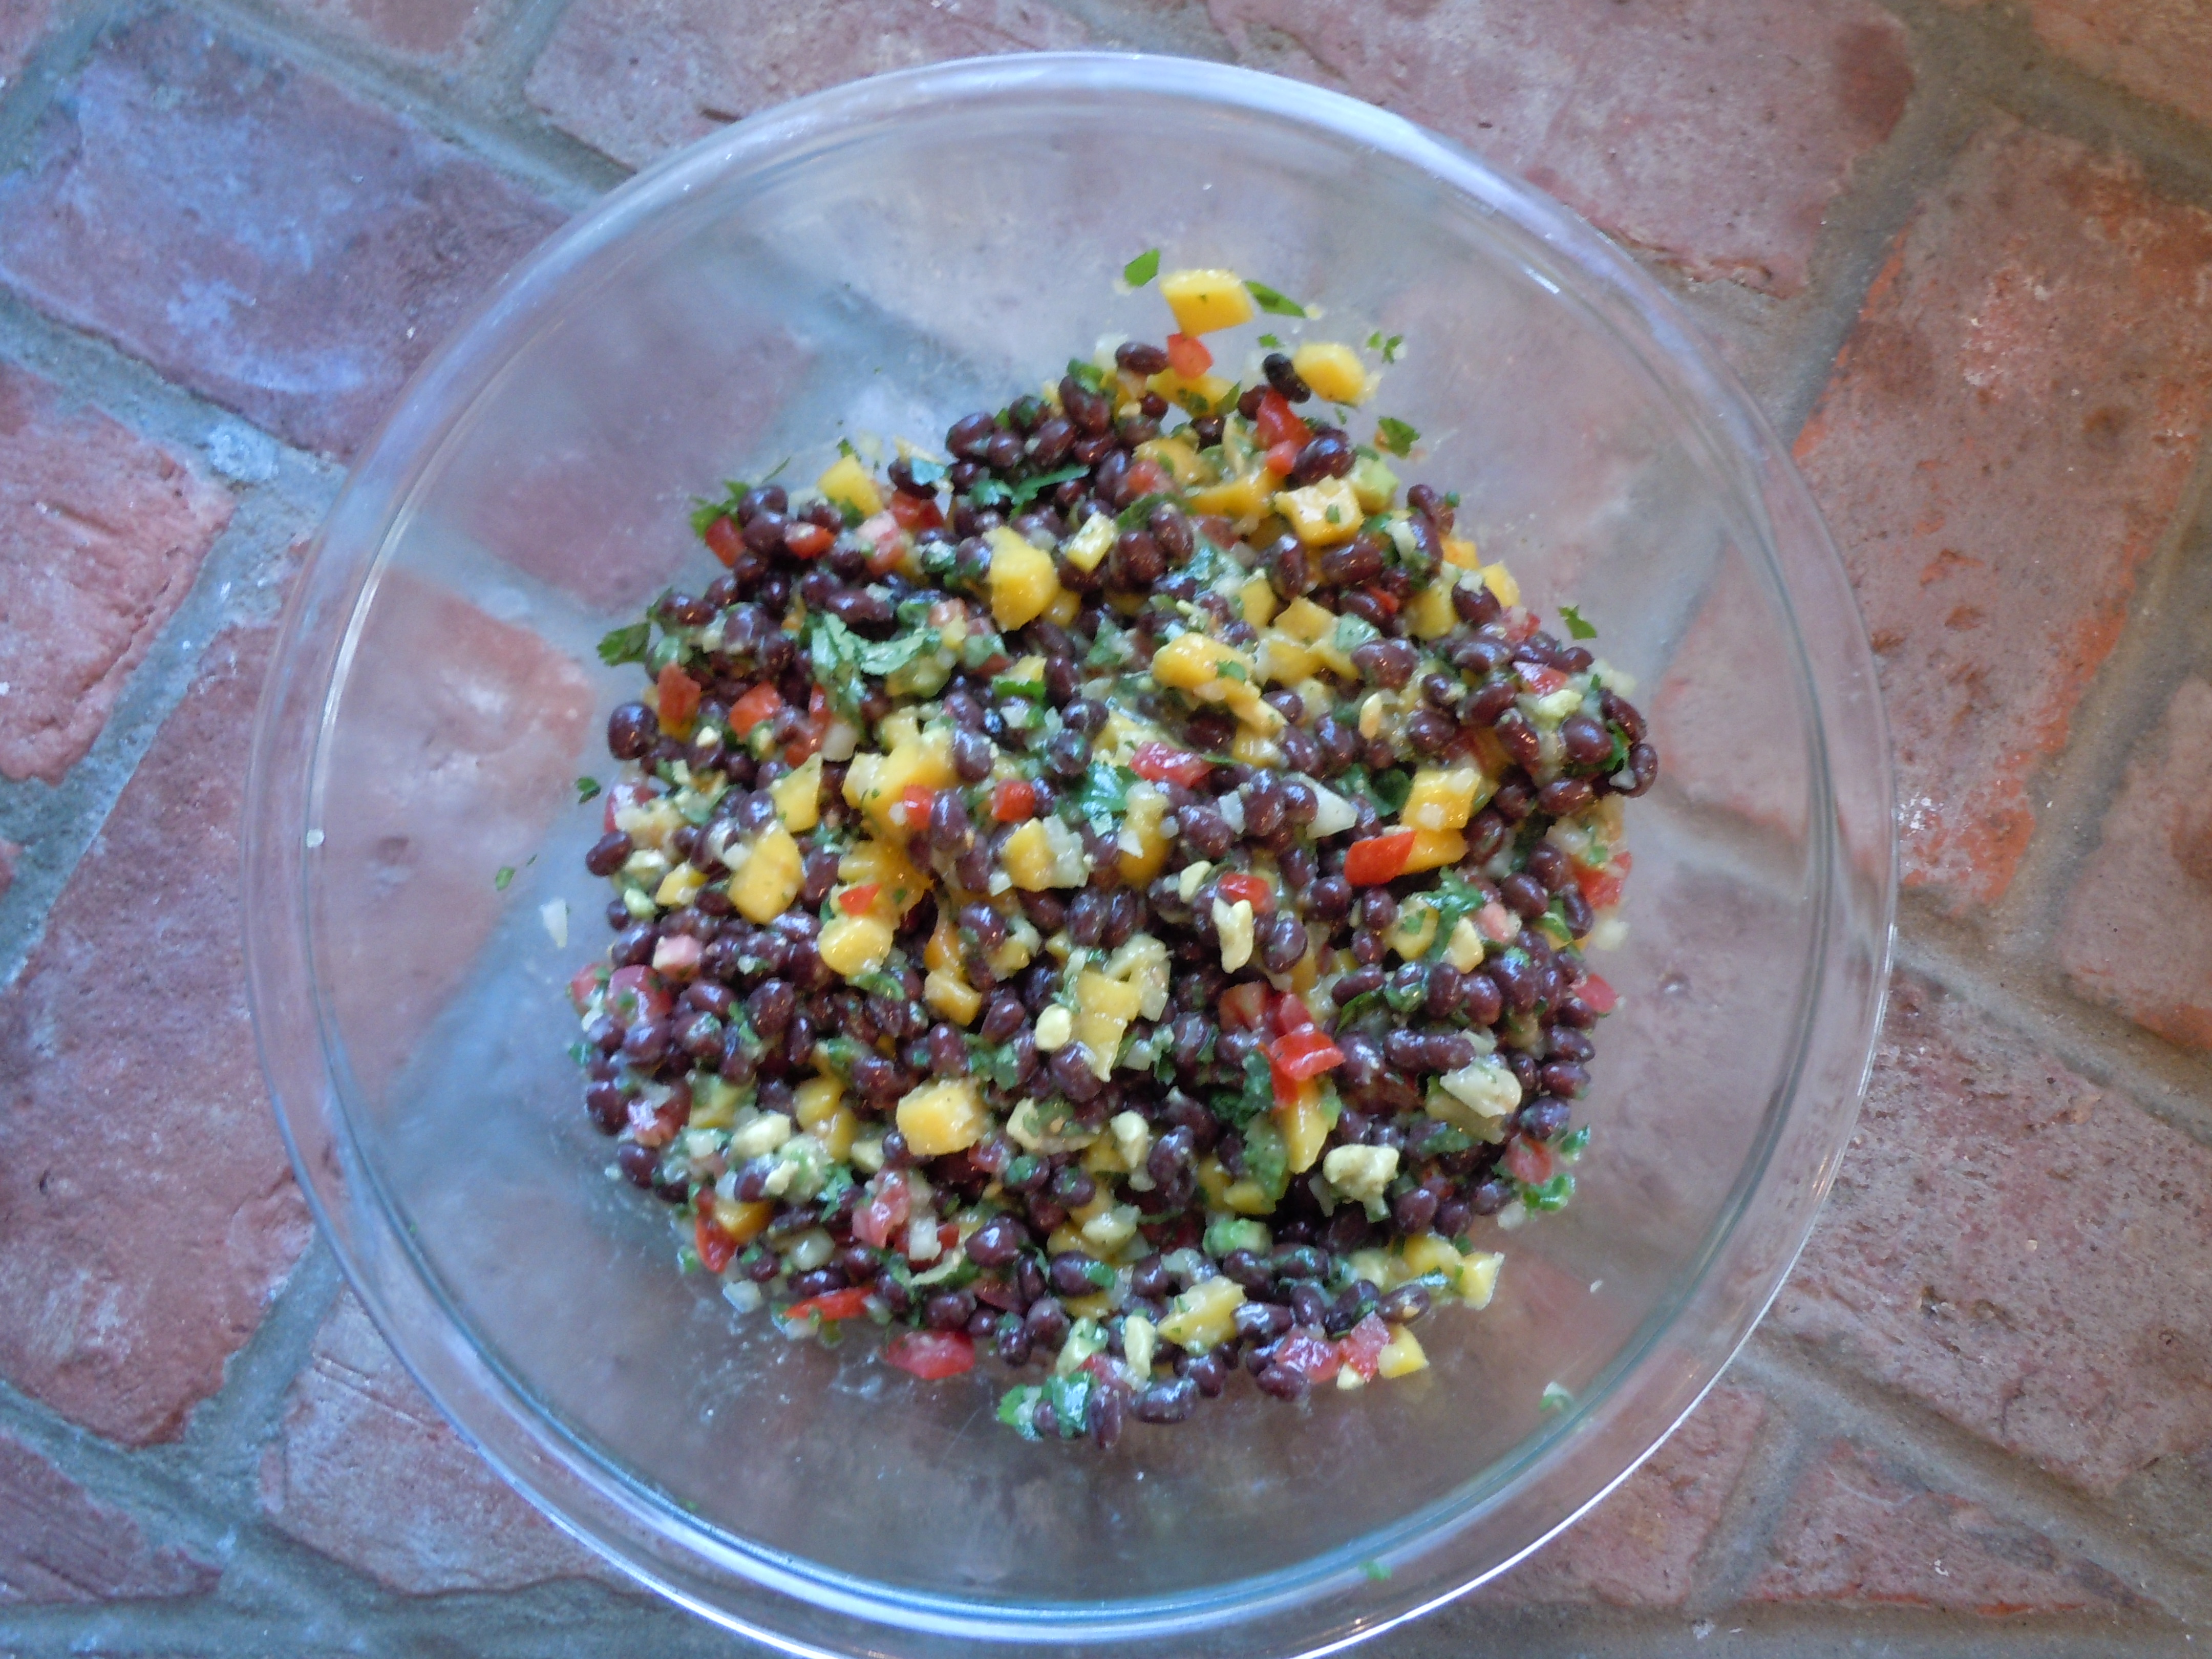
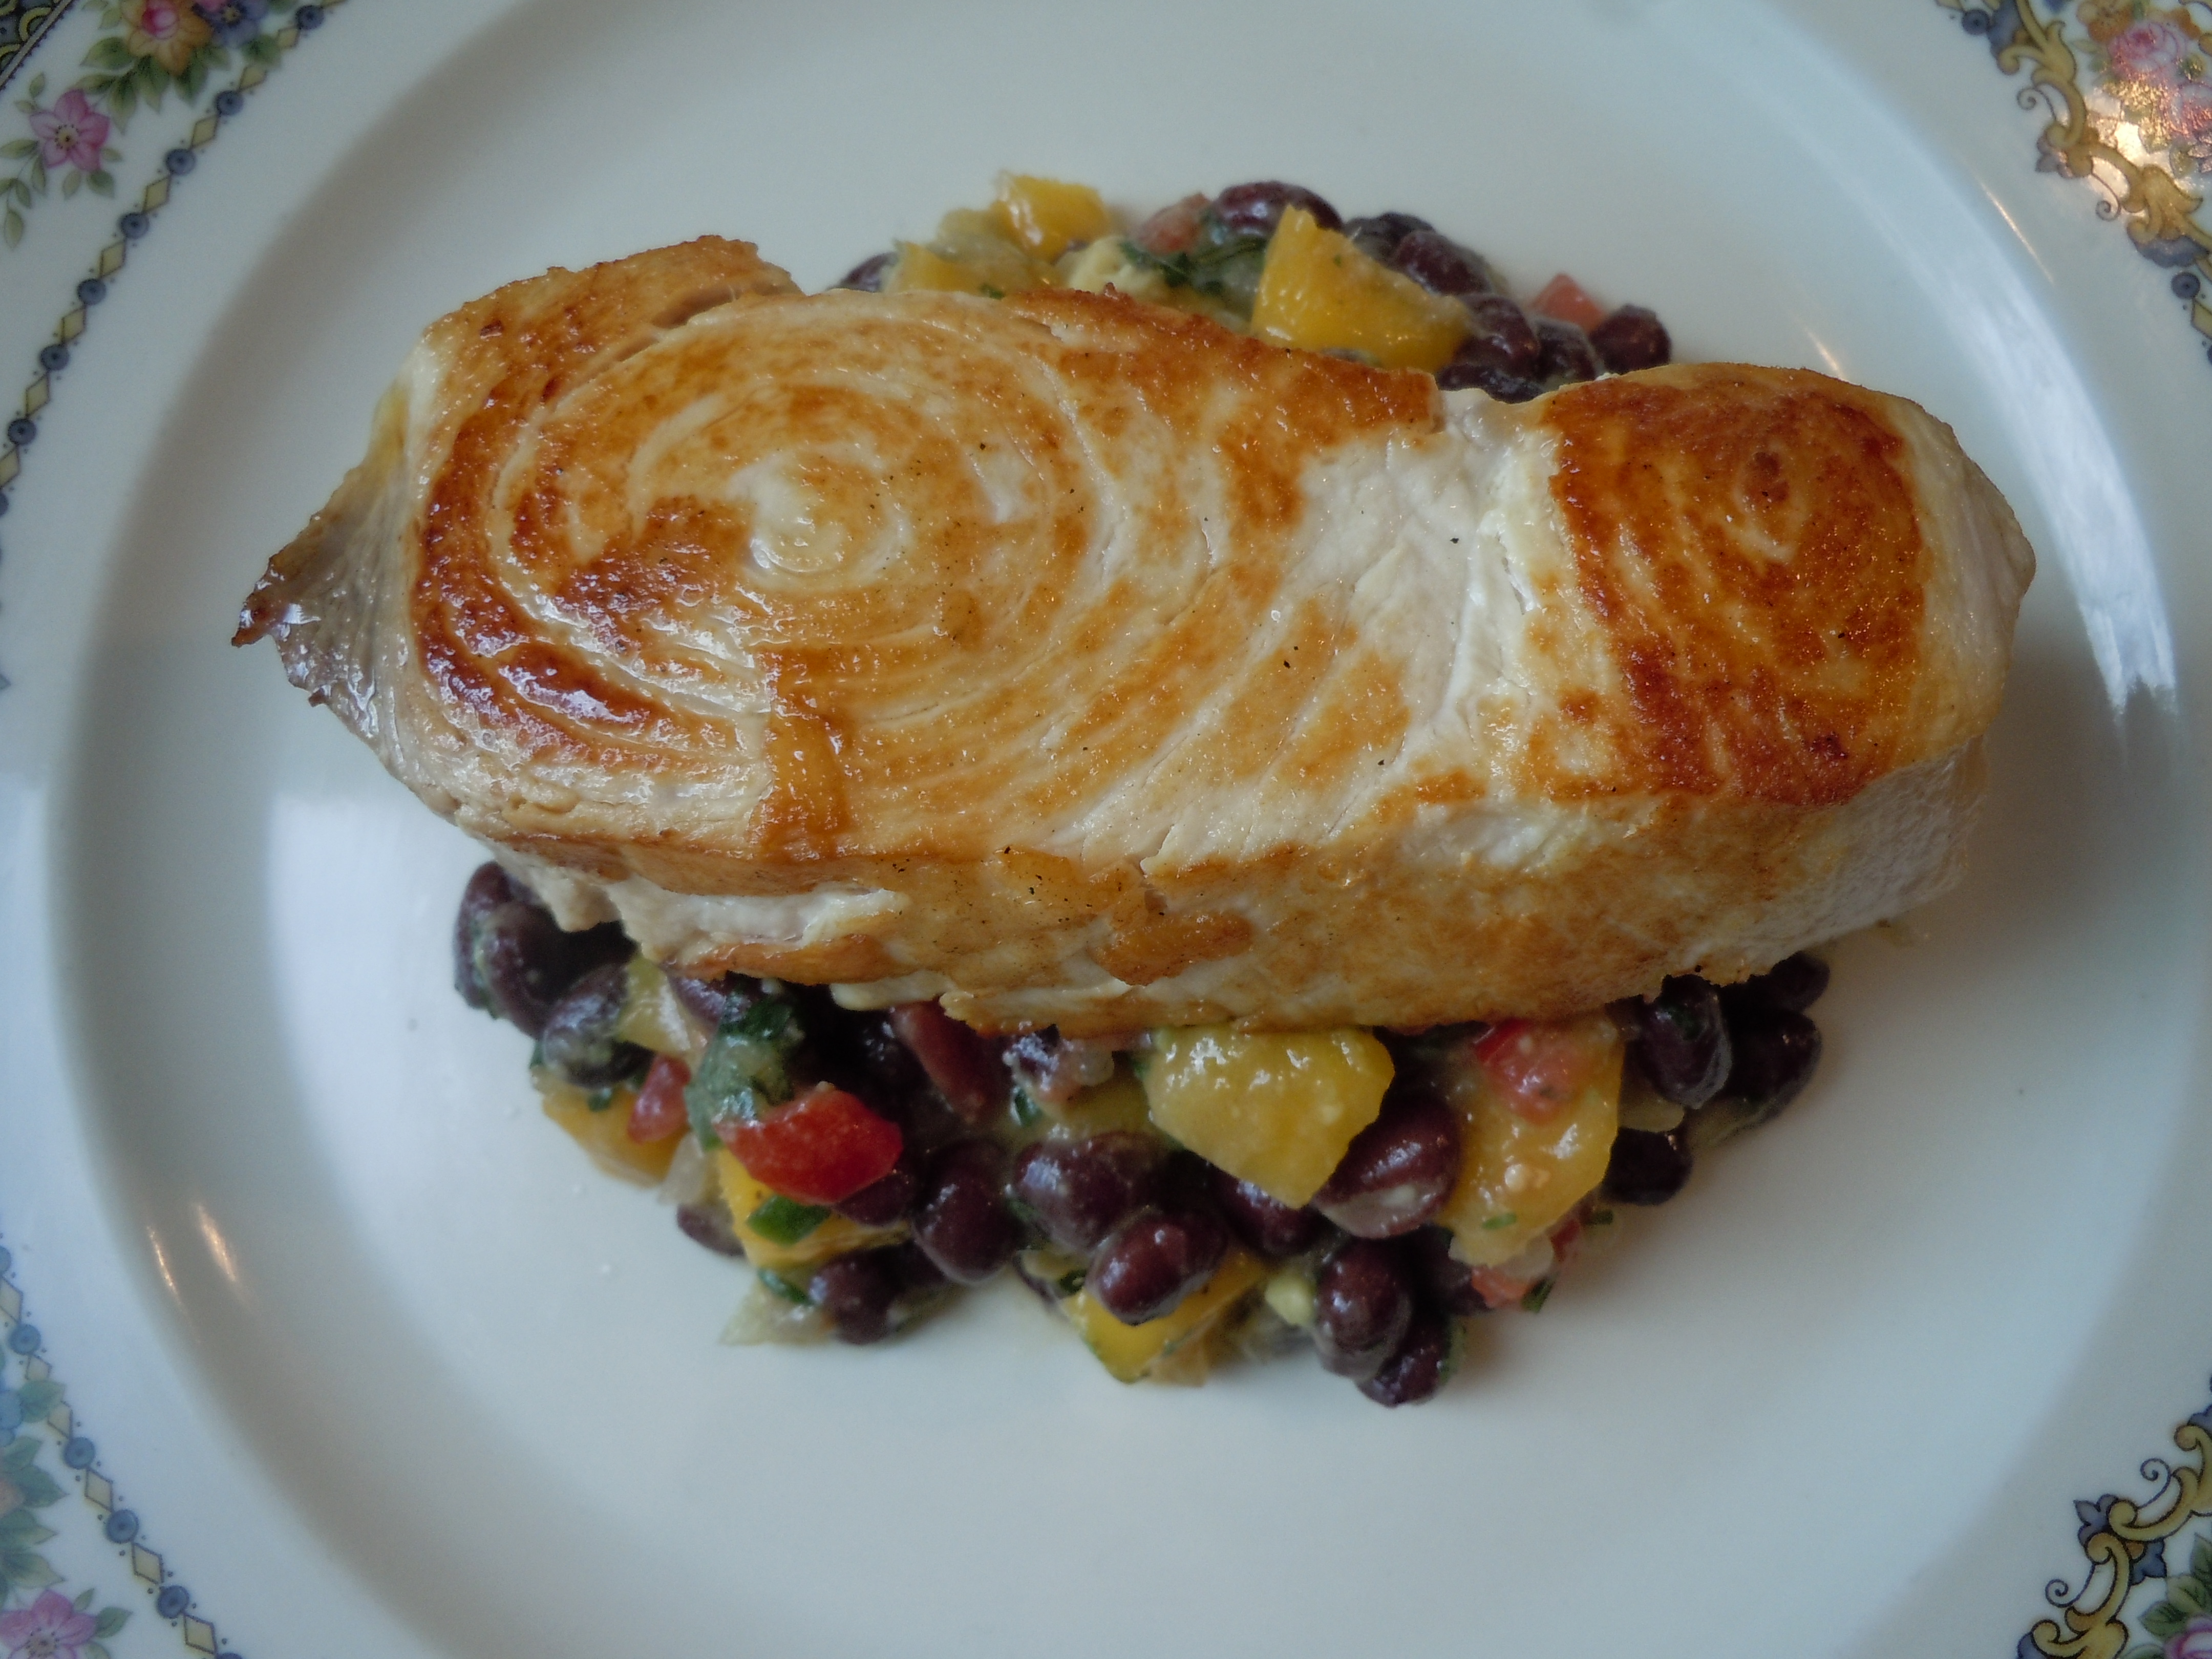
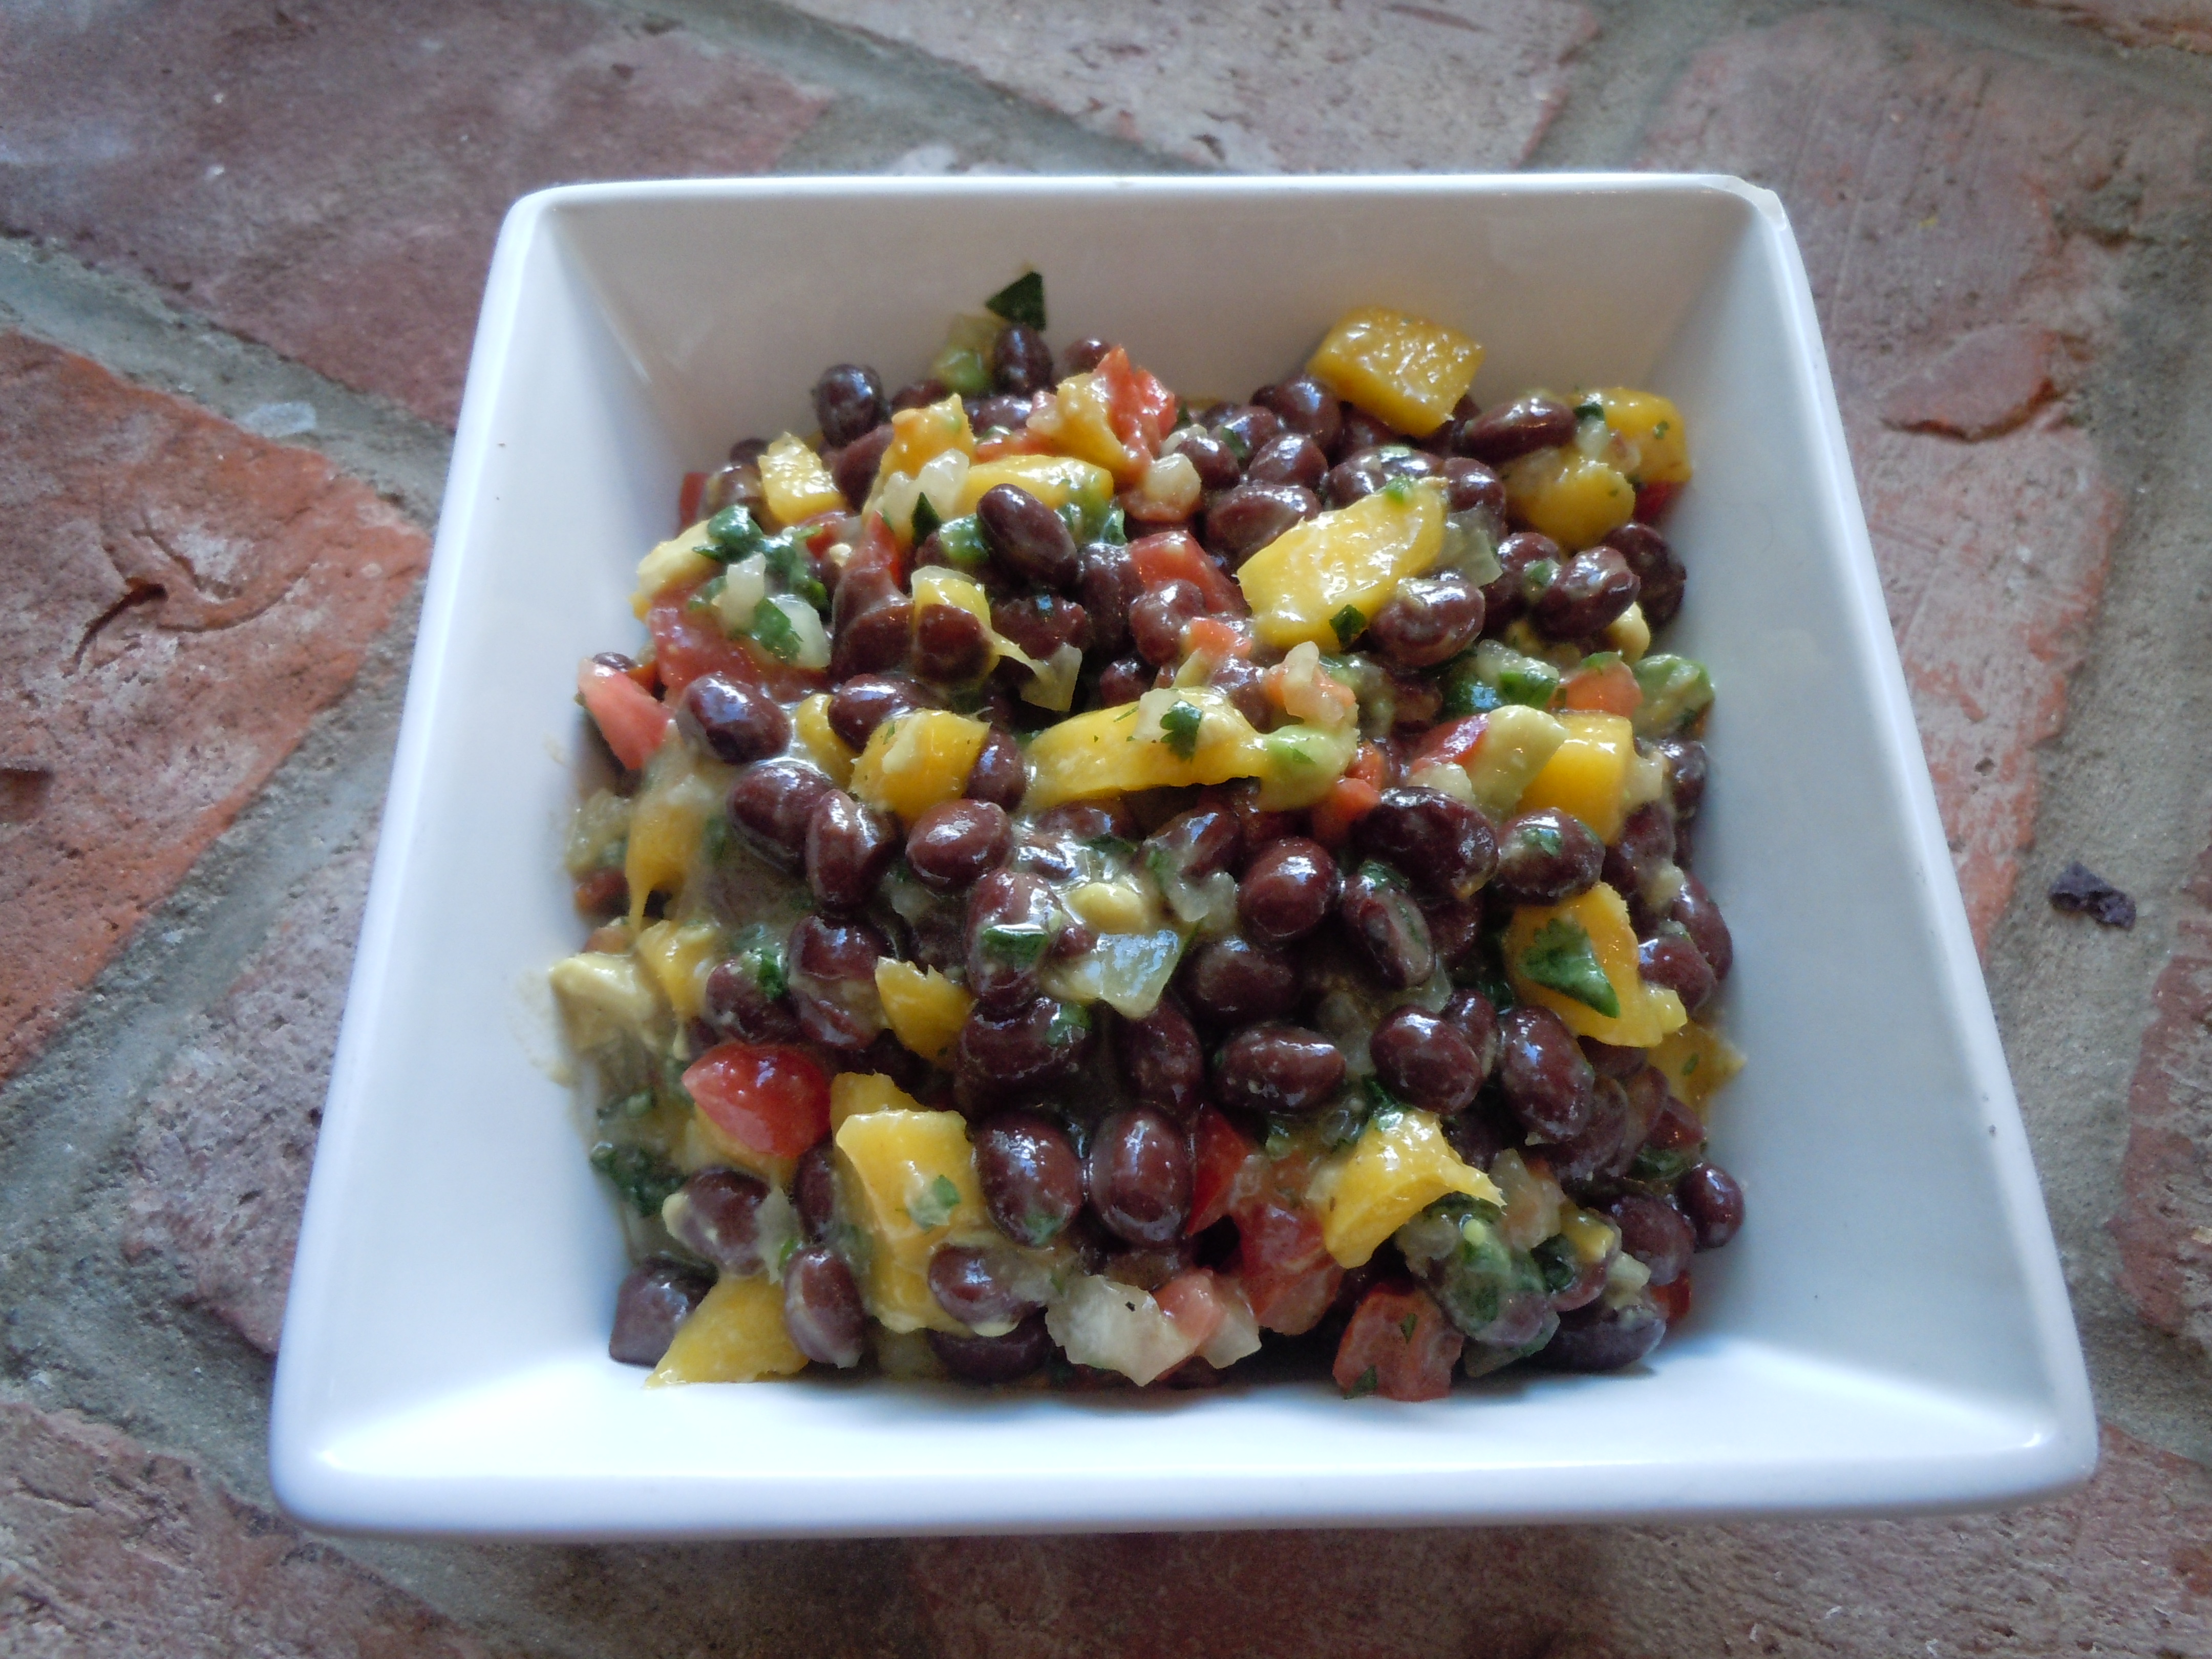
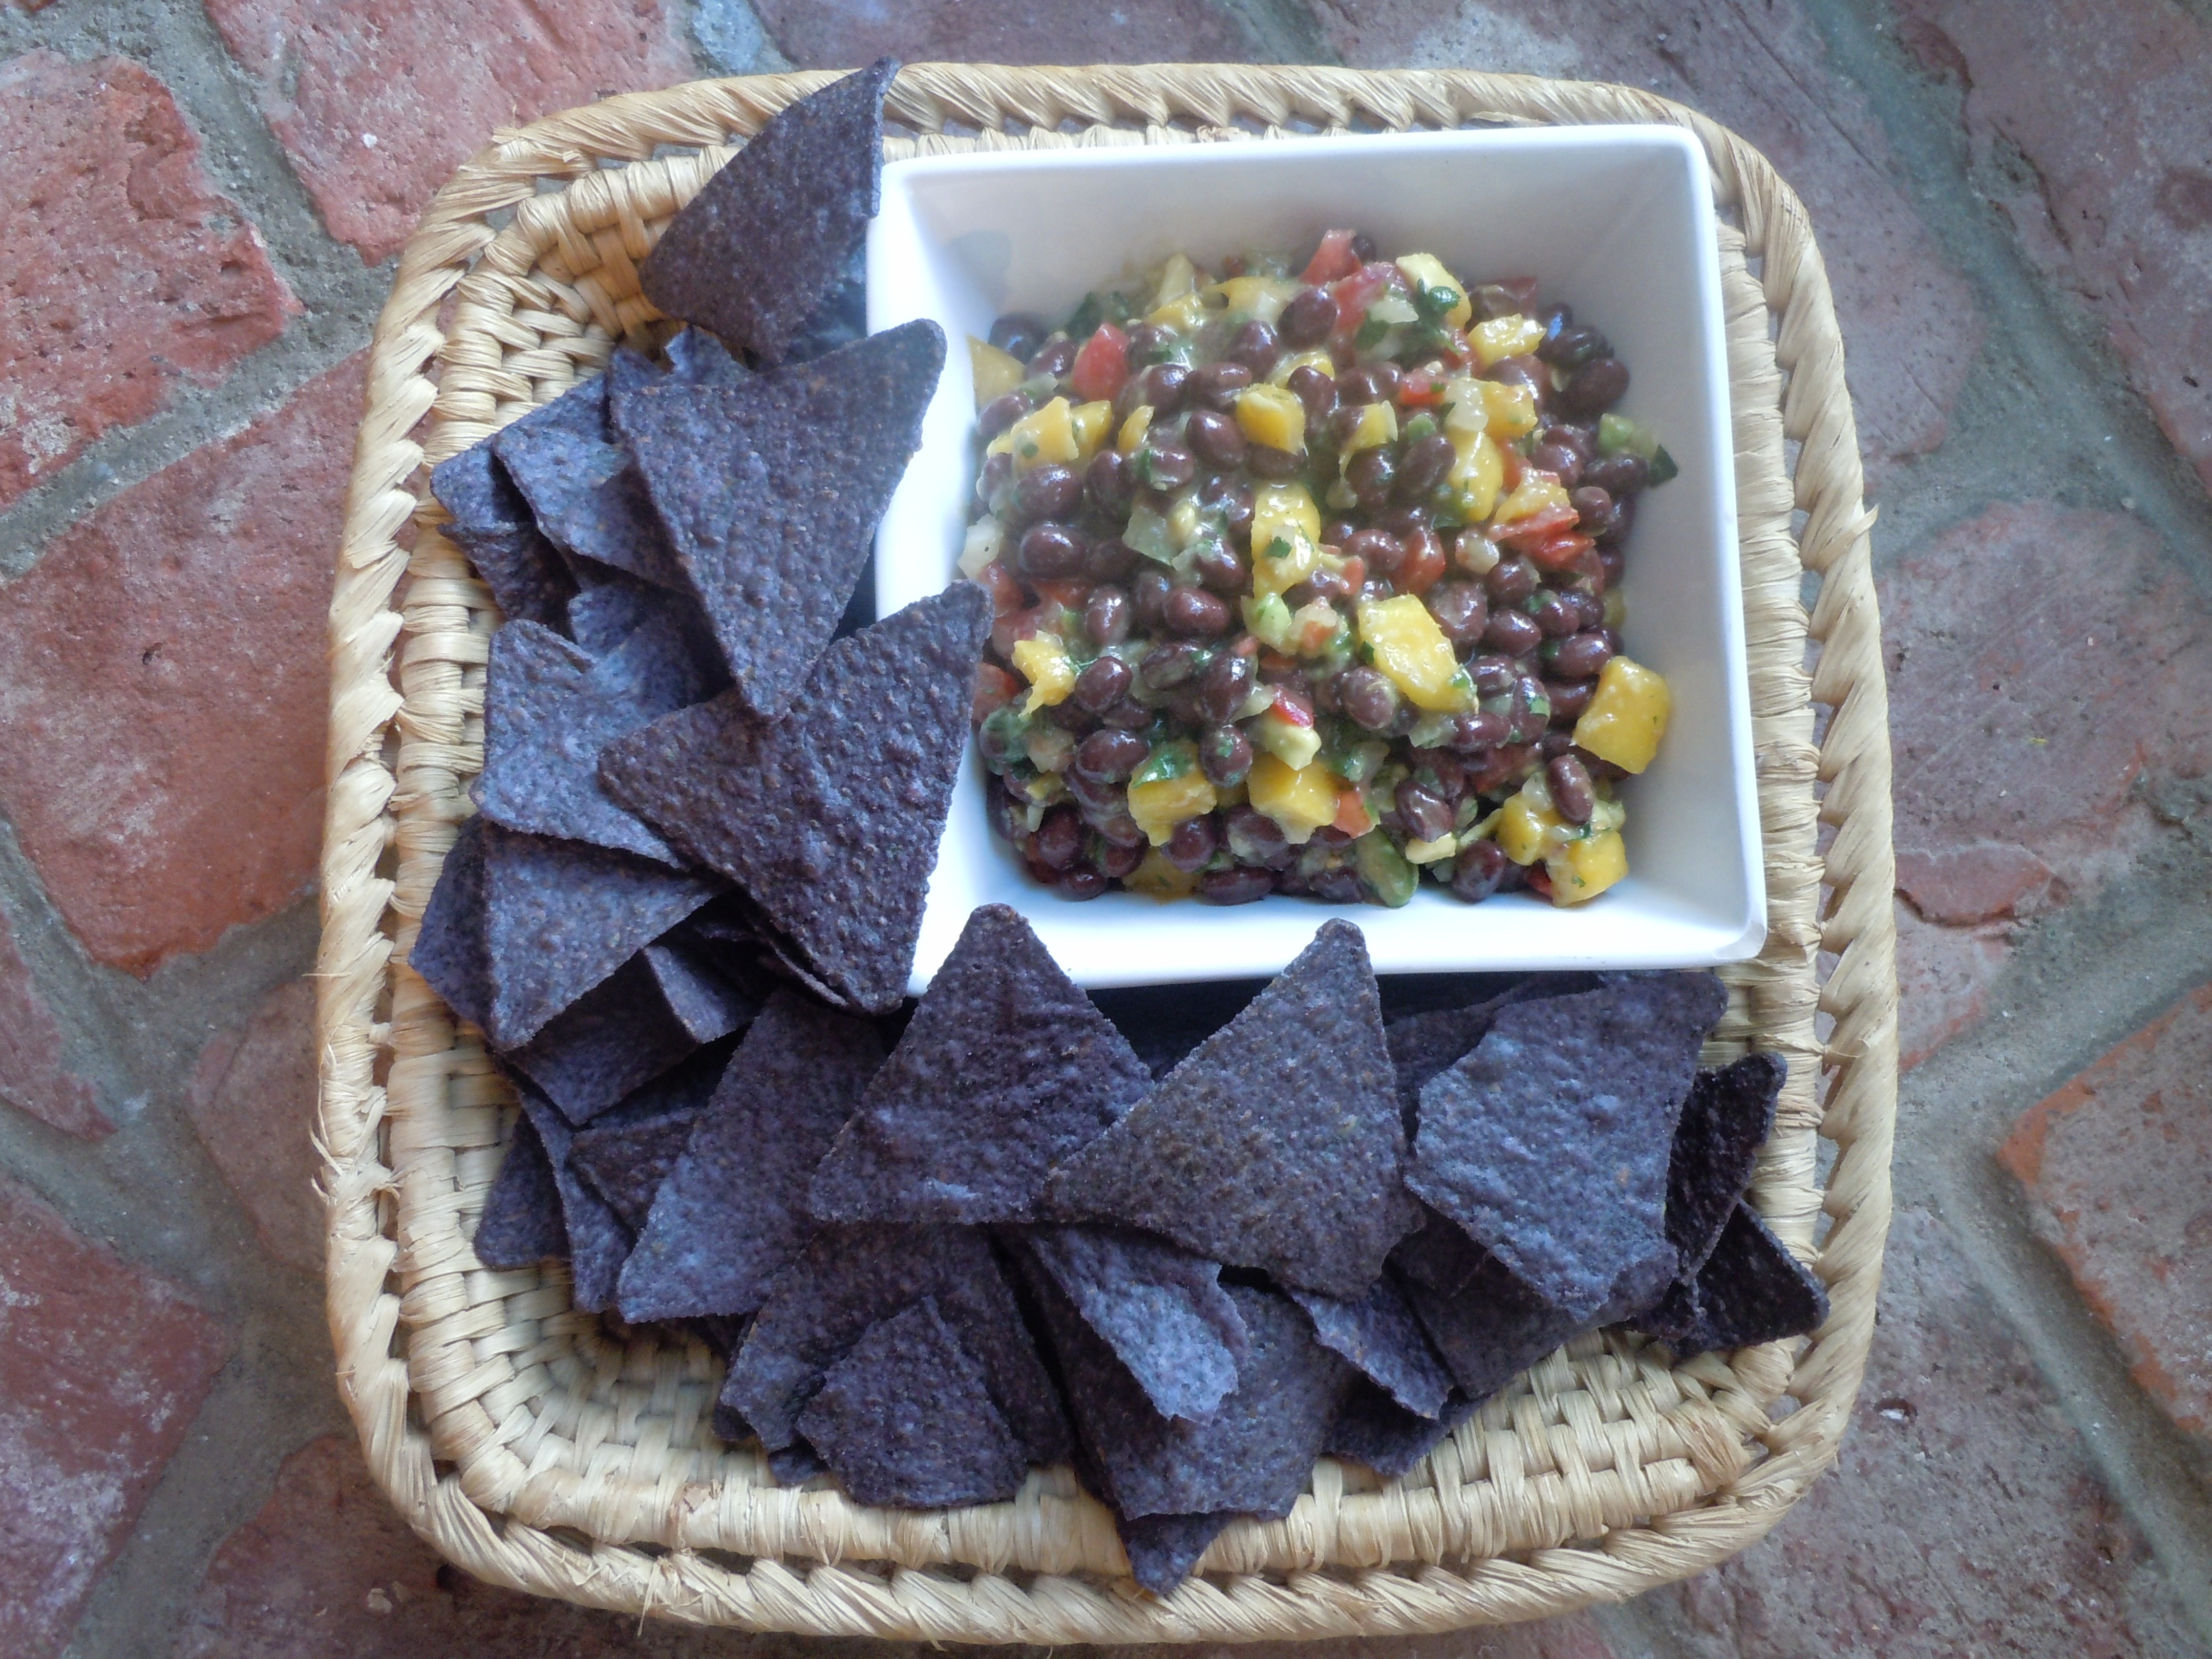
2015 is here so let’s not procrastinated and get right down to business with some refreshing and heathy dinners. You can’t beat this black bean salsa & swordfish with its nutritional values and taste to boot! It’s so nice to brighten up our menu after the starchy celebratory holiday meals. With this black bean salsa you still get that “comfort food” feeling because the black beans are so creamy and filling. Black beans are considered to be the best “meat-free” sources of protein serving up 15 grams each of protein and fiber per 1 cup…not to mention black beans have the highest antioxidant level of all beans!
I first learned how to make salsa almost 20 years ago from a Chef in San Franciso name Barclay. He was a chef at one of my favorite restaurants in San Francisco called Bix (on Gold St.) Bix had foie gras that was to die for and the most outrageous bar burgers that had to be made from filet mignon because they melted in your mouth like butter! Needless to say Barclay made a killer salsa and I’m thankful to him for starting me out on the right path when it came to making salsa.
This black bean salsa is almost identical to my “best mango-avocado salsa ever” on my website except I minus one mango and add 2 cans of Goya black beans. This is a such a quick and easy recipe and if you don’t have time for the chopping you’ve got to check out the produce department at your local store because most of them do offer a section of pre-chopped vegetables or you could pre-chop everything yourself the night before you put this dinner together.
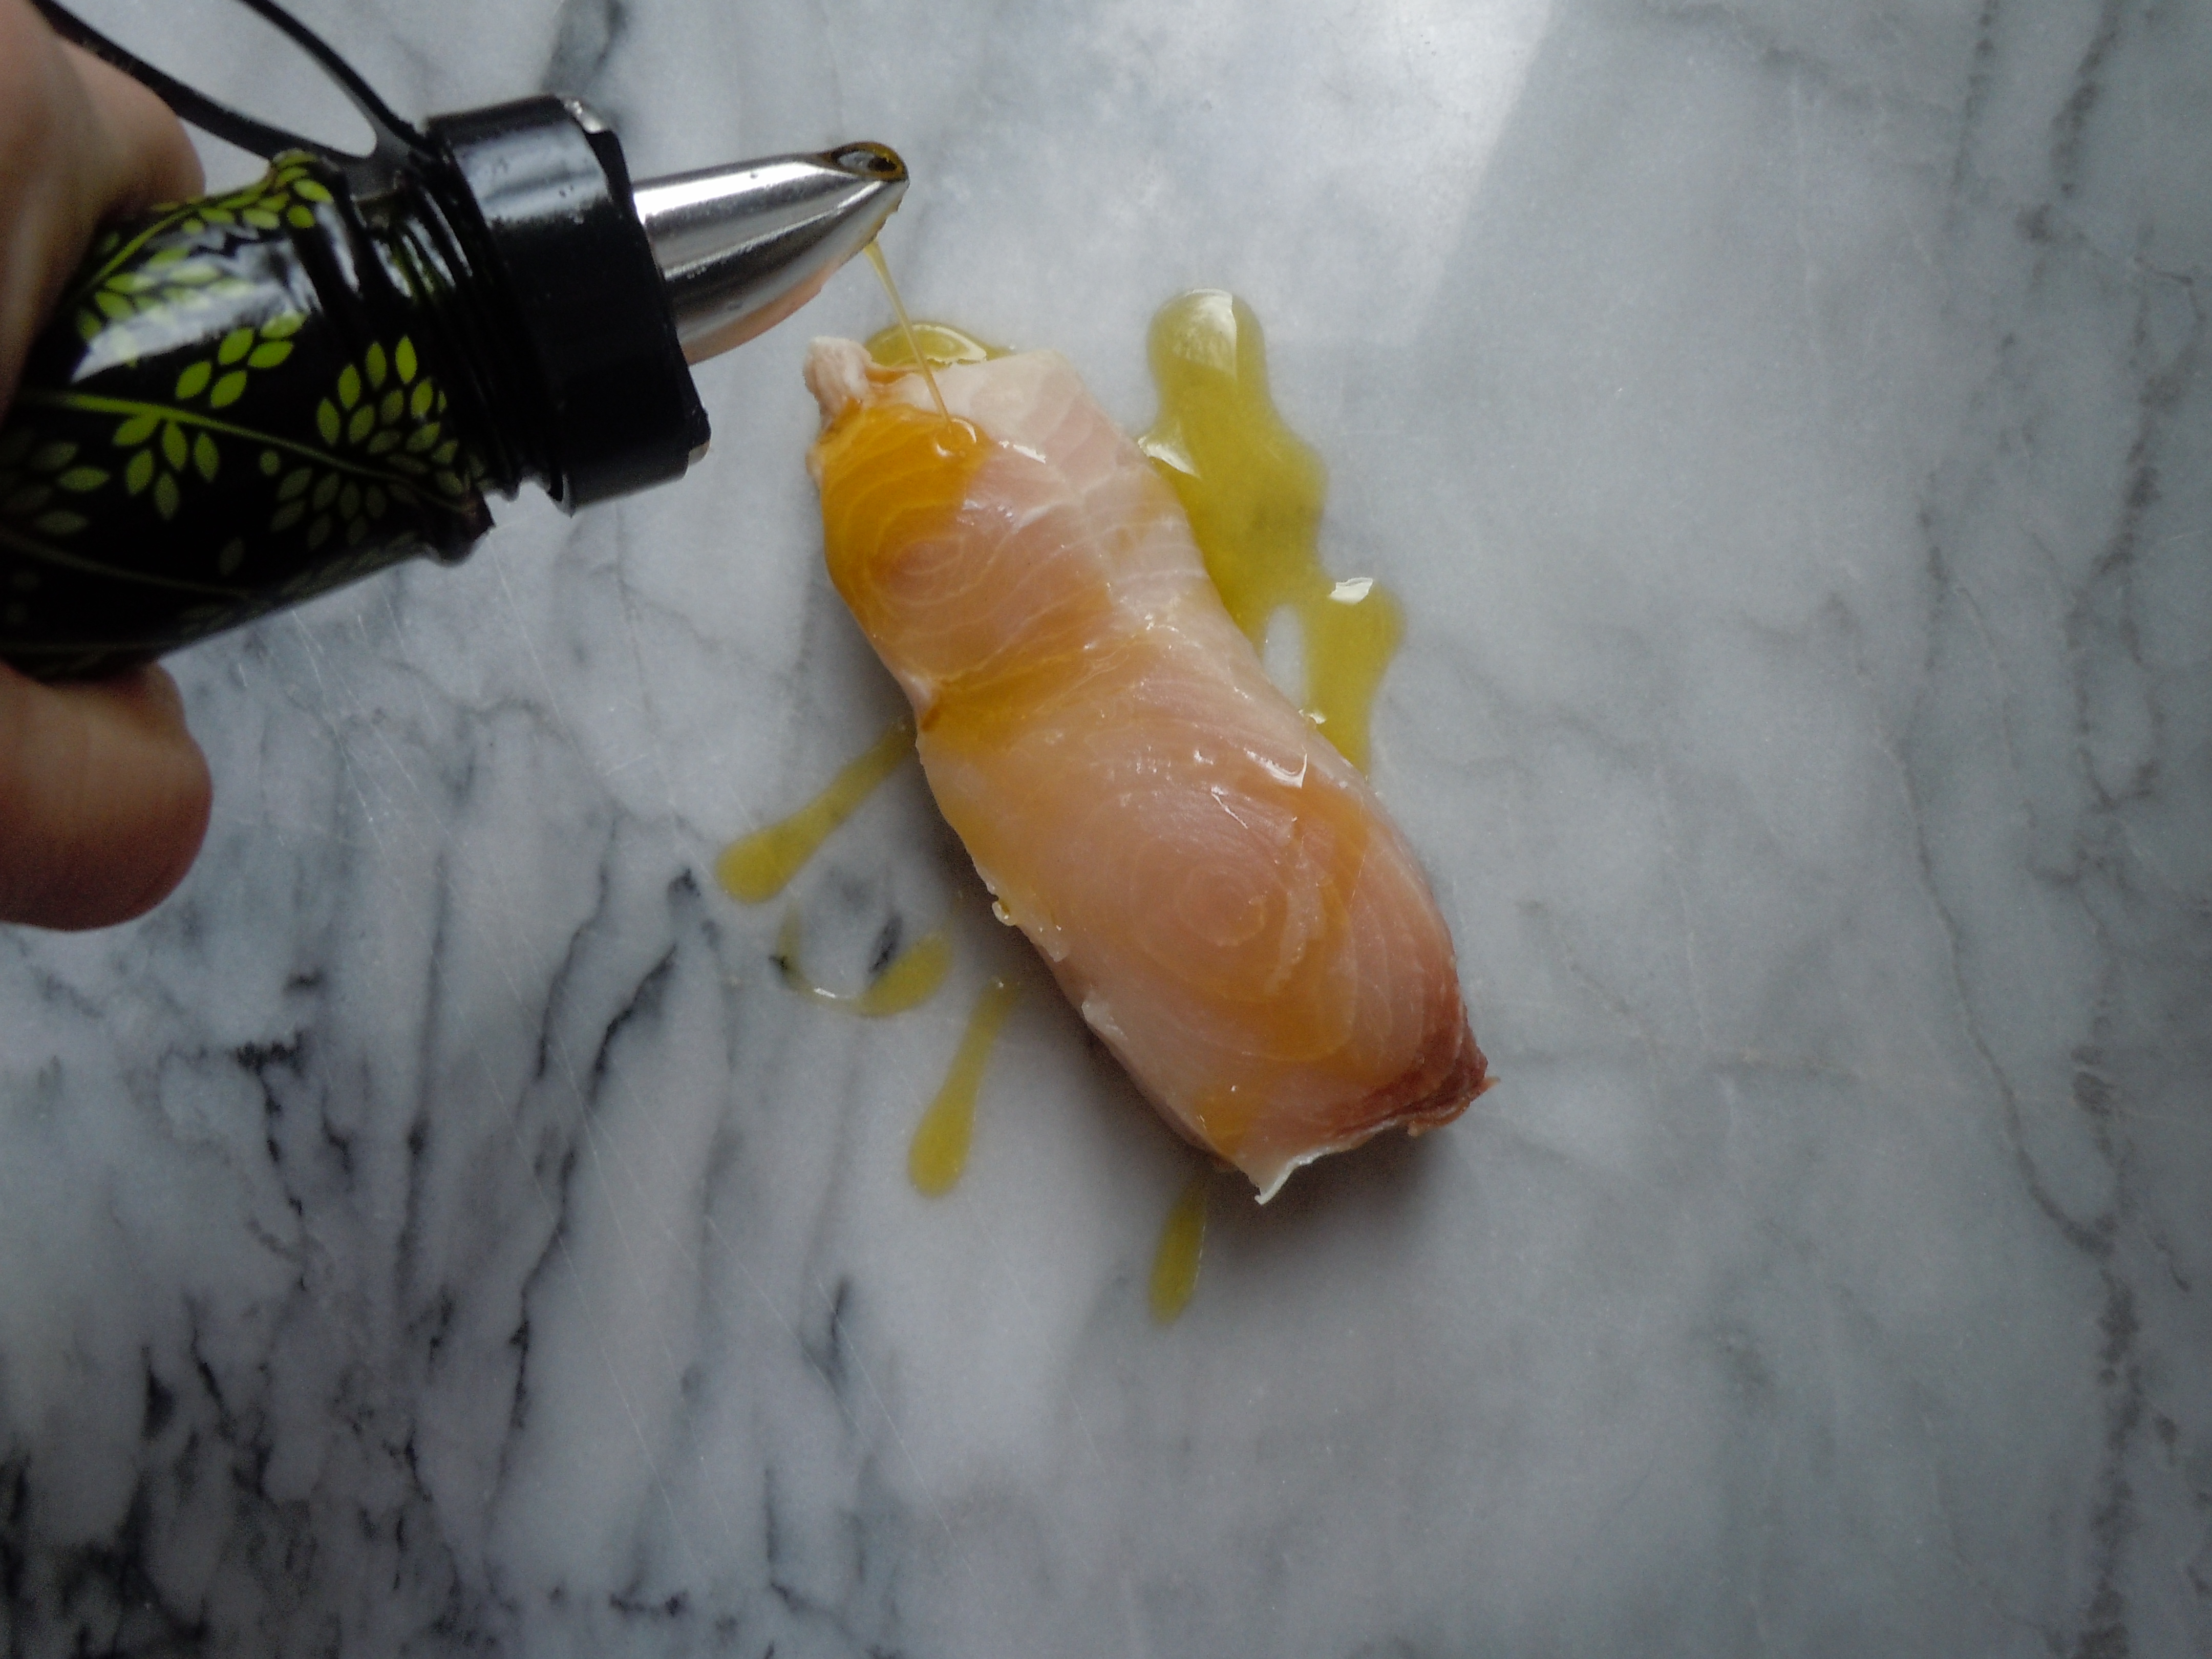
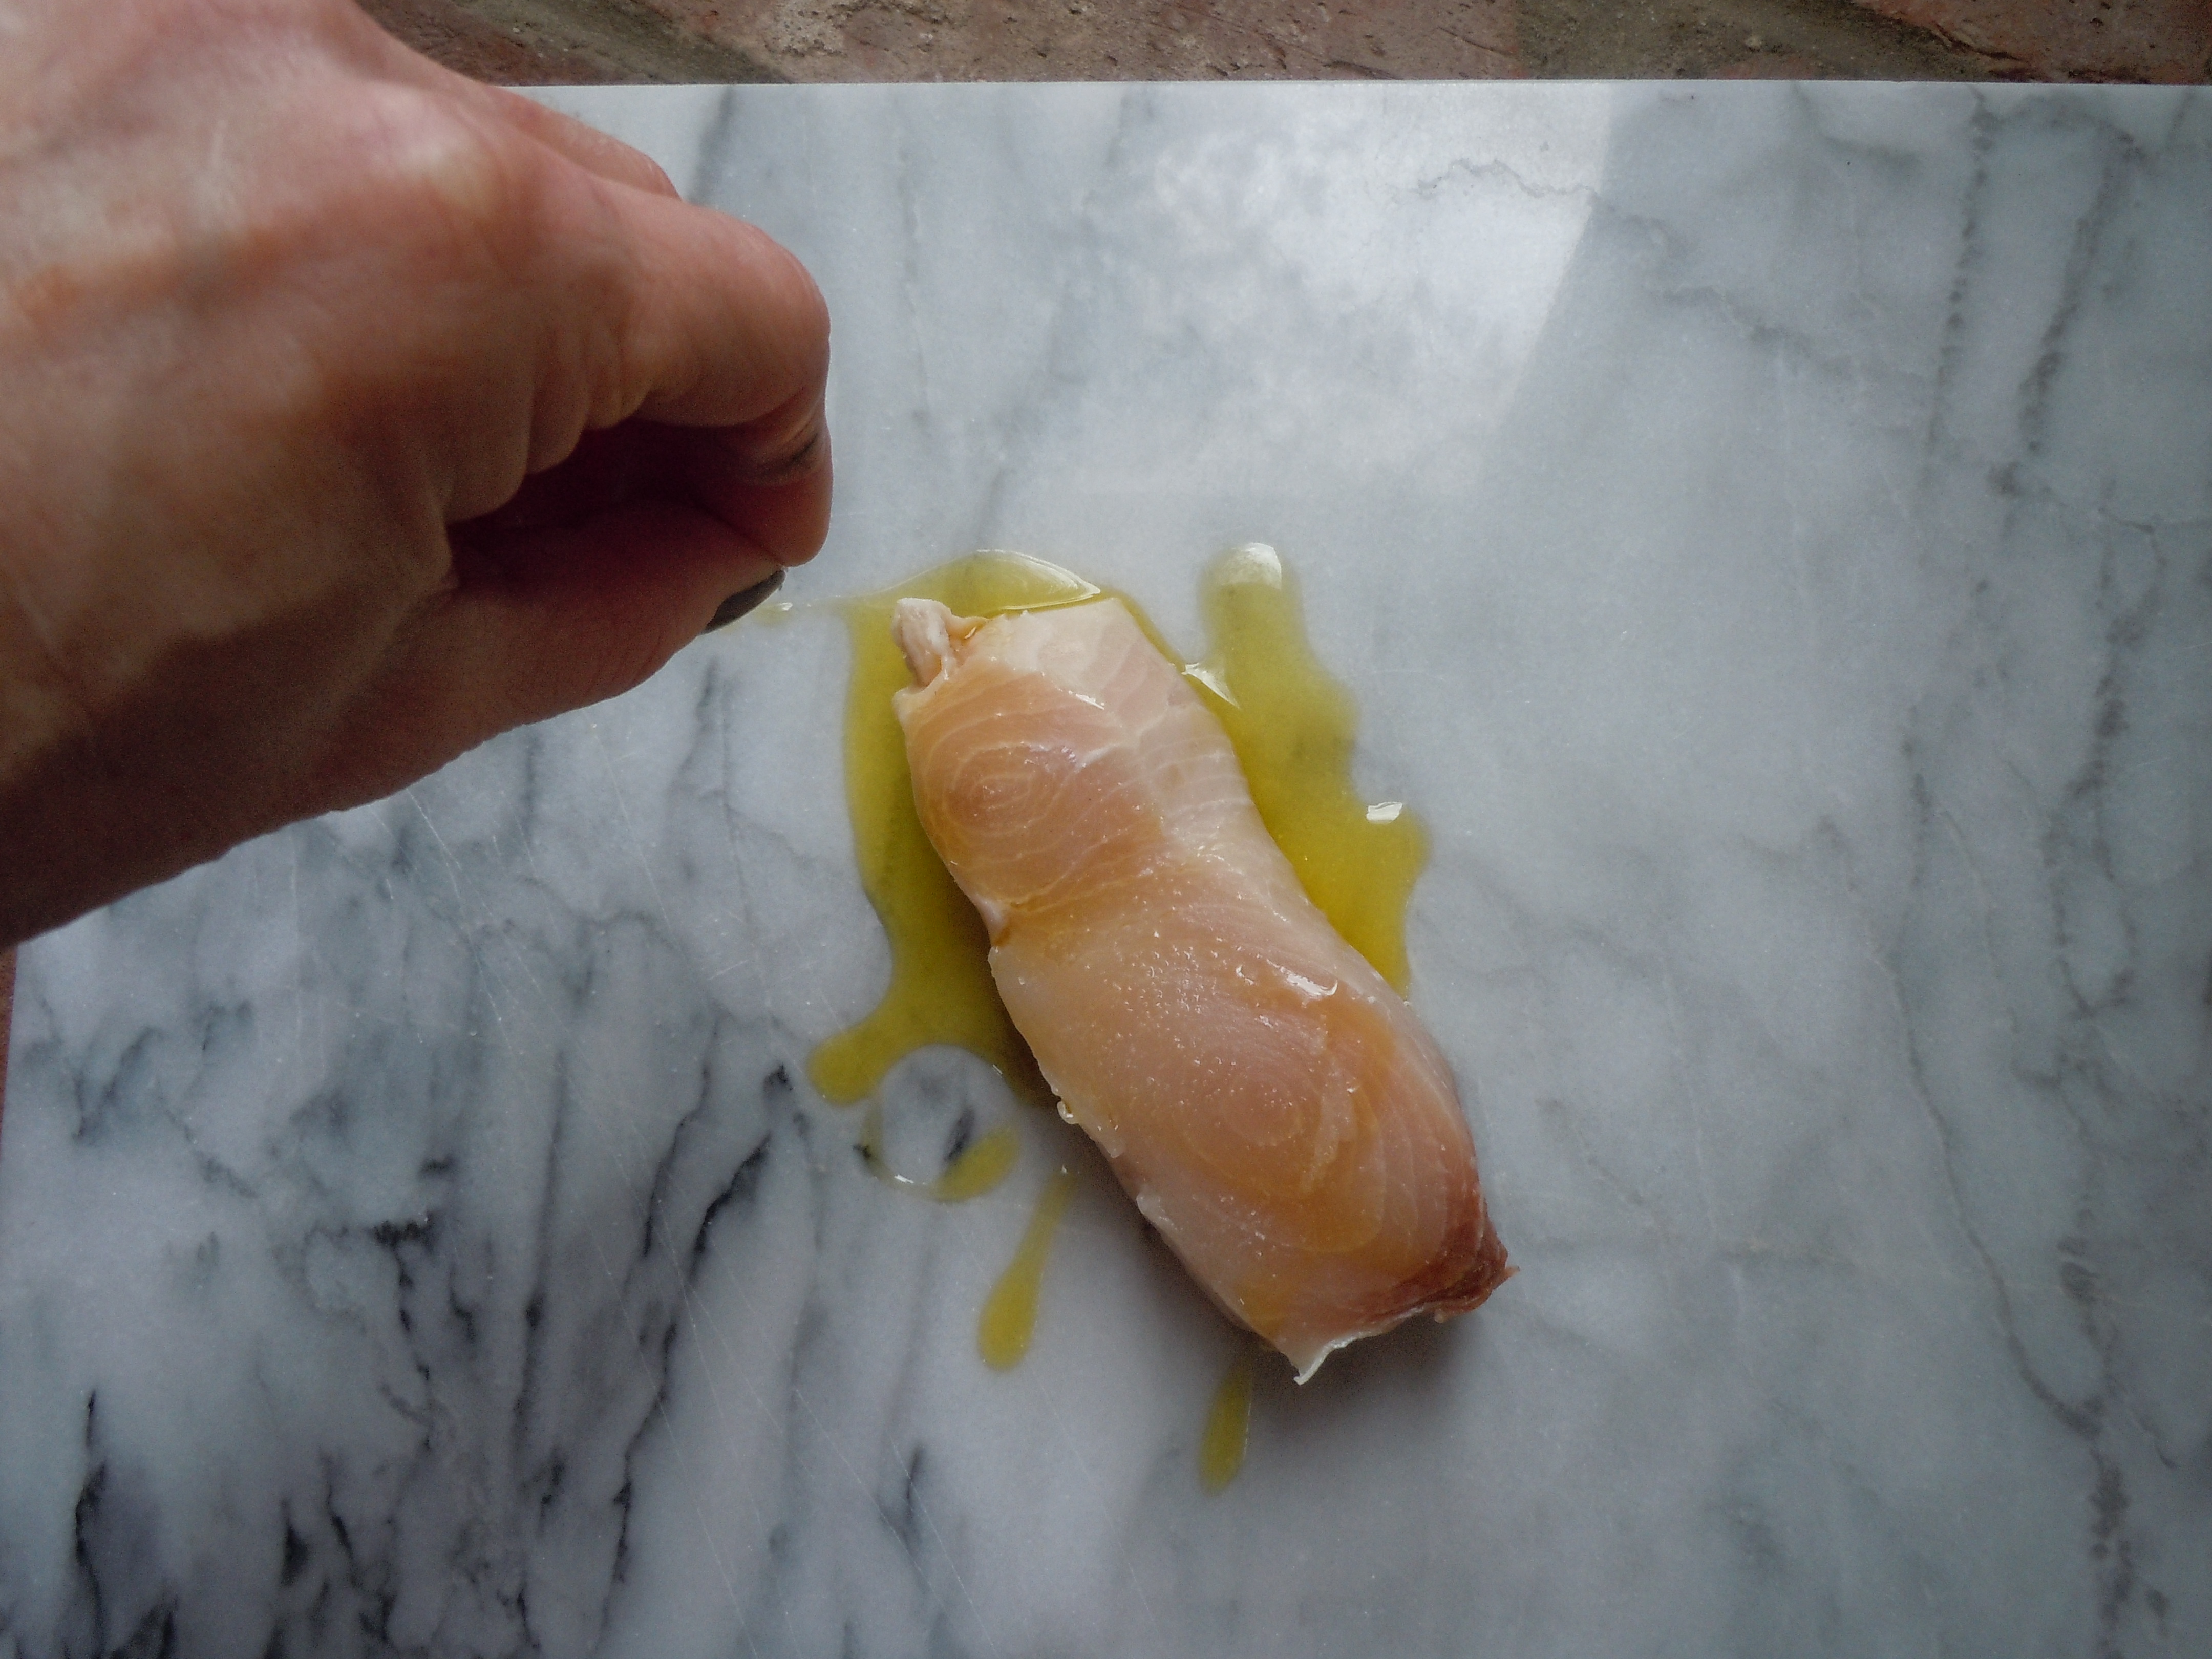
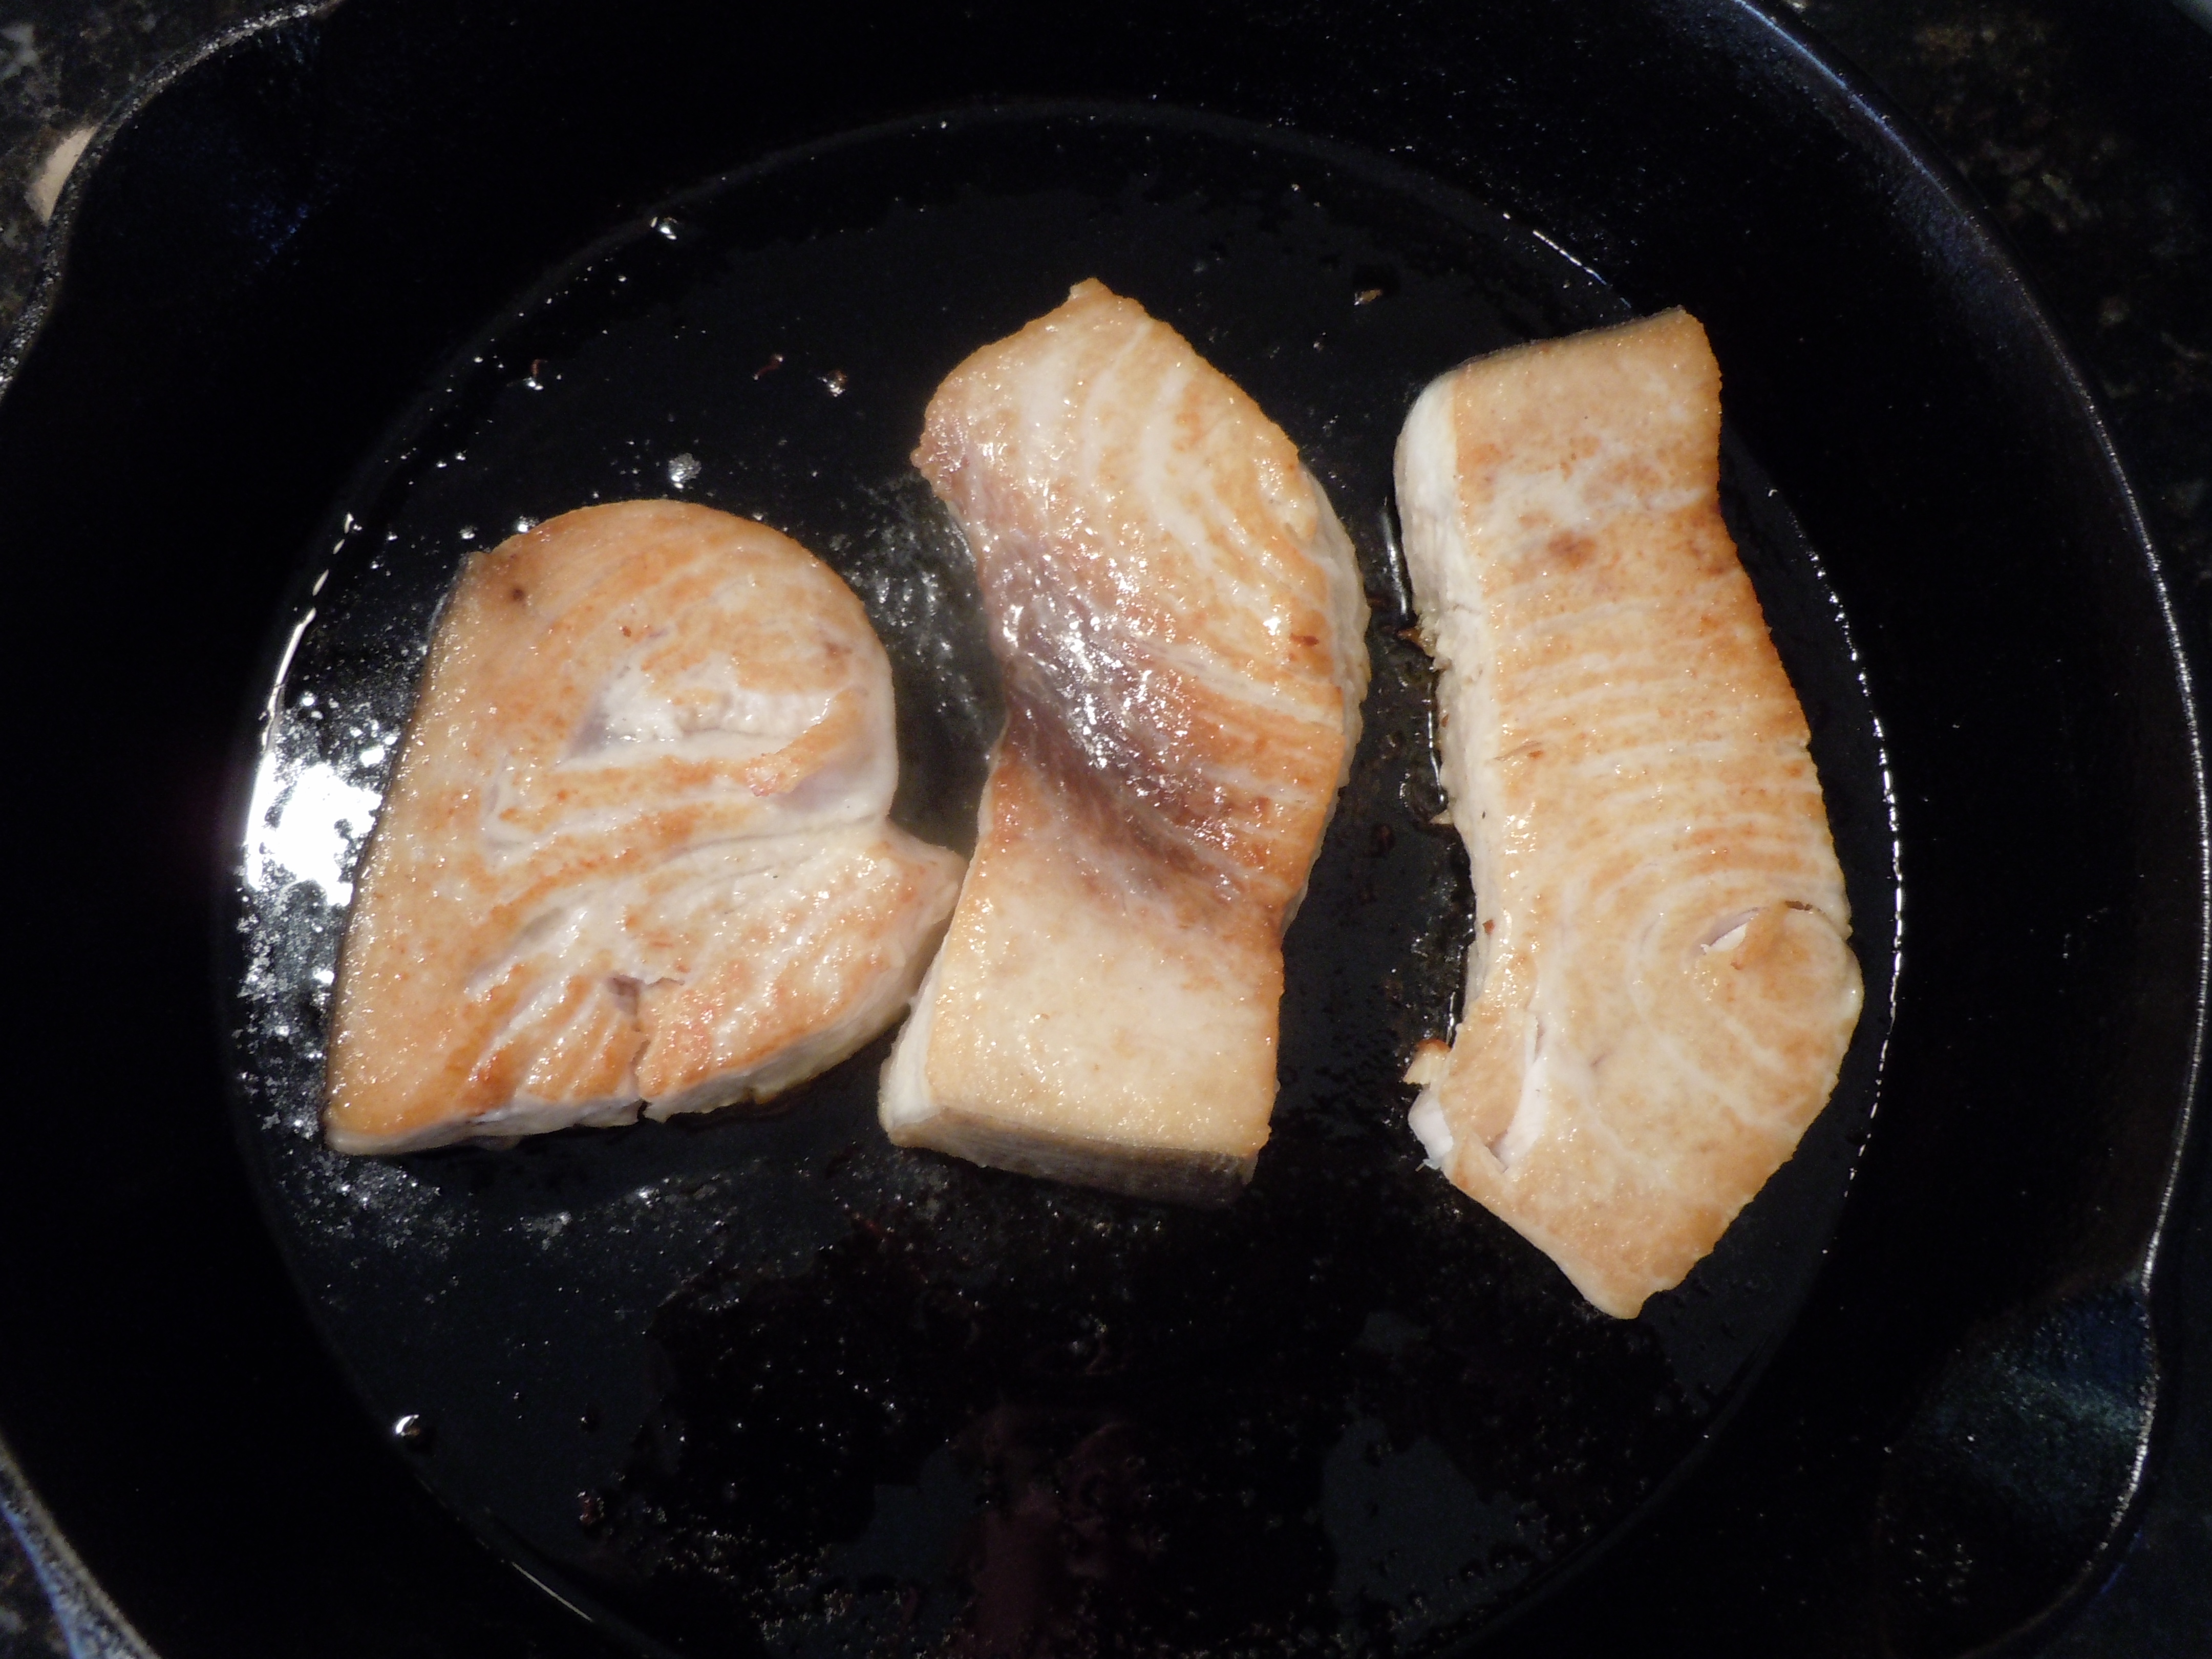
Fresh swordfish is now being caught off the Carolina’s so it’s an ideal fish to buy. Swordfish is a hardy kind of fish and eats like a steak so it is very filling. The oils in the swordfish are also as nutritious for you, if not more, as eating that black bean salsa. So what a team this black bean salsa & pan seared swordfish makes…you just can’t beat it! The best thing is it doesn’t have to be summer to whip this meal up either…enjoy. Make sure to watchmy YouTube cooking showthat goes with this recipe and don’t forget to subscribe on my YouTube channel so that you can receive my latest cooking show releases!
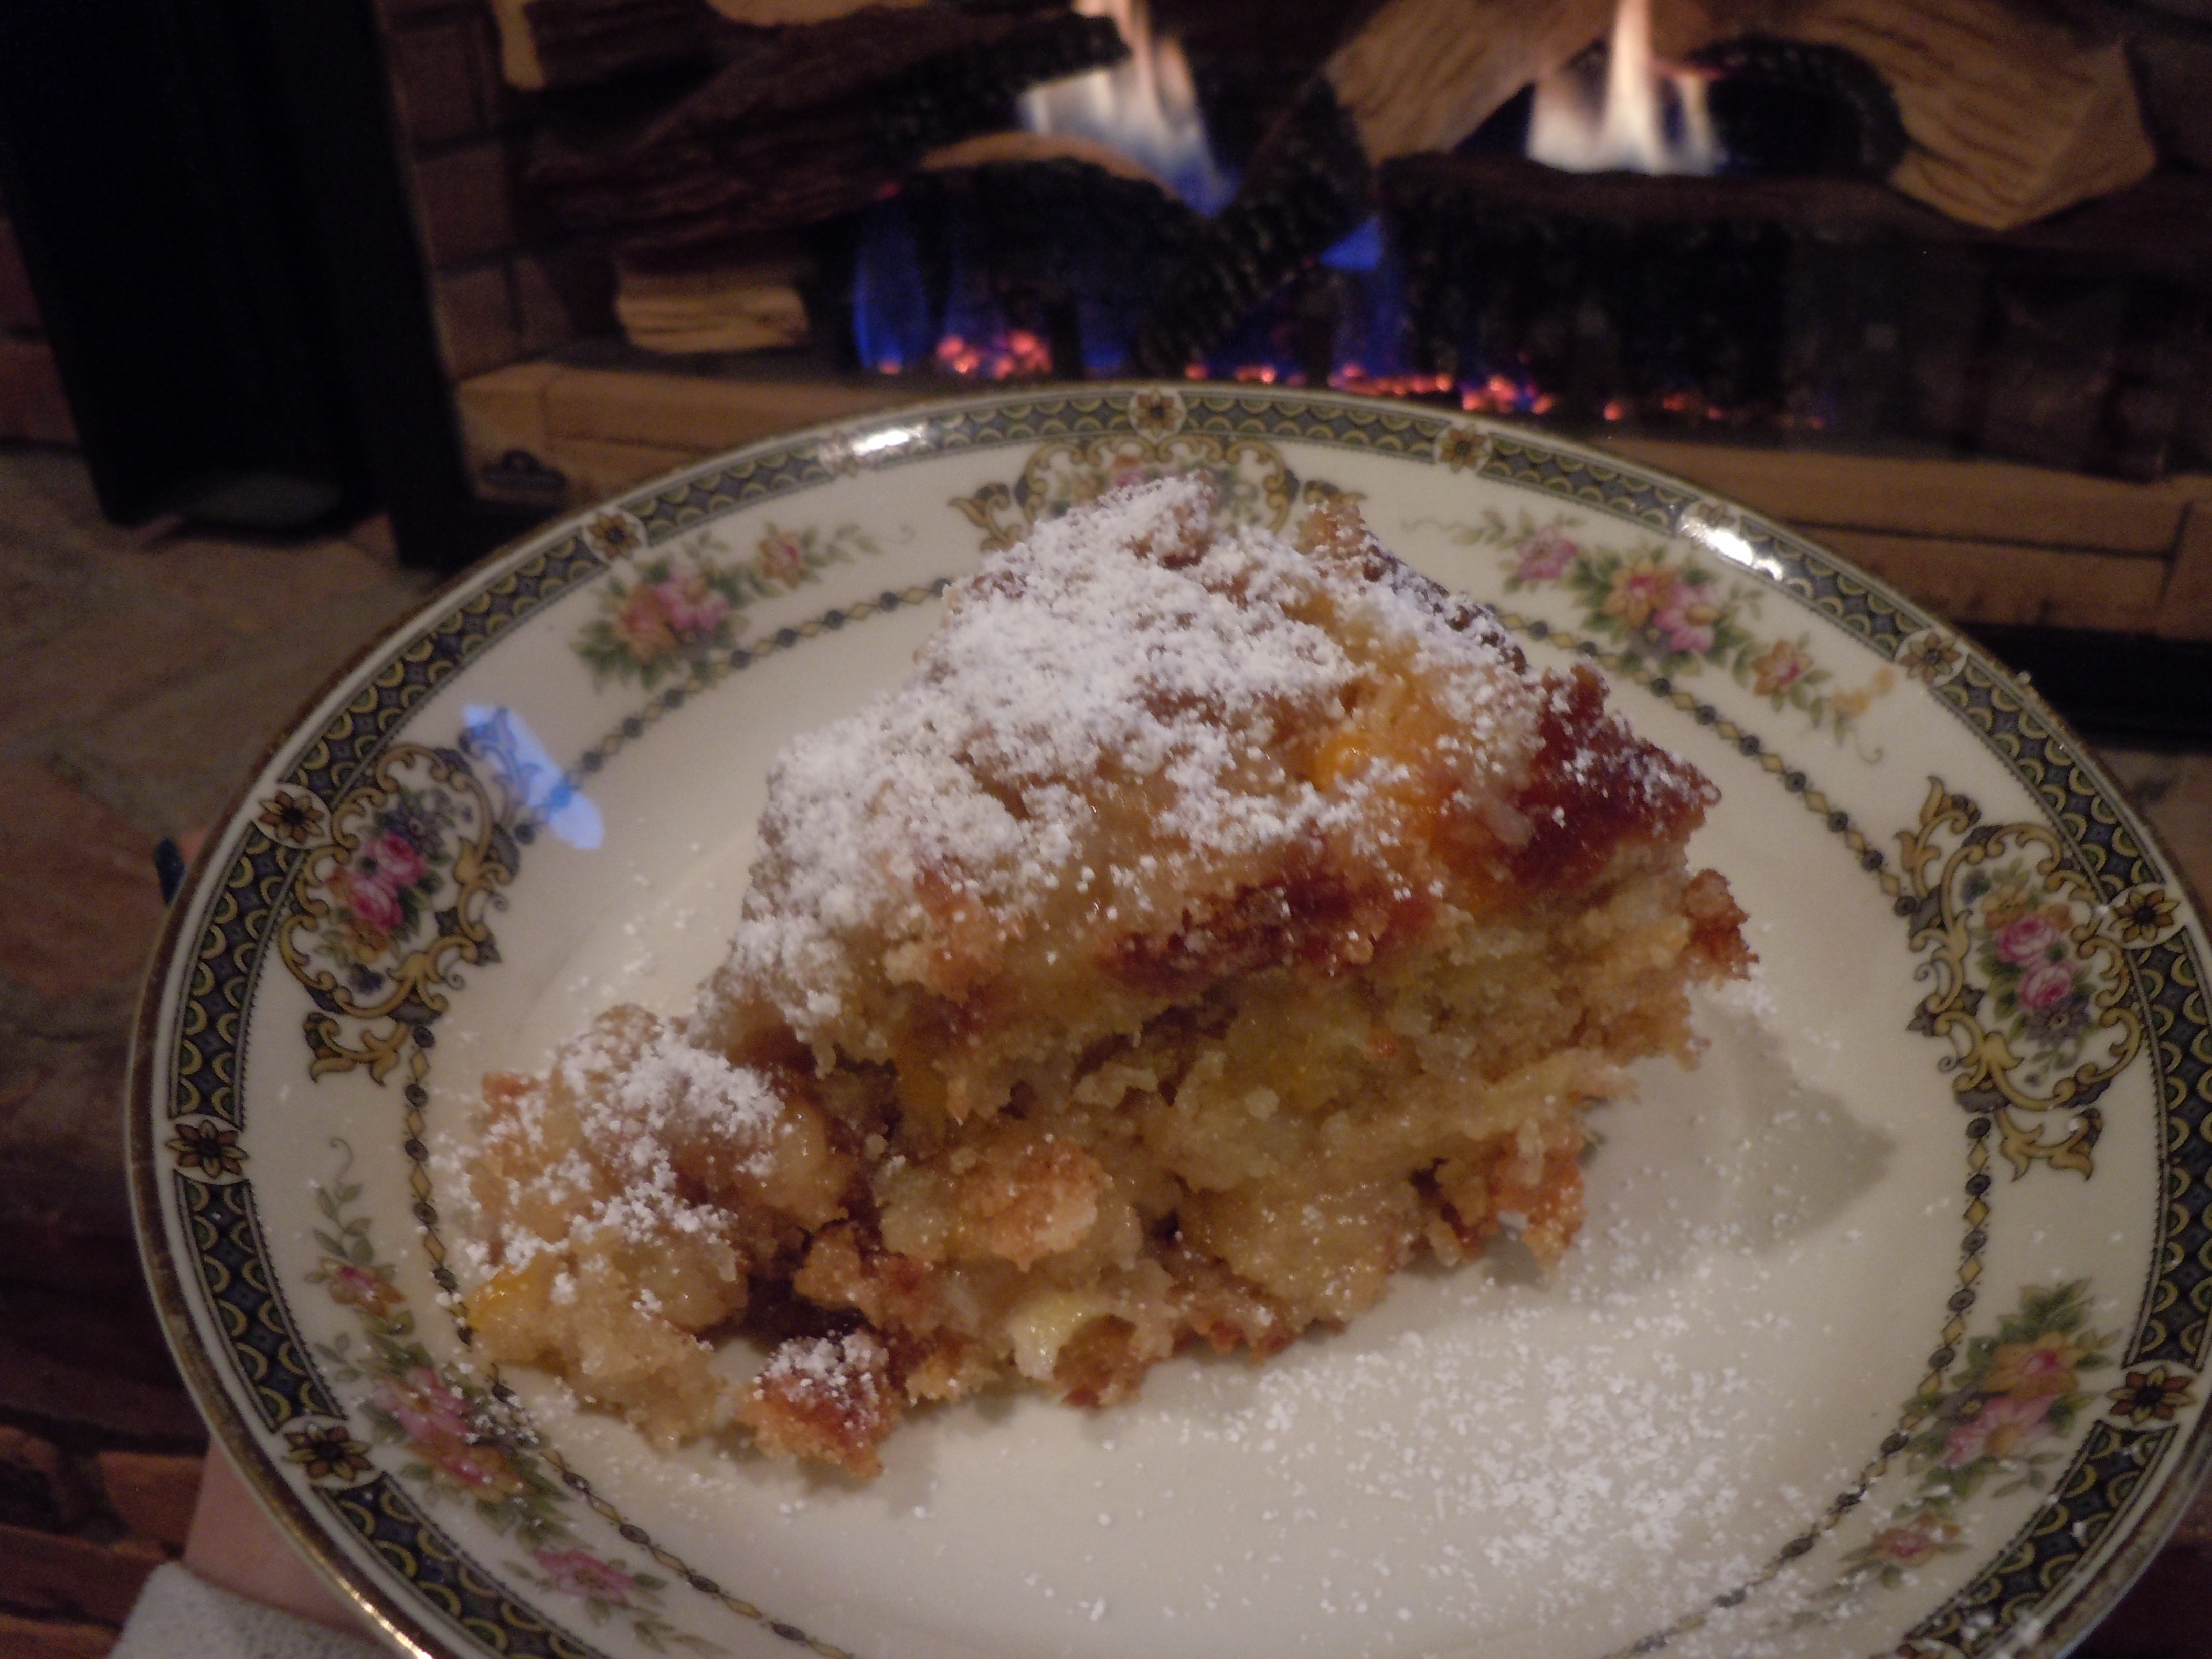
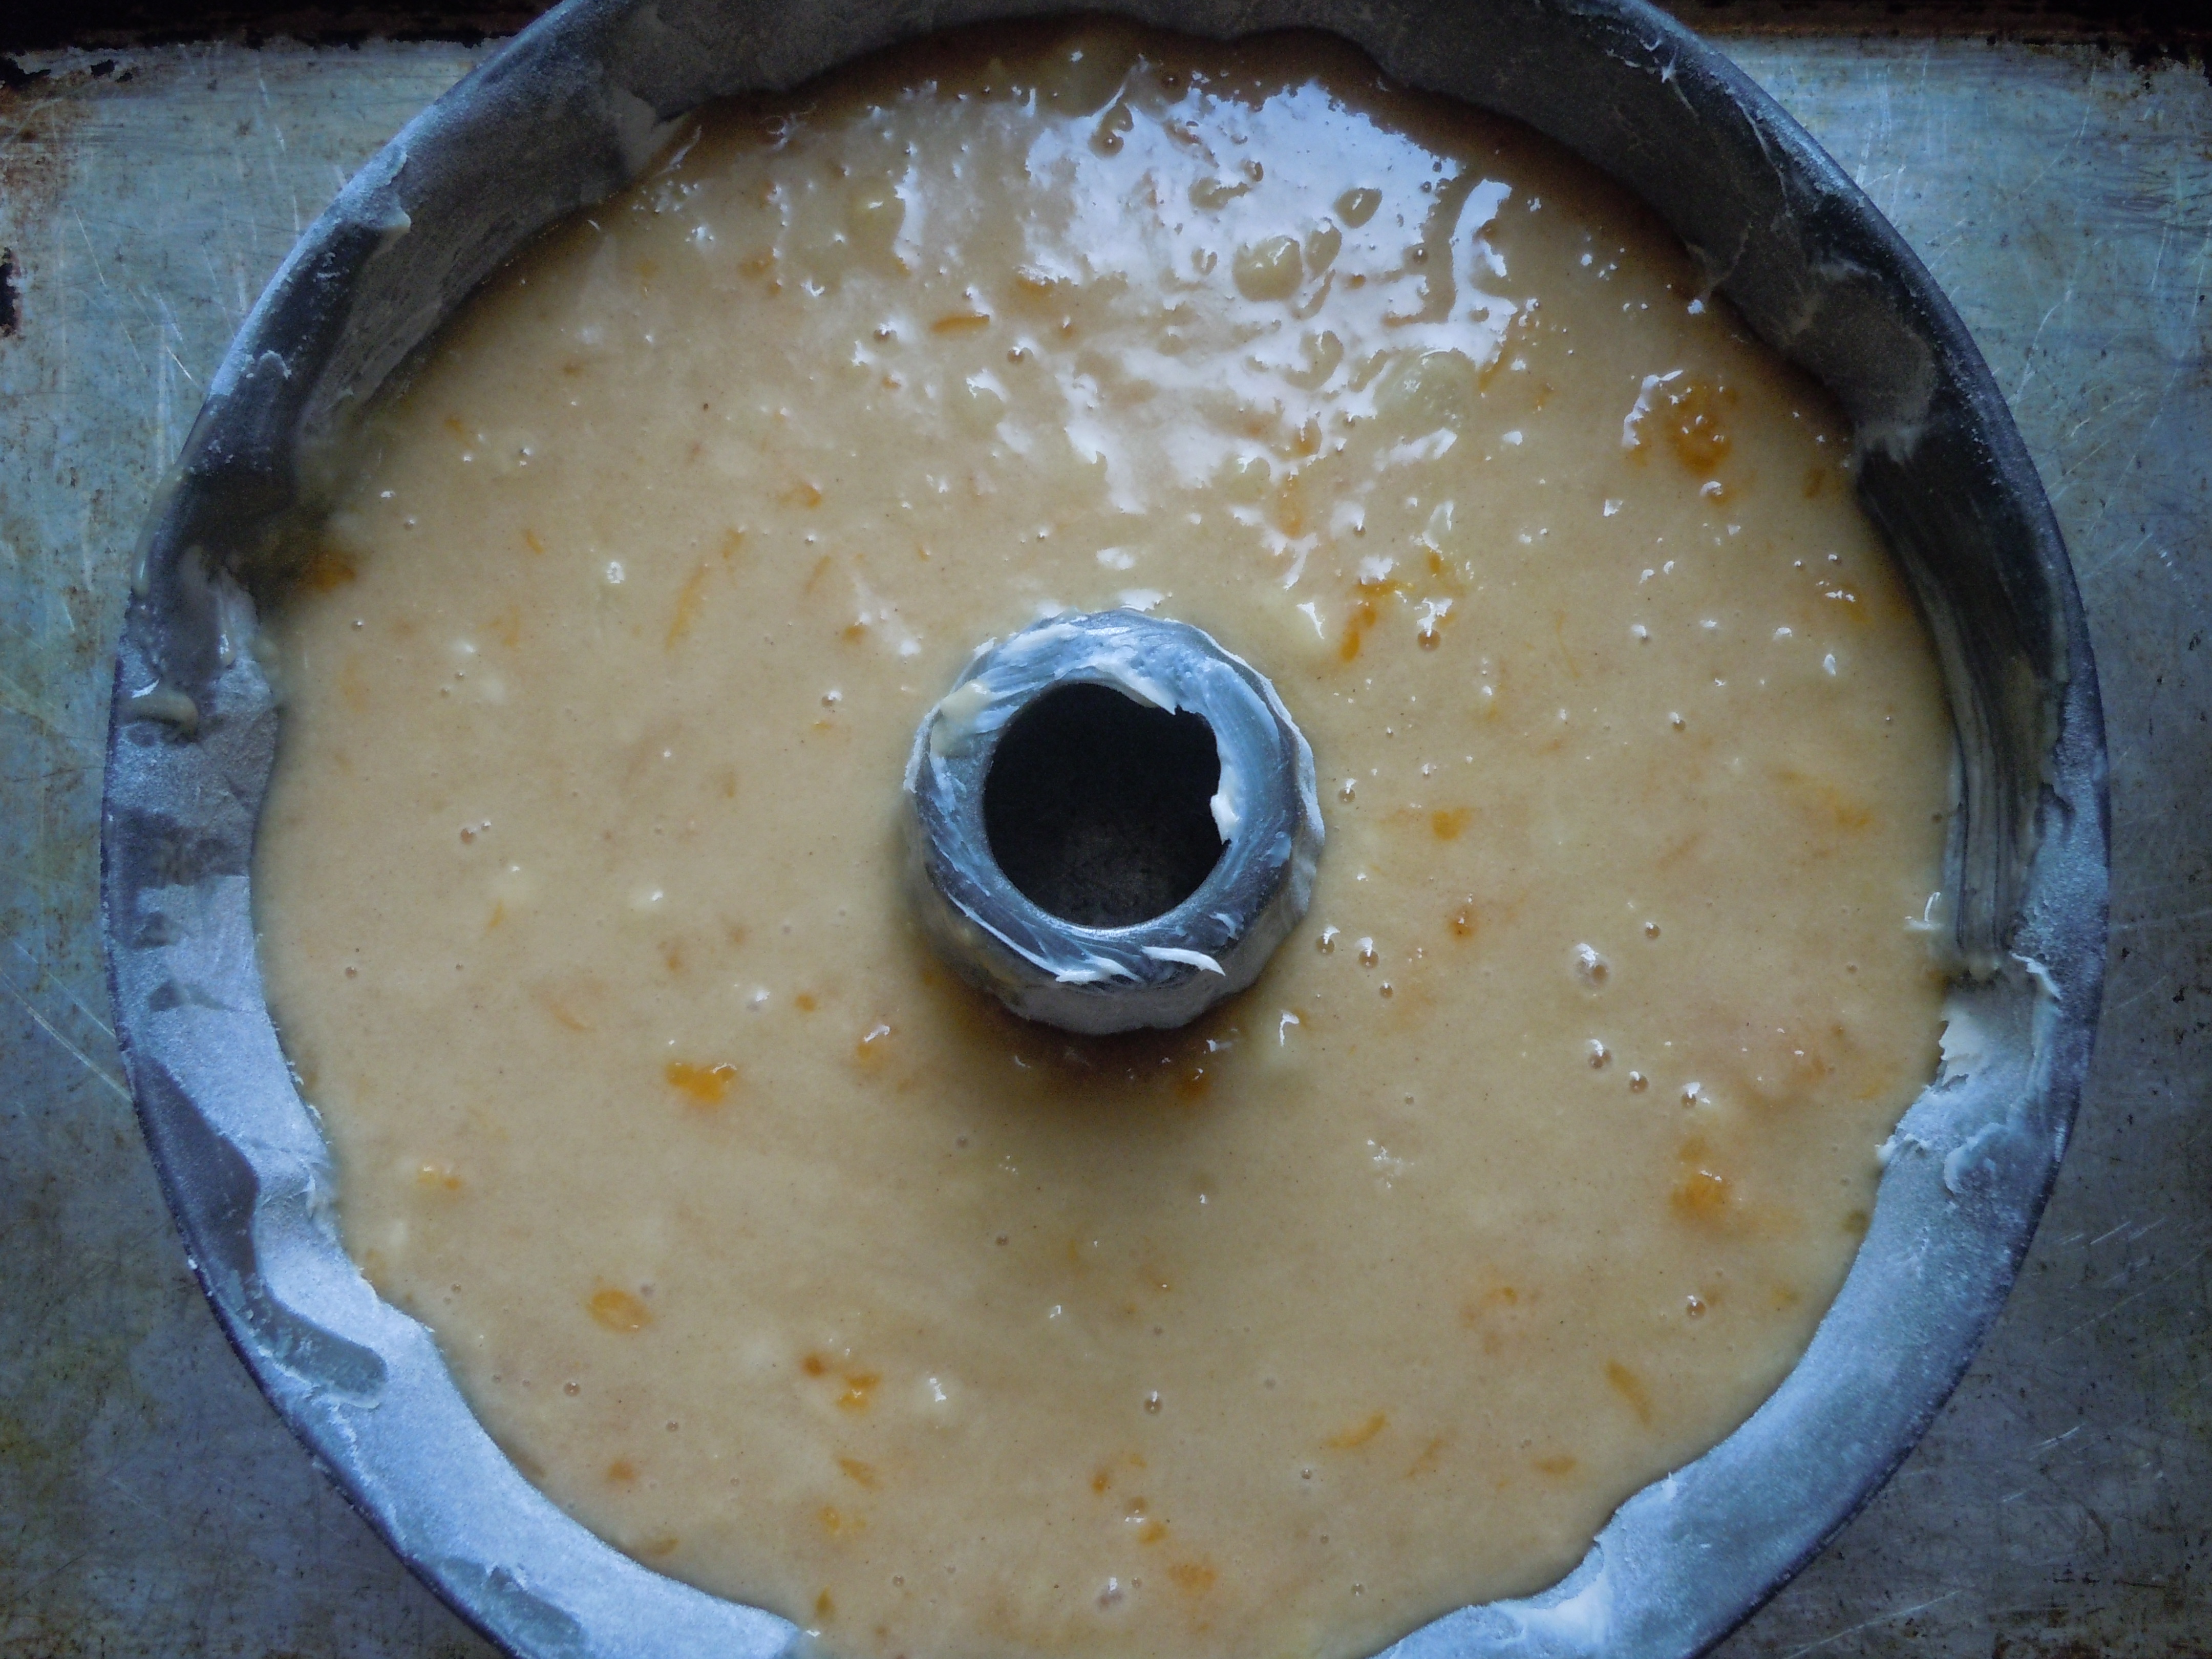
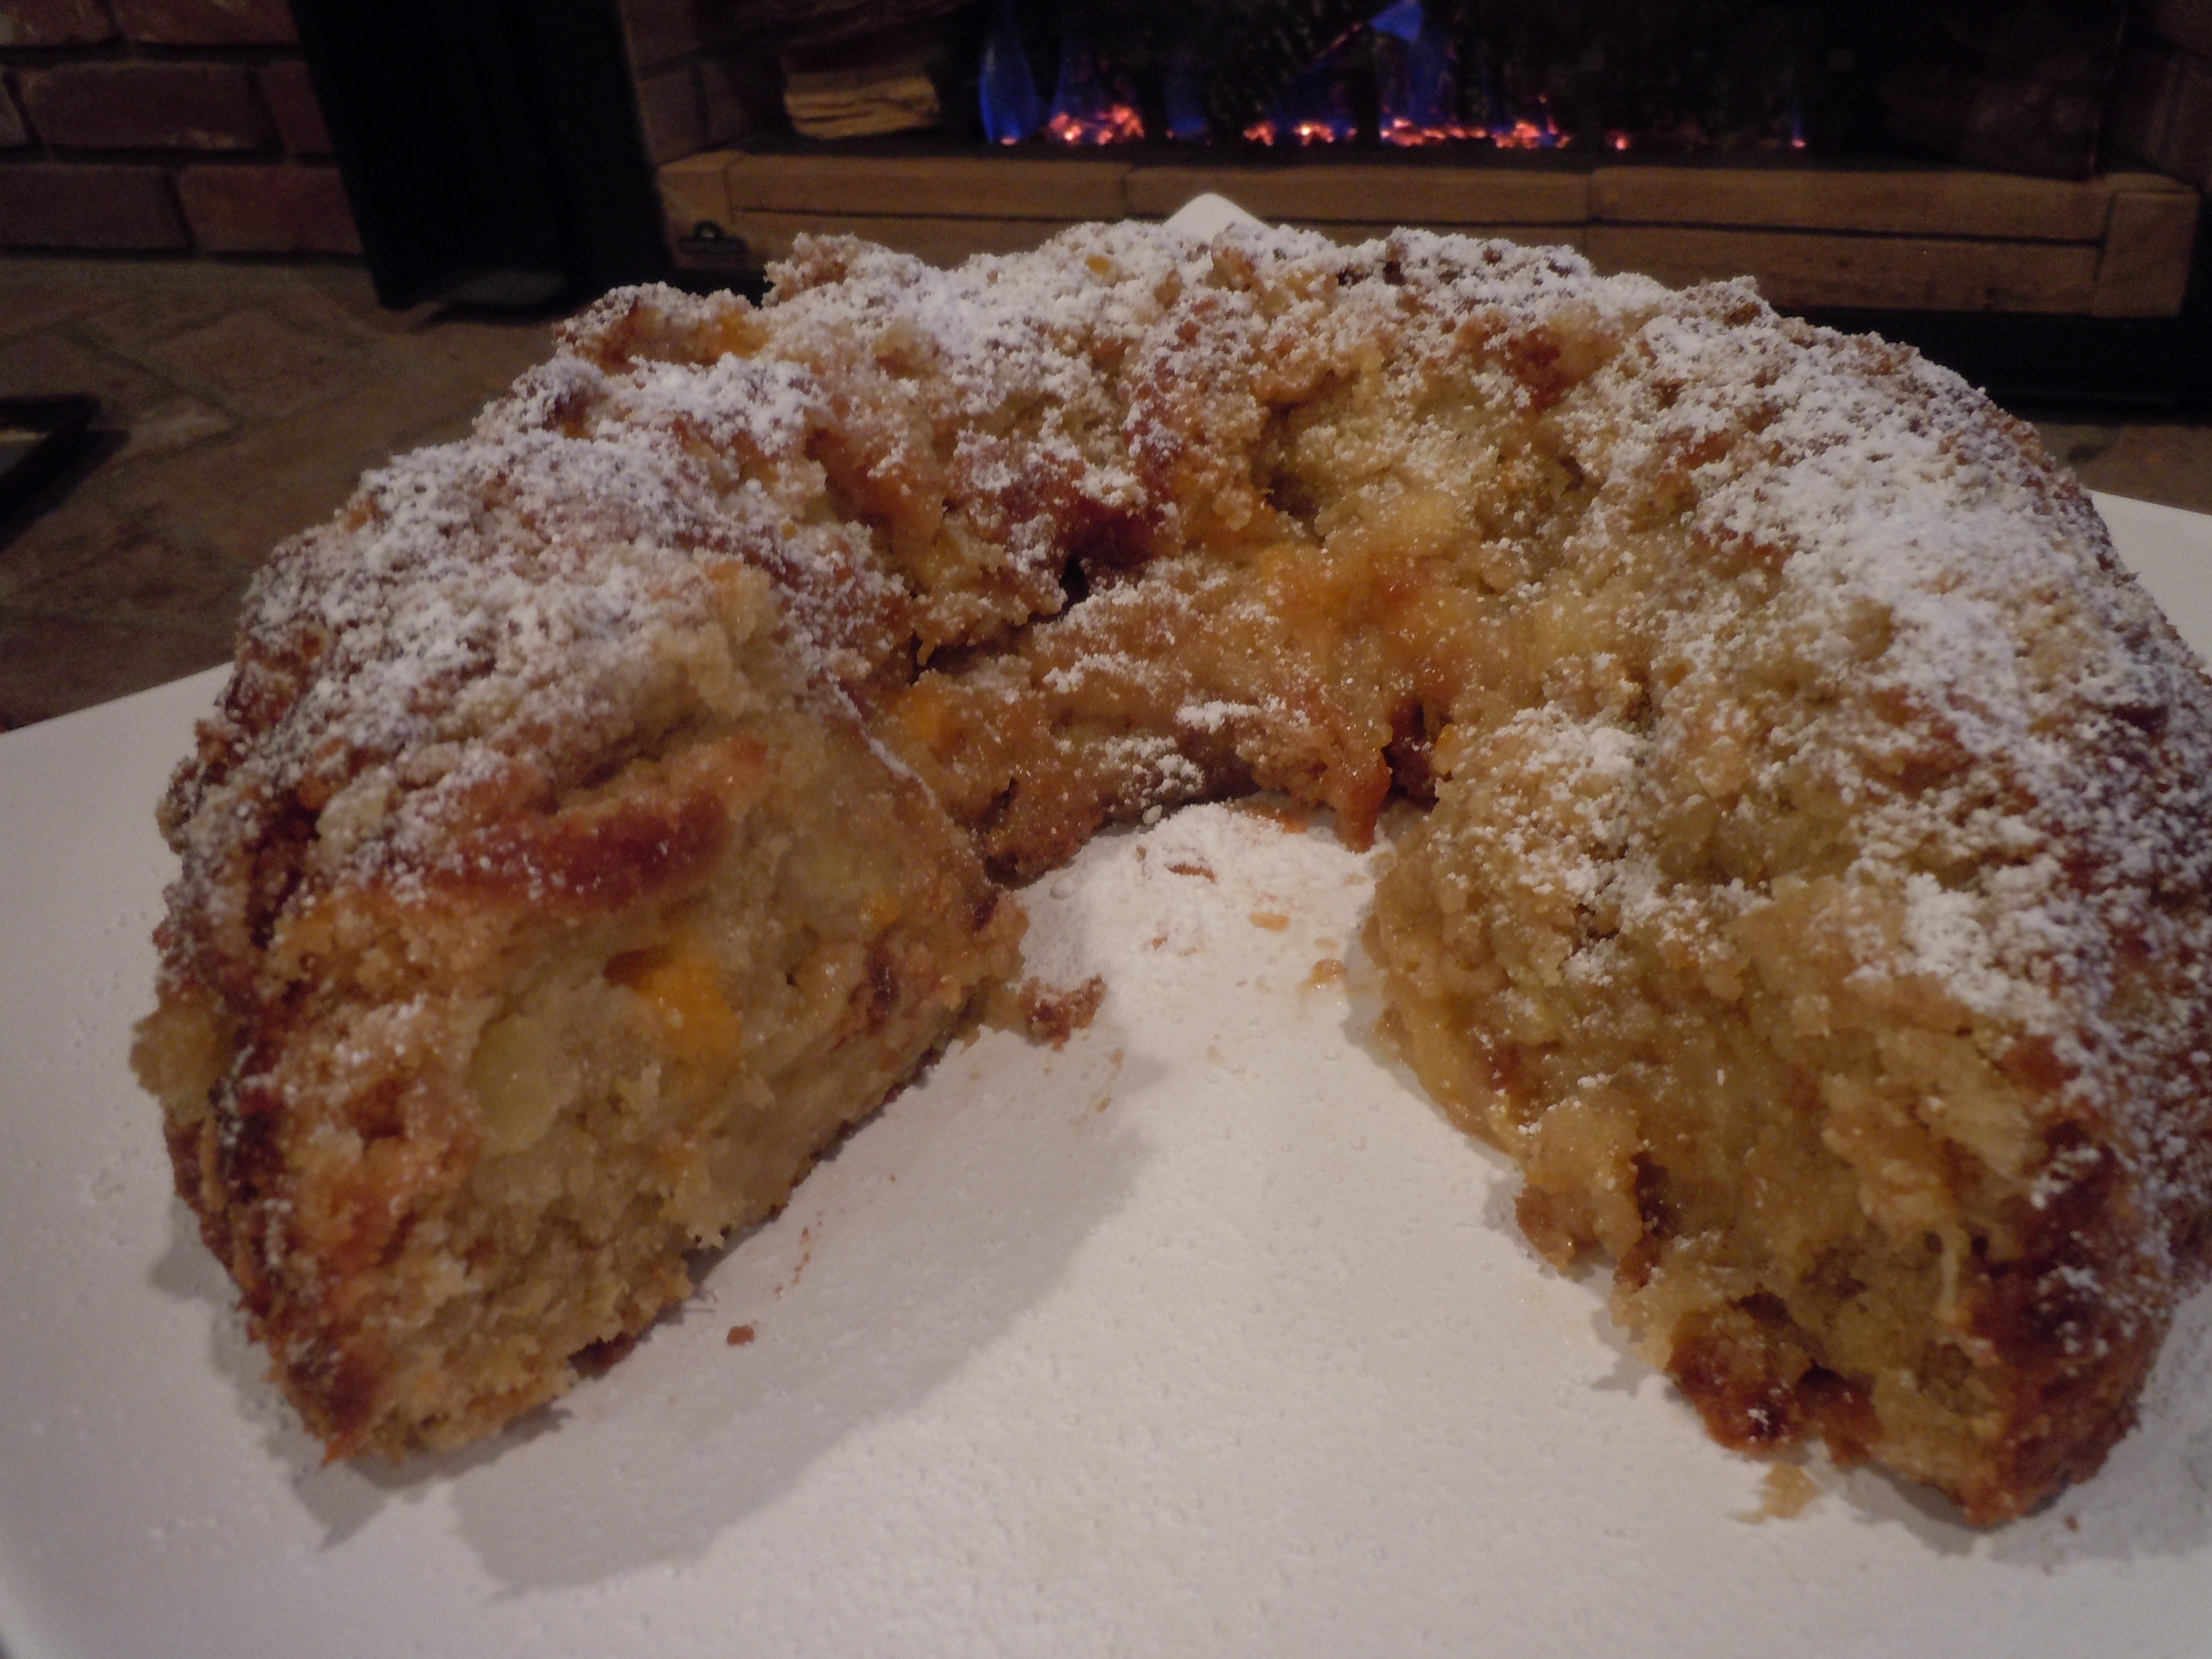
″Cake that won’t last″ is the perfect name for this dessert and when you make it you will understand why. This recipe came my dear foodie friend Christine. She is a great cook and whips up dishes like me in the “old school” self taught way of culinary cooking by taste and instinct, without recipes! Christine is one of my friends who graciously throws outrageous cooking parties where laughter and smiles are always in abundance.
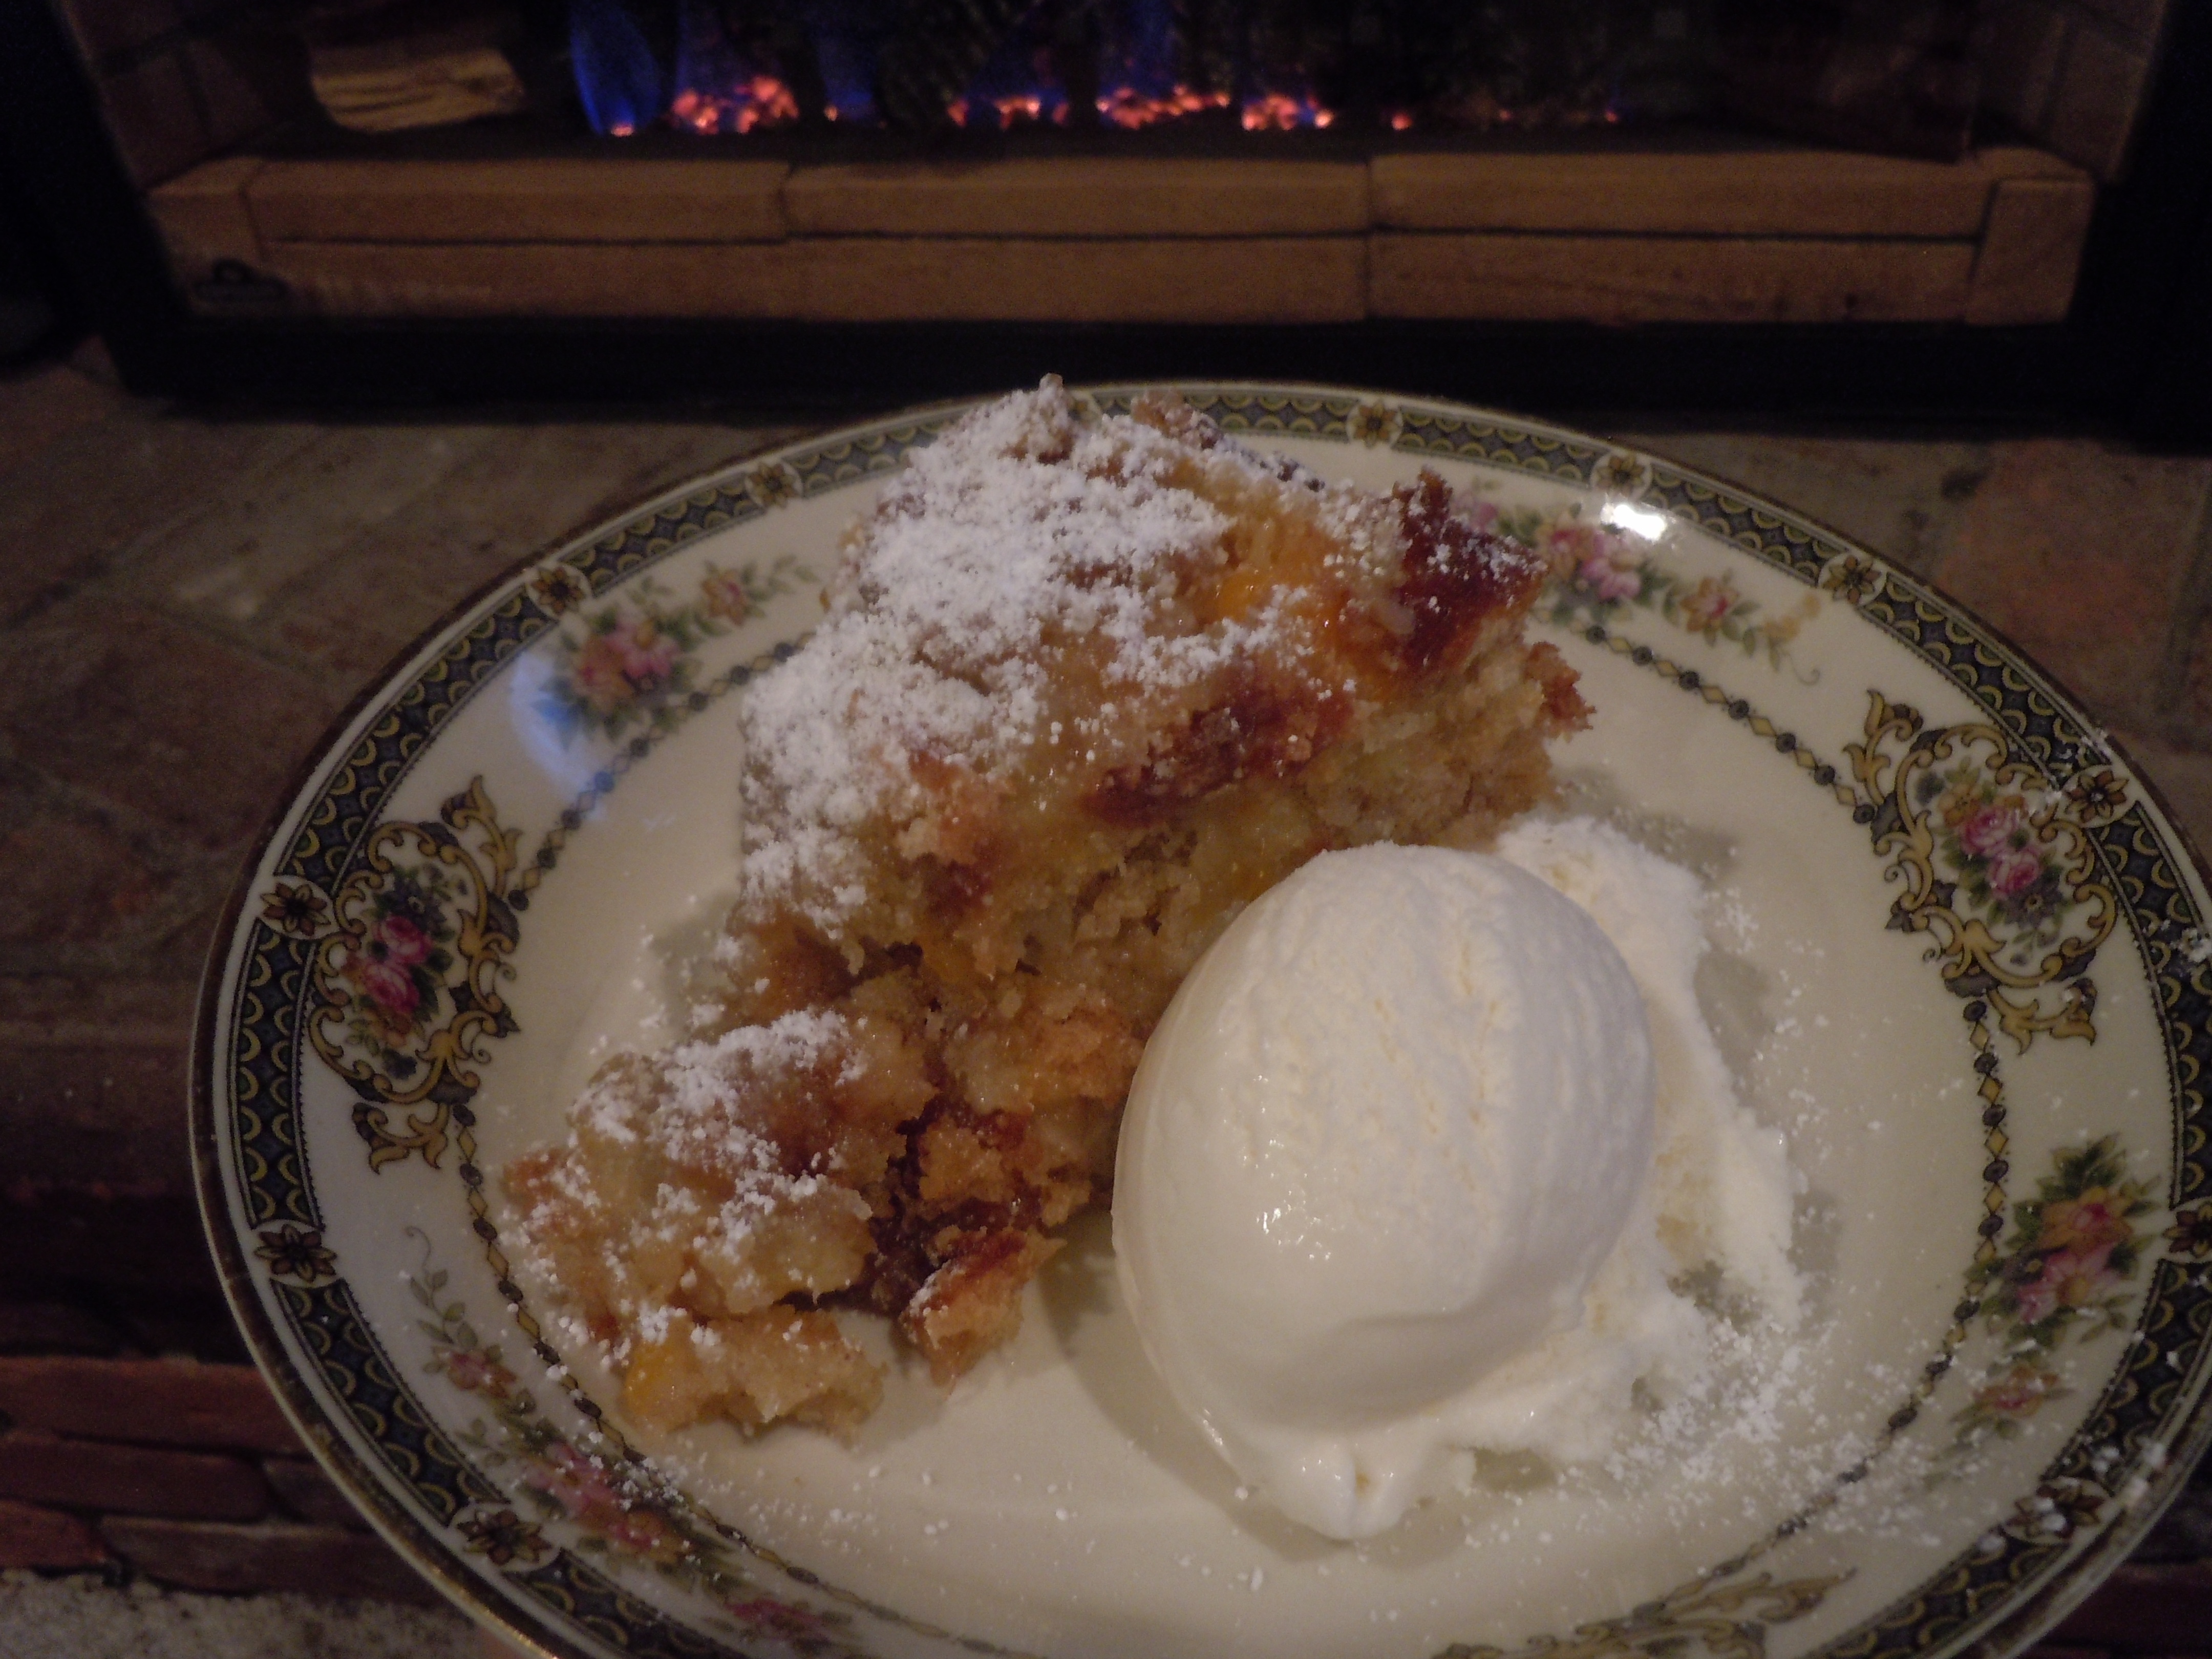
This “cake that won’t last” is more like a bread pudding that does a great job of holding together in an actual slice. So it is a little messy…it’s not like a perfect slicing cake and when you taste it you be very happy with exactly how it is. You don’t even need a Kitchen Aid Mixer with this cake…it’s all mixed easily by hand. Adding a good vanilla ice cream, one in particular that I really like is Hood “Homemade Vanilla” which goes great with this bread-pudding-cake making it even more indulgent! This is a great dinner party cake and your guests will never know how easy it was.
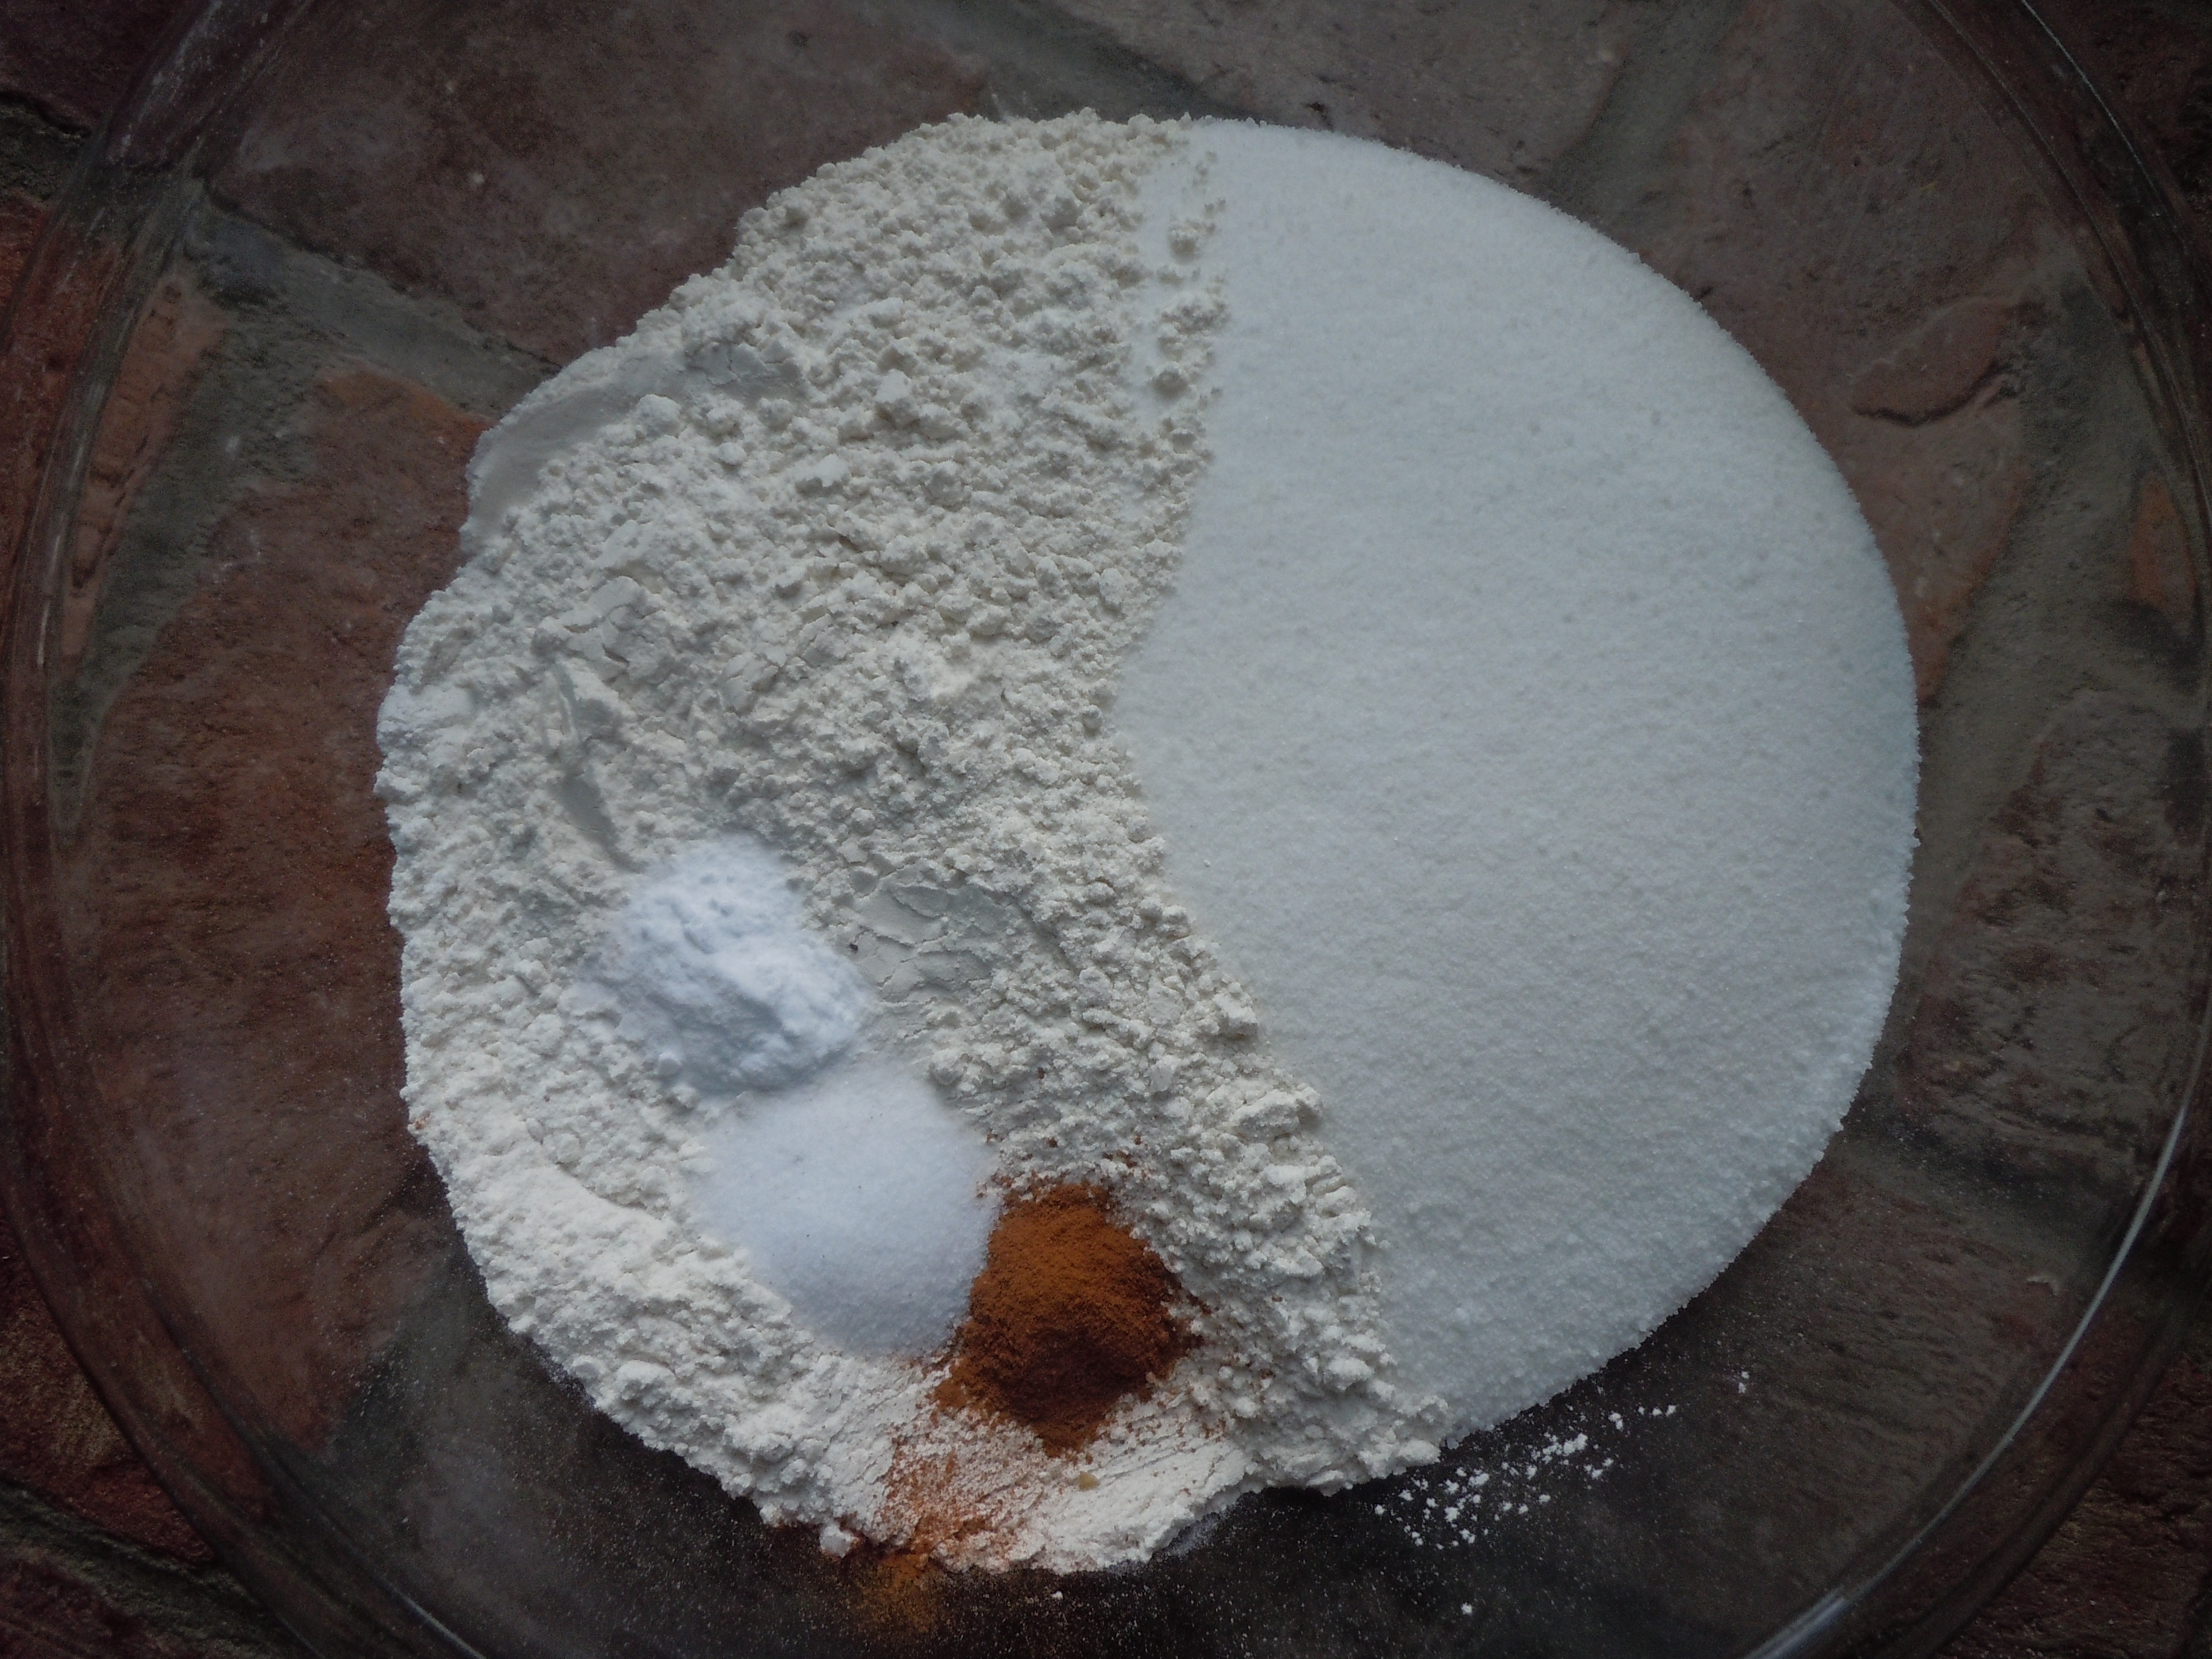
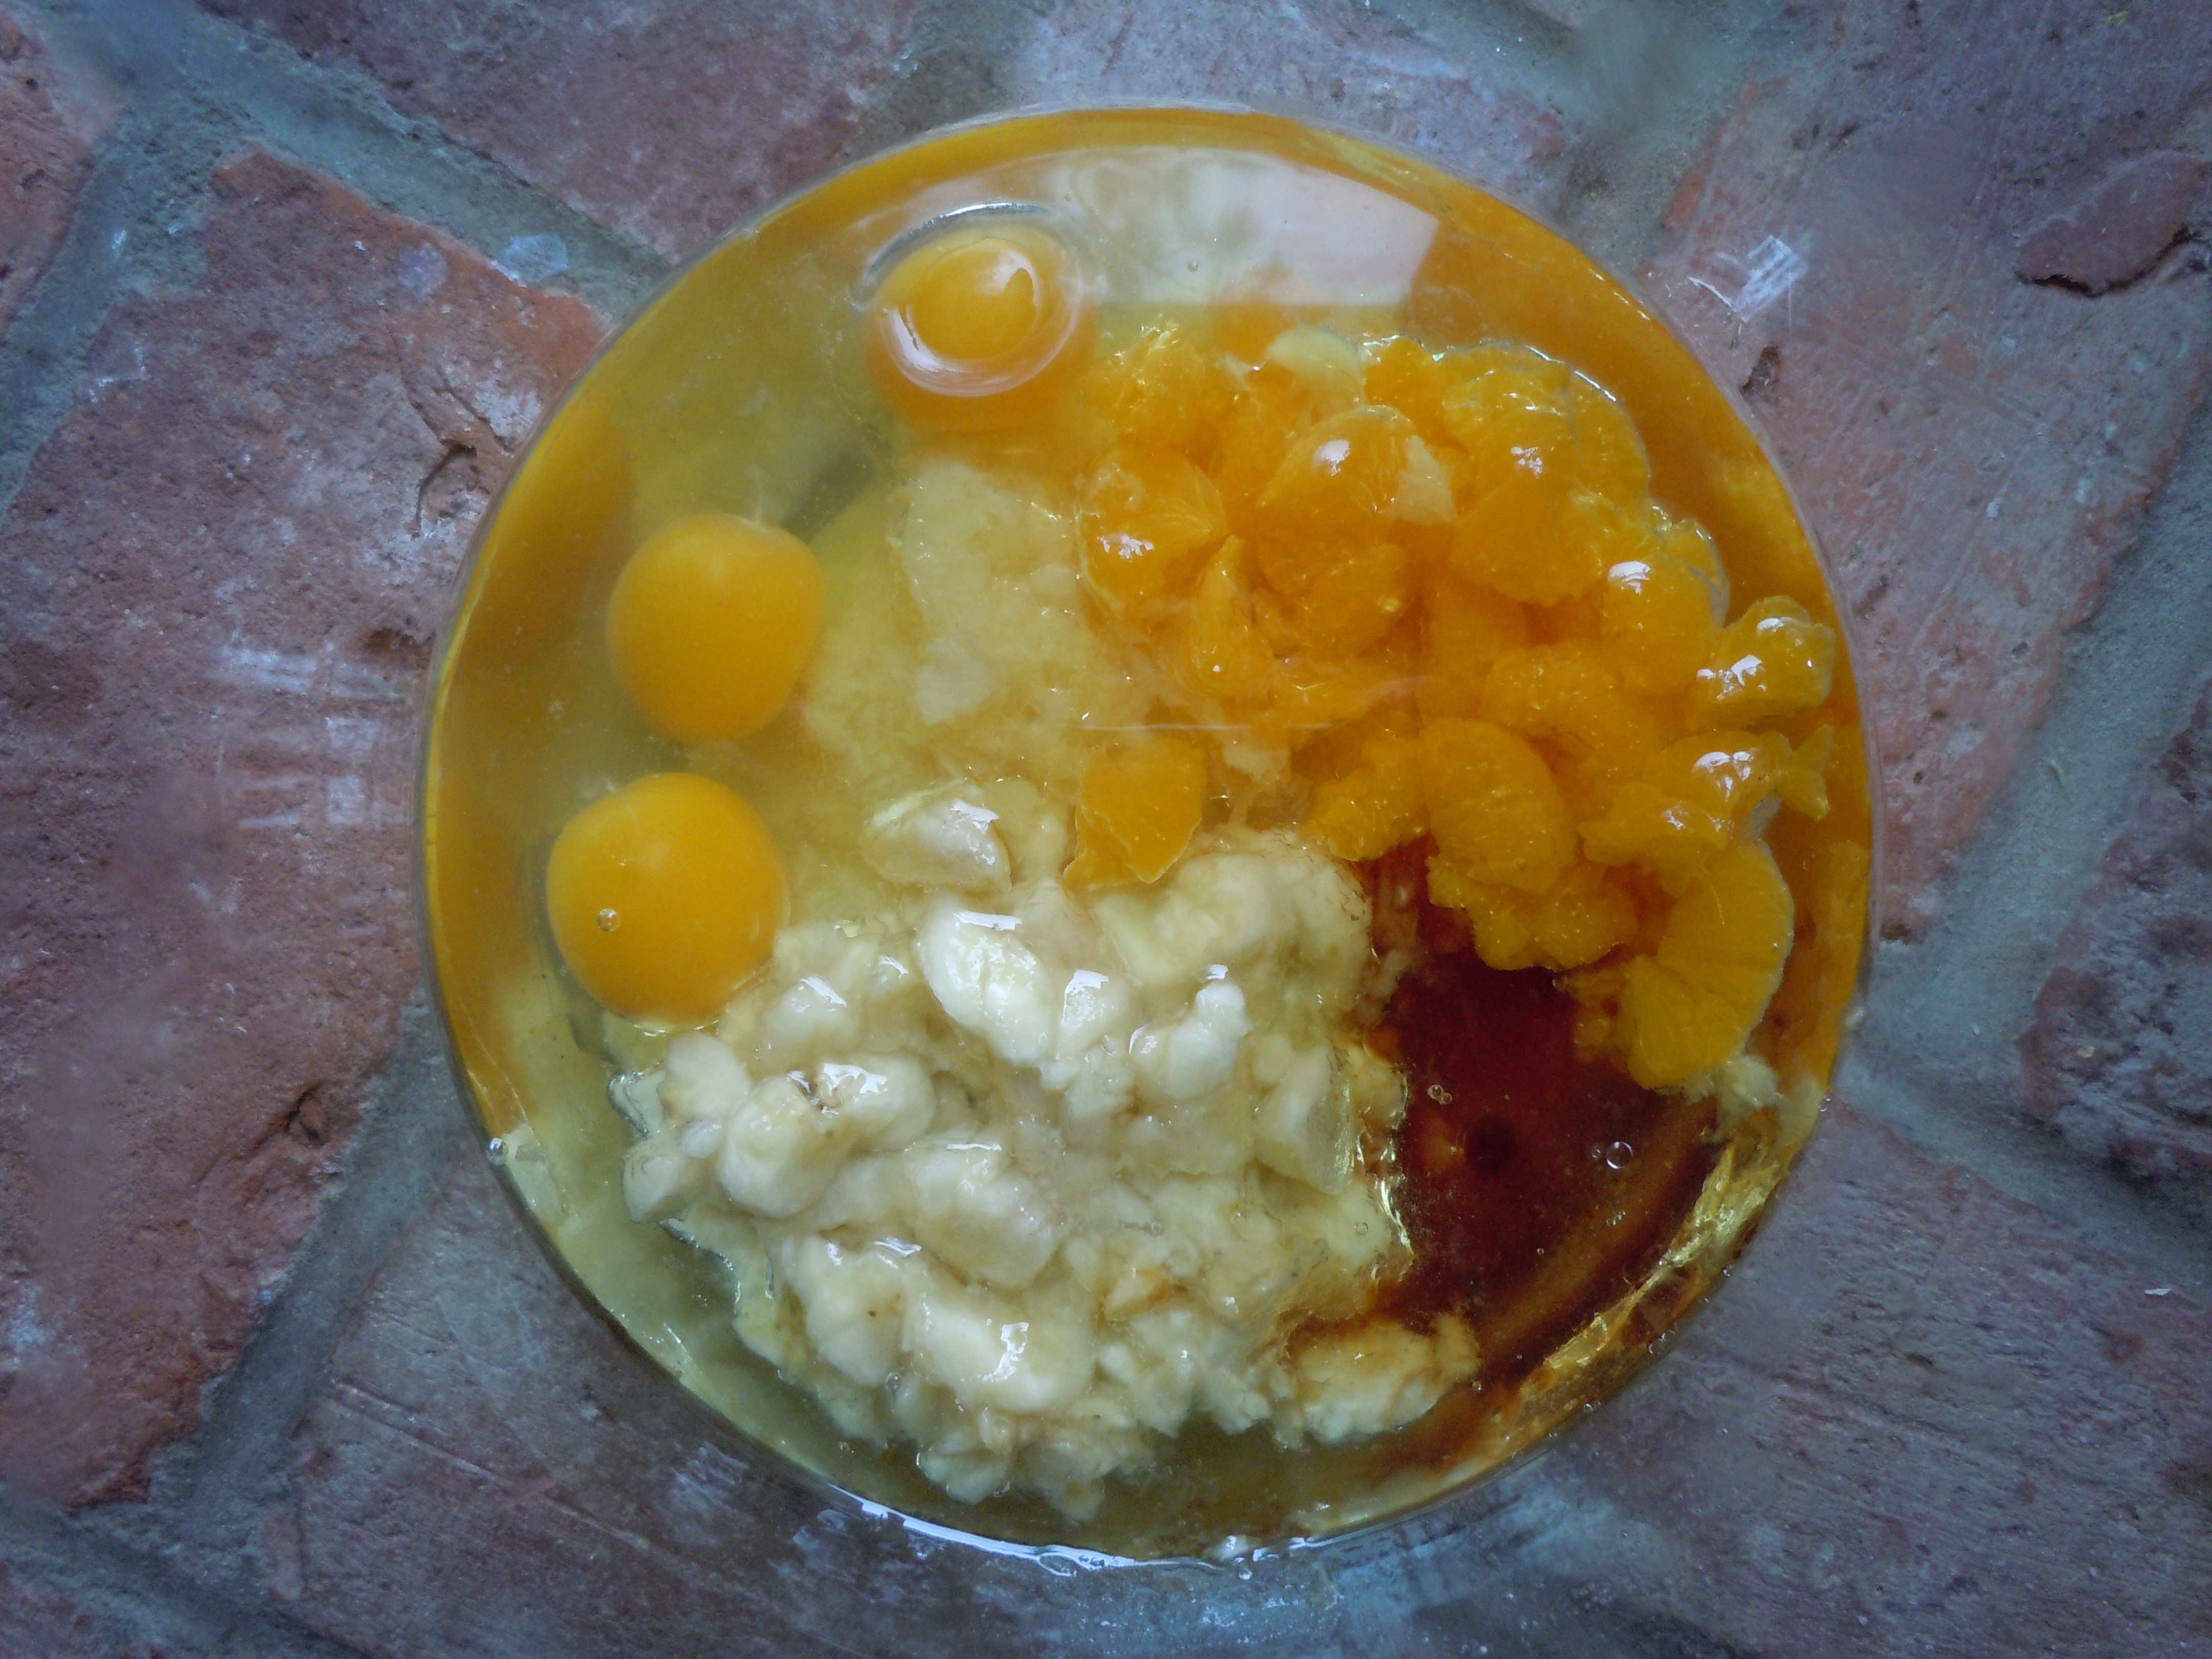
1 cup mandarin oranges with juice (if mandarin pieces are whole cut in 3’s)
1 cup canola oil
3 cups flour
1 1/2 Tsp vanilla extract
3 cup sugar
1 Tsp salt
1 Tsp baking soda
1 Tsp cinnamon
Directions:
Pre-heat the oven to 350º
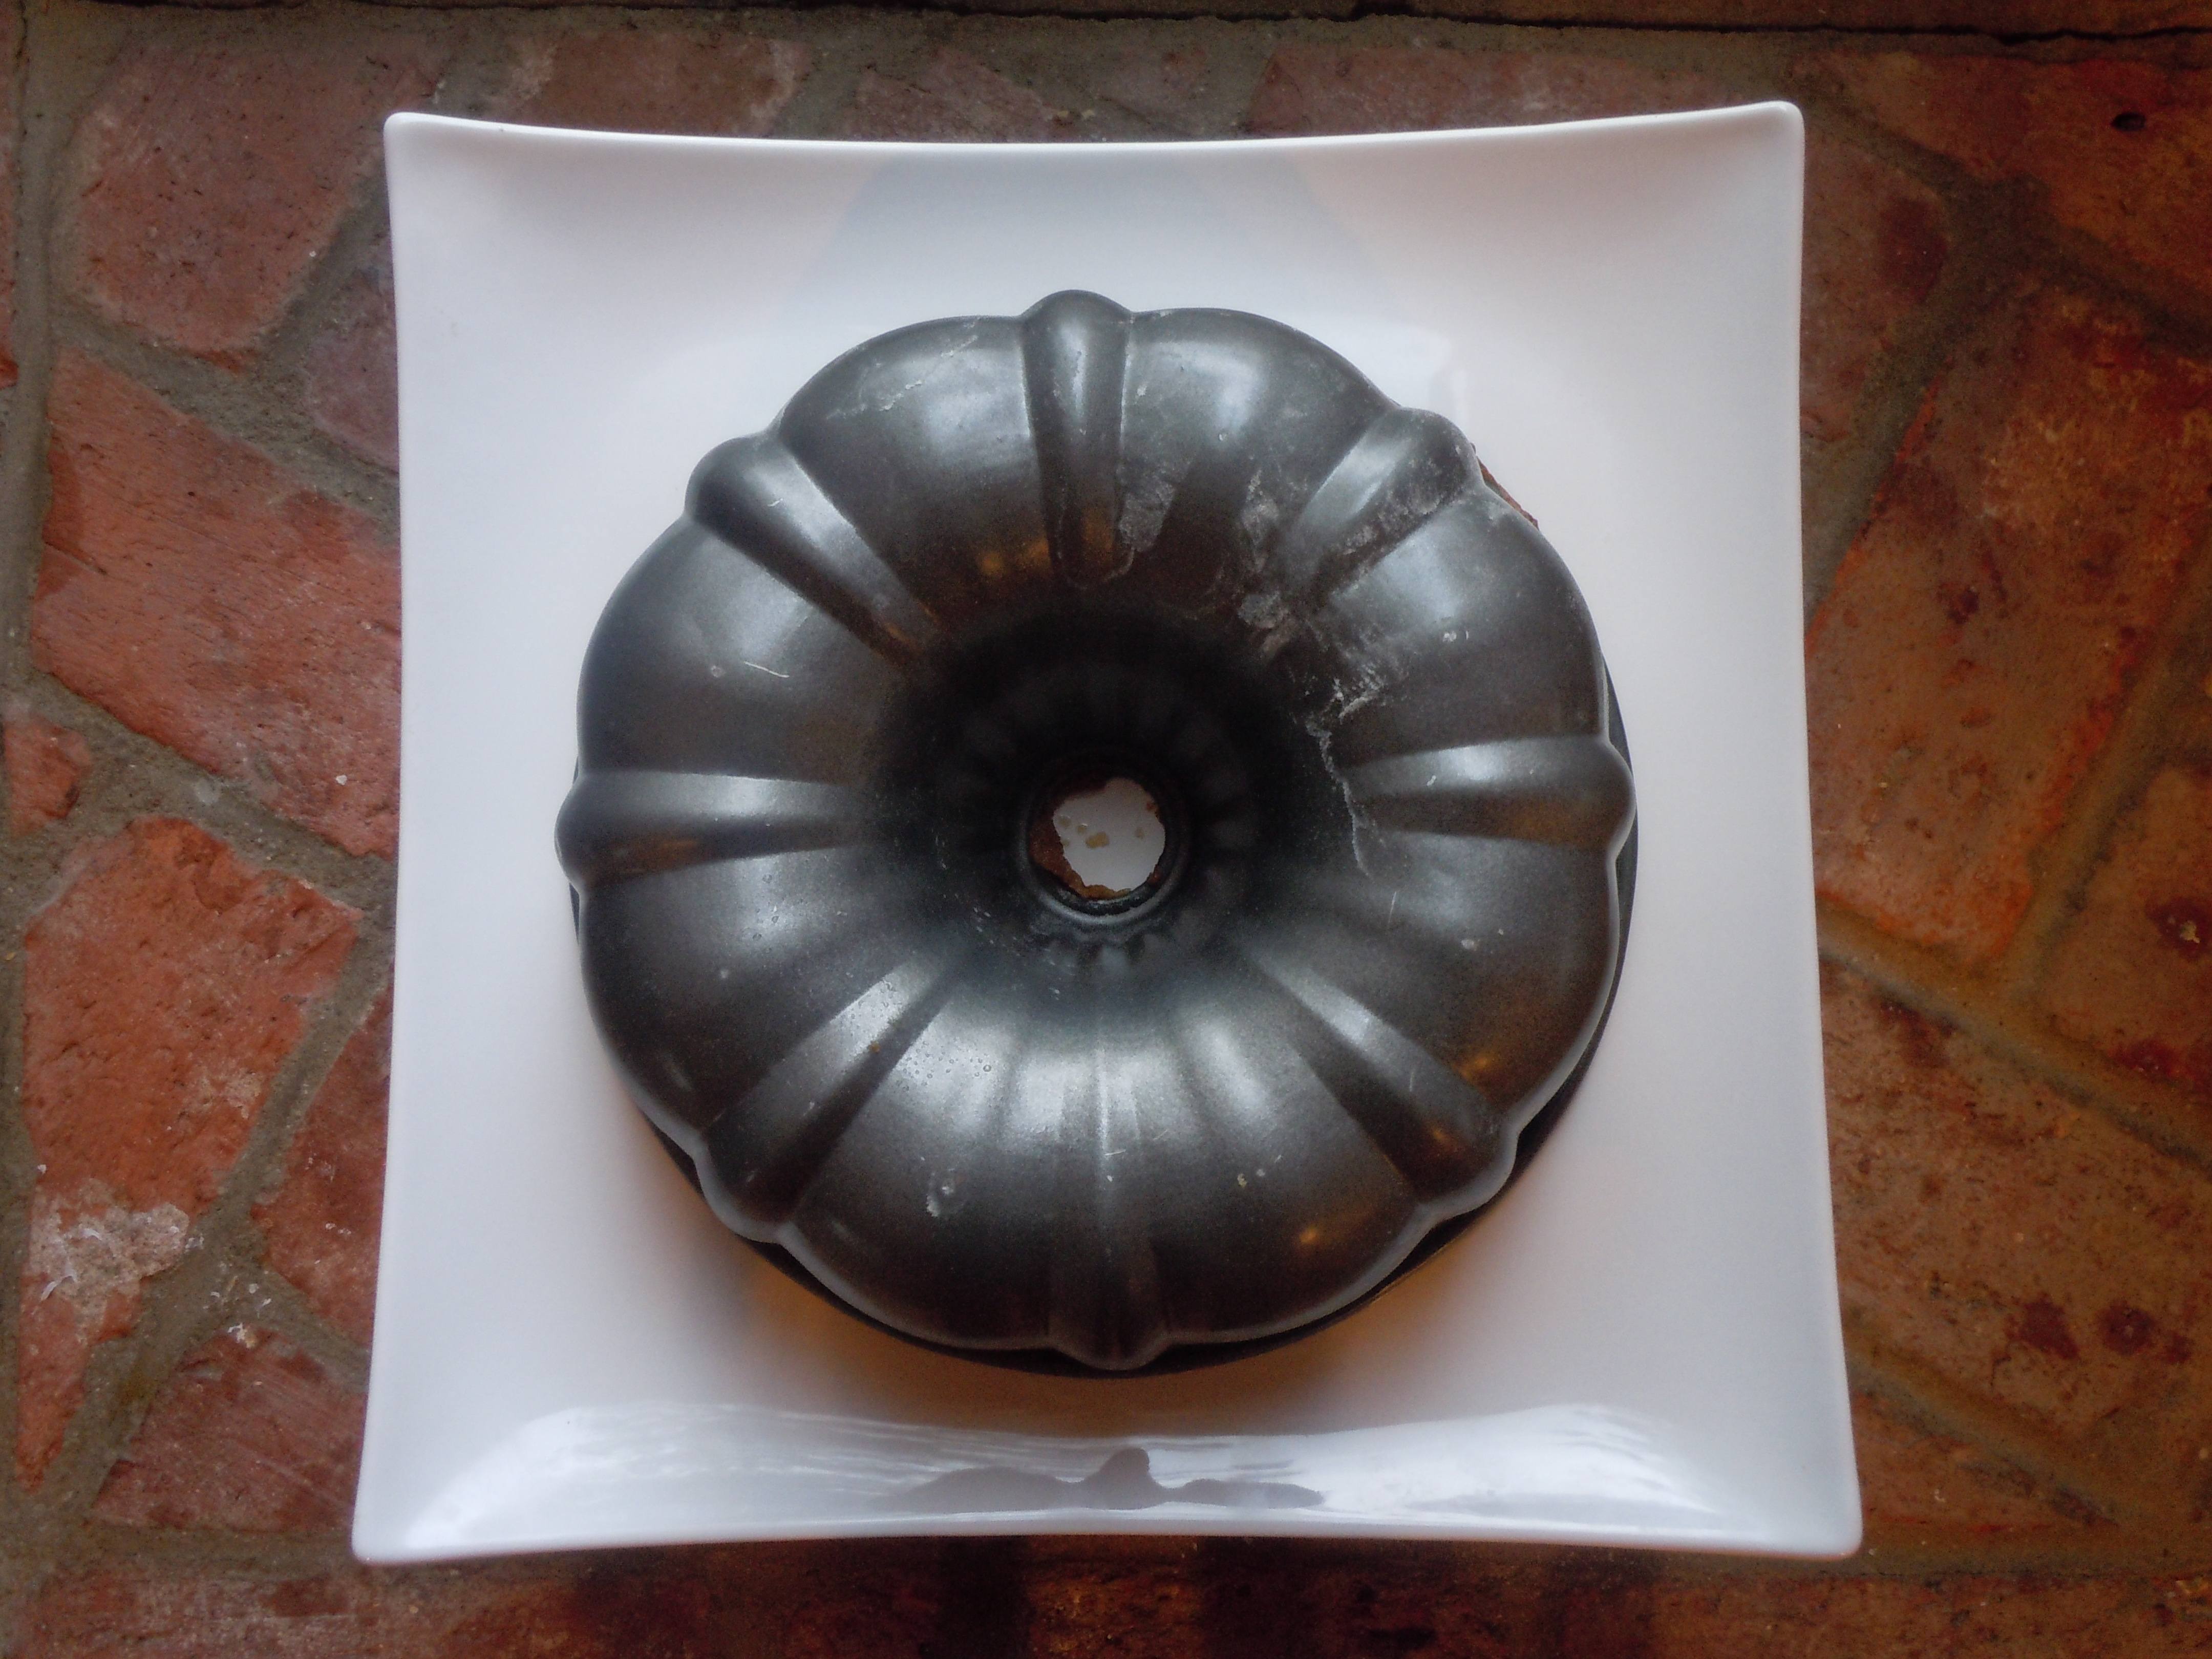
Butter and flour a bunt cake pan
Put all the dry ingredients into a large mixing, set aside
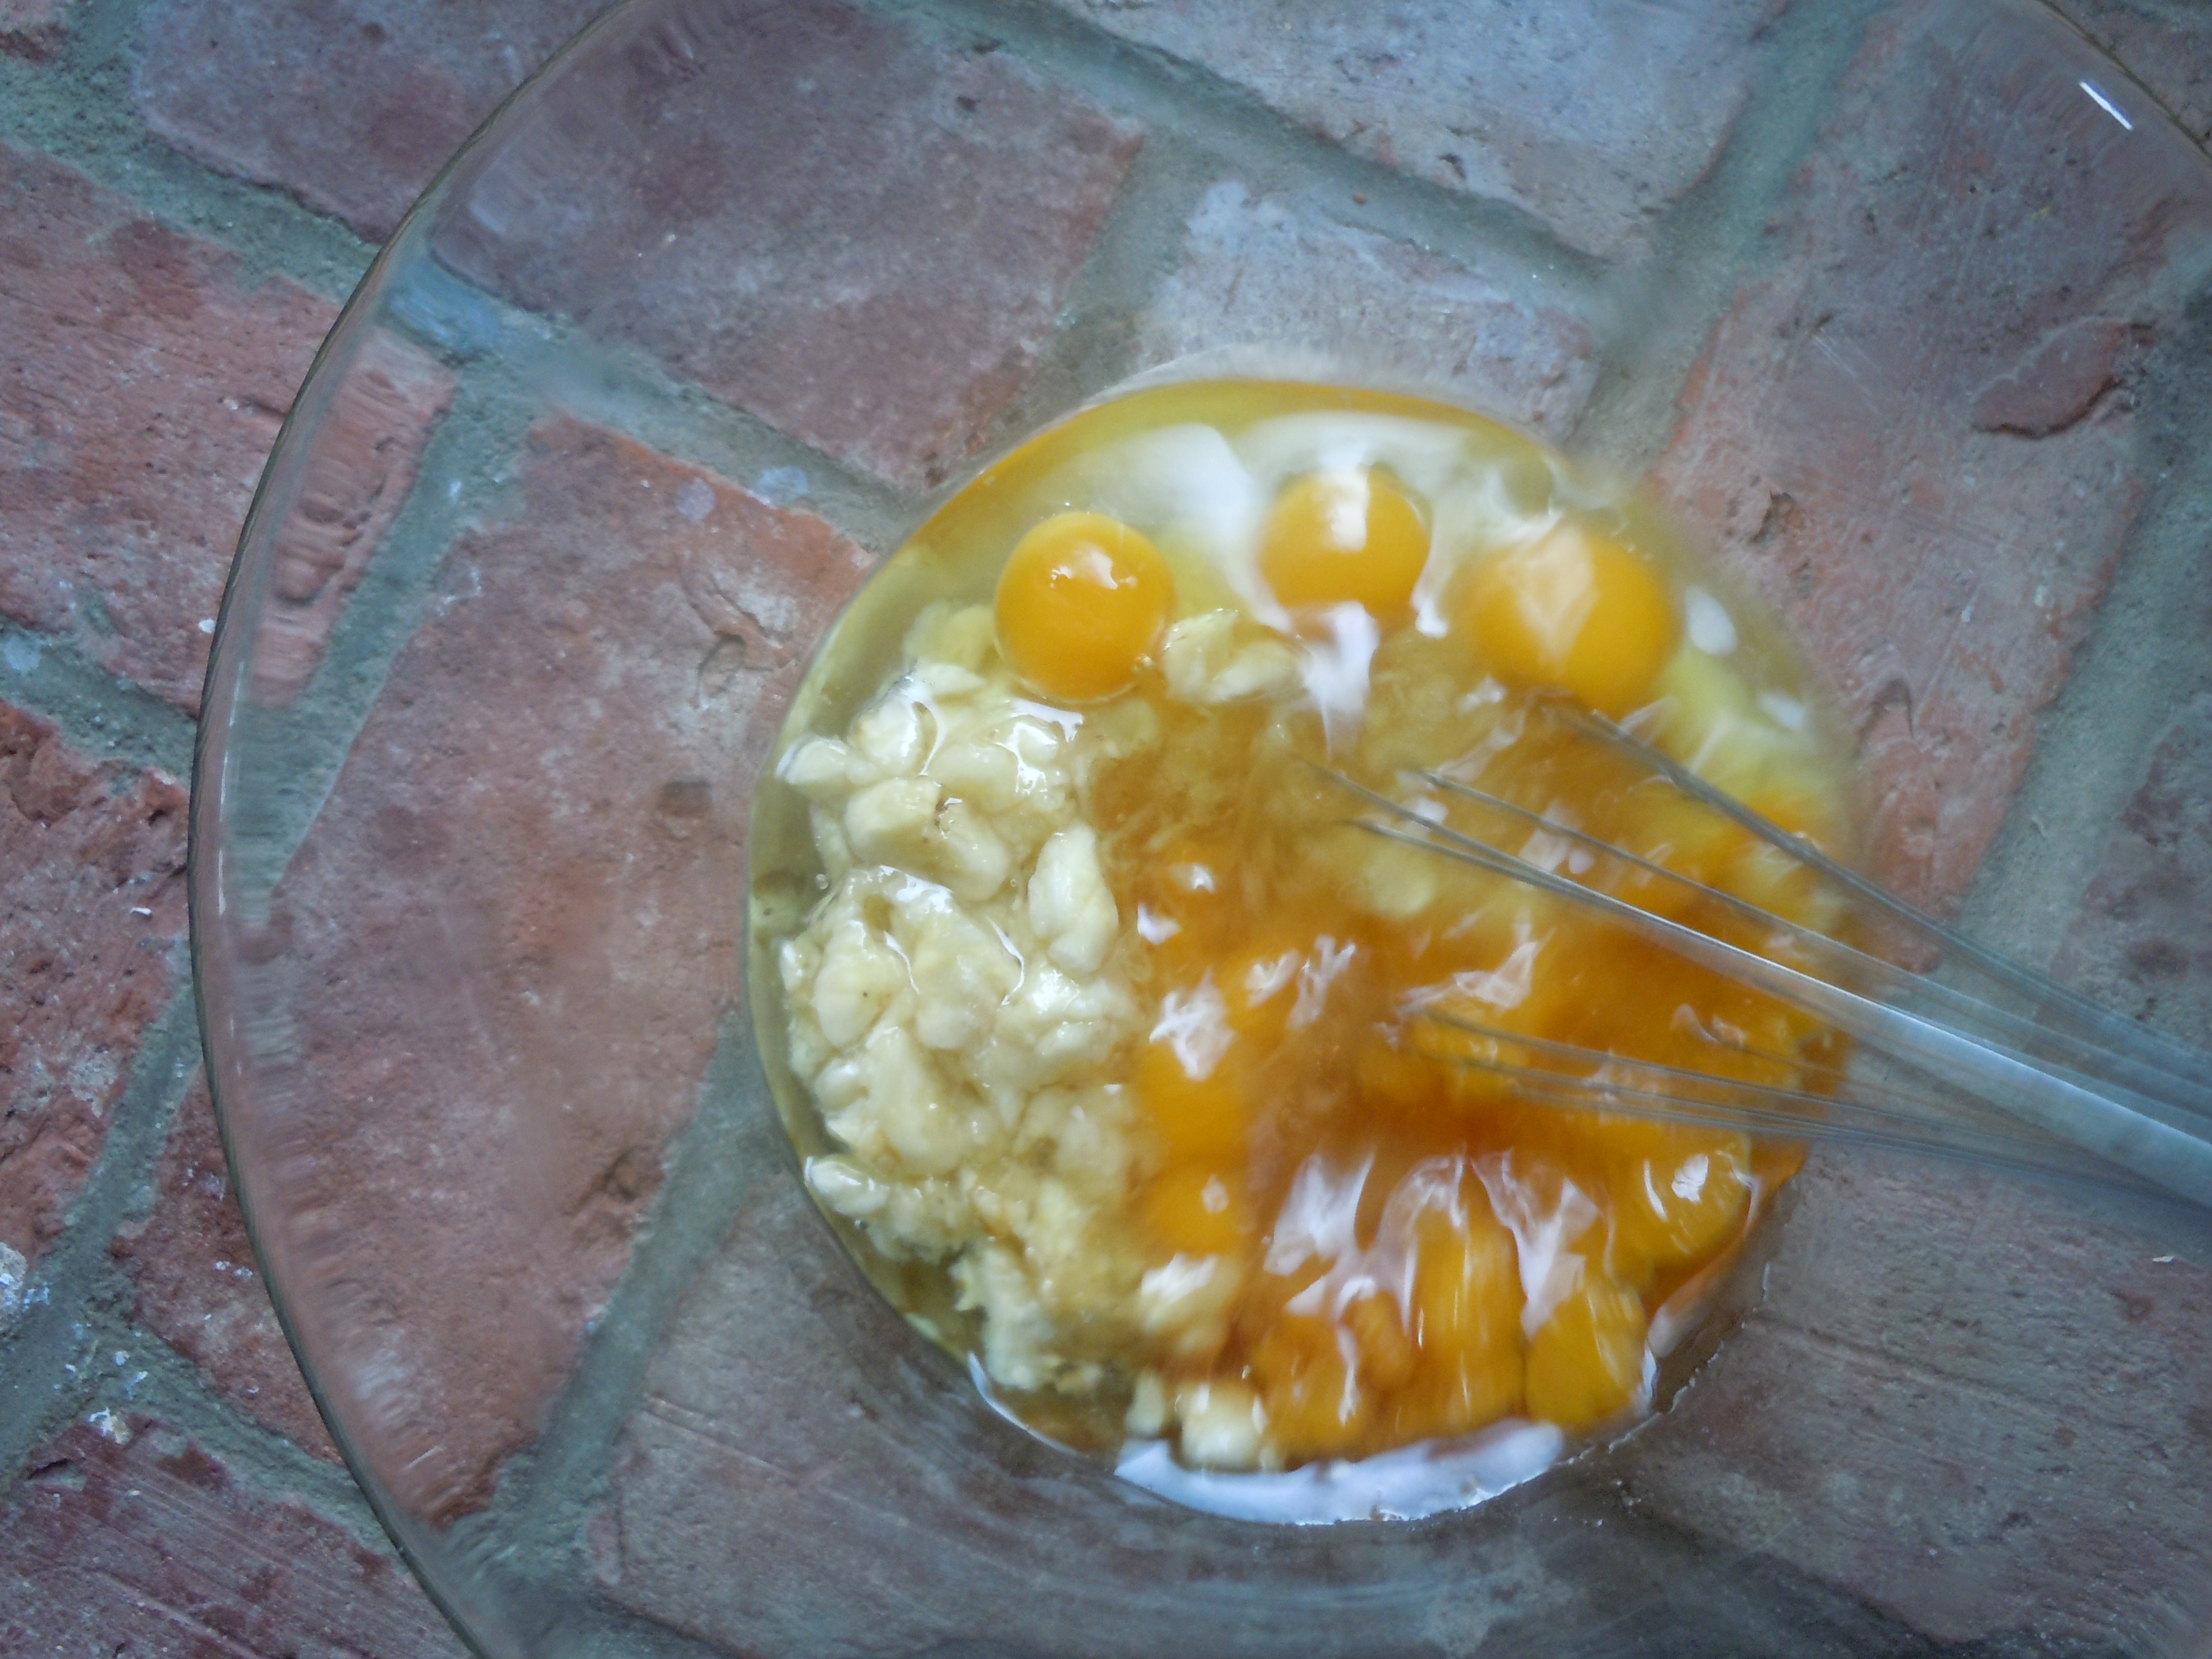
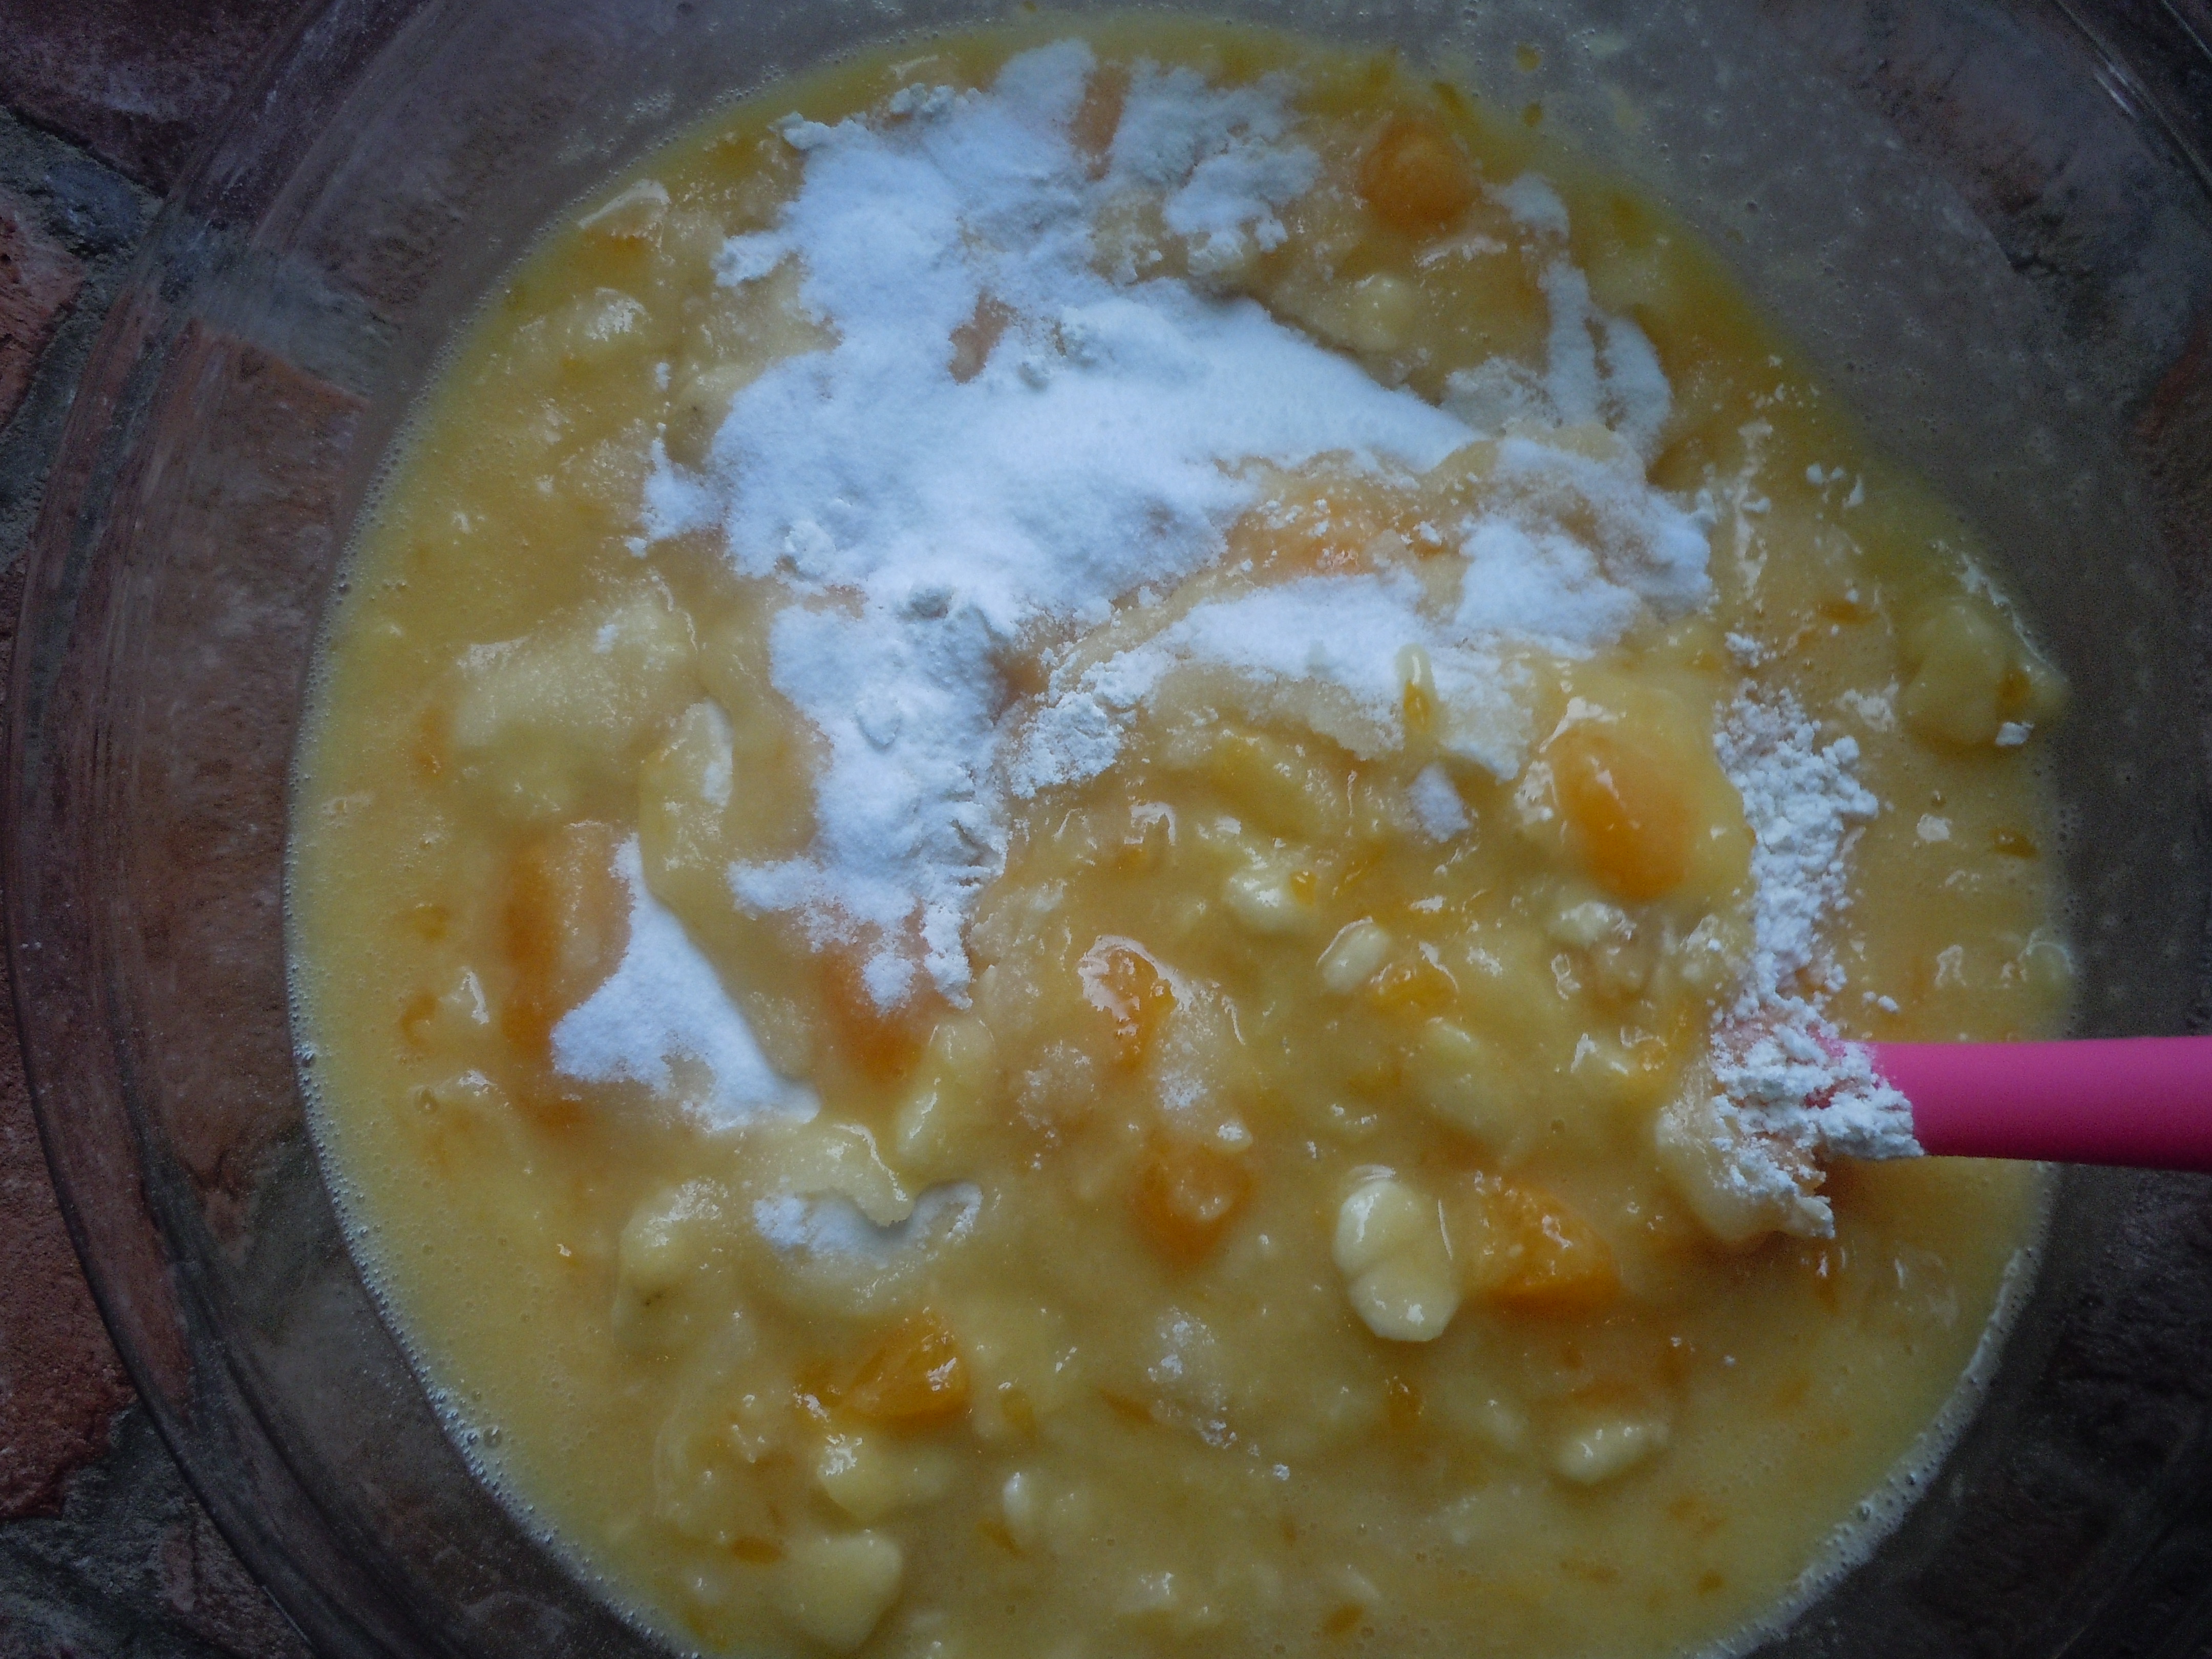
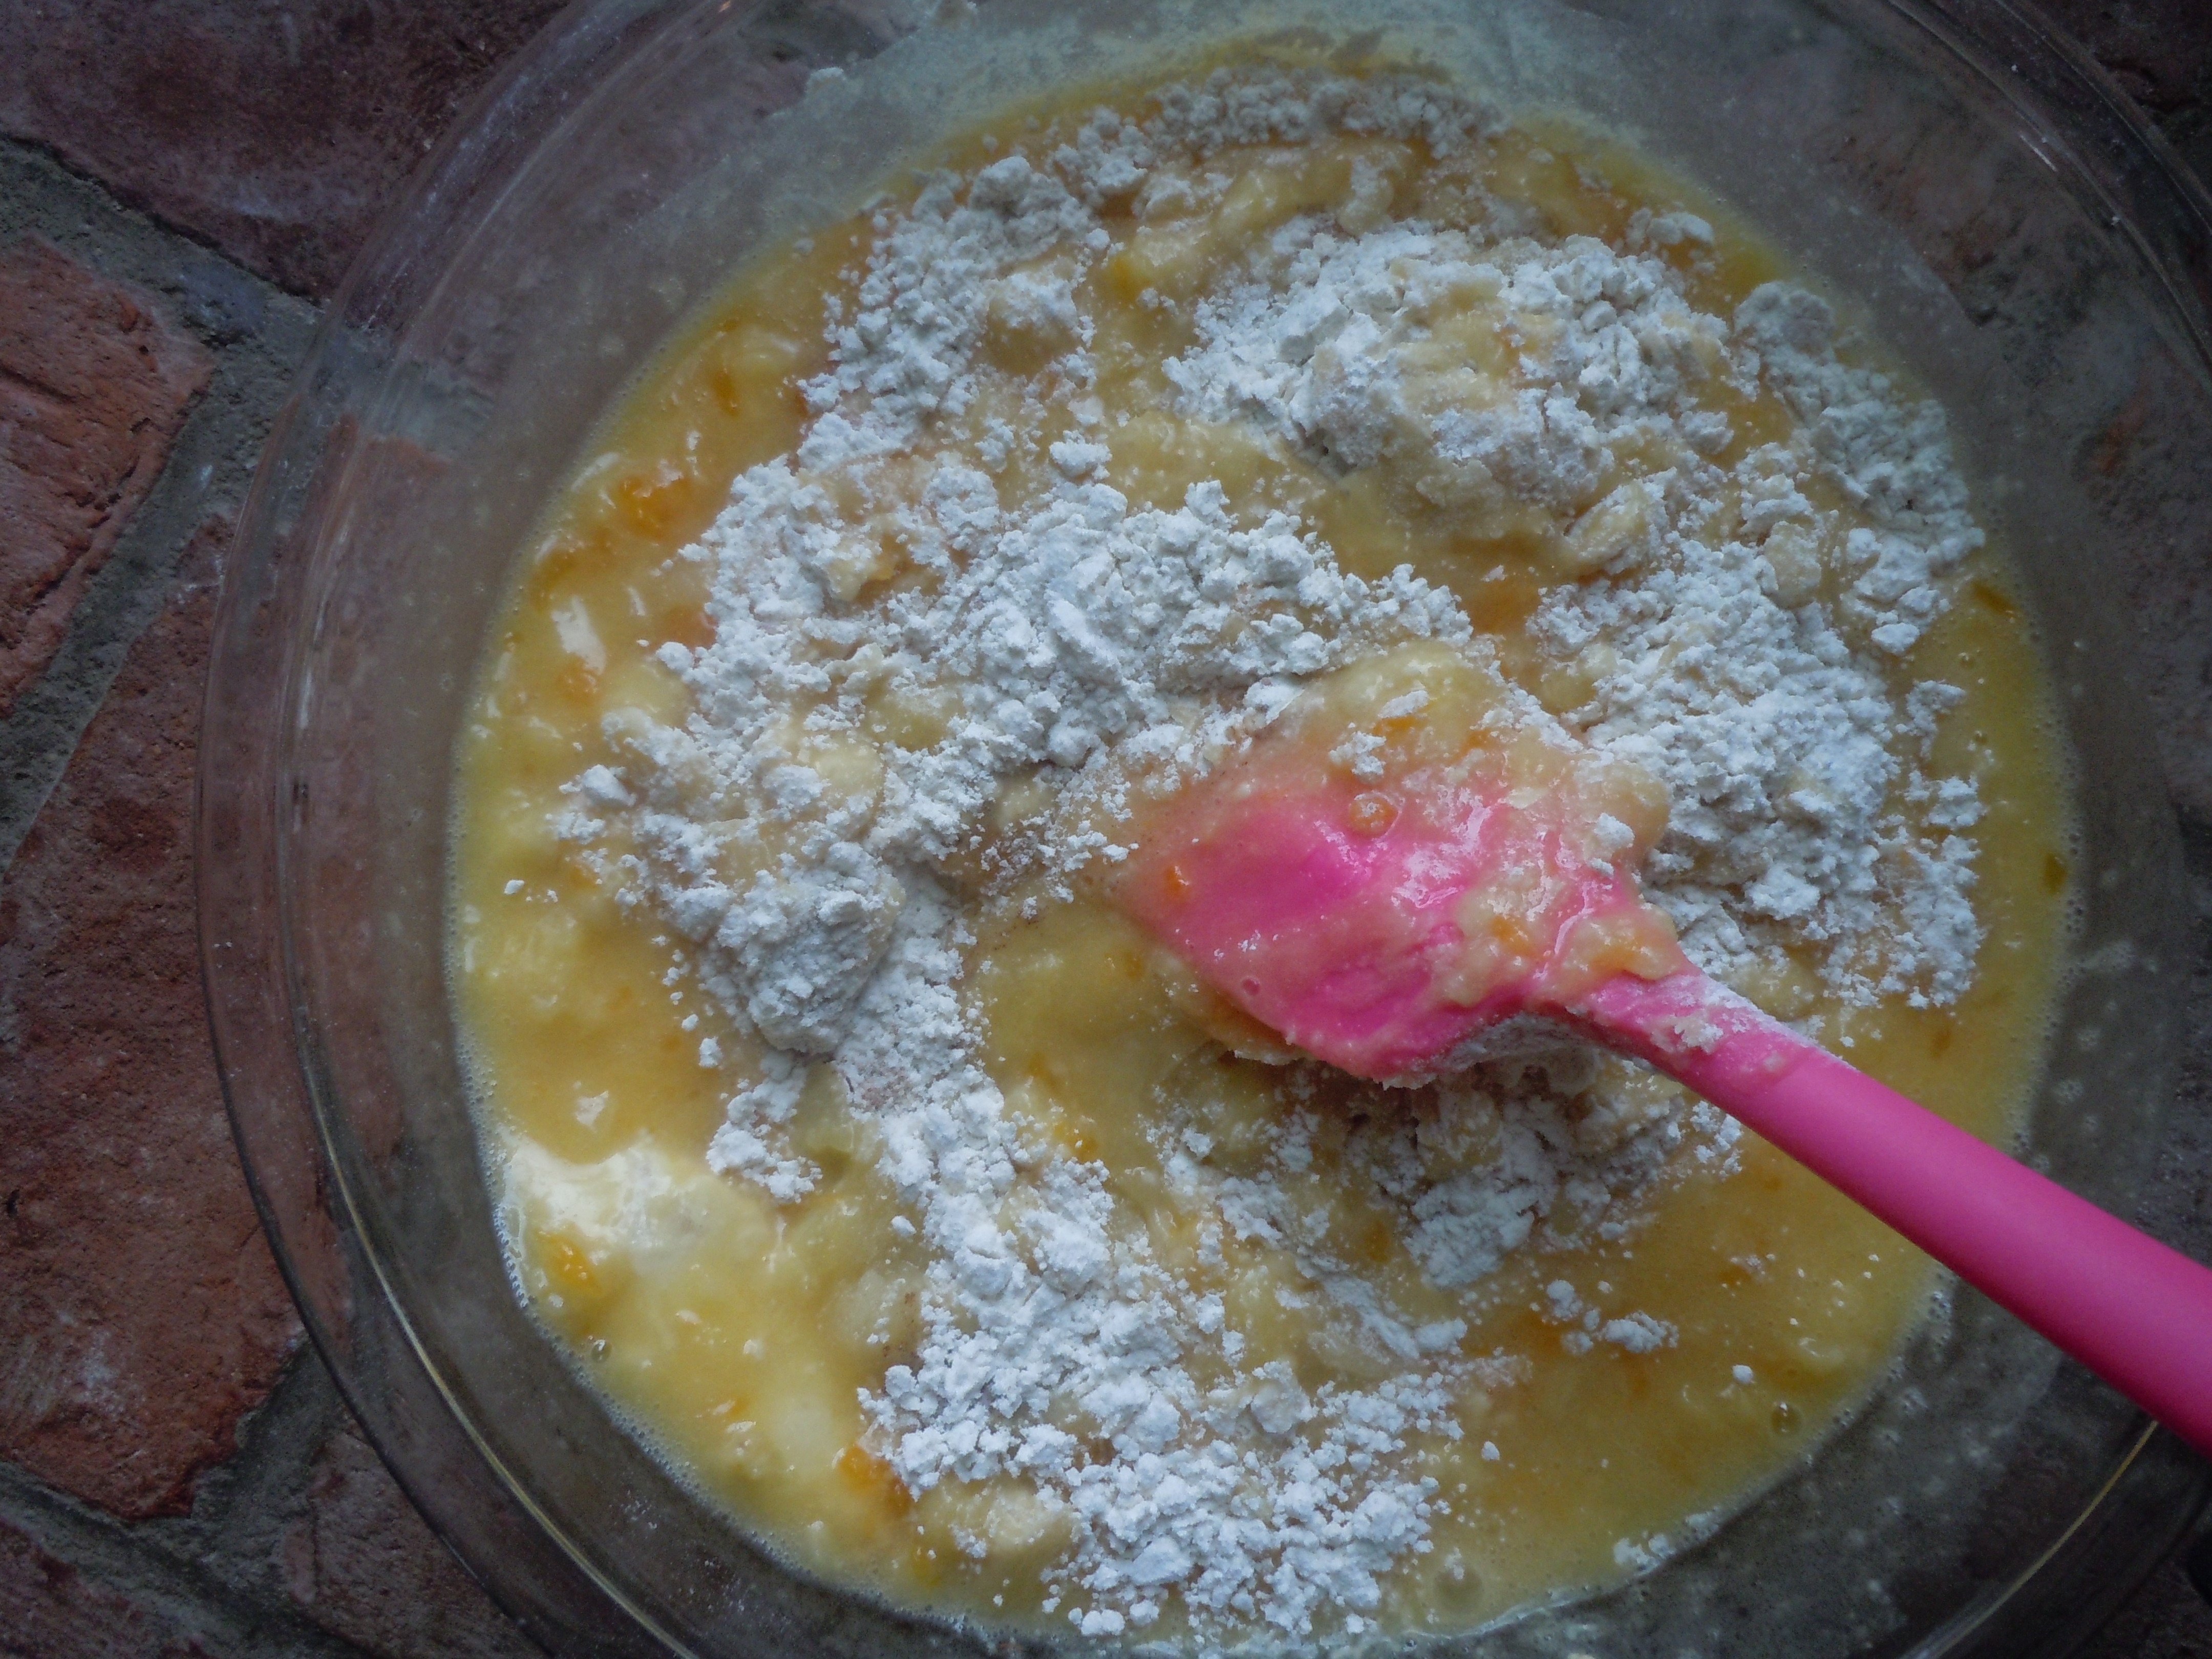
Put all the wet ingredients in another large bowl and gently whisk just to combine
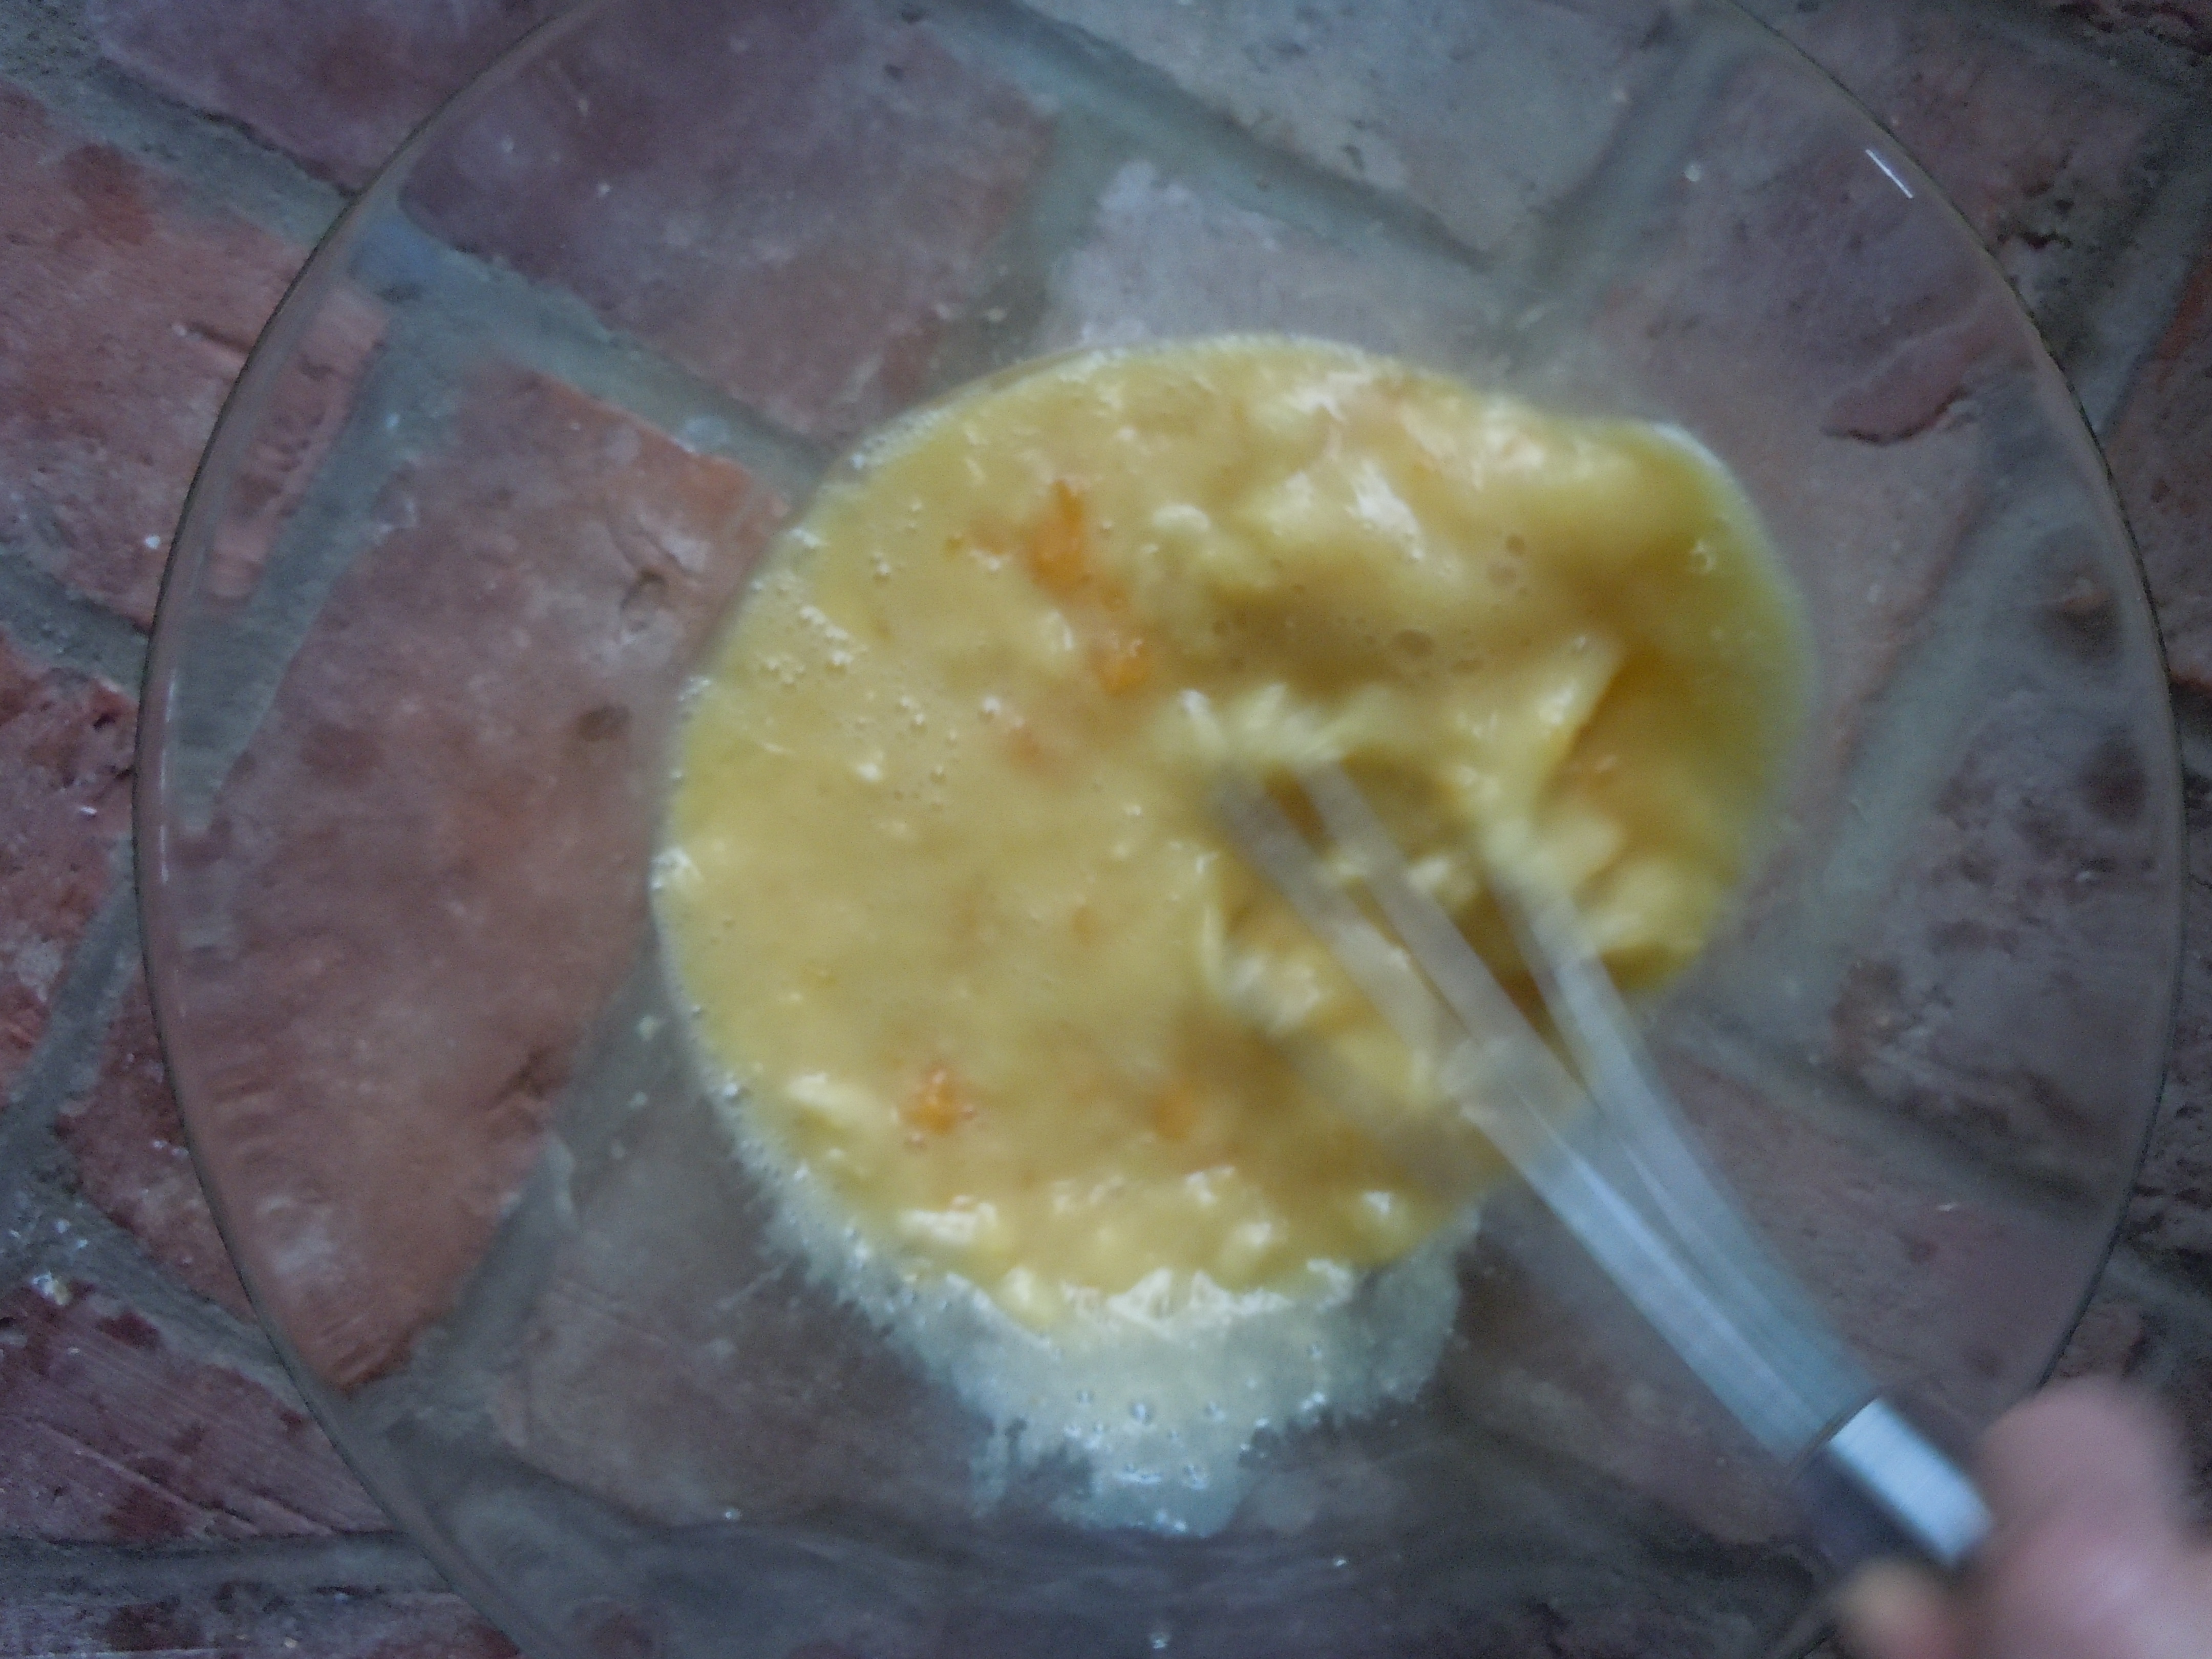
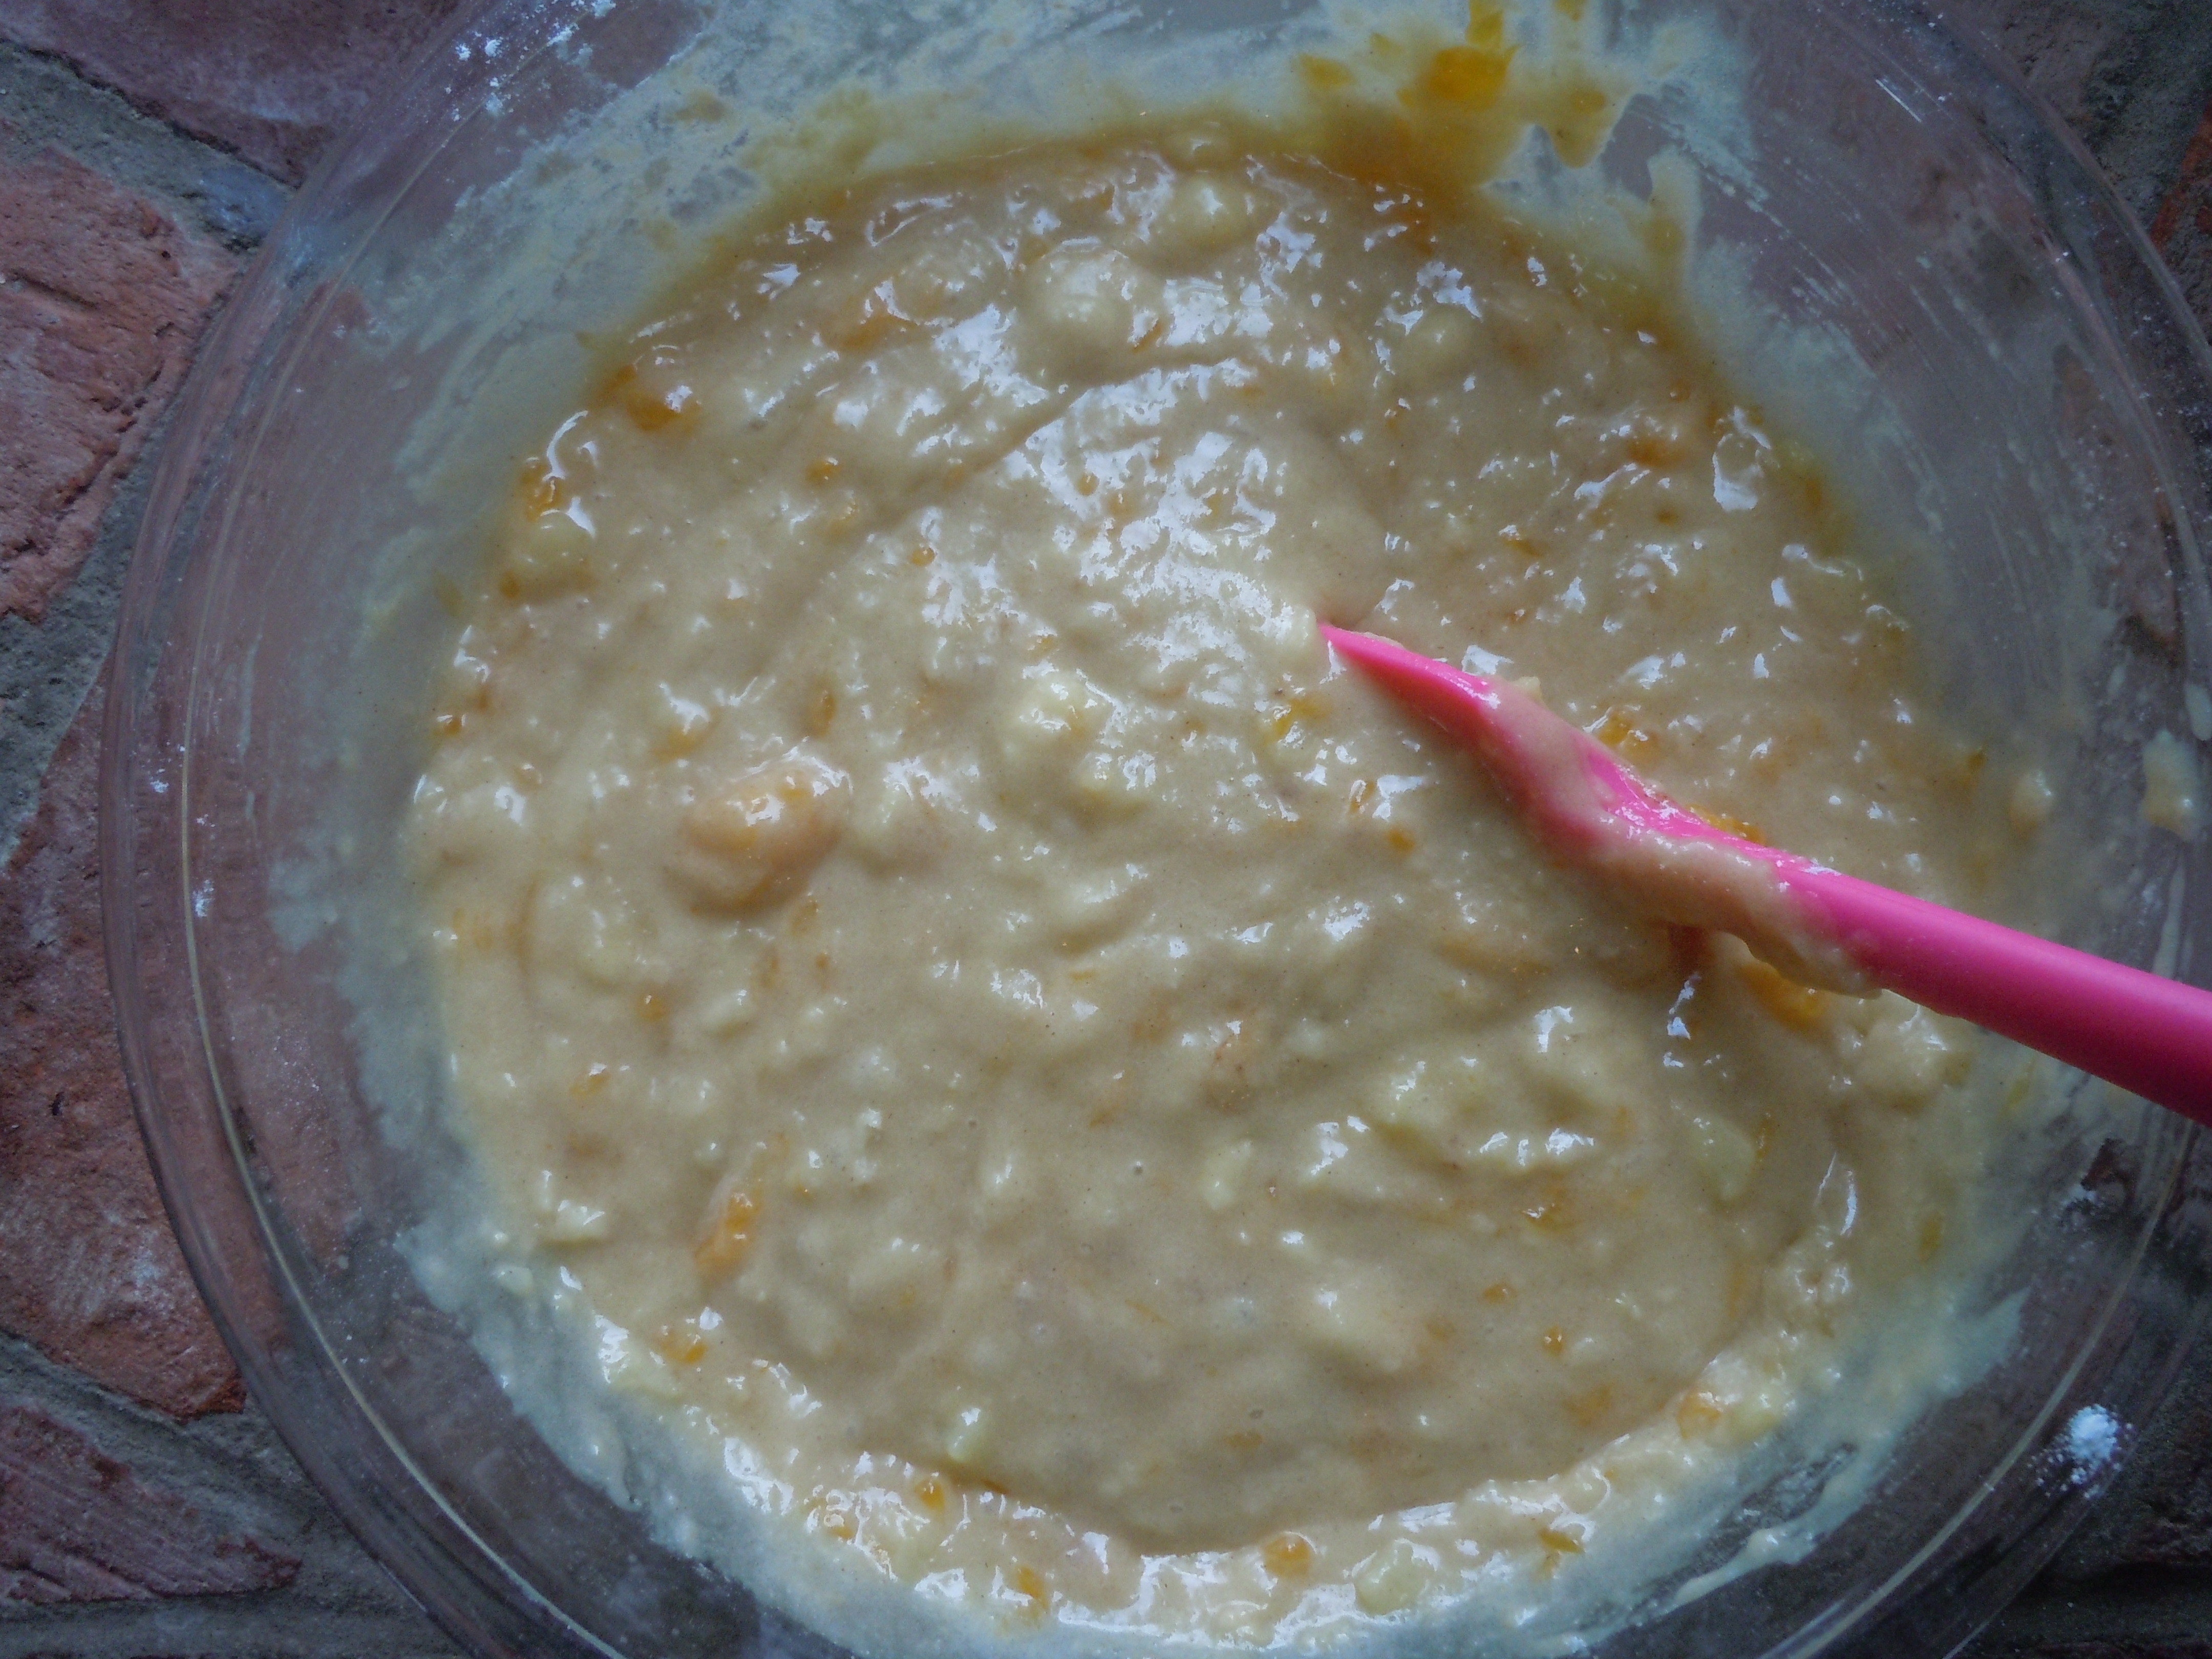
Add add the wet into the dry and using a spatula begin to stir to combine ingredients
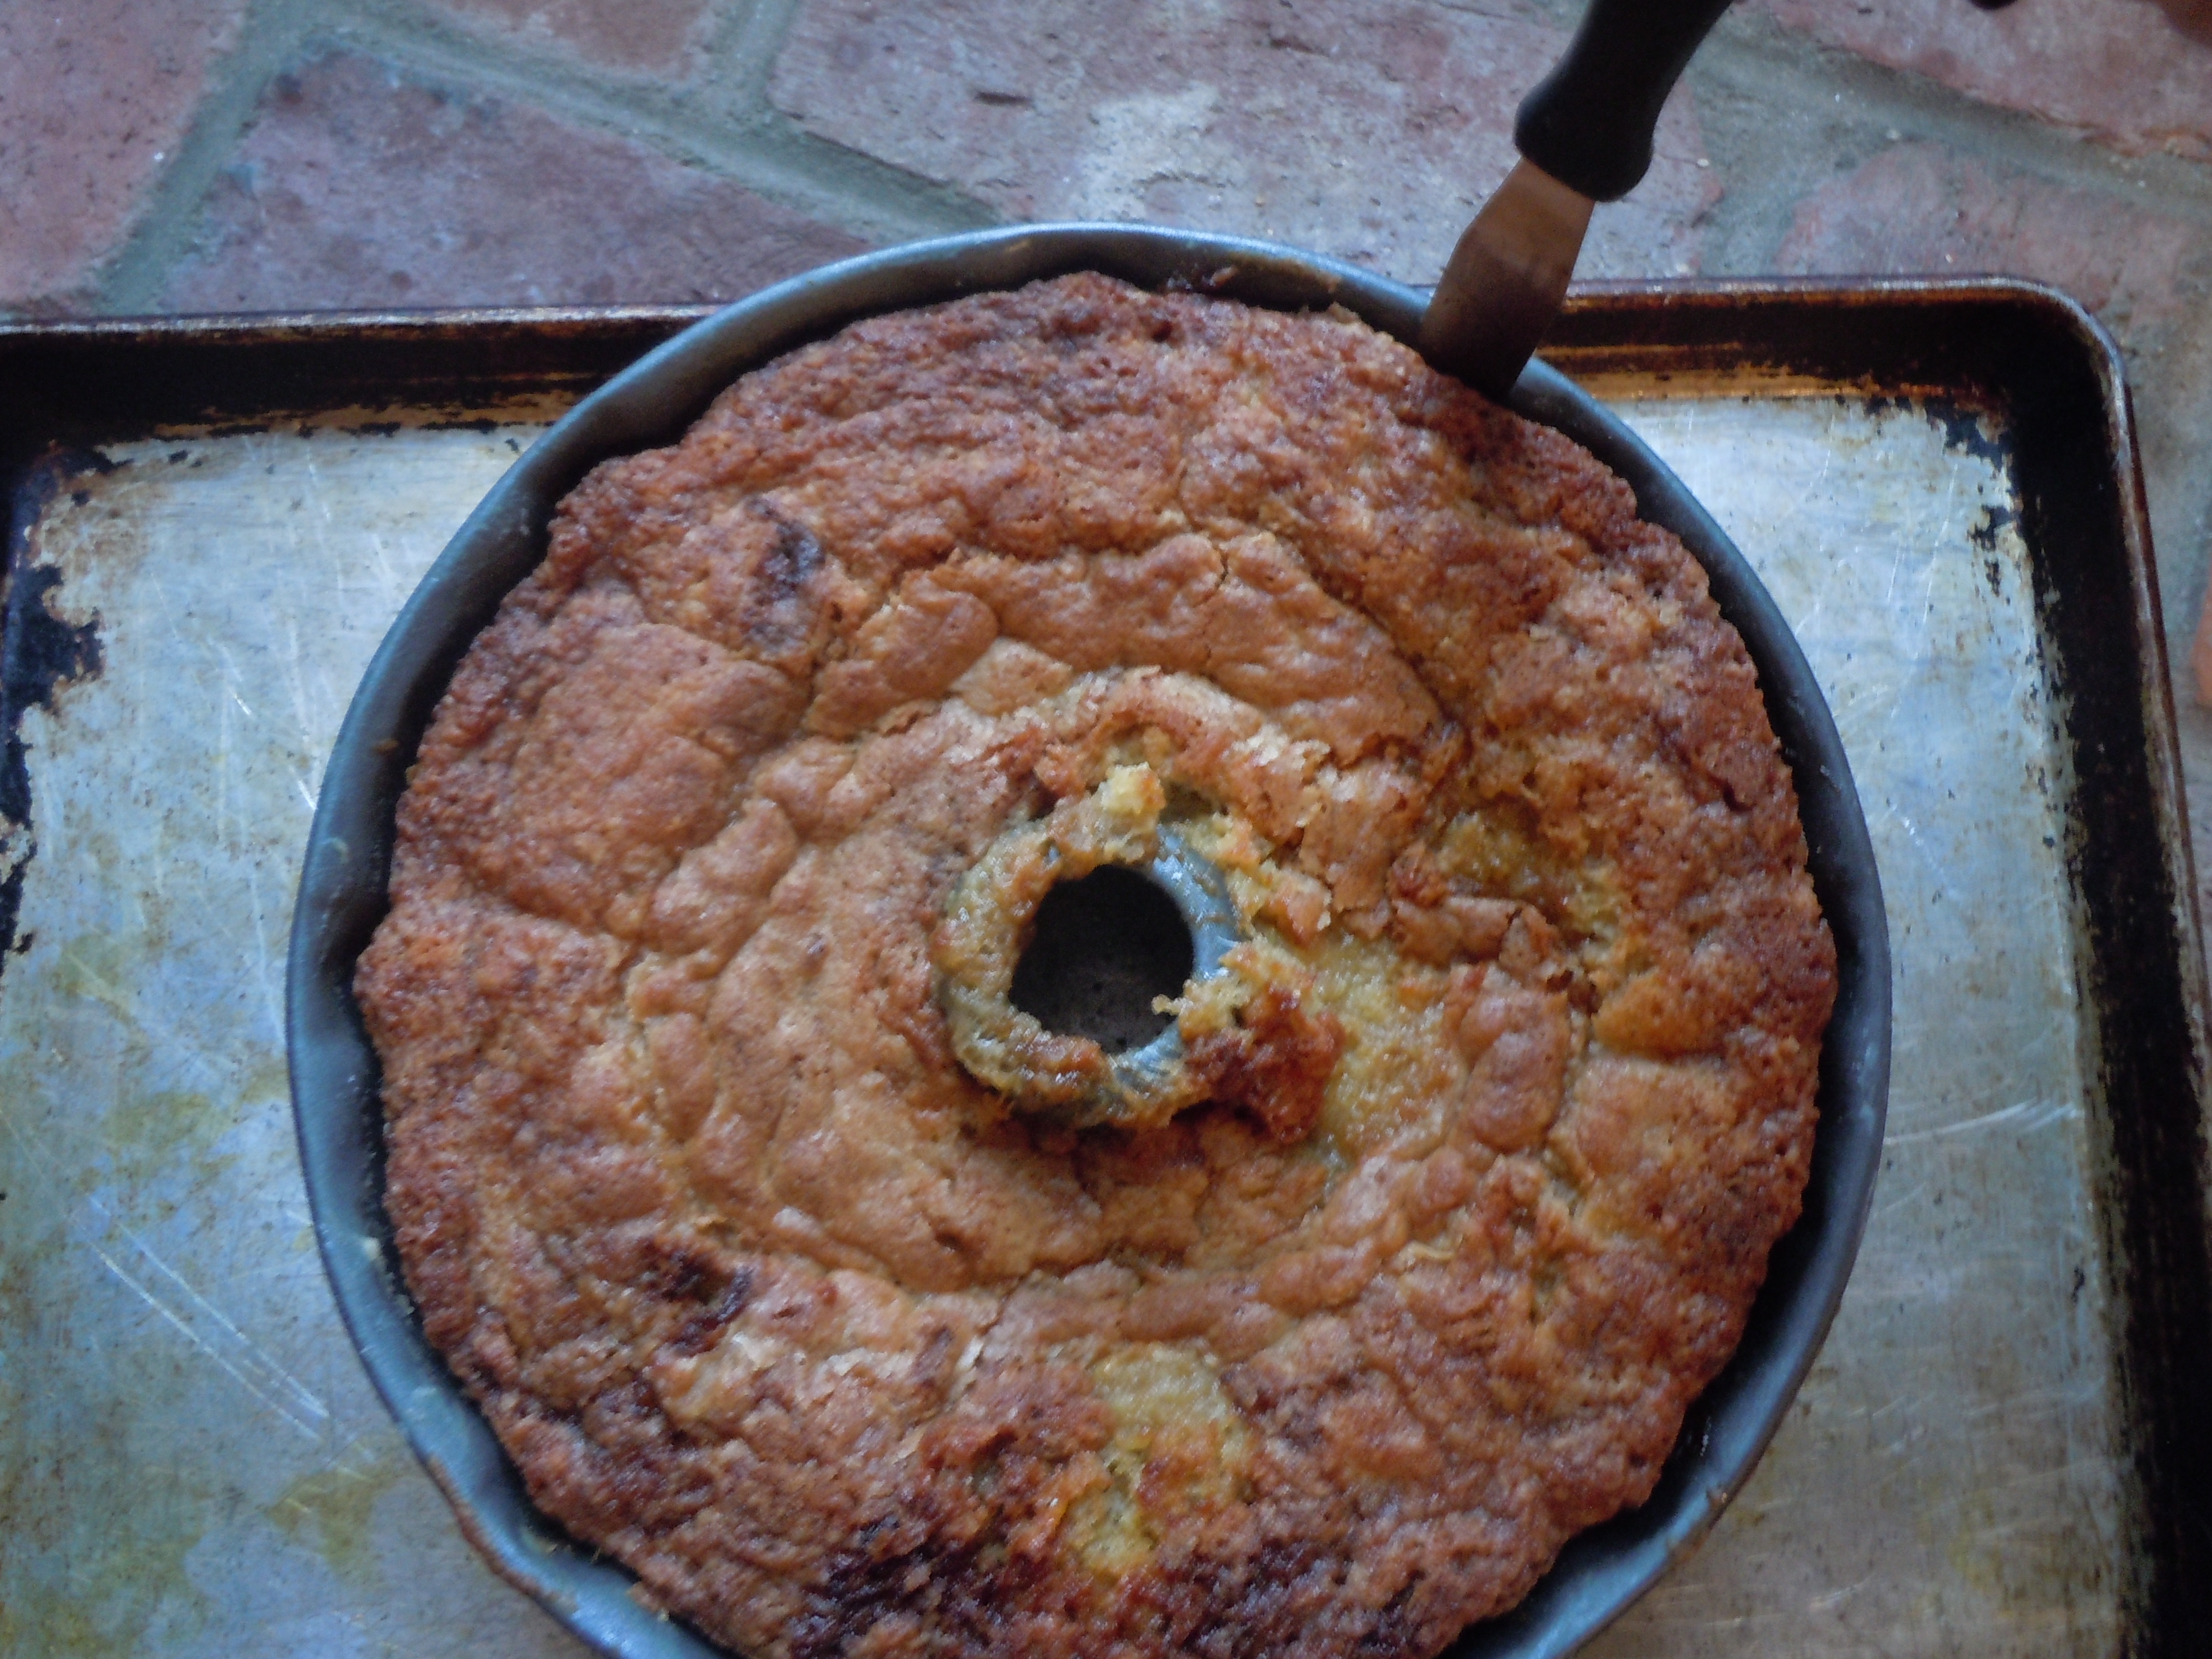
Put bunt cake pan onto a cookie sheet and place into the oven for 1 hour
Place a piece of foil over the top after about 40 minutes so it doesn’t burn
Take out and let cool 10 minutes
Run a bendy pastry knife around the edges of the bunt pan to loosen it up
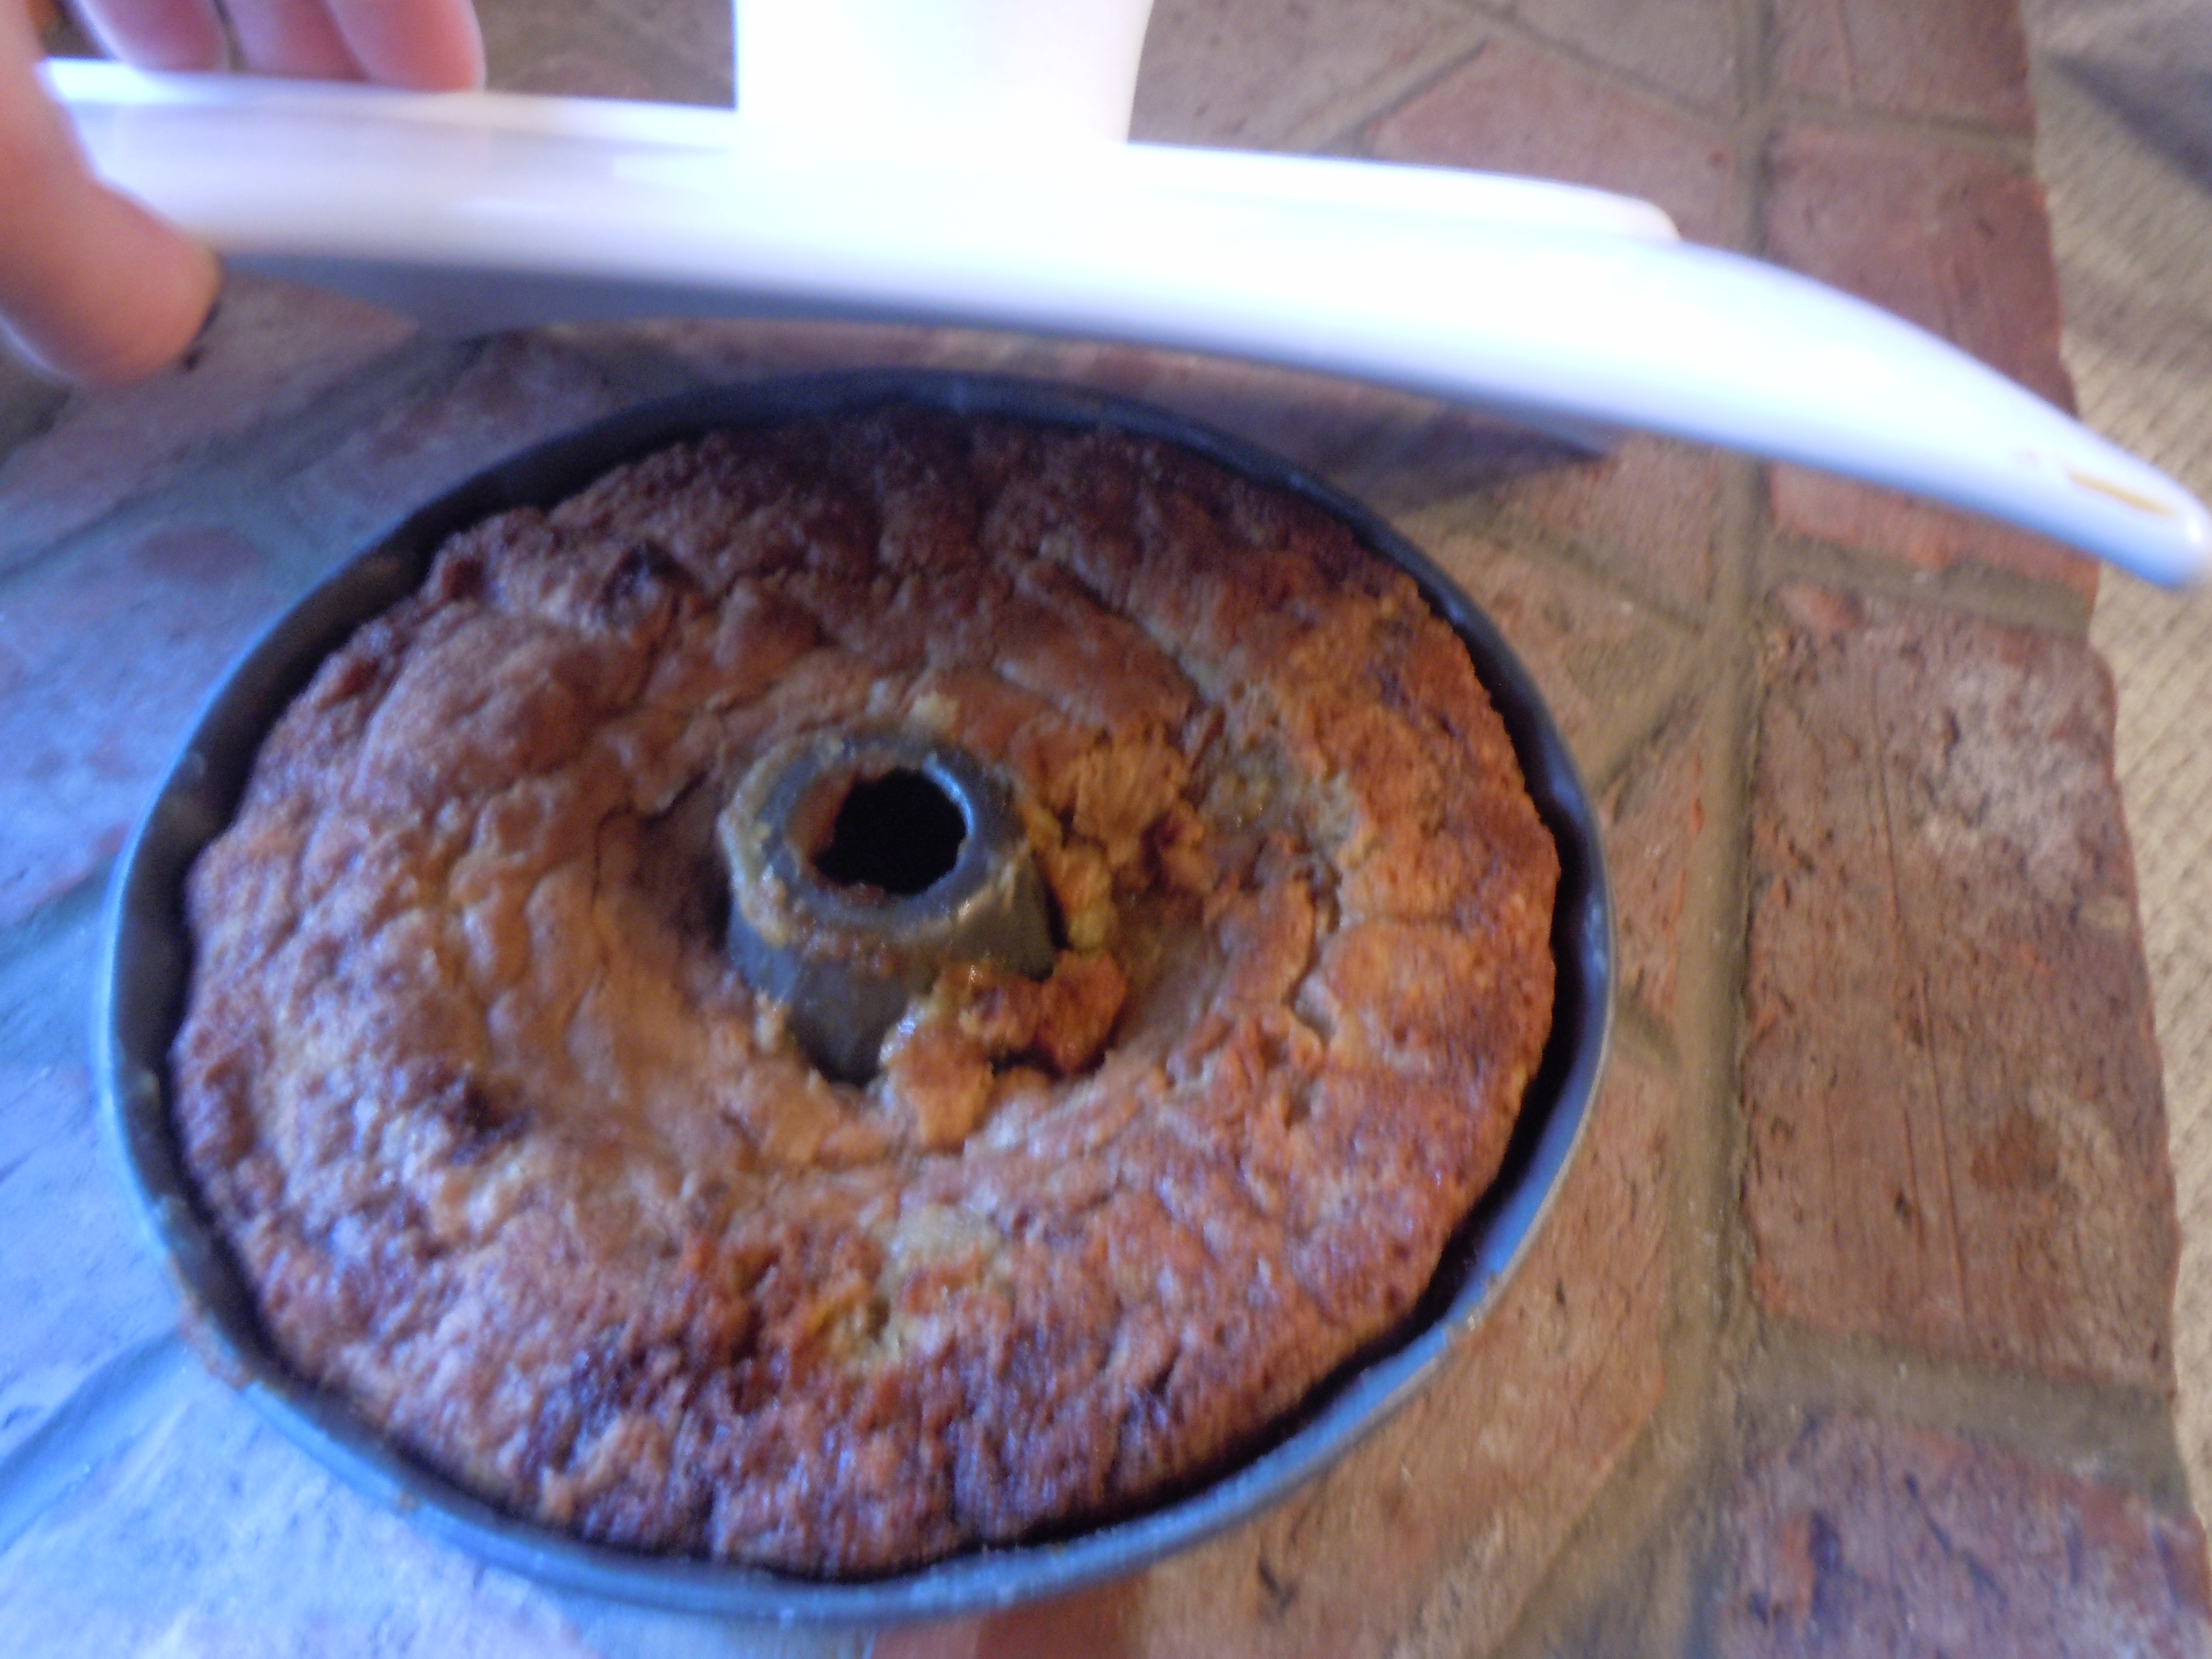
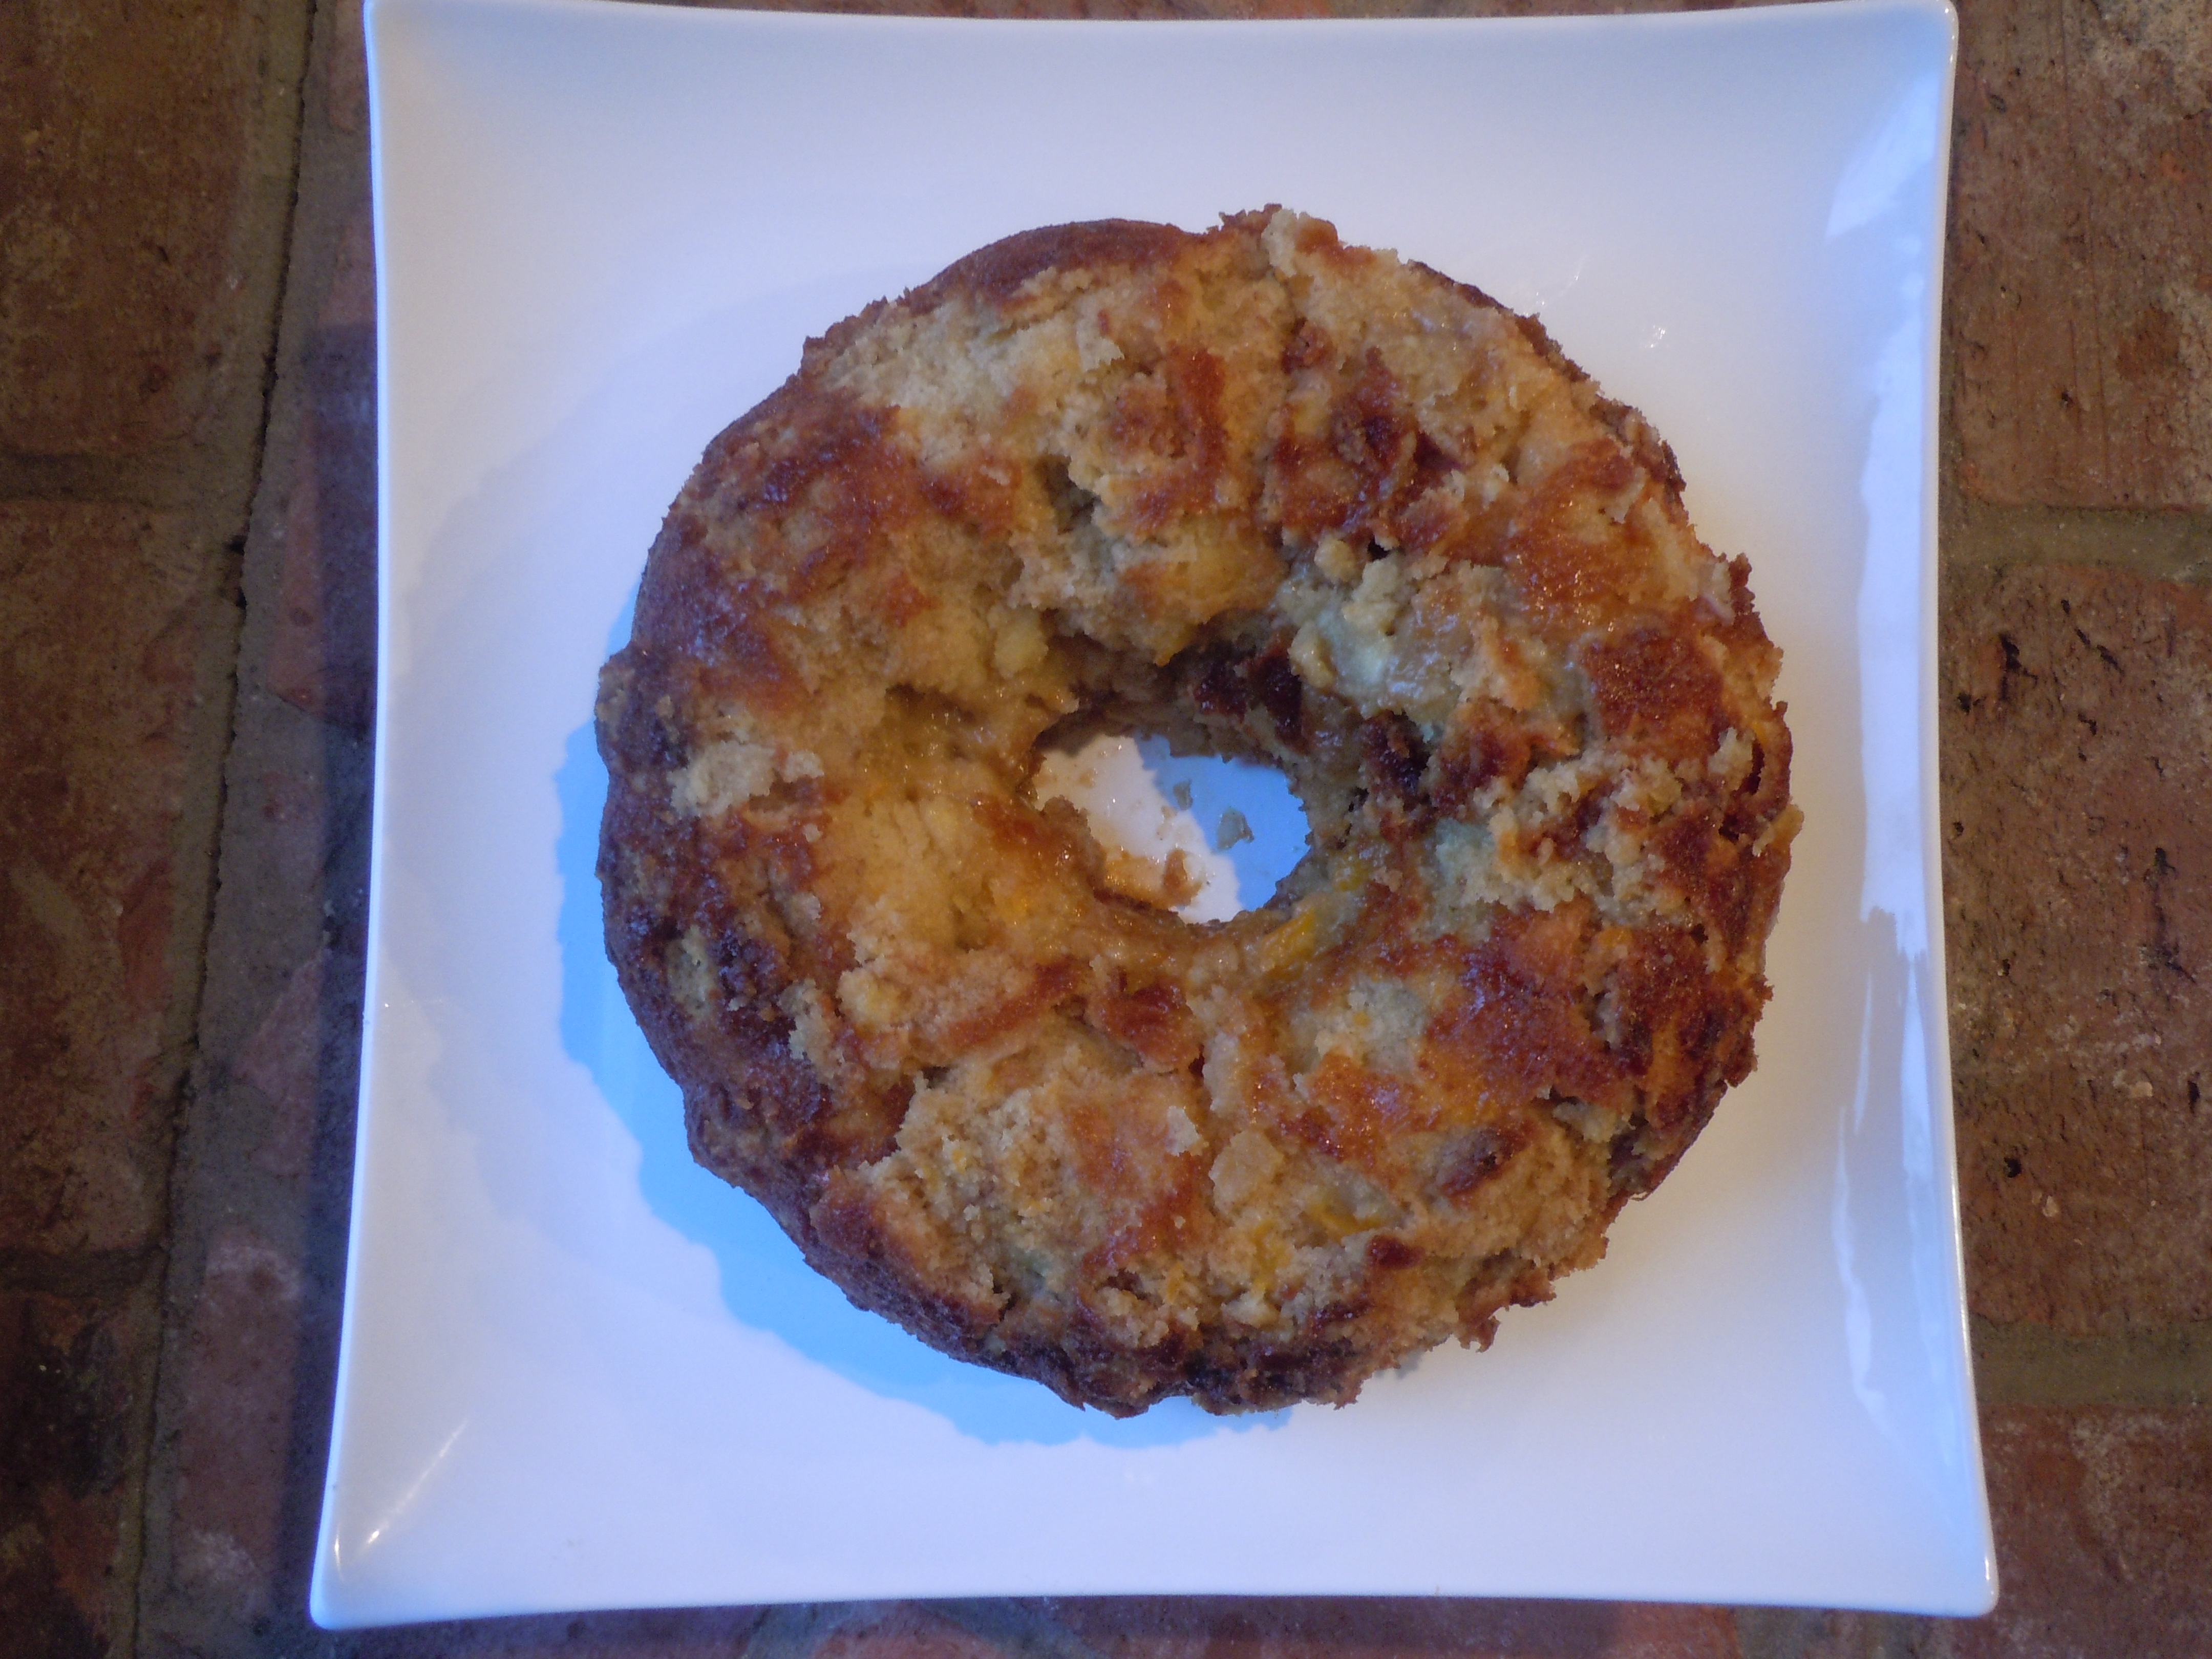
Lay a large cake dish over the bunt pan and flip the cake over
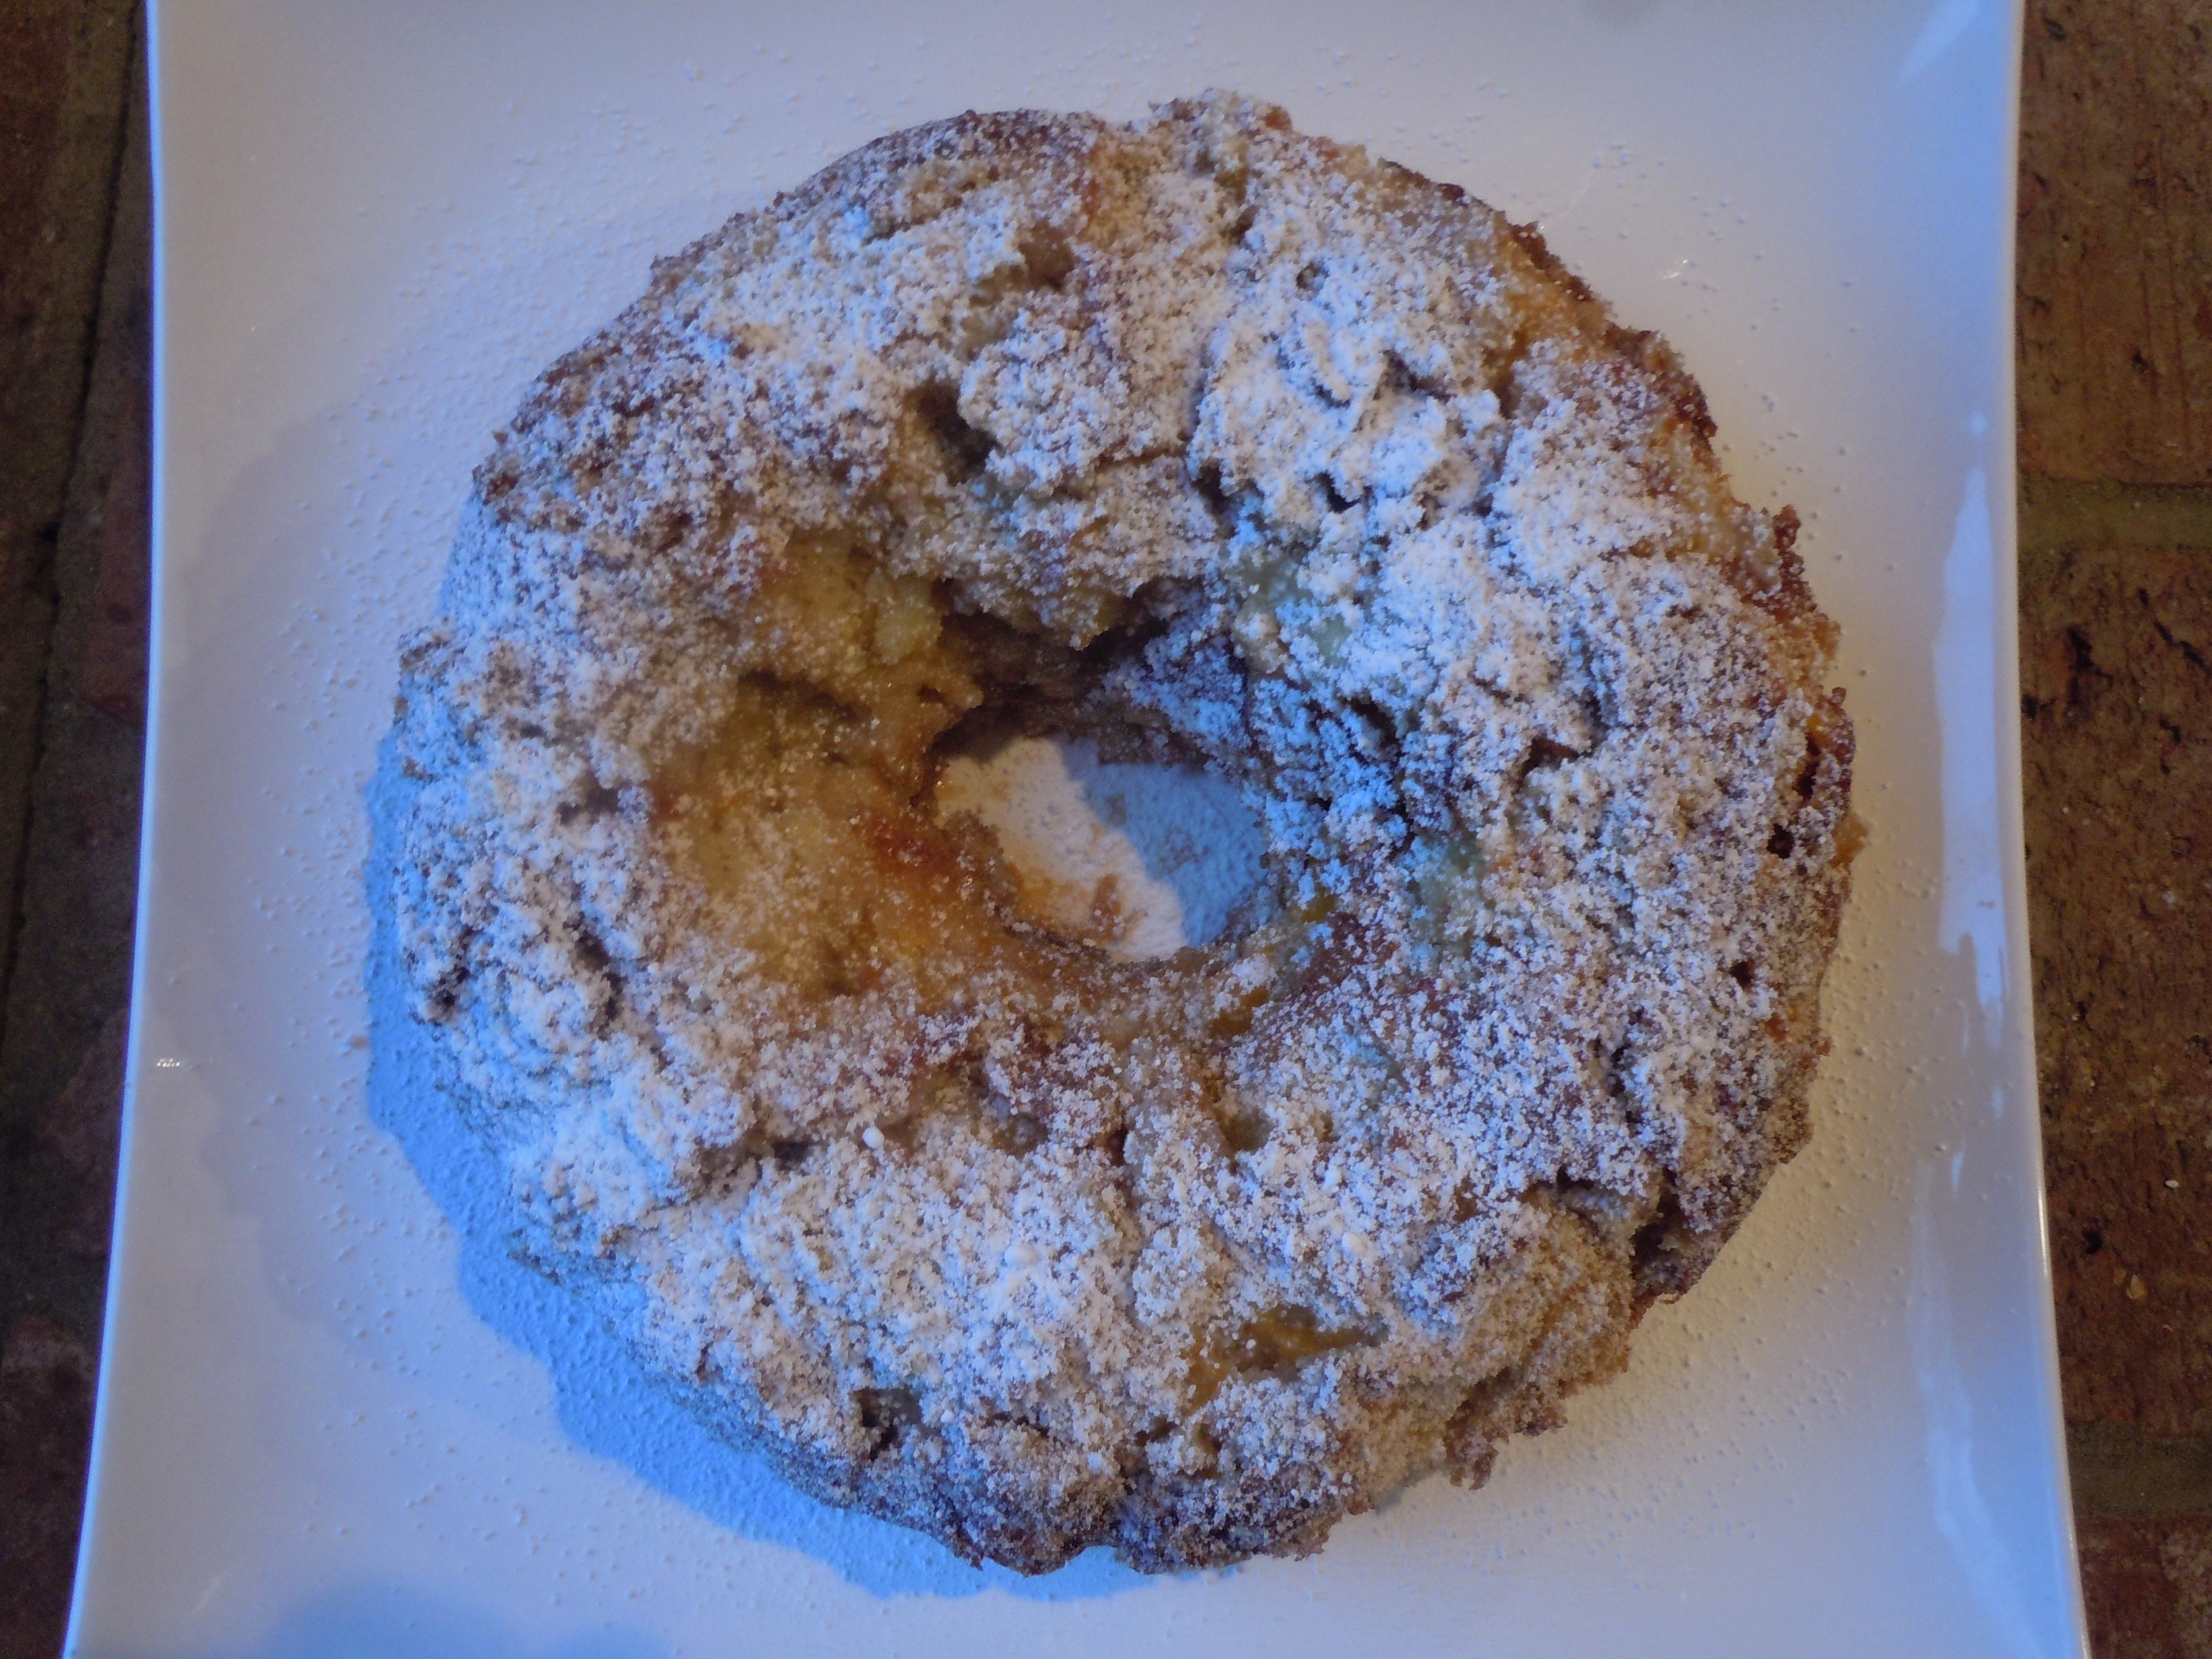
This cake is very moist and has bread pudding-like consistency so there may be some cake stuck to the bottom of the bunt pan after you flip the cake out…no worries just scrape any crispy or gooey parts off gently and put back onto cake top where it may be missing and you will also be sprinkling confectioners sugar over it
Put confectioner sugar into a sieve or fine mesh strainer and sprinkle onto cake
I like to serve this warm a la mode with Hood “Homemade Vanilla” ice cream
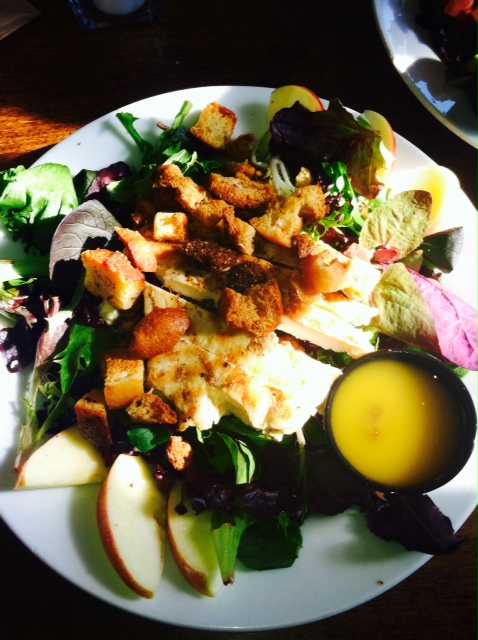
It’s so nice to have a local book store like R.J. Julia’s right in own own town of Madison, CT with a gourmet bistro to boot. R.J. Julia’s café serves freshly made soups, salads, sandwiches and paninis. The café also has a full espresso bar and we can’t forget those truly amazing cupcakes that come from from La Rosticceria in Guilford. Recently I was there and had their chicken and apple salad that came with a lovely balsamic-apple vinaigrette that was both tangy and fruity. The chicken was moist and flavorful and I loved the crumbled, sweet and creamy blue cheese. It went so well with the chewy cranberries, sliced chicken breast, and apples . Being a big crouton aficionado I adored their homemade croutons that they sprinkled on top of the salad too.
HAND CRAFTED SALADS COBB chicken, tomato, avocado, bleu cheese, bacon, egg 11
ROSTI goat cheese, dried cranberries, spiced walnuts 9
CAESAR romaine, chicken, shaved parmesan, caesar dressing, house croutons 10
ARUGULA fresh pear, bleu cheese, spiced walnuts, lemon dressing 9 SCOOPS your choice of one, two or three scoops of our freshly made tuna, chicken or egg salad over fresh greens with tomato and cucumber 6/8/10
CHICKEN & APPLE chicken, apple slices, dried cranberries, bleu cheese,
red onion, white balsamic apple vinaigrette 10
all salads come with house made croutons house salad dressings ~ creamy balsamic vinaigrette, white balsamic apple vinaigrette, lemon dressing we also have ~ asian sesame ginger, honey mustard and caesar

 I’m always thrilled to be back on CT Style and that’s where I was this past Friday with Ryan Kristafer & Kat Cosley sharing one of my favorite recipes, Mediterranean Chicken Kabobs made with Greek yogurt. This recipe originated from a show I taped at a beach house right here in Madison two years ago with my friend Maria. It’s delicious on the grill outside and I show on easy it is to grill indoors using my “Lodge” reversible cast iron grill-pan.
 Mediterranean meals which can be made ahead for a busy family,
 and green goddess sauce can be a great compliment to grilled steaks, pork or veal chops, scallops or any fish! These flavors really brighten up any dish.


 Giving my favorite
  In my opinion, finding a balance is the key to everything in life. Getting my dose of endorphins thru spin class at my gym, Funktion Fitness, is just as important to me as having a healthy go to energy drink. And not just any old healthy energy drink but one that’s as delicious as my Mango-Kale Smoothie! The best thing is attaining these things and enjoying yourself to the point where it just doesn’t seem like work at all!