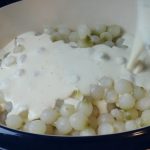
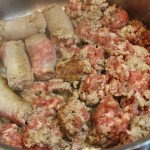
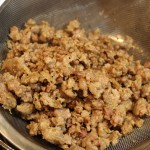
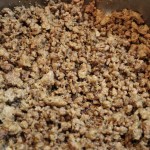
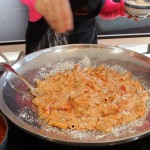
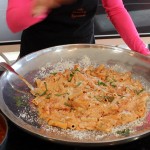
The Traveling Epicurean

Creamed Onions

Creamed Onions

Creamed Onions, inspired by my Grandma Reilly, are put together in mere minutes then baked in the oven until bubbly making for the perfectly saucey side dish. My secret ingredient in the creamed onions offers a suble flavor bringing together the heavy cream, half and half, white wine, chicken broth, and mild Emmentaler Swiss cheese.

The secret addition in these creamed onions that give’s this dish that extra special something is evaporated milk. A small amount of Emmentaler is the other delicate flavor. Emmentaler is a very mild swiss cheese with remarkable melting qualities usually found in fondue recipe’s. I never got the recipe from my Grandma but thru many yummy test runs figured it out and have been making this recipe for over 15 years.

I began reminiscing about my Grandma’s Reilly’s holiday dishes when Pem McNerney, Living Editor, for The Source and other Shoreline newpapers recently sent me an email with a list of questions pertaining to Thanksgiving asking me if I wanted to elaborate, I was happy to oblige. Look for the hyper-links below the creamed onion recipe to help with your Thanksgiving Dinner!

img_9378 img_9393 creamo

creamwine creamchix creamsandp

creamcorn creamemment

creambake img_9419 img_9450

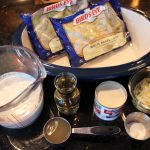
Ingredients for Creamed Onions:

  • 2 frozen bags (approx 2 lbs.) of white pearls onions 14 – 16 oz each bag
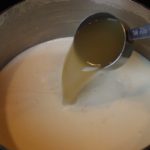
  • 1 cup heavy cream
  • 1/2 cup half and half
  • 1/2 cup white wine- chardonay
  • 1/2 chicken broth
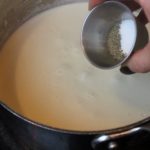
  • 1 small can evaporated milk (the 5 oz can)
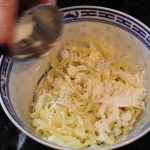
  • 1/2 cup grated Emmentaler Swiss cheese or Gruyere
  • 1 tbsp corn starch
  • 3/4 tsp sea salt
  • 1/4 tsp finely grated blk pepper OR white pepper

Directions for Creamed Onions:

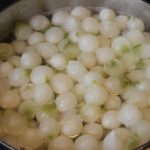
  1. Bring a pot of water to a boil and add frozen white pearl onions
  2. Bring back to a simmer, and keep simmering for 20 minutes
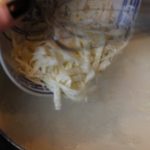
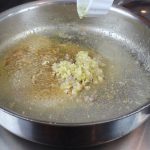
  3. Mix corn starch and Emmentaler cheese in a small bowl, set aside
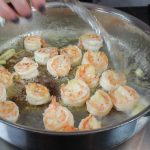
  4. Remove simmering pearl onions to the baking dish with a slotted spoon
  5. Drain water from sauce pan
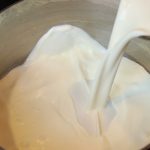
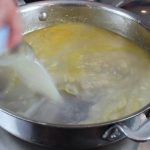
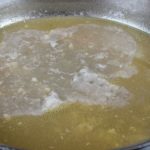
  6. Using SAME pan (no need to clean) add heavy cream, half and half, evaporated milk, chix broth, and salt and pepper and bring to a low bubbling simmer
  7. Whisk in Emmentaler cheese-corn starch mixture until combined, 20 seconds…keep whisking until melted in and then…
  8. Remove from heat immediately and pour over onions in baking dish
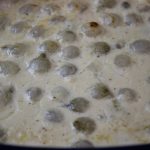
  9. Stir to even coating onions and bake for 35 minutes on 350º until bubbly, it will be golden around the egdes
  10. Note: Grilled ribeye or Filet Mignon, creamed onions and a drizzle of truffle oil is OUTRAGEOUS! Enjoy! 🙂
  11. NOTE: These creamed onions get even better when re-heated because the onions break down a little and melt into the sauce…MMM!

breads

iphone pictures 2419

iphone pictures 410

IMG_2658

blupie


Thanksgiving Memories

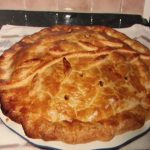
When I think of Thanksgiving many nostalgic memories come rushing in. It’s easy to do with all the aroma’s of this festive season.  The first fond memories I had of Thanksgiving were going to Grandma Reilly’s house having her homemade pies and creamed onions! The blueberry pie with a crispy, flaky crust and oozing sweet blueberries was my favorite. Her lemon meringue pie at a very close second. Not that her creamed onions didn’t leave a huge impression on me. Unfortunately, I never did get her pie crust recipes but have spent many hours fooling with pie crusts until I got it right, my “perfect pie crust in 5 minutes” with a “blueberry pie” filling to emulate her’s! –  https://thetravelingepicurean.com/perfect-pie-crust-in-5-minutes/  and  https://thetravelingepicurean.com/best-blueberry-pie/ .

The hard thing about Thanksgiving is there are so many dishes to make it can be exhausting. There’s the dilemma of which one’s are tradition, which one’s your favorite and can I eliminate any of them? The best answer is don’t be a control freak or a kitchen hog and have everyone join in doing their part, laughing, mixing, tasting, working along side of you. It’s ok to delegate out some of those tasks. Then it doesn’t seem like work at all! This being said, one Thanksgiving in particular comes to mind. Years ago while living in San Francisco my dear friends Lisa, Bobby, Pam and John came out West with their children and parents to visit more family and invited us to stay with them as well.  

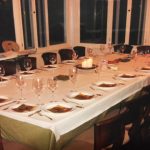
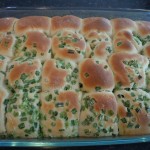
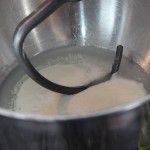
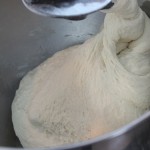
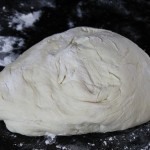
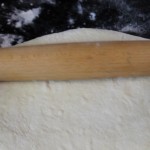
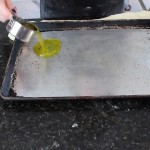
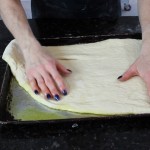
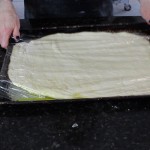
This was a grand occasion, not only was I excited to be with my nostalgic East coast friend’s for this Thanksgiving holiday but they rented out The Historic Spreckels House in Sonoma, CA. It was breathtaking! We went wine tasting, played football on the grounds, and read lots of storybook’s to the little ones. The lasting impression for me here was all the fun we had in the kitchen. We all pitched in together to make a gourmet Thanksgiving dinner that could have been a scene from a Norman Rockwell painting. My contribution to the dinner were my “Easy Icebox Dinner Rolls” that I dredged in chopped green onion and fresh rosemary. Nothing like adding to the aroma’s of roasted turkeys then with that of fresh baked breads. – https://thetravelingepicurean.com/easy-icebox-dinner-rolls-2/

The great thing about these icebox rolls is you can make the dough 4 days ahead. I call that brilliant! It’s key to staying sane on a holiday like Thanksgiving. These rolls have turned into tradition for me and my family, a dish that everyone asks about when ever they arrive. My friend Laura, and loyal Traveling Epicurean follower from Carmel, California will text me pictures of her “easy icebox rolls” every Thanksgiving. She writes, “it’s a family tradition and traditions create memories that last for generations.”

The most important thing about preparing for a holiday like Thanksgiving is timing. For instance, the pie crusts can easily be made a month ahead and put into the freezer. Take them out two days before to thaw. Roll them out, get them into your pie dish and back into the fridge until the night before when you can put together filling’s and bake.

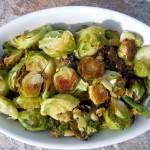
Roasting the brussel sprouts on a cookie tray with chopped garlic, a drizzle of olive oil and a sprinkle of salt and pepper is another time saver. Set aside after roasting in a heat proof serving dish and warm right before sitting down. This is the most delicious way I have ever had brussel sprouts. Once you try this way you’ll be hooked. – https://thetravelingepicurean.com/best-brussel-sprouts-ever/

My tip of the day: “Wondra flour” for your gravy is a God send! Don’t waste your time fussing with a roux! Is it too lumpy, will it dissolve, is it too thick, did the raw flour taste cook out? Forget about it… Wondra dissolves immediately and gives your gravy a luscious sheen in mere minutes. Yeah!

It’s funny because most of my friends who came out to stay with me when I was living in San Francisco knew they were to bring a tub of Mashmallow Fluff and a shrunk-wrapped pizza from Modern Apizza in New Haven. A couple of my favorite’s that you couldn’t get out there. Yet, the side dish that baffle’s me the most on Thanksgiving is the marshmallow’s on sweet potatoes. It’s something i just can’t wrap my brain around. The fact is, my confusion of why someone want’s marshmallow’s baked on sweet potatoes doesn’t really matter because this dish has been around since the early 1900’s. It is a tradition for many family’s on Thanksgiving. That to me say’s it all. Now nuts in cranberry sauce? I won’t even go there.

How I love this holiday and sharing other friend’s traditions with my children. Last year my kids and I had a blast on Thanksgiving meeting my family out at  an early Thanksgiving brunch, then it was off to my friend’s Marco and Sheryl’s Lathrop Manor in Norwich, CT, where they also reside. At dinner time we sat down with a house full of their relatives and friends to Marco’s gourmet dinner. His buttery mashed potatoes were over the top!. Conversation at dinner had my kids learning about Benedict Arnold and Connecticut history. Come to find out Arnold actually lived in this Lathrop Manor in the seventeenth century working as an apprentice to the Lathrops, the first apothecary in Connecticut…in this part of the world! Their Lathrop Manor is being remodeling right now but you can check out this very cool house in one of The Traveling Epicurean shows called “Salmon B.L T’s at Marco’s” – https://thetravelingepicurean.com/gourmet-salmon-b-l-t-sliders-at-marcos/

This Thanksgiving I am looking forward to going to my parents house early. Having them spend time with my children, seeing my brother and his family, then off to dear friends for a second round of festivities later on! Making more fun memories unique to each one of us! Family, friends and food bringing us all together once again. May you be thankful for having the chance to spend precious time with your family and friend’s this 2016 Thanksgiving Holiday!!

Warm Holiday Wishes,                                                                                                                               The Traveling Epicurean                                                                                                                             Michel Vejar

Thanksgiving Pictures of The Spreckles House in Sonoma, California

img_3486-1 img_3477 img_3479-1

img_3475-1 iphone pictures 702 img_3485-1

img_3487-1 img_3482-1 img_3498-1

spreck sprecgof img_3495

Feta-Basil Pesto

Feta-Basil Pesto

No doubt about it once you try this feta-basil pesto you will be hook! The creamy, French sheep’s milk feta pushes this pesto into a whole new arena! Combined with the fresh, floral basil leaves, Italian Reggiano Parmeggiano, extra-virgin olive oil and garlic are a creation that’s just born to go together! Done in mere minutes in a food processor there’s no excuse not to make this delectable sauce bursting with flavor every chance you get!

Making fresh feta-basil pesto can’t be any easier then the convenience of your food processor! There’s no need whatsoever lugging out the ole mortar and pestle making a huge project out of something that literally take’s 2 minutes to make. No cooking, no baking, no washing, NO FUSS, just load up the food processor and pulse. Voilà, you have a gourmet sauce that turns around any dish you add it to into gourmet.

One of the appetizer’s I like to make with feta-basil pesto are Crostini with Fresh Mozzarella and Roasted tomatoes. Let’s not forget to try the feta-basil pesto on seared Scallops, Swordfish or even Sweet Potato Fries! And then there’s the obvious, top EASY PEASY pasta or Zucchini spaghetti with the feta-basil pesto and you feel like a king. Any way you look at it this feta-basil pesto is a no brainer, a win-win situation! So get on it! lol … xoxo

IMG_7288 027 IMG_0668 fetapesto IMG_2418

img_8522 fetagar fetapulsejpg

fetareggiano fetafeta fetapulsejpg

fetahot img_8558 img_8565

pestcrostini IMG_2026 IMG_6818

Ingredients:

  • 1/2 sheep’s milk feta cheese – from local cheese shop if you can! It’s the star of the show!
  • 2 packed cups – fresh basil leaves
  • 1/4 packed Reggiano Parmasan – freshly grated if you can
  • 1 extra lg OR 2 medium garlic cloves put thru garlic press
  • 1/4 cup PLUS 1 tbsp extra-virgin olive oil
  • salt and pepper to taste
  • a few dashes of your fav hot sauce

Directions:

  1. Place 2 packed cups of basil, 2 tbsp of olive oil, garlic thru garlic press, a sprinkle of s & p in food processor and pulse 6x
  2. Scrape down sides and add in Reggiano Parmesan and sheep’s milk feta and pulse 4x more
  3. Scrape down sides and add in a few dashes of hot sauce
  4. Drizzle in thru top opening of food processor 3 more tbsp of extra-virgin olive oil and pulse 3x more …voila you have feta-basil pesto! It’s as easy as that! 🙂
  5. Add this feta-basil to Crostini with Fresh Mozzarella & Roasted Tomatoes for an appetizer that’s sure to turn heads!
  6. OR EASY PEASY …Add the feta-basil pesto to some sautéed shrimp and pasta! YUM!

Salsa 101


Salsa 101

When you learn to make my basic salsa 101 there will be no stopping you! It’s packed with flavor from the juicy summer tomatoes, sweet Georgia Vidalia onions, add in some fresh squeezed limes, chopped cilantro and jalapeño and you have yourself a fiesta!

When you know how to make a basic salsa the world your oyster! No food pun intended here, but seriously! From this salsa 101 recipe you can totally make it yours by adding in 1/2 cup of avocado, mango, pineapple or even cucumbers. Don’t be afraid to try adding your favorite’s to the basic recipe because that is how you learn to create, to taste different flavors. You can even try adding 1 cup of black beans to the salsa! YUM! Have fun and enjoy:)

Adding in the extra virgin olive oil and “seasoned” rice wine vinegar with the fresh squeezed limes keeps my salsa delicately balanced where one flavor isn’t over powering another. I love using the Georgia Vidalia onions because they are so sweet! If you are not a big onion fan these will surprise you for sure. You could also cut back on the amount of chopped onions even though I believe it’s a perfect amount in my salsa 101 when “finely” chopped. The beautiful thing about the salsa 101 recipe is you can use what ever tomatoes you want from heirlooms, to grape, to cherry, tiger tomatoes …what ever your little heart fancies!

You should try  Pulled Beef Taco’s to go with my salsa 101, or Zucchini Spaghetti, Roasted Garlic Bean Dip, or even Homemade BBQ Sauce on chicken wings and then end it with Drunk Blondies & a Bourbon Caramel Sauce and you will be The Belle of the Ball at your party!

IMG_3234 zucspaghetti dipshrimp IMG_7091 IMG_6622

IMG_7440 salsaonion salsatom

salsajala salsacilan IMG_7458

IMG_7475 IMG_7479

Ingredients:

  • 2 heaping cups – (12 Compari tomatoes-these are a med/small size, can use Heirloom tomatoes, cherry, grape …your favorite tomato!  finely chopped
  • 1 packed cup – 1/2 of extra large Vidalia onion finely chopped
  • 2 tbsp – 1/2 lg jalapeño extra finely chopped
  • 1 cup cilantro coarsely chopped
  • 2 tbsp extra virgin olive oil
  • 1 tbsp “seasoned” rice wine vinegar
  • 2 tbsp fresh squeezed lime juice – 1 lime
  • 1/2 tsp sea salt
  • 1/4 tsp pepper
  • OPTIONAL: dash of Siracha Hot Sauce or Franks or Tabasco

Directions:

  1. Finely chop tomatoes, Vidalia onion, jalapeño and cilantro
  2. Add to a large bowl
  3. Roll lime to get the juices flowing and squeeze over chopped veggie’s
  4. Add s & p, olive oil and seasoned rice wine vinegar
  5. Toss and serve with chips, chicken, fish, beef or pork!
  6. NOTE: Now that you have an incredible tasting basic salsa be creative and add 1/2 cup of chopped avocado, mango, pineapple, black beans, or cucumbers…Mangia Mangia!

Seared Scallops

Seared Scallops

Seared scallops are so gosh darn delicious you really don’t need anything else to accompany them. They have a succulent and creamy texture that’s so tender they melt in your mouth when cooked correctly. All that is needed to sear sea scallop’s is a hot non-stick pan, a couple tablespoons of olive oil, butter for basting at the end, a squeeze of fresh lemon and violà, you have an amazing seafood dish in 4 minutes.

Butter is just one of additions to seafood that always seems to give one last flavor boost. That’s why I have you baste the scallops in the last few seconds in the show. Butter makes everything better, right? You can’t get any easier then making scallops in mere minutes. It is best to use a non-stick pan to sear these though because it will make for a smooth ride home and super easy to flip them over to get that golden sear on the other side of the scallop.

You really need to try my cold cucumber and fennel soup to go with your seared scallops. The flavors you will get from all the vegetables and herbs in the soup to the creamy scallops will put you over the top. The green goddess sauce II goes without saying when paired up with the seared scallops. If I’m serving the scallops for an appetizer I set a small bowl of green goddess sauce right in the middle of a platter for dunking and scallops placed all around…YUM!

You may want to add something hardy to compliment the fish so if you haven’t tried my family recipe for the best pasta fagioli you will ever have you should get on the ball. You could go the zucchini spaghetti route or even my amazing melt-a-away homemade gnocchi with a bolognese sauce, and who doesn’t love sticky buns with their coffee for dessert!

IMG_0558 zucspaghetti 011 025 IMG_5574

IMG_7261 IMG_7275 IMG_7288

IMG_7290 IMG_7242 IMG_7305

Ingredients:

Directions:

  1. Heat non-stick pan to high heat
  2. Sprinkle salt and pepper to taste on both side of the scallops
  3. Add 2 tbsp of olive oil and begin to add scallops
  4. If you have a medium size pan you will have to do this in 2 batches
  5. Sear scallops about 2 minutes on each side until golden
  6. Optional: add 1 tbsp butter and baste scallops in the last 20 seconds
  7. Take off the heat and squeeze 1/2 lemon over scallops
  8. Remove scallops immediately from hot pan to a serving dish
  9. Plate each dish with a sautéed spinach in the center, top with scallops and drizzle with green goddess sauce around outer edge of the plate…enjoy!
  10. OR top cold cucumber & fennel soup with seared scallops!


Green Goddess Sauce ll

Green Goddess Sauce ll

Having my green goddess sauce ll at your next party will be sure to turn heads. It’s kind of like wearing a new party dress! This green goddess sauce is made in mere minutes in a blender. It’s a blend of Greek yogurt, mayo, fresh mint leaves and cilantro, garlic, green onion, lemon juice, olive oil and rice wine vinegar.  You don’t even have to waste time chopping finely because it all get puréed anyways!

Decorating your party plates with my green goddess sauce will make for a lovely presentation, a more formal one, but having a bowl or pouring cup of the sauce on the table will do the trick quite nicely! In fact, the latter might be better since there’s a good possibility your guest’s will be going back for seconds.

This green goddess sauce is so versatile because it literally goes with all foods! It’s heavenly on seared scallops…all fish for that matter, swordfish, rack of lamb, pulled beef tacos, Sweet Potato Fries , Baked Crispy Fries, or Baked Coconut Shrimp and even cut veggies!

027 IMG_3234 IMG_0672 IMG_0668 iphone pictures 447

IMG_6920 iphone pictures 1167 iphone pictures 1168

iphone pictures 1191 iphone pictures 331 iphone pictures 316

IMG_6956 IMG_6962 IMG_0672

Ingredients:

  • 1 cup plus 2 tbsp Greek yogurt
  • 1/4 cup mayo (I use Hellman’s)
  • 1/2 cup packed mint leaves (1 cup loose)
  • 1 cup packed fresh cilantro
  • 1 garlic clove put thru garlic press
  • 1/2 jalapeño diced
  • 4 lg stalks, 6 small of green onion chopped coarsely
  • 1 tbsp fresh lemon juice
  • 1 tbsp extra virgin olive oil
  • 1 Tbsp “seasoned” rice wine vinegar
  • 1 tsp sugar  – (NOTE: I forgot to add this in the show, but it really needs this for balance 🙂
  • s & p
  • If it’s not hot enough with the jalapeno add a dash of Siracha

Directions:

  1. Place all of the ingredients into a blender an purée for 10 seconds…be patient – you may need to stop and stir everything to get it going but do NOT add any more liquid
  2. Stop blender and scrap down sides to get the larger leaf pieces and blend for 5 more seconds and violà!
  3. Taste here and add salt and pepper
  4. Add a dash of Siracha – you need to taste the sauce first, sometimes a jalapeño can be super hot and other times it can be a mellow hot
  5. This sauce gets even better if you can pop it into the fridge for an hour and let the flavors mingle, the sauce will thicken up a little too!
  6. Make this ahead of time and keep sauce in a plastic container and refrigerate.  It stays nicely for days in frig.
  7. This green sauce is absolutely delicious on so many things…be creative.

Best Shrimp Scampi!

Best Shrimp Scampi!

shrimpy
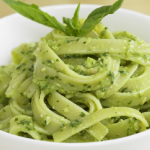
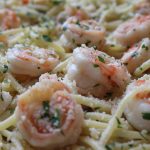
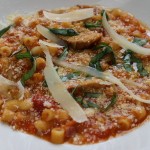
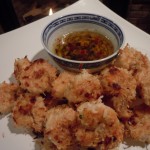
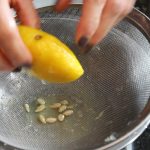
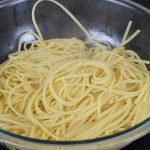
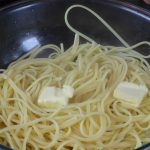
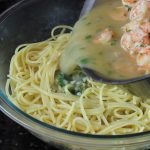
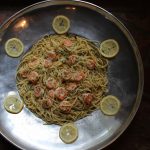
Shrimp scampi is one of those delicious dishes that’s sure to bring a smile to everyone’s face just on aroma’s alone! Shrimp sautéed in olive oil and butter with lots of garlic, shallots, clam broth, and white wine topped with fresh lemon juice, parsley and Parmesan make’s for a grand party atop a pile of linguine!

This quickie gourmet sauce I have created for you in this shrimp scampi dish is a light sauce, yet packed with flavor. The way we do this is by concentrating the juice’s released from those sautéed shrimp along with a couple of bottles of clam stock simmering for a brief seven minutes. The traditional and time consuming way to create this lovely stock would be to simmer the shrimp shells in white wine for a while like you would for a lobster bisque stock. The objective here was to take a short cut to accommodate our busy every day lives without foregoing taste by using bottled clam stock. Voilà, you have an amazing flavor base for our shrimp scampi with linguine in seven minutes.

One of my favorite way’s to serve the shrimp scampi with linguine is by offering up a Parmesan with red pepper flake’s mixed right into it. It’s nice to offer two small dishes of Parmesan, one with the pepper flakes and one without. By adding the red pepper flakes to the grated cheese guests are less likely to accidentally sprinkle on too much because it’s dispersed throughout the cheese.

You might want to try some homemade pasta to go with this wonderful shrimp scampi or even a Caesar Salad.  Some chocolate crackle cookies would be great for dessert or homemade chocolate eclairs with an incredibly easy and luscious vanilla filling. Then again there those drunk blondie bars with the bourbon caramel sauce that are to die for! Enjoy! 🙂

IMG_4327 DSCN4572-300x225 IMG_3663 IMG_6379 IMG_6622

IMG_6780 IMG_6793 shrimpwinejpg

shrimp gsrlic shrimpclam IMG_6801

shrimpy shrimplemon IMG_6805

shrimpbutter srhimp pasta shrimpeparsley

IMG_6819 IMG_6822 IMG_6818

Ingredients for Shrimp Scampi with Linguine – 6-10 People:

  • 1 – 1 1/2 lbs of peeled & deveined large shrimp (ask for a certain number of shrimp …2-5 per person depending on what other side dishes you are serving)
  • 2 bottle of Snows clam broth
  • 1/2 cup white wine – pinot grigio
  • 4 lg garlic clove finely chopped
  • 1 tbsp finely chopped shallot
  • 2 lg garlic clove smashed
  • 1/4  cup finely chopped FRESH FLAT LEAF Italian parsley
  • 5 Tbsp salted butter
  • 3 Tbsp olive oil
  • 1 lb pasta – linguine or linguine fini
  • 2 lemons
  • Reggiano Parmesano
  • Red pepper flakes -OPTIONAL
  • salt and pepper to taste

Directions:

  1. Peel and devein shrimp
  2. Bring large pan of salted water to a boil
  3. Add 2 tbsp olive oil, 1 tbsp butter and 2 lg crushed garlic cloves to large sauté pan over med/high heat
  4. When the pan is hot add in the shrimp
  5. Saute for 2 1/2 minutes per side
  6. Remove shrimp and garlic – set aside
  7. Add in 1 tbsp olive oil, finely chopped garlic and shallots into the same pan and saute til soft (lightly golden) for about 2-3 minutes
  8. Then pour in both cans of clam juice with the garlic and shallots
  9. Bring to a boil over high heat, turn down to a low simmer for 7 minutes
  10. Add pasta to boiling salted water and cook until aldente (don’t over cook!)
  11. Let pan with the clam broth/garlic simmer and reduce by 1/3
  12. Add shrimp back into reduced clam broth/garlic
  13. Add in juice from 1 whole lemon and 3 tbsp of chopped parsley to shrimp scampi
  14. Add in salt and pepper here to taste
  15. Simmer on LOW for 2 more minutes
  16. Drain pasta and pour out pasta into a large serving platter or bowl
  17. Add in 4 tbsp of butter to pasta and toss, add in salt and pepper to taste …taste the pasta and make sure the pasta is PROPERLY seasoned at this point
  18. Pour the shrimp scampi mixture over the pasta
  19. Sprinkle with more fresh chopped parsley and grated cheese and serve…YUM!
  20. NOTE: Make sure that each person gets some of that tasty broth in their dish

Homemade Pan Pizza

Homemade Pan Pizza

Homemade pan pizza made with different themed toppings from clams casino, to Hawaiian and Greek make for perfect party hors d’ oeuvres! Everyone seems to find their favorite flavors. When the sizzling pan pizza comes out of the oven heads turn especially when the aromas from the garlic, clams, bacon, onions and peppers fill the air!

The wonderful thing about all the different themed toppings for your pan pizza is you don’t need much in terms of quantity. The dough you make the day before, but if you forgot or didn’t have time it will still work if you make it the same day. If you make the dough the same day you don’t put it into the frig but let it proof for an hour and a half in a warm spot to develop some of that texture and flavor. The whole idea behind the “proofing in the refrigerator” is it let’s you do other things while the dough slowly rises developing a killer texture and flavor like in my delicious “Icebox Dinner Rolls”. So take advantage of this refrigerator method, you will be happy you did. 

As for my pizza sauce, it couldn’t get any easier because it’s puréed only, not cooked. If you go into a pizza place and inquire about their sauce the majority will tell you the tomato sauce is raw. I know because I have done just this, but they don’t always like to give away their pizza secrets so easily. To the raw, whole peeled tomatoes I add a garlic clove that I put thru the press, salt, pepper and some Italian seasonings and then it’s puréed. Keeping the tomatoes raw really compliments all those other strong flavors from the toppings yet not seeping into the background still being a pertinent player in the pizza game!

Have some fun with these pizza’s and customize those toppings on your homemade pan pizza! My favorite is the clams casino pizza because you have the best of both world’s, flavor’s and crispy, chewy edges. You can’t beat the garlic, clams, bacon and pepper combo. Drizzling on the extra clam juice not only makes it taste that much better but it let’s the crust get a little crispy while keeping the toppings moist enough so not to burn. With that in mind make sure to pour on any of the extra juices from what ever you are cutting up as when you are slicing up the cherry tomatoes. Another very important tip is to keep all the toppings, including the sauce and mozzarella, in the cold refrigerator until the last minute. This helps the toppings to cook properly giving the crust time to crisp up.

Enjoy the show and definitely think about some appetizer’s to go with these sizzling homemade pan pizza’s like my Caesar Salad, Crab Cakes, Baked Asparagus wrapped in Proscuitto, Spanakopita or my Roasted Chic Peas. All will bring a smile to your face I promise! 🙂

DSCN4572-300x225 DSCN45211-300x225 iphone-pictures-572-300x225 cookedspan iphone pictures 989

IMG_6226 IMG_6105 IMG_6123

IMG_6127 IMG_6170 rolldough

oilpan dougpan sran

IMG_6133 IMG_6145 piz

moz feta clams

IMG_6257 IMG_6258 IMG_6204

Ingredients for 1 Sheet Pan Pizza Dough – 12.5″ x 17.5″ x 1″ tray:

  • 4 cups all purpose flour
  • 1 1/2 cup warm water 105º-110º
  • 1/2 tsp sugar
  • 1 packet yeast or 2 1/4 tsp – not rapid rise
  • 1 tbsp salt
  • 3 tbsp extra virgin olive oil for the pizza dough
  • 1/3 extra virgin olive oil for the sheet pan
  • Plus more olive oil to drizzle on top of the pizza’s before baking

My Pizza Sauce – Enough for 2 Sheet Pan Pizza’s:

  • 1 can of whole peeled tomatoes (drained if the pulp is watery) pureed with 1 tsp salt, 1/2 finely ground Italian seasonings, 1/4 tsp pepper and 1 lg garlic clove put thru garlic press

Ingredients For The Toppings From The Show for 2 Trays of Pizza:

  • Clams Casino Pizza – (for 1/2 the pizza) 1-2 cans 1 cup of Snows canned clams drained except 3 tbsp of clam juice per can to drizzle over pizza,  1/4 cup of chopped peppers, 3/4 cup sliced thick cut bacon, 1 garlic clove thru press, 1 tsp chopped sweet onions
  • Greek Pizza – 3/4 cup sliced cheery tomatoes, 3/4 cup sheep’s milk feta, 1/4 cup sliced sweet onion, 1/2 cup sliced kalmata or canned black olives, 1/3 cup chiffonade basil
  • Bacon Pizza – 1 cup thick sliced bacon (for 1/2 of the pizza)
  • Hawaiian Pizza – 1 cup sliced ham, 1/2 cup chopped pineapple, 1/2 cup sliced green onions with whites too

Directions – (Pre-heat the oven to 450º right before the pizza dough has it’s final proof and make sure the rack is in the lowest possible position):

  1. Warm the stainless steel mixing bowl with warm water for 5 minutes
  2. Empty out warm water and add packet of yeast to mixing bowl
  3. Add in 1 1/2 cups of water at 105º-110º to the yeast
  4. Add in 1/2 tsp sugar and let the yeast proof for 10 nminutes
  5. Tour on knead hook and begin to add in 3 tbsp olive oil, flour and salt
  6. Keep mixing and knead with hook after it forms a dough ball for 10 minutes
  7. Take dough off of hook and onto a floured counter
  8. Knead by hand for 2 minutes and place into a large oiled bowl
  9. Cover with saran wrap and refrigerate for 18-24 hrs.
  10. When you are ready to make the pizza make sure to take out of the frig and let the cold dough sit for approx. 2 hrs. – this will make it easier to work with
  11. When the dough has sat for 2 hrs. turn out onto floured surface and begin to roll out and stretch to the size of the cookie tray
  12. Pour 1/3 cup of olive oil onto cookie tray and place the rolled out pizza dough onto olive oil
  13. Cover with plastic wrap and let sit 30 minutes
  14. Remove plastic wrap and stretch the dough if needed to the edges of the pan and using your thumb press the egde of the dough into the edges of the cookie tray to form a crust – this will become a crispy and chewy egde that you will love! 
  15. Spoon pureed tomatoes onto the dough and sprinkle mozzarella
  16. Add you desired topping and give a drizzle of olive oil across the top of the pizza and put into a 450º oven for 16-20 minutes.
  17. Definitely check at the 15 minute mark as all oven are different
  18. You want  the edges dark golden and the middle is sizzling
  19. Take out and let sit for 5 minutes
  20. Using a large spatula remove the pizza in one piece to a large cutting board and slice, or slice in the cookie tray

Lazy-Man’s Lasagna! – World’s Best!

Lazy-Man’s Lasagna! – World’s Best!

This world’s best lazy-man’s lasagna is the ultimate pasta dish because there is no fussing, layering or baking. It has all the ingredients and flavors of a traditional lasagna but without all the work! It’s done all-in-one pot and takes two minutes to put together after the ground meat is browned. It’s made with a tomato-basil sauce, homemade or store bought for convenience, rigatoni pasta, ricotta, mozzarella and a sautéed ground meat of your choice. The hardest part here is browning the meat, then it’s easy peasy from there on in.

When I first had this lazy-man’s lasagna it was made with ground beef. That’s the beauty of this pasta dinner you can customize it by browning up what ever your favorite meat is. I’ve actually made it with ground turkey, beef, Italian sausage and even a meatloaf mix of meats. What ever you decide I promise you it’s going to be delicious! In the show I used my favorite sweet Italian fennel sausage from Liuzzi Cheeses in North Haven, CT. I took the the sausage out of the casing and then browned it.

Usually, I serve up this lazy-man’s lasagna immediately after I combine all those yummy ingredients. Although, you can easily pour it out into a baking dish and top with one cup of shredded mozzarella to bake immediately or cover with foil and into the frig until you are ready. Granted, I do love to put together a tray of layered lasagna for the holidays but for those in between days when you want those gourmet flavors but don’t want to go through all the work this world’s best lazy-man’s lasagna is your dream come true.

You can check out my Live TV Cooking Segment on “CT STYLE”, WTNH – Channel 8 where I make Lazy-Man’s Lasagna in The Bender Kitchen with hosts Teresa Dufour and Ryan Kristafer!

If you are looking for something hardy and gourmet you should check out my Boeuf Bourguignon or Indian Spice Tomato-Cream with Snap Peas, Pulled Beef Taco’s with Mango Salsa, or for a lighter note you could check out my Swordfish with Black Bean Salsa or Asian Shrimp and Noodle Salad and for something sweet you just can’t beat Pavlova! Mangia Mangia…enjoy 🙂

150150boeuf IMG_3234 027 iphone pictures 1402 IMG_2283

IMG_5682 IMG_5617 IMG_5625

IMG_5637 IMG_5645 lazy

lazymozz lazymeat lazysaucejpg

lazymix lazyplatterjpg lazyparmjpg

lazybasil

Ingredients:

  • 1 lb. rigatoni pasta, zit rigati or your fav pasta!
  • My 20 minute tomato-basil pasta sauce recipe or a favorite store bought brand
  • 2 lbs ground meat OR 3 cups after browned of: ground beef, turkey, veal, pork, meatloaf mix, or sweet fennel sausage (Liuzzi makes my favorite sweet and spicy Italian fennel sausage)
  • 1 lb. whole milk ricotta (really easy to make your OWN HOMEMADE – check it out!)
  • 2 cups shredded mozzarella – 2 cups to mix into the lazy-man’s lasagna plus additional 1 cup to sprinkle on top if you are going to put the pasta into a baking dish to bake later
  • grated Parmesan
  • fresh basil

Directions:

  1. Brown the ground meat in a sauce pan on medium high heat
  2. Drain the meat to remove excess oil in a small strainer over a bowl
  3. Put the meat back into the pan on medium high heat add 1/3 cup of red wine to de-glaze the sauce pan scrapping up the little brown bits stuck the bottom of the pan
  4. Keep the browned meat on warm
  5. Heat tomato-basil sauce through – you want it hot to melt the mozzarella
  6. Cook the pasta in salted water until al dente …(Having a pinch of firmness to it so it’s not overly cooked)
  7. Drain the pasta and put it back into the same pan
  8. Immediately add 2 cups of hot tomato-basil sauce, 1 lb. of ricotta, 2 cups of mozzarella, 3 cups of browned meat and begin to stir
  9. Add another 1-1 1/2 cups of tomato-basil sauce
  10. Mix ingredients until combined and pour out into a serving platter
  11. Sprinkle with Parmesan and julienne fresh basil…mangia mangia 🙂

Mediterranean Layered Dip with Christine & Lisa

Mediterranean Layered Dip with Christine & Lisa

Mediterranean layered dip is one of those dishes that you will love to have up your sleeve. It’s super easy, literally takes all of five minutes to make and tastes amazing! All you have to do is layer these wonderful Mediterranean ingredients in a clear serving dish. The reason it’s so quick to make is because you’re using prepared products from the market.  It will not only wow your guests with the presentation but with the fresh flavors too!

IMG_5076
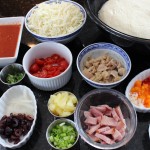
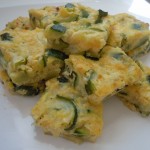
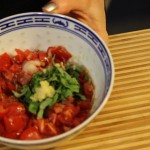
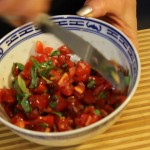
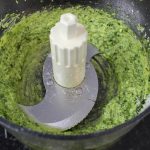
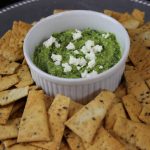
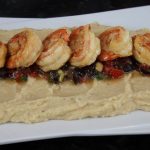
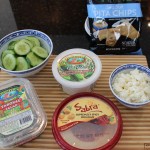
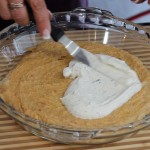
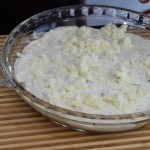
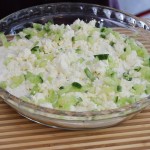
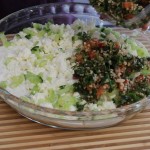
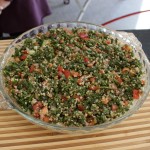
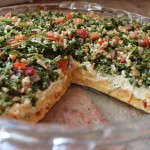
This Mediterranean dip starts off with a layer of hummus, and continue’s on with layer’s of Tzatziki, crumbled sheep’s milk feta, chopped up European cucumber’s, and finally a layer of Tabouleh. Scoop up this delicious dip with cucumber slice’s, and, or pita chip’s. Granted, if you have a little extra time on your hands you could make one or two of the layers that go into the dip
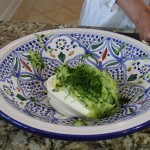
 IMG_1851homemade like my best hummus ever, or Tzatziki sauce. Since I’m such a big cheese head I definitely suggest getting decent feta from your local cheese shop, Madison Cheese. The creaminess of a good sheep’s milk feta really add’s a nice touch to the dip.

The first time I had this Mediterranean layered dip was three months ago at a friends tennis party celebrating our kids going to Nationals in South Carolina. My friend, Lisa, brought this Mediterranean layered dip to the party along with a buffalo chicken dip. Boy, did I make out like a bandit! I featured Lisa’s buffalo chicken dip recipe on my show not too long after the party and it has been a big hit, calling it “Best Buffalo Chicken Dip Ever!”. What can I say, I love a good dip!

I then phoned Lisa excited about having her come on my show to share the Mediterranean dip with all of you. Lisa was going to do the show but there was one caveat, she wanted her friend Christine to come too. You see this Mediterranean layered dip recipe wasn’t her recipe. She borrowed it from Christine. So we went directly to the source and had Christine come over to do the show also! 

What fun we had making the Mediterranean layered dip. You can’t go wrong here especially when you have other things to make for your get together. As Lisa say’s in the show, she keeps the ingredients to the dip unopened in her refrigerator at all time’s, just in case! I hope you enjoy this dip many times over. If you need another easy appetizer you should make my baked sweet potato fries & Green Goddess Dip or just go straight to the desserts and try my chocolate crackle cookieschocolate avocado moouse, perfectly chocolate chocolate cake or an applesauce-caramel sundae that will knock your socks off! 

IMG_3966 IMG_3663 iphone pictures 755 IMG_2793 IMG_4085

IMG_5388 IMG_5416 tatzdip

fetadip cucumberdip tabdip

IMG_5422 IMG_5433

Ingredients:

  • 1 container of prepared hummus OR my homemade best hummus ever – You can get the “spicy” BUT it’s very spicy in the prepared hummus so I like it better with the reg. hummus
  • 1 12 oz container of your favorite Tzatziki OR homemade tzatziki
  • 1 12 oz container of your favorite prepared tabouleh
  • 1 cup crumbled sheep milk’s feta – you can it buy pre-packaged but good sheep’s milk feta from you local cheese shop is amazingly creamy 🙂
  • 1 cup chopped European cucumber- (1/2 of the cucumber sliced for dipping and the other 1/2 chopped for one of the layers)
  • 1 bag pita chips
  • 8-10″ clear serving dish with 2″ sides

Directions:

  1. Begin putting the layers into the clear serving dish
  2. Start with the hummus spreading evenly on the bottom
  3. Next, spread the layer of Tzatziki
  4. Then crumble the sheep’s milk feta over the Tzatziki
  5. Then a layer of chopped up cucumber
  6. Lastly, a layer of Tabouleh
  7. Serve with cucumber slices and pita chips
  8. You can keep the Mediterranean layered dip like this in the refrigerator for up to one day ahead … enjoy 🙂

Holiday Appetizer’s

Holiday Appetizer’s

iphone pictures 572
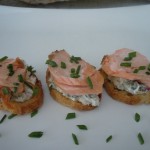
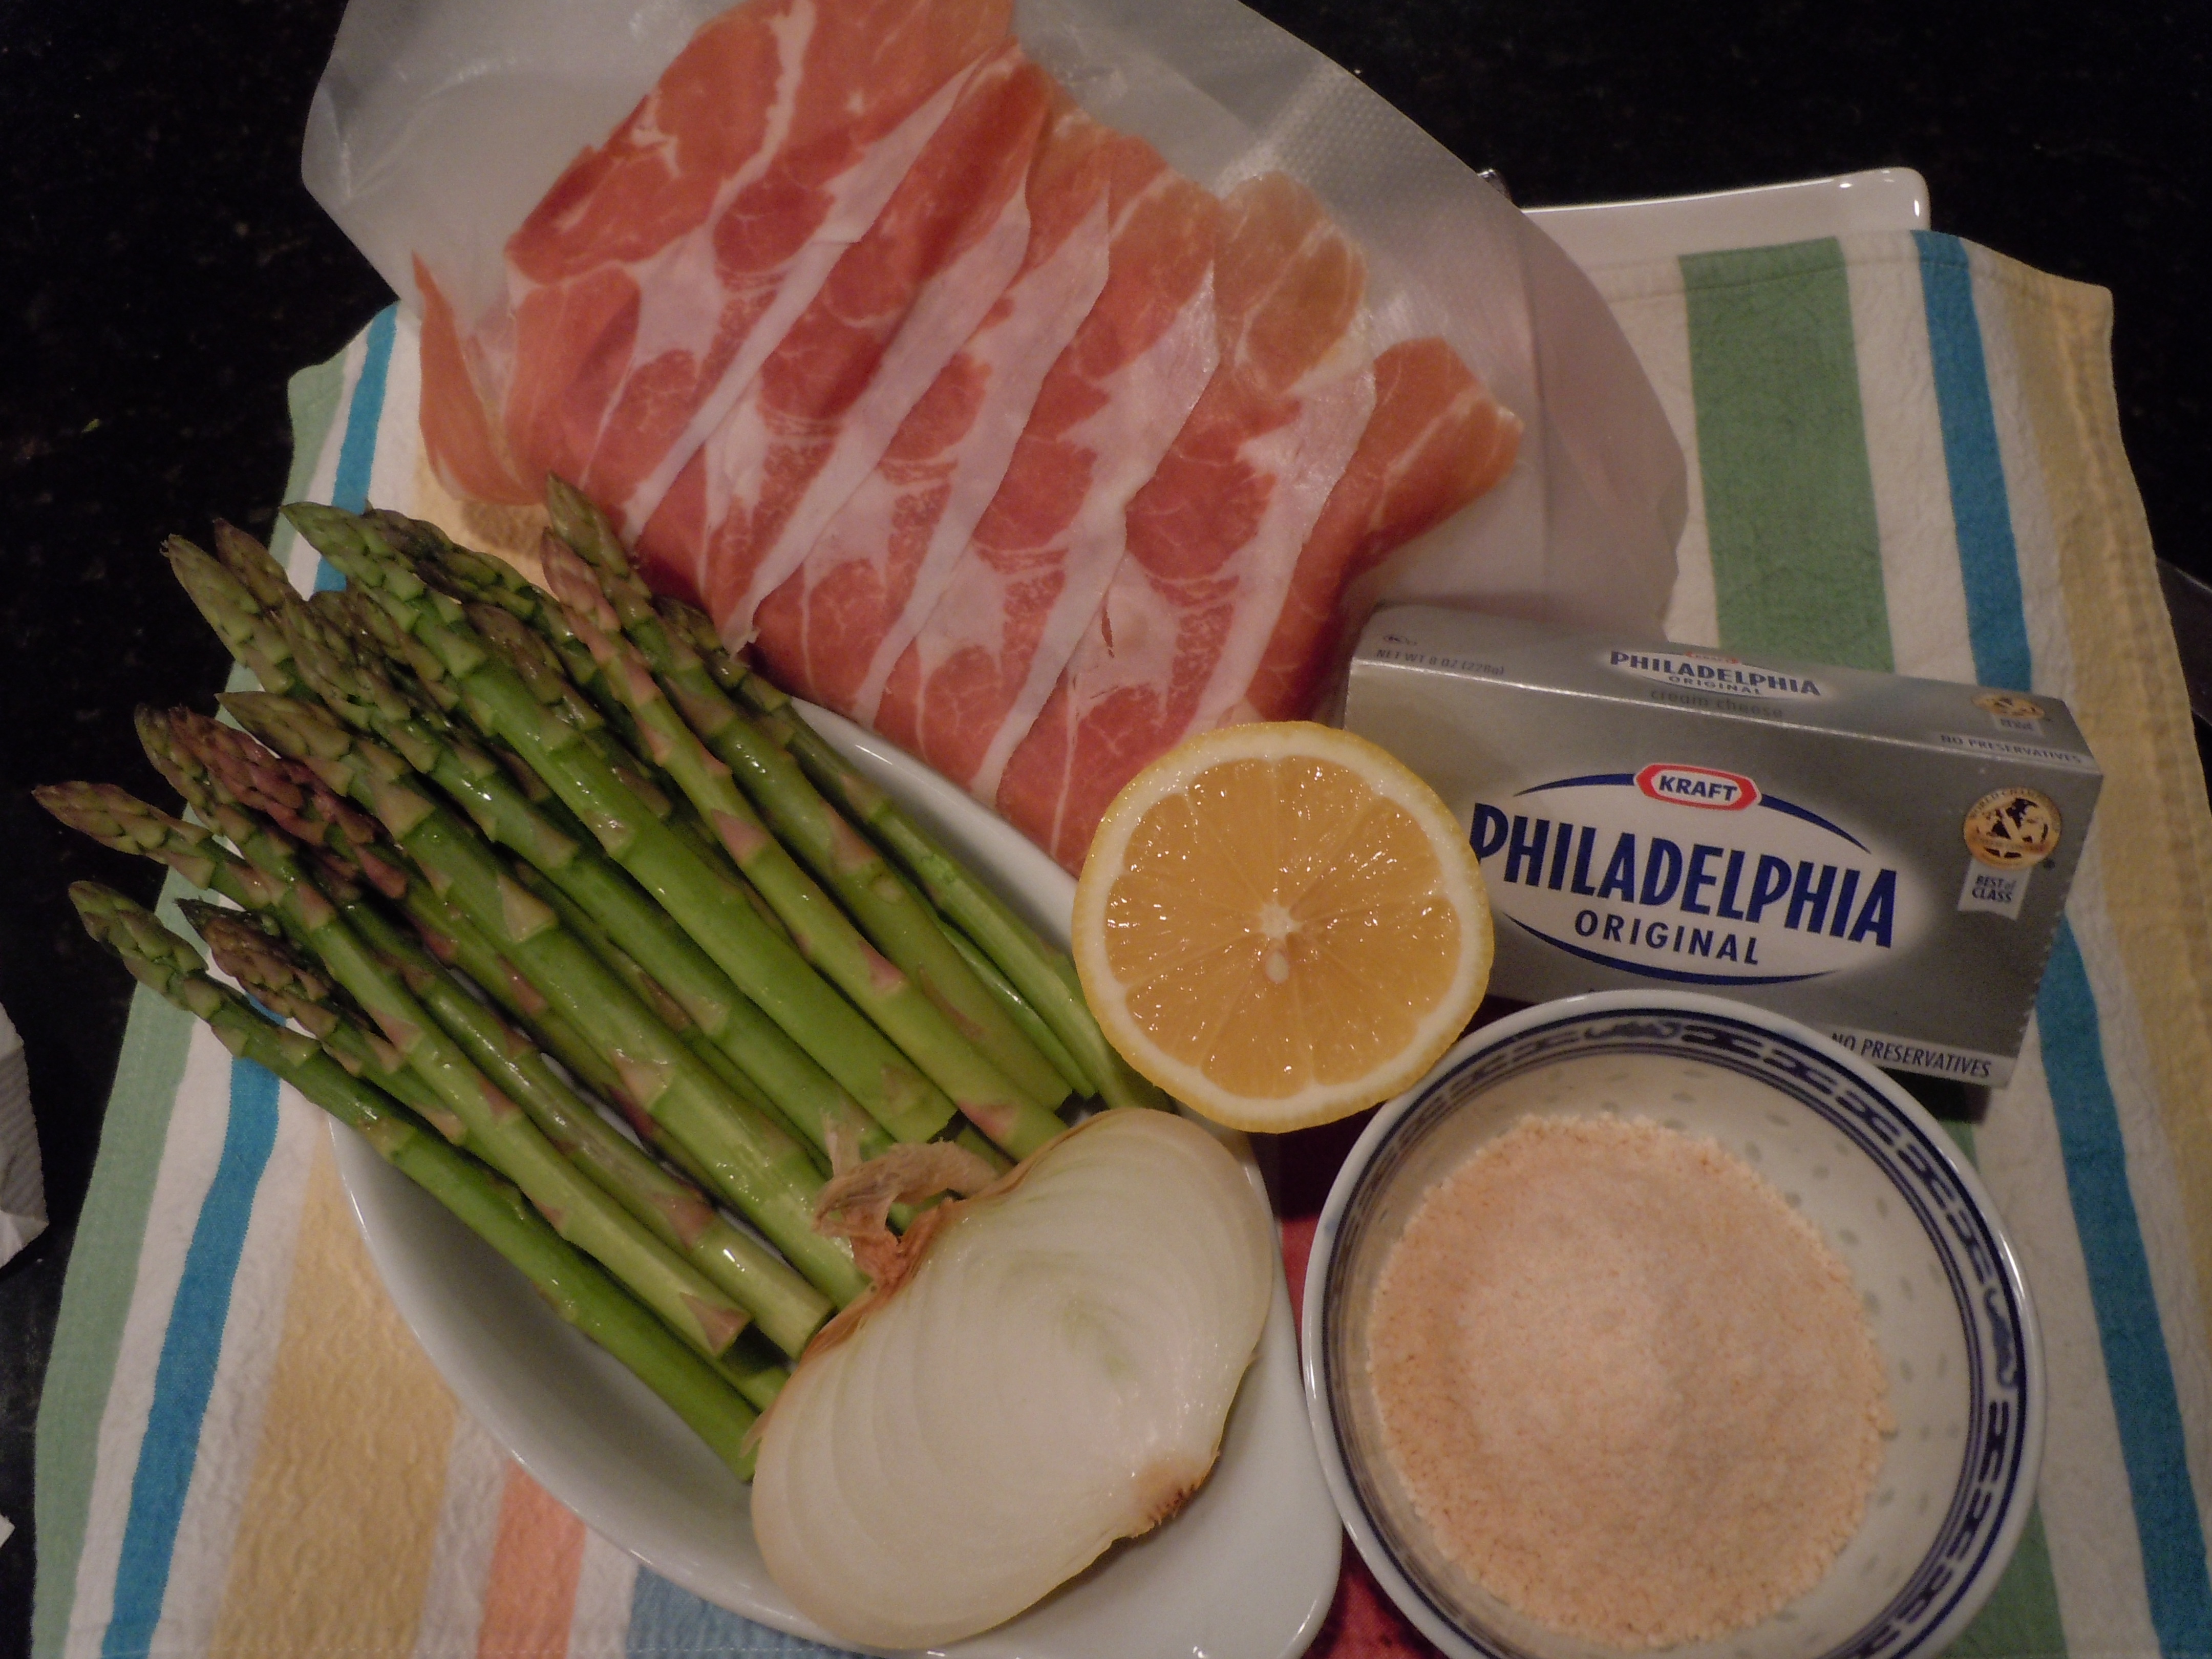
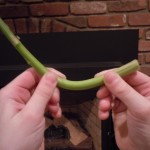
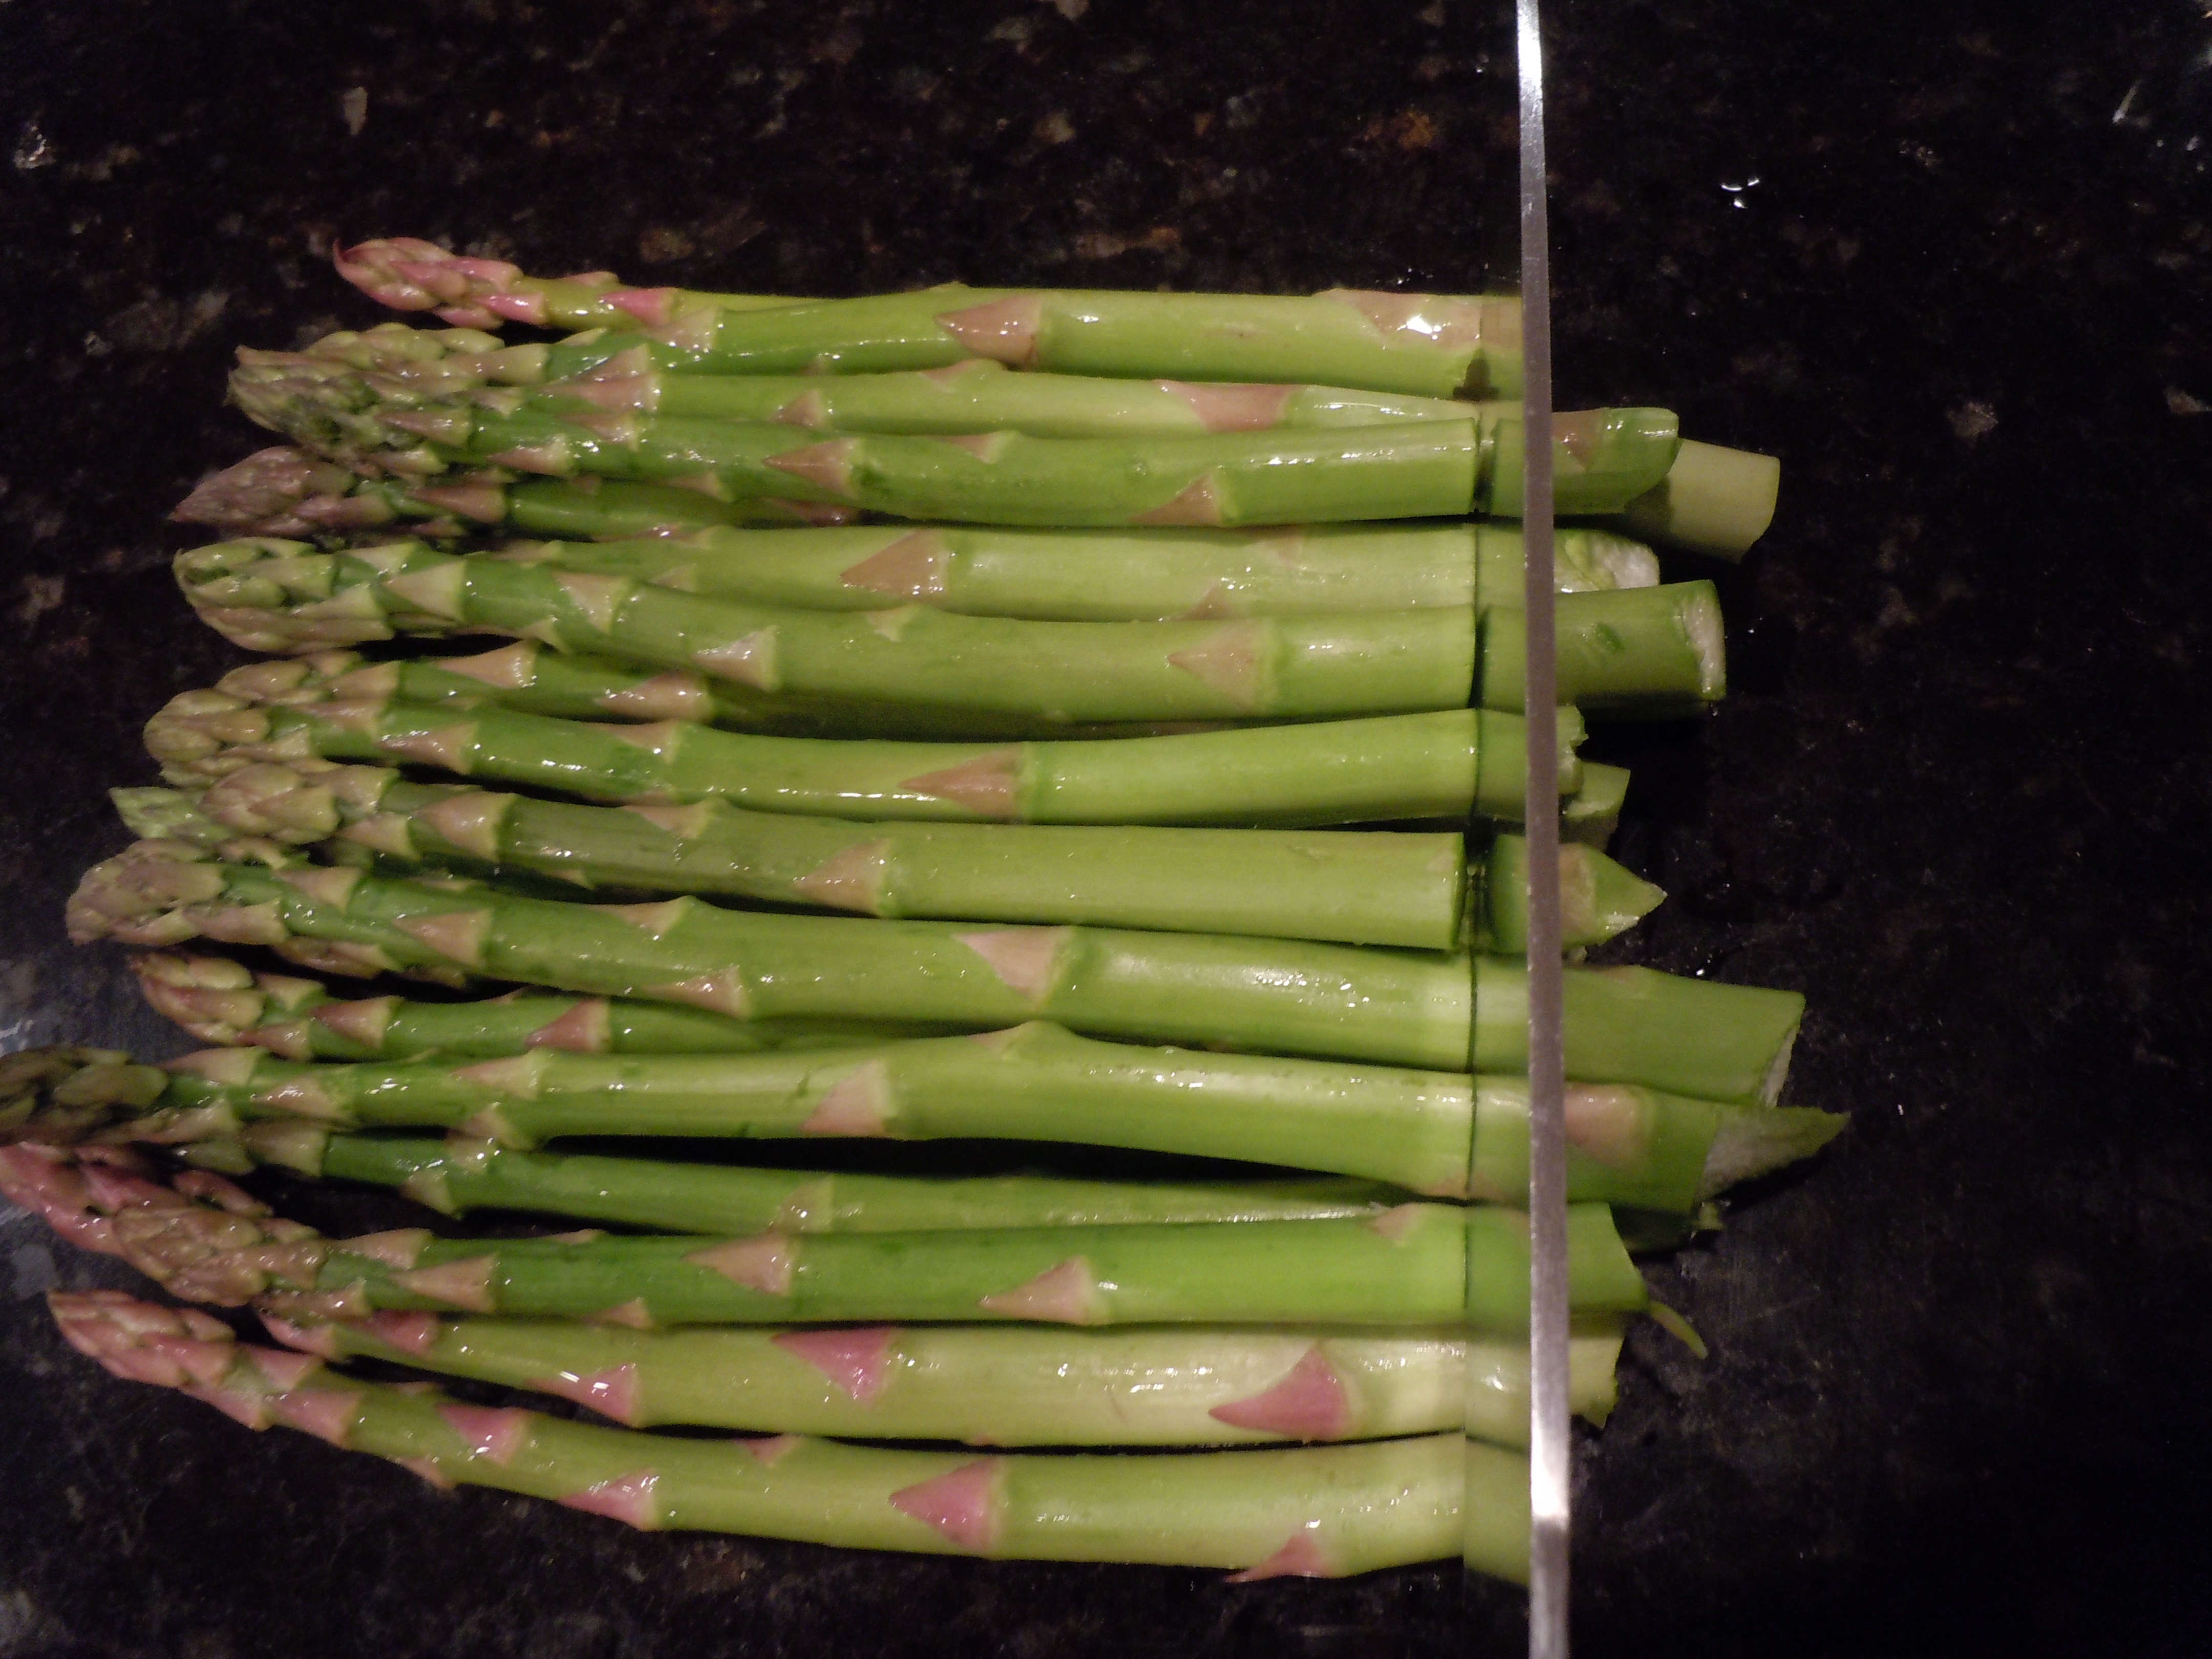
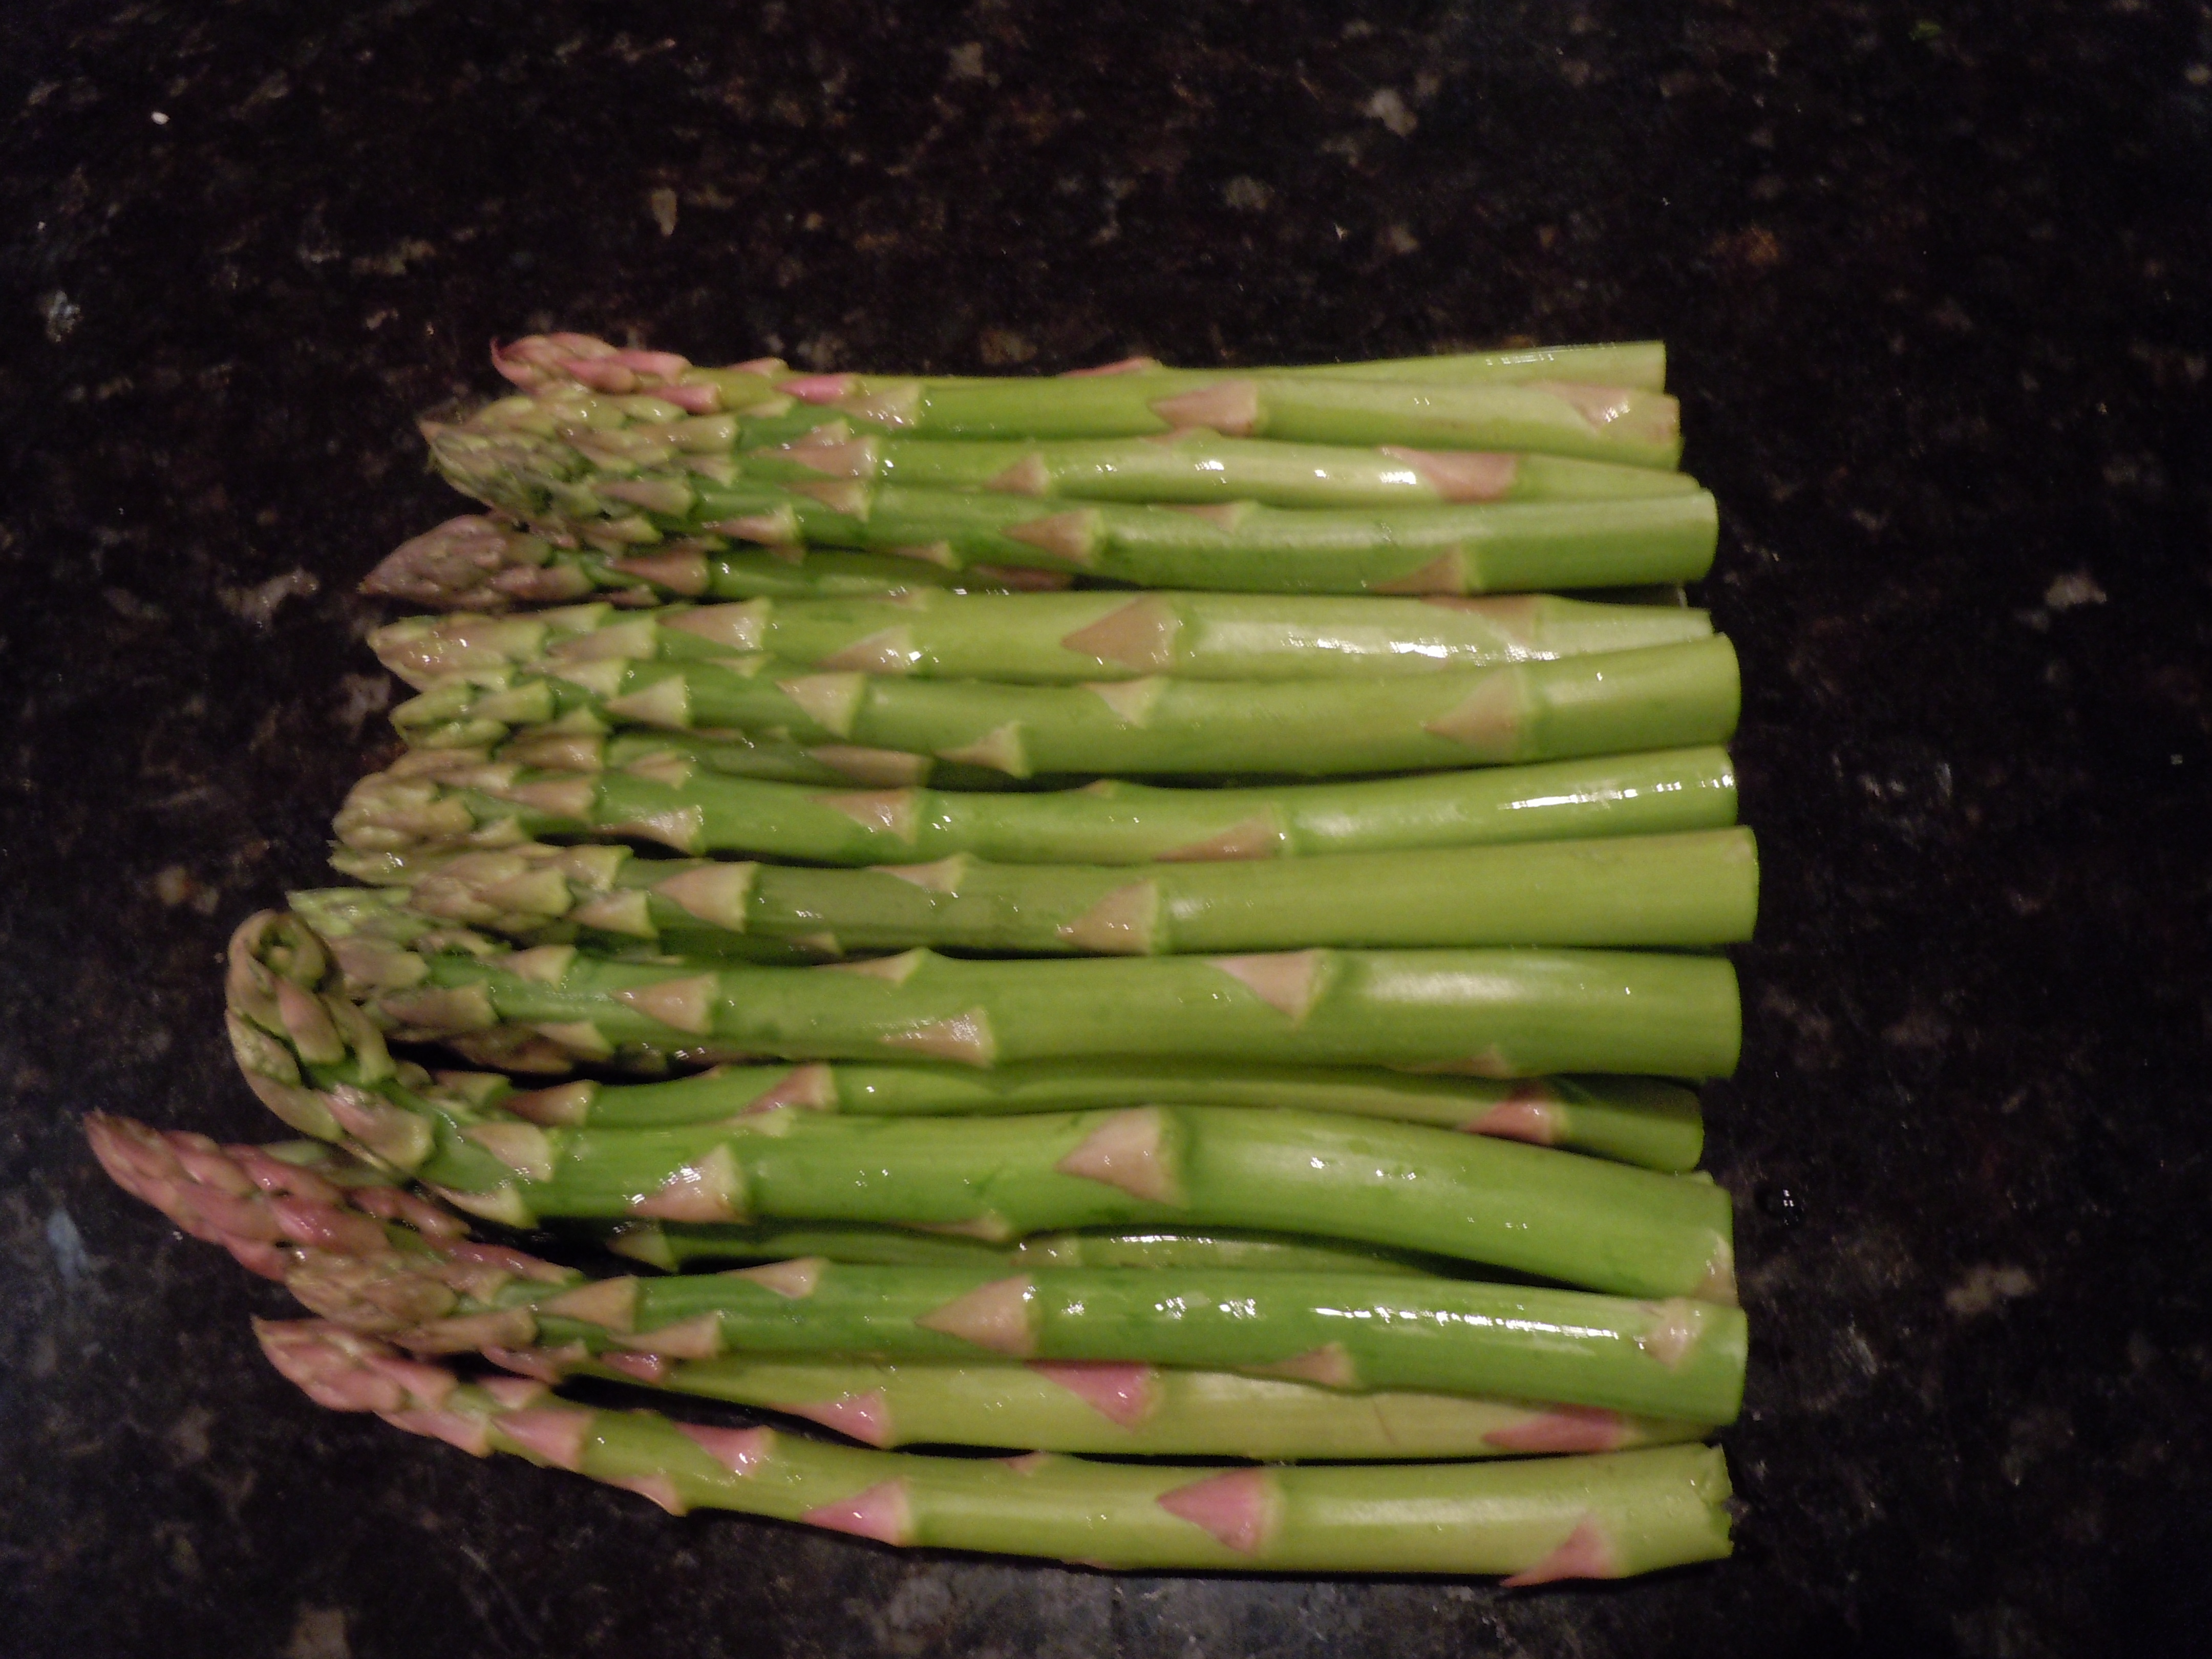
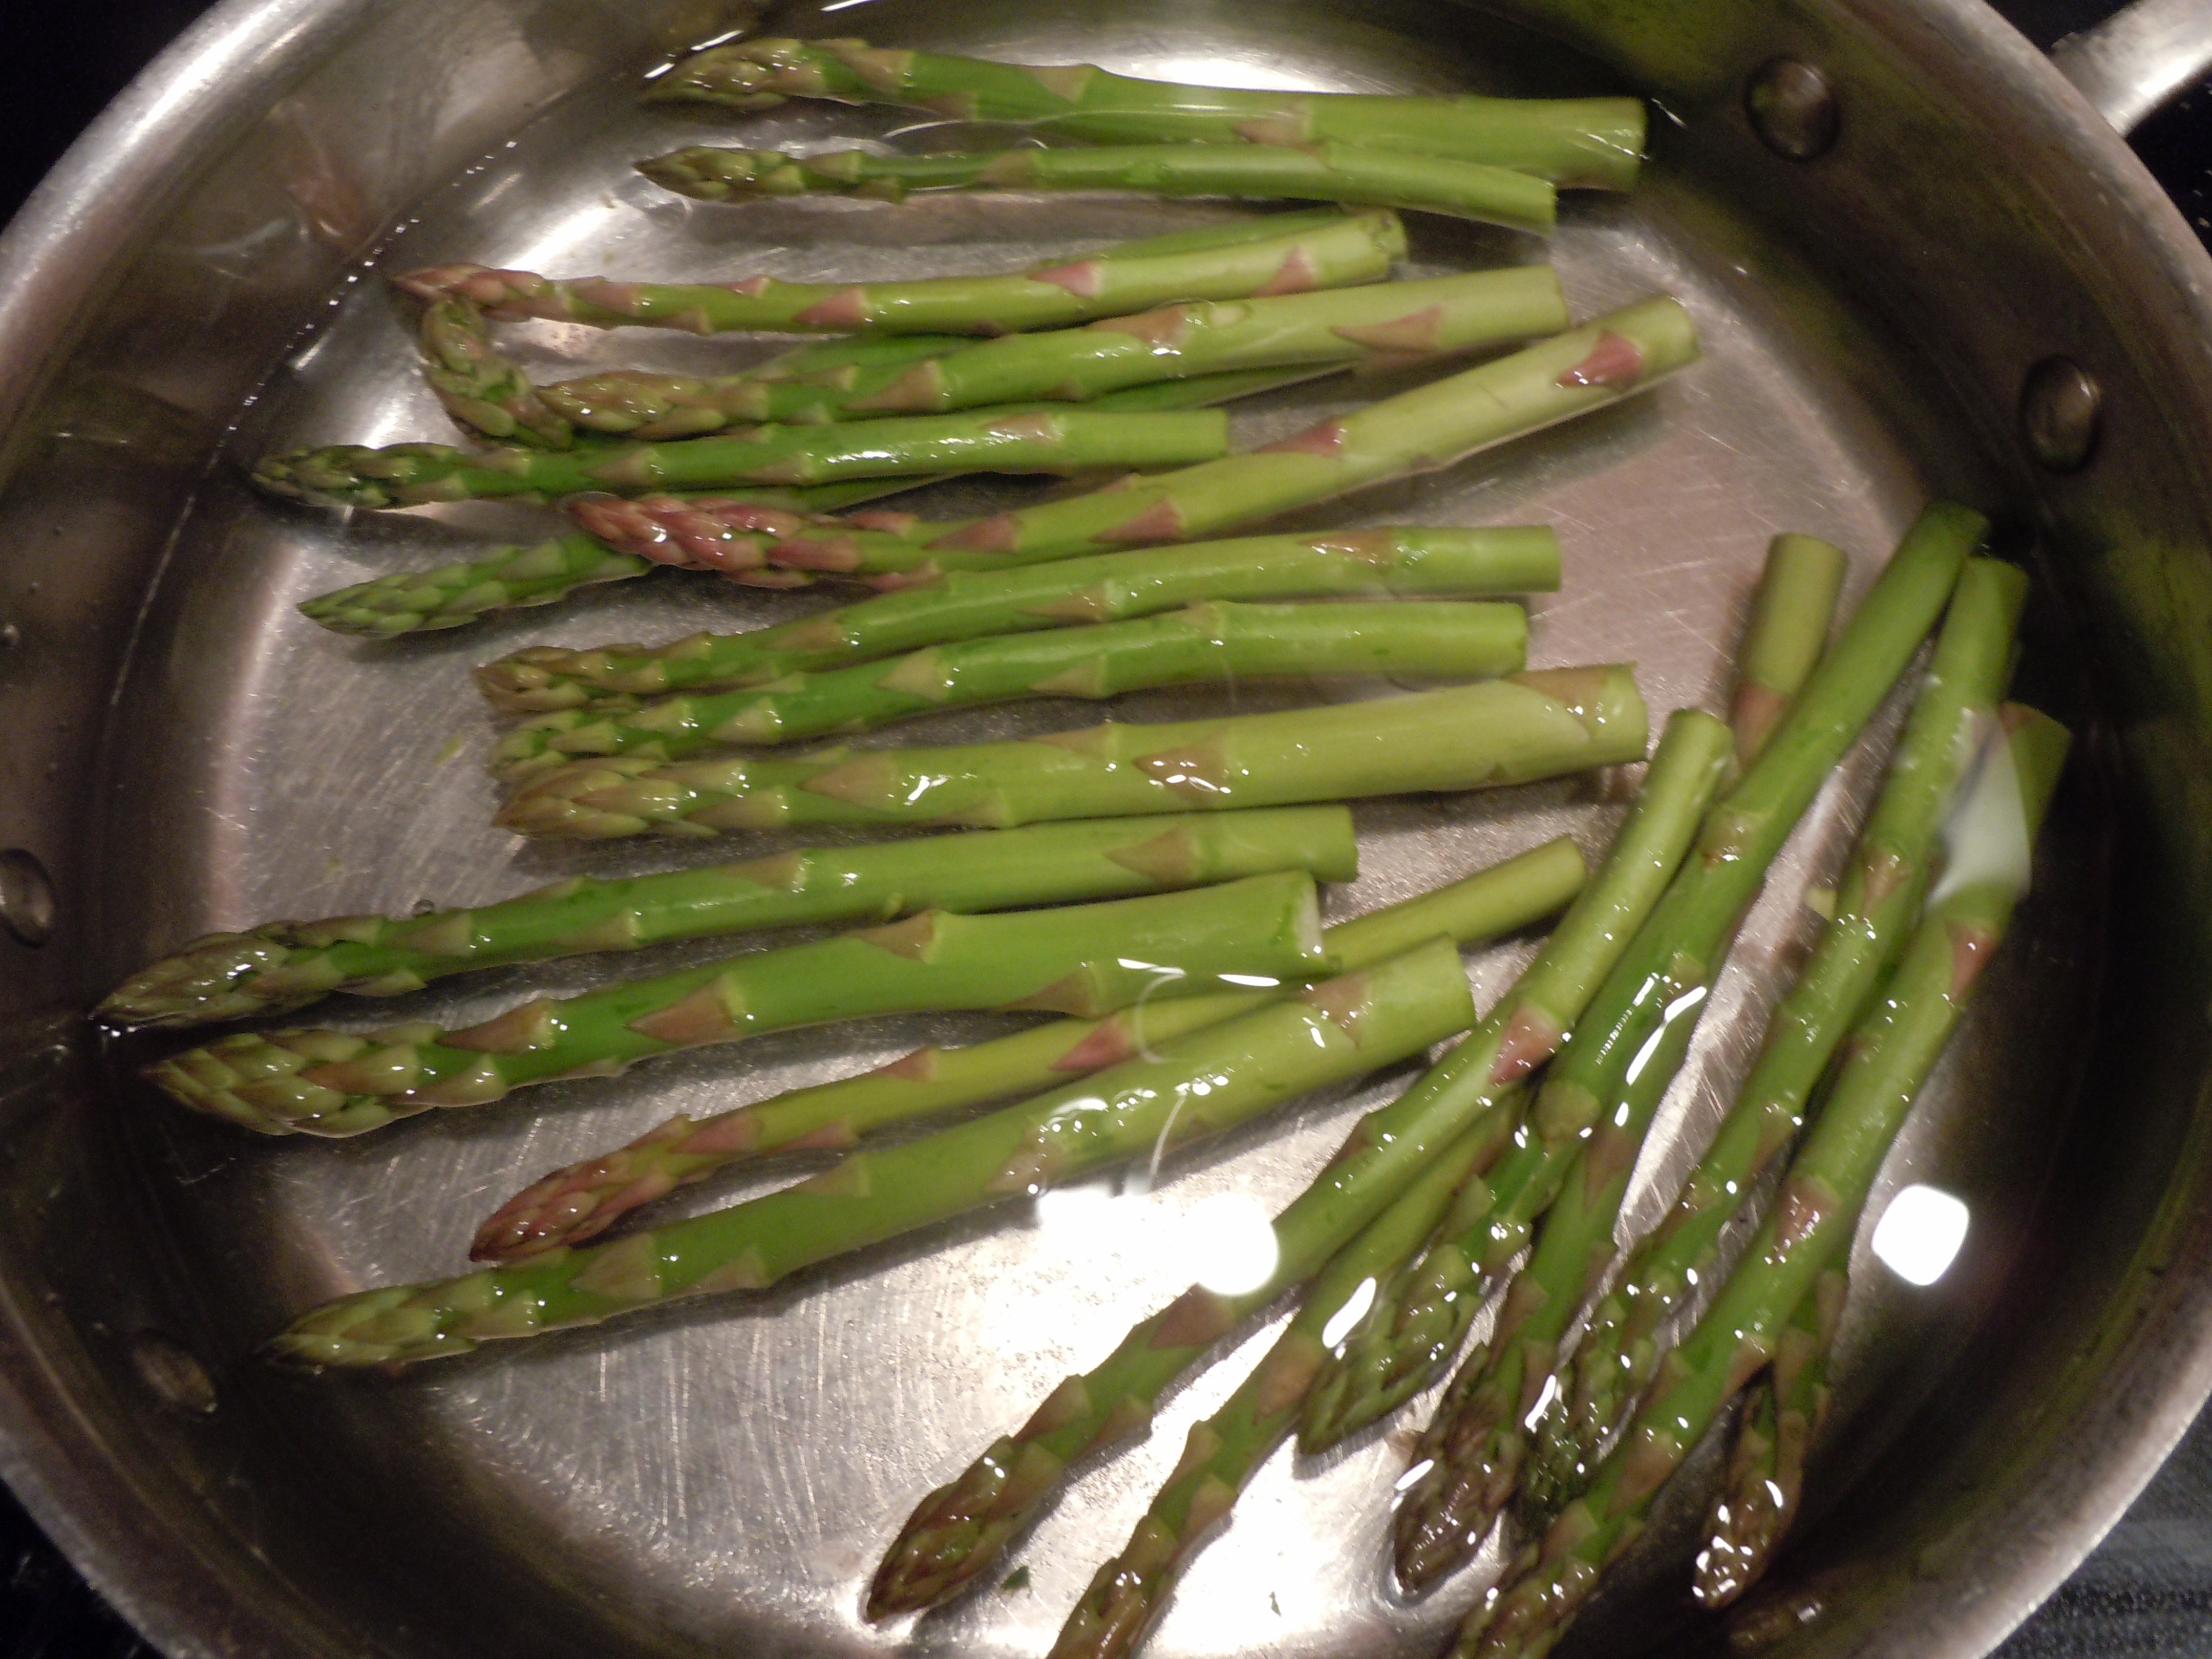
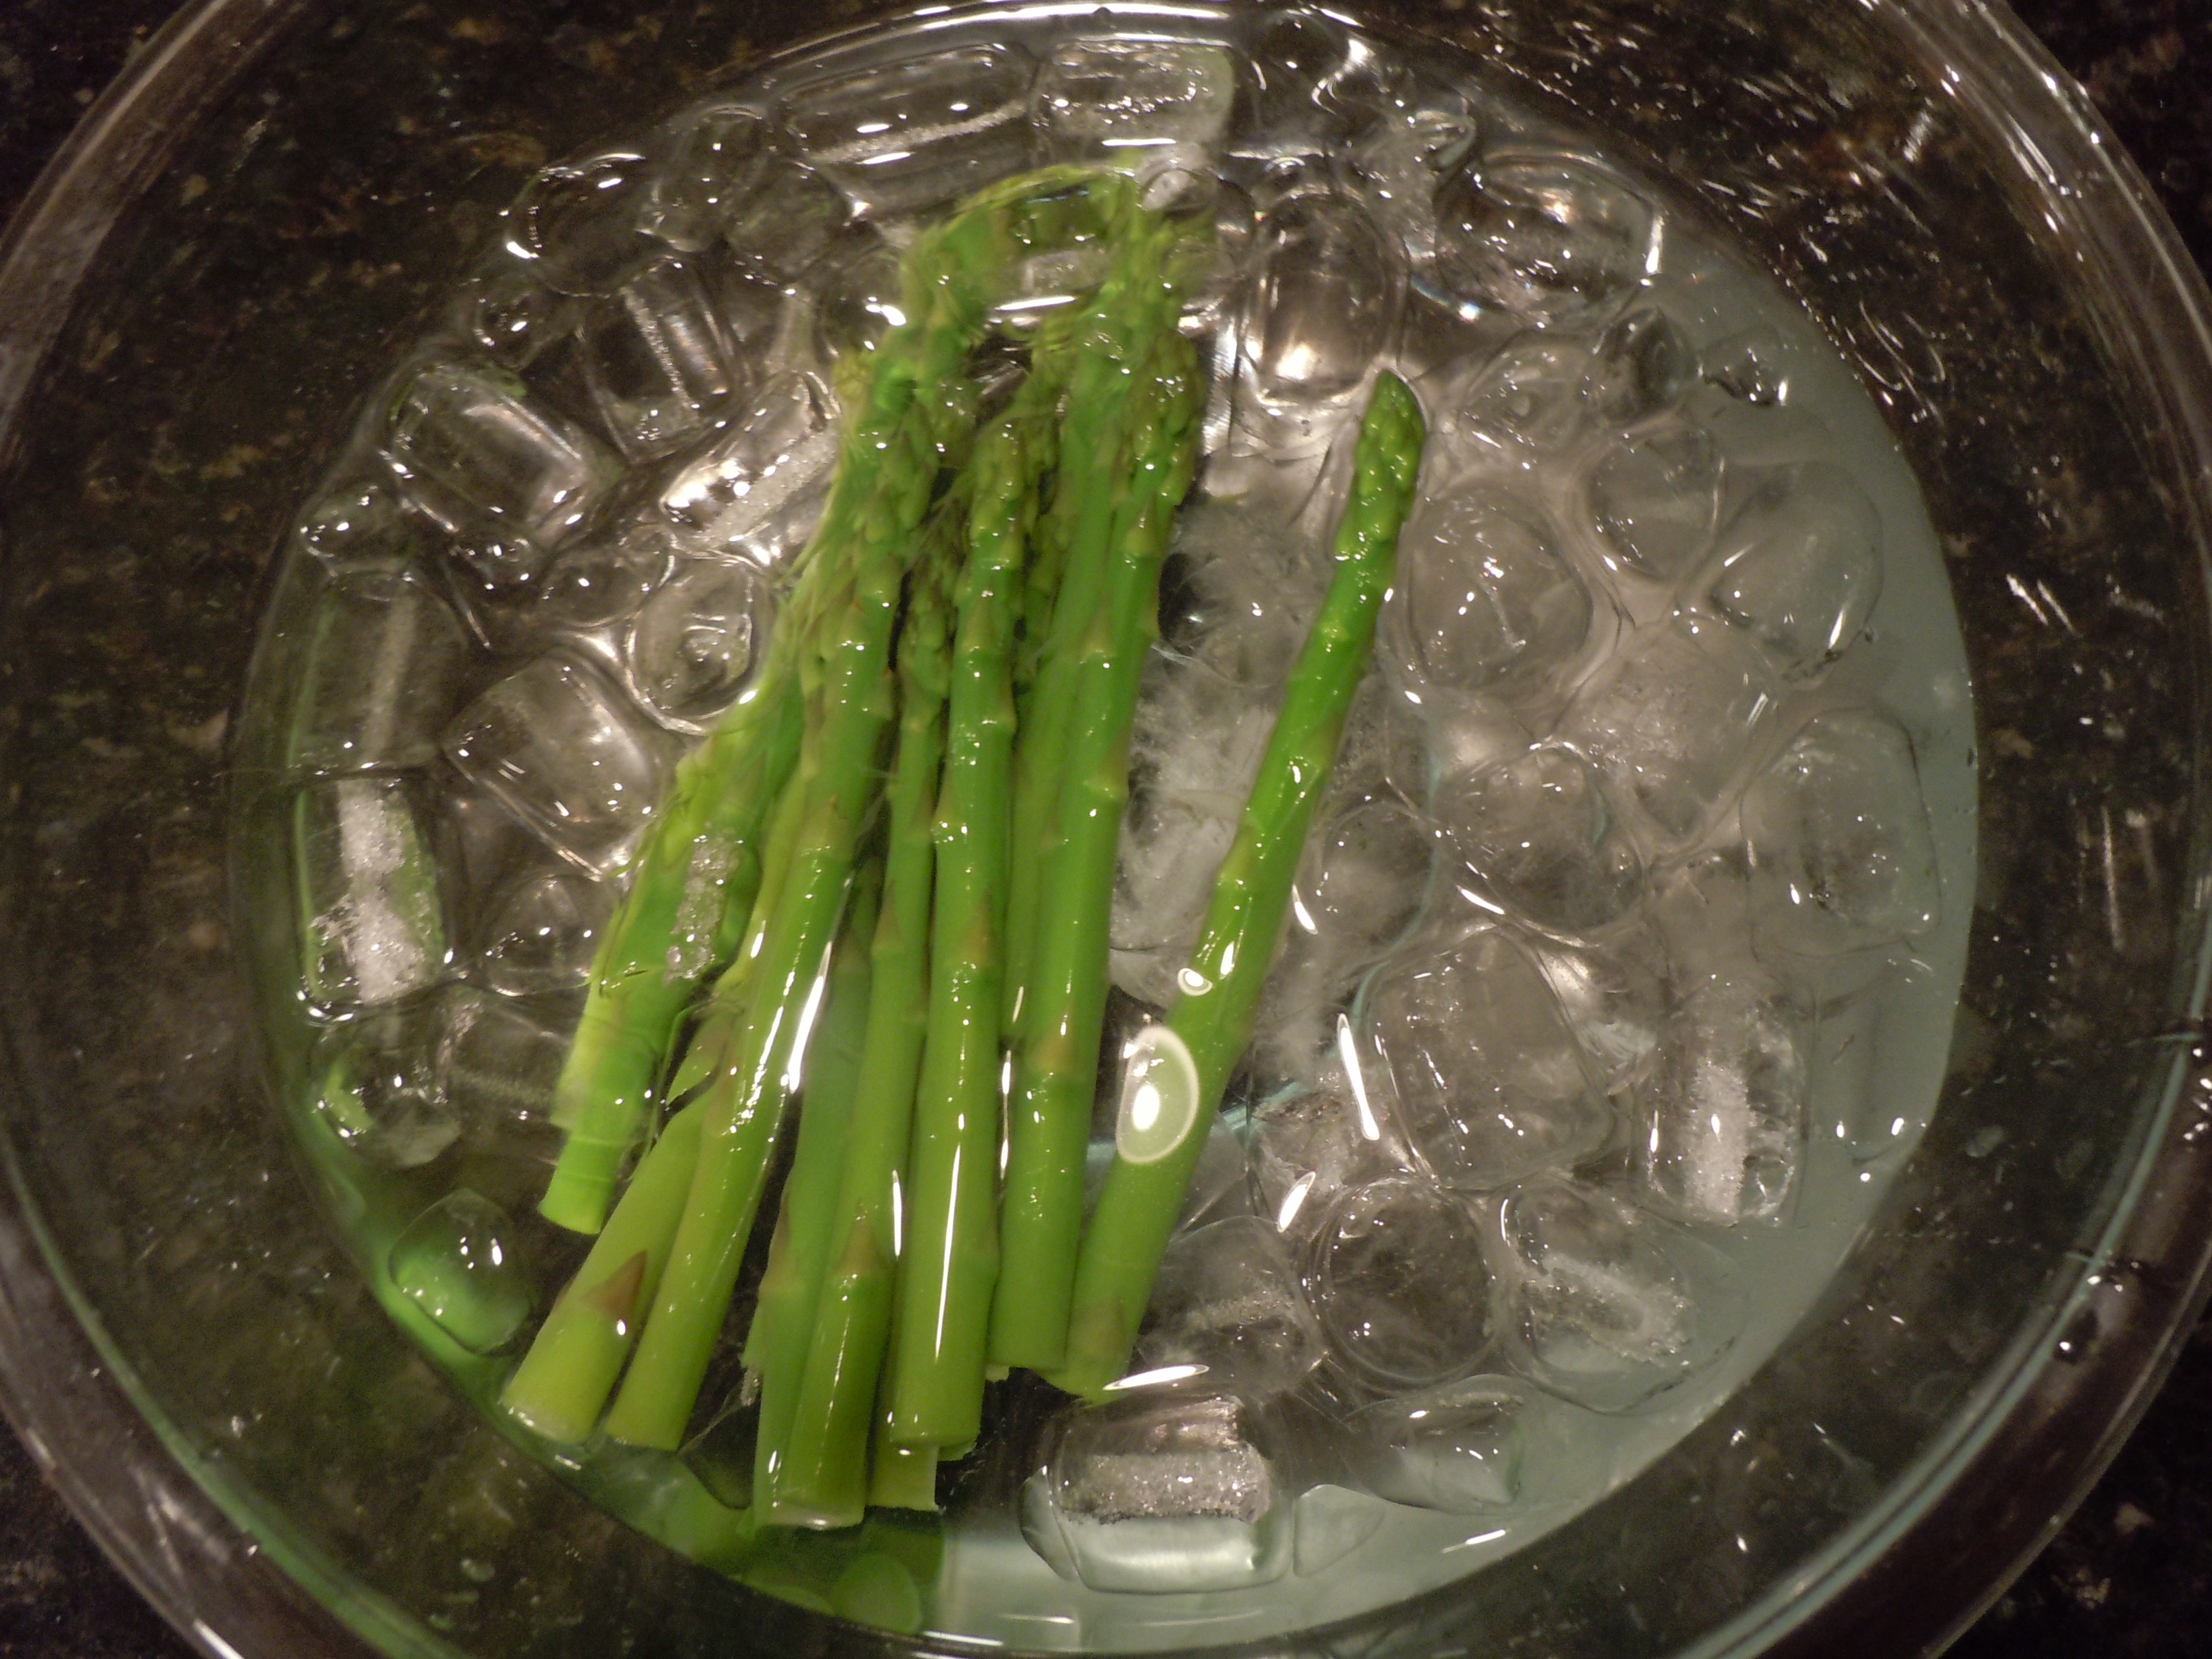
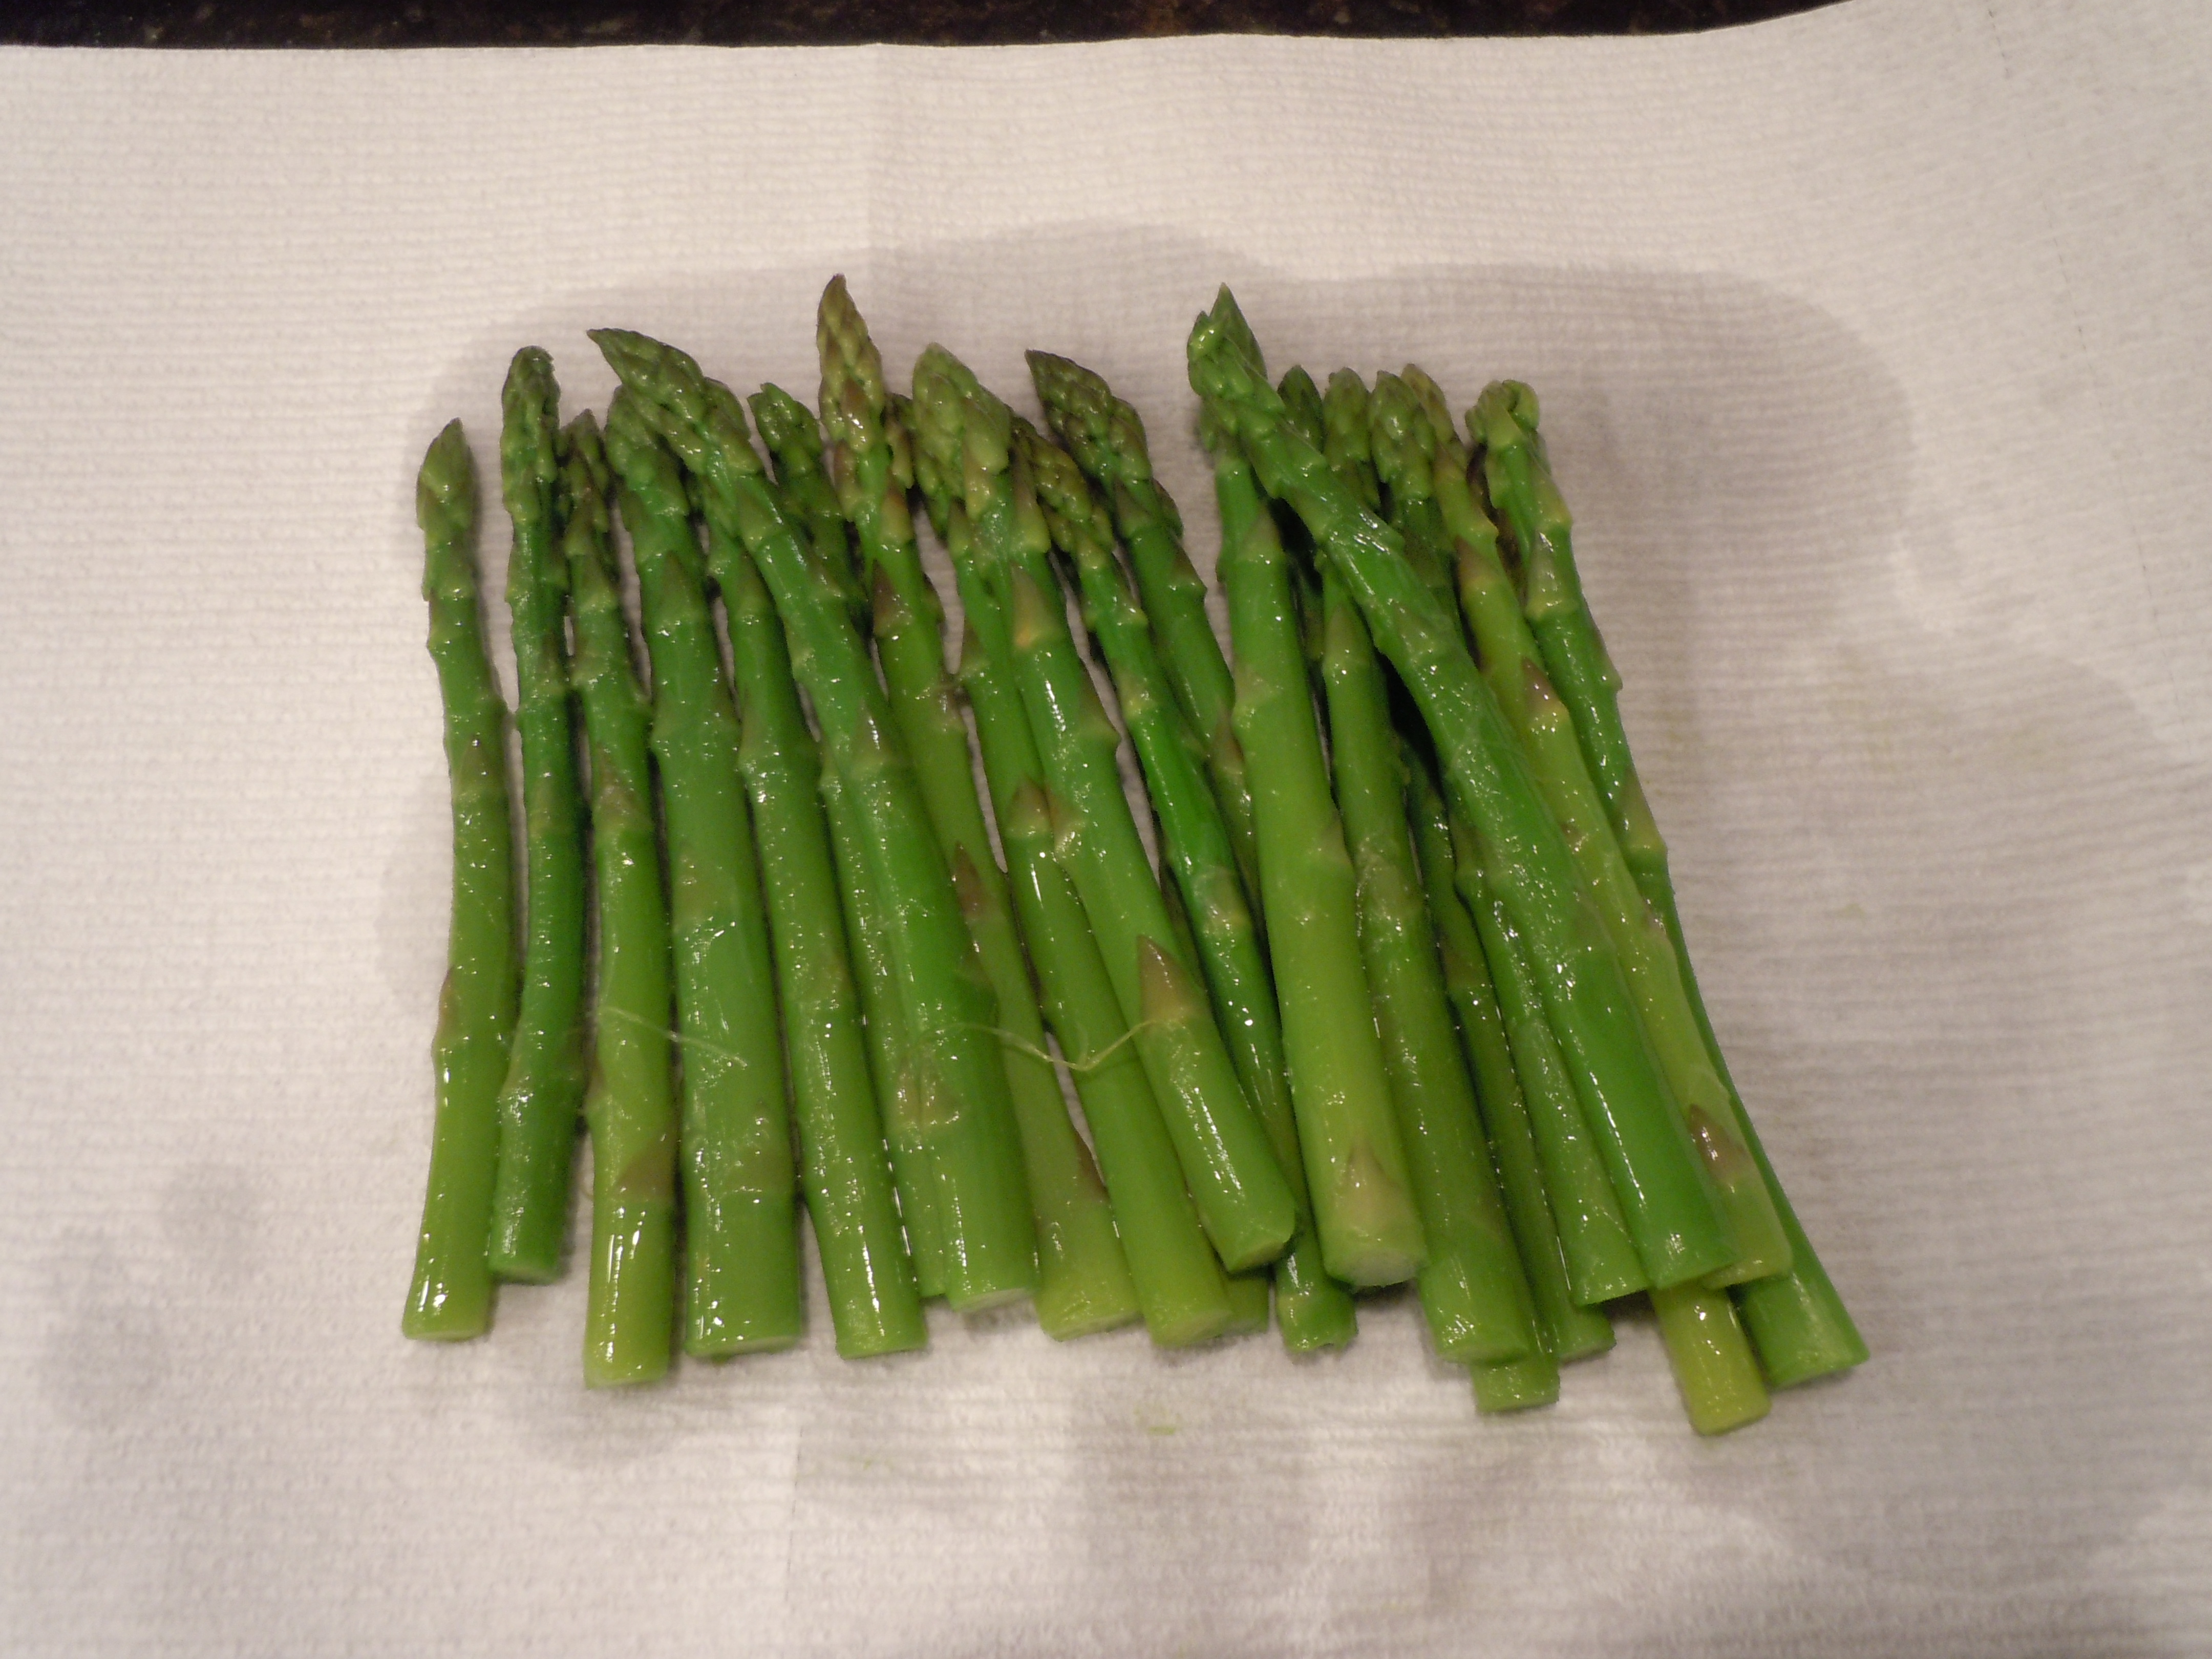
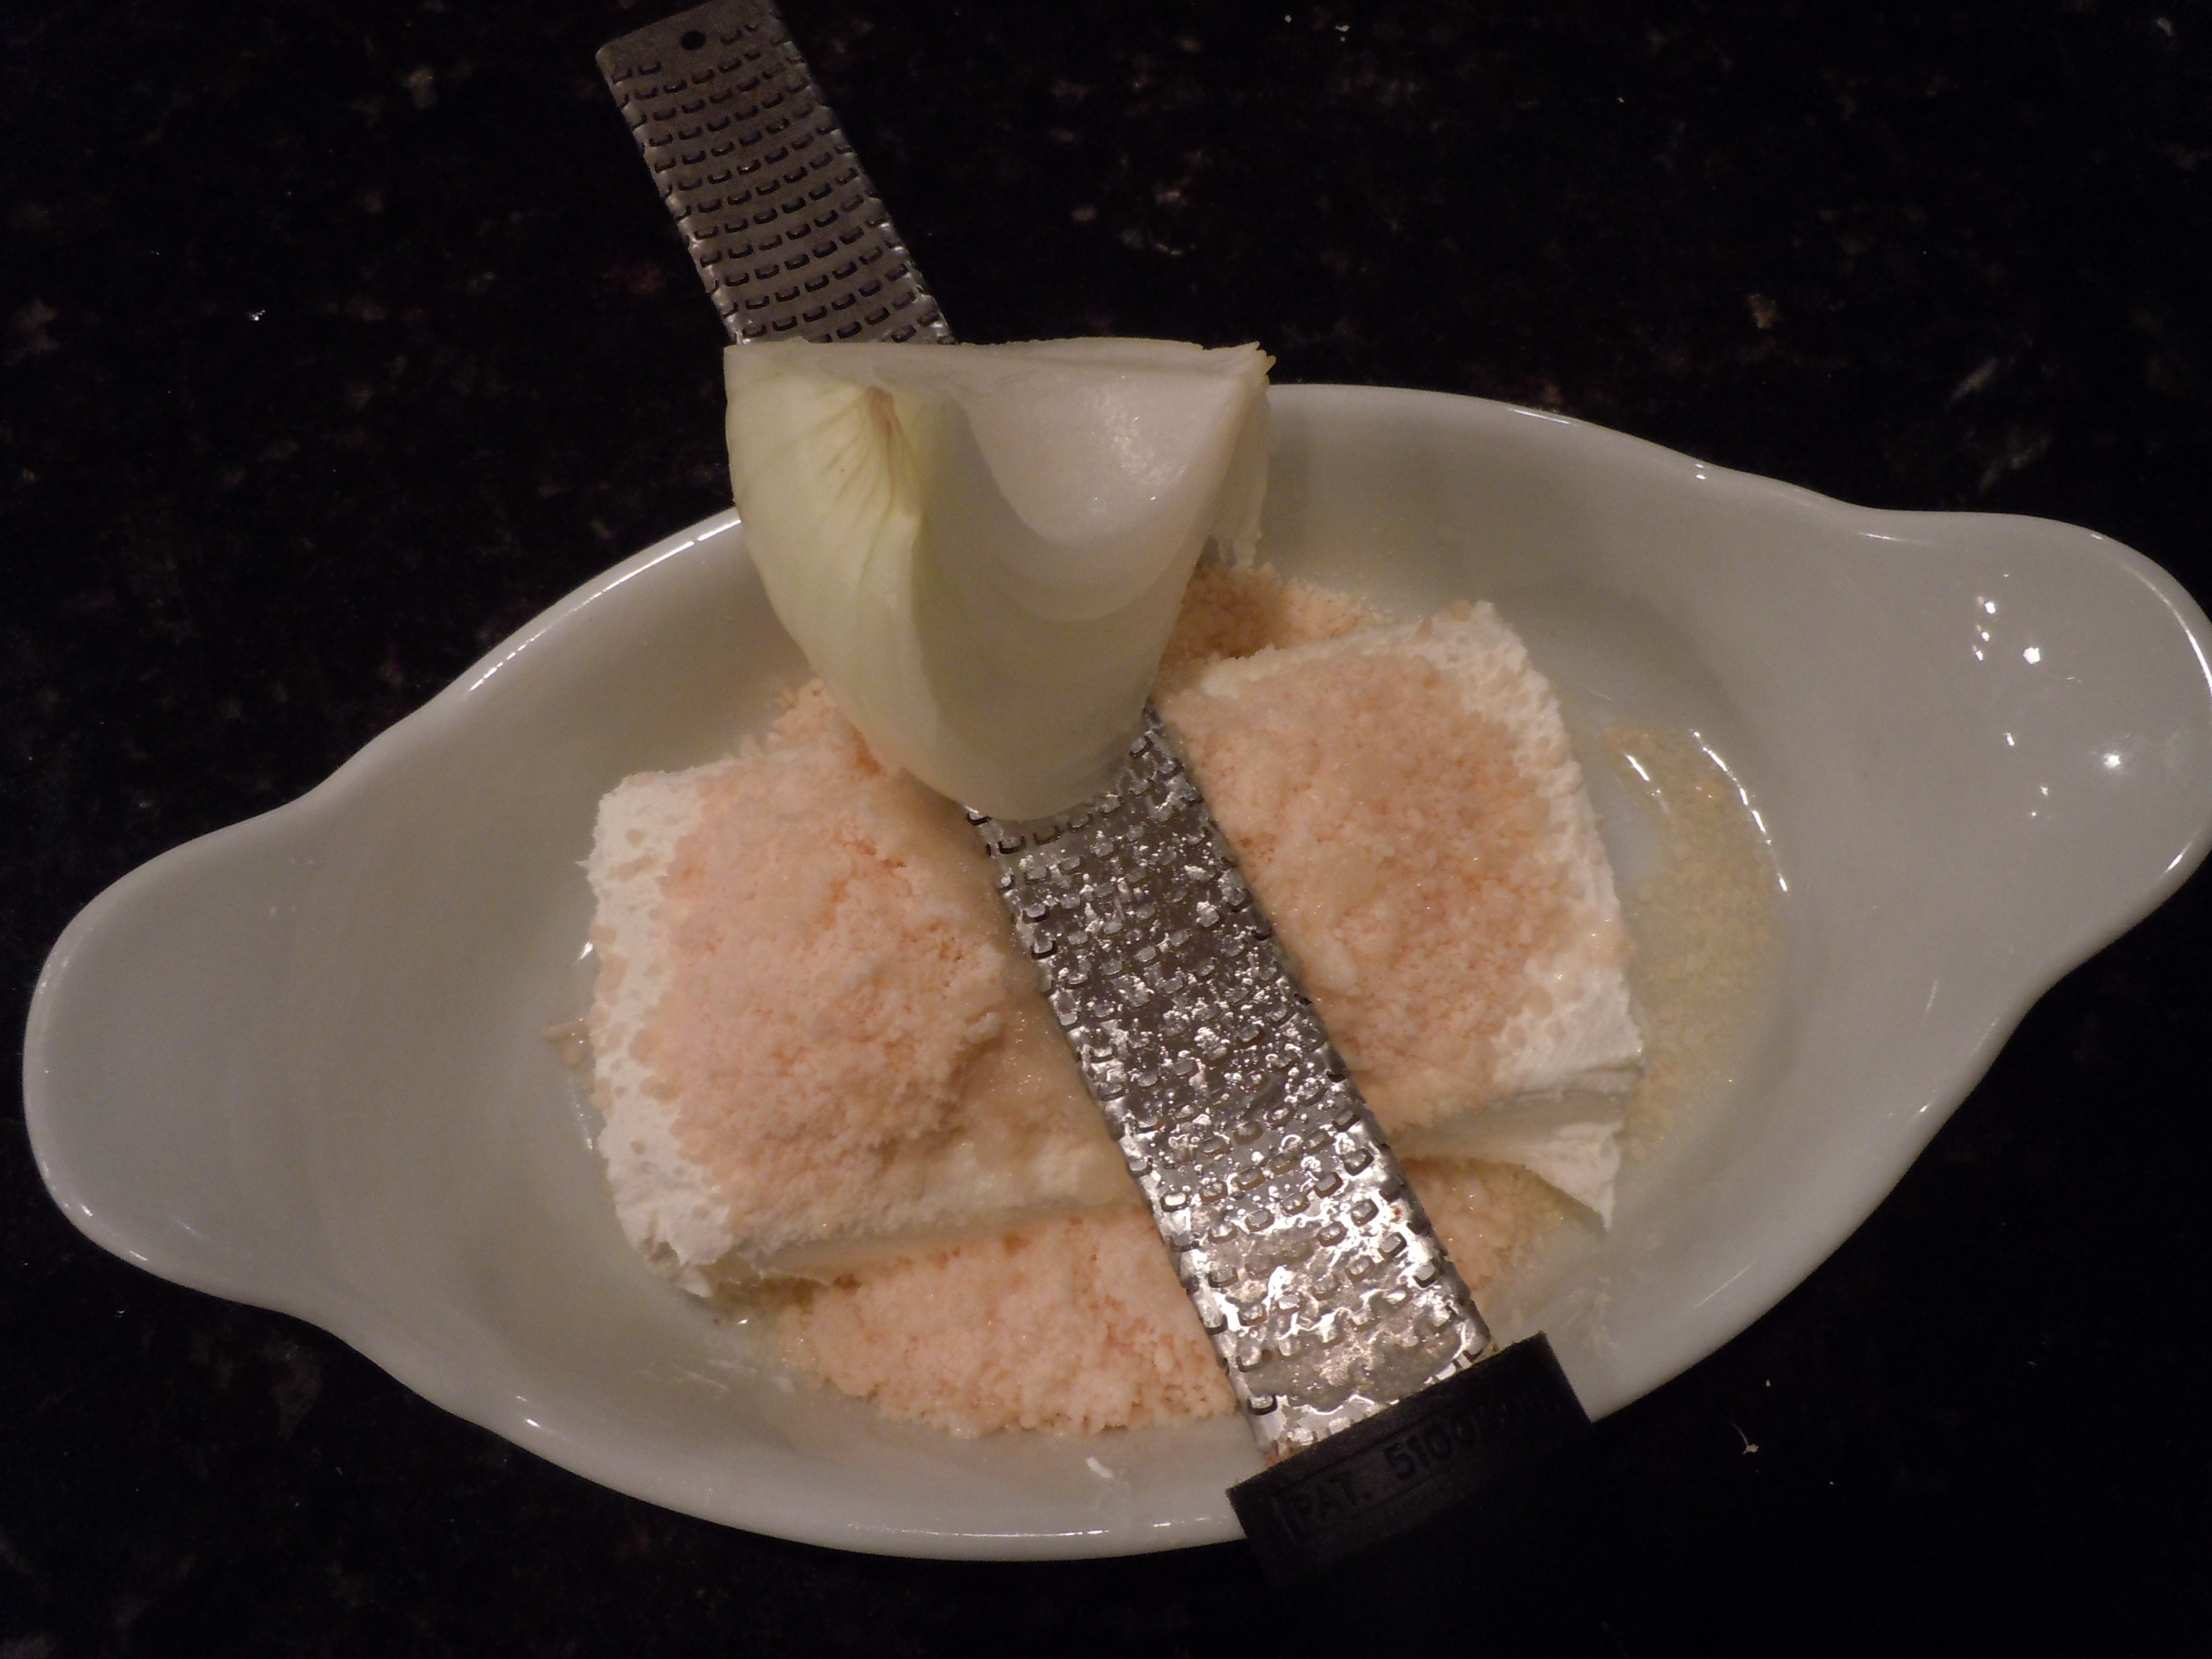
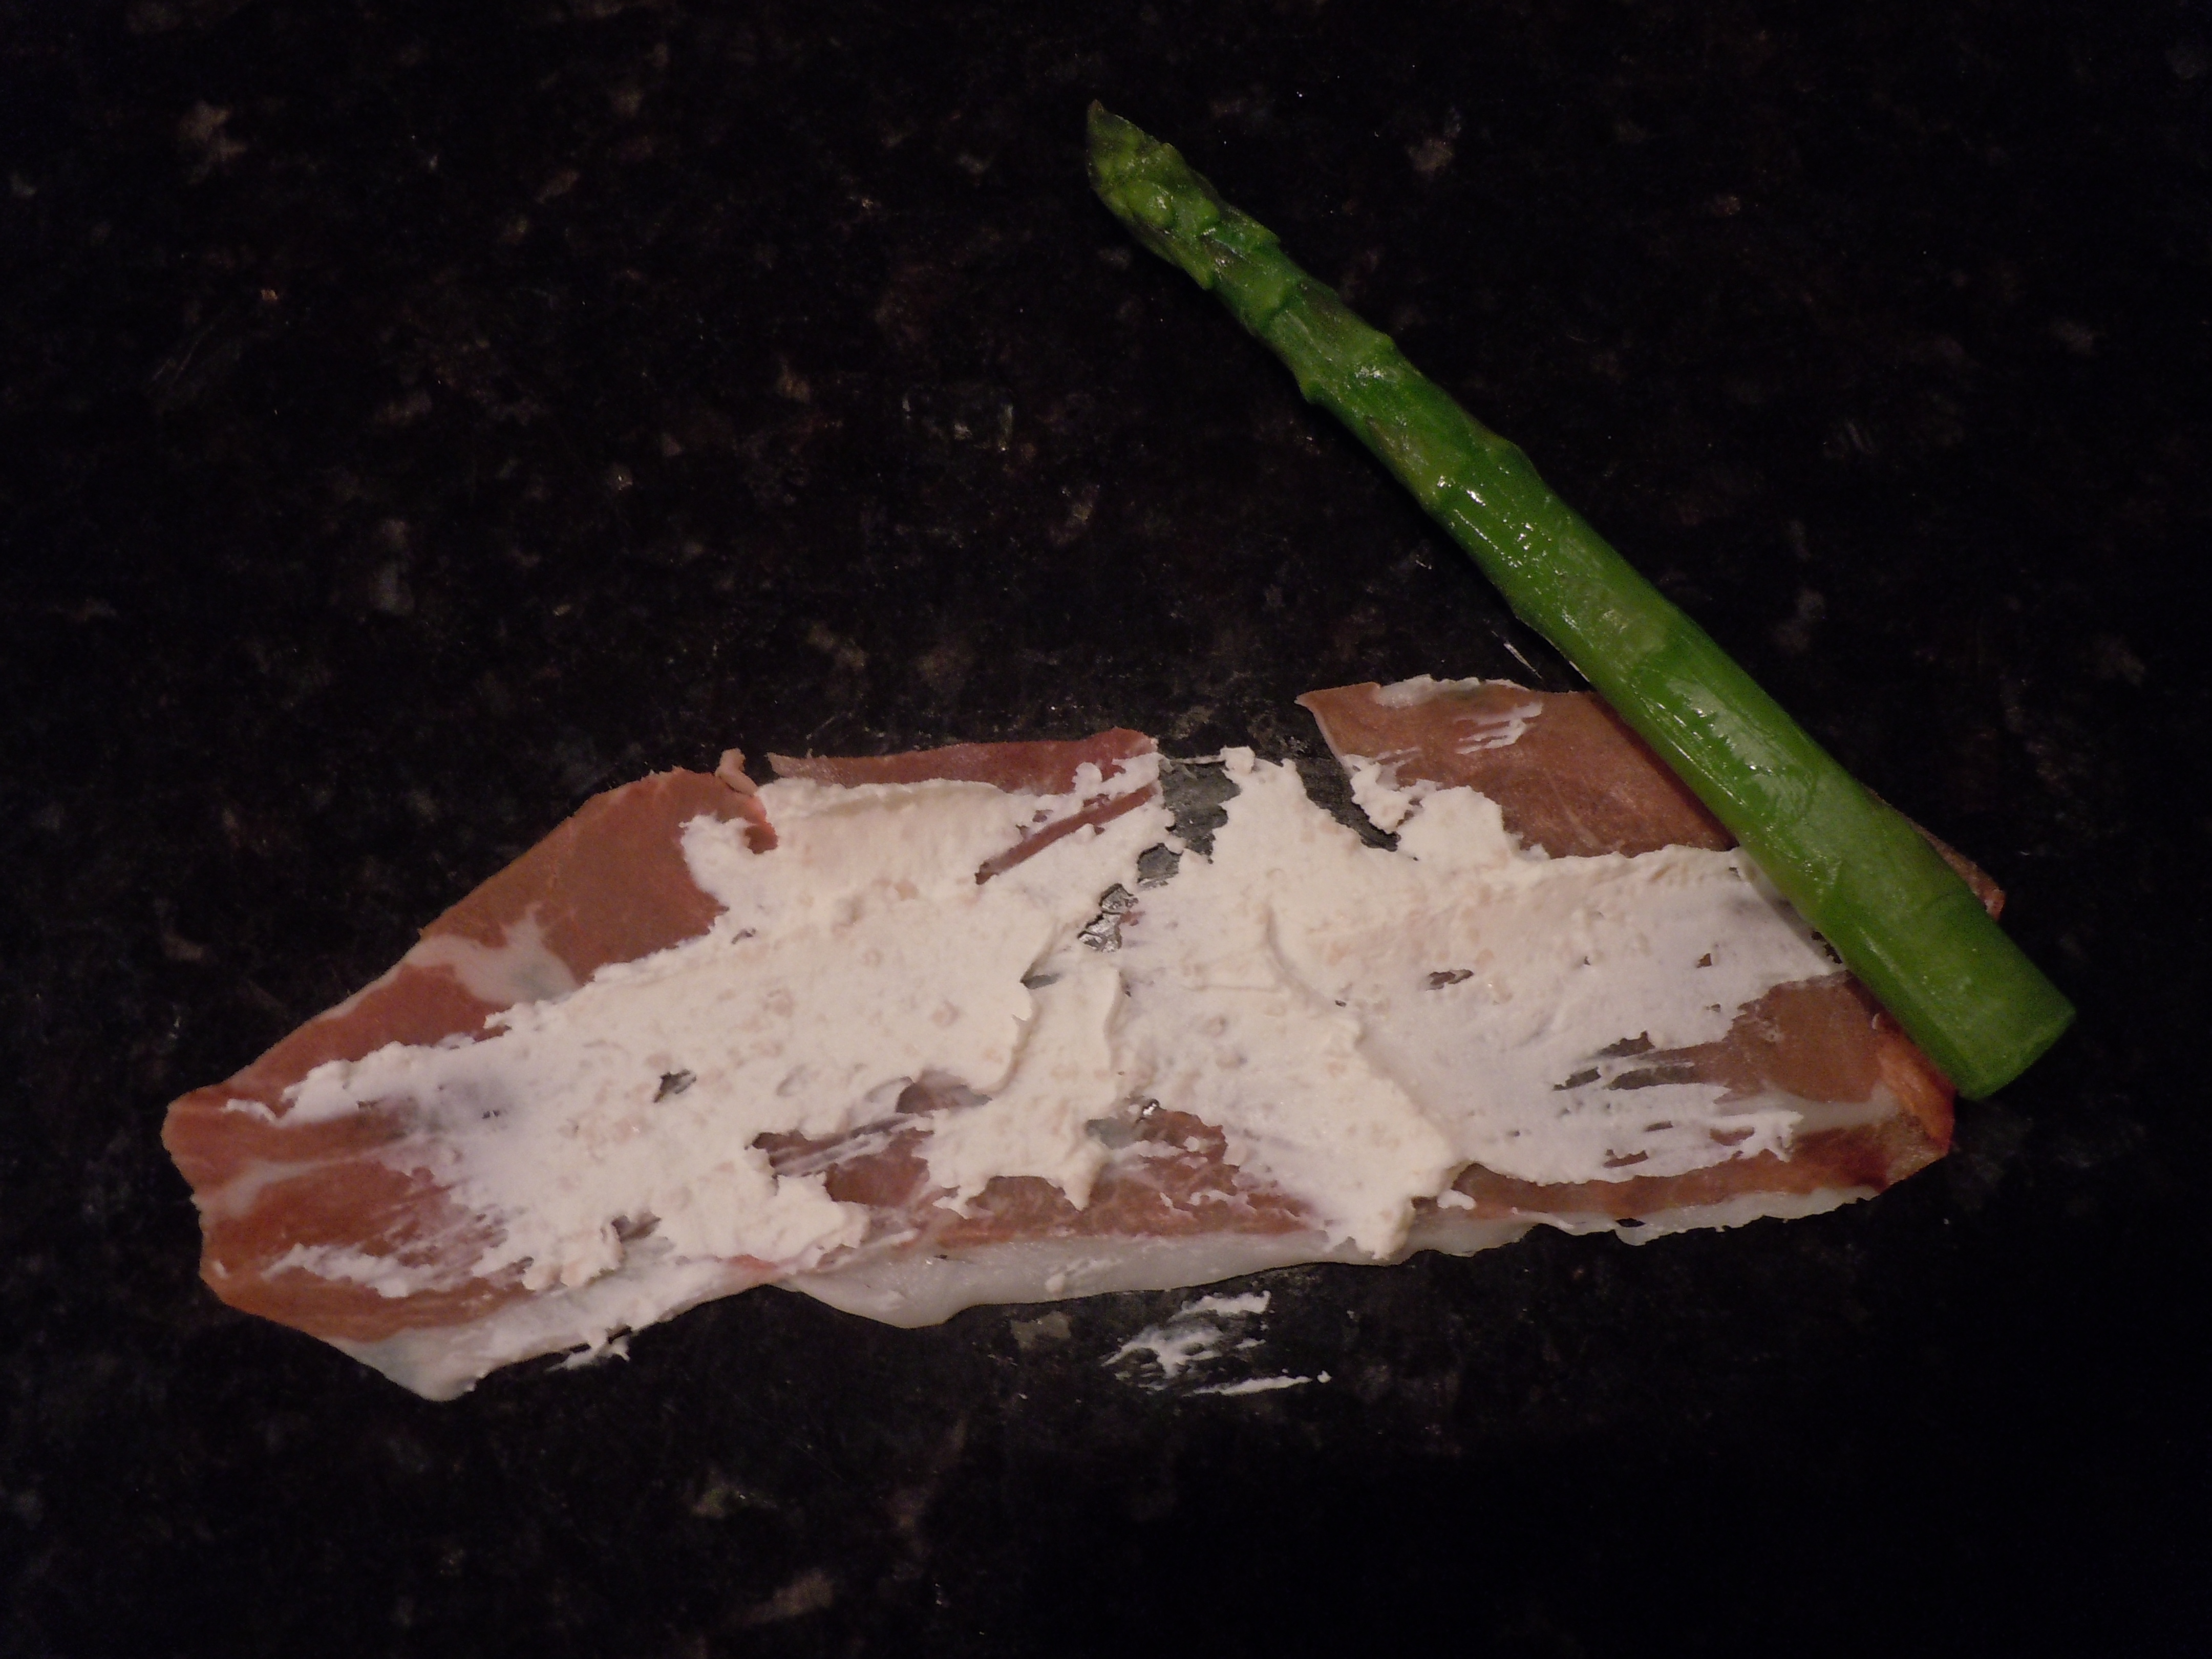
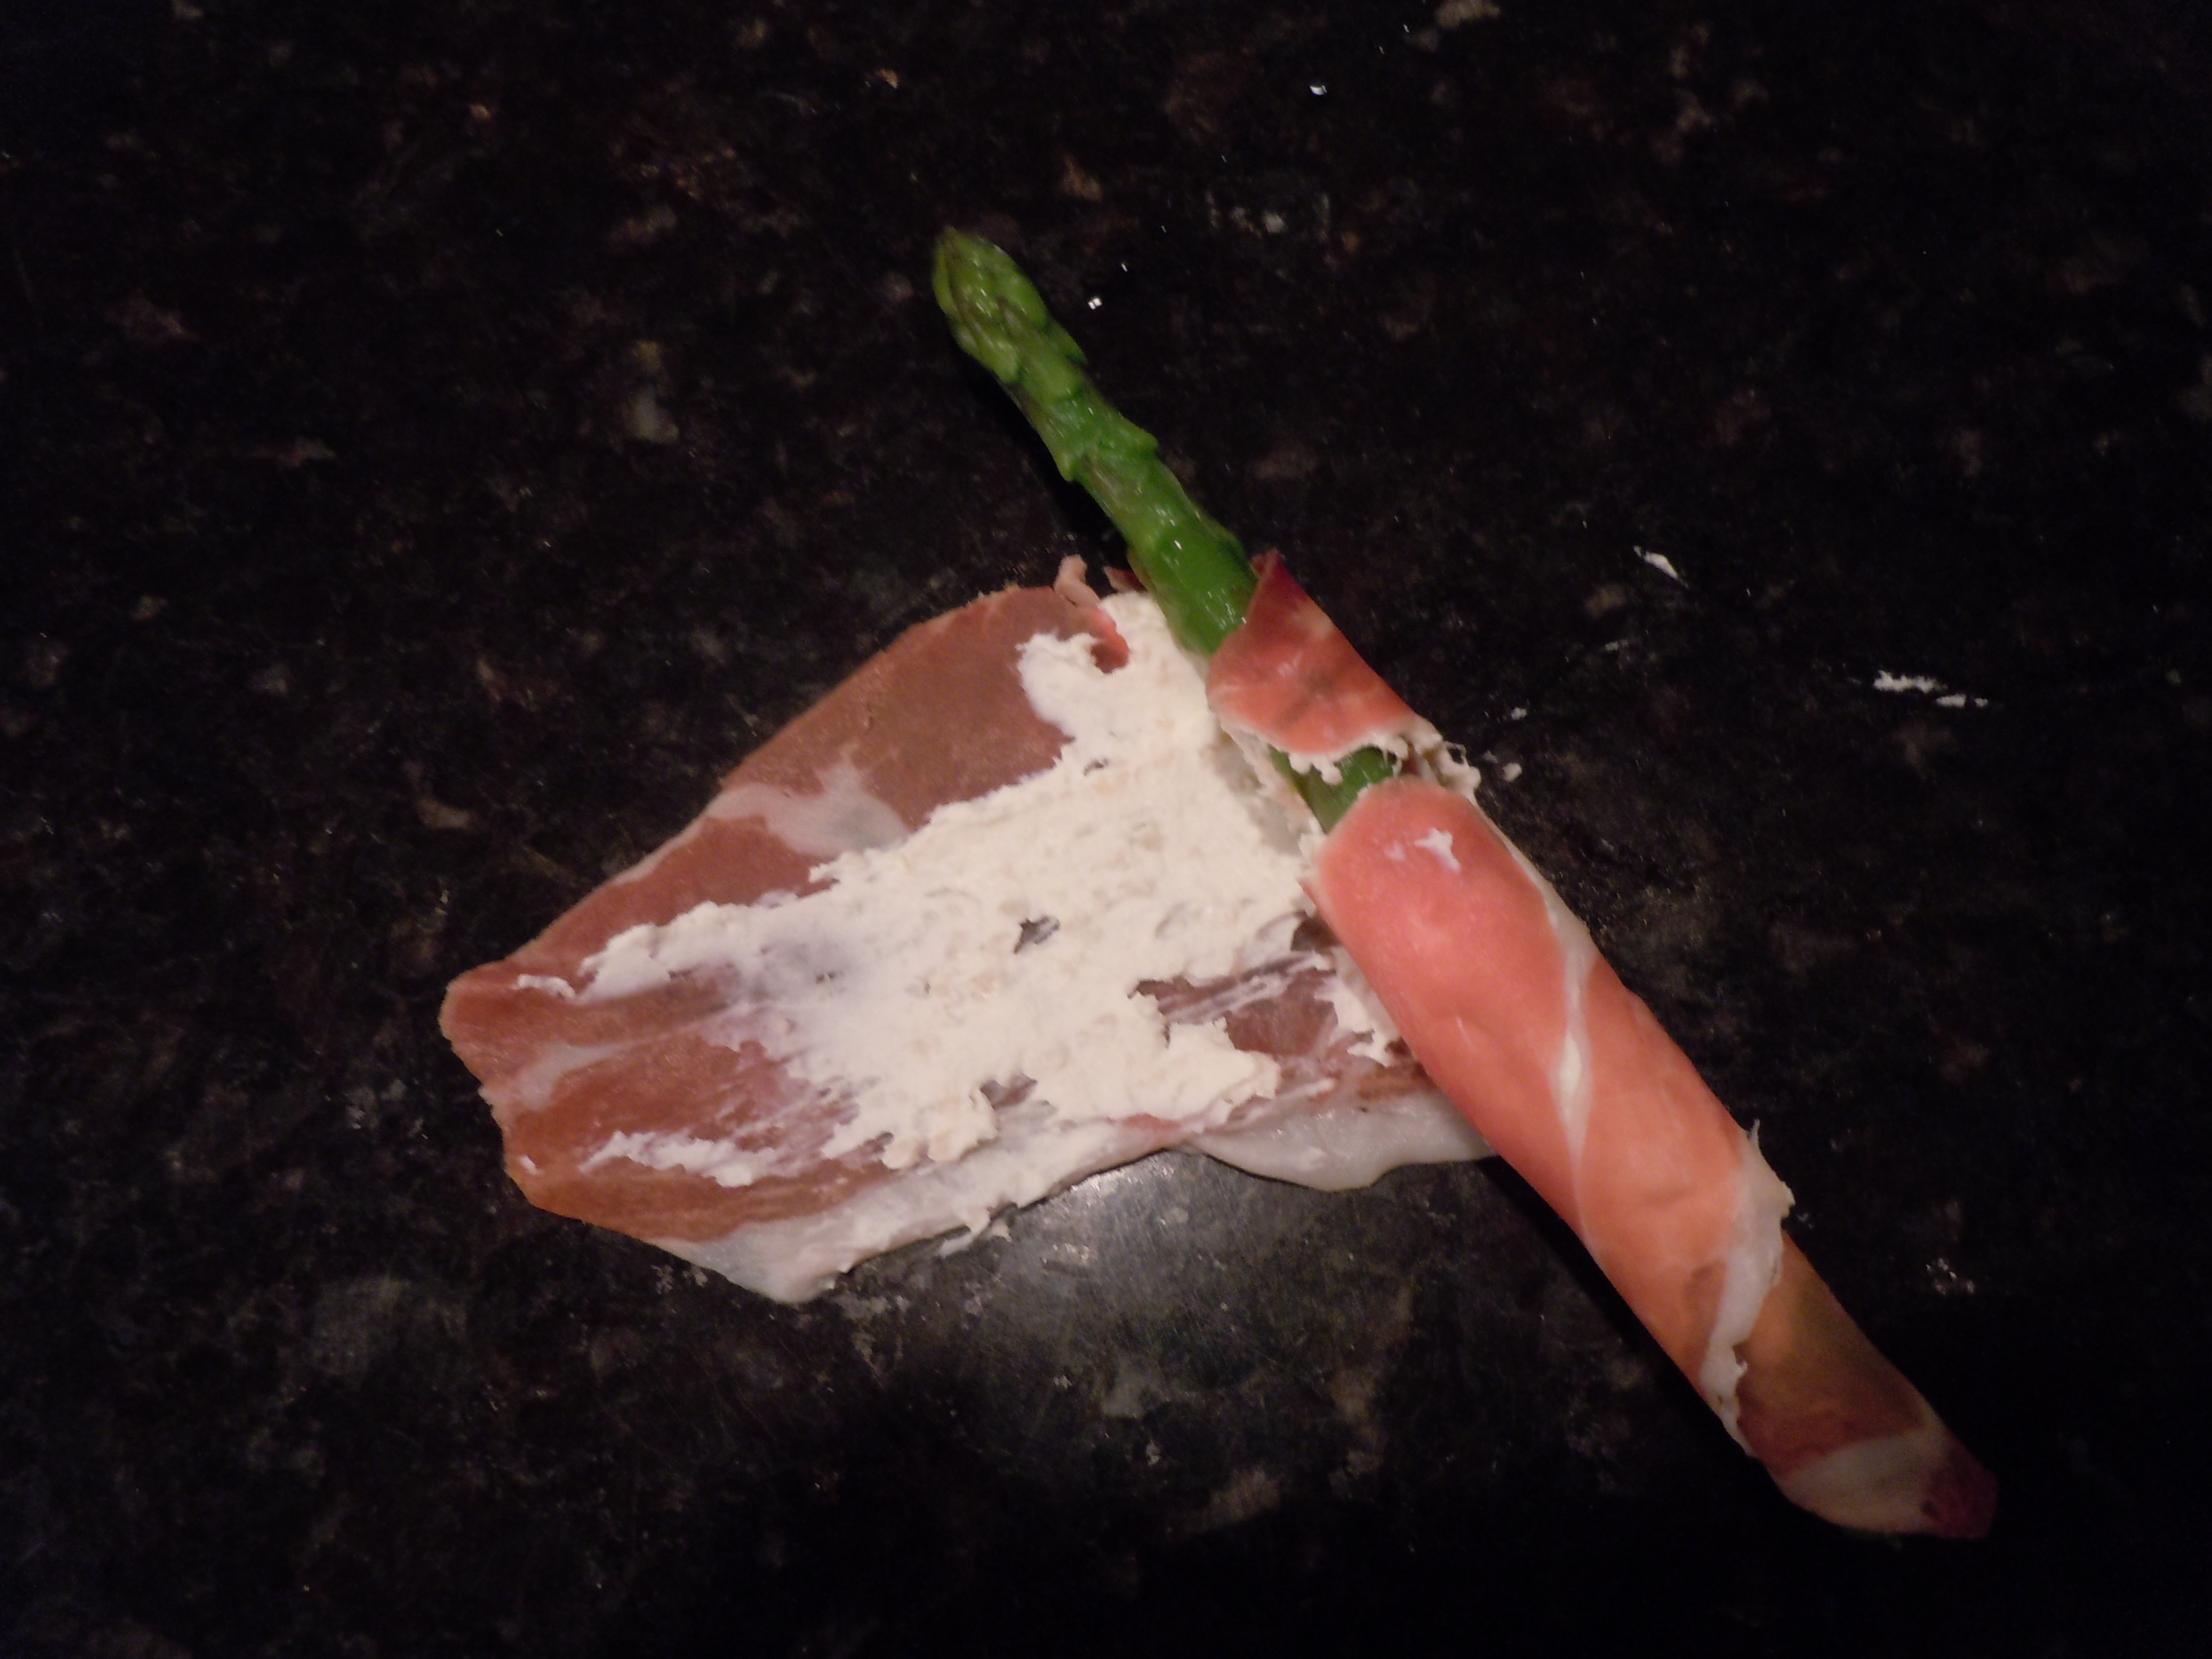
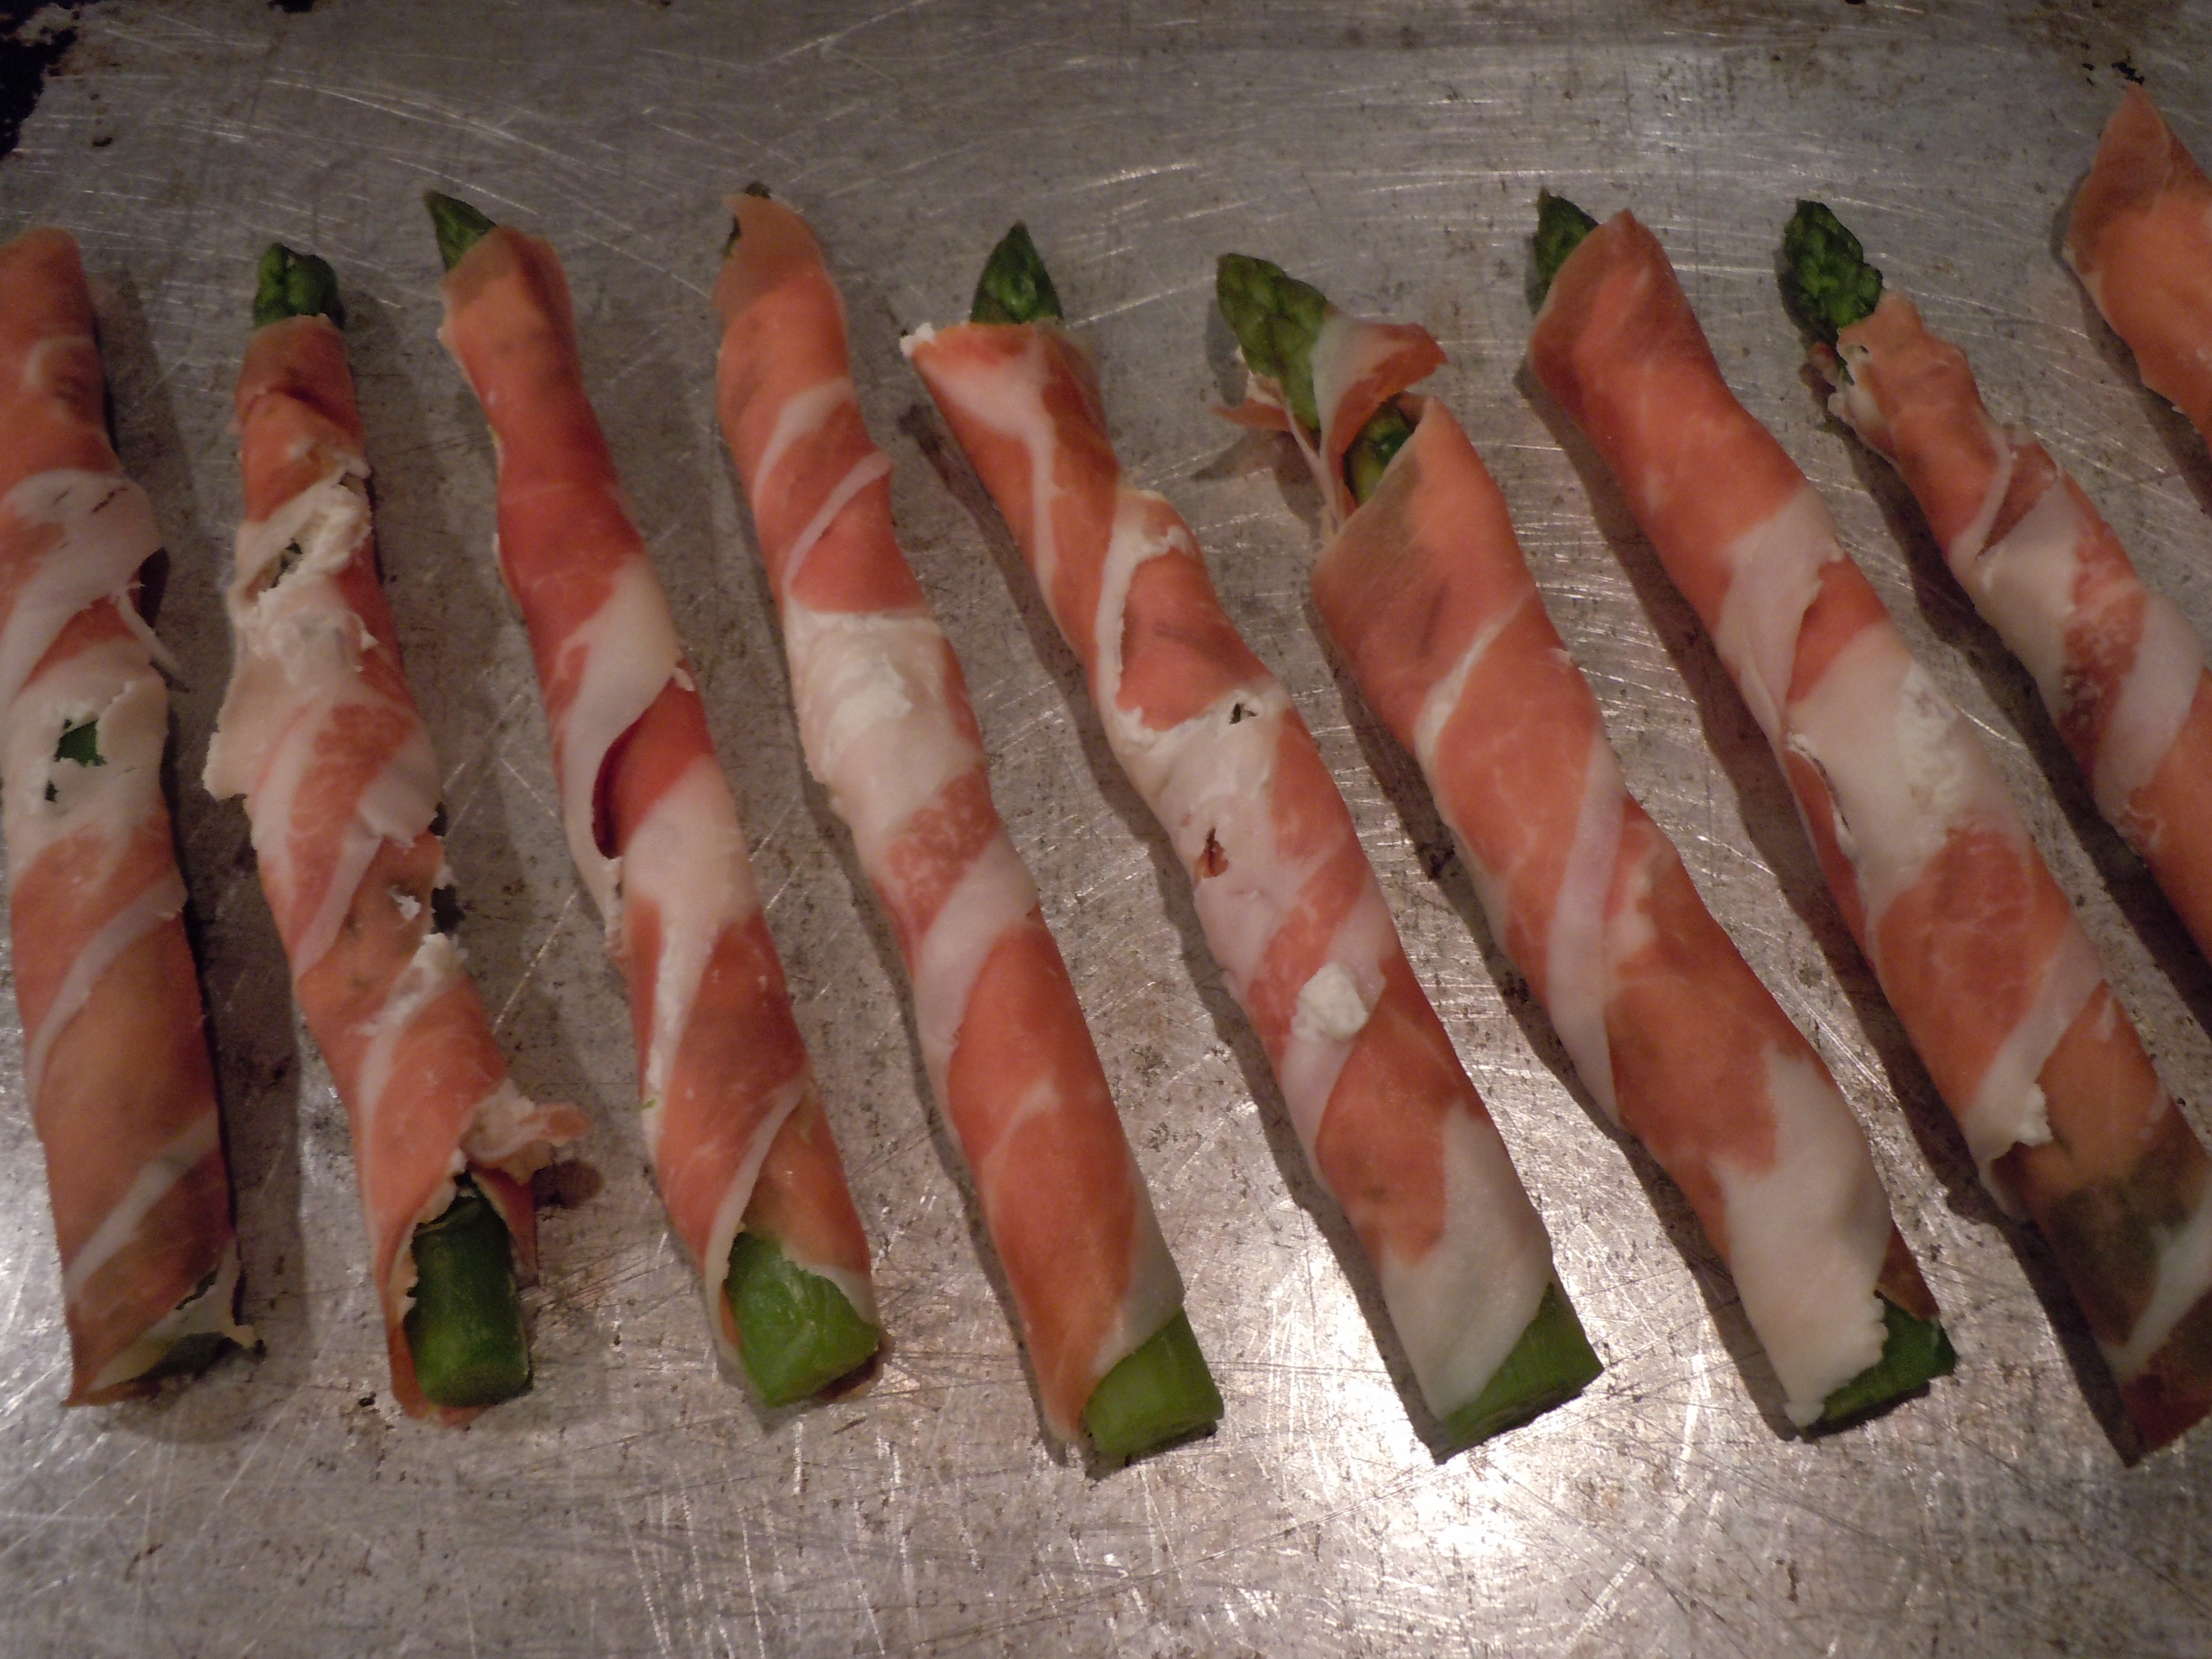
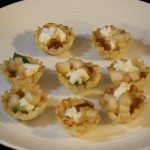
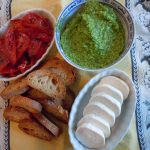
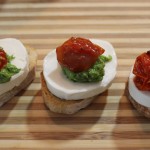
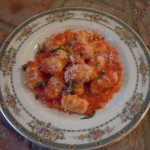
The first holiday appetizer I have for you is my baked asparagus wrapped in Prosciutto that has a smear of a cream cheese, sweet onion and Parmesan spread on the Prosciutto. These Proscuitto wrapped Asparagus are one of my favorite appetizers and can be a topping to a salad or a pretty side vegetable to lunch or dinner. I first had these delicious little bundles at my sister-in-law’s, Anita’s house, twenty years ago.  She is an amazing chef who’s always cooking up a storm. They can totally be made a day ahead, placed on a cookie tray and stored in the frig until you need them. The asparagus is blanched and shocked in an ice bath to stop the cooking and to keep that vibrant green color before they are wrapped with Proscuitto. You want to make sure you buy “Proscuitto di Parma” for this holiday appetizer because it’s the best and most delicate in flavor.  There are other tasty Prosciutto’s out there but they won’t be as tender as the Parma and may get too salty or waxy after baking.

The second quick and easy, gourmet tidbit i have for you are my holiday crostinis with Gorgonzola, fresh chopped tomato, basil and garlic that bakes for seven minutes. These take the same amount of time as the asparagus-Prosciutto appetizer’s. How convenient is that? You can buy already crumbled Gorgonzola at the market in small plastic containers. A little chopping of cherry or grape tomatoes and basil and voilà! The crostinis are beyond simple to make and you can check out that recipe by the hyper-link.

The last wicked easy and delicious holiday appetizer I have for you is something a little sweet. It’s a dollop of goat cheese, fig jam, fresh chopped pear and a mint leave all in a pre-baked fillo shell. Yes, I said pre-baked!!! Can you believe that one? This one you serve at room temperature so all you need to do is thaw the pre-baked shells which takes all of two minutes. It just can’t get any easier than that.

You can totally be flexible with these perfect little holiday appetizer’s too. If you don’t like Gorgonzola switch it out with some cubed up fresh mozzarella to top the crostinis and tomato-basil mixture. As for the pre-baked phylo cups, you can always swap out the goat cheese for a slice of brie if that’s more your taste.

I hope these last minute holiday appetizer’s help you out for your party! I wish you all a joyous New Year! You can certainly swap out or add in other hors d’ oeurves if you are feeling ambitious like baked coconut shrimp, zucchini torta, roasted chick peas, or smoked salmon on crostinis with cream cheese-caper spread. Enjoy 😉

iphone pictures 448

iphone pictures 1063

iphone pictures 970

iphone pictures 777


Baked Asparagus Wrapped in Prosciutto

iphone pictures 538 iphone pictures 601 iphone pictures 529

iphone pictures 532 iphone pictures 534 iphone pictures 540

iphone pictures 544 iphone pictures 546 iphone pictures 545

iphone pictures 552 iphone pictures 554 iphone pictures 560

Ingredients:

  • 20 large asparagus (the bigger the better)
  • 1/4 lb Prosciutto di Parma sliced thinly
  • 4 oz cream cheese room temp (Philadelphia)
  • 1 Tbsp grated vidalia onion (yellow or white is fine too)
  • 1/2 cup grated Parmesan cheese
  • 1 Tsp fresh lemon juice

Directions:

  1. Pre-heat the oven to 400º.
  2. Hold the asparagus with your fingers in the middle and on the end and bend.
  3. The asparagus will break where it’s supposed to.
  4. Line them up and cut evenly across the bottom so they are all at a consistent length.
  5. Bring salted water to a boil and add in asparagus …Blanch 2 minutes
  6. Drain and put into a ice bath.
  7. Dry the asparagus with paper towels.
  8. At this point you can pop them into a zip lock and into the frig until you are ready for them.
  9. Mix together in a small bowl the room temperature cream cheese, grated onion, Parmesan and lemon juice just til combined
  10. Take a piece of Prosciutto and smear 1 Tbsp of the cream cheese mixture down the length of it.
  11. Place the asparagus on a bit of a diagonal (see photo) and roll up.
  12. Place onto an ungreased cookie sheet and bake for 7 minutes – you are heating thru only
  13. Use a spatula to remove from pan and be sure to flip them over when you plate them to see the lovely caramelization on the under side.
  14. Optional: Drizzle a little olive oil, a fresh squeeze of lemon and some shaves of Parmesan on top for a little extra!

iphone pictures 545

 TIP:  Using a micro-plane grater or rasp to grate the onion is a wonderful culinary tool which actually started out back in the day as a wood planer for woodworkers!


Baked Crostinis with Gorgonzola, Fresh Tomato, Basil & Garlic

gorgon mixgorgan crostitoma

withgorg gorgtray IMG_4768

Ingredients:

  • 1 french baguette sliced into 20 – 1/4″ pieces
  • Crostini Recipe
  • 1 cup chopped cherry or grape tomatoes
  • 2 tbsp fresh julienne basil
  • 1 garlic clove put thru garlic press
  • dash salt and pepper
  • 1 small container crumbled Gorgonzola cheese 4 oz. OR diced up fresh Mozzarella

Directions:

  1. Pre-heat oven to 400º
  2. Top crostini with tomato-basil mixture and a tsp of crumbled Gorgonzola OR Mozzarella
  3. Bake for 7 minutes

Goat Cheese, Fig Jam, Fresh Pear and Mint in Pre-Baked Fillo Cups

fillocup withjam endgoat

Ingredients:

  • 1-2 pkg of pre-baked fillo cups (if you can’t find these just buy pre-formed pastry cups that you can quickly bake)
  • 2 oz. goat cheese OR wedge of your favorite dbl cream brie…Saint Albray for example
  • fig jam
  • 1/2 cup fresh chopped pear
  • Wedge of fresh lemon
  • fresh peppermint leaves

Directions:

  1. Chopped the pear and give a squeeze of a wedge of lemon
  2. Thaw the pre-baked fillo cups
  3. Place fresh mint leaf into cups
  4. Place a dollop of goat cheese or slice of brie into the cup
  5. Top with 1/2 tsp of fig jam
  6. Then top with diced fresh pear
  7. Serve room temperature