The Traveling Epicurean

Tortellini at The Gulla’s

Tortellini at The Gulla’s

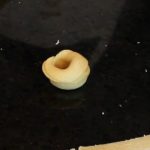
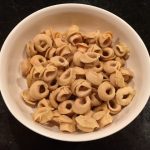
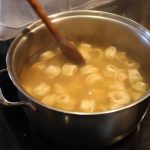
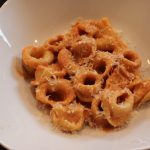
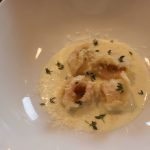
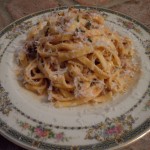
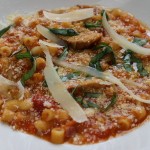
You know this labor of love is so worth the effort when you taste how tender and flavorful these homemade tortellini are! The delicate, circular shaped pasta are stuffed with a purée of sundried tomato, mozzarella, and Reggiano Parmesan and served in one of my all time favorites, a tomato-cream sauce.  I introduced Steve to another easy and scrumptious sauce, Gorganzola Dolce-Cream Sauce that’s garnished with fresh thyme and a drizzle of truffle oil! 

This past weekend I was at The Gulla’s house with Steve and his son Maximo making their homemade tortellini. Steve dedicates a few hours every Christmas Eve making these little gourmet bites for his family’s Christmas dinner. Making these tortellini is definitely a labor of love because you are creating each little amazing folded bundle of pasta by hand.

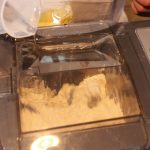
Having a Smart pasta machine like Steve’s really cuts down on the labor of making tortellini as the pasta comes out of the machine in long ready-made sheets in mere minutes. It’s a very cool process putting out smooth sheets of pasta in 3 minutes flat but you can also learn to make Steve’s tortellini using homemade pasta too if you don’t own an Smart pasta machine. I have a homemade pasta recipe below for all of us without a pasta machine who don’t want to miss out on learning how to make these incredible tortellini.

As Italian legend goes on how the shape of the tortellini came about dates back to the days when Venus, the Goddess of Love, was traveling to a small town in Italy between Modena and Bologna. She was staying at a tavern where the Innkeeper was so taken by her beauty he peeked thru the key to her room one night and got a glimse of her navel. He rushed to the kitchen and created a pasta in the likeness of her belly button. And that’s how the shape of the tortellini came about, the belly button pasta! Who Knew?

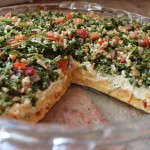
While you are working hard forming these wonderful tortellini you may need a little sip of something to get you through like a Metaxa Mojito! And for easy nibbles you can pick on some Mango Salsa, Sweet Potato Fries and Green Goddess Dip II,  Best Guacamole Ever or some delicious Mediterranean Layered Dip!
INGRDIENTS for making PASTA in The Smart Pasta Machine:

  • 3 parts flour
  • 1 part semolina
  • 180 ml OR 3/4 cup of water for 2 lbs flour in pasta machine
  • 1 egg and 1 tsp water whisked in a small bowl – set aside until ready to form tortellini

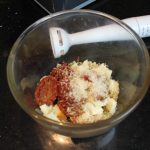
INGREDIENTS for Sun-dried Tomato FILLING:                                                                                         NOTE: THIS FILLING IS UNBELIEVEABLY DELICIOUS!…try it on crostini OR on crusty bread!

  • 1/2 cup sun dried tomatoes
  • 1/2 cup mozzarella – whole milk or part skim
  • 1/4 cup grated Reggiano Parmesan
  • 2-3 tbsp olive oil

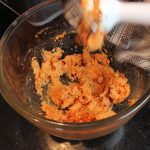
Purée these ingredients with an immersion blender or add to food processor and pulse. Start with 2 tbsp of olive oil and add a little extra if needed to purée til smooth texture

DIRECTIONS FOR FORMING THE TORTELLINI WITH SHEETS OF PASTA MADE FROM THE PASTA MACHINE:

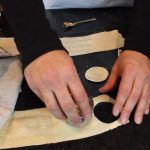
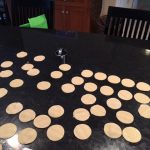
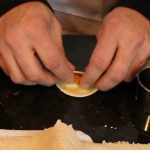
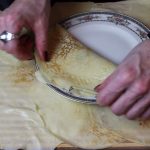
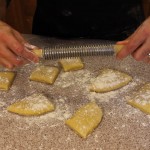
  1. Begin to cut 2″ circles with your cookie cutter out of the machine made sheets of pasta
  2. Brush top 1/2 of the circle edge with a whisked egg
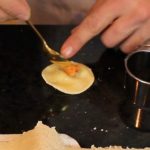
  3. Place 1/4 tsp of sun dried tomato filling in the middle of the circle pasta
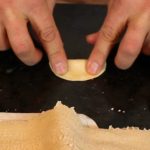
  4. Fold the circle in 1/2
  5. Press to SEAL the 1/2 circle of pasta…VERY IMPORTANT to SEAL this edge!
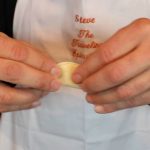
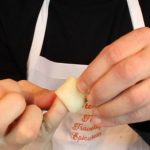
  6. Take 1/2 circle and wrap around your pinky having each end meet
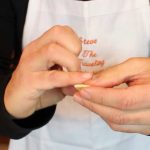
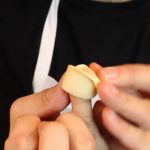
  7. Press these two ends together to seal and form one continous circular shape
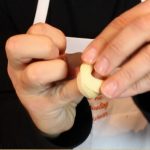
  8. Fold down top of circular pasta to form tortellini
  9. Place in a bowl as you finish each one until you gone thru all the pasta sheets
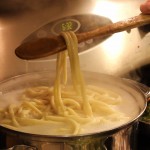
  10. Bring large pan of salted water to a boil and add fresh pasta
  11. Cook pasta for 8 minutes, test pieces of pasta for proper doneness
  12. Serve with tomato-cream sauce or Gorganzola Dolce-cream sauce, garnish with thyme and truffle oil … mmm!

INGREDIENTS FOR TOMATO-CREAM SAUCE:

  • 2 cloves finely chopped garlic
  • 1/2 tsp salt
  • 1/4 tsp dried oregano
  • 3 1/4 cup POMI “strained tomaotes” – 1 med box – 26 oz.
  • 2 cups heavy cream
  • 2 tbsp olive oil

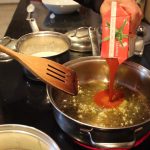
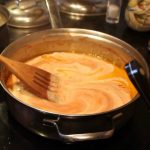
Sauté finely chopped garlic in 2 tbsp olive oil for 3 minutes, add in POMI strained tomatoes, salt & oregano and simmer for 15 minutes. Add in 2 cups of heavy cream to tomato sauce. Bring to a simmer for 15 miutes more. Serve with cooked tortellini, garnish with fresh thyme (and truffle oil.

INGREDIENTS FOR GORGANZOLA DOLCE-CREAM SAUCE:

  • 2 cups heavy cream
  • 1/4 cup Gorganzola Dolce cheese
  • 1/4 cup dry vermouth
  • fresh thyme leaves
  • truffle oil

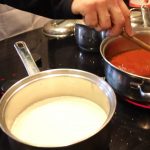
Add heavy cream, Gorganzola, and vermouth to a small sauce pan and bring to a simmer. When it comes to a simmer whisk the melted cheese into the cream and simmer 10 minutes. Serve with tortellini, garnish with a sprinkle of fresh thyme leaves and a drizzle of truffle oil.

INGREDIENTS for Easy Homemade-Handmade Pasta- (Recipe from “Pasta at Vin’s“)

  • 2 1/2 cups all purpose flour
  • 1/4 cup olive oil
  • 4 1/2  – 5 lg eggs
  • 1/4 tsp salt

DIRECTIONS:

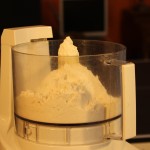
  1. Put the kneading attachment on your food processor and add the flour
  2. Add the salt and olive oil
  3. Turn on the food processor to slow
  4. Add in 1 tbsp of water
  5. Begin adding in 1 egg at a time with the processor still on slow
  6. Add in the rest of the eggs
  7. Keep the food processor going on medium speed to begin kneading the dough
  8. Let knead for about 8 minutes until the texture turns into a smooth consistency
  9. Remove the pasta dough and place onto the counter
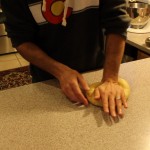
  10. Knead briefly with your hands and let sit for 1/2 hr.
  11. NOTE: Vin does not cover his pasta dough while it sits for the 1/2 so it can begin to dry out  a little bit
  12. Sprinkle some flour onto the counter or work surface and cut pasta dough into 8 pieces
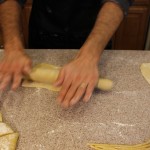
  13. Begin to roll out each piece of dough to your desired thickness, into long lasagna-like sheets
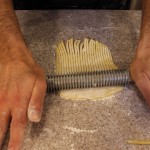
  14. Sprinkle more flour on top of each thinly rolled out pasta piece and begin to cut out 2″ circles with your cookie cutter
  15. Brush top 1/2 of the circle edge with a whisked egg
  16. Place 1/4 tsp of sun dried tomato filling in the middle of the circle pasta
  17. Fold the circle in 1/2
  18. Press to SEAL the 1/2 circle of pasta…VERY IMPORTANT to SEAL this edge!
  19. Take 1/2 circle and wrap around your pinky having each end meet
  20. Press these two ends together to seal and form one continous circular shape
  21. Fold down top of circular pasta to form tortellini
  22. Place in a bowl as you finish each one until you gone thru all the pasta sheets
  23. Bring large pan of salted water to a boil and add fresh pasta
  24. Cook pasta for 8 minutes, test pieces of pasta for proper doneness
  25. Serve with tomato-cream sauce or Gorganzola Dolce-cream sauce, garnish with thyme and truffle oil … mmm!


Crêpes 101- My Trick to EASY French Crêpes!

ê

Crêpes 101- My Trick to Easy French Crêpes!

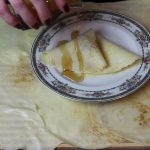
Buttery, paper thin crêpes filled with raspberry jam, topped with maple syrup, fresh berries and whipped cream is an amazing way to start your morning. Not only are these French crêpes a cinch to make but you can totally make them the night before. Re-heat them in your toaster oven wrapped in foil and they taste like you just made them! A real energy saver and perfect for all those holiday guests staying over.

The word “crêpe” actually means pancake in French, although they are quite different from the all American pancake. Now is it French crêpe or Swedish pancake? Well, they are really very similiar in the way that they are both paper thin compared to that well known Amercian pancake. Over the years I have found that French crêpes can be savory OR sweet while the Swedes like their swedish pancakes strictly with sweets, jams, ice cream or yogurts. The Swedish pancake also has a considerable amount more sugar in the recipe where as most crêpe recipe’s don’t have any sugar at all in the batter.

manicotti3My trick to keeping a recipe as easy as possible is knowing how to save time with a proven method of preparation without foregoing the quality or taste. That’s what I do with my crêpe recipe here, the order in which you whisk your ingredients in the batter is crucial and saves you energy and time so you don’t have to strain the batter! This method of mixing is exactly how I make my Homemade Manicotti Pasta Crepes.

IMG_2536If you are big on breakfast you will definitely want to try my mouth watering  Gourmet Frittata where you use what ever your favorite veggies are or my German Pancake that puffs to amazing heights coming out of the oven getting lot’s of ooh’s and ah’s! If your heading to lunch time try my Secret Family Zucchini Torta Recipe that also makes great appetizers! Another delectable brunch item to make are Homemade Gravlax, the best I’ve ever had, or my Pasta Fagioli that will have you going back for seconds! Hope you get to eventually try them all…you won’t be disappointed! Enjoy! 🙂
IMG_0558 IMG_0964 iphone pictures 1155 iphone pictures 1063

crepeswhisk crepesegg crepespan

crepecrepe crepeend crepesbord

crepefold crepedblfjpg crepesyrup

crepethmb


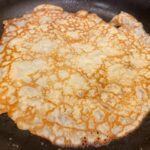
FOR EASY CRISPY CREPES: Add all ingredients below to food processor. blend until smooth, then refrigerate for 30 minutes. To get them crispy just cook 1 minute longer then the soft crepes below to get the edges golden approx 2 minutes on medium heat per side.

Ingredients for French Crêpes-“SOFT“- Makes 12 Crêpes:

  • 1 cup unbleached all-purpose flour
  • 1 cup whole milk
  • 1/3 cup water
  • 2 ex-lg eggs
  • 1/4 tsp sea salt
  • 3 tbsp. melted butter
  • 2 tsp vanilla extract
  • NOTE: If filling your crepes with sweets add vanilla, if savory omit
  • Maple syrup
  • Favorite jam
  • Confectioners sugar
  • Fresh berries, raspberries, blue berries black berries
  • Whipped cream
  • 8″ non-stick pan OR sauté pan OR crêpe pan

Directions:

  1. Melt 3 tbsp. butter and set aside to cool slightly
  2. ADD ALL INGREDIENTS TO A BLENDER AND BLEND UNTIL SMOOTH!
  3. IMPORTANT….if you don’t have a blend here is My Trick for smooth batter – MUST MIX IN THIS ORDER then you won’t have to strain batter …saving time!
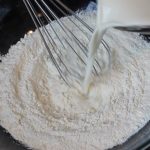
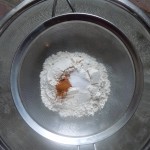
  4. Add flour and salt to a large mixing bowl
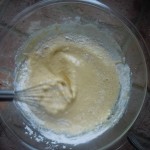
  5. Pour in milk and water and whisk until smooth
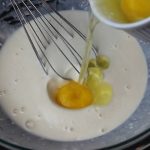
  6. Whisk in 1st egg until completely combined, then the 2nd egg
  7. Whisk in melted cooled butter until combined
  8. Tip for removing air bubbles – Gently stir the crepe batter with a large spoon to help remove any air bubble as these will cause tears in the crêpe
  9. You can make this up to 1 day ahead keeping in the fridge
  10. Put 8″ saute pan on medium heat
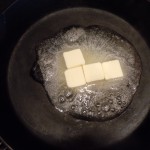
  11. TIP for EASY pan coating…Peel back one end of a whole 1/4 stick of butter and rub open end across pan just to coat right before pouring in ladle of batter!
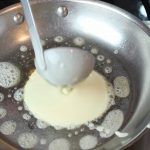
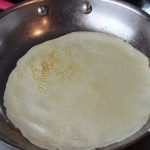
  12. Right as you ladle in 1/4 cup of crepe batter QUICKLY lift pan off the heat and SWIRL to spread batter evenly
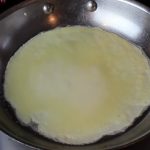
  13. Put pan back down on heat and cook for 35-45 seconds, then flip, 10 more seconds cooking
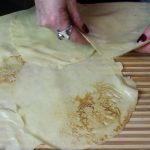
  14. Turn out cooked crêpes onto a dish or cookie rack
  15. They will not stick together
  16. OPTION: Cool a pinch and then stack them on top of one another and into fridge for the next day
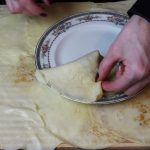
  17. Serve warm crêpes with you favorite fillings and roll up or fold and then top with syrup, confectioners sugar, fresh berries and whipped cream …YUM!

Homemade Pan Pizza

Homemade Pan Pizza

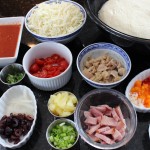
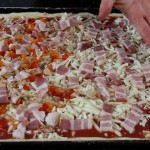
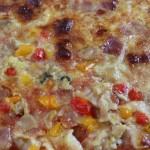
Homemade pan pizza made with different themed toppings from clams casino, to Hawaiian and Greek make for perfect party hors d’ oeuvres! Everyone seems to find their favorite flavors. When the sizzling pan pizza comes out of the oven heads turn especially when the aromas from the garlic, clams, bacon, onions and peppers fill the air!

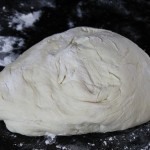
The wonderful thing about all the different themed toppings for your pan pizza is you don’t need much in terms of quantity. The dough you make the day before, but if you forgot or didn’t have time it will still work if you make it the same day. If you make the dough the same day you don’t put it into the frig but let it proof for an hour and a half in a warm spot to develop some of that texture and flavor. The whole idea behind the “proofing in the refrigerator” is it let’s you do other things while the dough slowly rises developing a killer texture and flavor like in my delicious “Icebox Dinner Rolls”. So take advantage of this refrigerator method, you will be happy you did. 

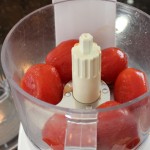
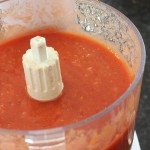
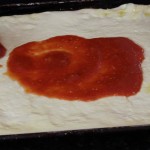
As for my pizza sauce, it couldn’t get any easier because it’s puréed only, not cooked. If you go into a pizza place and inquire about their sauce the majority will tell you the tomato sauce is raw. I know because I have done just this, but they don’t always like to give away their pizza secrets so easily. To the raw, whole peeled tomatoes I add a garlic clove that I put thru the press, salt, pepper and some Italian seasonings and then it’s puréed. Keeping the tomatoes raw really compliments all those other strong flavors from the toppings yet not seeping into the background still being a pertinent player in the pizza game!

Have some fun with these pizza’s and customize those toppings on your homemade pan pizza! My favorite is the clams casino pizza because you have the best of both world’s, flavor’s and crispy, chewy edges. You can’t beat the garlic, clams, bacon and pepper combo. Drizzling on the extra clam juice not only makes it taste that much better but it let’s the crust get a little crispy while keeping the toppings moist enough so not to burn. With that in mind make sure to pour on any of the extra juices from what ever you are cutting up as when you are slicing up the cherry tomatoes. Another very important tip is to keep all the toppings, including the sauce and mozzarella, in the cold refrigerator until the last minute. This helps the toppings to cook properly giving the crust time to crisp up.

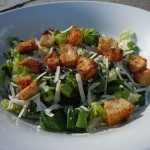
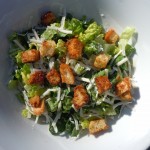
Enjoy the show and definitely think about some appetizer’s to go with these sizzling homemade pan pizza’s like my Caesar Salad, Crab Cakes, Baked Asparagus wrapped in Proscuitto, Spanakopita or my Roasted Chic Peas. All will bring a smile to your face I promise! 🙂

DSCN4572-300x225 DSCN45211-300x225 iphone-pictures-572-300x225 cookedspan iphone pictures 989

IMG_6226 IMG_6105 IMG_6123

IMG_6127 IMG_6170 rolldough

oilpan dougpan sran

IMG_6133 IMG_6145 piz

moz feta clams

IMG_6257 IMG_6258 IMG_6204

Ingredients for 1 Sheet Pan Pizza Dough – 12.5″ x 17.5″ x 1″ tray:

  • 4 cups all purpose flour
  • 1 1/2 cup warm water 105º-110º
  • 1/2 tsp sugar
  • 1 packet yeast or 2 1/4 tsp – not rapid rise
  • 1 tbsp salt
  • 3 tbsp extra virgin olive oil for the pizza dough
  • 1/3 extra virgin olive oil for the sheet pan
  • Plus more olive oil to drizzle on top of the pizza’s before baking

My Pizza Sauce – Enough for 2 Sheet Pan Pizza’s:

  • 1 can of whole peeled tomatoes (drained if the pulp is watery) pureed with 1 tsp salt, 1/2 finely ground Italian seasonings, 1/4 tsp pepper and 1 lg garlic clove put thru garlic press

Ingredients For The Toppings From The Show for 2 Trays of Pizza:

  • Clams Casino Pizza – (for 1/2 the pizza) 1-2 cans 1 cup of Snows canned clams drained except 3 tbsp of clam juice per can to drizzle over pizza,  1/4 cup of chopped peppers, 3/4 cup sliced thick cut bacon, 1 garlic clove thru press, 1 tsp chopped sweet onions
  • Greek Pizza – 3/4 cup sliced cheery tomatoes, 3/4 cup sheep’s milk feta, 1/4 cup sliced sweet onion, 1/2 cup sliced kalmata or canned black olives, 1/3 cup chiffonade basil
  • Bacon Pizza – 1 cup thick sliced bacon (for 1/2 of the pizza)
  • Hawaiian Pizza – 1 cup sliced ham, 1/2 cup chopped pineapple, 1/2 cup sliced green onions with whites too

Directions – (Pre-heat the oven to 450º right before the pizza dough has it’s final proof and make sure the rack is in the lowest possible position):

  1. Warm the stainless steel mixing bowl with warm water for 5 minutes
  2. Empty out warm water and add packet of yeast to mixing bowl
  3. Add in 1 1/2 cups of water at 105º-110º to the yeast
  4. Add in 1/2 tsp sugar and let the yeast proof for 10 nminutes
  5. Tour on knead hook and begin to add in 3 tbsp olive oil, flour and salt
  6. Keep mixing and knead with hook after it forms a dough ball for 10 minutes
  7. Take dough off of hook and onto a floured counter
  8. Knead by hand for 2 minutes and place into a large oiled bowl
  9. Cover with saran wrap and refrigerate for 18-24 hrs.
  10. When you are ready to make the pizza make sure to take out of the frig and let the cold dough sit for approx. 2 hrs. – this will make it easier to work with
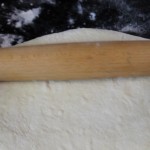
  11. When the dough has sat for 2 hrs. turn out onto floured surface and begin to roll out and stretch to the size of the cookie tray
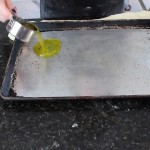
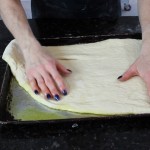
  12. Pour 1/3 cup of olive oil onto cookie tray and place the rolled out pizza dough onto olive oil
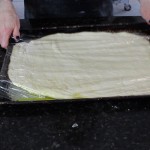
  13. Cover with plastic wrap and let sit 30 minutes
  14. Remove plastic wrap and stretch the dough if needed to the edges of the pan and using your thumb press the egde of the dough into the edges of the cookie tray to form a crust – this will become a crispy and chewy egde that you will love! 
  15. Spoon pureed tomatoes onto the dough and sprinkle mozzarella
  16. Add you desired topping and give a drizzle of olive oil across the top of the pizza and put into a 450º oven for 16-20 minutes.
  17. Definitely check at the 15 minute mark as all oven are different
  18. You want  the edges dark golden and the middle is sizzling
  19. Take out and let sit for 5 minutes
  20. Using a large spatula remove the pizza in one piece to a large cutting board and slice, or slice in the cookie tray

Chewy Chocolate Chip Cookies

Chewy Chocolate Chip Cookies

megordonMasterChef open casting calls and chewy chocolate chip cookies are the highlights of my blogging today. With exhausting life events that have taken place over the last three weeks I was some how able to produce my chewy chocolate chip cookie show for you and show up to my second pre-registered casting call for MasterChef.

Three weeks ago we received horrific news that my brother-in-law, George, passed away at the age of 57 from a heart attack. It was both devastating and unexpected. He was taken from us much too young and will be deeply missed by many. George lead an incredible life having the opportunities to accomplish many wonderful things that so many people wouldn’t have even had the chance to experience.

Bella and Reilly visiting with Brody

While dealing with the loss of Uncle George our King Charles, Brody, was hit by a car on Wednesday. I had just finished shooting my chewy chocolate chip cookie show when we got news of the accident. My kids and I were running between two vets for six hours for the later part of the day.

Brody didn’t have any broken bones, but a deep open gash on his upper right leg and bruising across his chest causing a profuse amount of swelling. They don’t stitch wounds like this so he got four staples and spent the next few nights at the vets for care and observation. Brody was heavily sedated on Thursday so I began to edit my chewy chocolate chip cookie show and was then able publish it to my YouTube Channel.

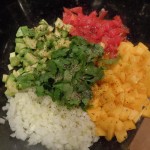
A second task now out of the way. My first task, was accomplished earlier in the week on Tuesday making a test run of my “Cold Cucumber-Fennel Soup” for the MasterChef three minute plating part of the casting call. I wanted to make sure the flavors were exactly how I wanted them with the new addition of the fennel to the soup. I was then off to pick up the King Crab legs from Altlantic Seafood in Old Saybrook. This crab will be set up on top of the cucumber-fennel soup in the center with a eatable garnish of fresh dill. The cold soup will also have a drizzle of Sicilian extra virgin olive oil, and fine dice, a brunoise, of avocado, tomato and cucumber scantly decorating the top of the soup around the king crab.

Friday morning was upon us and I was now making the a final batch of my Cold Cucumber-Fennel Soup for the MasterChef open call. Just as I was finishing, Brody’s vet called and wanted me to come for a visit with Brody. I put the soup into the refrigerator and headed right out. I felt that the hour I spent there with him helped so much I brought Reilly and Bella back at six o’clock that night right after picking up the rental car for New York City. I decided on driving this time to MasterChef because the five plus hours of train rides the last time was too draining.

The Veterinary hospital was forty-five minutes away so the kids and I were home by 8:45 Friday night after the visit with Brody. I then finished organizing the ice, the cooler, and chopped up the eatable garnish for the soup. Then I worked on finishing the eight page application to the MasterChef open casting call. Finally, I went to sleep at midnight and that 4:30 am alarm came way too fast.

MasterChef on Camera Shooting in Times Square

On Saturday morning, the MasterChef crew wanted contestants there at 8:00 for morning filming, so that’s what I did. They filmed us in groups in Times Square chanting “MasterChef”. They then did individual on-camera pieces with every single contestant stating what we did for a living, where we were from and a finish on a “I’m your next MasterChef”, with much enthusiasm! Myself and a few others were then asked sign release forms.

After two hours at Times Square we all went back to the hotel to wait our turn to enter into the “plate-up” room. We met the tasting chefs and the first set of interviewers walking around with clip boards discussing your life and what kind of person you are. Well, I’m ecstatic to say the judges loved my Cold Cucumber-Fennel Soup! My number was announced first once again, as it was in the first open casting call that I attended back in October of 2015. Our group of 9 was on to the next interview part of the casting call and the remaining contestants from our group were dismissed.

At this point it was noon and my energy level was deteriorating fast even after having a coffee at 4:30 am, a mini can of coca cola at 8:00 am and a 1/2 of a coffee at 10:30. But once again, I am there ready to forge on. Worries of Brody are also going through my mind. The anticipation and excitement of picking him up after I leave NYC which also included dropping off Bella to her Tennis match, the rental car, picking up Reilly and then heading to Piper Veterinary to get our boy home!

Oh yes, we are back at the MasterChef interview room facing the last judge with his seductive English accent, a kind of 007 look to him, is now asking me to tell him about myself. What! Really? OK, everything I was hoping to express to him just went out the window and I’m thinking “just try and be your funny self Michel” and all will be okay, but that is not how it worked out. Although I was hopeful that I may still have a chance to get to thru this “personality” phase to my dismay I was not. I know more of me was expected in that last phase then I was capable of giving this time.

Well, I did make a kick ass dish once again and actually enjoyed this round of MasterChef open casting call much more then the first time. You can’t always plan your life events! Life happens as they say and you have to roll with the punches and enjoy every minute. Definite kudos go out to that MasterChef casting call team who were there working their tails off for a good twelve hours. There’s always another chance at the next casting call later this year when MasterChef comes back to NYC!

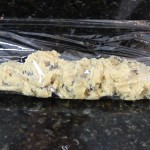
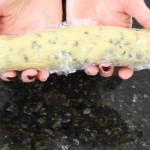
Hope you enjoy my chewy chocolate chip cookie show and the SECRET to their chewiness. Remember to grab a few for yourself because there are never any left over! If you are looking for some delicious appetizer’s you may want to try my baked sweet potato fries and green Goddess dipping sauce,  my crab cakes, or mediterranean layered dip. For a main course you could venture to my homemade bolognese sauce or even homemade pasta!

IMG_0672 DSCN45211-300x225 IMG_5433 025 IMG_4327

IMG_6002 IMG_6012 IMG_6021

IMG_6029 IMG_6032 IMG_6054

doughwrap rollcookie IMG_6064

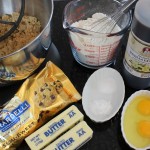
Ingredients:

  • 3 cups unbleached all purpose flour -sifted or whisked before measuring
  • 1 tsp baking soda
  • 1/4 baking powder
  • 1/2 tsp salt
  • 2 sticks room temperature butter- unsalted
  • 1 1/4 cup light brown sugar
  • 3/4 cup granulated sugar
  • 1 tbsp. vanilla pure extract
  • 2 lg eggs room temp
  • 1 bag of Ghirardelli Semi-Sweet Chocolate Chips

Directions:

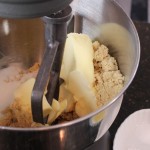
  1. Add room temp butter, light brown sugar and granulated sugar to mixing bowl with mixing paddle
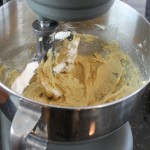
  2. Cream butter, sugars and vanilla on medium speed for 2 minutes until light and fluffy
  3. Add in one egg at a time, thoroughly mixing after each egg
  4. Whisk dry ingredients in a bowl and begin to add dry into creamed sugar and egg mixture
  5. Briefly mix until combined
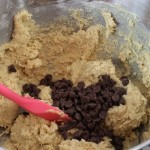
  6. Mix in chocolate chips by hand into cookie dough
  7. Using large cookie scoop, scoop cookie dough onto tray 2″ apart
  8. Bake approx. 8-10 minutes on 375º
  9. OR make giant 1/2 cup cookies, make sure they are far apart, bake for 15-16 minutes
  10. Bake until they are golden around edges and still blonde-pale in the middle
  11. Take out and let sit on tray for at least 2 minute then move then to a cookie rack to finish cooling…enjoy!!
  12. HINT: I like to refrigerate cookie dough mounds on the cookie tray for 5 minutes before baking them


Lobster Mac & Cheese at David & Eileen’s

Lobster Mac & Cheese at David & Eileen’s

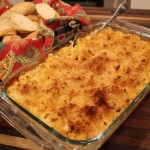
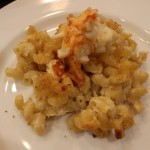
With this homemade gourmet lobster mac & cheese at David & Eileen’s you get the best of both worlds! Two of my very favorite things to eat all in the same dish! What more could you ask for? What, did someone say “smoked Gouda, please”? The Lobster goes with out saying and for those of you who appreciate that slightly salty, yet sweet and rich in every meaty bite know what I’m talking about. Then to add this succulent lobster to pasta that’s covered in a delicate, smokey, cheesy sauce put’s it right over the top!

When my dear friends David and Eileen suggested making lobster mac & cheese for my cooking show it was like bells went off. I thought it was a great idea. David had discussed the idea with our other foodie friend, Marco, who offered up his recipe to David. Marco and his wife, Sheryl, own an Inn near by called Lathrop Manor where Marco cooks up a five course gourmet breakfast if you’re a guest there.  Marco was also the chef in my “Salmon BLT Sliders at Marco’s Show” from this past summer. Needless to say, our group here loves to cook, eat and have fun. Even frequenting the Farm and Vine Dinner’s at The Ocean House together. 

Sharing family recipes, like Dave and Laurie did with their yummy “Caruso Salad” and the amazing lobster mac & cheese recipe between Marco and David is what brings friends together. Cooking, eating, laughing and enjoying each other’s company is the foundation of life in all cultures around the world . I am grateful to have such wonderful family and friends to do this with.

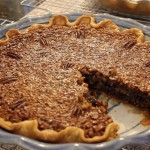
I hope you enjoy this homemade “Lobster Mac & Cheese at David & Eileen’s” show as much as we did making it! Have fun with this recipe. You may also want to check out my Caesar Salad for a side dish or some Arancini Reuben Balls, stuffed mushrooms ,or baked asparagus wrapped in Prosciutto for an appetizer. Although , we don’t have David’s incredible chocolate meringue pie recipe yet, you could check out a chocolate pecan pie recipe that’s to die for.

DSCN4575 030 iphone pictures 1441 iphone pictures 572 wholepiepecan

ingredlob IMG_5287 IMG_5289

IMG_5291 thumbsauce IMG_5304

lobmac lastthumbolb IMG_5305

IMG_5309 IMG_5314 IMG_5317

baked IMG_5373

Ingredients for Lobster Mac & Cheese at David and Eileen’s:

  • 2 Lobsters – meat from 2 – 1 1/2 lb. steamed lobsters
  • 3 tbsp butter
  • 3 tbsp flour
  • 2 small onion finely chopped (1/2 cup)
  • 3 1/2 cups whole milk
  • 2 cups heavy cream
  • 1/4 cup Dry Sherry -OPTIONAL
  • 2 tsp lobster base OR Lobster SHELLS- OPTIONAL it gives a wonderful flavor to the dish… we did forget to add the base in the show and the lobster mac & cheese was still delicioso!
  • 2 bay leaves
  • 1 1/2 cups smoked Gouda
  • 1 1/2 cups white Cabot cheddar
  • 1 cup mozzarella (I added in the mozzarella)
  • 1/4 cup grated Parmesan
  • 1 lb. cellentani pasta or elbow
  • s&p
  • 2 tbsp rm temp butter for coating the baking dish

Topping Ingredients:

  • 1/4 cup panko breadcrumbs
  • 1/2 cup grated Parmesan
  • 1/4 tsp garlic granules
  • 1/4 tsp onion granules
  • 1 tbsp olive oil
  • 1 tbsp melted butter
  • 4 pieces cooked and chopped bacon – Bacon OPTIONAL  (DO NOT use Maple Flavored Bacon)

Directions for Lobster Mac & Cheese at David and Eileen’s:

  1. Per-Heat oven to 350º on CONVECTION (convection helps to toast the bread crumbs without overbaking and curdling the cheese sauce)
  2. Coat the baking dish with 2 tbsp rm temp butter and set aside
  3. Cook Pasta til firm in salted water, al-dente, 5 minutes
  4. Drain and rinse to cool pasta and set back in the same pan
  5. Melt butter in sauté pan
  6. Sauté the chopped onion until soft and translucent
  7. Add a s&p
  8. Add flour to onions to make a roux
  9. Continue on stove stirring mixture for 1 minute to cook out raw flour flavor
  10. Slowly add milk & cream to roux while continuing to whisk so as not to get lumps
  11. Add in bay leaves
  12. Cook over medium heat while stirring until sauce thickens
  13. Taste here to see if you need more salt and pepper
  14. Add in 1/4 cup Dry Sherry
  15. OPTIONAL:  Add in lobster base OR LOBSTER SHELLS and simmer for 10 minutes
  16. Remove the shells if you added them and discard
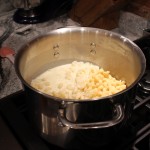
  17. Turn heat to low and add in smoked Gouda, cheddar & mozzarella while whisking for 30 seconds ONLY, then remove from heat immediately and continue to whisk until all the cheese is melted
  18. Sauce should have consistency of heavy cream
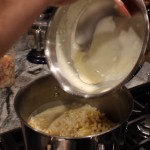
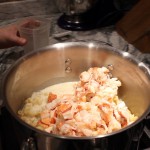
  19. Stir lobster meat into the sauce to infuse flavors
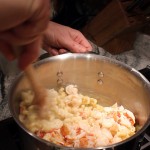
  20. Then pour lobster sauce over al-dente pasta and mix until combined
  21. Transfer to an oven safe baking dish
  22. Sprinkle in 1/4 cup Parmesan and mix gently
  23. Make the breadcrumbs by combining breadcrumbs, parmesan, onion and garlic granules, olive oil & butter and bacon
  24. Mix with your hands or a spoon and sprinkle evenly over the lobster mac & cheese
  25. Bake in a 350º oven for 25-30 minutes until slightly bubbly on the edges
  26. NOTE: DO NOT OVER BAKED OR CHEESE SAUCE WILL CURDLE!!!!
  27. NOTE: The pasta will absorb a lot of liquid in the beginning when you first mix it, AND then when you bake it, AND as it sits, AND then as it cools, so it’s a good thing to have a little extra sauce in the beginning …it will keep absorbing -you don’t want a dry lobster mac and cheese sauce 🙂

Easy Icebox Dinner Rolls

Easy Icebox Dinner Rolls

Laura, my loyal friend and follower making the icebox rolls for the holidays!
2014 – Laura, my loyal friend and follower making the icebox rolls for the holidays!

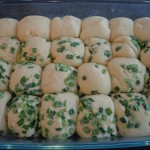
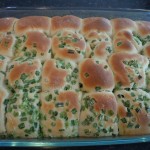
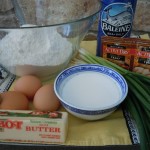
There’s nothing better than the aromas of homemade fresh baked bread, sweet onion and rosemary to wet the appetite! I was thrilled to find this icebox dinner roll recipe about fifteen years ago and have been making them ever since. The recipe card was from “easytobake” and I have tried to access their website but it doesn’t exist anymore. I have made many different bread dough’s in my life, kneading by hand, proofing, kneading again and it can all be exhausting. The whole idea behind icebox dough is that kneading is not necessary. The flavor and soft, tender texture develops as it proofs right in the refrigerator. Once you see how easy it is to make these melt in your mouth icebox dinner rolls you may never pick up store bought rolls again.

Laura making the icebox rolls for her 2015 Thanksgiving!

I have added lots of chopped green onion and fresh rosemary in my rolls but they are just as delicious plain too! It takes all of fifteen minutes to make this dough and can be made up to 4 days ahead. The dough stays in the refrigerator, hence the name “icebox” rolls. You take the dough out of the frig the morning of your dinner party. It get’s formed into dough balls mixing in chopped green onion and fresh rosemary. Then the rolls get lined up on a buttery baking tray and back into the frig.  Two hours before you want to serve the homemade icebox dinner rolls you take them out of the frig and let them rise for an hour and a half to two hours. When they have doubled in size, give them an egg wash for a little shine, then bake.

iphone pictures 1015

150150boeuf

025

IMG_2793

IMG_2283


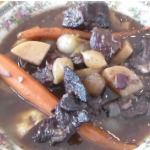
Hope you enjoy these scrumptious “easy icebox dinner rolls” as much as our family and friends do.  They will be asking you for the recipe for sure! These homemade dinner rolls aren’t just for holidays they are great for any day. Try them with my turkey stuffed peppers where you can dunk them in the sauce and pepper juices, the Au Jus in my Boeuf Bourguignon, or Bolognese Sauce. After all this savoriness you may need a chocolate fix with my perfectly chocolate chocolate cake or for a light and refreshing sweet try this amazing Pavlova!

iphone pictures 683  iphone pictures 686  iphone pictures 687

iphone pictures 688  iphone pictures 641  iphone pictures 643

iphone pictures 646  iphone pictures 692  iphone pictures 693

iphone pictures 694  iphone pictures 695  iphone pictures 697

iphone pictures 701  iphone pictures 702

Ingredients: Makes 24 Dinner Rolls

  • 4 1/2 cups all purpose flour
  • 2 packets active dry yeast (NOT rapid rise)
  • 1 cup warm water (105 -115 degrees)
  • 3 lg eggs (if you use extra large eggs you will need to add a little more flour to compensate)
  • 1/2 cup melted butter
  • 1/2 cup sugar
  • 1 Tsp salt
  • 2 bunches of green onions chopped to 1/8″ pieces -(from white/greenish part to ends)
  • 1/2 cup fresh chopped rosemary
  • 1/3 stick room temp butter to coat the cookie tray or inside of the 10″x 15″ baking dish

Directions:  

  1. Using a KitchenAid mixer OR lg mixing bowl pour in the 2 packets of yeast then add in 1 cup of 105º – 110 º  water.
  2. Then add 1 Tbsp of sugar (from the 1/2 of cup of sugar that you add later) now because it feeds the yeast and really gets it activated.
  3. Let this sit for about 5 minutes and you will see it get foamy.
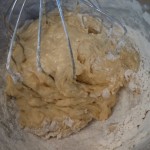
  4. Add in the eggs, melted butter, sugar, and salt and whisk- make sure the butter is not hot because it can kill the yeast if too hot
  5. Begin to beat in a 1/2 cup of flour at a time using the whisk the whole time until the dough gets too stiff to mix.
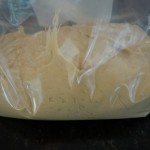
  6. Turn the dough out onto a lightly floured surface, place the big ball of dough into a large Ziploc baggy and put it into the refrigerator for 2 hours…. up to 4 days.
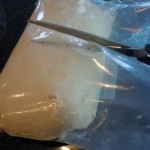
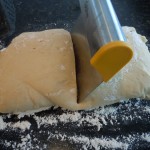
  7. When you are ready to make the rolls just cut the dough right out of the zip lock with scissors nice and easy…..then turn out the chilled dough onto a floured work surface and divide equally into 24 pieces with a pastry scraper
  8. Roll each piece into a ball then firmly push into the pile of chopped green onion and freshly chopped rosemary and re-roll into a ball again. You can keep some of the rolls plain.
  9. Coat 4 Tbsp of softened butter all over a cookie tray with 1/2″ sides or a 10″ x 15″ baking dish for taller rolls
  10. Place the dough balls into the buttered baking tray, cover with Saran wrap and let them rise for 1-2 hours depending how warm your kitchen is (they need to dbl in size) OR you can put them back into the frig until 1 1/2 hours before you need them then take them rolls back out of the frig and let them begin to rise and double in size
  11. Pre-Heat the oven to 375º
  12. Whisk 1 whole egg with 1 tbsp water and brush a good coating onto the rolls after they rise and before putting them into the oven
  13. Bake for 13-18 minutes until a dark golden color…it depends how warm the rolls got while rising so you’ll need to peak at them to see if they’re golden yet.

 TIP:   It’s a good idea to warm the stainless steel mixing bowl by running hot water into it before you begin so the cold bowl doesn’t take the necessary temperature of the water down.

Amazing German Pancake!

Amazing German Pancake!

This amazing German pancake is an awesome dish to make for your holiday guests! It’s festive and quite spectacular when your guests see how your pancake has puffed to enormous heights when you take it out of the oven. Not only does it make for a wonderful presentation but it’s made with little effort and can be served for breakfast or as a dessert!

A German pancake is really a giant popover. “Dutch baby” is another name for this pancake and rumor has it that the reason behind this name came about when a chef’s young child couldn’t pronounce the German word for German, “Deutsche”. Supposedly, this mis-pronunciation lead German Pancakes to the alternative name “Dutch Babies”. A couple other names that this German pancake has been called are “Dutch puff” and “Bismark”.

My kids get very excited for that moment when this amazing German pancake comes out of the oven! It has a bit of a custard like texture inside yet very light. We love eating these pancakes and have come to the conclusion that they taste like something in between a pancake, french toast and a crêpe!

My Vermont friends turned me on to this recipe years ago and I have been making them ever since. It’s fun for me to play around with recipes and see what works best so to this recipe I have added another egg, some vanilla and a little cinnamon. You can add grated nutmeg instead if you prefer. Originally, these homemade pancakes were served with lemon and confectioners sugar. I like to served them with confectioners sugar, real maple syrup, fresh blue berries and a dollop of my favorite “Wild Blueberry Preserves” by Bonne Maman, a product of France (sold right in our local market at Stop and Shop). German pancakes are so easy to make, taking on the same amount of time as making ordinary pancakes. The wonderful thing here is you are not glued to the stove pouring batter every few minutes.

Using cast iron is the way to go here because it holds in the heat evenly distributing it throughout the pan but I have made them in other oven proof pans and it comes out great. Some recipes have you pre-heating the pan in the oven, pulling out the rack, pouring in the batter, then pushing the rack back into the oven and in my opinion, this is a disaster waiting to happen since the batter can easily swoosh over the sides causing the oven to smoke ! The easiest way to start these homemade German pancakes is heat the pan in the oven then add butter and whisked, warm batter. The finished product will make you will feel like a french pastry chef all day. This could also make for a great dessert to an impressive dinner with entrees like turkey stuffed peppers, pulled beef tacos & mango salsa or yogurt-chicken kabobs & tzatziki. Enjoy!

tur IMG_3234 iphone pictures 387 IMG_1897 IMG_1826

iphone pictures 1093  iphone pictures 1094  iphone pictures 1099

iphone pictures 1102  iphone pictures 1097  iphone pictures 1098

iphone pictures 1108  iphone pictures 1111  iphone pictures 1114

iphone pictures 1155 IMG_4539 iphone pictures 1118

Ingredients for Traditional German Pancake:

  • 5 extra LG eggs ROOM temperature eggs (place eggs in a bowl of warm water for 20 minutes or leave on counter for 1 hr)
  • 1 cup Milk – WARM the milk (not hot)
  • 1 cup all purpose flour
  • 1/2 Tsp. salt
  • 1/4 Tsp cinnamon
  • 1 Tsp. vanilla
  • 2 Tbsp melted butter (warm)
  • 3 Tbsp butter – cut up to add to pan before you pour in batter

Ingredients for savory German Pancake:

  • 5 extra LG eggs (or 6 large) ROOM TEMP.
  • 1 cup Milk – WARM
  • 1 cup all purpose flour
  • 1/2 Tsp. salt
  • 1/2 cup swiss cheese OR cheddar
  • 1/2 cup thin diced ham OR sauteed mushrooms
  • 1/3 cup green onion OR sauteed sweet onion
  • NOTE: If you are going the cheddar, sauteed mushroom & onion route add 1 cup fresh baby spinach too!
  • 3 Tbsp butter  -cut up into 4 Tbsp (1/2 stick) COLD

Directions:  

  1. Pre-heat oven to 425º
  2. Add the cast iron pan to the oven while pre-heating
  3. Whisk milk, vanilla, salt and flour first in a large bowl
  4. Then whisk in 1 egg at a time just until combined
  5. Whisk in melted butter, final mix of batter should be WARM not cold (you can microwave for 10 seconds at a time and stir in between to get to WARM temperature if need be, DO NOT go longer then 10 seconds at a time in the microwave or batter will cook
  6. Take heated pan out of the pre-heated oven and add in 3 tbsp butter, let melt
  7. Once the butter is melted pour in WARM batter (If making a savory pancake add veggies and cheese now on top of the poured batter)
  8. NOTE: A savory pancake or blueberry pancake will not puff as much a plain German pancake!
  9. Bake for 21 minutes until puffed
  10. Remove from oven and transfer to a plate or cutting board with a spatula and sprinkle with confectioners sugar.
  11. Slice into wedges and serve with maple syrup, warm fresh strawberry jam/sauce (Recipe BELOW) and whipped cream! …mmm!

Ingrediesnts and Directions for EASY STRAWBERRY JAM/SAUCE:

  • 1 lb. hulled and chopped fresh stawberries
  • 1 cup white sugar
  • 1/4 cup fresh sqeezed lemon juice
  1. Finely dice strawberries and add to a wide 8″ sauce pan with 1 cup sugar and lemon juice
  2. Over med/high heat bring to a rolling simmer
  3. Keep an eye on the mixture, keep simmering for 15 min. – make sure it doesn’t boil over

  4. Skim off white foam that accumulates around the edges while simmering as this will make the jam cloudy (its just air bubbles that form in the jamming process)

  5. Remove from heat and serve warm with German pancake
  6. Jar the remaining strawberry sauce and refrigerate as it will thicken into a jam as it cools! It will stay good for 2 weeks in the frig.
 

Homemade Pasta at Vin’s

Homemade Pasta at Vin’s

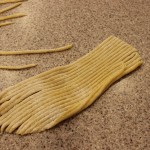
Homemade pasta is something you have to try at least once in your life! You’ll see how satisfying it is when you taste the tender, slightly chewy texture of the fresh pasta. Making pasta has been a part of my life ever since I was young making homemade manicotti with my mother for the holidays. At my Aunt Pasqualina’s, the counters were always covered with fresh pasta drying out on dish towels.
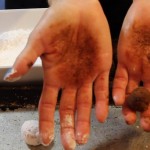
This past weekend, my friends Lisa and Vin, graciously agreed to share their grandfather’s secret family pasta recipe with me. I had the opportunity to try out, first hand, a pasta tool that belonged to Vin’s grandfather which he called the “trucal iron”. It’s a special pasta cutting tool, a roller, made years ago from medal and wood that was eventually passed on down to Vin. The center spiral part of this “trucal Iron”, made of medal, does the cutting as you roll out the pasta. It has Wooden handles which he said his grandfather glued back on a couple of times. Vin also has a newer version of this “trucal iron”, one made of all wood but the wood spirals have begun to chip away from wear and tear. They don’t make some things like they used to. Vinnie also shared some precious memories of his grandfather and father making this homemade pasta for Sunday dinners growing up where his grandfather would creatively hang the pasta noodles from atop the kitchen cabinet doors to dry out.

There’s nothing like an evening with special friends making homemade pasta! This night of homemade pasta making at Lisa and Vin’s reminded me of how much I really love to do this. Everyone has their own way of making pasta and that’s part of what makes this experience so fun. Now as for this “trucal iron”, there are other pasta tools out there that mimic what Vin’s special pasta tool does like the ones below from Amazon. I have to say, I haven’t used any of those tools from Amazon because I use my KitchenAid pasta attachment which is another great option for cutting the kneaded pasta dough. You could even cut your thinly rolled out pasta into strips by hand with a sharp knife to get the stands of fettuccine, spaghetti, or what ever thickness you might like.

iphone pictures 448 iphone pictures 572 DSCN4572 025  ita

Appetizers like baked coconut shrimp, baked asparagus wrapped in prosciutto, and, or a nice homemade Caesar Salad might be just what you are looking for to go with this homemade pasta of Vin’s! If you are looking for a meat sauce to go on this homemade pasta you should try my bolognese sauceOf course, there are other options like my Italian beef meatballsor Italian turkey meatballs. Hope you enjoy the show 😉

IMG_4244 eggpasta dough

pastdough kneadpasta trucalpasta

IMG_4283 ppasta IMG_4287

cookpastajpg IMG_4327

INGREDIENTS:

  • 2 1/2 cups all purpose flour
  • 1/4 cup olive oil
  • 4 1/2  – 5 lg eggs
  • 1/4 tsp salt

DIRECTIONS:

  1. Put the kneading attachment on your food processor and add the flour
  2. Add the salt and olive oil
  3. Turn on the food processor to slow
  4. Add in 1 tbsp of water
  5. Begin adding in 1 egg at a time with the processor still on slow
  6. Add in the rest of the eggs
  7. Keep the food processor going on medium speed to begin kneading the dough
  8. Let knead for about 8 minutes until the texture turns into a smooth consistency
  9. Remove the pasta dough and place onto the counter
  10. Knead briefly with your hands and let sit for 1/2 hr.
  11. NOTE: Vin does not cover his pasta dough while it sits for the 1/2 so it can begin to dry out  a little bit
  12. Sprinkle some flour onto the counter or work surface and cut pasta dough into 8 pieces
  13. Begin to roll out each piece of dough to your desired thickness
  14. Sprinkle more flour on top of each thinly rolled out pasta piece and use the roll cutter below or a sharp knife or a KitchenAid Pasta attachment to get desired pasta strips
  15. Bring large pan of salted water to a boil and add fresh pasta
  16. Depending on the thickness, cook pasta for 4-8 minutes, test pieces of pasta for proper doneness
  17. Serve with sauce and mangia, mangia!


Perfect Pie Crust in 5 Minutes!

Perfect Pie Crust in 5 Minutes!

IMG_4416Who would ever think you could make this buttery, flaky, homemade pie crust in 5 minutes? After eating many of my Grandma Reilly’s pies when I was little I was inspired to come up with a recipe that tasted just like hers. Unfortunately, I never got her recipe but have been making pie crust’s for over twenty years and I’m happy to say I came up with a pie crust recipe that is spot on to what my Grandma used to make . Granted, there are some pretty decent pie crusts available at the market and if you are making many pies it totally makes sense to go that route. If you are only making a couple of pies you really need to get busy and make this homemade pie crust!

Homemade pie crust in 5 minutes is just that but there two tricks to this amazing pie crust. First, all the ingredients must be very cold. Refrigerated butter cubes are already firm enough but to firm up the soft Crisco pieces it’s wise to put that into the freezer before adding it to the food processor. Second, you MUST NOT OVER WORK the dough! Over working the dough will build gluten’s like you are make a bread dough and we don’t want that for making this perfect pie crust in 5 minutes. We want our pie crust to be flaky in texture not tough and hard.

In my opinion, a couple of the best bakers in the world are the French and the Southerner’s. One loves butter and the other loves Crisco. So why not take the best of both worlds using both butter and Crisco to achieve these wonderful results. Not to mention, as I always do, I have tested many pie crusts recipes to come to this theory.

You need to try out this perfect pie crust in 5 minutes recipe just once to be convinced to start making your own. In fact, you will wonder why you haven’t been making your own homemade pie crust your whole life when it’s that easy to make and tastes like this! Enjoy the show and don’t forget to make this ahead of time popping it into your freezer until you are ready to roll it out for a pie or a quiche. I would transfer the dough from your freezer to your refrigerator couple of days before you are ready to use it in order for the dough to come to the proper workable temperature. Once you make your dough you really ought to try making an amazing Chocolate Pecan Pie  or Death by Chocolate Meringue Pie for your holiday. Don’t forget to watch Thanksgiving week when we roll out this dough and bake a pie together! For the Best Blueberry Pie ever recipe this is one that shouldn’t be missed. Enjoy 🙂

IMG_4190  IMG_4156  IMG_4219

pie  IMG_4221  piedough

cutdough  wrapdough

Ingredients:

  • 10 tbsp cold butter cut up each tablespoon into 4 pieces and into fridge until you are ready to add to flour
  • 1/2 cup cold Crisco cut into small pieces OR 1/2 cup REAL LARD from FIREFLY Farms OR 1/4 cup Crisco & 1/4 cup lard
  • 1/2 cup,  plus 2 tbsp cold water,  (keep in fridge until you are ready to add to flour)
  • 3 cup all-purpose flour
  • 1 tbsp sugar
  • 1 tsp sea salt
  • NOTE: I even keep food processor container with medal blade in it in the fridge until you are ready to pulse ingredients
  • Chocolate Pecan Pie Recipe OR Best Blueberry Pie Recipe OR Death by Chocolate Meringue Pie Recipe

Directions:

  1. Be sure all items above are completely chilled
  2. It’s easiest to freeze first, especially for crisco or real lard, then take out of freezer and cut up or grate before adding to processor
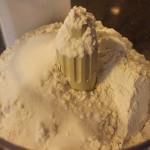
  3. Add dry ingredients to the food processor and pulse twice to combine
  4. Drop the freezer cold, firm Crisco or lard pieces onto the flour
  5. Then add the butter pieces helping the pieces to separate with a butter knife as you drop them onto the flour
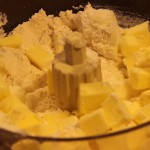
  6. Pulse 5-7 time until the Crisco and butter are pea size
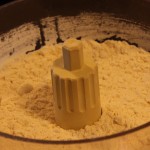
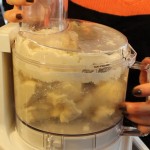
  7. Now turn processor to “on” and slowly add water through opening – Note: this will take about 12-15 seconds for the dough to come together
  8. The moment you see the dough begin to come together, STOP, and PULSE 2-3 times to finish into a ball
  9. Take dough out onto floured counter surface – you will see little specs of butter and Crisco in the dough which will make for a buttery, flaky crust!
  10. Cut dough into two pieces, cover with Saran Wrap and into fridge for at least 30 minutes or freezer until you are ready ( If you freeze it allow 2 days back in fridge to come to proper workable temperature)

Chocolate Crackle Cookies

Chocolate Crackle Cookies

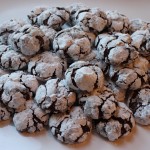
These homemade chocolate crackle cookies will make you feel like a baker of fine cookies. The snowy white confectioners sugar and the chocolaty brown cookie dough make a beautiful contrast when the cookies bake in the oven and make all those crackle lines.  Now the inside is some what of a surprise when you first bite into it. By the looks you might think its a crunchy cookie. Then you sink your teeth in and that velvety texture hits your tongue, feeling lighter then you thought and then the chocolaty silkiness just melts away.

I have been baking these incredible chocolate crackle cookies for at least ten years and for the life of me I can’t remember where I got this recipe from. All my life I have always written down recipes that looked irresistible whenever I was in a waiting room with an assortment food or cooking magazines. So I unfortunately cannot give credit where credit is due. I did of course change the recipe a pinch with the baking time and chocolate used. It originally said 12-15 minutes but I only bake them for eight minutes with a five minute waiting period before I move them off the cookie sheet to a cooling rack this way they can solidify a bit more. Shortening the cooking time gives them softer, gooier center that melts in your mouth rather then a slightly firmer cookie. I use the confection on my oven because the bottom of my oven runs really hot on “bake” not being conducive for even cooking. The hot air circulates in confection mode in my oven giving a more consistent outcome. As for the chocolate, the recipe had called for Verona chocolate which might be difficult to find last minute so I have been using my Ghiradelli bittersweet or Perugina chocolate bars and those are both scrumptious!

This homemade gourmet chocolate crackle cookie just may become a holiday tradition for you and your family too. Easy to make, oh so chocolaty and melts in your mouth! What more could you ask for in a cookie? Hope you enjoy the show 🙂

IMG_3571  IMG_3585  salt

sift  IMG_3597  IMG_3609

3disks  cut dough  roll

balls  IMG_3641  IMG_3660

IMG_3663

Ingredients:

  • 1 1/4 cup flour
  • 1/2 cup cocoa powder
  • 2 tsp baking powder
  • 1/4 tsp salt
  • 1 1/2 cups confectioners sugar
  • 1 stick of butter softened to room temp
  • 1 1/3 cup light brown sugar
  • 1/3 cup milk
  • 2 lg eggs
  • 1 tsp pure vanilla extract
  • 8 oz. bag of a bittersweet chocolate chips- Ghiradeli

Directions – Pre-heat oven to 350º to bake cookies :

  1. Sift flour, cocoa, baking powder and salt and set aside
  2. Place bitterswewet chips in a pan over double boiler and melt – you can use a microwave – heat 20 seconds and stir and 10 more seconds and stir but be very careful not to burn the chocolate in the microwave
  3. Cream room temperature butter with light brown sugar in your Kitchen Aid mixer
  4. Add in 2 eggs, one at a time and beat well after each addition
  5. Add vanilla and melted chocolate and beat briefly til combined
  6. Alternatively, begin to add dry sifted ingredients and 1/3 cup of milk all awhile mixing
  7. When completely mixed turn out dough onto 3 pieces of saran wrap
  8. Fold up in saran wrap and shape dough into disks, chill at least 2 hrs. – overnight
  9. You can also freeze at this point for a later date
  10. Take dough out and cut into 1″ pieces
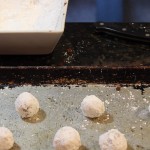
  11. Roll each of the pieces into balls
  12. As you shape the dough into balls place them into a bowl full of confectioners sugar and roll around to completely coat
  13. After the balls are coated place them onto cookie sheet 2″ apart
  14. You will need to periodically rinse you hands to remove the dough accumulating on them
  15. NOTE: The dough rolls into balls the easiest when your hands are rinsed and a little damp
  16. Bake for 8 minutes on 350º
  17. Remove and let cool on the cookie tray for 5 minutes before you transfer the cookies to a cooling rack
  18. Let cool completely before to stacking on serving plate