The Traveling Epicurean

Pickled Eggplant at Nancy’s
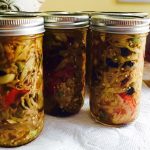
Pickled Eggplant at Nancy’s

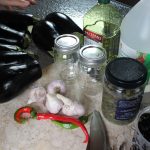
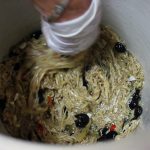
pickperfectThere’s nothing like homemade Pickled Eggplant with thinly sliced strands of eggplant delicately flavored by vinegar, garlic, red hot chili pepper’s, oil-cured black olives and capers all nestled in an olive oil bath. The oil-cured, black olives, add a burst of rich, meaty, sweetness and then there’s a little pucker from the capers. Similar to the oil-cured olives, the eggplant become’s sweet in the beginning of the pickling process when the salt pulls out all the moisture and bitterness.

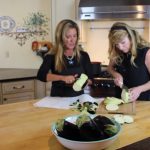
When Nancy first gave me a jar of her delectable pickled eggplant I knew I would have to get the recipe. Not only is her pickled eggplant to die for but everything she cooks is of the same standard, absolutely delicious! Along with inspiring me in the kitchen, Nancy had the same effect on me on the golf course when I first started playing 8 years ago. She has such tenacity and determination when playing I call her the fiesty golfer! Considering how difficult the game of golf can be, she’s the perfect person to learn the game with.

I had so much fun at Nancy’s house last week making her pickled eggplant. It’s so worth the effort you put into making your own, a most rewarding process when you taste the final product. All of these incredible flavors come together to make an amazing eggplant appetizer like you’ve never had before! You just can’t buy this in the stores!

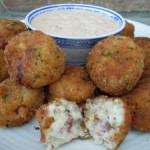
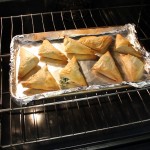
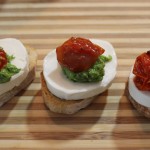
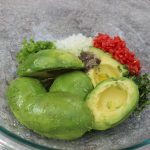
You may just want to turn your party into an anti-pasto party with other dishes to compliment your pickled eggplant like Guacamole Crostini, Roasted Garlic Bean Dip, Arancini Reubens Balls w/Homemade Thousand Island Dressing, Spanakopita w/Metaxa Mojito’s and, or Homemade Pesto w/Fresh Mozzarella & tomato Crostini! Yum! Hope to recieve an invite to your delectable party lol 🙂

IMG_7767 IMG_6722 030-300x225 cookedspan IMG_2026

img_8354 img_8357 pickslice pickstrips

img_8366 picksaltjpg img_8381 picksalt pickpillow pickwash img_8388 pickvinegar

img_8442 pickstir picegg

pickledegg pickledwash img_8458

pickelstir pickjar pickjarring

picklejar pickperfect

Ingredients:

  • 9 large eggplants
  • 10 cups distilled white vinegar – 3/4 of gallon jug
  • 10 cups water
  • 4 cups olive oil
  • approx 1/2 container of Mortons salt… use 1/3 cup per eggplant
  • 2 cups Italian black oil cured olives – seedless
  • 1 long hot red pepper
  • 2 tbsp capers
  • 8 lg garlic cloves coarsely chopped
  • 1 tbsp dried oregano OR 2 tbsp fresh oregano dried in the microwave
  • 1 large pickling crock
  • 2 clean white cotton pillow cases
  • 1 extra large bowl to tranfer wet eggplant in pillow cases back and forth from washing machine
  • a case of canning jars

Directions:

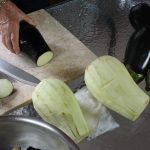
  1. Peel and slice all 9 eggplants into 1/8″ thick pieces
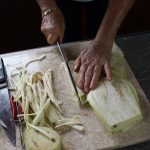
  2. Stack slices and cut into 1/8″ strips
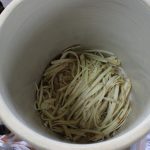
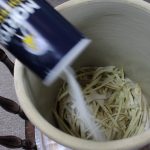
  3. Place cut up strips into large pickling crock
  4. After the addition of each cut up eggpant sprinkle in about 1/3 cup salt and mix strips around with salt by hand
  5. Go thru all 9 eggplant making sure to spinkle 1/3 cup salt after addition
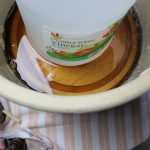
  6. Place a small dish on top of all the sliced eggplant so that the dish fits into the crock
  7. Place the gallon jug of vinegar onto dish and let sit 2-3 hours
  8. Remove vinegar bottle weight and plate from crock – at this point there will be a lot of dark brown juice extracted from the eggplant
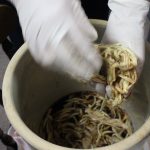
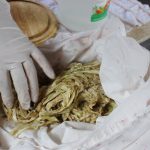
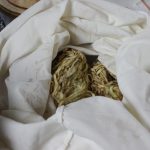
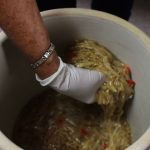
  9. Transfer eggplant to a clean pillow case a handful at a time leaving behind the brown juice
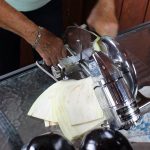
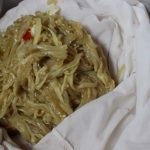
  10. Divide all the eggplant into 2 pillow cases and tie off the ends into knots so as the eggplant doesn’t come out when you “spin” it in the washer
  11. Rinse out the pickling crock
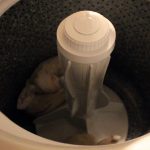
  12. Take the two pillow cases full of eggplant to the washer and put on “spin” cycle only – NO WATER
  13. After spin stops, remove eggplant from pillow cases & place back into crock (save pillow cases in a large bowl ready to use one more time before cleaning)
  14. Add in chopped garlic cloves and sliced hot pepper
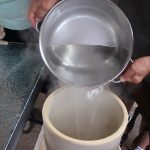
  15. Bring 10 cups vinegar/10 cups water to a rapid boil
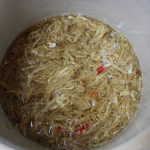
  16. Pour vinegar/water mix over eggplant strands in crock
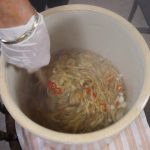
  17. Stir breifly to mix and cover
  18. Let ferment until cooled approx. for 3 hours giving the eggplant a stir at 1 1/2 hour mark
  19. When the eggplant is cooled remove from crock back into pillow caeses
  20. Divide up the eggplant and place back into the same two pillow cases you used on first spin
  21. At this point run all the jars thru dishwasher – time it so they are hot ready to jar the pickled eggplant after 2nd spin (give it about 1/2 hour-depending on timing of your own dishwasher)
  22. Put all the tops to the canning jars in a pan of water, bring to a boil to sterilze as well
  23. Place the eggplant strands back in the washer on “spin” cylce only again – NO WATER
  24. Rinse crock
  25. Microwave fresh oregano in a microwave for 1 minute, crumble the oregano leaves off the stem and set aside
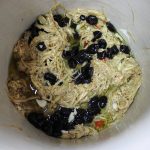
  26. Add spun pickled eggplant back into the clean crock, add in 4 cups olive oil, 2 cups oil-cured black olives, 2 tbsps of caper and 2 tbsp of fresh microwaved oregano
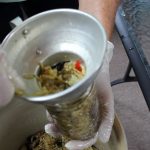
  27. Take hot jars out of the dishwasher and begin to fill with eggplant
  28. Top off the pickled eggplant in the jars with a drizzle of olive oil keeping 1/2″ from the top
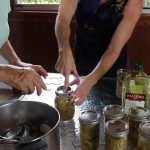
  29. Wipe the top of the jars clean with a clean paper towel and seal with the hot tops you boiled on the stove – Be Careful Not To Burn yourself here
  30. Approx 5 hours after putting the tops on the jars, gently push down on the middle circle to hear a small pop and complete the “seal” – NOTE: they may pop down completing that last seal all on their own
  31. The pickled eggplant is done and will keep for months at room temp
  32. I keep an opened jar in the fridge and bring to room temperature when ever I serve it…YUM!


Paleo Eggplant Lasagna at Christine’s
paleochrisnmePaleo Eggplant Lasagna at Christine’s
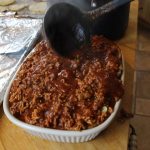
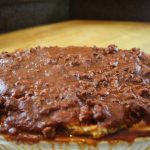
The crusty almond flour coating on the eggplant helps to soak up the meaty bolognese goodness getting ooey, gooey and decadent. Like making you feel warm all over on a winter’s day. That’s how my friend, Christine, describe’s her Paleo Eggpalnt Lasagna that we made at her house last week! She hit it right on the money.

It was Christine’s cross-fit community that introcuced her to this fresh Paleo way of living. Even though It did take a year before fully committing she has been following it for a couple of years and really loves it. Paleo refers to foods eaten during the Paleolithic times so basically if the cave man didn’t eat it, neither can you. There are different levels of Paleo, but true Paleo doesn’t allow any dairy or legumes. Not sure if being a true Paleo is exactly for me since I live for cheese and cetainly wouldn’t give up beans. Although, there are certain aspects of Paleo I think are wonderful like the fresh way of eating, nothing manufactured or processed! Like Christine say’s, everything in moderation.
This Paleo Eggplant Lasagna is definitly a guilt free dish that shouldn’t taste this darn good! You don’t even miss the cheese here because every bite is luscious! I highly recommend that you to get on the ball and check out this fresh Paleo way of eating. You won’t regret it one bit and may find yourself with a big ole smile on your face!

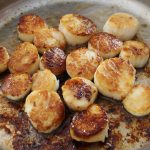
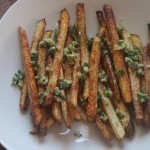
While you are on a freshness roll you may want to try my Guacamole, Pulled Beef and Mango Salsa, Salmon B.L.T Sliders, Seared Sea Scallops or Sweet Potato Fries with Green Goddess Sauce!

IMG_7737

IMG_3234

IMG_7288

IMG_0668

IMG_6962


paeomeat img_8286 paleosauce

paleoeggslice paleoeggs paleoalmond

img_8315 paleopan paleospoon

img_8334 paleospat paleoslice

Ingredients:

  • 2 large eggplants
  • 5 eggs
  • 1 recipe tomato-basil sauce (30 minute sauce) adding in an extra 28 oz can of puréed whole peeled tomatoes to the recipe OR Slow Cooked Old Style Italian-Tomato Sauce 101
  • 1 lb. ground pork
  • 1 lb. gound veal
  • 1 lb. ground lamb
  • 1 pkg. almond flour
  • s & p
  • coconut oil spray
  • grapeseed oil for sautéing the meats

Directions – Pre-heat Oven to 350º

  1. Make tomato- basil sauce and leave simmering on low, ready for the meats to be sautéed and added
  2. Sauté the pork, veal and lamb separately and drain the oil from each of the meats after each sautéing, this will take about 5 minutes each
  3. As each meat is finished draining stir it into your tomato sauce
  4. Peel and slice 2 lg eggplants approx. 1/8″-1/4″ thick
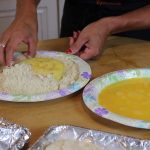
  5. Whisk 5 eggs in a medium bowl
  6. Add 3-4 cups almond flour in another bowl for dredging the eggplant
  7. Cover cookie tray with foil and spray with coconut oil
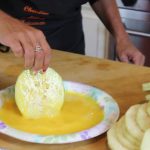
  8. Dip each eggplant slice into the egg, then dredge into the almond flour flipping a couple of times to get a good coating on there
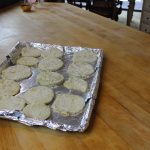
  9. Then begin to lay the coated eggplant slices on the cookie trays
  10. No need to spray the tops of the slices
  11. Pop them into the oven for 20 minutes, just until tender
  12. Note: the tops of the eggplant slices will not turn golden when baked
  13. Begin to layer the pre-baked eggplant slices in a 13″ x 9″, 12″ x 8″ approx. baking dish
  14. Spray bottom of baking dish with coconut oil
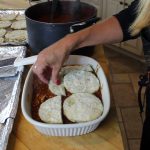
  15. Begin with a sauce layer, then eggplant slices, meat sauce, eggplant, meat sauce and so on until you reach the rim of the baking dish ending with a meat sauce layer completeing the Paleo Eggplant Lasagna
  16. Change foil layers on cookie tray to clean foil
  17. Place the Paleo Eggplant Lasagna onto the foiled tray and bake for approx. 35 minutes still on 350º until bubbly all over
  18. As with a traditional lasagna you want to let it sit for 10-15 minutes before slicing after you take it out of the oven…Mangia, mangia!!

Fresh Garden Tomato Sauce

Fresh Garden Tomato Sauce

When the aroma from your fresh garden tomato sauce smells exactly like a tomato plucked right out of your garden on a sultry summer day you know you have the right recipe! With all the beautiful weather we have had this summer everyone has an abundance of produce coming out of their garden’s. What a better way to dive right in and try your hand at making your very own tomato sauce. And when you taste how delicious the puréed tomatoes are as a raw sauce you may just stop right there. After that first taste of the raw tomato sauce there might not be any left over to go to the next simmering step!

I was very excited when some friend’s of mine, Becky and Mike, offered up a large bag of their fresh garden plum tomatoes. I knew I wanted to make fresh garden tomato sauce with them right off the bat. This is a bit nastalgic for me because it reminds me of when my mother used to make fresh garden tomato sauce for us when I was young.

It’s really an easy process of peeling, seeding and then puréeing the tomatoes with some sautéed onions and garlic. The more tomatoes you have the longer it well take but it’s so worth it. The fact that you can freeze the sauce for a later date makes it all worth while! What I love about making this fresh garden tomato sauce, other then the fact that it smells utterly amazing, is it’s just as delicious eating it raw as cooked. In fact, when I make this I can’t decide which I like better so I continue on to make both cause it’s so darn simple to do that once you are in the process.

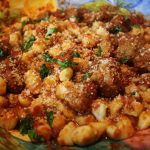
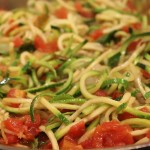
Once you see how easy to make your own sauce it may become a new family staple for you. You just might get inspired to make it a family affair having everyone join in to make homemade gnocchi or zucchini pasta too. Don’t forget the gourmet Caesar salad and then of course there’s an amazing ricotta pie or go for the death by chocolate meringue pie!

IMG_7868

zucspaghetti

DSCN4572-300x225

IMG_7641

IMG_8098


img_8165 fresh-core freshboil

freshice freshskin freshseeds

img_8215 freshpuree img_8249

img_8258 img_8240 img_8241

Ingredients:

  • 91 fresh garden tomatoes OR as many as you have
  • 1 tbsp sea salt, LESS if you have a smaller amount of plum tomatoes
  • 1/4 tsp finely ground pepper
  • 5 lg fresh basil leaves
  • 1 lg dried bay leaf
  • 1 tbsp sugar
  • 1/3 cup red wine – for the simmered sauce
  • 1 tsp finely ground Italian seasoning
  • 1 small Vadalia onion finely chopped
  • 4 extra lg OR 6 medium size garlic cloves
  • 1 tbsp tomato paste
  • 1/4 cup white wine to de-glaze the sautéed onions and garlic

Directions:

  1. Bring a large pot of water to a boil adding in 1 tbsp of salt
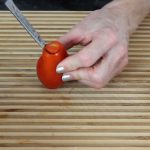
  2. Core the stem side of all your tomatoes
  3. Get a large bowl of ice water ready to put the tomatoes in after you blanch them
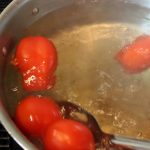
  4. Add plum tomatoes to boiling water, 25-30 at a time and blanch for 30-45 seconds, it’s totally fine if it goes past 45 seconds cause it’s going to take you a minute or two to scoop the tomatoes out
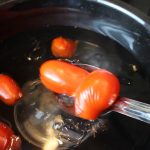
  5. Remove the tomatoes from the boiling water and submerse into the ice water
  6. Repeat until you have gone thru all your tomatoes
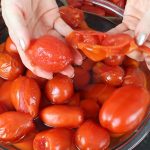
  7. Begin to remove the loosened skins from the tomatoes then placing into another bowl as you go
  8. Cut or tear tomatoes in half with your hands and remove most of the seeds putting pulp in one bowl and tomato flesh in another
  9. Spoon off any excess water that rises to the top of the bowl with all the tomato flesh
  10. Sauté chopped onion and garlic cloves til tranlucent
  11. De-glaze onions and garlic with 1/4 cup white wine
  12. Let the alcohol burn off and reduce slightly
  13. Begin to purée tomatoes and sauteed onions in the food processor in batches
  14. Add the puréed tomatoes/onions back into the large pan that you blanched the tomatoes in as you go along
  15. When done puréeing add salt and pepper to taste and voilà there is your raw sauce
  16. FOR RAW SAUCE: top pasta with raw sauce and sprinkle some fresh julienned basil, Parmesan and a drizzle of extra virgin olive oil
  17. FOR COOKED SAUCE: Put the pot of puréed tomatoes/onion back on the stove and add in the 5 extra lg fresh basil leaves, bay leaf, sugar, Italian spices, red wine and simmer for 1-2 hours…mangia mangia!!

Death by Chocolate Meringue Pie!


Death by Chocolate Meringue Pie

“Death by Chocolate Meringue Pie” is the perfect title for this recent cooking show taped at my foodie friend’s, David and Eileen’s house. When you taste this most chocolatey mousse-like filling topped with fluffy peaks of meringue you will think you have died and gone to heaven! This wonderful chocolate meringue pie recipe came from David’s mother, Alice, and has always been a family favorite for the holidays! With four boys in his family growing up, David said his mother was always welcome to the idea of having more cooks in the kitchen. You could only imagine that with four boys you’re going to need more then just one pie. David and his brothers happily learned at an early age how to pitch in and get this task done.

David uses the “chocolate fudge” flavor of Jello brand, the cook and serve, not the instant. Come to find out, this “chocolate fudge” flavor can be a difficult category to find. But using Jello brand’s “chocolate” flavor is the next best thing, so don’t fret. Make sure to keep an eye out for the “chocolate fudge” flavor next time you are at the store and shoot me an email if you strike “fudge”!

What takes this Jello cook and serve chocolate fudge pudding to a completely different universe, into a rich, chocolate mousse-like texture is the addtion of egg yolks, sugar, butter and pure vanilla extract. You will find yourself eating each bite of chocolate meringue pie very slowly just to savour every luscious bite. Part of this decadence comes from the rich, flaky crust made with a special lard David gets from Firefly Farmers in Stonington, CT. You can purchase their products at the Stonington, Waterford and Bozrah Farmers Markets. It definitely makes a difference in your pie crust to use both butter and lard like in my Perfect Pie Crust in 5 Minutes but using this lard that David use’s really puts the crust over the top!

Last but not least is the meringue that tops this incredible chocolatey filling and brings the whole pie together. Whipping the egg whites to soft peaks is important to achieve the elegant curly cues you can create when dipping a spatula gently into the surface of the meringue. Then off to the oven briefly until those beautiful peaks turn golden.

This wonderful chocolate meringue pie recipe could have easily remained a family secret but David and his mother were gracious enough to share it with us. The only option I see here is for you to get busy and make this luscious dessert for your next holiday! Don’t forget to share the YouTube link to the show 🙂 ENJOY xxoo

You should check out David and Eileen’s Lobster Mac & Cheese show if you are looking for an amazing entré, Pulled Beef Taco’s or Salmon B.L.T. Sliders at Marco’s would make for very tasty dishes also. Try my Guacamole or Homemade Salsa 101 to start everything off!

lobmac IMG_3234 Salmonslider guaca IMG_7479

chcocrusingred IMG_8026 chocdisc

chocorollcurust chococrust chocopiecrust

chocofork IMG_8071 chcomerg

Ingredients for David’s Pie Crust – 1 Crust for lg Deep Dish Pie Plate (measurements below are 3/4 of full recipe):

  • 1 1/2 cups flour
  • 1/4 cup lard frozen, grated
  • 1/4 cup butter refigerated, grated
  • 3/4 tsp salt
  • approx. 2-3 tbsp ice cold water

FULL PIE CRUST RECIPE – 2 Crusts:

  • 2 cups flour
  • 1/3 cup lard or crisco
  • 1/3 cup butter
  • 1 tsp salt
  • 3-4 tbsp ice cold water

Directions for Pie Crust – Pre-Heat Oven to 400º :

  1. Measure lard or crisco and put into freezer
  2. Grate lard or crisco and butter and place in separate bowls back in the frig til you are ready
  3. Add flour, salt, lard or crisco, and butter to food processor or mixer and begin to mix with paddle attachment slowly
  4. Then slowly add in 1 tbsp at a time while mixing, you may need to add another tbsp of water to have dough come together
  5. When dough comes together in 1-2 minutes turn dough onto wax paper forming into a disc shape and place into the freezer for 15 minutes
  6. Begin to roll out dough between wax paper until its large enough to fit pie plate
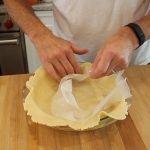
  7. Gently peel over top layer of wax paper flipping over into pie dish
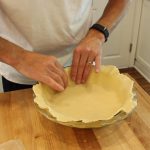
  8. Gently push edges in all around and remove the other piece of wax paper
  9. Scallop the edges of pie crust
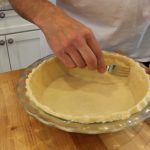
  10. Prick inside walls and bottom of crust with a fork
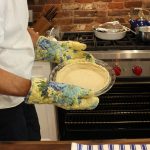
  11. Place into a 400º oven and bake 10-15 minutes until slightly golden around the edges
  12. Let pie crust cool and begin to make the chocolate filling

IMG_8075 chocopud IMG_8084

chcomerg chocopeaks IMG_8098

Ingredients for Chocolate Filling:

  • 2 boxes COOK and SERVE Jello brand “chocoate fudge” or “chocolate” pudding – NOT INSTANT
  • NOTE: I can only find “chocolate” so I mix “bittersweet chocolate chips & semi sweet chocolate chips heaping 1/4 cup of each and this tastes exactly like “chocolate fudge” brand of Jello 🙂
  • 4 egg yolks
  • 3 1/2 cups WHOLE milk
  • 1/2 heaping cup semi-sweet chocolate chips
  • 2 tbsp sugar
  • 2 tbsp butter
  • 1 tsp pure extract vanilla
  • 1 pre-baked pie crust cooled

Directions for Chocolate Filling:

  1. Separate 4 egg yolks from whites and place into separate bowls (yolks for filling and whites for meringue)
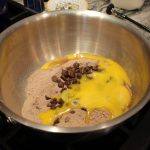
  2. Add 2 boxes of chocolate fudge pudding mix to medium size sauce pan
  3. Add in chocolate chips, 4 egg yolks, sugar, 3 1/2 cups of milk over medium heat
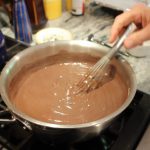
  4. Continue to whisk while bringing ingredients to a boil, it will thicken quickly
  5. When it thickens take off of heat
  6. Whisk in 3 tbsp of butter and 1 tsp vanilla
  7. Pour into the cooled pre-baked pie crust and let cool just a bit to a warm TEMP but NOT COLD– DO NOT put into the fridge because you DON’T want to put whipped meringue on a COLD pie, it will cause meringue to weep 🙂

Ingredients for Meringue:

  • 4 egg whites
  • 8 tbsp sugar – 2 tbsp per egg white
  • 1/8 tsp cream of tartar

Directions for Meringue – Pre-Heat Oven to 375º :

  1. Whisk egg whites until soft peak begin to form then start to add sugar 1 tbsp at a time
  2. Keep whisking unitl you get soft – stiff peaks – in between peaks – NOT STIFF
  3. Pour onto WARM chocolate pie filling
  4. Begin to smooth meringue over to touch edges of the pie crust making sure meringue seals all along the edge of the pie crust
  5. Once the meringue completely covers the chocolate filling begin to dip spatula in and out of meringue creating curly cue peaks
  6. Place chocolate meringue pie into 375º oven until peaks are golden approx 10-15 minutes – if the meringue is undercooked the it will weep
  7. Take out and let meringue cool, slice and mangia mangia!

MERINGUE TIP: Do not put whipped meringue on a COLD pie, a warm filling is better than COLD. Be sure to cook meringue through because undercooked meringue will weep 🙂

Salsa 101


Salsa 101

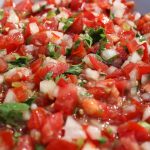
When you learn to make my basic salsa 101 there will be no stopping you! It’s packed with flavor from the juicy summer tomatoes, sweet Georgia Vidalia onions, add in some fresh squeezed limes, chopped cilantro and jalapeño and you have yourself a fiesta!

When you know how to make a basic salsa the world your oyster! No food pun intended here, but seriously! From this salsa 101 recipe you can totally make it yours by adding in 1/2 cup of avocado, mango, pineapple or even cucumbers. Don’t be afraid to try adding your favorite’s to the basic recipe because that is how you learn to create, to taste different flavors. You can even try adding 1 cup of black beans to the salsa! YUM! Have fun and enjoy:)

Adding in the extra virgin olive oil and “seasoned” rice wine vinegar with the fresh squeezed limes keeps my salsa delicately balanced where one flavor isn’t over powering another. I love using the Georgia Vidalia onions because they are so sweet! If you are not a big onion fan these will surprise you for sure. You could also cut back on the amount of chopped onions even though I believe it’s a perfect amount in my salsa 101 when “finely” chopped. The beautiful thing about the salsa 101 recipe is you can use what ever tomatoes you want from heirlooms, to grape, to cherry, tiger tomatoes …what ever your little heart fancies!

You should try  Pulled Beef Taco’s to go with my salsa 101, or Zucchini Spaghetti, Roasted Garlic Bean Dip, or even Homemade BBQ Sauce on chicken wings and then end it with Drunk Blondies & a Bourbon Caramel Sauce and you will be The Belle of the Ball at your party!

IMG_3234 zucspaghetti dipshrimp IMG_7091 IMG_6622

IMG_7440 salsaonion salsatom

salsajala salsacilan IMG_7458

IMG_7475 IMG_7479

Ingredients:

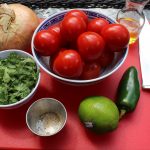
  • 2 heaping cups – (12 Compari tomatoes-these are a med/small size, can use Heirloom tomatoes, cherry, grape …your favorite tomato!  finely chopped
  • 1 packed cup – 1/2 of extra large Vidalia onion finely chopped
  • 2 tbsp – 1/2 lg jalapeño extra finely chopped
  • 1 cup cilantro coarsely chopped
  • 2 tbsp extra virgin olive oil
  • 1 tbsp “seasoned” rice wine vinegar
  • 2 tbsp fresh squeezed lime juice – 1 lime
  • 1/2 tsp sea salt
  • 1/4 tsp pepper
  • OPTIONAL: dash of Siracha Hot Sauce or Franks or Tabasco

Directions:

  1. Finely chop tomatoes, Vidalia onion, jalapeño and cilantro
  2. Add to a large bowl
  3. Roll lime to get the juices flowing and squeeze over chopped veggie’s
  4. Add s & p, olive oil and seasoned rice wine vinegar
  5. Toss and serve with chips, chicken, fish, beef or pork!
  6. NOTE: Now that you have an incredible tasting basic salsa be creative and add 1/2 cup of chopped avocado, mango, pineapple, black beans, or cucumbers…Mangia Mangia!

Secret Meatball Recipe at Glenn’s New Haven Apizza

Secret Meatball Recipe at Glenn’s New Haven Apizza

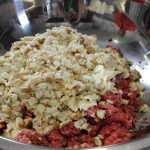
One of the most delicious meatballs you’ll ever have and the mammoth size will knock you for a loop! Glenn Proto, at New Haven Apizza & Bakery, right here in our very own Madison, CT, shared his mother, Annette’s, secret meatball recipe with me this week. The ingredients he use’s in his meatballs couldn’t get any fresher because he even grind’s his own meats for these meatballs. Freshly ground brisket, short ribs, 80/20 beef and Longhini sweet sausage are the main ingredients in his meatballs. Oh, but let’s not forget what he calls his “secret” to the meatballs, his addition of finely chopped pepperoni! Glenn says this is what give’s these authentic Italian meatball’s that extra special something!

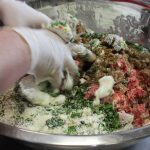
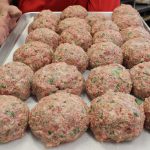
Once we get past all the freshly ground meat that goes into Glenn’s meatballs the love doesn’t stop there, he then caramelizes red onions, adds in Ricotta fina (a special and costly ricotta from the very best Liuzzi Cheese in North Haven,CT, eggs, grated Romano cheese, Italian cubed up bread soaked in heavy cream, and fresh garlic and herbs! Wow, he doesn’t hold back on quality that’s for sure. What an incredible ingredient list for these most flavorful and succulent morsels. Maybe I shouldn’t use the word “morsels” either because the size of these meatball’s are cray cray! It was a blast rolling the meat mixture into bigger then baseball size meatballs with Glenn and his son Dylan. Isn’t it wonderful how the tradition carries on as Dylan and his siblings grew up making these incredible meatballs just as Glenn did. And now, we can add some of this lovely tradition into our kitchen’s since Glenn was so kind as to share his family’s recipe with all of us. He believe’s traditions and recipe’s are meant to be shared so everyone can enjoy them!

Hope you enjoy this secret meatball recipe show and remember he serve’s up 3 of these colossal meatballs in one “spaghetti and meatball” order from his restaurant! You might want to start with a few appetizer’s like my crab cakes, buffalo chicken dip, Mediterranean layered dip, spanakopita or my hummus!

DSCN45211-300x225 buffdip IMG_5437 cookedspan IMG_5097

IMG_7328 IMG_7338 IMG_7342

IMG_7332 IMG_7334 IMG_7344

IMG_7351 IMG_7388 meatbll

Glenn’s Mammoth Size Meatballs – makes approx 10-12 Colossal Size…Can make them smaller to yield more meatballs!

  • 2 1/2 lbs. of ground beef (.75 lbs ea. of ground brisket, short ribs and 80/20 ground beef)
  • 1 1/4 lbs. Longhini sweet sausage
  • 1/2 cup finely chopped pepperoni
  • 2 cups Italian bread after soaked in heavy cream and squeezed slightly  (1 lb. about 1  loaf of Italian bread, cubed and soaked in heavy cream)
  • 2-3 cups heavy cream – to soak cubed up Italian bread
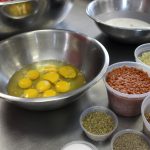
  • 3 lg eggs
  • 1 cup grated Romano cheese
  • 3/4 cup ricotta (ricotta fina if you can get it)
  • 3/4 cup fresh chopped parsley
  • 1/2 cup fresh chopped basil
  • 1/3 heaping cup finely chopped fresh garlic
  • 1/2 cup caramelized red onions (finely chop 2 med. size red onions and sauté on medium/high with 1 tbsp olive oil and 1 tbsp butter for 5 minutes and then twenty minutes on low with adding 1 tbsp sugar and 1/4 tsp salt)
  • 1 tbsp plus 1 tsp sea salt
  • 1 tbsp plus 1 tsp finely ground pepper
  • 1 tbsp plus 1 tsp dried oregano

Directions:

  1. Pre-heat oven to 400º
  2. Cube up the Italian loaf of bread to 3/4″ pieces
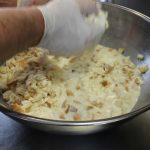
  3. Add cubed up bread to 2 – 3 cups heavy cream – should be enough to have all the pieces get saturated and soak for approx 15 minutes
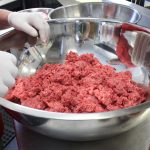
  4. Add beef and sausage to a large bowl and combine with your hands
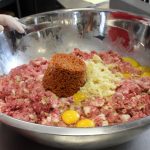
  5. Add in the pepperoni and the rest of the ingredients in the list and combine with your hands – Don’t over mixed meat …just until combined
  6. Begin to roll meat mixture into desired size meatballs dipping your hands in the left over the heavy cream to help smooth the edges of the meat while shaping them
  7. Place the meatballs onto a cookie tray..they can be right next to each other
  8. Note: the larger they are the longer you will bake them
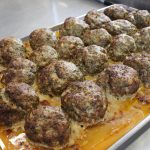
  9. Bake for 45-60 until the tops are crispy and brown …mangia, mangia!


Seared Scallops

Seared Scallops

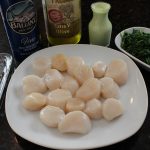
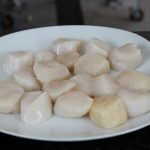
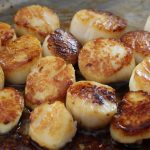
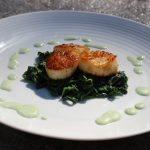
Seared scallops are so gosh darn delicious you really don’t need anything else to accompany them. They have a succulent and creamy texture that’s so tender they melt in your mouth when cooked correctly. All that is needed to sear sea scallop’s is a hot non-stick pan, a couple tablespoons of olive oil, butter for basting at the end, a squeeze of fresh lemon and violà, you have an amazing seafood dish in 4 minutes.

Butter is just one of additions to seafood that always seems to give one last flavor boost. That’s why I have you baste the scallops in the last few seconds in the show. Butter makes everything better, right? You can’t get any easier then making scallops in mere minutes. It is best to use a non-stick pan to sear these though because it will make for a smooth ride home and super easy to flip them over to get that golden sear on the other side of the scallop.

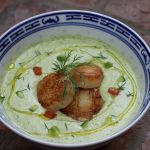
You really need to try my cold cucumber and fennel soup to go with your seared scallops. The flavors you will get from all the vegetables and herbs in the soup to the creamy scallops will put you over the top. The green goddess sauce II goes without saying when paired up with the seared scallops. If I’m serving the scallops for an appetizer I set a small bowl of green goddess sauce right in the middle of a platter for dunking and scallops placed all around…YUM!

You may want to add something hardy to compliment the fish so if you haven’t tried my family recipe for the best pasta fagioli you will ever have you should get on the ball. You could go the zucchini spaghetti route or even my amazing melt-a-away homemade gnocchi with a bolognese sauce, and who doesn’t love sticky buns with their coffee for dessert!

IMG_0558 zucspaghetti 011 025 IMG_5574

IMG_7261 IMG_7275 IMG_7288

IMG_7290 IMG_7242 IMG_7305

Ingredients:

Directions:

  1. Heat non-stick pan to high heat
  2. Sprinkle salt and pepper to taste on both side of the scallops
  3. Add 2 tbsp of olive oil and begin to add scallops
  4. If you have a medium size pan you will have to do this in 2 batches
  5. Sear scallops about 2 minutes on each side until golden
  6. Optional: add 1 tbsp butter and baste scallops in the last 20 seconds
  7. Take off the heat and squeeze 1/2 lemon over scallops
  8. Remove scallops immediately from hot pan to a serving dish
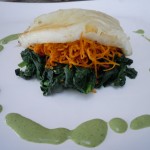
  9. Plate each dish with a sautéed spinach in the center, top with scallops and drizzle with green goddess sauce around outer edge of the plate…enjoy!
  10. OR top cold cucumber & fennel soup with seared scallops!


Green Goddess Sauce ll

Green Goddess Sauce ll

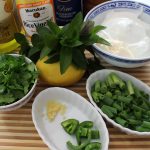
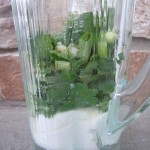
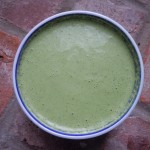
Having my green goddess sauce ll at your next party will be sure to turn heads. It’s kind of like wearing a new party dress! This green goddess sauce is made in mere minutes in a blender. It’s a blend of Greek yogurt, mayo, fresh mint leaves and cilantro, garlic, green onion, lemon juice, olive oil and rice wine vinegar.  You don’t even have to waste time chopping finely because it all get puréed anyways!

Decorating your party plates with my green goddess sauce will make for a lovely presentation, a more formal one, but having a bowl or pouring cup of the sauce on the table will do the trick quite nicely! In fact, the latter might be better since there’s a good possibility your guest’s will be going back for seconds.

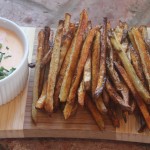
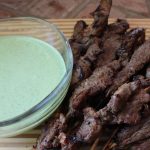
This green goddess sauce is so versatile because it literally goes with all foods! It’s heavenly on seared scallops…all fish for that matter, swordfish, rack of lamb, pulled beef tacos, Sweet Potato Fries , Baked Crispy Fries, or Baked Coconut Shrimp and even cut veggies!

027 IMG_3234 IMG_0672 IMG_0668 iphone pictures 447

IMG_6920 iphone pictures 1167 iphone pictures 1168

iphone pictures 1191 iphone pictures 331 iphone pictures 316

IMG_6956 IMG_6962 IMG_0672

Ingredients:

  • 1 cup plus 2 tbsp Greek yogurt
  • 1/4 cup mayo (I use Hellman’s)
  • 1/2 cup packed mint leaves (1 cup loose)
  • 1 cup packed fresh cilantro
  • 1 garlic clove put thru garlic press
  • 1/2 jalapeño diced
  • 4 lg stalks, 6 small of green onion chopped coarsely
  • 1 tbsp fresh lemon juice
  • 1 tbsp extra virgin olive oil
  • 1 Tbsp “seasoned” rice wine vinegar
  • 1 tsp sugar  – (NOTE: I forgot to add this in the show, but it really needs this for balance 🙂
  • s & p
  • If it’s not hot enough with the jalapeno add a dash of Siracha

Directions:

  1. Place all of the ingredients into a blender an purée for 10 seconds…be patient – you may need to stop and stir everything to get it going but do NOT add any more liquid
  2. Stop blender and scrap down sides to get the larger leaf pieces and blend for 5 more seconds and violà!
  3. Taste here and add salt and pepper
  4. Add a dash of Siracha – you need to taste the sauce first, sometimes a jalapeño can be super hot and other times it can be a mellow hot
  5. This sauce gets even better if you can pop it into the fridge for an hour and let the flavors mingle, the sauce will thicken up a little too!
  6. Make this ahead of time and keep sauce in a plastic container and refrigerate.  It stays nicely for days in frig.
  7. This green sauce is absolutely delicious on so many things…be creative.

Shrimp & Scallop Ceviche


Shrimp & Scallop Ceviche

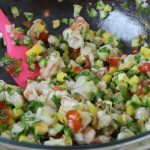
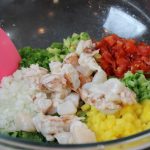
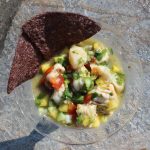
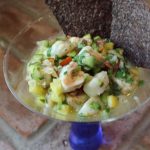
mixedcevicheMaking shrimp & scallop ceviche really can’t get an easier then this! Ceviche is a South American dish that’s usually served as an appetizer. The fish cures/cooks in citrus juice for an hour or two while you get all your salsa ingredients in order. The citrus curing juices are drained from the fish, leaving a tender shrimp & scallops to be tossed with salsa and voilà. The base of the shrimp and scallop ceviche here is my mango salsa recipe.

When I thought of making ceviche this week, sombrero popped into my head! I went to several store’s, costume store’s included which don’t exist anymore, and was out of luck. I then called my dear friend Maria who to my surprise had an authentic sombrero for me to borrow that her parents had picked up on a cruise to Cozumel, Mexico. I have to say it is a very cool hat, not to mention really beautiful. Although it has some weight to it so your neck gets a bit of a work out and you have to be careful not to knock into the walls because depth perception can be deceiving.

When I make this shrimp & scallop ceviche. or any ceviche for that matter, I like to cure my fish in lime juice and then drain that juice before adding the fish to my salsa ingredients. In my opinion, the flavors stay fresher that way. By draining the fish juice that’s released from the shrimp and scallops in the curing process it keep’s a better balance between fish and salsa. There are some recipe’s that have you toss everything into one bowl but I feel it taste’s better when you drain the curing fish juices prior to adding the fish into the salsa.

Since the texture’s of shrimp & scallops are a little different I have you cut the shrimp in 1/2 horizontally, and then dice, so the needed curing/cooking time between the two is closer. You could always change up the fish in this recipe to and go with all scallops or another favorite flaky fish. It’s all about being creative and using what’s freshest at the market!

Remember, always when preparing a fish dish, you will want to serve it the same day you make it and odds are there won’t be any leftovers! You may want to make it a party theme of appetizer’s to go along with this shrimp & scallop ceviche, and serve something like buffalo chicken dip, salmon BLT slider’s, fresh pesto, mozzarella and roasted tomato on a crostini, or shrimp & mango in wonton’s and end it with a dessert that will have everyone talking...fresh berries in a dreamy cream topping made from melted cream cheese and fluff that’s an incredible taste SENSATION!

buffdip IMG_2617 IMG_2026 wonyonshrimp_1606 IMG_2201

IMG_6855 IMG_6859 shrimp

lime IMG_6878 shrimplemon

mixedceviche IMG_6905 IMG_6900

Ingredients:

  • 1/2 lb. lg shrimp, peeled and deveined, 1/3″ diced
  • 1/4 lb of sea scallops, 1/3″ diced
  • 1/2 cup diced sweet mango
  • 1/2 cup sweet onion – Vidalia onion -finely chopped
  • 1/2 cup mini cucumber diced 1/3 cup cherry tomatoes finely chopped
  • 1/2 cup cilantro chopped (1/2 cup after it’s chopped)
  • 1/3 cup finely diced cherry tomato
  • 1/3 cup finely diced avocado
  • 1 jalapeno finely chopped without the seeds
  • juice from 1 lime – for the final ceviche
  • 1 tbsp fresh lemon juice – for the final ceviche
  • 2 tbsp extra virgin olive oil
  • 2 tbsp rice wine vinegar – (“seasoned”)
  • juice from 4 limes for the shrimp/scallop for the curing marinade
  • salt and pepper to taste
  • dash of Tabasco
  • Bag of blue corn chips (optional)

Directions:

  1. Wash and devein the shrimp
  2. Wash the sea scallops and remove little fibrous side muscle that’s attached to the scallop
  3. Pat the shrimp and scallops dry on paper towels
  4. Cut up the shrimp in 1/2 horizontally and then into 1/4″ pieces
  5. Slice up the scallops in 1/2 horzintally and then into 1/2″ pieces
  6. Put them into the same bowl… a non-reactive bowl like a glass bowl
  7. Roll the limes to soften them up
  8. Squeeze the lime juice over the shrimp and scallops
  9. Make sure there is enough juice so all the shrimp and scallop pieces are submersed in the lime juice and place into the frig until they are opaque…and place into the frig for 1- 2  hours
  10. NOTE: you should check the fish at 30 minutes intervals to see how it’s curing/cooking …depending on the coldness of the fish, kind and size it wil be ready at different time’s but it’s EASY – if it’s opaque then it’s done!
  11. Finely chop the tomatoes, jalapeno, sweet onion, cucumbers, mango and cilantro and set aside in a large bowl
  12. Drain all the liquid out from the shrimp and scallops and discard
  13. Add the shrimp and scallops to the large bowl with the salsa, add in juice of 1 tbsp lemon juice, juice from 1 lime, 2 Tbsp olive oil, 2 Tbsp rice wine vinegar, dash of Siracha, salt and pepper to taste
  14. Put back into the fridge for 15 minutes for flavors to marry
  15. Serve in martini glasses with blue chips…YUM!

Best Shrimp Scampi!

Best Shrimp Scampi!

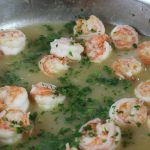
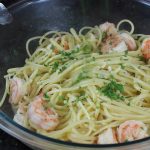
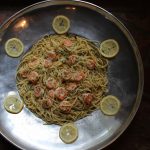
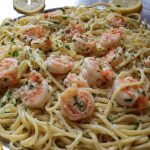
shrimpyShrimp scampi is one of those delicious dishes that’s sure to bring a smile to everyone’s face just on aroma’s alone! Shrimp sautéed in olive oil and butter with lots of garlic, shallots, clam broth, and white wine topped with fresh lemon juice, parsley and Parmesan make’s for a grand party atop a pile of linguine!
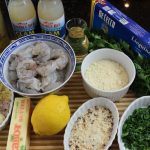
This quickie gourmet sauce I have created for you in this shrimp scampi dish is a light sauce, yet packed with flavor. The way we do this is by concentrating the juice’s released from those sautéed shrimp along with a couple of bottles of clam stock simmering for a brief seven minutes. The traditional and time consuming way to create this lovely stock would be to simmer the shrimp shells in white wine for a while like you would for a lobster bisque stock. The objective here was to take a short cut to accommodate our busy every day lives without foregoing taste by using bottled clam stock. Voilà, you have an amazing flavor base for our shrimp scampi with linguine in seven minutes.
One of my favorite way’s to serve the shrimp scampi with linguine is by offering up a Parmesan with red pepper flake’s mixed right into it. It’s nice to offer two small dishes of Parmesan, one with the pepper flakes and one without. By adding the red pepper flakes to the grated cheese guests are less likely to accidentally sprinkle on too much because it’s dispersed throughout the cheese.

You might want to try some homemade pasta to go with this wonderful shrimp scampi or even a Caesar Salad.  Some chocolate crackle cookies would be great for dessert or homemade chocolate eclairs with an incredibly easy and luscious vanilla filling. Then again there those drunk blondie bars with the bourbon caramel sauce that are to die for! Enjoy! 🙂

IMG_4327 DSCN4572-300x225 IMG_3663 IMG_6379 IMG_6622

IMG_6780 IMG_6793 shrimpwinejpg

shrimp gsrlic shrimpclam IMG_6801

shrimpy shrimplemon IMG_6805

shrimpbutter srhimp pasta shrimpeparsley

IMG_6819 IMG_6822 IMG_6818

Ingredients for Shrimp Scampi with Linguine – 6-10 People:

  • 1 – 1 1/2 lbs of peeled & deveined large shrimp (ask for a certain number of shrimp …2-5 per person depending on what other side dishes you are serving)
  • 2 bottle of Snows clam broth
  • 1/2 cup white wine – pinot grigio
  • 4 lg garlic clove finely chopped
  • 1 tbsp finely chopped shallot
  • 2 lg garlic clove smashed
  • 1/4  cup finely chopped FRESH FLAT LEAF Italian parsley
  • 5 Tbsp salted butter
  • 3 Tbsp olive oil
  • 1 lb pasta – linguine or linguine fini
  • 2 lemons
  • Reggiano Parmesano
  • Red pepper flakes -OPTIONAL
  • salt and pepper to taste

Directions:

  1. Peel and devein shrimp
  2. Bring large pan of salted water to a boil
  3. Add 2 tbsp olive oil, 1 tbsp butter and 2 lg crushed garlic cloves to large sauté pan over med/high heat
  4. When the pan is hot add in the shrimp
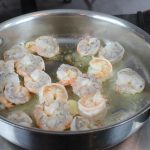
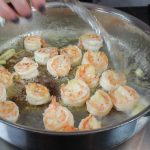
  5. Saute for 2 1/2 minutes per side
  6. Remove shrimp and garlic – set aside
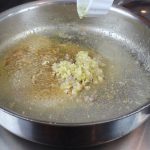
  7. Add in 1 tbsp olive oil, finely chopped garlic and shallots into the same pan and saute til soft (lightly golden) for about 2-3 minutes
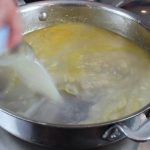
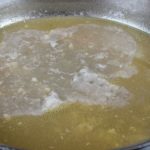
  8. Then pour in both cans of clam juice with the garlic and shallots
  9. Bring to a boil over high heat, turn down to a low simmer for 7 minutes
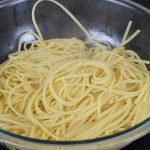
  10. Add pasta to boiling salted water and cook until aldente (don’t over cook!)
  11. Let pan with the clam broth/garlic simmer and reduce by 1/3
  12. Add shrimp back into reduced clam broth/garlic
  13. Add in juice from 1 whole lemon and 3 tbsp of chopped parsley to shrimp scampi
  14. Add in salt and pepper here to taste
  15. Simmer on LOW for 2 more minutes
  16. Drain pasta and pour out pasta into a large serving platter or bowl
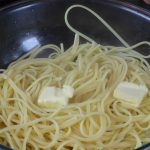
  17. Add in 4 tbsp of butter to pasta and toss, add in salt and pepper to taste …taste the pasta and make sure the pasta is PROPERLY seasoned at this point
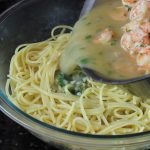
  18. Pour the shrimp scampi mixture over the pasta
  19. Sprinkle with more fresh chopped parsley and grated cheese and serve…YUM!
  20. NOTE: Make sure that each person gets some of that tasty broth in their dish