The Traveling Epicurean

Fresh Garden Tomato Sauce

Fresh Garden Tomato Sauce

When the aroma from your fresh garden tomato sauce smells exactly like a tomato plucked right out of your garden on a sultry summer day you know you have the right recipe! With all the beautiful weather we have had this summer everyone has an abundance of produce coming out of their garden’s. What a better way to dive right in and try your hand at making your very own tomato sauce. And when you taste how delicious the puréed tomatoes are as a raw sauce you may just stop right there. After that first taste of the raw tomato sauce there might not be any left over to go to the next simmering step!

I was very excited when some friend’s of mine, Becky and Mike, offered up a large bag of their fresh garden plum tomatoes. I knew I wanted to make fresh garden tomato sauce with them right off the bat. This is a bit nastalgic for me because it reminds me of when my mother used to make fresh garden tomato sauce for us when I was young.

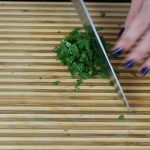
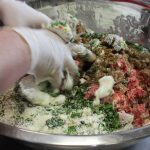
It’s really an easy process of peeling, seeding and then puréeing the tomatoes with some sautéed onions and garlic. The more tomatoes you have the longer it well take but it’s so worth it. The fact that you can freeze the sauce for a later date makes it all worth while! What I love about making this fresh garden tomato sauce, other then the fact that it smells utterly amazing, is it’s just as delicious eating it raw as cooked. In fact, when I make this I can’t decide which I like better so I continue on to make both cause it’s so darn simple to do that once you are in the process.

Once you see how easy to make your own sauce it may become a new family staple for you. You just might get inspired to make it a family affair having everyone join in to make homemade gnocchi or zucchini pasta too. Don’t forget the gourmet Caesar salad and then of course there’s an amazing ricotta pie or go for the death by chocolate meringue pie!
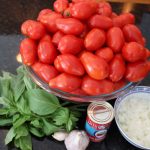
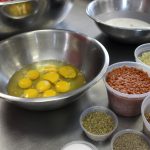
IMG_7868

zucspaghetti

DSCN4572-300x225

IMG_7641

IMG_8098


img_8165 fresh-core freshboil

freshice freshskin freshseeds

img_8215 freshpuree img_8249

img_8258 img_8240 img_8241

Ingredients:

  • 91 fresh garden tomatoes OR as many as you have
  • 1 tbsp sea salt, LESS if you have a smaller amount of plum tomatoes
  • 1/4 tsp finely ground pepper
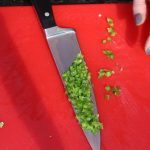
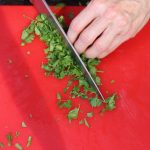
  • 5 lg fresh basil leaves
  • 1 lg dried bay leaf
  • 1 tbsp sugar
  • 1/3 cup red wine – for the simmered sauce
  • 1 tsp finely ground Italian seasoning
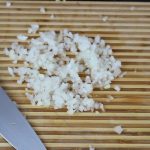
  • 1 small Vadalia onion finely chopped
  • 4 extra lg OR 6 medium size garlic cloves
  • 1 tbsp tomato paste
  • 1/4 cup white wine to de-glaze the sautéed onions and garlic

Directions:

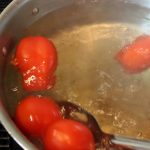
  1. Bring a large pot of water to a boil adding in 1 tbsp of salt
  2. Core the stem side of all your tomatoes
  3. Get a large bowl of ice water ready to put the tomatoes in after you blanch them
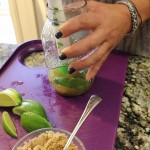
  4. Add plum tomatoes to boiling water, 25-30 at a time and blanch for 30-45 seconds, it’s totally fine if it goes past 45 seconds cause it’s going to take you a minute or two to scoop the tomatoes out
  5. Remove the tomatoes from the boiling water and submerse into the ice water
  6. Repeat until you have gone thru all your tomatoes
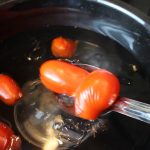
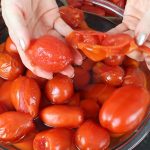
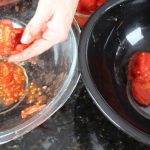
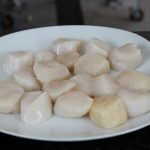
  7. Begin to remove the loosened skins from the tomatoes then placing into another bowl as you go
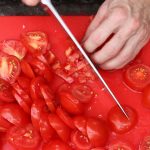
  8. Cut or tear tomatoes in half with your hands and remove most of the seeds putting pulp in one bowl and tomato flesh in another
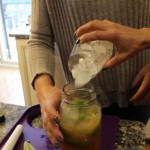
  9. Spoon off any excess water that rises to the top of the bowl with all the tomato flesh
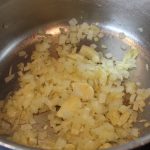
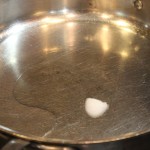
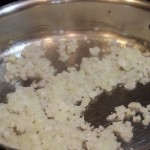
  10. Sauté chopped onion and garlic cloves til tranlucent
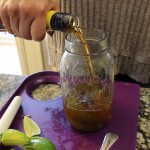
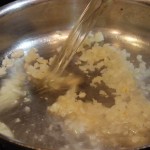
  11. De-glaze onions and garlic with 1/4 cup white wine
  12. Let the alcohol burn off and reduce slightly
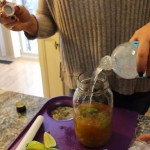
  13. Begin to purée tomatoes and sauteed onions in the food processor in batches
  14. Add the puréed tomatoes/onions back into the large pan that you blanched the tomatoes in as you go along
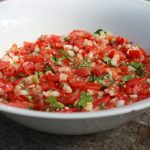
  15. When done puréeing add salt and pepper to taste and voilà there is your raw sauce
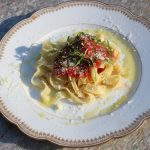
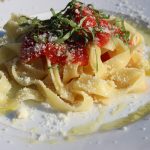
  16. FOR RAW SAUCE: top pasta with raw sauce and sprinkle some fresh julienned basil, Parmesan and a drizzle of extra virgin olive oil
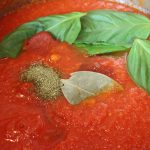
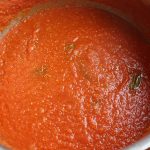
  17. FOR COOKED SAUCE: Put the pot of puréed tomatoes/onion back on the stove and add in the 5 extra lg fresh basil leaves, bay leaf, sugar, Italian spices, red wine and simmer for 1-2 hours…mangia mangia!!

Best Guacamole Ever!

Best Guacamole Ever!

This best guacamole ever recipe will definitely change the way you look at that mixture they call guacamole at the market. I find most of the brands out there both watery and mysterious. Why chance quality. The simple fact is, when my best guacamole recipe is so simple to make why settle for second rate! Even the amounts of finely chopped sweet onion, tomato, jalapeño and cilantro in this recipe are minimal so there’s not a whole lot of prep going on either. These amounts are just enough to add hints of lovely flavors and not take away from the sweet creamy California avocado’s.

Avocado’s are on sale just about every other week at the market so take advantage of this and load up. You can never buy too many and they don’t all have to be perfectly ripened right at that moment. They will ripen on your counter in a matter of days.

If I am not serving this best guacamole ever right away I put one of the avocado pits back into the middle of the guacamole, cover it with saran wrap and put it into the refrigerator until I’m ready. The saran wrap should go directly onto the surface of the guacamole so as not to let the dip oxidize and turn brown. If part of it does oxidize just skim that part off with a spoon and there will be a fresh green surface underneath. And, when making guacamole it’s best when it’s eaten the same day, or definitely by the next.

If you are a big fan of avocado’s you really need to try chocolate avocado mousse! My pulled beef taco’s would be incredible with the best guacamole ever. Serve up a variety of appetizer’s for your get together and add in Sweet potato fries  and salmon gravlax, both incredibly delicious and fun eats! A chocolate pecan pie just might put the party right over the top! Enjoy! 🙂

SAM_0154

IMG_3234

IMG_0668

IMG_0964

wholepiepecan


iphone pictures 718 iphone pictures 732 iphone pictures 722

iphone pictures 724 iphone pictures 738 iphone pictures 740

IMG_7686 guaconion guactom

guacjale guaccilan guacoil

guaccut guacfork guacsiracha

guaclemon IMG_7744 IMG_7767

Ingredients:

  • 3 small/med size ripened California avocado’s
  • 1/4 cup finely chopped Sweet or Vidalia onion (Georgia onion)
  • 1/4 finely chopped sweet tomatoes any color (cherry tomatoes, heirloom tomatoes…your fav)
  • 1/4 cup chopped cilantro (fill 1/4 cup first with whole leaves then chop that)
  • 1/2 of a lg jalapeno, finely chopped with seeds removed, approx. 2 tbsp
  • 2 tbsp extra-virgin olive oil
  • 1 tbsp rice wine vinegar “seasoned” – (rice wine vinegar and olive oil are my secret ingredients that give the guac that little someting extra!)
  • 1 tsp fresh squeezed lemon juice
  • 1/4 Tsp salt
  • 1/4 Tsp Pepper
  • 2 dashes of your favorite hot sauce …I use Siracha (which is sold right next to the Tabasco)

Directions:

  1. Slice and remove avocado flesh from the skins as shown in the photo above and place in a large bowl, save one of the avocado pits to add to dip at the end
  2. Slice off any black or dark spots on the avocado’s and discard
  3. Finely chop sweet onion, tomatoes, jalapeno and cilantro and add to bowl with avacado’s
  4. Add in s&p and olive oil and rice wine vinegar
  5. Begin to slice halved avocado’s with a knife to help break them up
  6. Then begin to mash with a fork and stir around all of the ingredients
  7. Lastly add Siracha (hot sauce) and 1 tsp of lemon juice
  8. Mix gently to combine and add pit to the middle of the guacamole
  9. The pit helps to preserve guacamole until it get’s all eaten up 🙂
  10. Serve with chips, turkey or beef burgers, salsa …be creative!

Salsa 101


Salsa 101

When you learn to make my basic salsa 101 there will be no stopping you! It’s packed with flavor from the juicy summer tomatoes, sweet Georgia Vidalia onions, add in some fresh squeezed limes, chopped cilantro and jalapeño and you have yourself a fiesta!

When you know how to make a basic salsa the world your oyster! No food pun intended here, but seriously! From this salsa 101 recipe you can totally make it yours by adding in 1/2 cup of avocado, mango, pineapple or even cucumbers. Don’t be afraid to try adding your favorite’s to the basic recipe because that is how you learn to create, to taste different flavors. You can even try adding 1 cup of black beans to the salsa! YUM! Have fun and enjoy:)

Adding in the extra virgin olive oil and “seasoned” rice wine vinegar with the fresh squeezed limes keeps my salsa delicately balanced where one flavor isn’t over powering another. I love using the Georgia Vidalia onions because they are so sweet! If you are not a big onion fan these will surprise you for sure. You could also cut back on the amount of chopped onions even though I believe it’s a perfect amount in my salsa 101 when “finely” chopped. The beautiful thing about the salsa 101 recipe is you can use what ever tomatoes you want from heirlooms, to grape, to cherry, tiger tomatoes …what ever your little heart fancies!

You should try  Pulled Beef Taco’s to go with my salsa 101, or Zucchini Spaghetti, Roasted Garlic Bean Dip, or even Homemade BBQ Sauce on chicken wings and then end it with Drunk Blondies & a Bourbon Caramel Sauce and you will be The Belle of the Ball at your party!

IMG_3234 zucspaghetti dipshrimp IMG_7091 IMG_6622

IMG_7440 salsaonion salsatom

salsajala salsacilan IMG_7458

IMG_7475 IMG_7479

Ingredients:

  • 2 heaping cups – (12 Compari tomatoes-these are a med/small size, can use Heirloom tomatoes, cherry, grape …your favorite tomato!  finely chopped
  • 1 packed cup – 1/2 of extra large Vidalia onion finely chopped
  • 2 tbsp – 1/2 lg jalapeño extra finely chopped
  • 1 cup cilantro coarsely chopped
  • 2 tbsp extra virgin olive oil
  • 1 tbsp “seasoned” rice wine vinegar
  • 2 tbsp fresh squeezed lime juice – 1 lime
  • 1/2 tsp sea salt
  • 1/4 tsp pepper
  • OPTIONAL: dash of Siracha Hot Sauce or Franks or Tabasco

Directions:

  1. Finely chop tomatoes, Vidalia onion, jalapeño and cilantro
  2. Add to a large bowl
  3. Roll lime to get the juices flowing and squeeze over chopped veggie’s
  4. Add s & p, olive oil and seasoned rice wine vinegar
  5. Toss and serve with chips, chicken, fish, beef or pork!
  6. NOTE: Now that you have an incredible tasting basic salsa be creative and add 1/2 cup of chopped avocado, mango, pineapple, black beans, or cucumbers…Mangia Mangia!

Secret Meatball Recipe at Glenn’s New Haven Apizza

Secret Meatball Recipe at Glenn’s New Haven Apizza

One of the most delicious meatballs you’ll ever have and the mammoth size will knock you for a loop! Glenn Proto, at New Haven Apizza & Bakery, right here in our very own Madison, CT, shared his mother, Annette’s, secret meatball recipe with me this week. The ingredients he use’s in his meatballs couldn’t get any fresher because he even grind’s his own meats for these meatballs. Freshly ground brisket, short ribs, 80/20 beef and Longhini sweet sausage are the main ingredients in his meatballs. Oh, but let’s not forget what he calls his “secret” to the meatballs, his addition of finely chopped pepperoni! Glenn says this is what give’s these authentic Italian meatball’s that extra special something!

Once we get past all the freshly ground meat that goes into Glenn’s meatballs the love doesn’t stop there, he then caramelizes red onions, adds in Ricotta fina (a special and costly ricotta from the very best Liuzzi Cheese in North Haven,CT, eggs, grated Romano cheese, Italian cubed up bread soaked in heavy cream, and fresh garlic and herbs! Wow, he doesn’t hold back on quality that’s for sure. What an incredible ingredient list for these most flavorful and succulent morsels. Maybe I shouldn’t use the word “morsels” either because the size of these meatball’s are cray cray! It was a blast rolling the meat mixture into bigger then baseball size meatballs with Glenn and his son Dylan. Isn’t it wonderful how the tradition carries on as Dylan and his siblings grew up making these incredible meatballs just as Glenn did. And now, we can add some of this lovely tradition into our kitchen’s since Glenn was so kind as to share his family’s recipe with all of us. He believe’s traditions and recipe’s are meant to be shared so everyone can enjoy them!

Hope you enjoy this secret meatball recipe show and remember he serve’s up 3 of these colossal meatballs in one “spaghetti and meatball” order from his restaurant! You might want to start with a few appetizer’s like my crab cakes, buffalo chicken dip, Mediterranean layered dip, spanakopita or my hummus!

DSCN45211-300x225 buffdip IMG_5437 cookedspan IMG_5097

IMG_7328 IMG_7338 IMG_7342

IMG_7332 IMG_7334 IMG_7344

IMG_7351 IMG_7388 meatbll

Glenn’s Mammoth Size Meatballs – makes approx 10-12 Colossal Size…Can make them smaller to yield more meatballs!

  • 2 1/2 lbs. of ground beef (.75 lbs ea. of ground brisket, short ribs and 80/20 ground beef)
  • 1 1/4 lbs. Longhini sweet sausage
  • 1/2 cup finely chopped pepperoni
  • 2 cups Italian bread after soaked in heavy cream and squeezed slightly  (1 lb. about 1  loaf of Italian bread, cubed and soaked in heavy cream)
  • 2-3 cups heavy cream – to soak cubed up Italian bread
  • 3 lg eggs
  • 1 cup grated Romano cheese
  • 3/4 cup ricotta (ricotta fina if you can get it)
  • 3/4 cup fresh chopped parsley
  • 1/2 cup fresh chopped basil
  • 1/3 heaping cup finely chopped fresh garlic
  • 1/2 cup caramelized red onions (finely chop 2 med. size red onions and sauté on medium/high with 1 tbsp olive oil and 1 tbsp butter for 5 minutes and then twenty minutes on low with adding 1 tbsp sugar and 1/4 tsp salt)
  • 1 tbsp plus 1 tsp sea salt
  • 1 tbsp plus 1 tsp finely ground pepper
  • 1 tbsp plus 1 tsp dried oregano

Directions:

  1. Pre-heat oven to 400º
  2. Cube up the Italian loaf of bread to 3/4″ pieces
  3. Add cubed up bread to 2 – 3 cups heavy cream – should be enough to have all the pieces get saturated and soak for approx 15 minutes
  4. Add beef and sausage to a large bowl and combine with your hands
  5. Add in the pepperoni and the rest of the ingredients in the list and combine with your hands – Don’t over mixed meat …just until combined
  6. Begin to roll meat mixture into desired size meatballs dipping your hands in the left over the heavy cream to help smooth the edges of the meat while shaping them
  7. Place the meatballs onto a cookie tray..they can be right next to each other
  8. Note: the larger they are the longer you will bake them
  9. Bake for 45-60 until the tops are crispy and brown …mangia, mangia!


Seared Scallops

Seared Scallops

Seared scallops are so gosh darn delicious you really don’t need anything else to accompany them. They have a succulent and creamy texture that’s so tender they melt in your mouth when cooked correctly. All that is needed to sear sea scallop’s is a hot non-stick pan, a couple tablespoons of olive oil, butter for basting at the end, a squeeze of fresh lemon and violà, you have an amazing seafood dish in 4 minutes.

Butter is just one of additions to seafood that always seems to give one last flavor boost. That’s why I have you baste the scallops in the last few seconds in the show. Butter makes everything better, right? You can’t get any easier then making scallops in mere minutes. It is best to use a non-stick pan to sear these though because it will make for a smooth ride home and super easy to flip them over to get that golden sear on the other side of the scallop.

You really need to try my cold cucumber and fennel soup to go with your seared scallops. The flavors you will get from all the vegetables and herbs in the soup to the creamy scallops will put you over the top. The green goddess sauce II goes without saying when paired up with the seared scallops. If I’m serving the scallops for an appetizer I set a small bowl of green goddess sauce right in the middle of a platter for dunking and scallops placed all around…YUM!

You may want to add something hardy to compliment the fish so if you haven’t tried my family recipe for the best pasta fagioli you will ever have you should get on the ball. You could go the zucchini spaghetti route or even my amazing melt-a-away homemade gnocchi with a bolognese sauce, and who doesn’t love sticky buns with their coffee for dessert!

IMG_0558 zucspaghetti 011 025 IMG_5574

IMG_7261 IMG_7275 IMG_7288

IMG_7290 IMG_7242 IMG_7305

Ingredients:

Directions:

  1. Heat non-stick pan to high heat
  2. Sprinkle salt and pepper to taste on both side of the scallops
  3. Add 2 tbsp of olive oil and begin to add scallops
  4. If you have a medium size pan you will have to do this in 2 batches
  5. Sear scallops about 2 minutes on each side until golden
  6. Optional: add 1 tbsp butter and baste scallops in the last 20 seconds
  7. Take off the heat and squeeze 1/2 lemon over scallops
  8. Remove scallops immediately from hot pan to a serving dish
  9. Plate each dish with a sautéed spinach in the center, top with scallops and drizzle with green goddess sauce around outer edge of the plate…enjoy!
  10. OR top cold cucumber & fennel soup with seared scallops!


Shrimp & Scallop Ceviche


Shrimp & Scallop Ceviche

mixedceviche
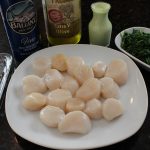
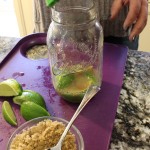
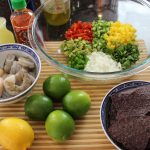
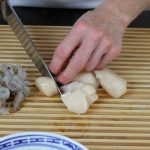
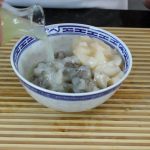
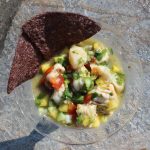
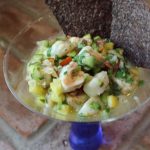
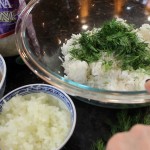
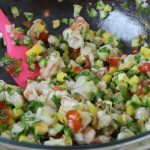
Making shrimp & scallop ceviche really can’t get an easier then this! Ceviche is a South American dish that’s usually served as an appetizer. The fish cures/cooks in citrus juice for an hour or two while you get all your salsa ingredients in order. The citrus curing juices are drained from the fish, leaving a tender shrimp & scallops to be tossed with salsa and voilà. The base of the shrimp and scallop ceviche here is my mango salsa recipe.

When I thought of making ceviche this week, sombrero popped into my head! I went to several store’s, costume store’s included which don’t exist anymore, and was out of luck. I then called my dear friend Maria who to my surprise had an authentic sombrero for me to borrow that her parents had picked up on a cruise to Cozumel, Mexico. I have to say it is a very cool hat, not to mention really beautiful. Although it has some weight to it so your neck gets a bit of a work out and you have to be careful not to knock into the walls because depth perception can be deceiving.

When I make this shrimp & scallop ceviche. or any ceviche for that matter, I like to cure my fish in lime juice and then drain that juice before adding the fish to my salsa ingredients. In my opinion, the flavors stay fresher that way. By draining the fish juice that’s released from the shrimp and scallops in the curing process it keep’s a better balance between fish and salsa. There are some recipe’s that have you toss everything into one bowl but I feel it taste’s better when you drain the curing fish juices prior to adding the fish into the salsa.

Since the texture’s of shrimp & scallops are a little different I have you cut the shrimp in 1/2 horizontally, and then dice, so the needed curing/cooking time between the two is closer. You could always change up the fish in this recipe to and go with all scallops or another favorite flaky fish. It’s all about being creative and using what’s freshest at the market!

Remember, always when preparing a fish dish, you will want to serve it the same day you make it and odds are there won’t be any leftovers! You may want to make it a party theme of appetizer’s to go along with this shrimp & scallop ceviche, and serve something like buffalo chicken dip, salmon BLT slider’s, fresh pesto, mozzarella and roasted tomato on a crostini, or shrimp & mango in wonton’s and end it with a dessert that will have everyone talking...fresh berries in a dreamy cream topping made from melted cream cheese and fluff that’s an incredible taste SENSATION!

buffdip IMG_2617 IMG_2026 wonyonshrimp_1606 IMG_2201

IMG_6855 IMG_6859 shrimp

lime IMG_6878 shrimplemon

mixedceviche IMG_6905 IMG_6900

Ingredients:

  • 1/2 lb. lg shrimp, peeled and deveined, 1/3″ diced
  • 1/4 lb of sea scallops, 1/3″ diced
  • 1/2 cup diced sweet mango
  • 1/2 cup sweet onion – Vidalia onion -finely chopped
  • 1/2 cup mini cucumber diced 1/3 cup cherry tomatoes finely chopped
  • 1/2 cup cilantro chopped (1/2 cup after it’s chopped)
  • 1/3 cup finely diced cherry tomato
  • 1/3 cup finely diced avocado
  • 1 jalapeno finely chopped without the seeds
  • juice from 1 lime – for the final ceviche
  • 1 tbsp fresh lemon juice – for the final ceviche
  • 2 tbsp extra virgin olive oil
  • 2 tbsp rice wine vinegar – (“seasoned”)
  • juice from 4 limes for the shrimp/scallop for the curing marinade
  • salt and pepper to taste
  • dash of Tabasco
  • Bag of blue corn chips (optional)

Directions:

  1. Wash and devein the shrimp
  2. Wash the sea scallops and remove little fibrous side muscle that’s attached to the scallop
  3. Pat the shrimp and scallops dry on paper towels
  4. Cut up the shrimp in 1/2 horizontally and then into 1/4″ pieces
  5. Slice up the scallops in 1/2 horzintally and then into 1/2″ pieces
  6. Put them into the same bowl… a non-reactive bowl like a glass bowl
  7. Roll the limes to soften them up
  8. Squeeze the lime juice over the shrimp and scallops
  9. Make sure there is enough juice so all the shrimp and scallop pieces are submersed in the lime juice and place into the frig until they are opaque…and place into the frig for 1- 2  hours
  10. NOTE: you should check the fish at 30 minutes intervals to see how it’s curing/cooking …depending on the coldness of the fish, kind and size it wil be ready at different time’s but it’s EASY – if it’s opaque then it’s done!
  11. Finely chop the tomatoes, jalapeno, sweet onion, cucumbers, mango and cilantro and set aside in a large bowl
  12. Drain all the liquid out from the shrimp and scallops and discard
  13. Add the shrimp and scallops to the large bowl with the salsa, add in juice of 1 tbsp lemon juice, juice from 1 lime, 2 Tbsp olive oil, 2 Tbsp rice wine vinegar, dash of Siracha, salt and pepper to taste
  14. Put back into the fridge for 15 minutes for flavors to marry
  15. Serve in martini glasses with blue chips…YUM!

Curry Shrimp & Snow Peas

Curry Shrimp & Snow Peas

Curry shrimp & snow peas is a luscious dish with a complex sauce that tastes like you spent all day on it! I serve up this yummy creation with fresh chopped dill and jasmine rice. Basmati is my other go to rice. This curry shrimp dish is made with snow peas, coconut milk, white wine, curry, turmeric, coriander, sour cream, half and half, chicken broth and fresh limes.

For goodness sake, don’t waste your time with an instant rice with no texture or flavor. Making good jasmine or basmati rice couldn’t get any easier just follow the directions on the label. When I make rice I always turn off the stove five minutes early. I then stir the rice and let it sit for ten minutes with the cover on. When you are ready for the rice give it another stir, add a tablespoon or two of butter, a sprinkle of salt and voilà.

One of the best things about making this incredible curry shrimp and snow peas is getting it done in fifteen minutes. A good time saver when cooking with shrimp is to buy already peel and devein shrimp. Make sure to get good, meaty shrimp from your local seafood store where all they sell is seafood. Considering the shrimp takes on a main roll in this curry shrimp and snow peas you better darn well get some decent shrimp and make your efforts worth while!

Before serving up this velvety curry shrimp and snow peas you will probably have time to make some appetizer’s like my best guacamole ever, or black bean & mango salsa, or baked sweet potato fries with my green goddess dipping sauce. For dessert, maybe something sweet but on the lighter side you should try fresh berries in a dreamy cream or my fresh berry granita!

iphone pictures 1856 027 IMG_0672 IMG_2201 IMG_2375

IMG_5815 IMG_5808 onions

wine IMG_5821 coconut milk

spices shrimp sourcream

IMG_5828 IMG_5863 ricedill

Ingredients for Curry Shrimp & Snow peas -(makes 6 servings):

  • 1 lb large good meaty shrimp from your local SEAFOOD store- peel & devein (better results if you don’t use pre-packaged frozen shrimp)
  • 1 1/2 cup fresh snow peas
  • 1/2 cup finely chopped sweet onion
  • 1 clove garlic put through garlic press
  • 1 can coconut milk
  • 1/2 cup half & half
  • 1/2 cup white wine
  • 1/4 cup chicken broth
  • 3 tbsp sour cream
  • juice from 1 1/2 -2 limes
  • 1/4 tsp salt
  • 1 1/2 tsp curry powder
  • 1/2 tsp turmeric powder (if you don’t have turmeric or coriander use 2 1/2 tsp curry)
  • 1/2 tsp coriander powder
  • 1 tbsp butter
  • 1 tbsp coconut oil or olive oil
  • 4 cups cooked rice – Jasmine or Basmati rice cooked to directions
  • fresh dill – 1/2 cup chopped coarsely added to cooked rice

Directions:

  1. Remove tail shells from all the shrimp and set aside
  2. Cook Jasmine rice and set aside
  3. Add coconut oil or olive oil and chopped onion to a large sauté pan on med/high heat
  4. Add in curry spices, and a sprinkle of salt stirring with onions sautéing for 2 minutes
  5. NOTE: Adding in curry now with onions will elininate potential of curry becoming grainy
  6. Add in garlic and stir
  7. De-glaze with wine
  8. Simmer and reduce the sauce for 2 minutes
  9. Add chicken broth and bring back to a simmer
  10. Add in snow peas and simmer 1 minute
  11. Add in coconut milk, whisk to mix
  12. Add in half and half, bring back to a simmer for 2-3 minutes
  13. Add in 1 tbsp butter and all of the raw shrimp simmer for 3 minutes until the shrimp are cooked through
  14. Whisk in 3 tbsp sour cream and just warm through
  15. Take off heat and squeeze juice from 1 1/2 fresh limes
  16. Taste and add sprinkle of salt if needed
  17. Add fresh chopped dill to Jasmine rice and serve with Curry Shrimp & Snow Peas
  18. Optional: Add a few dashes of Siracha, Franks Red Hot or Tabasco to heat it up a little


Mediterranean Layered Dip with Christine & Lisa

Mediterranean Layered Dip with Christine & Lisa

Mediterranean layered dip is one of those dishes that you will love to have up your sleeve. It’s super easy, literally takes all of five minutes to make and tastes amazing! All you have to do is layer these wonderful Mediterranean ingredients in a clear serving dish. The reason it’s so quick to make is because you’re using prepared products from the market.  It will not only wow your guests with the presentation but with the fresh flavors too!

IMG_5076
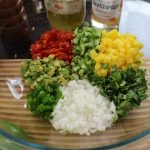
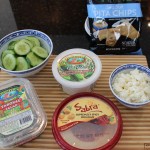
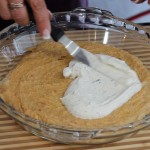
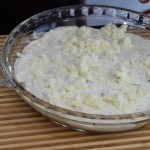
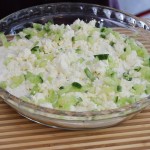
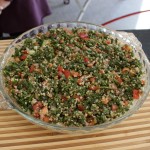
This Mediterranean dip starts off with a layer of hummus, and continue’s on with layer’s of Tzatziki, crumbled sheep’s milk feta, chopped up European cucumber’s, and finally a layer of Tabouleh. Scoop up this delicious dip with cucumber slice’s, and, or pita chip’s. Granted, if you have a little extra time on your hands you could make one or two of the layers that go into the dip
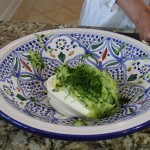
 IMG_1851homemade like my best hummus ever, or Tzatziki sauce. Since I’m such a big cheese head I definitely suggest getting decent feta from your local cheese shop, Madison Cheese. The creaminess of a good sheep’s milk feta really add’s a nice touch to the dip.

The first time I had this Mediterranean layered dip was three months ago at a friends tennis party celebrating our kids going to Nationals in South Carolina. My friend, Lisa, brought this Mediterranean layered dip to the party along with a buffalo chicken dip. Boy, did I make out like a bandit! I featured Lisa’s buffalo chicken dip recipe on my show not too long after the party and it has been a big hit, calling it “Best Buffalo Chicken Dip Ever!”. What can I say, I love a good dip!

I then phoned Lisa excited about having her come on my show to share the Mediterranean dip with all of you. Lisa was going to do the show but there was one caveat, she wanted her friend Christine to come too. You see this Mediterranean layered dip recipe wasn’t her recipe. She borrowed it from Christine. So we went directly to the source and had Christine come over to do the show also! 

What fun we had making the Mediterranean layered dip. You can’t go wrong here especially when you have other things to make for your get together. As Lisa say’s in the show, she keeps the ingredients to the dip unopened in her refrigerator at all time’s, just in case! I hope you enjoy this dip many times over. If you need another easy appetizer you should make my baked sweet potato fries & Green Goddess Dip or just go straight to the desserts and try my chocolate crackle cookieschocolate avocado moouse, perfectly chocolate chocolate cake or an applesauce-caramel sundae that will knock your socks off! 

IMG_3966 IMG_3663 iphone pictures 755 IMG_2793 IMG_4085

IMG_5388 IMG_5416 tatzdip

fetadip cucumberdip tabdip

IMG_5422 IMG_5433

Ingredients:

  • 1 container of prepared hummus OR my homemade best hummus ever – You can get the “spicy” BUT it’s very spicy in the prepared hummus so I like it better with the reg. hummus
  • 1 12 oz container of your favorite Tzatziki OR homemade tzatziki
  • 1 12 oz container of your favorite prepared tabouleh
  • 1 cup crumbled sheep milk’s feta – you can it buy pre-packaged but good sheep’s milk feta from you local cheese shop is amazingly creamy 🙂
  • 1 cup chopped European cucumber- (1/2 of the cucumber sliced for dipping and the other 1/2 chopped for one of the layers)
  • 1 bag pita chips
  • 8-10″ clear serving dish with 2″ sides

Directions:

  1. Begin putting the layers into the clear serving dish
  2. Start with the hummus spreading evenly on the bottom
  3. Next, spread the layer of Tzatziki
  4. Then crumble the sheep’s milk feta over the Tzatziki
  5. Then a layer of chopped up cucumber
  6. Lastly, a layer of Tabouleh
  7. Serve with cucumber slices and pita chips
  8. You can keep the Mediterranean layered dip like this in the refrigerator for up to one day ahead … enjoy 🙂

Happy Roasted Chic Peas!

Happy Roasted Chic Peas!

iphone pictures 970
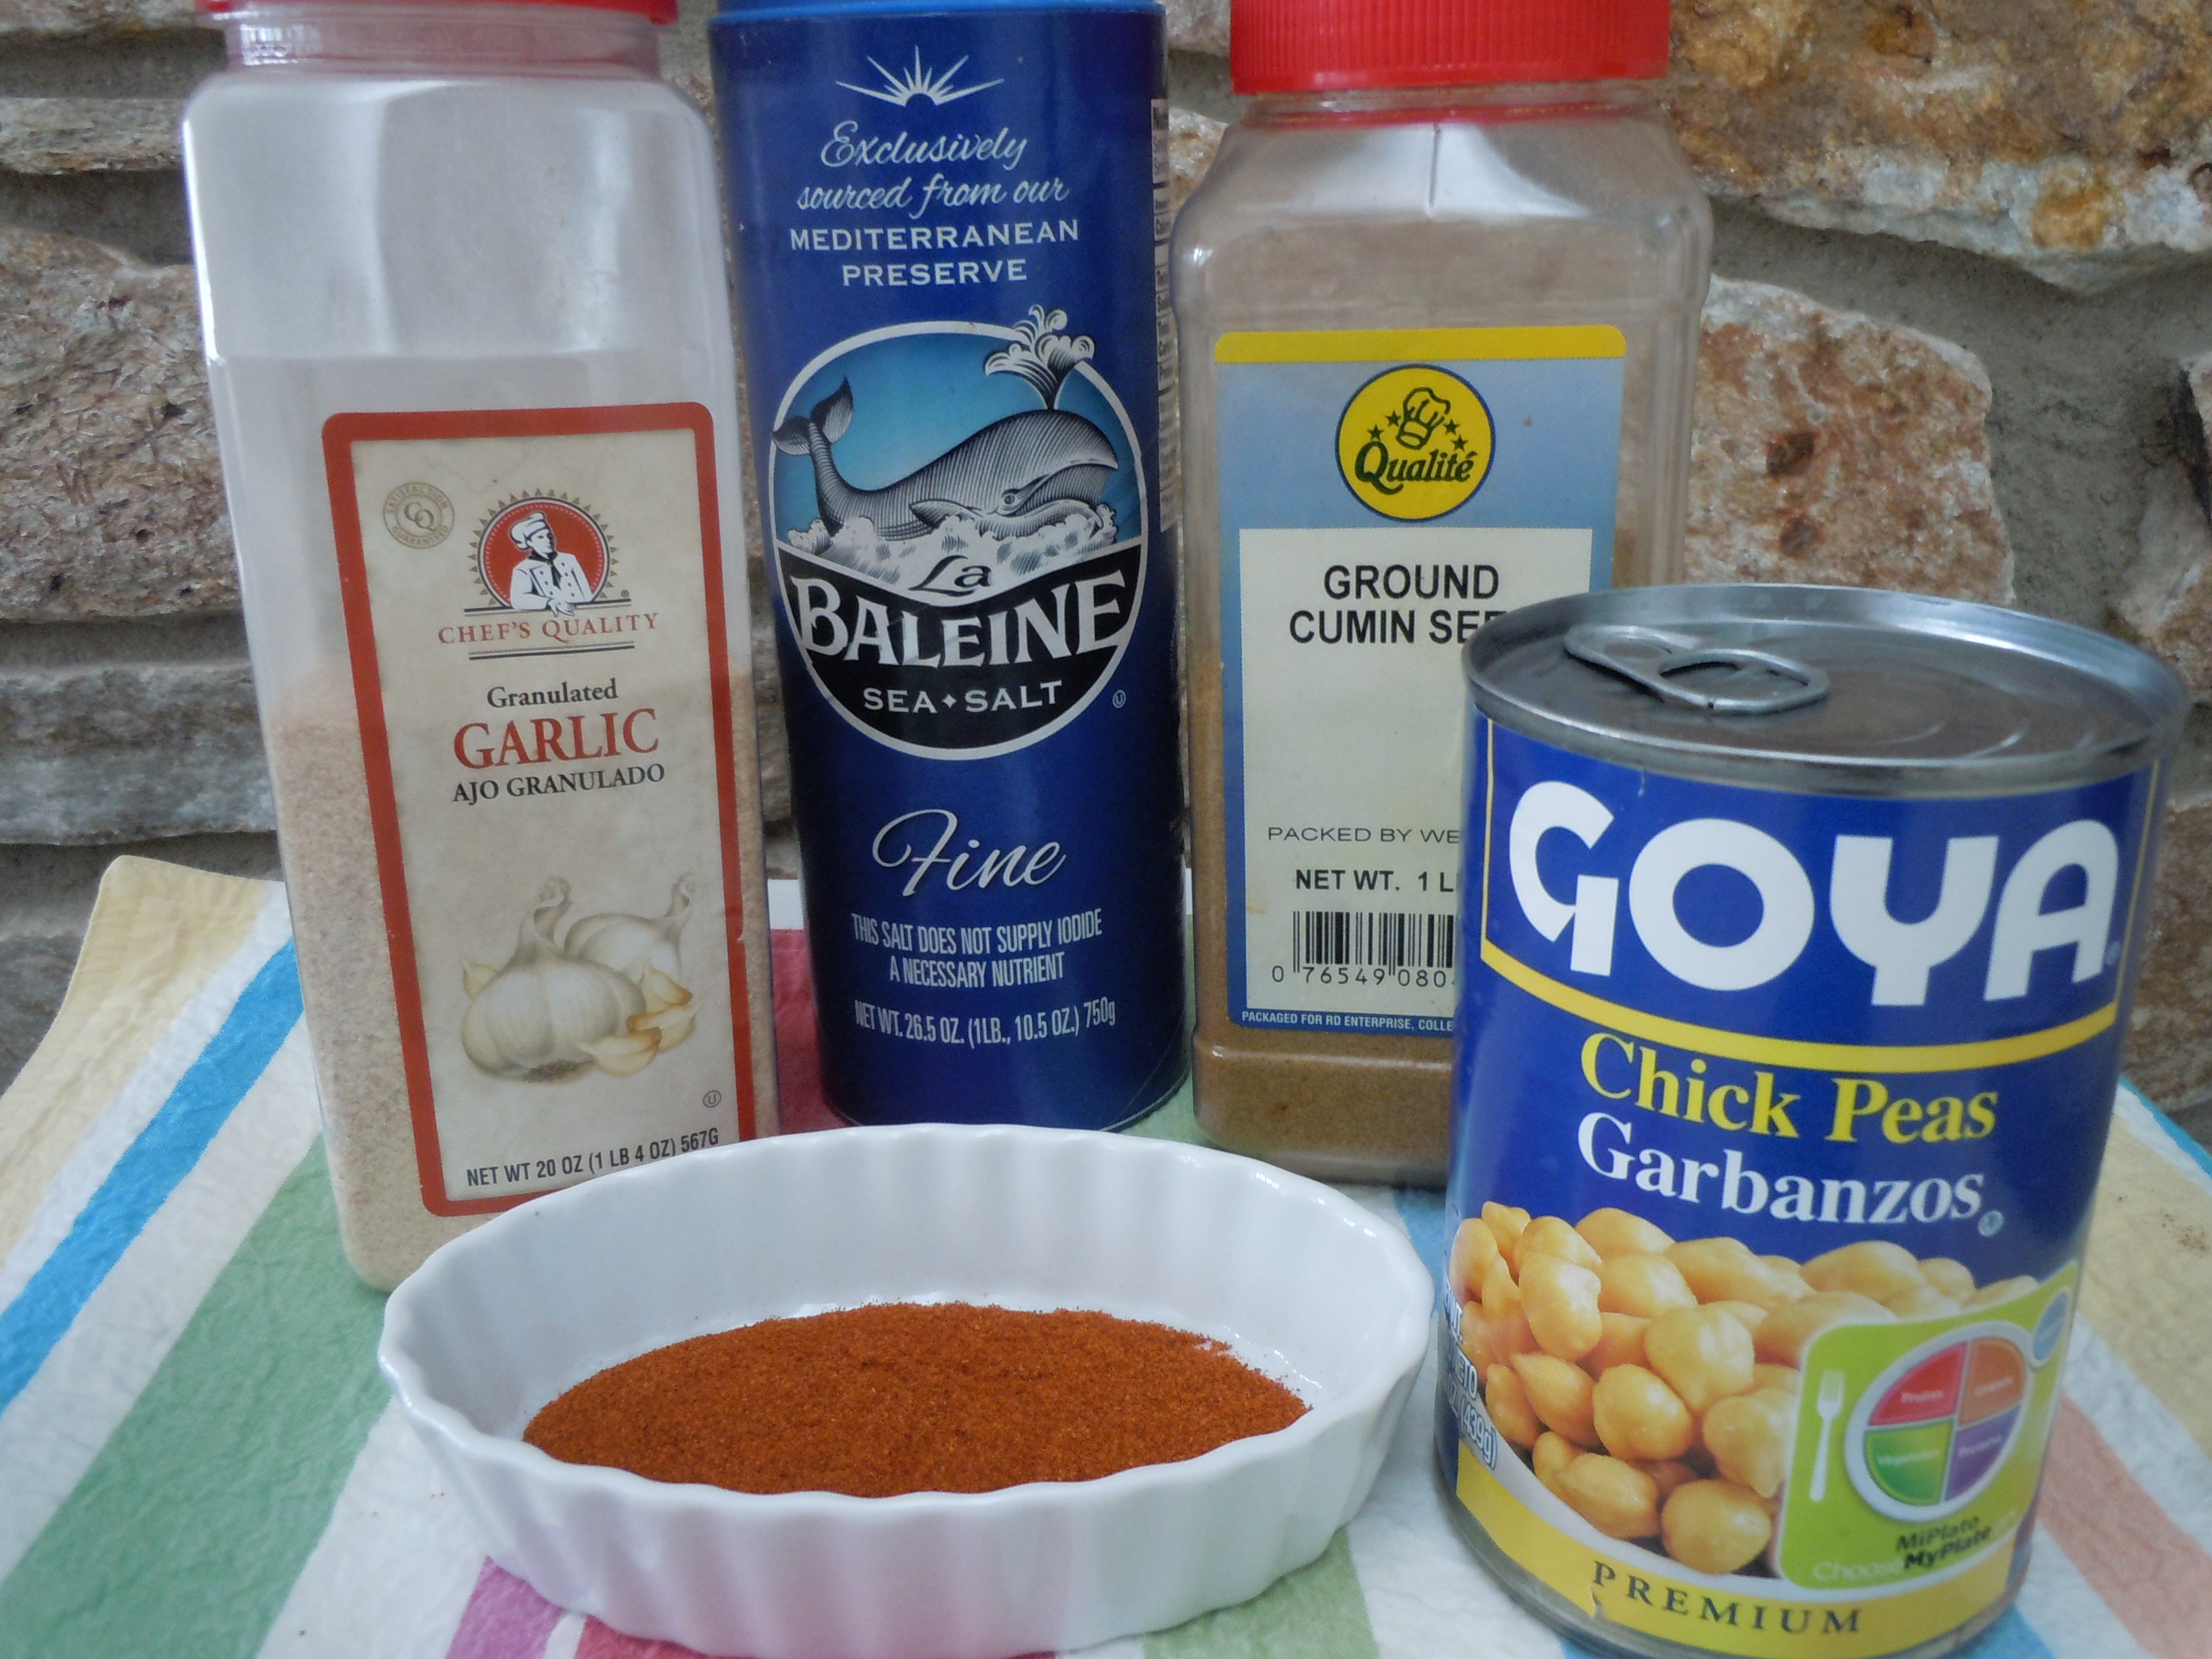
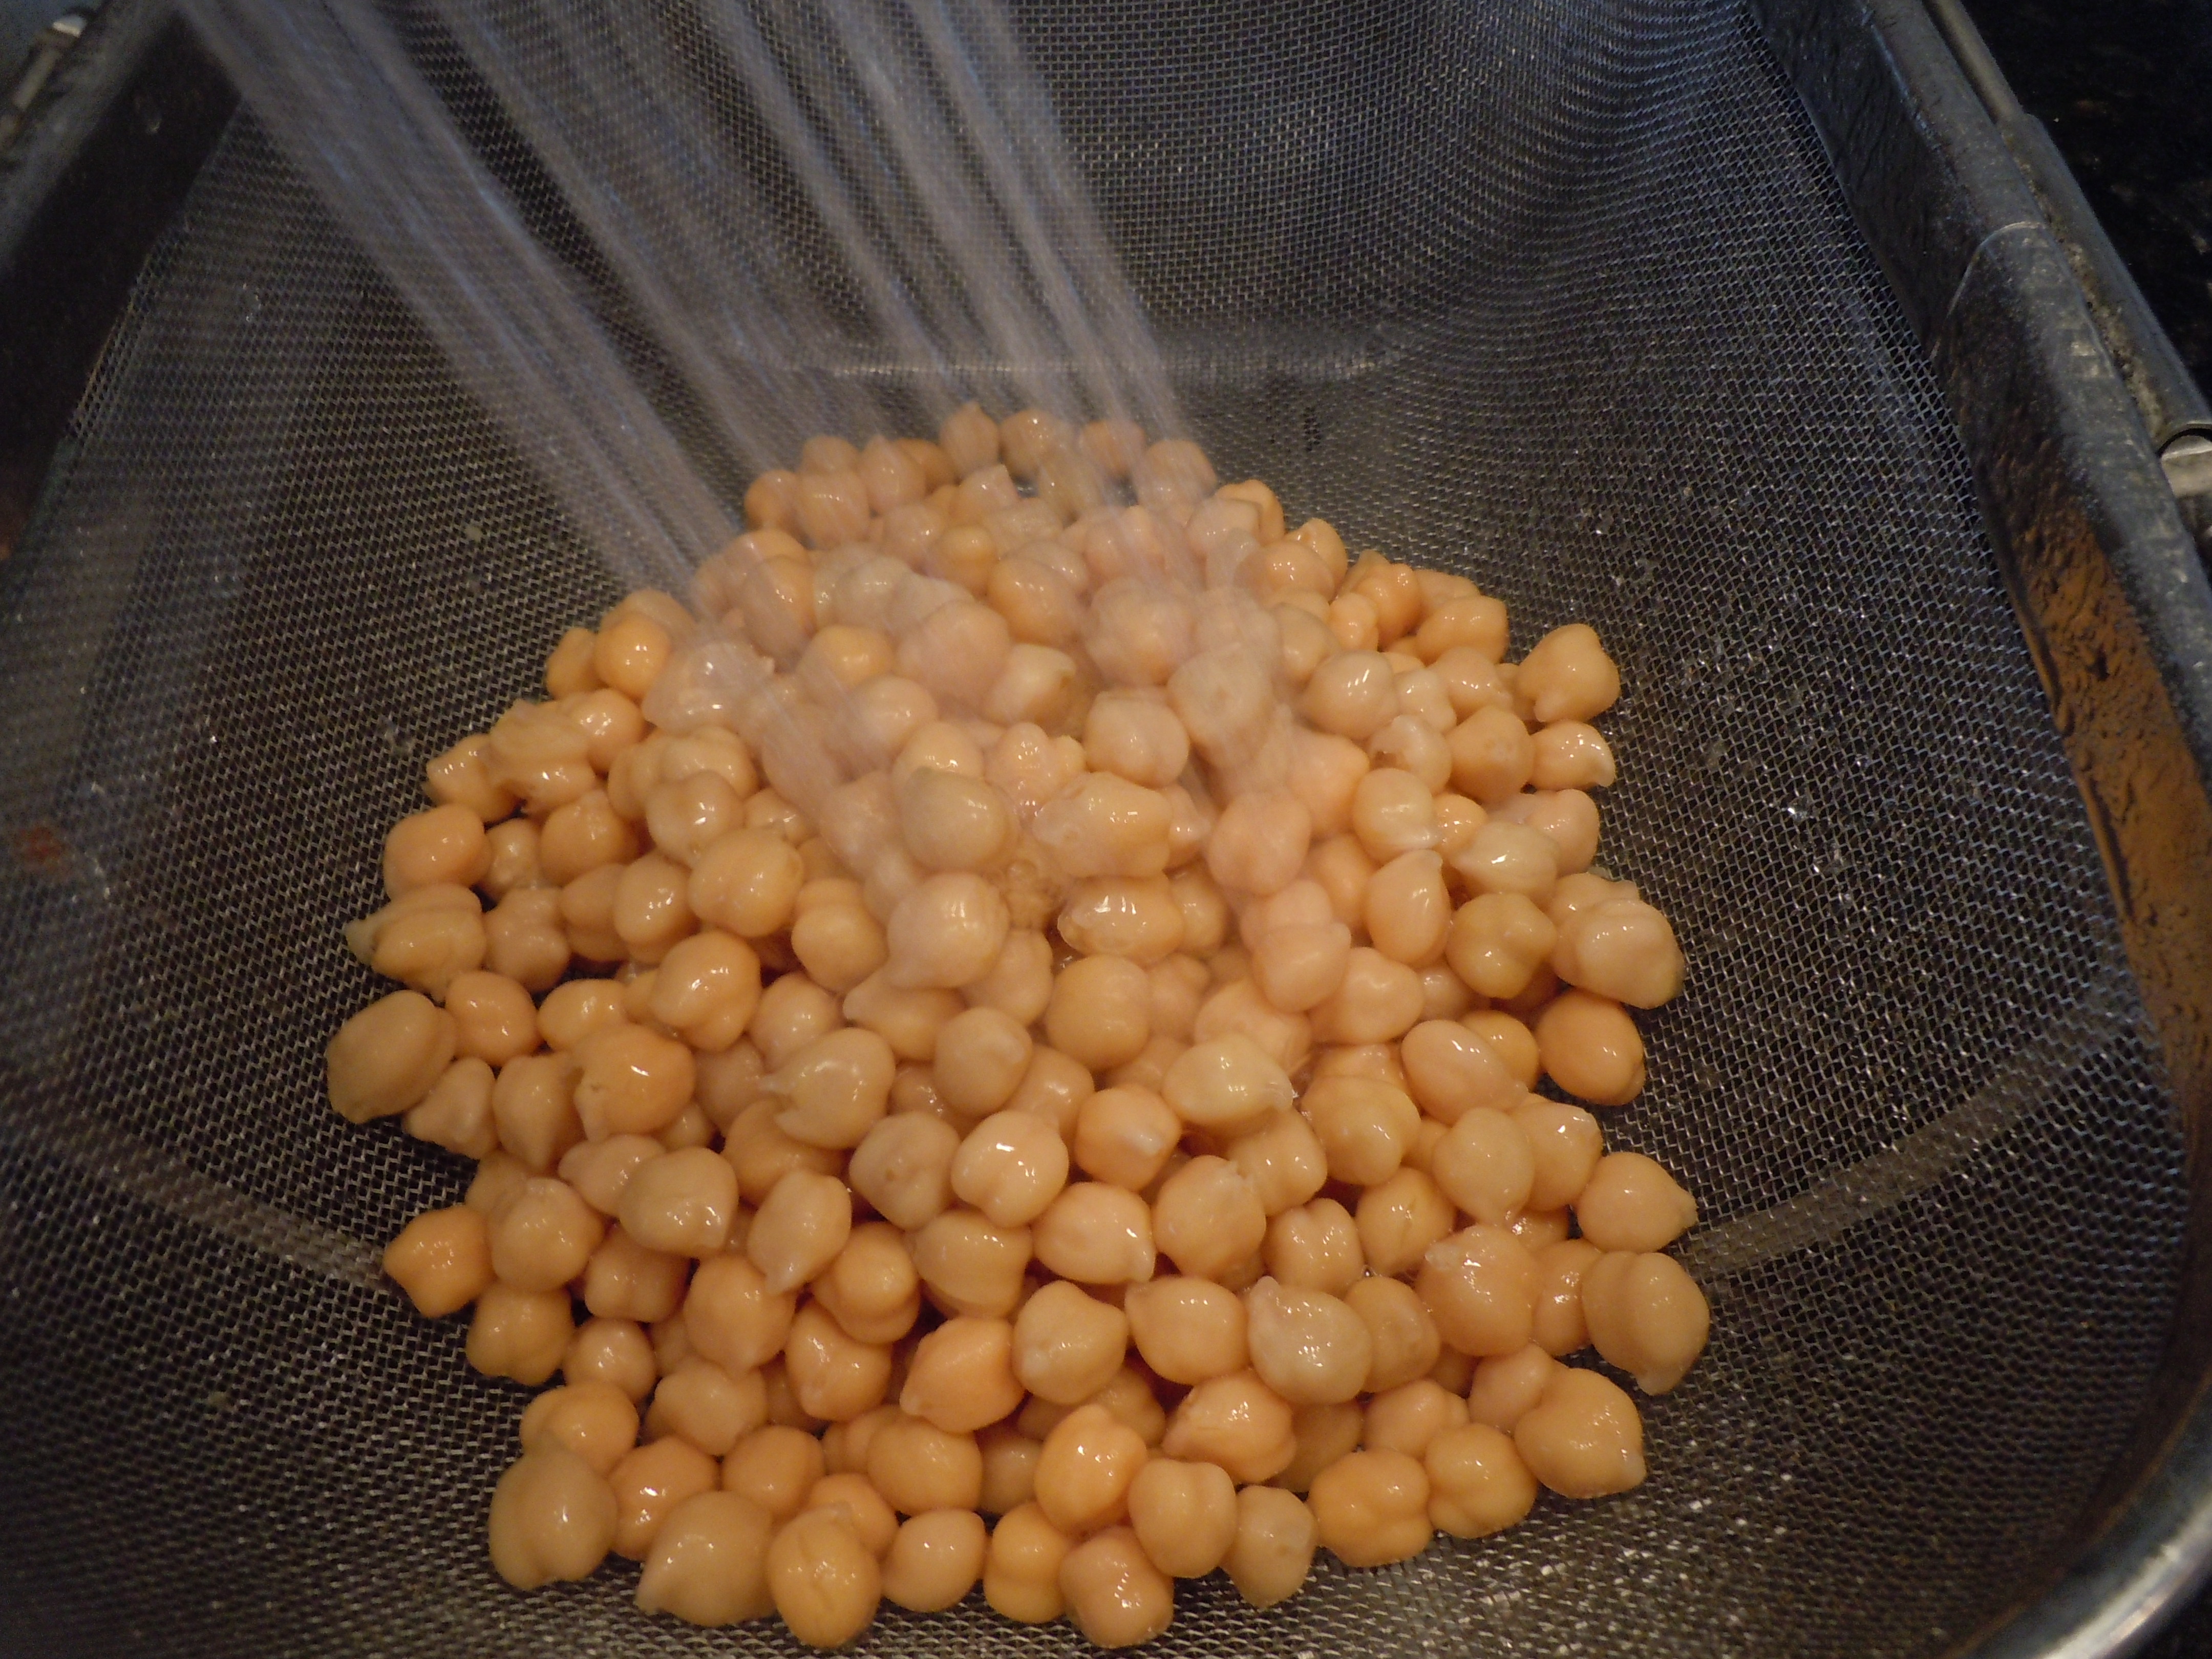
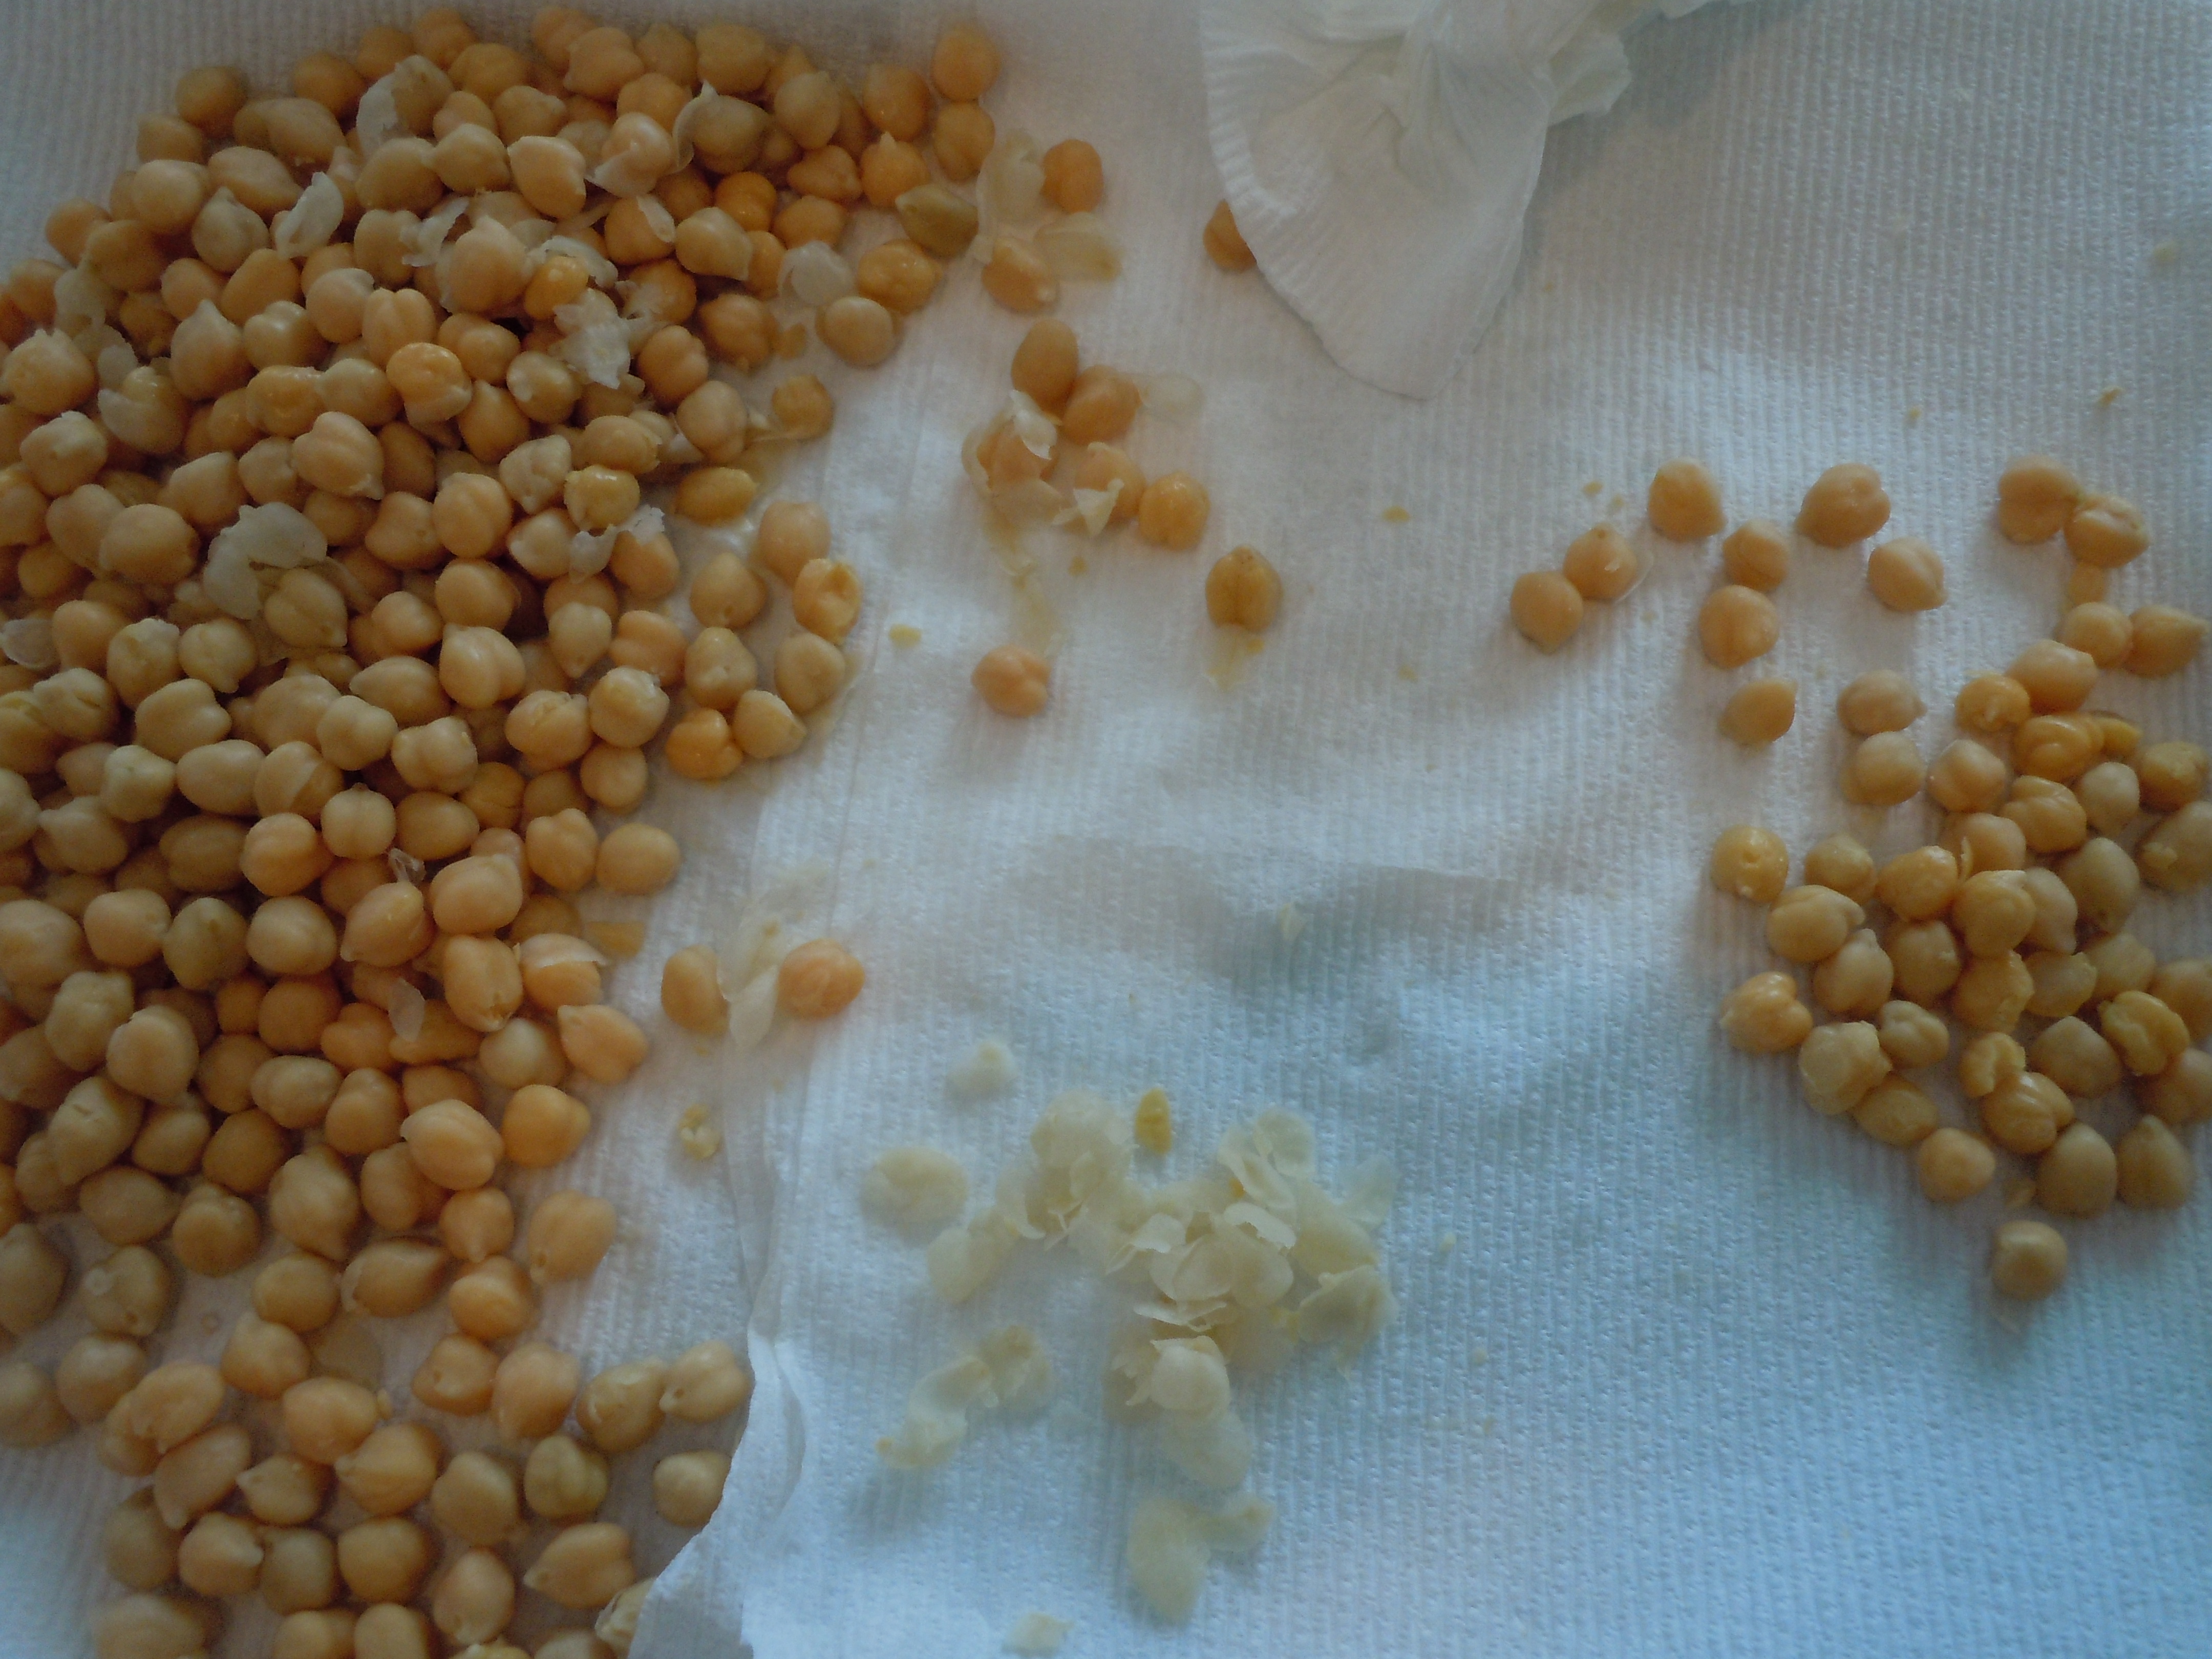
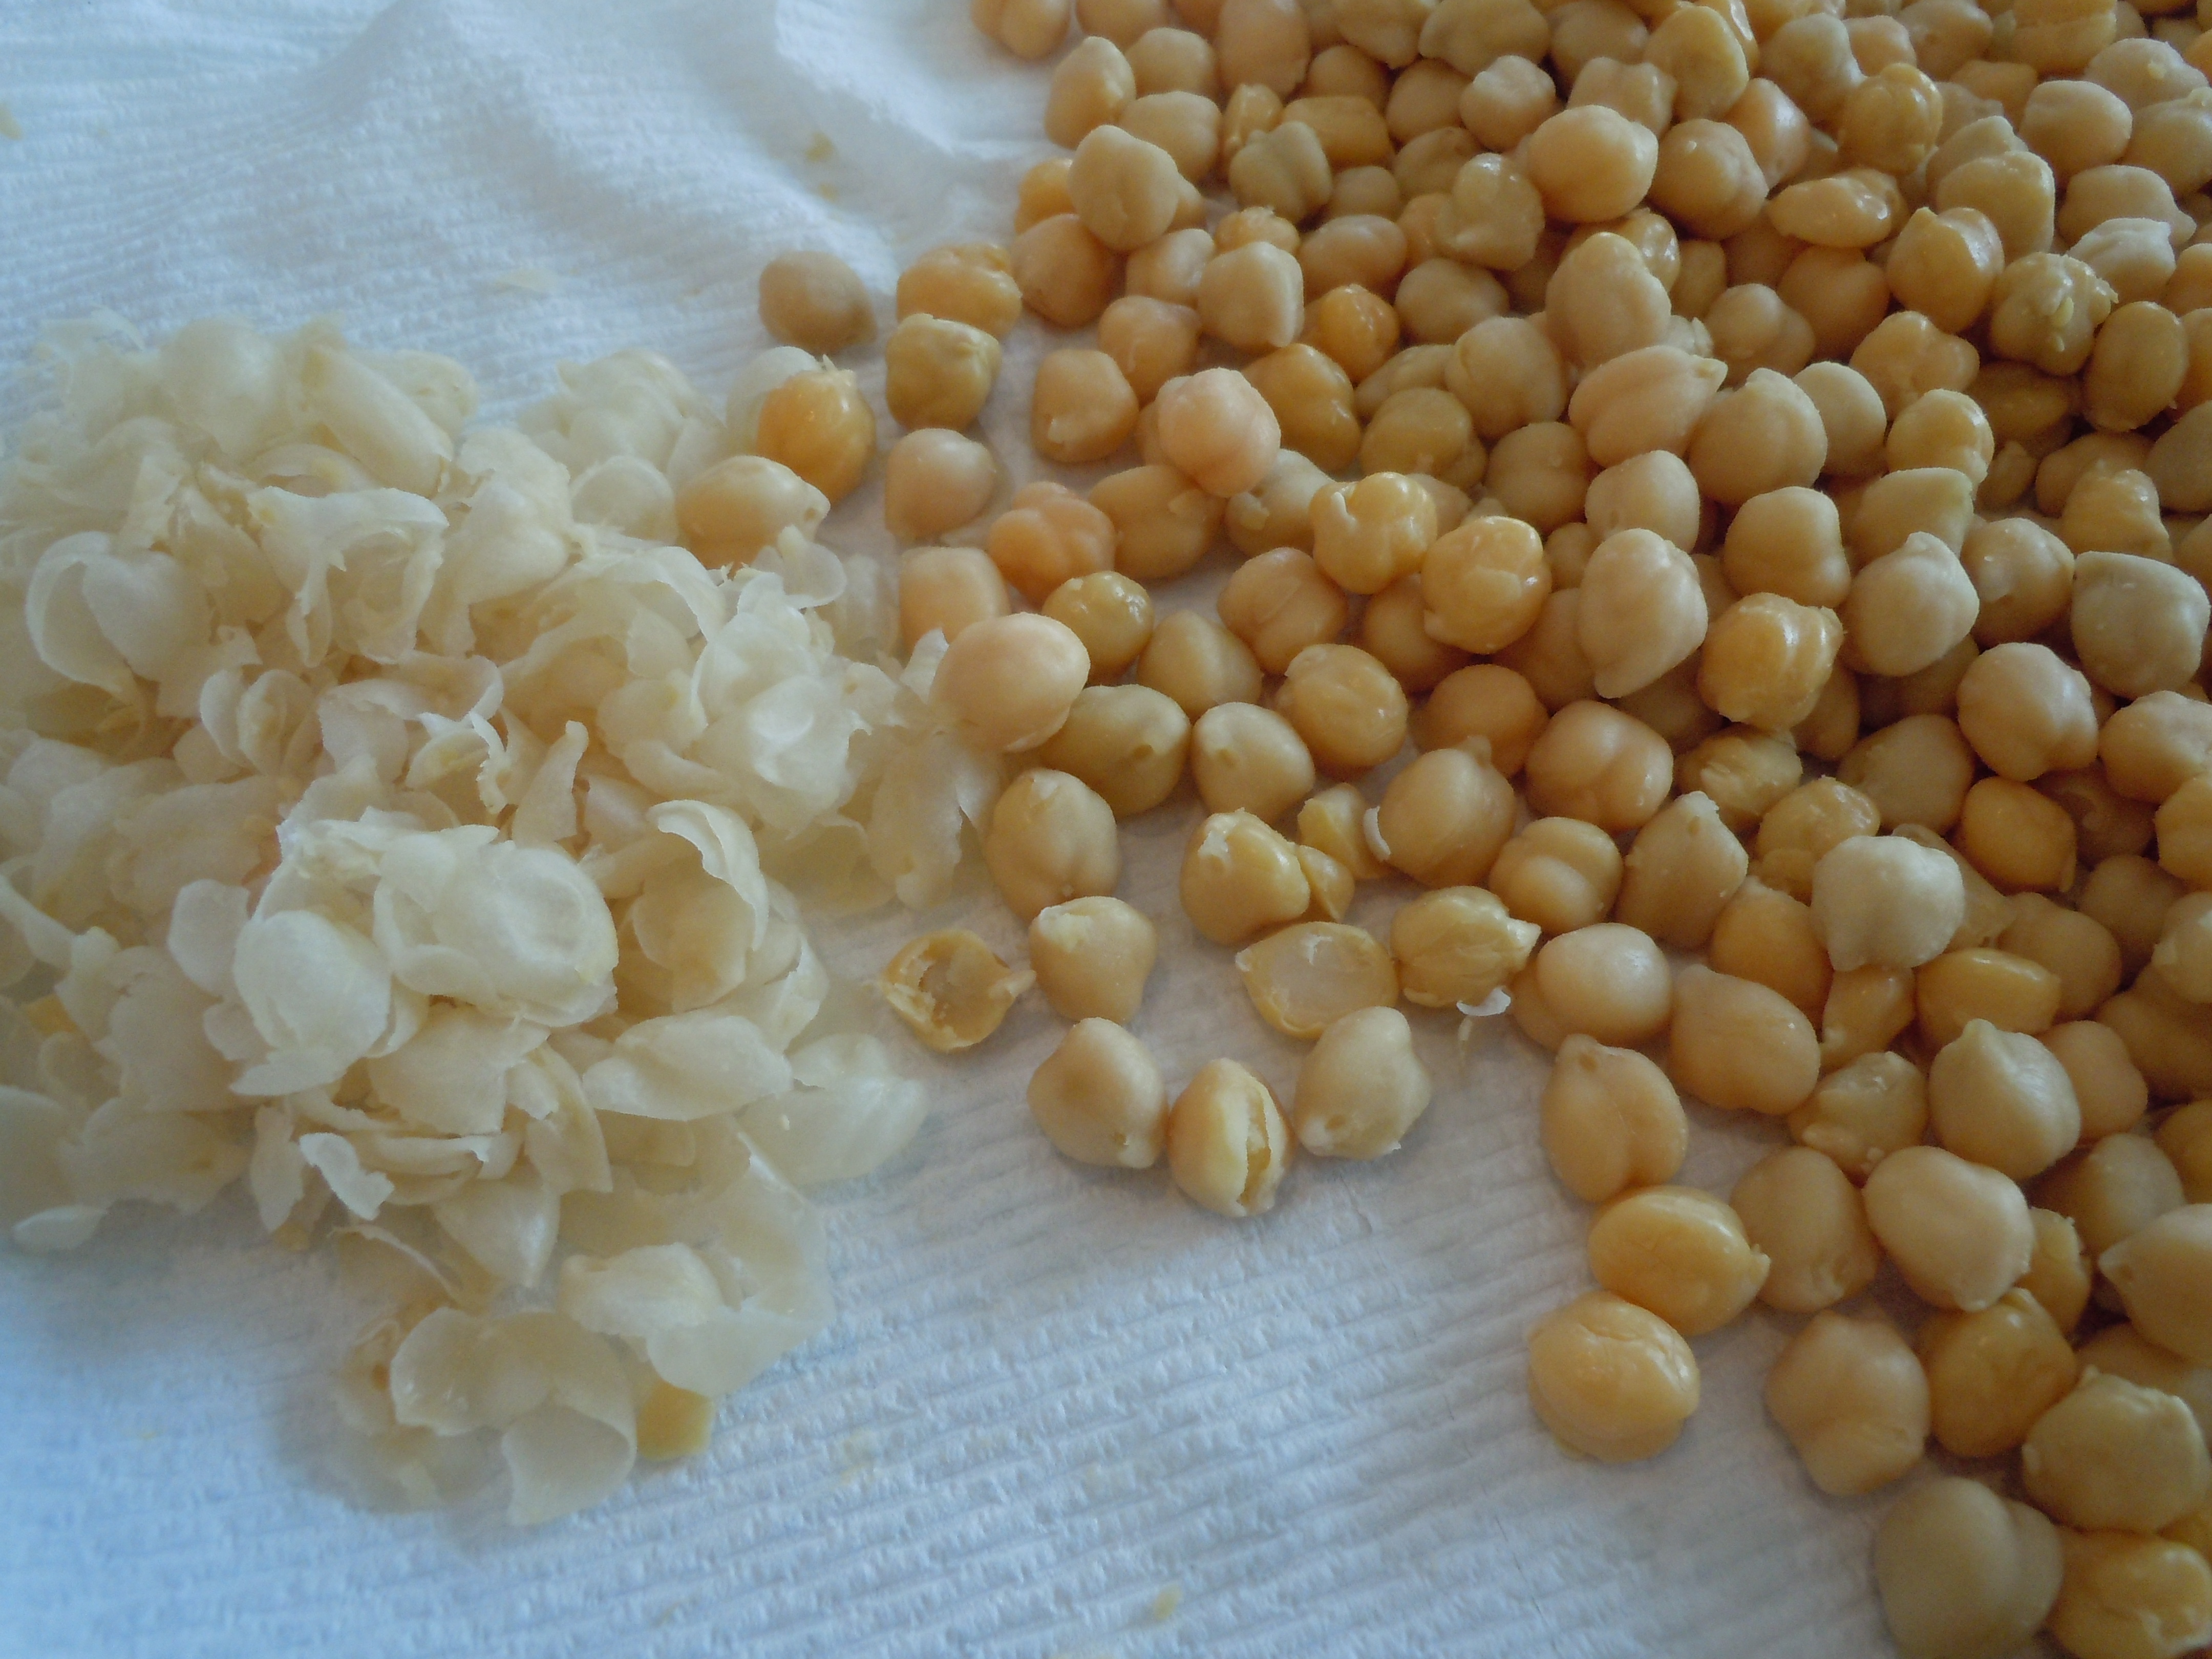
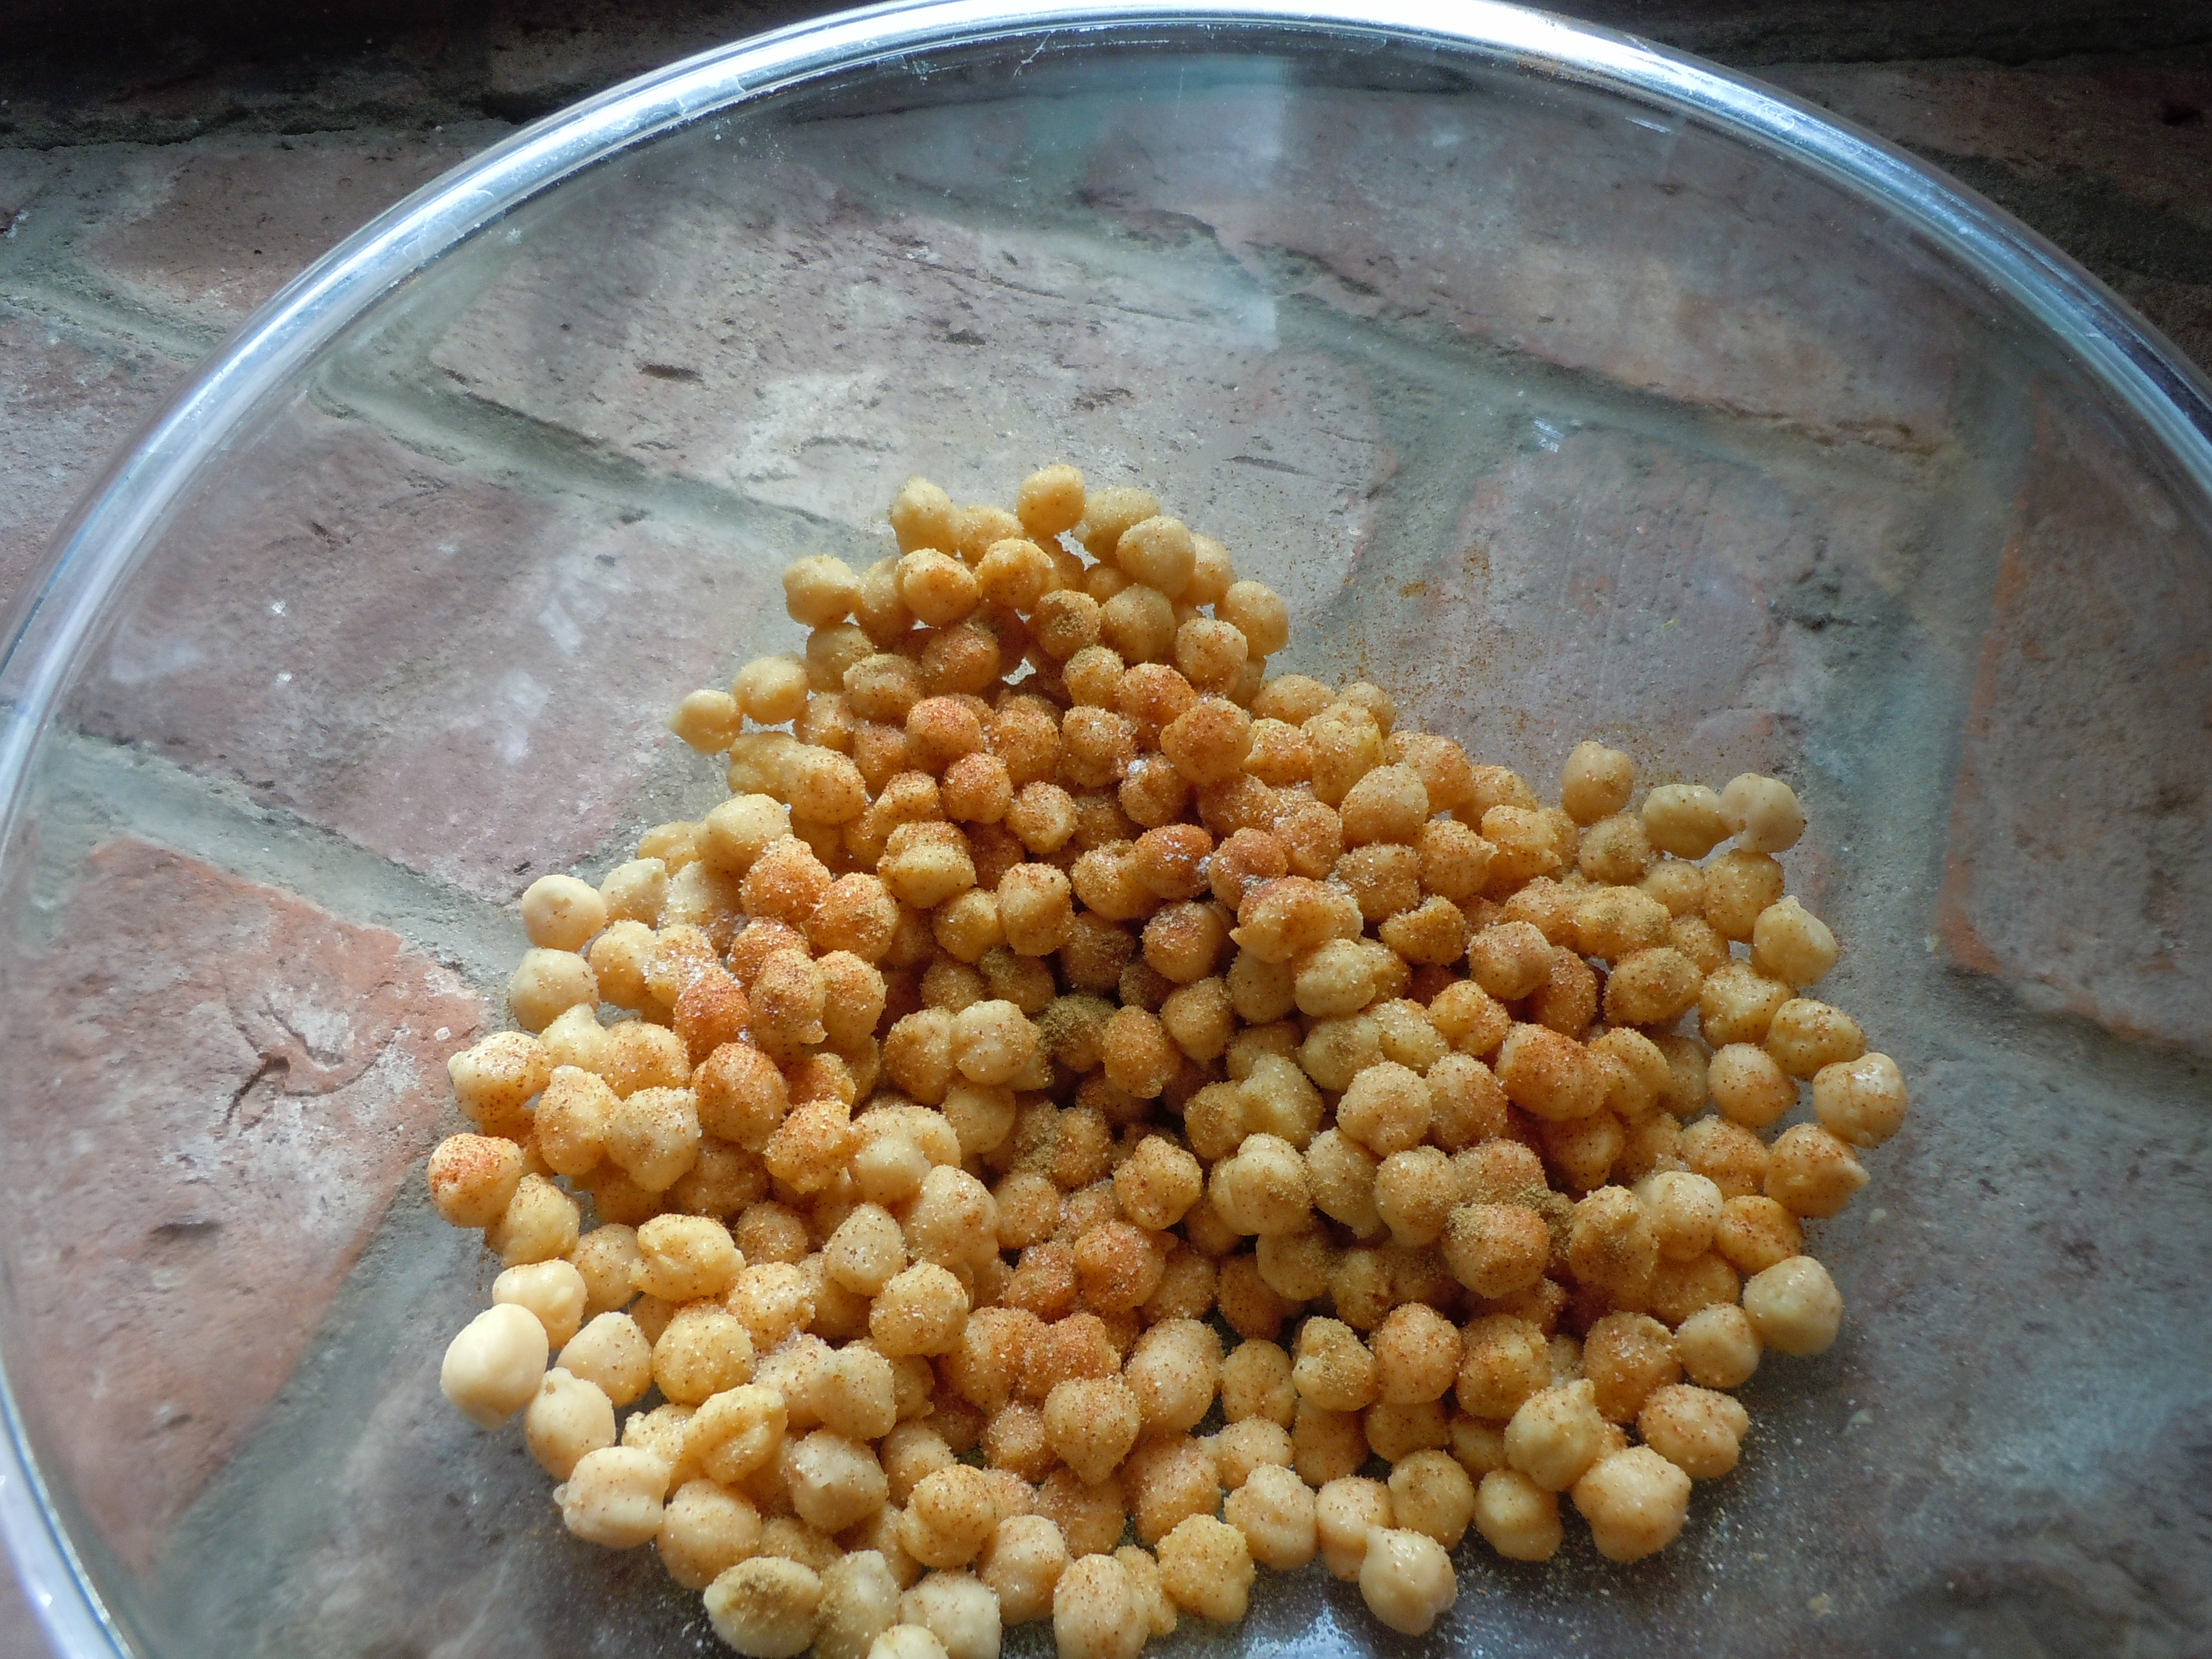
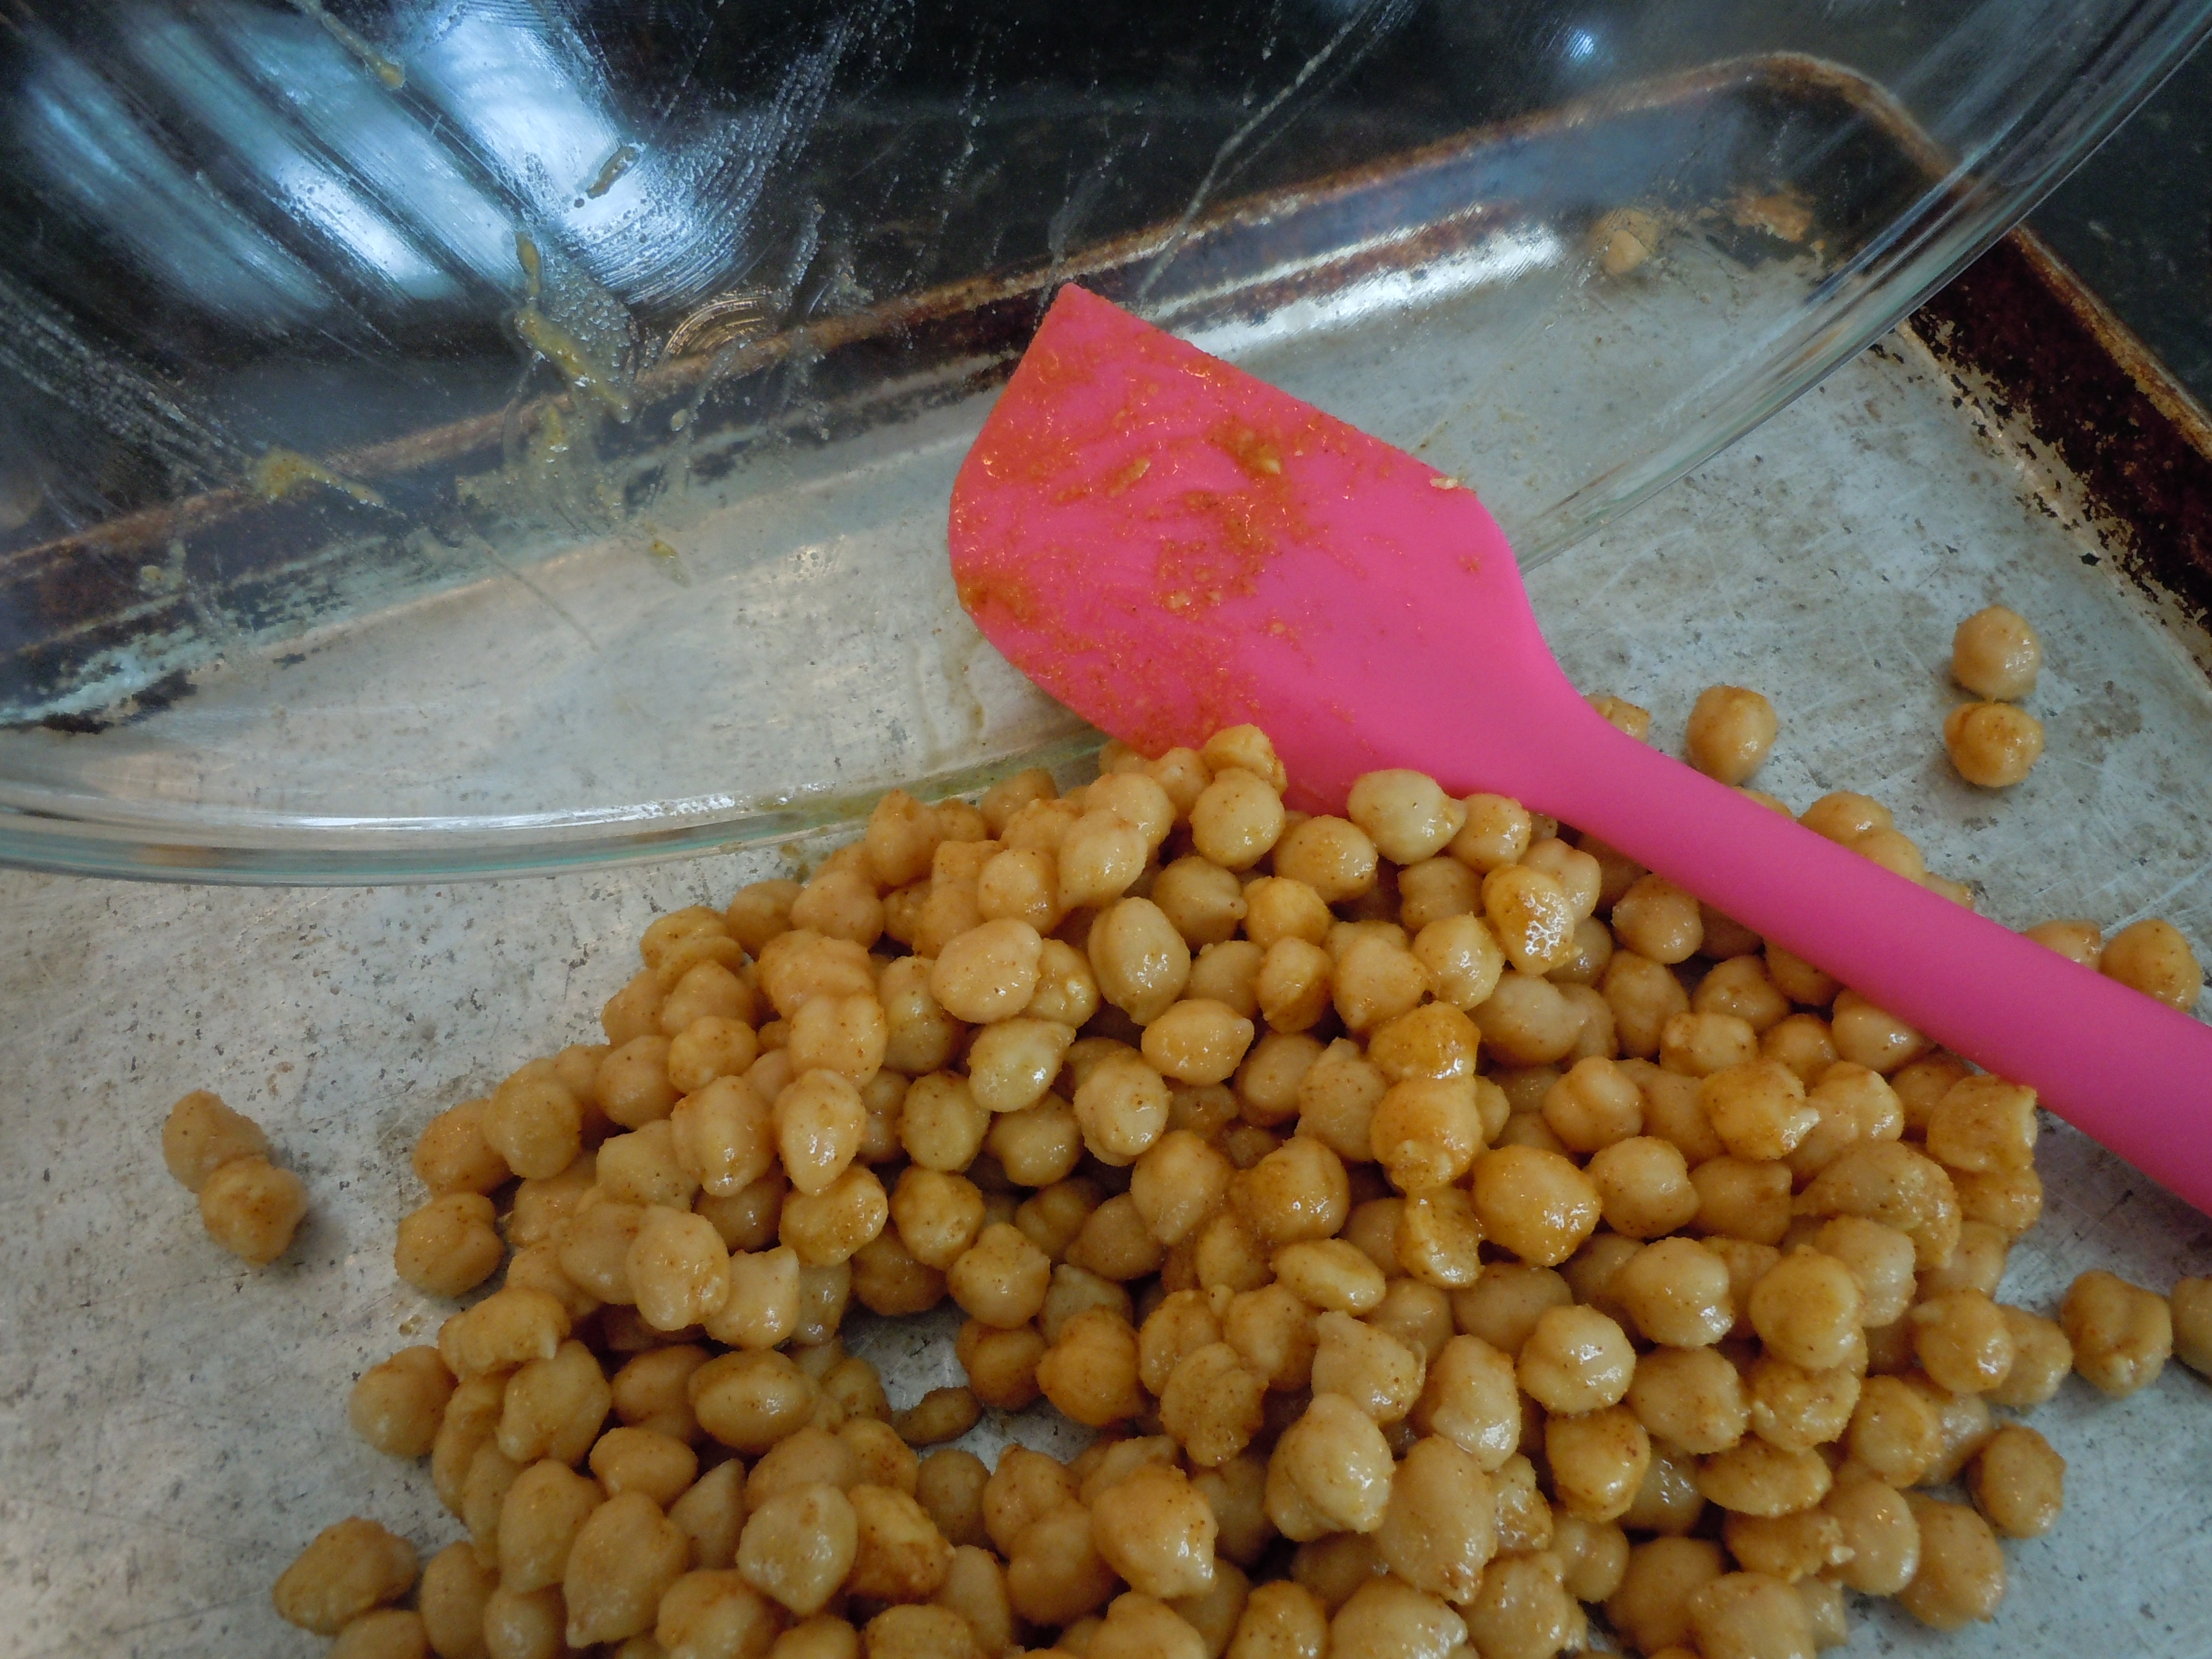
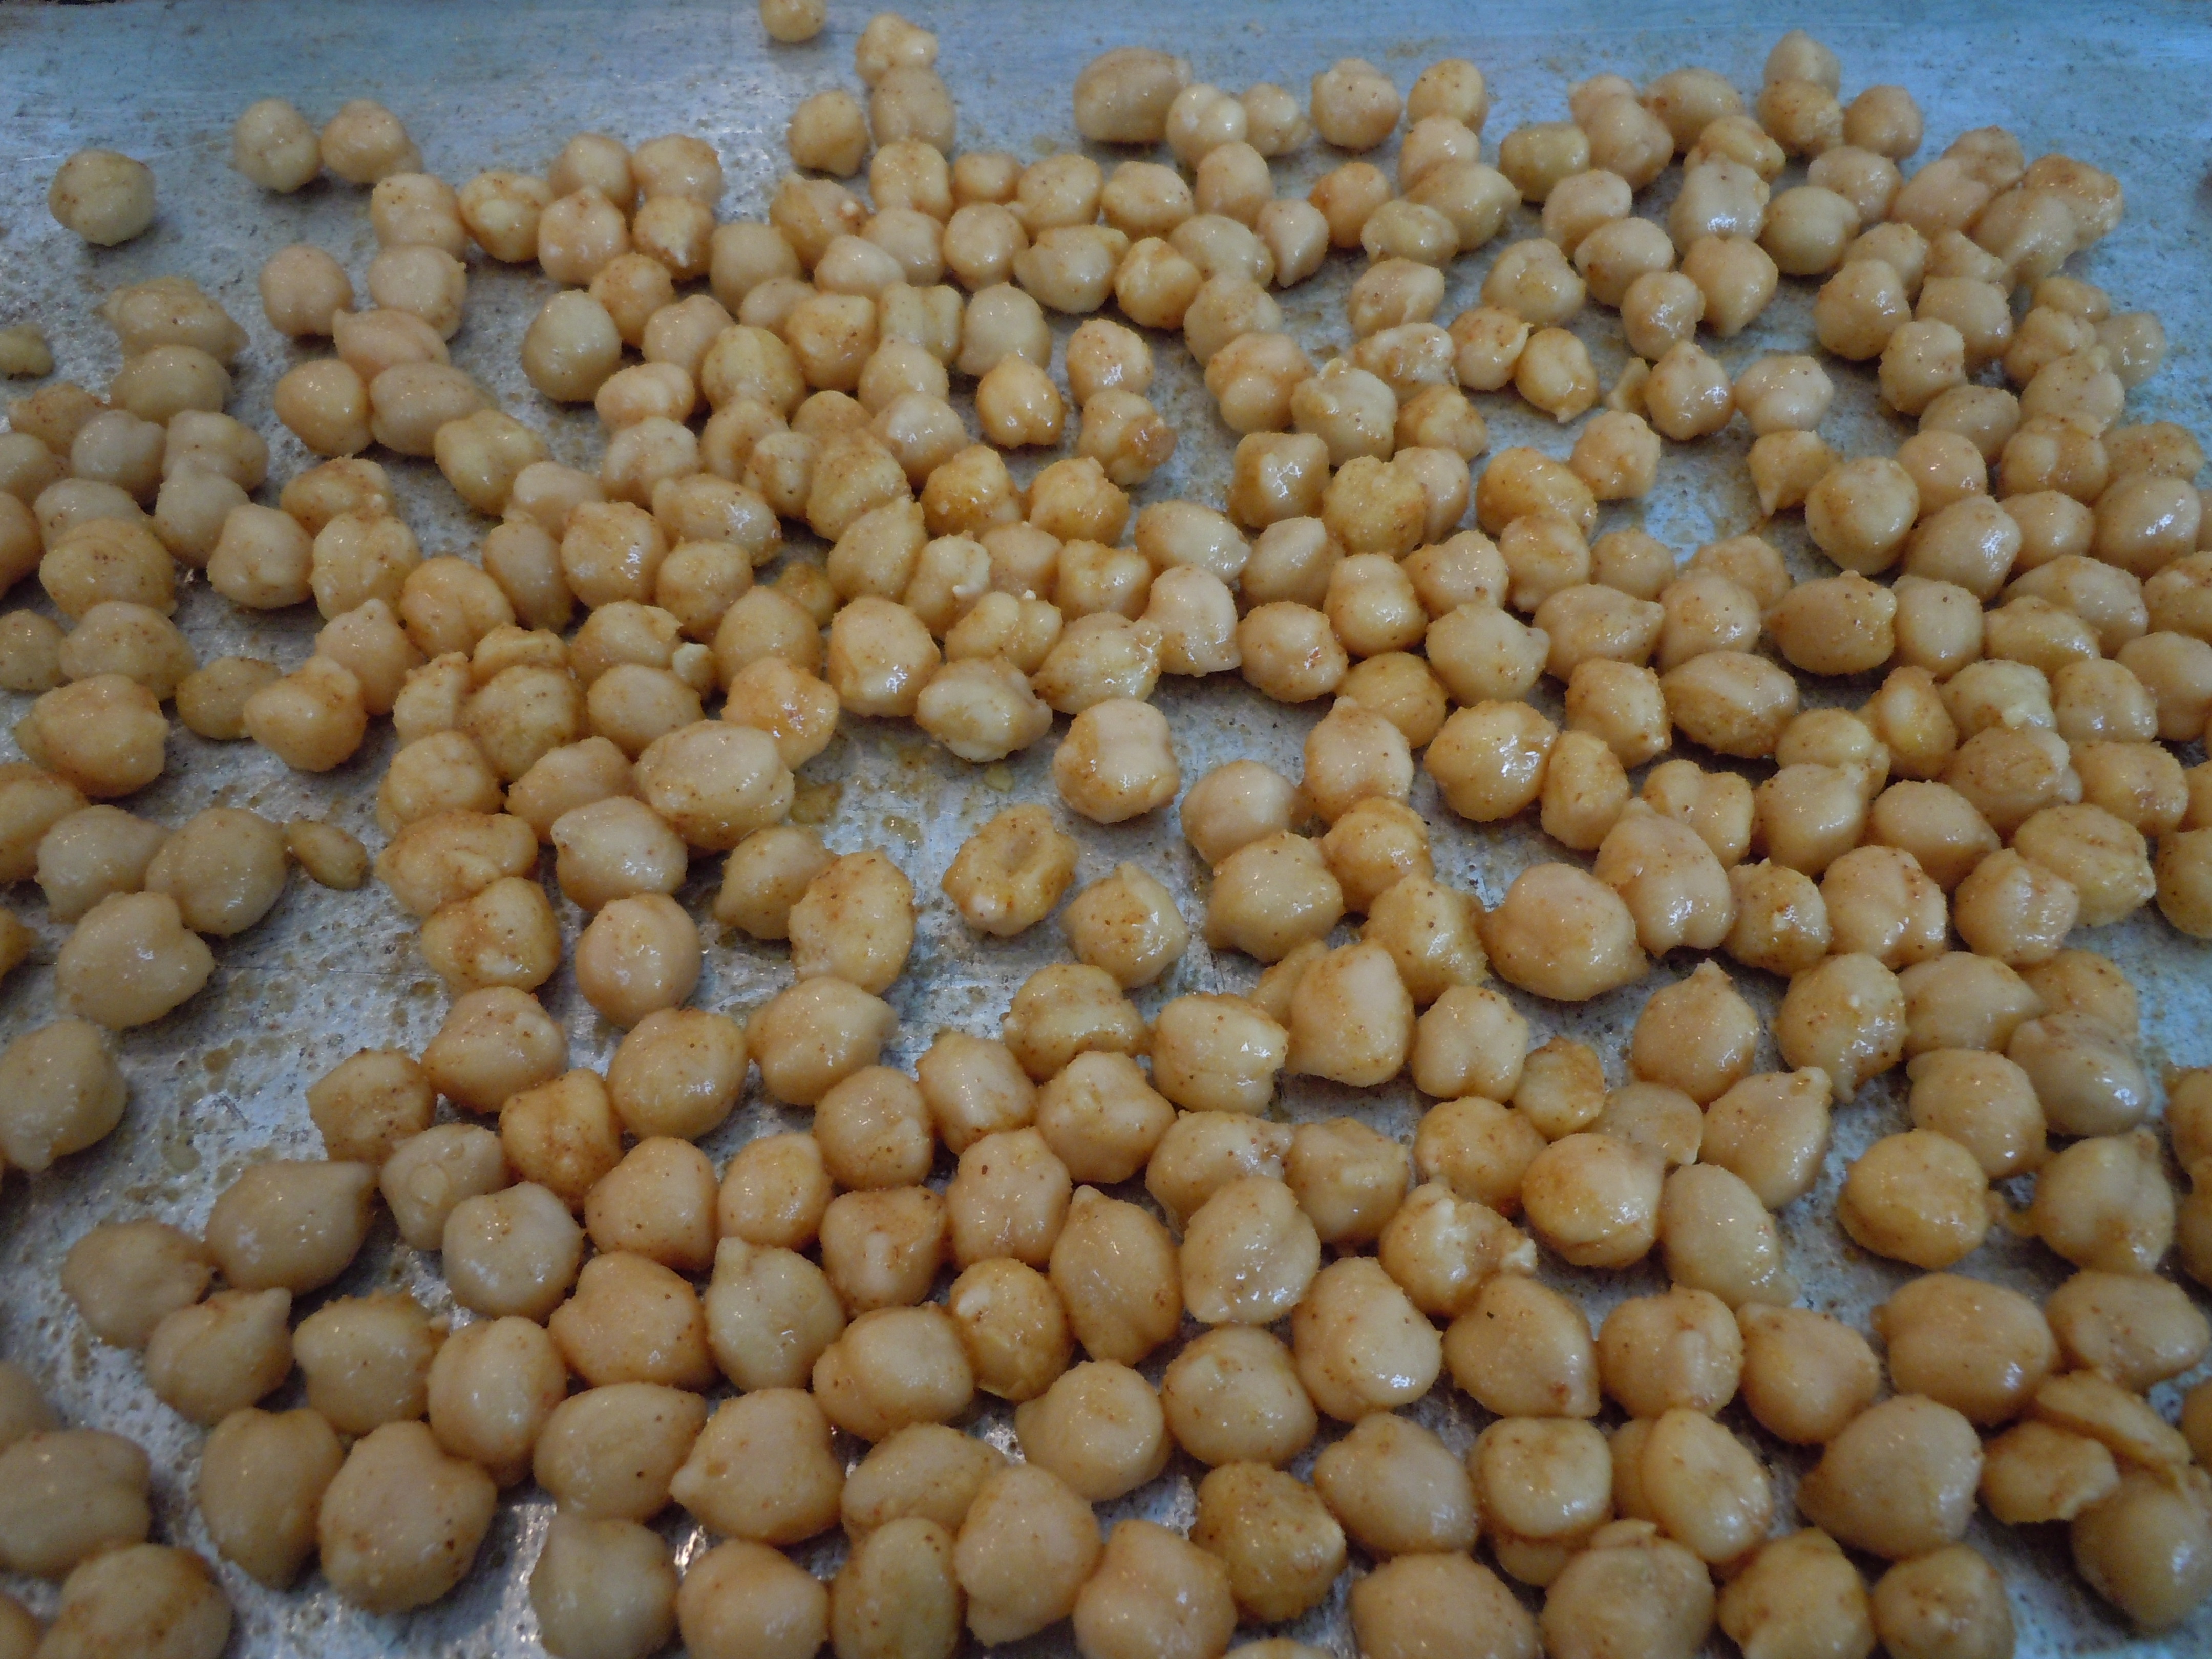
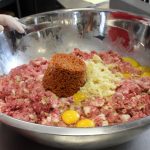
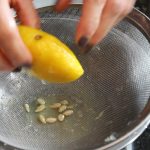
These roasted chick peas are a tasty and healthy treat that will definitely put a smile on your face. My daughter, Bella, thought it only logical that the name should be “happy” roasted chic peas if they make you smile like that and “because they are just happy”… lol

It’s amazing how this creamy bean can turn into this delicious crunchy snack. You are going to love them as much as I do. After being pleasantly surprised by the full flavored crunch you get with this roasted bean you’ll be back for seconds! A golfing friend of mine, Lisa, turned me on to these roasted chick peas a few years back. I’ve been happily making them ever since.

These roasted chic peas are wicked easy to make and a great on the go healthy snack. What’s so fun about making these happy roasted chic peas is you can totally change up the spices making them as spicy and flavorful as you want. Add in a 1/4 tsp of smoked paprika, chipotle pepper, or go for some Indian spices like a coriander/cumin combo, or one of my all time favorite spice’s garam masala. Garam masala differs depending on what region it’s from but basically it’s a combination of black pepper, mace, cinnamon, cloves, cardamons and nutmeg so you’ll get a big burst of flavor from that one alone!

After you happily roast these chic peas you may find yourself wanting to make my baked asparagus wrapped in prosciutto, zucchini torta or even some baked coconut shrimp.

iphone pictures  iphone pictures 953  iphone pictures 954

iphone pictures 956  iphone pictures 957  iphone pictures 958

iphone pictures 959  iphone pictures 960  iphone pictures 968

Ingredients:

  • 2 cans chick peas
  • 3 Tbsp olive oil
  • 1/2 tsp garlic granules
  • 1/2 tsp onion granules
  • 1/4 tsp cayenne pepper OR 1/4 tsp finely ground blk pepper for flavorful but not spicy
  • 1/4 tsp cumin
  • OPTIONAL: a few dashes of Siracha for a little extra spice
  • 1/2 tsp fine sea salt -1/4 before baking and 1/4 after they are roasted

Directions:

  1. Pre-heat oven to 450º.
  2. Drain and rinse 2 cans of chick peas.
  3. Gently rub and pat dry with paper towels.
  4. This action will loosen the skins off of the chick peas (you don’t have to get off every single chick peas skin..this just naturally happens as you are patting them dry).
  5. Put the chick peas into a medium bowl and add olive oil and spices.
  6. Mix and turn out onto a cookie sheet.
  7. Put them into the oven and bake for approx. 35 minutes.
  8. Shake the pan rolling around the chick peas every 10 minutes…at 25 minutes, 15 minutes and DEFINITELY at 5 minutes
  9. They will burn quickly at the end so you need to keep an eye on them especially during the last 5 minutes.
  10. Remove the chic peas from the oven and sprinkle with the other 1/4 tsp salt and let cool on tray

Spanakopita at Dana’s

Spanakopita at Dana’s

When you bite into the buttery, flaky pastry layers with the creamy sheep’s milk feta and ricotta-spinach filling you’ll agree that Spanakopita, a classic Greek dish, is so worth the effort. We neatly fold this delicate pastry dough, with a tablespoon of this amazing spinach mixture, into triangles for the perfect little appetizer shape that just melts in your mouth. The #4 fillo pastry dough becomes this delicate shell making for an elegant nibble.

This recipe came from my good friend, Dana, who happens to be a wonderful chef. In fact, Dana and her husband are opening up a restaurant in early spring at The Goodwin Golf Course called Birdie Cafe. Dana is half Greek and half Italian so this was family tradition for her growing up making these with her mother. My great grandmother was born in Crete making me one eighth Greek. So with a hint of Greek lineage in my blood I’m thinking that’s what drives my palate towards these Mediterranean flavors that I adore so much.

Spending the day in Dana’s kitchen with our other college friend, Lynn, making these spanakopita was ideal considering we were having so much fun it didn’t seem like work at all. We didn’t even realize how much we were accomplishing. Lynn, who manage’s Sam The Clam Pub & Grub in Southington, CT introduced us to a Greek Mojito with Metaxa, a Greek liquer, that was very delicious.

The fact that you can easily make these spanakopita triangles ahead of time which freeze so nicely for future dates is ideal for parties. So start making this spanakopita now for your Super Bowl get together! Invite over a few friends to make the spanakopita and the task goes really quickly and it’s a lot of fun. Add in our Greek Metaxa Mojito’s and I think you have yourself a pre-party to the party just like the one at Dana’s.

To cut down on the time and effort and not forgo making this delectable dish you could make one big tray of the spanakopita. In a 9 x 13 x 3 (or similar size) baking dish lay down 9 full sheets of phyllo pastry dough brushing in between each layer with butter of course. Next, lay in the entire bowl of spinach filling, then 9 more buttered layers of phyllo with a finishing buttered coating right on the top. If you are baking this one tray be sure to refrigerate the the spanakopita for twenty minutes before baking it. This will firm up the pastry dough so you can run a knife through the top layers of dough cutting in only about 1/4″ to give you pre-cut lines in the serving sizes you’ll want. It makes cutting the spanakopita much easier after it comes out of the oven. Of course, a tray this size will need to bake for about 55-60 on 350º instead of the 20 minutes the triangles take. The phyllo pastry dough is very forgiving. If your sheets are larger then the pan giving you extra dough on the sides when lining the baking dish just fold them over. You won’t notice that the sides may be folded over after it’s baked because it will be all flaky and puffed anyways and still taste incredible.

You may want to serve up some other appetizers like Prosciutto wrapped asparagus, a caesar salad with the spanakopita, turkey stuffed peppers are one of my very favorite or maybe something light like an Asian noodle & shrimp salad only to end with Pavlova or chocolate avocado mousse! To make a similar dressing to the one Dana makes in the show check out my amazing TANGERINE DRESSING here!

IMG_4768 DSCN4572 iphone pictures 1015 iphone pictures 1402 iphone pictures 1316

bowlspan IMG_5141 cutpastryh

butterpastryjpg spankopitathumb folder

butterfoldjpg IMG_5156 danaspankop

cookedspan

INGREDIENTS FOR Spanakopita – will make approx. 30 spankopita triangles :

  • 1 pkg. #4 Phyllo Pastry dough or Fillo pastry dough put into frig over night if frozen
  • 1 cup (1 pkg) thawed and fully drained (squeezed) frozen chopped spinach
  • 2 cup whole milk ricotta
  • 1 cup sheep’s milk feta cheese
  • 1 lb. melted butter
  • 3 scallions finely chopped white and green parts OR 2 tbsp finely chopped shallots
  • 2 tbsp each chopped parsley and fresh chopped dill
  • 1/4 tsp each nutmeg and black pepper

DIRECTIONS FOR Spanakopita:

  1. Pre-heat oven to 350º
  2. Take Phyllo dough out of the frig to bring to room temperature but still in the box
  3. Drain and squeeze ALL the water from chopped thawed spinach
  4. In a large bowl add 2 cup ricotta, 1 cup drained spinach, 1 cup sheep’s feta, scallions or shallots, parsley, dill, nutmeg and pepper – stir gently to mix and set aside
  5. Unroll Phyllo on counter top
  6. Cut the 15″ long pastry dough with a sharp knife into 3 3/4″ pieces getting 4 across
  7. Start to lay out the strips 4 across a work surface – always keep a layer of saran wrap and a damp dish towel on top of the layers you’re not using
  8. Brush thin coat of butter in between each layer til you have 3 layers down in each of the 4 rows
  9. Put 1 tbsp of ricotta-spinach mixture in the right bottom corner of the phyllo sheet – you can use a sm. cookie dough scoop to help keep the tbsp all the same size – this will help you to move along quicker
  10. Fold right corner over so the bottom edge lines up with the left side, like you are folding a flag
  11. Continue on up until you are at the top and used up all the pastry dough – brush a little butter on the last fold to seal it
  12. Put filled phyllo triangles onto a baking tray about 9 per tray
  13. Bake each tray of spanakopita triangles for 20 minutes on 350º until golden
  14. Be sure to let the spsankopita cool a little – the filling will be hot 🙂
  15. You may have 1/2-3/4 cup of filling leftovers so freeze it, roll up in pounded-out chicken breasts, stuff bone-in chicken breasts under the skin with the filling and bake or just buy extra phyllo…enjoy 🙂

IMG_5123 limemohito metaxa

seltzermojito icemohito shakemohito

drinksmohito

INGREDIENTS for the METAXA MOJITO’S:

  • 1 cup Metaxa Greek Liquer
  • 1 1/2 cups soda water
  • 1 fresh lime cut into wedges
  • 1 fresh lemon juiced = 1/4 cup lemon juice
  • 2 tbsp light brown sugar
  • 4 mint leaves or basil leaves

DIRECTIONS for making the Metaxa Mojito’s:

  1. Mint leaves muddled with fresh lime wedges and light brown sugar in a glass cocktail mixer
  2. Add fresh lemon juice, Metaxa, soda water and ice, shake and serve with mint or basil garnish…enjoy 🙂