The Traveling Epicurean

Green Goddess Sauce ll

Green Goddess Sauce ll

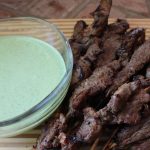
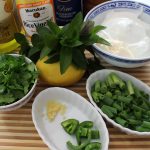
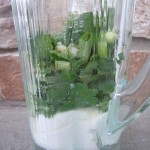
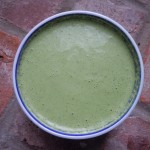
Having my green goddess sauce ll at your next party will be sure to turn heads. It’s kind of like wearing a new party dress! This green goddess sauce is made in mere minutes in a blender. It’s a blend of Greek yogurt, mayo, fresh mint leaves and cilantro, garlic, green onion, lemon juice, olive oil and rice wine vinegar.  You don’t even have to waste time chopping finely because it all get puréed anyways!

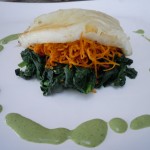
Decorating your party plates with my green goddess sauce will make for a lovely presentation, a more formal one, but having a bowl or pouring cup of the sauce on the table will do the trick quite nicely! In fact, the latter might be better since there’s a good possibility your guest’s will be going back for seconds.

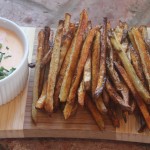
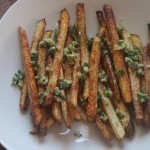
This green goddess sauce is so versatile because it literally goes with all foods! It’s heavenly on seared scallops…all fish for that matter, swordfish, rack of lamb, pulled beef tacos, Sweet Potato Fries , Baked Crispy Fries, or Baked Coconut Shrimp and even cut veggies!

027 IMG_3234 IMG_0672 IMG_0668 iphone pictures 447

IMG_6920 iphone pictures 1167 iphone pictures 1168

iphone pictures 1191 iphone pictures 331 iphone pictures 316

IMG_6956 IMG_6962 IMG_0672

Ingredients:

  • 1 cup plus 2 tbsp Greek yogurt
  • 1/4 cup mayo (I use Hellman’s)
  • 1/2 cup packed mint leaves (1 cup loose)
  • 1 cup packed fresh cilantro
  • 1 garlic clove put thru garlic press
  • 1/2 jalapeño diced
  • 4 lg stalks, 6 small of green onion chopped coarsely
  • 1 tbsp fresh lemon juice
  • 1 tbsp extra virgin olive oil
  • 1 Tbsp “seasoned” rice wine vinegar
  • 1 tsp sugar  – (NOTE: I forgot to add this in the show, but it really needs this for balance 🙂
  • s & p
  • If it’s not hot enough with the jalapeno add a dash of Siracha

Directions:

  1. Place all of the ingredients into a blender an purée for 10 seconds…be patient – you may need to stop and stir everything to get it going but do NOT add any more liquid
  2. Stop blender and scrap down sides to get the larger leaf pieces and blend for 5 more seconds and violà!
  3. Taste here and add salt and pepper
  4. Add a dash of Siracha – you need to taste the sauce first, sometimes a jalapeño can be super hot and other times it can be a mellow hot
  5. This sauce gets even better if you can pop it into the fridge for an hour and let the flavors mingle, the sauce will thicken up a little too!
  6. Make this ahead of time and keep sauce in a plastic container and refrigerate.  It stays nicely for days in frig.
  7. This green sauce is absolutely delicious on so many things…be creative.

Homemade Applesauce

Homemade Applesauce

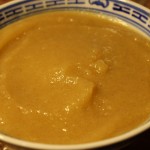
Playing at my childhood friend Karen’s house growing up and smelling her mom’s homemade applesauce simmering on the stove with aromas of apple and cinnamon in the fall air are one of those nostalgic memories that will stay with me my whole life. That’s where the inspiration for this show and recipe came from. I contacted my friend Karen about her mom’s recipe and she was happy to share.

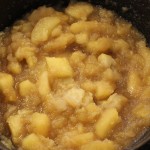
Karen’s mom, Pat, used a food mill to pass the apples through smoothing out the consistency and removing the peels . For those of you who don’t have a food mill I am simplifying that process having you peel the apples prior to simmering. Even though the peel does offer a little extra flavor we will take the middle of the road for convenience purposes. For that smooth texture that I like I put the simmered apples in my food processor in small batches. You can skip this step completely by using a potato masher, whisk or even a fork to work out the lumps to your desired texture.

The only addition to Pat’s recipe is that I add in a couple of tablespoons of fresh squeezed lemon juice for a subtle brightness to the sauce balancing out the sweetness. Actually, I add the fresh lemon juice while I peel, core and slice the apples into eighths so they don’t turn brown. I want those cinnamon-apple aromas to permeate the house as soon as possible so I add her spices in the beginning of the simmering. Some recipes even add in orange or lemon peel when simmering the apples but I think that’s a matter of preference and you can get as creative as you want.

Making homemade applesauce is really easy to make filling your kitchen with so many wonderful seasonal aromas you may wonder why you don’t do it more often. You may find your self starting a crackling fire to get the full effect while your apples are simmering on the stove. Be careful if a window is open you may just find a neighbor or two dropping in to “borrow” a cup of sugar.

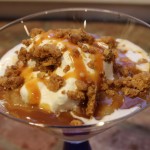
Fall is the perfect time to make this homemade applesauce with apples in abundance at the stores and local orchards. A wonderful thing about making applesauce is it stays well for months in your freezer. One of my favorite ways to have applesauce is with grilled pork chops, caramelized onions and a little crumbled Gorgonzola. For a simple, gluten-free dessert that’s out of this world you can top vanilla ice cream with this warm homemade applesauce, whipped cream, a drizzle of caramel sauce and a sprinkle of toasted apple crisp topping made with oats! This just may be my new favorite dessert! I buy our local Ashley’s vanilla ice cream and their caramel sauce when I make this incredible Applesauce-Caramel Sundae. So get into the holiday spirit and create those nostalgic memories for your kids, family and friends filling the house with simmering apples and cinnamon, a similar aroma to hot apple cider, that will stay with them forever. Hope you enjoy the show 🙂

IMG_3993  IMG_4014  IMG_4063

IMG_3967  IMG_3986  IMG_3988

smileapple  IMG_4104  caramelapple

IMG_4086

Ingredients:

  • 4 lbs. (10 apples) – an assortment of apples for well rounded flavors
  • 3 tbsp brown sugar
  • 3 tbsp white sugar
  • 1/8 tsp salt
  • 1 tsp cinnamon
  • 1/4 tsp nutmeg
  • dash of cloves (optional)
  • 1 1/4 cup water
  • 2 tbsp fresh lemon juice

FOR Applesauce-Caramel Sundae:

  • Your favorite “apple crisp topping” recipe made with oats toasted up in the oven on 400º in a bake dish until golden
  • 1 Quart of your favorite local Ice creamery Vanilla and 1/2 pint of their caramel sauce
  • Whipped cream (1 cup heavy whipping cream, 1 tbsp confectioners sugar, 1 tsp vanilla, bourbon or whiskey)
  • Toasted apple crisp topping with oats

Directions:

  1. Peel, core and slice apples into 8ths and place into large pan
  2. Squeeze lemon juice on them slices as you go to prevent them from turning brown
  3. Mix the brown and white sugar together
  4. Sprinkle 1/2 the sugar on the apples
  5. Add all of the cinnamon, nutmeg, (cloves -optional) salt and the water
  6. Mix with a spoon and put on the stove over med/high bringing to a boil
  7. Turn down and keep simmering for 20-25 minutes until softened
  8. Taste and check sugar content, add the remaining sugar if you want sweeter
  9. If you add the rest of the sugar simmer for a few more minutes til it melts
  10. Remove from stove and let cool 5 minutes
  11. Mash the apples with a potato masher, fork, whisk or add to food processor til you get the texture that you want – If you are using a food processor only fill 1/2 way then puree
  12. Serve with a big grilled pork chop, topped with caramelized onions, and crumbled Gorgonzola or do up dessert with the Applesauce-Caramel Sundae…enjoy! 🙂

Homemade Berry Granita

Homemade Berry Granita

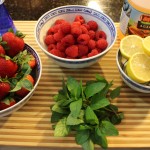
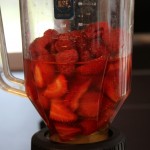
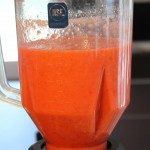
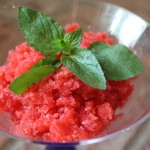
Homemade berry granita is similar to a sorbet or an Italian ice and gives you the same happy feeling as eating ice cream but can be made with out all that hard work. Granita is made in three simple steps – purée, freeze and scrape. How simple is that? Most recipes for granita have you making a simple syrup by boiling the water and melting the sugar but I find that unnecessary. Instead, I substitute the sugar with Agave Nectar this way you add it right to the berries in the blender! Yeah!

Granita actually originated in Sicily and is a frozen treat made all over the world. In Quebec they call it a slushy or a slurry. This frozen treat can also be made into a after dinner dessert for adults by adding in a jigger or two of rum to give it a little kick. Another great idea is serving granita between meals as a palate cleanser to clear the taste buds for next course as an elegant presentation to your dinner party.

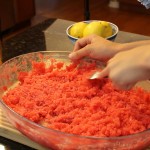
In my homemade granita recipe I have also simplified the freezing steps. Instead of scraping with a fork every 45 minutes just wait the three hours or so until the entire dish is frozen and then scrape with a fork at the end like we do in the show. This way it’s less time consuming and a smoother, easier surface to work with all awhile still coming out fluffy and delicious! I think you and your family and friends will really enjoy the simplicity of this delicious frozen treat.

IMG_2321

IMG_2122

IMG_2364


slurry

freezer

fluffygranita


IMG_2375


Ingredients:

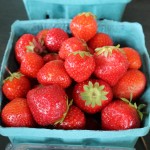
  • 2 cups fresh strawberries
  • 1 cup fresh raspberries
  • 1 cup cold water
  • 2 tbsp agave nectar or honey (Optional)
  • 1/4 cup sugar
  • 1/4 cup fresh squeezed lemon juice
  • Juice from 1 lime
  • 1 bunch fresh peppermint leaves

Directions:

  1. Wash and dry fruit
  2. Squeeze juice from lemons and lime
  3. Hull strawberries and slice in half
  4. Place all berries into blender
  5. Add citrus, H20 and agave
  6. Blender for 20 seconds til pureed
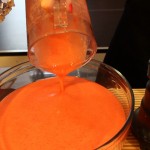
  7. Pour into a Pyrex dish
  8. OPTIONAL: Add in 1-2 jiggers of rum, stir and freeze
  9. OPTIONAL: You can give a stir before its frozen around the 45 minute mark BUT this is not a necessary step (as you see in the show we did not get around to this)
  10. Freeze for approx. 3 hours
  11. Pull out from freezer and begin to scrape with a fork until fluffy
  12.  Spoon into martini glasses and top with fresh mint