Wow! What an impression 9 simmering trays of meatballs made when you walked into Lisa & Vin Esposito’s kitchen this past fall for their 2016 Annual Meatball Competition! There were meatball’s with sauce, meatball’s without sauce, and some topped with hot cherry peppers. All I know is the aroma’s of the meatball’s, tomato sauce, basil, and garlic had you salavating in mere minutes in anticipation of sampling these delectable little morsels.
The Esposito’s actually started this meatball competition about 4 years ago with 22 meatball entries! Realizing that it was difficult to judge with too many to try in order to submit an objective ballot they are now down to 9 meatball entries in the competition.
It took a little patience to get thru the holiday’s to coordinate next week’s show, the winner of “Lisa & Vin’s 2016 Annual Meatball Throw Down” but it was worth it! Everyone loves a great meatball and I’m happy to say I had voted for the winner’s meatball in this competition! I’m excited to get you the recipe!
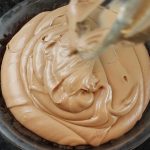
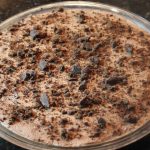
This Girl Scouts thin mint chocolate mousse pie is absolutely delicious! The oh so chocolaty mousse is light and lucious and melts in your mouth. The texture’s of the pie are undenialbly one of my favorite aspects of the pie. It goes from the cool, silky mousse to the crunchy cookie crumble in the crust with subtle hints of mint.
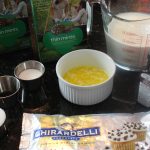
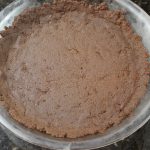
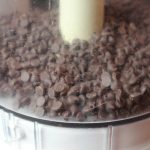
Although you do bake the thin mint crust for a mere 8 minutes, this is a no-bake, no fuss, chocolate mousse filling. The crunchie crust is made with puréed Girl Scout Cookies, butter and sugar. In the same food processor that the thin mint cookies were just puréed, the chocolate mousse starts off with mini semi-sweet chocolate chips, vanilla, and a pinch of salt. Then boiling heavy cream is streamed into the opening at the top to melt the chips as they spin into a smooth and creamy chocolate delight. This chocolate is cooled to room temperature and folded into whipped heavy cream for the finale. It’s one of those special dessert’s that’s so uncomplicated you’ll find yourself making it more than just once.
Having my daughter’s Girl Scout troop in my kitchen making this thin mint chocolate mousse pie was so much fun! We are very fortunate for our wonderful leader, Jen Swenson, who is generous with her efforts and time with the troop. It’s one of those precious things in life that the girls will treasure always.
Those of you who love the good ole mint-chocolate flavors will go crazy for this dessert. Those of you who aren’t partial to that flavor combo might be surprised how suble and sweet the thin mint crust is …tamed by the butter maybe! And like I told Maisy in the show, you can always just eat the chocolate mousse middle!
If you are looking for some appetizer’s to start off this Girl Scouts Thin Mint Chocolate Mousse Pie extravaganza you should try my Salsa 101 or Best Guacamole Ever! Maybe you are more in the mood for Zucchini Torta or a main dish like one of my all time favorite’sStuffed PeppersorChicken Piccata…both dishes you’ll add to your week day meals once you have your first bite! Enjoy! 🙂
Ingredients for Girl Scouts Thin Mint Crust Pre-Heat oven to 350º :
28 Thin Mint Girl Scout cookies – 1 3/4 sleeve …(a few left over for nibbling on)
5 tbsp butter
2 tbsp sugar
10″ pie plate, or 9″ spring form pan, OR 9″ pie plate & cups for the extra chocolate mousse you will have
Directions for the Girl Scouts Thin Mint Crust:
Melt 5 tbsp butter, set aside
Add 28 cookies to the food processor and pulse 3-4 times until they are a fine crumb
Pour in melted butter and 2 tbsp sugar and pulse 10 seconds to combine
Turn out crumb mixture into a 10″ pie plate, or 9″ spring form pan
NOTE: If you only have a 9″ pie plate NO WORRIES just add the excess chocolate mousse to cups or glasses, topping with cookies crumble and set the same in the frig for 4-6 hours or even freeze for a later date!
Press cookie crumb mixture all along the bottom and up the edges of the pie dish forming the crust
Put the pie crust into a 350º oven for 8 minutes
Take out and completely cool
Ingredients for Chocolate Mousse:
3 cups heavy cream – 2 cups for whipping the heavy cream/ 1 cup for melting the chocolate chips in the food processor
1 tbsp vanilla
pinch of sea salt
1 bag mini semi-sweet chocolate chips
Directions for the Chocolate Mousse:
Wipe thin mint cookie crumbs out of food processor and add mini chocolate chips
Add vanilla and pinch of salt
Add 1 cup heavy cream to small sauce pan and bring to a boil
Place cover on food processor, turn on and slowly add hot cream thru opening at top
Keep it running for about 20-30 seconds until chips are melted and creamy
Empty out into a bowl to cool, only cool to room temperature NOT COLD because the chocolate will solidify and it will be difficult to fold into the whipped cream
When chocolate is close to room temp add 2 cups heavy cream to a large glass bowl with 1/4 cup sugar and begin to whisk with electric beater
Whisk the cream until stiff peaks, 3-5 minutes
Fold 1/2 cup at a time of the room temp chocolate into the whipped cream until there’s none left
Pour out chocolate mousse into the COMPLETELY cooled baked pie crust and smooth out top with a offset spatula
Sprinkle thin mint cookie crumble over the top and place into the frig for 4-6 hours
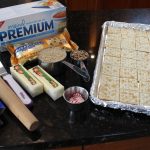
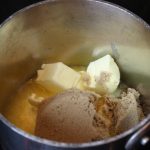
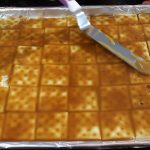
This Saltine Christmas Bark is the perfect holiday treat made in mere minutes. You get the best of both world’s, sweet and salty plus a crunch from the Saltine cracker base! It starts with crushed peppermint candy (my favorite), or pecans, then a layer of creamy chocolate leading into the slightly chewy toffee which all sets up on a crunchy saltine cracker! Oh my goodness, bring it on!
The fun part about making this Saltine Christmas Bark is breaking up this giant slab of goodness into randon size pieces. You kind of feel like an artist deciding how big and even the shape of the final outcome! Plate them up and voilà your masterpiece. These also make great holiday gift’s that you can fancy up in decorative celophane candy bags with ribbon.
Let your holiday Saltine Christmas Bark making be extra special with my Bolognese Sauce, a scrumptious recipe I developed thru inspiration from a favorite pasta dish where I went to college in Urbino, Italy. If you’re now thinking Italian you should try my chicken Piccata, a savory white wine, capers and mushroom sauce that’s delectable. Maybe Lobster Mac N’ Cheese is more your style! Or you could be looking for a “Steak-House” Creamed Spinach that pairs up nicely with steak or fish! Since we are so close to the holidays what better time to make the most amazing chocolate pecan pie ever!
Ingredients:
2 pkgs saltine
1 cup butter – 2 sticks
1 cup light brown sugar
2 cups “mini” semi-sweet chocolate chips (if you can’t get “mini” the regular size is fine)
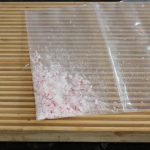
5 pepermint candies – finely crush peppermnt candy in a Ziplock with a rolling pin – My Favorite!
1 cup finely chopped pecans, walnuts, m&m’s, or …what ever you want to sprinkle onto the melted chocolate chips
Non-stick aluminum foil – regular foil works too!
12 x 17 Cookie tray
Directions:
Pre-heat oven to 400º
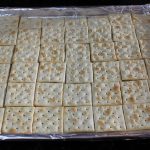
Cover cookie tray with aluminum foil
Arrange 48 crackers on your cookie tray, you may have to break or cut some in 1/2 to get to the edges
Chop up pecans, walnuts or macadamia nuts and set aside
Put candy canes in a ZipLock baggie, cover with a dish towel and give a few hits from your rolling pin to crush the candy to small and powder-like pieces, set aside
Over medium – Med/high heat add 1 cup light brown sugar and 1 cup butter to a deep sauce pan
Stir in the beginning ONLY to combine then leave it alone
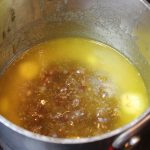
Bring to a boil and TURN DOWN to medium and let boil 3 MINUTES
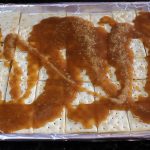
Immediately pour over laid out saltine crackers and spread the toffee with an offset spatula so it covers every saltine
Then pop into oven for 5 minutes
Take out and the toffee will be bubbly, IMMEDIATELY pour “mini” semi-sweet chocolate chips all over the top (if you can’t get “mini” the regular works just as well)
Let the chips sit for about 5 minutes to soften up
Using your offset spatula spread the softened chocolate chips covering all the toffee
Immeduiately after spreading chocolate take your crushed candy cane and nuts and begin to sprinkle over the wet chocolate
NOTE: You want to sprinkle toppings BEFORE the chocolate sets so it STICKS to the top
Pop the whole cookie tray into the fridge for 45 minutes – 1 hour to set OR freezer for 20-25 minutes if you are in a rush
Take out of fridge, remove foil and begin to break up the saltine Christmas bark into what ever size you like…mangia mangia!
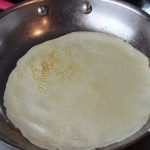
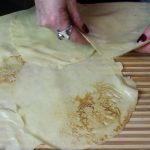
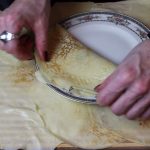
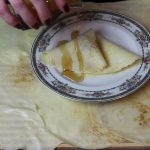
Buttery, paper thin crêpes filled with raspberry jam, topped with maple syrup, fresh berries and whipped cream is an amazing way to start your morning. Not only are these French crêpes a cinch to make but you can totally make them the night before. Re-heat them in your toaster oven wrapped in foil and they taste like you just made them! A real energy saver and perfect for all those holiday guests staying over.
The word “crêpe” actually means pancake in French, although they are quite different from the all American pancake. Now is it French crêpe or Swedish pancake? Well, they are really very similiar in the way that they are both paper thin compared to that well known Amercian pancake. Over the years I have found that French crêpes can be savory OR sweet while the Swedes like their swedish pancakes strictly with sweets, jams, ice cream or yogurts. The Swedish pancake also has a considerable amount more sugar in the recipe where as most crêpe recipe’s don’t have any sugar at all in the batter.
My trick to keeping a recipe as easy as possible is knowing how to save time with a proven method of preparation without foregoing the quality or taste. That’s what I do with my crêpe recipe here, the order in which you whisk your ingredients in the batter is crucial and saves you energy and time so you don’t have to strain the batter! This method of mixing is exactly how I make my Homemade Manicotti Pasta Crepes.
If you are big on breakfast you will definitely want to try my mouth watering Gourmet Frittata where you use what ever your favorite veggies are or my German Pancake that puffs to amazing heights coming out of the oven getting lot’s of ooh’s and ah’s! If your heading to lunch time try my Secret Family Zucchini Torta Recipethat also makes great appetizers! Another delectable brunch item to make are Homemade Gravlax, the best I’ve ever had, or my Pasta Fagioli that will have you going back for seconds! Hope you get to eventually try them all…you won’t be disappointed! Enjoy! 🙂
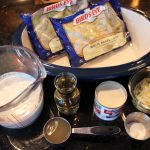
FOR EASY CRISPY CREPES: Add all ingredients below to food processor. blend until smooth, then refrigerate for 30 minutes. To get them crispy just cook 1 minute longer then the soft crepes below to get the edges golden approx 2 minutes on medium heat per side.
Ingredients for French Crêpes-“SOFT“- Makes 12 Crêpes:
1 cup unbleached all-purpose flour
1 cup whole milk
1/3 cup water
2 ex-lg eggs
1/4 tsp sea salt
3 tbsp. melted butter
2 tsp vanilla extract
NOTE: If filling your crepes with sweets add vanilla, if savory omit
Maple syrup
Favorite jam
Confectioners sugar
Fresh berries, raspberries, blue berries black berries
Whipped cream
8″ non-stick pan OR sauté pan OR crêpe pan
Directions:
Melt 3 tbsp. butter and set aside to cool slightly
ADD ALL INGREDIENTS TO A BLENDER AND BLEND UNTIL SMOOTH!
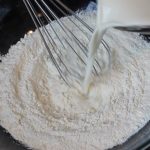
IMPORTANT….if you don’t have a blend here is My Trick for smooth batter – MUST MIX IN THIS ORDER then you won’t have to strain batter …saving time!
Add flour and salt to a large mixing bowl
Pour in milk and water and whisk until smooth
Whisk in 1st egg until completely combined, then the 2nd egg
Whisk in melted cooled butter until combined
Tip for removing air bubbles – Gently stir the crepe batter with a large spoon to help remove any air bubble as these will cause tears in the crêpe
You can make this up to 1 day ahead keeping in the fridge
Put 8″ saute pan on medium heat
TIP for EASY pan coating…Peel back one end of a whole 1/4 stick of butter and rub open end across pan just to coat right before pouring in ladle of batter!
Right as you ladle in 1/4 cup of crepe batter QUICKLY lift pan off the heat and SWIRL to spread batter evenly
Put pan back down on heat and cook for 35-45 seconds, then flip, 10 more seconds cooking
Turn out cooked crêpes onto a dish or cookie rack
They will not stick together
OPTION: Cool a pinch and then stack them on top of one another and into fridge for the next day
Serve warm crêpes with you favorite fillings and roll up or fold and then top with syrup, confectioners sugar, fresh berries and whipped cream …YUM!
CT Style in The Bender Kitchen Making “Lazy-Man’s Lasagna”!
With all our crazy schedule’s during this busy holiday season I wanted to present an uncomplicated dish on the CT Style Show today that could be made in mere minutes yet still taste absolutely delicious, so I opted for my “Lazy-Man’s Lasagna” (click here to go to recipe page).
I have such a great time doing the cooking segment on CT Style and this time around I had both Teresa and Ryan with me in The Bender Kitchen so it was double the fun!
You can be creative with this lazy-man’s lasagna by changing the meat you use to what ever your favorite type is. What’s nice about this dish is having all the luscious flavors of a lasagna but without all the work. It’s a win-win in my book!
You may want to try making the Fennel and Citrus Salad with aTangerineDressing that I made for the CT Style crew. Growing up in an Italian family we ate a lot of fennel, cooked and raw. Fennel is both refreshing and delicious especially in salads. It has a very mild licorice flavor with a crunchy texture. If you have never tried it you ought to give it a try, it just might surprise you! Or you may want to make my signature Caesar Salad with Homemade Garlic Croutons.
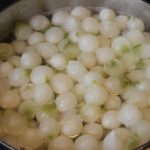
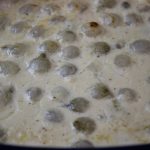
Creamed Onions, inspired by my Grandma Reilly, are put together in mere minutes then baked in the oven until bubbly making for the perfectly saucey side dish. My secret ingredient in the creamed onions offers a suble flavor bringing together the heavy cream, half and half, white wine, chicken broth, and mild Emmentaler Swiss cheese.
The secret addition in these creamed onions that give’s this dish that extra special something is evaporated milk. A small amount of Emmentaler is the other delicate flavor. Emmentaler is a very mild swiss cheese with remarkable melting qualities usually found in fondue recipe’s. I never got the recipe from my Grandma but thru many yummy test runs figured it out and have been making this recipe for over 15 years.
I began reminiscing about my Grandma’s Reilly’s holiday dishes when Pem McNerney, Living Editor, for The Source and other Shoreline newpapers recently sent me an email with a list of questions pertaining to Thanksgiving asking me if I wanted to elaborate, I was happy to oblige. Look for the hyper-links below the creamed onion recipe to help with your Thanksgiving Dinner!
Ingredients for Creamed Onions:
2 frozen bags (approx 2 lbs.) of white pearls onions 14 – 16 oz each bag
1 cup heavy cream
1/2 cup half and half
1/2 cup white wine- chardonay
1/2 chicken broth
1 small can evaporated milk (the 5 oz can)
1/2 cup grated Emmentaler Swiss cheese or Gruyere
1 tbsp corn starch
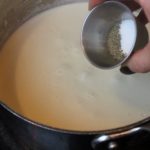
3/4 tsp sea salt
1/4 tsp finely grated blk pepper OR white pepper
Directions for Creamed Onions:
Bring a pot of water to a boil and add frozen white pearl onions
Bring back to a simmer, and keep simmering for 20 minutes
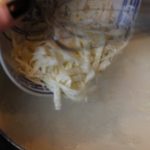
Mix corn starch and Emmentaler cheese in a small bowl, set aside
Remove simmering pearl onions to the baking dish with a slotted spoon
Drain water from sauce pan
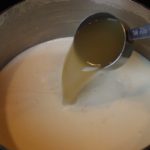
Using SAME pan (no need to clean) add heavy cream, half and half, evaporated milk, chix broth, and salt and pepper and bring to a low bubbling simmer
Whisk in Emmentaler cheese-corn starch mixture until combined, 20 seconds…keep whisking until melted in and then…
Remove from heat immediately and pour over onions in baking dish
Stir to even coating onions and bake for 35 minutes on 350º until bubbly, it will be golden around the egdes
Note: Grilled ribeye or Filet Mignon, creamed onions and a drizzle of truffle oil is OUTRAGEOUS! Enjoy! 🙂
NOTE: These creamed onions get even better when re-heated because the onions break down a little and melt into the sauce…MMM!
Thanksgiving Memories
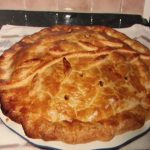
When I think of Thanksgiving many nostalgic memories come rushing in. It’s easy to do with all the aroma’s of this festive season. The first fond memories I had of Thanksgiving were going to Grandma Reilly’s house having her homemade pies and creamed onions! The blueberry pie with a crispy, flaky crust and oozing sweet blueberries was my favorite. Her lemon meringue pie at a very close second. Not that her creamed onions didn’t leave a huge impression on me. Unfortunately, I never did get her pie crust recipes but have spent many hours fooling with pie crusts until I got it right, my “perfect pie crust in 5 minutes” with a “blueberry pie” filling to emulate her’s! – https://thetravelingepicurean.com/perfect-pie-crust-in-5-minutes/ and https://thetravelingepicurean.com/best-blueberry-pie/.
The hard thing about Thanksgiving is there are so many dishes to make it can be exhausting. There’s the dilemma of which one’s are tradition, which one’s your favorite and can I eliminate any of them? The best answer is don’t be a control freak or a kitchen hog and have everyone join in doing their part, laughing, mixing, tasting, working along side of you. It’s ok to delegate out some of those tasks. Then it doesn’t seem like work at all! This being said, one Thanksgiving in particular comes to mind. Years ago while living in San Francisco my dear friends Lisa, Bobby, Pam and John came out West with their children and parents to visit more family and invited us to stay with them as well.
This was a grand occasion, not only was I excited to be with my nostalgic East coast friend’s for this Thanksgiving holiday but they rented out The Historic Spreckels House in Sonoma, CA. It was breathtaking! We went wine tasting, played football on the grounds, and read lots of storybook’s to the little ones. The lasting impression for me here was all the fun we had in the kitchen. We all pitched in together to make a gourmet Thanksgiving dinner that could have been a scene from a Norman Rockwell painting. My contribution to the dinner were my “Easy Icebox Dinner Rolls” that I dredged in chopped green onion and fresh rosemary. Nothing like adding to the aroma’s of roasted turkeys then with that of fresh baked breads. – https://thetravelingepicurean.com/easy-icebox-dinner-rolls-2/
The great thing about these icebox rolls is you can make the dough 4 days ahead. I call that brilliant! It’s key to staying sane on a holiday like Thanksgiving. These rolls have turned into tradition for me and my family, a dish that everyone asks about when ever they arrive. My friend Laura, and loyal Traveling Epicurean follower from Carmel, California will text me pictures of her “easy icebox rolls” every Thanksgiving. She writes, “it’s a family tradition and traditions create memories that last for generations.”
The most important thing about preparing for a holiday like Thanksgiving is timing. For instance, the pie crusts can easily be made a month ahead and put into the freezer. Take them out two days before to thaw. Roll them out, get them into your pie dish and back into the fridge until the night before when you can put together filling’s and bake.
Roasting the brussel sprouts on a cookie tray with chopped garlic, a drizzle of olive oil and a sprinkle of salt and pepper is another time saver. Set aside after roasting in a heat proof serving dish and warm right before sitting down. This is the most delicious way I have ever had brussel sprouts. Once you try this way you’ll be hooked. –https://thetravelingepicurean.com/best-brussel-sprouts-ever/
My tip of the day: “Wondra flour” for your gravy is a God send! Don’t waste your time fussing with a roux! Is it too lumpy, will it dissolve, is it too thick, did the raw flour taste cook out? Forget about it… Wondra dissolves immediately and gives your gravy a luscious sheen in mere minutes. Yeah!
It’s funny because most of my friends who came out to stay with me when I was living in San Francisco knew they were to bring a tub of Mashmallow Fluff and a shrunk-wrapped pizza from Modern Apizza in New Haven. A couple of my favorite’s that you couldn’t get out there. Yet, the side dish that baffle’s me the most on Thanksgiving is the marshmallow’s on sweet potatoes. It’s something i just can’t wrap my brain around. The fact is, my confusion of why someone want’s marshmallow’s baked on sweet potatoes doesn’t really matter because this dish has been around since the early 1900’s. It is a tradition for many family’s on Thanksgiving. That to me say’s it all. Now nuts in cranberry sauce? I won’t even go there.
How I love this holiday and sharing other friend’s traditions with my children. Last year my kids and I had a blast on Thanksgiving meeting my family out at an early Thanksgiving brunch, then it was off to my friend’s Marco and Sheryl’s Lathrop Manor in Norwich, CT, where they also reside. At dinner time we sat down with a house full of their relatives and friends to Marco’s gourmet dinner. His buttery mashed potatoes were over the top!. Conversation at dinner had my kids learning about Benedict Arnold and Connecticut history. Come to find out Arnold actually lived in this Lathrop Manor in the seventeenth century working as an apprentice to the Lathrops, the first apothecary in Connecticut…in this part of the world! Their Lathrop Manor is being remodeling right now but you can check out this very cool house in one of The Traveling Epicurean shows called “Salmon B.L T’s at Marco’s” –https://thetravelingepicurean.com/gourmet-salmon-b-l-t-sliders-at-marcos/
This Thanksgiving I am looking forward to going to my parents house early. Having them spend time with my children, seeing my brother and his family, then off to dear friends for a second round of festivities later on! Making more fun memories unique to each one of us! Family, friends and food bringing us all together once again. May you be thankful for having the chance to spend precious time with your family and friend’s this 2016 Thanksgiving Holiday!!
Warm Holiday Wishes, The Traveling Epicurean Michel Vejar
Thanksgiving Pictures of The Spreckles House in Sonoma, California
Homebrewing will open up a whole new world for you! I never knew how delicious beer could be before my friend’s, Bill & Alicia and Mike & Becky, introduced me to their homemade beer. Notes of chocolate, caramel and citrus, even banana and apricot with a soft, creamy texture will convert you too, in a matter of minutes!
Bill and Mike call themselves The Bilco Boys Brewery because when these neighbors started brewing beer together three years ago they entered thru the bilco doors of Bill and Alicia’s house that led to the basement, their spot for homebrewing. So far they have homebrewed 135 batches of beer and as Becky say’s “with only a couple mishaps”. They started with one of the kits you can purchase from Stomp N Crush, a spirits supply store for making your own right here in Clinton, CT. Kathy and Al, owners of Stomp N Crush are very knowledgeable and helpful in you getting you started on the right track for homebrewing!
After you understand more about beer brewing you may want to invest in a brewing machine like the one you see in the show, a Zymatic beer brewing system. You can find it under “PicoBrew Zymatic” out of Seattle Washinton. Bill says they even offer a counter top, Keurig-like, beer brewing system now…how cool is that.
One great way to learn more about beer brewing is to join a home brew club like the club Stomp N Crush offers called MASHwhich just had one of it’s event held at the Thimble Island Brewing Company . While meeting Bill and Mike at this MASH event to learn more about the brewing process I found out they have a tasting room there with 16 rotating tap lines as well as specialty casks. Owner of the Thimble Island Brewing Company, Justin Gargano, brewed up a batch of wort for the MASH members, which they were able to take home. Justin was recently featured the fall issue of our shoreline’s élan Magazine in an article called “Tapping into Local Brews”.
MASH stands for Maniacal Association of Shoreline Homebrewers, a registered “American Homebrewers Association” (AHA) home brew club. You don’t even need to have brewing experience to join just contact Stomp N Crush!
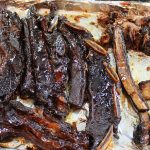
The magic of braising, turning a tough cut of meat into fork tender, is a no brainer for me. Braising these beef short ribs in a combination of stout beer, red wine, beef stock, soy sauce, whole peeled tomatoes, a mirepoix, and creative assortment of spices make for a luscious dish. Then piling the stout braised beef short ribs on top of yukon mashes potatoes made with half & half, heavy cream, butter, paper thin red onions and a healthy drizzle of truffle oil puts it right over the top!
These stout braised beef short ribs came from Firefly Farms in North Stonington, CT. Firefly is one of two farm’s in Connecticut Certified Humane! When you are buying from a farm like Firefly, who’s practices are above and beyond, you know you are getting a product of a different caliber. The beef I used in this stout braised short ribs recipe was moist, tender, and packed full of flavorful.
We all have some idea of the instense amount of work that goes into farming but their practices at Firefly Farm take it way beyond that. Analyzing agricultural charts dating back to World War II to understand and perfect feeds for each of their endandered breeds they raise on their farm is a grand example of that. Getting the animals diets just right to yeild a most natural and high quality product.
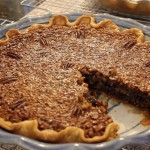
The lard that Firefly offers makes the perfect pie crust, as shown in “Death by Chocolate Meringue Pie”. It is unsaturated because of the attention to detail of the mulefoot hogs diet, one without corn or soy. And oh boy, you should try their bacon!
The special stout I got to braise the beef short ribs was creamy and smooth bringing deep luscious flavors to the dish. The stout came from some friends who have made home craft brewing a hobby, and they call themselves The Bilco Boys Brewery. It’s like night and day to taste a fresh homemade-crafted brew. I find the beer much smoother and the flavors really fresh from citrus to notes of chocolate with a creamy mouth finish. Make sure to keep an eye out for another up and coming craft brewing show next week with The Bilco Boys!
I know you will enjoy the ease of these stout braised beef short ribs whether Flanken or English cut. The end product is the easy sell here. You should try my Homemade Caesar Salad to go along with the ribs, or how about Spanakopitafor an appetizer. If you have a little time on your hands one weekend definitely try this amazingPickled Eggplant recipe, perfect for holiday gifts! You will need dessert too so be sure to take a look at the beautiful and delicious Pavlovaor my special Homemade Chocolate Chip Cookies!
Ingredients for Beef Short Ribs:
5-6 lbs Beef short ribs (Firefly Farms if possible) Flanken Cut if you want to remove the meat as I did in show OR English Cut – 1″ X 3″ pieces
OPTIONAL: Truffle oil – finishing oil to drizzle over stout braised short ribs, yukon mashed potatoes and gravy
Directions for Beef Short Ribs:
Pre-heat oven to 350º
Rub spice mixture all over ribs anf marinate for 4-12 hours or over night
Pat dry ribs without removing all the spices
Heat 2 tbsp olive oil in a large dutch oven or pan
Begin to sear beef short ribs in pan with olive oil, you will have to probably do this in two batches so you don’t crowd the pan
Sear the ribs 3-4 minutes on each side until browned
Remove 1st batch of ribs, set aside in a lg bowl and brown 2nd batch of beef short ribs
Remove 2nd batch of ribs to bowl
Then add in mirepoix with 1/2 tsp salt and 1/4 tsp pepper to dutch oven
Sauté for 5-8 minutes until softened
Add in 2 bottles stout, 1 cup cabernet, 2 cups beef stock, 2 tbsp soy sauce, 1/2 cup whole peeled tomatoes and 1 bay leaf to dutch oven
Add all of the beef short ribs back into the dutch oven making sure the liquid is 3/4 up the side of the meat
Bring to a simmer on the stove for 15 minutes
Cover Dutch oven and place into a pre-heated 350º oven for 3 hours
Every 50-60 minutes check on the ribs to fiip over and make sure you don’t need to add more liquid – it shouldn’t be dry (if it is you can add a splash of water, red wine, or more beef broth…all will work great)
While the beef short ribs are braising in the oven whisk together the glaze
At the 3 hour mark remove beef and place the ribs onto a cookie tray
Put the oven on Broil
Brush a coat of glaze on one side of the ribs and place under the broiler of 2 minutes (only 1 side)
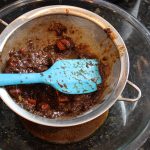
Tilt Dutch oven pan to the side to skim oil off the top of braised veggies
Push all the braised veggies thru a strainer set over a bowl to catch all the juices
Make sure to scrape juices on bottom of the strainer into the bowl too
Add the strained gravy juices to a sauce pan and bring to a simmer on low
Whisk in 1 tsp of Wondra flour into the gravy and simmer for 15 minutes to thicken slightly (if it gets too thick you can add in a splash of red wine or beef broth)
If you have Flanken Cut Short ribs remove meat for bones and place in heat proof pan until you are ready to place on top of pile of mashed potatoes with a drizzle of gravy and truffle oil, and a sprinkle of chives
If you have English Cut short ribs place 2 ribs per person onto a pile of Yukon Mashed Potatoes with a drizzle of thickened gravy, truffle oil and a sprinkle of chopped chives, then serve… mangia, mangia!
NOTE: For a finishing oil drizzle Truffle oil all over dish for an extra wow!
NOTE: If you are not eating ribs right away, and want to re-heat add to a heat proof dish, add 1/4-1/2 cup of red wine and beef stock and re-heat on a 350º oven for 30-40 minutes
Spice Rub Ingredients:
2 tbsp light brown sugar
1 tsp garlic granuales
1 tsp onion granuales
1/2 tsp cumin
1/4 tsp five spice
2 tsp sea salt
1/2 tsp blk pepper
Glaze:
1/4 cup honey
2 tbsp kethcup
1 tbsp soy
1 tsp “seasoned” rice wine vinegar
a few dashes of favorite hot sauce (Siracha)
Whisk in a medium bowl until combined and brush on ribs
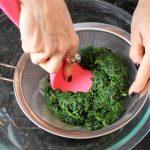
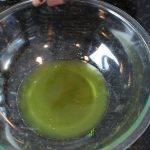
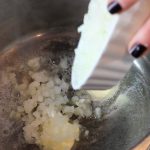
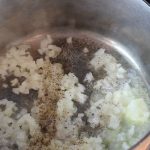
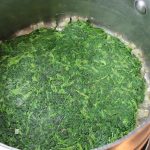
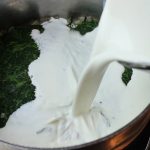
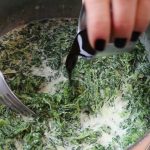
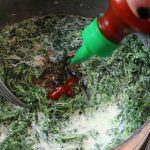
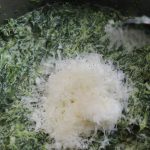
When you think of creamed spinach you usually think “fancy steak house”. Well who knew you could make a rockin creamed spinach right in your own kitchen that would give any steak house a run for it’s money! It’s thick and creamy made with spinach, finely chopped sweet onions, heavy cream, butter, Reggiano Parmesan, Worcestershire sauce and a dash of hot sauce. The sweet onion’s melt away into the creamed spinach leaving a lovely subtle flavor, and there’s no need for flour here either. Try giving the creamed spinach a little squeeze of lemon at the end to brighten all those luscious flavors!
Some 20 years ago I was taught this recpie from a big foodie friend, Warren, out in Mill Valley, California. When I go to a steak house now I find myself slightly biased with standards of expectations to be met. Warren says his recipe originated from Trader Vic’s which makes total sense considering everything they make is exceptional. I’m sure you remember my scrumptious appetizer “Bacon Wrapped Water Chestnuts”that originated from Trader Vic’s!
When you get ahold of a recipe like this creamed spinach it becomes part of your repertoire of easy gourmet “go to’s”. Just like the recipe Warren’s brother, Jim, gave us when I showed you how to make those amazing homemade Salmon Gravlaxlast year,another perfect dish for this holiday season, by the way!
This is the only creamed spinach recipe you will ever need. It can also be a base for other creations. If by some chance there is any of this delicious creamed spinach left over it freezes wonderfully for future concoctions.
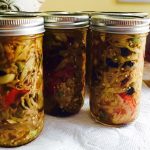
In the past, I have thawed left over creamed spinach, added in fresh chopped tomatoes, garlic thru garlic press, feta or swiss cheese, seasoned bread crumbs, a drizzle of olive oil and made baked stuffed mushrooms and tomatoes. Have even added in raw bay scallops and crab to that mixture above to make baked stuffed artichokes! YUM!
If you are wary of kale you won’t be after trying my scrumptious mango-kale smoothie! In fact, if you didn’t see that this mango-kale smoothie was green you would never know there was kale in it! It’s made from frozen mango chunks, fresh kale leaves, a pinch of banana and ginger, vanilla-bean Greek yogurt and light apple juice. The silky creaminess comes from using Cabot vanilla-bean Greek yogurt. And the “light” apple juice has the perfect amount of sweetness bringing it all together. The subtle flavors from the scant amounts of banana and ginger will have your guest’s trying to pinpoint exactly what they are. This most delicious concoction will have you licking your lips after the first sip!
My mango-kale smoothie is a real energy booster! I love that it’s super easy and convenient with store bought frozen mango chunks! My kitchen always has mangoes on the counter ripening for these mango-kale smoothie’s or my mango salsabut sometimes the timing isn’t right. That’s why I always have a bag of store bought frozen mango in my freezer. I can always depend on the the quality of the store bought frozen mango being deep orange in color offering a sweet mango flavor. Many times I cut up the ripened fresh mangoes using 1/2 cup fresh and 1 cup frozen in the mango-kale smoothie. Then I add any leftover fresh mango to the frozen mango bag and pop in back into the freezer for next time.
I make many different smoothies some of which you can find in my “Energy Smooties 101” but I think this is one of my fave’s because of the simpicity, delicious flavor and nutritional benefits. I add ginger in my mango-Kale smoothie for an immune system booster offering up anti-inflammatories and antioxidants. Kale is another antioxidant with more nutrients then spinach, if you can believe that one! It has calcium, potassium, vitamin C and B6 all helping to give you awesome looking skin & hair, and healthy bones & heart. Then there’s the mighty mango that’s known to help fight cancer with vitamin’s like A, C, E and B6!
This Mango-Kale Smoothie energy drink should be part of your weekly regimen. It’s a win-win for all us busy bees who just don’t have time for ailments! Enjoy 🙂 Now that I have you on a health craze you have to try my easy fresh salsa 101 that you can make 12 months of the year, or BEST guacamoleever. Don’t forget the Seared Sea Scallops, Salmon BLT Slider’sand how about ending it with someRicotta Pie!
Ingredients for Mango-Kale Smoothie makes 8 small glasses:
1 1/2 cups frozen mango chunks (I love Stop & Shop brand -bag of frozen mango)
You can change up fruit and swap out 1/2 cup mango for pineapple
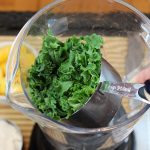
1 cup PACKED, about 5 lg fresh kale leaves with ribbing removed
3 1/2″ slices frozen banana, (fresh banana’s sliced, placed into baggies and freeze)
1 1/2 tsp fresh grated ginger
1 cup Cabot vanilla-bean Greek yogurt- “Cabot”
1 1/2 cup light or unsweetened apple juice…the perfect amount of sweet
NOTE: Make sure the liquid is 1″ down from top of fruit and kale level
1/2 cup water OR Muscle milk …..If you need more liquid you can just add water OR a protein powder like muscle milk -vanilla is my favorite
1/4 cup crushed ice …helps to purée the kale to a fine, smooth consistency
Directions:
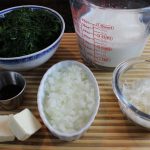
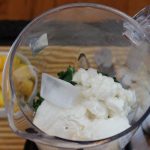
Place the kale leaves into the blender first, followed by Greek yogurt, ice cube, frozen mango chunks and banana, zested fresh ginger and light apple juice
Purée for 1 minute til frothy and smooth
Pour into glasses and serve
NOTE: you can freeze any left over mango-kale smoothie in plastic container for future frozen “Italian ice” like snacks!
Add some vodka or rum to make delicious party cocktails!


 Lisa & Vin’s 2016 Meatball Throw Down! In the mean time you can check out my Turkey or Italian beef meatballs. Then there’s the giant meatballs with a Secret ingredient in the Meatball Recipe from Glenn’s New Haven Apizza. You could always keep with a beef theme with my Braciole and while you are making all these yummy Italian dishes you will need some Homemade Pasta and a Caesar Salad! Mangia, mangia 🙂
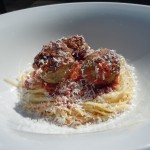


 My trick to keeping a recipe as easy as possible is knowing how to save time with a proven method of preparation without foregoing the quality or taste. That’s what I do with my crêpe recipe here, the order in which you whisk your ingredients in the batter is crucial and saves you energy and time so you don’t have to strain the batter! This method of mixing is exactly how I make my
  If you are big on breakfast you will definitely want to try my mouth watering


 With all our crazy schedule’s during this busy holiday season I wanted to present an uncomplicated dish on the CT Style Show today that could be made in mere minutes yet still taste absolutely delicious, so I opted for my
  You can be creative with this lazy-man’s lasagna by changing the meat you use to what ever your favorite type is. What’s nice about this dish is having all the luscious flavors of a lasagna but without all the work. It’s a win-win in my book!


 Homebrewing will open up a whole new world for you! I never knew how delicious beer could be before my friend’s, Bill & Alicia and Mike & Becky, introduced me to their homemade beer. Notes of chocolate, caramel and citrus, even banana and apricot with a soft, creamy texture will convert you too, in a matter of minutes!
 Last week I made