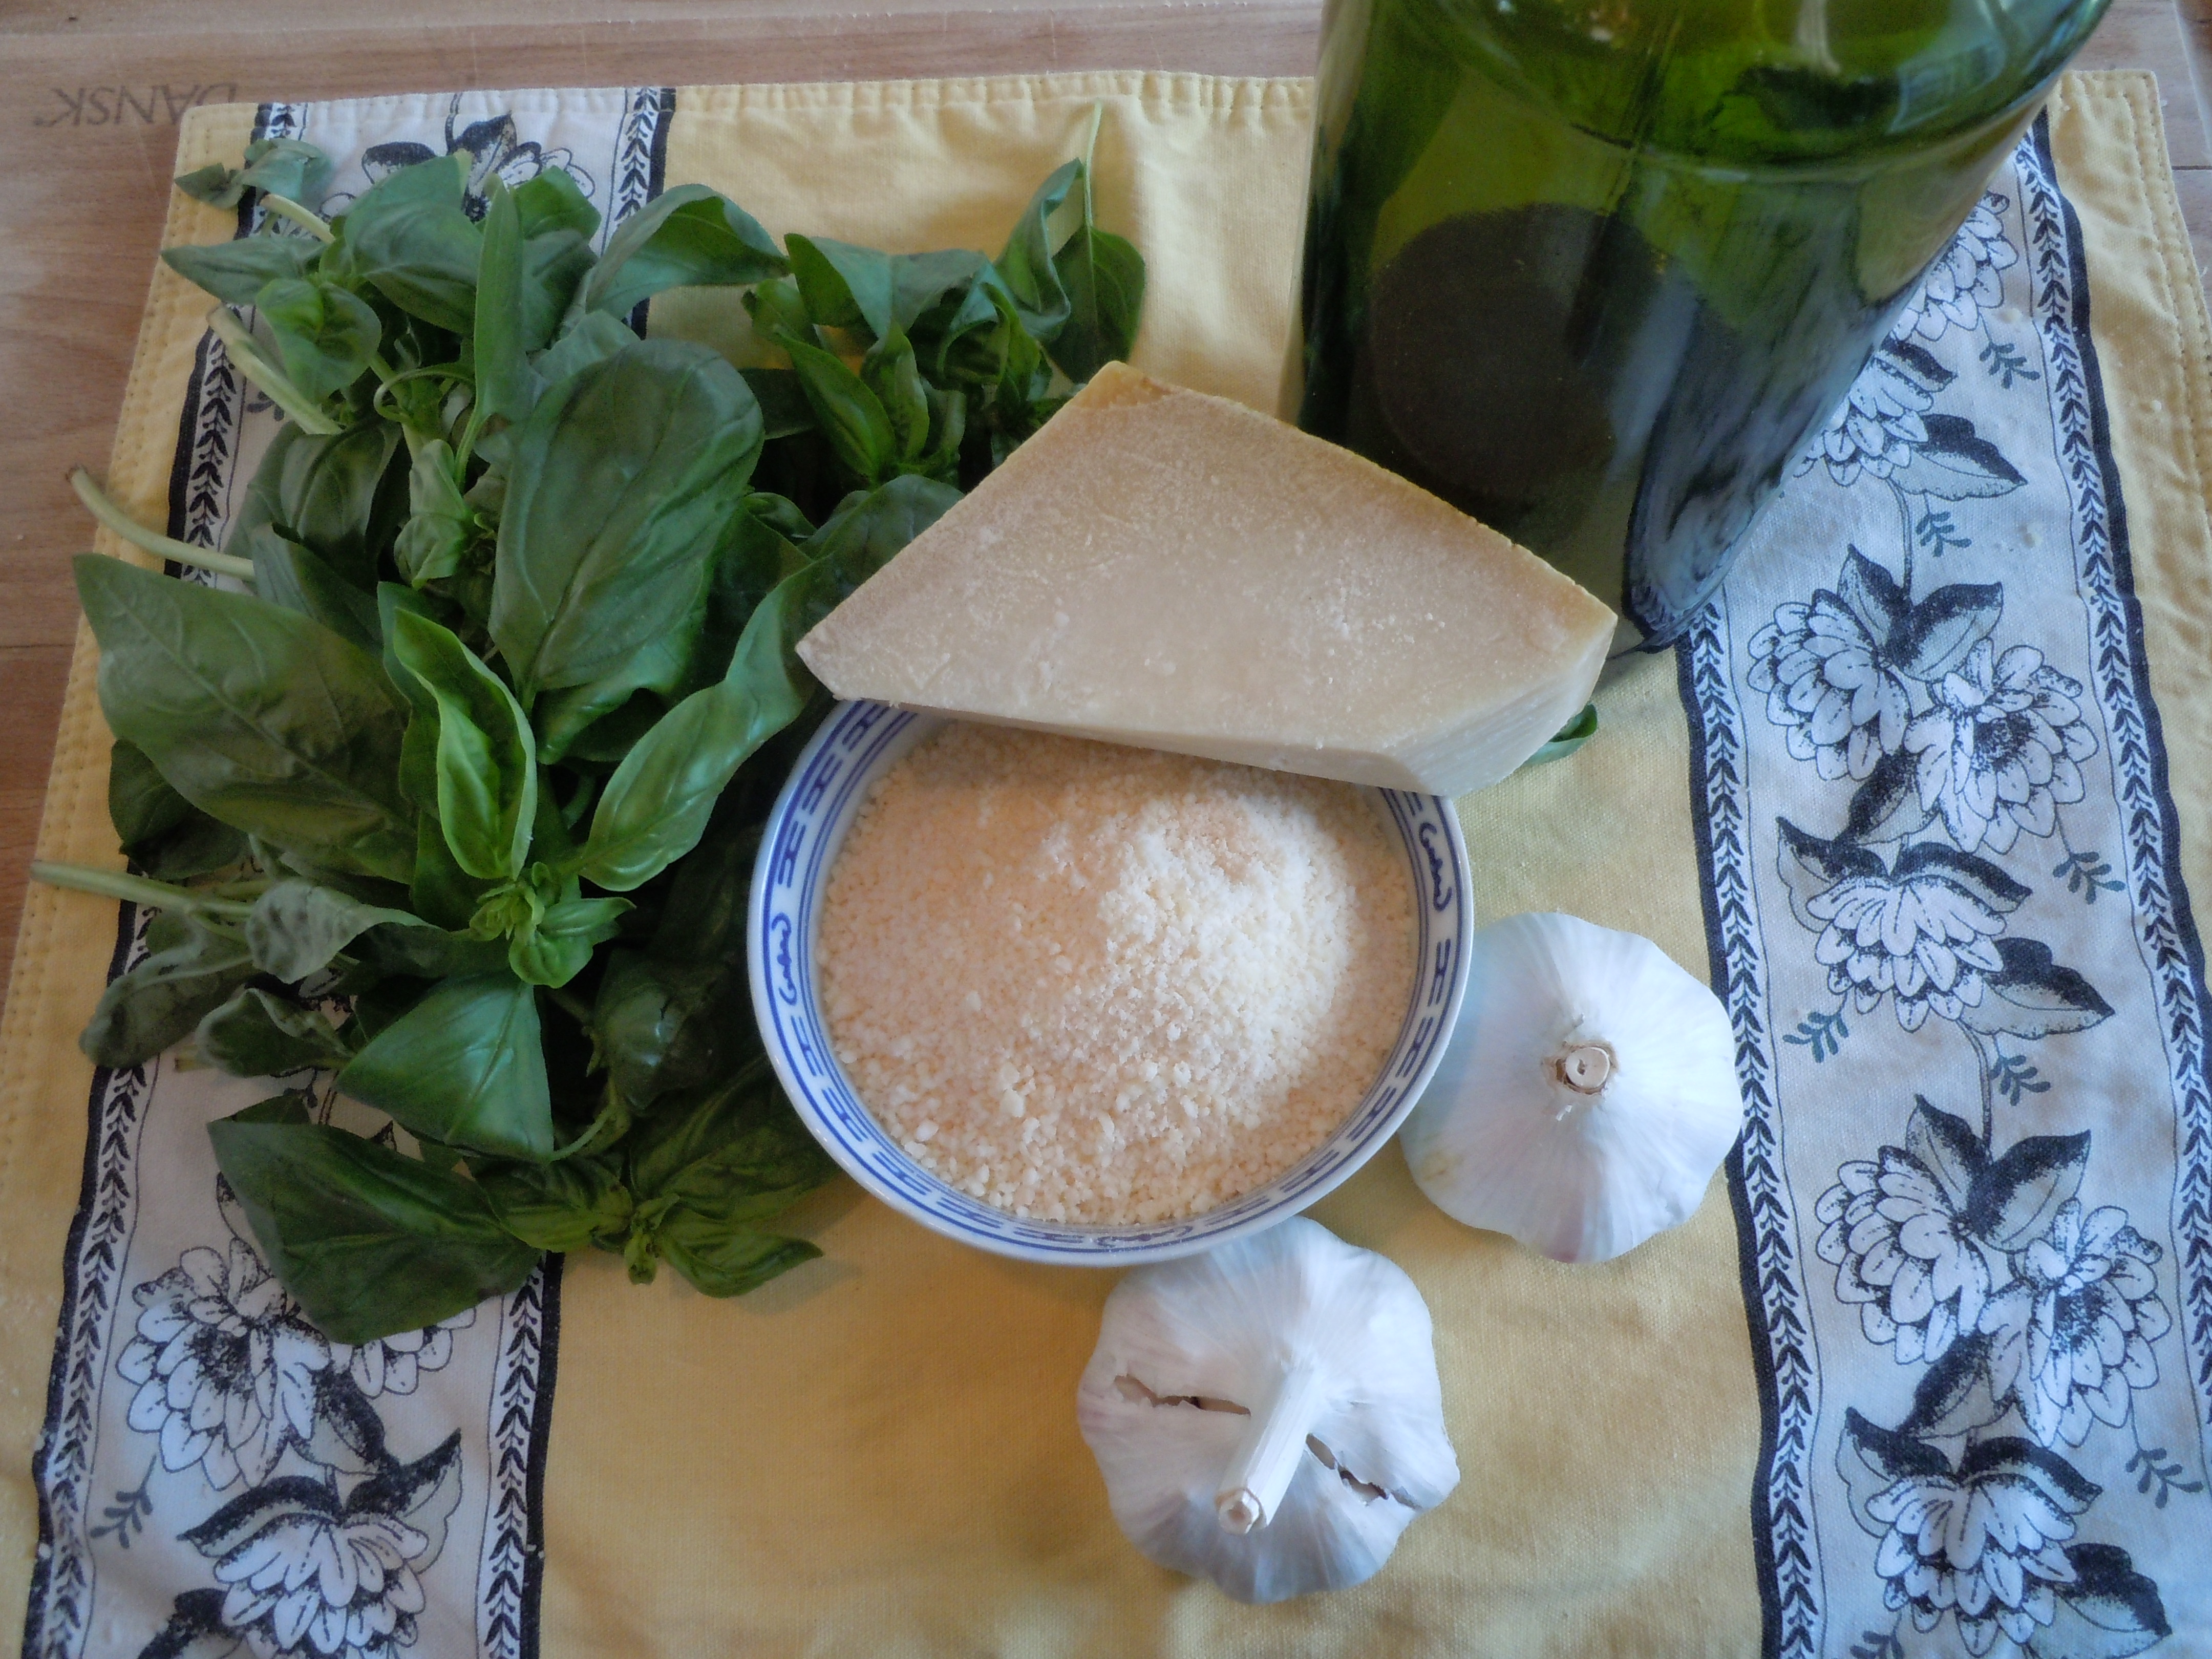
The Traveling Epicurean


Cold Cucumber Soup

Cold Cucumber Soup

This homemade cold cucumber soup is out of this world! It has texture and flavors that won’t stop! Not one of the flavors in this soup over powers another, it’s the perfect balance. You actually find yourself trying to distinguish between them only because you are aware of all the fresh vegetables and herbs that went into this amazing cold soup.

Being a born and raised East Coaster I have to say I have never been a big “cold soup” kind of person. With our unbearably cold winters we have here I really appreciate a very hot bowl of soup to warm the bones. So when ever I’m making this cold cucumber soup I’m slightly biased going in, not willing to give merit where it is due, until I take my first spoonful and it all changes!

My cold cucumber soup completely stands on it’s own and is very satisfying not to mention the medicinal qualities that cucumbers offer. Cucumber’s can reduce puffiness, help to eliminate toxins in your body and we all know that slice’s of cucumber over your eyes can help to reduce dark circles! Some of the vitamin’s cucumber’s offer are A, C and folic acid and minerals of potassium and magnesium.  All and all this homemade cold cucumber soup is a win win situation.

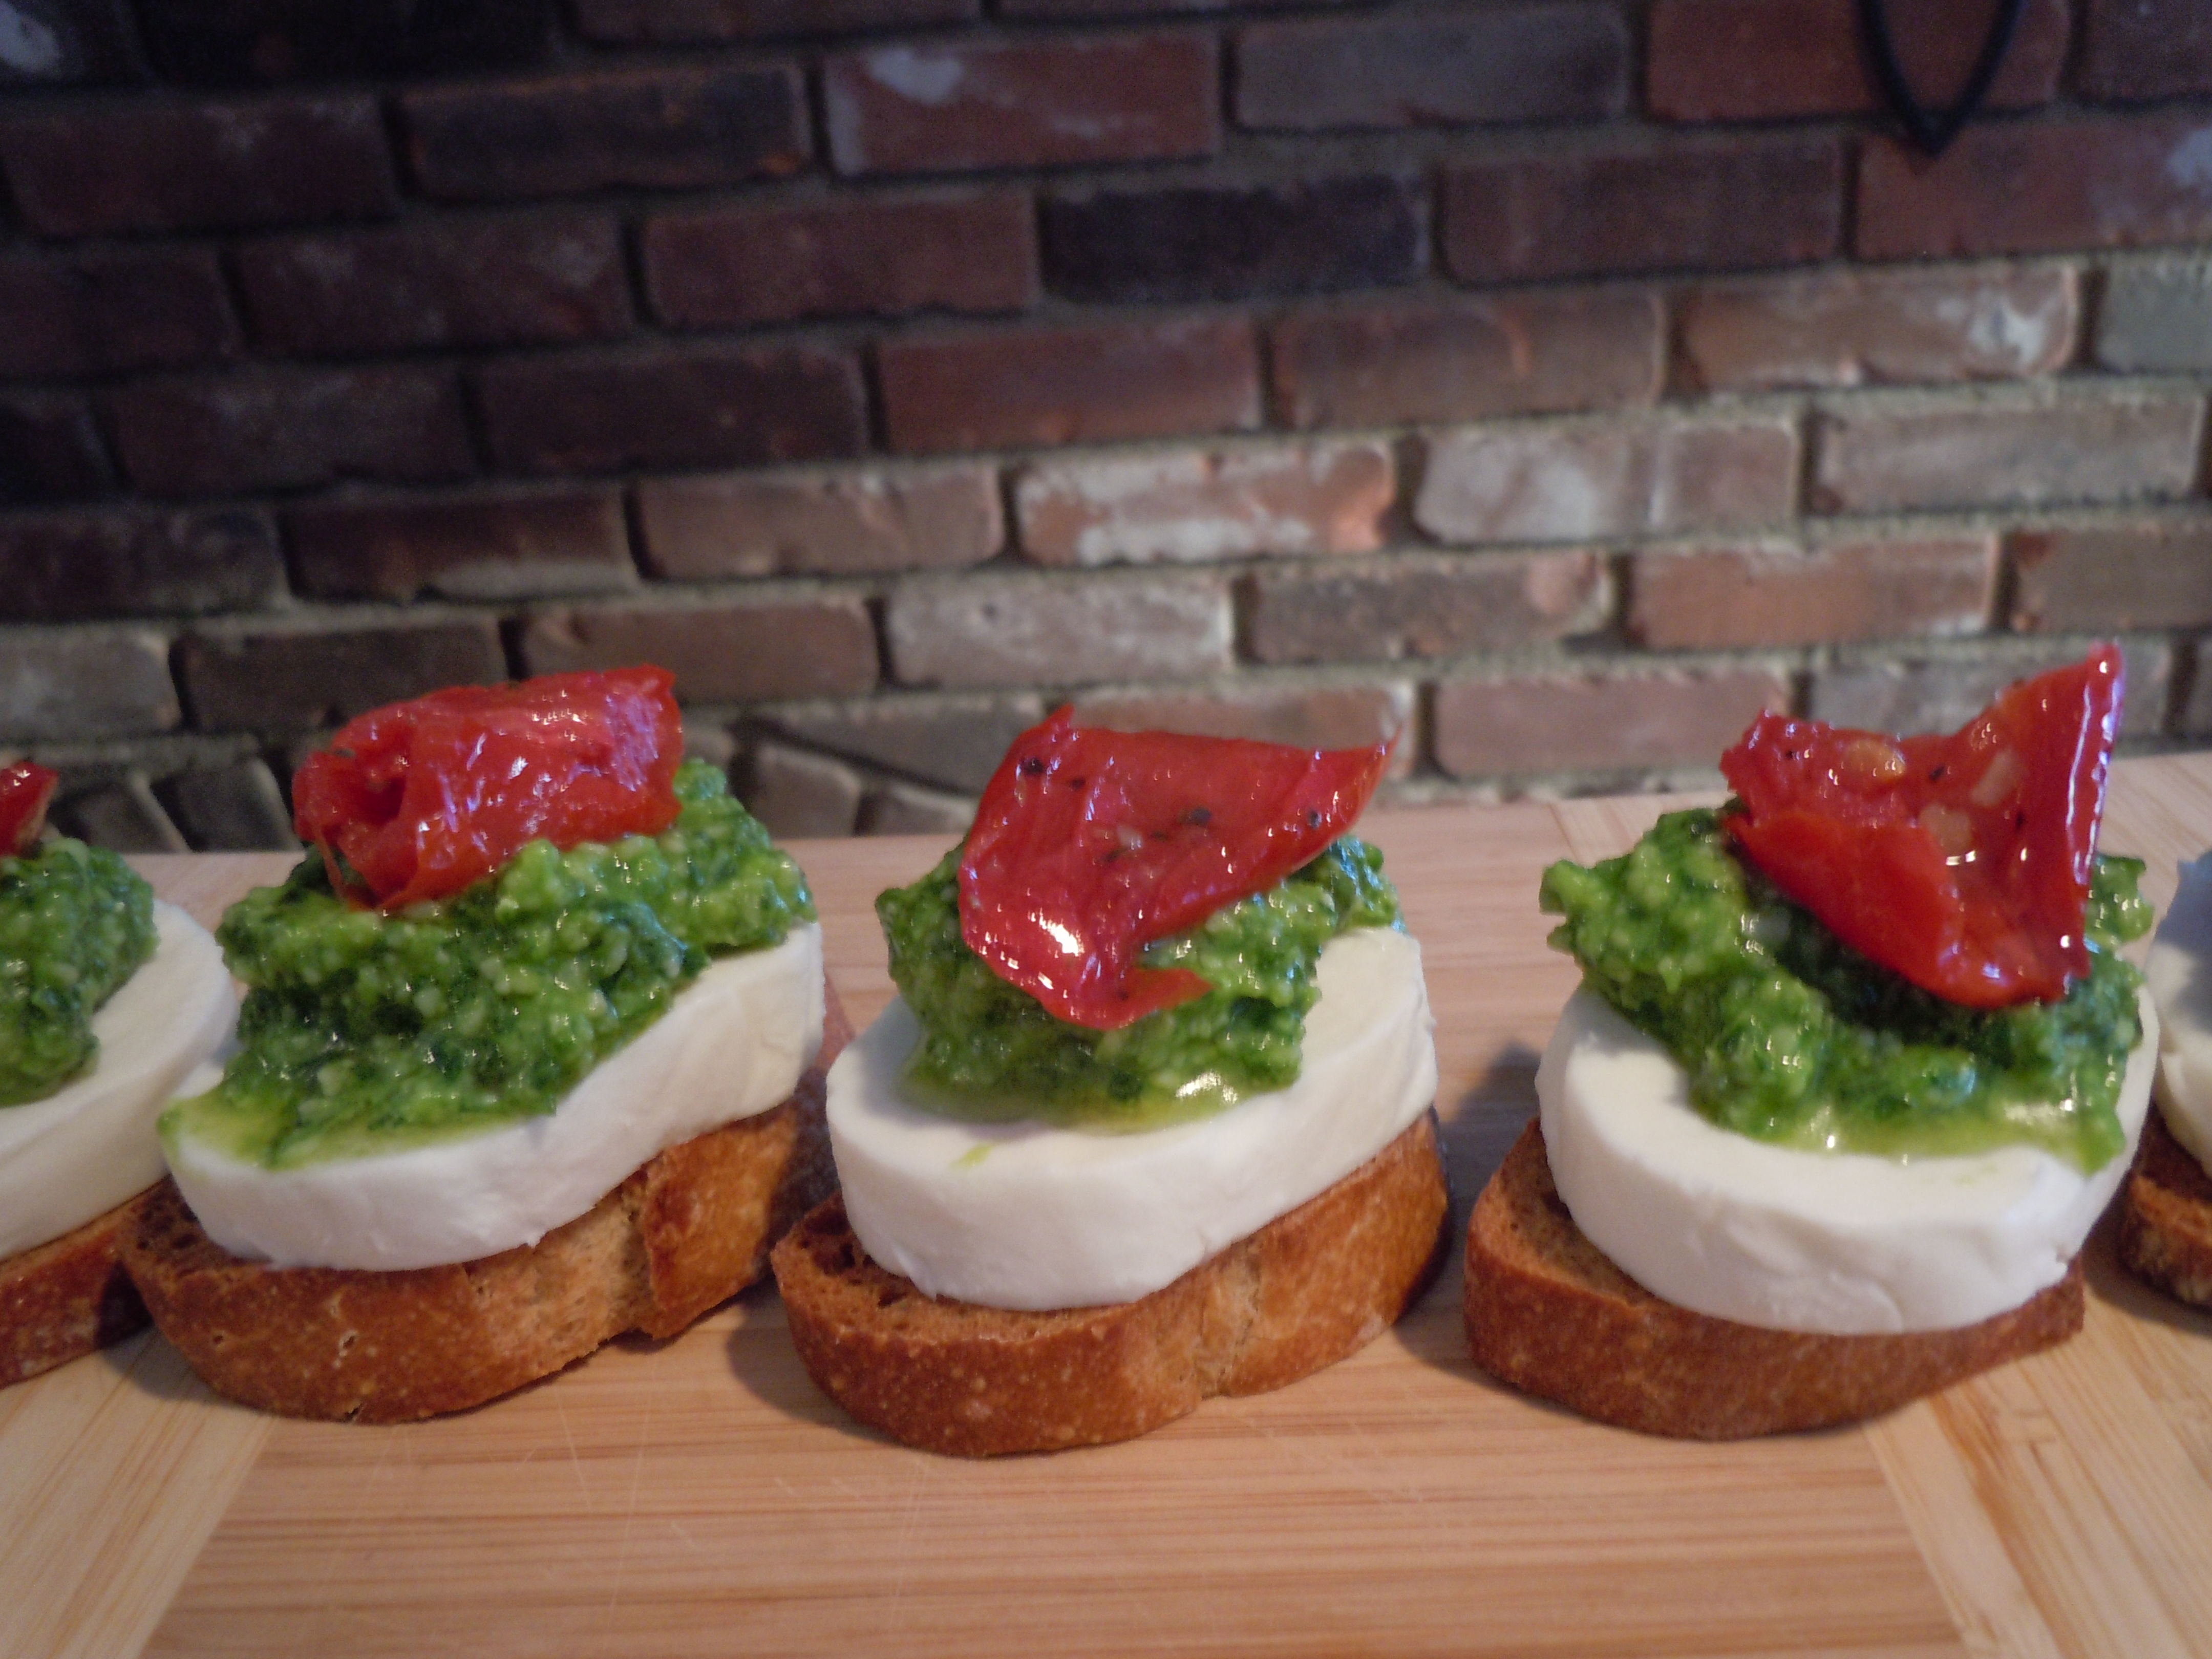
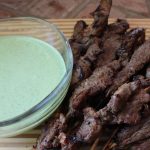
This homemade cold cucumber soup would be great for lunch with a side sandwich or grill up some shrimp like I did in the show. One of my favorite accents to this soup are seared scallops cut in half and placed right in the center on the soup. You can check out in my “Seared Scallop Show” to see exactly how to make the scallops.

King crab meat is also a lovely topping to this cold cucumber soup and was a big hit when I presented this soup this way to the tasting judges at my second MasterChef open casting call in NYC this past March (2016)! All of the MasterChef casting call judges didn’t have any critique for my soup during the tasting phase…they just said “they really, really loved it!” When I made my cucumber soup for the MasterChef casting call I added fresh fennel to the recipe to change it up and give it that je ne sais qua…that extra special something!

This cold cucumber soup is an amazing way to start your dinner party or even have for a luncheon. If you are thinking of other course’s to add to your soup you should check out my stuffed mushrooms, yogurt chicken kabobs, bolognese sauce with homemade pasta and end with my perfect chocolate cake that will rock your world! Enjoy 🙂
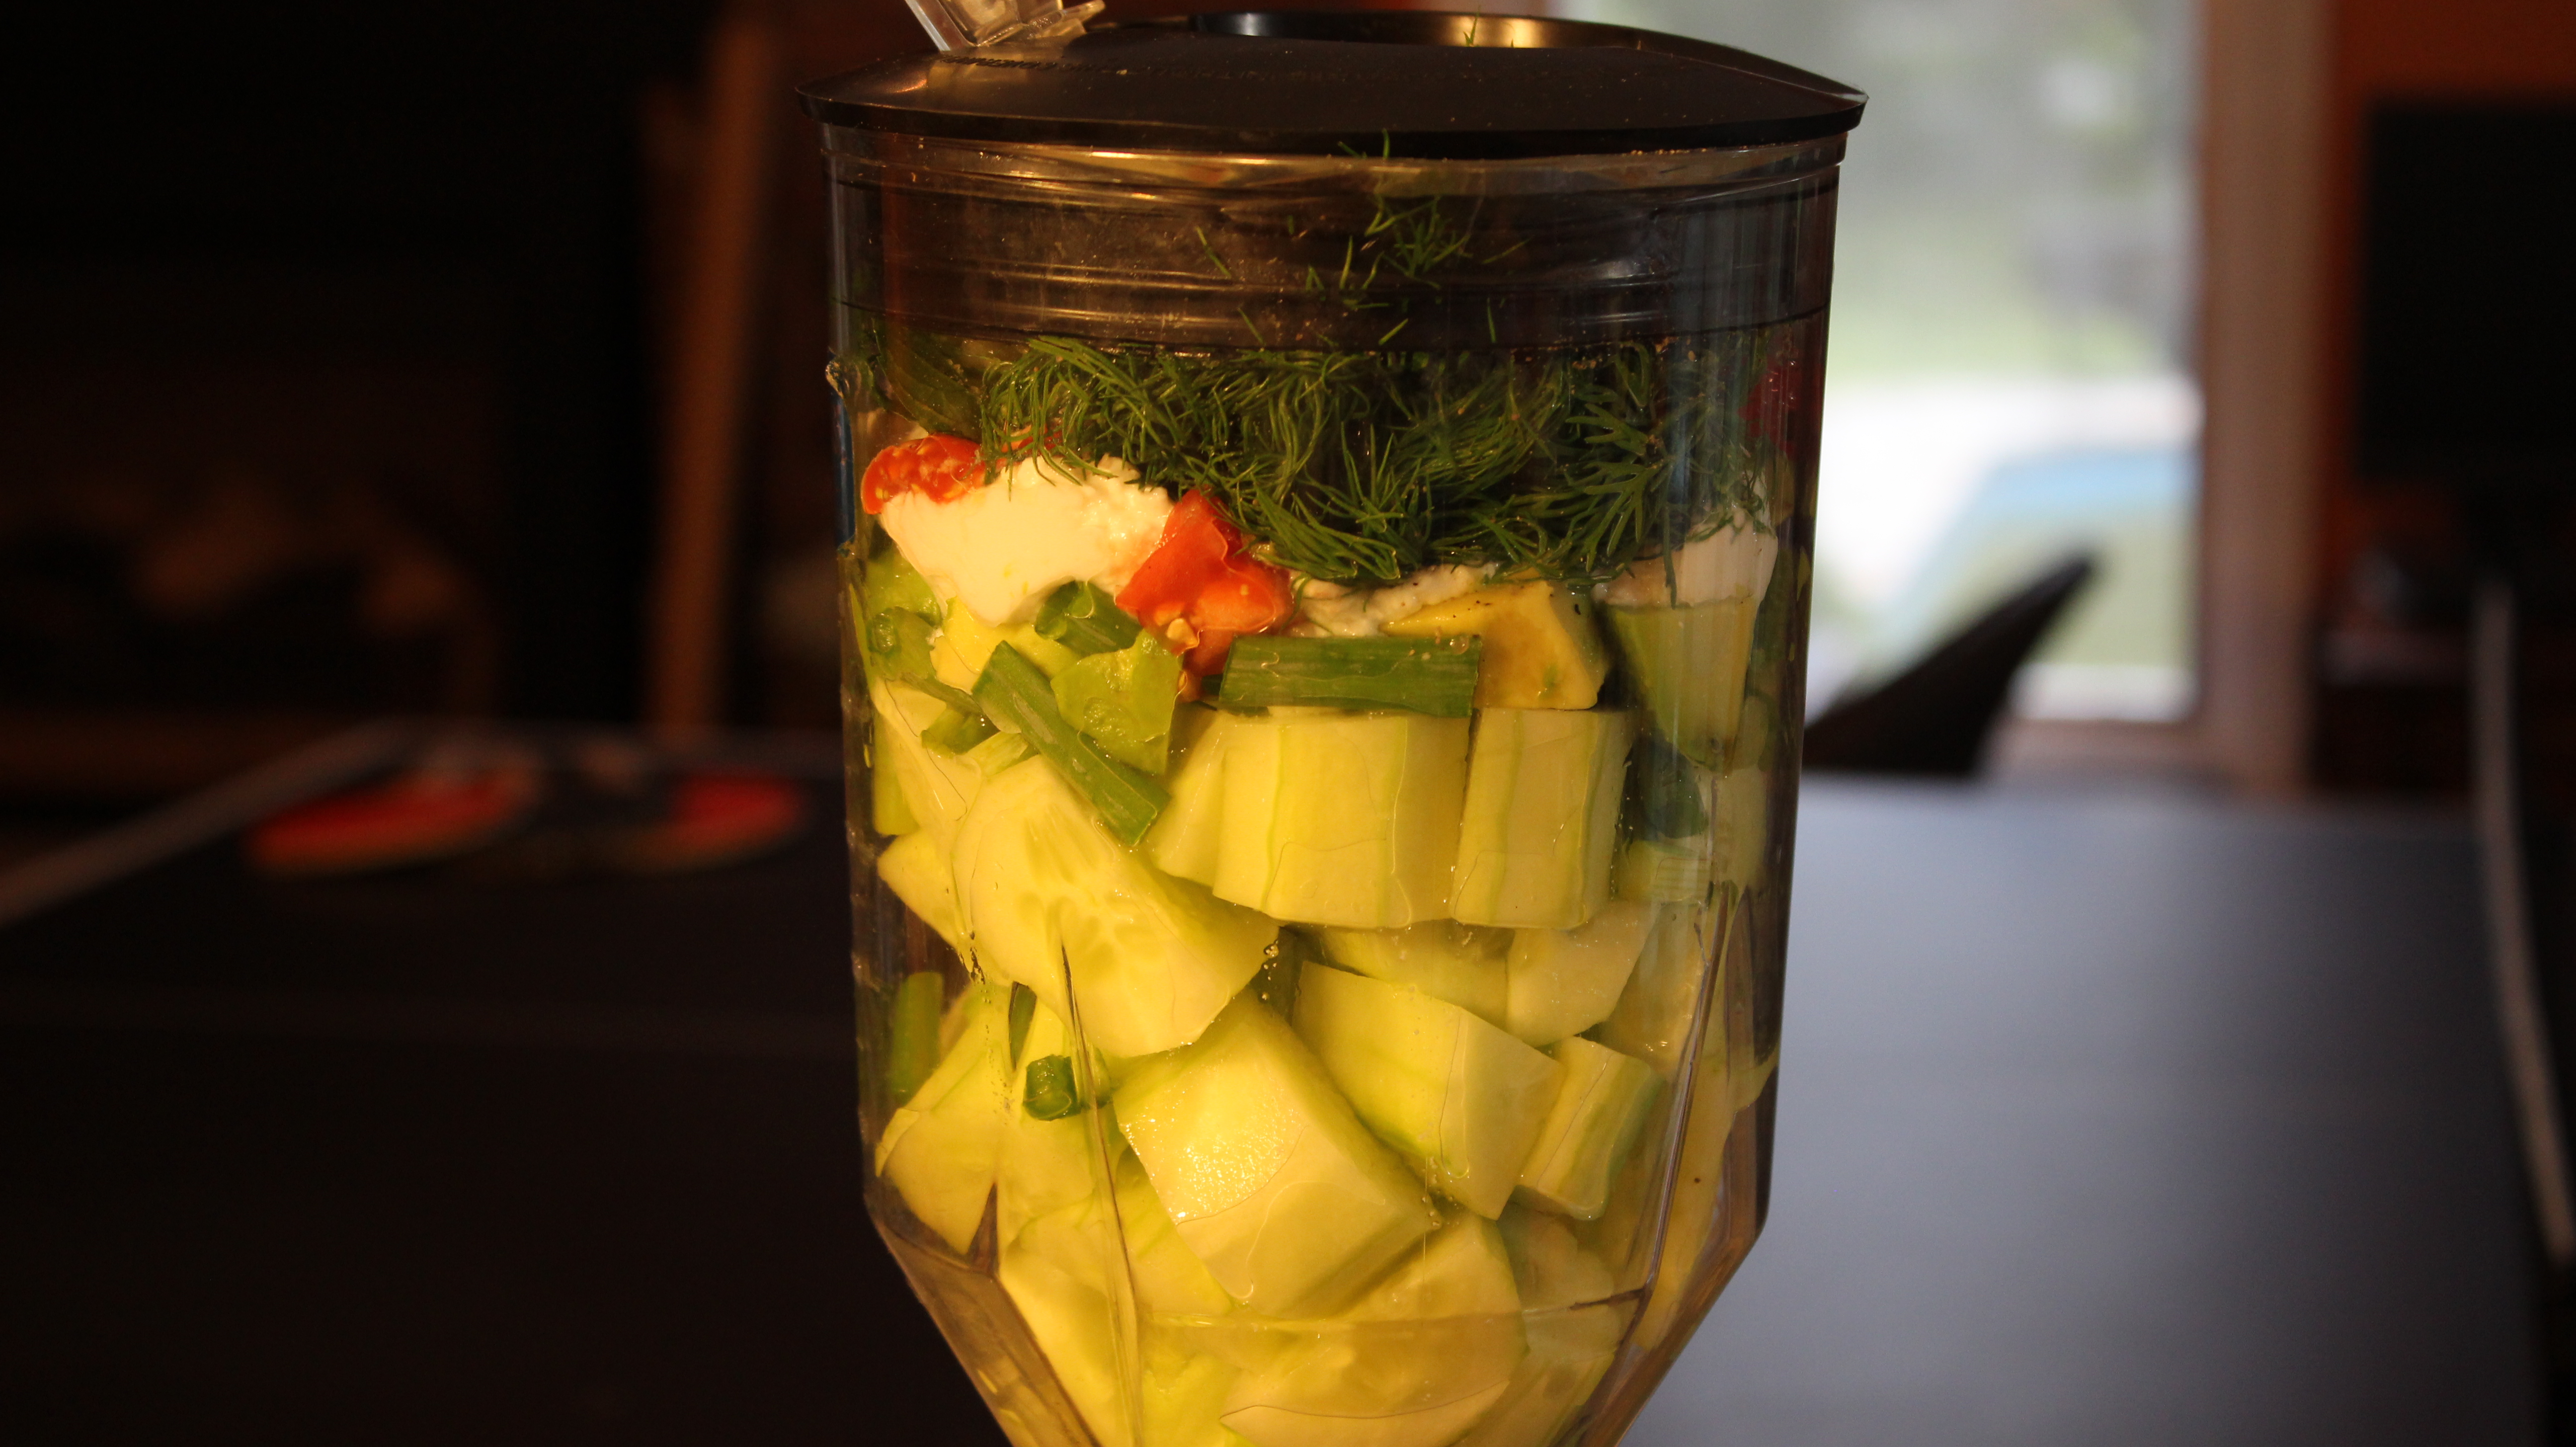
mushrooms IMG_1897 025 IMG_4327 IMG_2793

IMG_2859  IMG_2880  blendsoup

pureed  IMG_2902  IMG_7236

IMG_7242 IMG_7223

Ingredients:

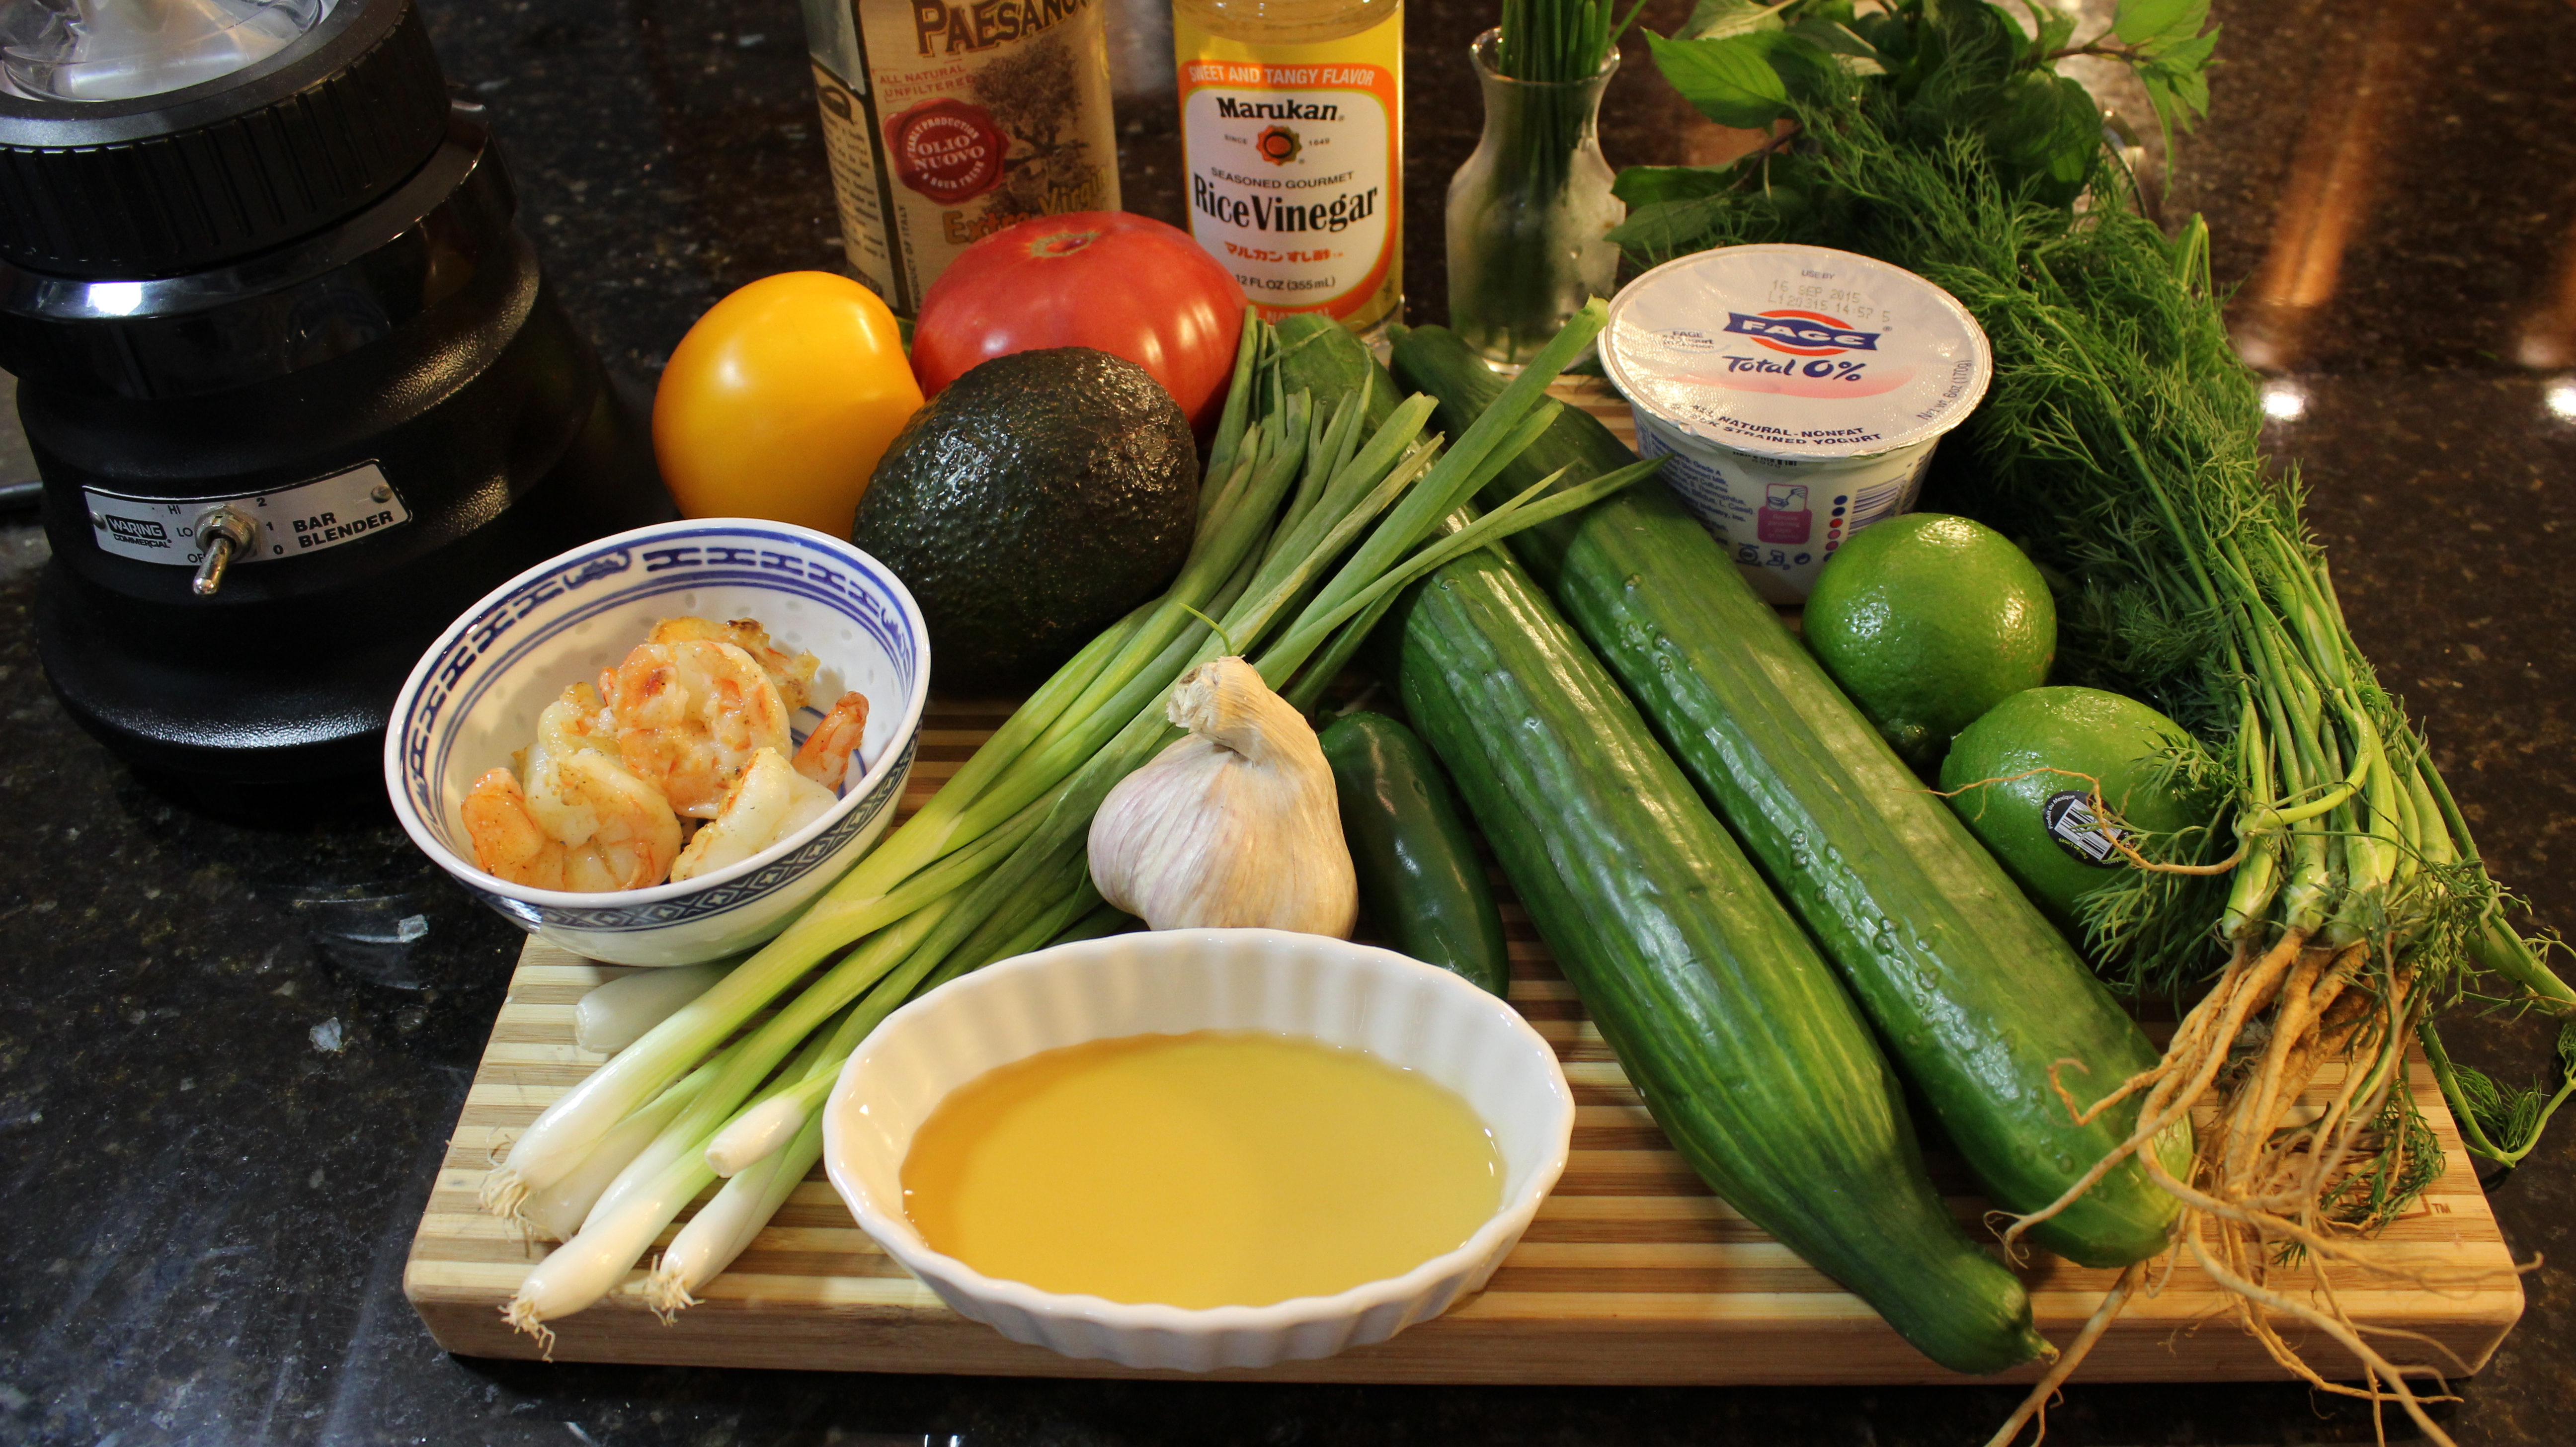
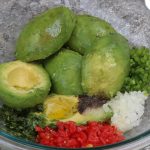
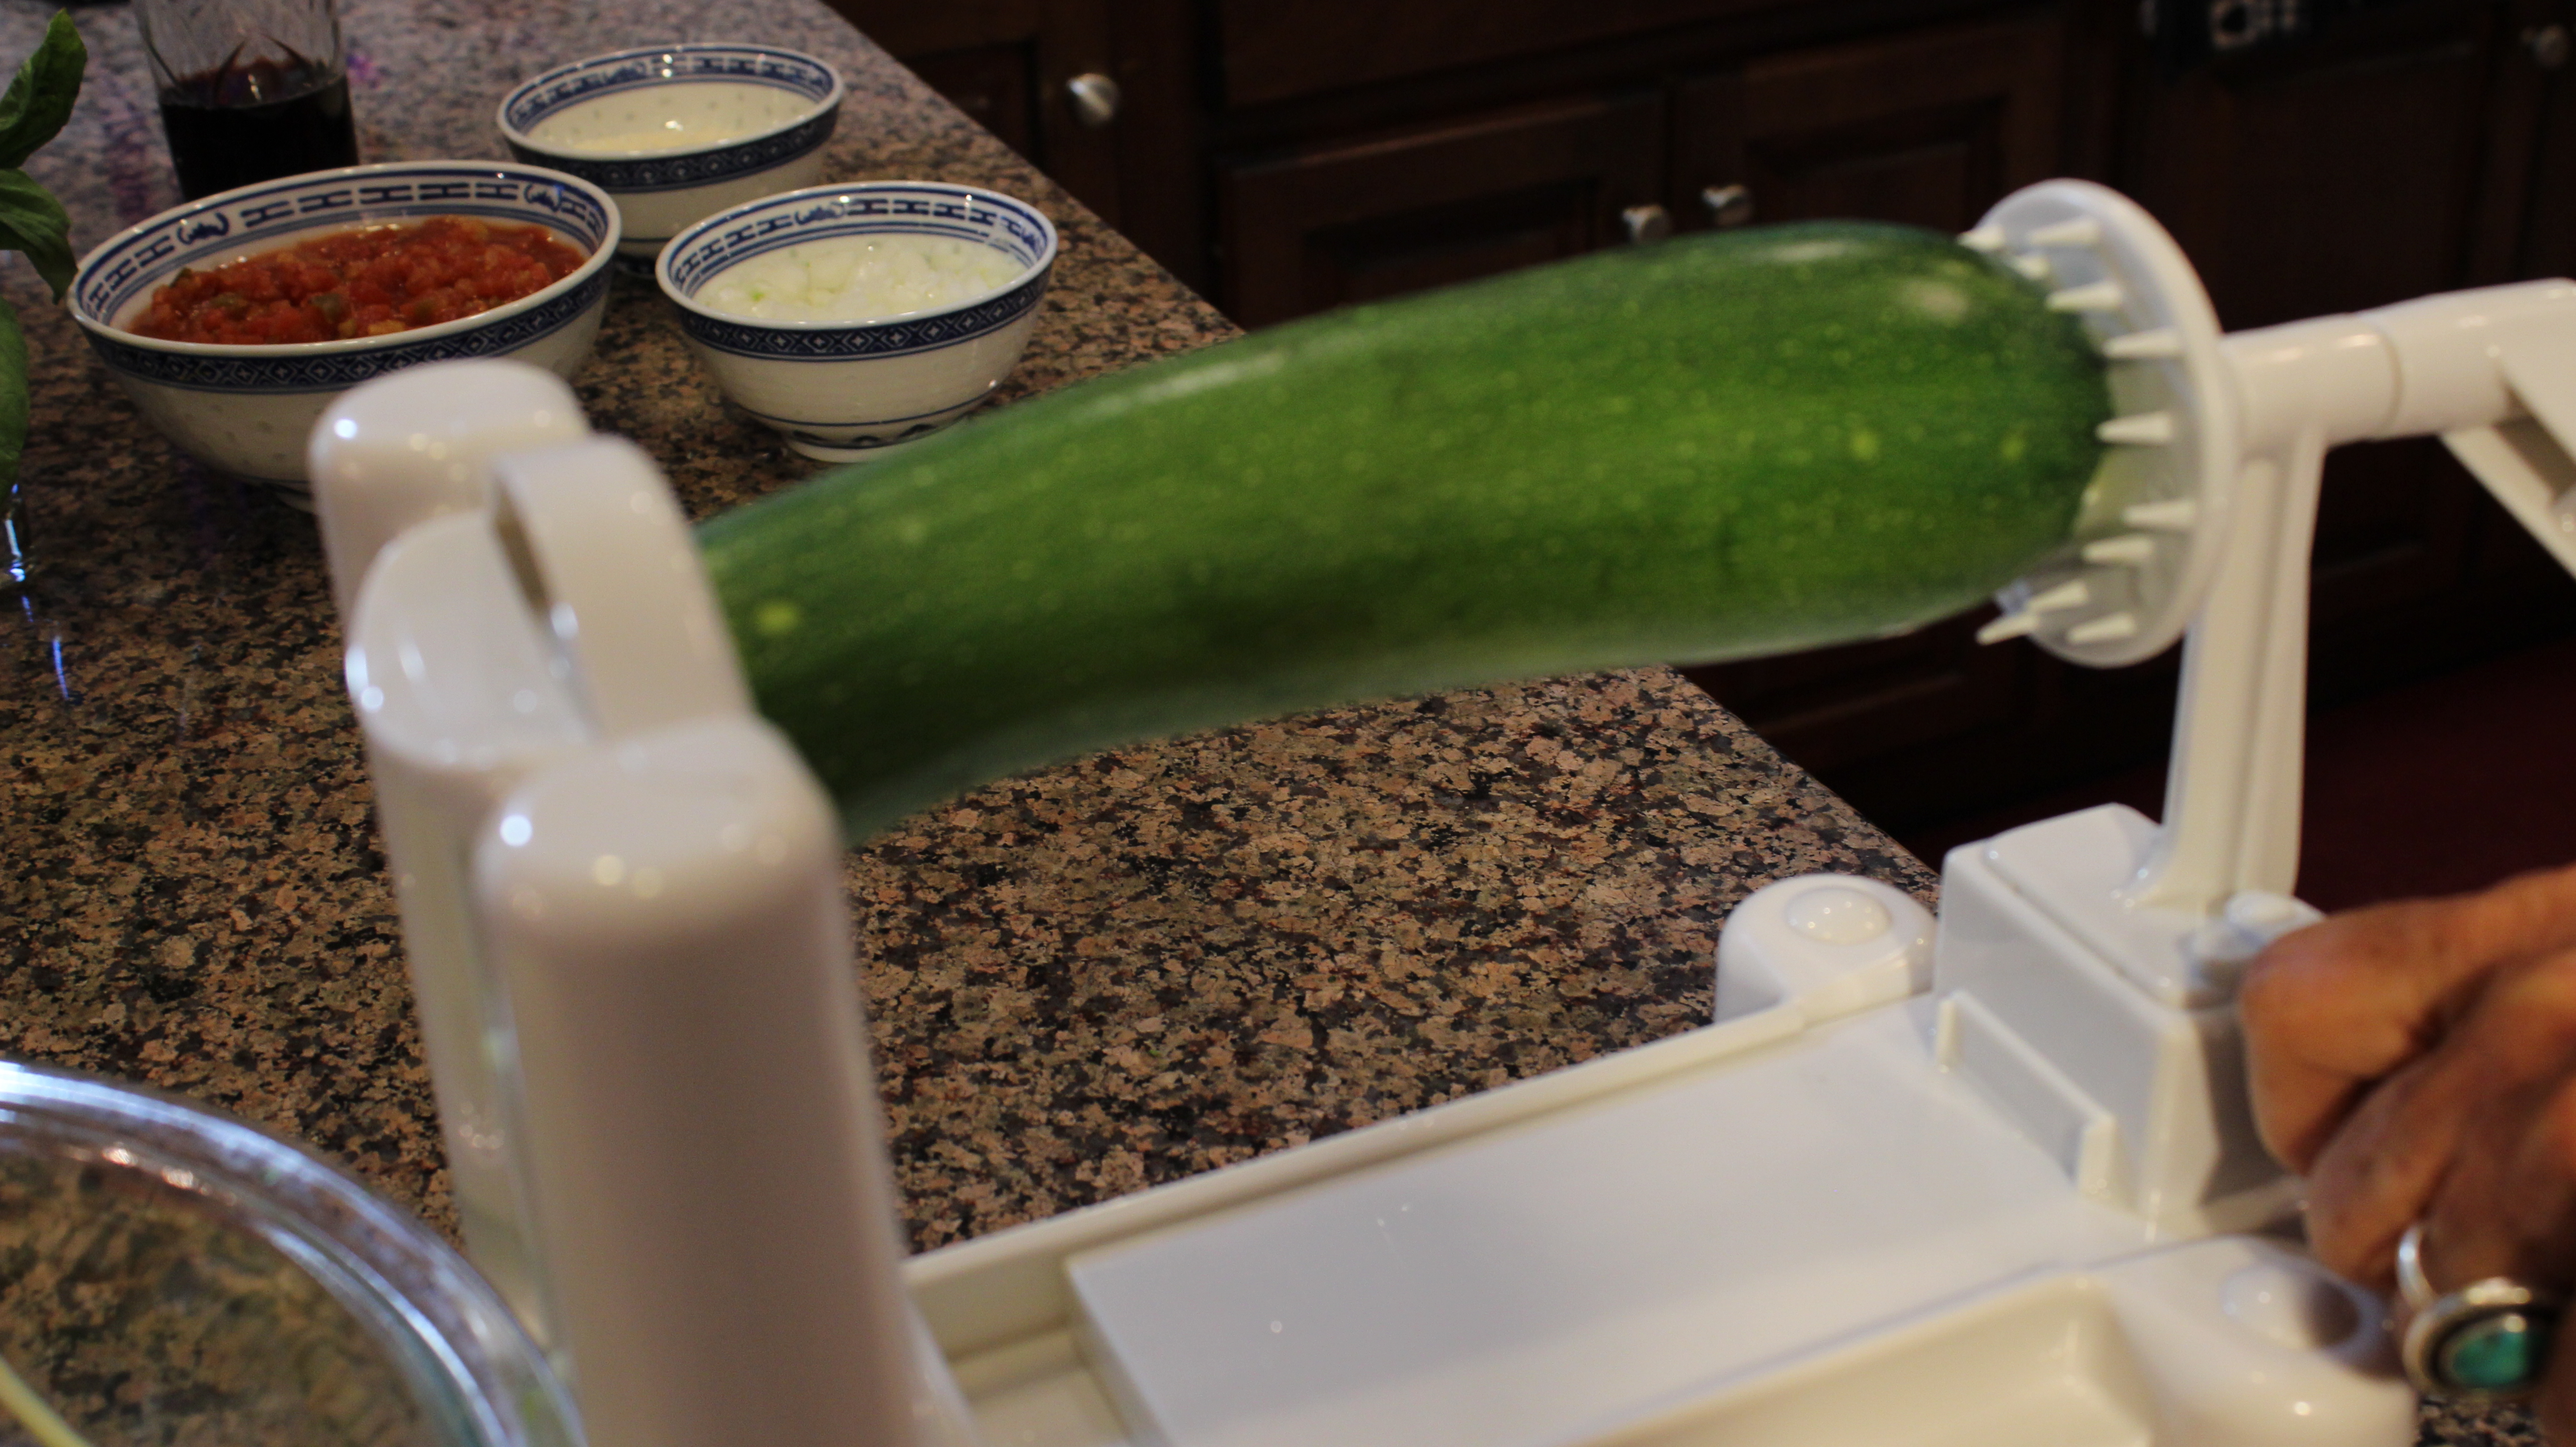
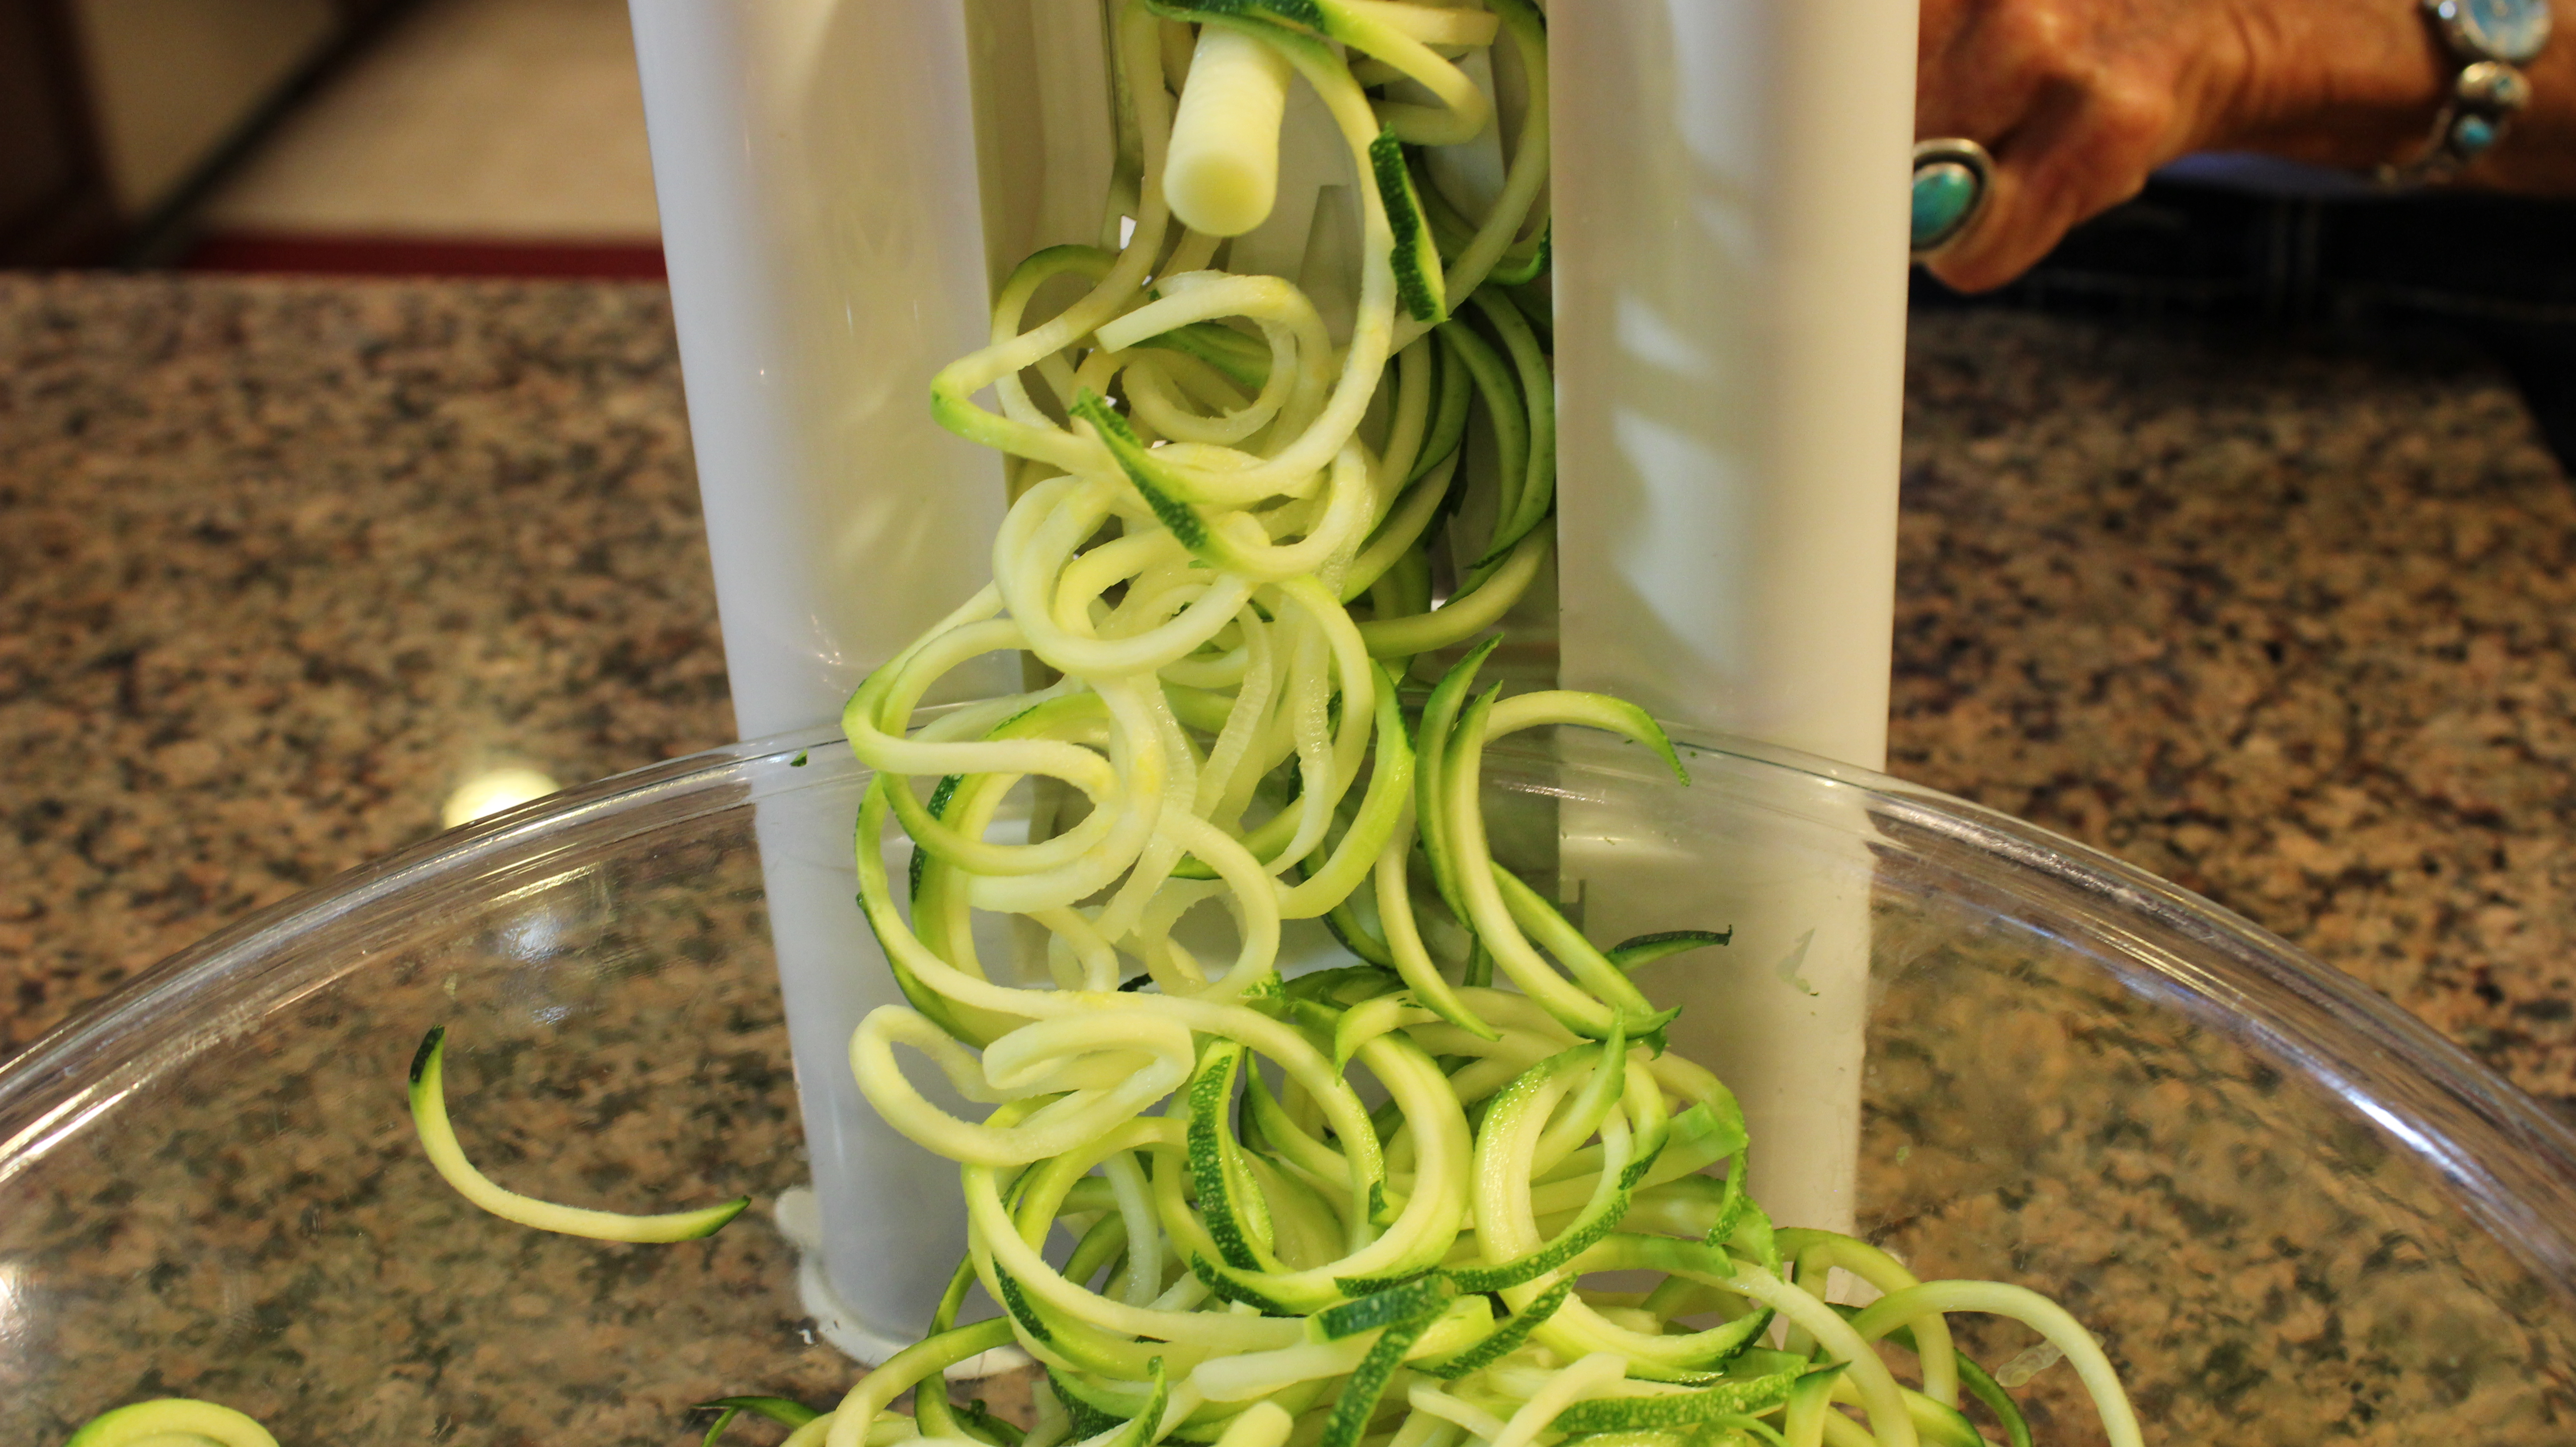
  • 2 European cucumbers peeled and cubed – 4 1/2 cups – you do not need to remove seeds with the European cucumbers
  • If you are using regular cucumbers, peel and slice down the middle and remove the seeds scooping them out with a small spoon and cut into chunks
  • 3 ex-lg green onions or 5 small sliced in 1″ pieces from green tips to whitish green stems
  • 1/4 cup of diced cherry tomatoes OR diced heirloom tomatoes
  • ½ an avocado cut in chunks
  • 1 jalapeño chopped (take out seeds)
  • 1 lg garlic clove put through garlic press
  • 1 cup plus 2 tbsp Greek Yogurt – whole milk
  • 1/3 cup fresh dill
  • 1/4 cup fresh mint leaves
  • 1 Tbsp of honey
  • 1/4 cup of seasoned rice vinegar
  • juice from 1 lime
  • 1/4 cup olive oil
  • 1/2 tsp salt – to taste  – (NOTE: I said 1 tsp in the show but I meant to say 1/2 tsp!)
  • 1/4 tsp finely ground pepper

         -FOR COLD CUCUMBER & FENNEL SOUP …ADD:

  • 1 cup cut up fresh FENNEL  …for a change up try this with the FENNEL – YUM!
  • chopped fresh chives for garnish
  • seared scallops , cooked Lobster, Shrimp, or Crab to top the soup in the center

Directions:

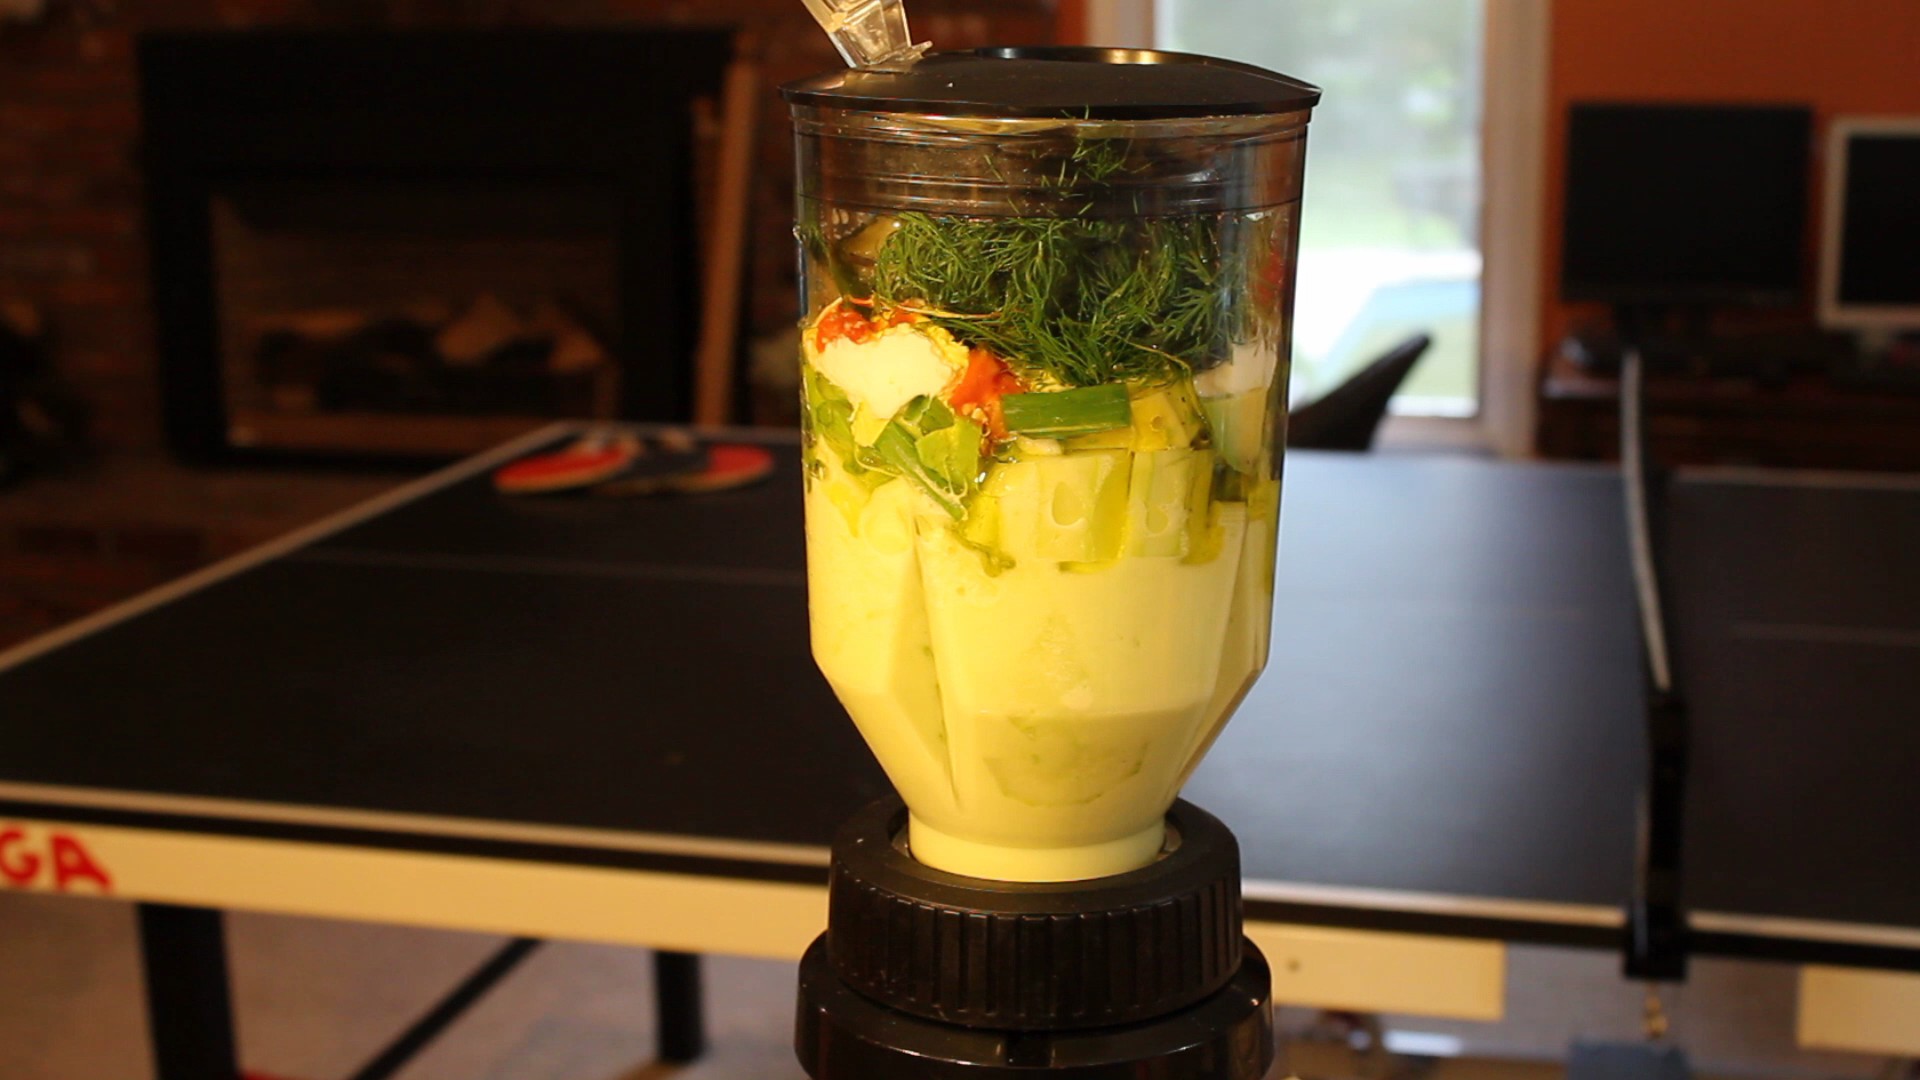
  1. Add all the ingredients in the list above to your blender except olive oil
  2. Begin to puree while slowly pouring in olive oil through the opening at the top
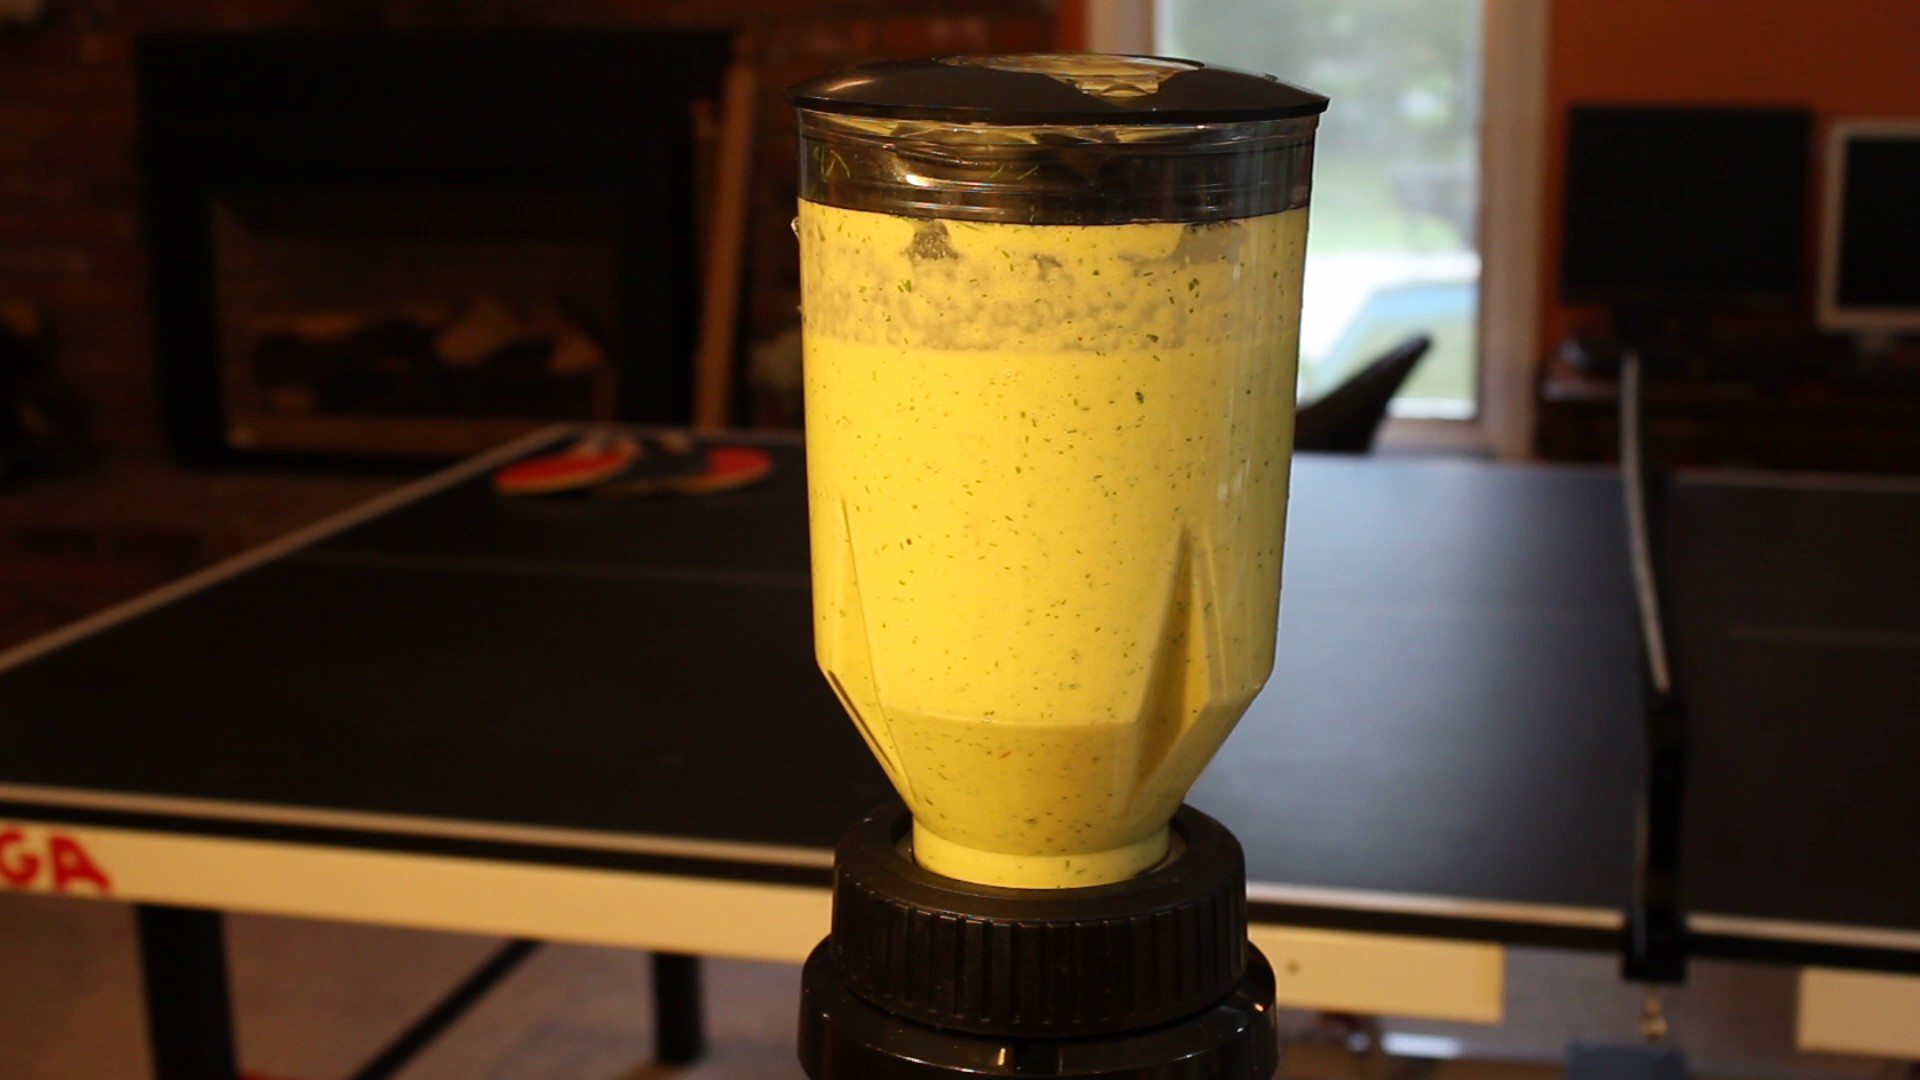
  3. Continue to puree for 20-30 seconds
  4. Be patient, all the vegetables in the cucumber soup will begin to slowly puree
  5. Stop and scrape down any herbs or vegetables stuck on the side’s and pulse for 10 more seconds
  6. Chill in the refrigerator for 1 hour
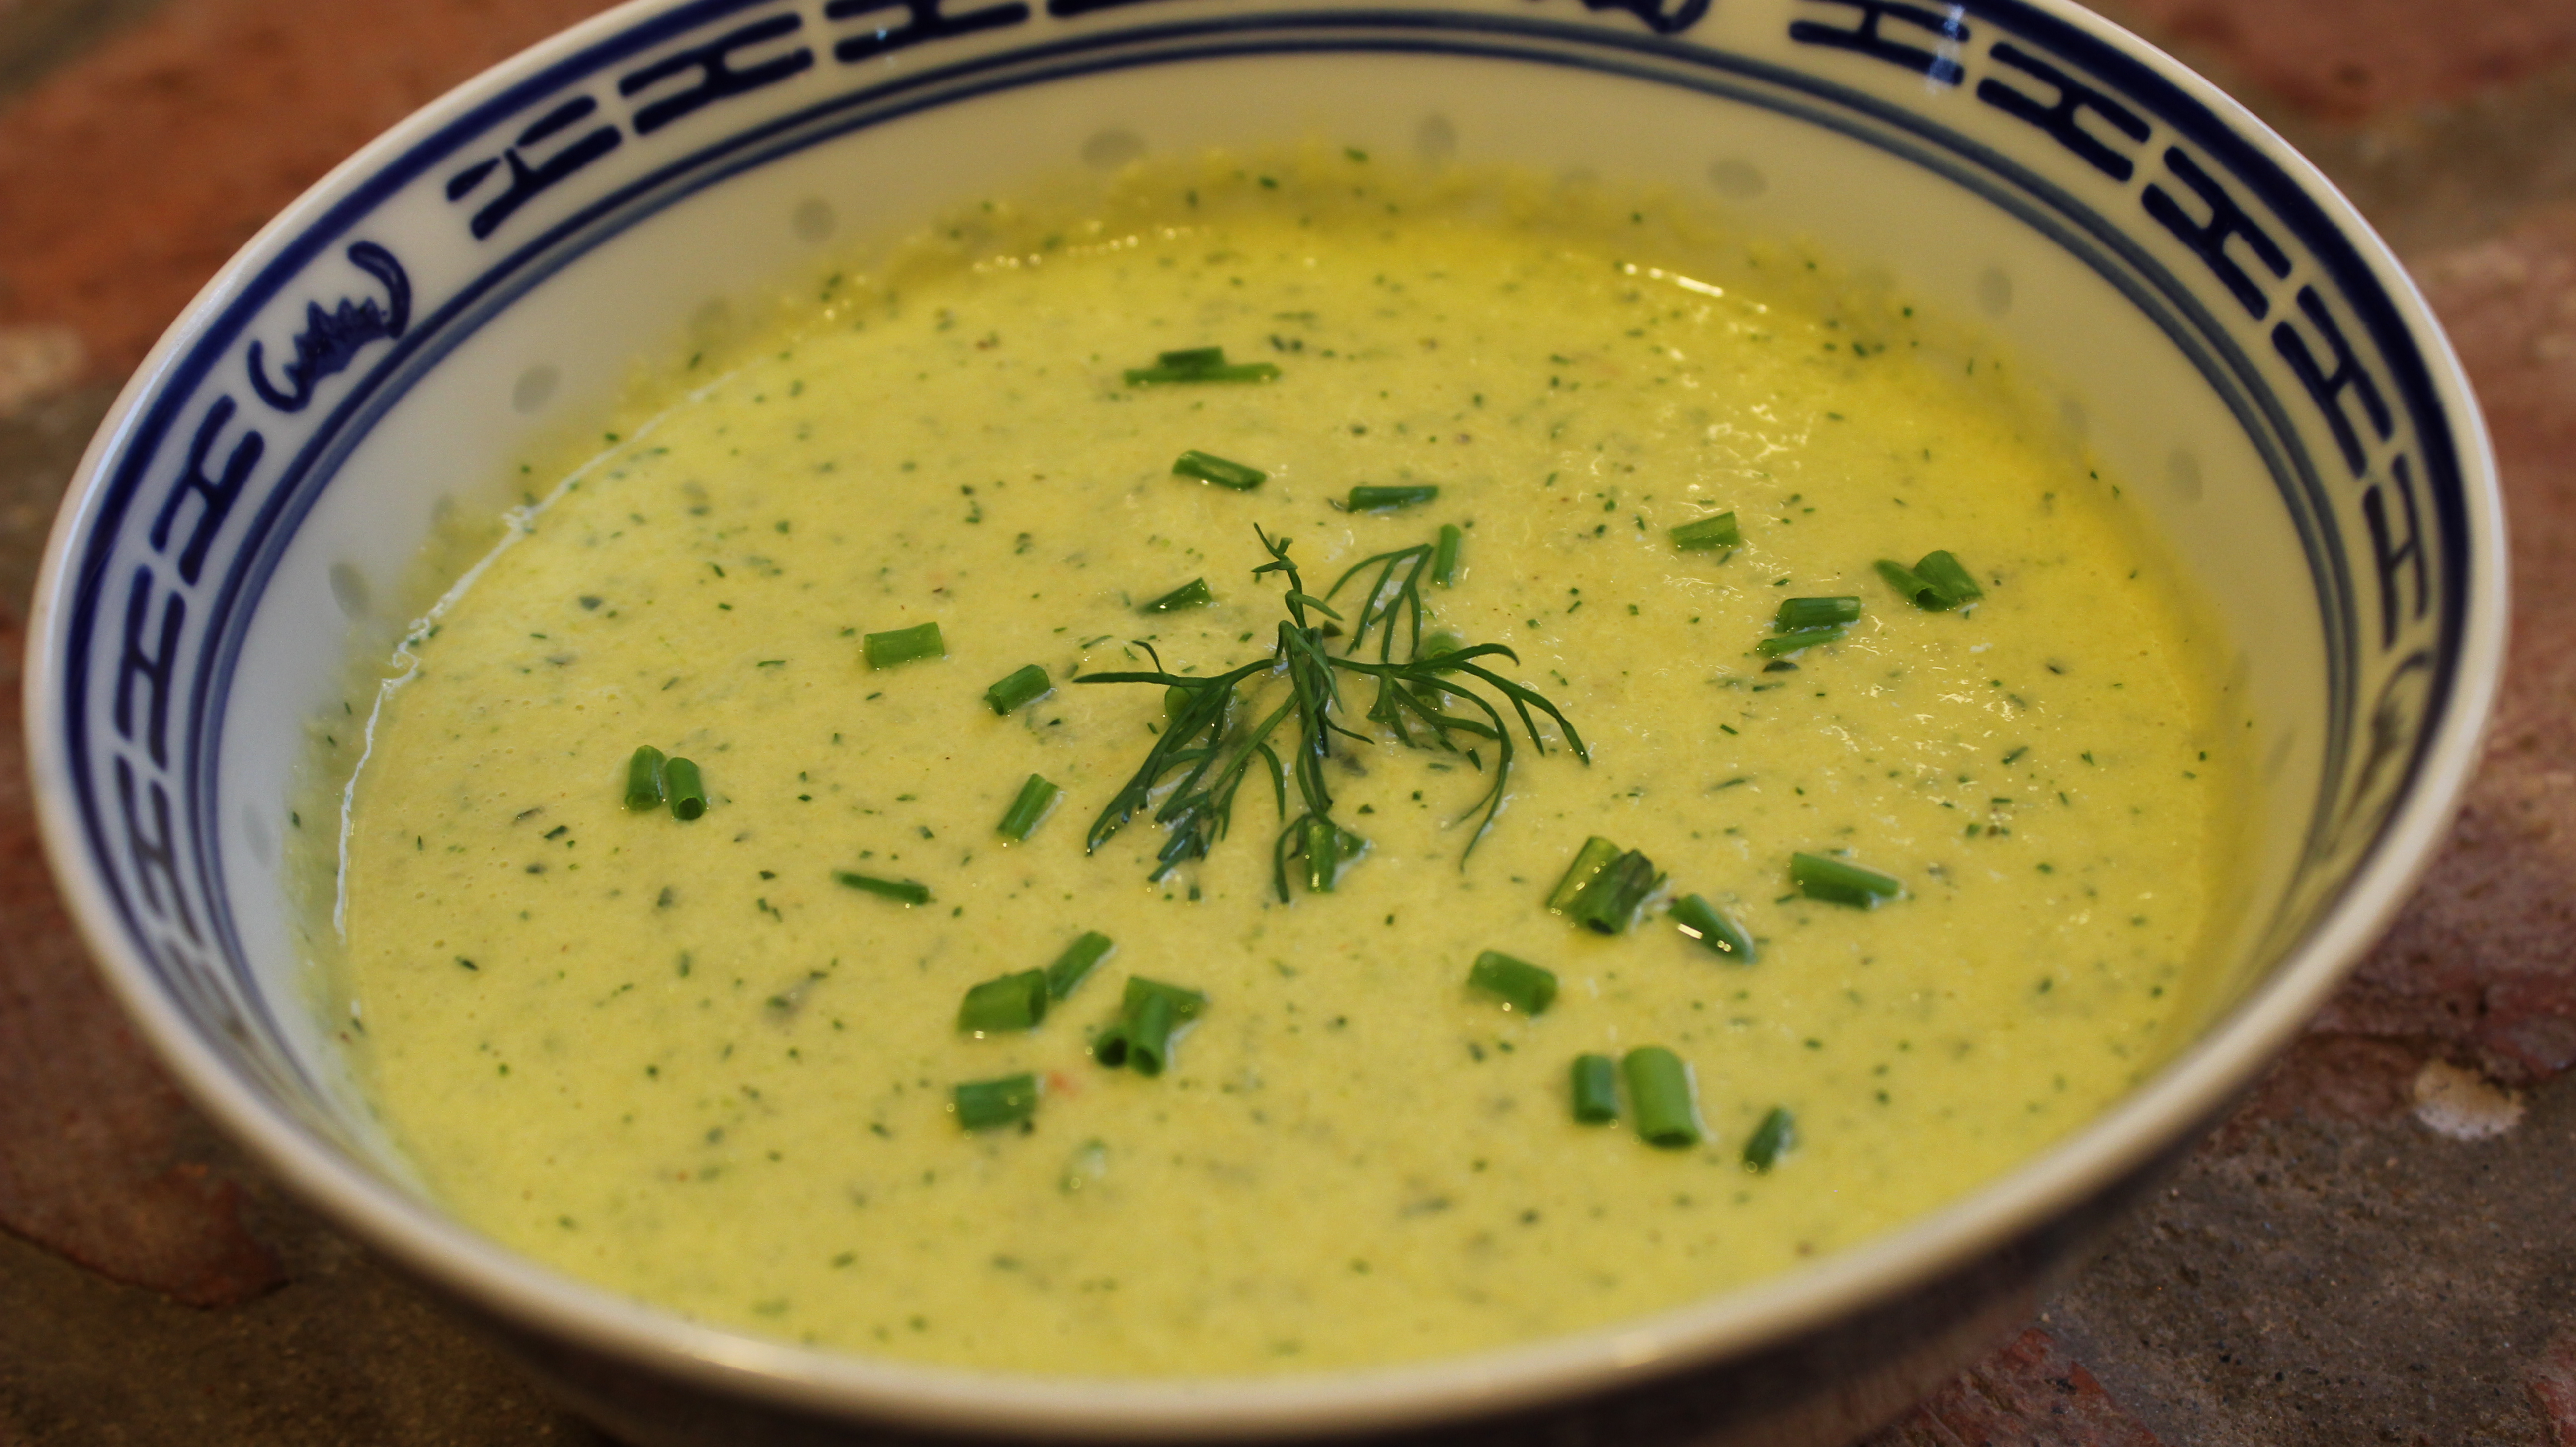
  7. Serve with a sprinkle of dill, finely chopped tomato, cucumber and avocado
  8. Top the center of the soup with seared scallops – room temperature cooked lobster, king crab meat, or shrimp AND then a drizzle of extra virgin olive oil

“Perfectly Chocolate Chocolate Cake”

“Perfectly Chocolate Chocolate Cake”

ghostpeepstwo
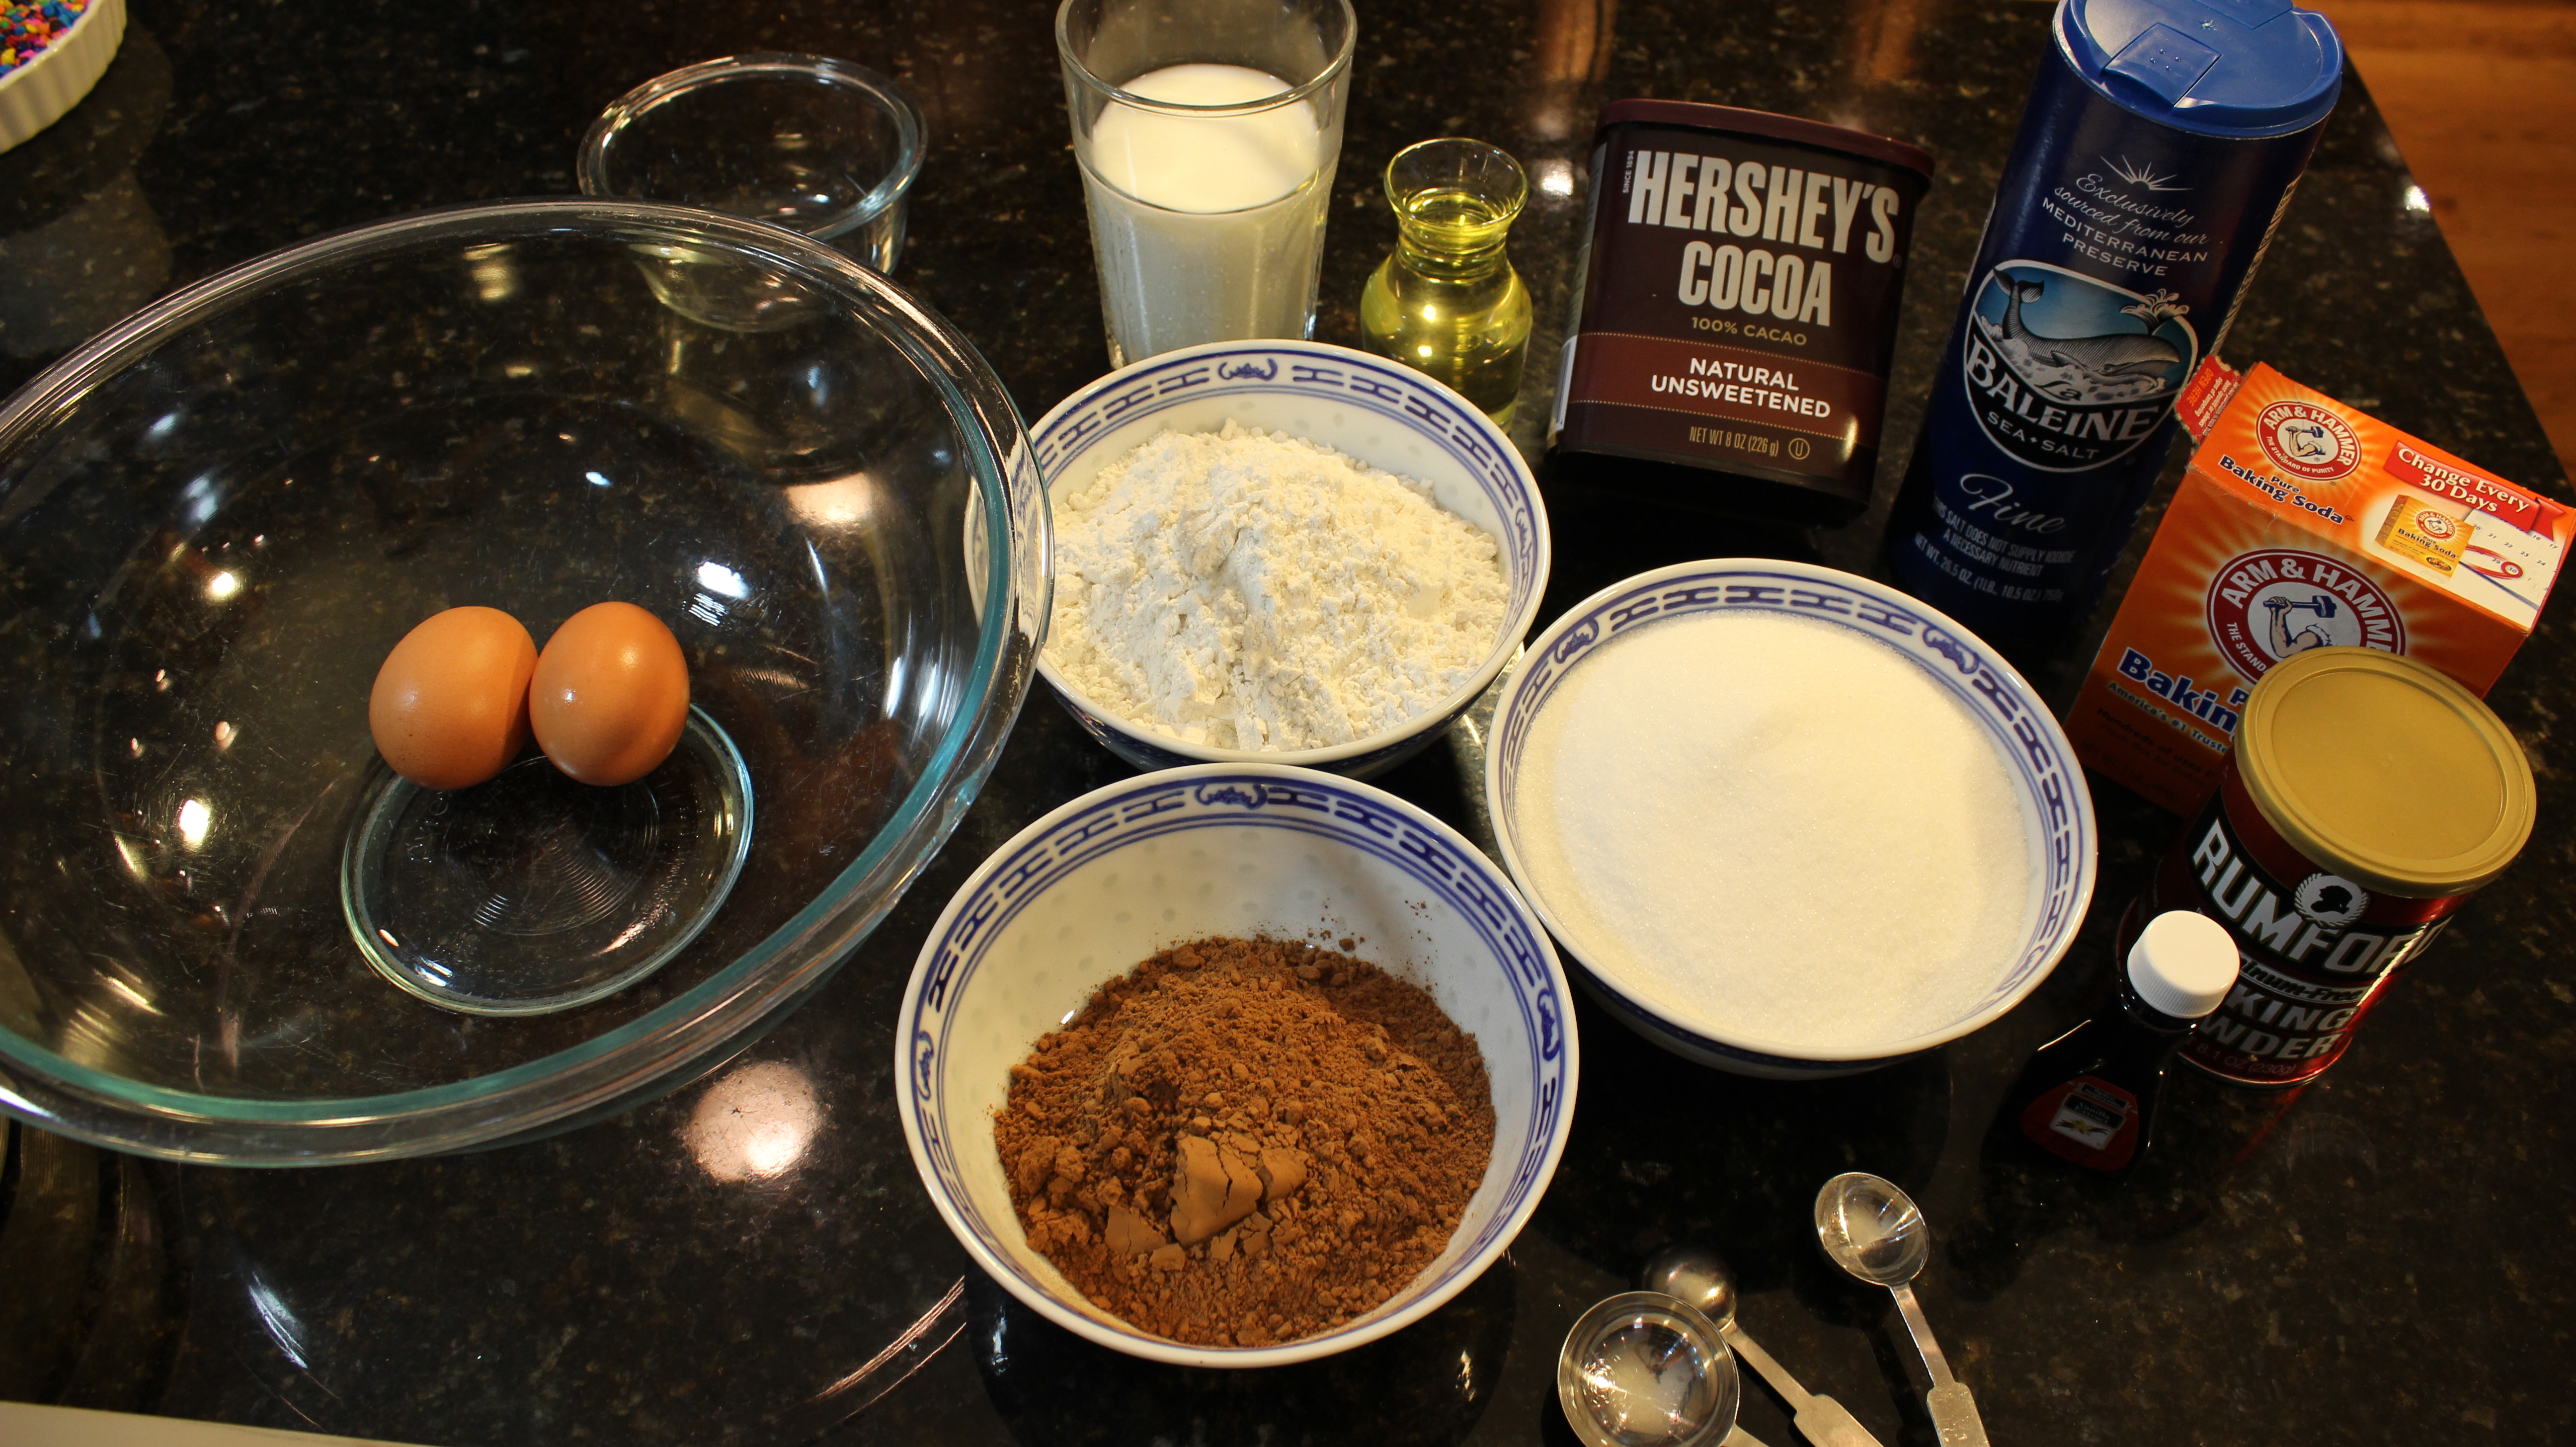
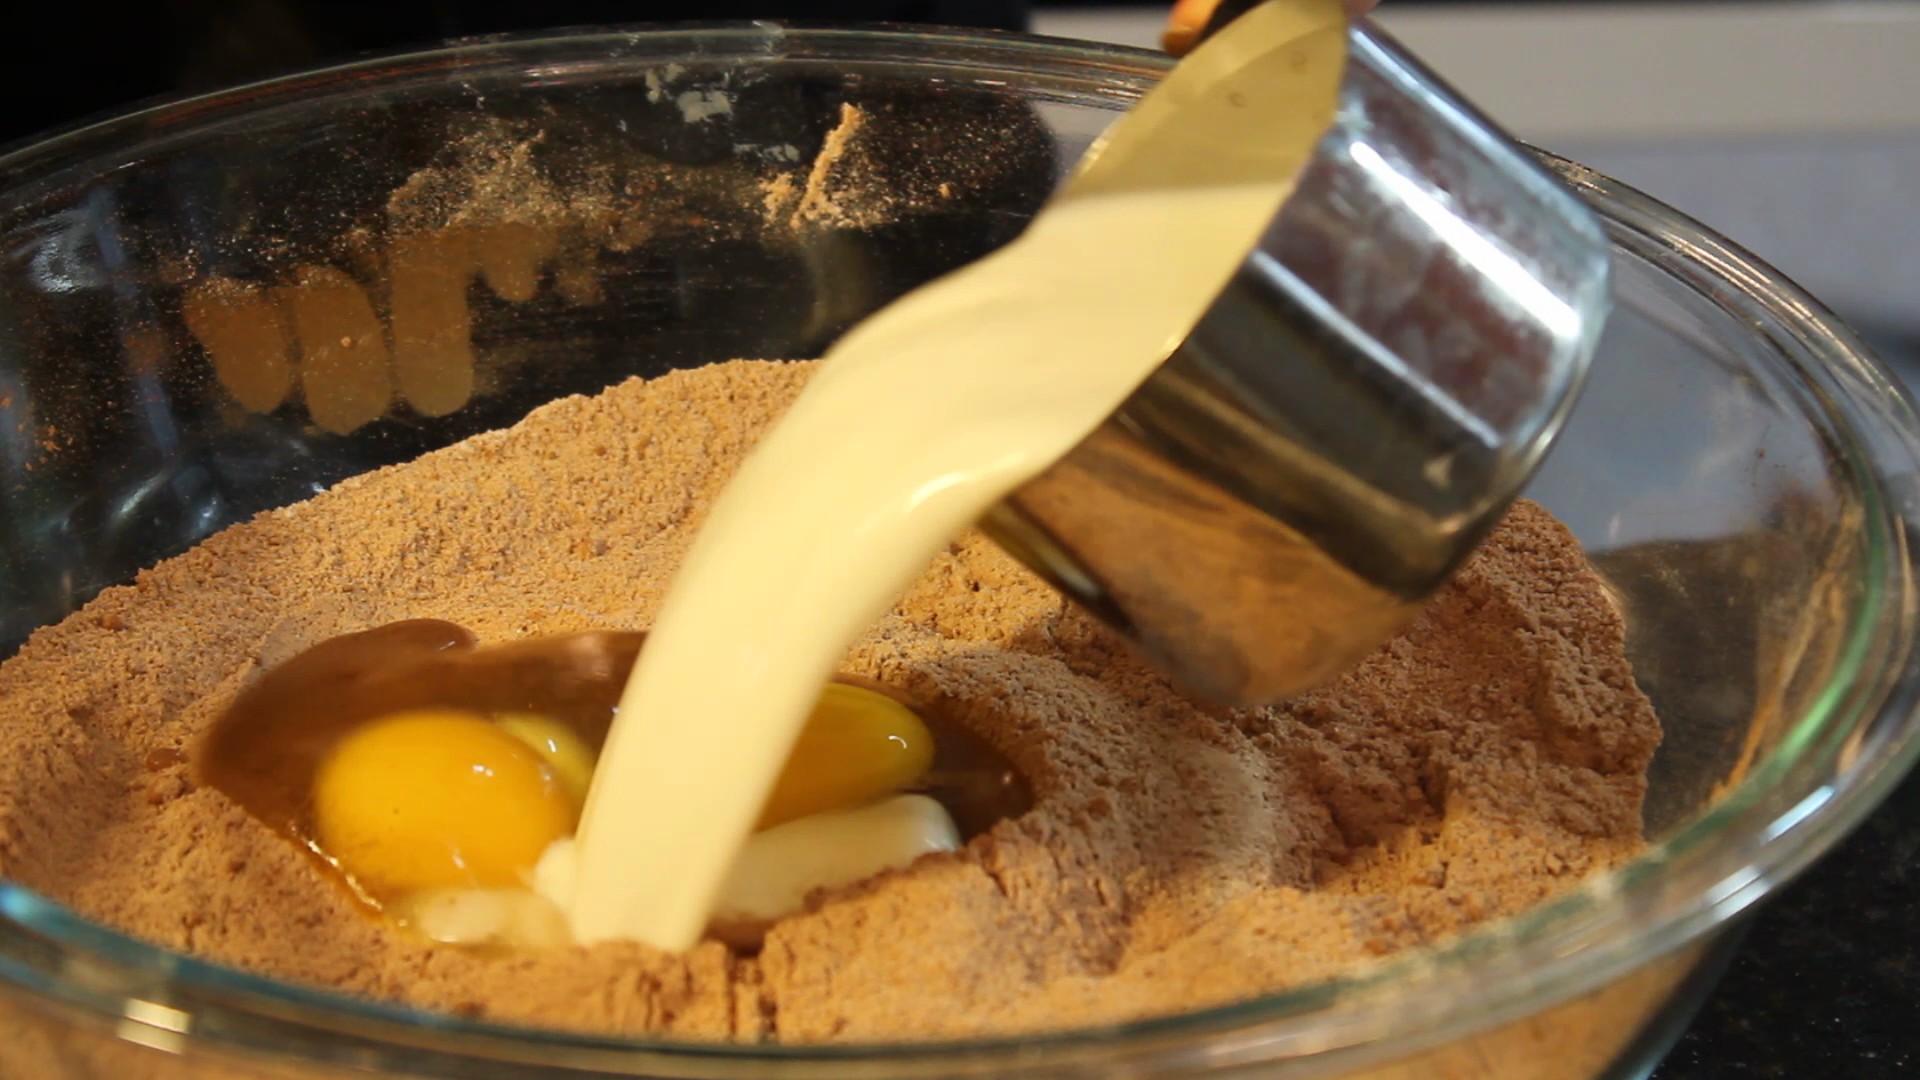
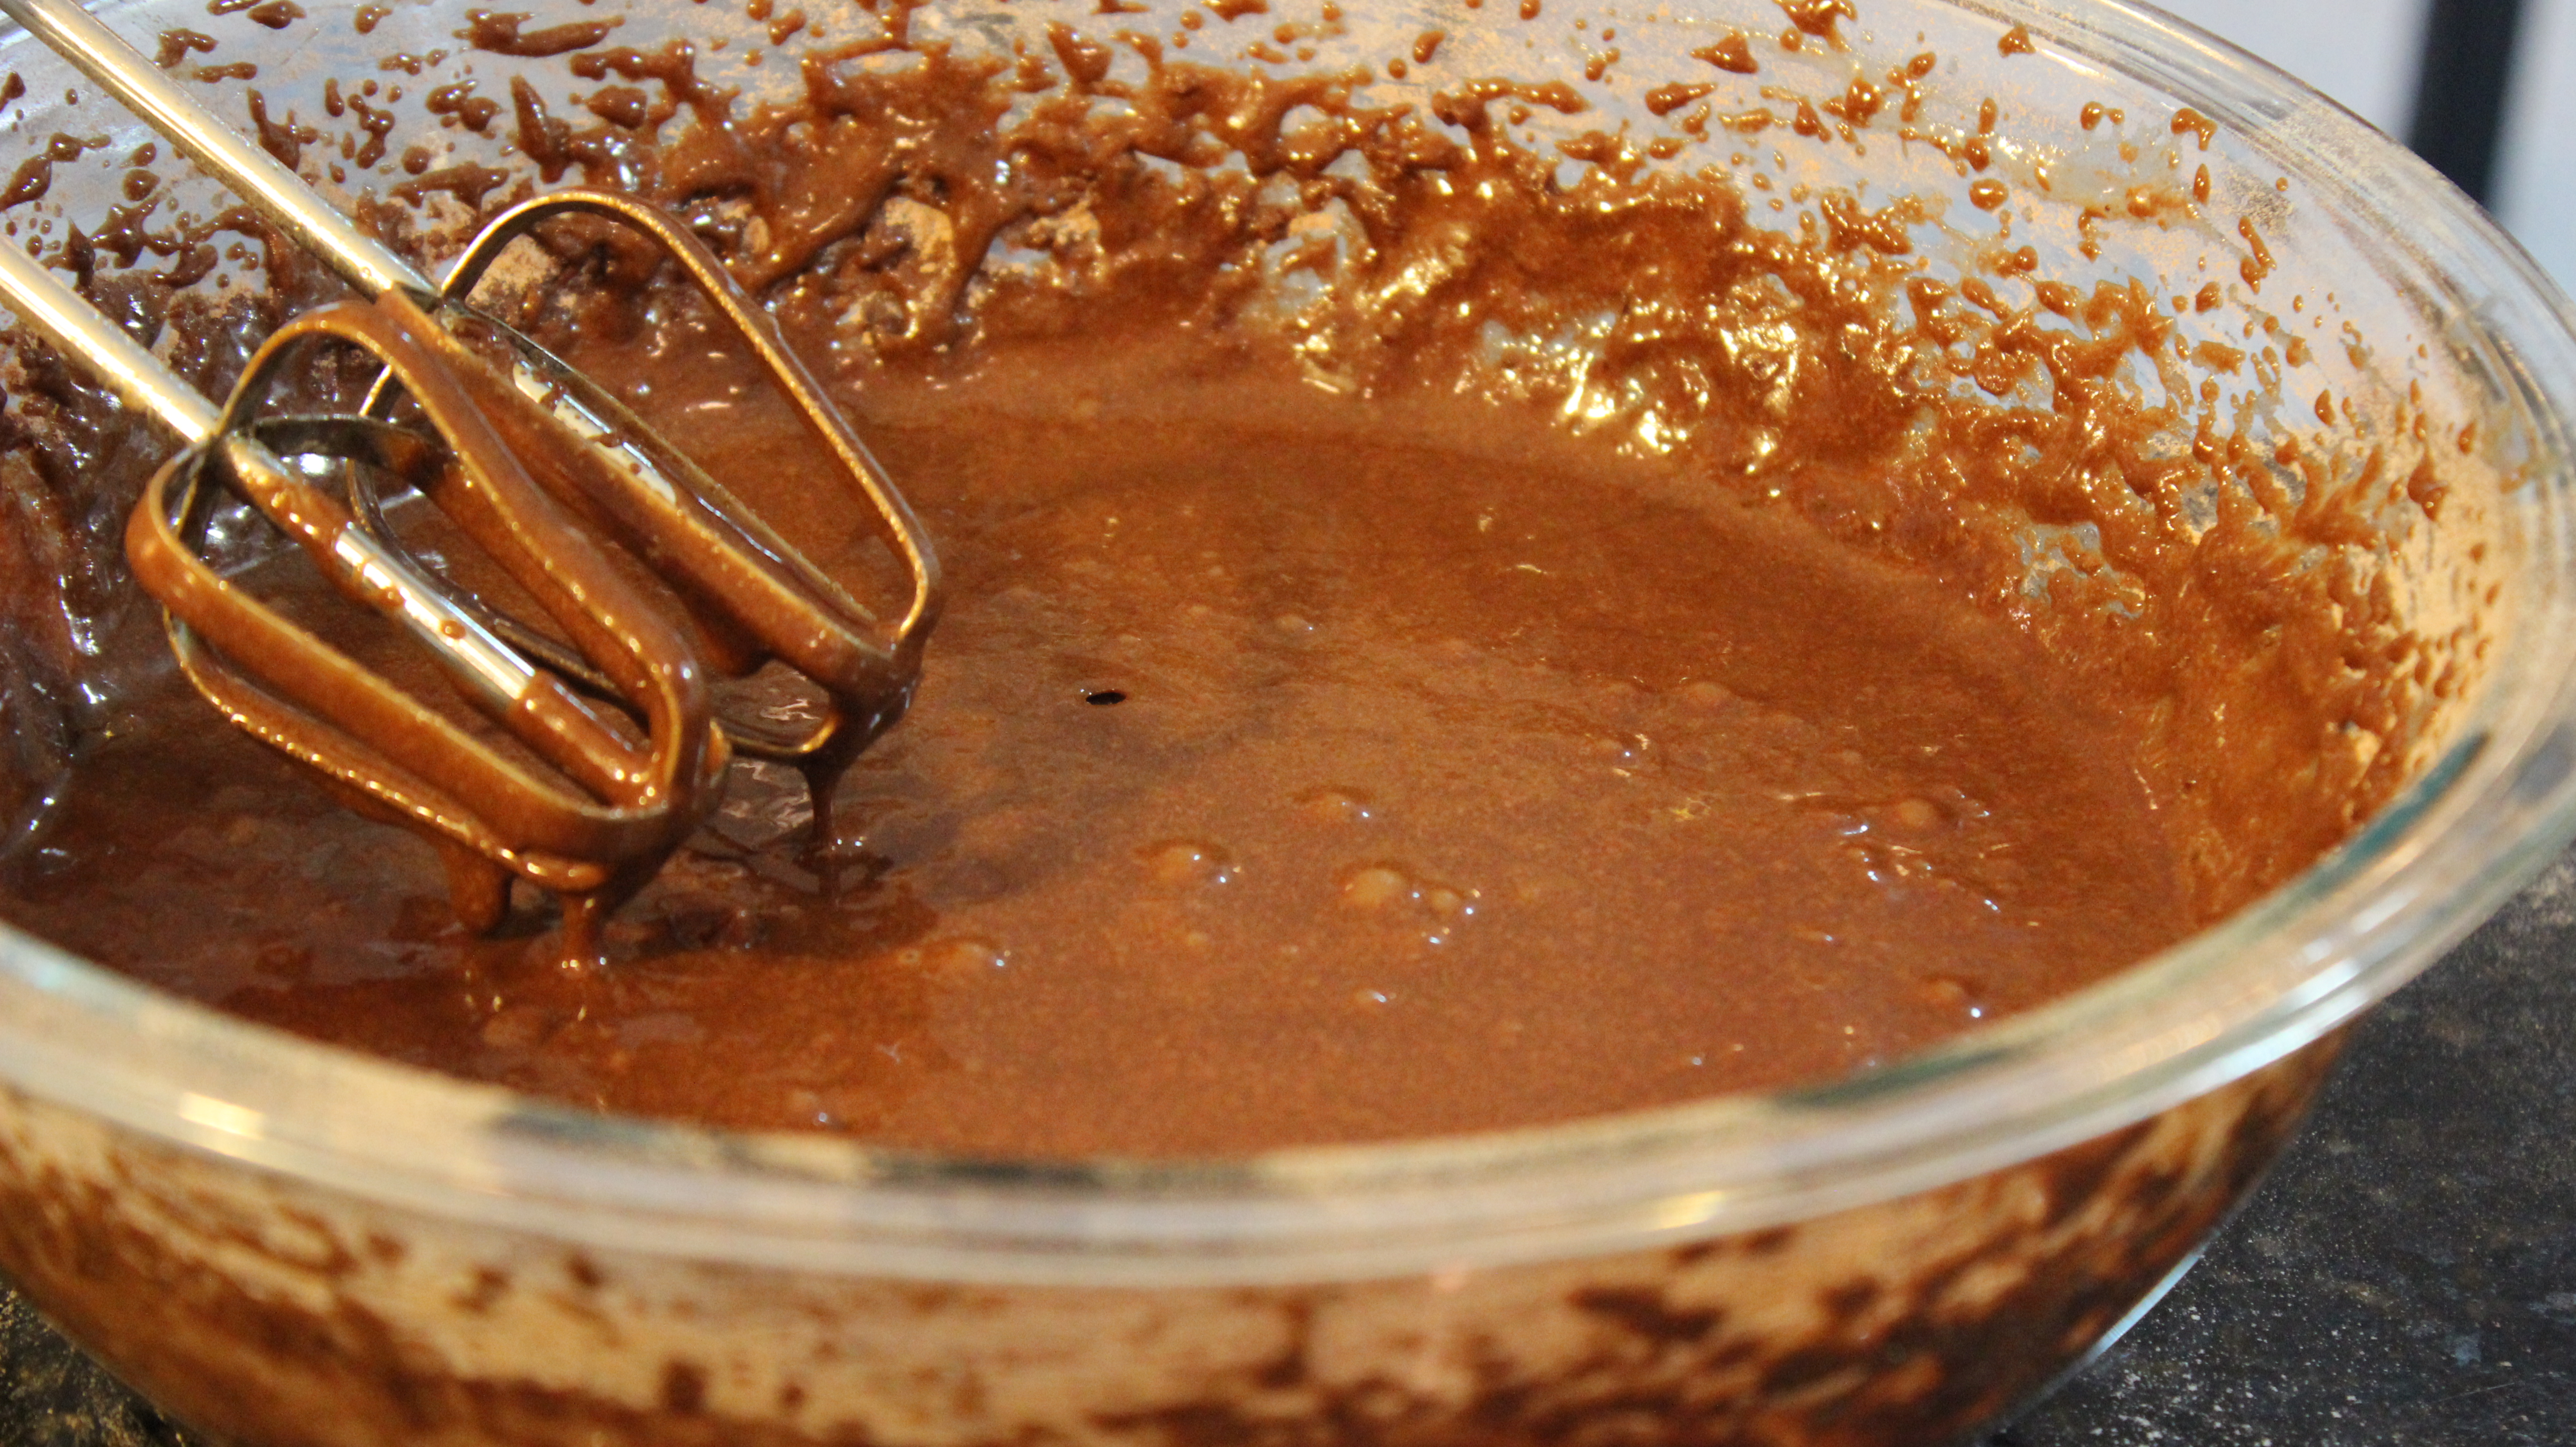
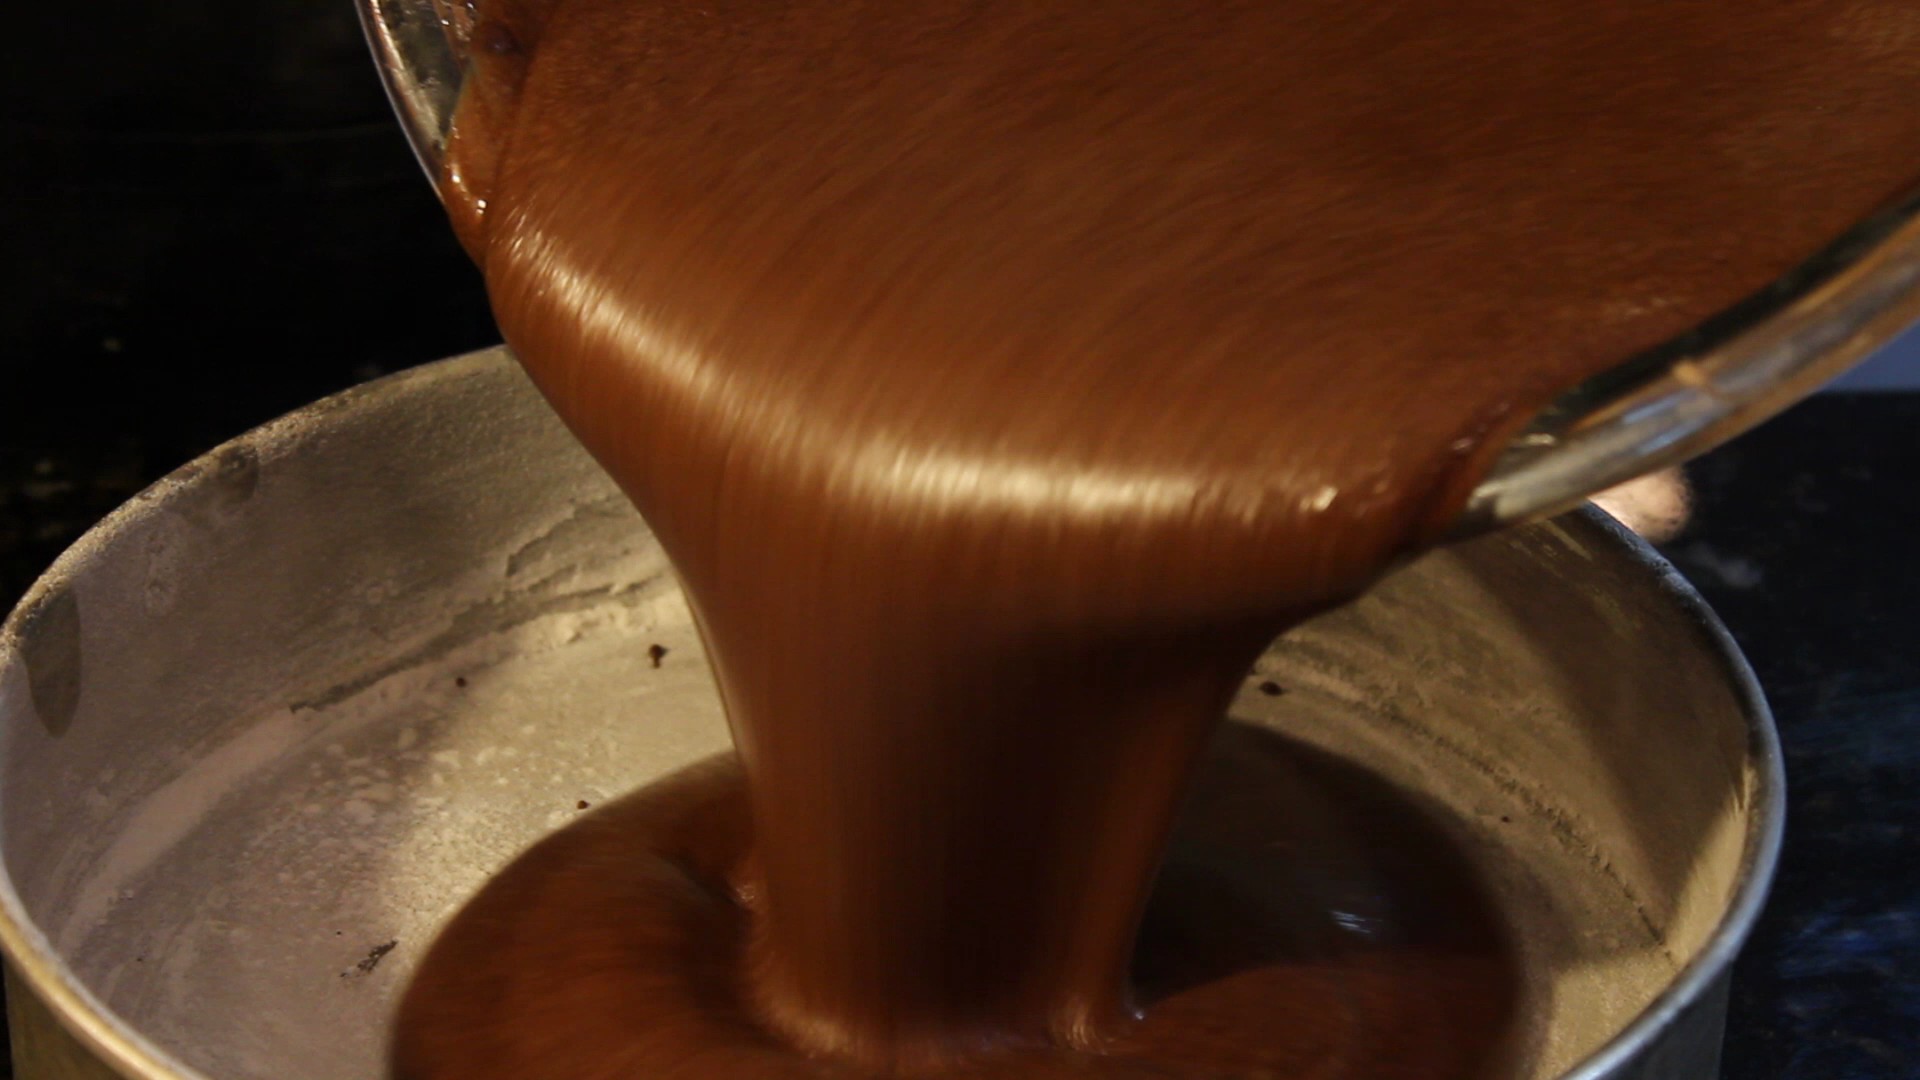
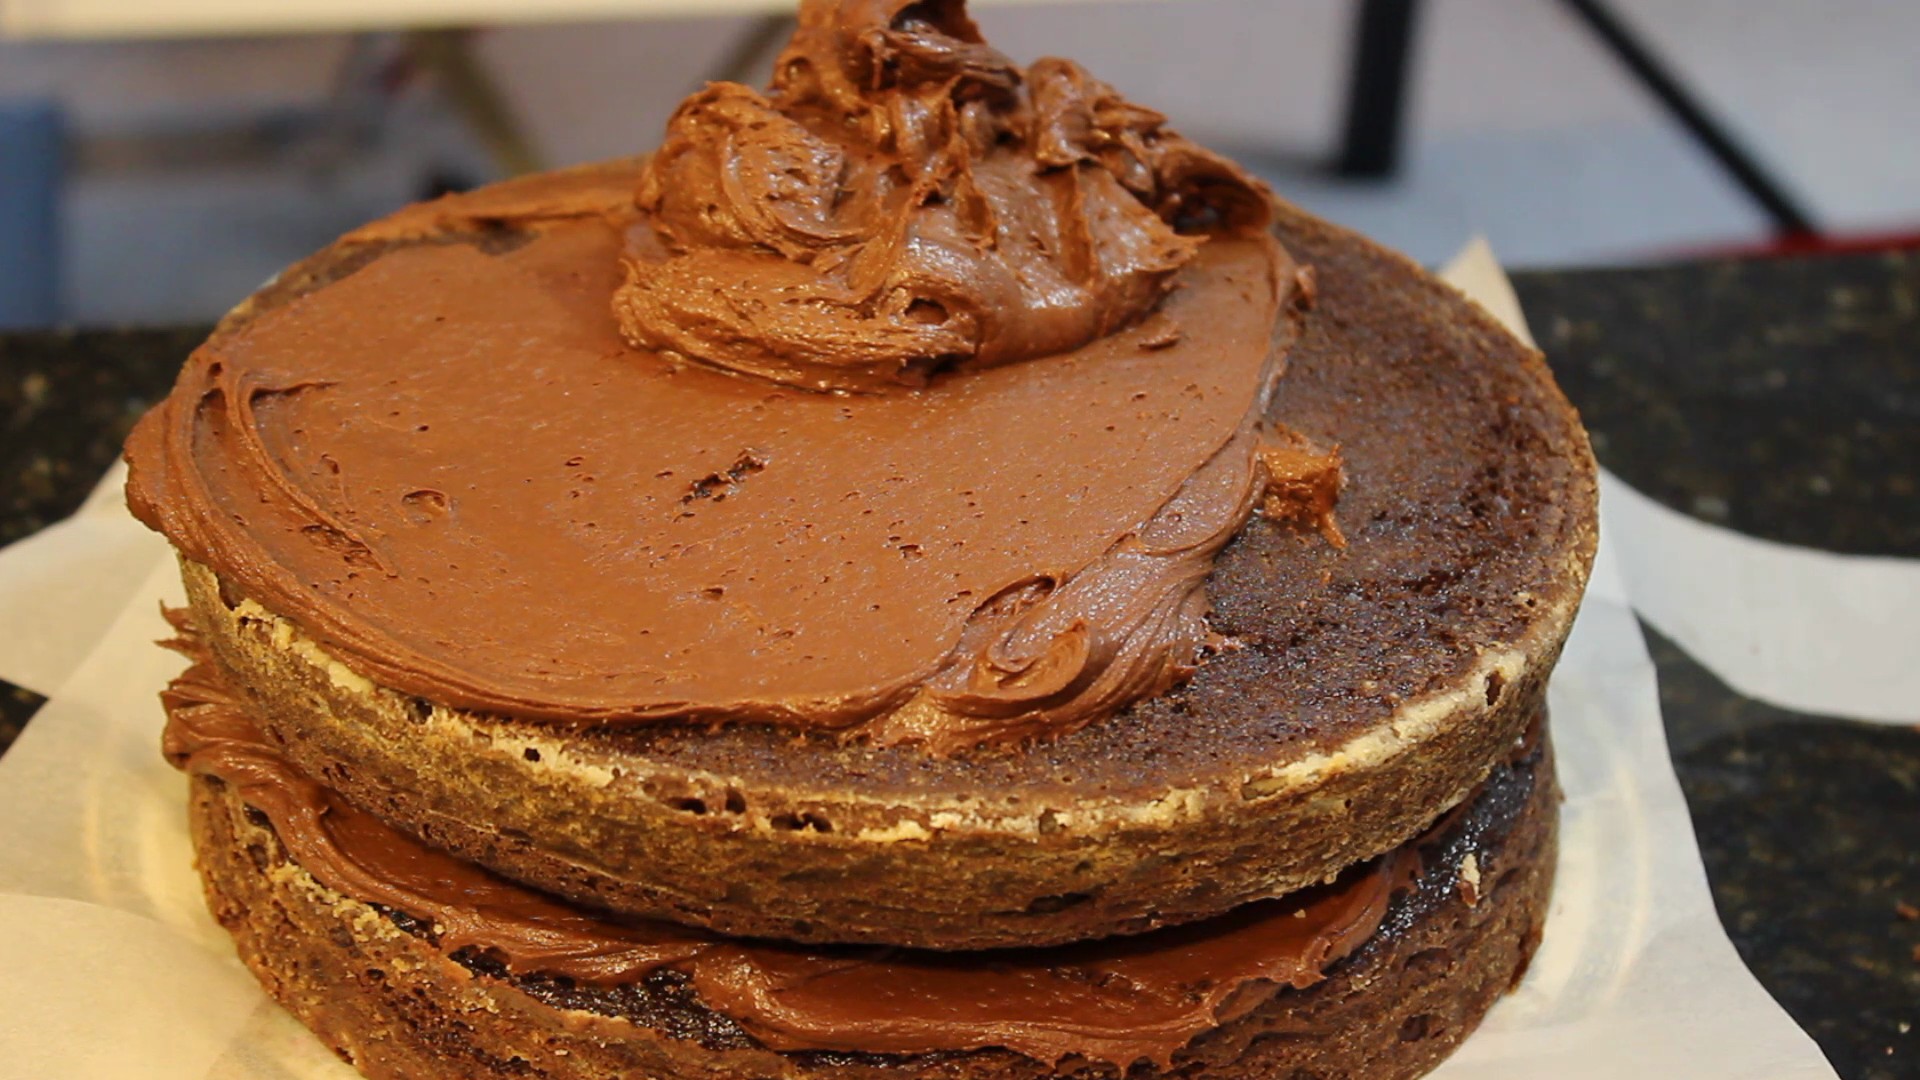
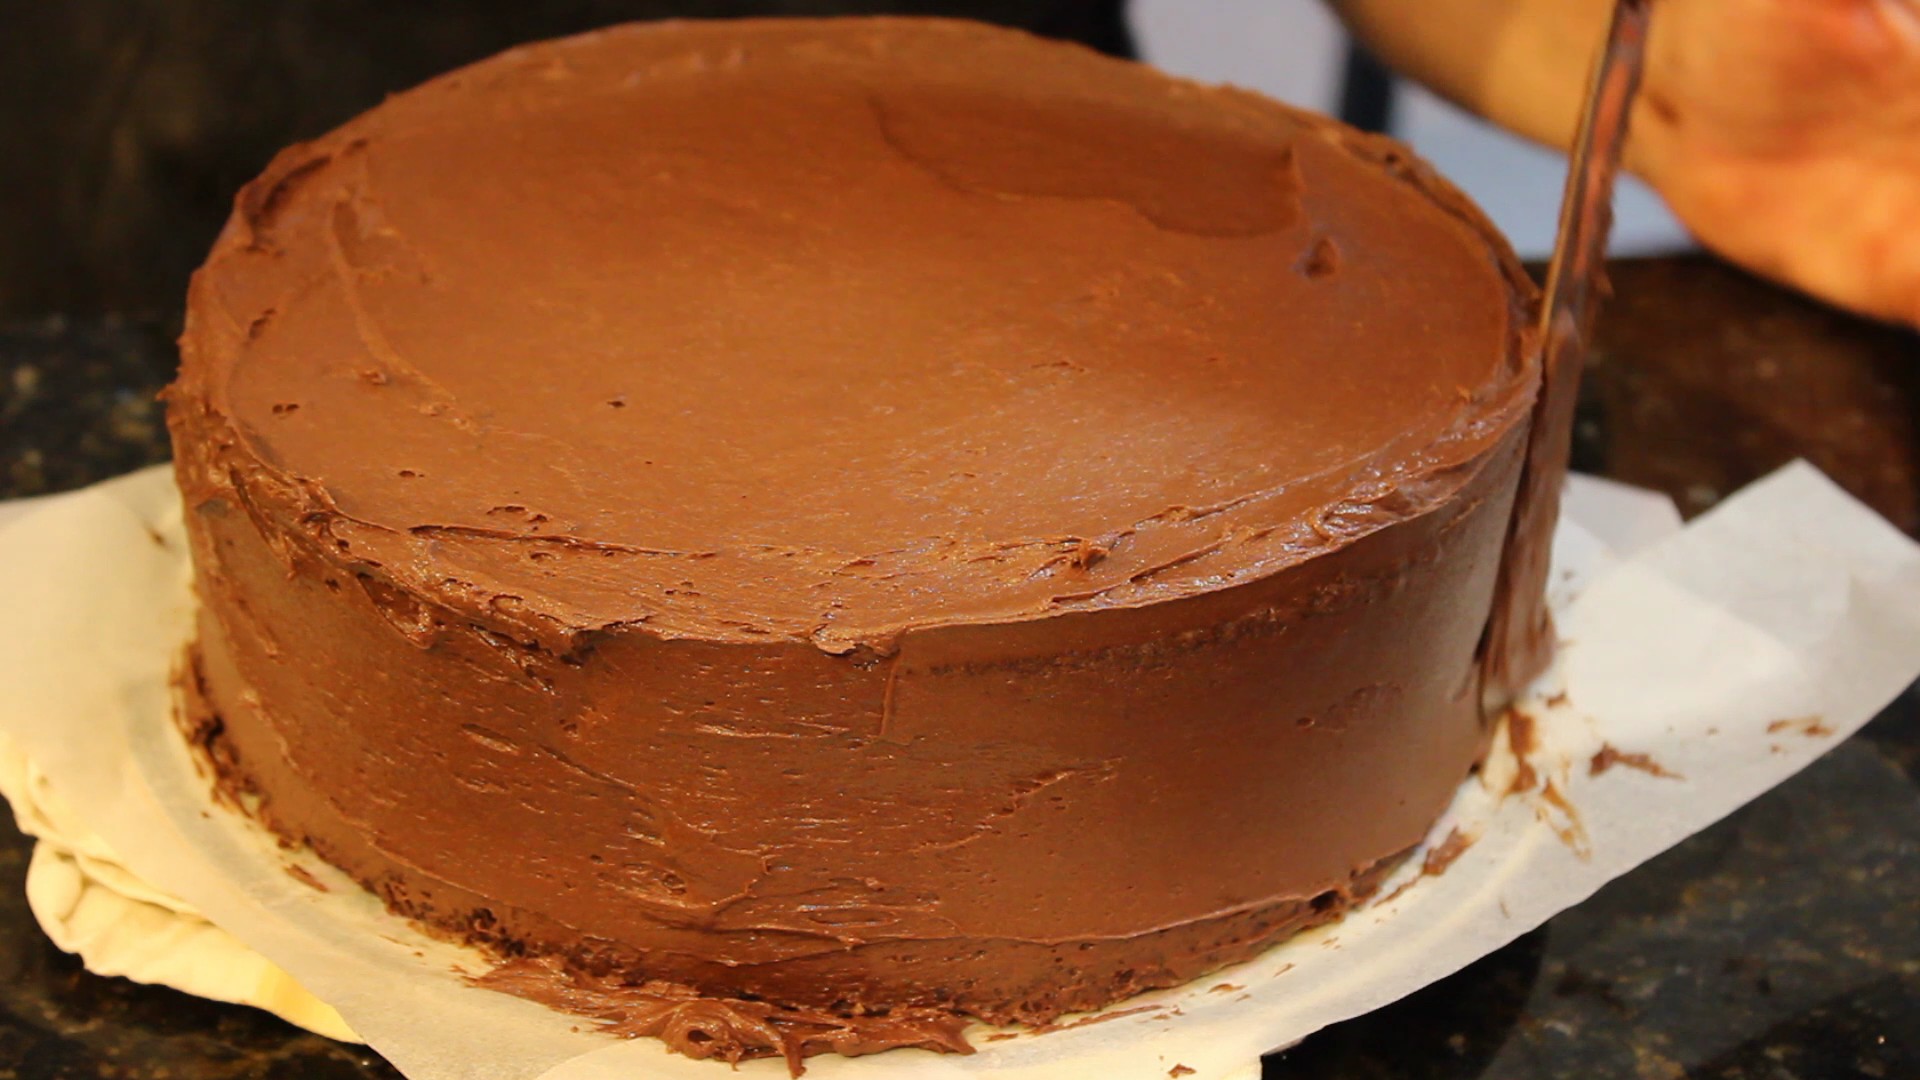
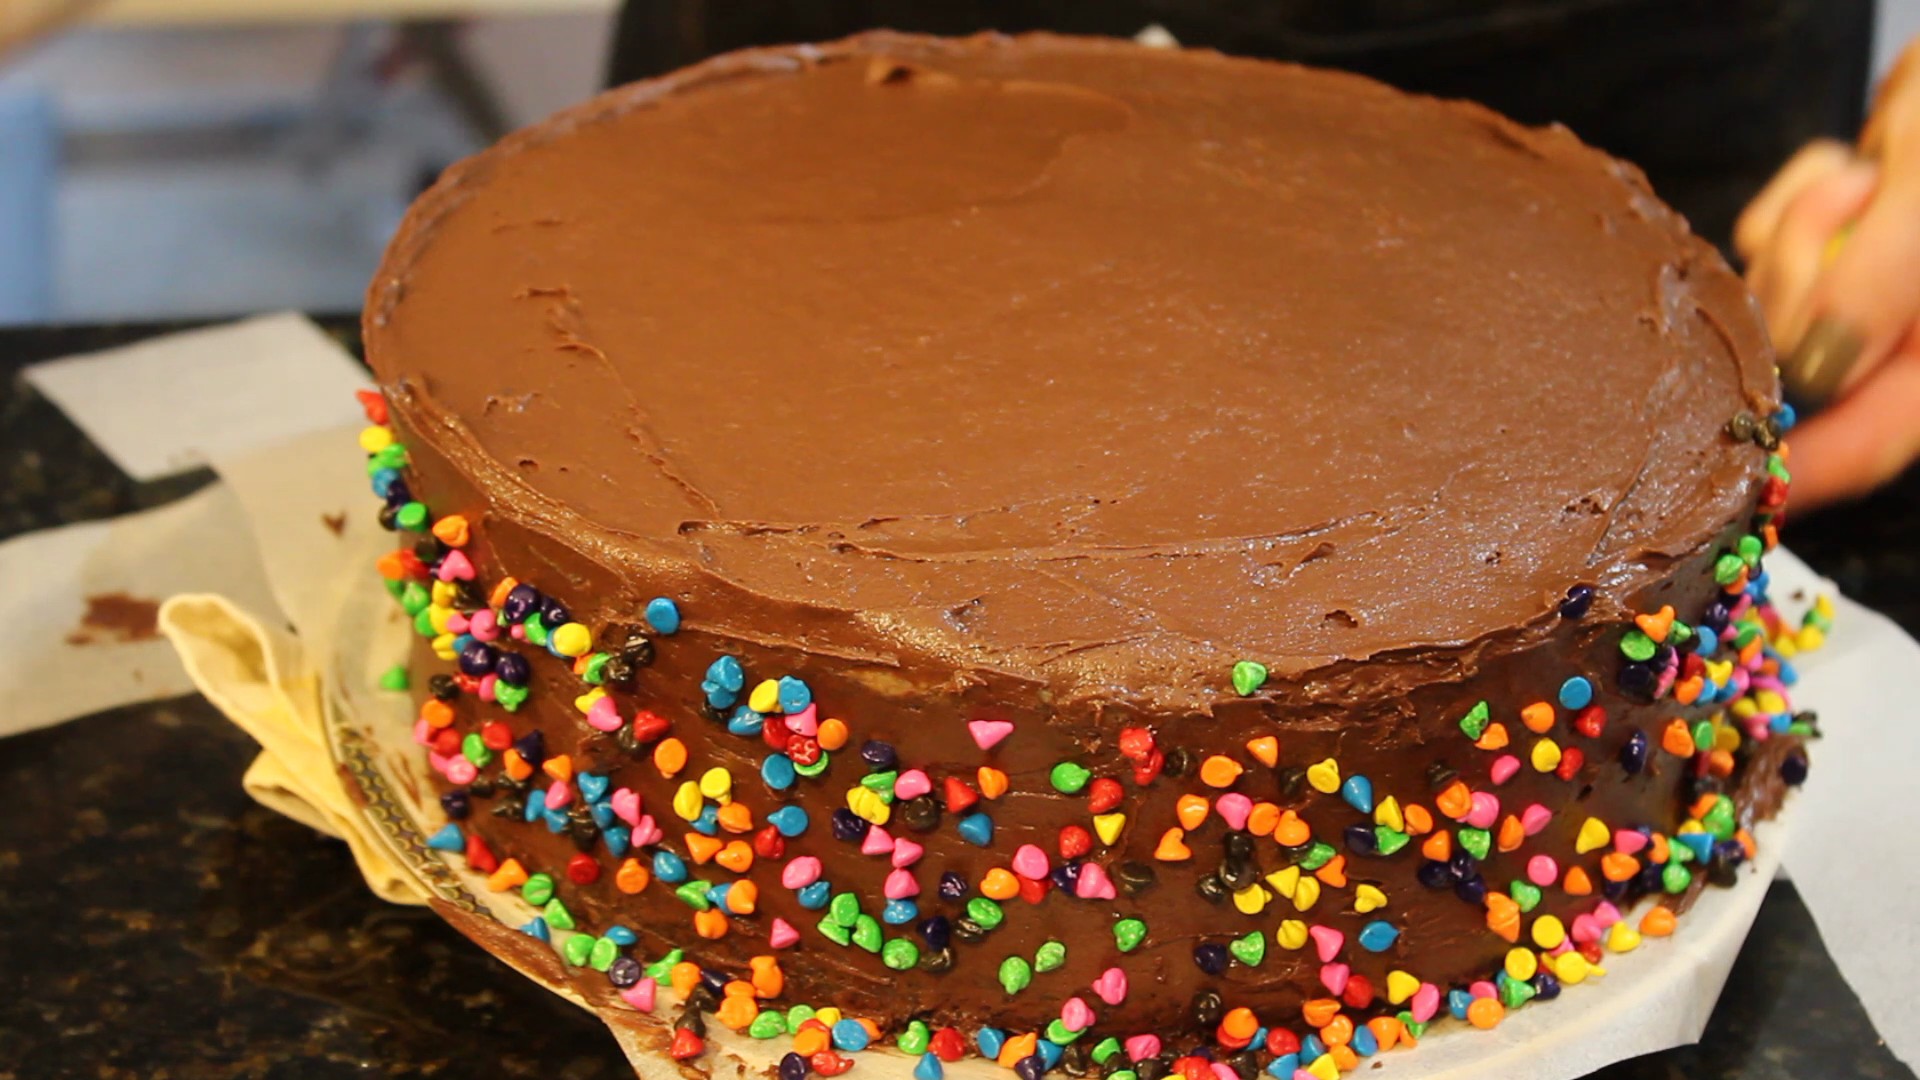
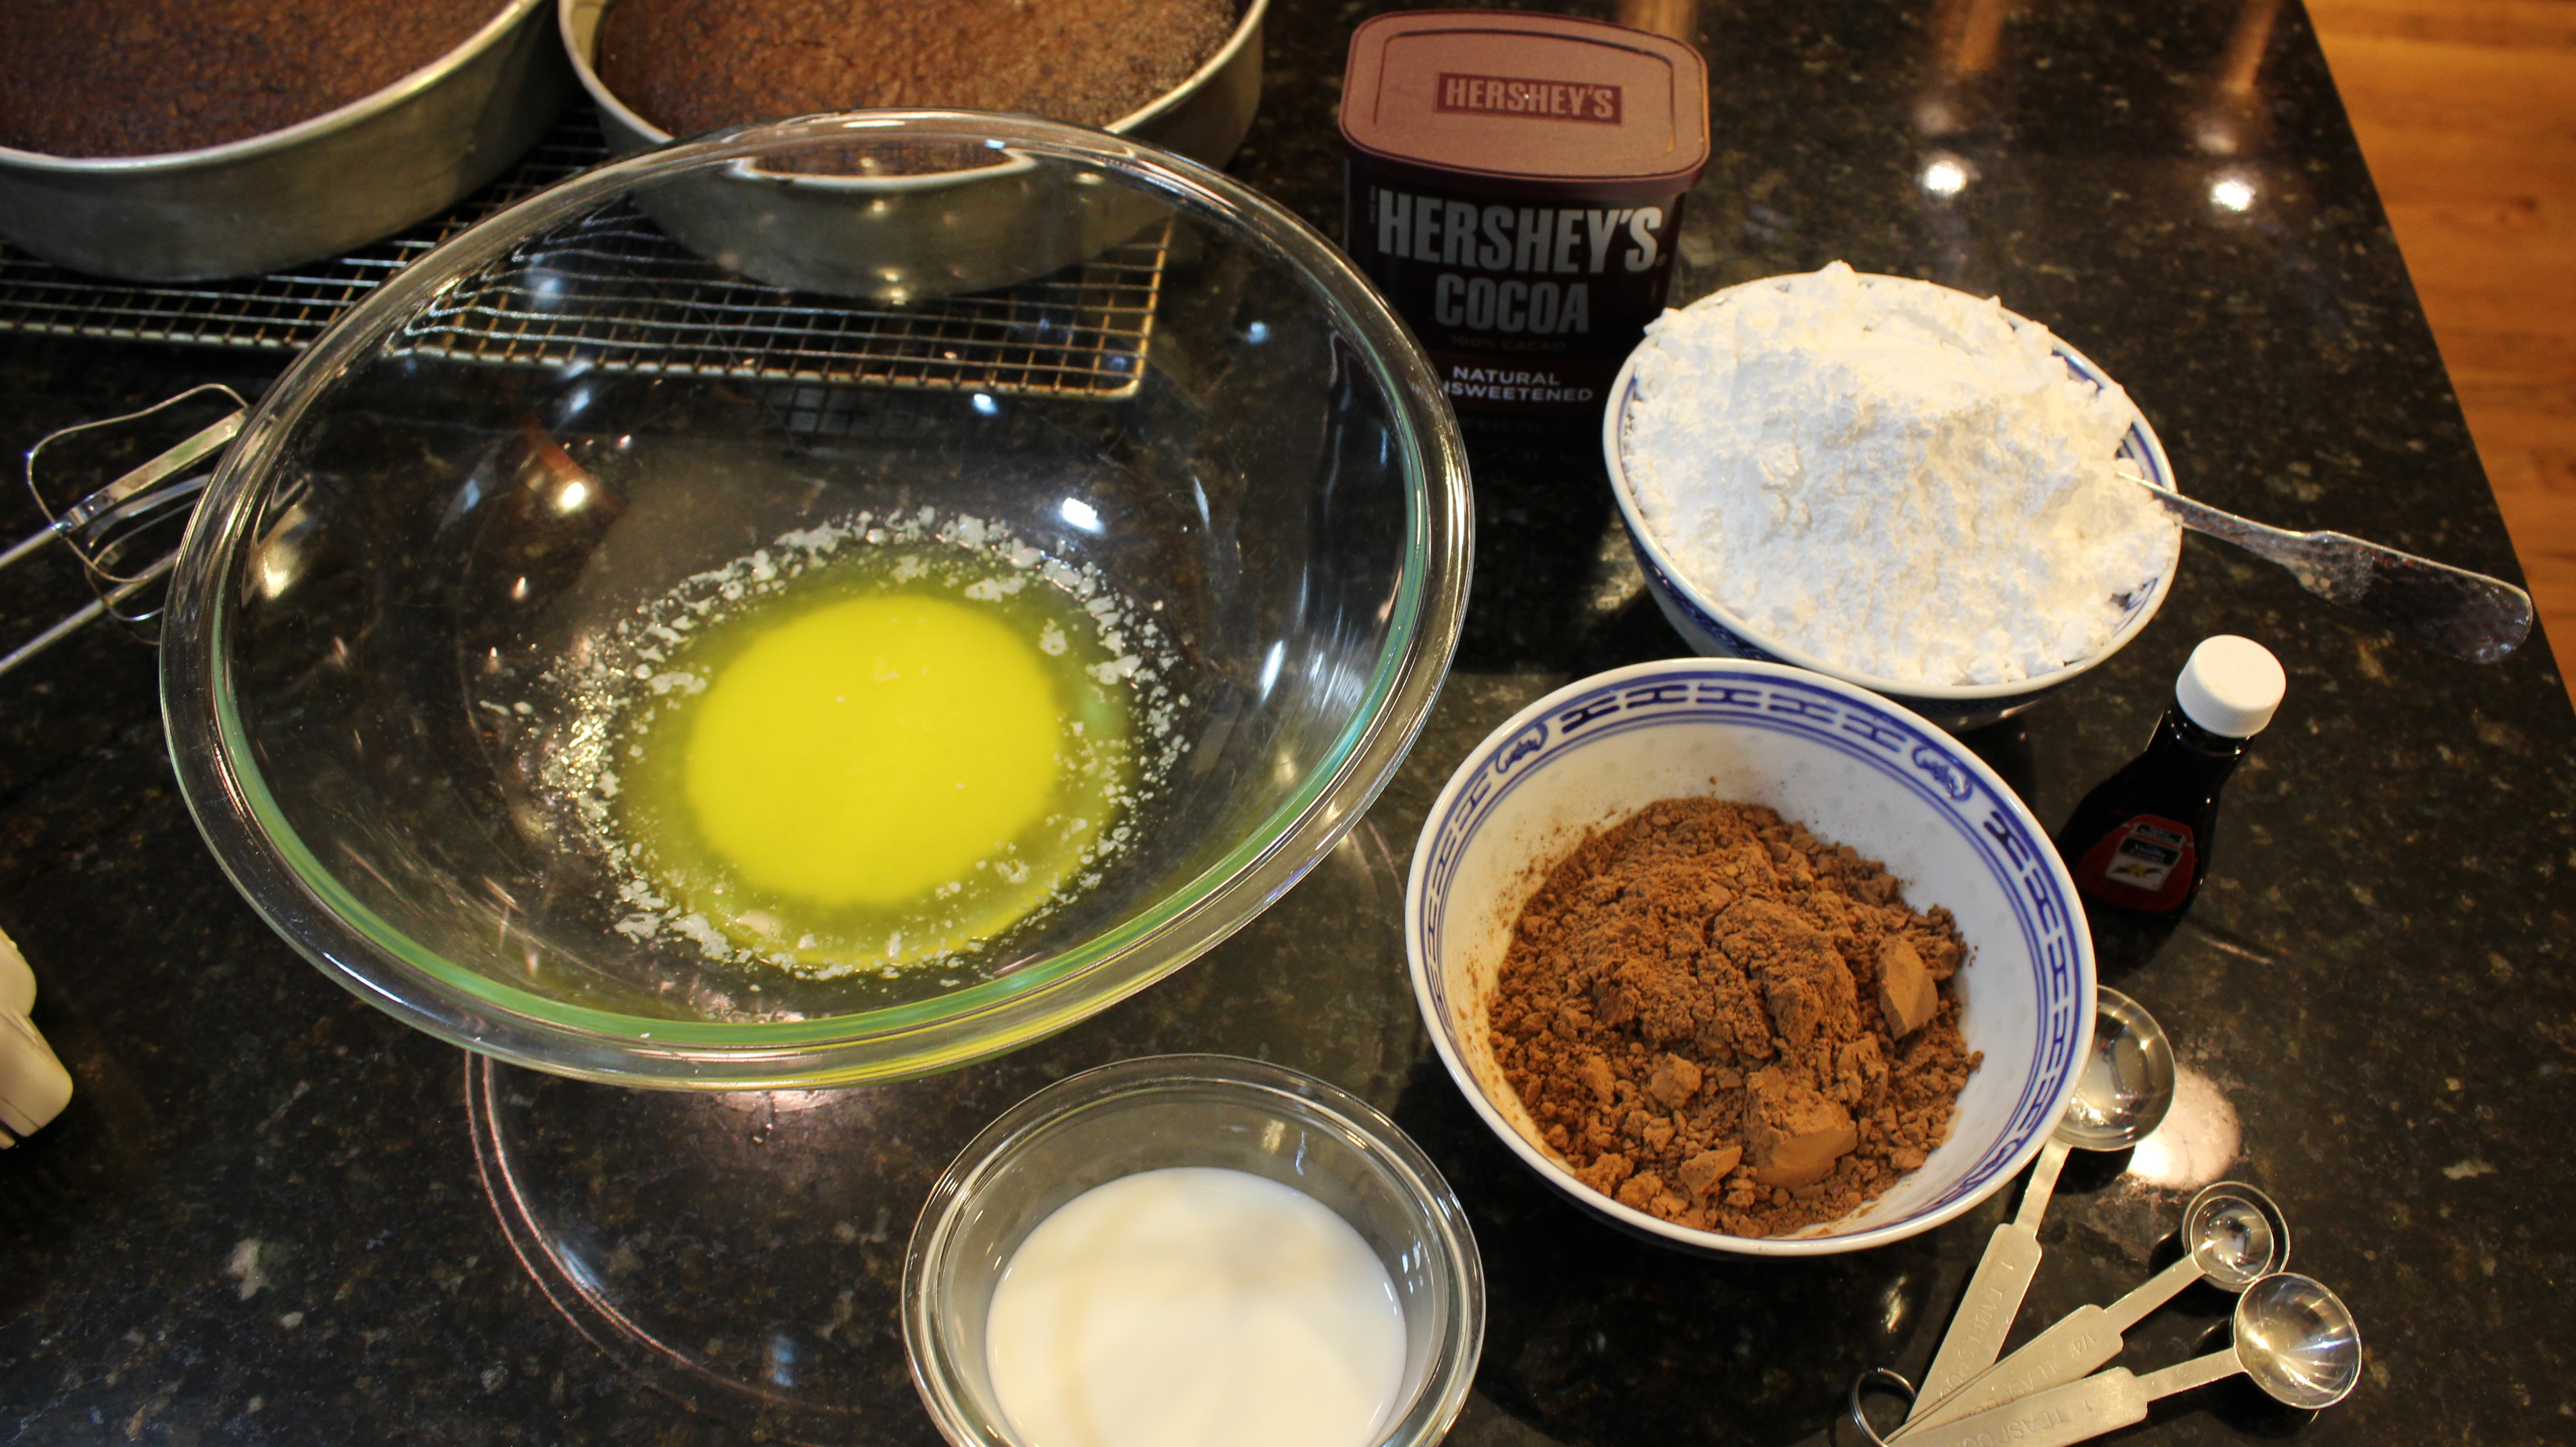
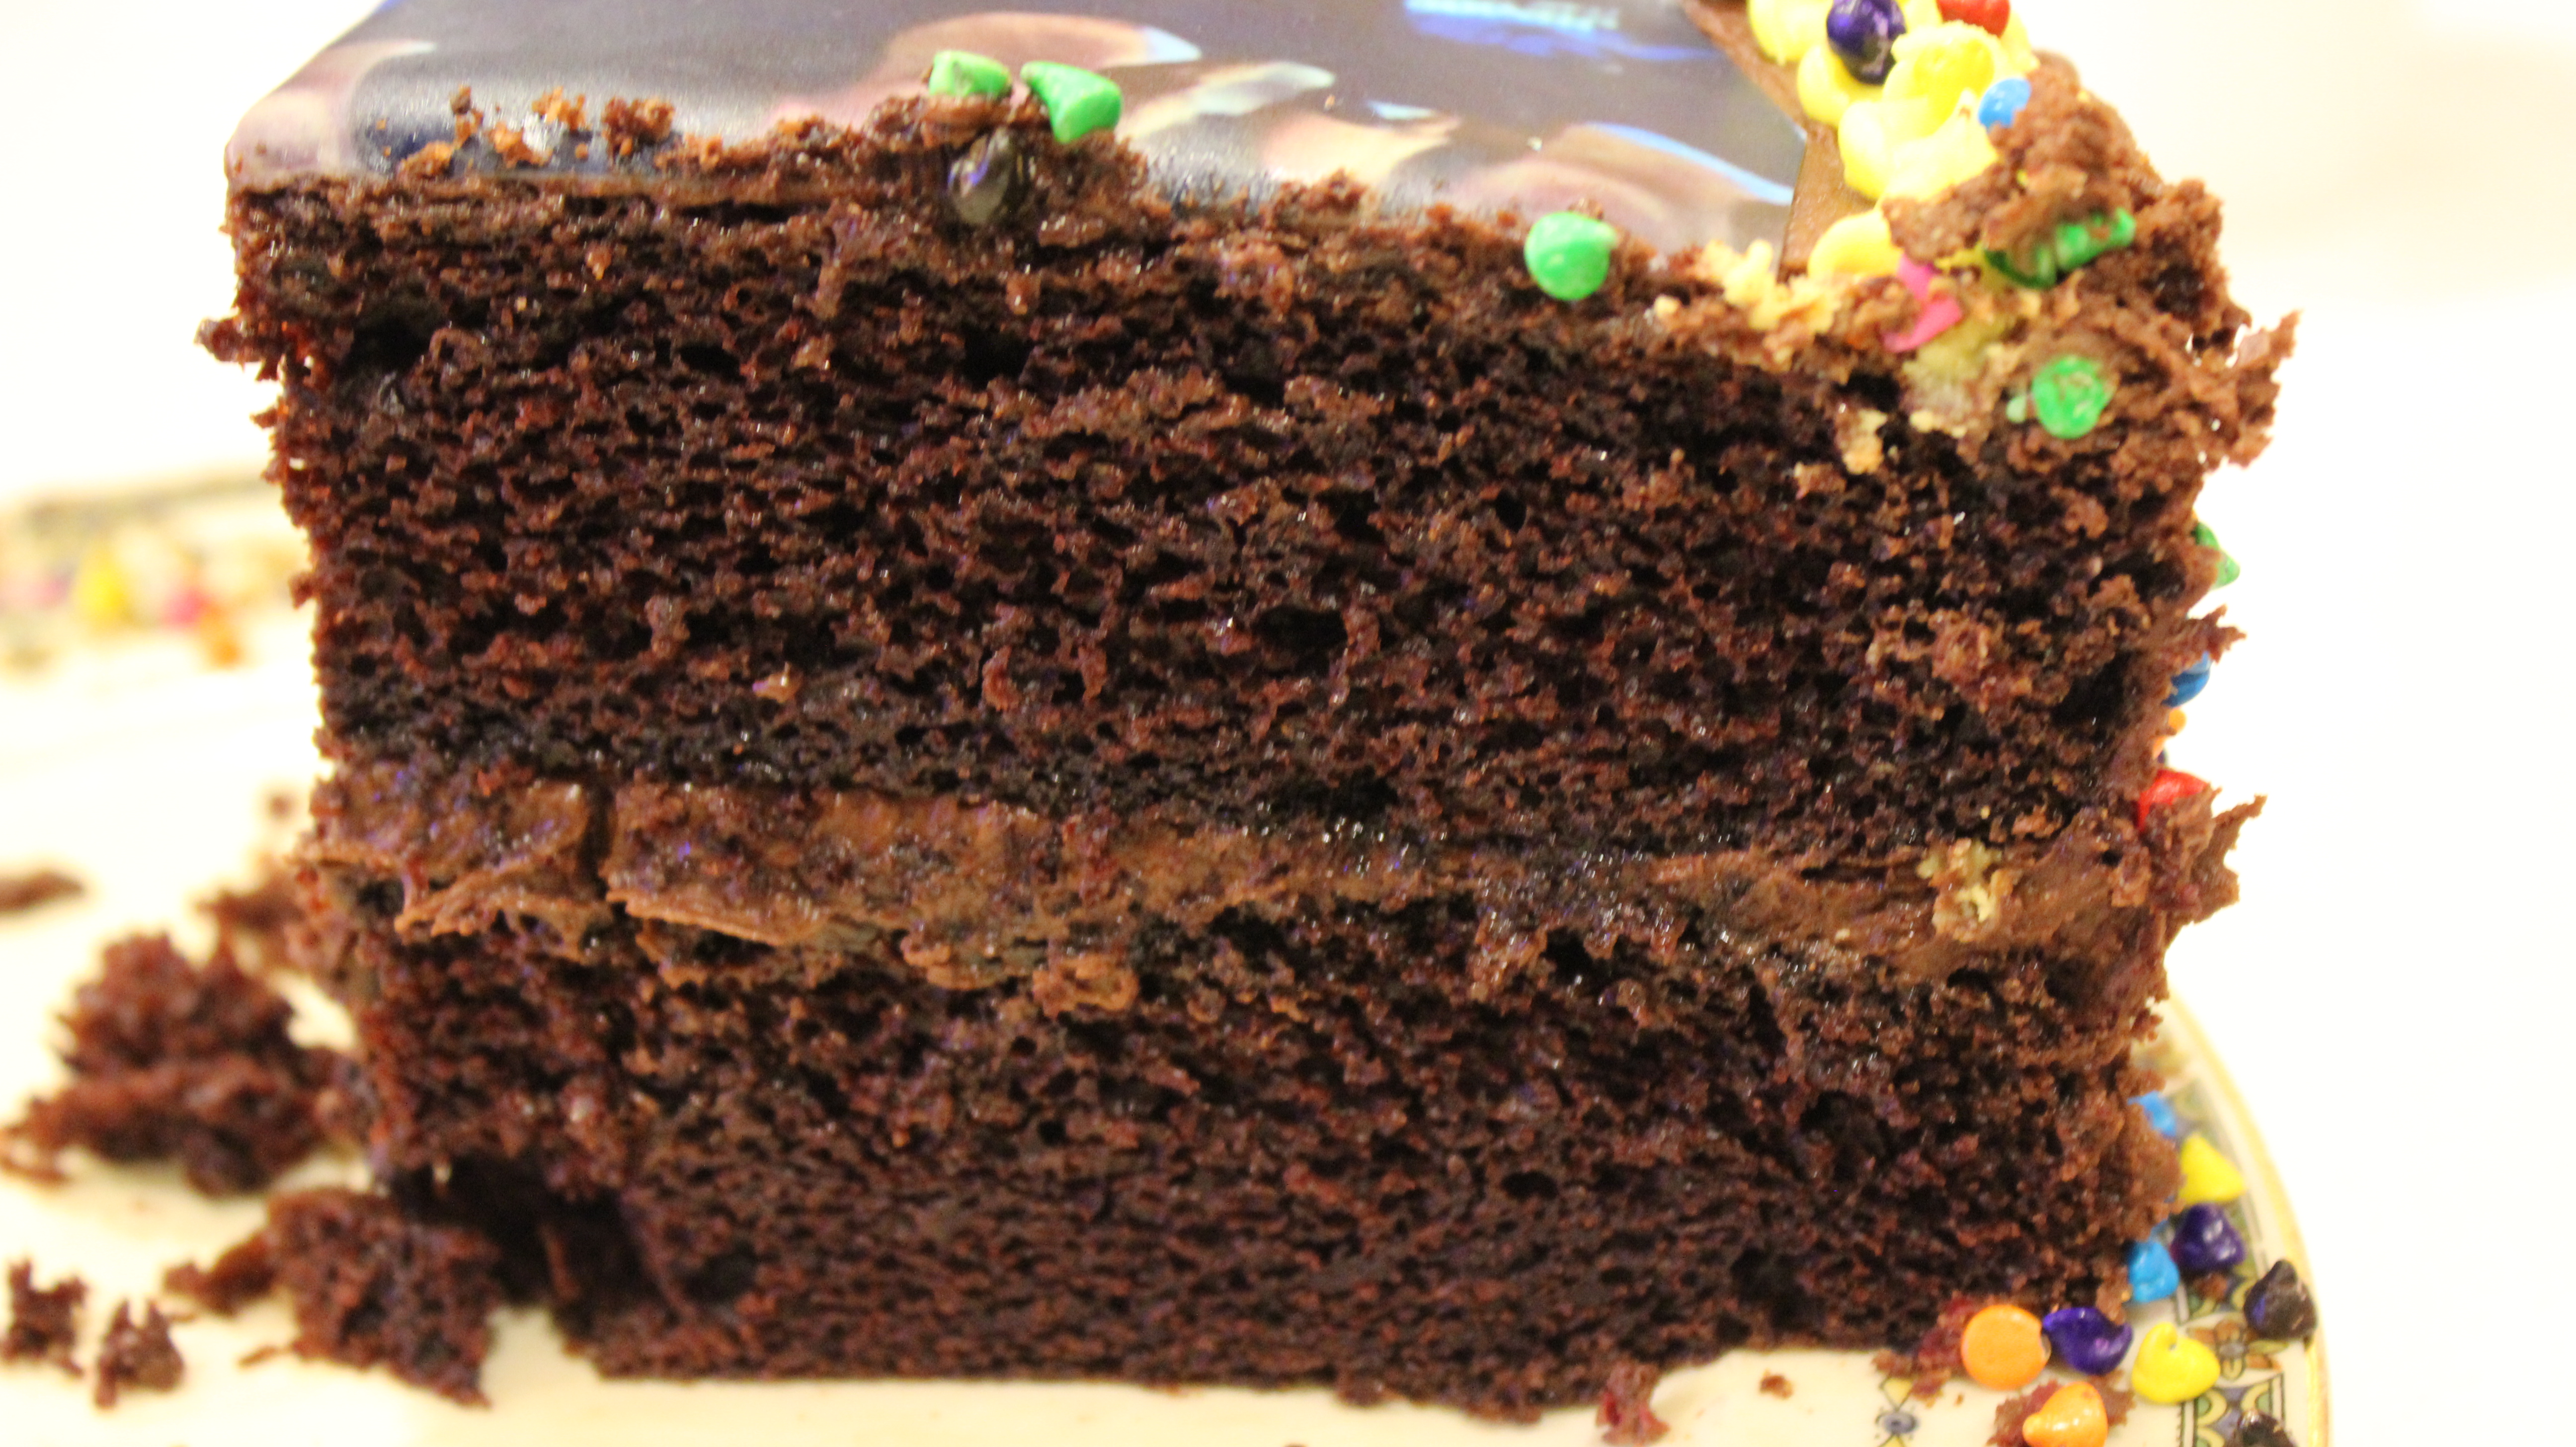
The name “perfectly chocolate chocolate cake” pretty much sums it up right there although you won’t know how easy it is to make this homemade gourmet chocolaty cake until you give it a go! This incredible cake and frosting made from Hershey’s Cocoa Powder I have been making for almost 20 years now!  Once you see how easy it is to make these moist and chocolaty homemade cakes you’ll never go back to the box again! Besides on my blog you can find these recipe’s right on the back of the Hershey’s Cocoa canister.

I was first turned on to the recipe by a mother-daughter baking team that I met about 20 years ago. They were professional baking contestants from the Midwest who had won numerous times. My quest at the time was to find the “perfect” chocolate cake and their answer was the Hershey’s Cocoa recipe. Not that the name itself on the back of the Hershey canister for this chocolate cake recipe wasn’t “perfect” enough I just couldn’t take the irony of it all so off I was trying out the recipe and baking this cake! It had such a lovely texture without being too dense or heavy. It was oh so chocolaty and moist to top it off. The amount of steps and effort put in to making this cake is pretty much equal to that of making a box cake so why would you ever resort back to making box ever again. You know me, I test other recipes to make sure I have the best and I always go back to the Hershey Cocoa recipe!

The Hershey’s “perfectly chocolate chocolate frosting” is one that should not be over looked either. The frosting is amazing and one of my favorite go to recipes totally blowing away that “canned” stuff with the plastic lid. I am really excited for these recipe’s to become a couple of your favorites too. You may find your friends and family requesting “your” perfectly chocolate cake for their next visit! I hope you enjoy the show!

You should check out my Green Goddess Dip & Sweet Potato Fries for an appetizer!  what ever you do DON’T FORGET TO ROAST your PUMKIN SEEDS! And how about some green ghoul Best Guacamole Guacmole Ever!  Or be creative with another dessert placing eatable eyballs on top a homemade Chocolate Meringue Pie!

IMG_0672 IMG_6956 IMG_3812 guaca IMG_8098

IMG_2689  hershey  IMG_2710

cakebatter  frosting  sidefrosting

chocsprink  finishcake  IMG_2730

IMG_2793 ghostpeps ghostwrt

ghostwebbing ghostpeepstwo

Ingredients for Cake:

  • 1 3/4 cups white sugar  -(Hershey recipe calls for 2 cups white sugar)
  • 1/4 cup light brown sugar
  • 1 3/4 cup all purpose flour
  • 3/4 cup Hershey Cocoa
  • 1 1/4 tsp baking powder -(Hershey recipe calls for 1 1/2 tsp)
  • 1 1/4 tsp baking soda -(Hershey recipe calls for 1 1/2 tsp)
  • NOTE: I like to use 1 1/4 tsp baking powder & 1 1/4 tsp baking soda instead of the “Hershey” recipe that calls for 1 1/2 tsp for both because this produces a cake that is a little more moist because it doesn’t rise fully, and sometimes I even use 1/2 tsp baking powder & 1/2 tsp baking soda for a cake that has more of a pudding texture (not too dense or heavy either …just pudding like) Have fun!
  • 1 tsp salt
  • 2 lg. eggs
  • 1 cup whole milk
  • 1/2 cup vegetable oil
  • 2 tsp pure vanilla extract
  • 1 cup boiling water

TO MAKE GHOST CAKE THIS IS WHAT YOU’LL NEED:

ghostpeps ghostwrt ghostwebbing

Find at “Michaels Stores” No. 1-3                                                                                                               Find at “Fresh Market” No. 4

  1. Ghost peeps
  2. Eatable eyballs
  3. Cookie Icing to write on small Hershey chocolate bars for tomb stone’s “RIP”
  4. Spider web stretchy candy (stretchy cotton candy-like) – stretch all around base & in between chocolate bar tomb stone’s
  5. Confectioner’s sugar sprinkled on top to look like a dusting of snow!
  6. Hershey chocolate bars-small ones-write on back “RIP” with Icing in bottle SHOWN ABOVE
  7. Glue candy eye’s and anchor tomb stone’s to cake with the cookie icing

Directions for Cake…NOTE- I Bake My Cake On Convection:

  1. Pre-heat oven to 350º
  2. Grease and flour 2 – 9″ round baking pans
  3. Add all dry ingredients to a large mixing bowl and whisk to combine
  4. Add in eggs, milk vanilla and oil and beat on medium speed for 2 minutes
  5. Stir in 1 cup boiling water til combined (batter will be thin)
  6. Pour evenly into cake pans
  7. Bake for 30-35 minutes –NOTE: I ALWAYS take the cake out at 30 minutes!
  8. Remove from oven and cool 10 minutes
  9. Remove cakes from pans, place on cookie racks to cool completely before frosting
  10. I cool for 1 hour then immediately frost the cake

Ingredients for Frosting:

  • 1 stick of butter melted
  • 2/3 cup Hershey Cocoa
  • 3 1/2 cups confectioners sugar (powdered sugar)
  • 1/3 cup plus 1-2 tbsp milk
  • 1 tsp pure vanilla extract

Directions for Frosting:

  1. Melt butter and add to lg bowl
  2. Add in Hershey Cocoa and vanilla and whisk til smooth
  3. Alternate adding in a tbsp of milk and 1/4 powdered sugar while beating on medium speed til smooth
  4. When texture is smooth add in more milk and powdered sugar until all is gone and it’s the thick creamy consistency you want

Salmon B.L.T. Sliders at Marco’s

Salmon B.L.T. Sliders at Marco’s

lathropmanorThese gourmet salmon B.L.T. sliders are like no other you have ever had before. It’s a genius sandwich offering up a sweetness with the tenderly seared Sockeye salmon fillets to the salty in the roasted pancetta and lets not forget the scrumptious homemade aioli with lemon zest and garlic. Then there is the peppery baby arugula and juicy tomato slices all captured on a soft potato bun. WOW! This sandwich slider just melts in your mouth giving you a variety of flavors that compliment each other so well you try to remember each one as it passes over you tongue. Chef Marco, from the charming B & B in Norwich, Connecticut Historic District called Lathrop Manor has these salmon B.L.T. sliders down to perfection so well that it seems everyone in the neighborhood has had one! Make sure to take notice of the homemade lemon aioli recipe which is really lovely and goes with so many foods as shown below on grilled vegetables.

Marco and his wife Sheryl bought this 5500 sq. ft. B & B back in 2005 coming from a 700 sq. ft. apartment in Manhattan. Talk about a culture shock. They then put their heart and soul into the Lathrop Manor making it what it is today and filling the empty building with beautiful period pieces bringing it all together. You couldn’t ask for more gracious hosts then Marco and Sheryl with their warmth and compassion making your visit here a very special place to be.

Lathrop Manor as been written up in Yankee Magazine as well by a Kim Beckius who has written several books about New England B & B’s. You shouldn’t miss the opportunity to stay here and meet Marco and Sheryl, and experience their gourmet fare. Chef Marco can cook up a IMG_2283storm like nobody’s business which is evident their in B & B’s five course breakfast! Hope you enjoy the show and don’t forget to let me know how much you love these gourmet salmon B.L.T. sliders!  You might just get inspired and make Pavlova for dessert!


IMG_2592  IMG_2593  IMG_2587

IMG_2580  IMG_2577  IMG_2655

IMG_2658  IMG_2662  IMG_2617

IMG_2663  Poached

Ingredients for Marco’s Salmon B.L.T. Sliders – makes approx. 20 sliders:

  • 1 1/2 -2 lb. fresh Sockeye Salmon, have fishmonger fillet (remove skin) and de-bone
  • 1/2 lb sliced Pancetta (you’ll need as many slices as sliders that you are making)
  • Arugula
  • olive oil
  • fresh lemons
  • lemon aioli
  • Potato buns
  • Compari tomatoes sliced
  • s & p
  • Marco’s homemade lemon aioli

Directions For Marco’s Salmon B.L.T. Sliders :

  1. Make homemade lemon aioli recipe below
  2. Pre-heat the oven to 400º
  3. Place piece of parchment onto cookie sheet and place pancetta slices onto parchment
  4. Bake pancetta slices for approx. 12 minutes (you can leave slices on the tray when done cooking until you make the sandwich sliders)
  5. Slice salmon fillets in approx. 2 1/2 ” pieces
  6. Season salon with s & p on both sides
  7. Heat lg fry pan on med/high heat
  8. Add 3 tbsp to pan and begin to add salmon squares 4-6 at a time
  9. Sear on first side approx 1 1/2 minutes and flip (it will release when it ready)
  10. Sear 2nd side 30 seconds and remove to platter
  11. Dress arugula with 1 tbsp olive oil and 1 tbsp lemon juice and a sprinkle of s & p and toss (light dressing)
  12. On a large platter line up top and bottoms of potato rolls
  13. Smear a tsp of aioli on each side of the bun halves
  14. Begin to build gourmet salmon B.L.T. sliders
  15. Layer potato bun, aioli, pancetta, salmon, tomato slice, small mound of arugula and top with bun that has a smear of aioli
  16. Buon Appetito!

Ingredients for Marco’s Homemade Lemon Aioli:

  • 1 egg yolk
  • 1 tbsp fresh lemon Juice
  • Zest from 1 lemon
  • 1 heaping tbsp finely chopped shallots
  • 1 tsp fresh garlic finely chopped or through garlic press
  • 1/4 tsp salt
  • sprinkle fresh pepper
  • 1 heaping tbsp Dijon mustard
  • 1/3 cup olive oil
  • 2-3 tbsp grape seed oil (or Olive oil)

Directions for Homemade Lemon Aioli:

  1. Add egg yolk to large glass bowl
  2. Add in Dijon, lemon zest, lemon juice, shallots, garlic
    • Whisk to mix
    • Begin to drizzle in olive oil, then switch to grape seed oil all awhile whisking constantly to emulsify ingredients into thick texture
  3. Add s & p to taste and set aside

Gourmet Frittata

Gourmet Frittata

The Frittata first came about as practical dish in theory for using up those leftovers in our frig but when adding in some lovely melting cheeses and a pinch of dairy it turns into something much more then that. Not to mention this Italian egg dish is just as delicious served room temperature as it is warm.

Making a gourmet frittata is as easy as can be leaving you with lots of room to be creative. The measurements do not have to be exact at all to get wonderful results. You can use 10-12 eggs, and mix in heavy cream, half and half, sour cream, or even creme fresh. You can also change out the cheeses to one that you prefer. Use feta or goat cheese, cheddar, Monterey Jack, Pepper jack, Colby-jack, Swiss or Gruyère, Parmesan and so on. It’s nice to mix it up too using a combination of these cheeses. I really love using up the leftover veggies in the fridge and don’t mind sautéing up one or two more to enhance the leftovers.

By no means does this homemade frittata have to remain a vegetarian either! Pack in the meat using chunks or slices of ham, cooked sausages, bacon, steak and well that list goes on too. I think the trick here is not to fuss too much, be sure to add a little dairy and be sure not to over cook the frittata thinking that it’s not done enough because you see a little movement in the center when taking it out of the oven. Remember it will keep cooking after you take it out of the oven and it will also congeal a bit with the cooling process. Enjoy the show and making this yummy gourmet frittata! You may want to try some grilled Asian Salmon or Caesar Salad with this frittata too.

IMG_2490  onions  mushrooms

kale  cookedkale  eggwithvg

IMG_2533  IMG_2536  slice

Ingredients:

  • 12 extra-lg eggs
  • 1/2 cup half & half, heavy cream or creme fresh
  • 1 1/2 cup gruyere cheese ( 1/2 cup is for the topping) OR 1/2 cup cheddar, 1/2 gruyere with addtional 1/2 cup mix of each for the topping
  • 1/3 cup grated Reggiano Parmesan
  • 8 oz. pkg baby bella mushrooms sliced
  • 1 1/2 cup chopped or sliced onions
  • 6 small tomatoes sliced 1/8″ thick to decorate top of frittata before you bake it
  • 1 tsp salt (1/2 tsp into eggs & 1/4 tsp each for onion/mush. and 1/4 tsp when you add kale)
  • 1/4 tsp ground pepper
  • 1 tsp Siracha (or more…to taste)

Directions :

  1. Pre-heat oven to 350º
  2. Wash and dry kale leaves
  3. Remove kale leaves from the ribbing (stalk) as shown in show
  4. Slice mushrooms, onions, kale and tomatoes – set aside
  5. Whisk 12 eggs, then whisk in 1/2 tsp salt. 1/4 tsp finely ground pepper and half and half
  6. Add 3 tbsp olive oil to 10″ cast iron pan or oven proof pan on med/high heat
  7. Add onions and sauté for 5 minutes
  8. Add mushrooms to onions and 1/4 tsp salt, then sauté another 5 minutes on med/high
  9. Add in kale when juices begin to release from the mushrooms along with another 1/4 tsp salt and sprinkle of pepper, and a few shots of Siracha
  10. Sauté kale mixture for 5 minutes while stirring just to wilt slightly
  11. Add 1 cup of gruyere and 1/2 cup of parm to egg mixture and give it a quick stir
  12. Turn off heat on cast iron pan and add in egg mixture
  13. Give it a stir to the veggies and egg mixture
  14. Then top with 1/2 cup more gruyere cheese and decorate with sliced tomatoes
  15. Put into the oven and bake for approx. 23 minutes
  16. Take a peak at the 20 minute mark to make sure that the top hasn’t gotten golden
  17. You only want slight golden on outer edge
  18. Take out frittata and let sit for 20-30 minutes
  19. NOTE: the frittata will keep cooking after you remove it from the oven
  20. Slice and serve with a sprinkle of grated Reggiano Parmesan on top

Zucchini Spaghetti at Jaynee’s

Zucchini Spaghetti at Jaynee’s

Wow! Zucchini spaghetti…who would have ever thought? A gluten free dish full of nutrients that taste’s amazing and looks as gorgeous as does is the perfect path to healthy eating! Bringing you this zucchini spaghetti simmering with tomato, basil and red wine at Jaynee’s has inspired me to put together future recipes and shows like this one.

Jaynee and I cook the zucchini spaghetti in this recipe so that it’s al dente. For those of you who might not know what Al dente means it’s an Italian term meaning to have some tooth or bite to it where the texture isn’t too soft. This is kind of ironic because that’s exactly how I like to cook my wheat pasta. I can’t think of anything worse than pasta that is fully cooked to a soft texture.

It is really exciting all the different things you can do with these creative veggie noodles! From Thai themes where raw zucchini noodles are dressed with a citrus dressing made from puréed mangoes, cilantro, fresh lime juice, and avocado’s to tahini sauce puréed with green onions, coconut meat, ginger and fresh lemons. Not only are these dressings packed with anti-oxidants and exotic flavors but the citrus partially cooks the zucchini getting results similar to ceviche. The citrus actually softens the texture of the vegetable giving you a softer mouth feel crunch rather than a harsh raw bite.

It couldn’t get any easier to make these spiral veggie noodles with the new-fangled devices available out there. I purchased my Spiralizer at William Sonoma Outlet in Westbrook on a 30% off sale with an additional 20% off if I gave them my email. Can’t go wrong there. Here is the Spiralizer Amazon link offering a great deal too! Can’t wait for you to venture off into veggie noodle land. You will be amazed how fun and delicious it is to make this recipe. Hope you enjoy the show and keep a look out for future veggie noodle recipes 🙂

IMG_2403  intro  IMG_2416

IMG_2418  IMG_2422  IMG_2430

zucspaghetti  IMG_2442  IMG_2446

Ingredients: Need “Spiralizer” or similar to make zucchini spaghetti

  • 4 med/lg zucchini
  • 1 small vadalia (sweet) onion chopped
  • OPTIONAL: 2 finely chopped garlic cloves – If you love garlic as I do
  • 1 14 oz. can of diced tomatoes flavored with onion, garlic, celery and or green peppers OR your favorite can of peeled tomatoes in your cabinet (just need to add in 1/4 cup chopped peppers in addition to the onion/garlic above – chop up the whole peeled tomatoes as well to add in after you sauté veggies)
  • NOTE: If you use “whole peeled” tomatoes DO NOT use the juice too, tomatoes only, because the zucchini renders out a lot of water all on its own.
  • 1/4 cup red wine
  • 3 tbsn olive oil
  • 1 bunch fresh basil
  • 1/2 tsp salt
  • S & P to taste
  • OPTIONAL: 1 small container of fresh ricotta to garnish at the end with the Parmesan

Directions:

  1. Spiralize all 4 zucchini and place in a lg bowl
  2. Add chopped onion to 3 tbsp olive oil in a large fry pan on medium heat
  3. Sauté for 5 minutes til soft
  4. Add in Spiralized zucchini with 1/2 tsp salt and sauté 5 minutes on med/high heat- Make sure to stir a couple of times to help it from not sticking.  Sautéing on med/high will help to evaporate some of that liquid rendering out of the zucchini while sautéing– (If you saute on low it will just simmer in all the water, you will then have to drain a little of the water out of the pan)
  5. Add in tomatoes, red wine, s & p to taste and simmer 5 more minutes
  6. Plate up and top with your favorite grated Parmesan cheese
  7. OPTIONAL: Top with dollops of fresh ricotta and grated Parmesan

Homemade Berry Granita

Homemade Berry Granita

Homemade berry granita is similar to a sorbet or an Italian ice and gives you the same happy feeling as eating ice cream but can be made with out all that hard work. Granita is made in three simple steps – purée, freeze and scrape. How simple is that? Most recipes for granita have you making a simple syrup by boiling the water and melting the sugar but I find that unnecessary. Instead, I substitute the sugar with Agave Nectar this way you add it right to the berries in the blender! Yeah!

Granita actually originated in Sicily and is a frozen treat made all over the world. In Quebec they call it a slushy or a slurry. This frozen treat can also be made into a after dinner dessert for adults by adding in a jigger or two of rum to give it a little kick. Another great idea is serving granita between meals as a palate cleanser to clear the taste buds for next course as an elegant presentation to your dinner party.

In my homemade granita recipe I have also simplified the freezing steps. Instead of scraping with a fork every 45 minutes just wait the three hours or so until the entire dish is frozen and then scrape with a fork at the end like we do in the show. This way it’s less time consuming and a smoother, easier surface to work with all awhile still coming out fluffy and delicious! I think you and your family and friends will really enjoy the simplicity of this delicious frozen treat.

IMG_2321

IMG_2122

IMG_2364


slurry

freezer

fluffygranita


IMG_2375


Ingredients:

  • 2 cups fresh strawberries
  • 1 cup fresh raspberries
  • 1 cup cold water
  • 2 tbsp agave nectar or honey (Optional)
  • 1/4 cup sugar
  • 1/4 cup fresh squeezed lemon juice
  • Juice from 1 lime
  • 1 bunch fresh peppermint leaves

Directions:

  1. Wash and dry fruit
  2. Squeeze juice from lemons and lime
  3. Hull strawberries and slice in half
  4. Place all berries into blender
  5. Add citrus, H20 and agave
  6. Blender for 20 seconds til pureed
  7. Pour into a Pyrex dish
  8. OPTIONAL: Add in 1-2 jiggers of rum, stir and freeze
  9. OPTIONAL: You can give a stir before its frozen around the 45 minute mark BUT this is not a necessary step (as you see in the show we did not get around to this)
  10. Freeze for approx. 3 hours
  11. Pull out from freezer and begin to scrape with a fork until fluffy
  12.  Spoon into martini glasses and top with fresh mint

Homemade Pavlova at Jacqui’s

Homemade Pavlova at Jacqui’s

Maybe it’s the bright vivid colors of all the fresh fruits or the fruit that’s layered on a pillow of whipped cream, then set up on a bed of crispy meringue with a marshmallow center that makes this Pavlova the talk of the town when the party is over! This inspired recipe originates from my dear friend Jacqui who has been making this amazing Pavlova creation since she was 11 years old. She first started making this Pavlova with her friend’s mother back in her home land of Ireland.

There were definite ooh’s and aah’s in the room upon first setting eye’s on Jacqui’s pavlova at her St. Patricks Day party three years ago when she made her grand unveiling. That praise continued on after everyone finished eating their slice of heaven. I knew that this amazing Pavlova was next on my list of culinary endeavors.

The wonderful thing about Jacqui’s recipe is that she keeps it simple. I have gone through many recipes for this Pavlova and there are too many unnecessary steps being taken. I have made these other recipes with the stabilizers using cream of tartar and vinegar and corn starch but you just don’t need to waste your energy going through all this. The reason behind using all these stabilizers is because a meringue is usually set on top of a custard like base as in a lemon meringue pie where condensation is a very likely occurrence and the meringue weeps beads of moisture if it isn’t perfectly cooked through. In a Pavlova dessert you needn’t worry about any condensation forming because it’s base is a cake or serving platter. Jacqui bakes her Pavlova on a piece of tin foil that’s coated with butter and placed over an oven proof plate…how simple is that? If you are uncomfortable with that or don’t have a oven proof plate as such you can easily use a cookie sheet and parchment as shown below going about her same recipe.

I like that there isn’t any sugar in the whipped cream because the meringue is sweet enough. Planning ahead is a great idea and will make things easier if you can get the meringue done the night before. In Jacqui’s recipe there is also no need for a low and slow bake or a long slow cool off with the oven turned off and the oven door slightly open while the meringue stays in there until completely cooled.  I have put in all the extra steps and that extra time with meringue’s before…it is unnecessary here! I say the proof is in the pudding…or should I say the Pavlova! You will love making this recipe as much as I do.

“Meringue with Fruit Filling” is what this dessert was originally called. Both New Zealand and Australia claim to have invented Pavlova and both claim it as their national dish.  What it really comes down to is two countries being inspired by a Russian prima ballerina named Anna Pavlova. She was on tour in their countries from 1926-1929. A chef in New Zealand said he had invented the dessert for her and another chef in Australia had commented “It is as light as Pavlova”, comparing the dessert to the ballerina, and that’s how the name came about. Now you see how light this dessert truly is …just wait til you try it. You too will become a fan of Pavlova! I hope you enjoy the show and become as inspired by Jacqui and her Pavlova as I am.

iphone pictures 1236  iphone pictures 1322  iphone pictures 1237

iphone pictures 1240  iphone pictures 1241  iphone pictures 1243

iphone pictures 1246  iphone pictures 1252  iphone pictures 1255

iphone pictures 1329  iphone pictures 1330  iphone pictures 1332

iphone pictures 1259  iphone pictures 1263  iphone pictures 1266

iphone pictures 1268  iphone pictures 1269  iphone pictures 1270

iphone pictures 1275  iphone pictures 1278  iphone pictures 1279

iphone pictures 1280  iphone pictures 1281  iphone pictures 1285

iphone pictures 1286  iphone pictures 1287  iphone pictures 1289

iphone pictures 1291  iphone pictures 1327  iphone pictures 1294

iphone pictures 1296  iphone pictures 1305  iphone pictures 1308

iphone pictures 1314  iphone pictures 1312  foil

whipfoil  foileggwhites  IMG_2268

IMG_2283 IMG_7406 IMG_7403

Ingredients for Pavlova – Serves approx 16-20 slices:

  • 6 extra large egg whites
  • 1 cup plus 2 tbsp sugar
  • 1 pint heavy cream (2 cups) NO SUGAR IN WHIPPED CREAM
  • small containers of strawberries, blueberries,  & black berries
  • 1 whole pineapple (buy ahead of time and leave on your counter for 2-3 days to get maximum sweetness)
  • Pam canola oil spray
  • parchment paper
  • pencil

Directions for Meringue: (Good idea to make this the night before and leave on the counter covered with foil:

  1. Pre-heat and put on Convection if you have it to 325º When I have tested cooking the meringue on a regular oven setting the bottom burns on the cookie tray. The convection setting distributes the heat for a more even cooking and beautiful bottom
  2. Lightly spray cookie sheet with Pam-canola oil to help keep parchment in place while you are shaping the meringue into a circle
  3. You can use tin foil that is coated with butter on both sides and placed over a oven proof dish OR trace the outside of a 9″ dinner plate on a piece of parchment and flip it over so the drawing is facing down and place onto sprayed cookie sheet (top of parchment is clean and dry)
  4. Separate egg whites from the yolks using your hands – it’s the best way to ensure you won’t break the yolk & having the eggs at room temperature helps you get more volume when you whisk
  5. Put the egg whites into kitchen aid mixing bowl with whisk attachment (or electric mixer and large mixing bowl)
  6. Beat egg whites on medium/high speed (#8) til it begins to looks white, and firm and you see volume form – 4 minutes here)
  7. Begin to add 1/2 cup of sugar, and whisk- you will see the whites becoming shiny
  8. Add 2 Tbsp at a time every 15 seconds on medium (#6) speed – the meringue holding stiff peaks and looking shiny – this will take 3 minutes while adding sugar and 1 more minute after sugar addition is done
  9. GRAND TOTAL WHISKING 8 MINUTES
  10. Gently fold in the rest of the 2 tbsp of sugar
  11. Scoop whipped meringue onto parchment paper and spread with spatula into the circle shape – keep thickness at 2.5″-3.0 because you will loose a little volume when it cools
  12. Put into the oven for 45 minutes… DO NOT OPEN OVEN DOOR (especially in the first 30 minutes!)
  13. Clean and chill your kitchen-aid mixing bowl and whisk or mixing bowl by placing it in the freezer (at least in the frig. if no room in freezer)
  14. Slice up your fresh pineapple as shown in the photos
  15. Slice up your strawberries and put all your fruit on a plate to make laying it out on the whipped cream an easier process
  16. Take the meringue out of the oven and let it cool 5 minutes just so you can handle the hot pan better (I actually even slide the meringue off of the cookie tray onto the counter – you can actually pull the parchment paper so the meringue slides with it and let it completely cool)
  17. Then flip it over onto your serving platter –  get your hands underneath it to help flip it over onto serving dish
  18. Let meringue cool completely if you haven’t already (if you put the whipped cream on when it’s not fully cooled and the whipped cream will melt)
  19. DON’T WORRY about any cracks or imperfections, that’s the nature of the meringue when cooked for a Pavlova and you are topping it with whipped cream and fruit : )
  20. Peel off the parchment paper
  21. Take out your chilled mixing bowl and begin to whisk 2 cups of heavy cream
  22. Whisk on medium/high till the cream turns into stiff peaks
  23. Using your spatula scoop out whipped cream and spread a layer of whipped cream on top and then layer your different fruits in your favorite design
  24. You can store this in the refrigerator for a few hours until you are ready to serve it

TIP: Always use stainless steel or glass mixing bowls to whisk eggs whites and NEVER plastic or wood because they can have residual oils in them which is very bad for egg whites.  Also NEVER use a wooden spoon to scoop out the meringue …same idea.


Mixed Berries with Dreamy Cream

Mixed Berries with Dreamy Cream

Mixed berries with dreamy cream is a really easy yet super delicious way to end any meal! This homemade white fluffy fruit dip is made from melting and whisking Marshmallow Fluff with Philadelphia cream cheese. Believe it or not this mixture is a perfect combination. You might think at first that it may be wicked sweet but the tang from the cream cheese mellows that right out and brings it all together in a very nice balance.

You can add a half of teaspoon of vanilla extract to this recipe but I feel like it just gets lost anyways and I like to keep this fluffy dip a bright white making for a wonderful color contrast with the berries. This dreamy cream fruit dip is pretty rich so all you really need is a small dollop in between fruit layers.

Now you may think this Marshmallow Fluff and Philadelphia cream cheese is the perfect compliment to the berries but wait until you invite fresh mint to the party! The flavor of the mint with the mixed berries and dreamy cream is an absolute MUST. I happen to have “peppermint” mint growing around my yard and I use it for so many things like my roasted beets and feta salad. Once you start to grow mint it just takes off and the is no need to ever fuss over it again. 

With all the effort we put into entertaining I’m so happy to be able show you a recipe that can be made in a matter of minutes and get the oohs and aah’s that it does! Hope you enjoy the show and the mixed berries and dreamy cream recipe as much as we do.

IMG_2170  IMG_2122  IMG_2185

IMG_2193 IMG_2201  DaveBella

Ingredients:

  • 12 martini glasses, parfait or plastic drink cups
  • 1 16 oz. container of Marshmallow Fluff
  • 1 8 oz. pkg. Philadelphia cream cheese
  • 1 pint of blue berries
  • 2 lbs fresh strawberries sliced
  • 1 pkg black berries
  • 1 pkg raspberries
  • fresh mint leaves

Directions:

  1. Place room temperature Philadelphia cream cheese and Marshmallow Fluff in a medium size pan on medium heat
  2. Begin to melt this combination all awhile whisking the whole time
  3. This process will only take 1 minute
  4. Let this mixture fully come to room temperature before layering with the fruit
  5. Begin to layer berries into glass with a small dollop of dreamy cream in between each layer
  6. Top with fresh mint leaves

Homemade Chocolate Pecan Pie at Barbara’s

Homemade Chocolate Pecan Pie at Barbara’s

barbarapie
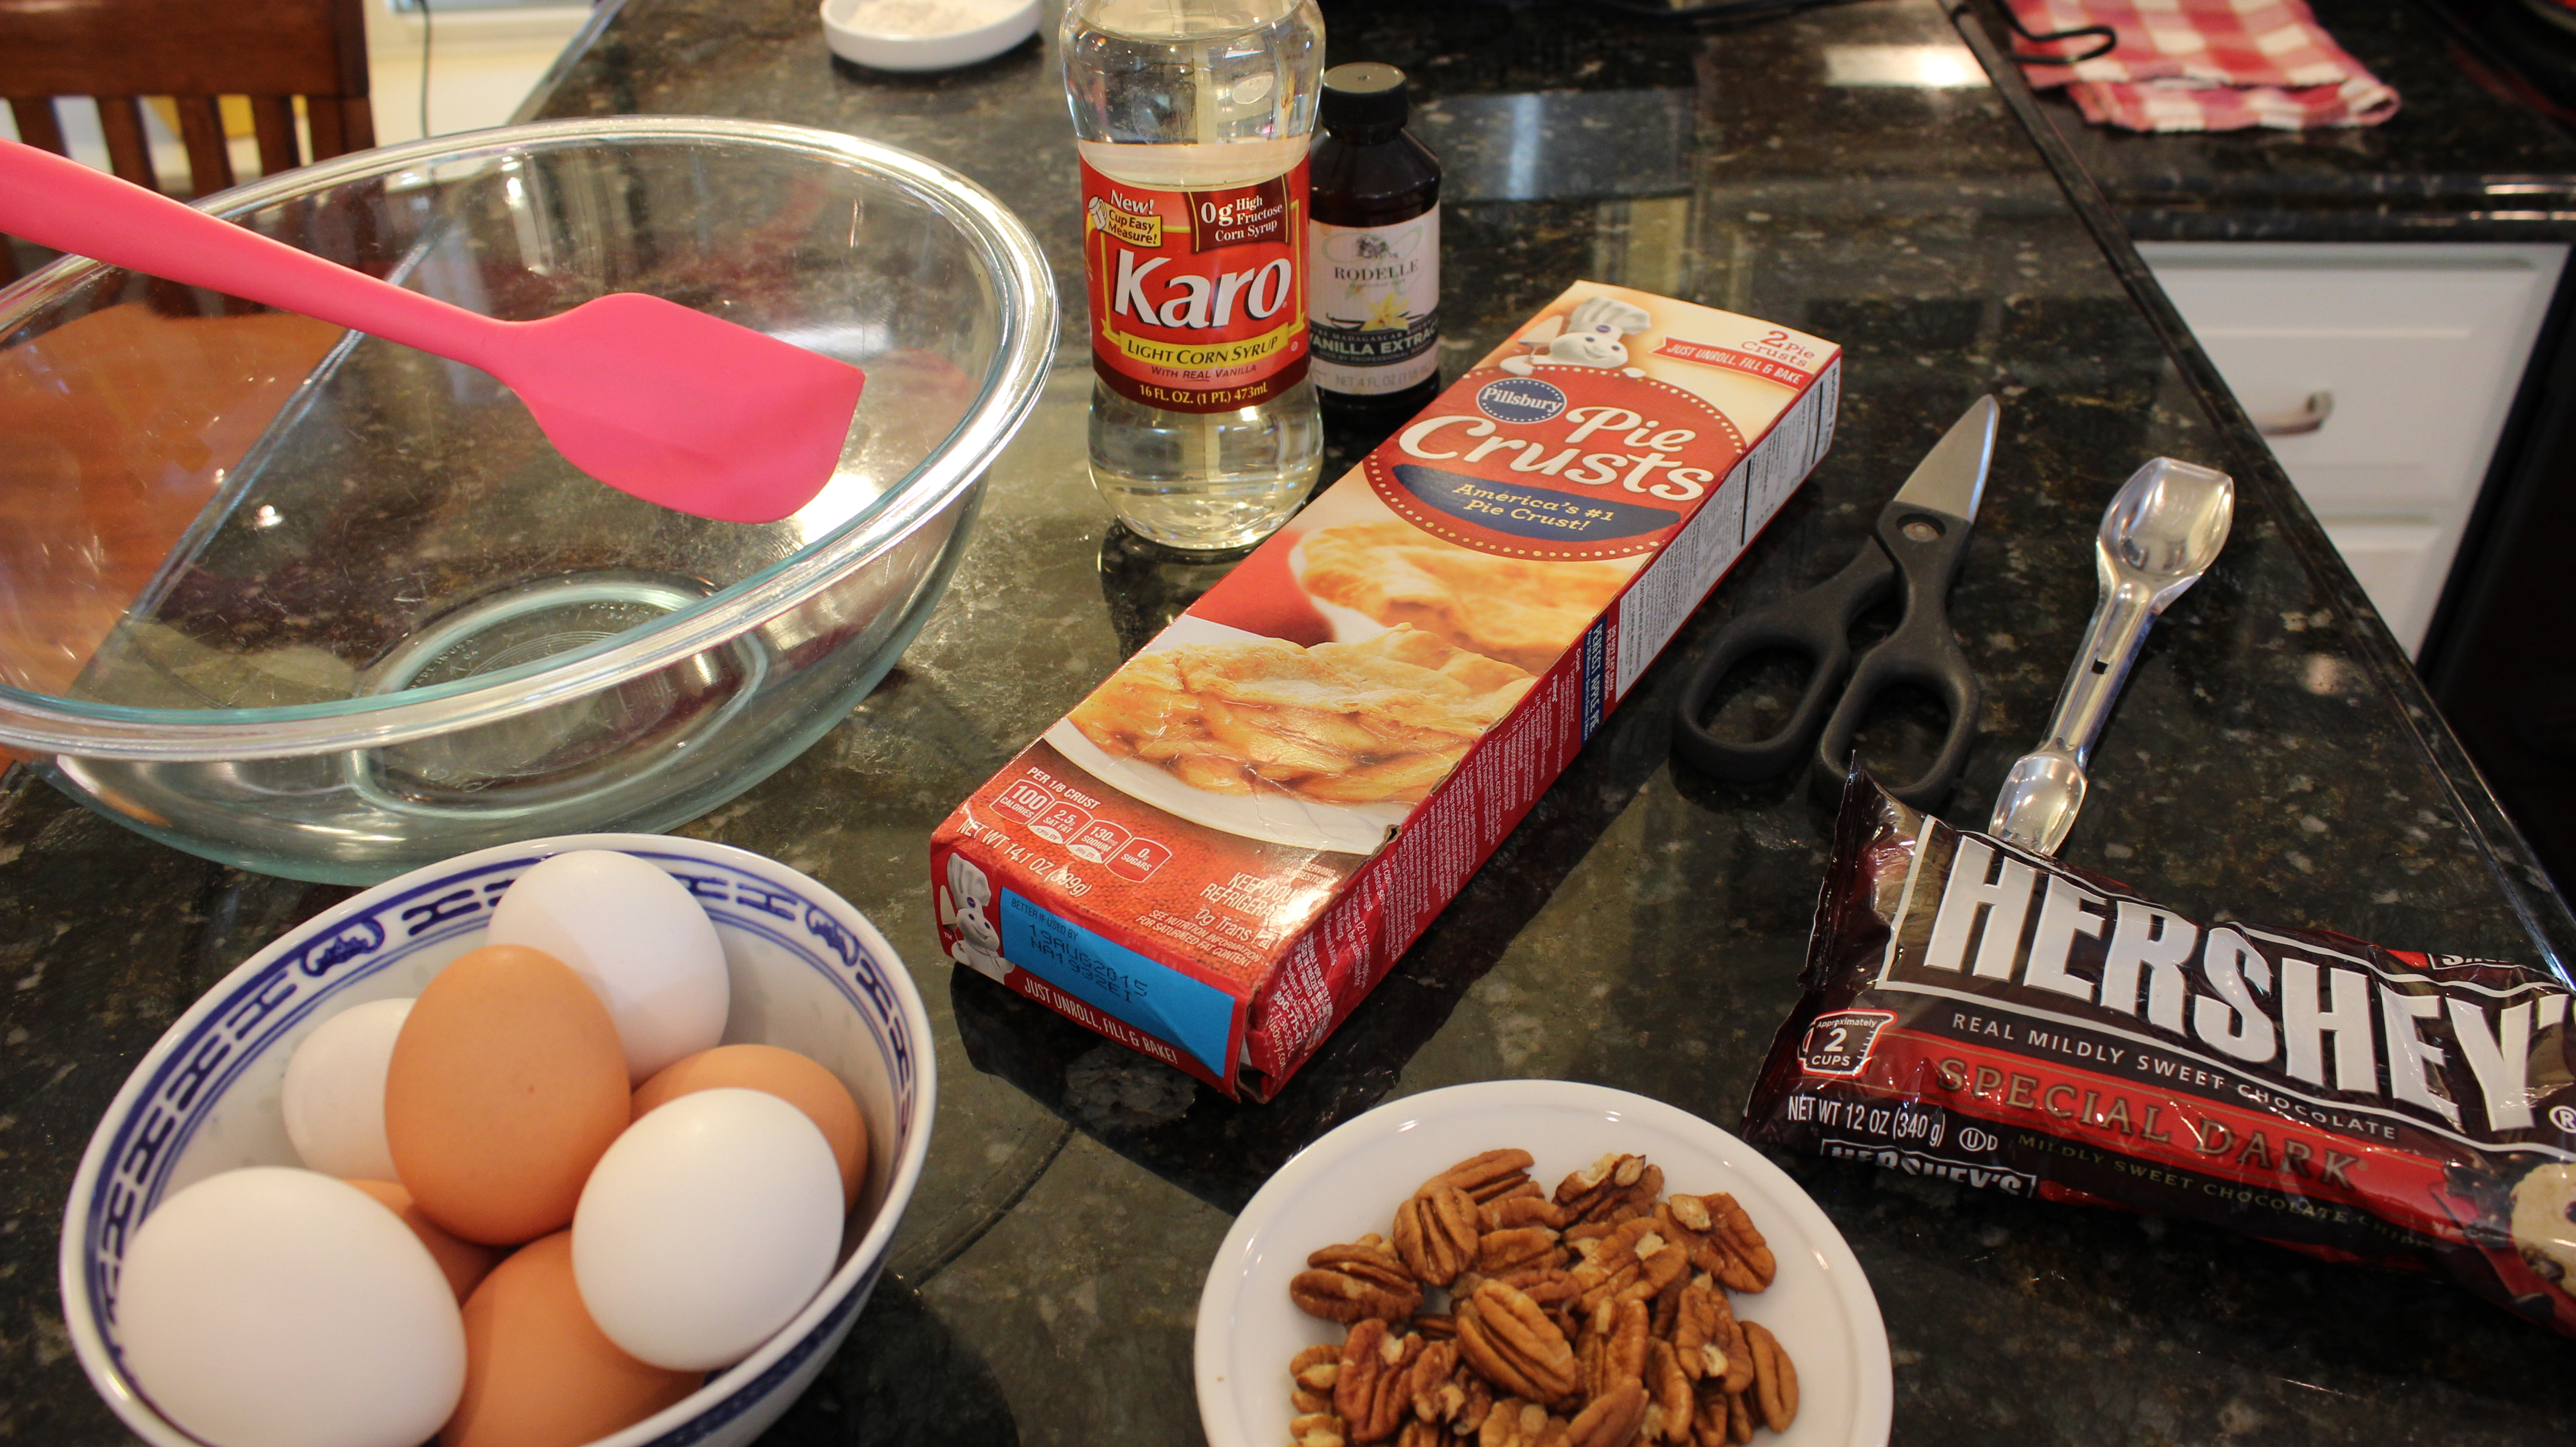
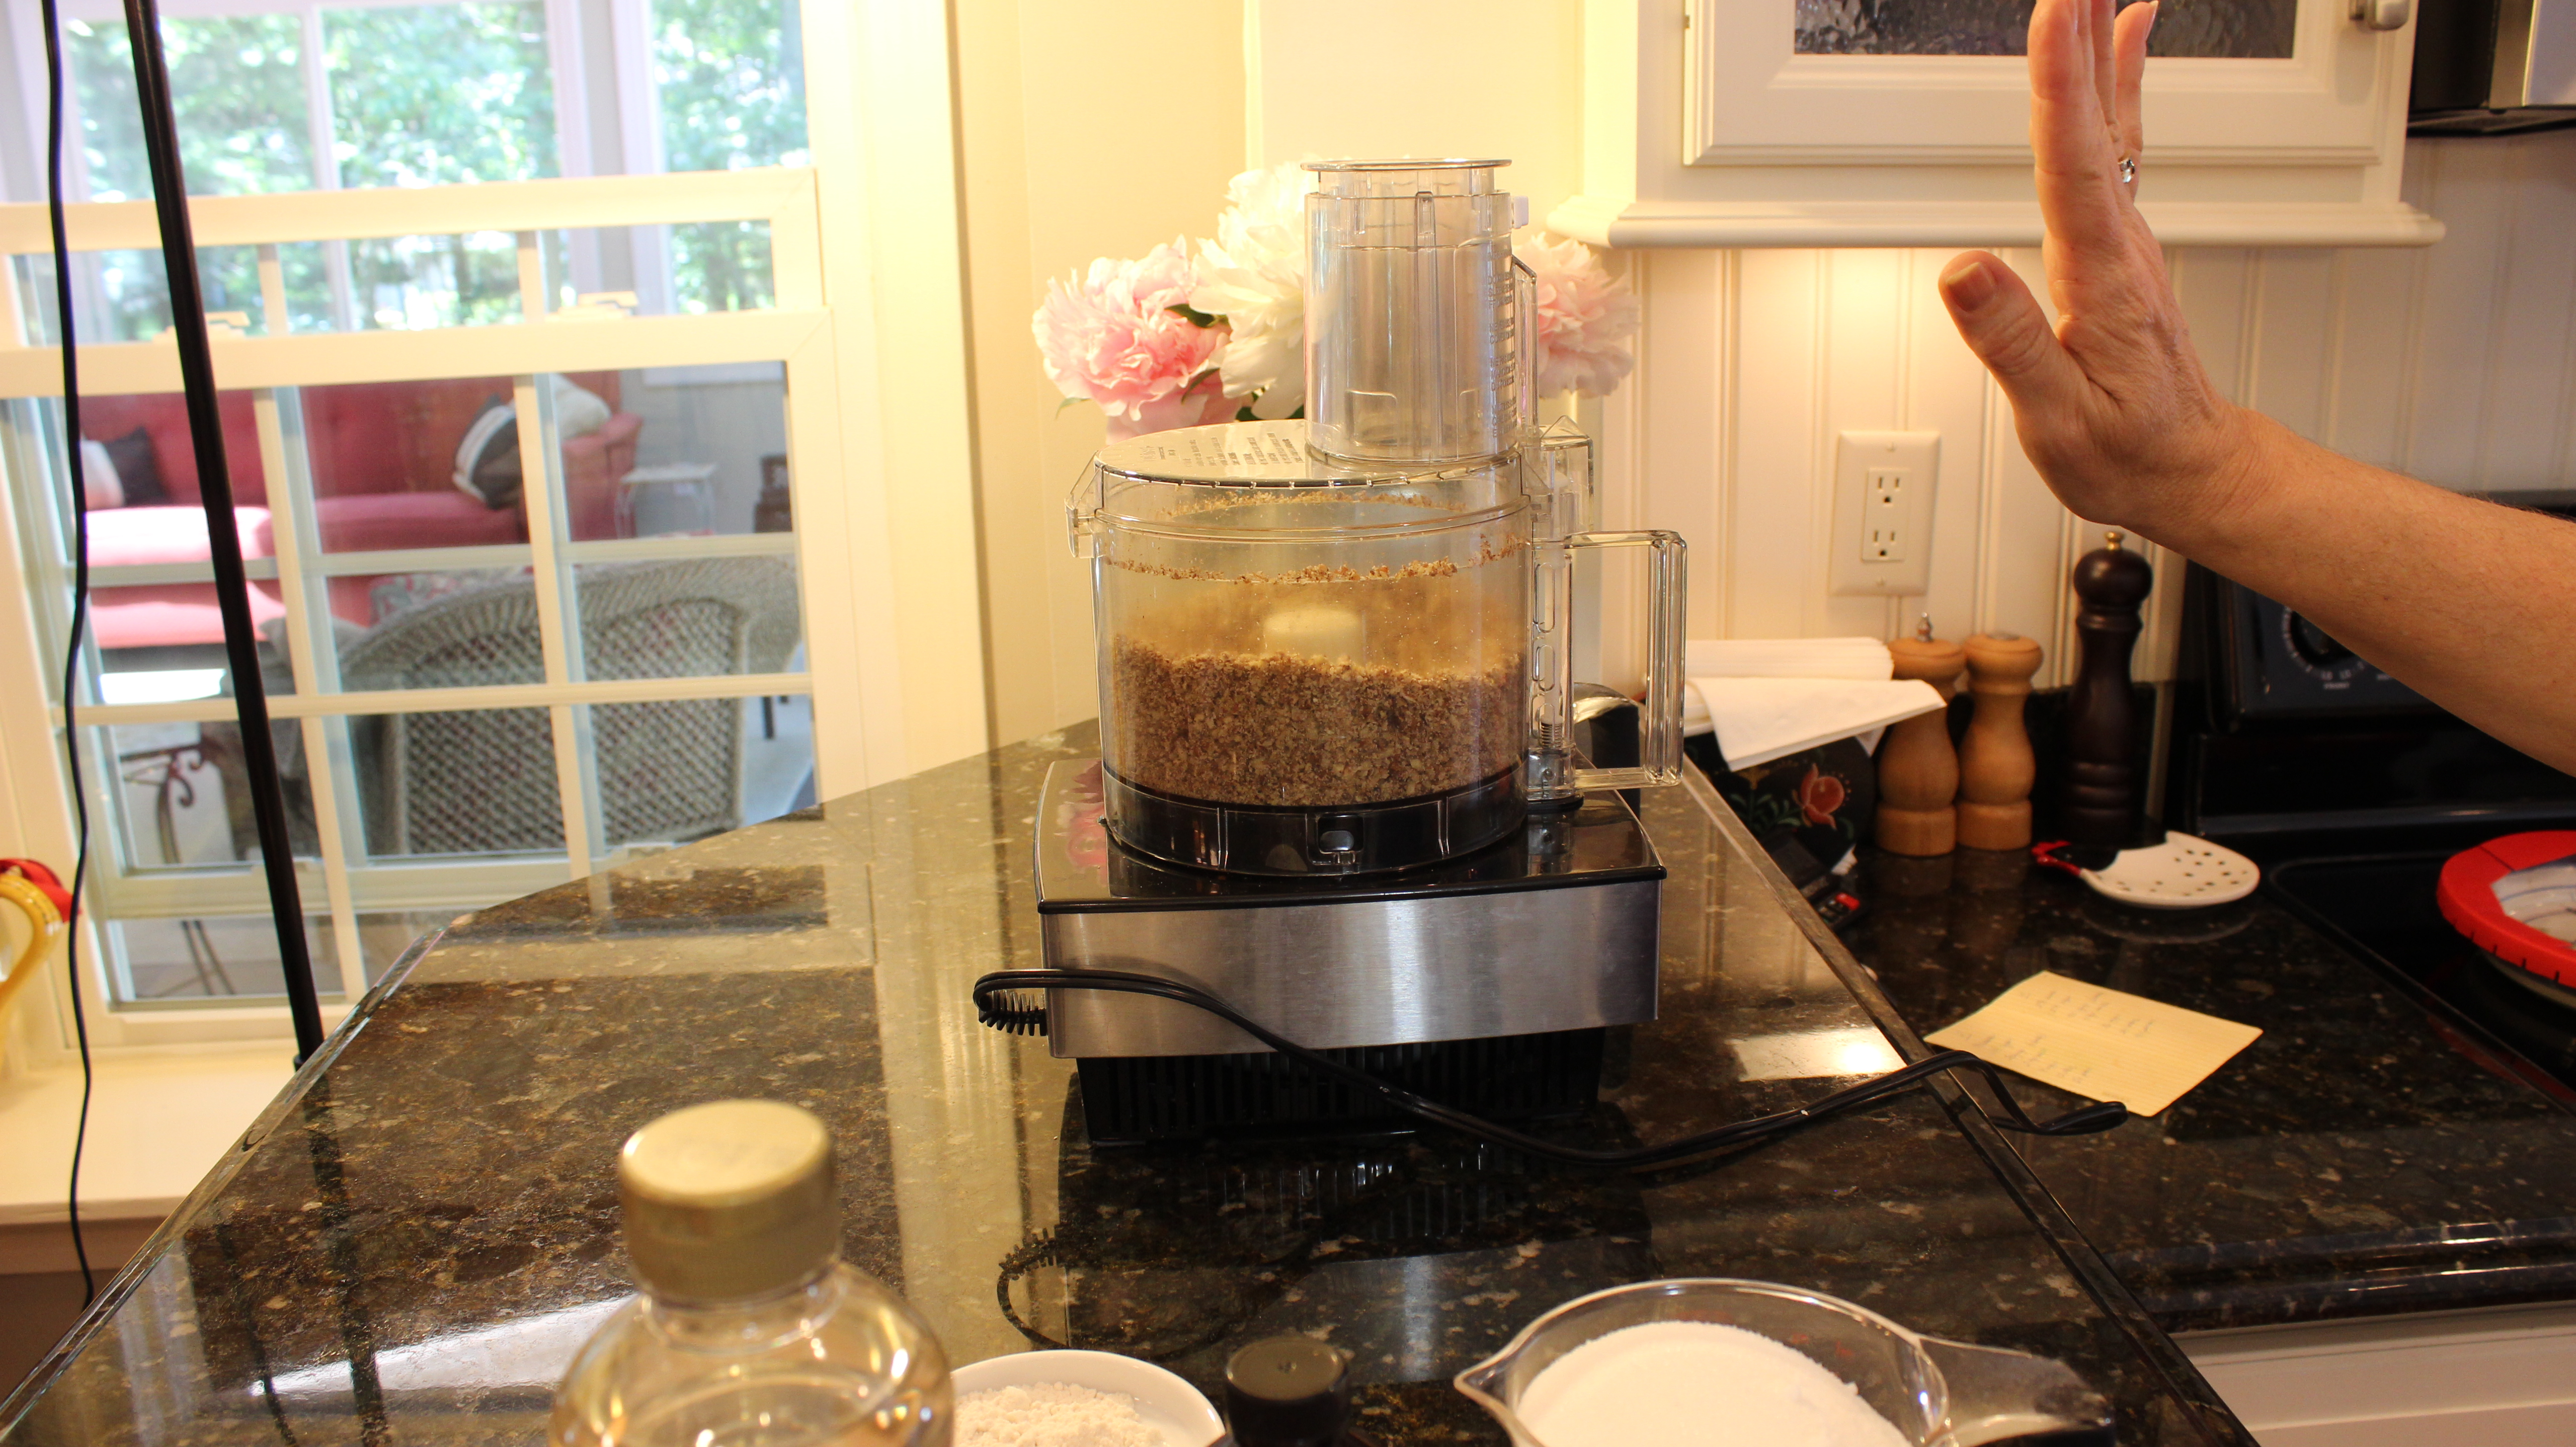
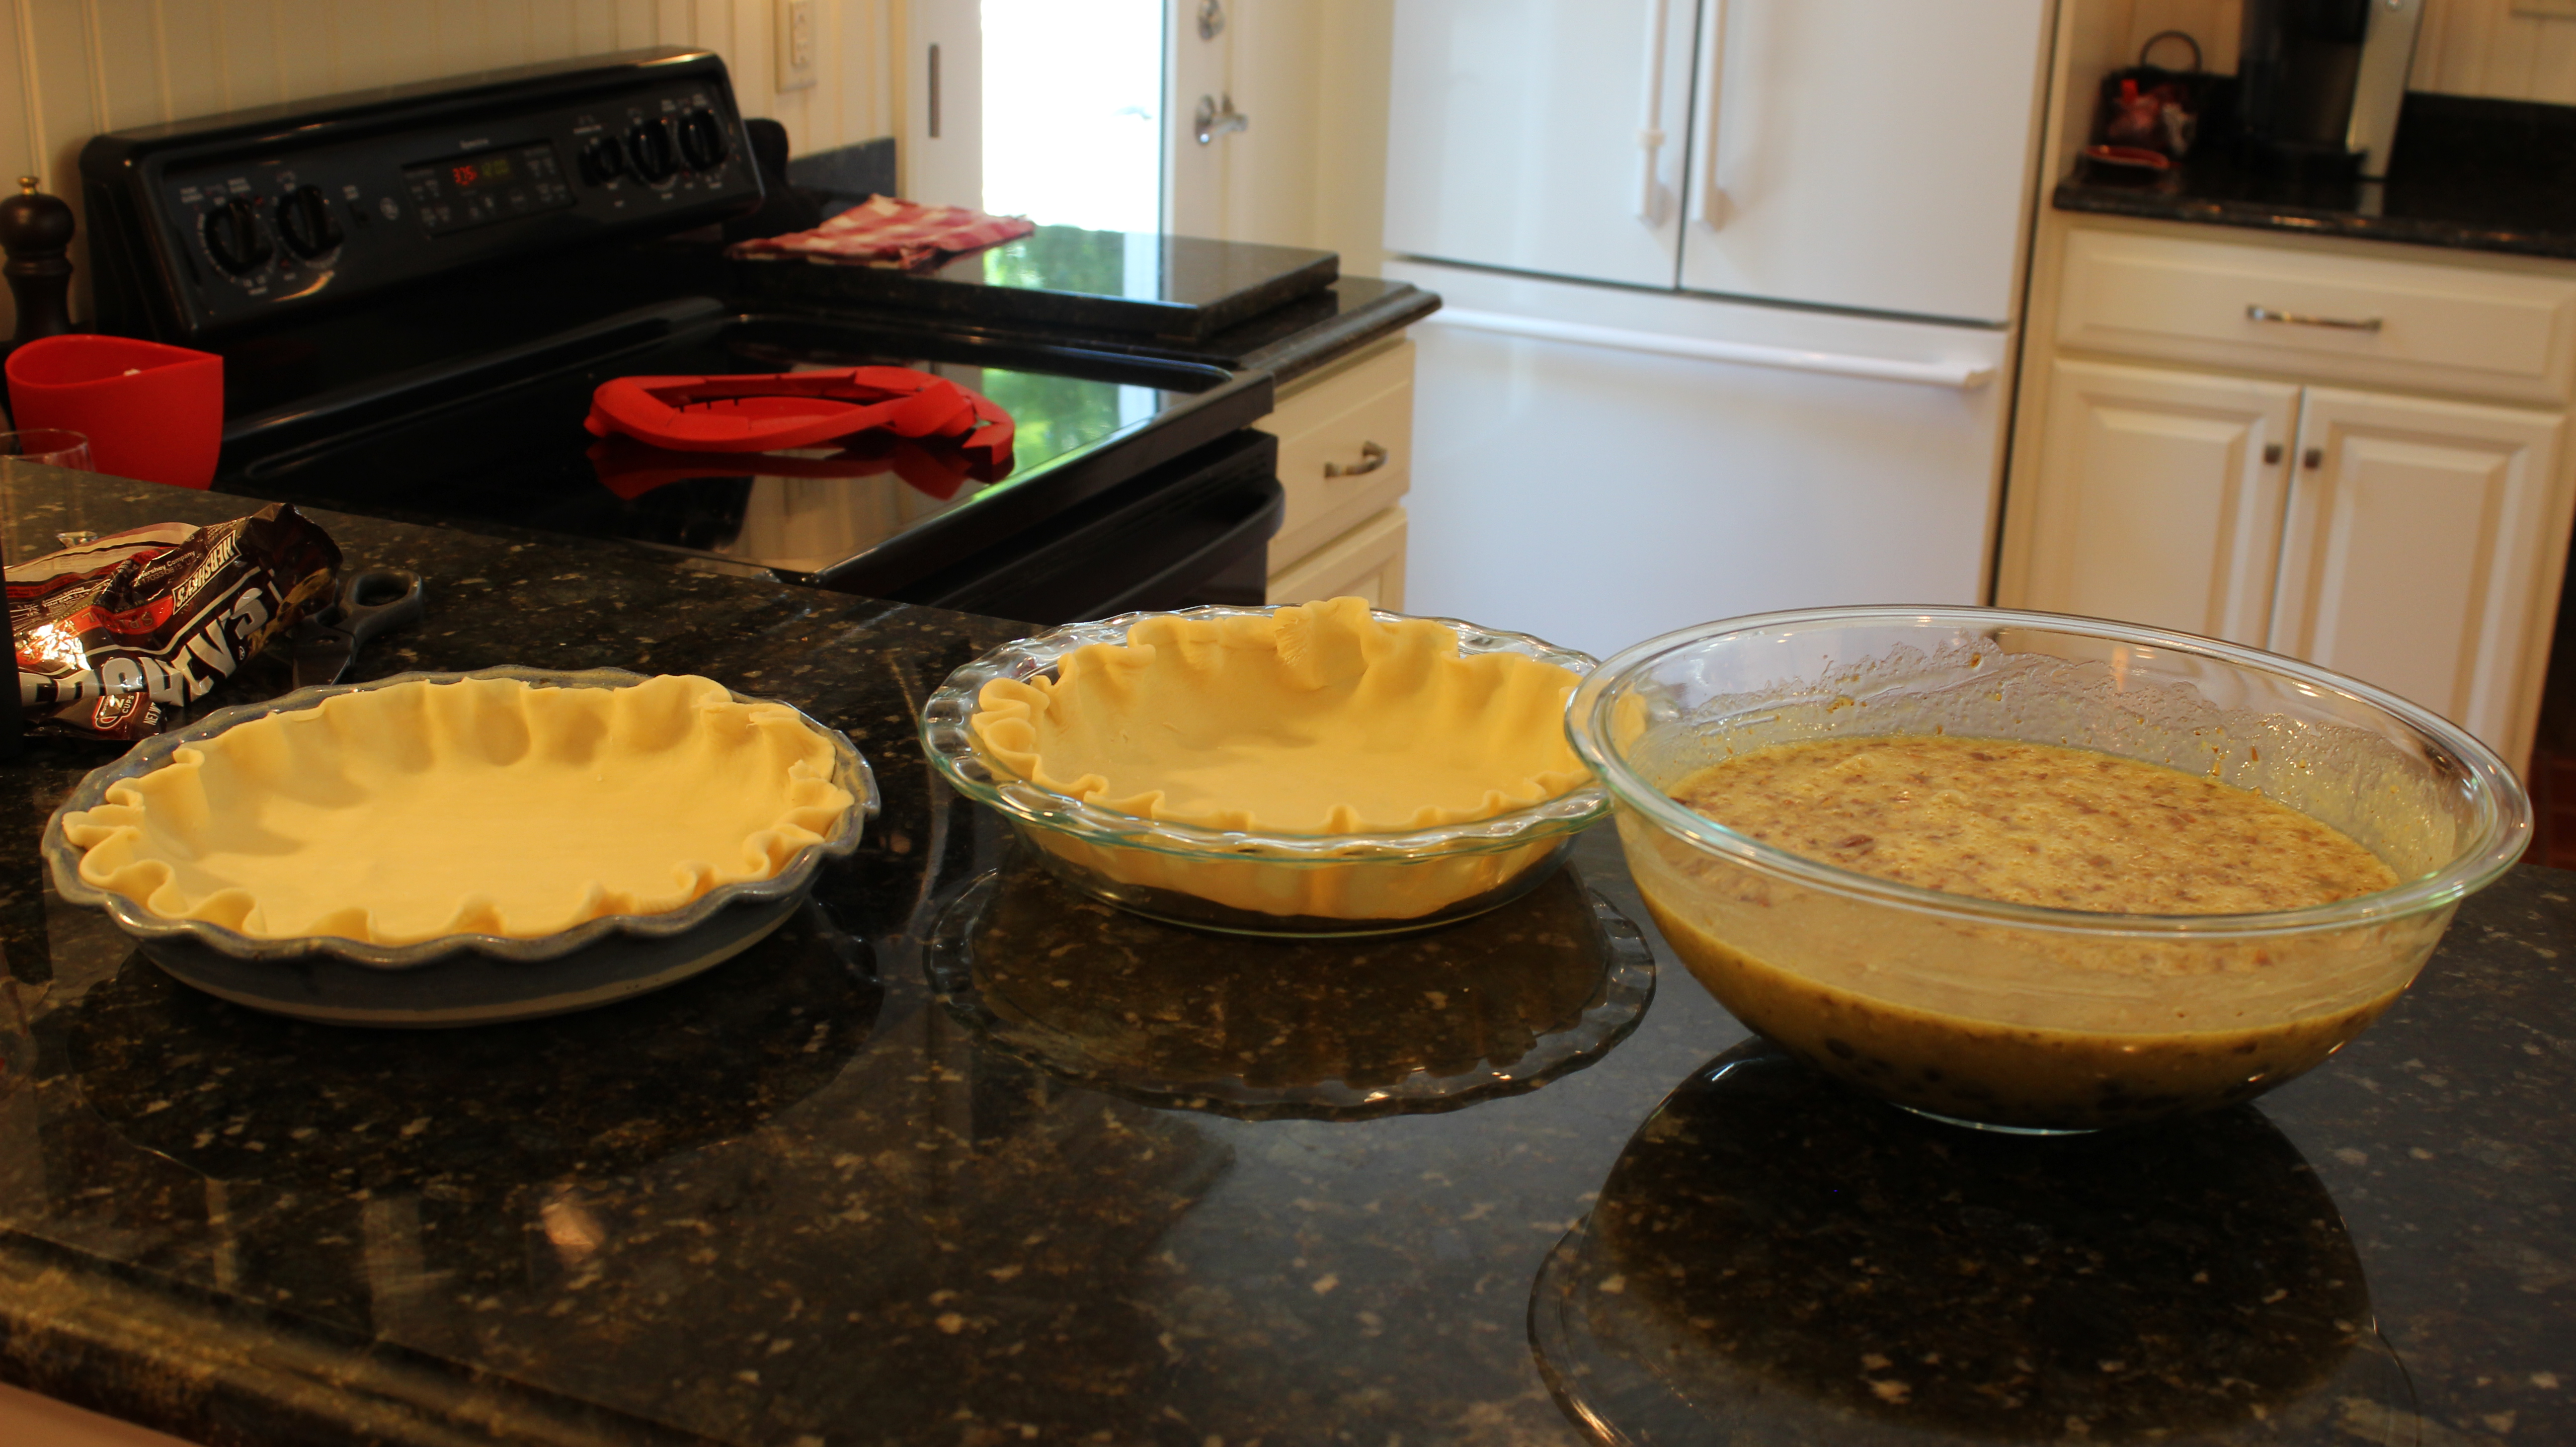
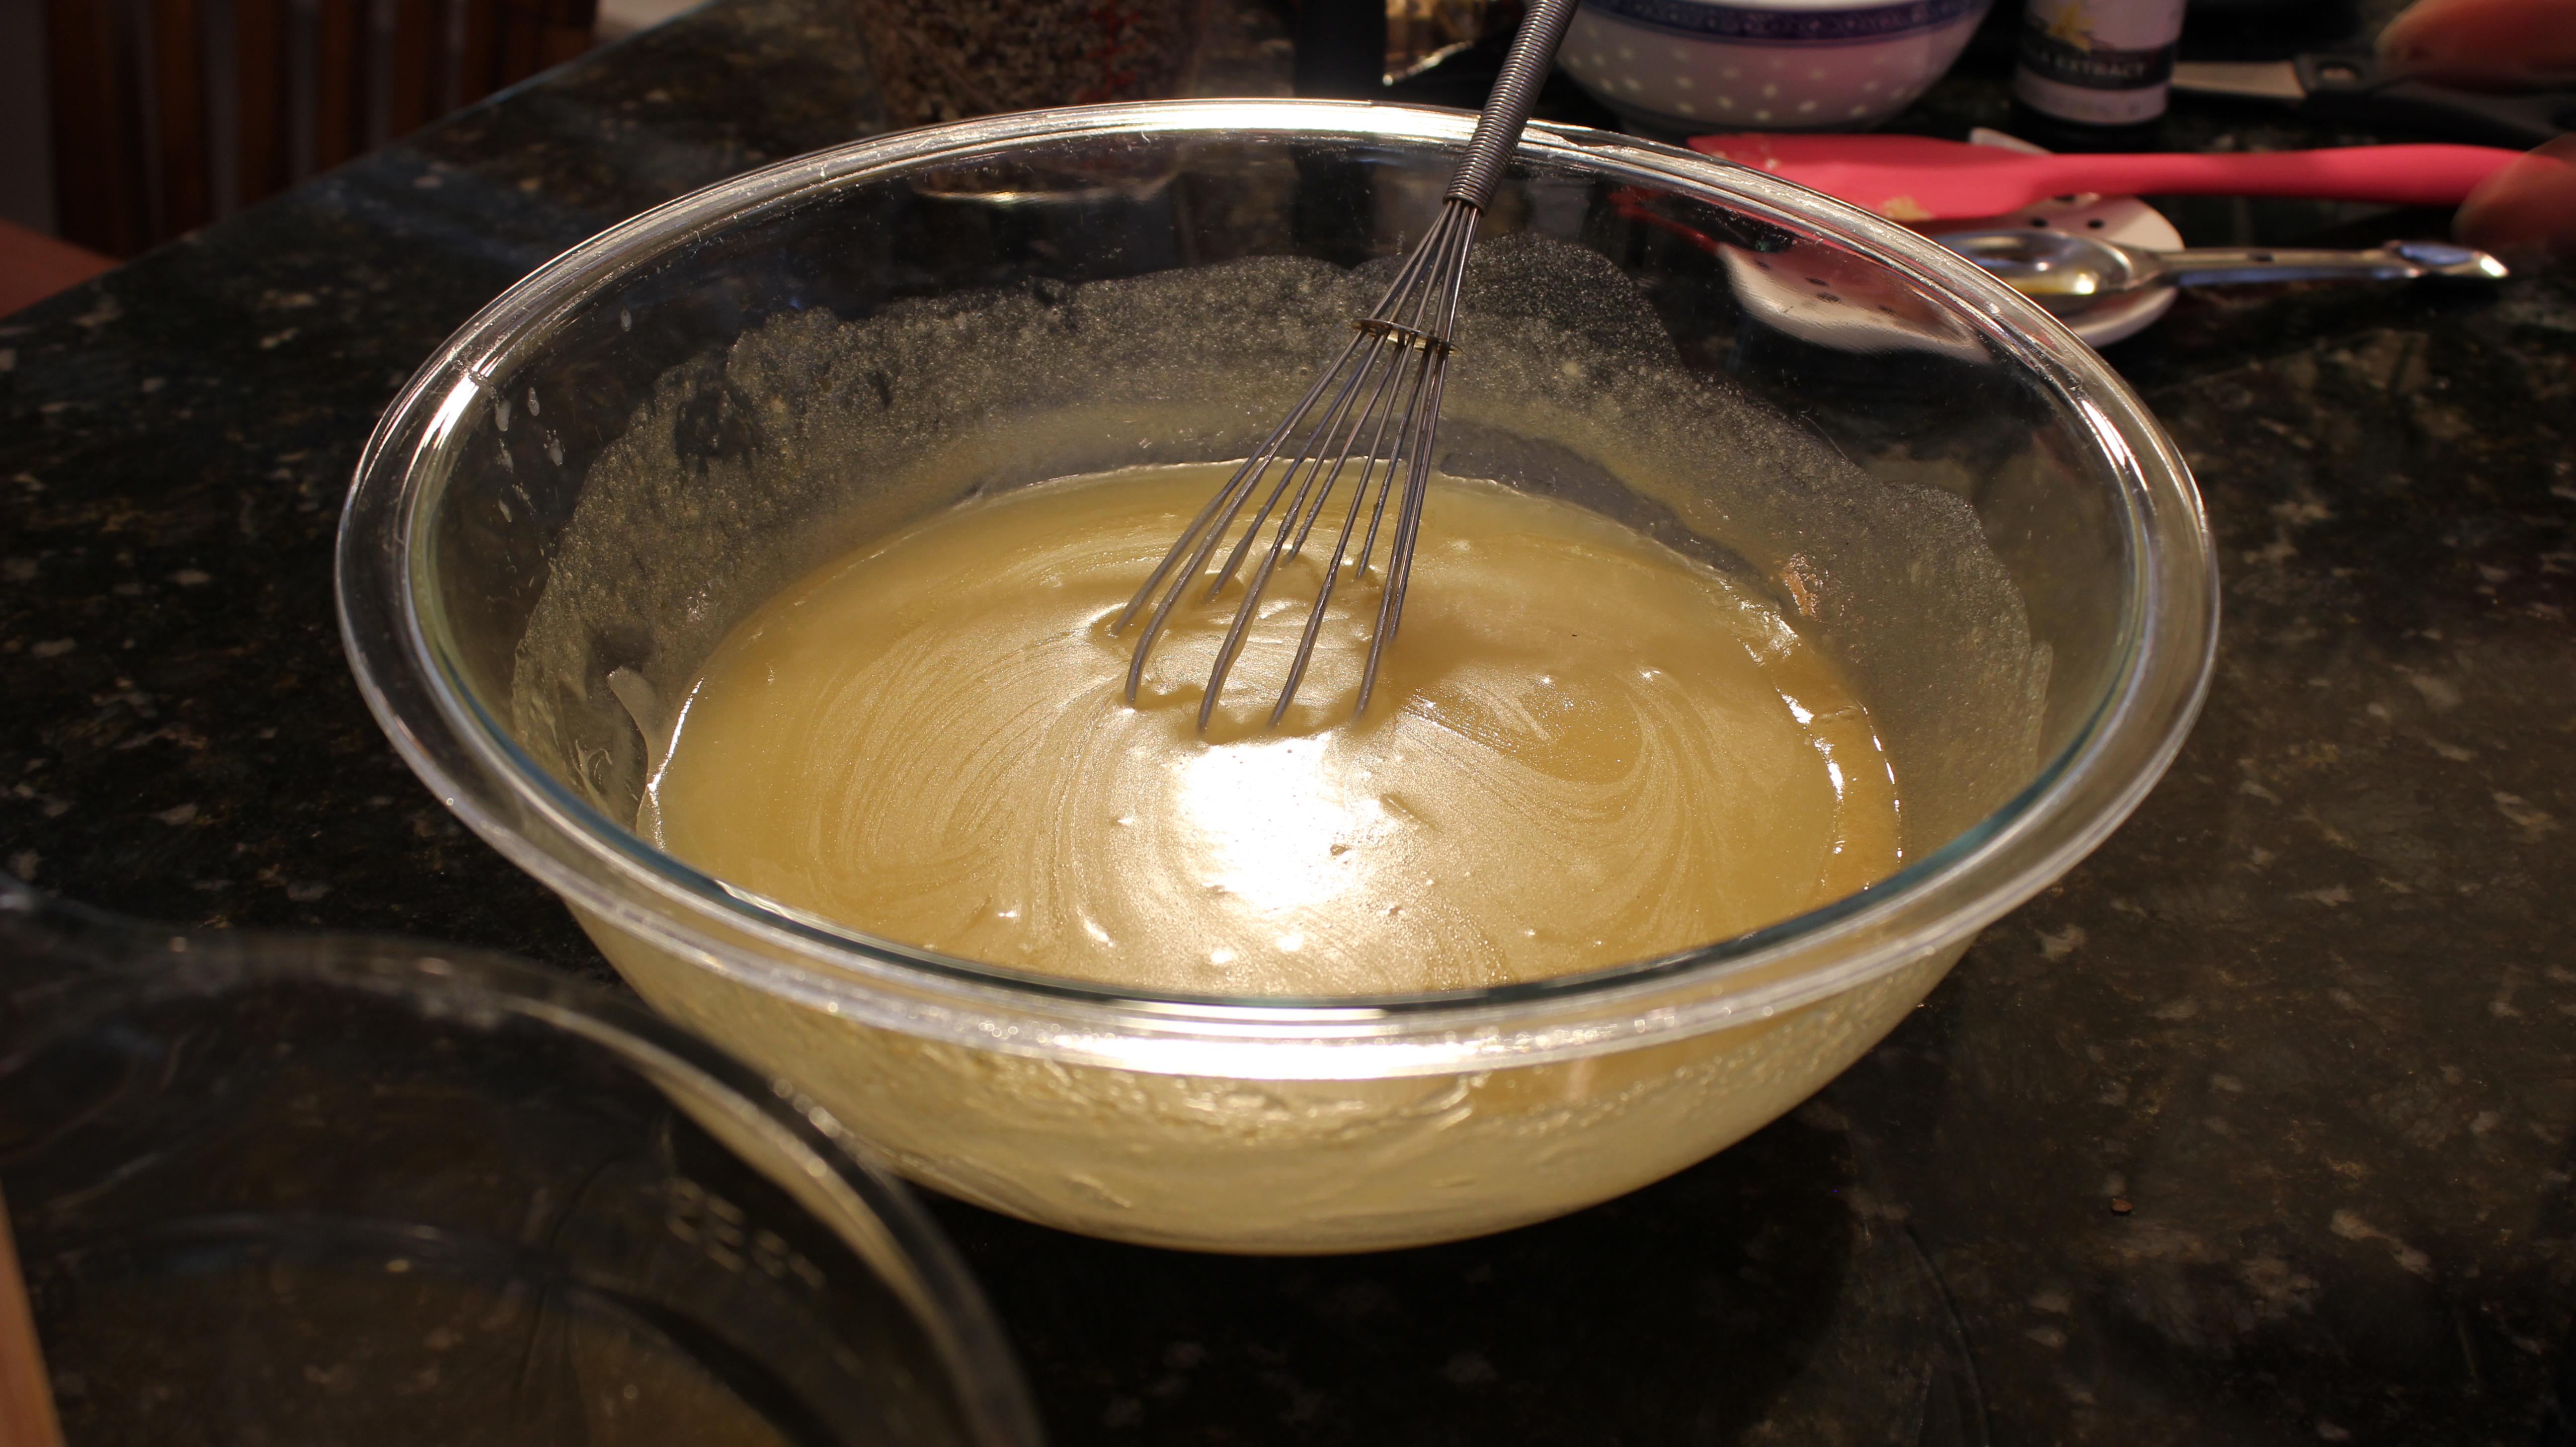
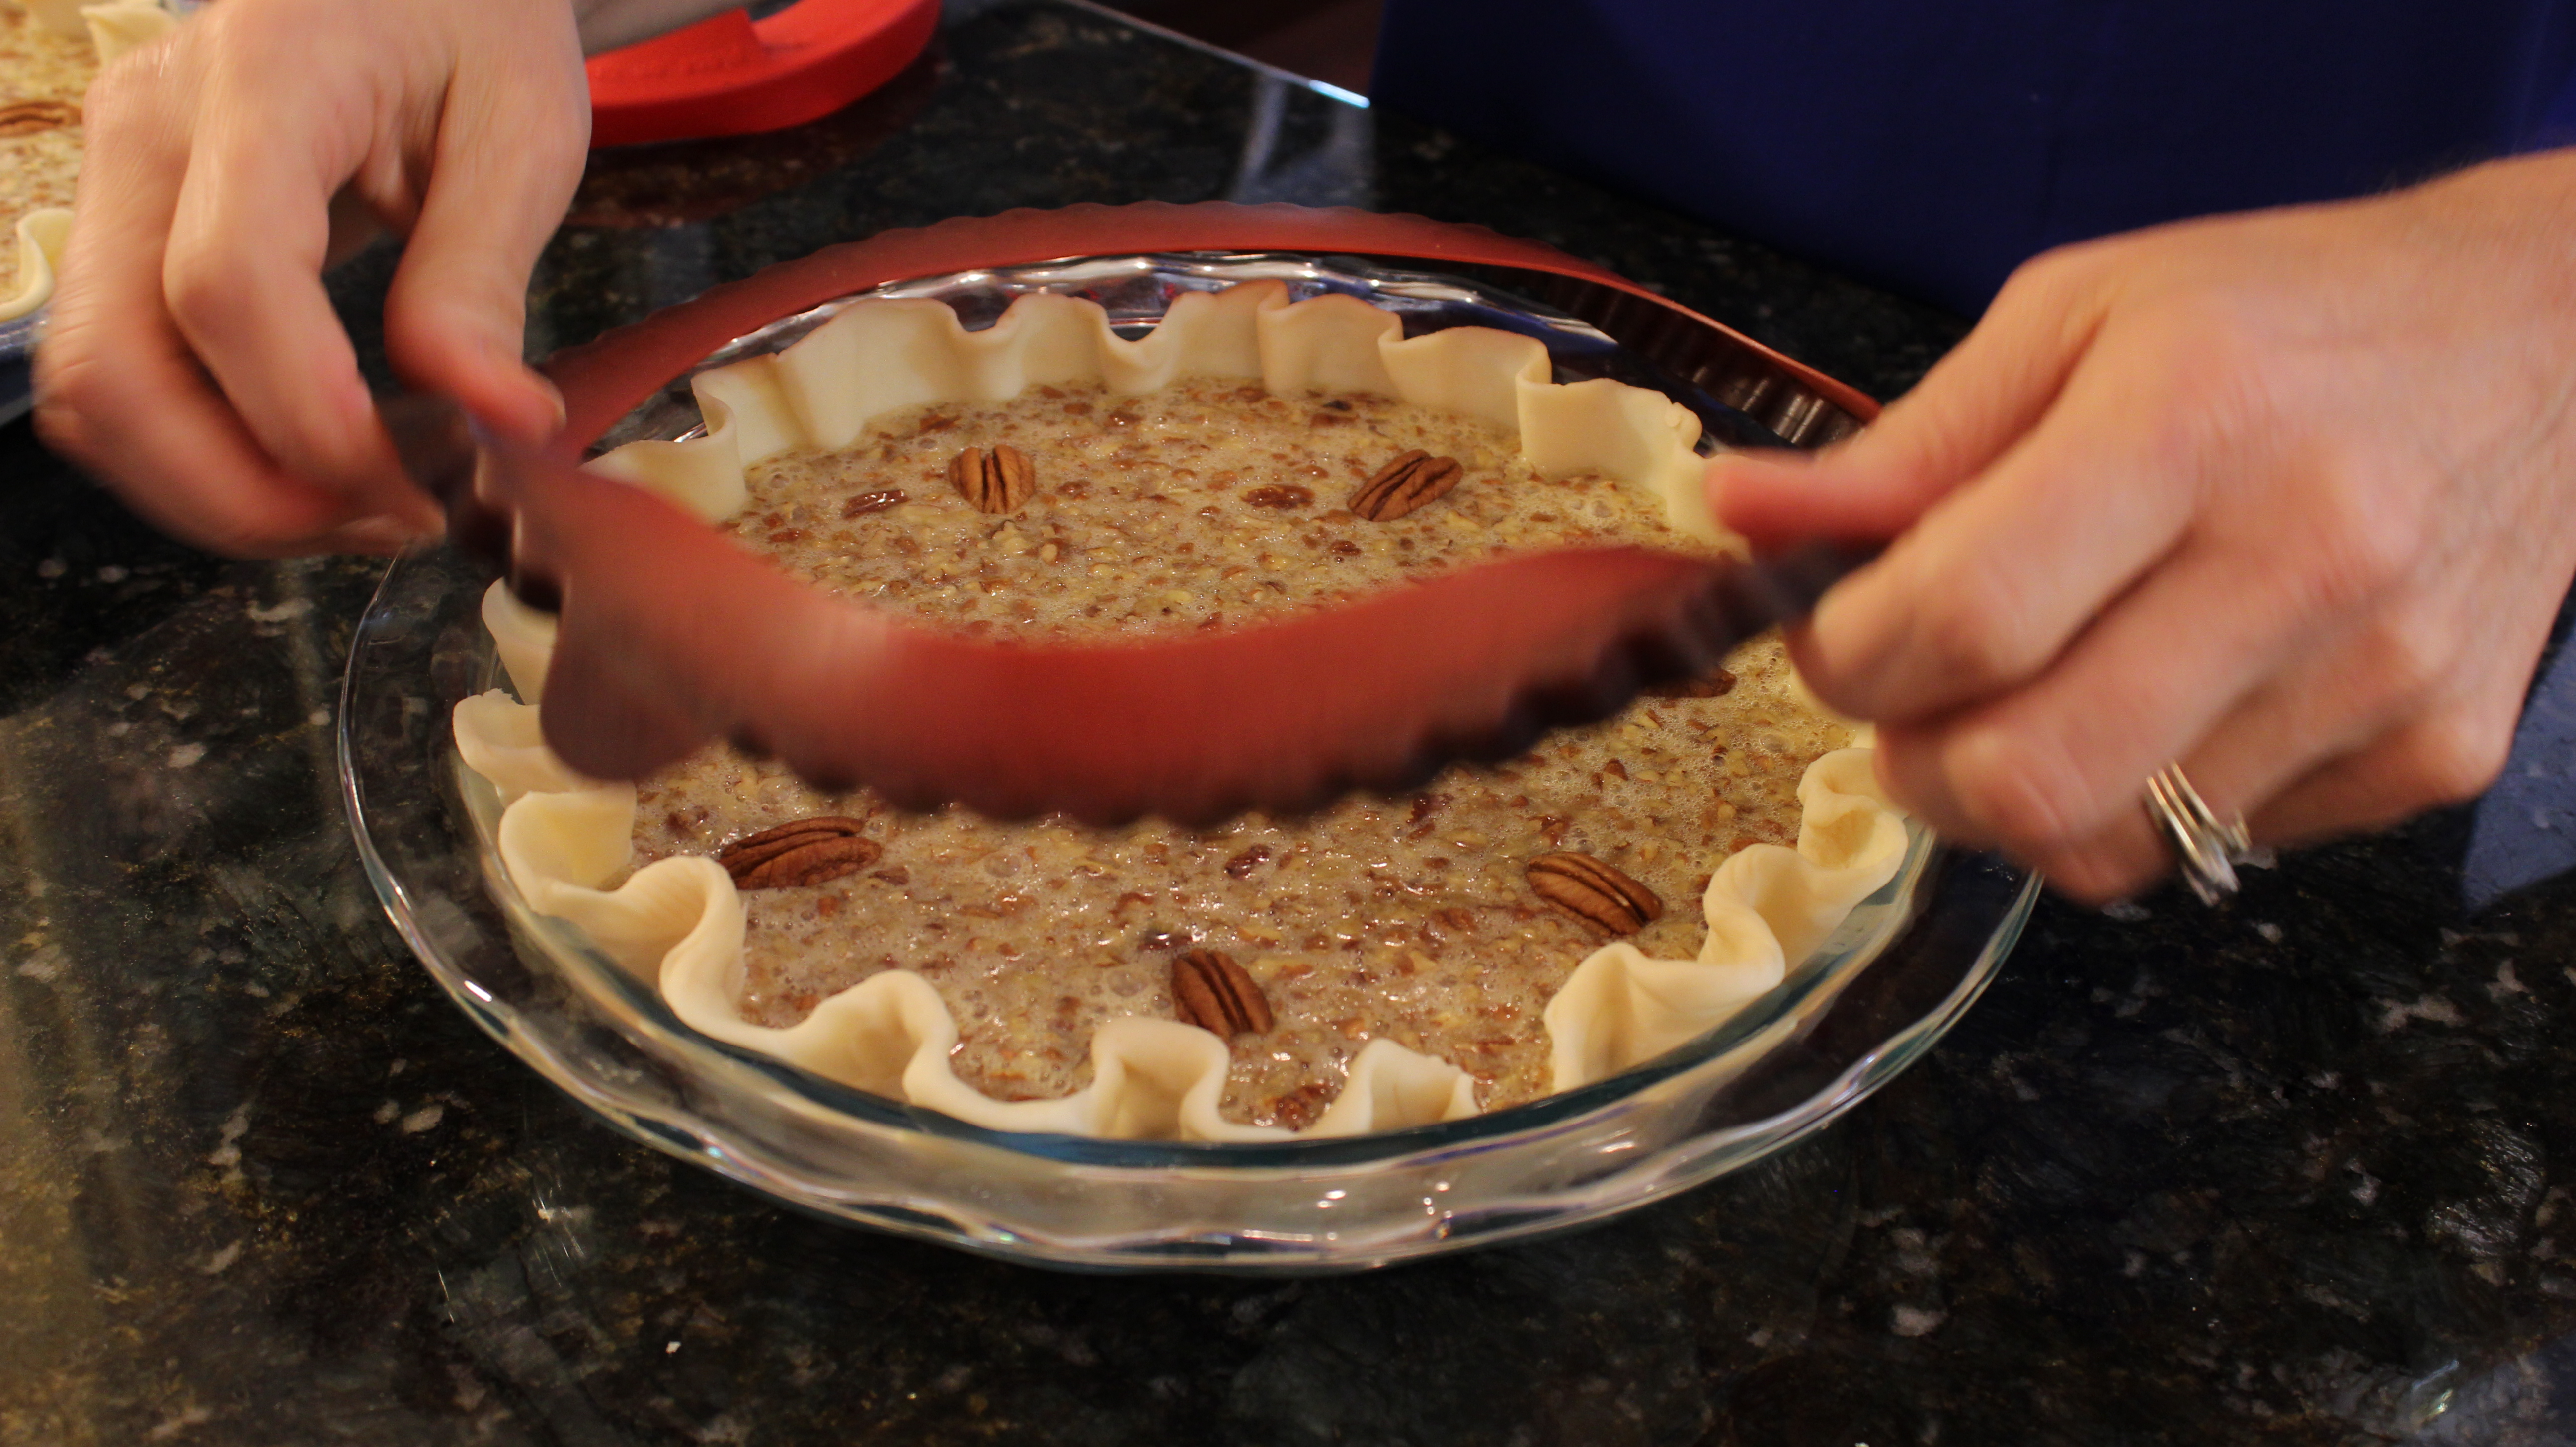
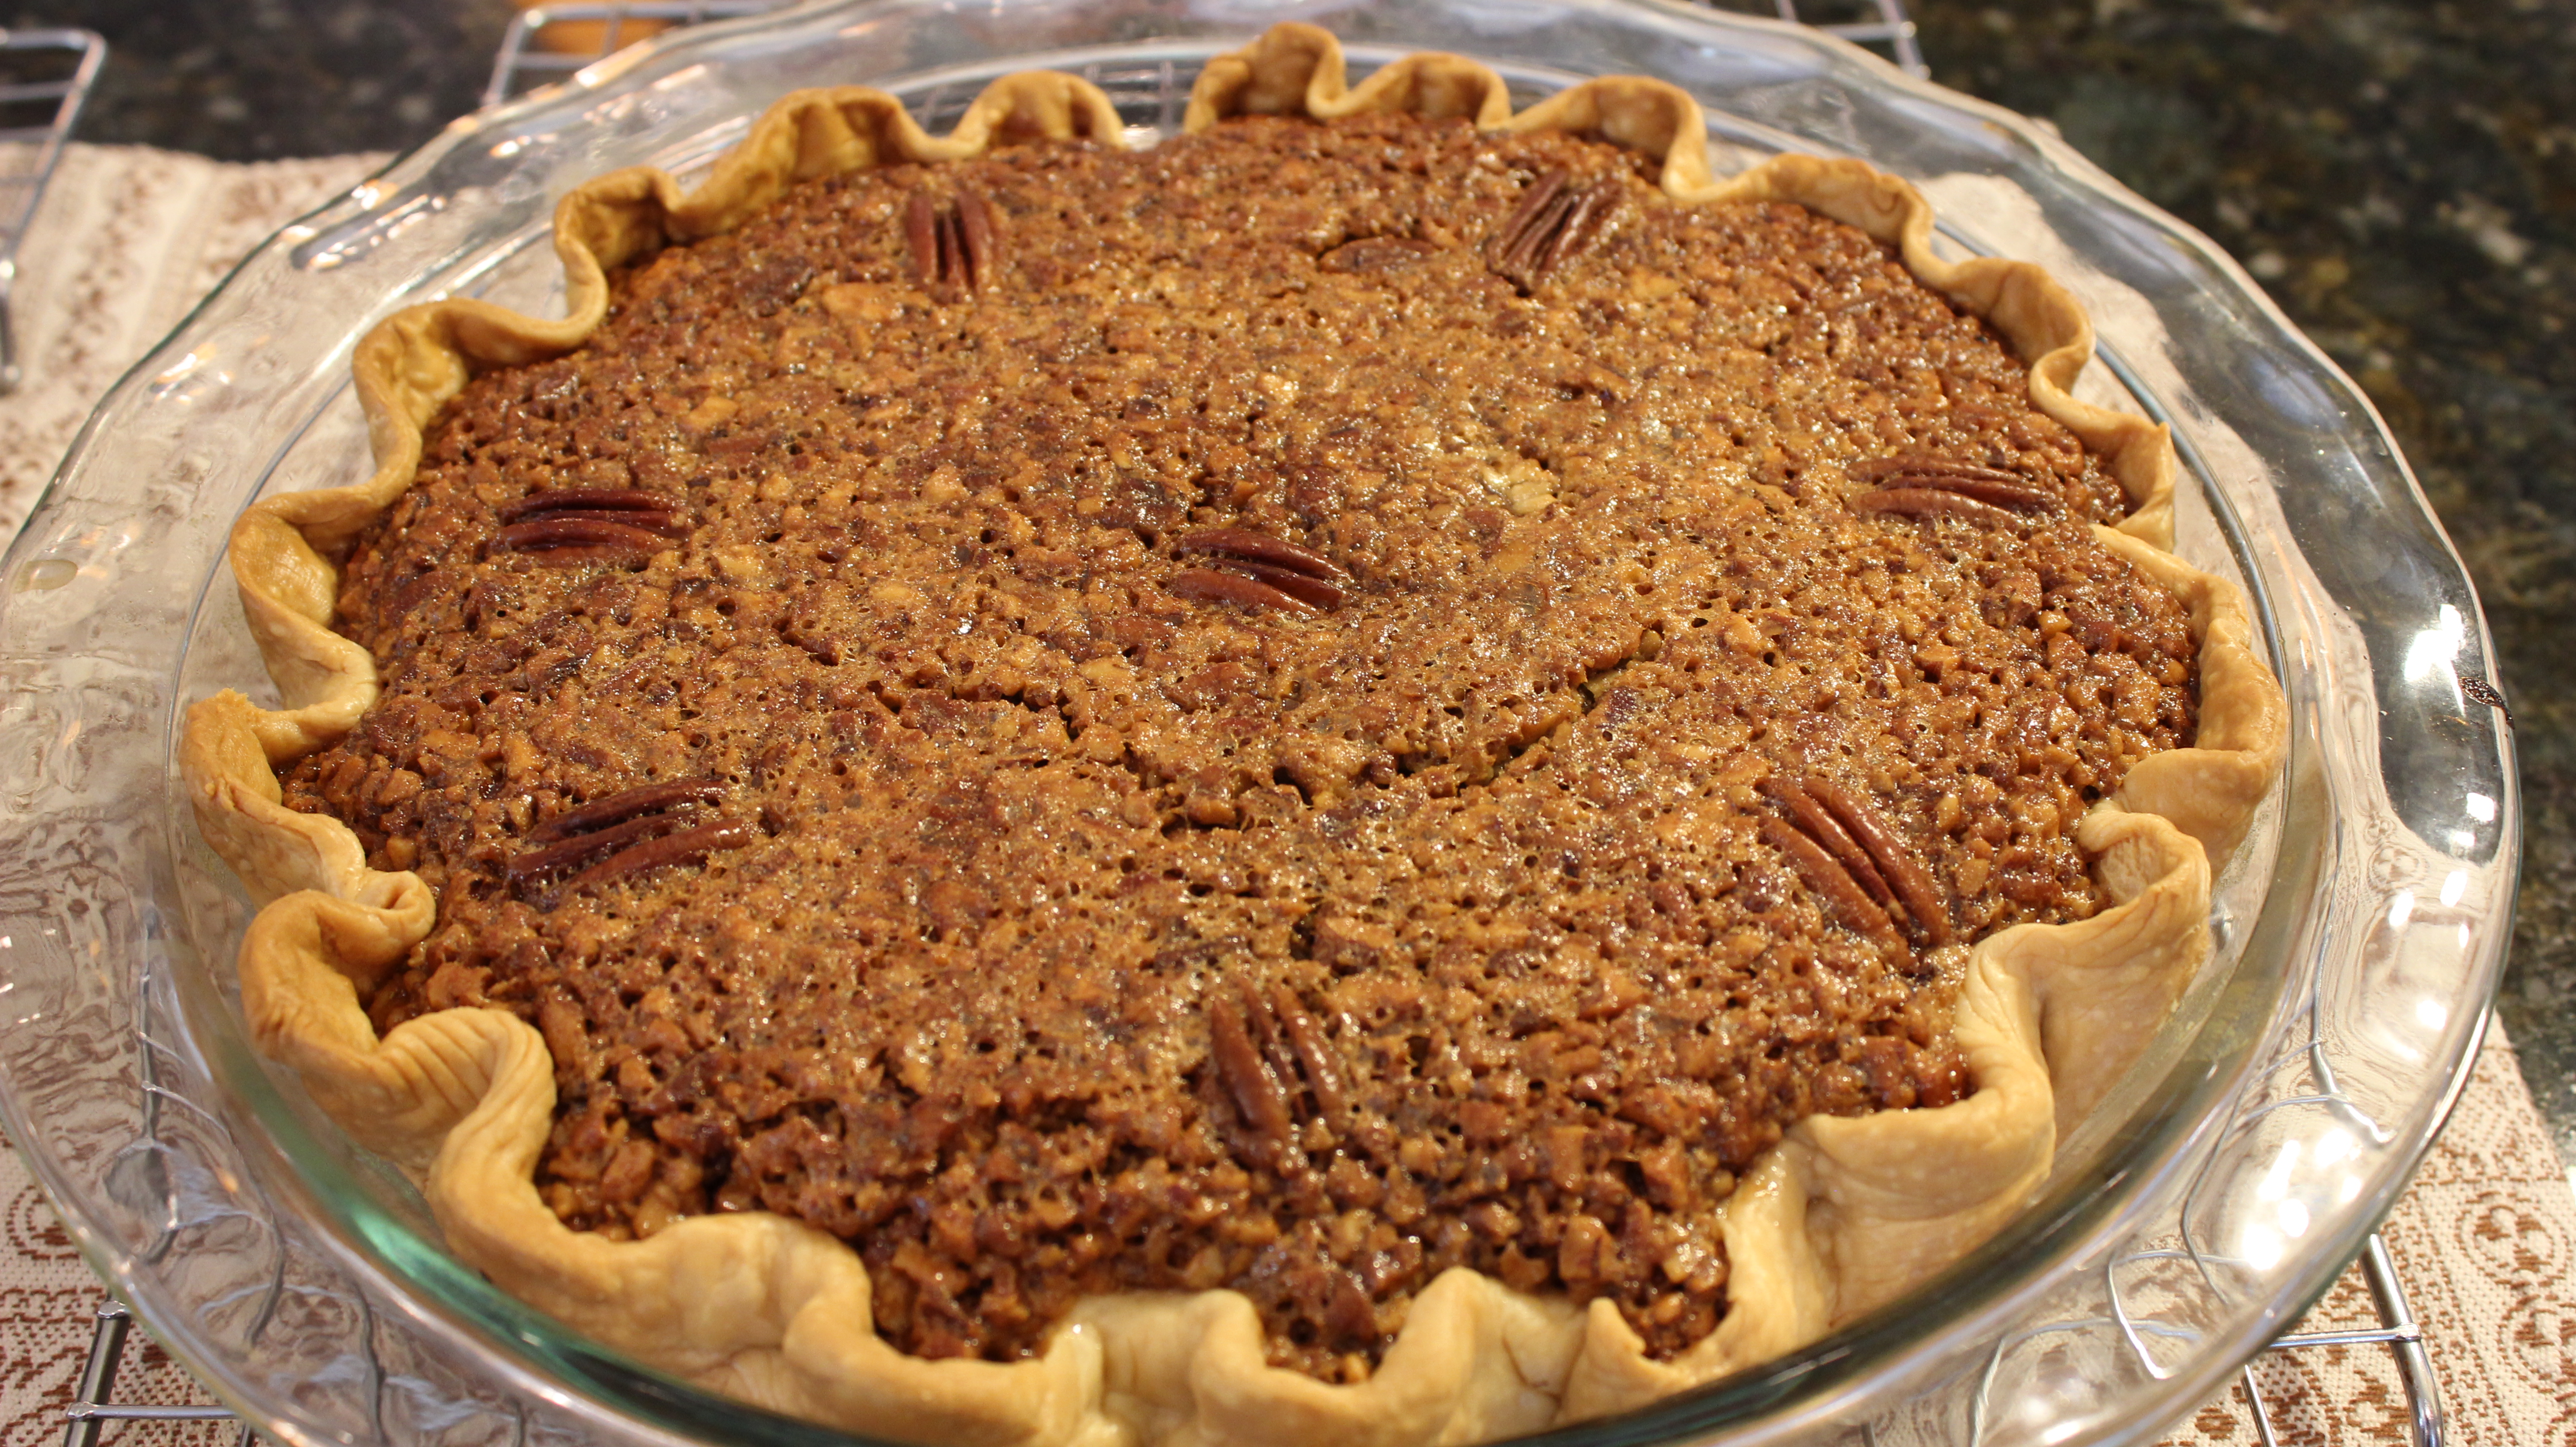
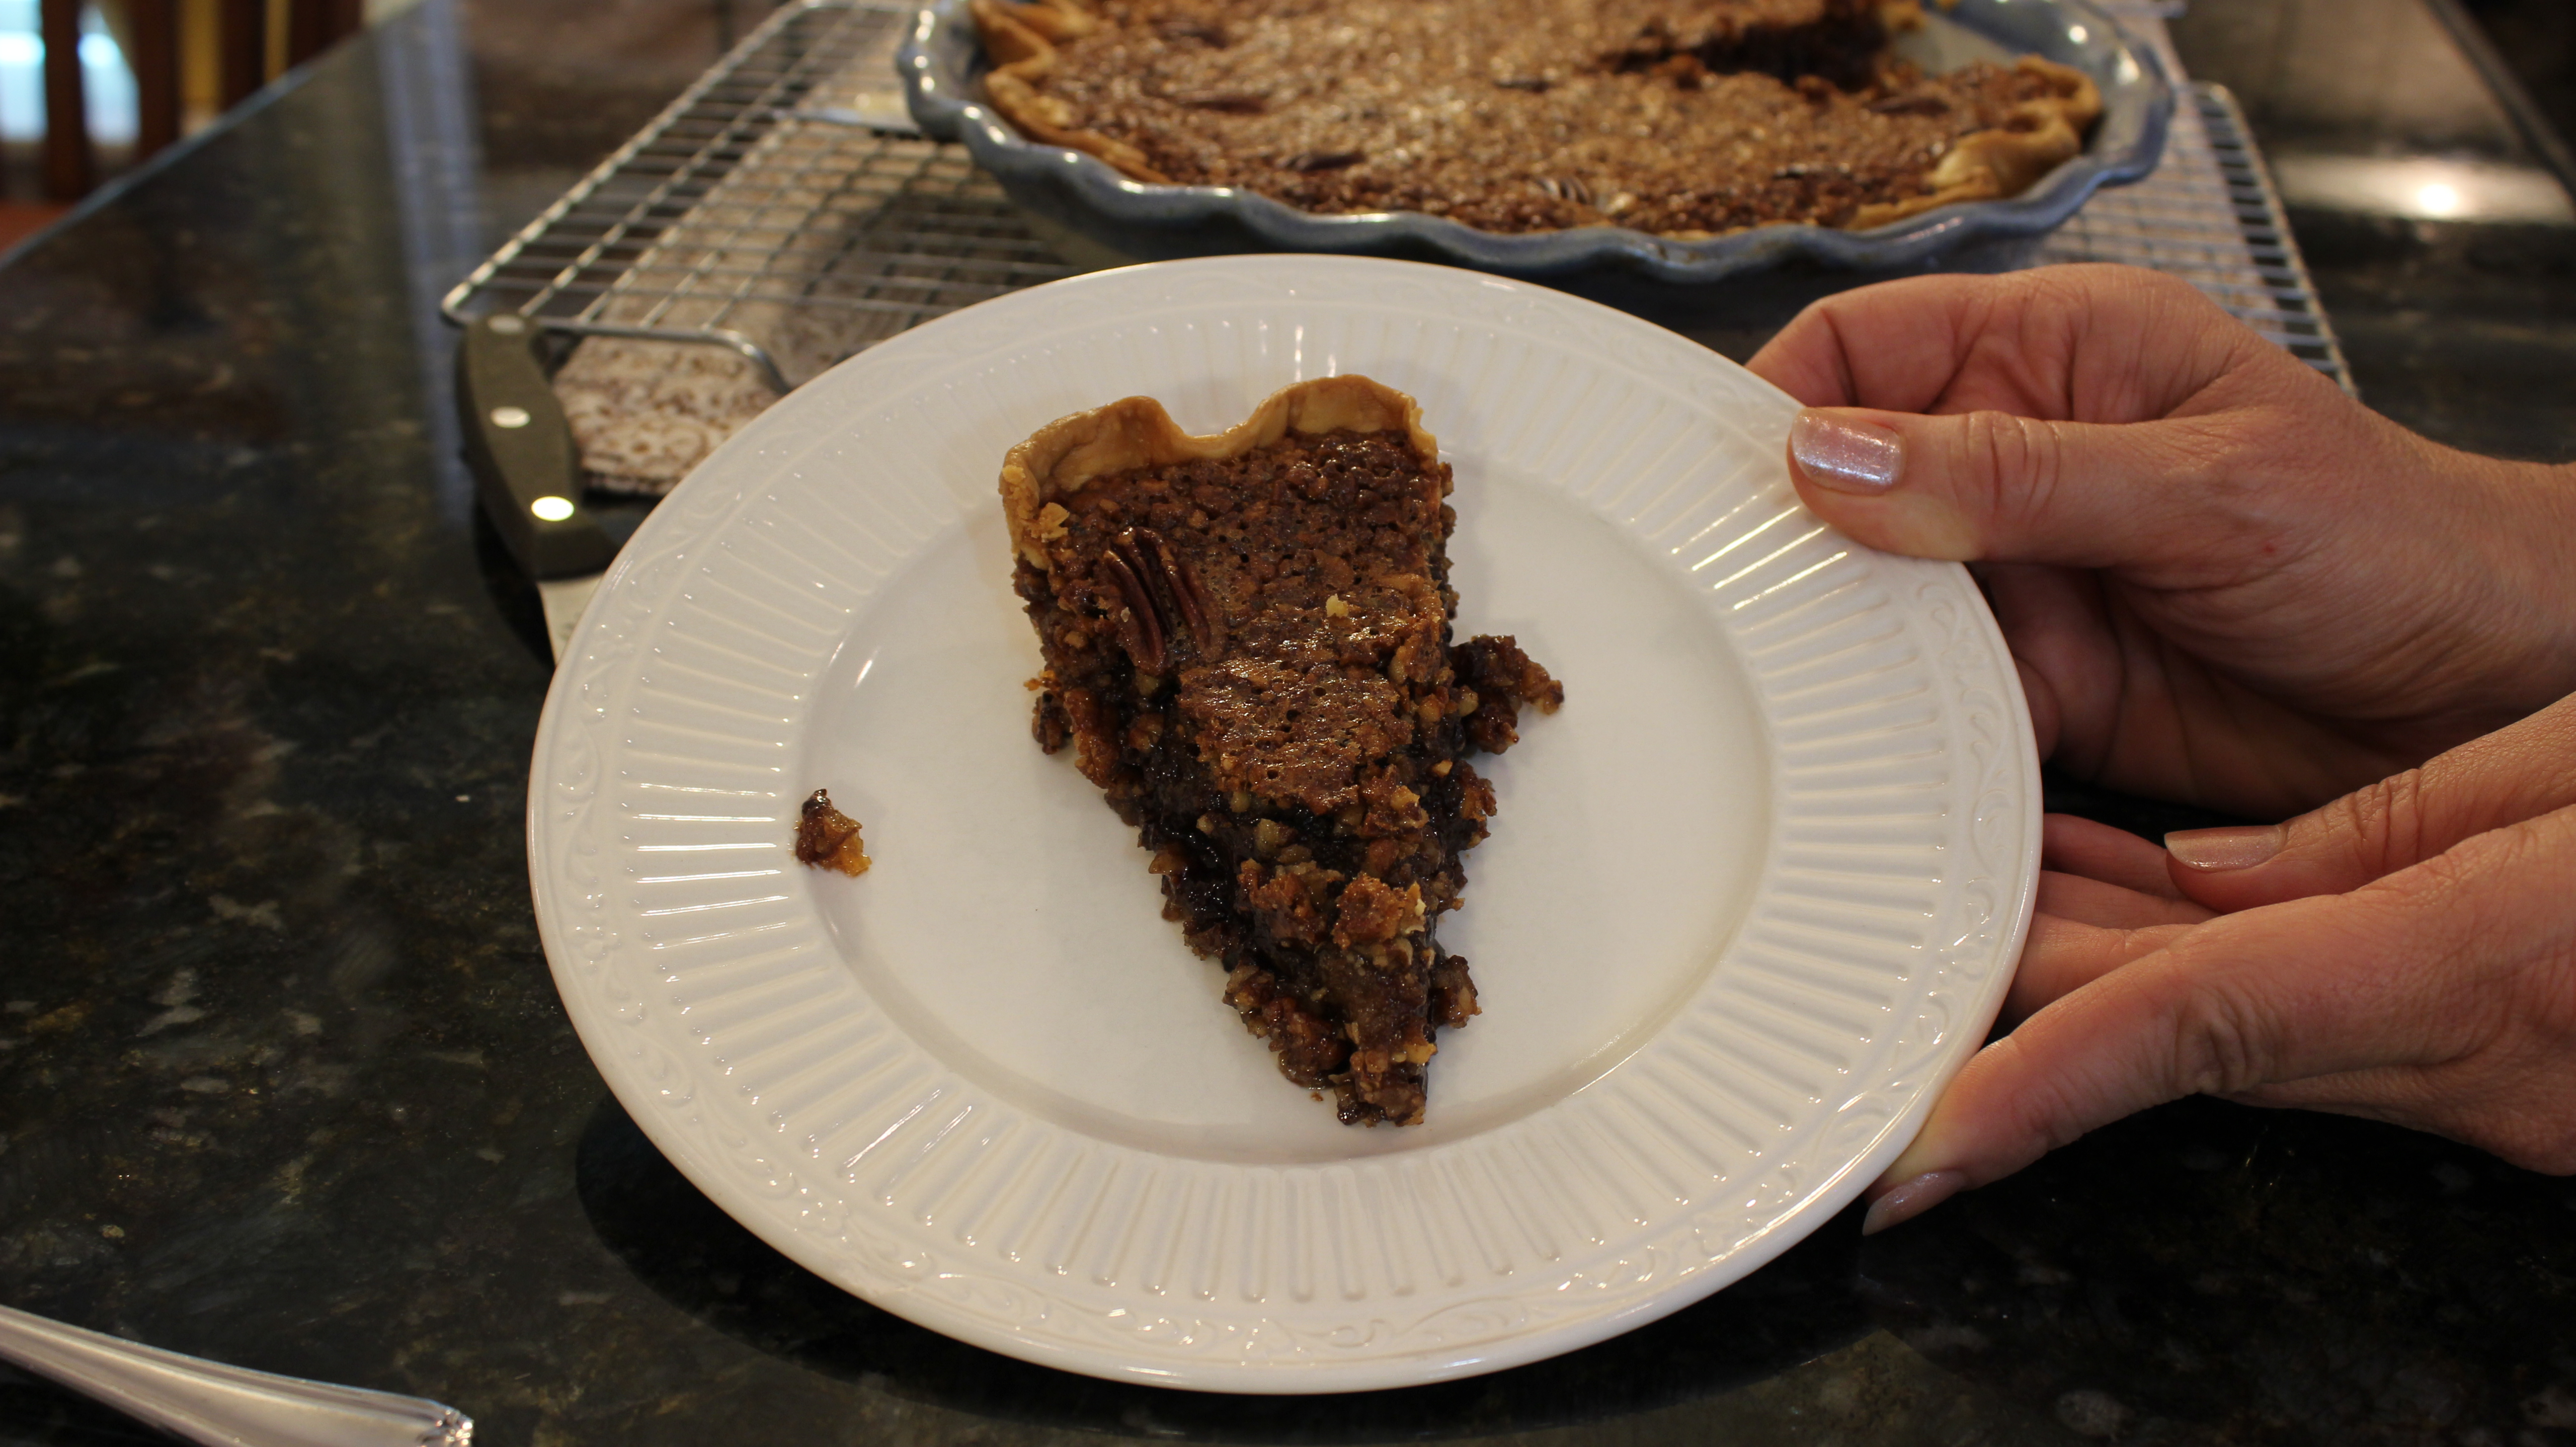
Barbara’s homemade chocolate pecan pie is like nothing you’ve had before. Not only do you get that gooey texture with a hint of nutty caramel because it’s a pecan pie but a chocolaty finish slides right on in and makes you say wow! Gooey, nutty, caramel, chocolate …need I say MORE?  In fact, it is plenty chocolaty so if you wanted to nibble on those “special dark” Hershey’s chocolate chips while you are making the pie feel free it wouldn’t make the pie any less delicious.

When Barbara first delivered her scrumptious homemade pecan pie to my house I was beside myself. I just couldn’t believe my eyes and with an invitation to her Christmas Eve party to top it off which she also cooks for. I later found out that she makes seventy pies that get hand delivered with the invite to her party. It all began fifteen years ago at a surprise party her husband Peter threw for her where stories evolved of first meetings with Barbara and her gifts of homemade chocolate pecan pie. From that point on the pie numbers grew and it now totals out at around 72 pies.

This gourmet chocolate pecan pie of Barbara’s has become a tradition for many of the families on her pie list that wait in anticipation of her delivery in order to take the pie to their relatives on Christmas Day. This pie freezes extremely well and slicing it before freezing making for easy removal without having to thaw the whole pie is ideal. I must say though eating my slice right out of the freezer before it thaws is my new favorite way…wait til you try it!

Barbara is very busy in the month of December when all the pies get baked and delivered. She does get things going back in September though putting in an order for a twenty-two pound box of pecans from Georgia which arrive around Thanksgiving time. Then the whole process takes off from the chopping of the pecans in the food processor,  measuring exact amounts placed into baggies and stored in the frig , to purchasing large bottles of Karo syrup that are shelved until needed and so on until December is upon her and the baking begins.

IMG_4416This truly is a labor of love for Barbara and I’m very grateful to have become a part of this amazing tradition and see first hand how inspirational she is. You can see for yourself and hear some of the extremely funny stories that go along with Barbara’s pie making in my “Homemade Chocolate Pecan Pie Show” above. I hope you enjoy the show and now you too can make this blueberrypiehomemade chocolate pecan pie part of your family tradition. If you have the time and are only making a pie or two you can check out my “Perfect Pie Crust In 5 Minutes Recipe” or even myBest Blueberry Pie!recipe if you are looking to have a second pie 😉

IMG_2058

IMG_2062

IMG_2080

IMG_2077

IMG_2083


IMG_2086

IMG_2095

IMG_2106


Ingredients – Pre-Heat oven to 375º:

  • 1 cup coarsely chopped pecans (on the finer side but NOT a powder)
  • handful pecan halves for decoration
  • 6 oz. HERSHEY’S Special Dark chocolate chips (full bag for 2 pies)
  • 1 cup light Karo corn syrup -NOTE: Spraying the inside of measuring cup with Pam vegetable or coconut oil will help the Karo syrup ease out (full bottle of Karo for 2 pies)
  • 2/3 cup sugar
  • 2/3 cup melted butter and cooled to ROOM TEMPERATURE or LUKE WARM
  • 1 1/2 Tsp pure vanilla
  • 4 lg eggs lightly beaten (WITHOUT any frothiness occurring)
  • 1 pkg. Pillsbury Prepared Pie Crusts ROOM TEMPERATURE@ (2 crusts inside)
  • 1 tsp all purpose flour
  • 1 – 9″ deep dish pie plate

Directions:

  1. Pre-heat oven to 375º
  2. Place out rolled out pie crust in the deep dish pie plate
  3. Form edges like a scallop shell as shown in show above, then put into the refrigerator until its needed
  4. In a large bowl mix cooled-melted butter & sugar with a spatula, you are NOT CREAMING the two just stir to combine
  5. Add in Karo Syrup and stir
  6. Then add in vanilla and whisked eggs, don’t want froth so just stir to combine
  7. Mix in chocolate chips, stir
  8. Then add in ground pecans, mix with a spatula
  9. Pour into pie shell
  10. Decorate the top of the pie with pecan halves
  11. Add rim covering on top of pie so crust does not burn if using A Prepared Pie Crust from the store
  12. NOTE: No need to cover my HOMEMADE PIE CRUST with rim covering because it won’t burn
  13. In a 375º pre-heated oven, place the chocolate pecan pie on the lowest rack so the top doesn’t burn and if the top begins to get too dark towards the end place a piece of foil over the pie for the duration
  14. Let cool slightly, slice and serve with bourbon, scotch, wine, coffee or milk…oh and also great with whipped cream or vanilla ice cream 😉
  15. Freezes incredibly well- make sure to cut into slices before you freeze for easy removal. In fact, I love the texture of having the chocolate pecan pie right out of the freezer without thawing! – you should try it this way 🙂


Easy Gourmet Pesto

Easy Gourmet Pesto

This easy gourmet pesto will definitely put a smile on your face when you see how quickly you can make it! You may never go out and buy the jar stuff again when you taste your own homemade either. There’s just no comparison when you make your own pesto. Now that I show you in my new show how to make it simply in a food processor you have no excuse but to get going and create some incredibly delicious dishes with my homemade pesto recipe.

There’s making pesto by means of mortar and pestle and I admit I have spent many a day making it this way, but there’s another way which I will show you here that saves you time and energy which we all seem to run low on by the end of the day.  If it’s the weekend and you have some time on your hands then be my guest and knock yourself out with the mortar and pestle.  It is truly is a lovely way to make this paste, and useful in so many other ways like grinding spices for instance not to mention being therapeutic.

Back to reality, being able to use my food processor to make my homemade gourmet pesto is a wonderful thing!  The pesto tastes the same and you still put all the love into it using good ingredients.  You can play with this recipe also when it comes to amounts like adding a little more Parmesan if it’s too thin or drizzling in a tad more olive oil if it’s too thick.  Making pesto is a very forgiving process…. just trust yourself and be sure to taste as you go along to see if you need to add a sprinkle more of salt and or pepper.

iphone pictures 472 iphone pictures 473 iphone pictures 477

IMG_2008 IMG_1959 IMG_1956

iphone pictures 479 iphone pictures 484 iphone pictures 478

iphone pictures 483 iphone pictures 1722 iphone pictures 1837

Ingredients for Pesto:

  • 1 pkg. 2-3 cups of fresh basil leaves
  • 1/2-3/4 cup grated Reggiano Parmesan
  • 1 lg. garlic clove put thru garlic press
  • 1/4 cup extra virgin olive oil
  • salt & pepper
  • dash of Siracha

Directions for Pesto: 

  1. Take the basil leaves off of the stems and place them into the food processor with the pressed garlic.
  2. Begin to pulse while drizzling in all of the olive oil thru the top opening of the food processor.
  3. Once you finish adding the oil you may need to stop and scrape the sides with a spatula if you see large pieces of basil leaves.
  4. Pulse once more, then add the parmesan.
  5. Pulse a couple more times to blend, taste and add salt and pepper and tabasco if you want a little kick to it.
  6. Pulse once more to combine.
  7. The pesto is ready to use.
  8. If you want to save the pesto put it into a plastic container and drizzle about 1 Tbsp of olive oil right on top, lay a piece of Saran wrap right on top of the new layer of olive oil so there isn’t any air touching (This will keep the basil from oxidizing and turning brown).
  9. At this point you can either keep in the refrigerator for up to 2 days or put it into the freezer.
  10. When you are ready to use the frozen pesto take it out the night before and let it thaw in the refrigerator.
  11. Now that you have this delicous pesto you can easily make the Crostinis with Fresh Mozzarella, Pesto and Roasted Tomato appetizer.

Ingredients for Roasted Tomatoes:

  • 1 lb. grape or cherry tomatoes
  • 2-3 tbsp olive oil
  • s&p to taste

Directions for Roasted Tomatoes:

  1. Slice tomatoes in half, drizzle on olive oil and S&P and roast in a 400º oven for 15-20 minutes