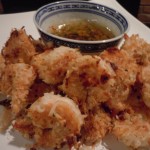
CT Style Making Asian Shrimp & Rice Noodle Salad with Ryan & Teresa!
Back on CT Style this week with Ryan Kristafer and Teresa Dufour making the perfect summer picnic dish, Asian Shrimp & Rice Noodle Salad, never gets dull with those two! I thoroughly enjoy every second on the WTNH set at Channel 8. There were several groups going on camera this week making it even more exciting then usual, if that’s at all possible.
Not only do I try to offer appropriate seasonal recipes but its important for me to find out what recipes my followers and friends want to see so please feel free to make suggestions always. That’s how I came up with this Asian Shrimp & Noodle Salad… it was the #1 request, a picnic-beach salad that won’t spoil.
You can find the wriiten recipe for this Asian Shrimp & Rice Noodle Salad and how I originally got it from my big foodie friends Karen and Ken from Andover, MA by clicking on the hyper-link.
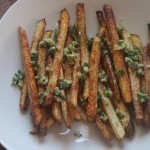
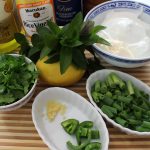
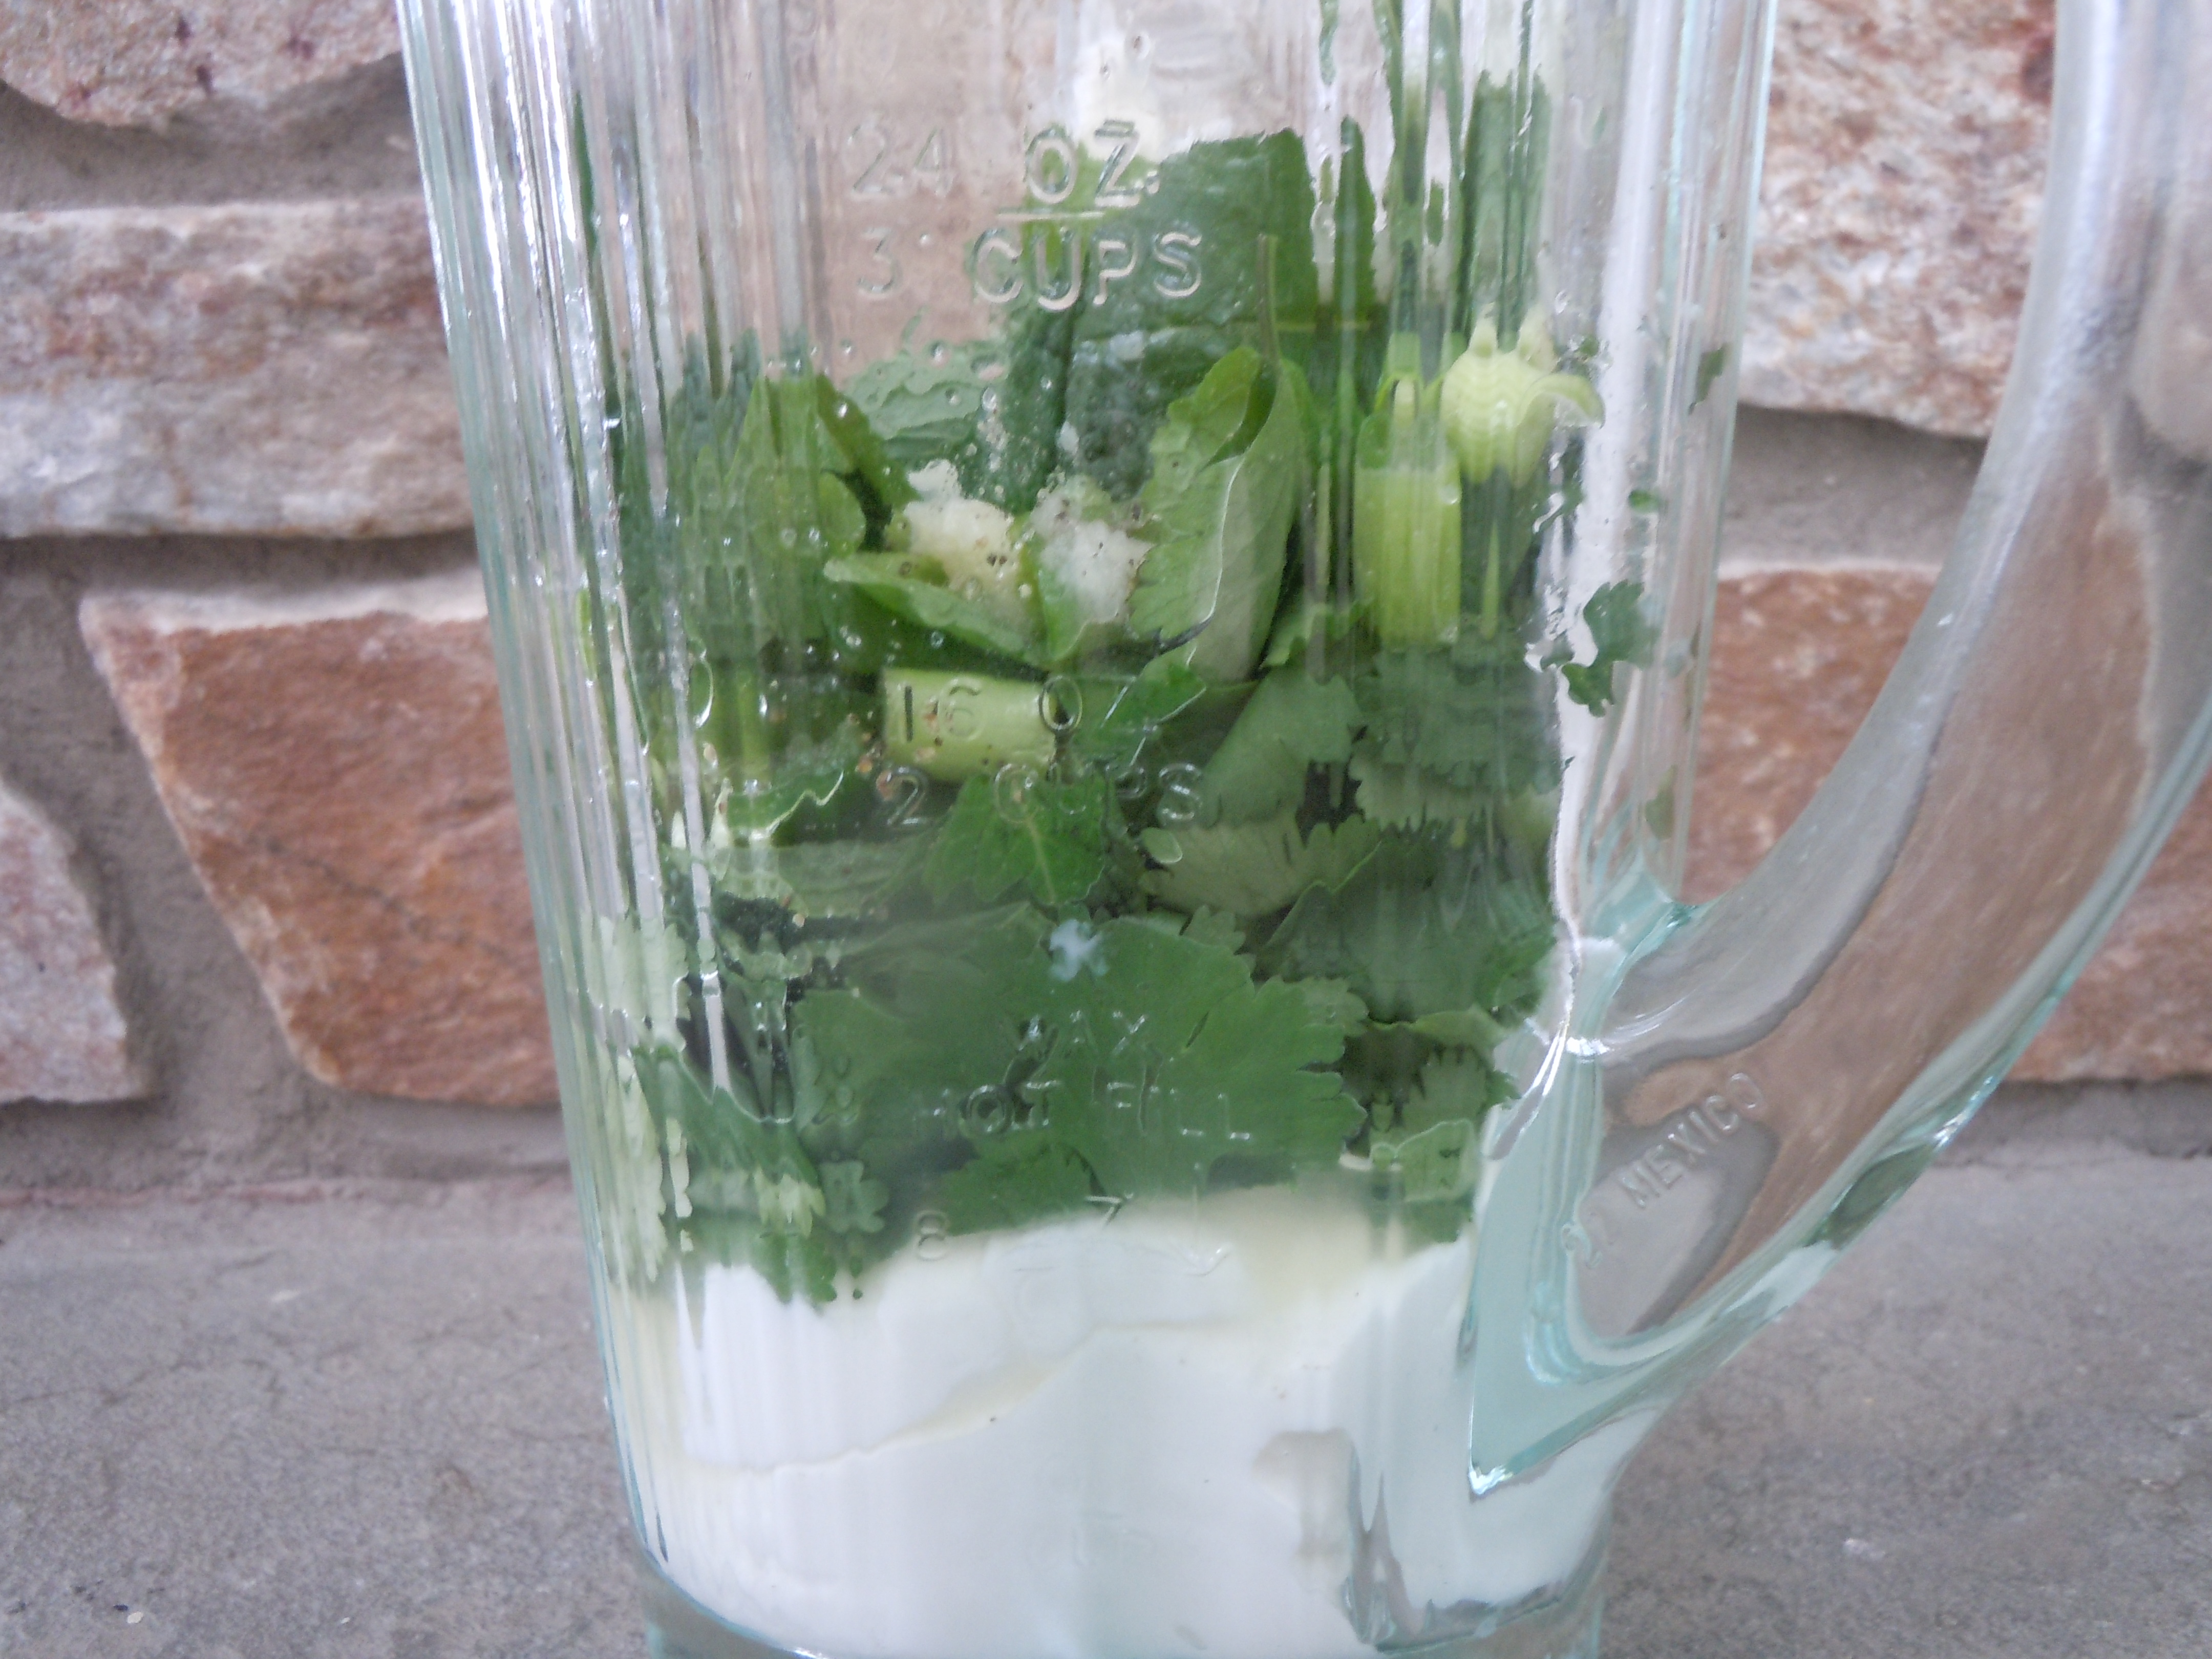
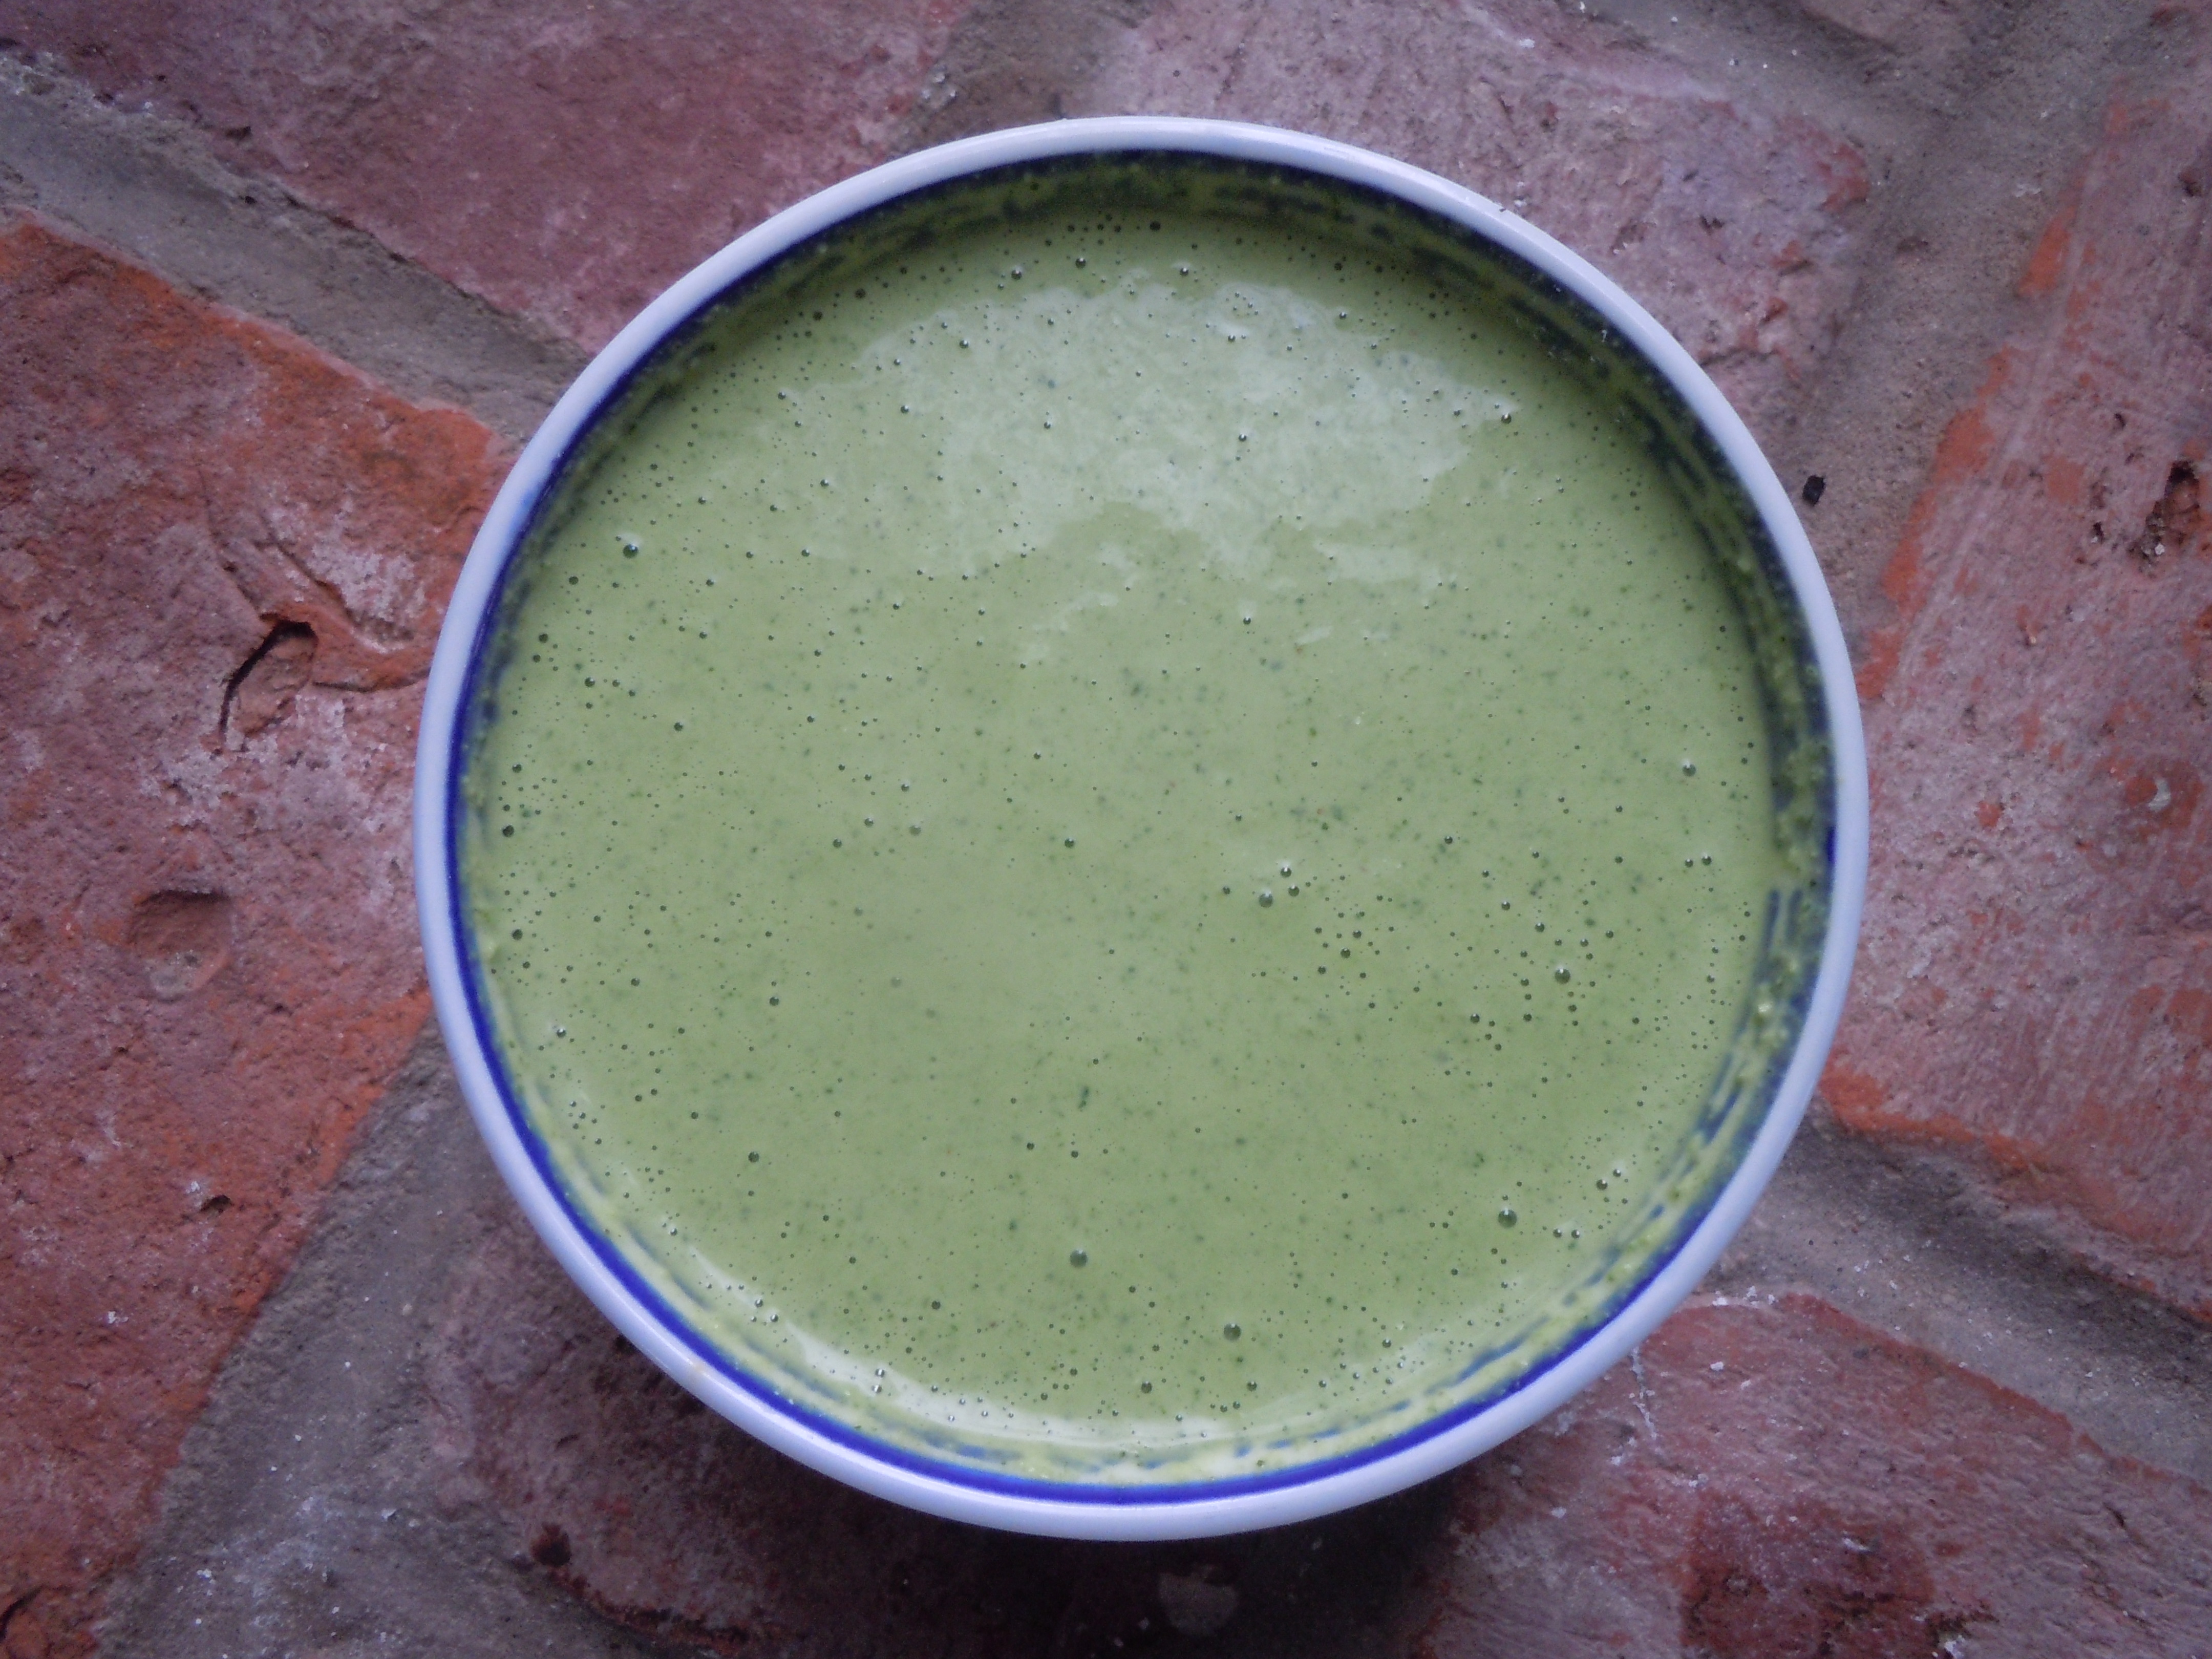
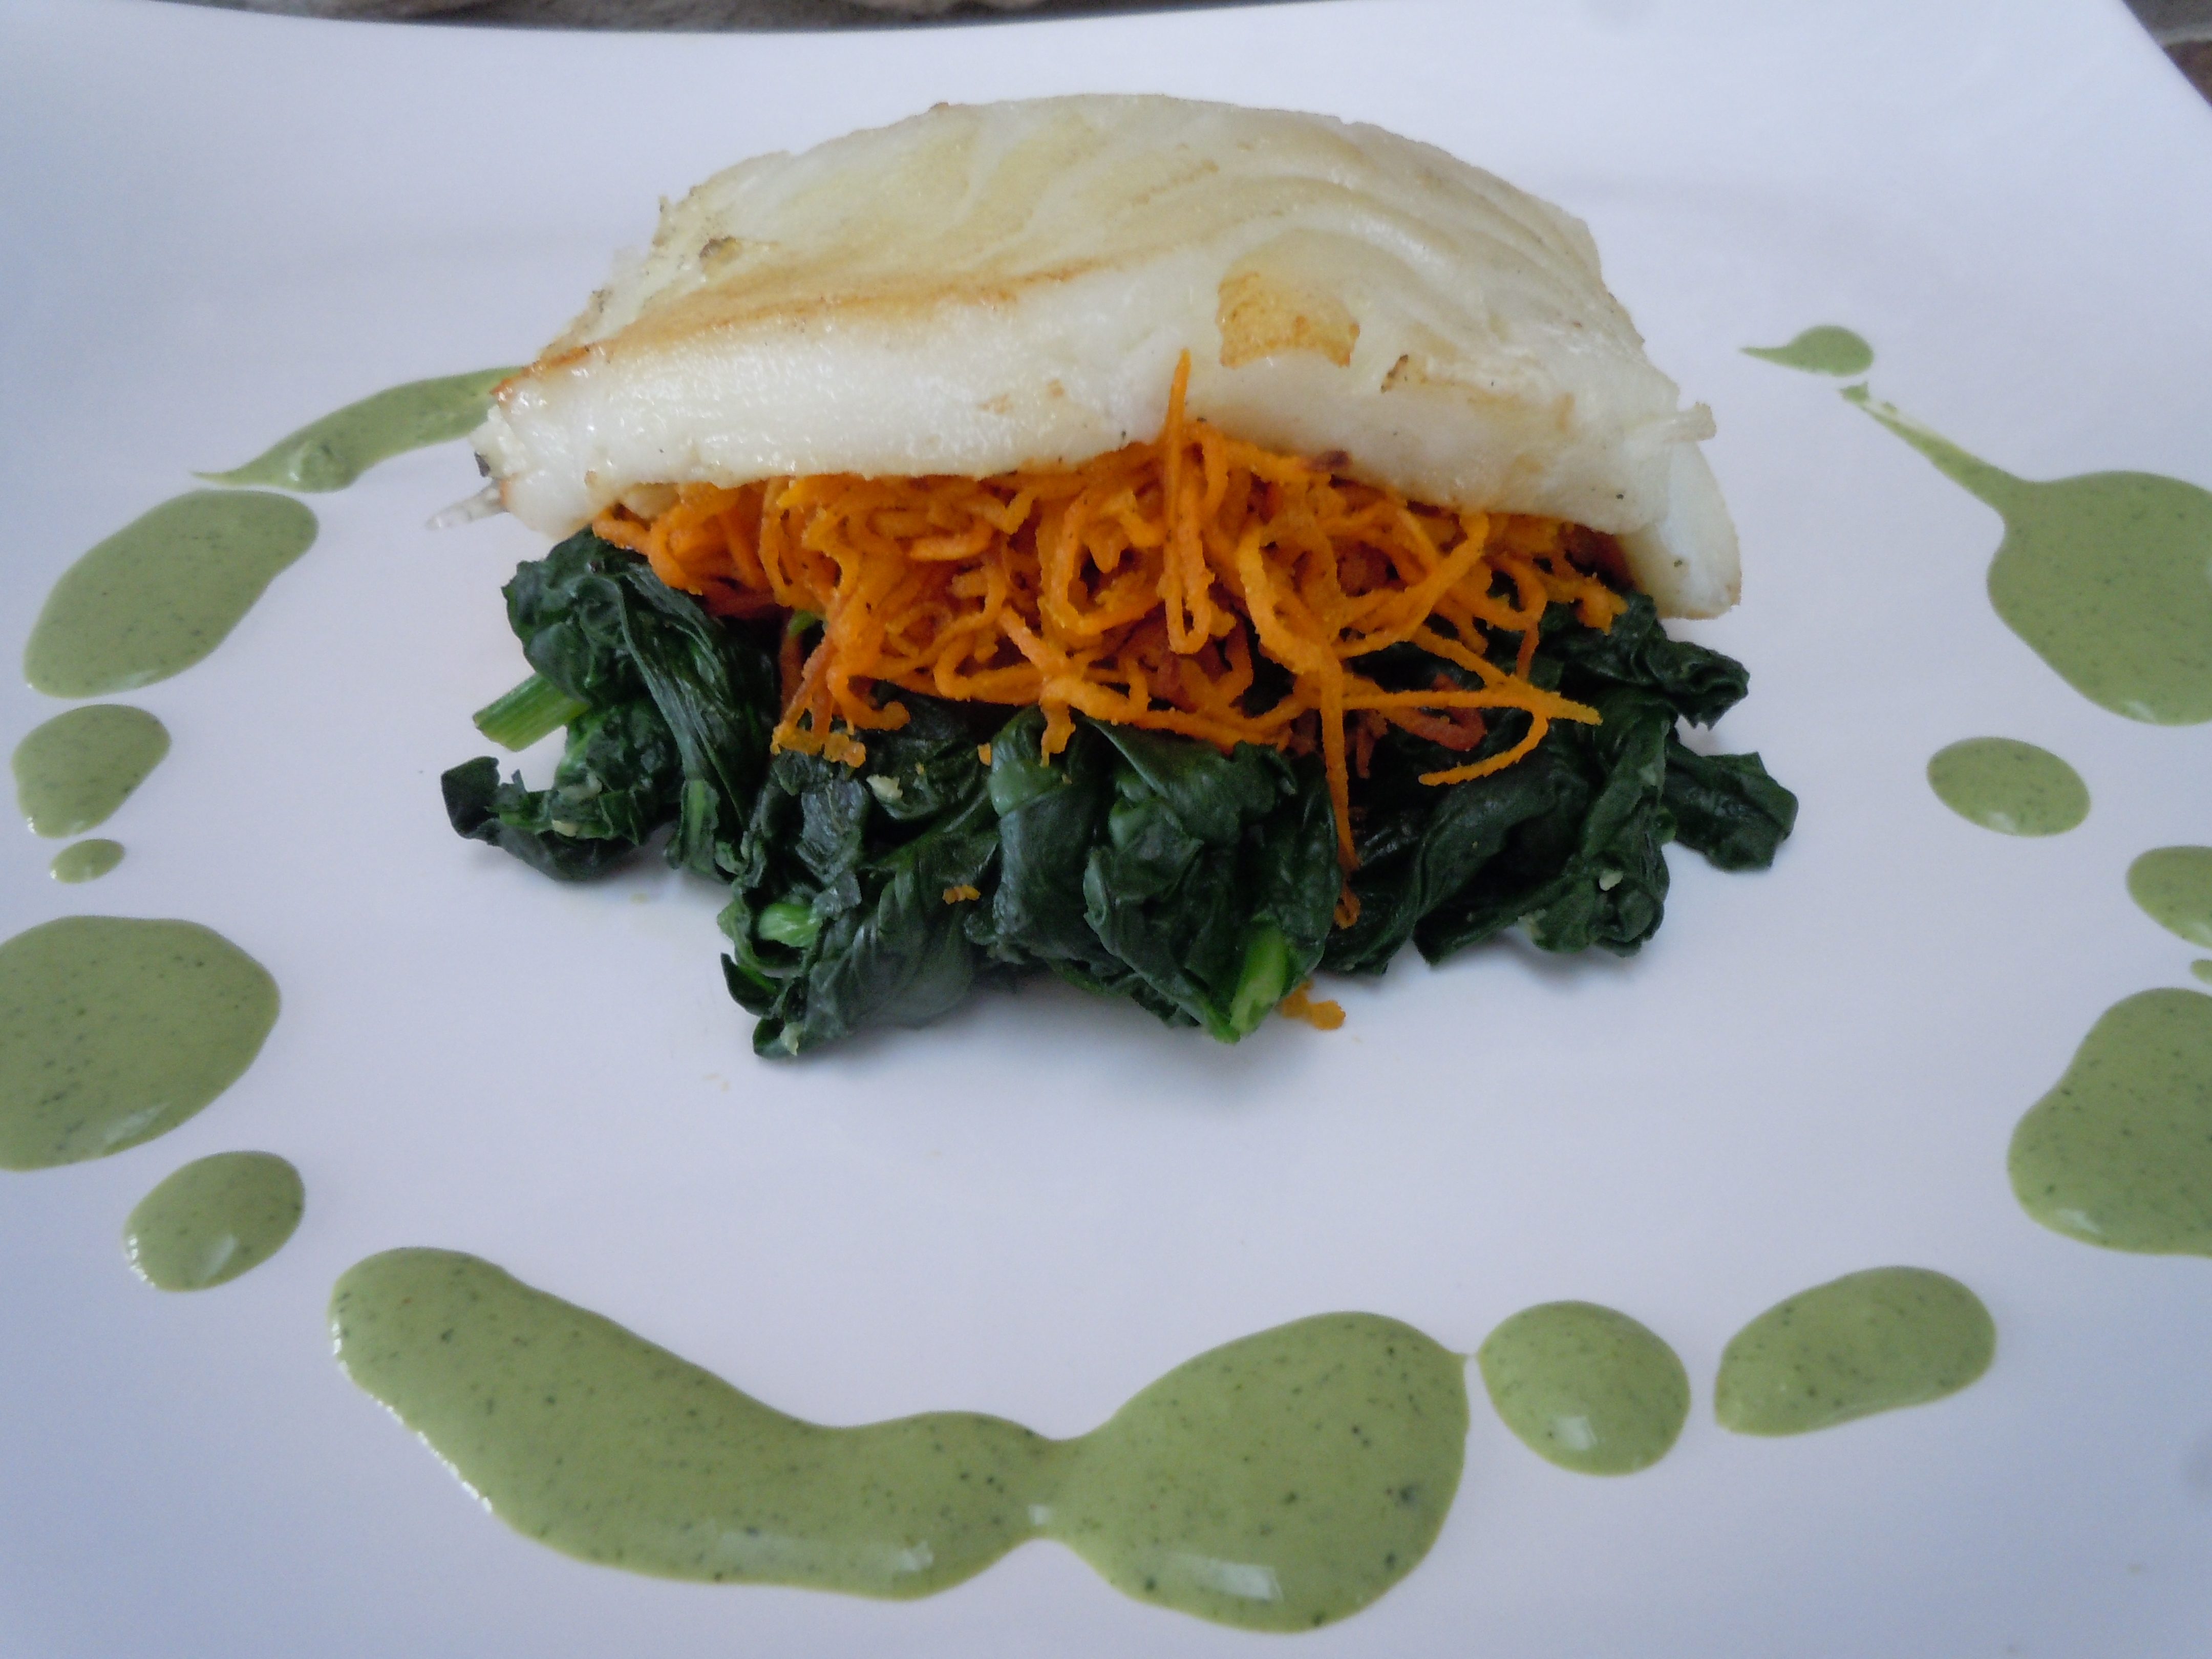
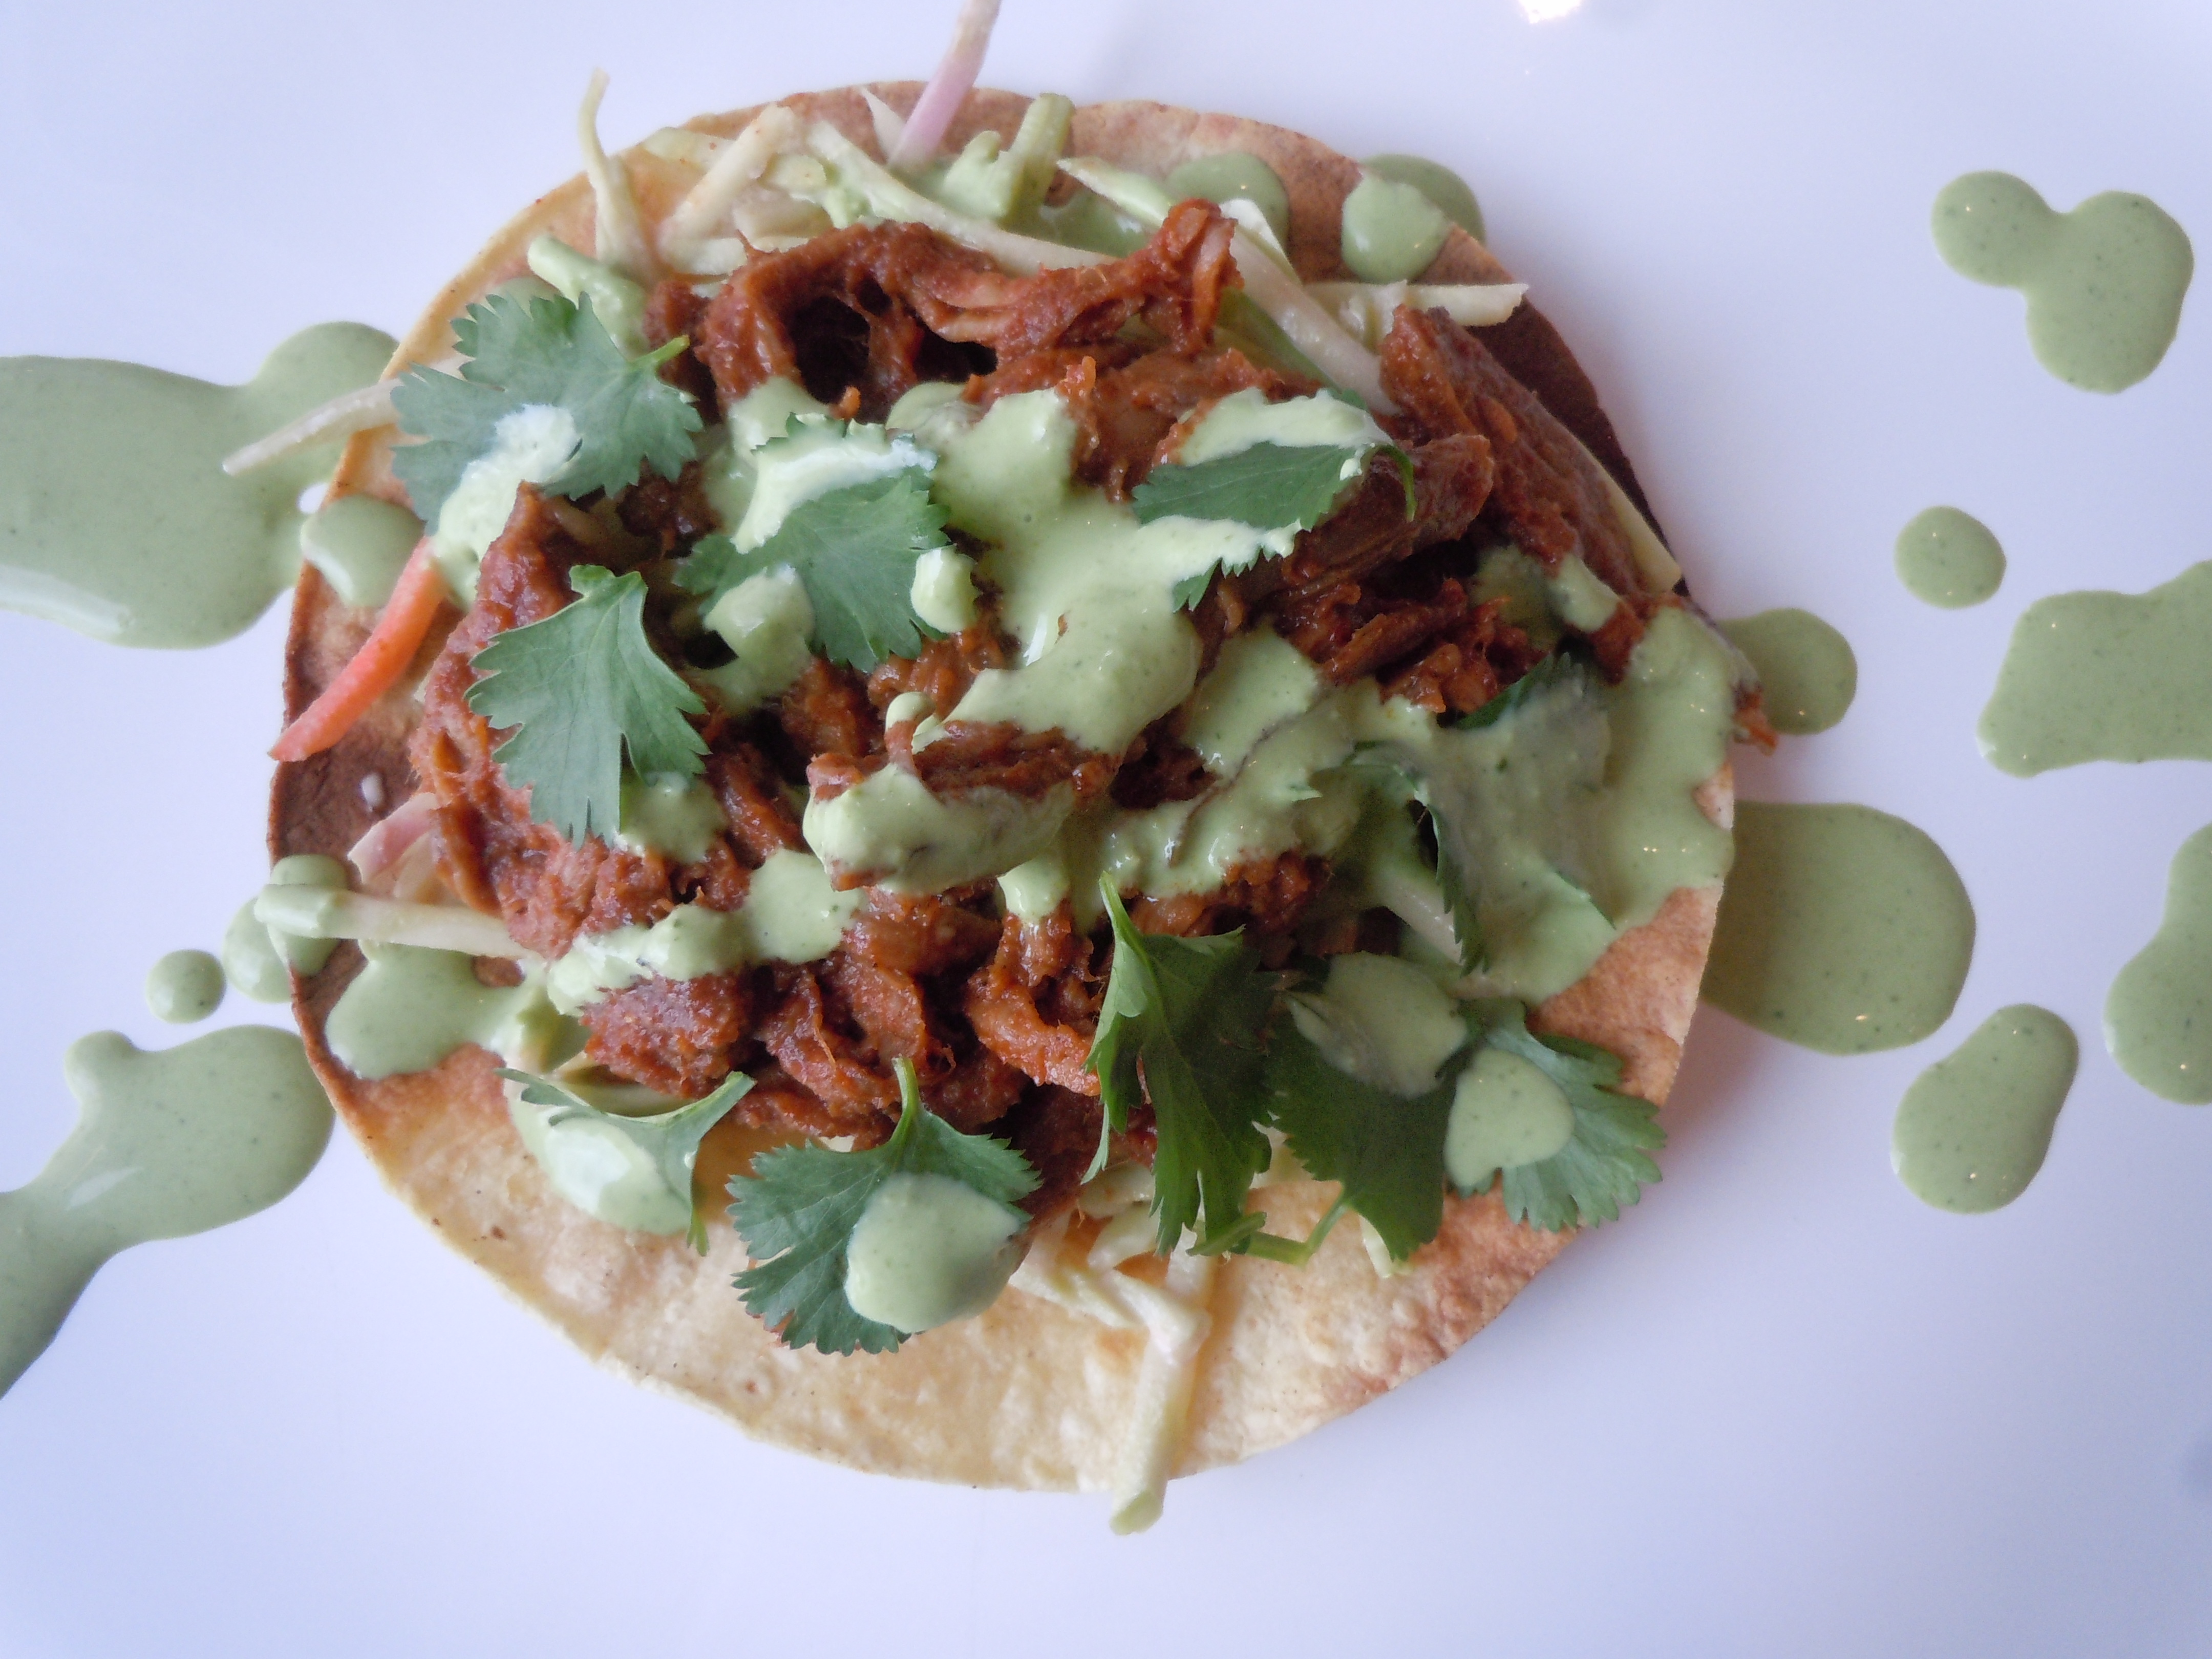
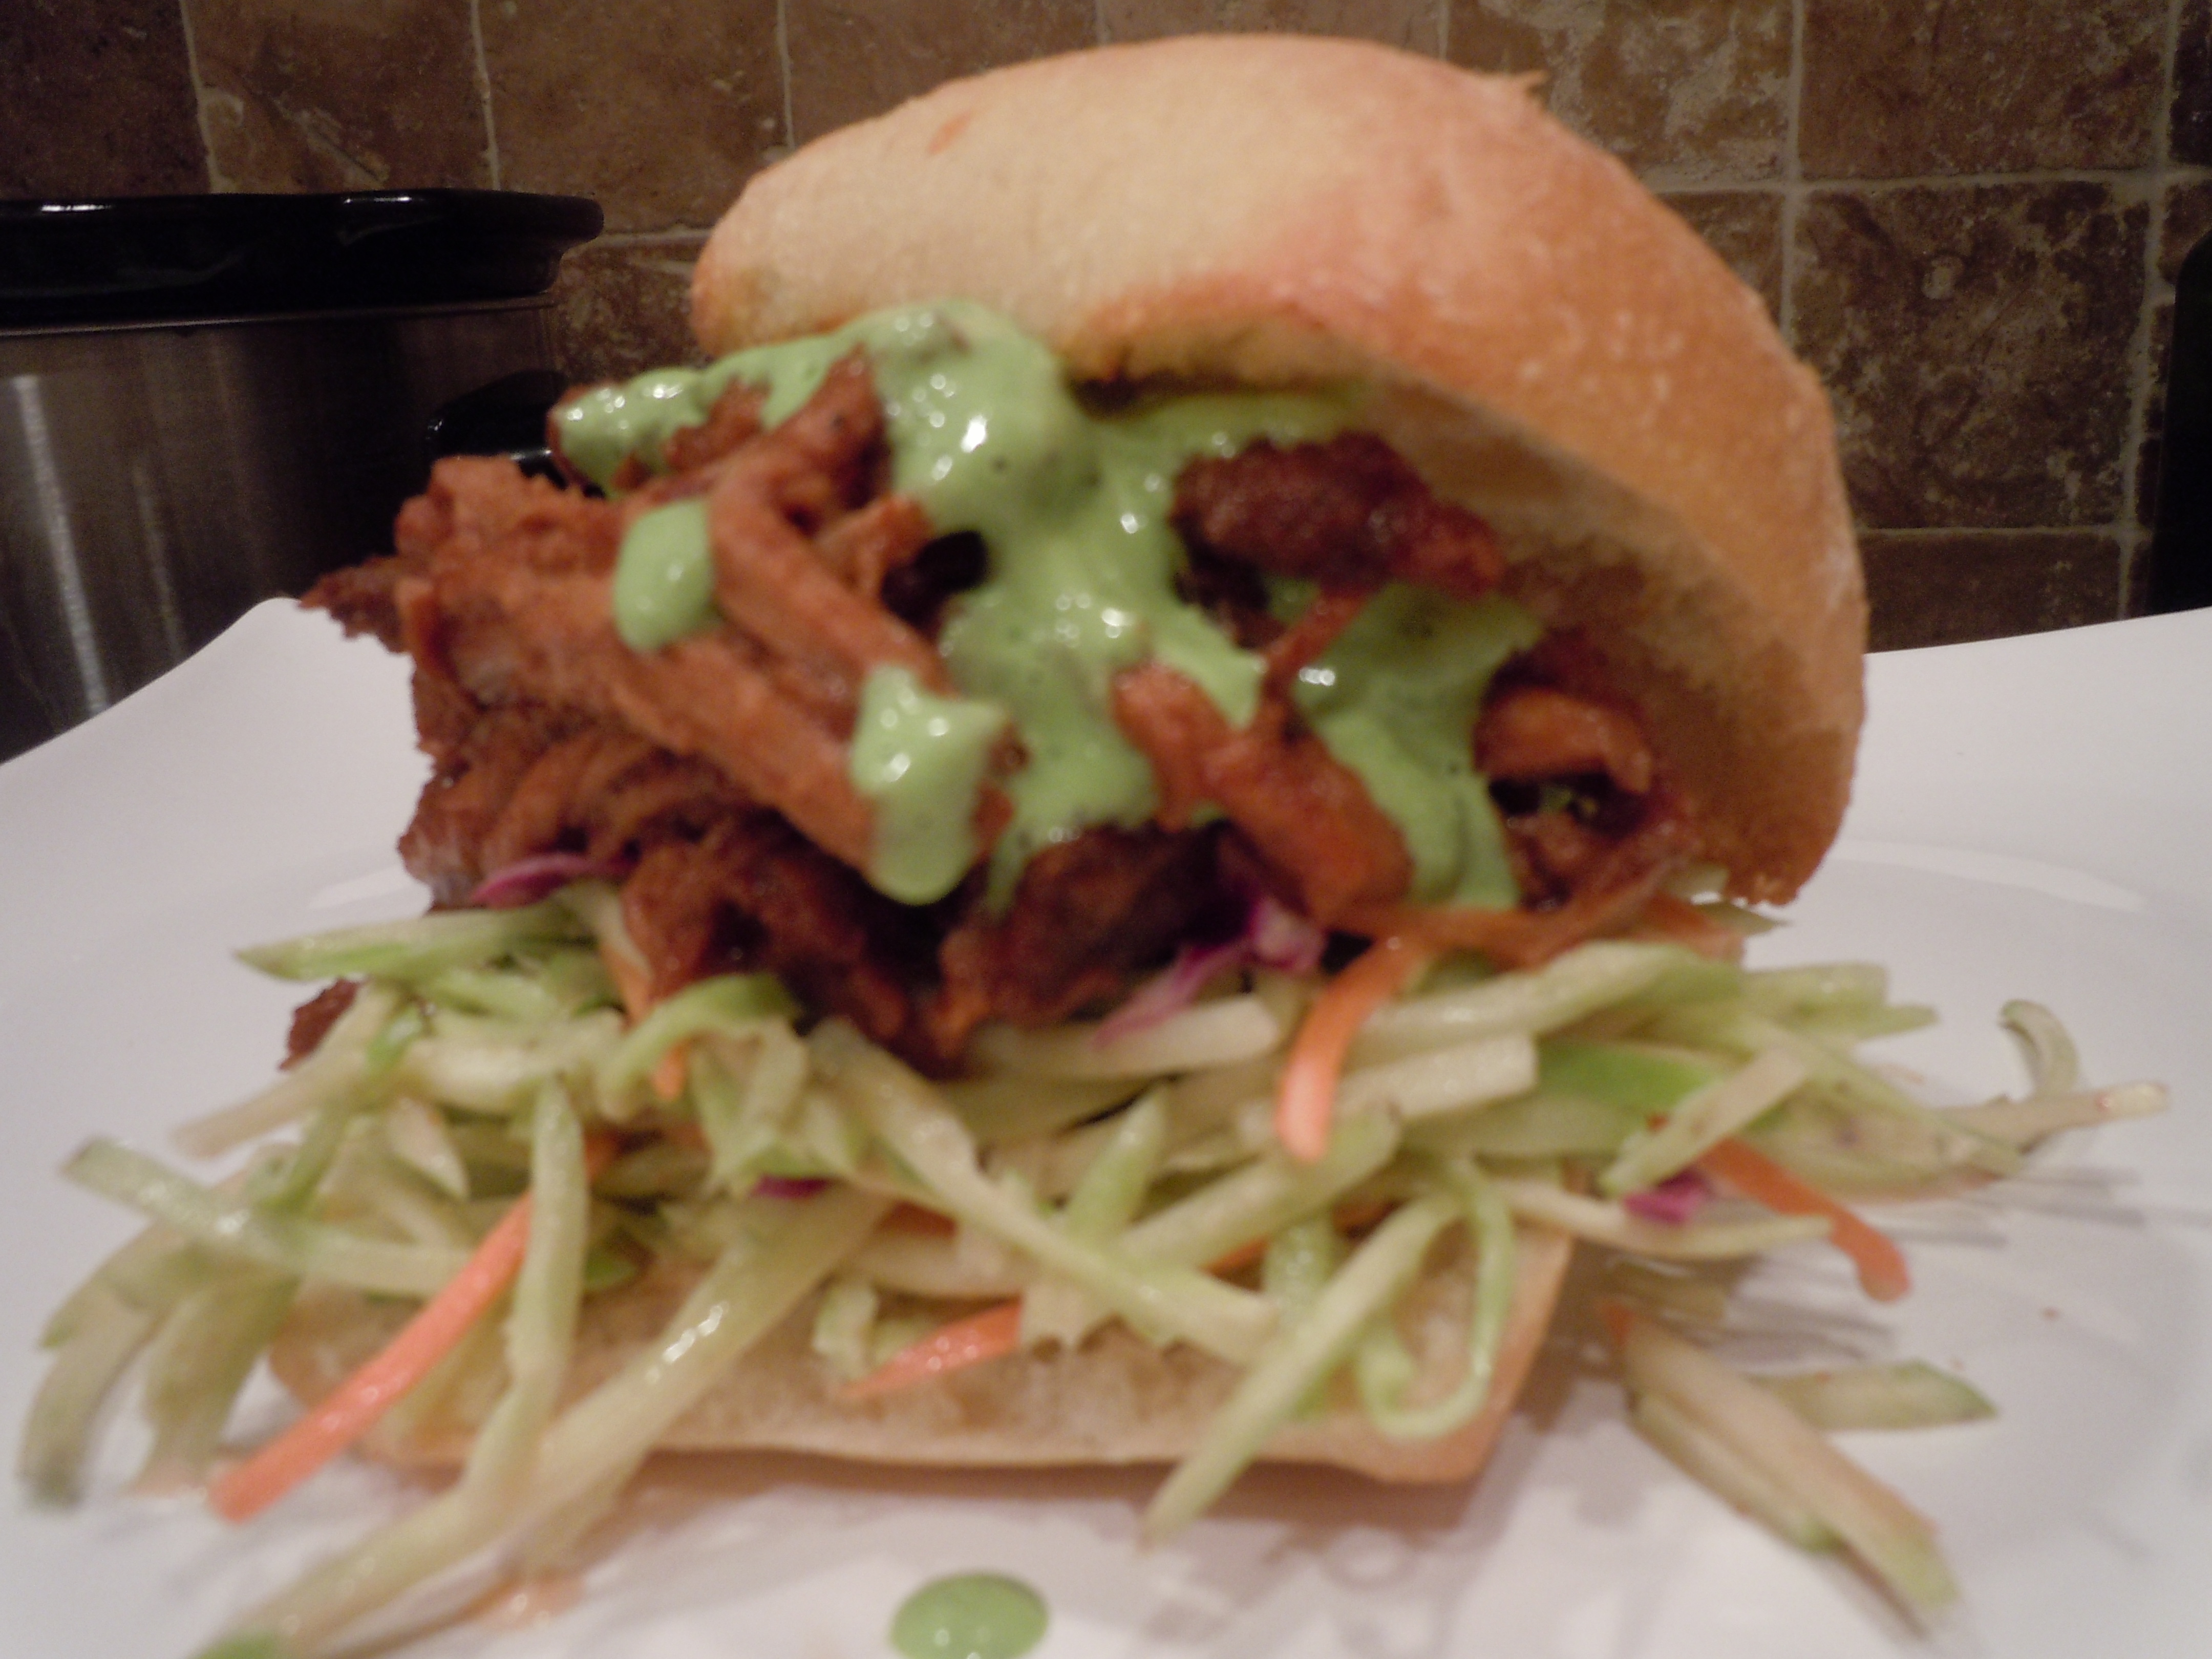
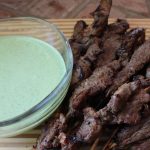
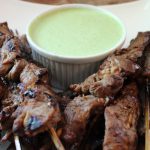
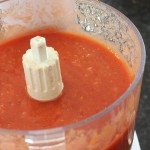
Having my green goddess sauce ll at your next party will be sure to turn heads. It’s kind of like wearing a new party dress! This green goddess sauce is made in mere minutes in a blender. It’s a blend of Greek yogurt, mayo, fresh mint leaves and cilantro, garlic, green onion, lemon juice, olive oil and rice wine vinegar. You don’t even have to waste time chopping finely because it all get puréed anyways!
Decorating your party plates with my green goddess sauce will make for a lovely presentation, a more formal one, but having a bowl or pouring cup of the sauce on the table will do the trick quite nicely! In fact, the latter might be better since there’s a good possibility your guest’s will be going back for seconds.
4 lg stalks, 6 small of green onion chopped coarsely
1 tbsp fresh lemon juice
1 tbsp extra virgin olive oil
1 Tbsp “seasoned” rice wine vinegar
1 tsp sugar – (NOTE: I forgot to add this in the show, but it really needs this for balance 🙂
s & p
If it’s not hot enough with the jalapeno add a dash of Siracha
Directions:
Place all of the ingredients into a blender an purée for 10 seconds…be patient – you may need to stop and stir everything to get it going but do NOT add any more liquid
Stop blender and scrap down sides to get the larger leaf pieces and blend for 5 more seconds and violà!
Taste here and add salt and pepper
Add a dash of Siracha – you need to taste the sauce first, sometimes a jalapeño can be super hot and other times it can be a mellow hot
This sauce gets even better if you can pop it into the fridge for an hour and let the flavors mingle, the sauce will thicken up a little too!
Make this ahead of time and keep sauce in a plastic container and refrigerate. It stays nicely for days in frig.
This green sauce is absolutely delicious on so many things…be creative.
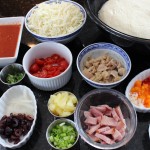
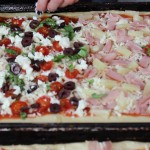
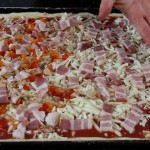
Homemade pan pizza made with different themed toppings from clams casino, to Hawaiian and Greek make for perfect party hors d’ oeuvres! Everyone seems to find their favorite flavors. When the sizzling pan pizza comes out of the oven heads turn especially when the aromas from the garlic, clams, bacon, onions and peppers fill the air!
The wonderful thing about all the different themed toppings for your pan pizza is you don’t need much in terms of quantity. The dough you make the day before, but if you forgot or didn’t have time it will still work if you make it the same day. If you make the dough the same day you don’t put it into the frig but let it proof for an hour and a half in a warm spot to develop some of that texture and flavor. The whole idea behind the “proofing in the refrigerator” is it let’s you do other things while the dough slowly rises developing a killer texture and flavor like in my delicious “Icebox Dinner Rolls”. So take advantage of this refrigerator method, you will be happy you did.
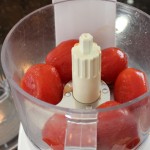
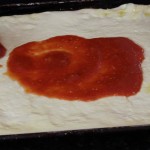
As for my pizza sauce, it couldn’t get any easier because it’s puréed only, not cooked. If you go into a pizza place and inquire about their sauce the majority will tell you the tomato sauce is raw. I know because I have done just this, but they don’t always like to give away their pizza secrets so easily. To the raw, whole peeled tomatoes I add a garlic clove that I put thru the press, salt, pepper and some Italian seasonings and then it’s puréed. Keeping the tomatoes raw really compliments all those other strong flavors from the toppings yet not seeping into the background still being a pertinent player in the pizza game!
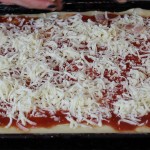
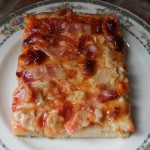
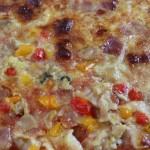
Have some fun with these pizza’s and customize those toppings on your homemade pan pizza! My favorite is the clams casino pizza because you have the best of both world’s, flavor’s and crispy, chewy edges. You can’t beat the garlic, clams, bacon and pepper combo. Drizzling on the extra clam juice not only makes it taste that much better but it let’s the crust get a little crispy while keeping the toppings moist enough so not to burn. With that in mind make sure to pour on any of the extra juices from what ever you are cutting up as when you are slicing up the cherry tomatoes. Another very important tip is to keep all the toppings, including the sauce and mozzarella, in the cold refrigerator until the last minute. This helps the toppings to cook properly giving the crust time to crisp up.
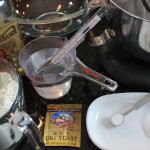
Ingredients for 1 Sheet Pan Pizza Dough – 12.5″ x 17.5″ x 1″ tray:
4 cups all purpose flour
1 1/2 cup warm water 105º-110º
1/2 tsp sugar
1 packet yeast or 2 1/4 tsp – not rapid rise
1 tbsp salt
3 tbsp extra virgin olive oil for the pizza dough
1/3 extra virgin olive oil for the sheet pan
Plus more olive oil to drizzle on top of the pizza’s before baking
My Pizza Sauce – Enough for 2 Sheet Pan Pizza’s:
1 can of whole peeled tomatoes (drained if the pulp is watery) pureed with 1 tsp salt, 1/2 finely ground Italian seasonings, 1/4 tsp pepper and 1 lg garlic clove put thru garlic press
Ingredients For The Toppings From The Show for 2 Trays of Pizza:
Clams Casino Pizza – (for 1/2 the pizza) 1-2 cans 1 cup of Snows canned clams drained except 3 tbsp of clam juice per can to drizzle over pizza, 1/4 cup of chopped peppers, 3/4 cup sliced thick cut bacon, 1 garlic clove thru press, 1 tsp chopped sweet onions
Greek Pizza – 3/4 cup sliced cheery tomatoes, 3/4 cup sheep’s milk feta, 1/4 cup sliced sweet onion, 1/2 cup sliced kalmata or canned black olives, 1/3 cup chiffonade basil
Bacon Pizza – 1 cup thick sliced bacon (for 1/2 of the pizza)
Hawaiian Pizza – 1 cup sliced ham, 1/2 cup chopped pineapple, 1/2 cup sliced green onions with whites too
Directions – (Pre-heat the oven to 450º right before the pizza dough has it’s final proof and make sure the rack is in the lowest possible position):
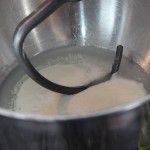
Warm the stainless steel mixing bowl with warm water for 5 minutes
Empty out warm water and add packet of yeast to mixing bowl
Add in 1 1/2 cups of water at 105º-110º to the yeast
Add in 1/2 tsp sugar and let the yeast proof for 10 nminutes
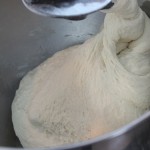
Tour on knead hook and begin to add in 3 tbsp olive oil, flour and salt
Keep mixing and knead with hook after it forms a dough ball for 10 minutes
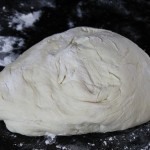
Take dough off of hook and onto a floured counter
Knead by hand for 2 minutes and place into a large oiled bowl
Cover with saran wrap and refrigerate for 18-24 hrs.
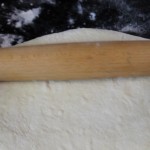
When you are ready to make the pizza make sure to take out of the frig and let the cold dough sit for approx. 2 hrs. – this will make it easier to work with
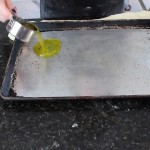
When the dough has sat for 2 hrs. turn out onto floured surface and begin to roll out and stretch to the size of the cookie tray
Pour 1/3 cup of olive oil onto cookie tray and place the rolled out pizza dough onto olive oil
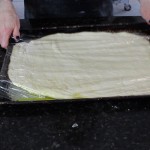
Cover with plastic wrap and let sit 30 minutes
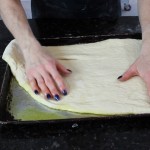
Remove plastic wrap and stretch the dough if needed to the edges of the pan and using your thumb press the egde of the dough into the edges of the cookie tray to form a crust – this will become a crispy and chewy egde that you will love!
Spoon pureed tomatoes onto the dough and sprinkle mozzarella
Add you desired topping and give a drizzle of olive oil across the top of the pizza and put into a 450º oven for 16-20 minutes.
Definitely check at the 15 minute mark as all oven are different
You want the edges dark golden and the middle is sizzling
Take out and let sit for 5 minutes
Using a large spatula remove the pizza in one piece to a large cutting board and slice, or slice in the cookie tray

 Back on CT Style this week with Ryan Kristafer and Teresa Dufour making the perfect summer picnic dish, Asian Shrimp & Rice Noodle Salad, never gets dull with those two! I thoroughly enjoy every second on the WTNH set at Channel 8. There were several groups going on camera this week making it even more exciting then usual, if that’s at all possible.
 important for me to find out what recipes my followers and friends want to see so please feel free to make suggestions always. That’s how I came up with this Asian Shrimp & Noodle Salad… it was the #1 request, a picnic-beach salad that won’t spoil.
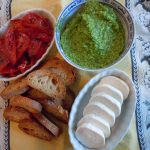
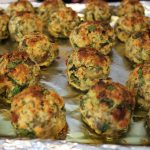
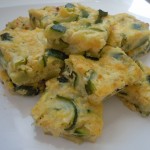
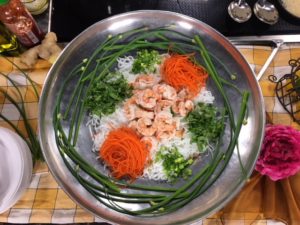 Here are some other summer dishes you may enjoy like my 2 minute Homemade PESTO on crostini with roasted cherry tomatoes and mozzarella, EGGPLANT BALLS, ZUCCHINI TORTA, Mediterranean Chicken Kabobs, or Dreamy Cream & Fresh Berries.