The Traveling Epicurean

Salmon B.L.T. Sliders at Marco’s

Salmon B.L.T. Sliders at Marco’s

lathropmanorThese gourmet salmon B.L.T. sliders are like no other you have ever had before. It’s a genius sandwich offering up a sweetness with the tenderly seared Sockeye salmon fillets to the salty in the roasted pancetta and lets not forget the scrumptious homemade aioli with lemon zest and garlic. Then there is the peppery baby arugula and juicy tomato slices all captured on a soft potato bun. WOW! This sandwich slider just melts in your mouth giving you a variety of flavors that compliment each other so well you try to remember each one as it passes over you tongue. Chef Marco, from the charming B & B in Norwich, Connecticut Historic District called Lathrop Manor has these salmon B.L.T. sliders down to perfection so well that it seems everyone in the neighborhood has had one! Make sure to take notice of the homemade lemon aioli recipe which is really lovely and goes with so many foods as shown below on grilled vegetables.

Marco and his wife Sheryl bought this 5500 sq. ft. B & B back in 2005 coming from a 700 sq. ft. apartment in Manhattan. Talk about a culture shock. They then put their heart and soul into the Lathrop Manor making it what it is today and filling the empty building with beautiful period pieces bringing it all together. You couldn’t ask for more gracious hosts then Marco and Sheryl with their warmth and compassion making your visit here a very special place to be.

Lathrop Manor as been written up in Yankee Magazine as well by a Kim Beckius who has written several books about New England B & B’s. You shouldn’t miss the opportunity to stay here and meet Marco and Sheryl, and experience their gourmet fare. Chef Marco can cook up a IMG_2283storm like nobody’s business which is evident their in B & B’s five course breakfast! Hope you enjoy the show and don’t forget to let me know how much you love these gourmet salmon B.L.T. sliders!  You might just get inspired and make Pavlova for dessert!


IMG_2592  IMG_2593  IMG_2587

IMG_2580  IMG_2577  IMG_2655

IMG_2658  IMG_2662  IMG_2617

IMG_2663  Poached

Ingredients for Marco’s Salmon B.L.T. Sliders – makes approx. 20 sliders:

  • 1 1/2 -2 lb. fresh Sockeye Salmon, have fishmonger fillet (remove skin) and de-bone
  • 1/2 lb sliced Pancetta (you’ll need as many slices as sliders that you are making)
  • Arugula
  • olive oil
  • fresh lemons
  • lemon aioli
  • Potato buns
  • Compari tomatoes sliced
  • s & p
  • Marco’s homemade lemon aioli

Directions For Marco’s Salmon B.L.T. Sliders :

  1. Make homemade lemon aioli recipe below
  2. Pre-heat the oven to 400º
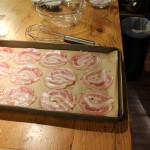
  3. Place piece of parchment onto cookie sheet and place pancetta slices onto parchment
  4. Bake pancetta slices for approx. 12 minutes (you can leave slices on the tray when done cooking until you make the sandwich sliders)
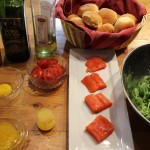
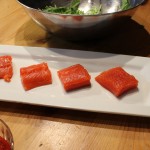
  5. Slice salmon fillets in approx. 2 1/2 ” pieces
  6. Season salon with s & p on both sides
  7. Heat lg fry pan on med/high heat
  8. Add 3 tbsp to pan and begin to add salmon squares 4-6 at a time
  9. Sear on first side approx 1 1/2 minutes and flip (it will release when it ready)
  10. Sear 2nd side 30 seconds and remove to platter
  11. Dress arugula with 1 tbsp olive oil and 1 tbsp lemon juice and a sprinkle of s & p and toss (light dressing)
  12. On a large platter line up top and bottoms of potato rolls
  13. Smear a tsp of aioli on each side of the bun halves
  14. Begin to build gourmet salmon B.L.T. sliders
  15. Layer potato bun, aioli, pancetta, salmon, tomato slice, small mound of arugula and top with bun that has a smear of aioli
  16. Buon Appetito!

Ingredients for Marco’s Homemade Lemon Aioli:

  • 1 egg yolk
  • 1 tbsp fresh lemon Juice
  • Zest from 1 lemon
  • 1 heaping tbsp finely chopped shallots
  • 1 tsp fresh garlic finely chopped or through garlic press
  • 1/4 tsp salt
  • sprinkle fresh pepper
  • 1 heaping tbsp Dijon mustard
  • 1/3 cup olive oil
  • 2-3 tbsp grape seed oil (or Olive oil)

Directions for Homemade Lemon Aioli:

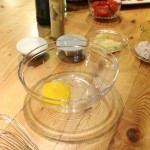
  1. Add egg yolk to large glass bowl
  2. Add in Dijon, lemon zest, lemon juice, shallots, garlic
    • Whisk to mix
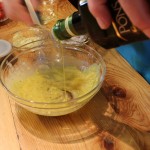
    • Begin to drizzle in olive oil, then switch to grape seed oil all awhile whisking constantly to emulsify ingredients into thick texture
  3. Add s & p to taste and set aside

Homemade Berry Granita

Homemade Berry Granita

Homemade berry granita is similar to a sorbet or an Italian ice and gives you the same happy feeling as eating ice cream but can be made with out all that hard work. Granita is made in three simple steps – purée, freeze and scrape. How simple is that? Most recipes for granita have you making a simple syrup by boiling the water and melting the sugar but I find that unnecessary. Instead, I substitute the sugar with Agave Nectar this way you add it right to the berries in the blender! Yeah!

Granita actually originated in Sicily and is a frozen treat made all over the world. In Quebec they call it a slushy or a slurry. This frozen treat can also be made into a after dinner dessert for adults by adding in a jigger or two of rum to give it a little kick. Another great idea is serving granita between meals as a palate cleanser to clear the taste buds for next course as an elegant presentation to your dinner party.

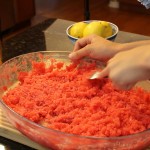
In my homemade granita recipe I have also simplified the freezing steps. Instead of scraping with a fork every 45 minutes just wait the three hours or so until the entire dish is frozen and then scrape with a fork at the end like we do in the show. This way it’s less time consuming and a smoother, easier surface to work with all awhile still coming out fluffy and delicious! I think you and your family and friends will really enjoy the simplicity of this delicious frozen treat.

IMG_2321

IMG_2122

IMG_2364


slurry

freezer

fluffygranita


IMG_2375


Ingredients:

  • 2 cups fresh strawberries
  • 1 cup fresh raspberries
  • 1 cup cold water
  • 2 tbsp agave nectar or honey (Optional)
  • 1/4 cup sugar
  • 1/4 cup fresh squeezed lemon juice
  • Juice from 1 lime
  • 1 bunch fresh peppermint leaves

Directions:

  1. Wash and dry fruit
  2. Squeeze juice from lemons and lime
  3. Hull strawberries and slice in half
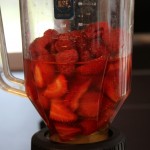
  4. Place all berries into blender
  5. Add citrus, H20 and agave
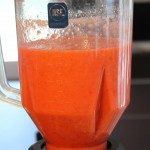
  6. Blender for 20 seconds til pureed
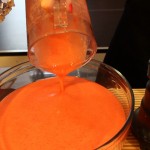
  7. Pour into a Pyrex dish
  8. OPTIONAL: Add in 1-2 jiggers of rum, stir and freeze
  9. OPTIONAL: You can give a stir before its frozen around the 45 minute mark BUT this is not a necessary step (as you see in the show we did not get around to this)
  10. Freeze for approx. 3 hours
  11. Pull out from freezer and begin to scrape with a fork until fluffy
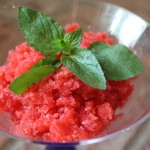
  12.  Spoon into martini glasses and top with fresh mint

Yogurt Chicken Kabobs, Tzatziki & Toum at Maria’s

Yogurt Chicken Kabobs, Tzatziki & Toum At Maria’s

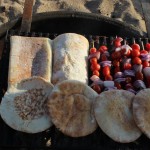
Wow, this gourmet yogurt marinated chicken kabob recipe is the most scrumptious marinade I have ever had on chicken. It will be my new favorite marinade for summer grilling! There is really nothing to putting together this marinade and the results are outstanding. The grilling goes really quickly here too because you cube up the chicken into small pieces so it only takes about 7-8 minutes for each side on high heat.  I know I will be baking my chicken with this marinade over the winter months. Maria got this yogurt-marinated chicken kabob recipe from epicurious.com and of course making a couple of adjustments as I go through my own test kitchen adding in the fresh ground coriander and the “smoked” Spanish paprika giving it that hint of something extra that I was looking for.

The combination of these three gourmet recipes together are packed full of flavor! My favorite is actually having  this dynamic combo on some warmed or toasted naan adding in a chewy soft texture to this heavenly dish. Using the toum, the garlic Lebanese sauce as a baster for the breads and vegetables when you are grilling in a no brainer.

This homemade gourmet sauce called toum is such an unusual sauce because it’s hard to initially imagine how such a thick and creamy texture can come about from peeled garlic cloves and vegetable oil! You must be patient with this recipe as the slow drizzling of the vegetable oil is crucial in the emulsification of this garlic-oil combo but the efforts are well worth it. Watching the show to see how I get the sauce thick and foamy I hope will help clarify the “how to’s” of it. This toum sauce will last up to 2-3 weeks in your frig and who’s better than you with this little hidden gem just waiting to put a flavor punch of silky garlic on your sauteed veggies, garlic breads, meats, fish, chicken… the options are really endless.

Maria’s homemade tzatziki sauce is a recipe I’m sure you will love and want to add to your go to recipes for summer. The way she has you drain the whole fat Greek Yogurt makes this sauce even creamier and gives your mouth a smooth silky texture yet refreshing at the same time with the grated cucumber, and vinegars and fresh lemon juice. This sauce can easily be used as an amazing dip with pita chips. It’s similar to my cucumber & Vadalia onion salad but definitely different. So nice to have a couple different styles to choose from.

This Mediterranean night of exotic spices and flavorful recipes will not be easily forgotten. You just may start to crave these homemade dishes sooner than you think. I hope you enjoy the show and the gourmet yogurt marinated chicken kaobs, tzatziki and toum recipes.

IMG_1789  IMG_1787  IMG_1817

IMG_1897  IMG_1768  IMG_1778

IMG_1780  IMG_1826  IMG_1831

IMG_1832  IMG_1851  IMG_1898

IMG_1802  IMG_1890  IMG_1879

IMG_1809  IMG_1794  IMG_1911

INGREDIENTS for Yogurt Chicken Kabobs:

  • 1 tsp ground red pepper flakes
  • 1 tsp (Spanish) smoked paprika
  • 1 tsp (Hungarian) sweet paprika
  • 2 tsp coarse kosher salt
  • 1 tsp fine ground black pepper
  • 2 tbsp tomato paste
  • 6 garlic cloves peeled and smashed
  • 2 whole lemons thinly sliced
  • 2 tbsp red wine vinegar
  • 3 tbsp olive oil
  • 1 cup whole milk Greek Yogurt
  • 2 1/2 lbs. chicken thighs
  • 1 package extra-long wooden skewers
  • 1 package cherry or grape tomatoes
  • 1 or Vadalia sweet onion sliced into 1″ pieces

Mediterranean Yogurt Chicken Kabobs DIRECTIONS:

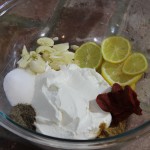
  1. Take first 11 ingredients in above list and add to large mixing bowl
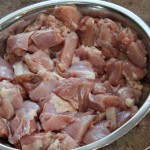
  2. Mix everything with a spatula then add in chicken pieces and toss to coat
  3. Cover with saran and pop into the frig for 24 hours
  4. Cover 2 cookie tray with foil and begin to place pieces of marinated chicken
  5. Place chicken thigh pieces on BROIL for 10 nminutes, then flip & broil 10 minutes more
  6. Be sure to keep an eye on them so as not to burn
  7. Remove tray and let cool to touch while broiling other tray of chicken thigh pieces
  8. When all chicken can be handled place 3 cooked pieces onto each wooden skewer
  9. OR you can grill…
  10. OPTIONAL: Skewer cherry tomatoes and onion alternating pieces
  11. You can also alternate chicken, tomato, onion, chicken and repeat
  12. Grill on high for 7-8 minutes on each side (even with veggies in the mix)
  13. Serve grilled chicken and tomato/onion on naan or pita bread with tzatziki, and hummus or rice ….YUM!

INGREDIENTS for Tzatziki Sauce:

  • 1 16 oz. container of whole fat Greek yogurt
  • 1 English cucumber
  • 1 garlic clove put thru garlic press
  • 1/2 cup chopped fresh dill
  • 2 tbsp rice wine vinegar
  • 1 tbsp red wine vinegar
  • 1 tsp salt
  • 1/4 tsp pepper
  • 1/2 tsp cumin
  • juice from 1/2 fresh lemon
  • 2 tbsp good extra virgin olive oil in sauce and some to drizzle on top at the end

DIRECTIONS for Tzatziki:

  1. Slice cucumber in half-length wise, then in half crosswise
  2. Scoop out middle seeds and discard
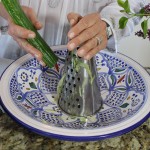
  3. Grate cucumber halves into a large bowl
  4. Put cucumber gratings into a Ziploc baggie and add 1/2 tsp salt, let sit for 1 hour or over night
  5. Unseal a small corner of the Ziploc & drain water from baggie squeezing the grated cucumber
  6. Add grated cucumber to a medium bowl, and pat dry with paper towels to remove any excess water
  7. Add fresh dill, garlic, s&p, cumin, lemon juice and Greek yogurt to grated cucumber, mix til creamy texture
  8. Drizzle 2 tbsp good extra virgin olive oil on top and voilà you have tzatziki

INGREDIENTS for TOUM – Lebanese Garlic Sauce:

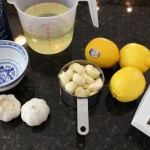
  • 1 cup peeled white garlic
  • 2 1/2 cups vegetable oil
  • 1/4 tsp salt
  • 1/2 cup fresh lemon juice

DIRECTIONS for Toum: Approx Time 12 minutes

  1. Add 1 cup peeled garlic and salt to food processor and pulse 3 times
  2. Scrape down sides
  3. Begin the garlic-vegetable oil emulsion by SLOWLY beginning to drizzle in the oil – This will take about 12 minutes to slowly drizzle in all of the oil
  4. When you have reached adding in 1/2 cup of oil you will need to stop and scrap sides one last time then start up processor again and resume adding in oil, at about 1 cup of oil mark begin to add 2 tsp of lemon juice – KEEP food processor going the WHOLE TIME
  5. Go back and forth from oil to lemon juice until it’s finished (I begin to add 3 tbsp of lemon juice at a time after about 1 1/2 cup of oil mark)
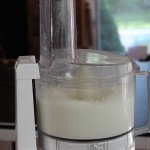
  6. You should see the volume doubling then quadrupling
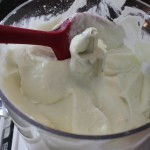
  7. At this point the toum will be thick and foamy
  8. Since the food processor has been running for a while now you will need to let it COOL and put into a container but DO NOT seal at this point because any condensation will ruin the texture of the toum and all your hard work
  9. Just loosely cover with a paper towel til COMPLETELY COOLED
  10. At this point you can seal with a top
  11. It will last in the frig for a couple of weeks
  12. Serve with the yogurt marinated chicken kabobs, sauté vegetables, brush on grill items, naan, pita bread, ciabatta for garlic bread … the options are endless ENJOY 🙂


Homemade Salmon Gravlax

Homemade Salmon Gravlax
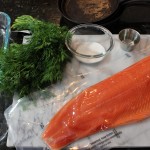
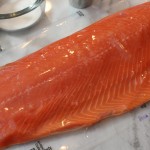
What a treat it is to have homemade salmon gravlax. It’s an even bigger delight to be able to make it yourself at home and have left overs the next day that are just as incredible as the first day they finished curing. Not to mention the money you will save from the astronomical price tag usually attached to those salmon gravlax or Nova lox if you were to buy them at a specialty shop!

You won’t believe how easy it is until you make these gourmet salmon gravlax for yourself. It is very important that when you do decide to make my homemade salmon gravlax to buy wild salmon and NOT farm raised. The wild salmon is definitely going to be pricier then the farm raised but you will still be saving a ton from having a specialty shop cure and sell them to you.

Now there is a little difference between salmon gravlax and Nova lox. Nova lox come from Nova Scotia and are cold smoked after the curing or brining process using some kind of brandy, gin or lemon vodka. Gravlax is the Scandinavian preparation of lox with just the curing or brining using dill and other spices like juniper berries, pepper corns as well as a liquid like an aquavit or vodka. Gravlax actually originated a lot like how sushi evolved in Asia where they buried the fish in rice to preserve and ferment.  Gravlax was made by fishmen who salted and fermented it by burying it in the sand …hence the Scandinavian word “grava” meaning to dig.

This homemade salmon gravlax recipe of mine came from a good friend, Jim, who is a saucier himself and always has an endless assortment of great recipes up his sleeve. His wife Jen and him are also big foodies and a lot of fun has been had with them in our own “kitchen cook-offs”! Needless to say I have been making these homemade salmon gravlax for over fifteen years and the results are always amazing. They are for sure “easy gourmet”.

With all the graduations and summer parties around the corner I think you better get busy and invest in some Coho wild salmon or do a little fishing yourself. I actually bought my Coho wild salmon that’s in the cooking show at Whole Foods Market. Their Coho wild caught salmon is packaged and flash frozen by the fisherman to a certain degree required by FDA law to kill any parasites and is ready for distribution. You may never buy store bought salmon gravlax or Nova lox at specialty shops again after eating this incredible delicacy! I hope you Enjoy the “Homemade Salmon Gravlax” show!

IMG_0872  IMG_0876  IMG_0947

IMG_0949  IMG_0966  IMG_0964

INGREDIENTS for Salmon GRAVLAX:

  • 1 1/2 -2 lbs. fresh Wild Coho Salmon (flash frozen or right out of the ocean!)
  • 3-4 tbsp sea salt ( USE 2 tbsp PER POUND of salmon)
  • 3-4 tbsp sugar (USE 2 tbsp PER POUND of salmon)
  • 2 tbsp vodka or aquavit
  • 1 lg bunch of fresh dill
  • 2 tbsp pepper corns -OPTIONAL -for a little spice (Use pepper corns not ground pepper)

DIRECTIONS for Salmon GRAVLAX:

  1. Cut 2 lb salmon filet in 1/2 so we can sandwich the halves together with salmon flesh facing the inside
  2. Whisk dry ingredients together salt, sugar and peppercorns
  3. Sprinkle about 1 tsp of vodka on the flesh sides of each of the salmon halves
  4. Rub all of the dry mixture onto the flesh sides and skin sides of the salmon halves…most of the rub should be on the flesh side though
  5. Lay fresh dill bunch onto one the the salmon fillets, on the flesh side
  6. Sandwich the other salmon fillet on top so that the flesh sides are facing each other
  7. Place into a Ziploc baggie and place in a glass baking dish
  8. Top the salmon fillets with cast iron pans and large cans – YOU NEED TO WEIGHT THE SALMON DOWN (tomato or vegetable cans work great)
  9. Place into the frig and cure for 3 days (2-3 days preferably 3)
  10. Flip the curing salmon every 24 hours making sure to out the weights back on
  11. On day 3 remove the salmon from the baggie and pick off all of the toppings (dill, pepper corns) and give a QUICK rinse or rub off toppings with a damp paper towel (you don’t want to run water over your cured salmon … it’s a QIUCK rinse)
  12. Pat completely dry and sliced salmon on a bias as shown in the show
  13. Serve with mustard sauce or cream cheese-caper mixture and bagels or rye bread rounds and a sprig of fresh dill on top
  14. Mangia mangia

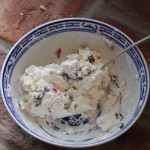
INGREDIENTS for CREAM CHEESE SPREAD:

  • 6 oz. Philadelphia cream cheese
  • 2 tbsp finely chopped red onion
  • 2 tbsp small capers
  • 1/2 fresh squeezed lemon
  • 2 tbsp chopped fresh dil

Bring cream cheese to room temperature, add remaining ingredients and mix to combine

INGREDIENTS for MUSTARD SAUCE:

  • 2 tbsp Dijon
  • 1 tbsp sugar
  • 1 tbsp finely chopped red onion
  • 2 tbsp finely chopped dill
  • 3 tbsp “seasoned” rice wine vinegar
  • 3 tbsp good olive oil

Put first 4 ingredients in a medium size bowl, add in vinegar and begin to whisk in olive oil


Homemade Pasta Fagioli

Homemade Pasta Fagioli

This homemade pasta fagioli dish is a traditional Italian soup where the recipe differs from family to family and region to region. Every single version is different which makes it nice because it’s very personal that way. It’s what ever you were used to having in your own home or at your relatives growing up. Originally, pasta fagioli was made without meat, then there were versions that started the dish off by sauteing pancetta and now there are so many different recipes floating around. It’s what ever floats your boat really! It’s supposed to be easy gourmet…what ever you have in the pantry and refrigerator will work.

Pasta fagioli is a savory comfort food that I just love. It consist of several universal ingredients like ditalini pasta,  cannellini beans, some kind of tomato base and a liquid of either chicken, or vegetable and I have even seen water used. It’s been considered a soup which is perfect for dunking that crusty bread but there are versions that make it more like a thick saucy “pasta” dish. The liquids do evaporate quickly after the pasta is added to the pot and cooked through so you have to be careful at this point to keep an eye on that if you want it to have a looser soup-like consistency.

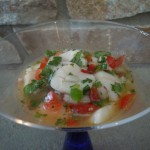
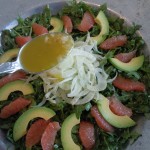
The pronunciation of the word has evolved to “pasta fazool”. Then again, there are many variations of that as well 🙂 So enjoy this Italian soup…I know you will love it. If you need an appetizer to go with this gourmet homemade pasta fagioli you may want to check out my sea scallops wrapped in bacon, scallop cerviche, or even a refreshing fennel and citrus salad with tangerine dressingAnd how about some Pavlova with fresh pineapple and berries for dessert!

iphone pictures 2152iphone pictures 1830iphone pictures 1790

des


INGREDIENTS For Pasta Fagioli (makes enough for many…10-15 side dishes):

  • 2 cans cannellini beans
  • 1/2 -3/4 cup ditalini pasta ( 1/2 if you want it looser soup-like consistencey …remember it just keeps getting thicker even after you take it off the stove as the liquid evaporates)
  • 1 qt. (4 cups) chicken stock
  • 1 cup white wine-pinot grigio or what ever you are drinking -(1/2 to deglaze pancetta and veggies and 1/2 when you add stock
  • 1/3 cup each diced carrots, celery and onion
  • 3 tbsp finely chopped garlic
  • 2 cups whole peeled tomatoes with some juice, broken up with your hands – NOTE: USE 3 cups if you are not using a cup of “leftover pork & sauce”
  • 1 cup pork in tomato sauce OR 1 lb. sausage taken out of the casing ready to sauté OR omit all together
  • 2 1/4″ sliced of pancetta diced up or bacon
  • 2 sprigs of fresh rosemary and 2 of fresh thyme tied in up with string
  • Fresh basil -julienne to add at the end
  • grated Reggiano Parmigiano and some to shave for decoration
  • good olive oil to drizzle at the end
  • 1/2 tsp salt -add 1/4 tsp at the addition of sauteing veggies and 1/4 tsp when you add beans and broth
  • 1/4 tsp pepper
  • 1/4 tsp crushed red pepper flakes if you like a pinch of HEAT

DIRECTIONS:

  1. Add diced pancetta to a large pan and begin to sauté for 8 minutes on med heat
  2. Add in broken up sausage to brown with the pancetta If you do not have “pork in sauce”
  3. On med/low heat add diced carrots, onion, celery and garlic with 1/4 tsp salt (along with 1/4 tsp crushed red pepper flakes if you want a little heat) to the same pot with 1 tbsp olive oil extra – sauté til veggies are tender 10 minutes
  4. De-glaze with 1/2 cup white wine and simmer 5 minutes
  5. Add in beans, pork-sauce, whole peeled tomatoes, herb bouquet, chicken stock, 1/4 salt, 1/4 pepper and simmer for 30 minutes
  6. Remove herb bouquet from soup
  7. Take 4-5 ladles of beans out of the soup to puree for a little creamier then adding back in
  8. Simmer 5 minutes and add in 1/2 cup ditalini pasta
  9. Cook til pasta is cooked – approx 7 minutes
  10. Plate up and drizzle olive oil, sprinkle parmigiano cheese and fresh basil and mangia mangia!


Energy Smoothies 101 VIDEO

Energy Smoothies 101 Recipe and VIDEO

Making homemade smoothies is such an ideal way to get so many wonderful nutritients into one beverage and not compromise on taste! These gourmet energy smoothies are absolutely scrumptious! Who doesn’t love a smoothie and now with all the high tech appliances available out there just for puréeing vegetables into drinks you can’t go wrong. Those juicers can get a little pricey though and an average Waring blender can get the job done too! So don’t feel like you can’t join in if you’re a novice to all this and start making your own homemade gourmet energy smoothies if you haven’t spent the dough…no pun intended 🙂 Yes, you can make your own!

My energy smoothies 101 recipes and video start you off with some basics on how to create these delicious energy smoothies. I make it easy for you with a proven lists of ingredients that taste incredible and help your body to feel good too. Granted, there’s always that afternoon cup of joe that you can grab for a boost and let me tell you I do love my caffeinated beverages! Standing by my coffee pot in the morning in anticipation of pouring that first cup is how I begin my day. Then there’s mid-afternoon when we all seem to need that extra zing to keep us going and that’s when I usually go for my cup of tea which has sentimental reasons for me as well reminding me of my Grandmother and I having tea and crackers together when I was very little. BUT when I add an energy smoothie into my day I definitely feel the difference with more of a long lasting energy and good feeling surge!

Making these energy-power smoothies will give you that “feel good” energy surge and when we are feeling up it puts us in a good mood! There are studies that show an anti-inflammatory diet that is high in protein really does have an effect on our moods and increases our stamina… who doesn’t need that!

While doing some research on high protein and anti-inflammatory diets I was recently turned on to Muscle Milk. Muscle Milk is a product that a lot of athletes use because it’s great for after work out recovery. It’s also formulated for people who are lactose sensitive, it’s gluten free and they do carry a line of Muscle Milk Light too. Best of all, while offering up all that great protein it taste scrumptious in my first “tropical vanilla energy smoothie”! The vanilla Muscle Milk compliments the vanilla Greek yogurt making for a creamy tropical flavor. It’s truly a tropical vanilla flavor that’s luscious.

My second smoothie is called the “green zinger” because the spinach turns it green and the fresh grated ginger gives it that underlying needed zing. This may me one of the most unique and delicious smoothies I have come up with. Maybe it’s because I absolutely adore the taste of fresh ginger and honey together and if you haven’t had this combo yet please put it on your bucket list! Fresh grated ginger and honey with a little squeeze of lemon will send your tea through the roof in flavor…please try it 🙂

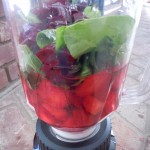
And last but not least is my third smoothie called “the berry-beta bomb” where the color alone is enough to make you smile. There is a small amount of beets in this smoothie which give you a unique source of that wonderful nutrient called betaine. Betaine is like a power nutrient that protects our cells from stress which help fight inflammation and at the same time caring more iron than even spinach…woo hoo I say who’s better that you! I have you baking the beets for a no fuss way to cook them. If you are not big on beets try the golden beets or chioggia striped beets which you can find at Whole Foods or our local Bishop Orchards because they are definitely milder in flavor and it’s important to have them in this smoothie.

When you make your homemade batch of smoothies don’t forget to freeze a small amount in containers. That’s take some of the work out of your next round and makes for refreshing little energy snacks in the afternoon. I take them right out of the freezer and eat them like an Italian ice. Make sure to watch my show on how to make these babies! Enjoy and stay healthy!

002  005  008

009  024  013

INGREDIENTS FOR THE TROPICAL VANILLA SMOOTHIE W/ MUSCLE MILK:

  • 1 cup Muscle Milk
  • 1 cup vanilla Greek yogurt
  • 1 cup unsweetened apple juice
  • 1 cup frozen cut-up mangoes
  • 1 cup frozen cut-up peaches
  • 2/3 cup frozen cut-up bananas
  • 3 tbsp honey

INGREDIENTS FOR THE GREEN ZINGER SMOOTHIE:

  • 1 cup vanilla Greek yogurt
  • 2 cups unsweetened apple juice
  • 2 cups baby spinach leaves
  • 1 cup frozen cut-up mangoes
  • 1 cup frozen cup-up peaches
  • 2/3 cup frozen cut-up bananas
  • 1 heaping tbsp fresh zested ginger
  • 3 tbsp honey

INGREDIENTS FOR THE BERRY-BETA BOMB SMOOTHIE:

  • 1 1/2 cups vanilla Greek yogurt
  • 1 1/2 cups unsweetened apple juice
  • 1 1/2 cups baby spinach leaves
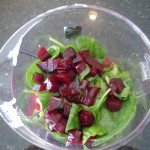
  • 1/4 cup roasted beet – diced up (If you are not a big beet lover use lighter colored beets like golden beets, or Chioggia beets – the striped beets because they are more mellow in flavor
  • TO COOK BEETS: Cut stems off of beets 1/2″ up on stem from actual base of  beet, wash and dry the beets, place them in a small shallow baking dish like a pie plate, cover with foil snugly and bake for 1 hr. When beets are done, let them cool and then peel off skin with your fingers.
  • 2 cups frozen strawberries
  • 1 cup frozen cut-up peaches
  • 3 tbsp honey

DIRECTIONS FOR ALL SMOOTHIES:

  1. Place ingredients into blender and puree til smooth.
  2. You use frozen fruits in these energy smoothie 101 recipes but feel free to add crushed ice as well to add in volume and help keep them frosty.
  3. Keep in the frig if you are drinking right away or put into several small containers and freeze to have at a later time.
  4. If you do freeze them in containers just take out from freezer when ready and let it sit on the counter for 15 minutes and stir to drink or eat them right out of the frigerator scrapping with a spoon like an Italian ice! Enjoy!

(Note: Muscle Milk is not a paid sponsor at this time I just happen to really like the product 🙂