Pickled Eggplant at Nancy’s
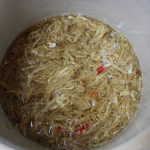
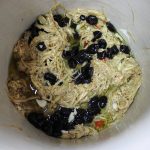
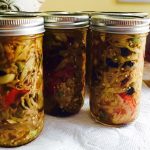 There’s nothing like homemade Pickled Eggplant with thinly sliced strands of eggplant delicately flavored by vinegar, garlic, red hot chili pepper’s, oil-cured black olives and capers all nestled in an olive oil bath. The oil-cured, black olives, add a burst of rich, meaty, sweetness and then there’s a little pucker from the capers. Similar to the oil-cured olives, the eggplant become’s sweet in the beginning of the pickling process when the salt pulls out all the moisture and bitterness.
When Nancy first gave me a jar of her delectable pickled eggplant I knew I would have to get the recipe. Not only is her pickled eggplant to die for but everything she cooks is of the same standard, absolutely delicious! Along with inspiring me in the kitchen, Nancy had the same effect on me on the golf course when I first started playing 8 years ago. She has such tenacity and determination when playing I call her the fiesty golfer! Considering how difficult the game of golf can be, she’s the perfect person to learn the game with.
I had so much fun at Nancy’s house last week making her pickled eggplant. It’s so worth the effort you put into making your own, a most rewarding process when you taste the final product. All of these incredible flavors come together to make an amazing eggplant appetizer like you’ve never had before! You just can’t buy this in the stores!
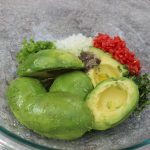
You may just want to turn your party into an anti-pasto party with other dishes to compliment your pickled eggplant like Guacamole Crostini, Roasted Garlic Bean Dip, Arancini Reubens Balls w/Homemade Thousand Island Dressing, Spanakopita w/Metaxa Mojito’s and, or Homemade Pesto w/Fresh Mozzarella & tomato Crostini! Yum! Hope to recieve an invite to your delectable party lol 🙂


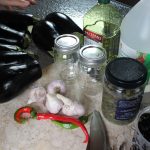


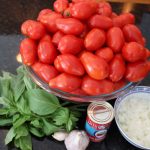
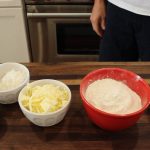
Ingredients:
- 9 large eggplants
- 10 cups distilled white vinegar – 3/4 of gallon jug
- 10 cups water
- 4 cups olive oil
- approx 1/2 container of Mortons salt… use 1/3 cup per eggplant
- 2 cups Italian black oil cured olives – seedless
- 1 long hot red pepper
- 2 tbsp capers
- 8 lg garlic cloves coarsely chopped
- 1 tbsp dried oregano OR 2 tbsp fresh oregano dried in the microwave
- 1 large pickling crock
- 2 clean white cotton pillow cases
- 1 extra large bowl to tranfer wet eggplant in pillow cases back and forth from washing machine
- a case of canning jars
Directions:
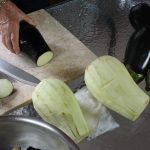
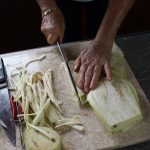
- Peel and slice all 9 eggplants into 1/8″ thick pieces
- Stack slices and cut into 1/8″ strips
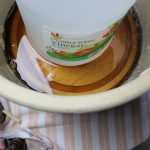
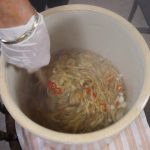
- Place cut up strips into large pickling crock
- After the addition of each cut up eggpant sprinkle in about 1/3 cup salt and mix strips around with salt by hand
- Go thru all 9 eggplant making sure to spinkle 1/3 cup salt after addition
- Place a small dish on top of all the sliced eggplant so that the dish fits into the crock
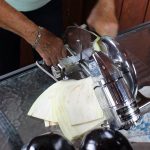
- Place the gallon jug of vinegar onto dish and let sit 2-3 hours
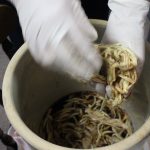
- Remove vinegar bottle weight and plate from crock – at this point there will be a lot of dark brown juice extracted from the eggplant
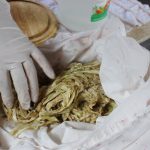
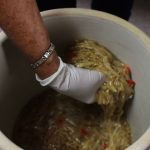
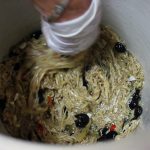
- Transfer eggplant to a clean pillow case a handful at a time leaving behind the brown juice
- Divide all the eggplant into 2 pillow cases and tie off the ends into knots so as the eggplant doesn’t come out when you “spin” it in the washer
- Rinse out the pickling crock
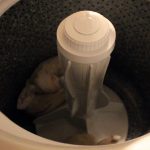
- Take the two pillow cases full of eggplant to the washer and put on “spin” cycle only – NO WATER
- After spin stops, remove eggplant from pillow cases & place back into crock (save pillow cases in a large bowl ready to use one more time before cleaning)
- Add in chopped garlic cloves and sliced hot pepper
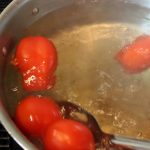
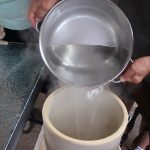
- Bring 10 cups vinegar/10 cups water to a rapid boil
- Pour vinegar/water mix over eggplant strands in crock
- Stir breifly to mix and cover
- Let ferment until cooled approx. for 3 hours giving the eggplant a stir at 1 1/2 hour mark
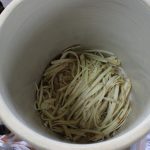
- When the eggplant is cooled remove from crock back into pillow caeses
- Divide up the eggplant and place back into the same two pillow cases you used on first spin
- At this point run all the jars thru dishwasher – time it so they are hot ready to jar the pickled eggplant after 2nd spin (give it about 1/2 hour-depending on timing of your own dishwasher)
- Put all the tops to the canning jars in a pan of water, bring to a boil to sterilze as well
- Place the eggplant strands back in the washer on “spin” cylce only again – NO WATER
- Rinse crock
- Microwave fresh oregano in a microwave for 1 minute, crumble the oregano leaves off the stem and set aside
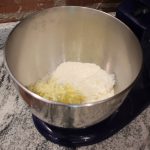
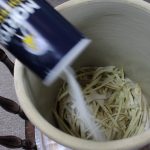
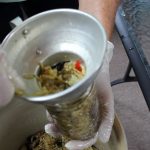
- Add spun pickled eggplant back into the clean crock, add in 4 cups olive oil, 2 cups oil-cured black olives, 2 tbsps of caper and 2 tbsp of fresh microwaved oregano
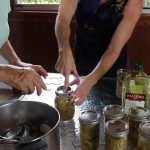
- Take hot jars out of the dishwasher and begin to fill with eggplant
- Top off the pickled eggplant in the jars with a drizzle of olive oil keeping 1/2″ from the top
- Wipe the top of the jars clean with a clean paper towel and seal with the hot tops you boiled on the stove – Be Careful Not To Burn yourself here
- Approx 5 hours after putting the tops on the jars, gently push down on the middle circle to hear a small pop and complete the “seal” – NOTE: they may pop down completing that last seal all on their own
- The pickled eggplant is done and will keep for months at room temp
- I keep an opened jar in the fridge and bring to room temperature when ever I serve it…YUM!
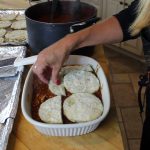
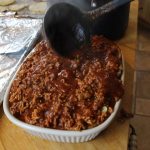
 Paleo Eggplant Lasagna at Christine’s