The Traveling Epicurean

Drunk Blondies & Bourbon Caramel Sauce

Drunk Blondies & Bourbon Caramel Sauce

IMG_6622
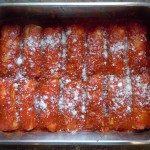
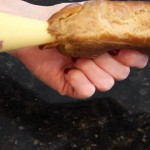
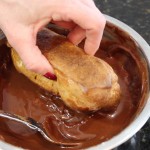
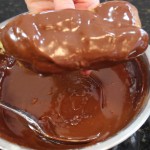
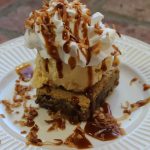
Drunk blondies are a dessert that will have you and your guest’s reminiscing for days! These drunk blondies are a buttery, chewy cookie bar made with bourbon, butter, toasted coconut, pecans and semi-sweet chocolate chips…could it get any better then that! They get even more decadent when you serve them with vanilla ice cream, homemade bourbon caramel sauce, whipped cream and extra toasted coconut to top it off. In fact, I wouldn’t serve them any other way. You will feel like you are in dessert ecstasy!

The recipe for these mouth watering cookie bars actually originates from the Back in the Day Bakery CookBook by Cheryl and Griffith Day. I Found this recipe on a fellow food blogger, Adam Robert’s website, called Amateur Gourmet. I haven’t had a chance myself to buy this cookbook but it’s high on my list! Adam serves up these drunk blondies with a bourbon caramel sauce from Food and Wine but I have my own which I love that I share below.

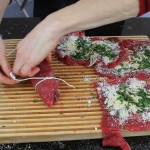
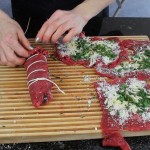
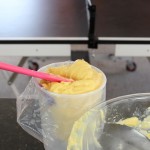
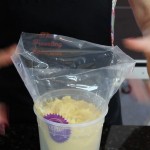
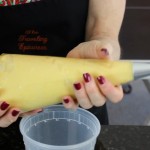
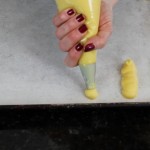
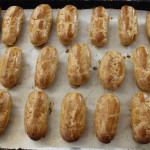
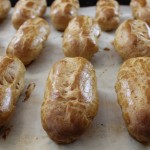
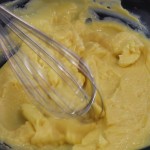
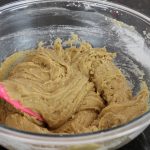
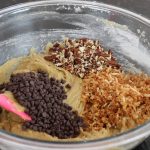
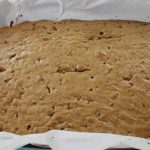
The Drunk Blondie bars couldn’t get any easier to make. You don’t even need a kitchen aid or electric mixer to make these just a large bowl and spatula or wooden spoon! It literally take’s all of a few minutes to combine the brown sugar, eggs, vanilla, bourbon, toasted coconut, pecans, chocolate chips and flour mixture. Then off into a baking dish lined with parchment for easy removal.

This is a great dessert if you entertain a lot because is it’s a total make ahead project. You can make the drunk blondies up to 3 days ahead and the bourbon caramel sauce up to a week ahead. The toasted coconut you want to make the same day or night before. You may burn the toasted coconut on your first try because that cooks faster then you think and you only have 6 minutes of toasting time. Don’t worry, just toss out the first round and throw in a second batch. You will be that much more knowledgeable and ready for the toasty quickness in the next round! Be sure to toast up extra coconut too, because it makes for an incredible addition at the end to sprinkle on top of your drunk blondie sundae’s!

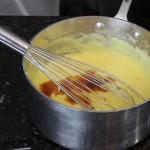
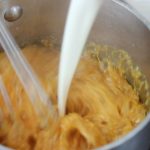
As for my bourbon caramel sauce I have you heat up the heavy cream. This is a necessary step that some recipes don’t even mention.  It’s important to do this because adding cold cream into a boiling sugar mixture will most likely seize up and get temporarily lumpy.  There’s no worries here though. If this does happen just put the pan back on the stove, keep whisking and it will become a smooth caramel sauce in a matter of seconds!

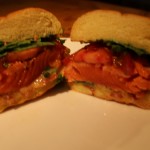
Hope you enjoy the amazing drunk blondie sundae’s with ice cream, bourbon caramel sauce and toasted coconut. If you are putting together a whole meal you could start with an appetizer like crab cakes, spanakopita triangles, my famous Caesar salad, salmon BLT sliders, or move right to a main course like my bolognese sauce right from Urbino, Italy made with homemade spaghetti!

DSCN45211-300x225 cookedspan DSCN4572-300x225 IMG_2624 IMG_4327

IMG_6501 IMG_6540 IMG_6542

IMG_6550 IMG_6561 IMG_6622

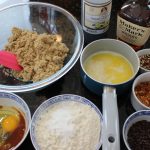
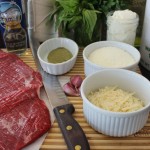
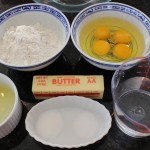
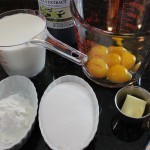
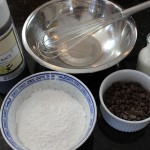
Ingredients for Drunk Blondies – Makes 12 – 24 bars 

  • 2 cups all purpose flour
  • 1 teaspoon baking powder
  • 1/4 teaspoon fine sea salt
  • 2 sticks unsalted butter – melted
  • 2 cups packed light brown sugar
  • 2 large eggs room temp
  • 2 teaspoons pure vanilla extract
  • 3 tablespoons Bourbon
  • 1/4 cup chopped pecans
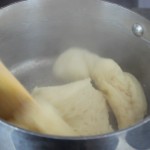
  • 1 cup (1/2 cup is for sprinkling over the dessert at the end) sweetened flaked coconut, toasted in a 350º oven on a cookie sheet until fragrant and golden brown – about 5 minutesNOTE: you need to stir every 2 minutes with a spatula and then shake the tray to distribute evenly ….watch it carefully- it burns easily
  • 1/4 cup mini semisweet chocolate chips

 Directions – Pre-Heat Oven to 350º:

  1. Position a rack in the middle of the oven and preheat the oven to 350 degrees F
  2. Grease a 9-by-13-by-2-inch baking pan and line with parchment, allowing the ends of the paper to hang over two opposite edges of the pan
  3. In a medium bowl, whisk together the flour, baking powder, and salt; set aside
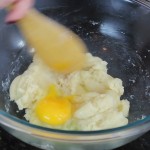
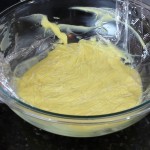
  4. Put the butter and brown sugar in a large mixing bowl and stir with a spoon until smooth
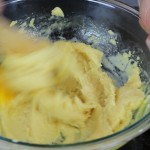
  5. Add the eggs, vanilla, and bourbon, and mix until thoroughly combined
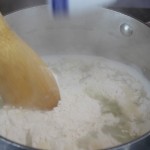
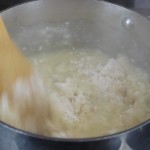
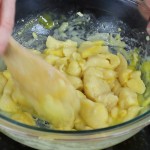
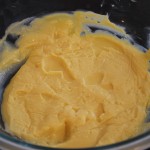
  6. Stir in the flour mixture, followed by the pecans, coconut, and chocolate chips
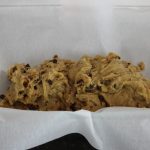
  7. Pour the batter into the prepared pan and smooth the top with an offset spatula. Bake for 20-25 minutes, until the top is golden brown
  8. Remove the pan from the oven and let cool completely on a wire rack
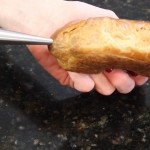
  9. Cut the blondies into bars
  10. The blondies will keep in an airtight container at room temperature for up to 3 days.

Tip: The easiest way to toast coconut is in the oven. Position a rack in the lower third of the oven and preheat the oven to 350º. Spread the coconut on a baking tray and bake for 6 minutes, tossing every couple of minutes. Keep a close eye on the coconut, because it can burn easily.

IMG_6569 IMG_6579 IMG_6583

IMG_6598 IMG_6603 blonide

IMG_6607 IMG_6622

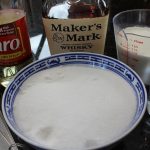
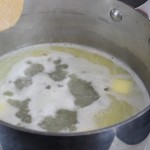
Ingredients for Bourbon Caramel Sauce:

  • 1 3/4 cups sugar
  • 1/2 cup water
  • 1 tablespoon light corn syrup
  • 2 tbsp butter
  • 1/3 cup bourbon
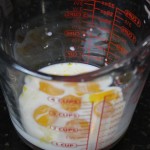
  • 1 1/2 cups heavy cream HEATED – If you don’t warm up the cream the temperature change will temporarily seize up the boiling water-sugar mixture…BUT don’t fret because all you need to do if this happens is put the pan back on the stove while whisking CONTINUOUSLY and it will all come back to a nice smooth sauce!

Directions for Bourbon Caramel Sauce:

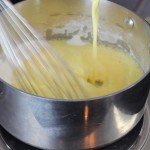
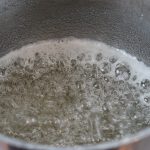
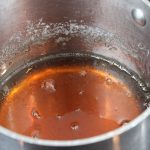
    1. In a medium saucepan, bring the sugar, water and corn syrup to a boil over high heat
    2. You can stir the sugar-water mixture at first just to combine then DO NOT STIR after
    3. Cook until the sugar is dissolved washing down the sides of the pan with a wet pastry brush…just once
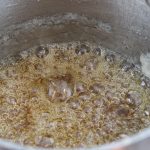
    4. Continue cooking without stirring until an amber caramel forms – from 5-8 minutes
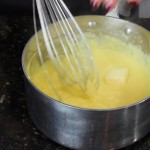
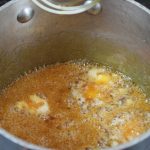
    5. When it turns the pretty light amber color add in the butter and keep whisking
    6. BE CAREFUL NOT TO GET BURNED HERE because the mixture will rise up a little here at the butter/cream stages
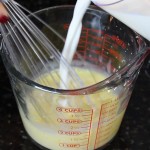
    7. Remove from the heat and carefully stir in 1/2 the cream while STILL WHISKING – it will foam up here quite a bit so whisk it down slightly, then add in the rest of the cream and butter
    8. if it seizes up NO WORRIES all you need to do if this happens is put the pan back on the stove while whisking CONTINUOUSLY and it will all come back to a nice smooth sauce!
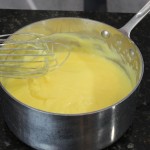
    9. Let cool for 1 minute and then stir in the bourbon
    10. Put the pan back on the stove and TURN DOWN the heat to medium and simmer any where from 3-15 minutes…how ever thick you like the sauce (it won’t get any darker at this point either just thicker)
    11. Let the caramel sauce cool slightly and serve warm or at room temperature
    12. NOTE: as the sauce cools it will thicken anyways
    13. The caramel sauce can be refrigerated for up to 1 week.

Best Braciole Ever!

Best Braciole Ever!

Making Braciole for dinner or the holidays is one of those authentic comfort foods that’s so delicious it could easily become a tradition for you and your family, even if you are not Italian. Some of you may be asking yourself what is braciole? Well, it’s thinly sliced flank steak that’s rolled up and stuffed with Reggiano Parmigiano, Asiago, and fresh herbs. The braciole is sautéed in olive oil and garlic cloves and then simmered in a tomato-basil sauce for a couple of hours until tender and juicy. And I tell you it’s even better when re-heated the next day!

The Italians aren’t the only ones who have come up with this fun and creative idea of rolling up and stuffing thinly sliced beef then simmering or braising in a gravy until tender. There’s a German dish that I absolutely love that’s just as flavorful as braciole called beef rouladen. German beef rouladen is made up of thinly sliced top or bottom round stuffed with mustard, onions, bacon and pickles, then sautéed and braised in the oven with veggies in a beef and wine gravy until tender. It’s serve with sautéed red cabbage and spaetzle or potatoes and ooh is that scrumptious too! That will have to be another show I will put together for you!

Now that I have you in the mood for some creativity in the kitchen …get to work! lol You will be very happy to expand that recipe repertoire of yours after making this wonderful Italian braciole for dinner. Make sure to serve up your sliced braciole with a dollop of ricotta cheese on top of the pasta to give it that unexpected extra flavor and creaminess. I will get working on the German beef rouladen show for you:)

If you are going for the Italian theme you might as well treat yourself to some of my appetizer’s like baked asparagus wrapped in Prosciutto, or crab cakes with a homemade remoulade sauce. Then you can really go for it with my SECRET manicotti recipe or homemade spaghetti that’s totally fun for the whole family and easy to make! Then end it all with some chocolate eclairs with the BEST vanilla custard you have ever had …enjoy! 🙂

iphone-pictures-572-300x225 DSCN45211-300x225 iphone pictures 2002 IMG_4328 IMG_6379

IMG_6413 slicingbraciole grated

tie wrap IMG_6444

IMG_6397 IMG_6453 IMG_6460

slicebraciole ricotta IMG_6487

Ingredients:

  • 2 lb flank steak sliced horizontally into 3 layers
  • 1 cup grated Reggiano Parmigiano
  • 1 cup grated Asiago
  • 1 tbsp dried ground Italian seasonings
  • 1 bunch parsley
  • 1 bunch fresh basil
  • salt and pepper
  • olive oil
  • 1 recipe tomato-basil sauce but simmered for 1 1/2 – 2 hours
  • 1 cup ricotta
  • 1 cup red wine or white (I actually prefer to deglaze here with red)
  • 1 lb rigatoni

Directions:

  • Start sautéing the veggies for the tomato-basil sauce and use the same pan for sautéing the braciole logs
  • Slice or have your butcher slice the 2 lb piece of flank steak into 3 horizontal layers
  • Then cut those pieces in half so you now have 6 semi-equal pieces
  • Sprinkle 1 tbsp each of Reggiano and Asiago on each piece
  • Lay whole basil leaves or chop basil and parsley and sprinkle onto flank slices
  • Roll up starting at the small end
  • Cut approx 40″ of cotton string and tie a knot at one of the ends
  • Then keep wrapping string all around the length of the rolled up flank til you are at the other end
  • Now come back tucking under each row of string going across like shown in the video til you get to the end and tie off a knot with the original piece of string you started with
  • Add 2 tbsp of olive oil a large pan and a few large cloves of garlic kept whole for extra flavor and sauté 3 rolled up pieces of braciole at a time
  • Brown on all sides on medium/high heat about 3-4  minutes each side (remove the garlic coves when golden and smear on a baguette and dip into the tomato-basil sauce when you start to simmer with braciole…YUM!)
  • After browning the second batch of (3) braciole add back in the first 3 and de-glaze with red wine (I used white in the show but prefer to use red here)
  • Add in puréed tomatoes and simmer for 1 1/2 – 2 hours
  • Take braciole rolls out and slice 3/8″-1/2″ thick
  • Serve with pasta (rigatoni) and a dollop of ricotta on top with a few slices of braciole and grated Reggiano…mangia, mangia.
  • PS- It’s even better re-heated the 2nd day! 🙂


Chocolate Eclairs with The French Club

Chocolate Eclairs with The French Club

IMG_6379Making Chocolate eclairs with The French Club this week made for an incredibly fun afternoon! The Chocolate eclair shells made from pâte à choux, a french pastry dough, is a cinch to make and so delicious you may find your self wanting to make them this weekend.

The method I use to make the pastry cream is simplistic and straight forward. This method for making the pastry cream I got from one of Martha Stewart’s chefs, Thomas Joseph. I wanted to show you an easier way to prepare the custard then your traditional tempering of the eggs method, especially if you have never tried to make this before. The actual recipe for the pastry cream is from my own collection and playing around with recipes over the years.

As for the pâte à choux dough, what can I say, but wow! Although, this is a French dough with French ties it is also noted that Catherine de Medici left Florence in 1533 to marry the Duke of Orleans who later became Henry II, King of France. She brought with her the entire court which included her chefs! Smart woman is all I can say. A few years later her head chef, Panterelli, invented a hot paste-like dough and called it pâte à Panterelli. Of course, the recipe has evolved some what since then and with a couple of names changes too but with the same idea. It’s a dough with a paste like texture that use’s heat and moisture-steam for a raising agent instead of the baking powders that we use so much today.

These chocolate eclair’s are easy to follow and so worth the effort. You should really give it the ole college try because your family and friends will be thanking you! In between making the pastry cream and the pâte à choux you may want to prepare some other great dishes like lobster mac & cheese,  pulled beef taco’s and mango salsa or some homemade pasta  and Turkey meatballs that are simpler then you think! And for a nice salad you could check out my Caesar salad with homemade croutons …that’s always a crowd pleaser!

lobmac IMG_3234 IMG_4327 018 DSCN4572-300x225

IMG_6305 IMG_6316 flour

mix patdough eggdough

egg doughd IMG_6325

bag withtip rows

IMG_6348 IMG_6347 MVI_6371

cuttip cream dunk

chocdunk IMG_6379 thumpate

Ingredients for the Pâte à Choux: :

  • 1 stick of unsalted butter
  • 1 cup water
  • 1 cup flour – all purpose
  • 1 tsp sugar (only for desserts)  (not for gougeres)
  • 1/2 tsp salt
  • 4 lg eggs
  • 1 egg + 1 1/2 tsp water whisked together – for egg wash

Directions for the Pâte à Choux:

  1. Preheat the oven to 400º degrees
  2. Line a cookie tray with a piece of parchment paper – when you are done making the pate a choux squeeze out 4 dime size pieces of dough on each corner of the cookie tray, then place parchment over that – to hold in paper in place while you form eclairs
  3. Bring the water, butter, salt and sugar to a rolling boil over medium-high heat in a medium size sauce pan
  4. Stir in all of the flour and continue to stir vigorously with a wooden spoon for about 1 1/2 minutes – which will start to make a film on the bottom of the pan
  5. Turn out flour-egg  mixture into a large glass bowl and stir to cool for 1 minute
  6. Crack eggs into a bowl to make sure there are no shells
  7. Begin to add one egg at a time into the dough and keep mixing with a wooden spoon
  8. The mixture will look broken up at first but no worries because it comes back together
  9. After each egg is absorbed into the flour mixture ADD another egg and repeat stirring
  10. Spoon the Pate a Choux dough into a pastry bag … I don’t even use a tip here
  11. Cut about 3/4″ off the end of the pastry bag
  12. Twist down the open end of the bag a little to keep dough enclosed and to put pressure on the cut off end
  13. Squeeze out 3-4″ x 3/4″ rows of Pate a Choux dough to form eclairs making sure they are about 2″ apart
  14. Brush with egg wash and smooth with your finger if needed to smooth any bumps
  15. Put into 400º oven for 15 minutes
  16. Turn down to 350º for another 25 minutes
  17. Turn oven off and open door 5″ but leave eclairs in the oven to dry out another 10 minutes

IMG_6274 IMG_6286 eggswhisk

milkcorn IMG_6294 but

vanilla saran IMG_6366

whisk cuttip cream

Ingredients for the Pastry Filling:

  • 2/3 cup granulated sugar
  • 1/4 cup cornstarch
  • Pinch of salt
  • 2 cups half and half room temperature
  • 6 lg eggs yolks room temperature
  • 2 tablespoons unsalted butter
  • 1 teaspoons pure vanilla extract

Directions for the Vanilla Custard Filling:

  1. In a medium sauce pan add sugar and corn starch and whisk to combine
  2. In a medium bowl whisk milk and egg yolks until combined
  3. Whisk in milk and egg mixture into sugar and corn
  4. Turn heat to medium and bring to a bubbling simmer, so the mixture can begin to THICKEN
  5. As soon as it begins to thicken whisk 5 SECONDS more and TAKE OFF HEAT continually whisking, after 5 seconds put BACK ON heat for 5 SECONDS and IMMEDIATELY take off heat
  6. DO NOT BOIL ON HEAT FOR MORE THAN 10 SECONDS after this point or the texture will become grainy
  7. Add in butter and vanilla while still whisking
  8. Strain the custard into a glass bowl
  9. Stir to cool slightly and cover directly onto custard saran wrap OR Pour into a prepared tart shell, then into the frig and when cooled and thickened top with fresh sliced fruit and voilà another dessert! …just saying 🙂
  10. Place into the frig for atleast 2 hours up to 3 days
  11. Take the thick pastry cream out of frig and whisk til smooth -5 seconds and the texture will become smooth and ready to place in the pastry bag to pipe

IMG_6342 dunk chocdunk

Ingredients for the Chocolate Dipped Toppping:

  • 4 oz. semisweet chocolate chips
  • 1/2 cup heavy cream
  • 1 cup confectioners sugar to desired thickness

Directions:

  1. Heat the cream to a small sauce pan and bring to a boil
  2. Pour the hot cream over the chocolate chips and vanilla in a medium size bowl and let it melt the chocolate for 2 minutes
  3. Whisk the cream and chocolate until smooth
  4. With a whisk slowly add in confectioners sugar while whisking until smooth
  5. If the chocolate gets cooled and too thick to dip heat for a minute over double boiler
  6. Dip the tops of the eclairs in the warm chocolate glaze
  7. Set on a cookie tray
  8. Place into the frig uncovered for at least 1 hour to set the glaze
  9. Serve chilled…YUM!