The Traveling Epicurean

Best Blueberry Pie!

Best Blueberry Pie!

There’s nothing like fresh blueberries simmering in a buttery, flaky pie crust with aromatic fruit juices getting bubbly and syrupy. It’s tough to let this mouth watering concoction cool for three hours when all you really want to do is scoop some vanilla ice cream over a slice letting the cream melt onto the crispy crust and gooey berries submerging oneself into pie heaven! This might just be the perfect dessert bite!

There are recipes out there that have you use flour as a thickener in some fruit pies but with this best blueberry pie recipe I think it’s important to use cornstarch. Blueberries release so much juice the best one for the job is cornstarch. You can add orange zest or lemon zest to brighten up the flavors and then there’s always cinnamon or nutmeg. Blueberries happen to be one of my favorite fruits and I feel that they are already flavorful enough so I only add one tablespoon of fresh lemon juice to balance everything out. Blueberries are also considered to be one of the healthiest fruits out there offering up one of the highest levels of antioxidants of all fruits and vegetables so I think it’s a win-win here!

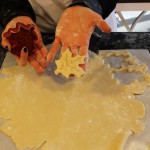
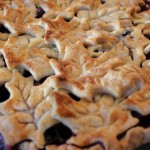
Cutting out decorative leaf shapes (or what ever shape you like) from the top sheet of pie crust is a no brainer for me because it’s so gosh darn easy to do, it looks like you spent all day on it and it’s very forgiving. When it bakes in the oven getting golden, crispy and slightly shiny from brushing on the egg wash it’s going to look and taste amazing no matter what!

This best blueberry pie recipe might just become your decadent dessert ritual for your holiday dinners! Making the “perfect pie crust in 5 minutes” a week or two ahead of time and popping it into the freezer until you need it is a great way to cut down on some of the work that’s involved in throwing a Thanksgiving dinner or any holiday feast for that matter. If you get ambitious you iphone pictures 2419can always add a chocolate pecan pie into the mix. To help save some time with the side dishes you might try these roasted brussel spouts. They are so delicious roasted like this you’ll never eat them any other way. Have fun and enjoy 🙂

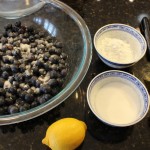
IMG_4364  IMG_4363  IMG_4369

IMG_4383  piepie  piedou

IMG_4385  pieplate  crimp

IMG_4408  leafcutter  blupie

IMG_4420  IMG_4416  blueberrypie

INGREDIENTS:

  • 4 1/2 cups blueberries (that’s after you have sorted thru bad berries…start with 5 cups to have enough)
  • 1/2 cup sugar
  • 1/4 corn starch
  • 1/8 tsp salt
  • Juice from 1/2 lemon
  • 1 1/2 tbsp cut up cold butter
  • 1 egg
  • 1 tbsp heavy cream
  • “Perfect Pie Crust in 5 Minutes!” recipe
  • Parchment paper for rolling out pie dough
  • 1 1/2 ” – 2″ pie leaf cut outs or what ever shape cookie cutter you want to dress the top of the pie with instead of using a whole sheet of pie crust dough

DIRECTIONS:

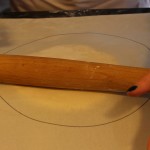
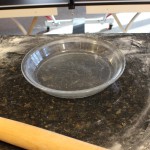
  1. Trace the edge of the pie plate onto both pieces of parchment paper
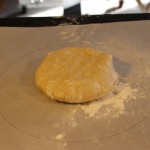
  2. Roll out 1/2 of the pie crust at a time in between two pieces of parchment with circle drawing on the outside
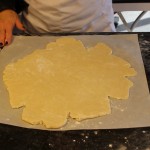
  3. When the dough is rolled out to approx 1/8″ thick and the proper circle size flip pie dough over with parchment paper into pie plate
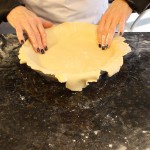
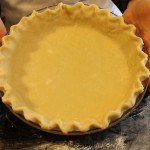
  4. Gently fit pie dough into dish without pushing down hard and place into the fridge
  5. Wash and dry blueberries, picking through them to remove any under and over ripe berries and stems
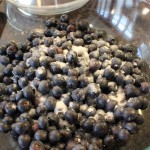
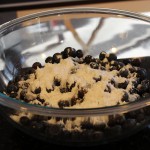
  6. Place berries in a large bowl and add 1/4 cup corn starch, 1/2 cup sugar, 1/8 tsp salt and juice from 1/2 lemon and toss until coated
  7. Put the bowl of blueberries into the fridge
  8. Roll out the other pie dough disc and cut out leaf shapes or what ever shape you want to be the top layer of the pie
  9. Lay down a piece of parchment on a cookie sheet with a sprinkle of flour and place leaf cut outs onto the cookie sheet
  10. Put leaf cut outs into the fridge
  11. Take out pie dish with pie dough from fridge and crimp edges
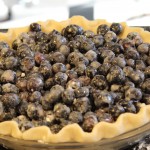
  12. Pour the blueberries into the pie dish and back into the fridge
  13. Whisk 1 egg with 1 tbsp of heavy cream
  14. Take the leaf cut-outs on the cookie sheet from the fridge and brush with the egg wash
  15. Take the blueberries in the pie dish out of the fridge and dot the pie with 1  1/2 tbsp of cut up cold butter
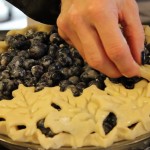
  16. Begin to place leaf cut-outs on top of the blueberries. Go along the edge of pie all around and then work your way in (you only need to gently push a couple of the edges of the leaf to crimped edges of the pie and to each leaf
  17. Put the pie back into the fridge for 15 minutes while you pre-heat oven to 400º
  18. Place blueberry pie on the cookie sheet that has a piece of parchment covering the bottom in case of spillage and pop into the oven for 30 minutes
  19. Turn the oven down to 350º and bake for another 40 minutes until a golden crust and juices are bubbly
  20. You must let cool 3 hours so the blueberry juicy can thicken properly
  21. Serve with your best vanilla ice cream and you will be one happy camper! 🙂


Homemade Pasta at Vin’s

Homemade Pasta at Vin’s

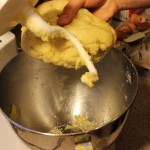
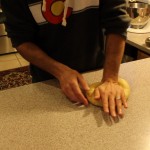
Homemade pasta is something you have to try at least once in your life! You’ll see how satisfying it is when you taste the tender, slightly chewy texture of the fresh pasta. Making pasta has been a part of my life ever since I was young making homemade manicotti with my mother for the holidays. At my Aunt Pasqualina’s, the counters were always covered with fresh pasta drying out on dish towels.

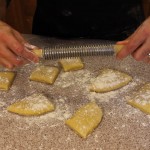
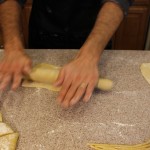
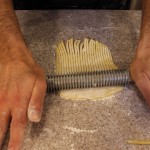
This past weekend, my friends Lisa and Vin, graciously agreed to share their grandfather’s secret family pasta recipe with me. I had the opportunity to try out, first hand, a pasta tool that belonged to Vin’s grandfather which he called the “trucal iron”. It’s a special pasta cutting tool, a roller, made years ago from medal and wood that was eventually passed on down to Vin. The center spiral part of this “trucal Iron”, made of medal, does the cutting as you roll out the pasta. It has Wooden handles which he said his grandfather glued back on a couple of times. Vin also has a newer version of this “trucal iron”, one made of all wood but the wood spirals have begun to chip away from wear and tear. They don’t make some things like they used to. Vinnie also shared some precious memories of his grandfather and father making this homemade pasta for Sunday dinners growing up where his grandfather would creatively hang the pasta noodles from atop the kitchen cabinet doors to dry out.

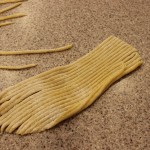
There’s nothing like an evening with special friends making homemade pasta! This night of homemade pasta making at Lisa and Vin’s reminded me of how much I really love to do this. Everyone has their own way of making pasta and that’s part of what makes this experience so fun. Now as for this “trucal iron”, there are other pasta tools out there that mimic what Vin’s special pasta tool does like the ones below from Amazon. I have to say, I haven’t used any of those tools from Amazon because I use my KitchenAid pasta attachment which is another great option for cutting the kneaded pasta dough. You could even cut your thinly rolled out pasta into strips by hand with a sharp knife to get the stands of fettuccine, spaghetti, or what ever thickness you might like.

iphone pictures 448 iphone pictures 572 DSCN4572 025  ita

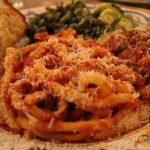
Appetizers like baked coconut shrimp, baked asparagus wrapped in prosciutto, and, or a nice homemade Caesar Salad might be just what you are looking for to go with this homemade pasta of Vin’s! If you are looking for a meat sauce to go on this homemade pasta you should try my bolognese sauceOf course, there are other options like my Italian beef meatballsor Italian turkey meatballs. Hope you enjoy the show 😉

IMG_4244 eggpasta dough

pastdough kneadpasta trucalpasta

IMG_4283 ppasta IMG_4287

cookpastajpg IMG_4327

INGREDIENTS:

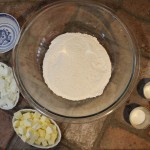
  • 2 1/2 cups all purpose flour
  • 1/4 cup olive oil
  • 4 1/2  – 5 lg eggs
  • 1/4 tsp salt

DIRECTIONS:

  1. Put the kneading attachment on your food processor and add the flour
  2. Add the salt and olive oil
  3. Turn on the food processor to slow
  4. Add in 1 tbsp of water
  5. Begin adding in 1 egg at a time with the processor still on slow
  6. Add in the rest of the eggs
  7. Keep the food processor going on medium speed to begin kneading the dough
  8. Let knead for about 8 minutes until the texture turns into a smooth consistency
  9. Remove the pasta dough and place onto the counter
  10. Knead briefly with your hands and let sit for 1/2 hr.
  11. NOTE: Vin does not cover his pasta dough while it sits for the 1/2 so it can begin to dry out  a little bit
  12. Sprinkle some flour onto the counter or work surface and cut pasta dough into 8 pieces
  13. Begin to roll out each piece of dough to your desired thickness
  14. Sprinkle more flour on top of each thinly rolled out pasta piece and use the roll cutter below or a sharp knife or a KitchenAid Pasta attachment to get desired pasta strips
  15. Bring large pan of salted water to a boil and add fresh pasta
  16. Depending on the thickness, cook pasta for 4-8 minutes, test pieces of pasta for proper doneness
  17. Serve with sauce and mangia, mangia!


Perfect Pie Crust in 5 Minutes!

Perfect Pie Crust in 5 Minutes!

IMG_4416Who would ever think you could make this buttery, flaky, homemade pie crust in 5 minutes? After eating many of my Grandma Reilly’s pies when I was little I was inspired to come up with a recipe that tasted just like hers. Unfortunately, I never got her recipe but have been making pie crust’s for over twenty years and I’m happy to say I came up with a pie crust recipe that is spot on to what my Grandma used to make . Granted, there are some pretty decent pie crusts available at the market and if you are making many pies it totally makes sense to go that route. If you are only making a couple of pies you really need to get busy and make this homemade pie crust!

Homemade pie crust in 5 minutes is just that but there two tricks to this amazing pie crust. First, all the ingredients must be very cold. Refrigerated butter cubes are already firm enough but to firm up the soft Crisco pieces it’s wise to put that into the freezer before adding it to the food processor. Second, you MUST NOT OVER WORK the dough! Over working the dough will build gluten’s like you are make a bread dough and we don’t want that for making this perfect pie crust in 5 minutes. We want our pie crust to be flaky in texture not tough and hard.

In my opinion, a couple of the best bakers in the world are the French and the Southerner’s. One loves butter and the other loves Crisco. So why not take the best of both worlds using both butter and Crisco to achieve these wonderful results. Not to mention, as I always do, I have tested many pie crusts recipes to come to this theory.

You need to try out this perfect pie crust in 5 minutes recipe just once to be convinced to start making your own. In fact, you will wonder why you haven’t been making your own homemade pie crust your whole life when it’s that easy to make and tastes like this! Enjoy the show and don’t forget to make this ahead of time popping it into your freezer until you are ready to roll it out for a pie or a quiche. I would transfer the dough from your freezer to your refrigerator couple of days before you are ready to use it in order for the dough to come to the proper workable temperature. Once you make your dough you really ought to try making an amazing Chocolate Pecan Pie  or Death by Chocolate Meringue Pie for your holiday. Don’t forget to watch Thanksgiving week when we roll out this dough and bake a pie together! For the Best Blueberry Pie ever recipe this is one that shouldn’t be missed. Enjoy 🙂
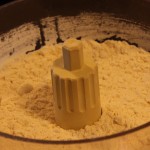
IMG_4190  IMG_4156  IMG_4219

pie  IMG_4221  piedough

cutdough  wrapdough

Ingredients:

  • 10 tbsp cold butter cut up each tablespoon into 4 pieces and into fridge until you are ready to add to flour
  • 1/2 cup cold Crisco cut into small pieces OR 1/2 cup REAL LARD from FIREFLY Farms OR 1/4 cup Crisco & 1/4 cup lard
  • 1/2 cup,  plus 2 tbsp cold water,  (keep in fridge until you are ready to add to flour)
  • 3 cup all-purpose flour
  • 1 tbsp sugar
  • 1 tsp sea salt
  • NOTE: I even keep food processor container with medal blade in it in the fridge until you are ready to pulse ingredients
  • Chocolate Pecan Pie Recipe OR Best Blueberry Pie Recipe OR Death by Chocolate Meringue Pie Recipe

Directions:

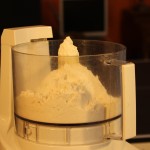
  1. Be sure all items above are completely chilled
  2. It’s easiest to freeze first, especially for crisco or real lard, then take out of freezer and cut up or grate before adding to processor
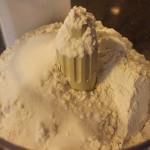
  3. Add dry ingredients to the food processor and pulse twice to combine
  4. Drop the freezer cold, firm Crisco or lard pieces onto the flour
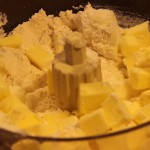
  5. Then add the butter pieces helping the pieces to separate with a butter knife as you drop them onto the flour
  6. Pulse 5-7 time until the Crisco and butter are pea size
  7. Now turn processor to “on” and slowly add water through opening – Note: this will take about 12-15 seconds for the dough to come together
  8. The moment you see the dough begin to come together, STOP, and PULSE 2-3 times to finish into a ball
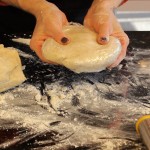
  9. Take dough out onto floured counter surface – you will see little specs of butter and Crisco in the dough which will make for a buttery, flaky crust!
  10. Cut dough into two pieces, cover with Saran Wrap and into fridge for at least 30 minutes or freezer until you are ready ( If you freeze it allow 2 days back in fridge to come to proper workable temperature)

Homemade Applesauce

Homemade Applesauce

Playing at my childhood friend Karen’s house growing up and smelling her mom’s homemade applesauce simmering on the stove with aromas of apple and cinnamon in the fall air are one of those nostalgic memories that will stay with me my whole life. That’s where the inspiration for this show and recipe came from. I contacted my friend Karen about her mom’s recipe and she was happy to share.

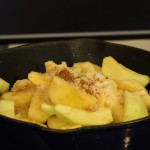
Karen’s mom, Pat, used a food mill to pass the apples through smoothing out the consistency and removing the peels . For those of you who don’t have a food mill I am simplifying that process having you peel the apples prior to simmering. Even though the peel does offer a little extra flavor we will take the middle of the road for convenience purposes. For that smooth texture that I like I put the simmered apples in my food processor in small batches. You can skip this step completely by using a potato masher, whisk or even a fork to work out the lumps to your desired texture.

The only addition to Pat’s recipe is that I add in a couple of tablespoons of fresh squeezed lemon juice for a subtle brightness to the sauce balancing out the sweetness. Actually, I add the fresh lemon juice while I peel, core and slice the apples into eighths so they don’t turn brown. I want those cinnamon-apple aromas to permeate the house as soon as possible so I add her spices in the beginning of the simmering. Some recipes even add in orange or lemon peel when simmering the apples but I think that’s a matter of preference and you can get as creative as you want.

Making homemade applesauce is really easy to make filling your kitchen with so many wonderful seasonal aromas you may wonder why you don’t do it more often. You may find your self starting a crackling fire to get the full effect while your apples are simmering on the stove. Be careful if a window is open you may just find a neighbor or two dropping in to “borrow” a cup of sugar.

Fall is the perfect time to make this homemade applesauce with apples in abundance at the stores and local orchards. A wonderful thing about making applesauce is it stays well for months in your freezer. One of my favorite ways to have applesauce is with grilled pork chops, caramelized onions and a little crumbled Gorgonzola. For a simple, gluten-free dessert that’s out of this world you can top vanilla ice cream with this warm homemade applesauce, whipped cream, a drizzle of caramel sauce and a sprinkle of toasted apple crisp topping made with oats! This just may be my new favorite dessert! I buy our local Ashley’s vanilla ice cream and their caramel sauce when I make this incredible Applesauce-Caramel Sundae. So get into the holiday spirit and create those nostalgic memories for your kids, family and friends filling the house with simmering apples and cinnamon, a similar aroma to hot apple cider, that will stay with them forever. Hope you enjoy the show 🙂
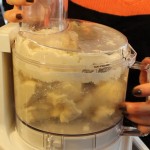
IMG_3993  IMG_4014  IMG_4063

IMG_3967  IMG_3986  IMG_3988

smileapple  IMG_4104  caramelapple

IMG_4086

Ingredients:

  • 4 lbs. (10 apples) – an assortment of apples for well rounded flavors
  • 3 tbsp brown sugar
  • 3 tbsp white sugar
  • 1/8 tsp salt
  • 1 tsp cinnamon
  • 1/4 tsp nutmeg
  • dash of cloves (optional)
  • 1 1/4 cup water
  • 2 tbsp fresh lemon juice

FOR Applesauce-Caramel Sundae:

  • Your favorite “apple crisp topping” recipe made with oats toasted up in the oven on 400º in a bake dish until golden
  • 1 Quart of your favorite local Ice creamery Vanilla and 1/2 pint of their caramel sauce
  • Whipped cream (1 cup heavy whipping cream, 1 tbsp confectioners sugar, 1 tsp vanilla, bourbon or whiskey)
  • Toasted apple crisp topping with oats

Directions:

  1. Peel, core and slice apples into 8ths and place into large pan
  2. Squeeze lemon juice on them slices as you go to prevent them from turning brown
  3. Mix the brown and white sugar together
  4. Sprinkle 1/2 the sugar on the apples
  5. Add all of the cinnamon, nutmeg, (cloves -optional) salt and the water
  6. Mix with a spoon and put on the stove over med/high bringing to a boil
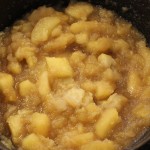
  7. Turn down and keep simmering for 20-25 minutes until softened
  8. Taste and check sugar content, add the remaining sugar if you want sweeter
  9. If you add the rest of the sugar simmer for a few more minutes til it melts
  10. Remove from stove and let cool 5 minutes
  11. Mash the apples with a potato masher, fork, whisk or add to food processor til you get the texture that you want – If you are using a food processor only fill 1/2 way then puree
  12. Serve with a big grilled pork chop, topped with caramelized onions, and crumbled Gorgonzola or do up dessert with the Applesauce-Caramel Sundae…enjoy! 🙂