The Traveling Epicurean

Sweet Potato Fries & Green Goddess Dip lll
Sweet Potato Fries & Green Goddess Dip lll

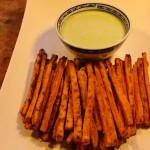
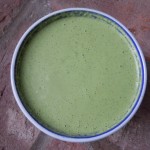
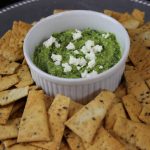
IMG_3827The colors orange and green were stuck in my head for this Halloween episode and that’s why I decided to share my sweet potato fries & green goddess dip recipes with you! These baked sweet potato fries are so delicious all on their own but wait until you dip them into the green goddess sauce you’ll want to put green goddess dip on EVERYTHING! I make this dipping sauce when I cook up swordfish, shrimp, tuna, chicken and steaks also. Being able to make a homemade gourmet sauce like this in 5 minutes, in a blender is basically a no-brainer for me. I can’t wait until you taste this sauce. And here I go again, making my dipping sauce with Greek yogurt to balance out the mayo giving it yet another layer of flavor and tangy richness.  I do this also with my pink remoulade sauce too.

Baking the sweet potato fries is definitely healthier then frying and a lot less work!  Now if you don’t have cornstarch in the cabinets don’t let it keep you from making these fries because they will still be delicious. Dusting the raw sweet potatoes fries with a couple of tablespoons of cornstarch helps with the moisture content and gives them a little extra crunch.

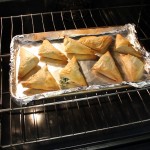
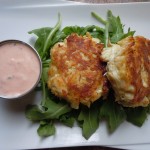
I hope you enjoy making the sweet potato fries and green goddess dipping sauce and that they will become part of your go to appetizer list. You may want to venture off and some other appetizer’s like my Feta-Basil Pesto Dip,  Crab CakesSpanakopita Triangle’s, or some yummy Homemade Hummus! You can end with my Chewy ChocolateChip Cookies!
img_8565 cookedspan IMG_5076 IMG_6064 DSCN4521

IMG_3880 IMG_3943  IMG_3885

IMG_3895  IMG_3966  IMG_3862

iphone pictures 1167  iphone pictures 1156  iphone pictures 1169

IMG_3806  IMG_3808  IMG_3827

Ingredients and Directions for Sweet Potato Fries:

  • 3 extra lg sweet potatoes ONLY need 2 but I like to have an extra just in case
  • 1/4 cup extra virgin olive oil
  • 1/2 tsp salt
  • 2 tbsp corn starch
  • 1 tsp garlic granules
  • 1 tsp onion granules
  1. Pre-heat the oven to 425º.
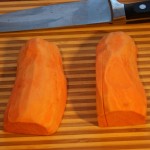
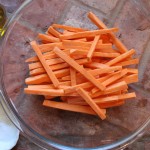
  2. Peel and Slice sweet potatoes in 1/4″ sticks -CUT ENDS FLAT so they don’t burn
  3. Dab with paper towels to dry excess sweet potato moisture
  4. Drizzle with 1/4 cup olive oil and sprinkle with 1 tsp garlic granules,  1 tsp onion granules  and 1/2 tsp salt
  5. Mixed with hands and then spread out into even layer on cookie sheet
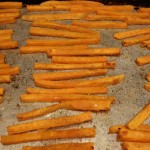
  6. Bake for 15 minutes then flip and back into the oven for 8-10 more minutes
  7. BE SURE TO keep an eye on them at this point so they don’t BURN 🙂

Ingredients and Directions for Green Goddess Dip lll:

  • 3/4 cup Greek yogurt
  • 1/3 cup mayo (I use Hellmans)
  • 1 cup fresh cilantro
  • 1 garlic clove put thru press
  • 1/2 jalapeño diced
  • 4 green onion stalks
  • 1 tsp. grated vadalia onion ( or yellow onion)
  • 1 tbsp ( 1/2) fresh lime juice
  • 1 tbsp “seasoned” rice wine vinegar ( “oops” – I accidentally said red wine vinegar in the show but it’s rice wine vinegar)
  • s & p
  • Optional: dash of Siracha (Siracha is a hot chili sauce sold next to Tabasco at the store)
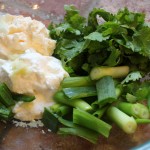
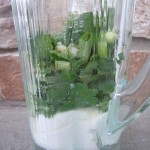
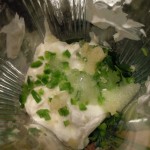
  1. Place all of the ingredients into a blender an purée and you will probably need to stop and stir everything a couple of times to get it going but do not add any more liquid (you will see that once it gets going it will be just right).
  2. You can make this ahead of time and keep sauce in a plastic container and refrigerate.  It  gets thicker as it sits in the fridge chilling and stays nice for a few days…  Yum!

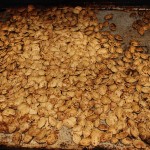
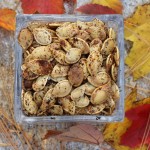
Ingredients and Directions for Roasted Pumpkin Seeds:

  • Pumpkin Seeds for 2 pumkins
  • 1 tsp garlic granules
  • 1 tsp onion granules
  • 1/2 sea salt (plus a sprinkle at the end for a pinch more seasoning)
  • 2 tbsp olive oil
  1. Pre-heat oven at 425º.
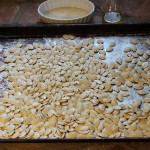
  2. Wash pumpkins seeds to remove pulp.
  3. Dry between paper towels and leave on cookie tray to dry further over night (can roast right away if you don’t have time – just by sure to completely dry seeds)
  4. Drizzle olive oil over seeds and sprinkle all of seasonings and toss to evenly mix
  5. NOTE: you can add in cumin, cayenne, chili powder … add your favorite seasonings
  6. Roast for 10 minutes, take out and stir seeds, put back in oven for approx. 4 more minutes – Keep an eye on them at this point so they don’t burn




Best Buffalo Chicken Dip Ever!

Best Buffalo Chicken Dip Ever!

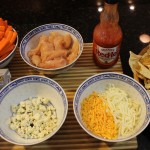
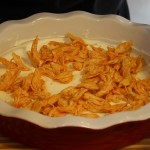
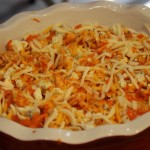
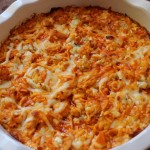
This delicious buffalo chicken dip is my top viewed recipe on my YouTube Channel at 160,704 views and climbing! It takes center stage every time! You may find yourself not straying too far in fear that it will be devoured. The layers start with room temperature cream cheese, chicken tenderloins sautéed in Franks Hot Sauce, a drizzling of homemade buffalo sauce, and finally a sprinkle of crumbled blue cheese, sharp cheddar and mozzarella. It bake’s in the oven until bubbly and served with tortilla chips. I also like to serve this appetizer with carrots, celery and cucumber slices on the side.

I have a secret for you! I’ve been using rotisserie chicken instead! It comes out just as good as sautéing the tenderloin and it saves time! Just toss the rotisserie chicken pieces with some of the butter whisked with the Frank’s Red sauce, and begin to layer. You can also bake chicken wings at 400° for 40 minutes and then toss with this butter-Frank’s Red Hot sauce and you’ll have amazing Buffalo wings!

The Buffalo chicken dip gives all the amazing flavors of that typical “buffalo wings and blue cheese” with out all the work! I am very particular about my blue cheese dressing so I highly recommend my easy homemade blue cheese dressing recipe!

This buffalo chicken dip recipe came from my friend Lisa who just recently made it for a party we were at and it didn’t last very long! I make this dish all year round not to mention how totally awesome it is for football season.

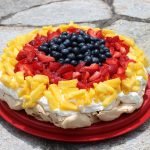
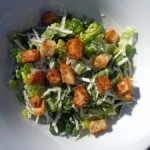
IMG_7406I think this buffalo chicken layered dip is a win win for you and your party. Everyone will be asking you for the recipe. I hope you enjoy this “BEST Buffalo Chicken Dip” recipe and the show too! Don’t miss the “Behind the scenes bloopers” included at the end of the show. And if you want to make an amazing desert that will get you lots of oohs and ahhs try the Pavlova or the “Death by Chocolate Meringue Pie”! Don’t forget a Homemade Caesar Salad and an entré of Lobster Mac n’ Cheese or Eggplant Balls with pasta or Zucchini Spaghetti!

chcomerg lobmac DSCN4572-300x225 IMG_8005 zucspaghetti

IMG_3721  IMG_3751  chixfranks

bufchix  chixbuf  creamchixbuf

chixcream  withcheeses   buffdip

Ingredients: NOTE: You can use ROTISSERIE Chicken!

  • 3/4 lb chicken tenderloins raw OR 1/2 of a ROTISSERIE Chicken
  • 1 tbsp olive oil (NOTE: this is only if sautéing up the tenderloins)
  • Sprinkle of salt (only if sautéing up the tenderloins)
  • 1 -8 oz pkg Philadelphia Cream Cheese
  • Frank’s Hot Sauce
  • Buffalo sauce: 1/4 cup (1/2 stick) butter (Kerrygold or favorite) & 1/3 cup Franks Hot Sauce
  • 1/4 cup Blue cheese crumbles
  • 1/4  cup sharp cheddar cheese
  • 1/4  cup mozzarella
  • (1) 9″ Deep-dish baking pie plate

Directions:

  1. Pre-heat oven to 375º
  2. Melt 1/2 stick of butter in microwave, then add 1/3 cup of Frank’s Red Hot Sauce, whisk until combined – this is the “homemade buffalo sauce” – set aside
  3. Add 1 tbsp. olive oil on medium heat
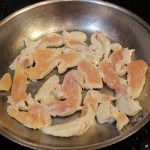
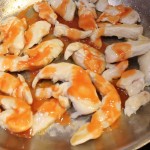
  4. Add in the chicken tenderloin pieces to a pan on med. high heat, sprinkle with a pinch of salt begin to sauté for 3 minutes
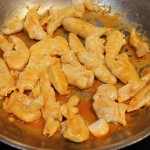
  5. Flip chicken pieces over and sauté another 3 minutes
  6. Once they start to golden slightly add 2 tbsp. Franks hot sauce and let reduce on low 1-2 minutes
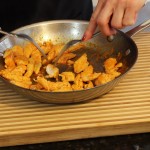
  7. Remove from heat and shred or cut up
  8. OR toss ROTISSERIE CHICKEN meat from 1/2 of a chicken, cut up or pulled apart to bite-size pieces with enough Frank’s Red Hot/butter sauce mixture to coat
  9. Begin the layering on top of the cream cheese
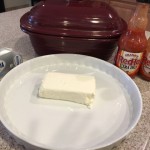
  10. Smear 8 oz. of room temperature cream cheese in bottom of your bake dish
  11. Then add the shredded chicken for the layer next
  12. Drizzle homemade buffalo sauce over the chicken (save some to drizzle after the layer of cheeses)
  13. Sprinkle 1/4 cup crumbled blue cheese
  14. Then Sprinkle 1/4-1/3 cup cheddar and mozzarella each – if using 9″ baking dish go with 1/4 cup, if using 12″ baking dish you could use 1/3 cup if you want a little extra
  15. OPTIONAL – Drizzle more buffalo sauce over the cheeses
  16. Bake for 20 minutes until bubbly and serve with tortilla ships, carrots and celery

Chocolate Crackle Cookies

Chocolate Crackle Cookies

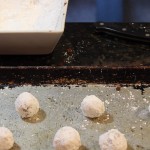
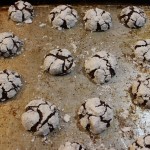
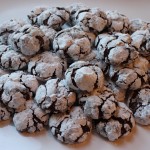
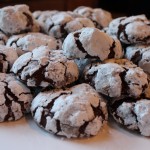
These homemade chocolate crackle cookies will make you feel like a baker of fine cookies. The snowy white confectioners sugar and the chocolaty brown cookie dough make a beautiful contrast when the cookies bake in the oven and make all those crackle lines.  Now the inside is some what of a surprise when you first bite into it. By the looks you might think its a crunchy cookie. Then you sink your teeth in and that velvety texture hits your tongue, feeling lighter then you thought and then the chocolaty silkiness just melts away.
I have been baking these incredible chocolate crackle cookies for at least ten years and for the life of me I can’t remember where I got this recipe from. All my life I have always written down recipes that looked irresistible whenever I was in a waiting room with an assortment food or cooking magazines. So I unfortunately cannot give credit where credit is due. I did of course change the recipe a pinch with the baking time and chocolate used. It originally said 12-15 minutes but I only bake them for eight minutes with a five minute waiting period before I move them off the cookie sheet to a cooling rack this way they can solidify a bit more. Shortening the cooking time gives them softer, gooier center that melts in your mouth rather then a slightly firmer cookie. I use the confection on my oven because the bottom of my oven runs really hot on “bake” not being conducive for even cooking. The hot air circulates in confection mode in my oven giving a more consistent outcome. As for the chocolate, the recipe had called for Verona chocolate which might be difficult to find last minute so I have been using my Ghiradelli bittersweet or Perugina chocolate bars and those are both scrumptious!
This homemade gourmet chocolate crackle cookie just may become a holiday tradition for you and your family too. Easy to make, oh so chocolaty and melts in your mouth! What more could you ask for in a cookie? Hope you enjoy the show 🙂

IMG_3571  IMG_3585  salt

sift  IMG_3597  IMG_3609

3disks  cut dough  roll

balls  IMG_3641  IMG_3660

IMG_3663

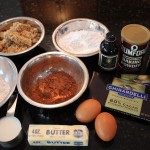
Ingredients:

  • 1 1/4 cup flour
  • 1/2 cup cocoa powder
  • 2 tsp baking powder
  • 1/4 tsp salt
  • 1 1/2 cups confectioners sugar
  • 1 stick of butter softened to room temp
  • 1 1/3 cup light brown sugar
  • 1/3 cup milk
  • 2 lg eggs
  • 1 tsp pure vanilla extract
  • 8 oz. bag of a bittersweet chocolate chips- Ghiradeli

Directions – Pre-heat oven to 350º to bake cookies :

  1. Sift flour, cocoa, baking powder and salt and set aside
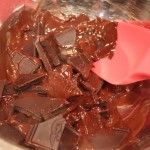
  2. Place bitterswewet chips in a pan over double boiler and melt – you can use a microwave – heat 20 seconds and stir and 10 more seconds and stir but be very careful not to burn the chocolate in the microwave
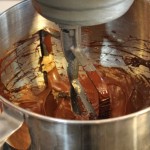
  3. Cream room temperature butter with light brown sugar in your Kitchen Aid mixer
  4. Add in 2 eggs, one at a time and beat well after each addition
  5. Add vanilla and melted chocolate and beat briefly til combined
  6. Alternatively, begin to add dry sifted ingredients and 1/3 cup of milk all awhile mixing
  7. When completely mixed turn out dough onto 3 pieces of saran wrap
  8. Fold up in saran wrap and shape dough into disks, chill at least 2 hrs. – overnight
  9. You can also freeze at this point for a later date
  10. Take dough out and cut into 1″ pieces
  11. Roll each of the pieces into balls
  12. As you shape the dough into balls place them into a bowl full of confectioners sugar and roll around to completely coat
  13. After the balls are coated place them onto cookie sheet 2″ apart
  14. You will need to periodically rinse you hands to remove the dough accumulating on them
  15. NOTE: The dough rolls into balls the easiest when your hands are rinsed and a little damp
  16. Bake for 8 minutes on 350º
  17. Remove and let cool on the cookie tray for 5 minutes before you transfer the cookies to a cooling rack
  18. Let cool completely before to stacking on serving plate


My MasterChef Sauces

My MasterChef Sauces

masterchefpicThe creation of these MasterChef sauces. a spicy, sweet and sour mango and a ginger-peanut sesame sauce, all began while surfing the net a few weeks ago, I accidentally ran into the MasterChef homepage advertising “Casting calls are coming soon to a city near you”.  My kids, Reilly and Bella were there at the time and enthusiastically shouted, “you should do it”! I think what sealed the deal was reading the “Come and meet the MasterChef casting team for your chance to be on the show!” The excitement started to seep in and I began to seriously consider going to the New York City MasterChef open call. If anything, I knew it would be a step in the right direction and a great learning experience let alone the adrenaline of it all!

After sending in their required online pre-registration form and printing out the nine page hard copy form to be submitted at the casting call I thought it would be a good idea to look over the FAQ page. The FAQ’s certainly had a list of what to do and what not to do. The “to do’s” started off like this:  First, bring one prepared dish to serve to their food judges. Second,  we would be given 3 minutes to plate our dish at their casting call location and for some reason I had initially thought I had 5 minutes to plate so that was a bit of an eye opener! Third, there wouldn’t be a kitchen to cook or warm our dish up so we were to come prepared! Fourth, we are to supply our own dishes, utensils, etc.

The “do not do’s went like this:  no air mattresses, no alcoholic beverages, no animals (unless health related), no candles, no cans or bottles (except water bottles), no chairs that do not fold (i.e. lawn chairs, chaise lounges, molded plastic chairs), no digital or still cameras, no fireworks, no hair dryers, no illegal drugs, no tents, no video, cameras or camcorders of any kind, no weapons of any kind, no children under the age of 13 years are allowed at the audition venues. There you have it!

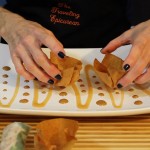
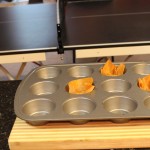
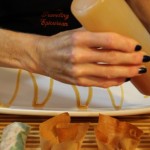
Well OK,  I had a little organizing to do and a plate to figure out for my MasterChef casting call debut! I really wanted to wow them! The part about the “NO kitchen” and “come prepared” got me to thinking that a cold dish of some sort might be a wise way to go! An appetizer is probably the most logical then, right? Yes that’s it, it came to me.  I would make my “Fresh Shrimp and Chive Rolls” with the new MasterChef sauces that I have created which I can decorate the plate with. A julienne of daikon radish, carrots and a sprinkle of toasted sesame seeds with micro herbs for some pizzaz would add in the finishing touches. I also thought I needed to add in some height so I came up with baked egg roll shells that I form in a cup cake pan. I got this idea from my “Bloody Mary shrimp and Mango-Curry Shrimp in Wonton cups at Nancy’s Show” except I decided to use egg rolls shells instead of won-ton because they are a little bit lighter.

Now that I knew what I was going to make I thought I would practice my plate decorating with my MasterChef Sauces by shooting it in this weeks show so I could share this fun experience with all of you! It was definitely a lot of work to do this and go to the casting call but I did it! It was an awesome experience being there and the “MasterChef team” was pretty dynamite. They had everything down to a science and moved around with ease offering up a very warm welcome to all the competitors. I am super glad that I took Reilly and Bella’s advice on going for this.

I kicked you know what with my dish and the plating. I went there and did exactly what I set out to do with my presentation with 8 or so seconds left before they yelled “TIMES UP”! That part I have to say was such a RUSH because it reminded me of chopped!!! I was then the first to be called back in with 8 others for that first plate presentation part from our first group of 30 plating competitors.  I might be over thinking all of this a little, but I was so tired from preparing the food and shooting the show I feel as though I forgot to prep myself on what exactly to say about “me” when they pulled us 8 into interview. Although, I had them laughing a bit. I got the feeling what was more important to them was the person who said the right things in that second interviewing, more character not food ability. Gods only knows I do have lots of that so if it doesn’t work out this time I NOW know what they want next time around! I still have to wait until the end of October to see if I hear from them (they are still traveling to other states). I had an incredible time and will keep you all posted. Thank you all for your support, it means a lot! Hope you enjoy “My MasterChef Sauces” Show! 

IMG_3462 IMG_3468 IMG_3472

IMG_3474 milkpean  IMG_3489

IMG_3506  IMG_3508  mangosieve

IMG_3514  saucesqueeze  squeeze

eggrollcups  juienned  microherbs

rolls

Ingredients for Ginger-Peanut Sesame Sauce:

  • 3 tbsp smooth peanut butter (Teddy’s All Natural)
  • 1/4 cup soy sauce
  • 2 tbsp toasted sesame oil
  • 1 1/2 tbsp vegetable oil
  • 1 tbsp rice wine vinegar
  • 1 tbsp red wine vinegar
  • 1/2 tsp wasabi powder
  • 2 tbsp sugar
  • 1/2-1 tsp Siracha (can find this next to Tabasco products)
  • 1 whole lime
  • 1 tbsp corn starch dissolved in 3 tbsp pineapple juice – Use 1 1/2 tsp of this 
  • 1 tbsp fresh grated ginger
  • 2 tbsp half and half

Directions for Ginger-Peanut Sesame Sauce:

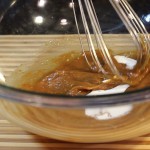
  1. Add all of the ingredients to a large bowl (EXCEPT corn starch mixture) and whisk
  2. Squeeze only 1/2 of the lime in at this point
  3. Add to medium pan over medium/high bring to a low simmer – whisking constantly this will be about 2-3 minutes
  4. When this begins to thicken turn down to med/low and add in 1 1/2 tsp of corn starch mixture and keep whisking- this will be about 3-4 minutes
  5. Remove from stove and cool
  6. When cooled add in 2 tbsp half and half and a squeeze of the other half of the lime and whisk briefly til smooth
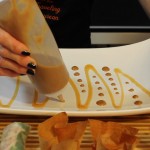
  7. Add to ramekins for a dipping sauce or put into squeeze bottle to decorate plate with

Ingredients for Spicy, Sweet and Sour Mango Sauce:

  • 1 cup pineapple juice
  • 1/2 cup mango
  • 1/4 cup red wine vinegar
  • 1/4 cup sugar
  • 1 tsp ketchup
  • 1 tsp fresh grated ginger
  • 1 tsp Siracha
  • 1/8 tsp salt
  • 2 tbsp corn starch dissolved in 3 tbsp water
  • 1 lemon

Directions for Spicy, Sweet and Sour Mango Sauce:

  1. Add all of the ingredients to a large bowl except the corn starch mixture
  2. Whisk til combined – use juice from 1/2 lemon here
  3. Add to a medium size pan over med/high heat and bring to a low simmer to melt sugar – 3 minutes
  4. Add in corn starch and keep whisking at a low simmer til the mixture is transparent again and thickened – 5 more minutes
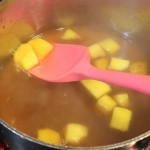
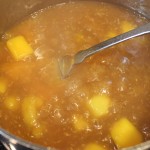
  5. Mash Mango pieces into sauce with a fork
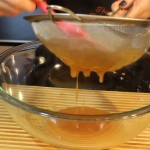
  6. Remove from heat and press thru a sieve into a bowl and let cool completely (can add a little squeeze of the other half of the lemon if too thick)
  7. Pour into ramekins for dipping or put in a squeeze bottle to draw on plates …have fun decorating!