The Traveling Epicurean

Easy Gourmet Eggplant Parmesan

Easy Gourmet Eggplant Parmesan

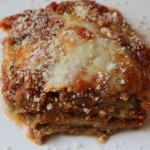
My easy gourmet eggplant Parmesan is sweet, saucy and oozing with mozzarella getting even better the next day when it’s re-heated if that’s even possible! Eggplant Parmesan one of my very favorite things to make. I used to watch my mother fry eggplant when I was young and I have been making this homemade eggplant Parmesan for 30 years now. Eggplant Parmesan is one of those delicious Italian comfort foods that can be a little bit of work to prepare so I show you how to keep the process simple by spreading out the steps.

The secret to sweet eggplant Parmesan is slicing , lightly salting and weighting down the eggplant letting it sit in the refrigerator for 2 hrs to overnight preferably to remove the bitter purple juice making my homemade baked eggplant Parmesan as sweet as ever. This is a simple but ingenious way that’s been in my family for generations.

It will be much easier to try and fry up only one eggplant if it’s your first time just to get the hang of it. If you have gone through the frying process before I would suggest cooking up two or three large eggplants. I like to fry up 3 eggplants because I freeze the slices I don’t use right away when they are completely cooled in between layers of thick durable Bounty paper towels in freezer Ziploc baggies. This way all your base work is done for you and you are able to pull them out of the freezer and whip up an eggplant rollatini, eggplant Parmesan, or even eggplant lasagna. When you take them out of the freezer they pop apart easily thawing in minutes too ready for what ever dish you may have in mind.

I recommend making my quick and easy tomato-basil pasta sauce  or even my slow cooked pasta sauce to baked this easy gourmet eggplant Parmesan dish. I love the fact that it can totally be made days ahead, even weeks ahead and put into the freezer ready to thaw when you need it.

If you’re feeling ambitious you may want to venture off and try my homemade eggplant rollatini with vodka sauce and, or my homemade ricotta which you can also make the day before or just treat yourself and buy Liuzzi Cheese ricotta or your favorite store brand for the rollatini. Planning is sometimes the name of the game for taking the labor out of scrumptious food like this where if you get it done in steps it makes everything go so smoothly.

You may want to accompany this amazing Italian dish with some apps like crab cakes, a homemade Caesar saladMediterranean layered dip, or asparagus wrapped in Prosciutto and you could end it with the best chocolate cake you ever had that’s a snap to make! ENJOY! 🙂

DSCN45211-300x225 DSCN4572-300x225 IMG_5437 iphone-pictures-572-300x225 IMG_2793

DSCN4361[1]  DSCN4362[1]  DSCN4364[1]

DSCN4367[1]  DSCN4369[1]  DSCN4372[1]

DSCN4374[1]  DSCN4376[1]  DSCN4378[1]

DSCN4382[1]  DSCN4385[1]  DSCN4386[1]

DSCN4391[1]  DSCN4393[1]  DSCN4395[1]

DSCN4399[1]  DSCN4405[1]  sauce

sauceeggplant  eggplsnt  eggwithplant

IMG_3349

Ingredients:

  • Tomato-Basil Pasta Sauce or Slow cooked pasta 101 recipe
  • 2-3 large eggplants
  • 6-9 extra large eggs whisked (approx. 3 eggs per 1 extra-large eggplant)
  • 3 cups seasoned Italian bread crumbs – (use “seasoned breadcrumbs” then you don’t have to add that in)
  • salt
  • 1 16 oz. block of part-skim or whole milk mozzarella shredded or sliced thinly
  • 3 1/2-4 cups canola oil for frying
  • fresh basil leaves
  • grated Parmesan for garnish
  • Cookie racks
  • 1 whole roll of Bounty Paper Towels (it’s important to get quality paper towel so they will absorb the oil properly and won’t fall apart)
  • Candy thermometer to keep oil at 300º

Directions – Pre-heat oven to 350º:

  1. Slice the ends off the eggplants
  2. Using a potato peeler peel off all the skin of the eggplants
  3. Slice up eggplants on a slight bias (on a little bit of an angle) into 1/4″ slices (1/4″ for rolling up for eggplant rollatini BUT you can cut them a little thicker 3/8″ for eggplant parm!
  4. NOTE: If i plan on freezing the left over fried eggplant slice’s for future dinners (eggplant rollatini) I cut them length wise so as to have enough length to roll up with ricotta in the middle BUT if I’m just making enough for parm I cut the eggplant on a slight bias because I don’t need the length…I try to cut them all the same so cooking time is constant.
  5. Layer the eggplant slices in a large glass bowl
  6. In between each layer sprinkle 1/4 Tsp of salt, and keep layering eggplant, salt, eggplant, salt…
  7. Cover with Saran wrap and place a small plate on top and then some heavy fry pans or large tomato can to weight down the eggplant and into the frig for 1-2 hours up to 1 day
  8. Drain the purple juice from the bowl
  9. Take the eggplant and pat them dry in layers between Bounty paper towels
  10. Whisk eggs
  11. Get your line-up of bowls in order: eggplant slices – whisked eggs – bread crumbs
  12. Add 3 1/2 – 4 cups canola oil to a large sauce pan and begin to heat up on medium/high heat
  13. The oil needs to get to about 300º …The temperature will go down a little when you start filling the pan with breaded eggplant slices so start with the heat on med/high then after you start to fry you will have to turn it up a little to maintain the 300º
  14. Lay out 2-3 cookie racks covered with layers of paper towels to absorb oil for frying
  15. Add slices of eggplant to the egg bowl in batches – only add in the 4 or 5 slices that are going next into the oil and ready to go into the bread crumbs
  16. Then dip into the bread crumbs and into the heated oil
  17. Put 4 or 5 slices of breaded eggplant into the oil at a time…
  18. They will fry for about 2-3 minutes per side til golden then flip the slice over
  19. While the 1st batch is frying get the 2nd batch ready to fry dipping into the egg and then into the bread crumbs and let them sit there on the bread crumbs til they are ready to go into the oil
  20. Once the eggplant are golden place onto cookie racks with paper towels and dab them with fresh paper towels, flip and do the same to the other side to remove all excess oil
  21. Throw away oily paper towels and re-place with a new set of paper towels for the next and replace with each batch there after
  22. Then place the eggplant onto the wire cookie racks with out paper towels to cool
  23. Finish frying the rest of the eggplant going thru the same procedures
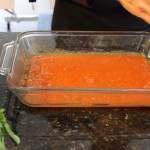
  24. Get out your favorite baking dish and cover the bottom with sauce
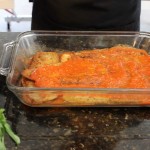
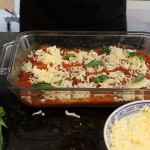
  25. Begin to layer sauce, eggplant, mozzarella and some fresh basil leaves til you are 1″ from the top
  26. Cover with foil and bake for 50-55 minutes appox. with foil til sides are bubbling and bake another 5-10 with out foil so mozzarella can get bubbly

FREEZING TIPS: I love, love, love to freeze my fried eggplant slices because all the work is done for you the next time you want to make parm or rollatini. BEST way to freeze your eggplant slices:  let all the fried slices COMPLETELY cool on a cookie rack, then layer as many slices in between BOUNTY (need a durable paper towel)  paper towels. Layer enough slices to fit a SINGLE layer in between each sheet of Bounty in a FREEZER ZIP-LOC baggie.  Begin with a sheet of Bounty in the Zip-Loc, then slices of eggplant-single layer, then another sheet of Bounty, then another layer of eggplant slices and so on until you can barely close baggie. Lay flat in you freezer and Voilà! Freezes great 4-5 months!

Pulled Beef Taco’s & Mango Salsa


Pulled Beef Taco’s & Mango Salsa

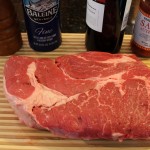
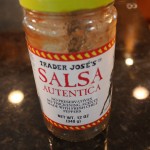
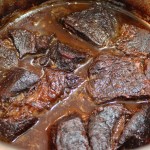
Just wait until you taste the flavors in this pulled beef taco dish that ONLY uses three ingredients! Yes, that’s right we only use three ingredients… red wine, Trader Joe’s Autentica Salsa and a chuck roast that braises in the oven for two and a half hours with the cover off. I almost feel like we are cheating here by only using these three items because it seems as though something this amazing in taste, similar to Boeuf Bourguignon, should involve way more effort and ingredients. I think it’s important here to use the oven instead of a crock pot because the dry heat helps to caramelize the beef really building on all those layers of flavors.

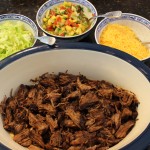
This is the perfect dish for having groups of friends over because it’s a total make ahead dish. You can even make my mango salsa the day before. If you are really in a pinch for time you could always buy fresh made salsa at the store. I personally like to make this homemade pulled beef the morning of the party so that the house fills with all the aromas of the braising chuck roast, red wine and tomatoes. Really gets the juices flowing!

You can use your favorite hard taco shells to serve up the homemade pulled beef, corn and flour tortilla’s or even serve it on a bed of lettuce with shredded cheddar cheese and my mango salsa! I would also offer sour cream and Siracha in the side fixin’s and just let people go to town making their own creations. How fun is that?
You may just want to make my decadent Hershey’s Perfectly Chocolate Chocolate Cake for dessert! You won’t believe how EASY it is to make! You could also try my Chocolate Crackle Cookies that melt in your mouth. Then there always Fresh Berry Granita or Berries in a Dreamy Cream for dessert too. You’ll be able to actually relax and have lots of fun with your family and friends.

IMG_2793 IMG_3663 IMG_2375 IMG_2201

IMG_3110  IMG_3140  IMG_3127

IMG_3132  IMG_3135  IMG_3173

IMG_3223  IMG_3234  IMG_3144

mangosalsa

Ingredients for the Pulled Beef Taco’s:

  • 3 1/2 lb. beef chuck roast (look for some good marbling)
  • 1 bottle of red wine – Cabernet Sauvignon
  • 1 bottle Trader Joe’s Salsa – Autentica
  • 3 tbsn olive oil

Directions:

  1. Pre-heat the oven to 350º
  2. Slice  the chuck roast into 6 pieces
  3. Salt and pepper the pieces
  4. Add 3 tbsn of olive oil to a large pan on med/high heat and begin to add the beef pieces
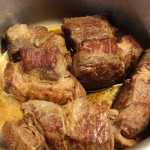
  5. Turn up the heat to high and quickly sear all sides til browned – this takes 10 minutes
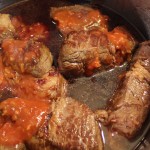
  6. Add in 3/4 of the bottle of red wine (be careful of steam here) and the whole jar of salsa
  7. Bring to a simmer and pop into the oven for 2 1/2 hrs.
  8. Every hour turn the beef pieces over so the other sides can caramelize
  9. At 2 1/2 hours take the braising meat out of the oven and begin to remove the beef to a dish wear you can start to pull apart the beef pieces
  10. Tilt the braising pan to the side so that you can skim off the fat that rendered out of the meat
  11. Pour the left over juice onto the pulled beef and serve with taco shells and my mango salsa…enjoy!

Ingredients for the Mango Salsa:

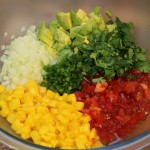
  • 2 lg mangoes chopped 1/4″ cubed – (about 1 1/2 cups)
  • 1 avocado chopped 1/4″ cubed (1 cup)
  • 2 med/lg size tomato’s or 5 small tomato’s chopped 1/4″ cubed (1 cup)
  • 1/2 Vidalia onion (or yellow) FINELY chopped (1/2 cup)
  • 1 FINELY chopped jalapeno (2-3 tbsn)
  • juice from 1 lime
  • 2 Tbsp olive oil
  • 1 Tbsp rice wine vinegar
  • 1/2 cup coarsely chopped cilantro
  • a dash of Siracha (optional)
  • S & P

Directions:

  1. Add all of the ingredients to a large bowl and mix thoroughly.
  2. We really love to eats this salsa with blue chips too
  3. I have also served this salsa up on the tips of endive leaves, and or with a cooked shrimp on top of that ….yum!
  4. I must warn you this salsa is highly addictive……consume at your own risk! LOL

iphone pictures 718  iphone pictures 732  iphone pictures 721

iphone pictures 722  iphone pictures 724  iphone pictures 738

iphone pictures 739  iphone pictures 740

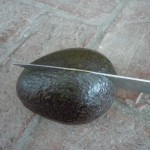
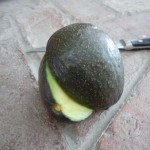
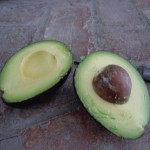
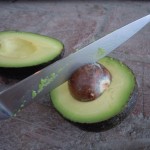
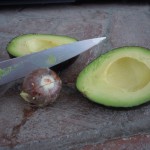
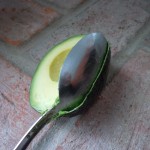
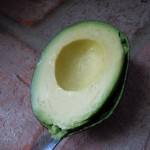
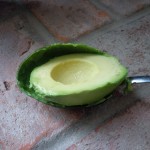
TIP:  There is an easy way to get the pit out of a avocado which I have displayed in the pictures above.  After running the knife around the flesh of the avocado against the edges of the inside pit… put the knife down and twist the avocado halves and pull apart. Then stick the knife into the pit and do the same thing holding on to the knife with one hand and carefully twist the avocado pit and it will pop right out.  Then knock the pit off onto the board away from your hands.  This can be a little tricky the first time so I would advise that this would be for an adult to try.   Finally, Insert a large spoon and scoop the avocado along the edge of the avocado skin to remove avocado flesh.

Michigan Sauce at Kathleen’s

Michigan Sauce at Kathleen’s

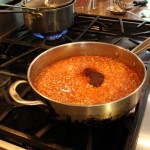
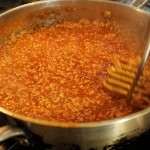
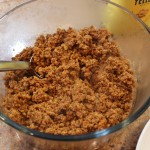
We make this incredible Michigan sauce in the show with ground turkey, but many who make this savory sauce make it with ground beef! Michigan sauce is made from simmering ground turkey, warm water, French’s Yellow Mustard, Franks Hot Sauce, Hunts Tomato Sauce, chili powder, ground cumin all awhile mashing the ground meat with a potato masher to achieve a tender, fine sauce.

Now you may think that adding a whole 5 oz. bottle of Frank’s Hot Sauce to this homemade Michigan sauce would make it really spicy but it doesn’t at all. The amounts of all the flavorful ingredients are pretty perfect here giving you this nicely balanced combination. You get hints of citrus and floral from the ground cumin, a bit of a kick from the cayenne in the Frank’s Hot Sauce and a little tang from the French’s Yellow Mustard. Lets not forget the chili powder that gives it the right amount of earthiness to complete the circle. Now you know how important it is to me that you always season a dish as you go along but here there is no need for salt or pepper because all of the ingredients added into this recipe take care of that.

These Michigan Sauce recipes go back for generations and are very special to an Upstate New Yorker such as Kathleen and her family. I feel honored that they were willing to share their family recipe that they hold so dear to them so that I might be able to share it with all of you.

clarecarlsOver the years there have been legends and tales going around of how this delicious Michigan Sauce recipe began. One says that the Coney Island hot dog met a sauce made from a woman in Nashville who married a man from Detroit and they moved to Plattsburgh, NY. They started selling hot dogs with this sauce and called them “Michigans”. The other says it was a couple from Detroit that moved to Plattsburgh, NY.  But if you ask some of the locals they will insist that “Michigans” have nothing to do with Detroit! Back in the 1920’s is when the the first “Michigan” stand opened up but Clare and Carl’s is the one very well known to people which opened in the 1940’s along Lake Champlain. To this day, Clare & Carl’s keeps the car hop service that made it popular a half century ago.

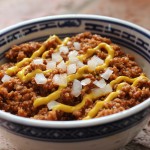
A typical “Michigan” is garnished with chopped onion and a line of French’s Yellow Mustard on the top. If you to go into Clare and Carl’s they would ask you if you want your Michigans “with” or “without”, referring to the chopped onions of course. You might reply, I would like two Michigans “with-buried”. This would mean you want onions and they are to be under the sauce. Now you know how to properly order your Michigans when you are in Upstate New York.

Even though this special meat sauce is an Upstate New York summer tradition I think this is the perfect dish for football season! Not to mention it’s a total make ahead dish so you won’t miss any of the game tending to that darn stove. This Michigan sauce also freezes really well so make sure to take advantage of that and make an extra large batch like Kathleen’s mom, Shirley, does for future meals and get together’s. Thank you again Shirley and Kathleen for enlightening us with your lovely Michigan sauce recipe.

IMG_2283

Hope you enjoy the show! You may want to try and make some refreshing Pavlova for dessert to go with this savory Michigan sauce!


IMG_3020  IMG_3031  IMG_3041

IMG_3044  IMG_3072  IMG_3054  

clarecarls  clarecarl  clares

Ingredients:

  • 1 lb. Ground turkey
  • 1 cup warm water – Add 1/2 cup in the beginning and add 1/2 cup after adding the Hunts Tomato Sauce
  • 1 heaping tbsp French’s yellow mustard
  • 1- 5 oz. bottle Franks Hot sauce (whole bottle)
  • 8 oz. can of hunts-plain tomato sauce plain or garlic
  • 3 tsp ground cumin
  • 3 tsp chili powder
  • 1 small chopped Vadalia sweet onion – chopped for garnish or a Michigan “with-buried” (if you don’t get this you need to watch the show) 🙂
  • 1 pkg Deutschmacher Frankfurters (mild and delicious) OR Red Hots
  • Hot dog rolls

Directions:

  1. Add 1/2  cup water to 1 lb. ground turkey (beef) in a large sauté pan on medium/low
  2. Continue to mash these two for 10 minutes while simmering with a potato masher
  3. Change to a fork to further mash ground turkey to a finer mash for 5 minutes
  4. Stir in 1 heaping tbsp French’s Yellow Mustard until it disappears into turkey mixture
  5. Stir in 1 whole 5 oz. bottle of Frank’s Hot Sauce until it disappears into turkey mixture
  6. Stir in 1- 8 oz. can of Hunt’s tomato sauce
  7. Add in another 1/2 cup of warm water
  8. And then stir in 3 tsp chili powder and 3 tsp ground cumin
  9. Let this simmer on low for 1/2 hour
  10. Then mash a little more with the potato mash to make sure you have a fine texture.
  11. You can let simmer for another 1/2 – 1 hour til a thick consistency
  12. The more you let it simmer the more the flavors develop
  13. This sauce freezes really well for future meals
  14. Serve in a bowl with a drizzle of French’s Yellow Mustard and some chopped onions on top OR on top of a steamed hot dog in a bun with a drizzle of French’s Yellow Mustard and some chopped onions on top …YUM!