Talk about a perfect sauce, well this homemade Alfredo sauce is right on the money! Not only can you make this Alfredo sauce in 5 minutes but it’s a delicate sauce, cheesy, but not too heavy, nutty, sweet and tangy all at the same time. Granted this sauce will come out good no matter which reggiano cheese you end up with but we go to The Madison Cheese Shop to get a three year old aged Reggiano Parmigiano which just takes the Alfredo sauce to another level, where it should be.
You can really taste the difference from a generic grocery store cheese to a specialty cheese shop cheese like this incredible Reggiano Parmigiano that I got from Fawn at The Madison Cheese Shop. With knowledgeable people like Fawn and Henry, Fawn’s assistant at Madison cheese, you just can’t go wrong making this one of your routine stops building on your own knowledge of cheeses and inventory!`
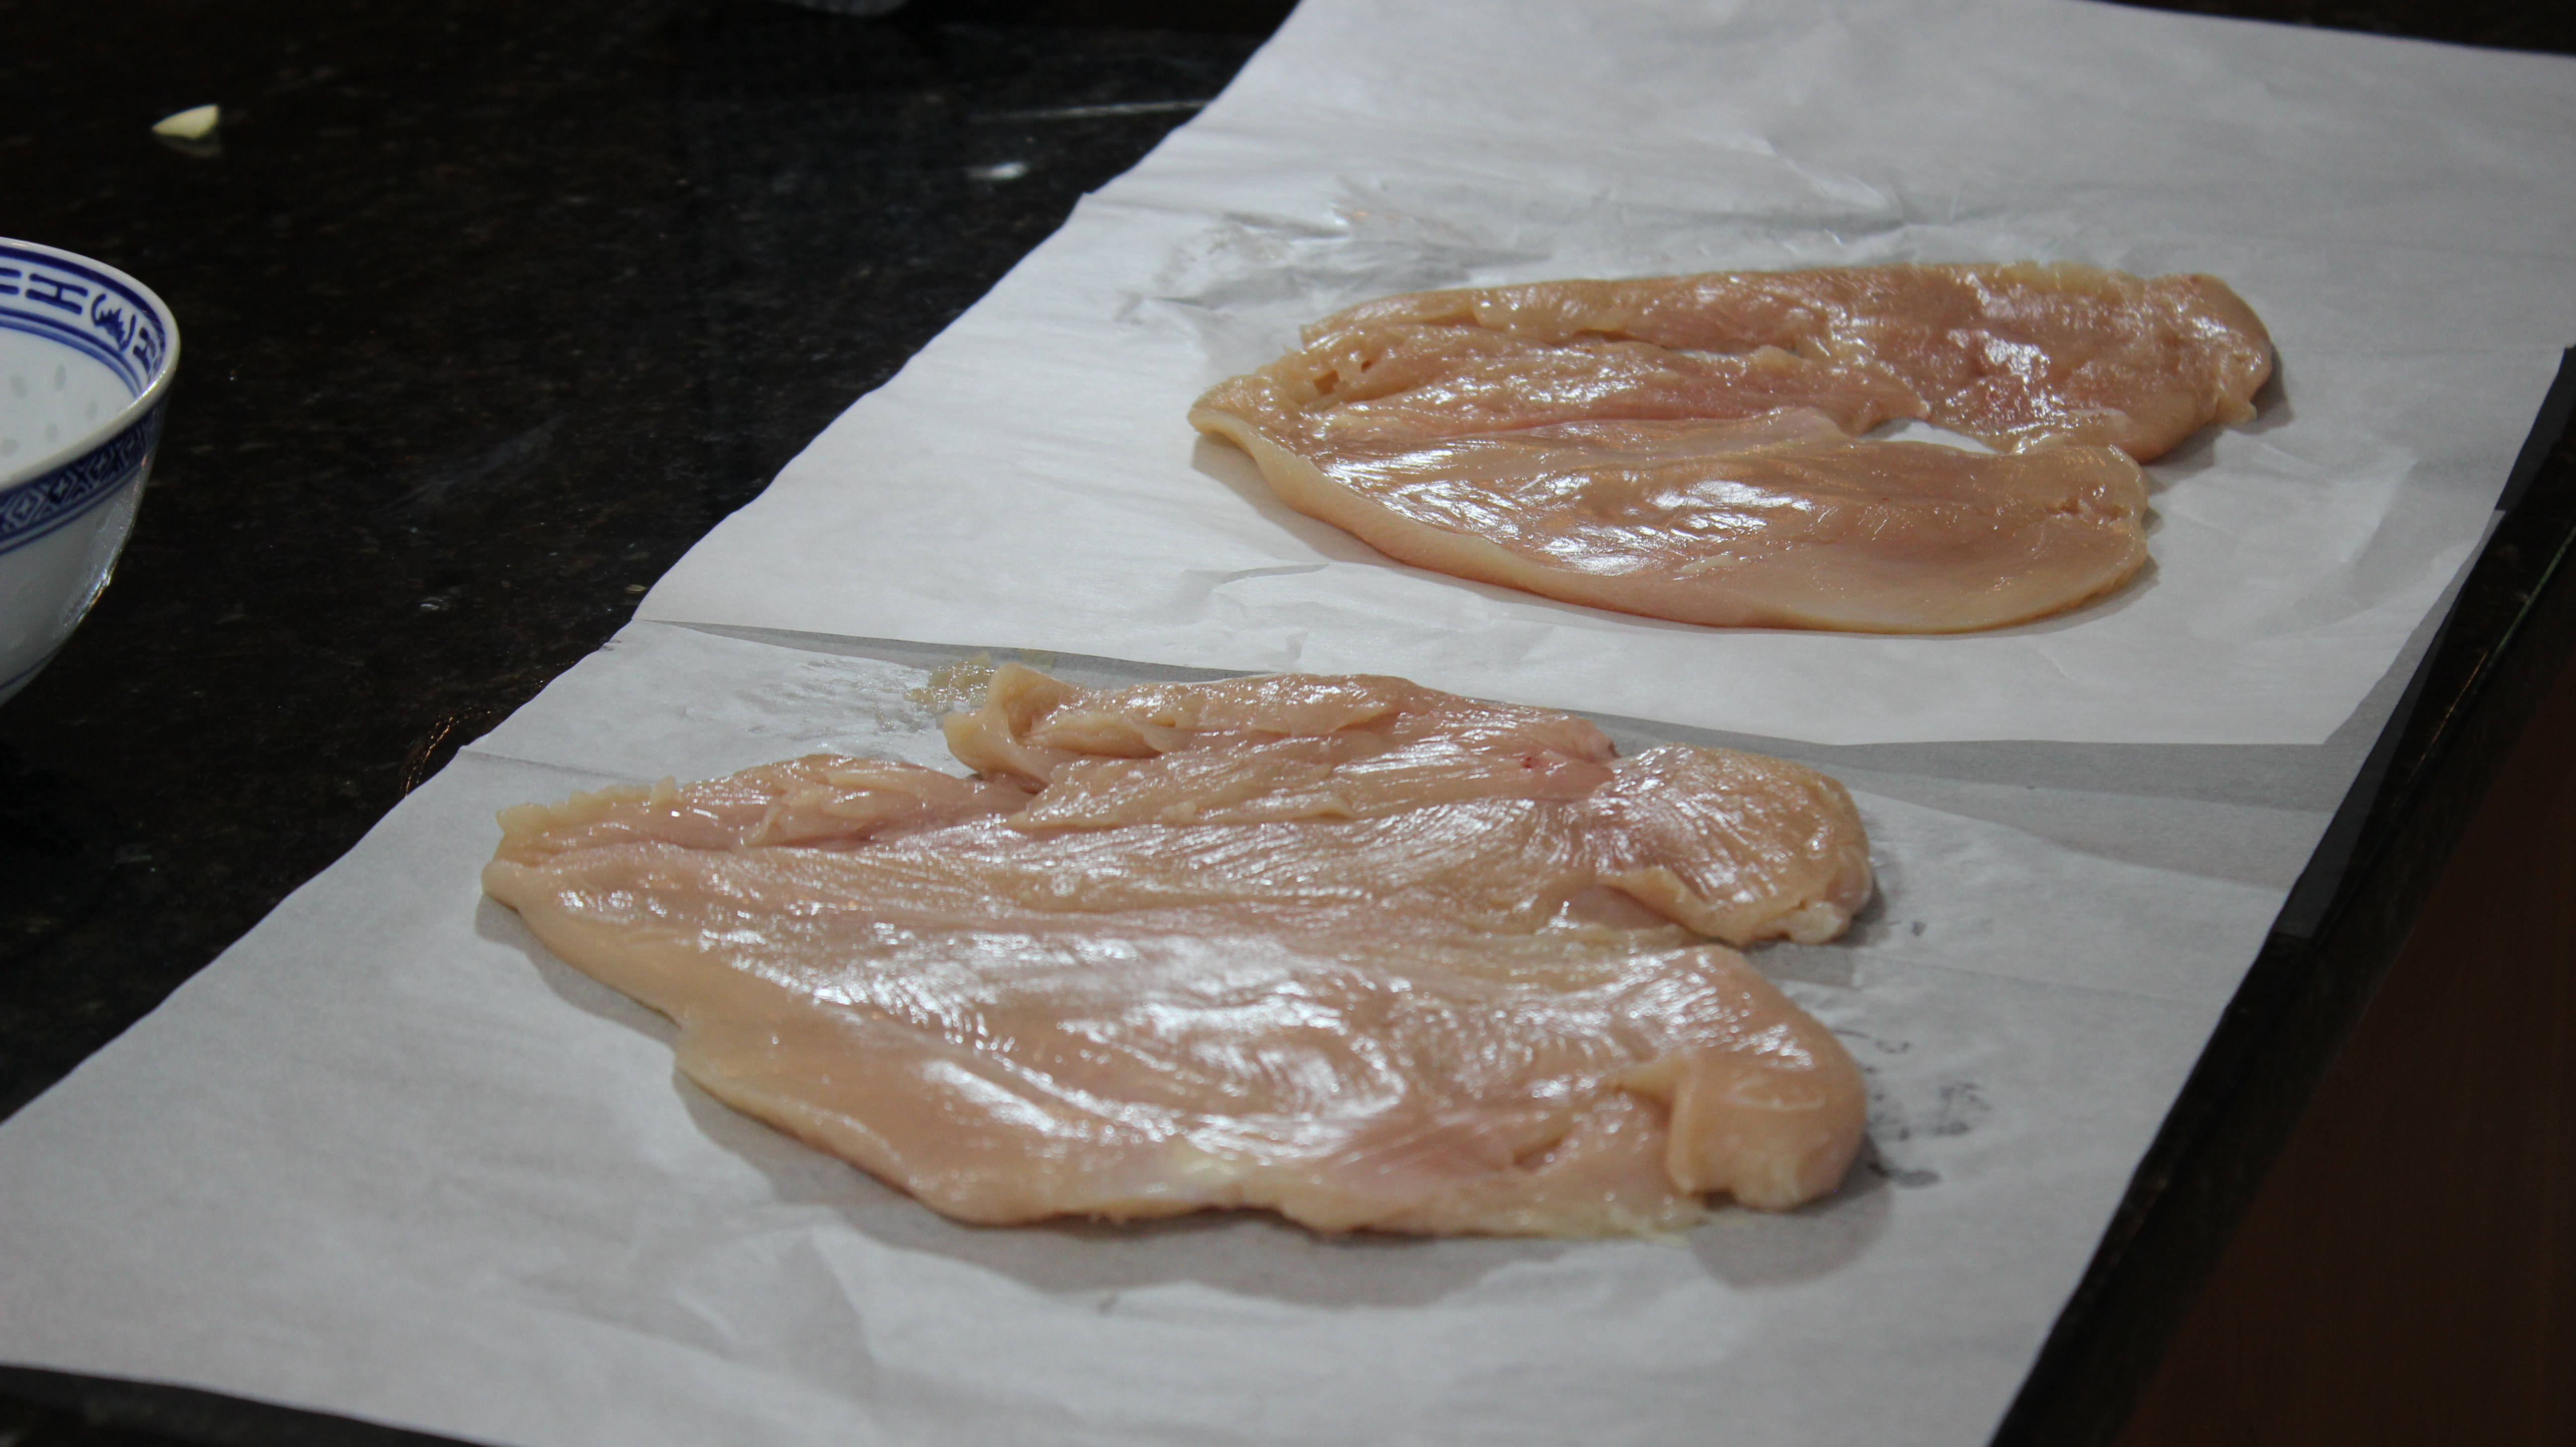
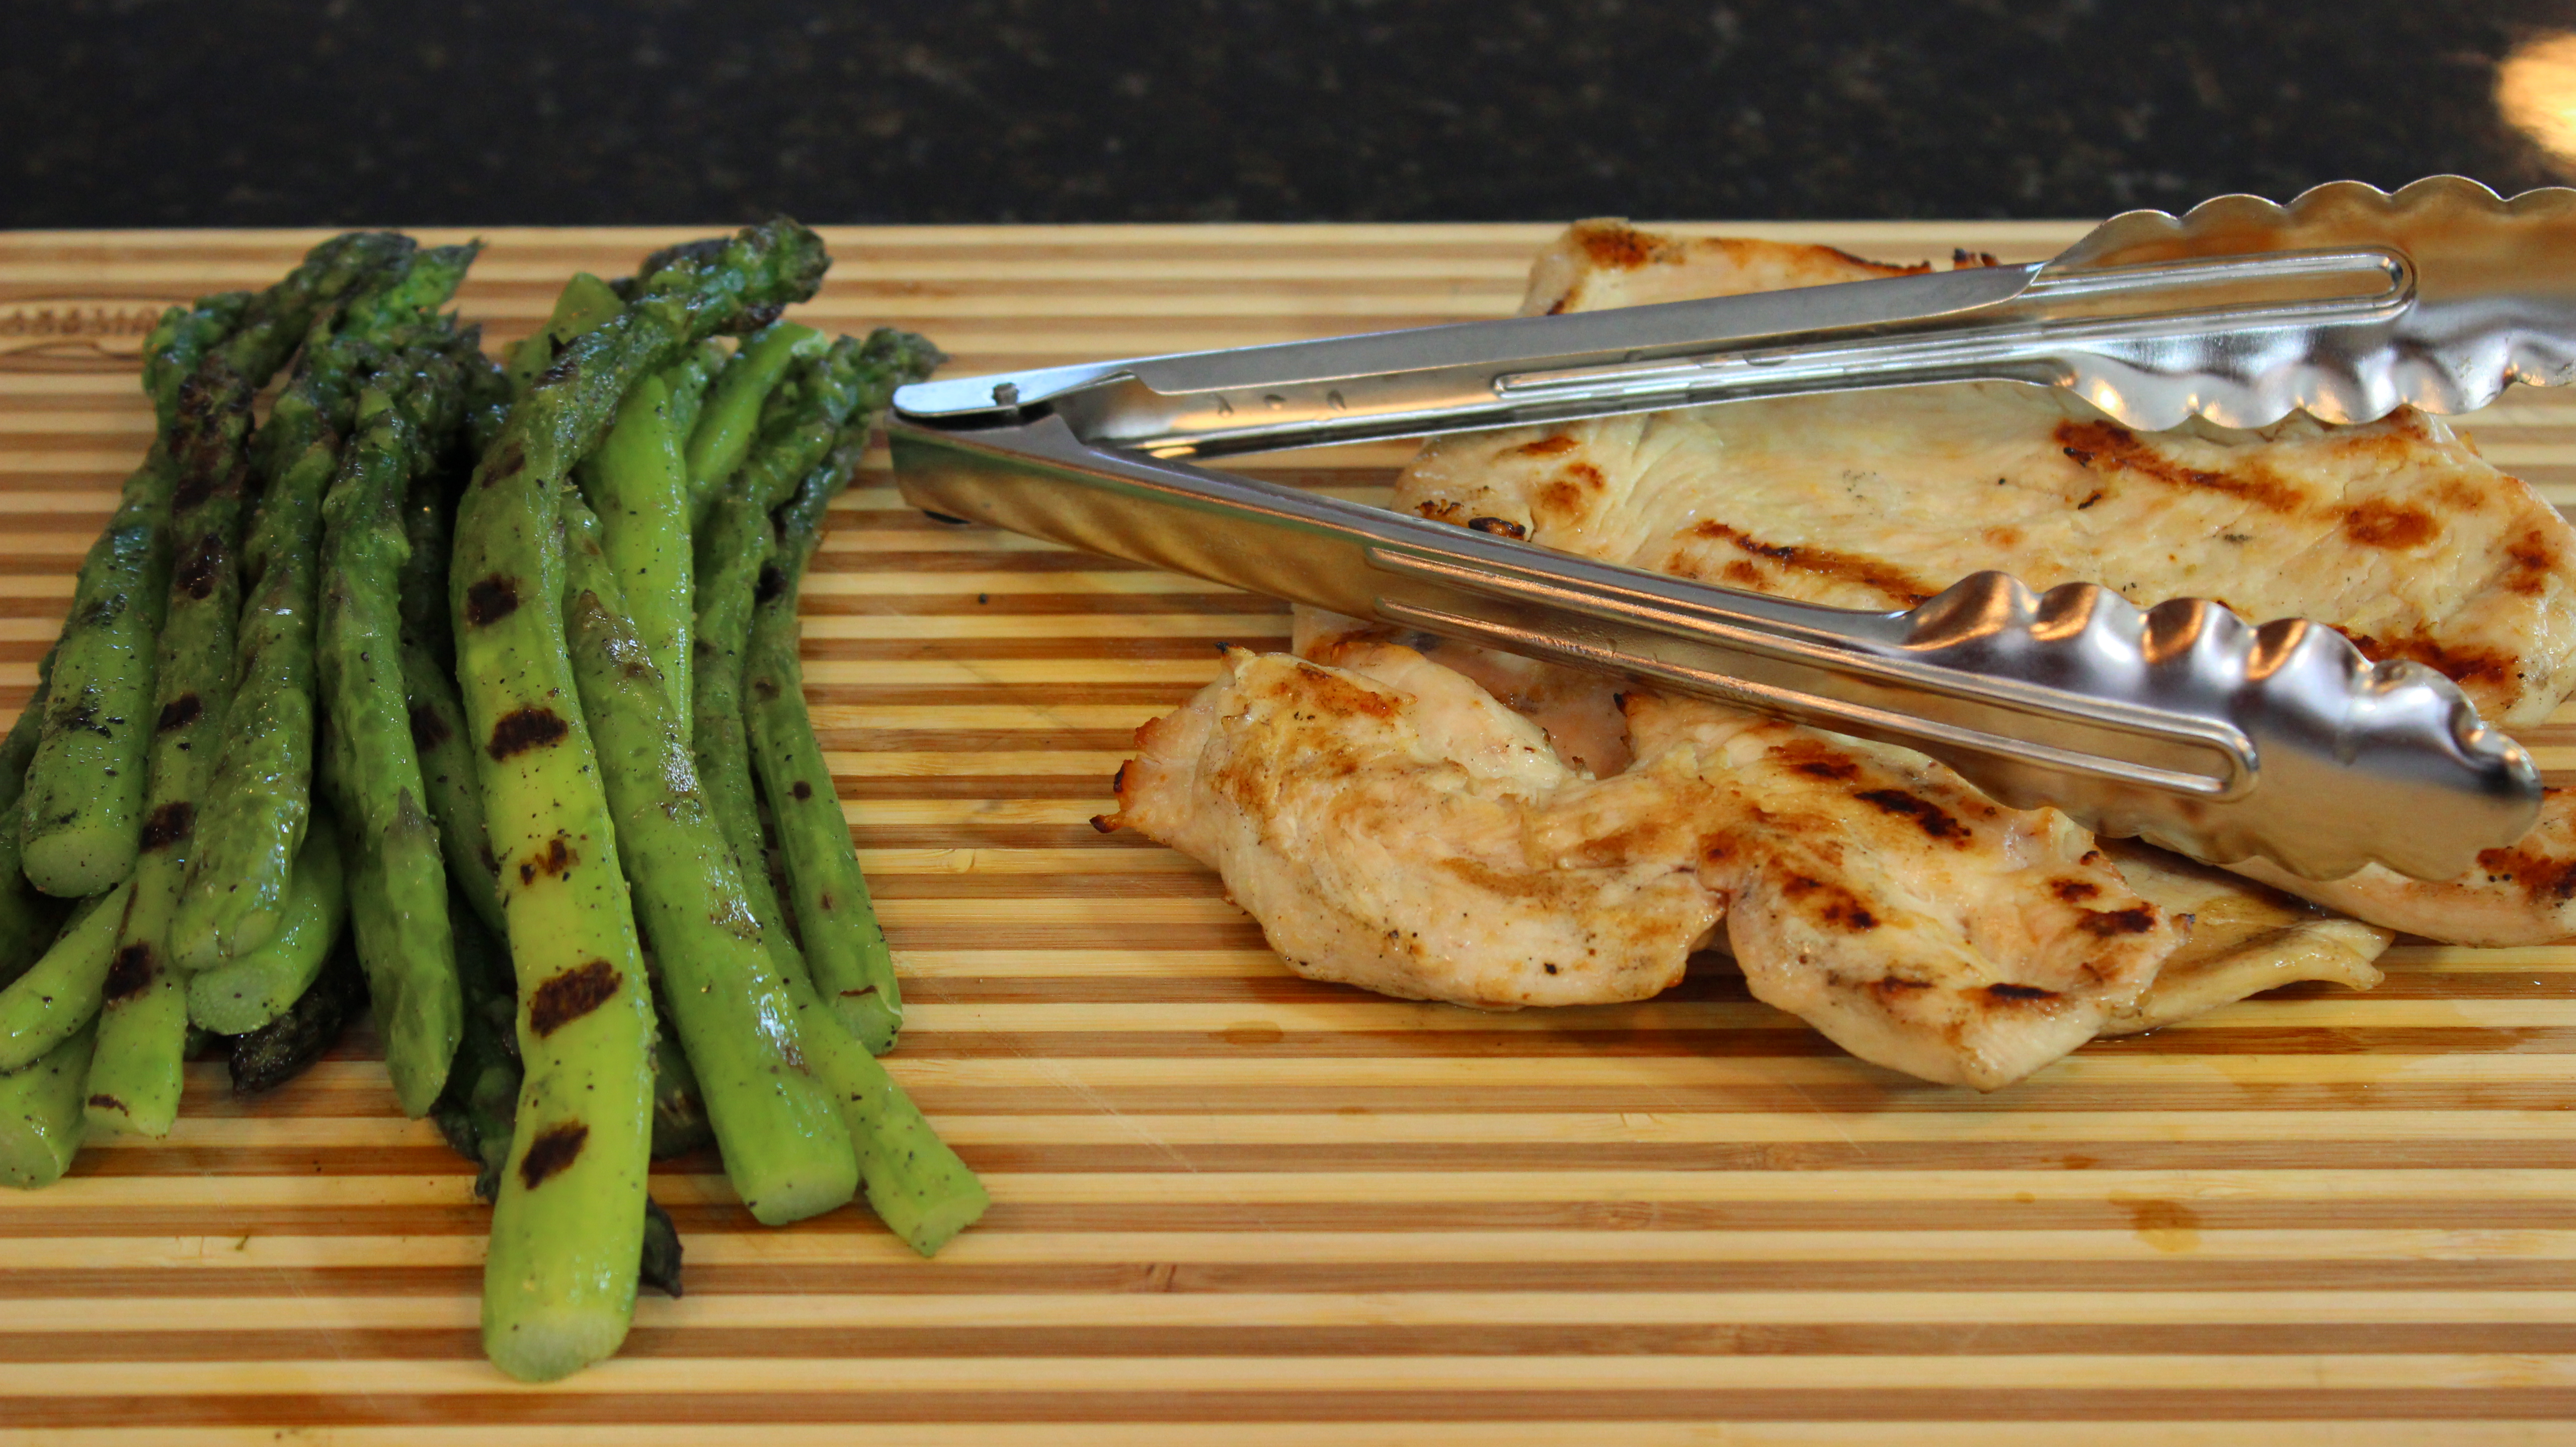
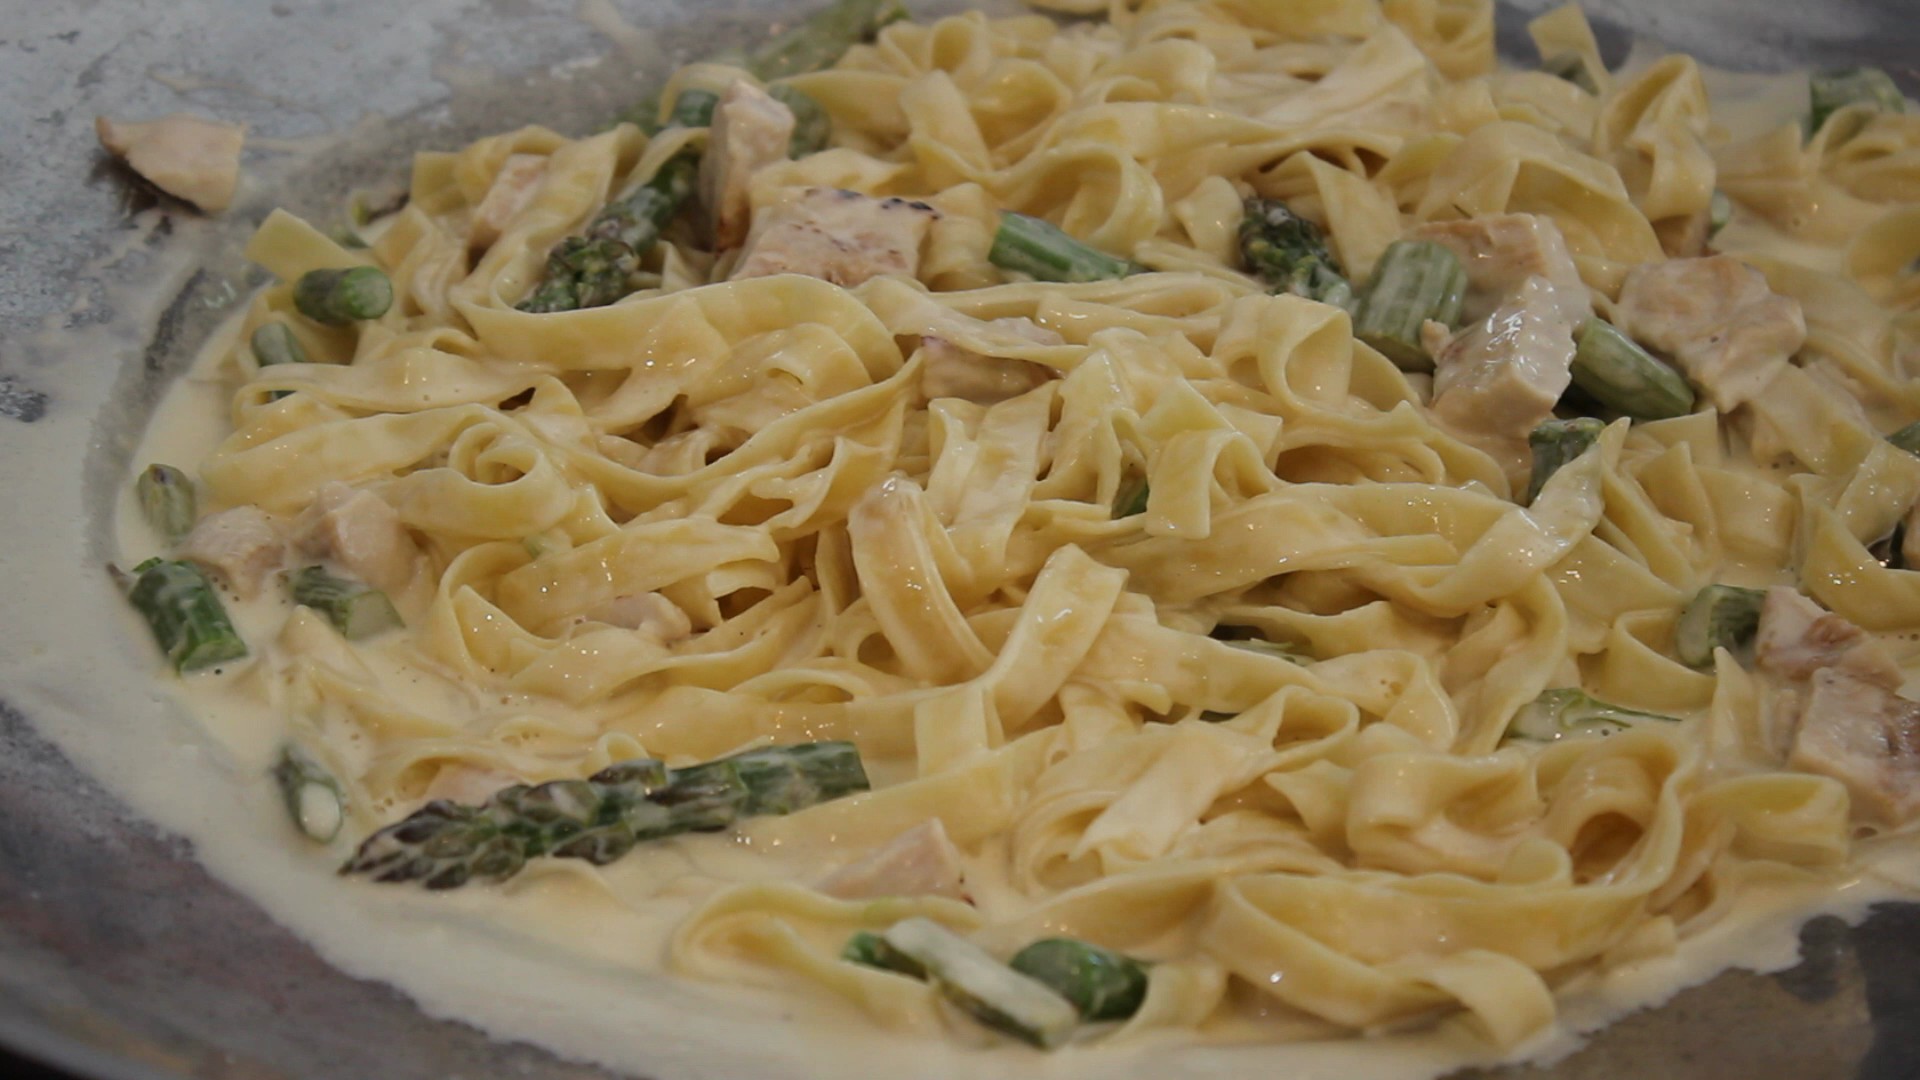
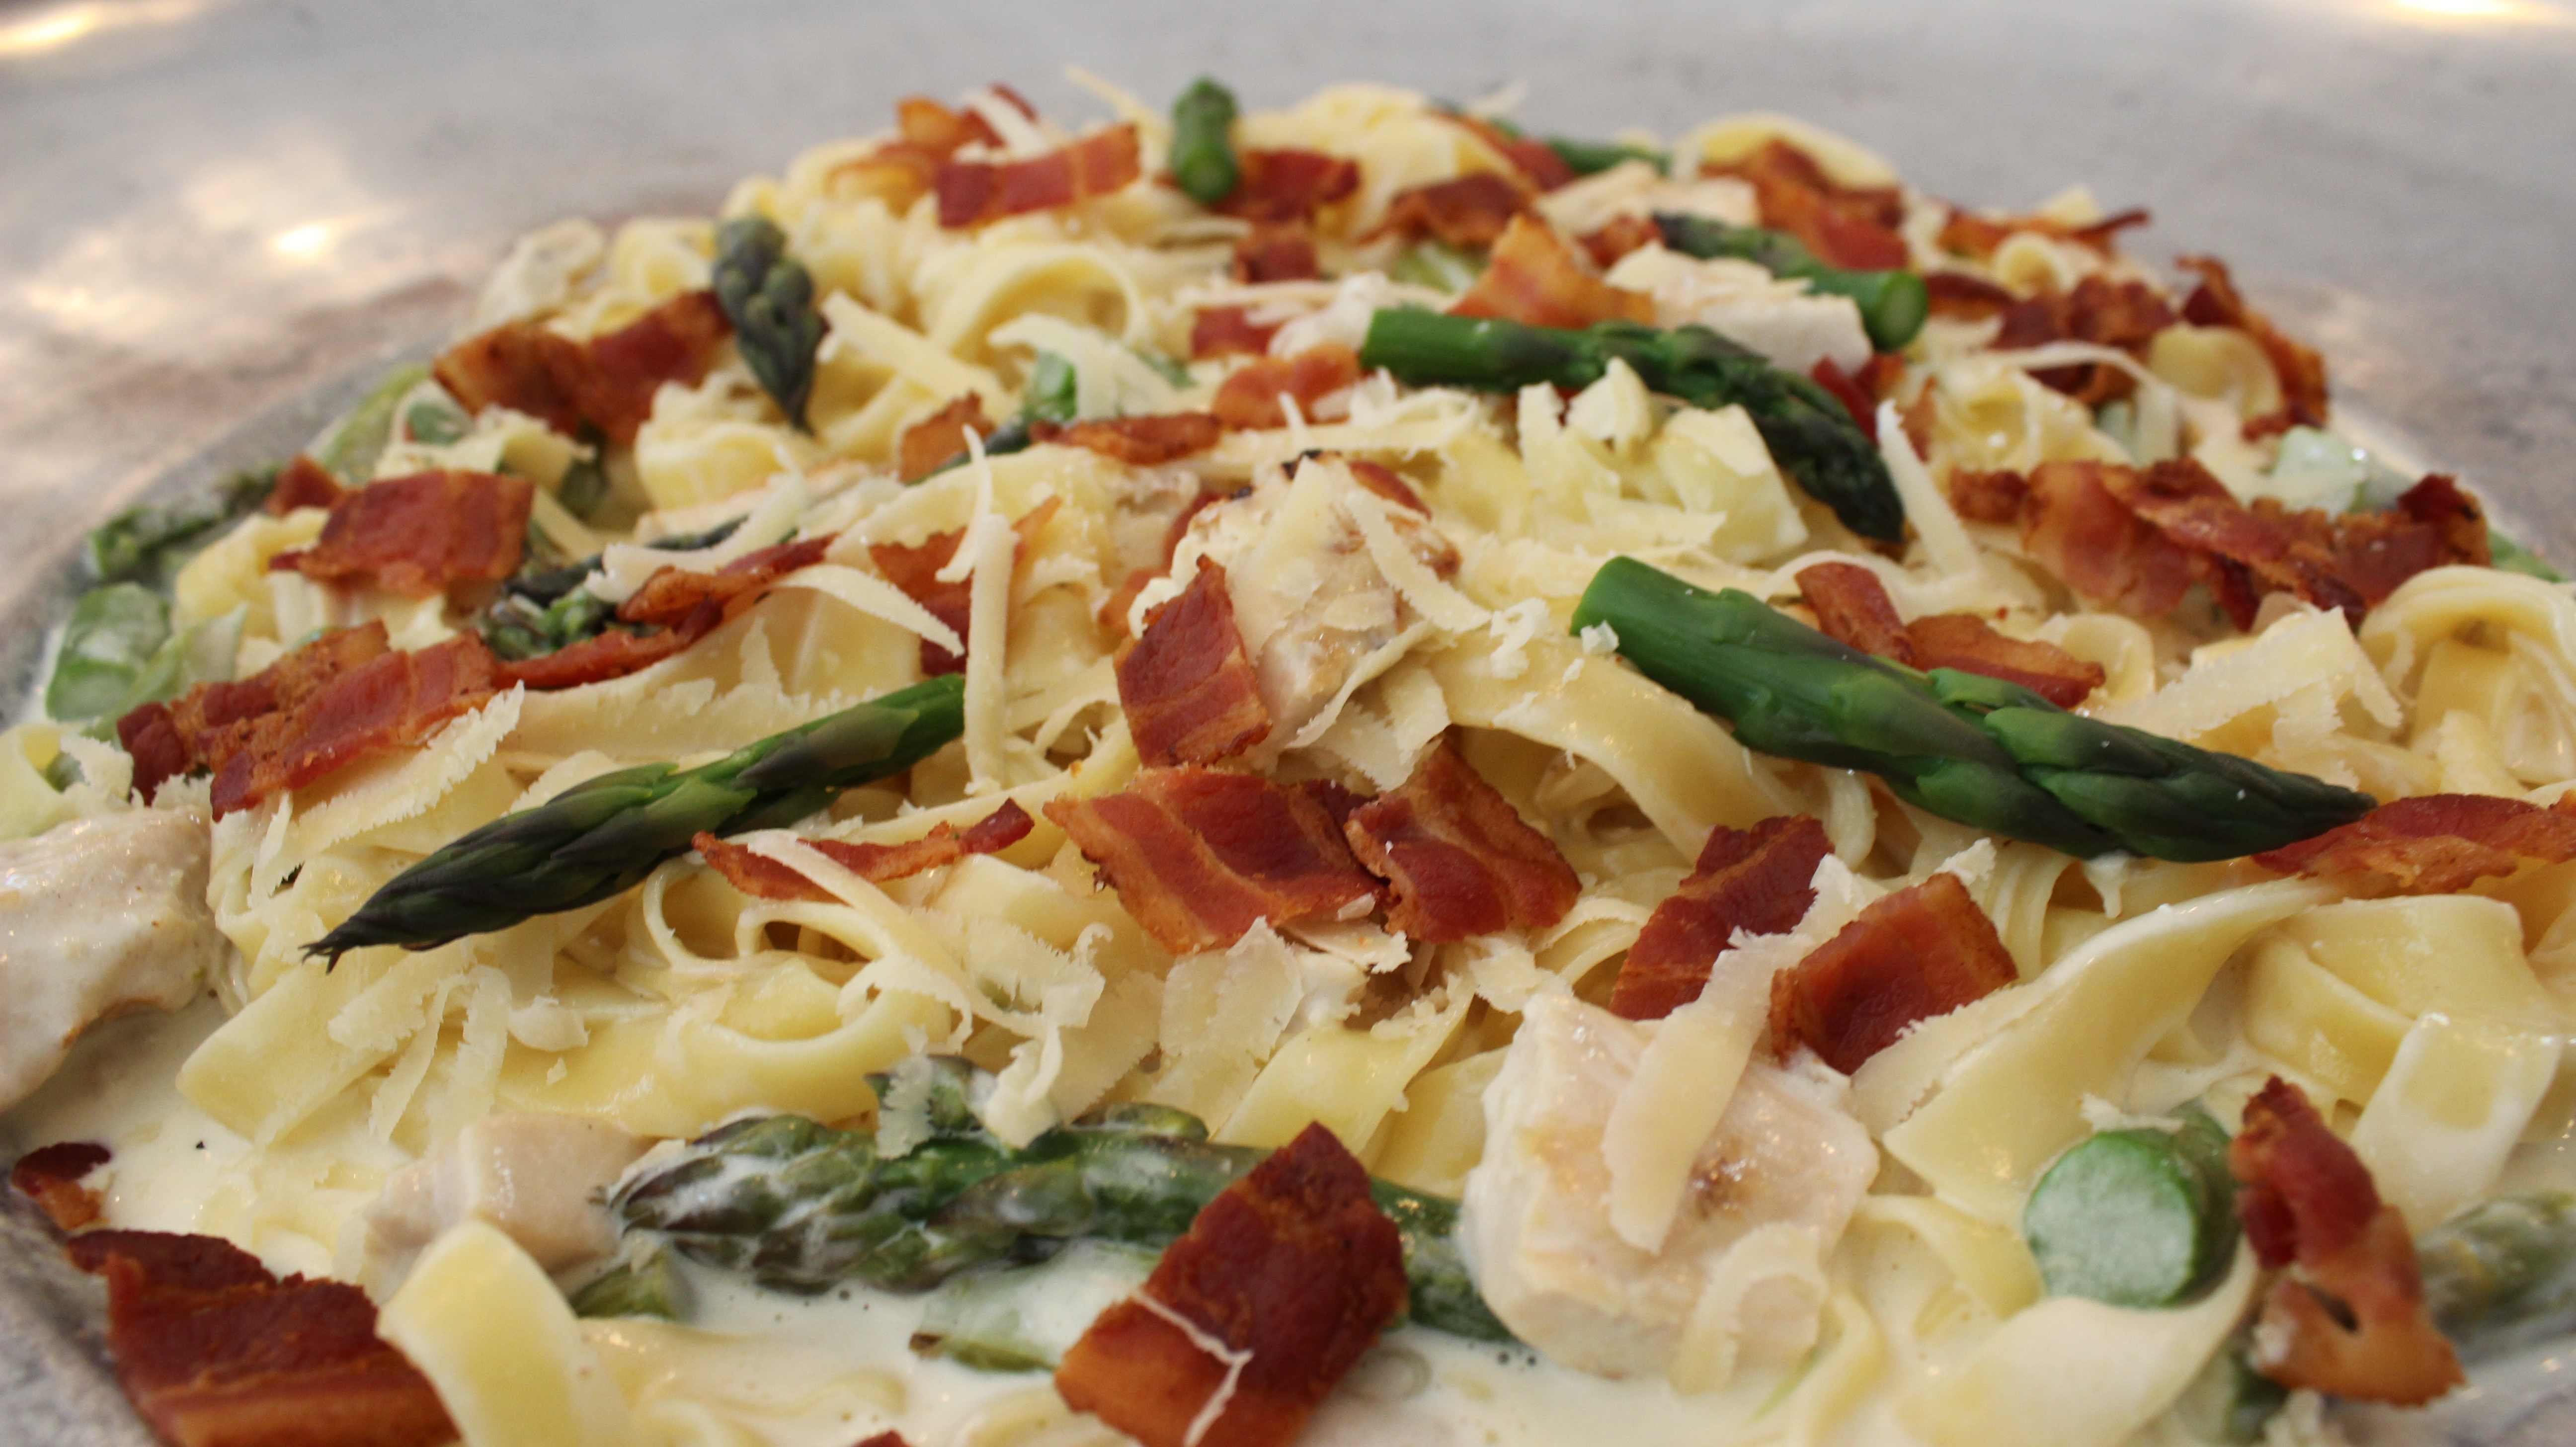
You can keep this fettuccine alfredo vegetarian or add in chicken and asparagus as I did in the show. A nice combination for this alfredo sauce is to add in peas and crispy bacon and you have yourself some fettuccine carbonara. Have fun with this one by adding in your favorites or just changing up the pasta shape because you have the perfect Alfredo sauce base already figured out for you!
INGREDIENTS:
3 cups heavy cream (1 1/2 cups heavy cream, 1 1/2 cups half & half)
1/2 cup white wine
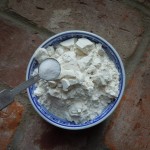
1 1/2 cups fresh grated Reggiano Parmigiano
1/2 tsp salt
6 strips of Boars Head smoked bacon, cooked til crispy and then crumbled or sliced into 1/2″ strips (which ever you prefer)
1 bunch fresh asparagus blanched for 4 minutes, then throw on grill for 3 minutes if grilling chicken just for extra flavor, then slice into 1″ pieces putting aside several tips for garnish
1 lb. egg fettuccine pasta OR your favorite pasta
2 grilled chicken breasts or sautéed chicken breasts ( click this link for sautéed chicken recipe)
DIRECTIONS:
Cook up bacon slices, cool and slice or crumble
Grill up or sauté your 2 chicken breasts and dice up into 1″ pieces
Blanch your asparagus and if grilling, throw onto grill just briefly for grill flavor, remove and slice into 1″ pieces
Cook fettuccine according to directions on box
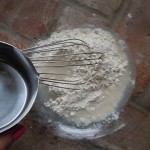
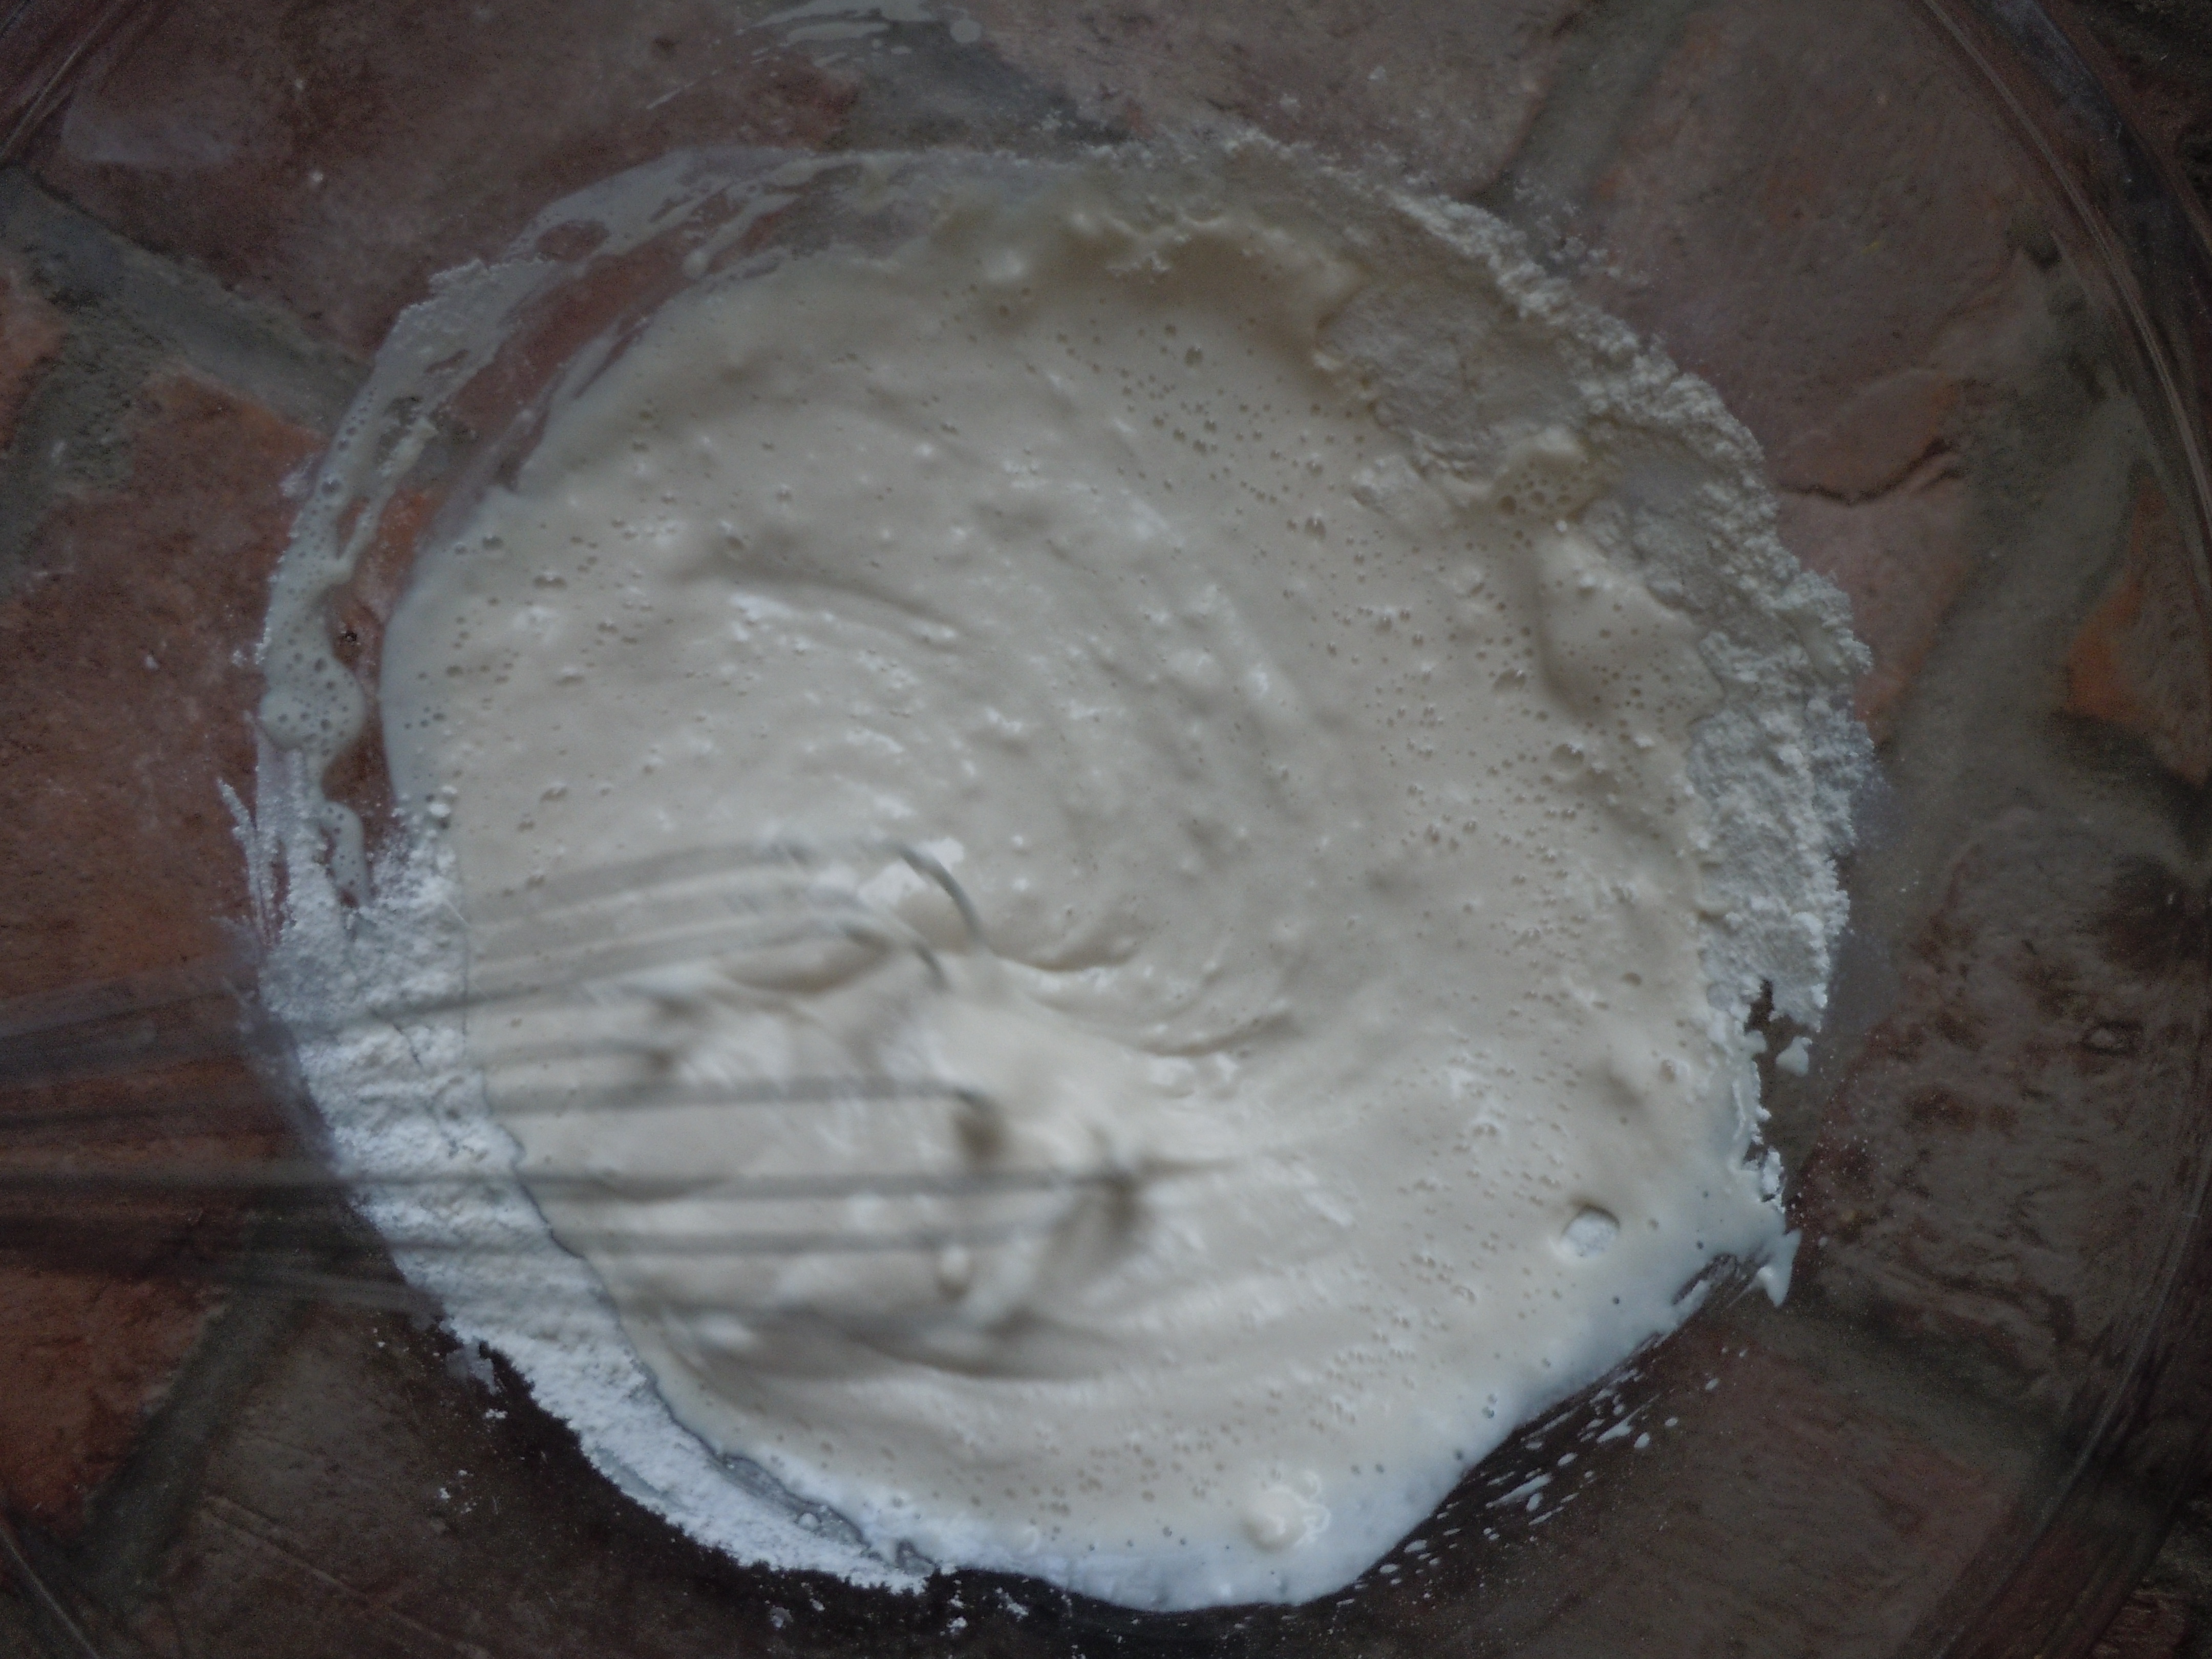
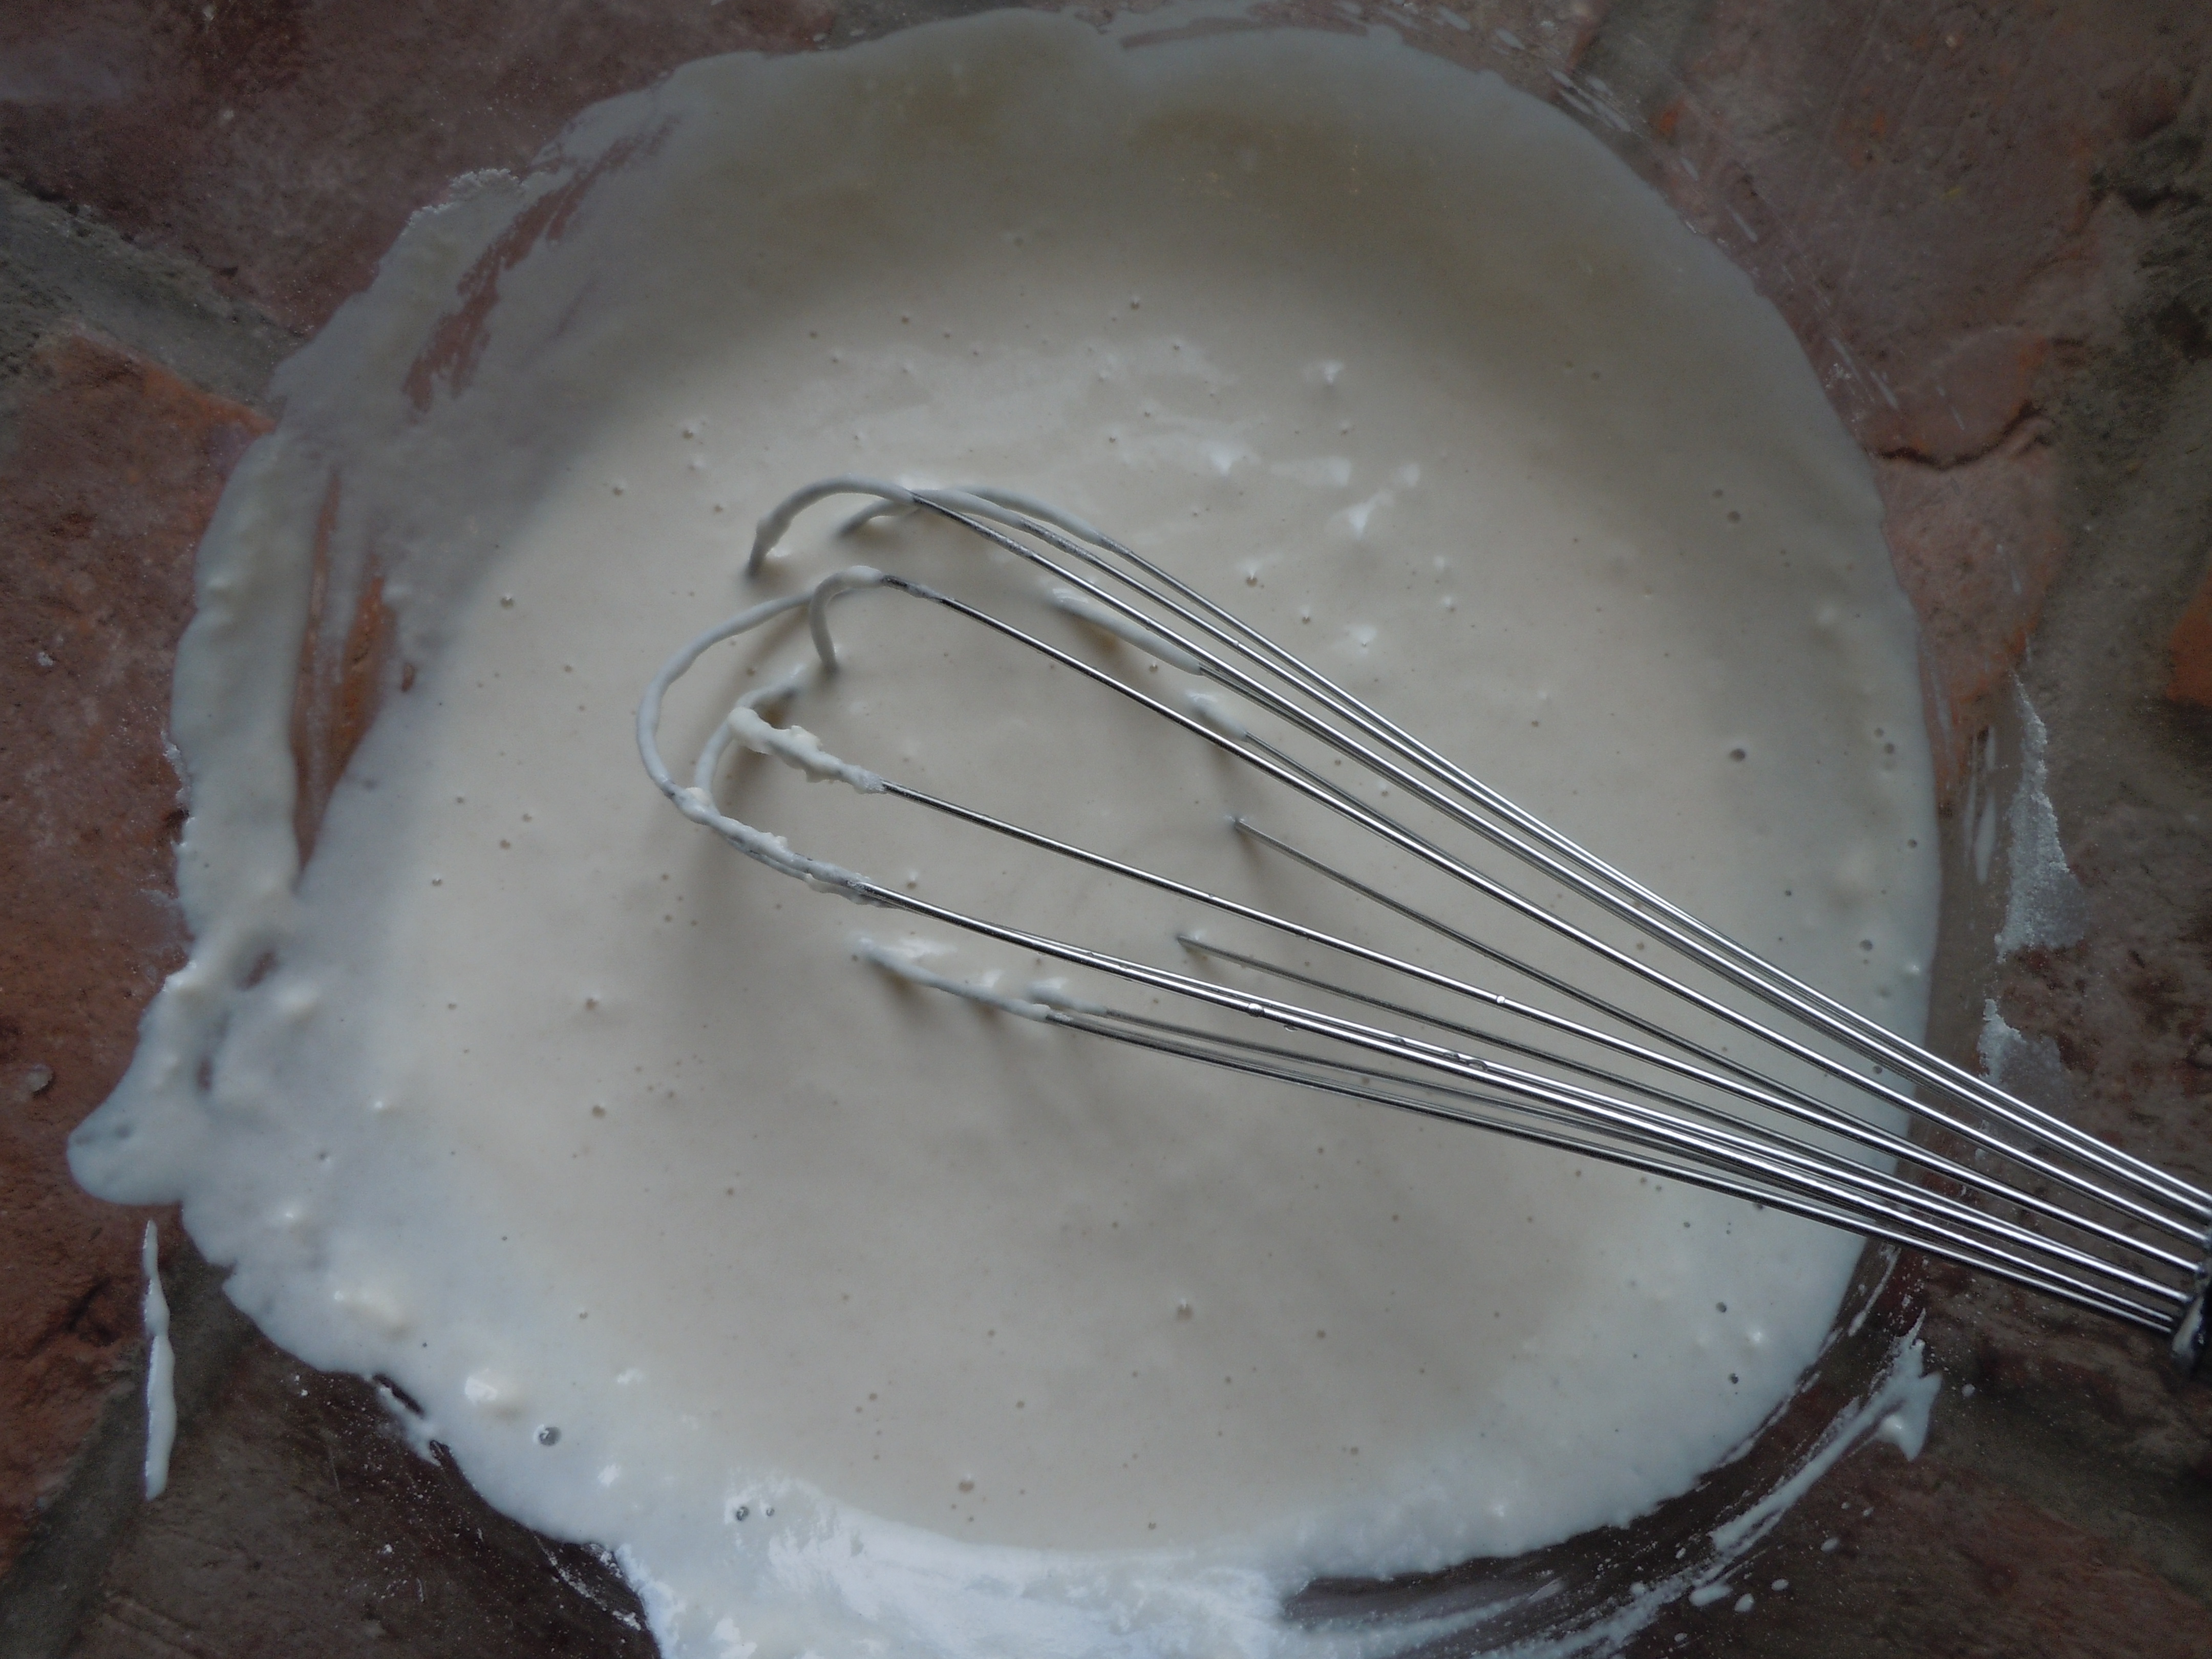
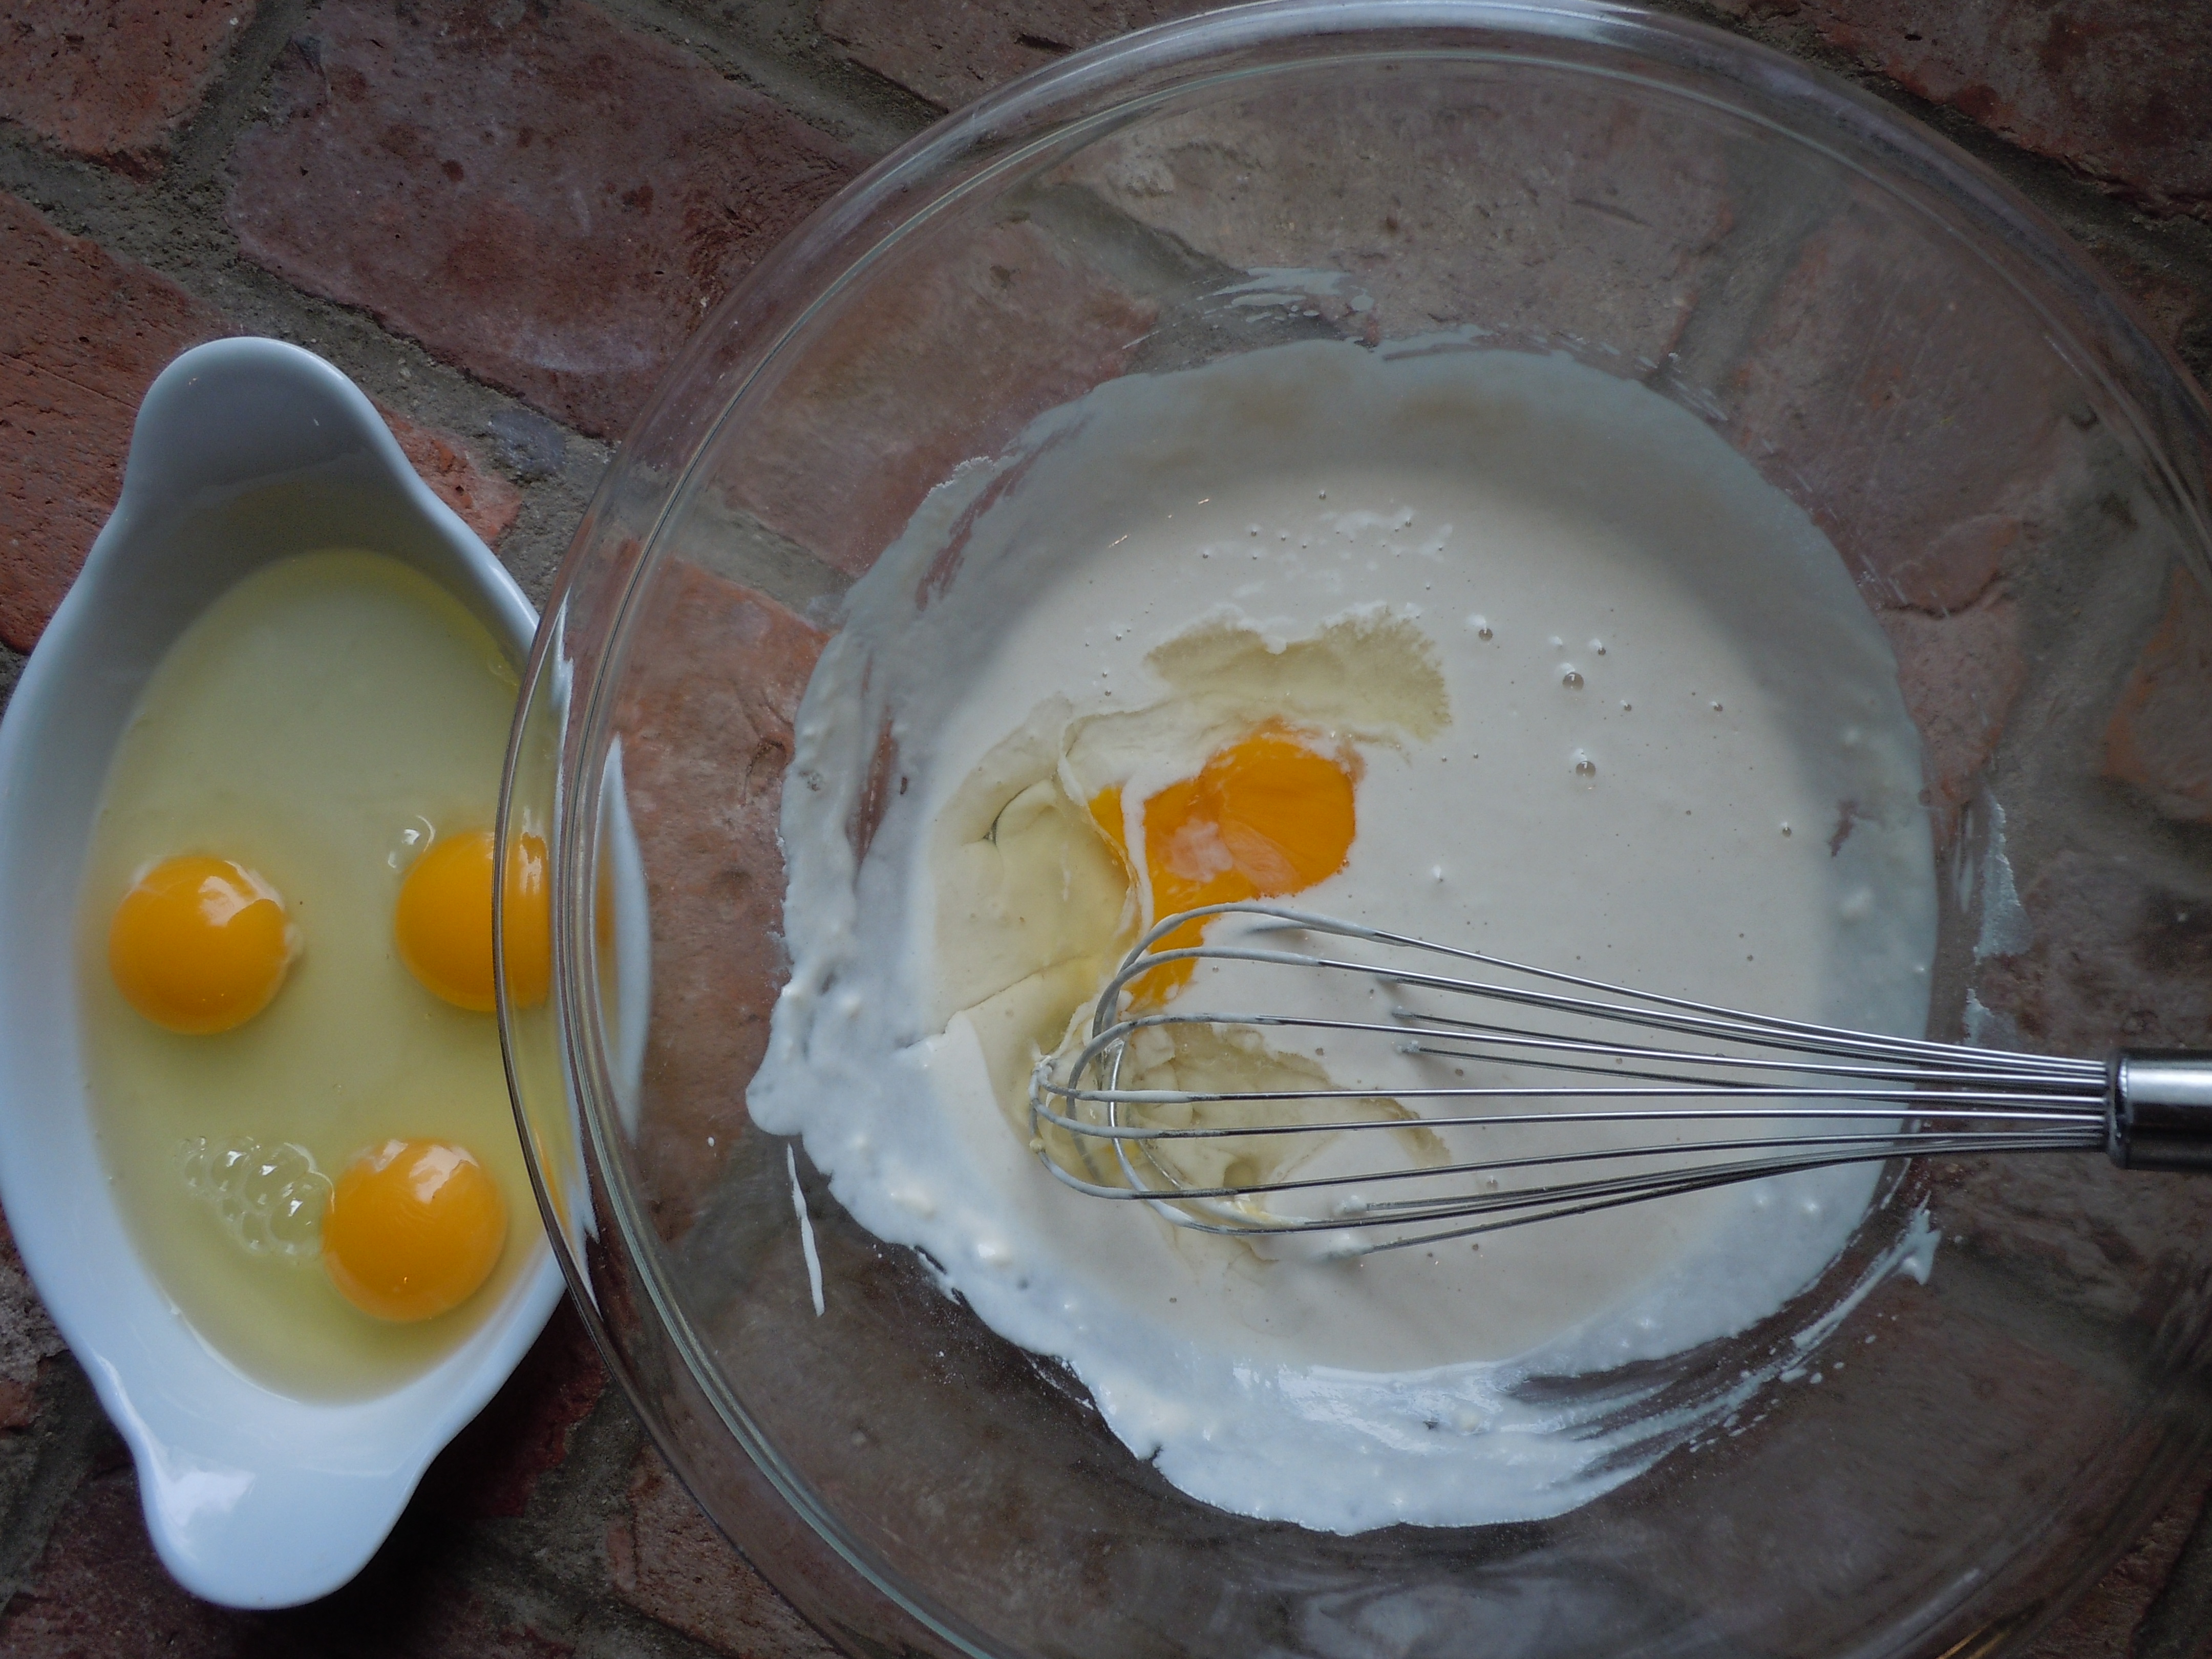
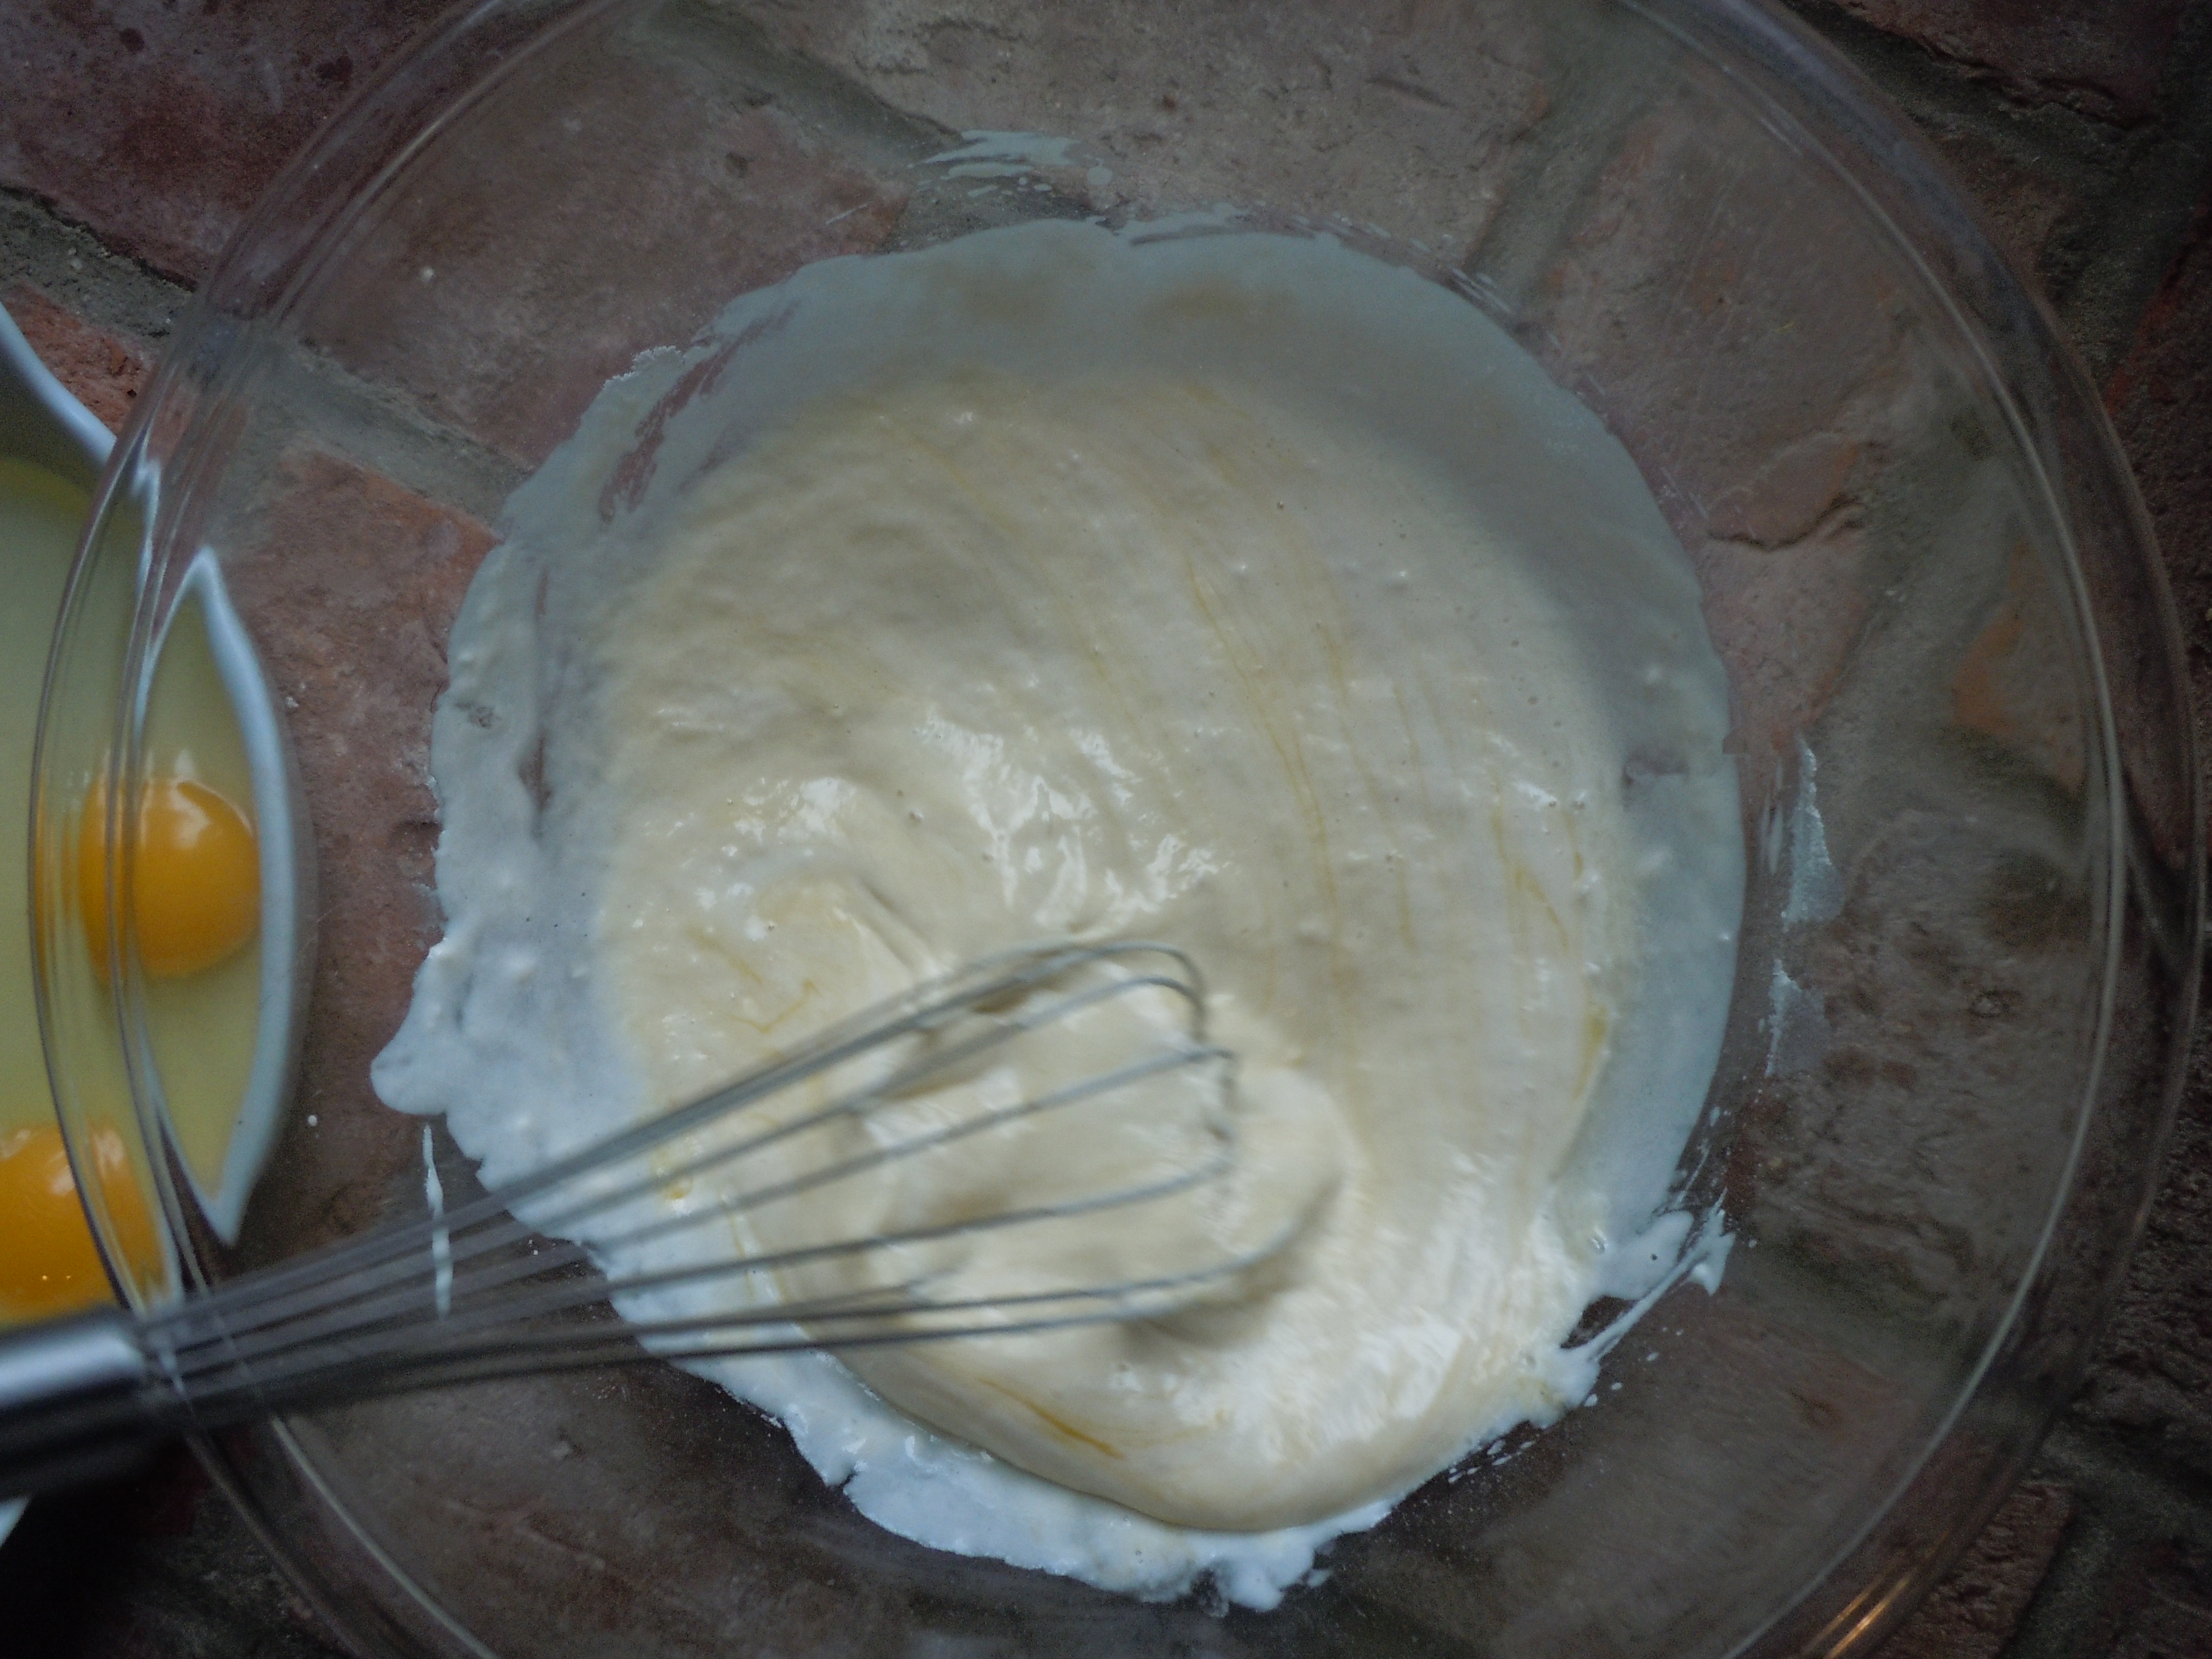
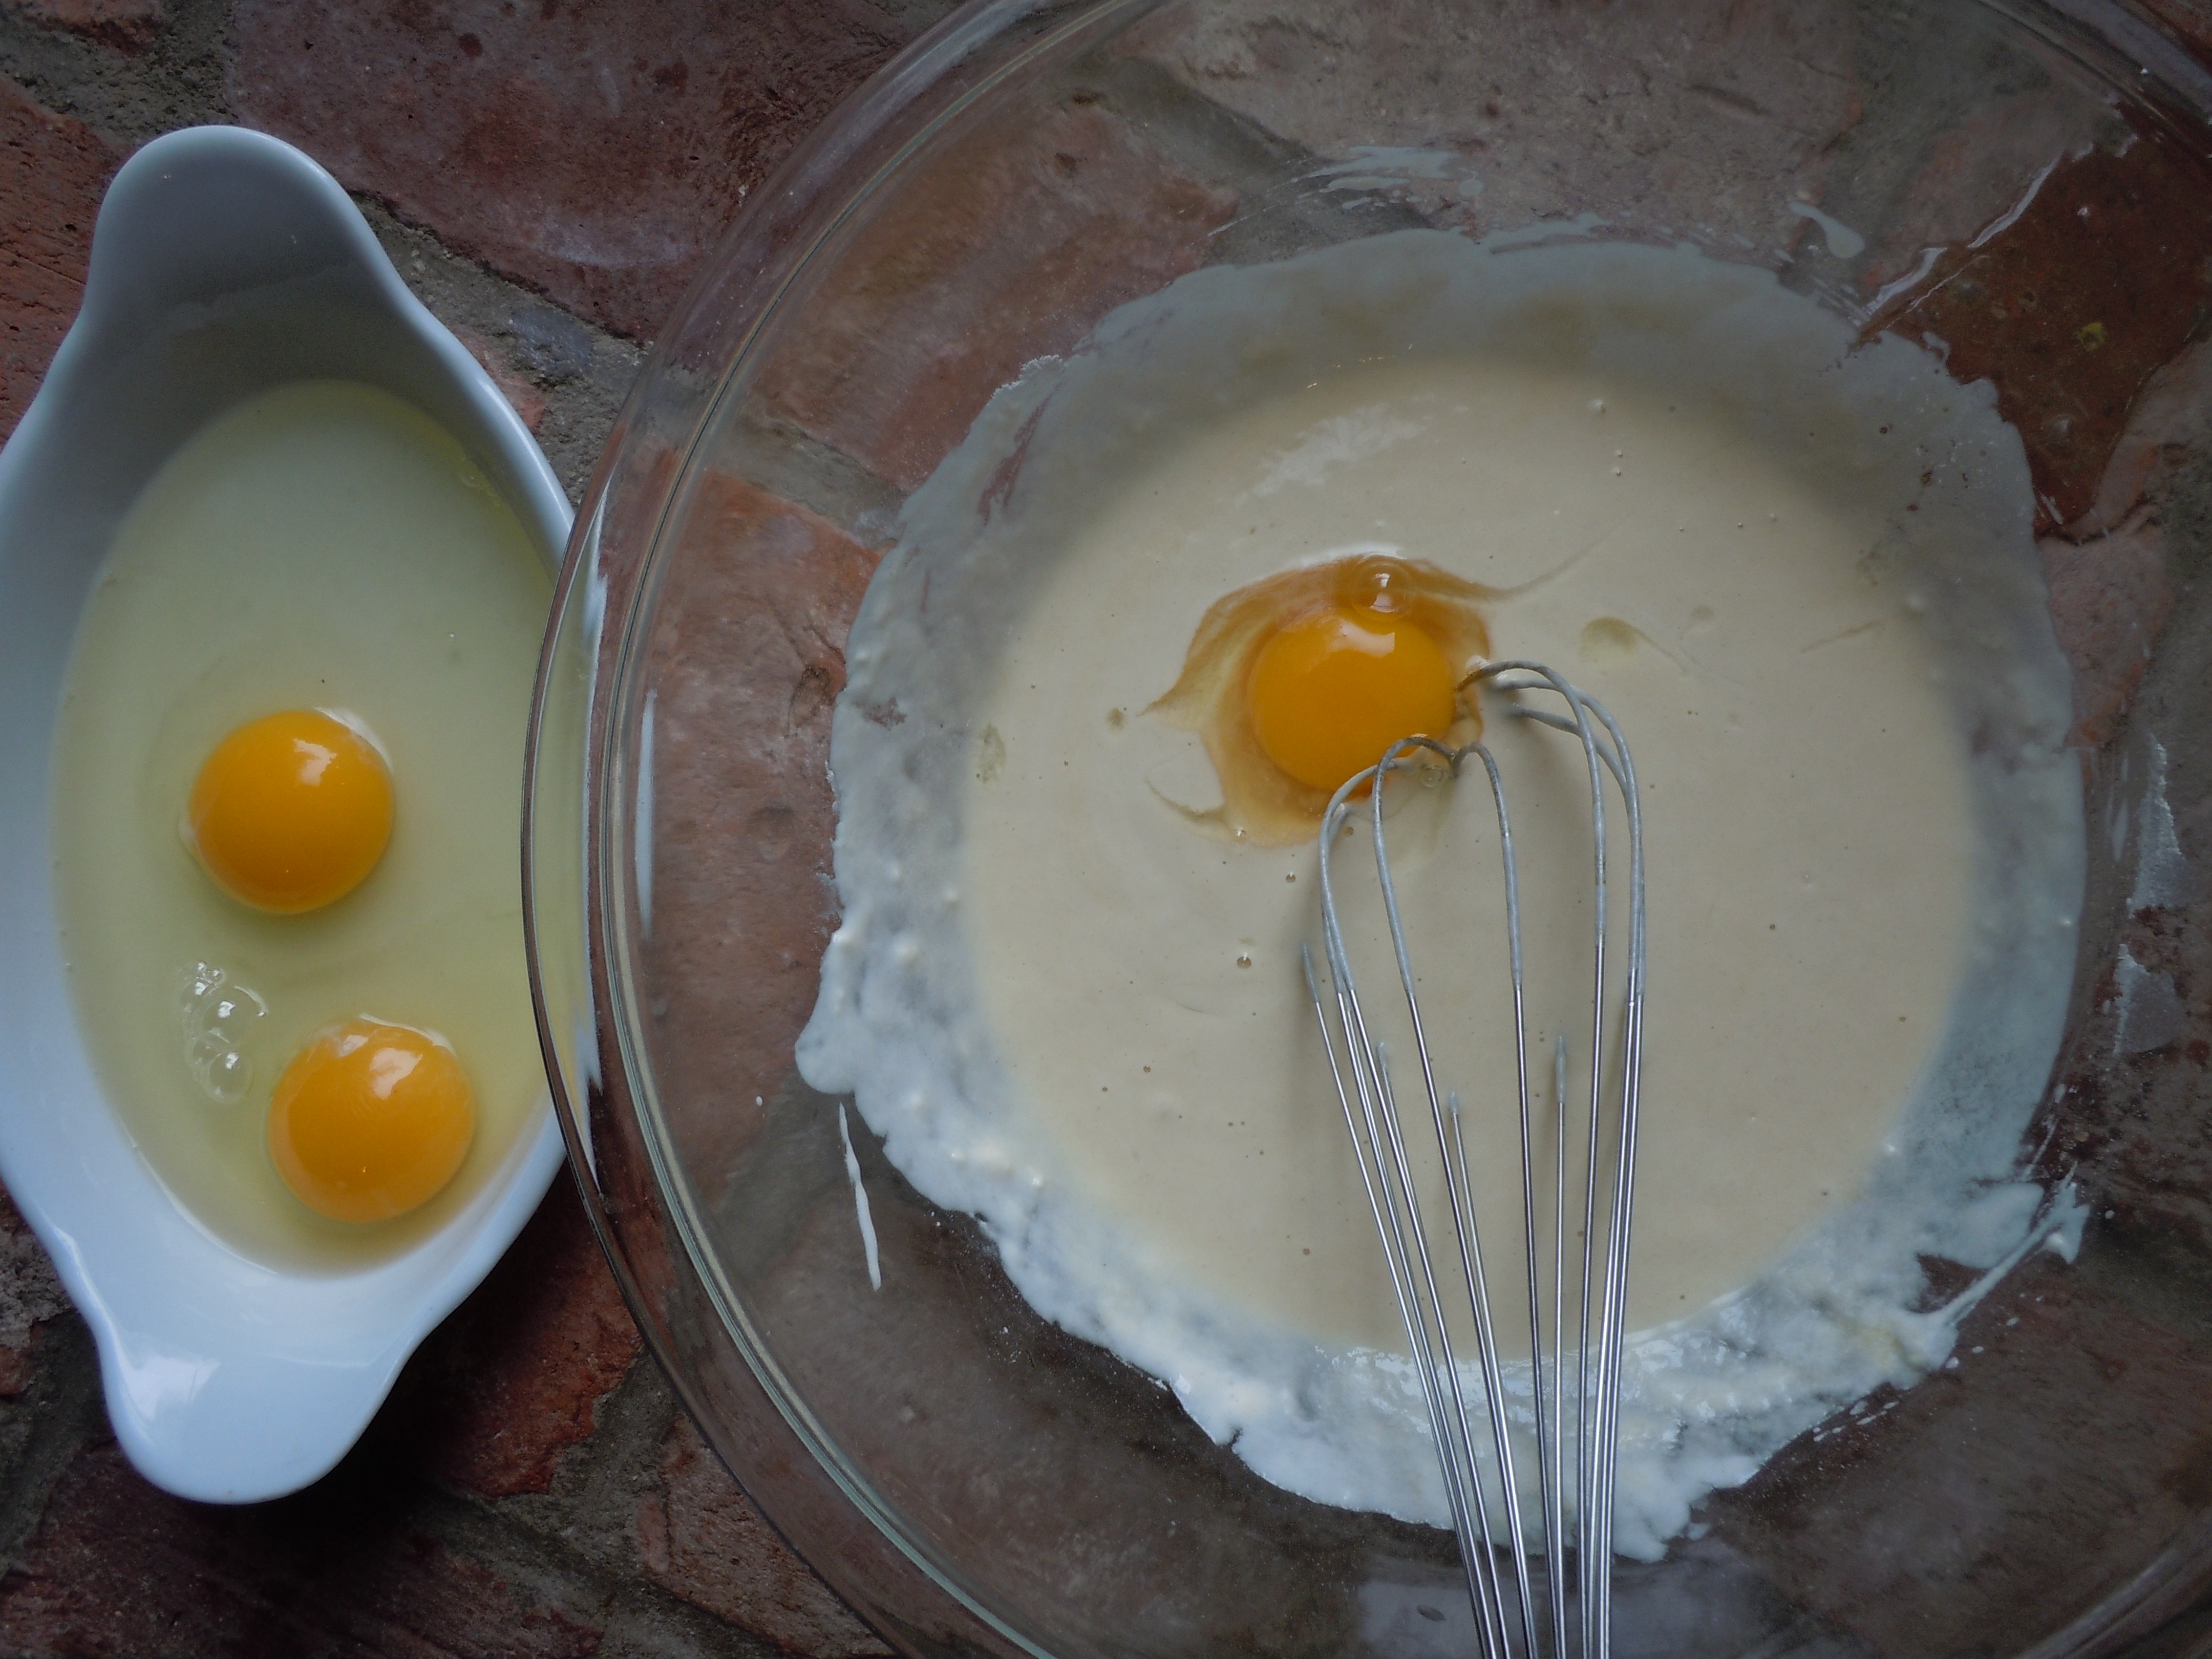
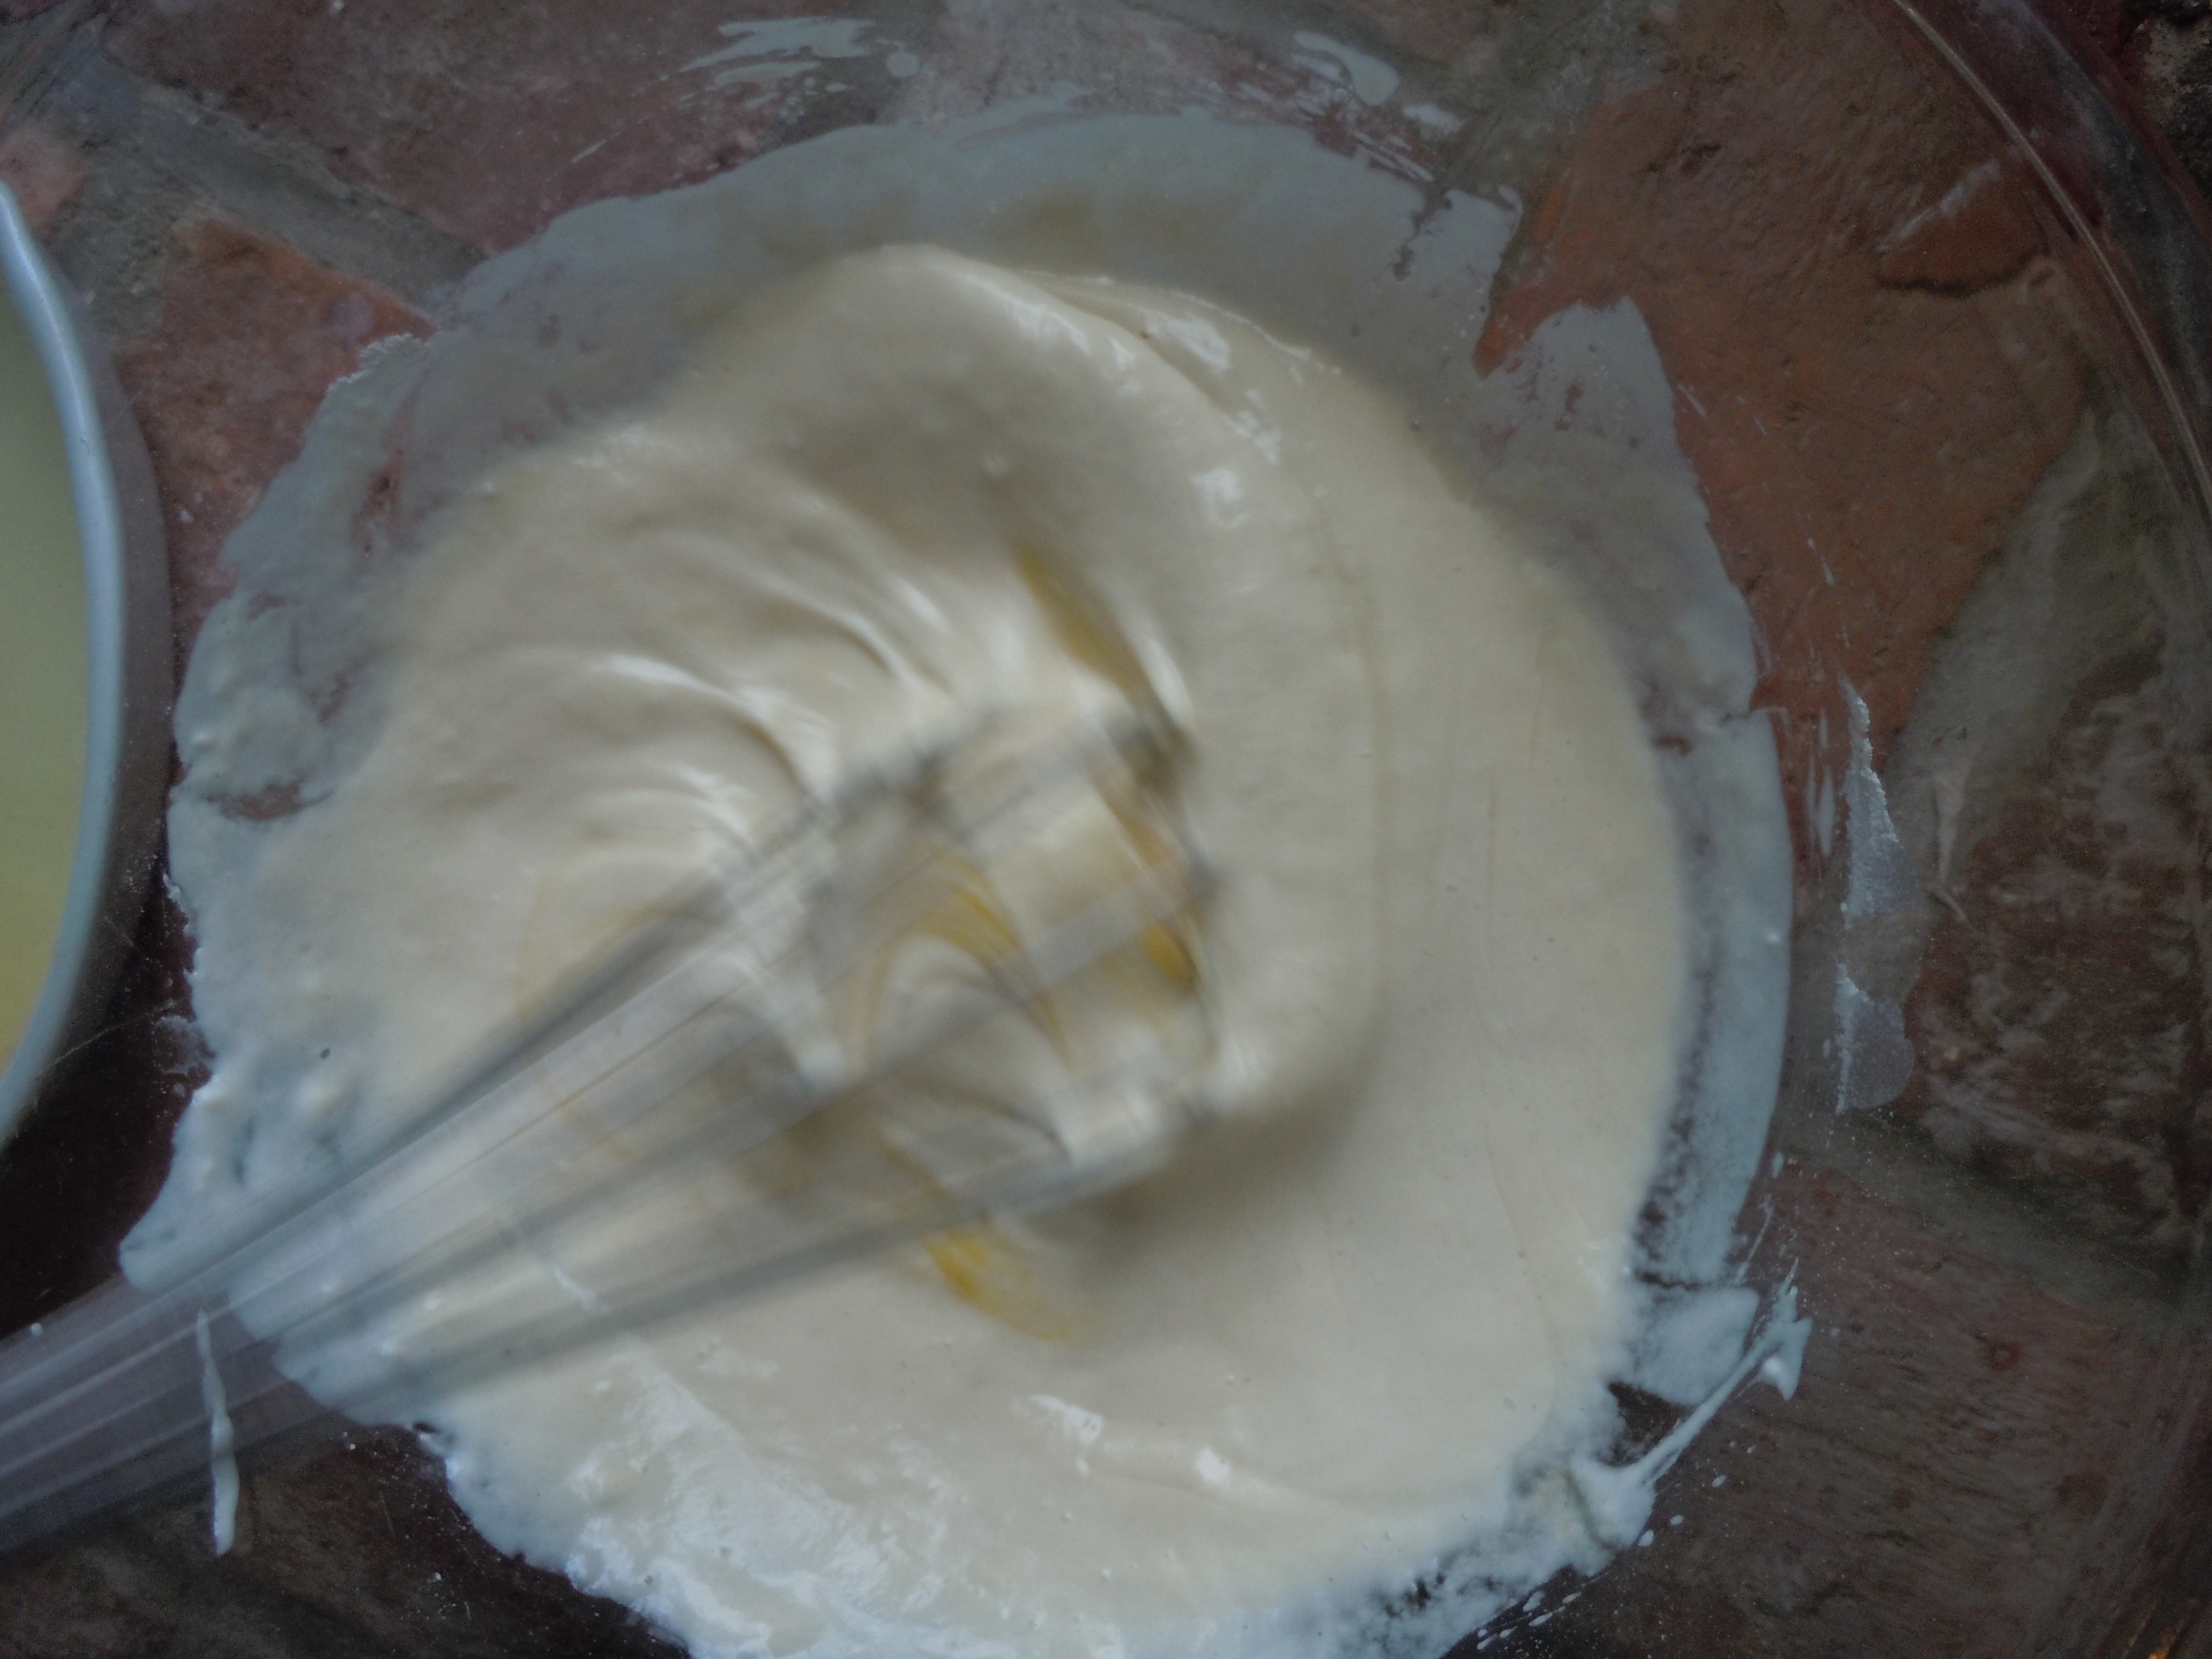
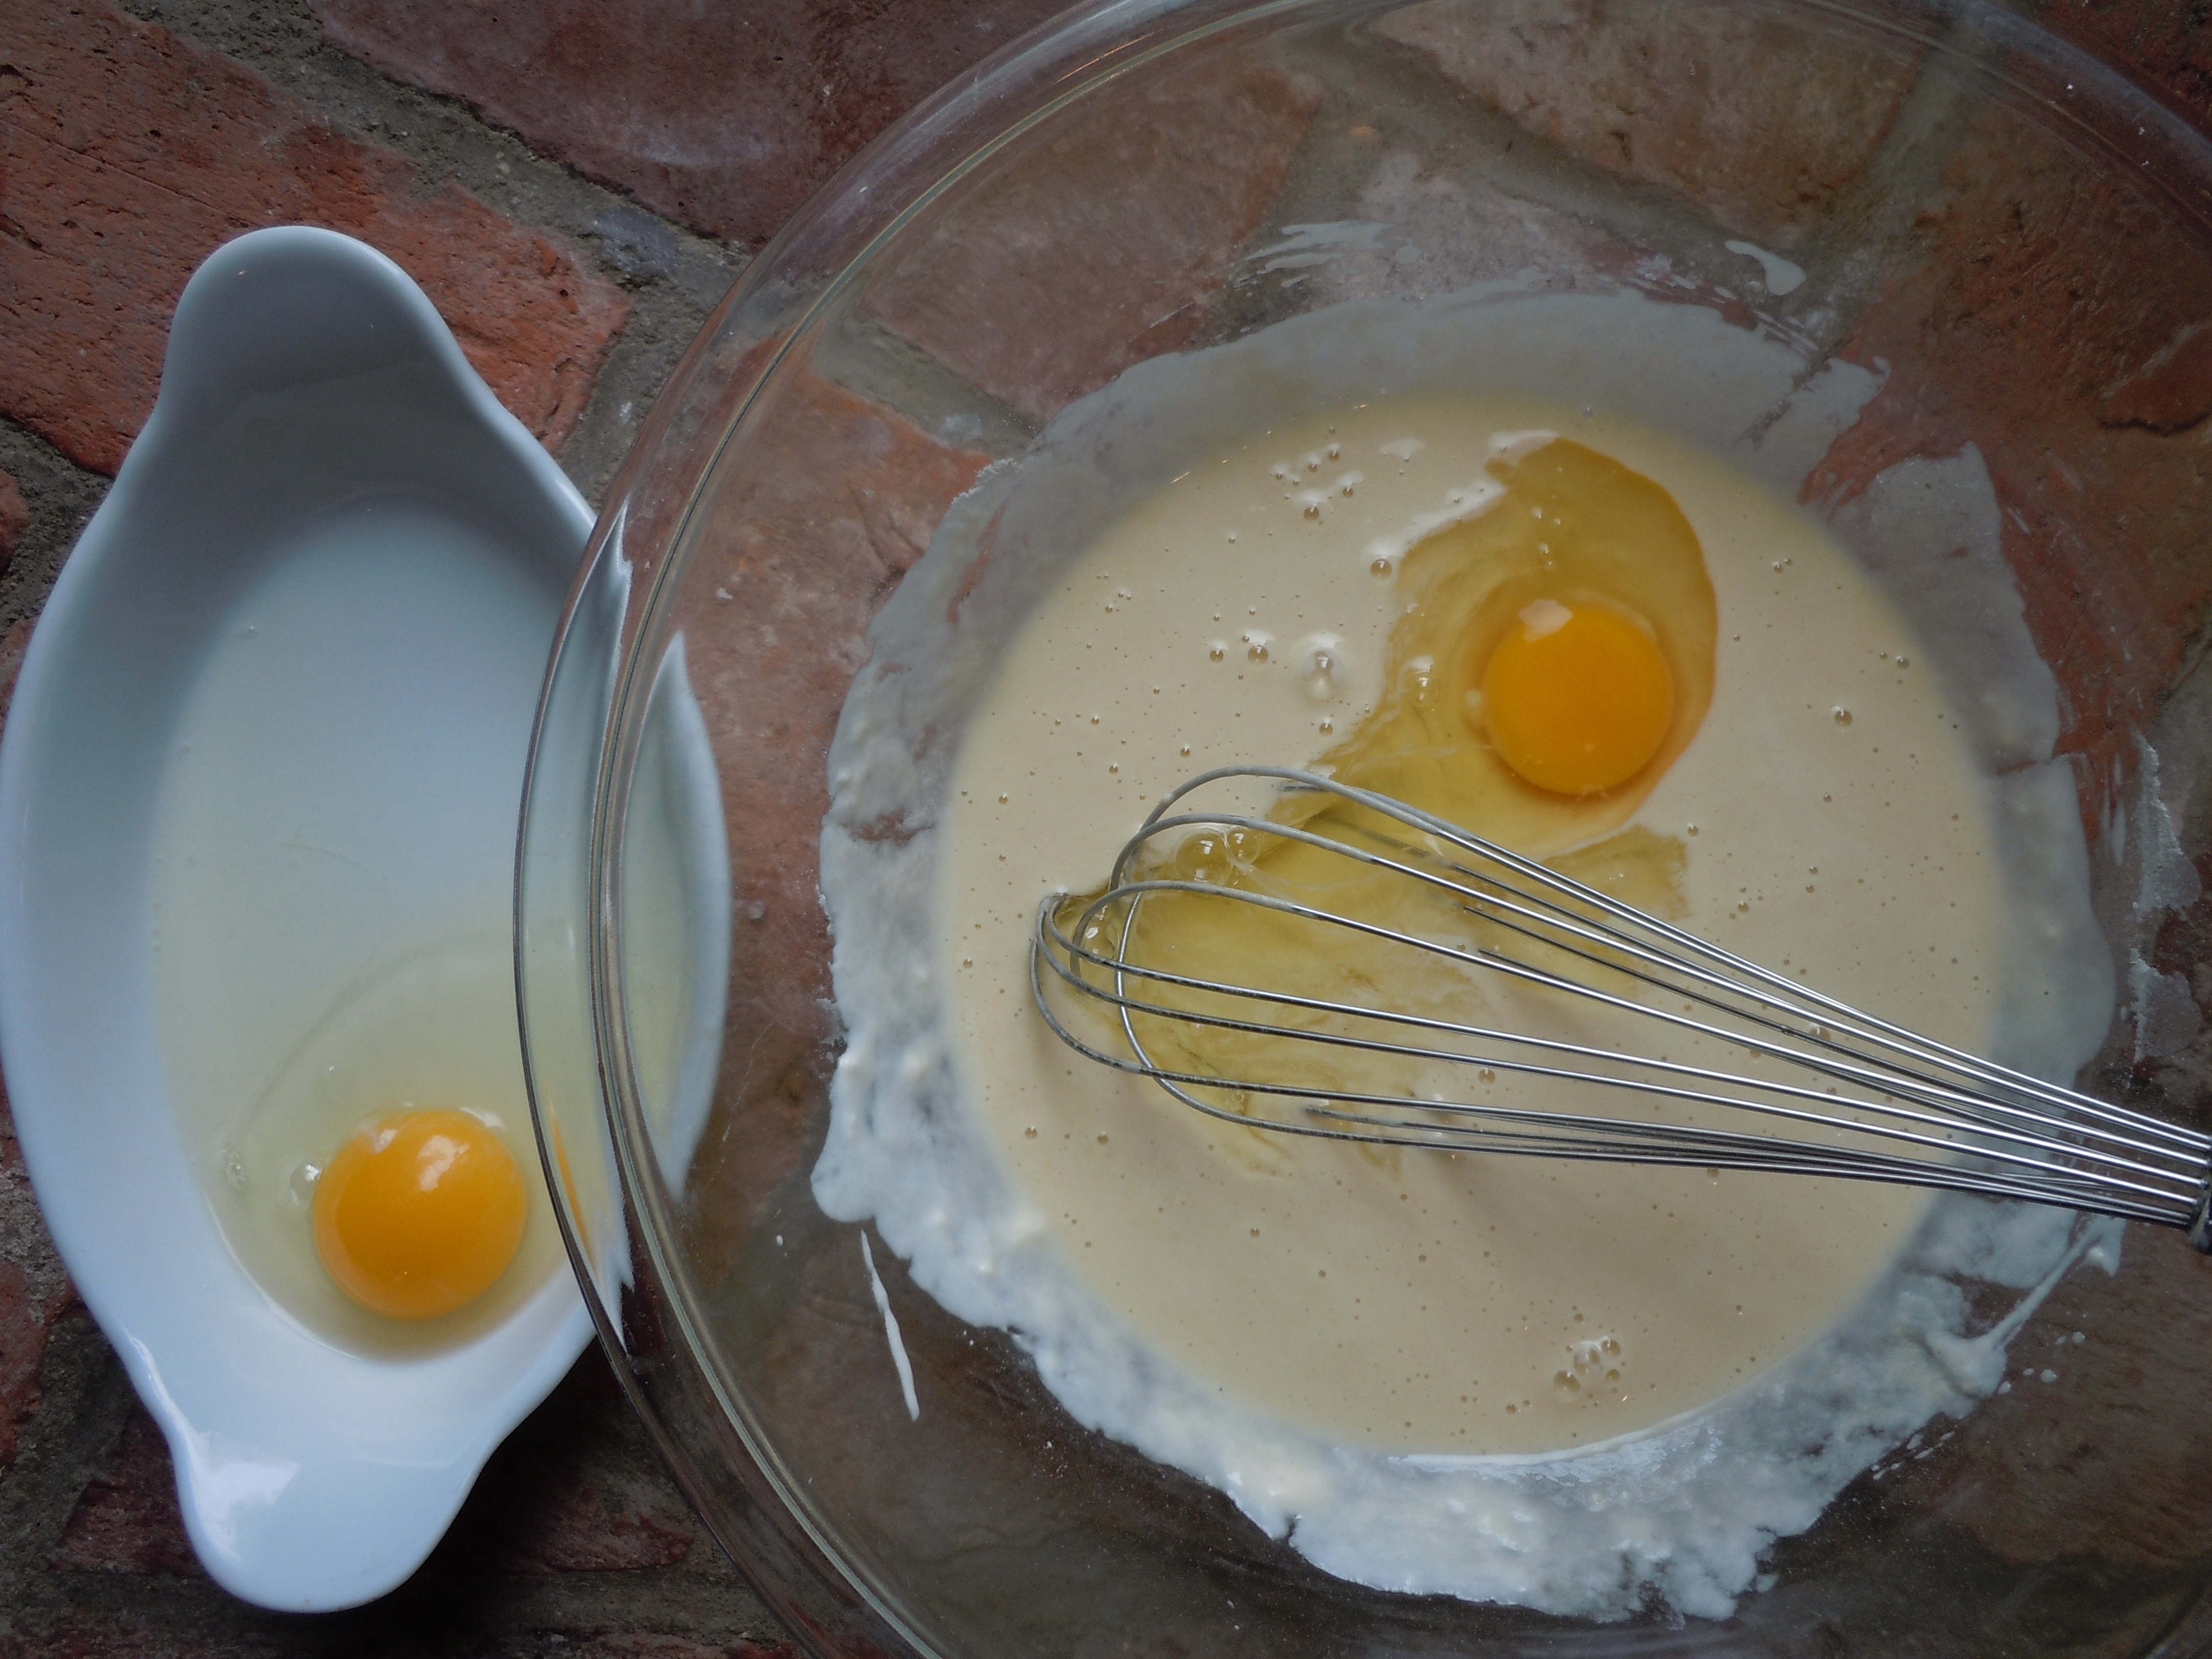
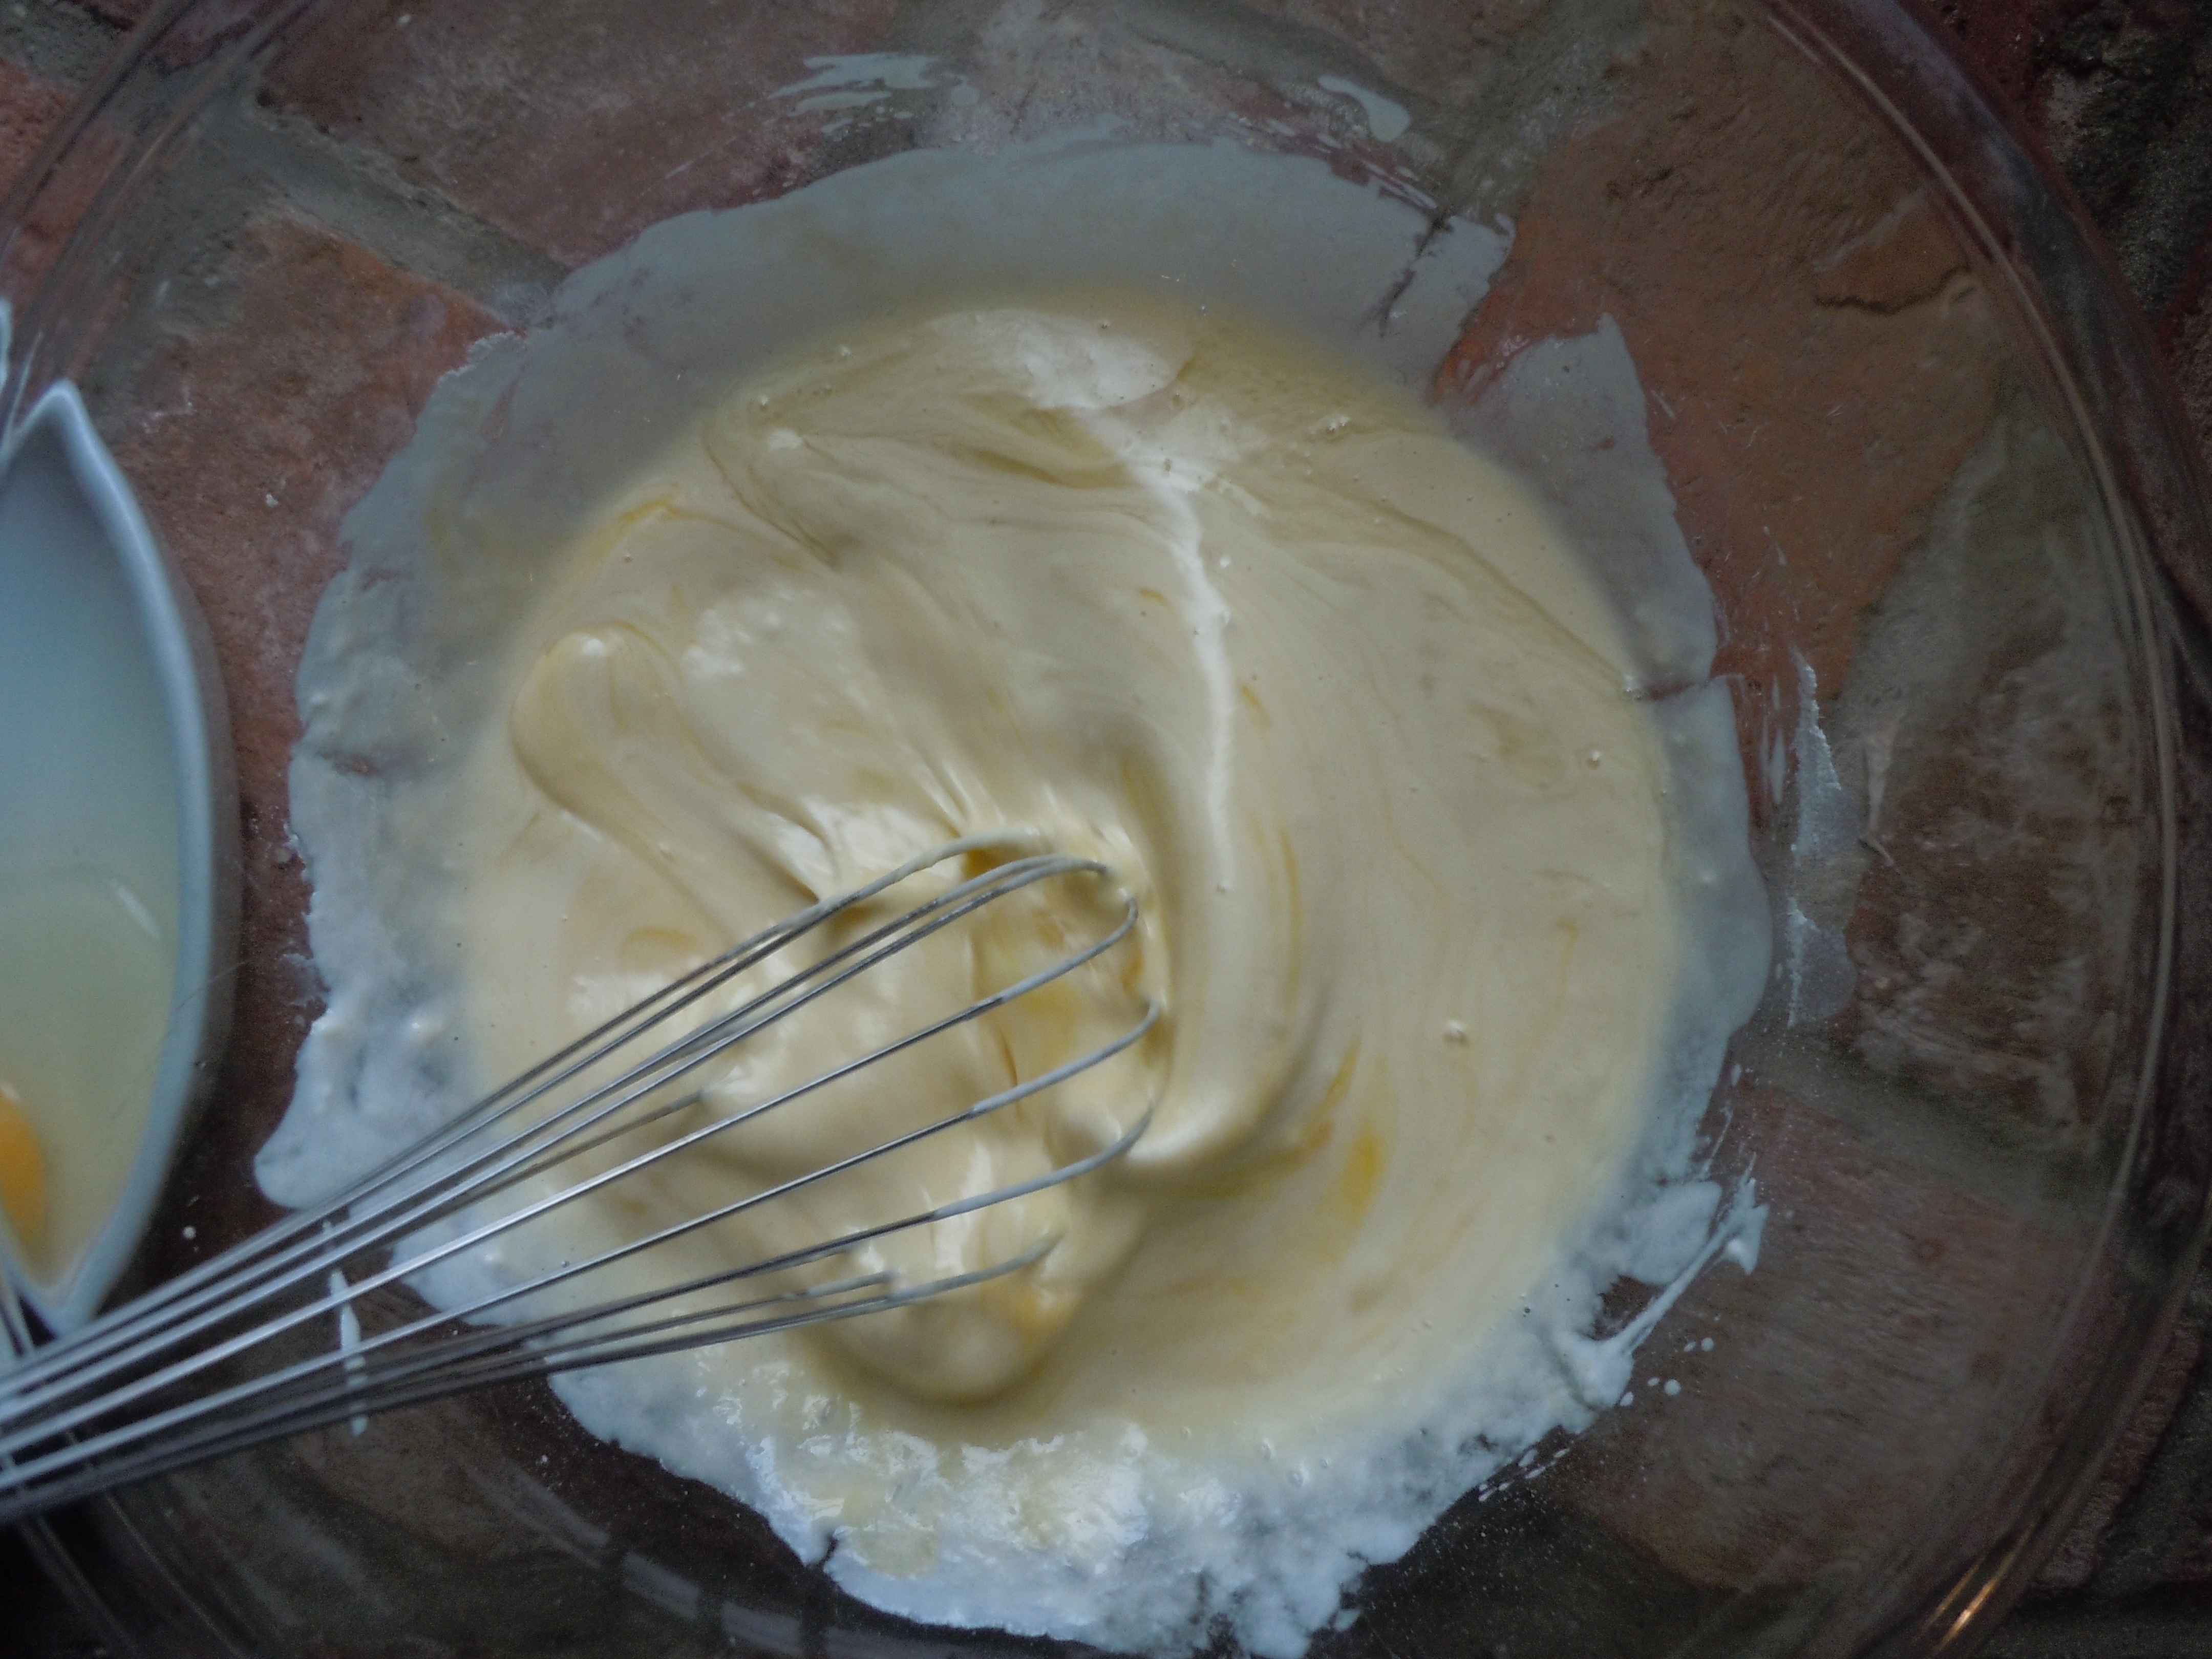
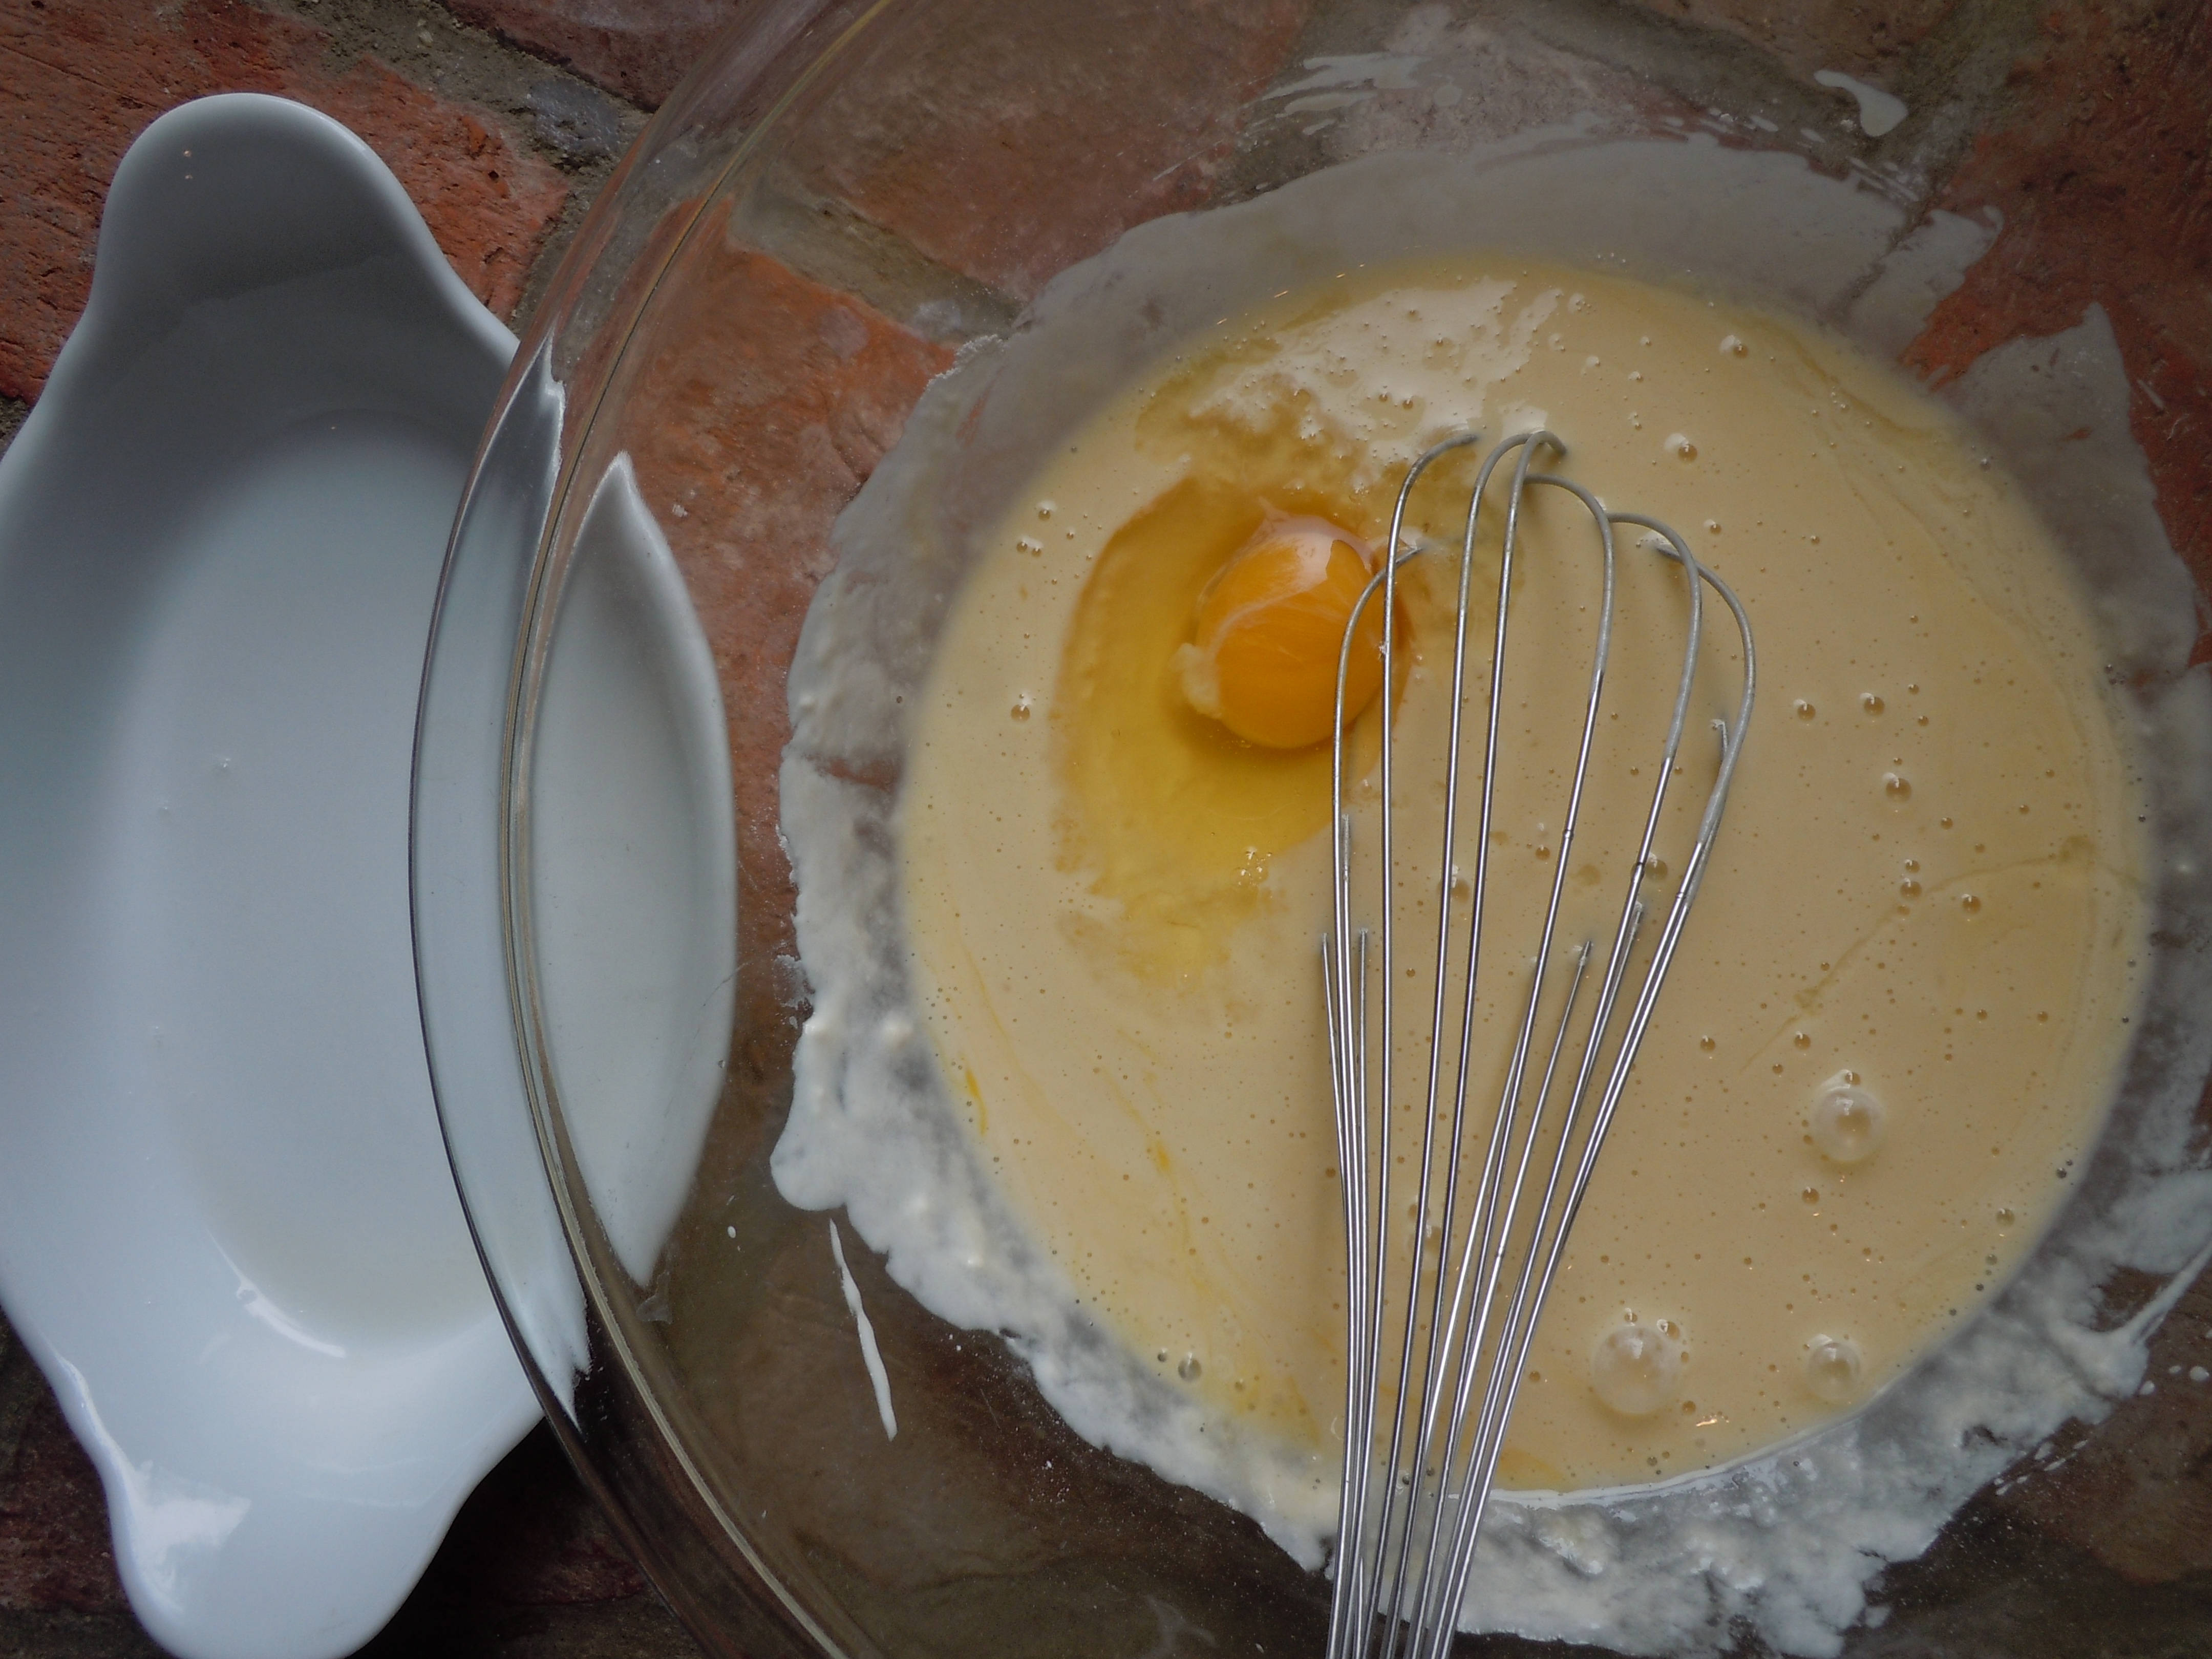
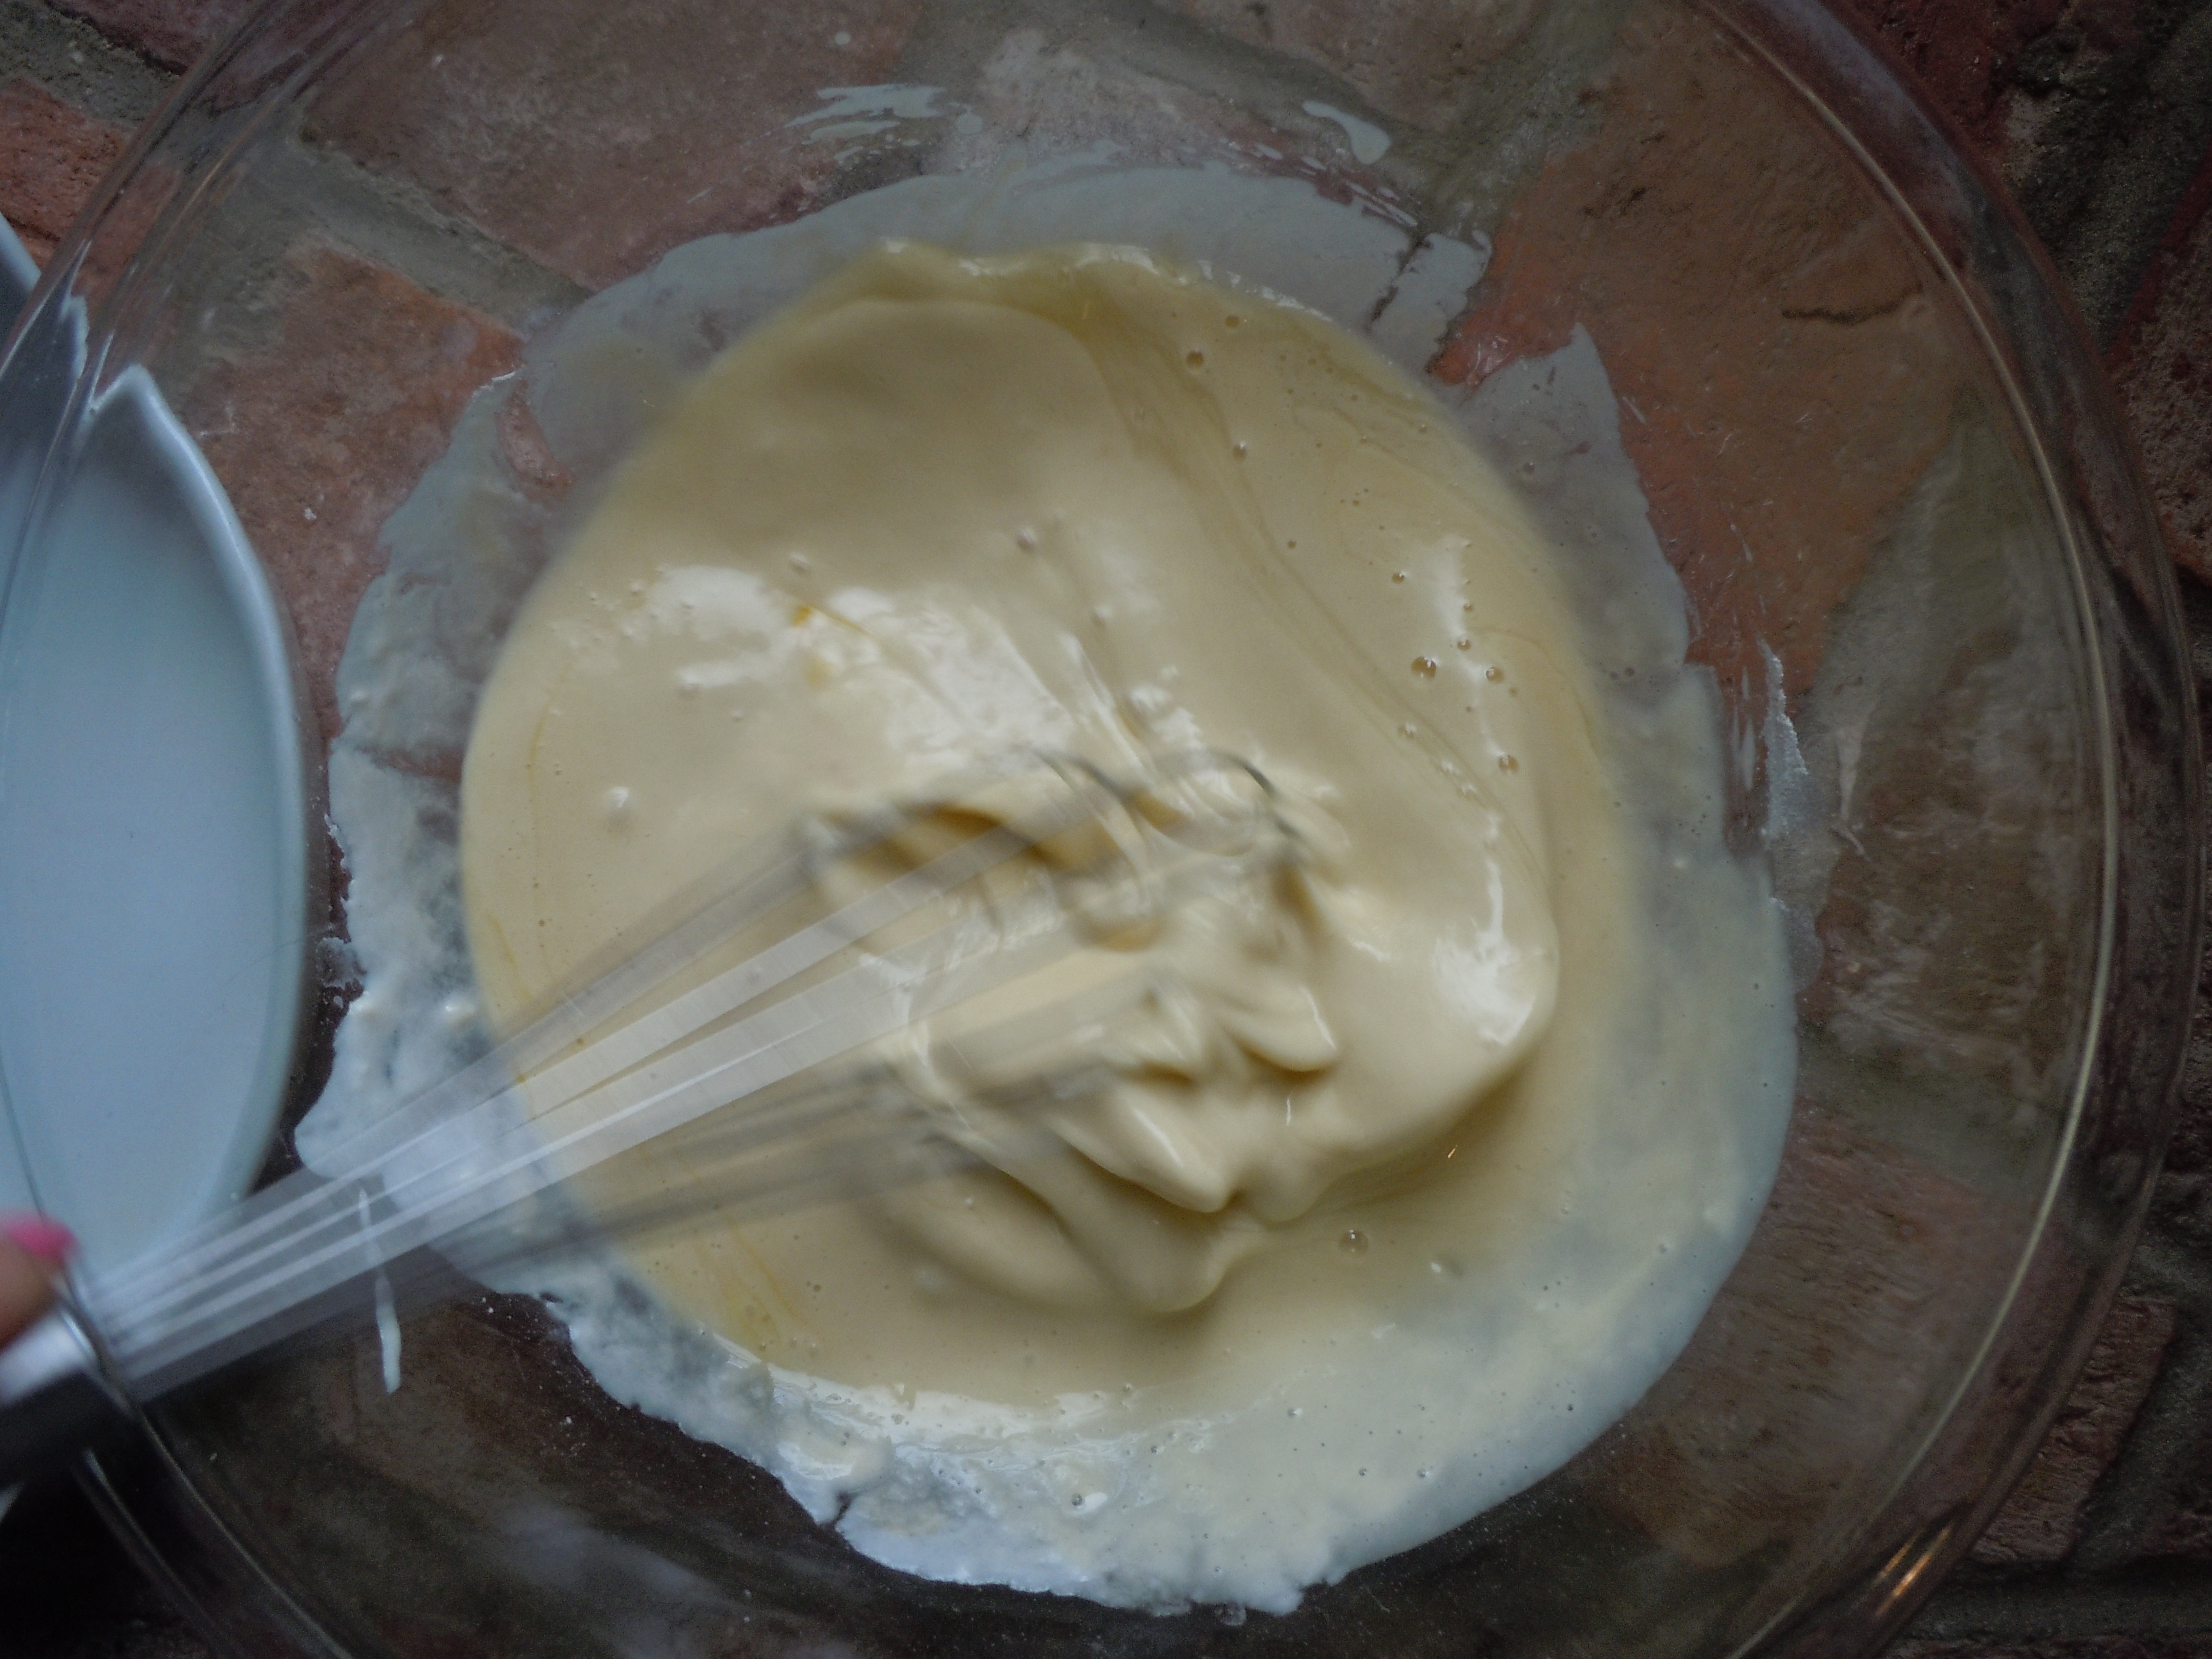
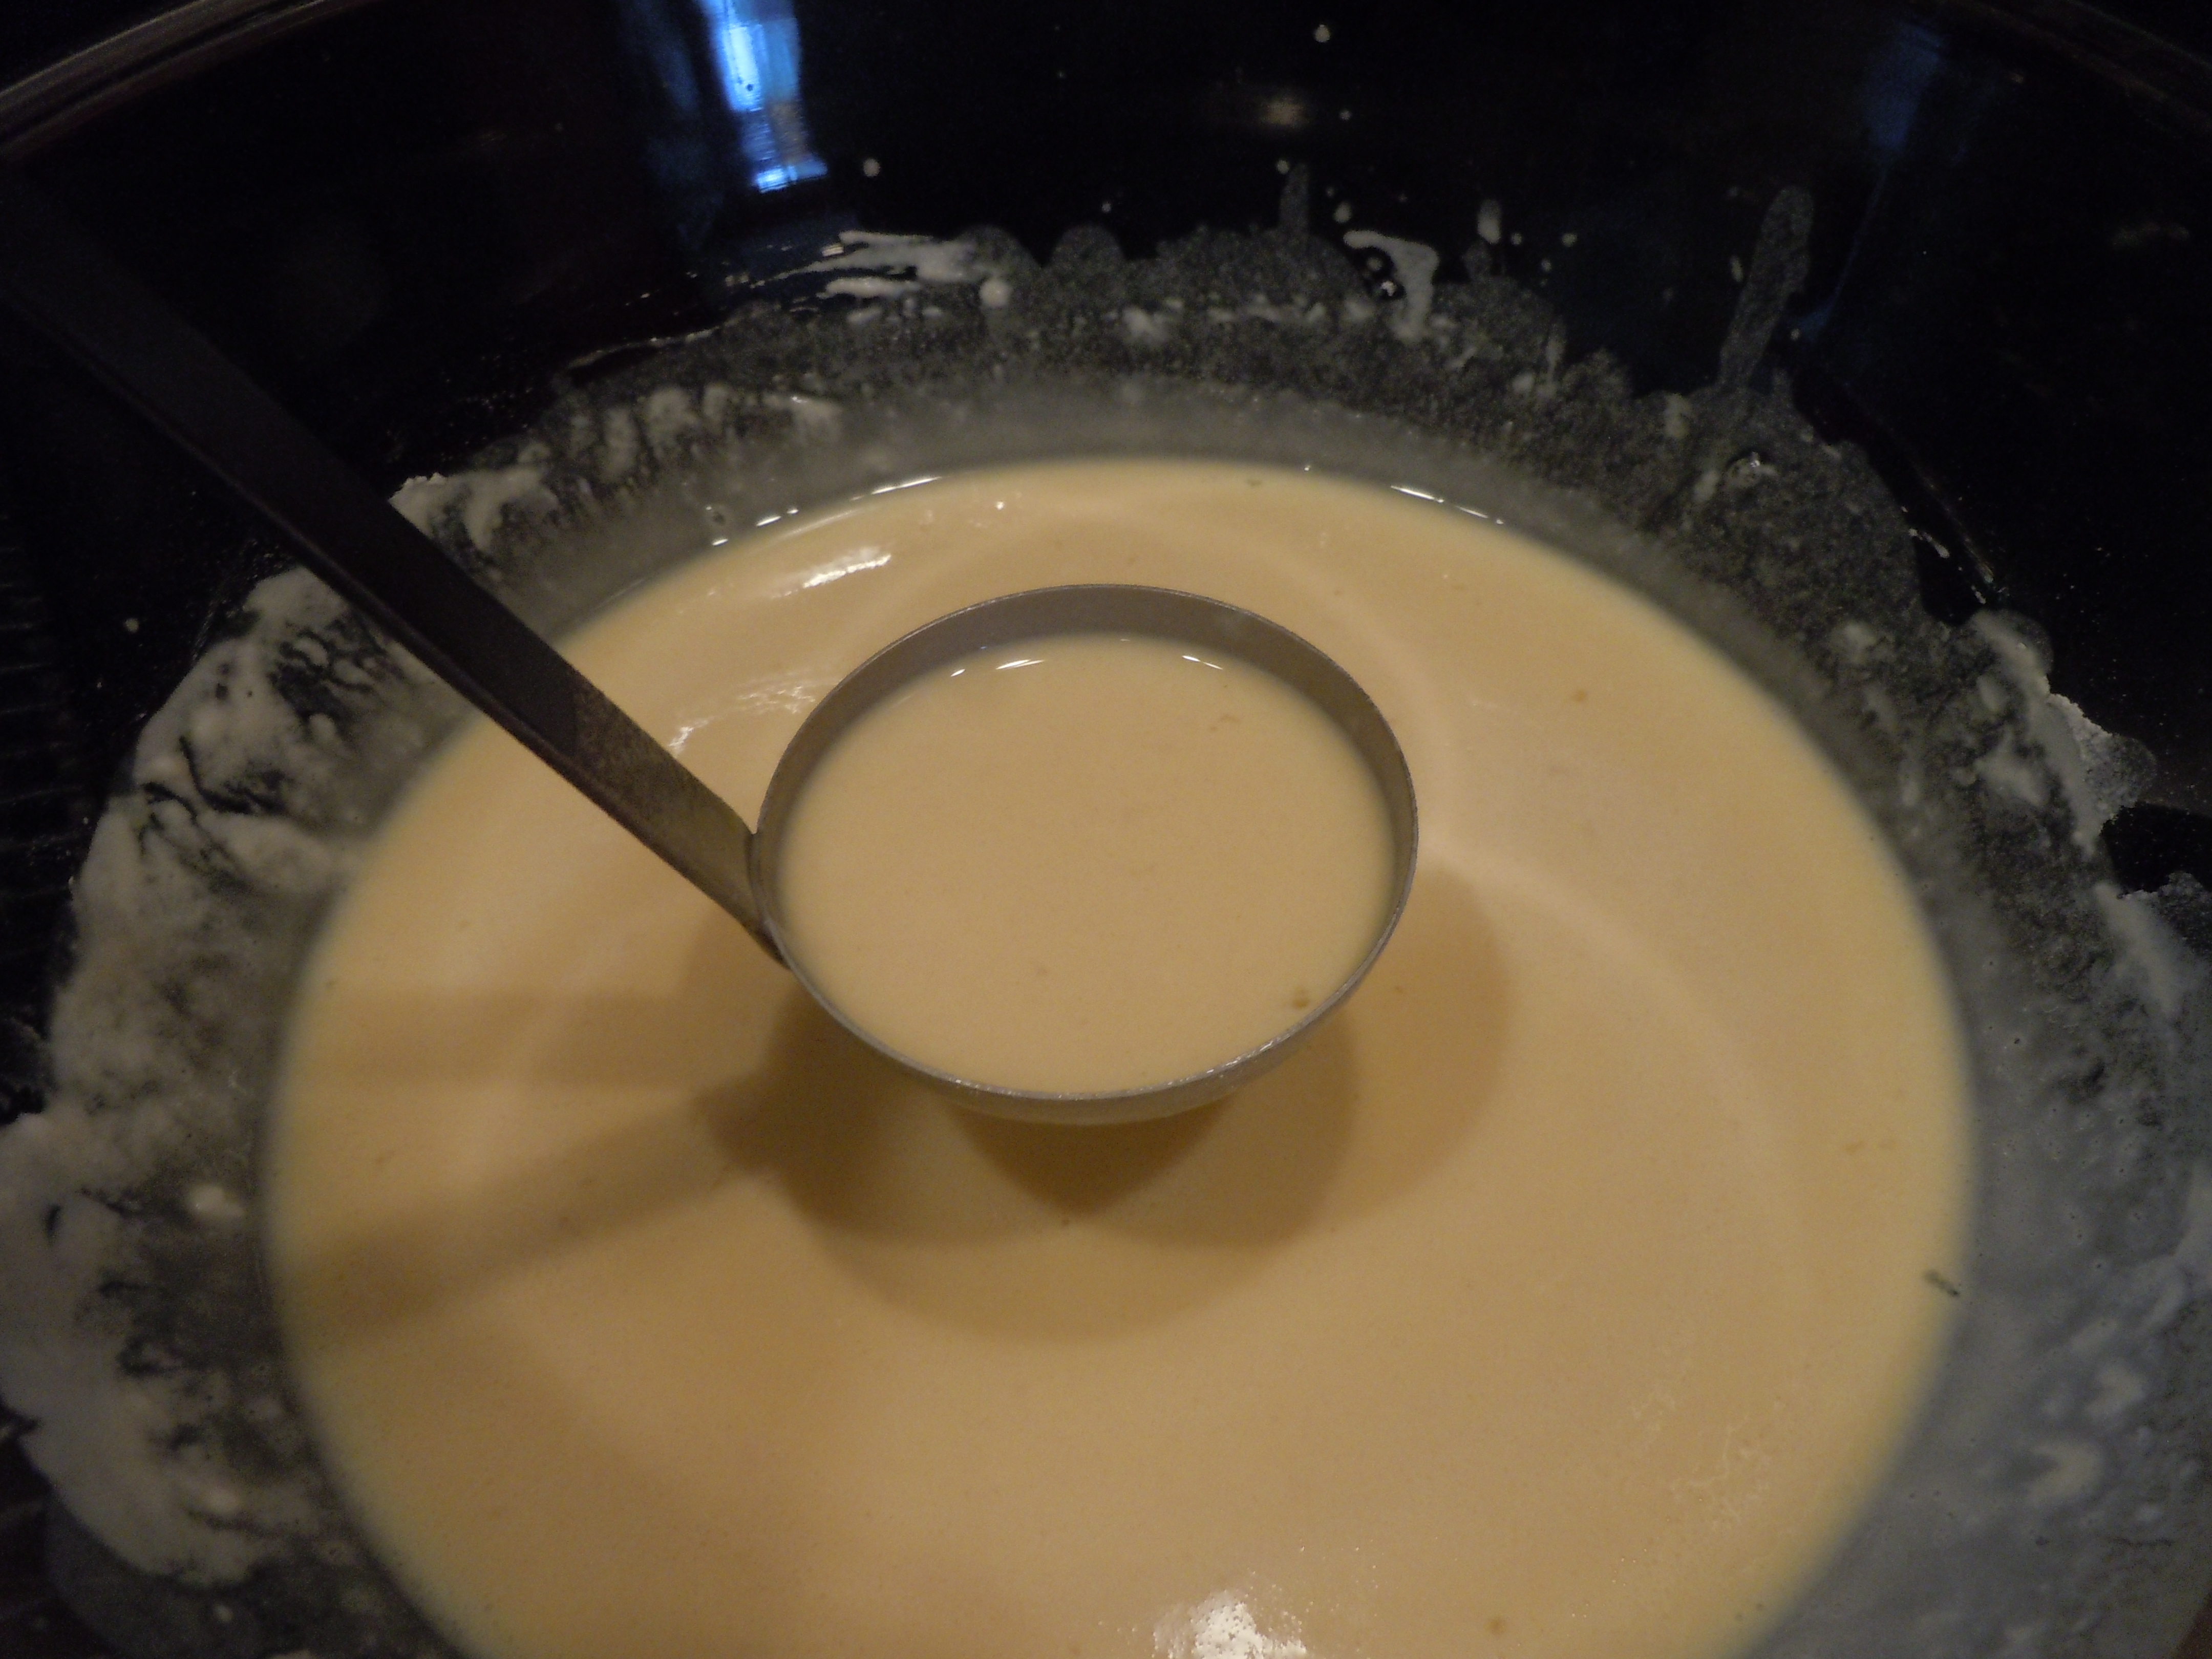
Add heavy cream to a large sauce pan with wine and bring to a simmer for 5 minutes
If chicken has cooled add in diced chicken and asparagus and simmer for 5 minutes
Turn off the heat to sauce pan and whisk in 1 1/2 cup Reggiano cheese
Place cooked pasta into a large serving bowl, pour over the Alfredo sauce and toss
Serve and garnish with bacon and more grated Reggiano
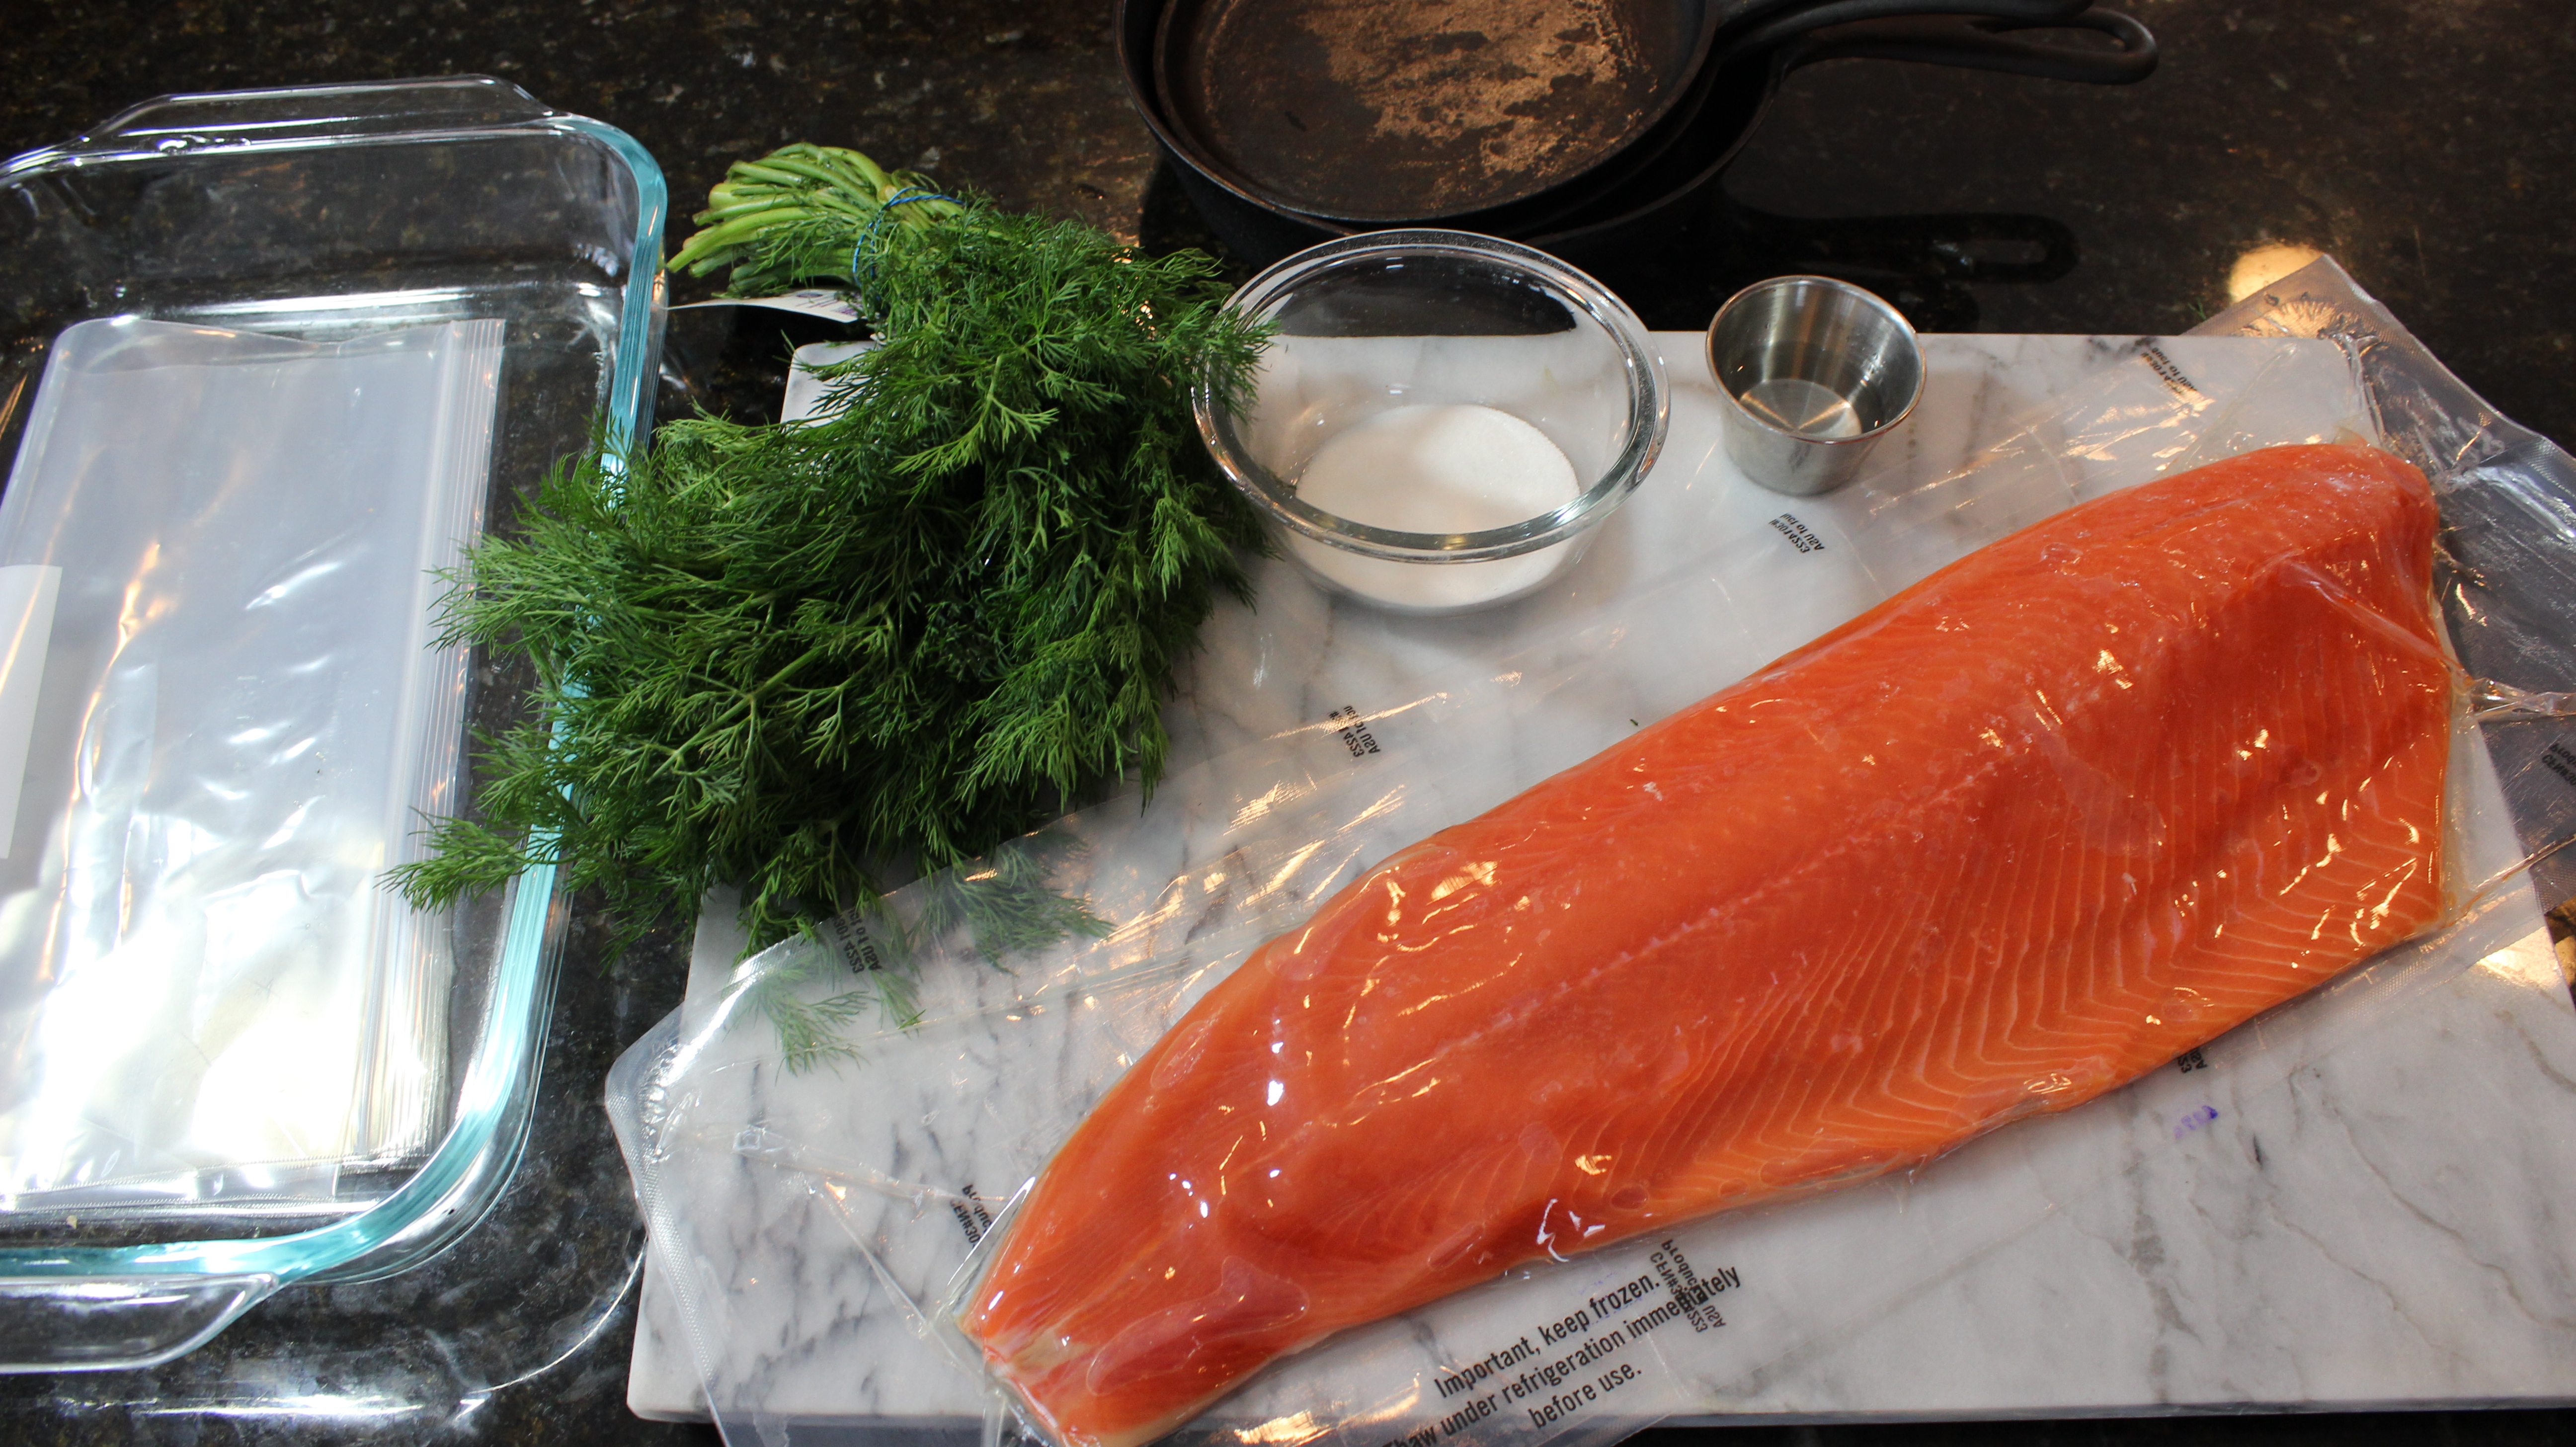
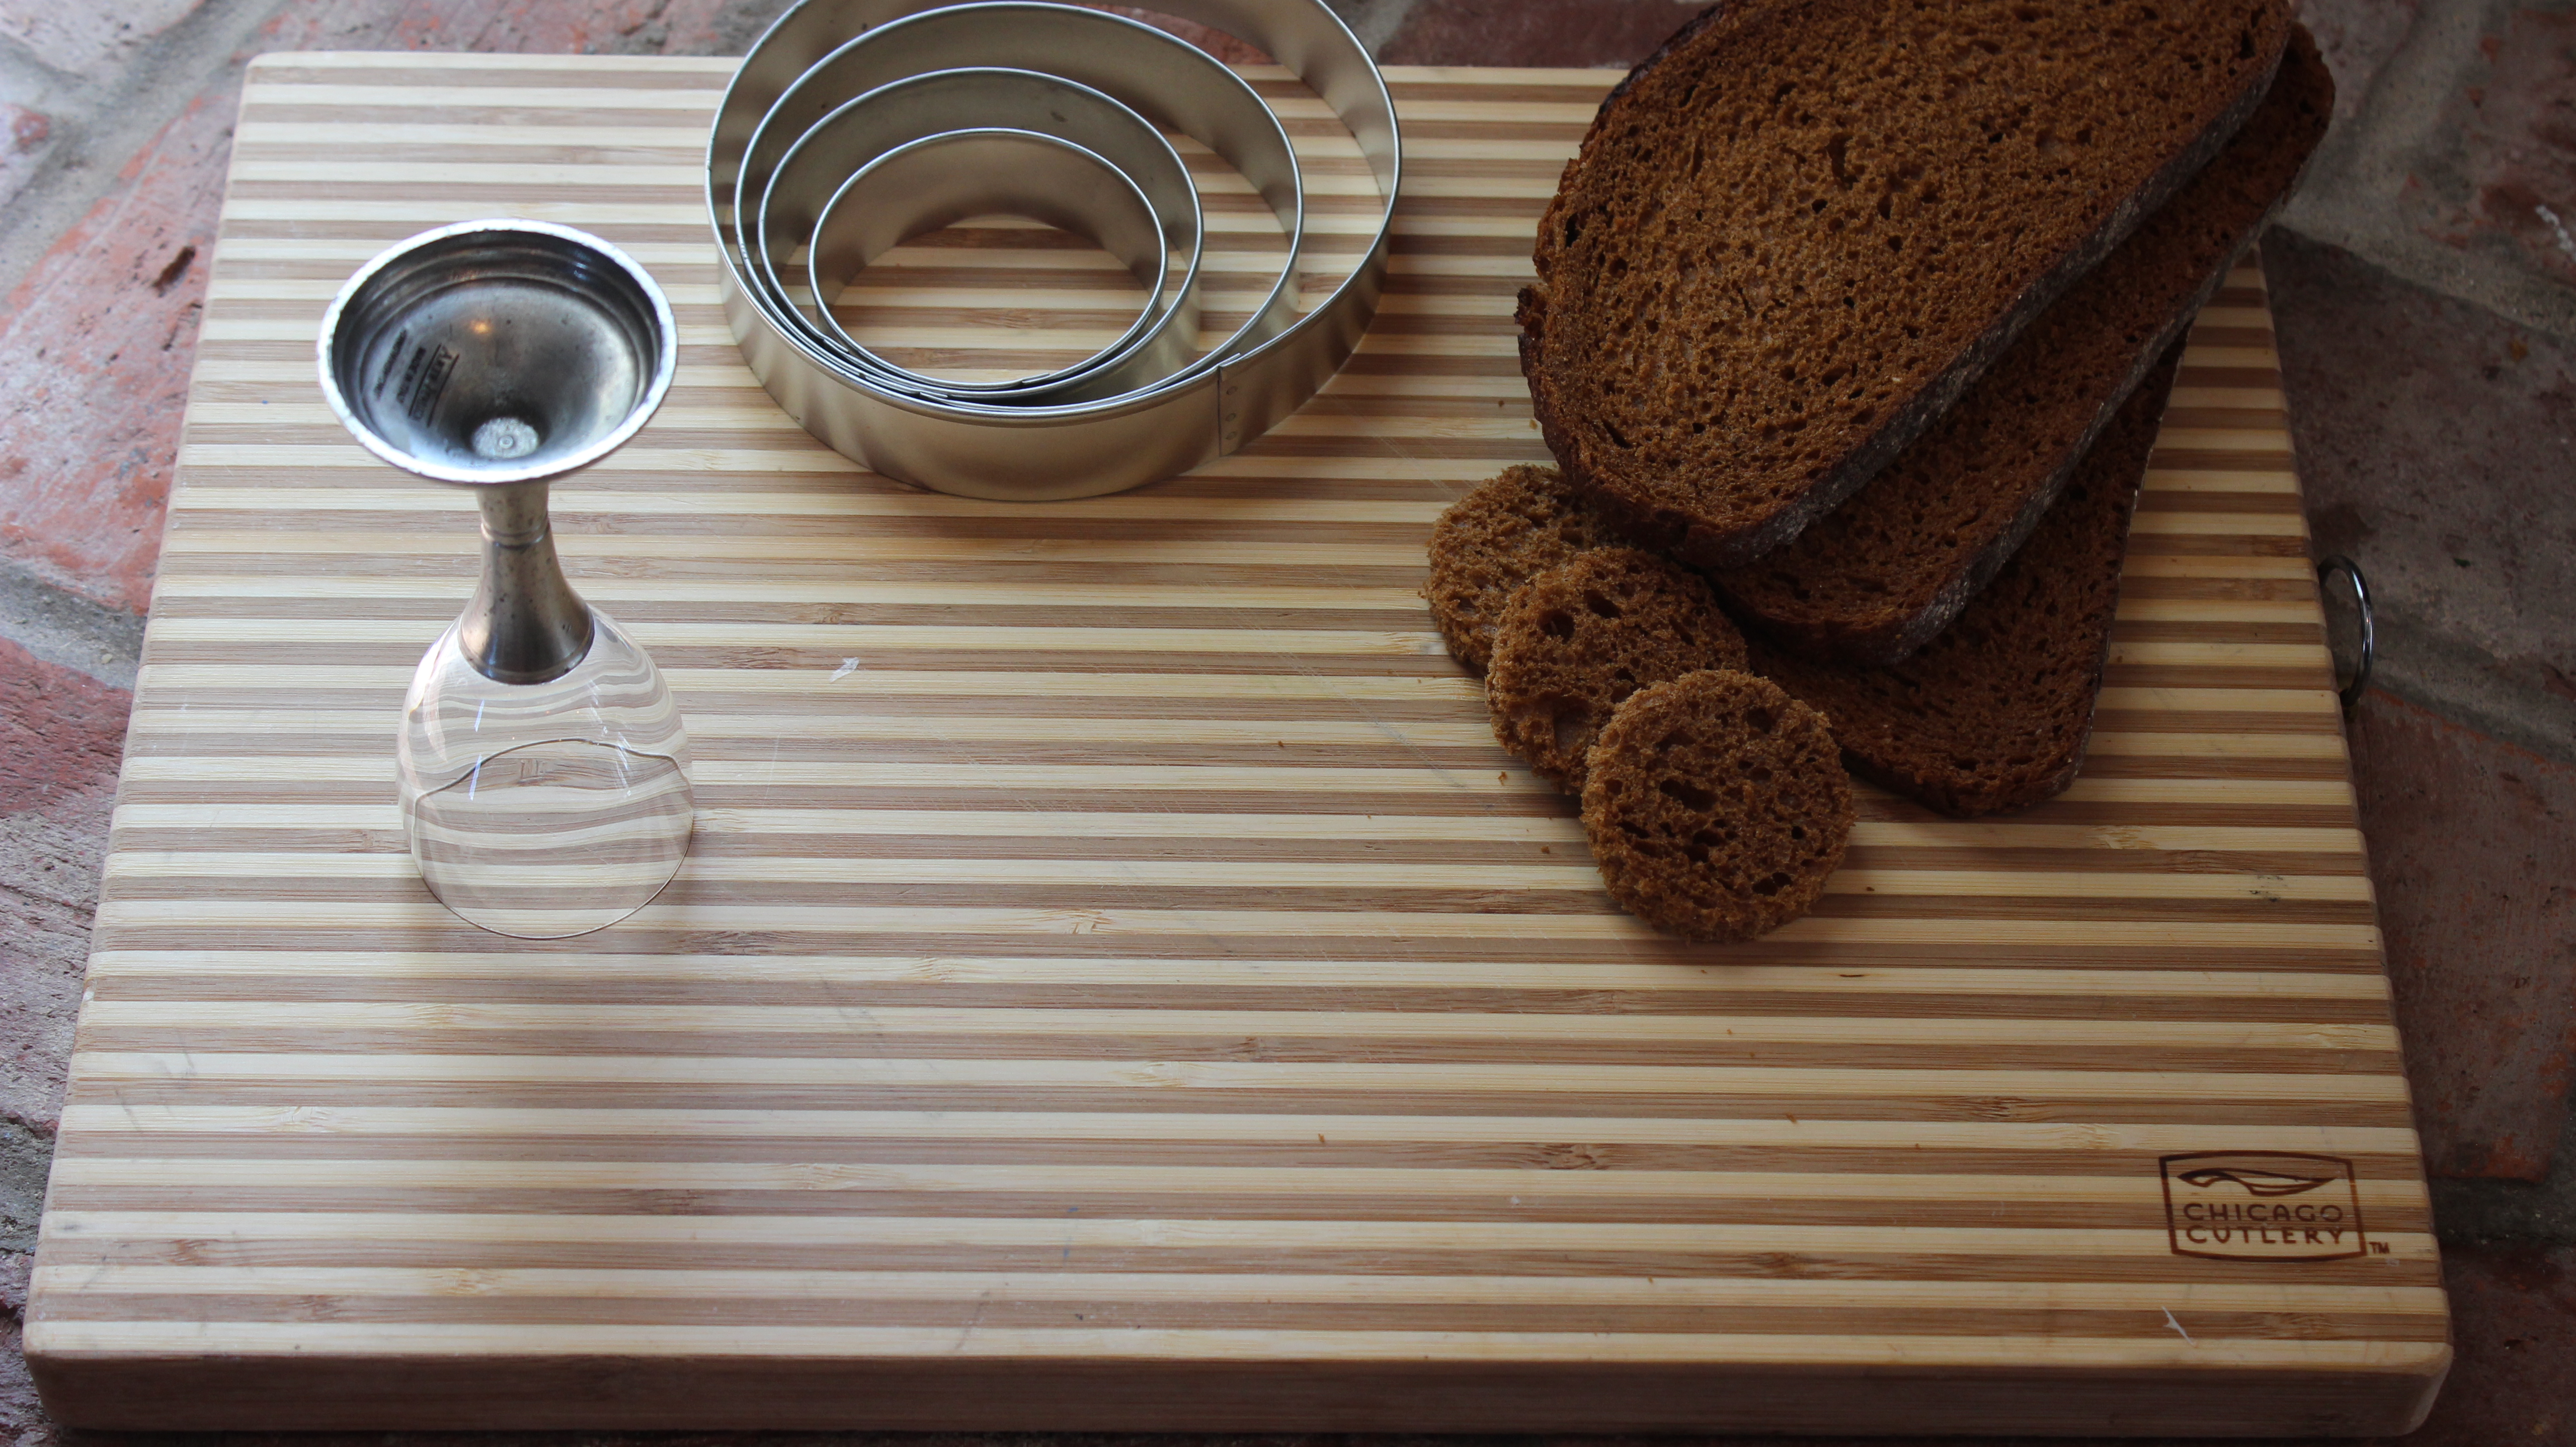
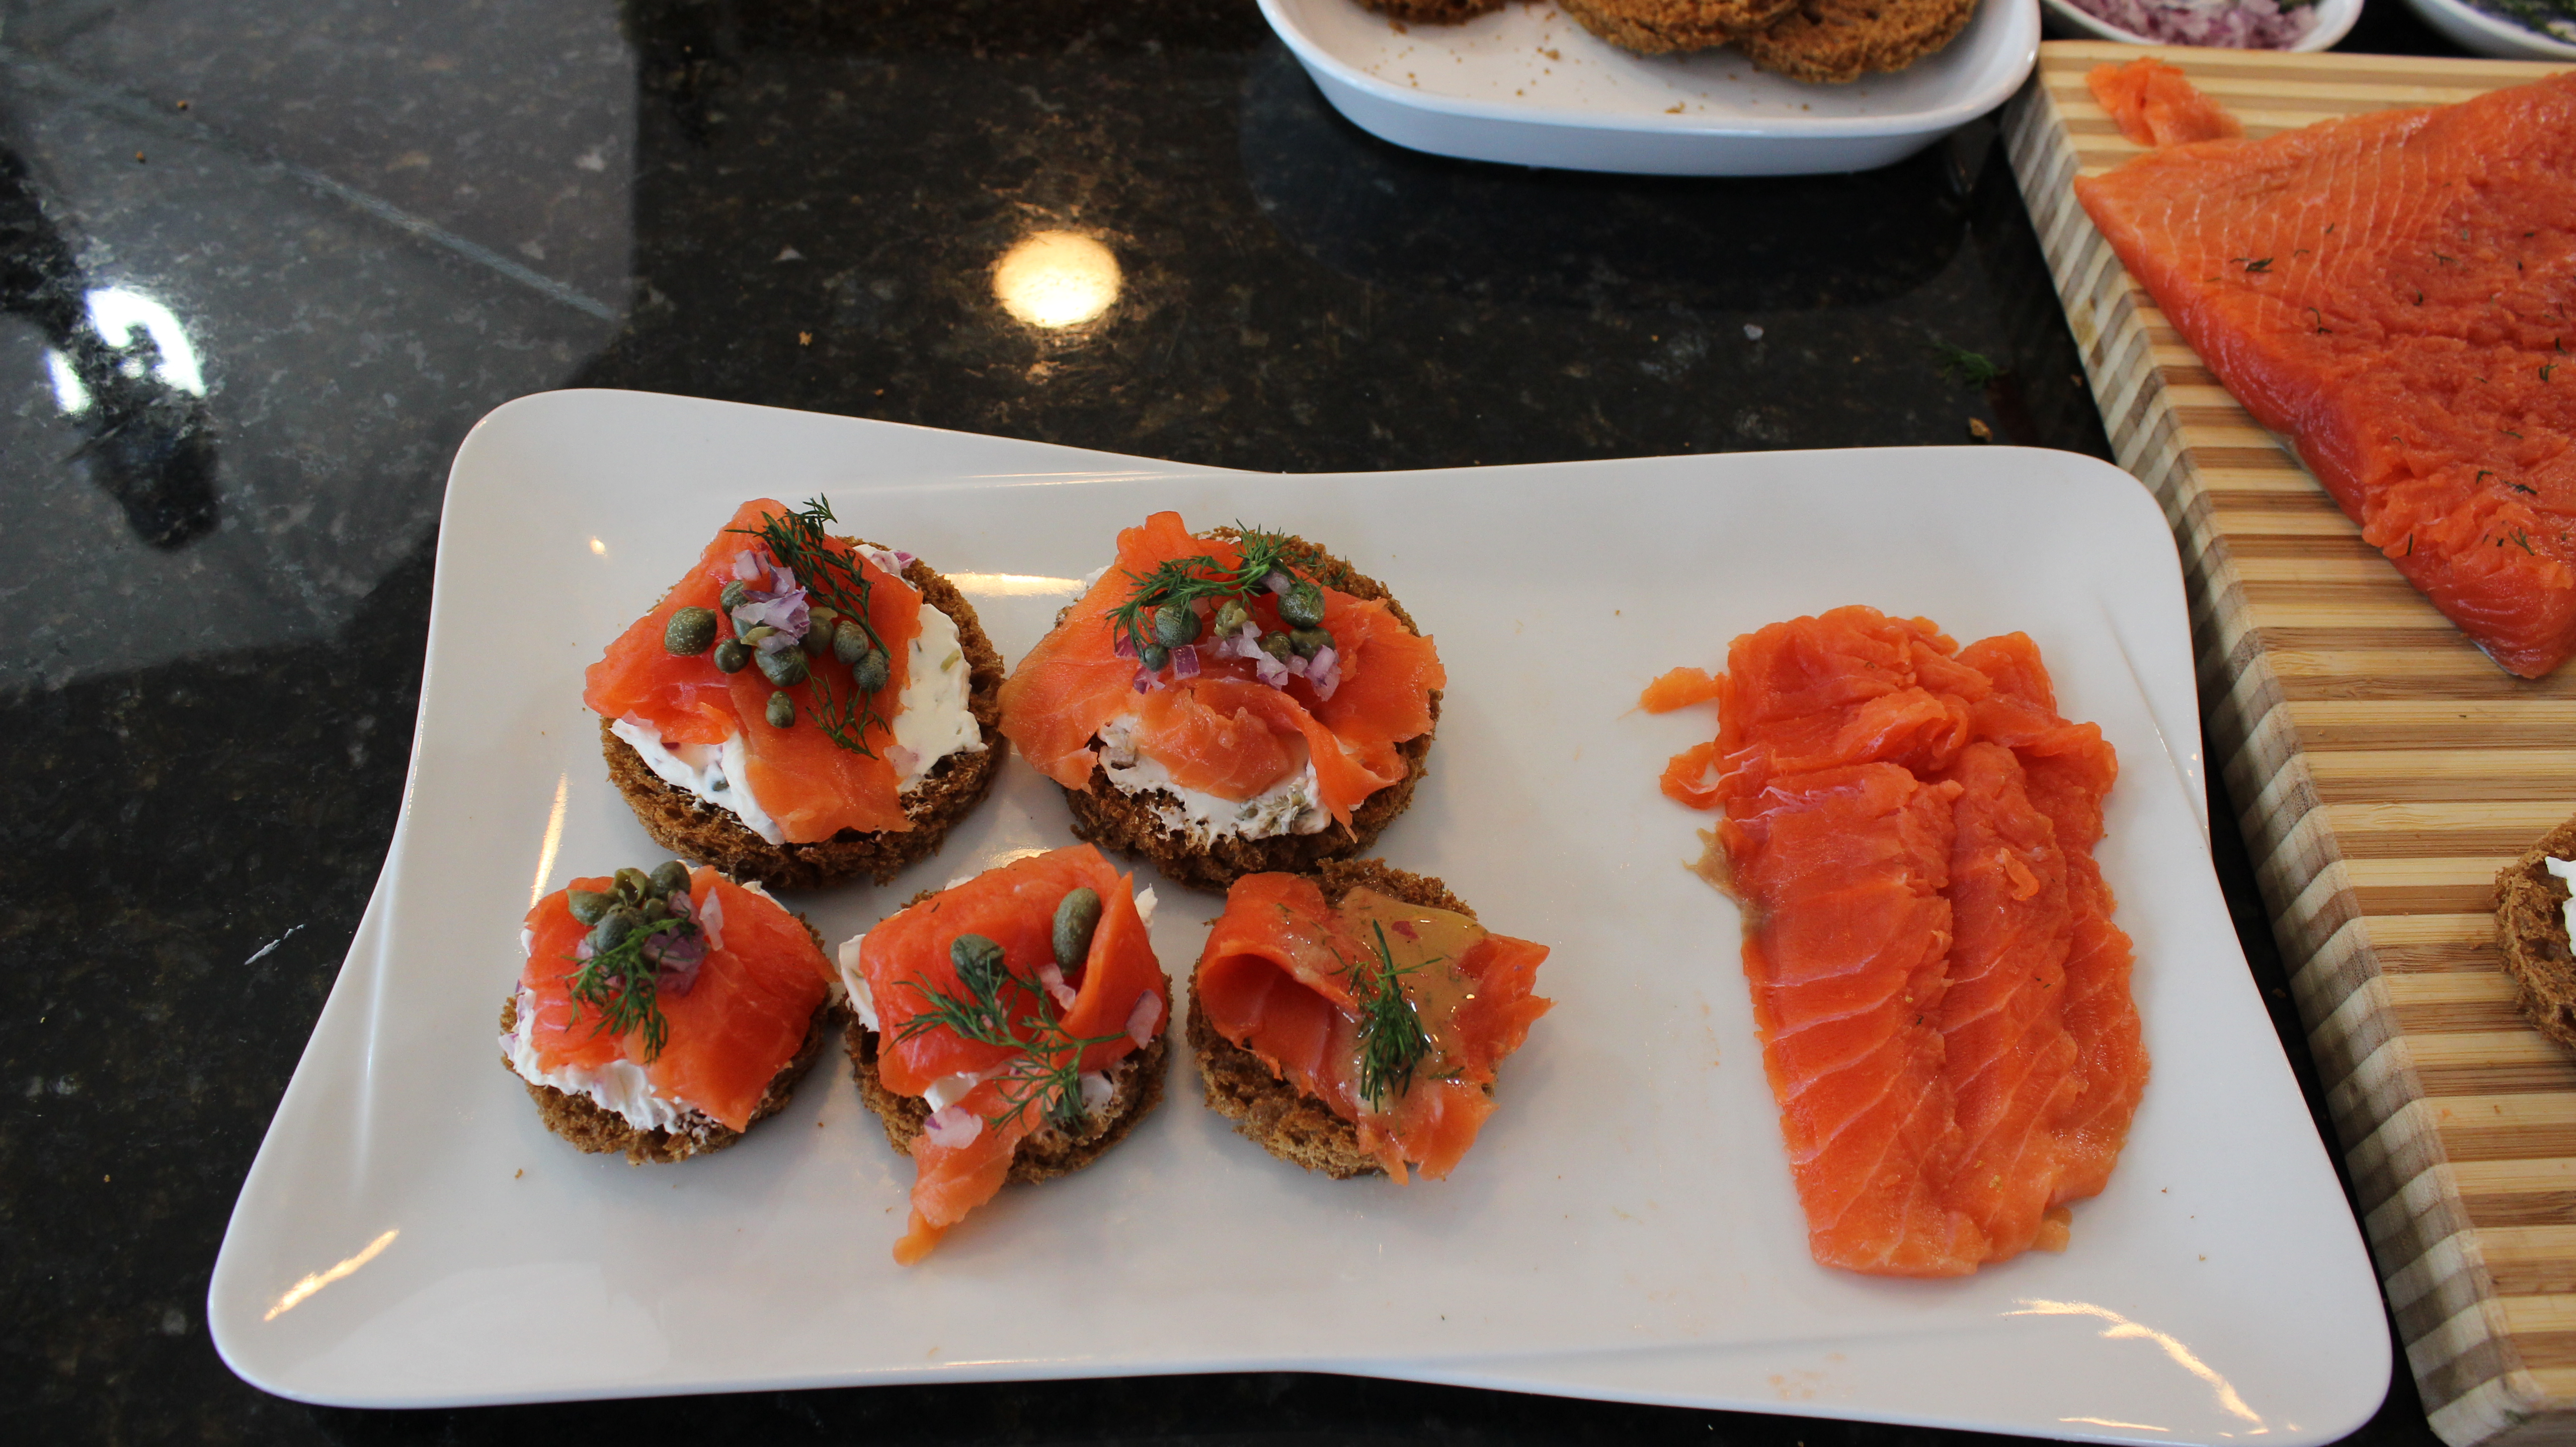
What a treat it is to have homemade salmon gravlax. It’s an even bigger delight to be able to make it yourself at home and have left overs the next day that are just as incredible as the first day they finished curing. Not to mention the money you will save from the astronomical price tag usually attached to those salmon gravlax or Nova lox if you were to buy them at a specialty shop!
You won’t believe how easy it is until you make these gourmet salmon gravlax for yourself. It is very important that when you do decide to make my homemade salmon gravlax to buy wild salmon and NOT farm raised. The wild salmon is definitely going to be pricier then the farm raised but you will still be saving a ton from having a specialty shop cure and sell them to you.
Now there is a little difference between salmon gravlax and Nova lox. Nova lox come from Nova Scotia and are cold smoked after the curing or brining process using some kind of brandy, gin or lemon vodka. Gravlax is the Scandinavian preparation of lox with just the curing or brining using dill and other spices like juniper berries, pepper corns as well as a liquid like an aquavit or vodka. Gravlax actually originated a lot like how sushi evolved in Asia where they buried the fish in rice to preserve and ferment. Gravlax was made by fishmen who salted and fermented it by burying it in the sand …hence the Scandinavian word “grava” meaning to dig.
This homemade salmon gravlax recipe of mine came from a good friend, Jim, who is a saucier himself and always has an endless assortment of great recipes up his sleeve. His wife Jen and him are also big foodies and a lot of fun has been had with them in our own “kitchen cook-offs”! Needless to say I have been making these homemade salmon gravlax for over fifteen years and the results are always amazing. They are for sure “easy gourmet”.
With all the graduations and summer parties around the corner I think you better get busy and invest in some Coho wild salmon or do a little fishing yourself. I actually bought my Coho wild salmon that’s in the cooking show at Whole Foods Market. Their Coho wild caught salmon is packaged and flash frozen by the fisherman to a certain degree required by FDA law to kill any parasites and is ready for distribution. You may never buy store bought salmon gravlax or Nova lox at specialty shops again after eating this incredible delicacy! I hope you Enjoy the “Homemade Salmon Gravlax” show!
INGREDIENTS for Salmon GRAVLAX:
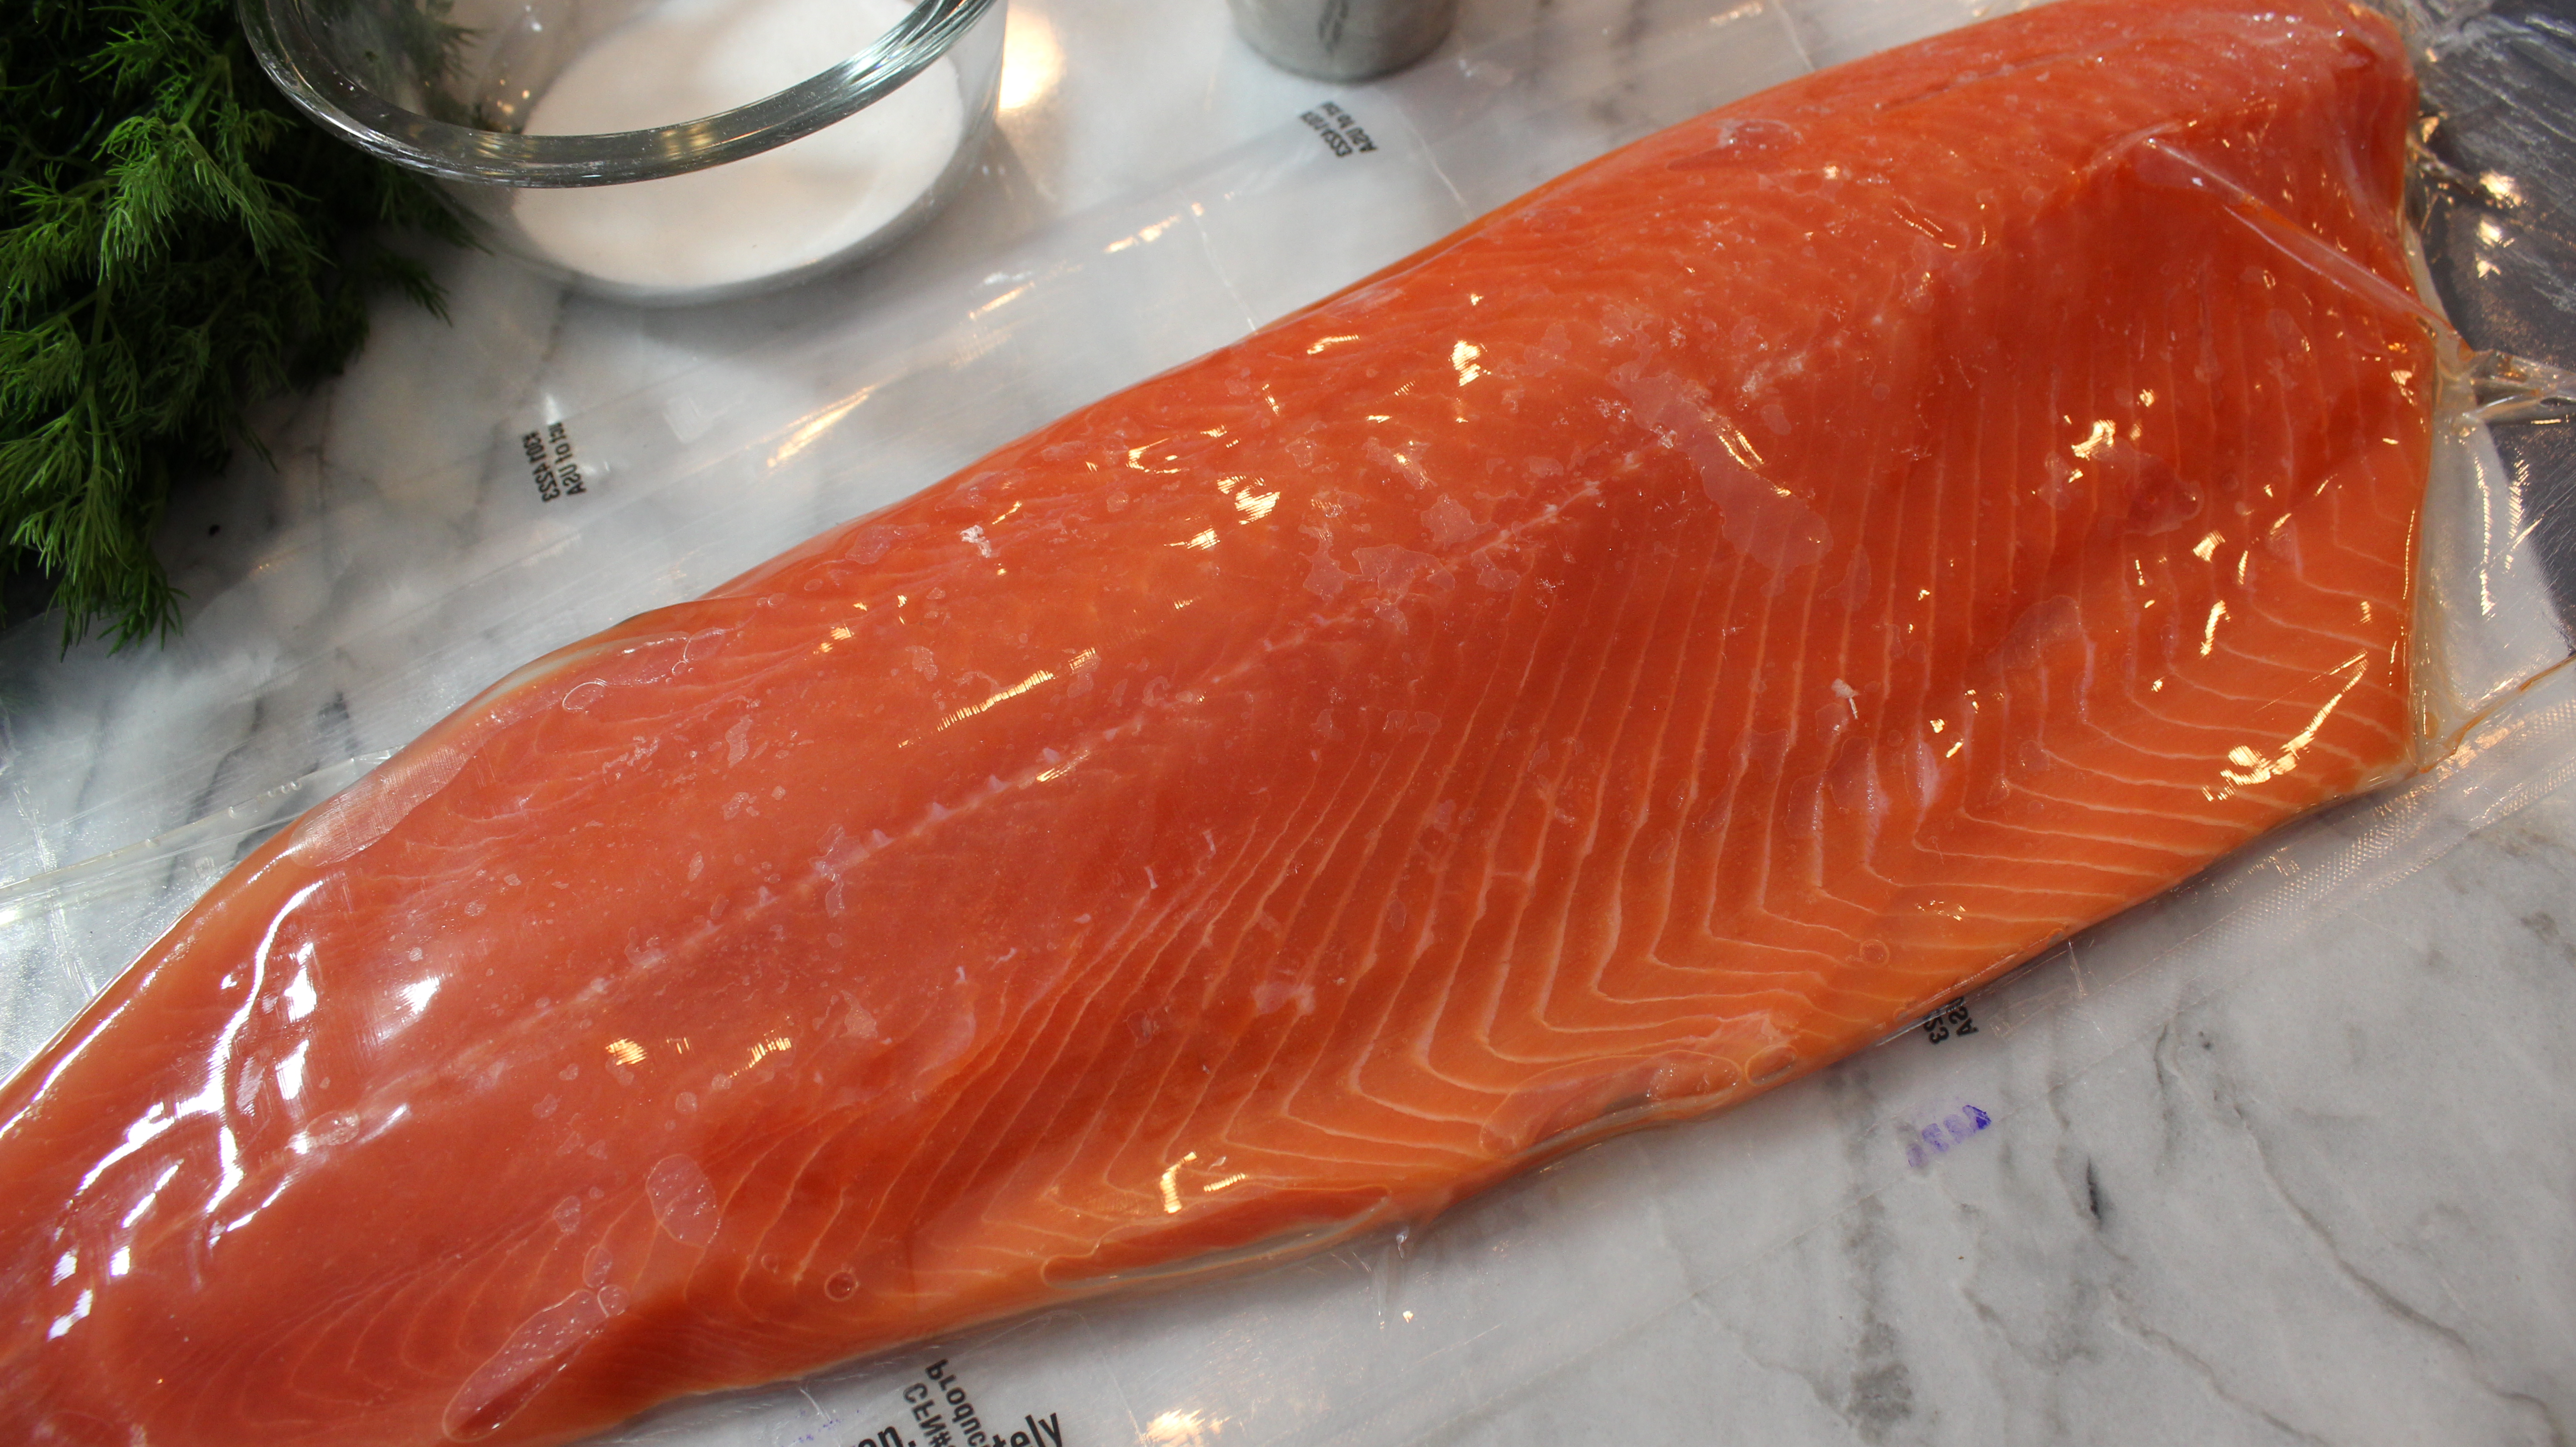
1 1/2 -2 lbs. fresh Wild Coho Salmon (flash frozen or right out of the ocean!)
3-4 tbsp sea salt ( USE 2 tbsp PER POUND of salmon)
3-4 tbsp sugar (USE 2 tbsp PER POUND of salmon)
2 tbsp vodka or aquavit
1 lg bunch of fresh dill
2 tbsp pepper corns -OPTIONAL -for a little spice (Use pepper corns not ground pepper)
DIRECTIONS for Salmon GRAVLAX:
Cut 2 lb salmon filet in 1/2 so we can sandwich the halves together with salmon flesh facing the inside
Whisk dry ingredients together salt, sugar and peppercorns
Sprinkle about 1 tsp of vodka on the flesh sides of each of the salmon halves
Rub all of the dry mixture onto the flesh sides and skin sides of the salmon halves…most of the rub should be on the flesh side though
Lay fresh dill bunch onto one the the salmon fillets, on the flesh side
Sandwich the other salmon fillet on top so that the flesh sides are facing each other
Place into a Ziploc baggie and place in a glass baking dish
Top the salmon fillets with cast iron pans and large cans – YOU NEED TO WEIGHT THE SALMON DOWN (tomato or vegetable cans work great)
Place into the frig and cure for 3 days (2-3 days preferably 3)
Flip the curing salmon every 24 hours making sure to out the weights back on
On day 3 remove the salmon from the baggie and pick off all of the toppings (dill, pepper corns) and give a QUICK rinse or rub off toppings with a damp paper towel (you don’t want to run water over your cured salmon … it’s a QIUCK rinse)
Pat completely dry and sliced salmon on a bias as shown in the show
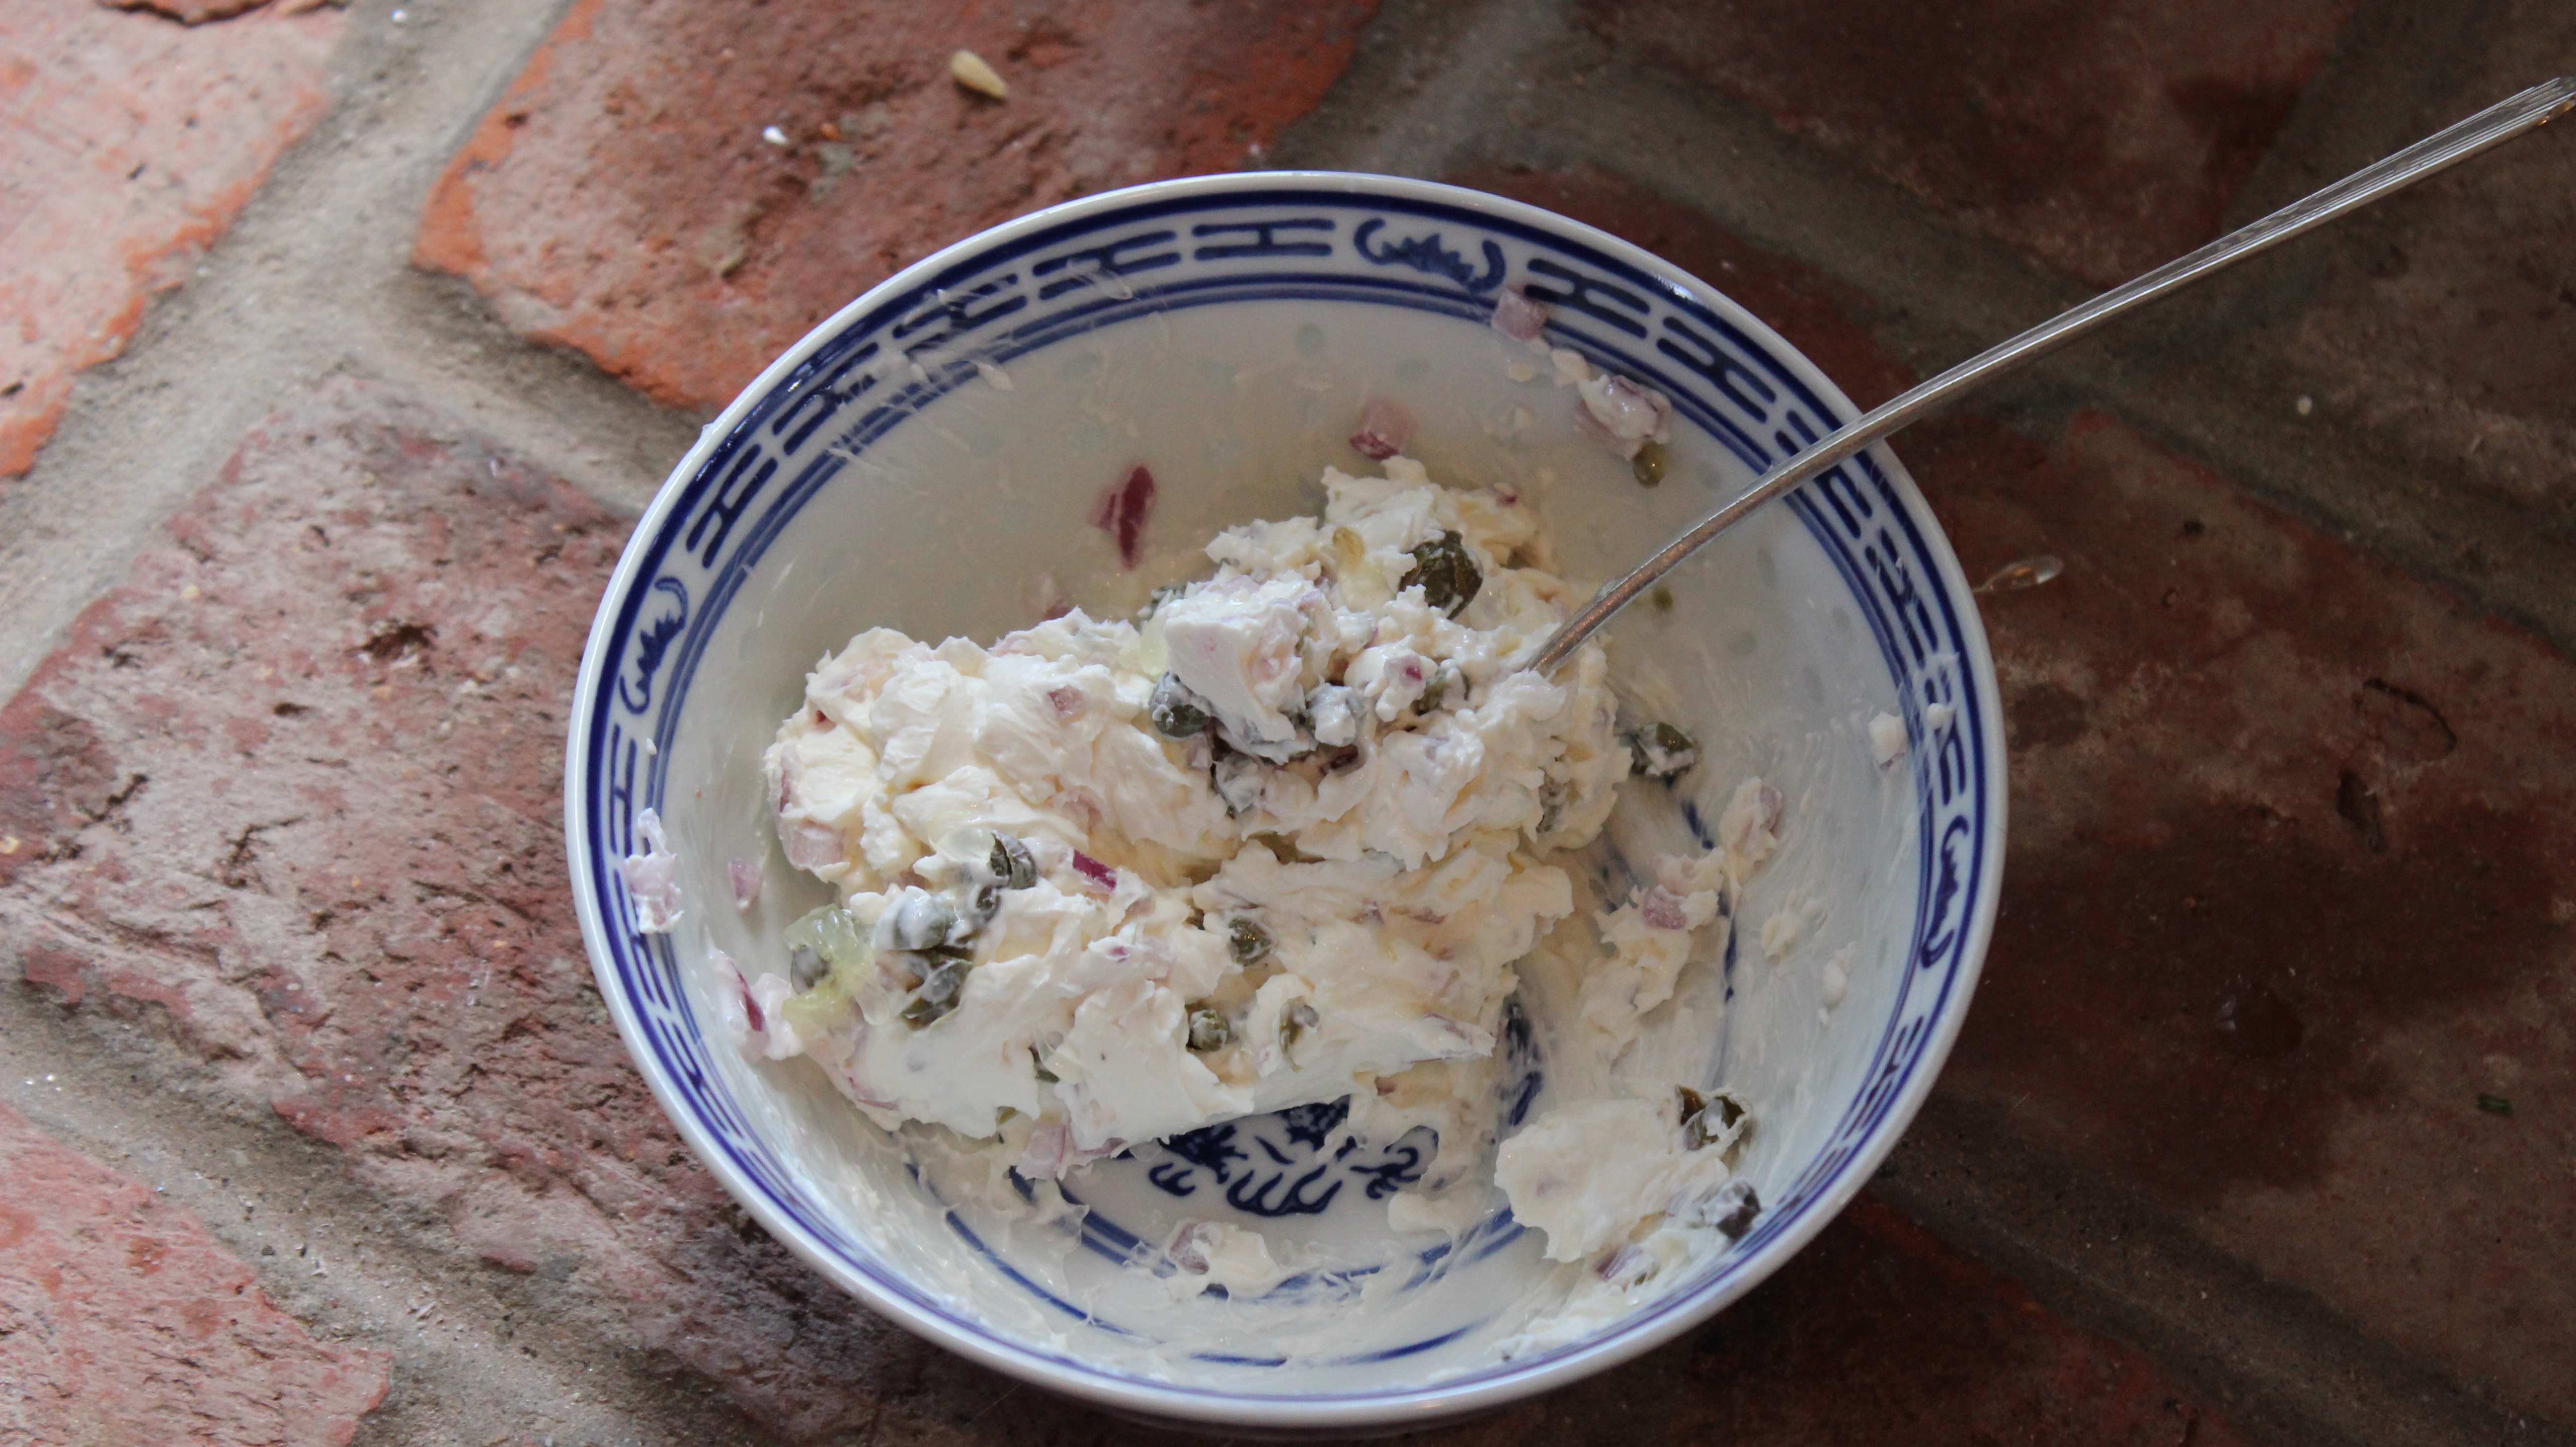
Serve with mustard sauce or cream cheese-caper mixture and bagels or rye bread rounds and a sprig of fresh dill on top
Mangia mangia
INGREDIENTS for CREAM CHEESE SPREAD:
6 oz. Philadelphia cream cheese
2 tbsp finely chopped red onion
2 tbsp small capers
1/2 fresh squeezed lemon
2 tbsp chopped fresh dil
Bring cream cheese to room temperature, add remaining ingredients and mix to combine
INGREDIENTS for MUSTARD SAUCE:
2 tbsp Dijon
1 tbsp sugar
1 tbsp finely chopped red onion
2 tbsp finely chopped dill
3 tbsp “seasoned” rice wine vinegar
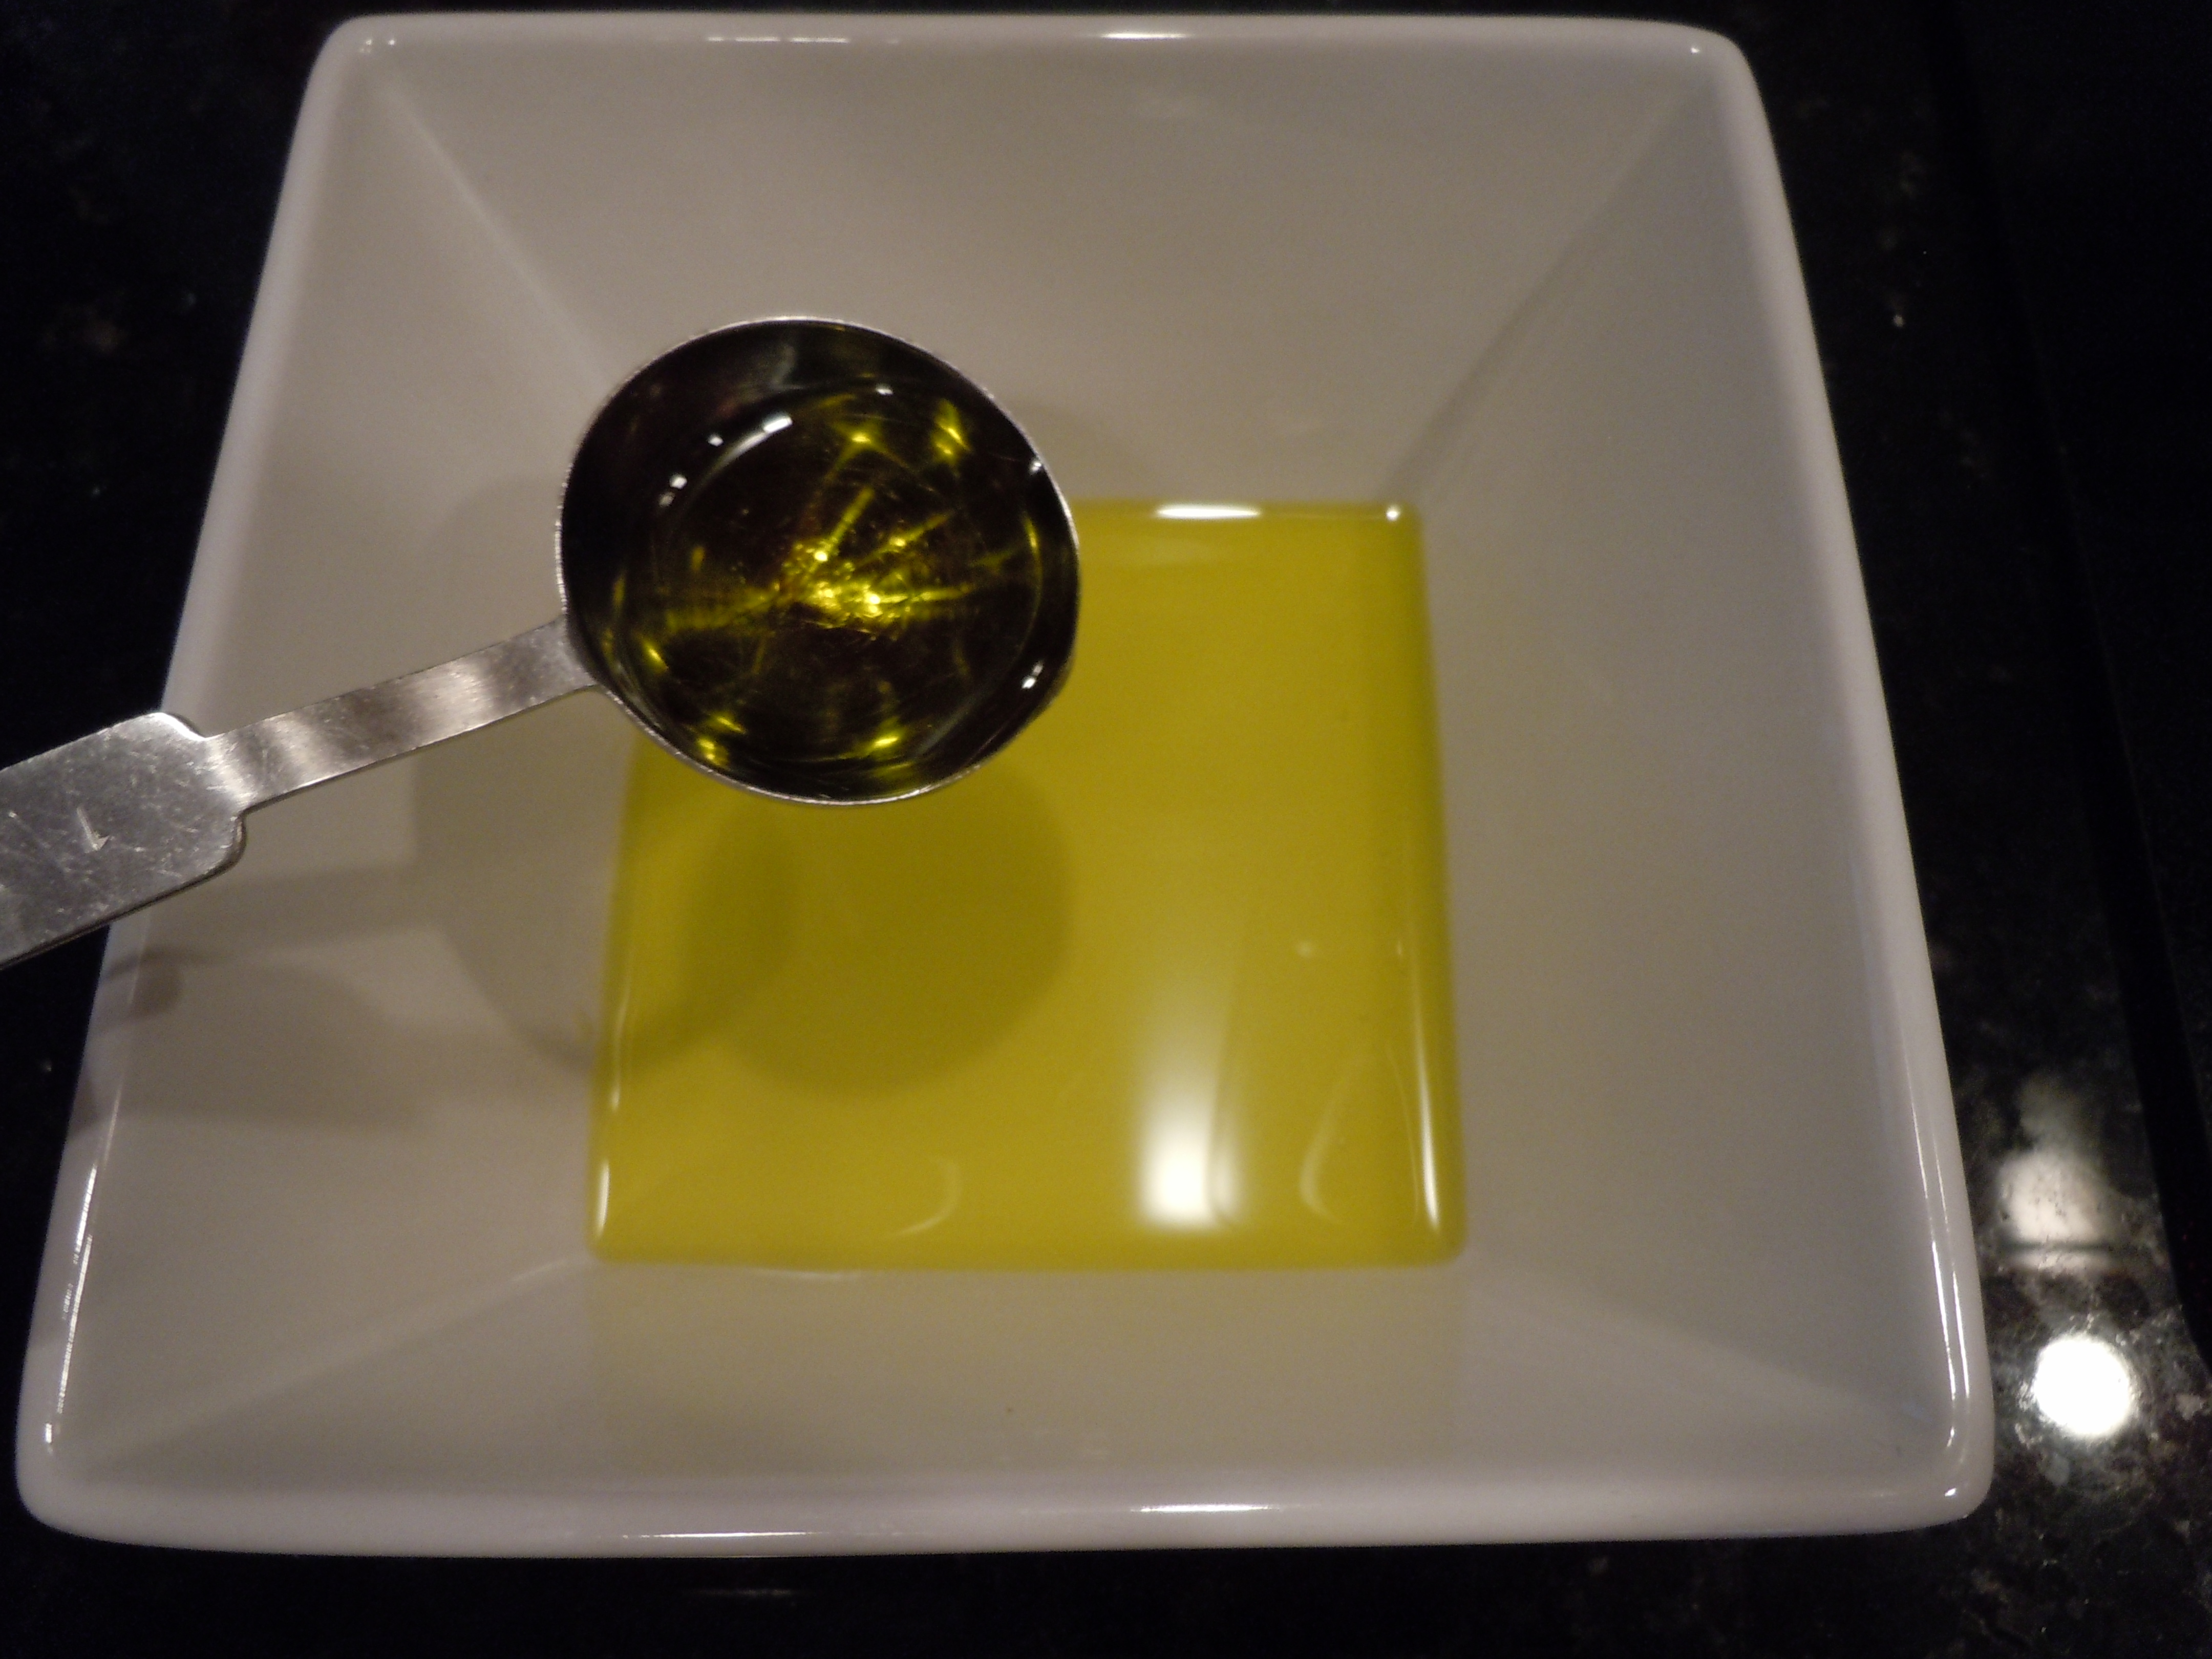
3 tbsp good olive oil
Put first 4 ingredients in a medium size bowl, add in vinegar and begin to whisk in olive oil
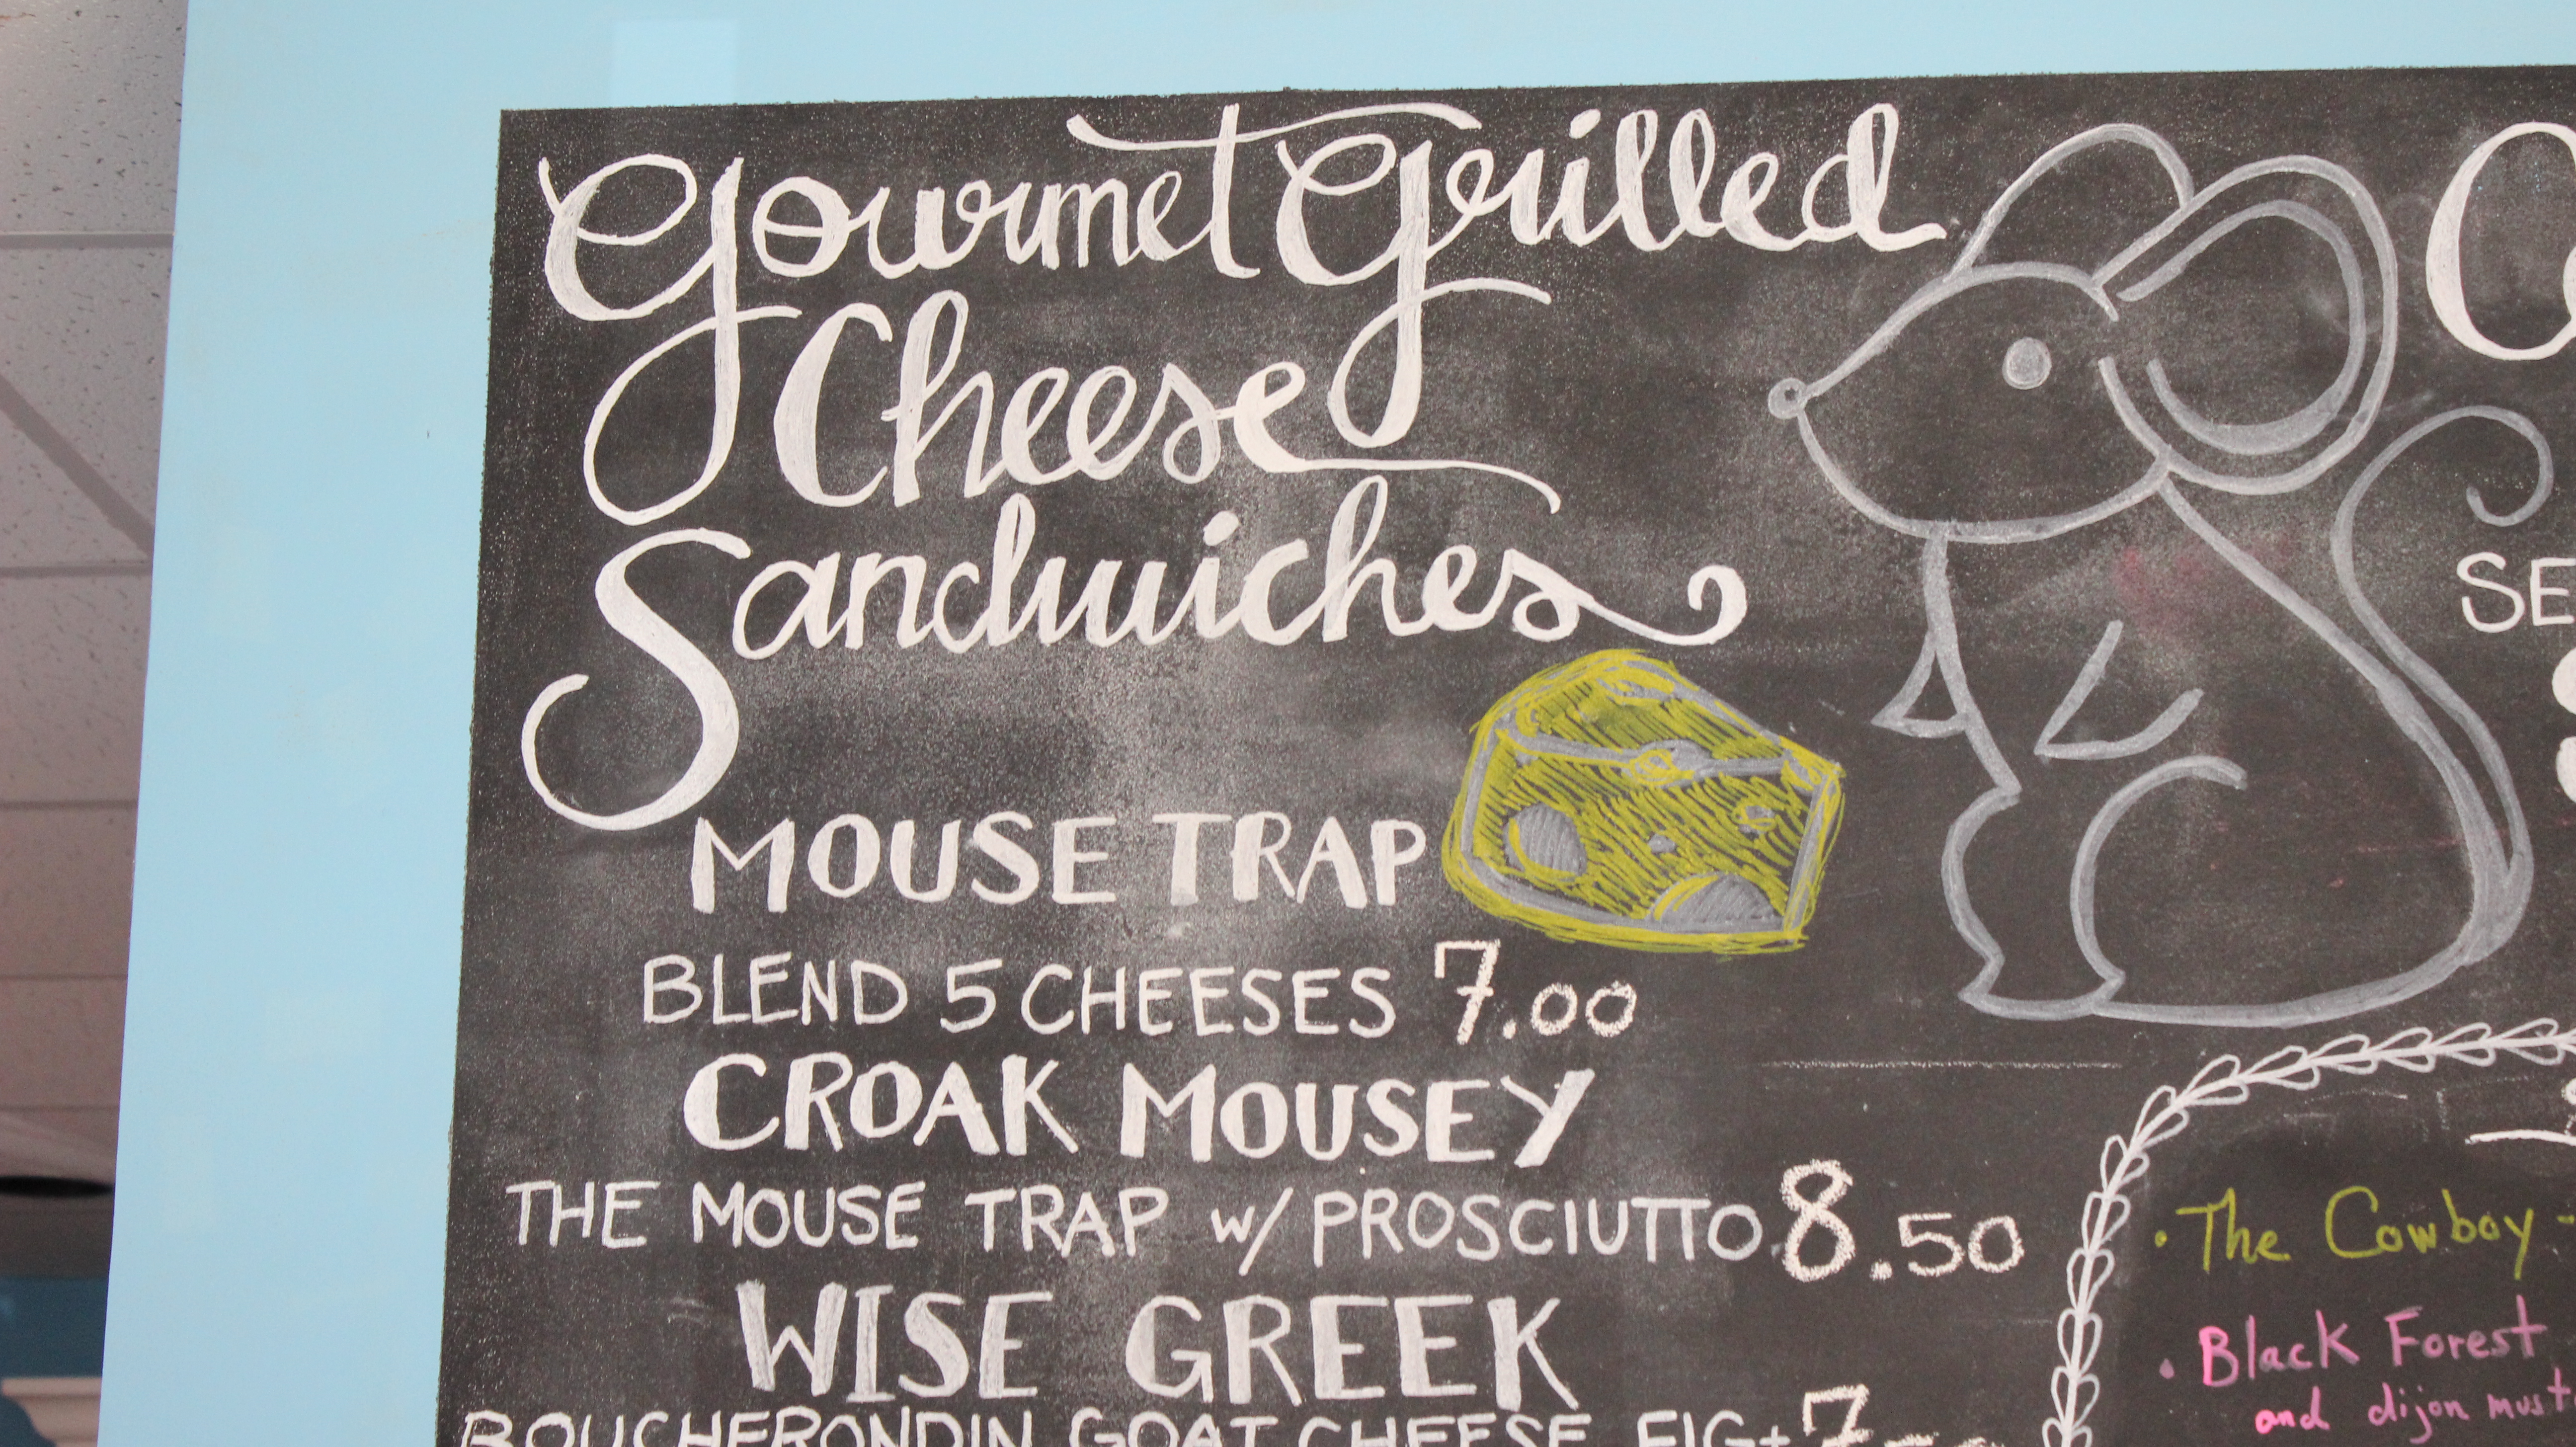
Turkey Stuffed Peppers & Nick Fradiani Day Recipe/VIDEO
Homemade turkey stuffed peppers and a peek at Nick Fradiani’s home town concert celebration made for quite an exciting time for my kids, Reilly and Bella. Probably more so with Nick’s concert than the peppers with them lol. I have to say though that these turkey stuffed peppers are one of my favorites!
Originally, my intentions with this post were to emphasis how important it is to support your local butcher and to introduce you to one of my favorites. With all this in mind, it also happened to be Nick Fradiani Day here in Guildford, CT when I shot my visit at their Food Center. So you now get to see how a small New England town supports their own Nick Fradiani, one of the American Idol finalists!
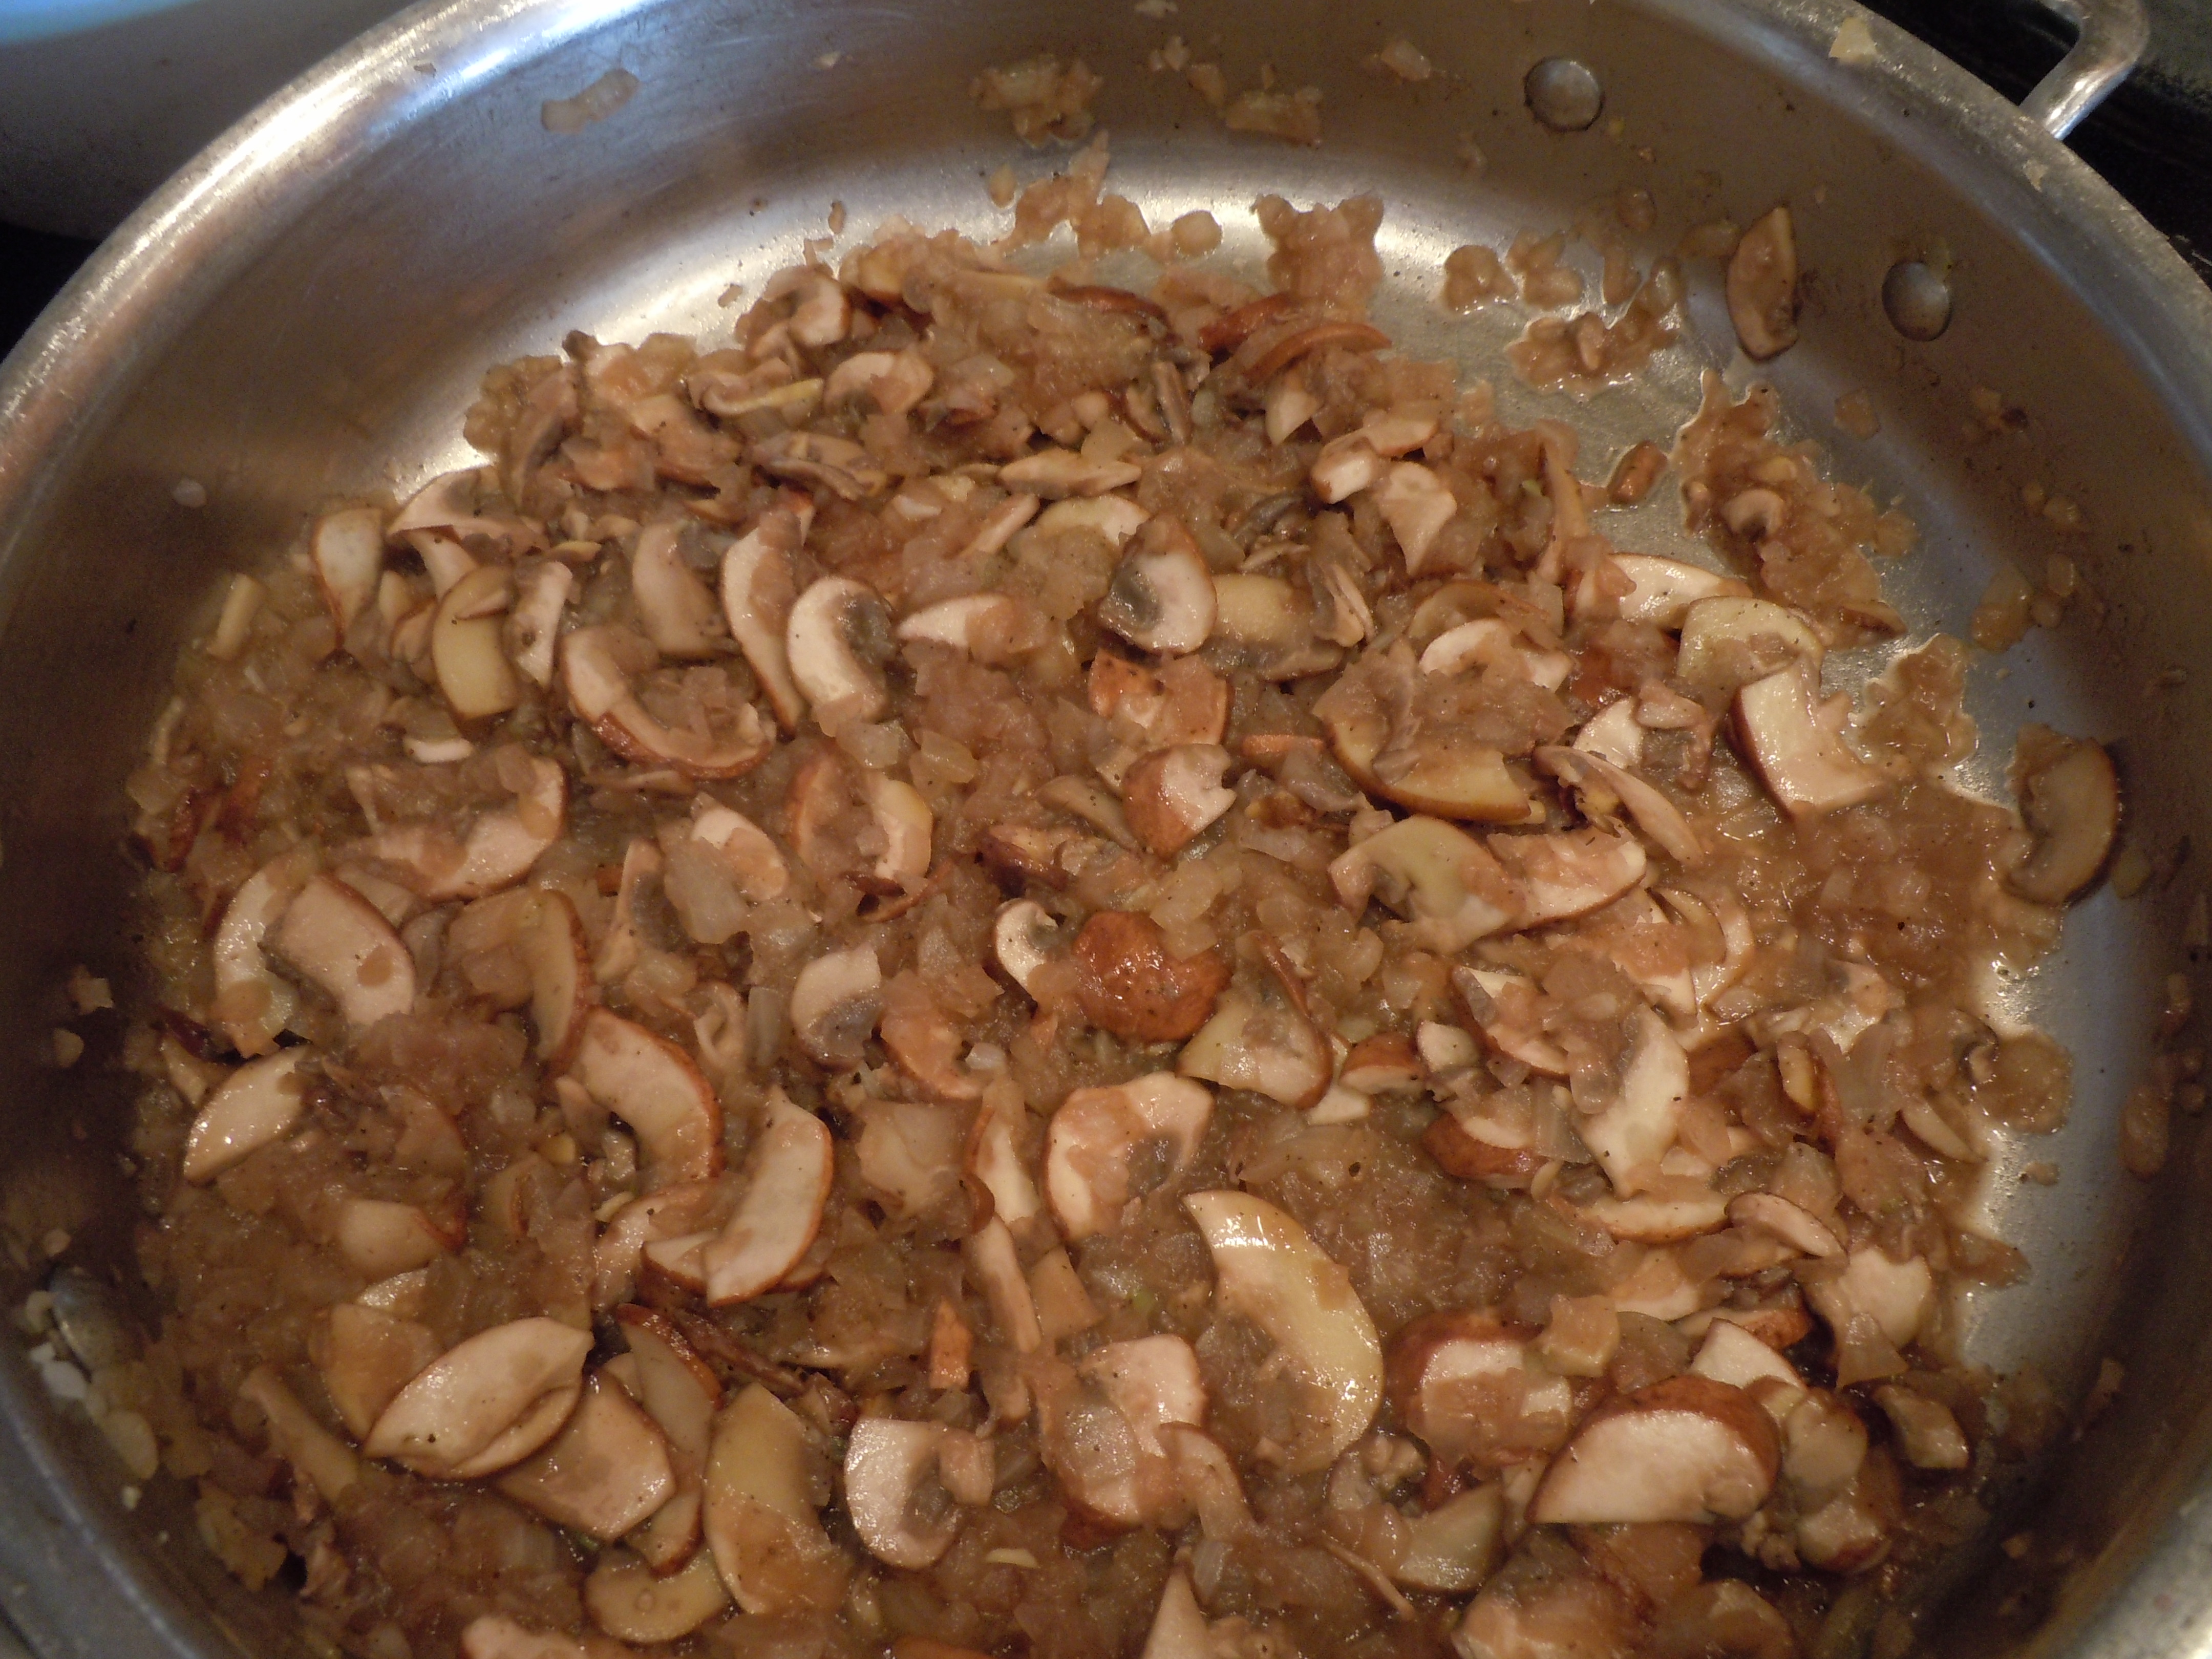
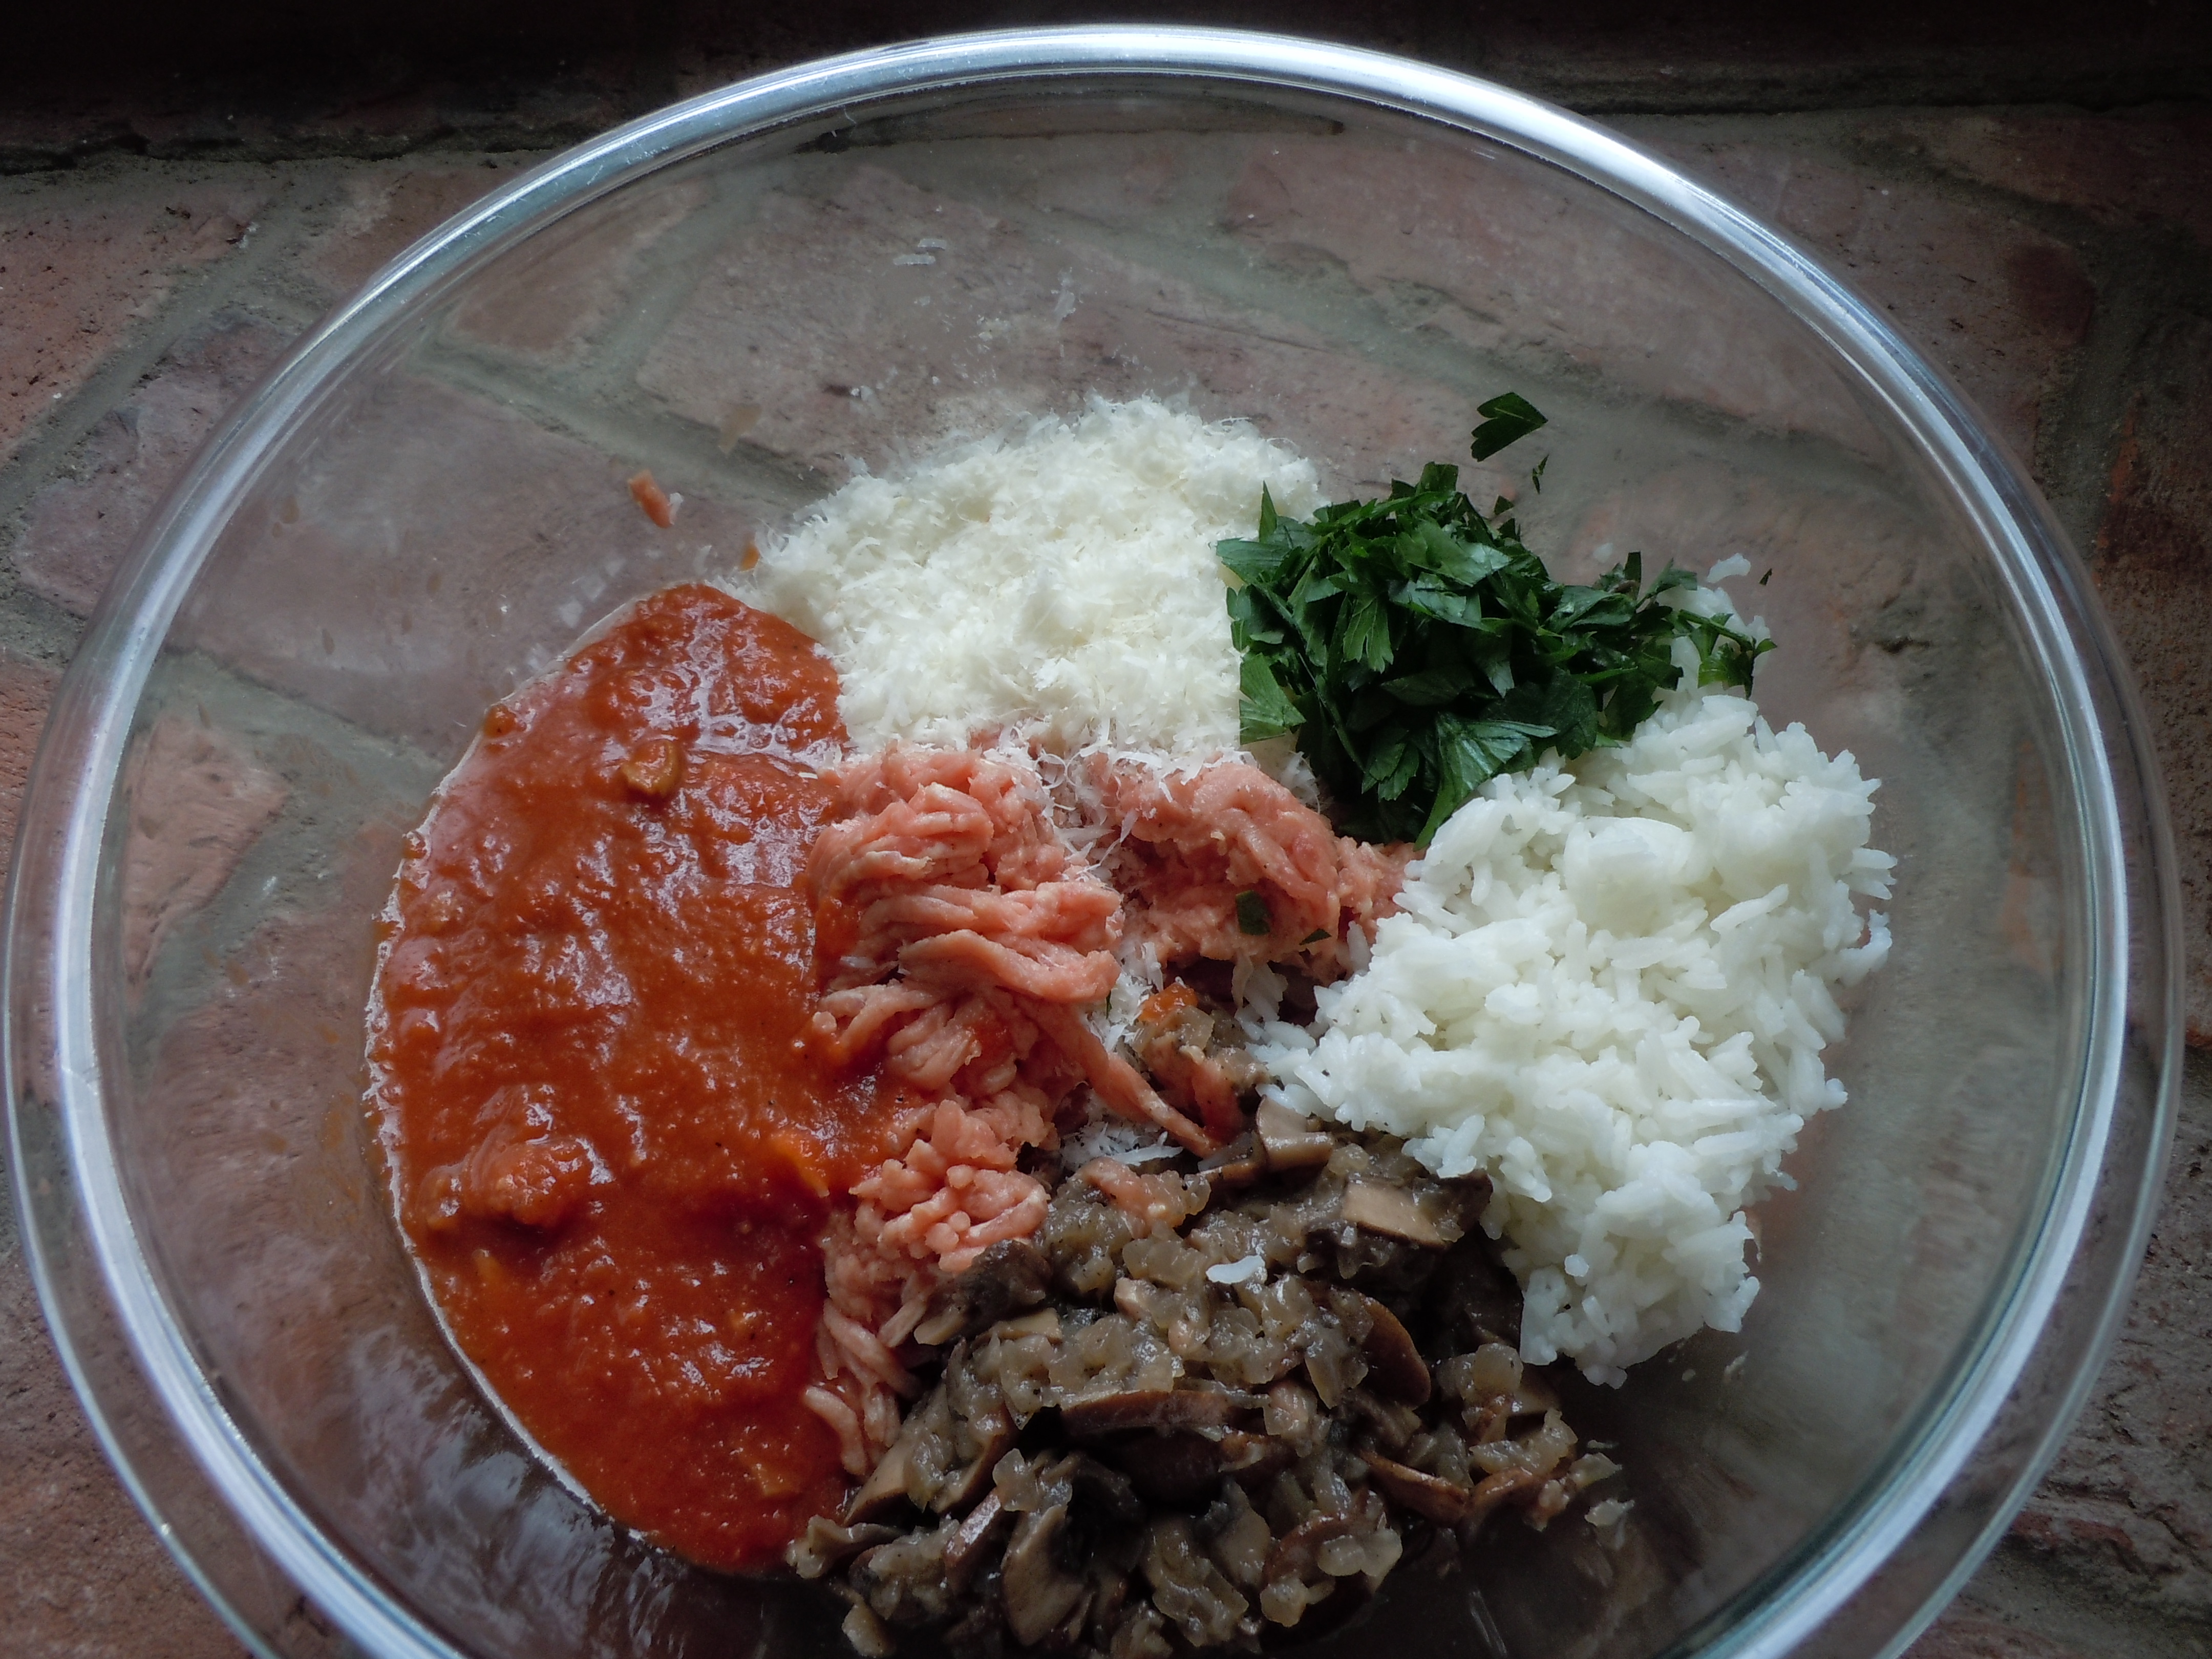
I used to make these stuffed peppers with beef but a good friend has turned me on to turkey and I am really loving it. After making these homemade gourmet stuffed peppers with the ground turkey I have no desire to go back to beef. The turkey based stuffing really hold its own! These peppers are juicy, tender and sweet made with ground turkey, sautéed mushrooms and onions, fresh chopped parsley, rice, grated Reggiano Parmesan, pinot noir or cabernet (your favorite red) and baked in a porcini red wine sauce.
My porcini sauce gives this recipe a really nice flavor but if you don’t have time for it you shouldn’t let that stop you from making these savory stuffed peppers. You can buy a favorite store sauce for convenience or use one of your own. I have you slice the mushrooms paper thin here and then cut those in 1/2 and that keeps the flavor delicate and the mushrooms very tender not chewy …. they almost melt into the stuffing when baking. The onions are finely chopped so I love to use my vegetable hand chopperbecause it saves a ton of time when you are doing all this prep work unless you have a sous chef that is.
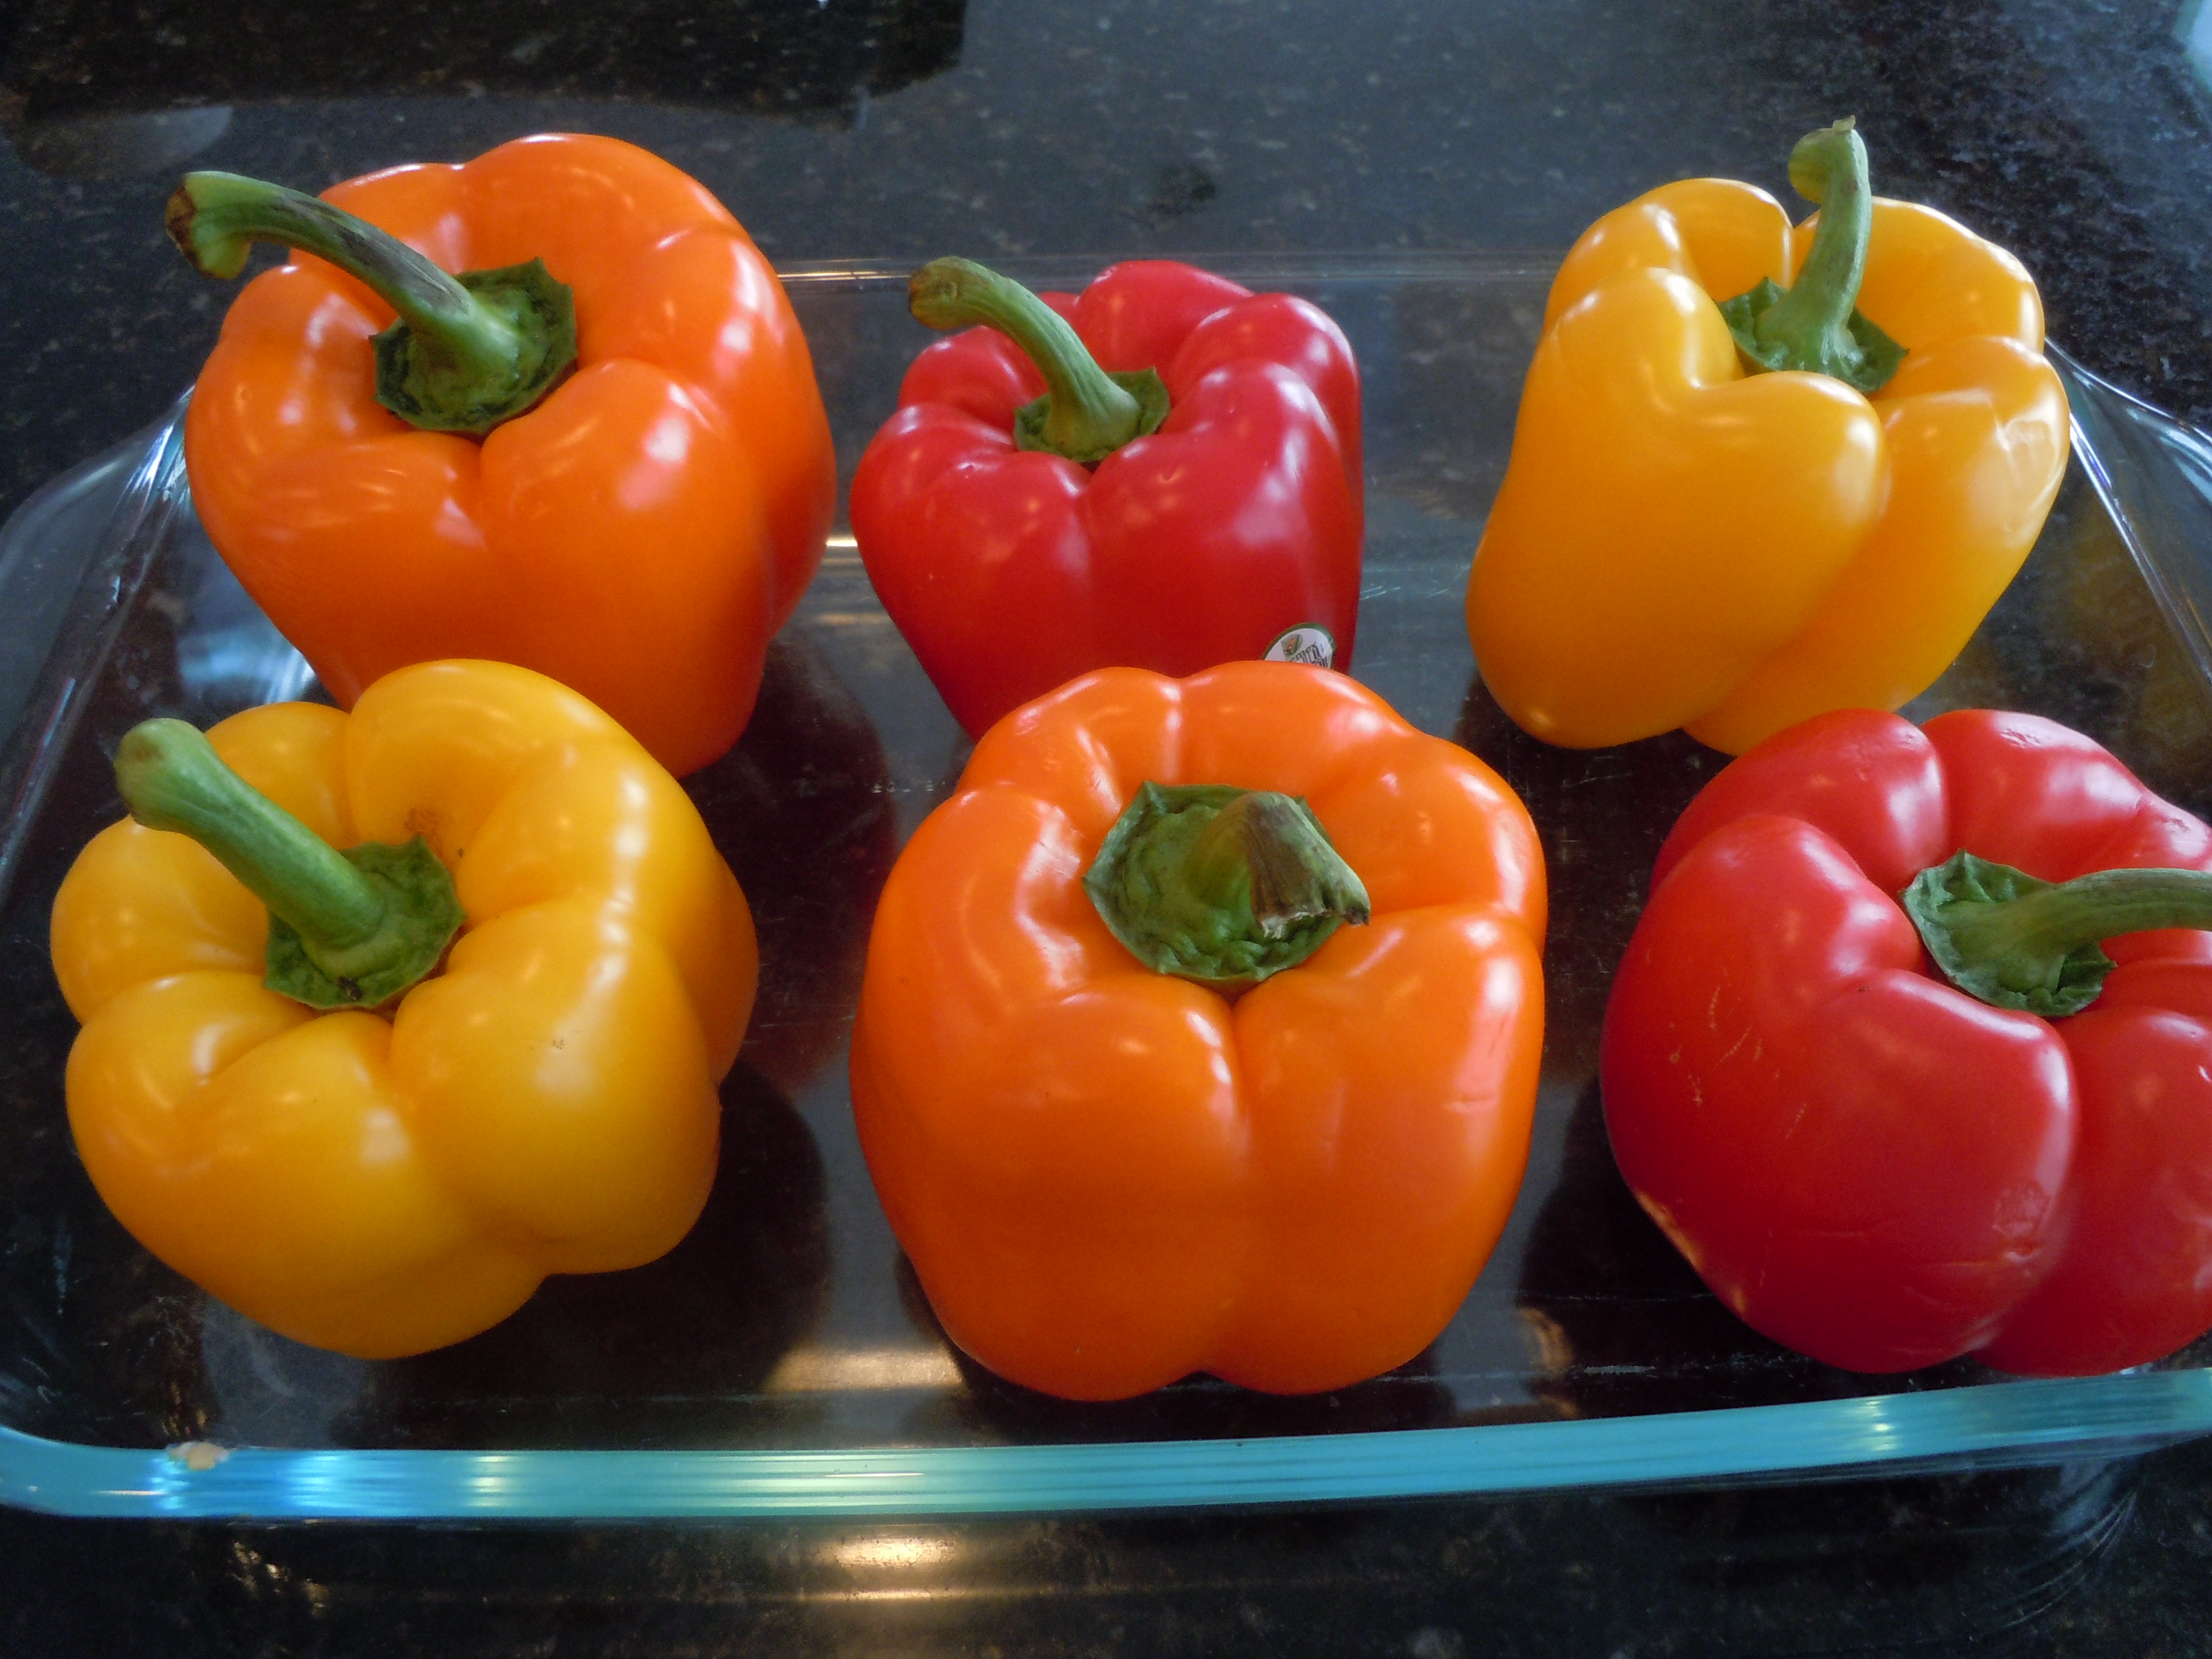
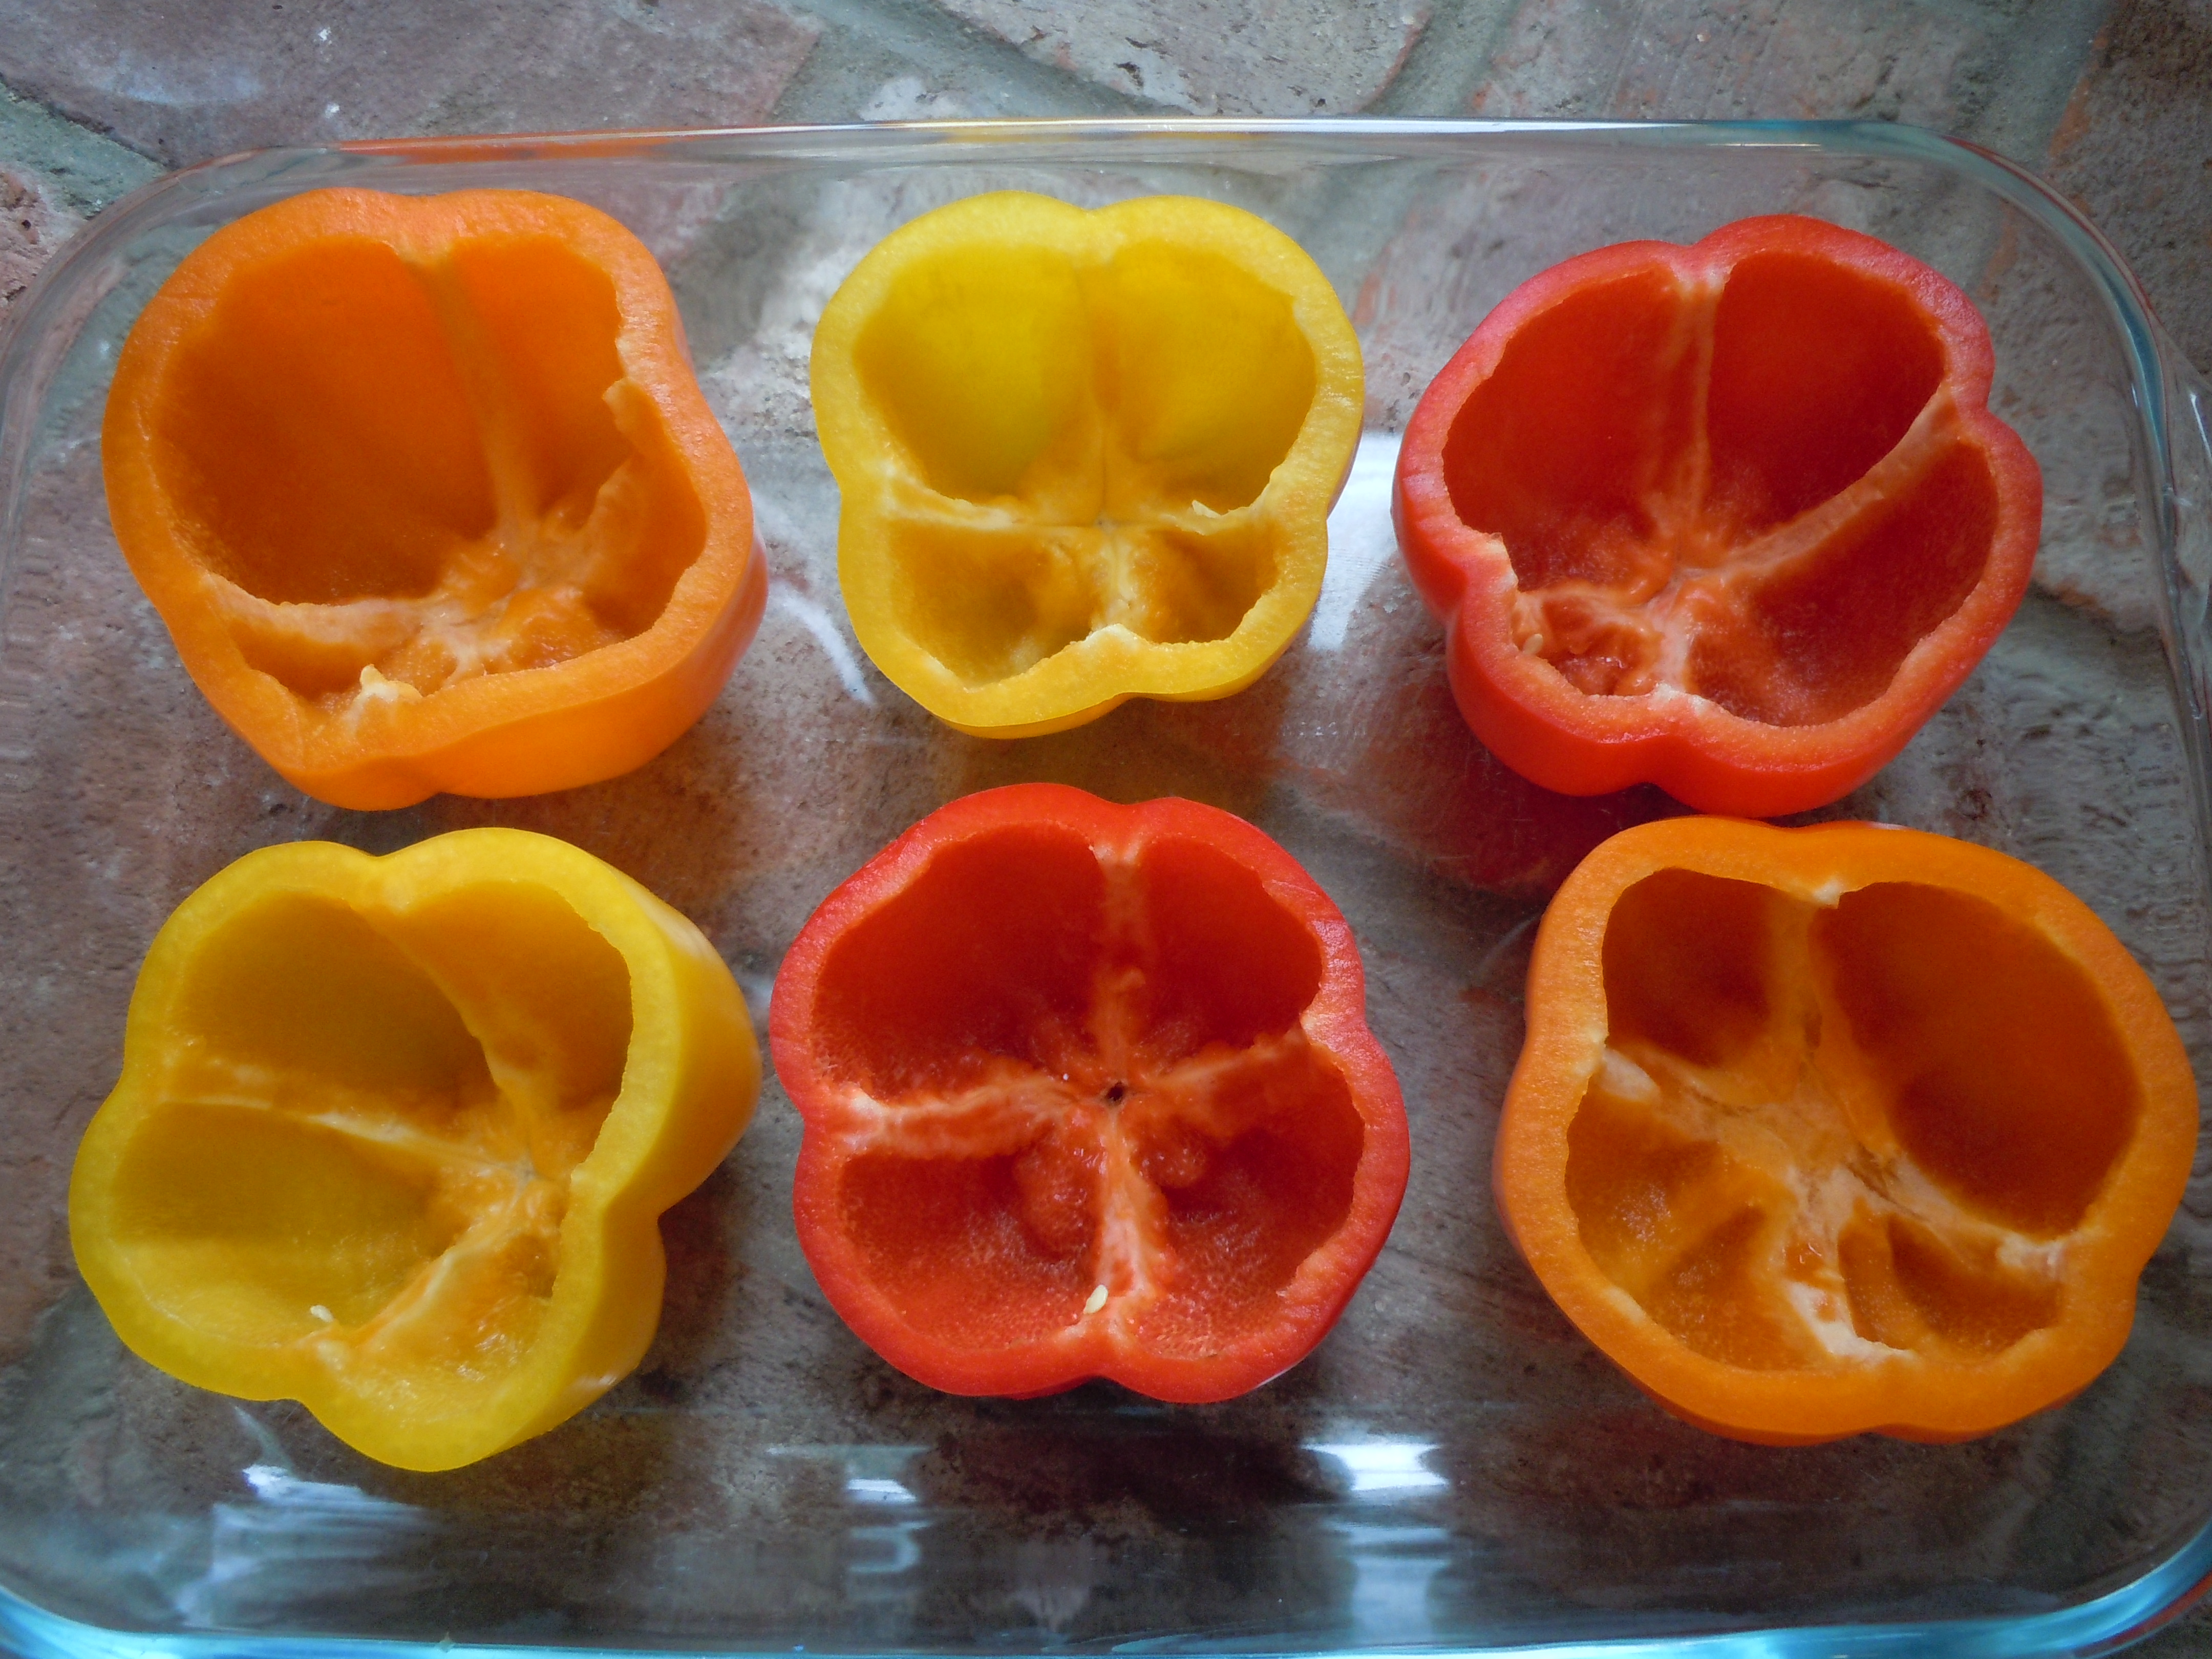
Now you of course can use any color pepper you like. I like using the green ones because I like the strong flavor they render. Peppers are milder in flavor and sweeter with the reds, oranges, and yellows. I don’t believe in using “instant rice” ever because it doesn’t have a great texture. Making rice is a simple process …see “TIP” below. These stuffed peppers are a few step process so it’s a good idea to get some of the work done the day before like making the porcini red sauce and the rice. This dish is so worth the effort …. It just may become your go to Sunday dinner and you can even end this delicious dinner with a bang making a quick and easyGerman pancake recipe or chocolate-avocado mousse!
Ingredients: For Porcini Red Sauce:
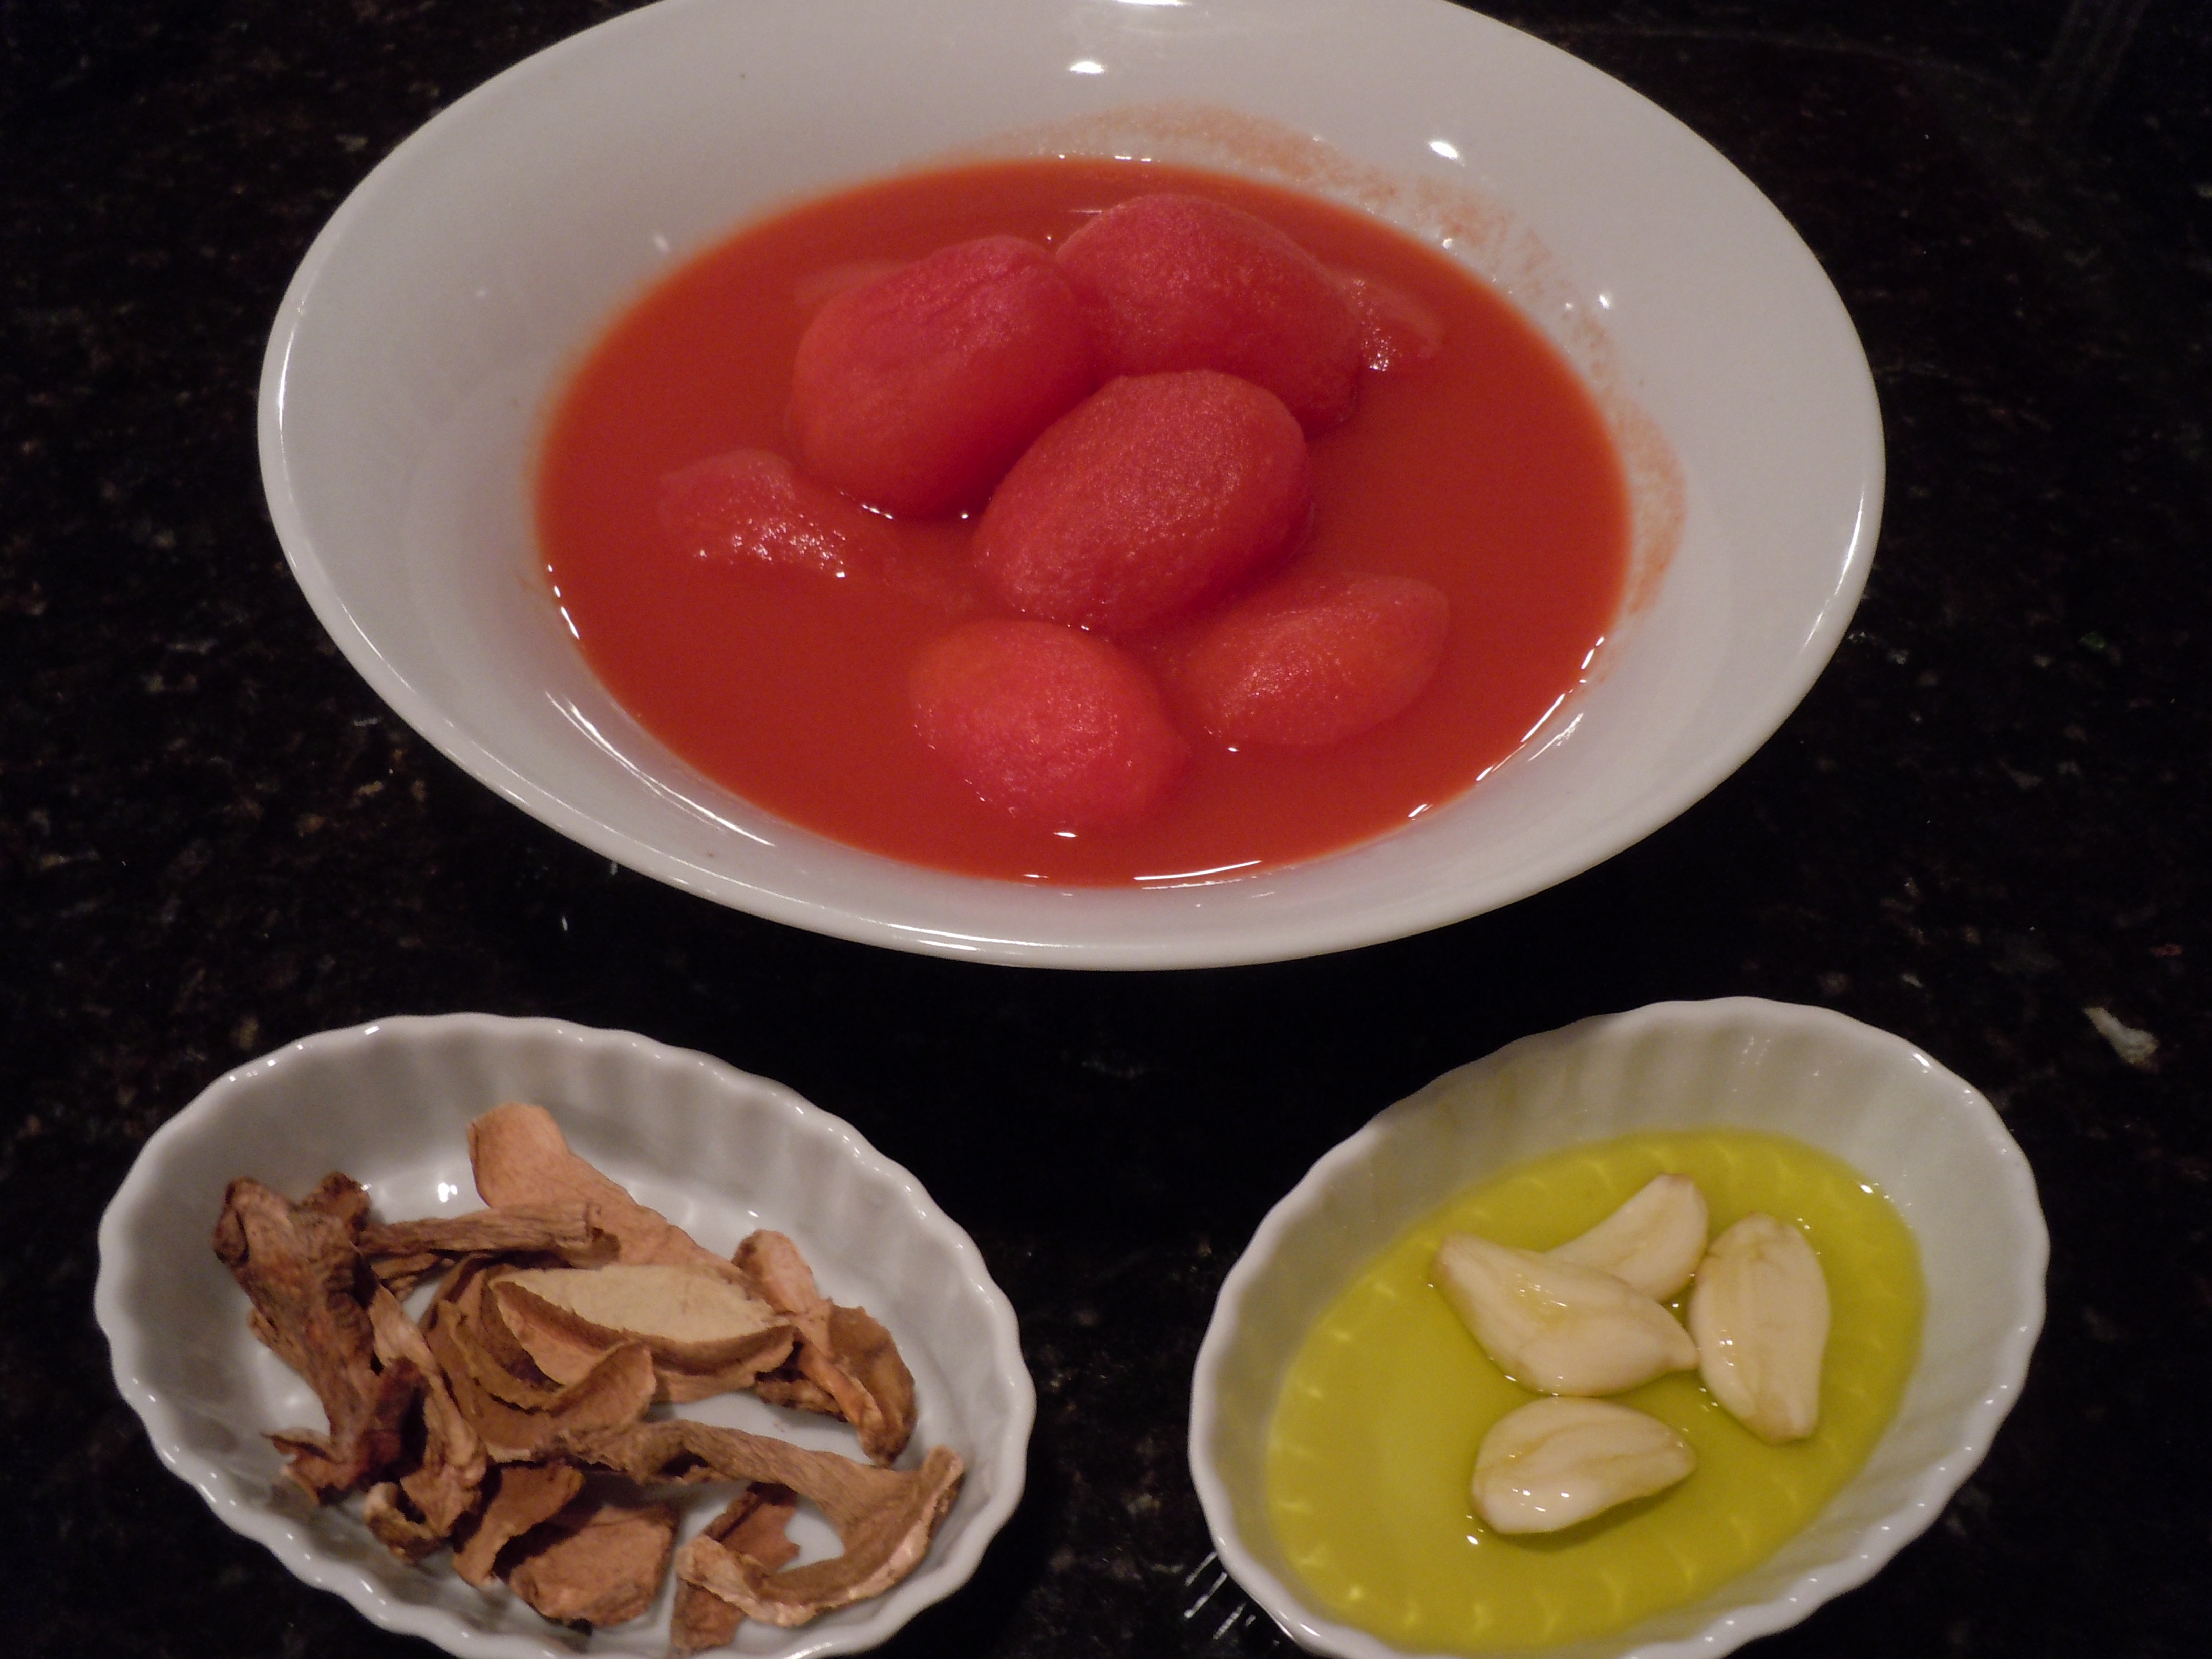
1 large can whole peeled tomatoes (I use Sclafani)
4 large garlic cloves
1/4 -1/3 cup dried broken up porcini mushrooms
1/4 cup warm water for the porcini mushrooms
1/4 cup pinot noir wine
1 Tbsp olive oil
1 Tsp salt
1 Tsp pepper
1 Tbsp sugar
Directions:
Put the dried porcini mushrooms in 1/4 cup water and let sit for 1/2 hour.
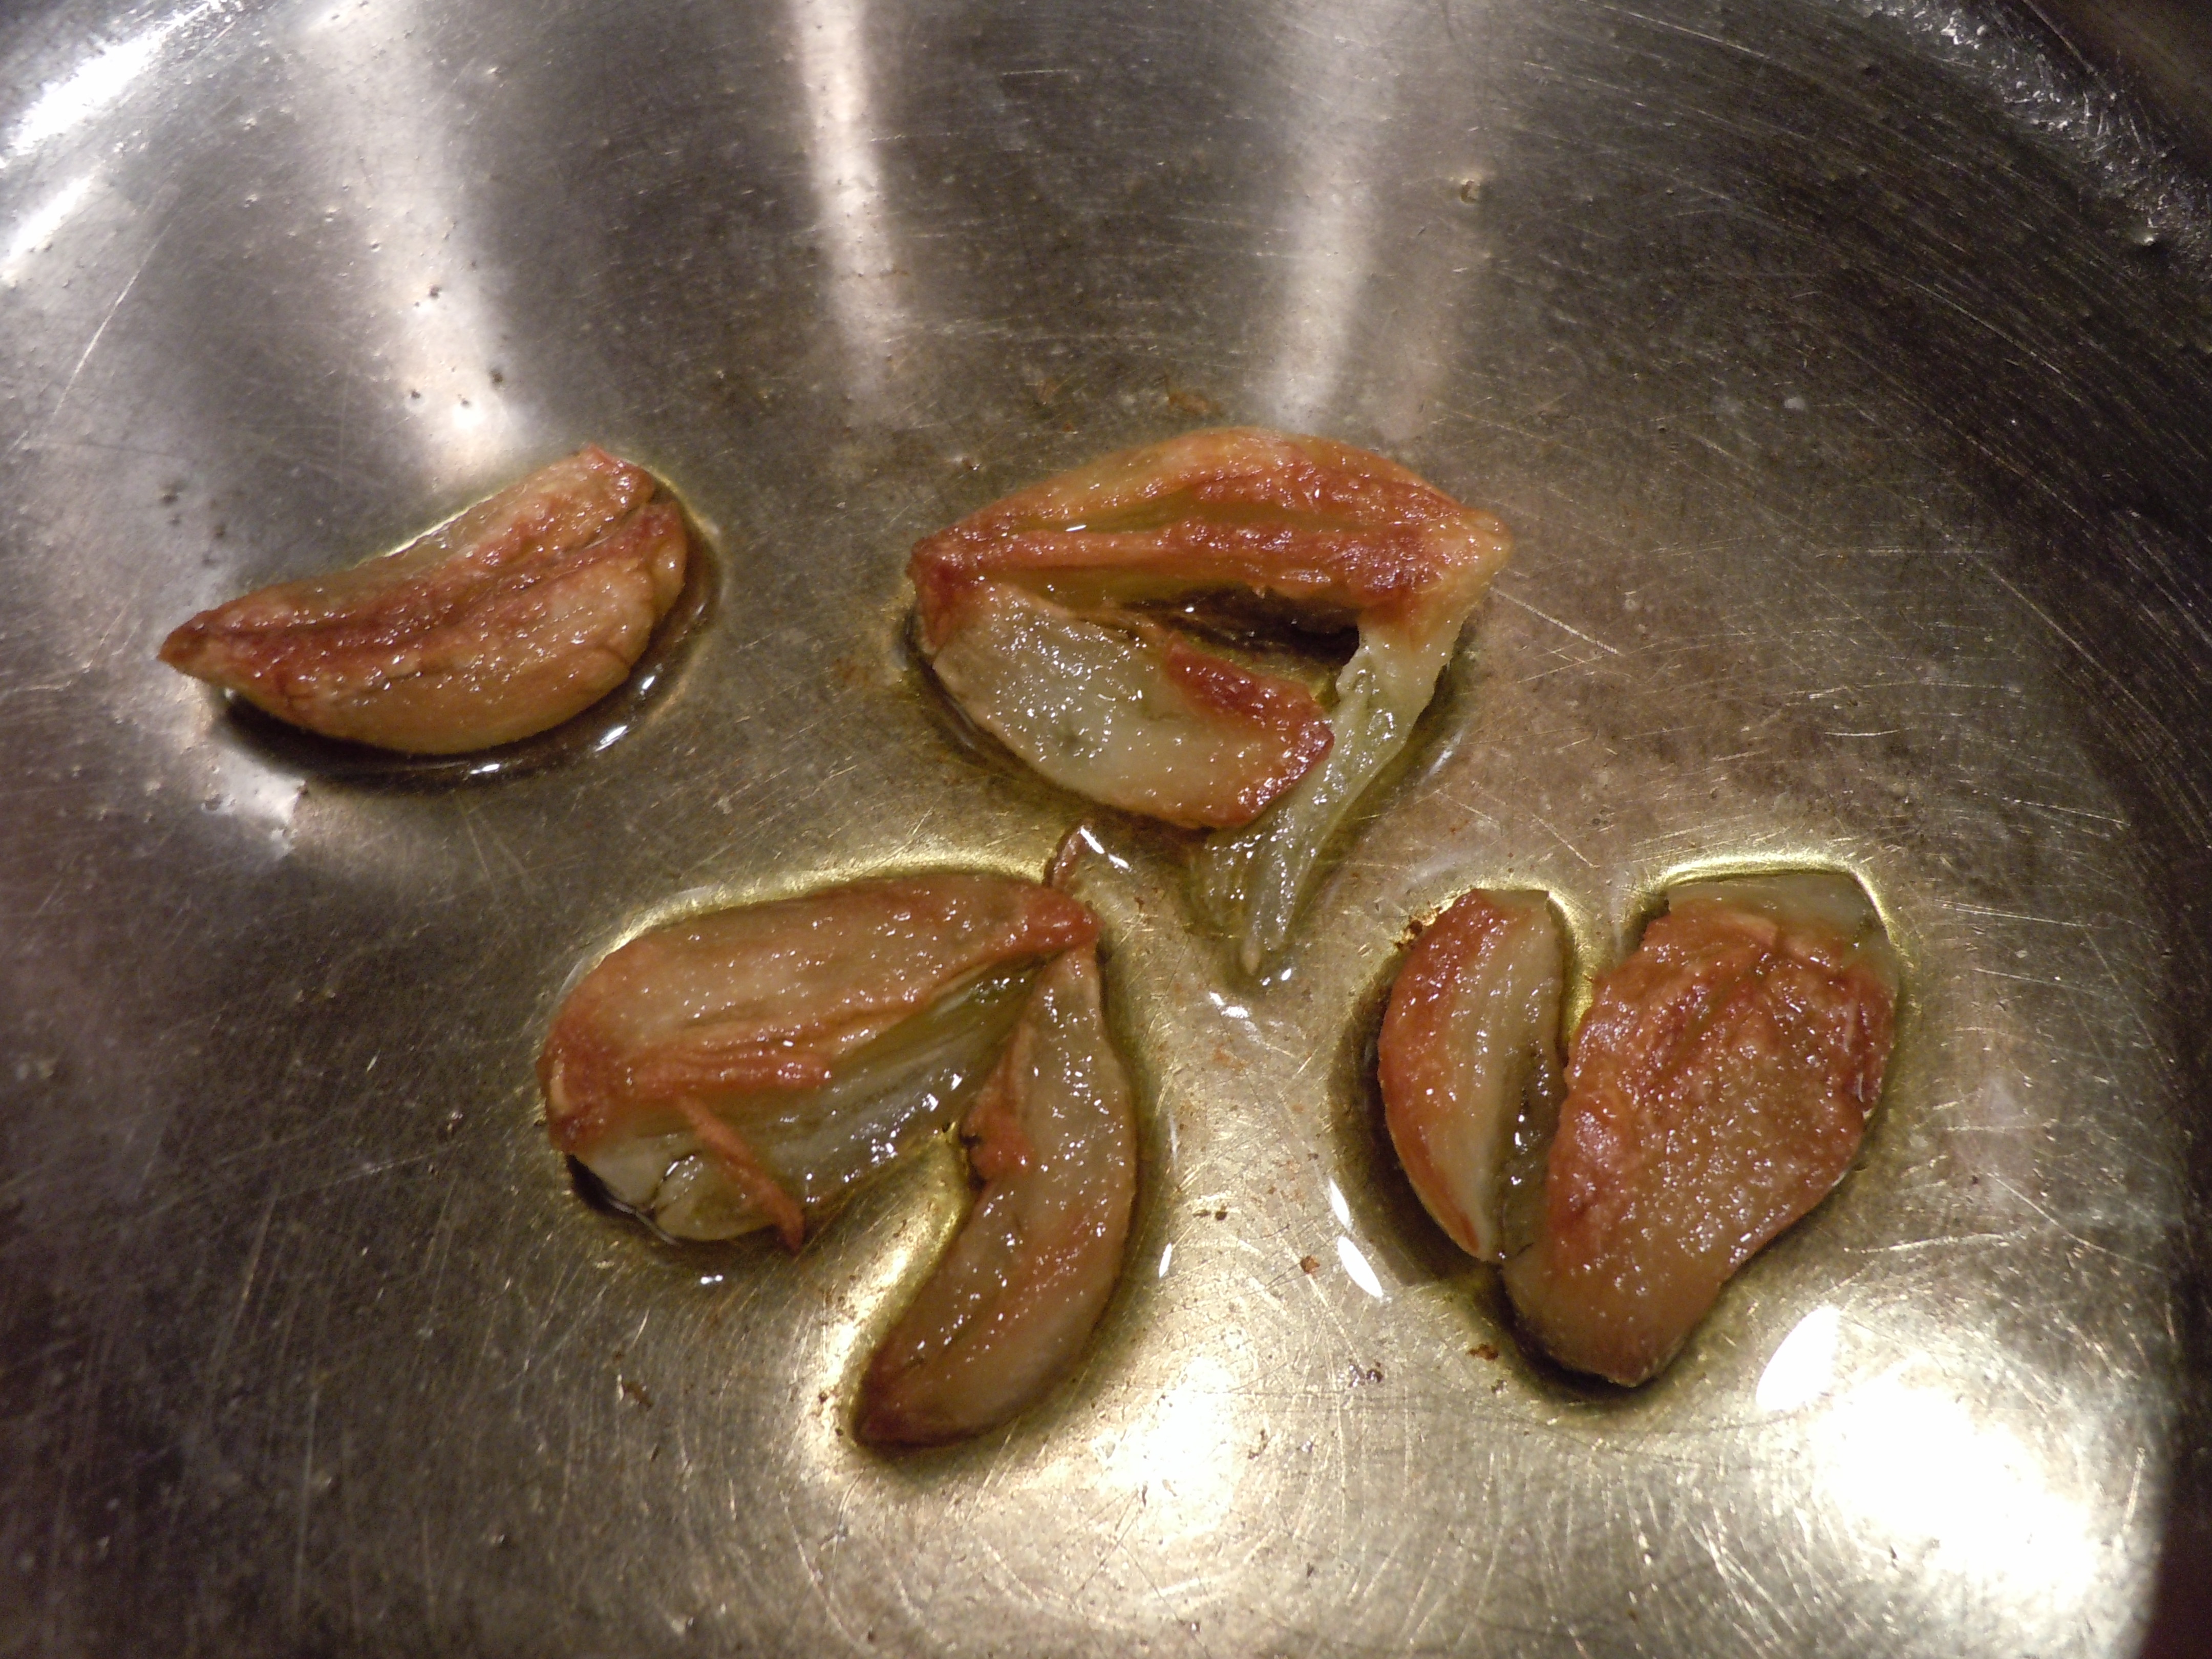
Sauté 4 large garlic cloves in 1 tbsp olive oil in a medium sauce pan until golden.
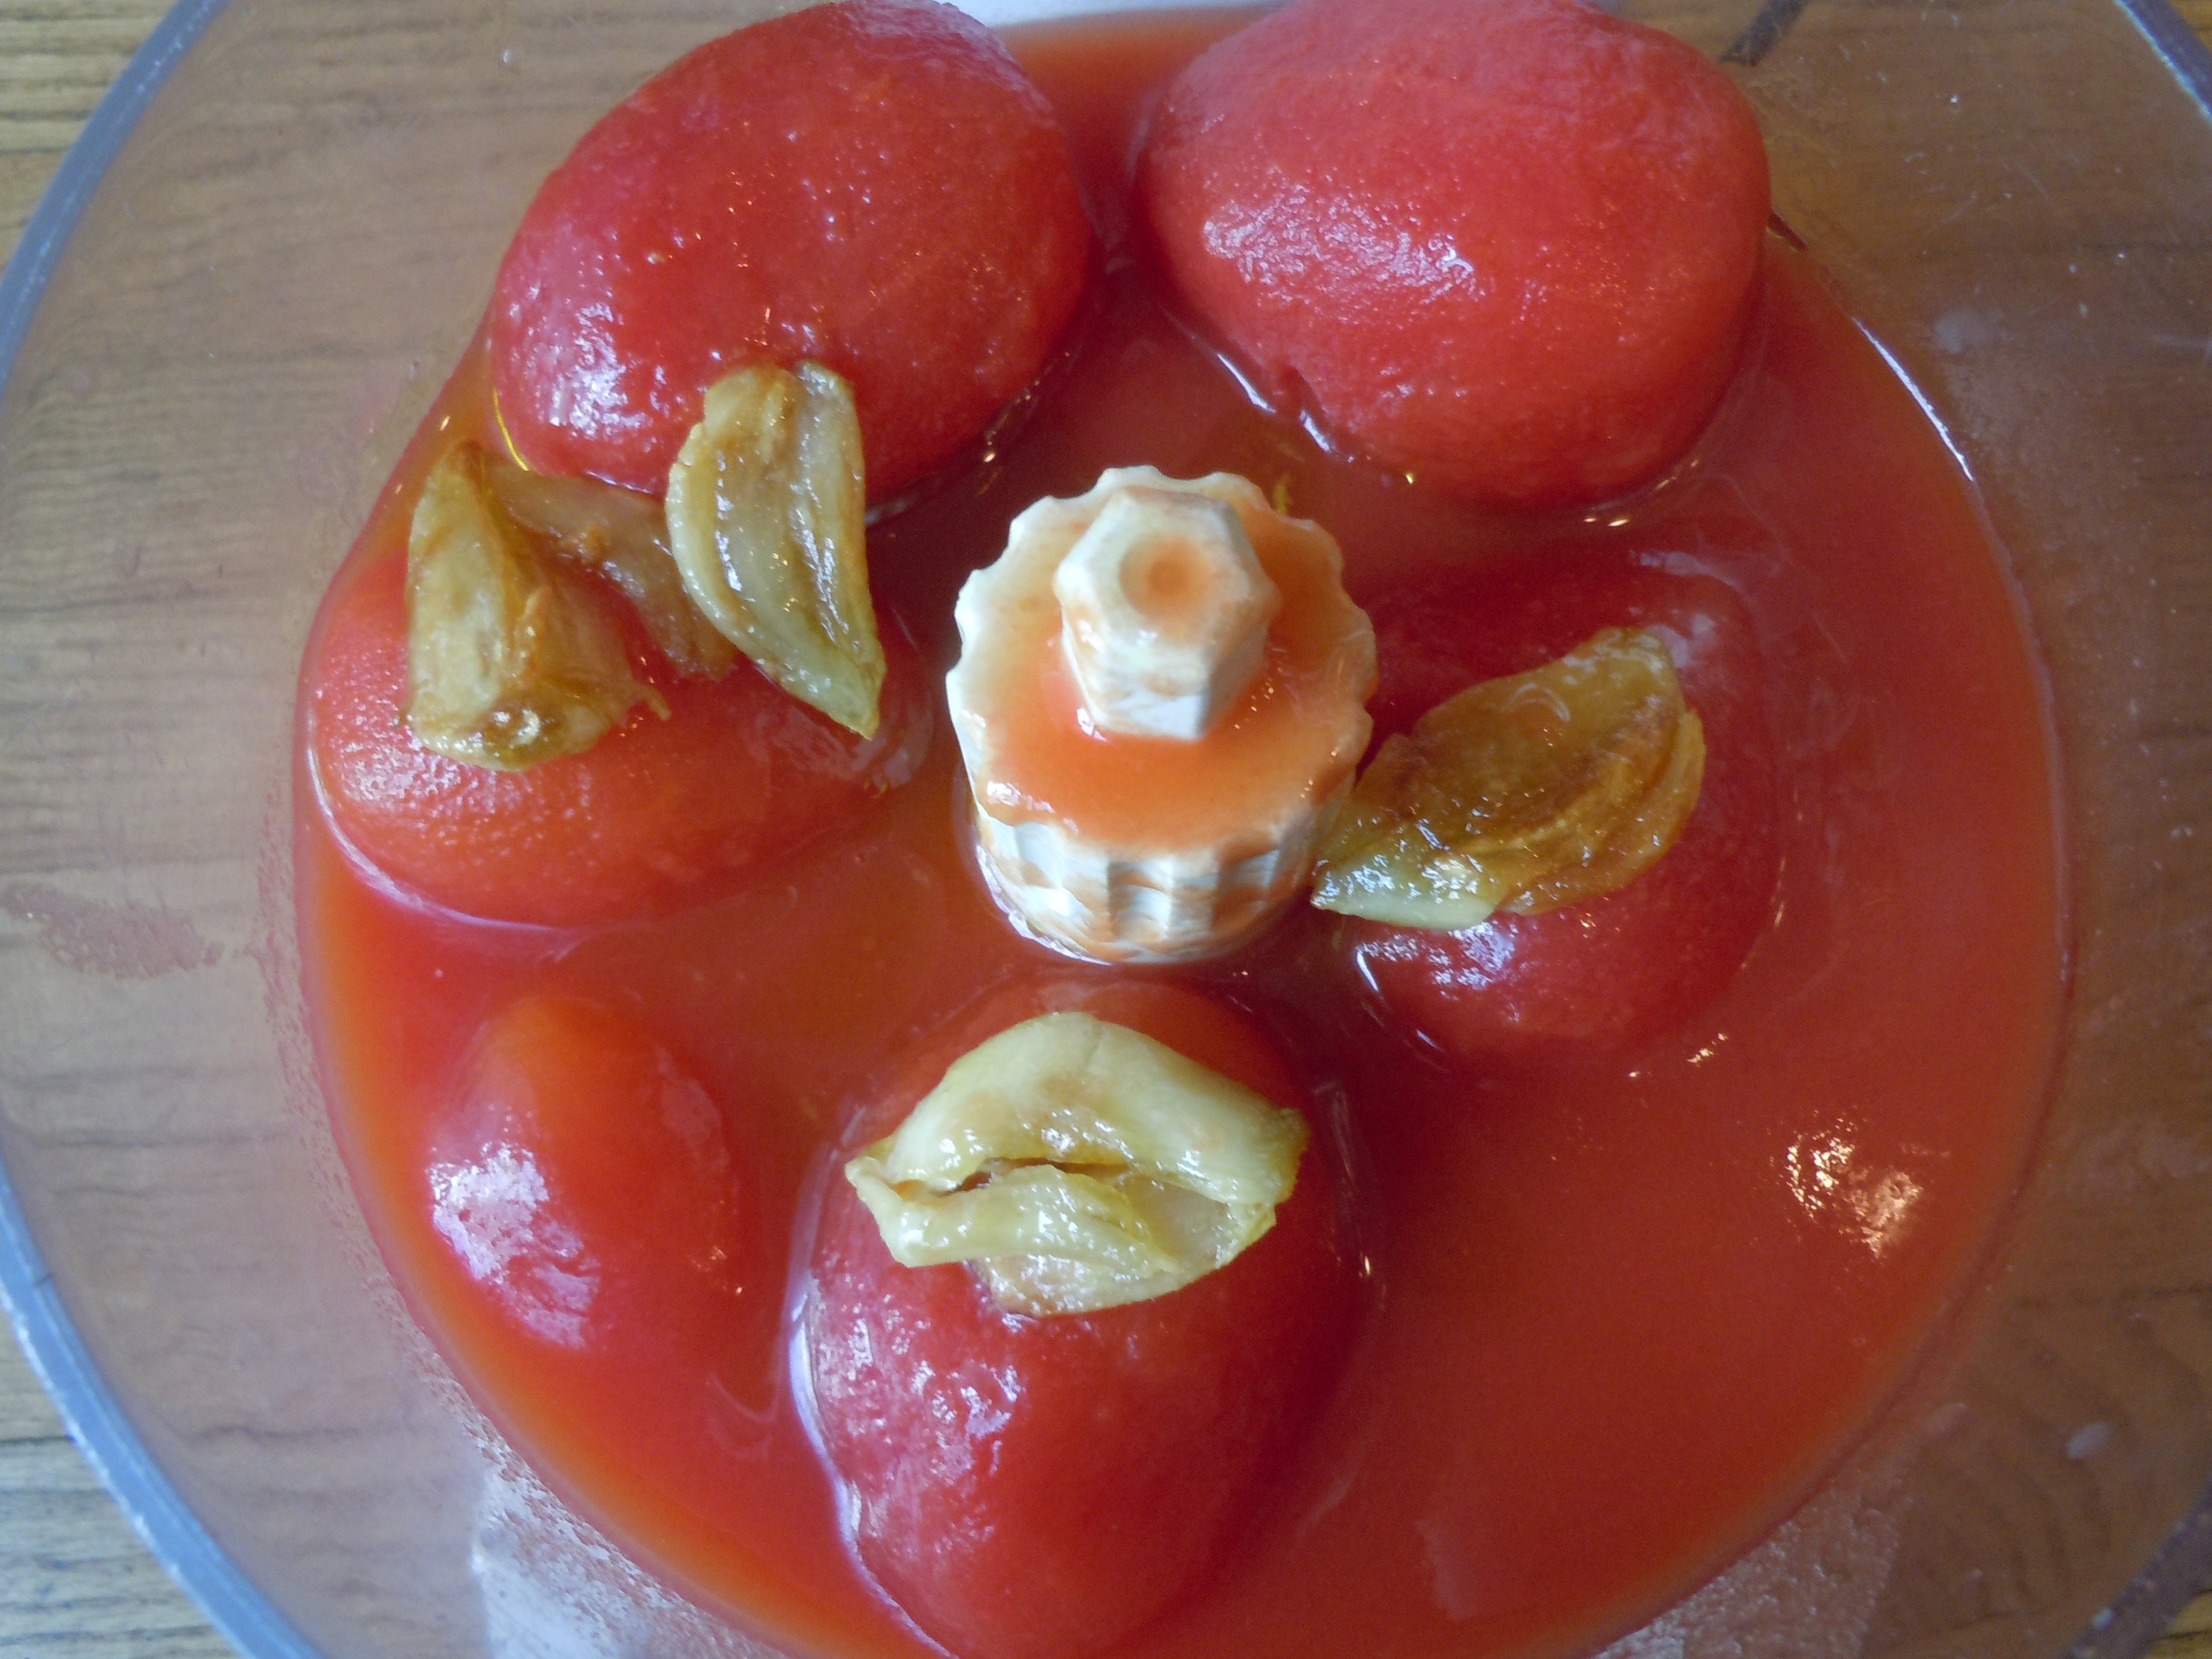
Add whole tomatoes and golden garlic cloves to food processor and purée for 1 minute.
Add this back to the pan.
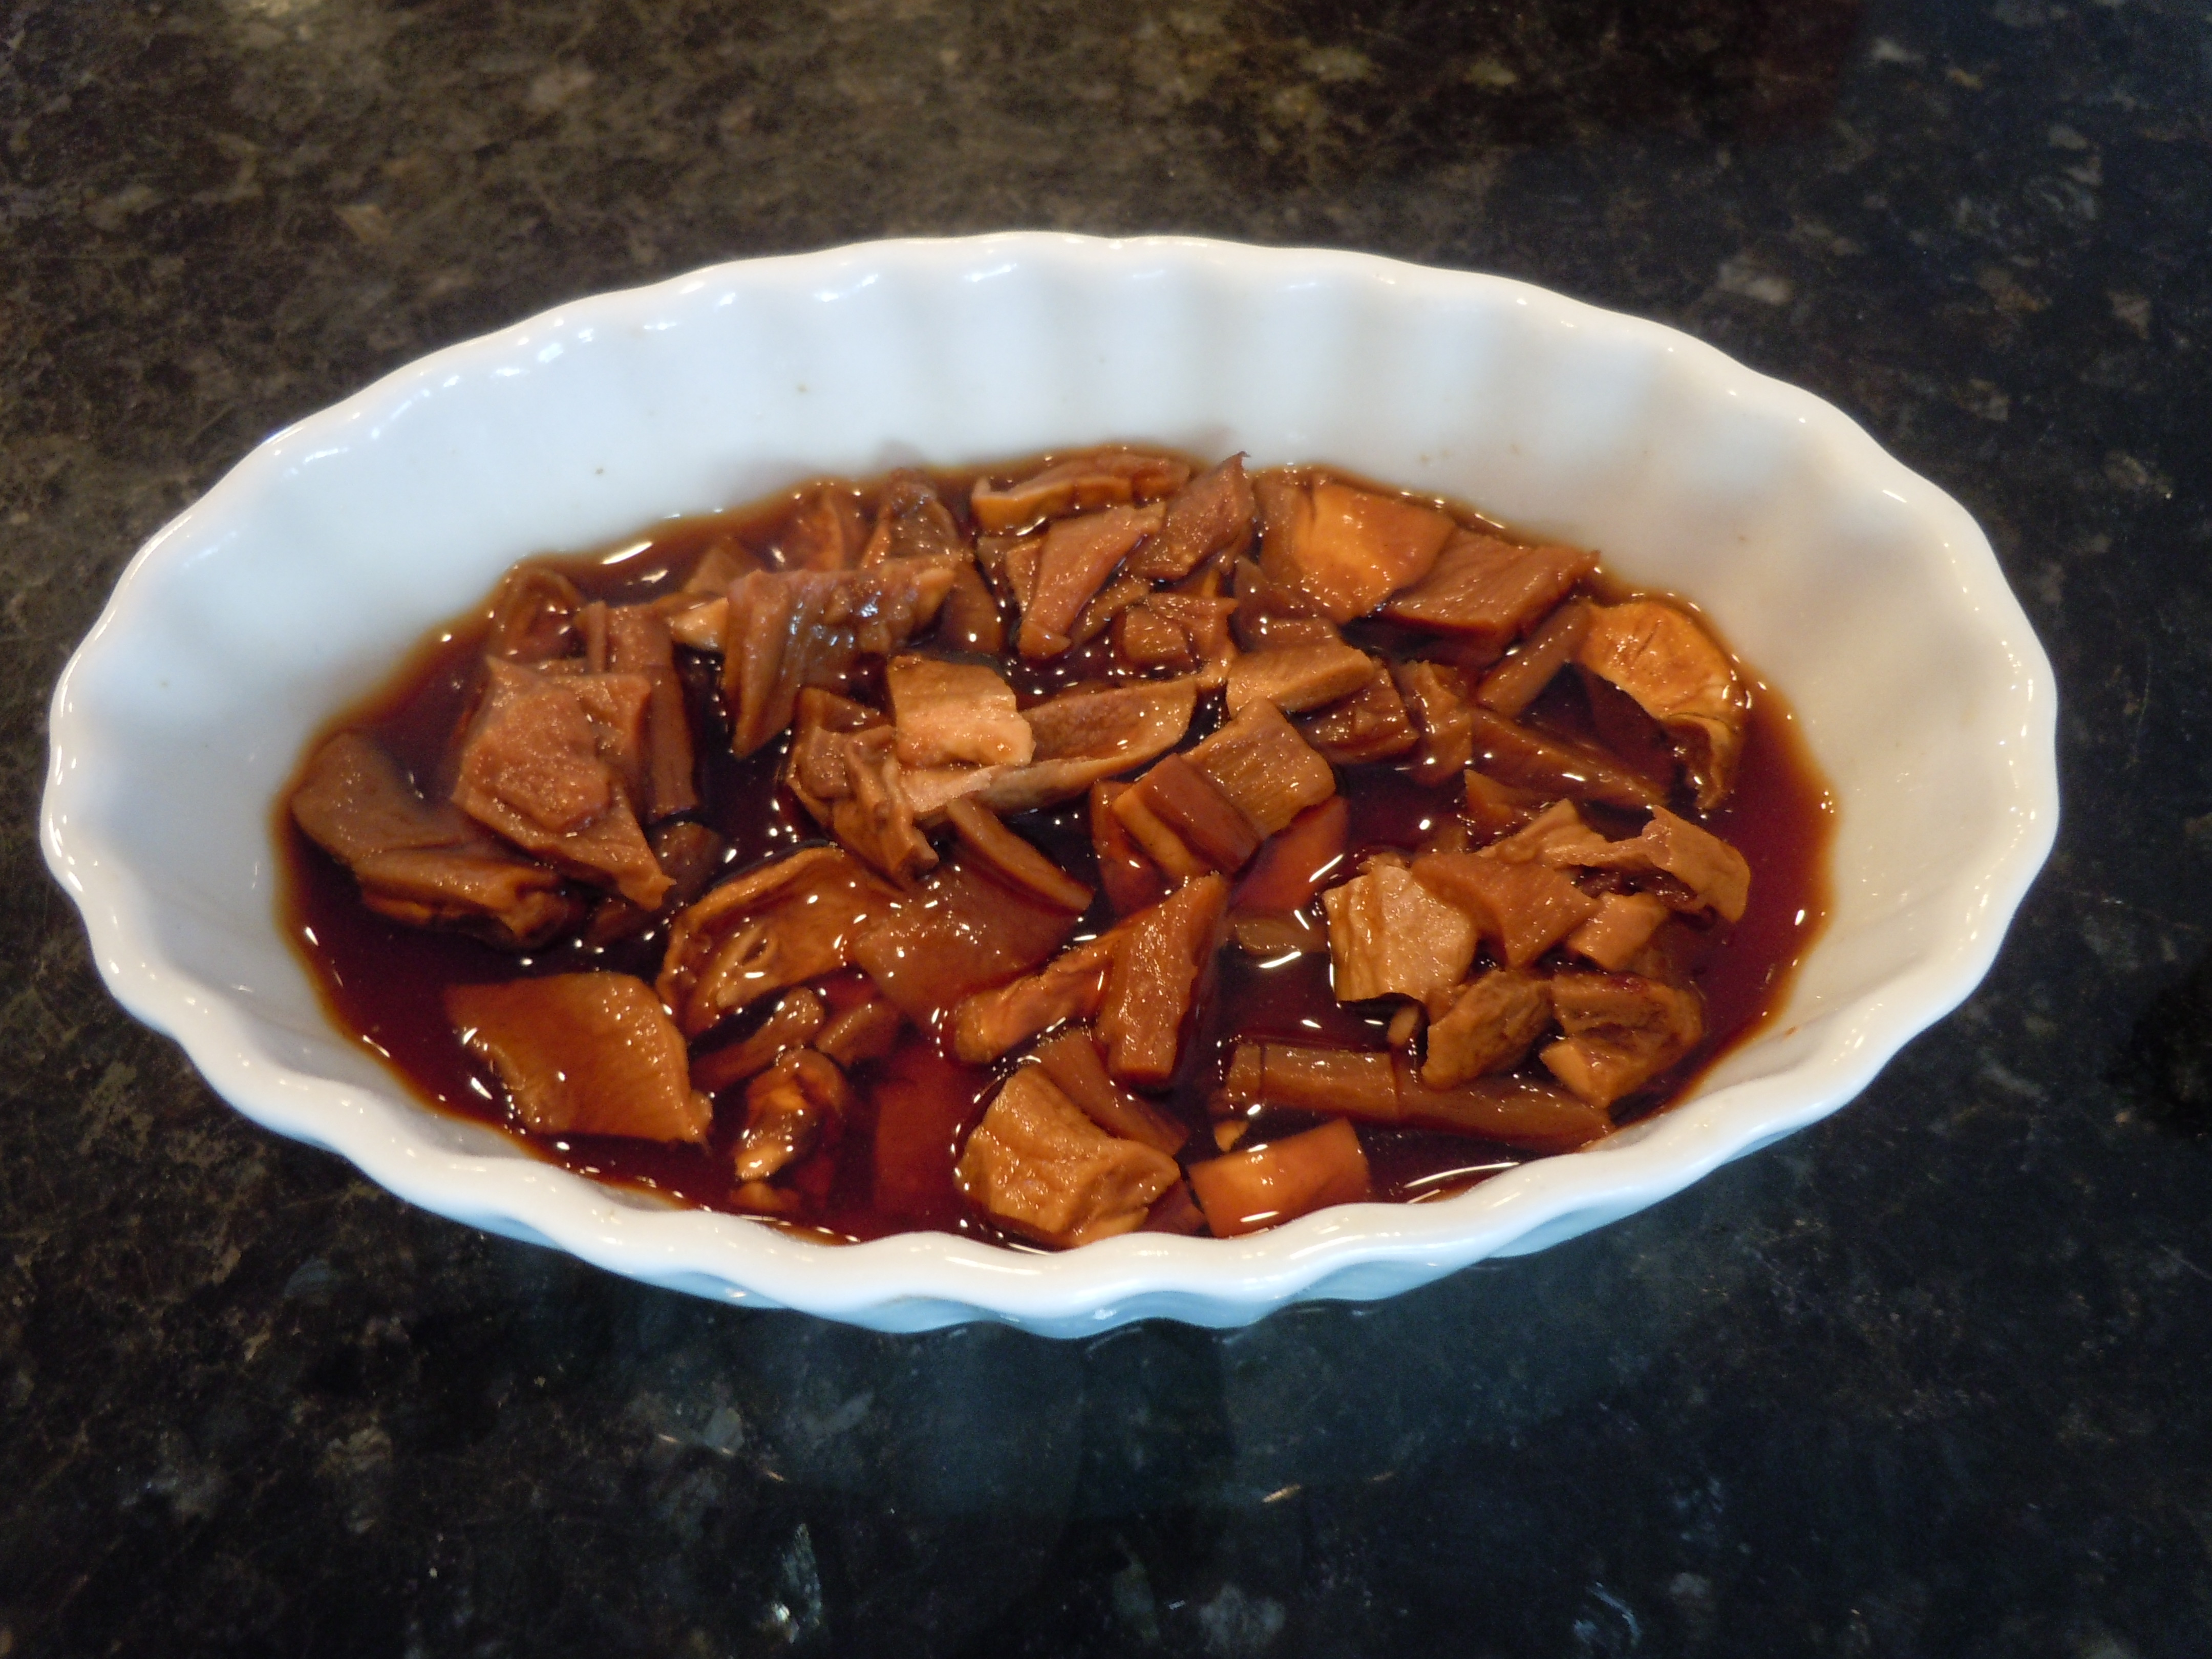
Take the soaked, softened porcini’s out of the water and coarsely chop.
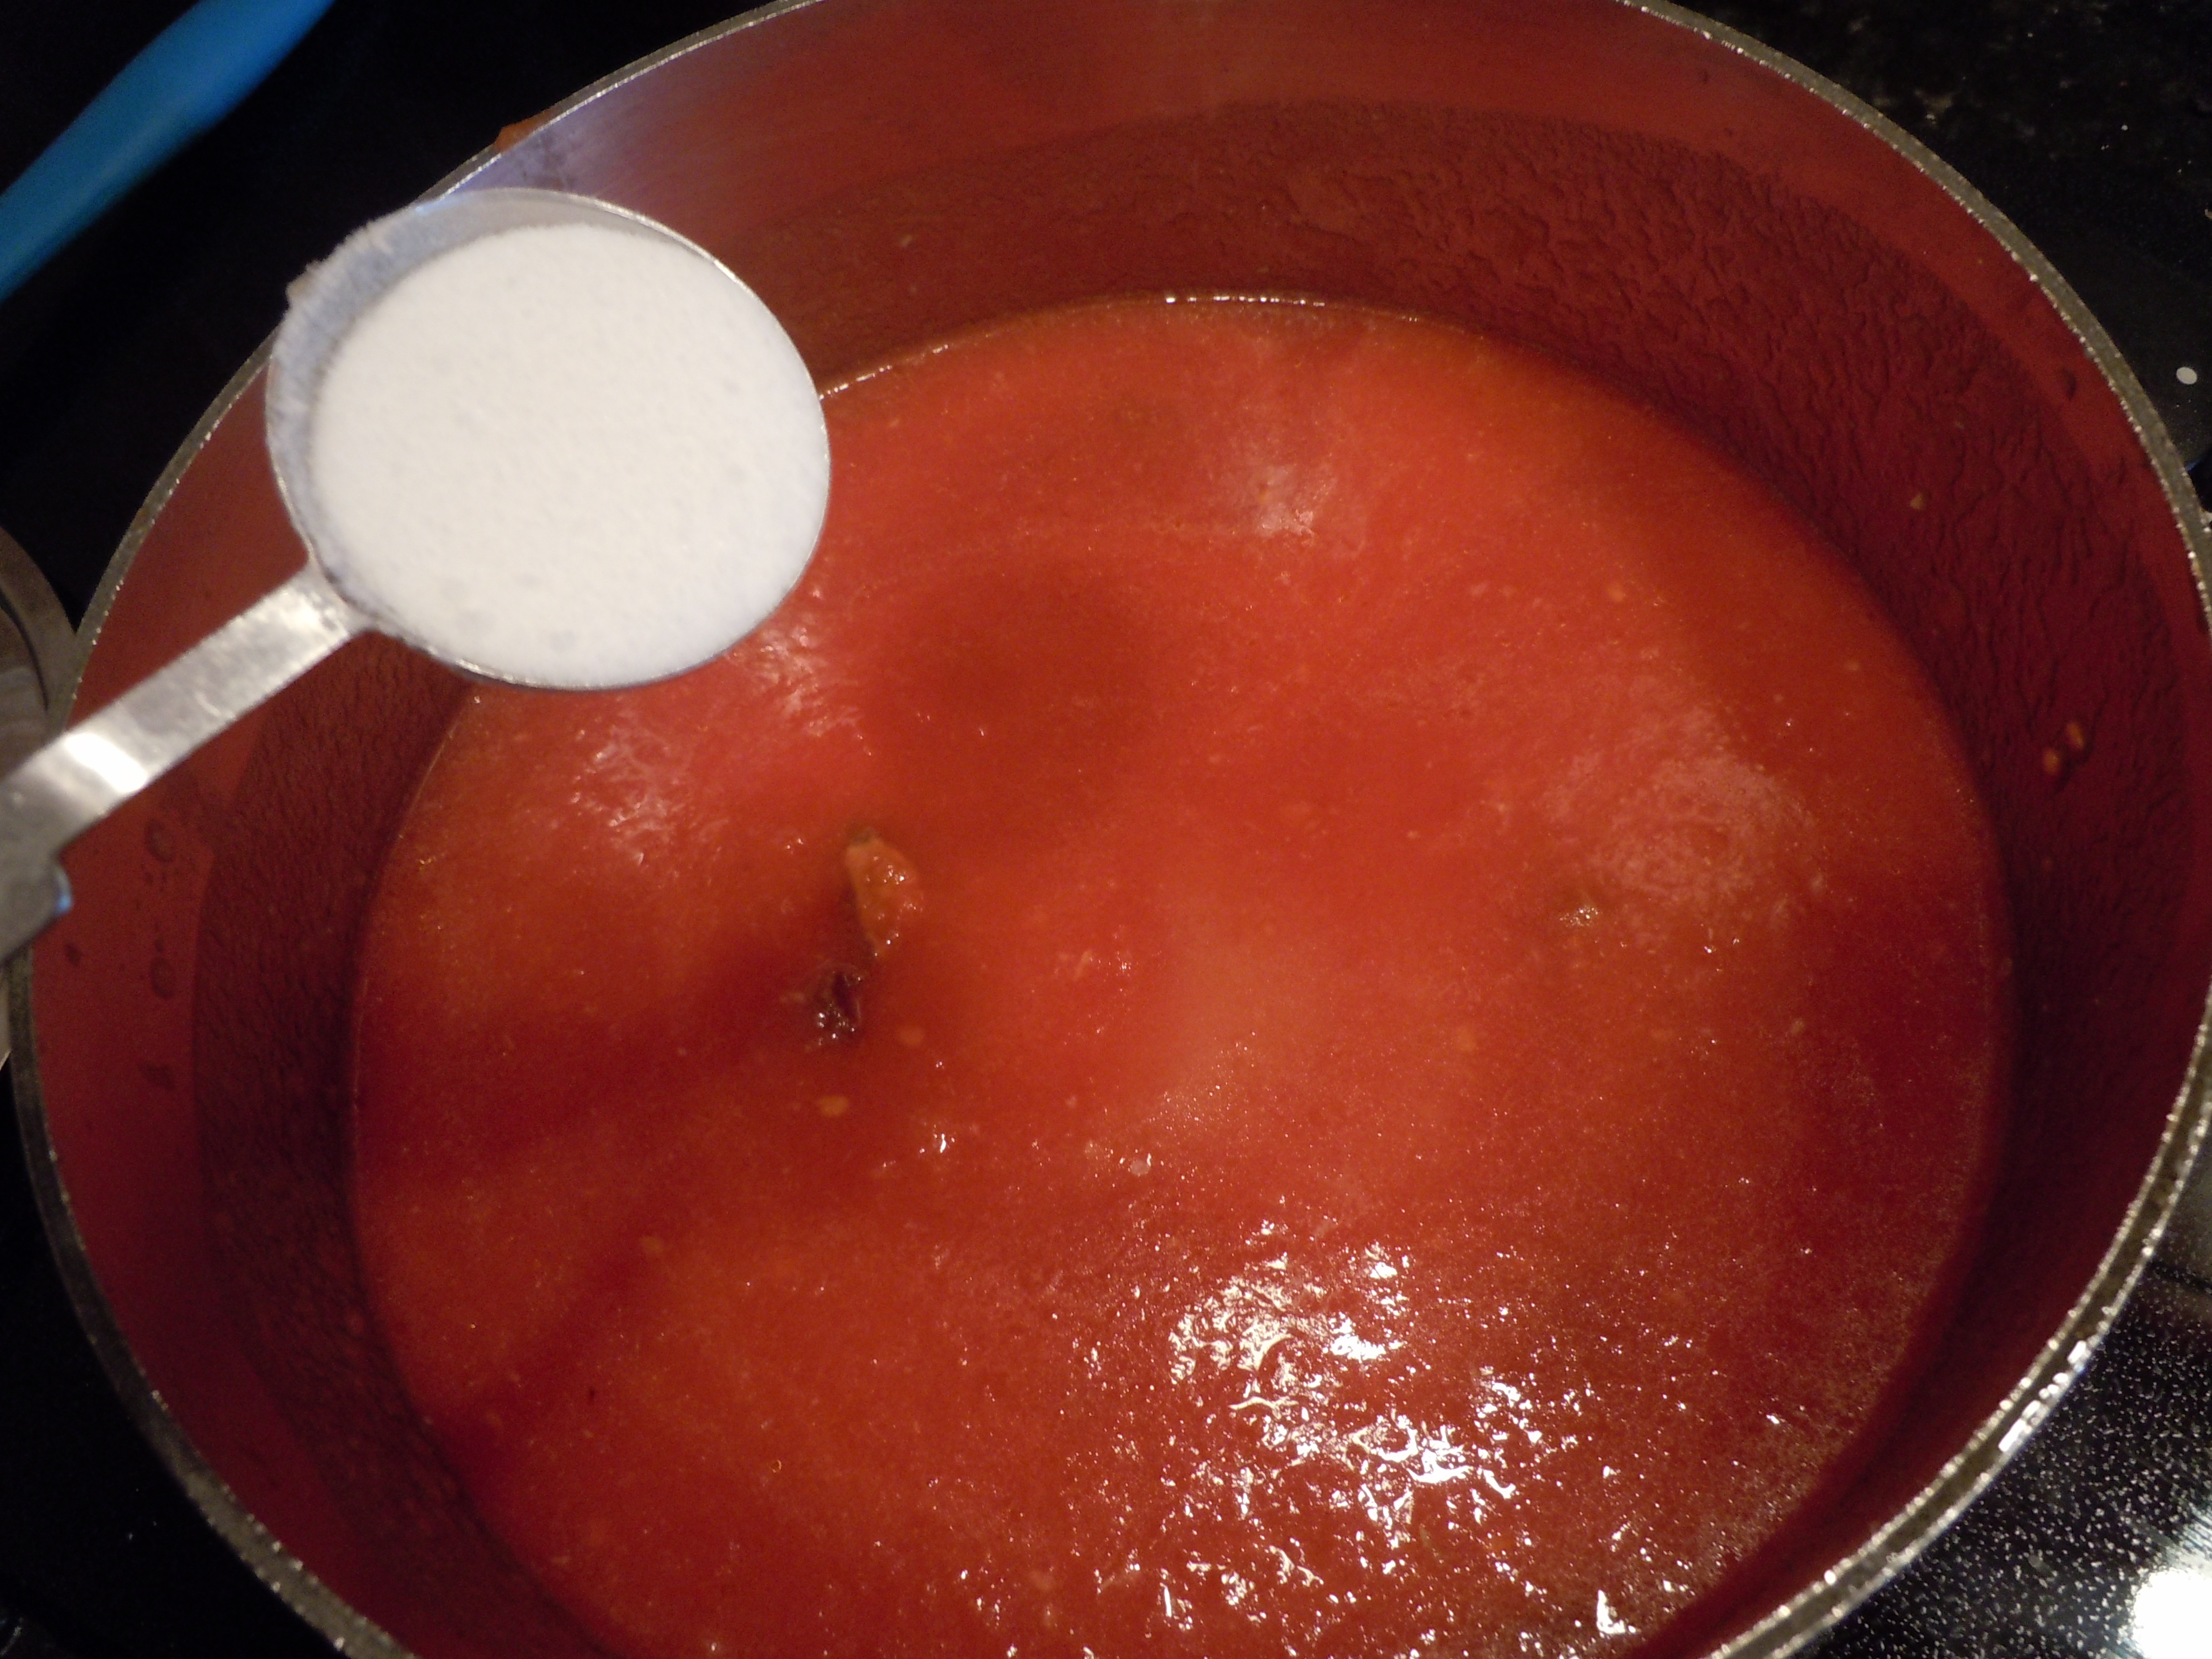
Add the porcini’s and their juice to the sauce pan along with 1/4 cup pinot, salt, pepper and sugar.
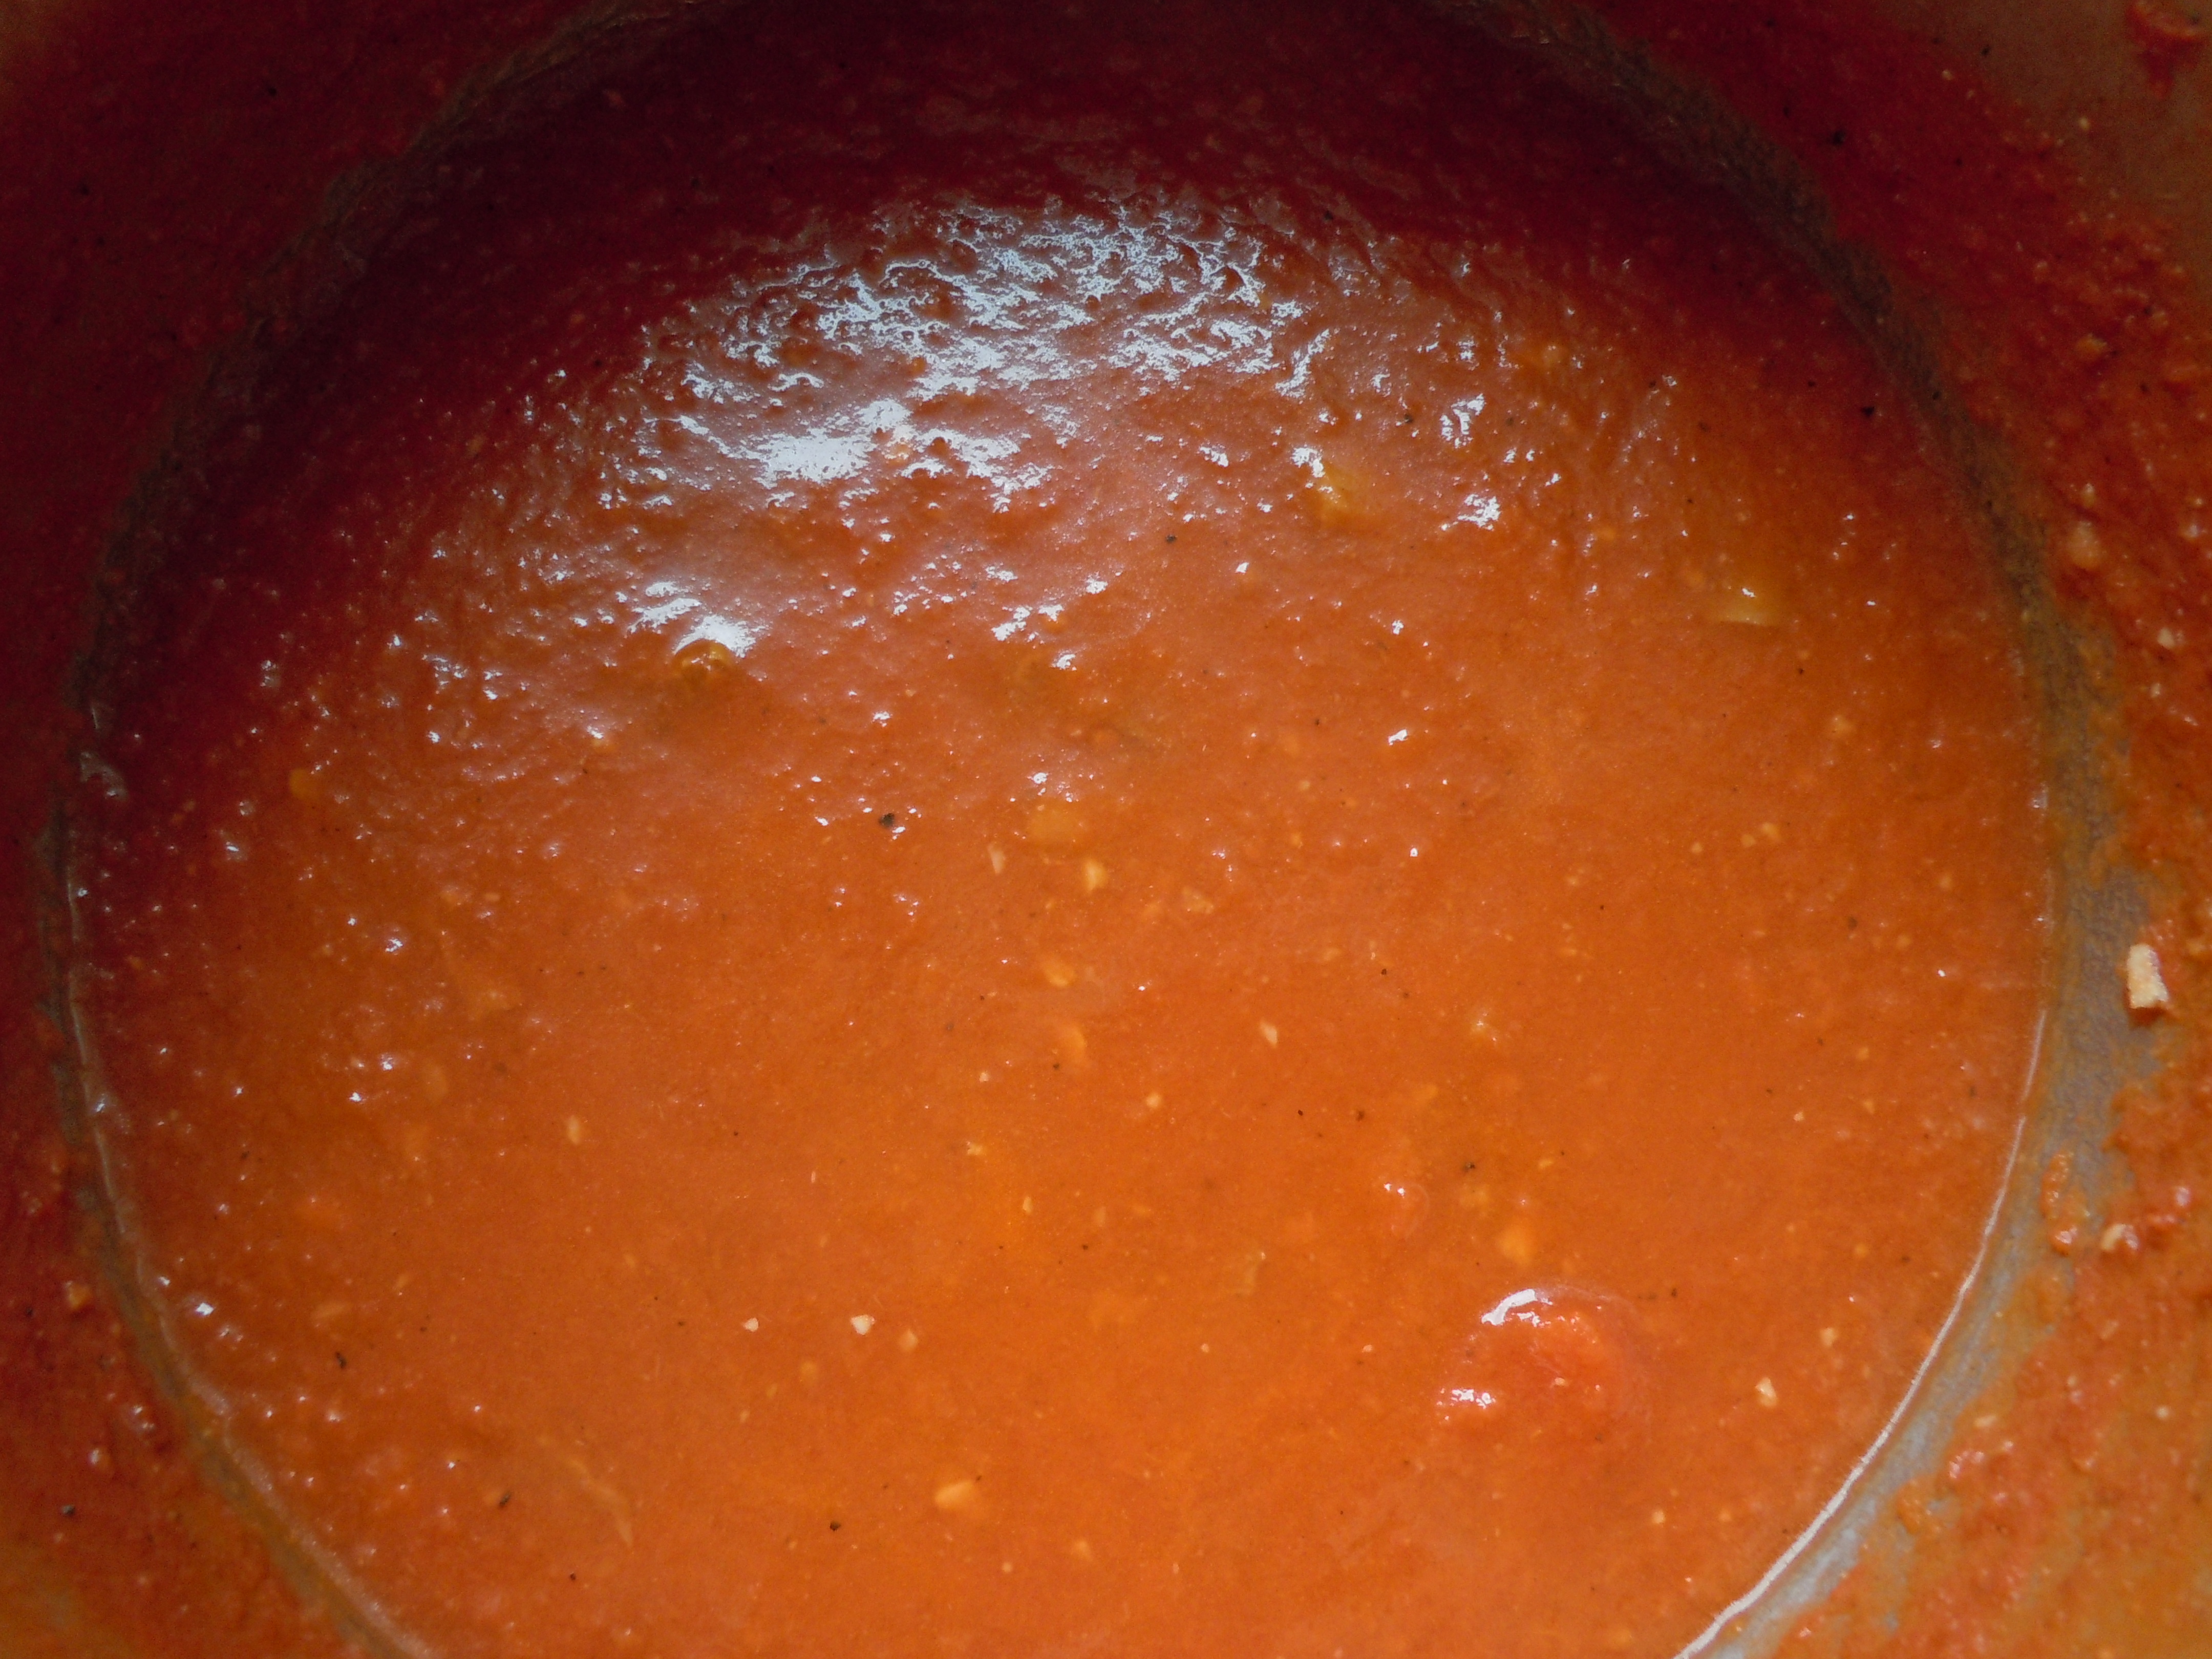
Bring to a simmer, lower heat and keep simmering for 20-30 minutes.
Remove from the stove and cool.
Ingredients – For Stuffed Peppers – Serves 6-8 people:
1 lb. ground turkey
6 -8 large bell peppers, 2 red, 2 orange, 2 yellow, 2 green (USE 6-8 peppers)
2 1/4 cups porcini red sauce (1 c. in the stuffing, 2 1/4 c. in the bottom of baking dish)
1 1/2 cup cooked Basmati or Jasmine long grain rice
1 cup grated Reggiano Parmesano
1/3 cup coarsely chopped flat leaf parsley
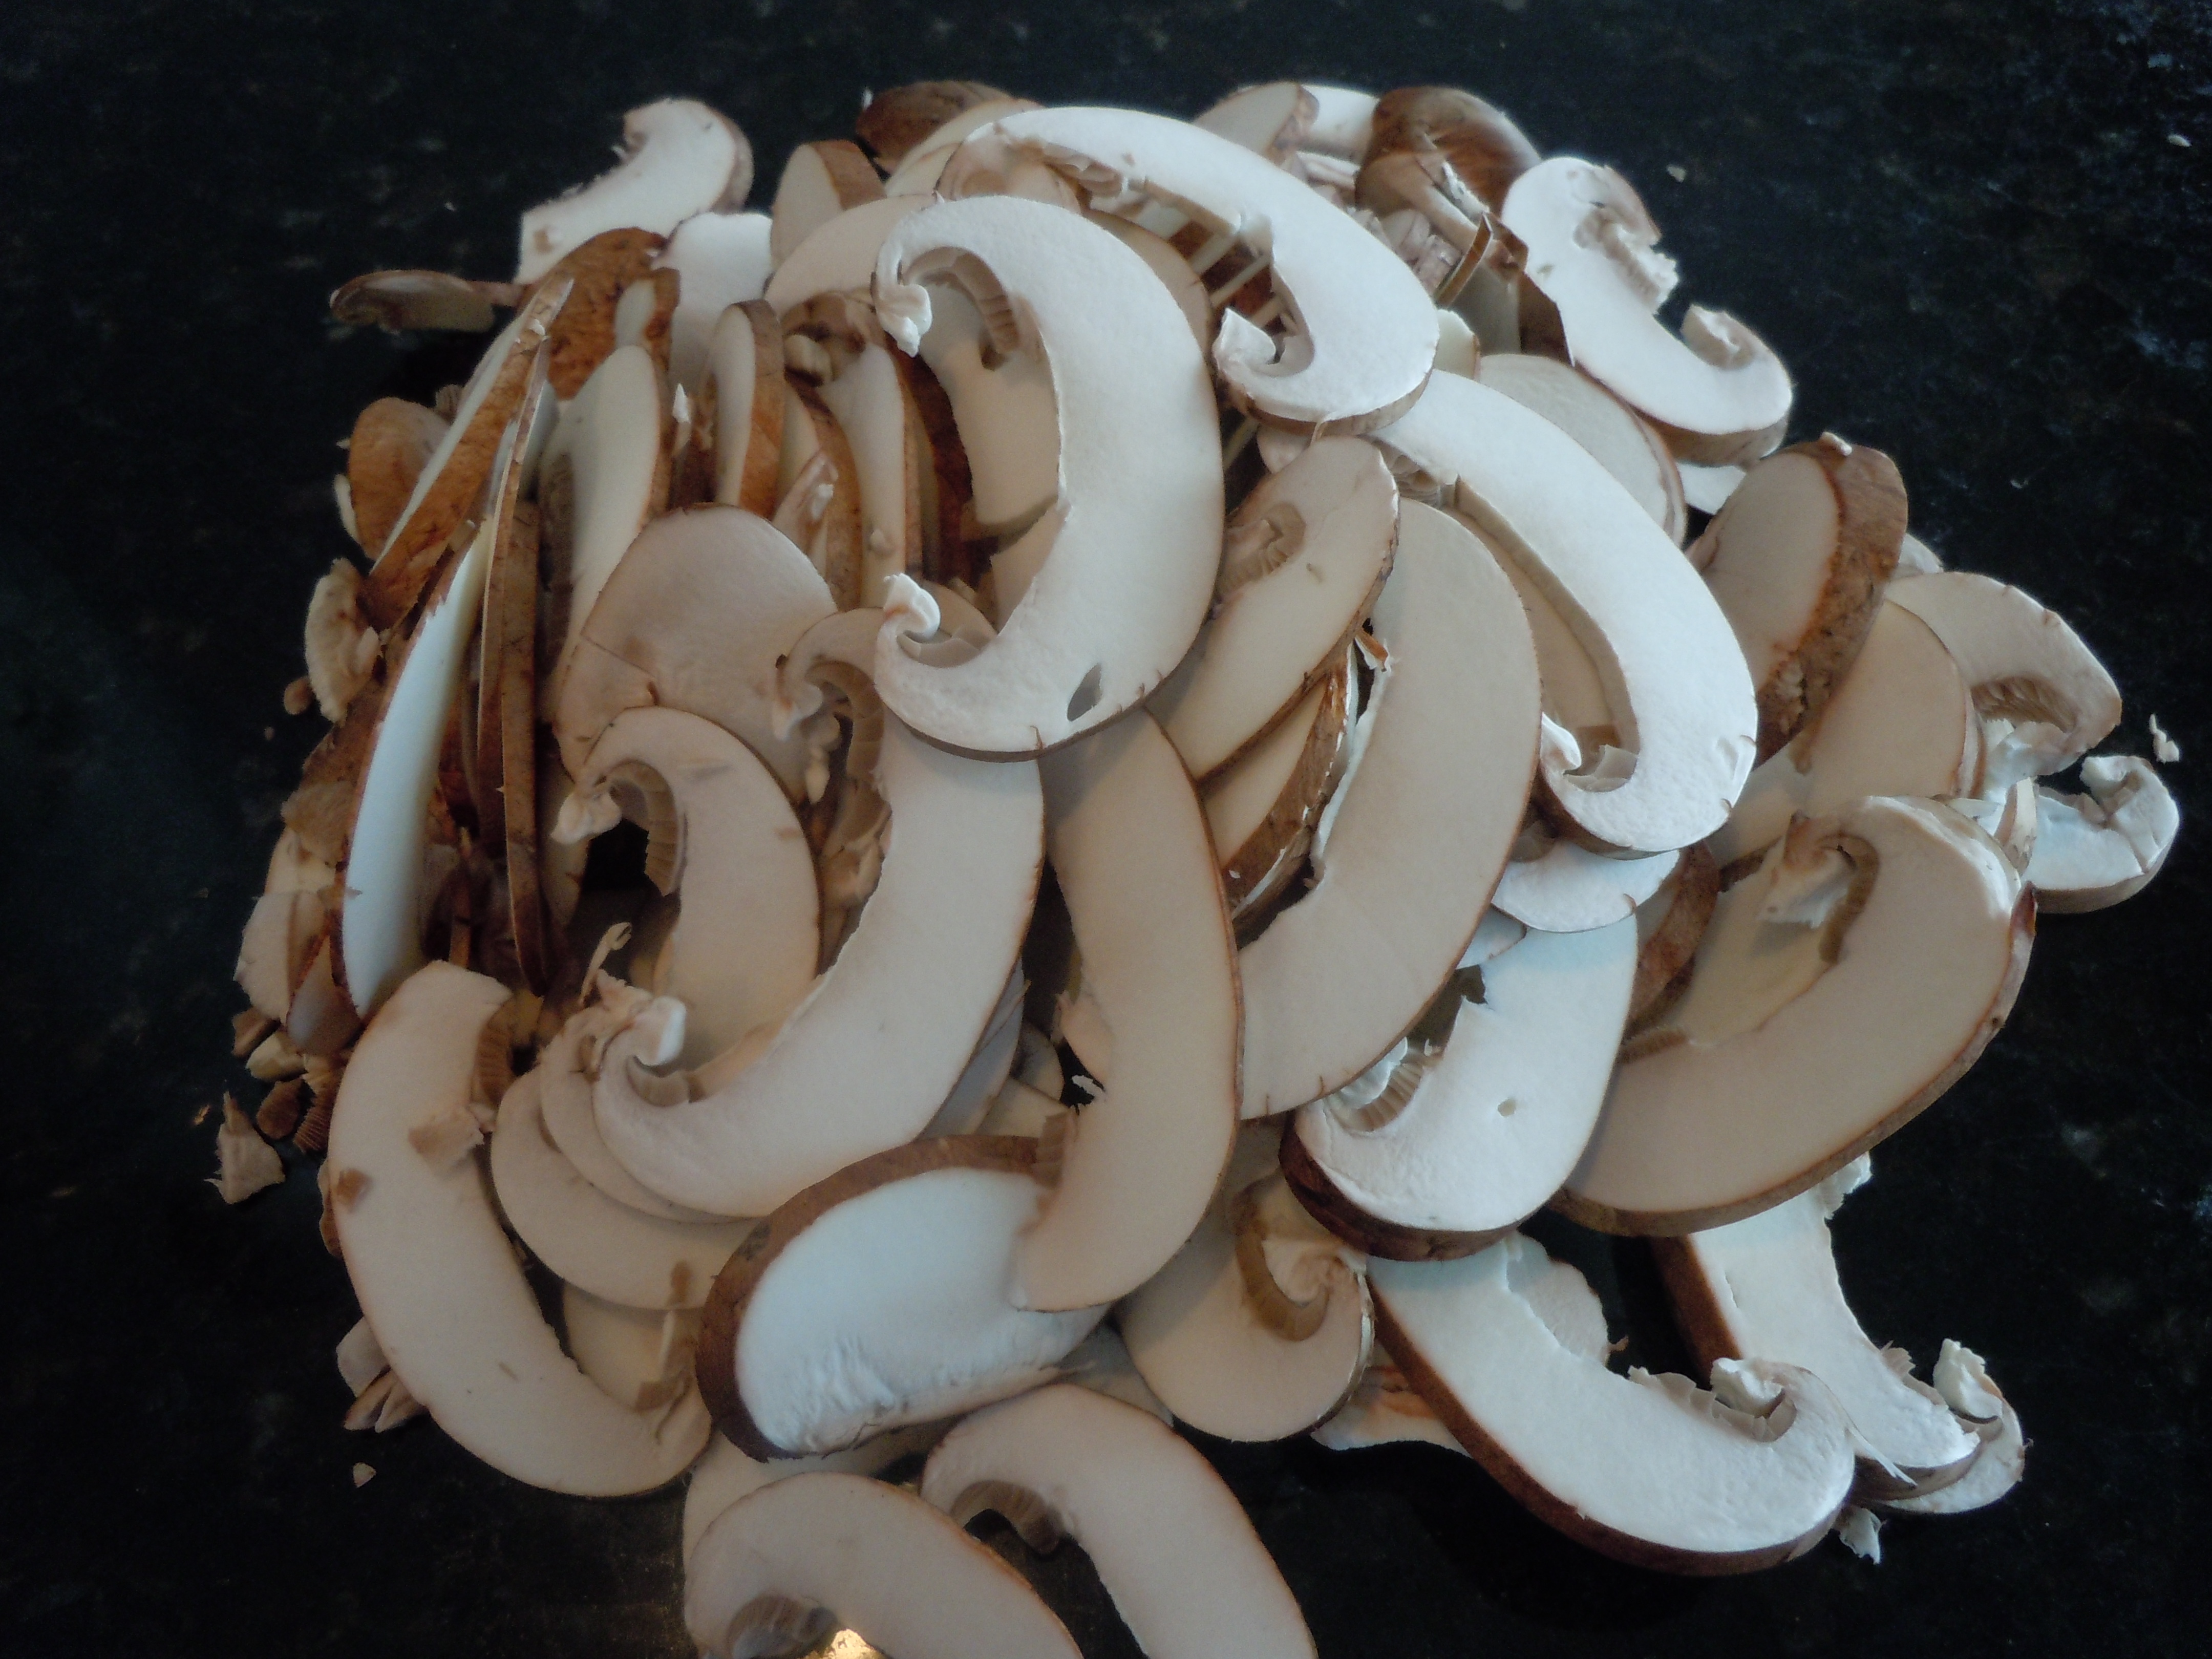
8oz. pkg of baby bella brown mushrooms (finely sliced) and then a little chop
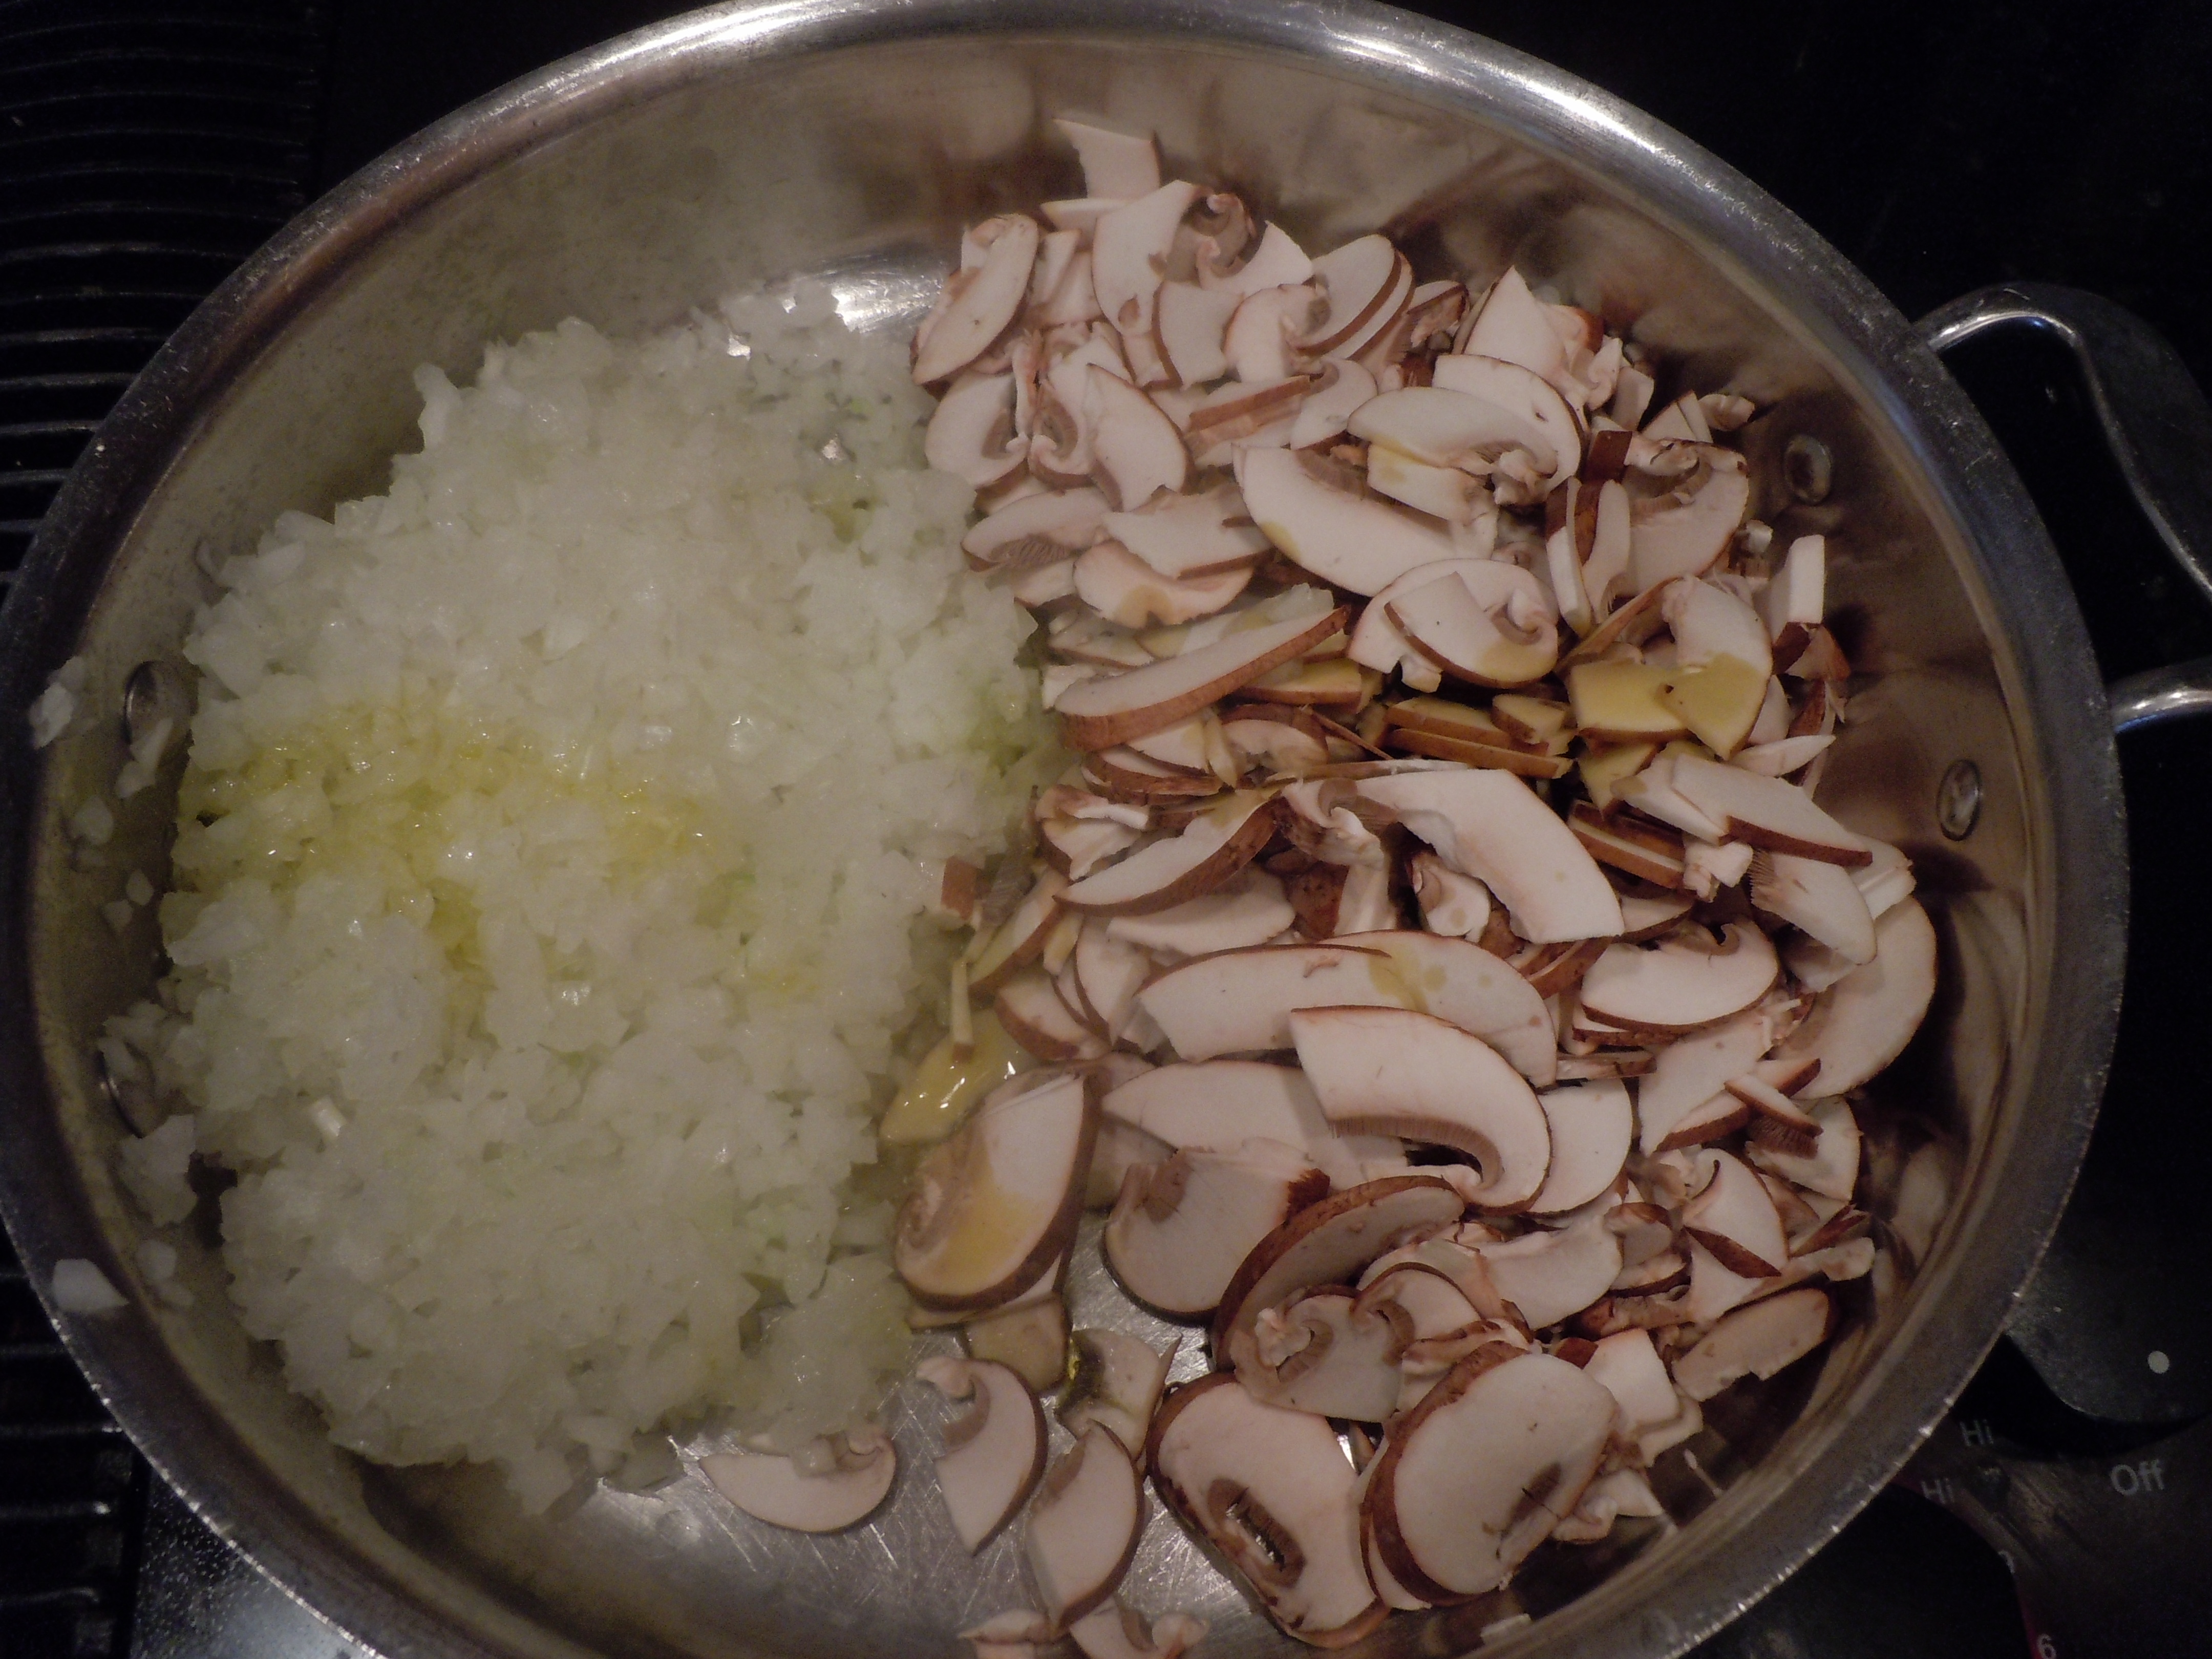
1 large spanish onion FINELY chopped about 2 1/2 -3 cups
1 cup pinot noir or cabernet (1/4 c. for mushroom/onion mixture, 3/4 c. for baking dish)
1/2 cup boiling water
2 1/4 Tsp salt (2 tsp in bowl with stuffing ingredients and 1/4 when sauteing the mushrooms and onions)
1/4 Tsp pepper
2 Tbsp live oil (for sautéing)
Directions:
Pre-heat oven to 350º.
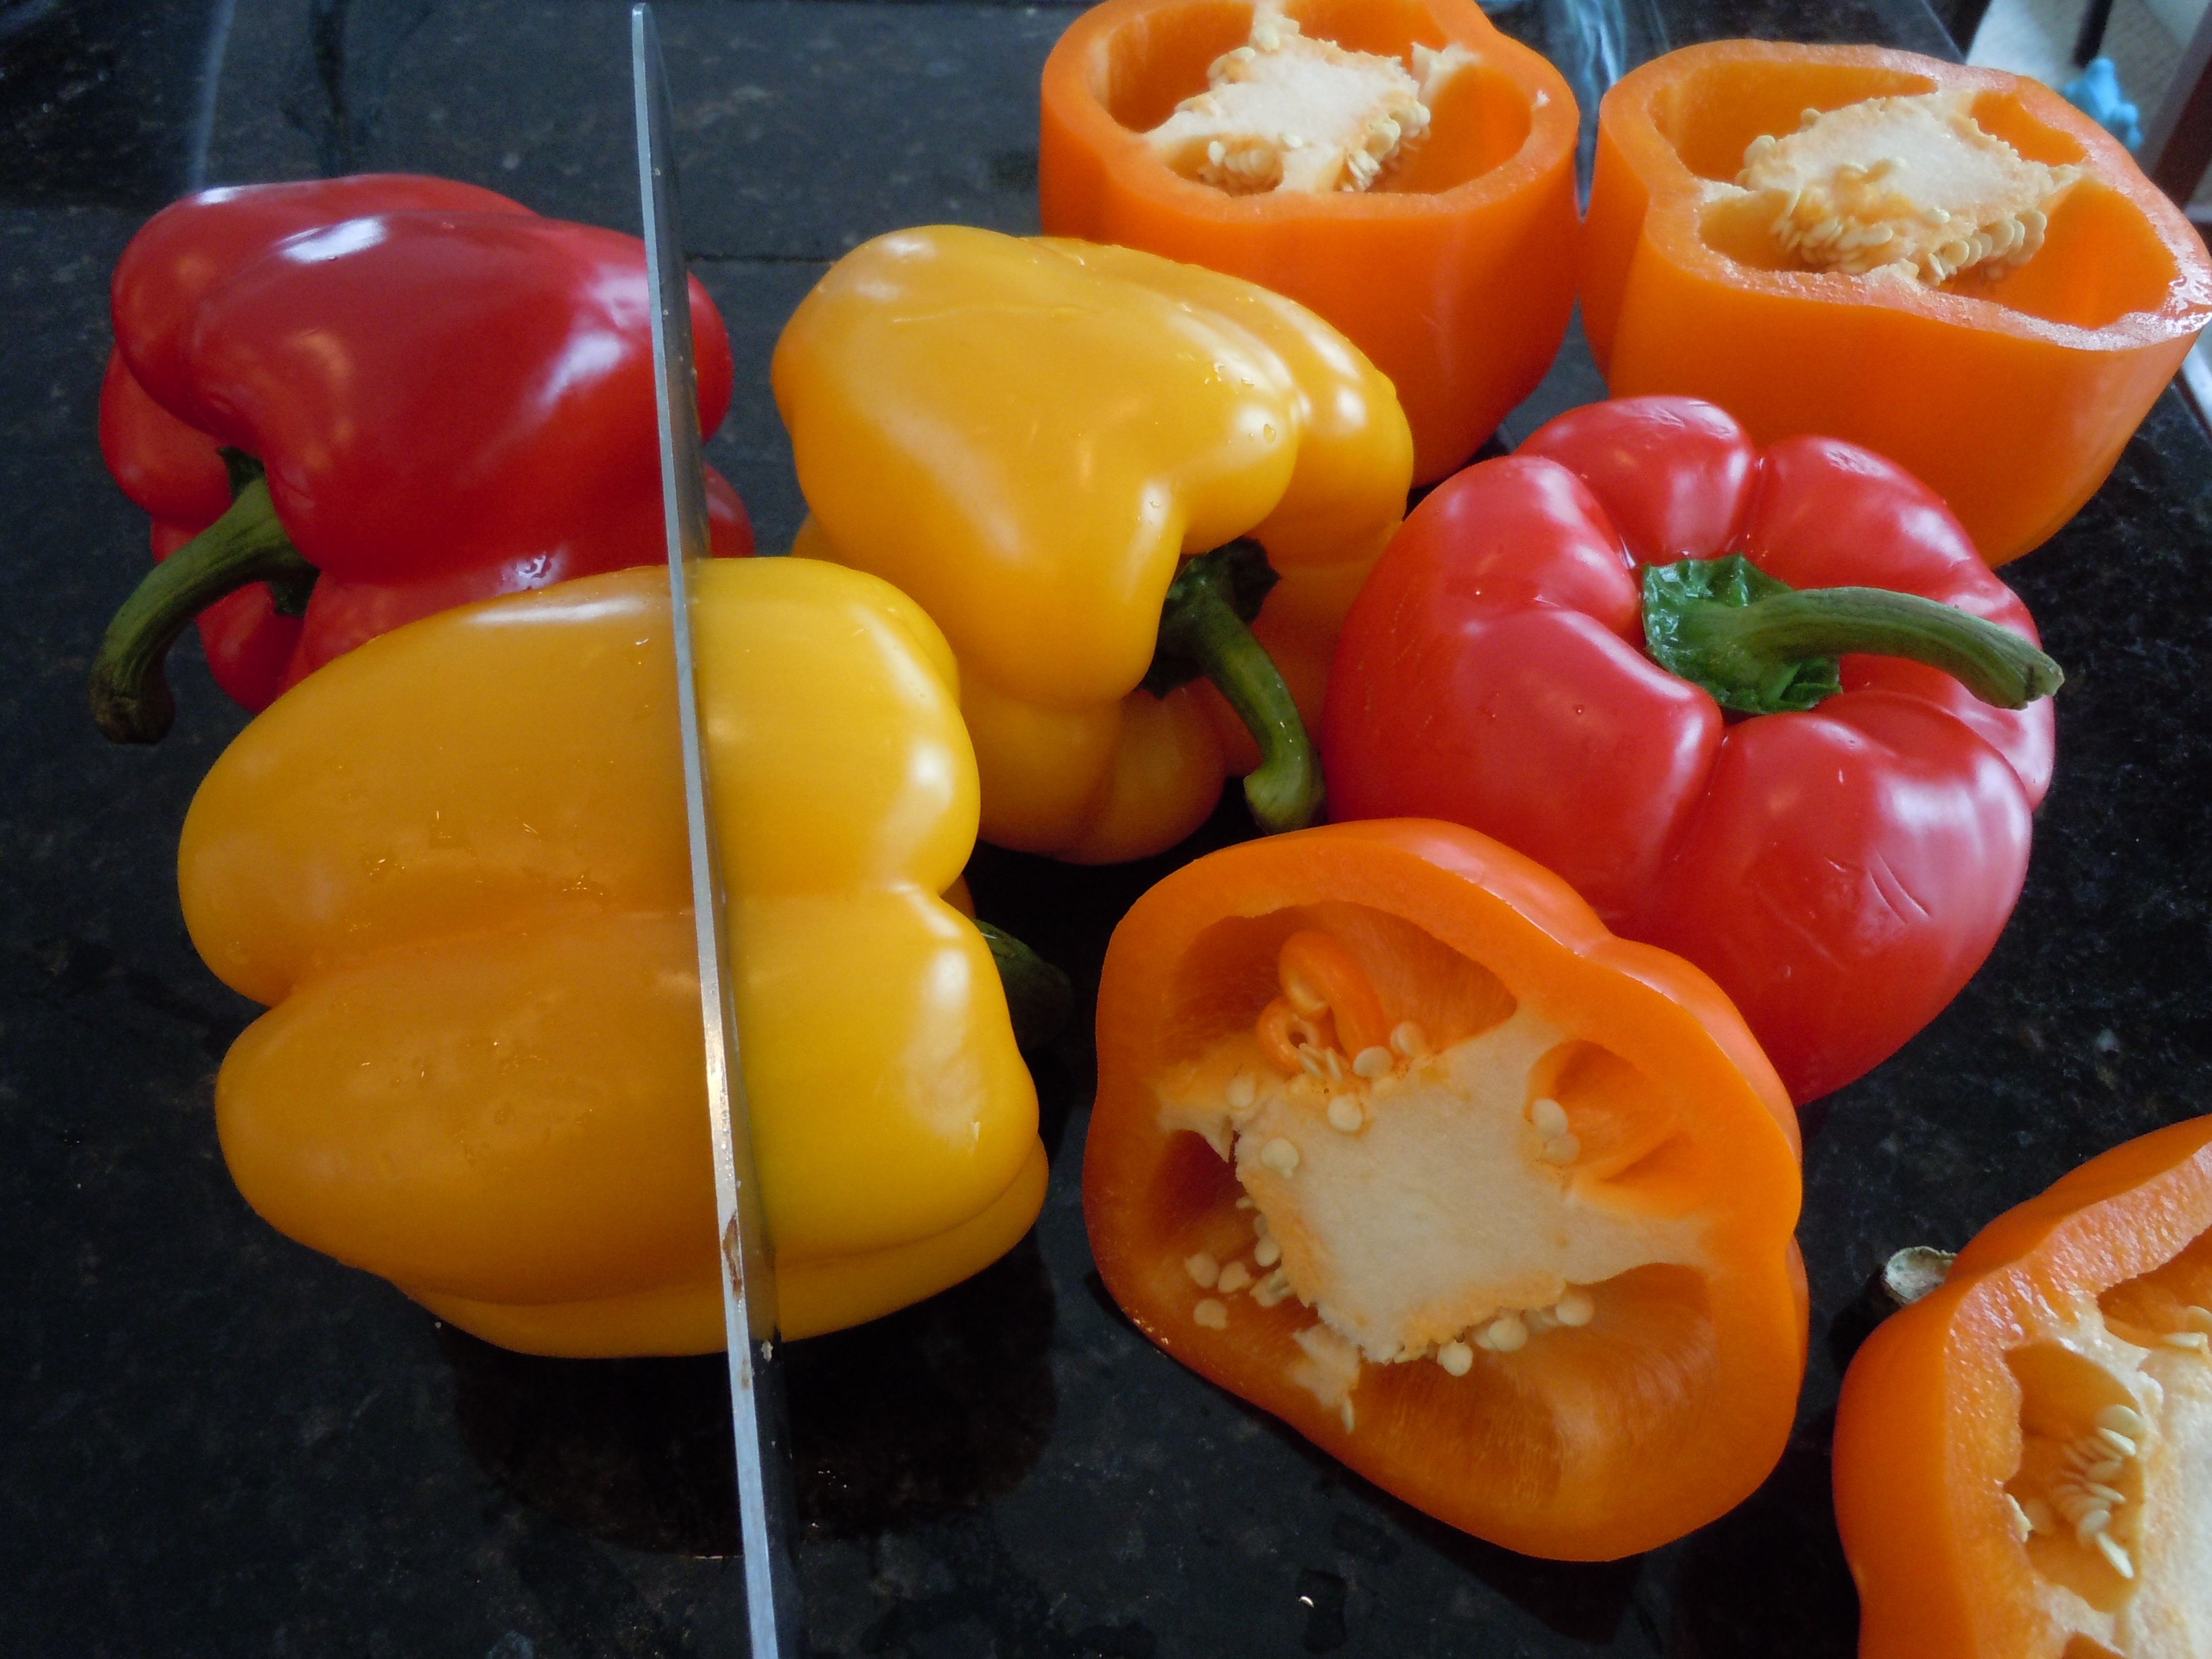
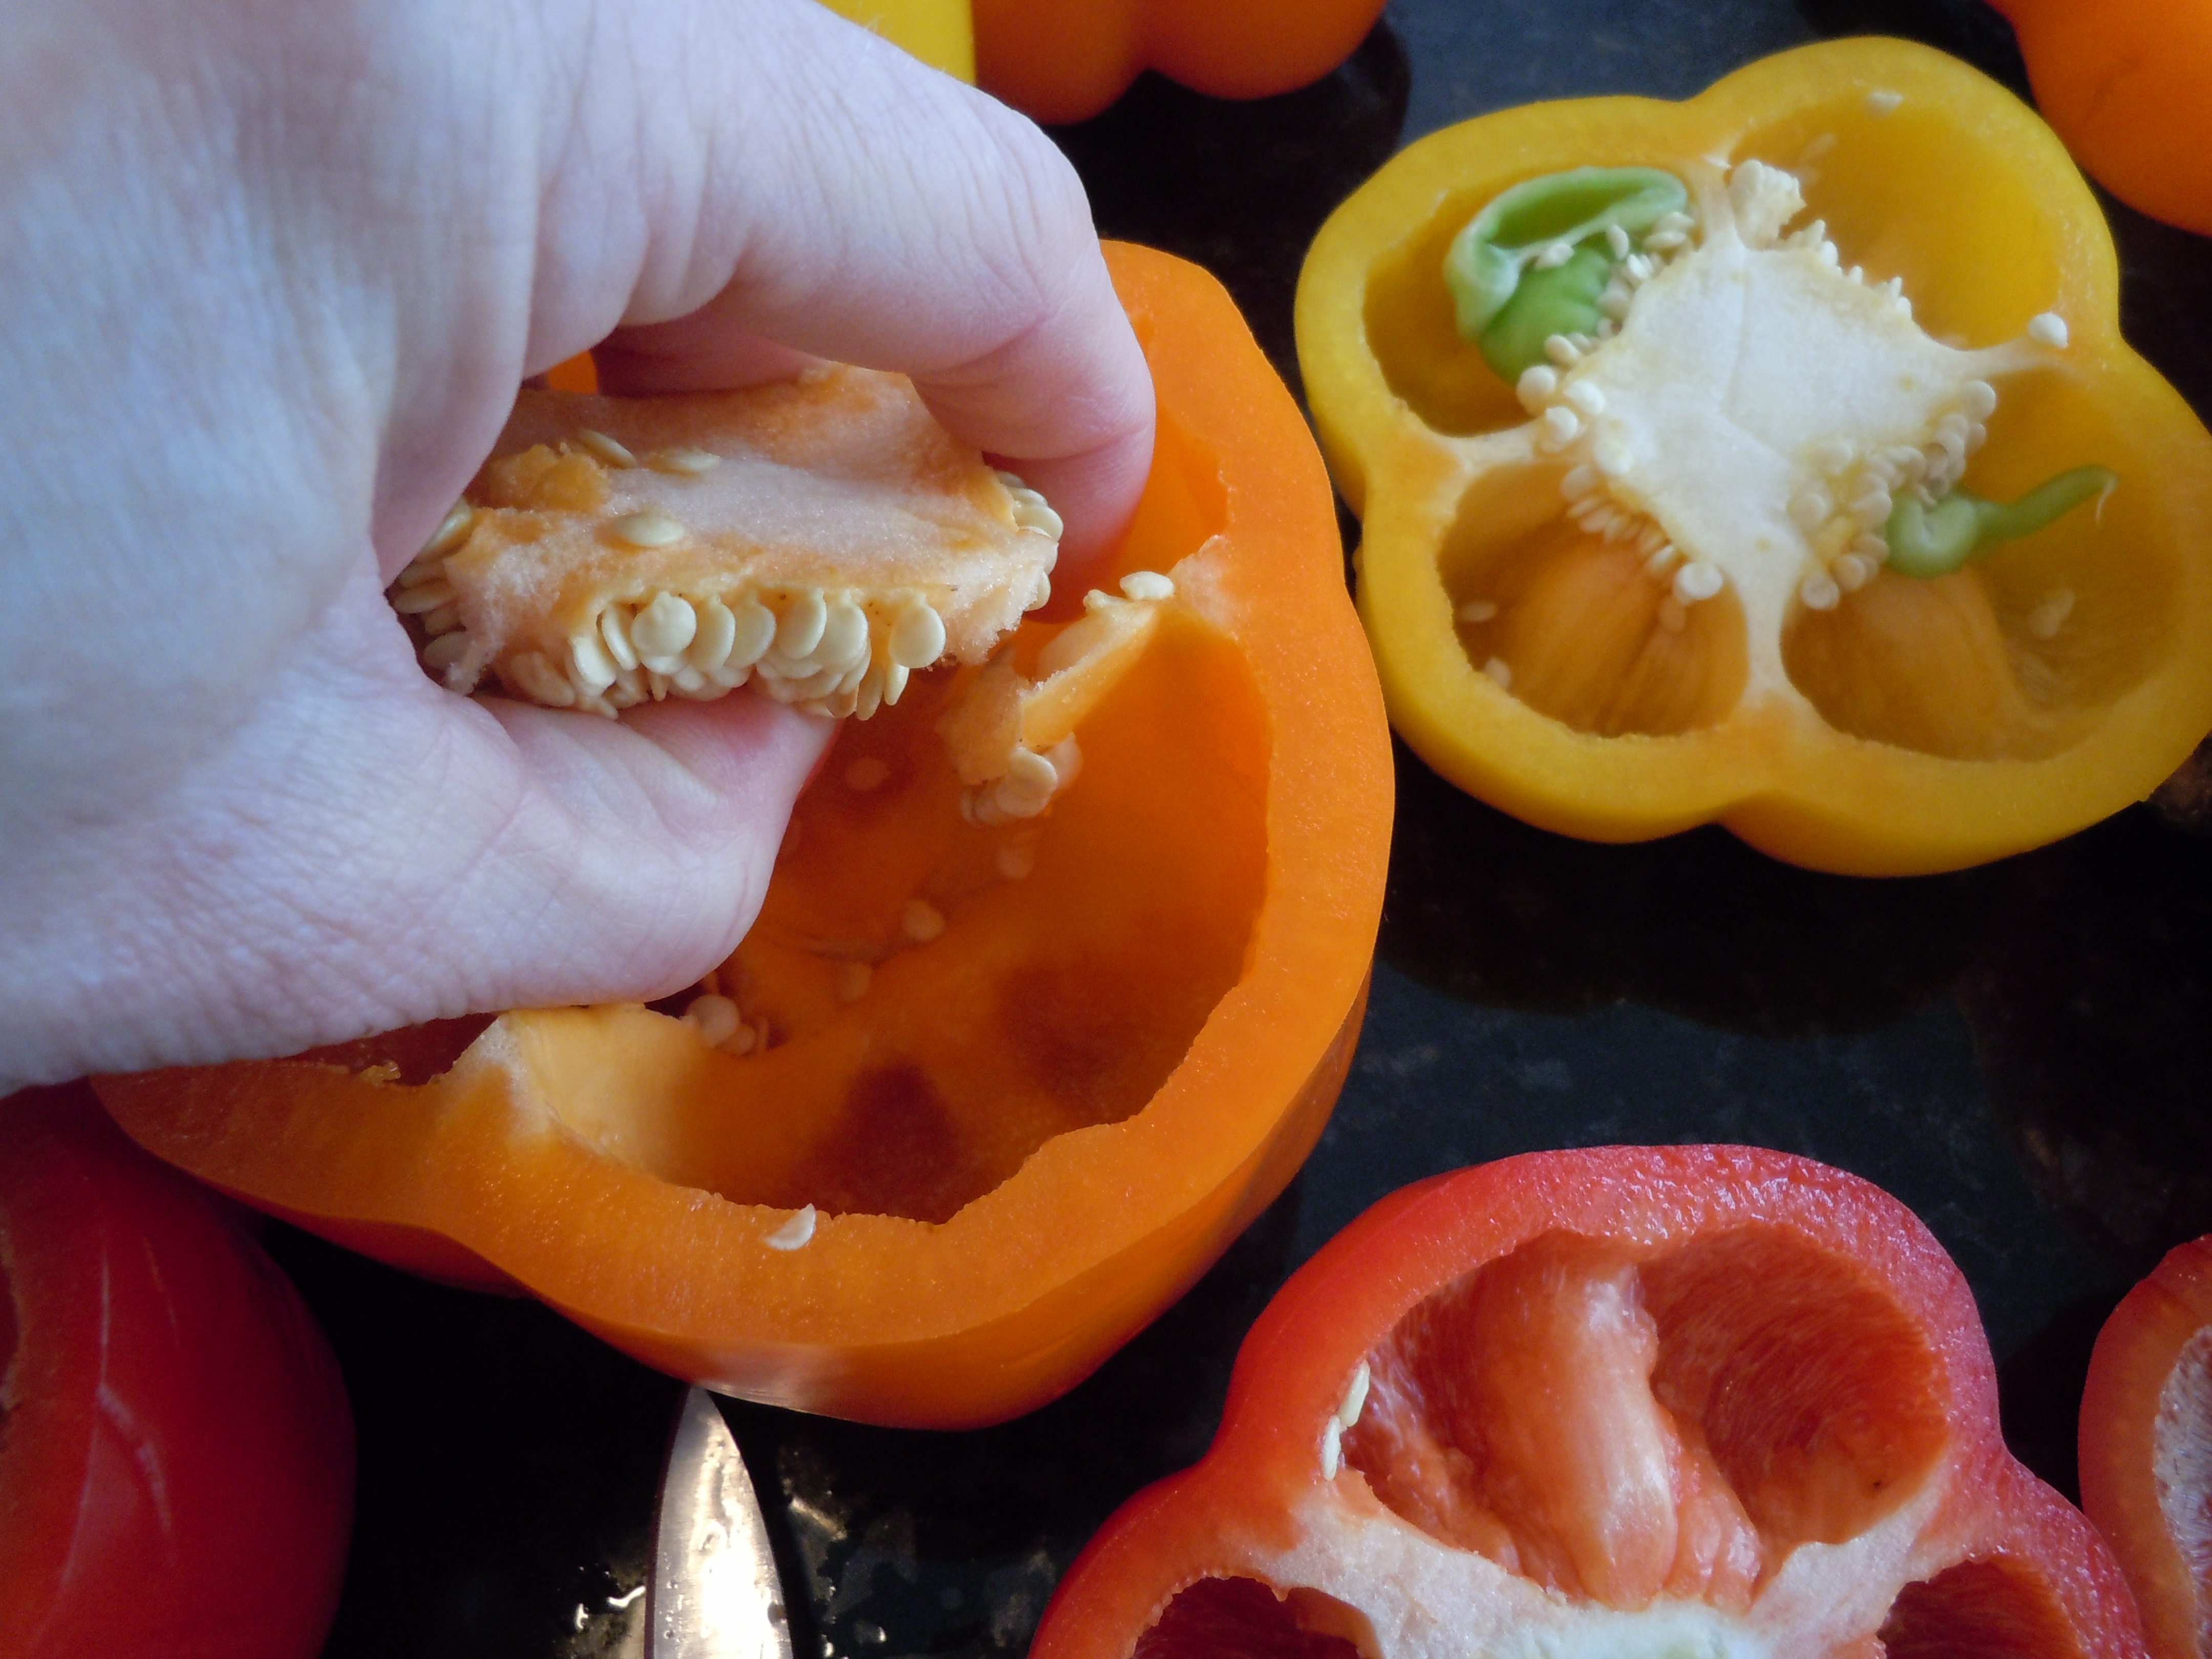
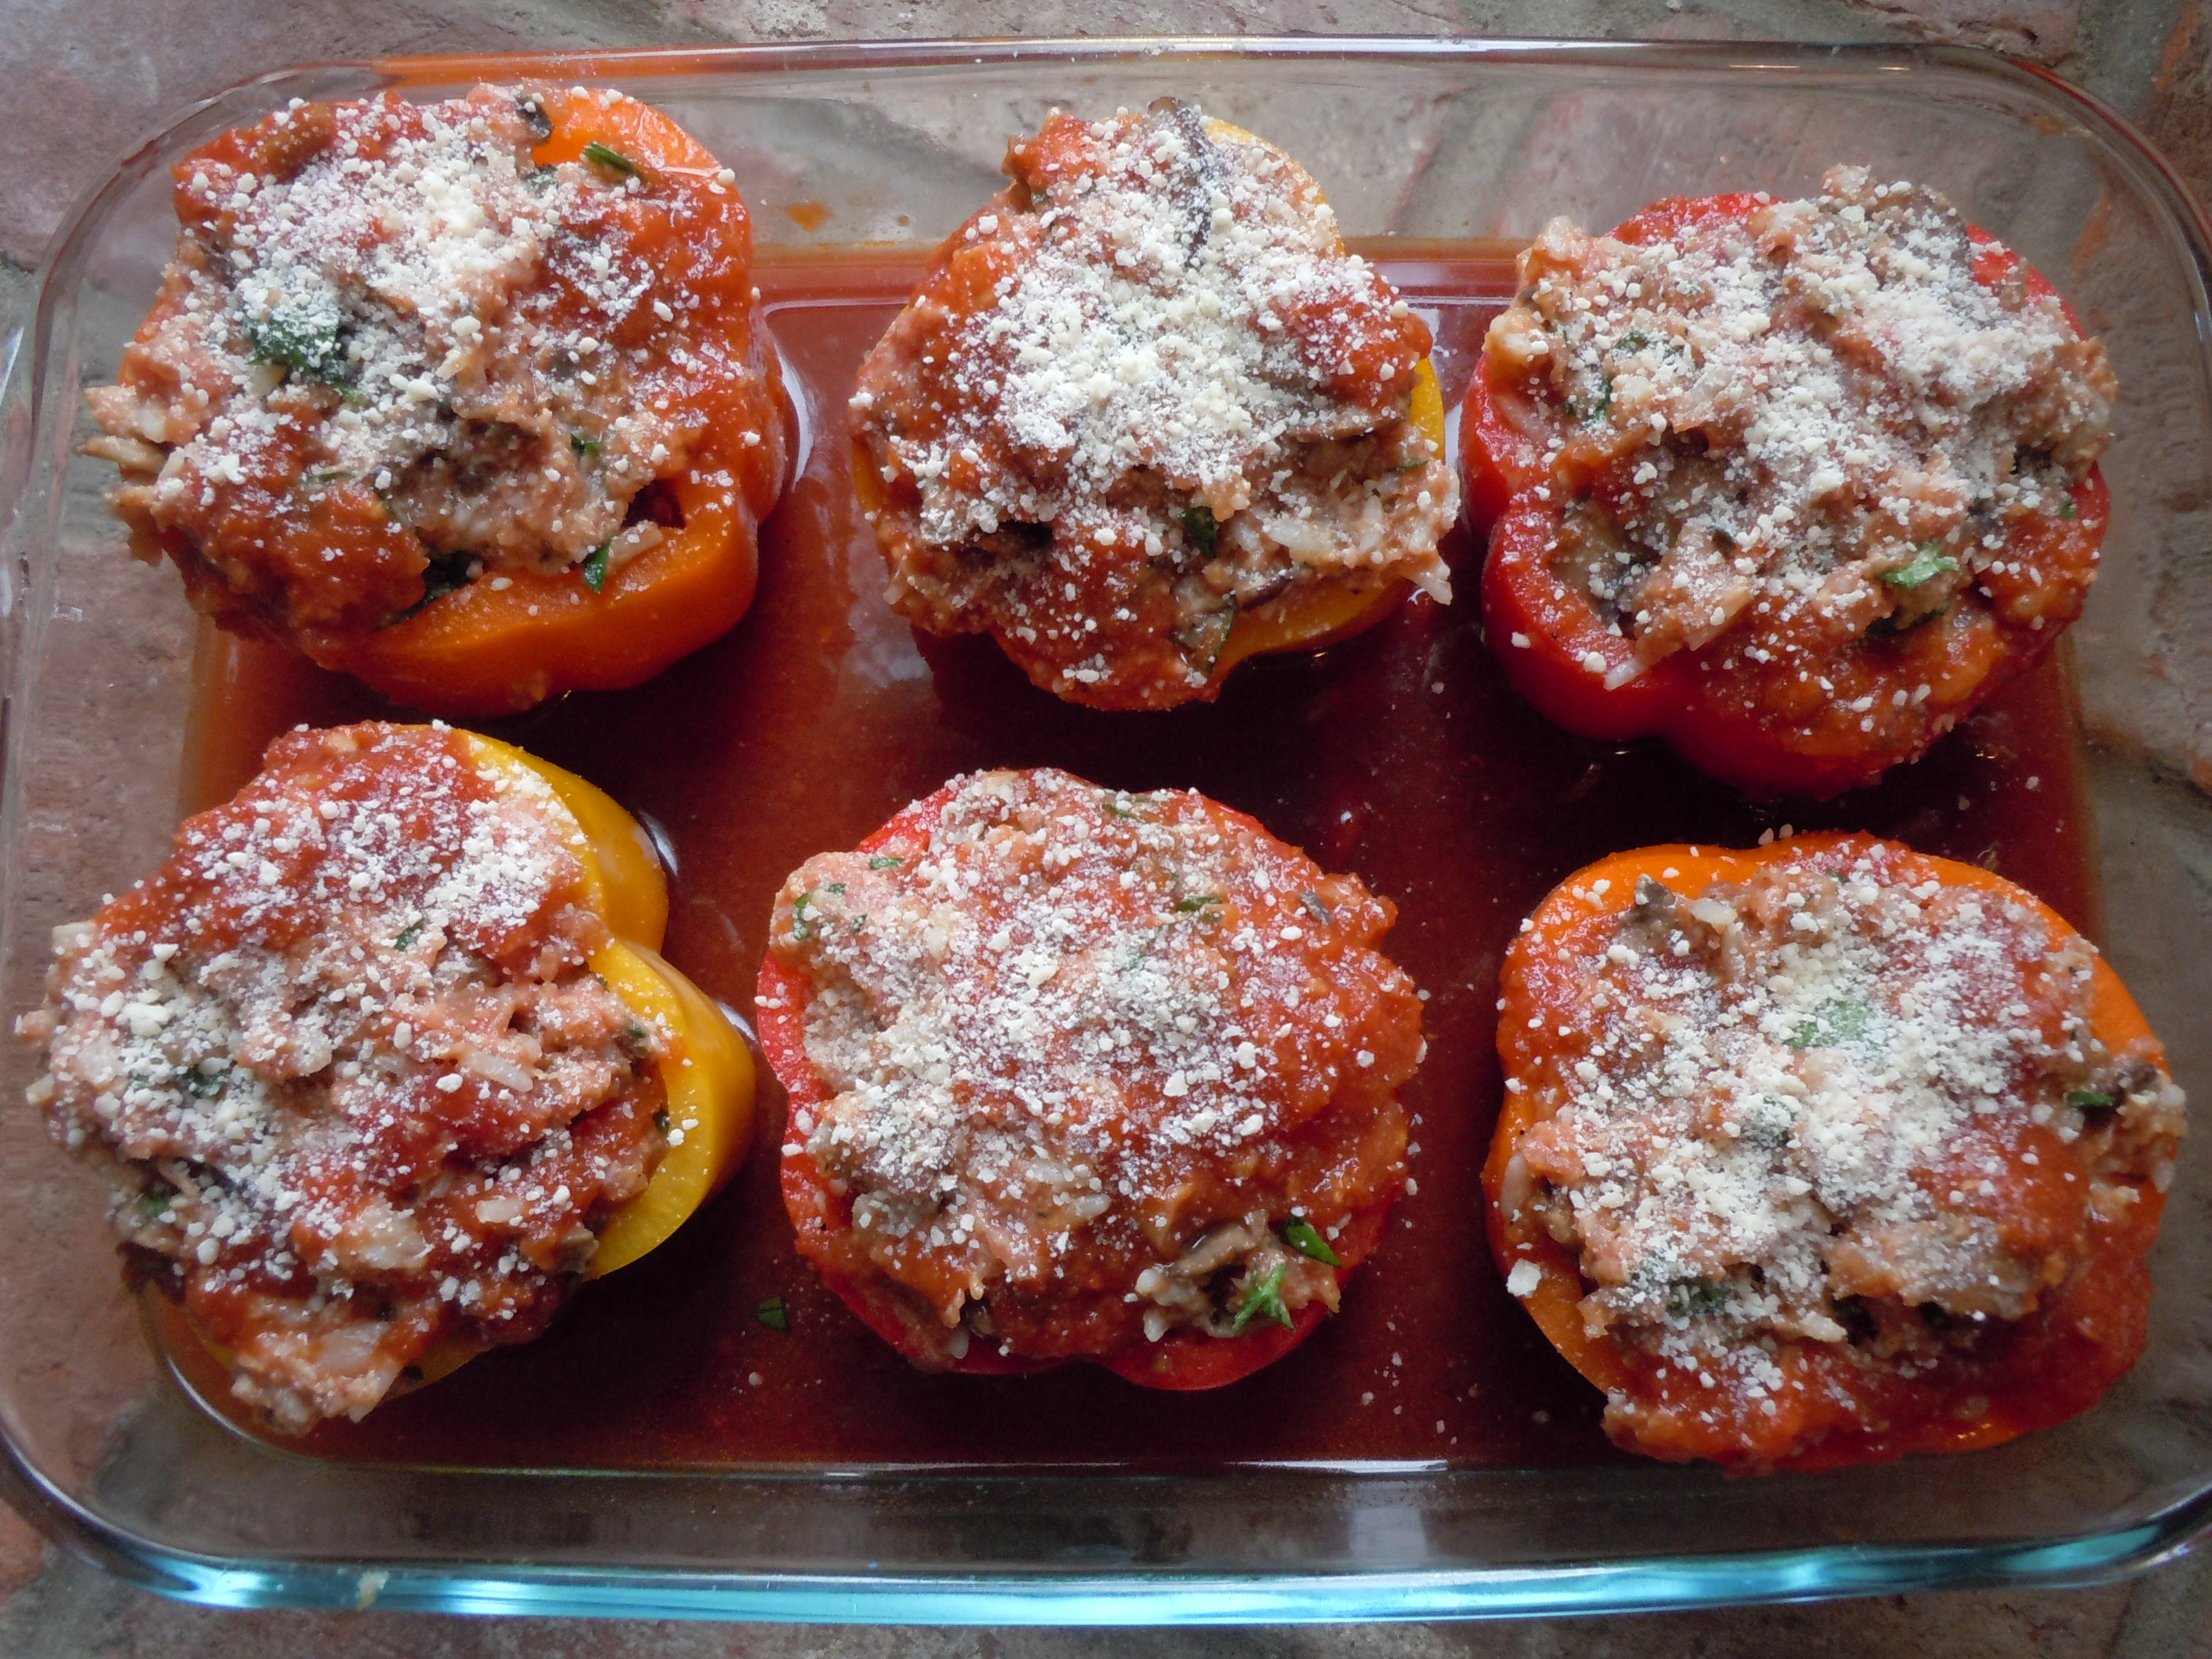
Cut 1″ off of the top of the peppers, pull out the centers with your hands and clean out the inside white part of the pepper.
Place into baking dish.
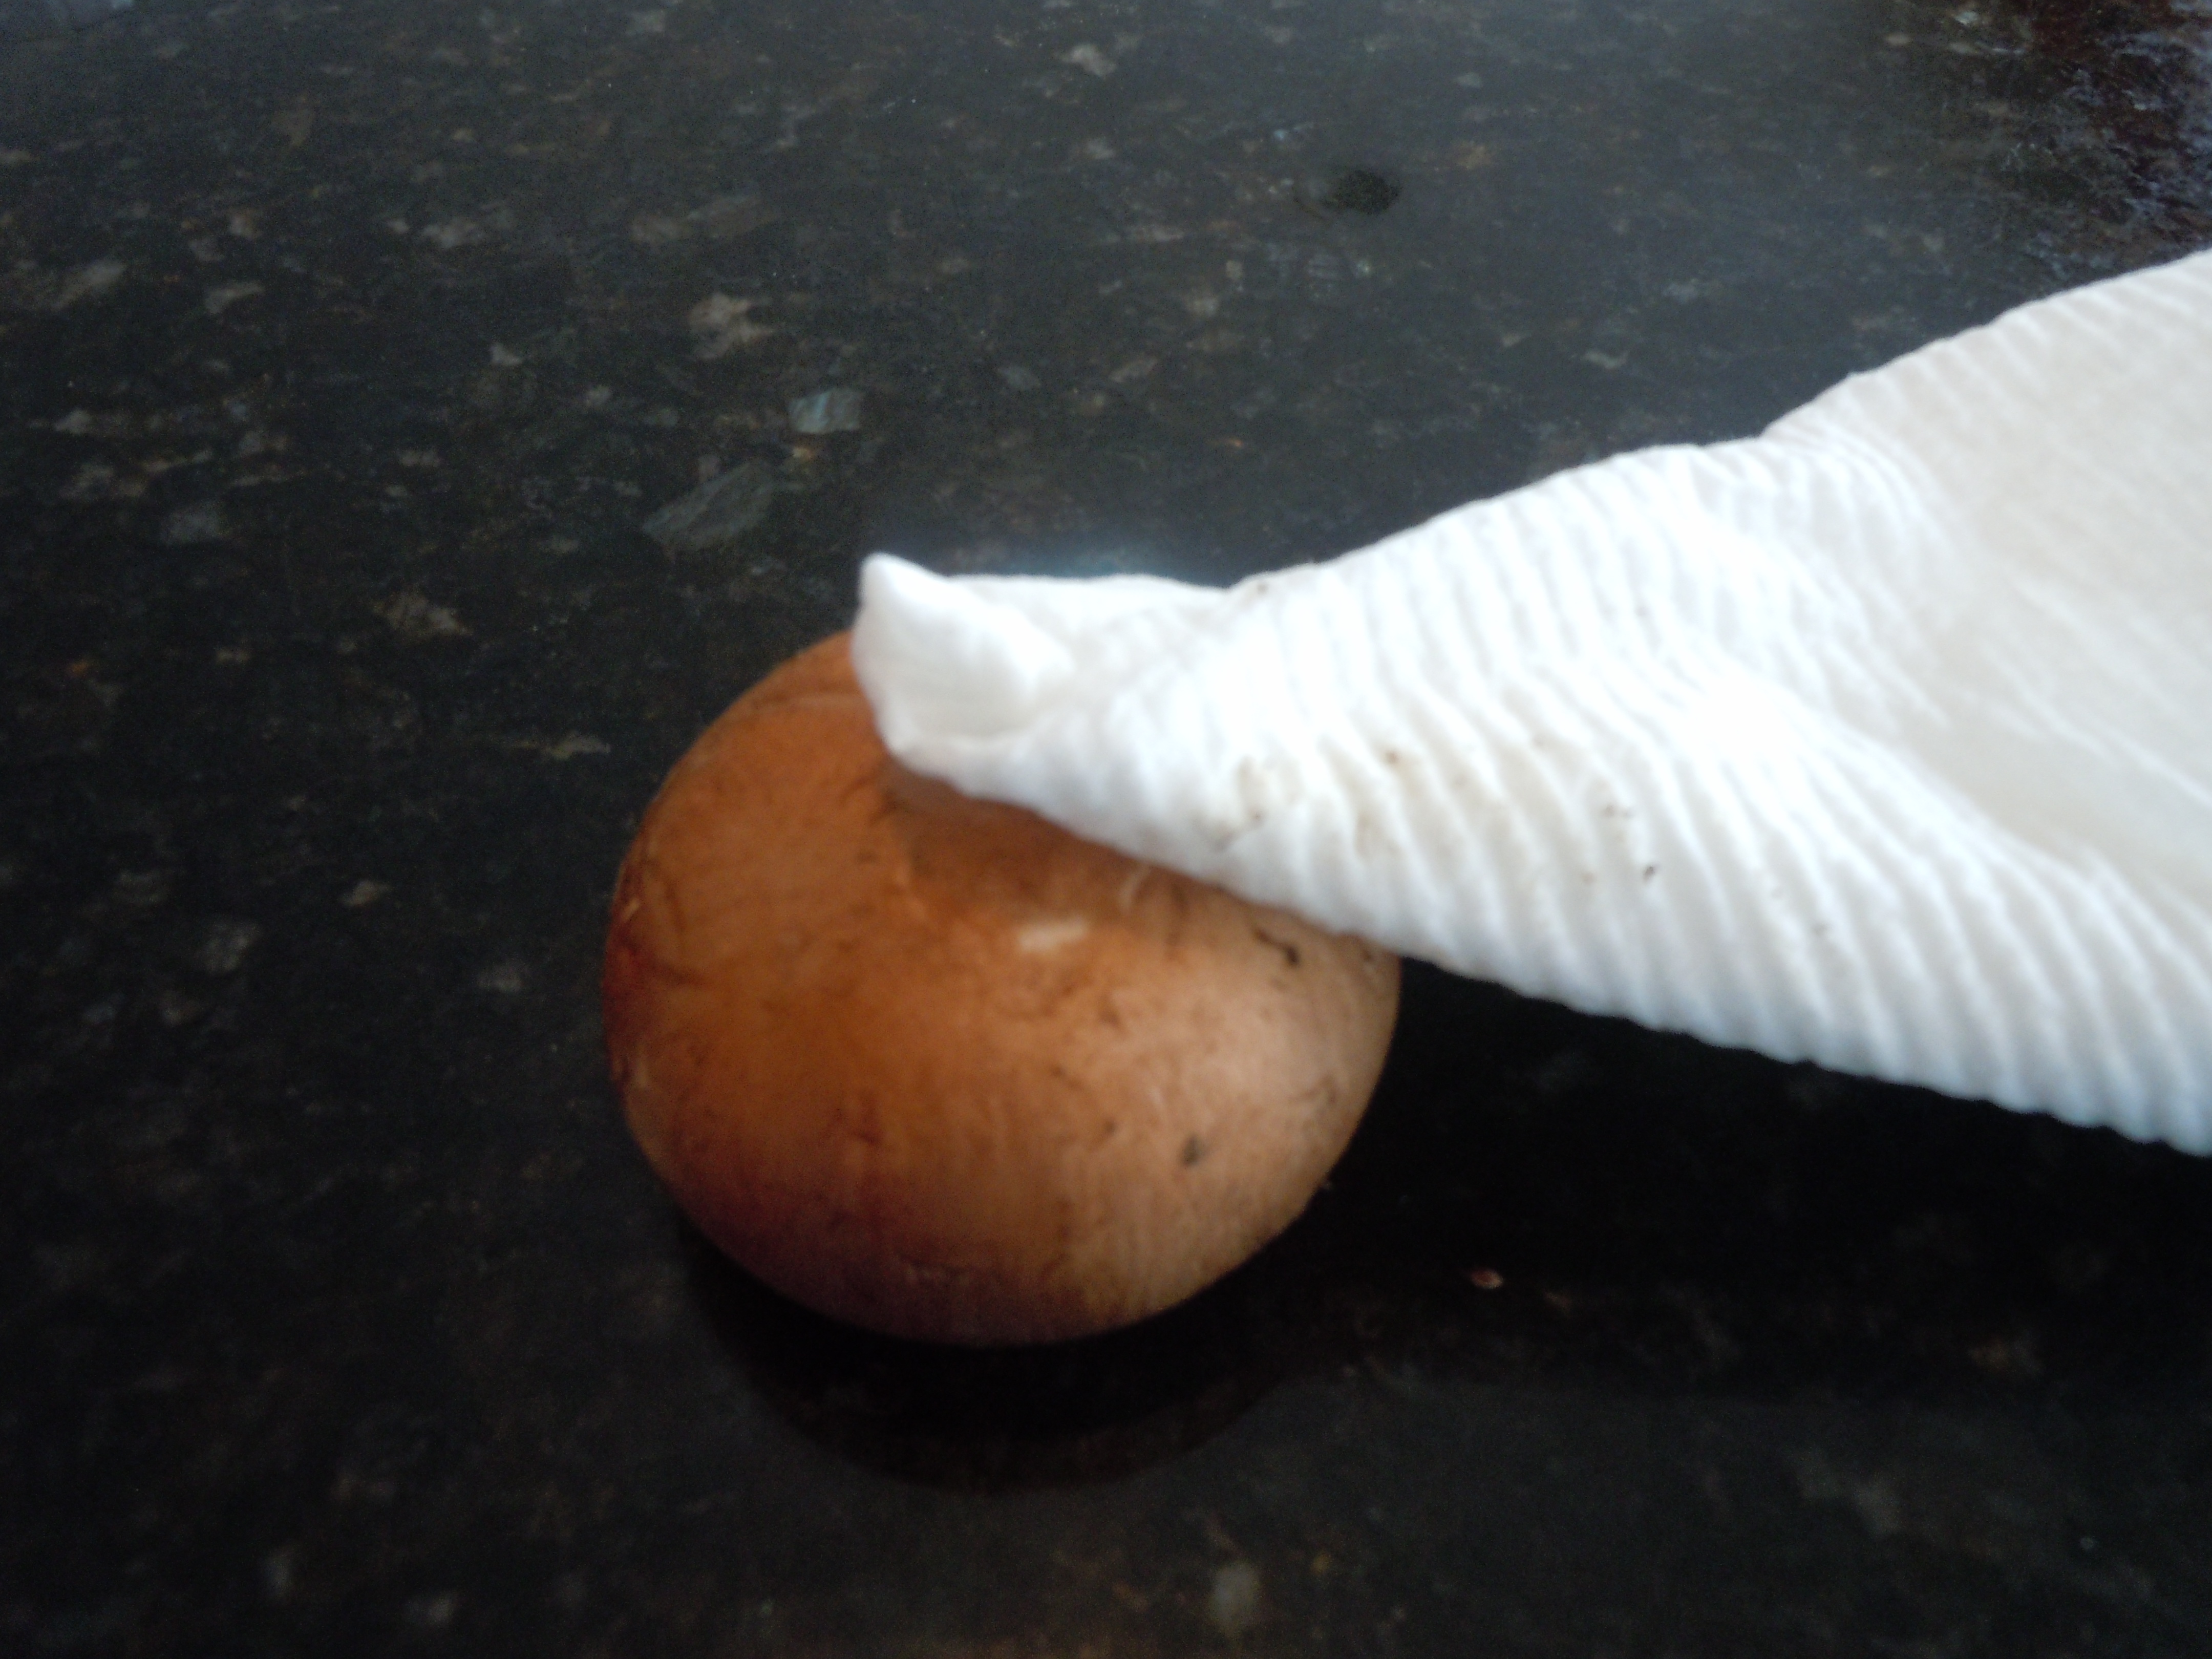
Clean your mushrooms with either a damp paper towel or a mushroom brush … you should NEVER wash your mushrooms or submerse them in water because mushrooms are porous.
Pop out the mushroom stem and finely slice them and then slice that pile in 1/2…don’t need to be neat about it.
Finely chop a large spanish onion…I’m all for using one of those choppers for this!
Add onion and mushrooms and 1/4 tsp salt to 2 Tbsp olive oil and sauté on medium/high heat for 10 minutes til soft and then on medium heat to caramelize for anther 10 minutes
De-glaze with 1/4 cup pinot let evaporate about another 5 min.
Remove from the stove and let cool.
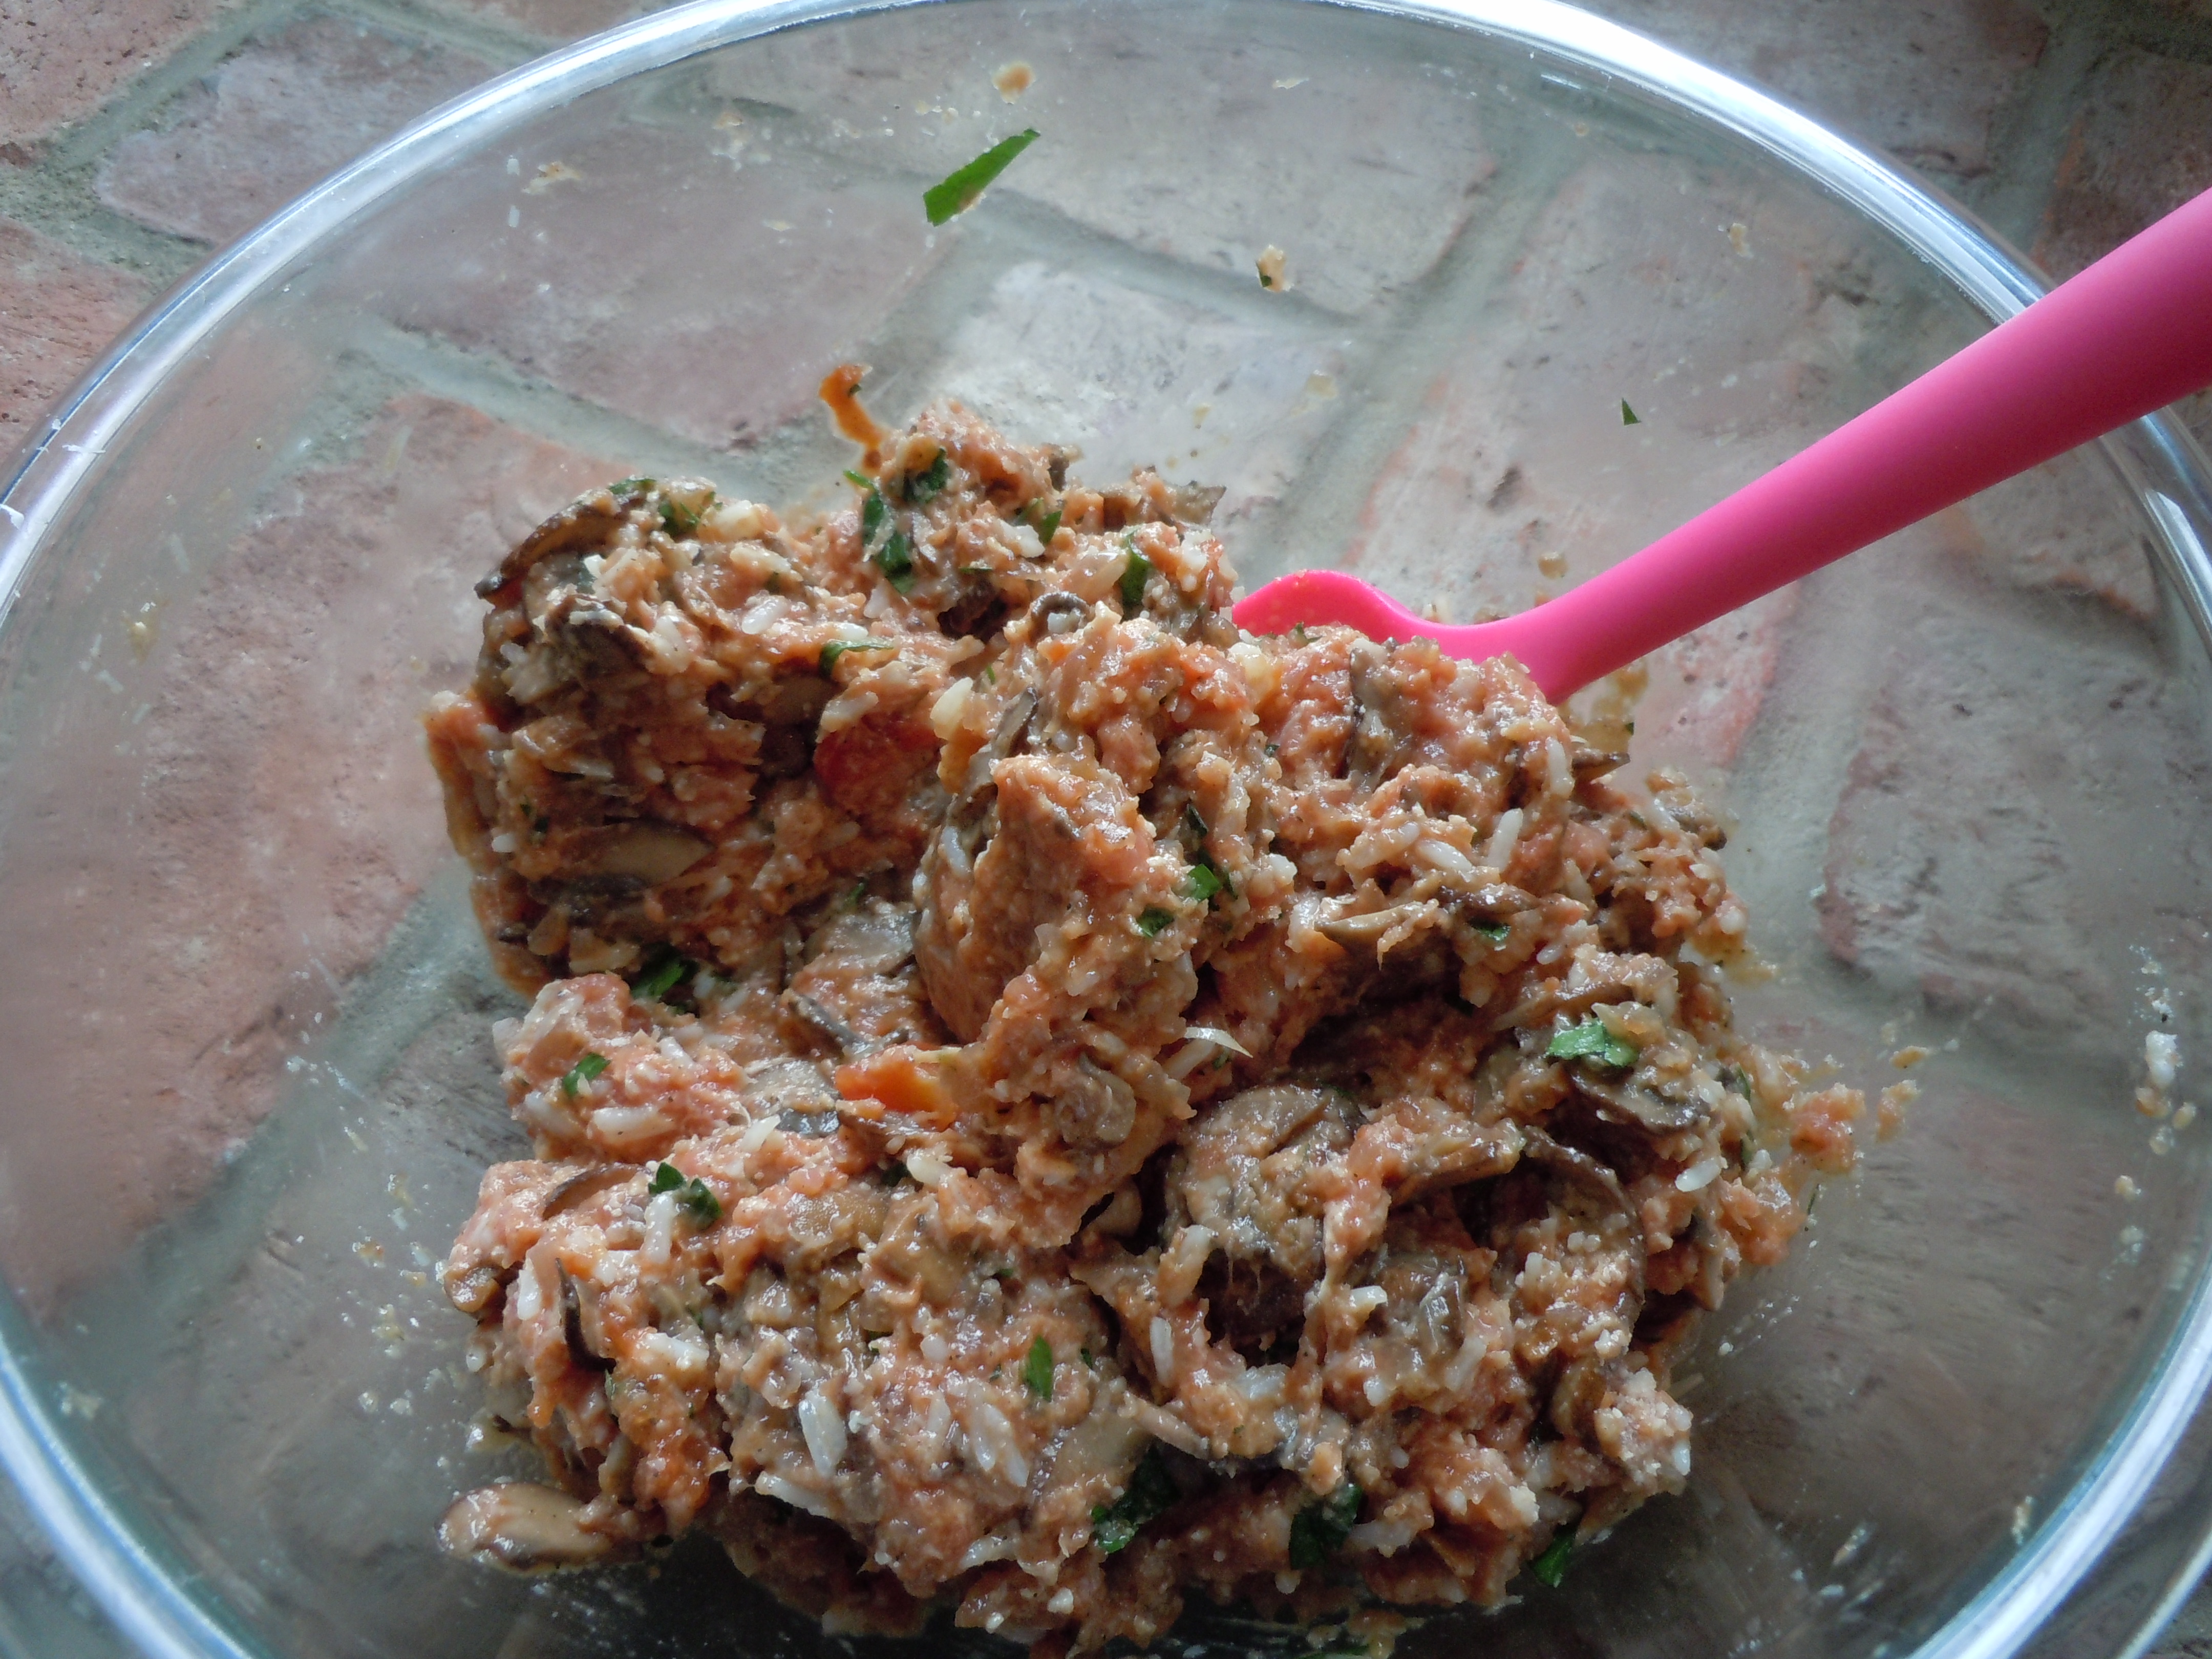
Add Turkey, grated cheese, 1 cup cooled sauce, 1/3 cup parsley, 2 tsp salt, 1/4 tsp pepper and all of cooled mushroom/onion mixture to a large bowl and gently mix.
Fill the peppers gently with the stuffing, don’t pack it down.
Add the rest of the porcini sauce (approx. 2 cups), 3/4 cup pinot, and 1/2 cup boiling water to the bottom of the baking dish.
NOTE: If the porcini sauce was refrigerated you should warm it a little to room temperature so it doesn’t prolong the cooking process of the stuffed peppers.
Sprinkle with a little Parmesan, cover with foil and bake at 350º for 1 hr.
Remove the foil after 1 hour
Then up the heat to 400º for another 30 minutes uncovered
Keep an eye on it at this point so the tops don’t blacken too much (everyone’s oven is a little different)
Total cooking time approx. 1 hour 30 minutes
Take the peppers out of the oven, cover back up with foil and let them sit for 5 minutes.
Sprinkle with more parmesan and serve with porcini sauce from bottom of bake dish
TIP: RICE- To make Basmati or Jasmine rice measure 1 cup rice and put into medium pan. Run cold water over rice and drain using your hand to hold back the rice. Then add 1 1/2 cups water (water level is 1 knuckle over rice), cover and bring to a boil, turn down heat IMMEDIATELY to low and simmer for 20 minutes. Remove from the heat and keep covered letting it sit for another 10 minutes and voilà. Fluff with a fork
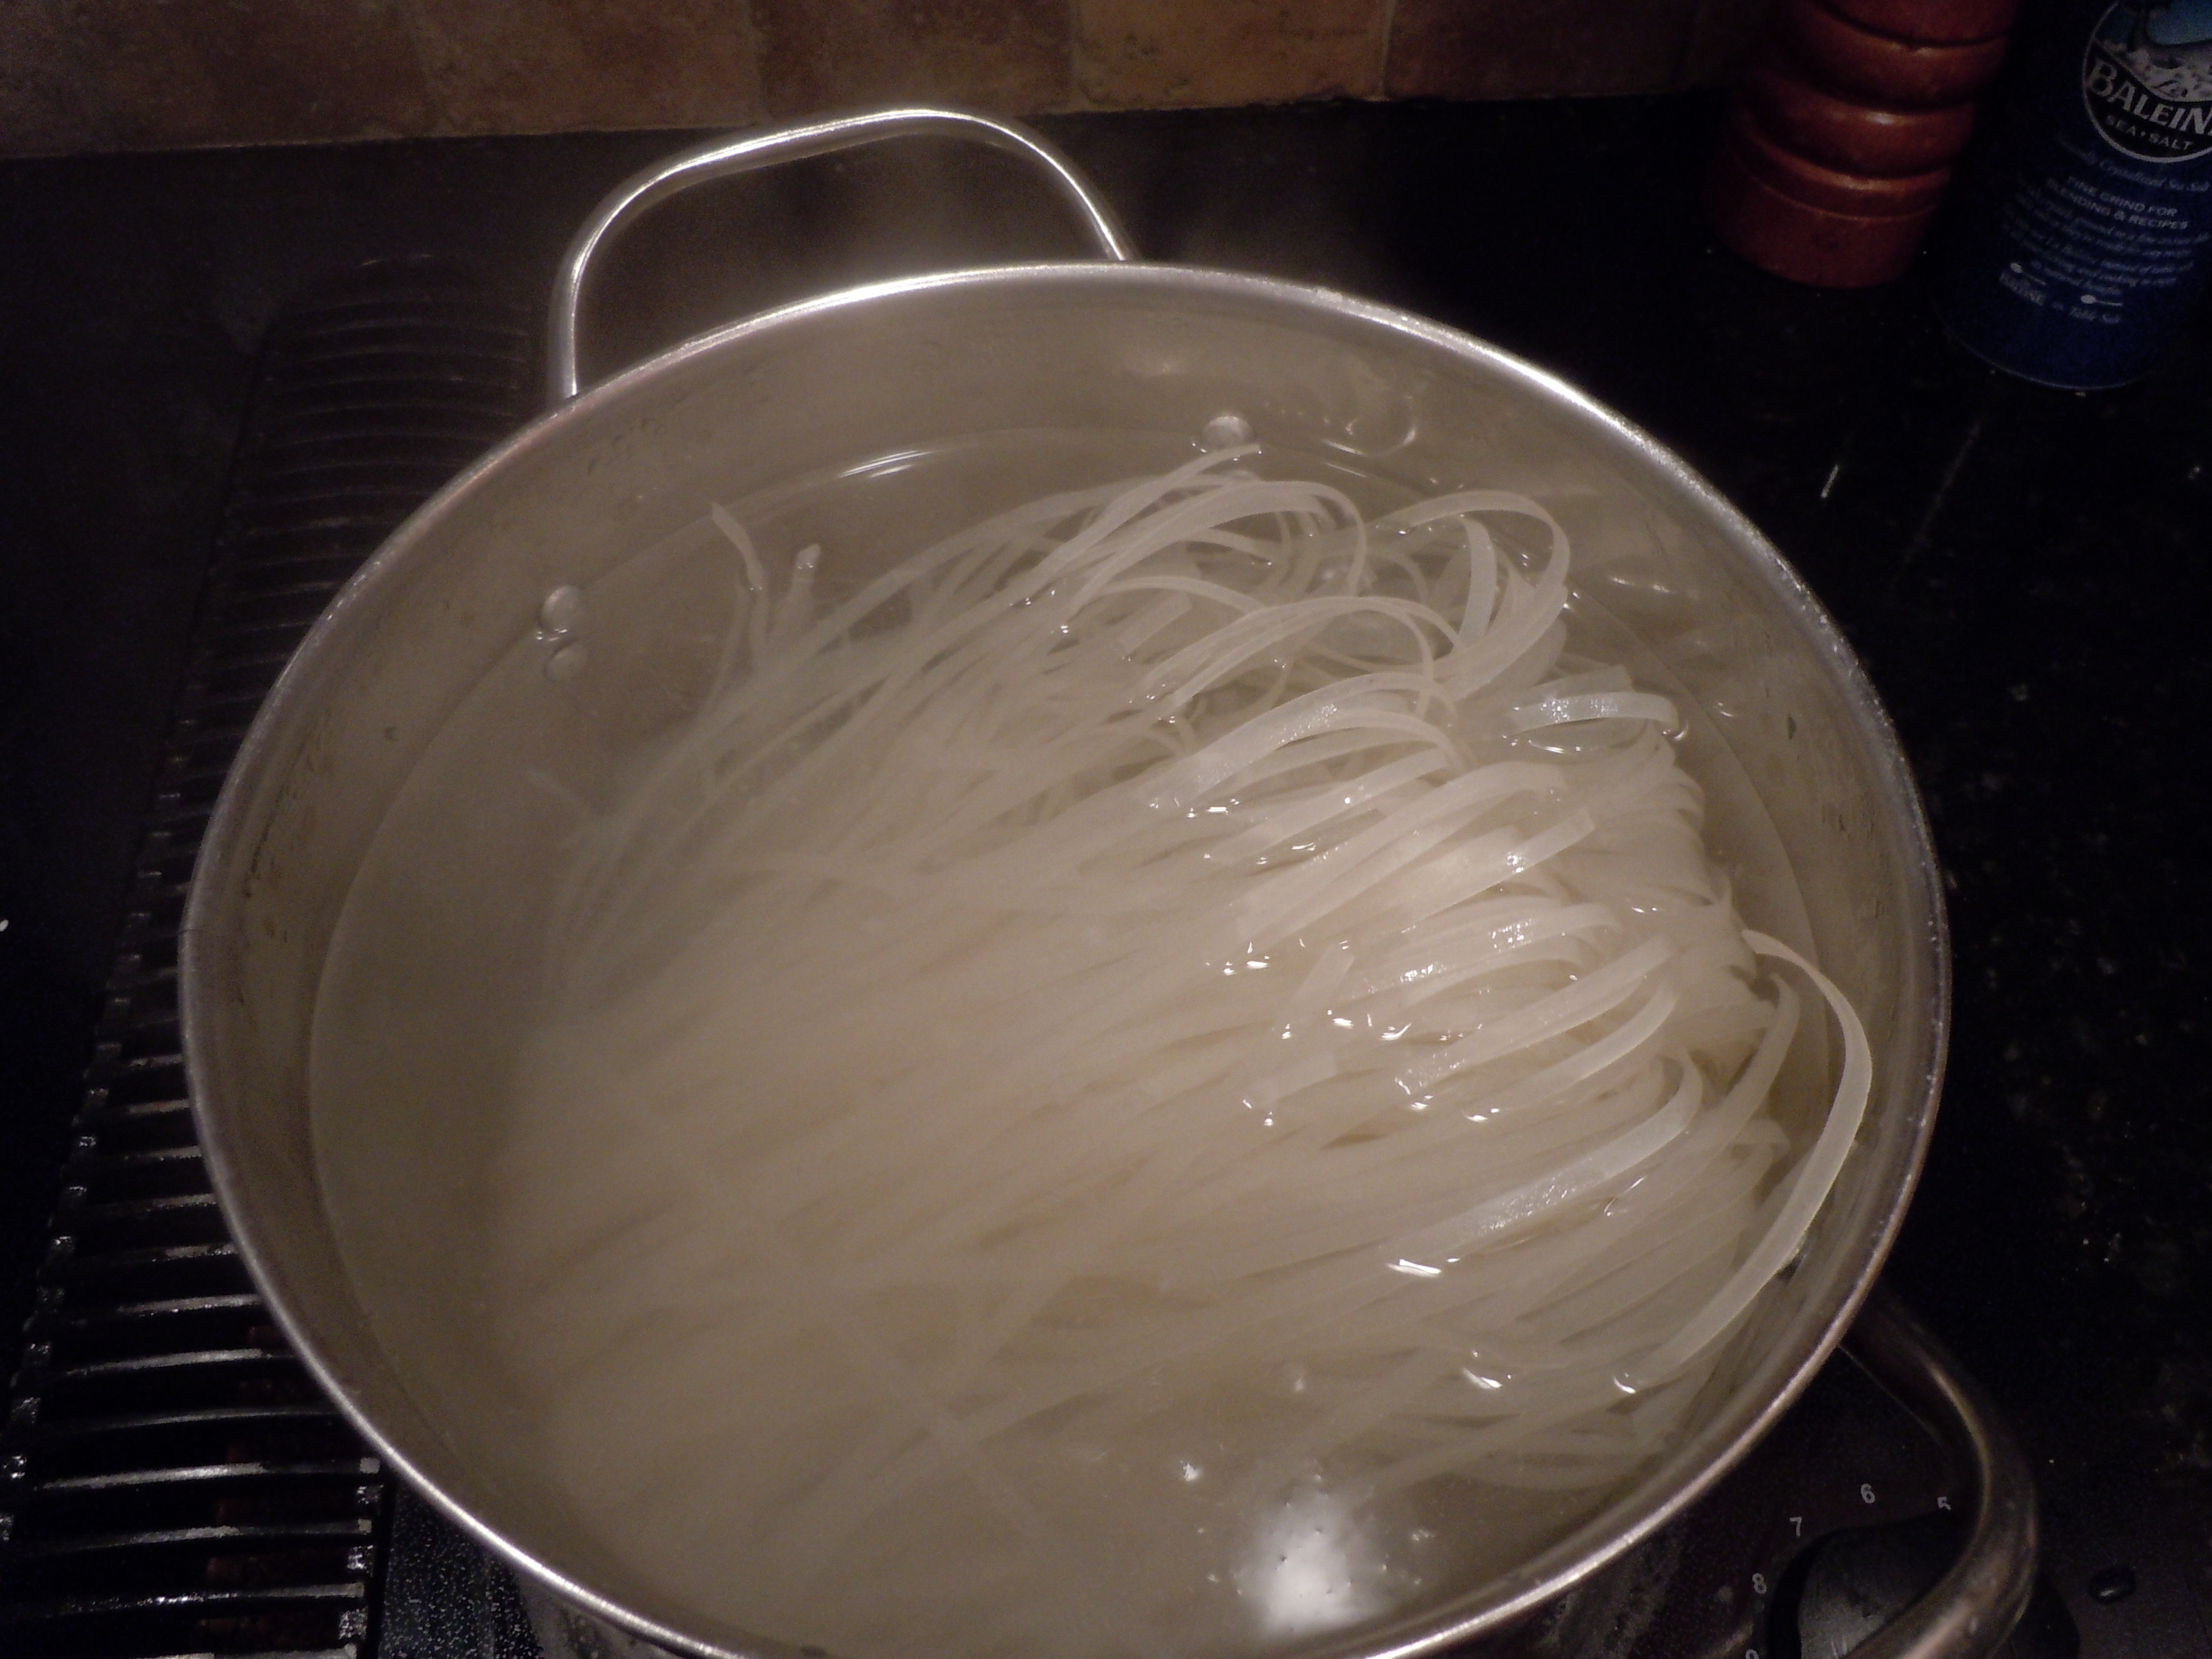
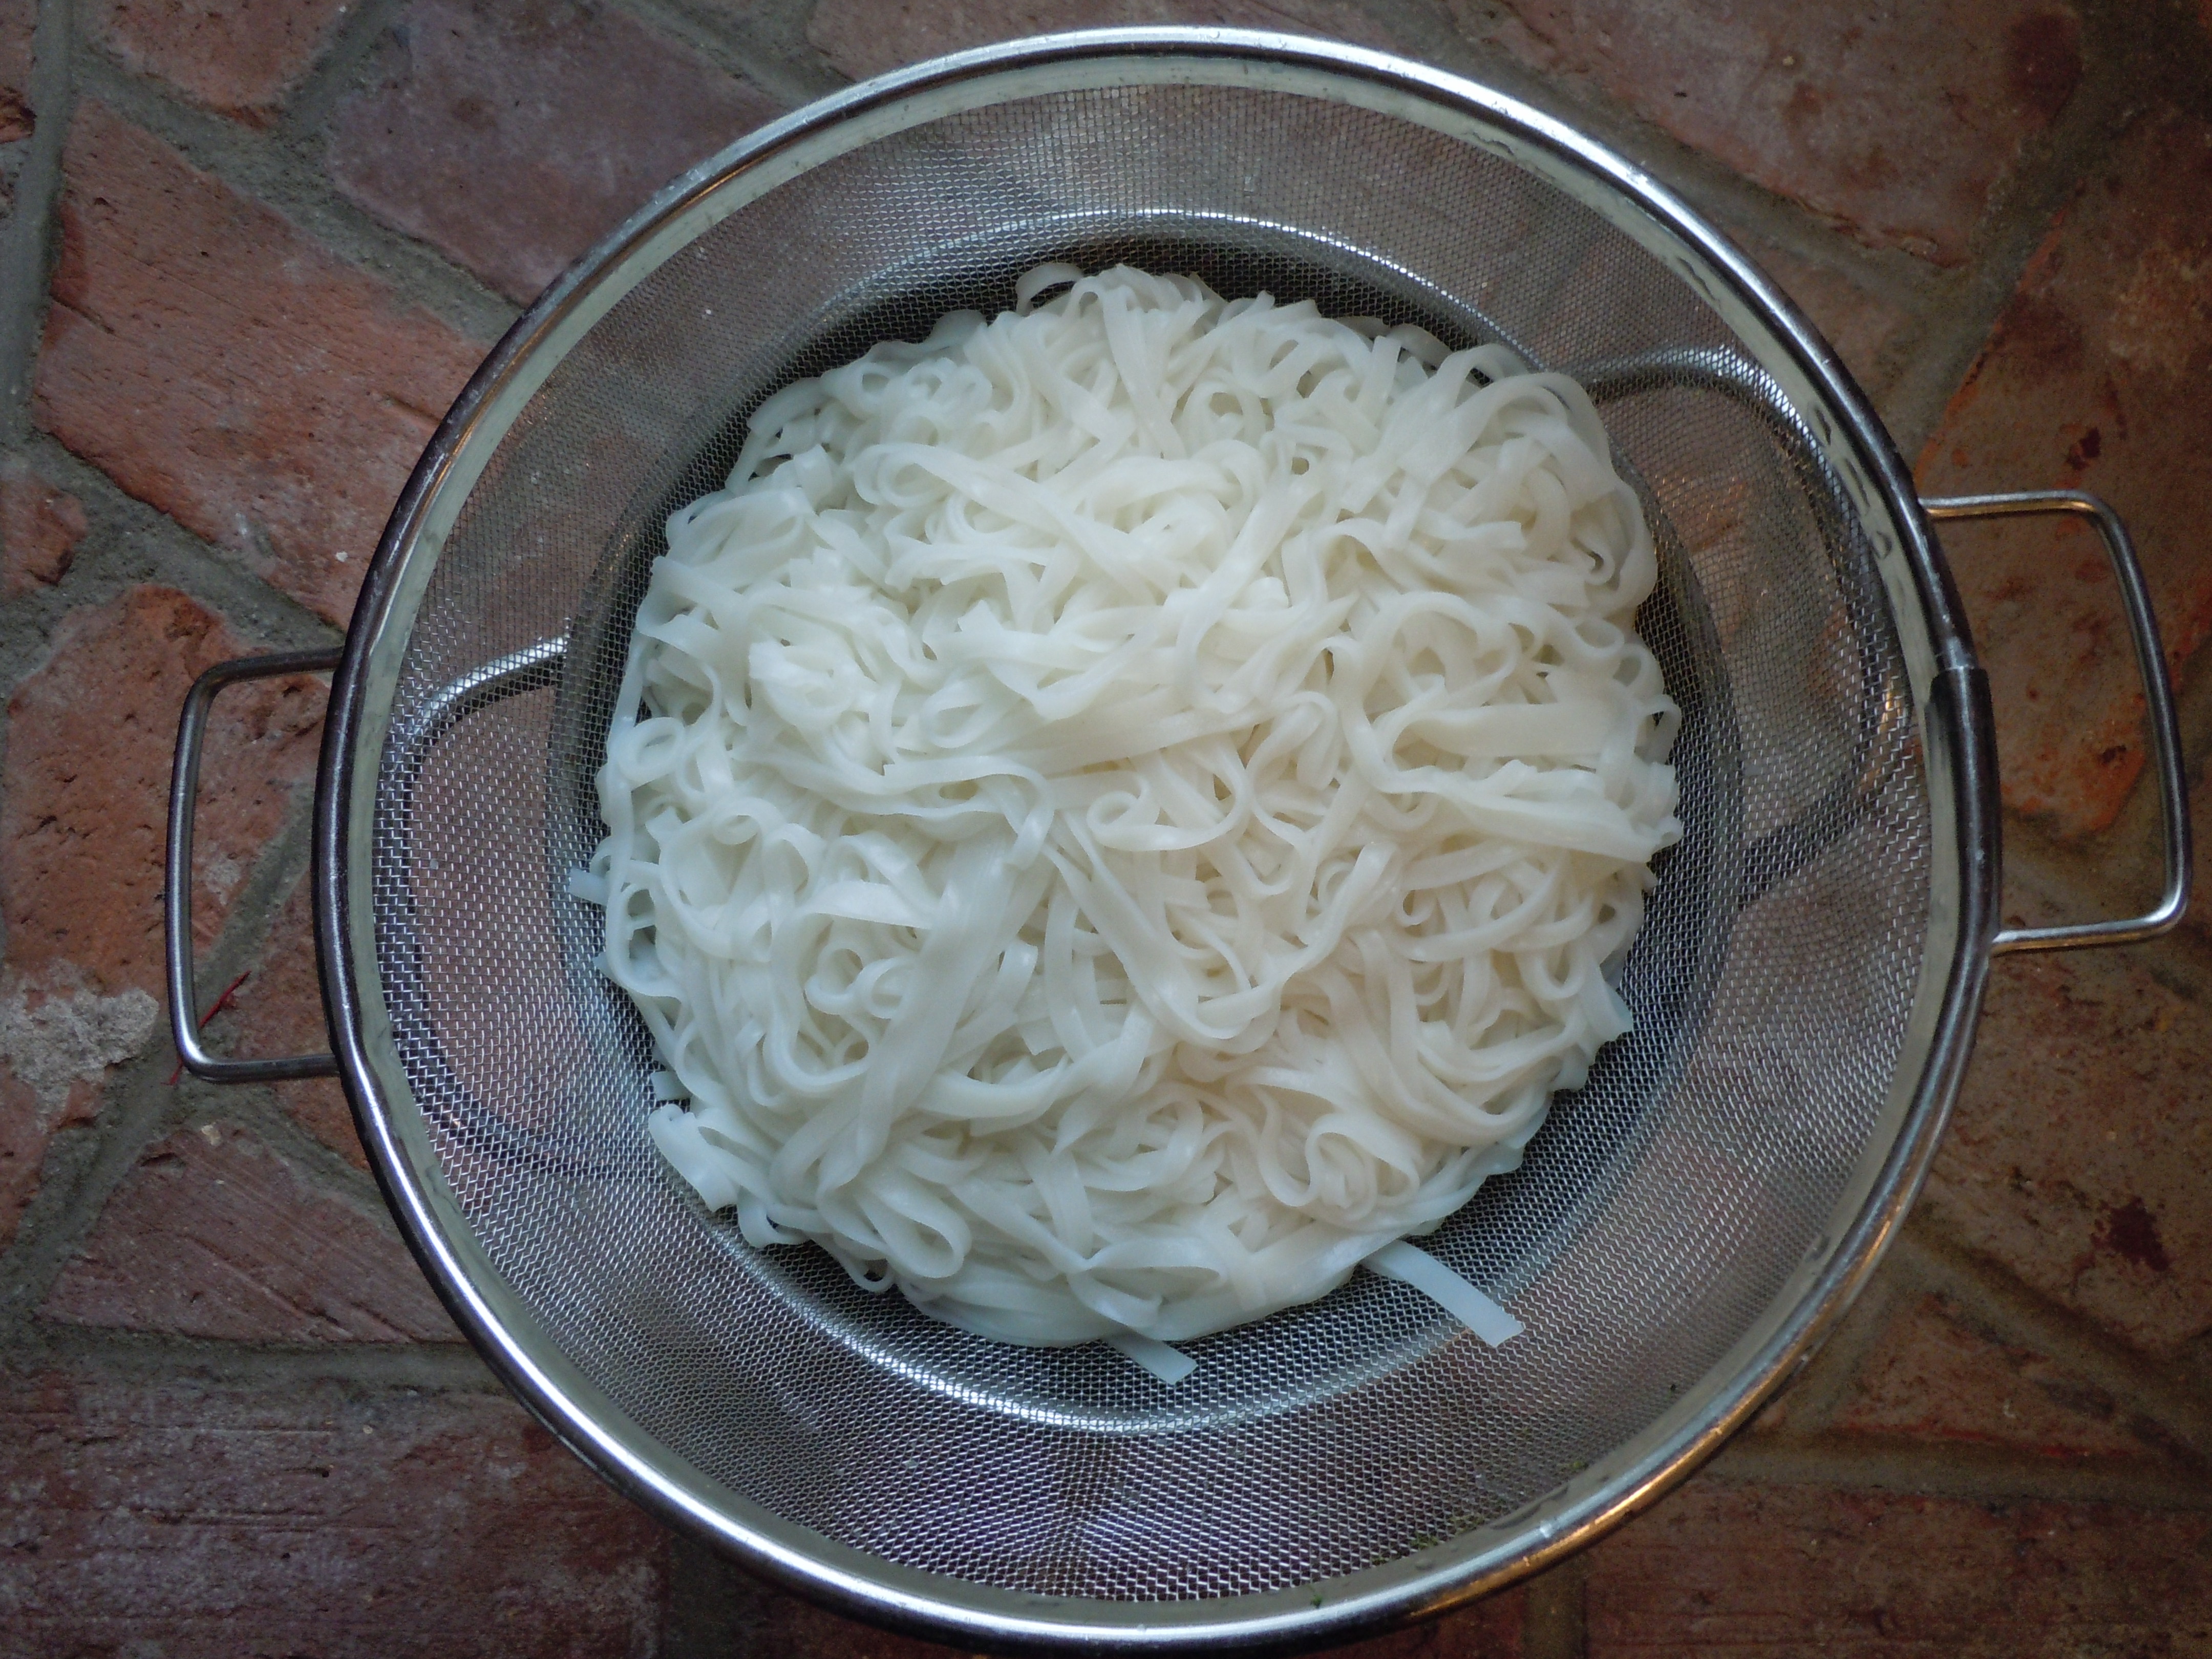
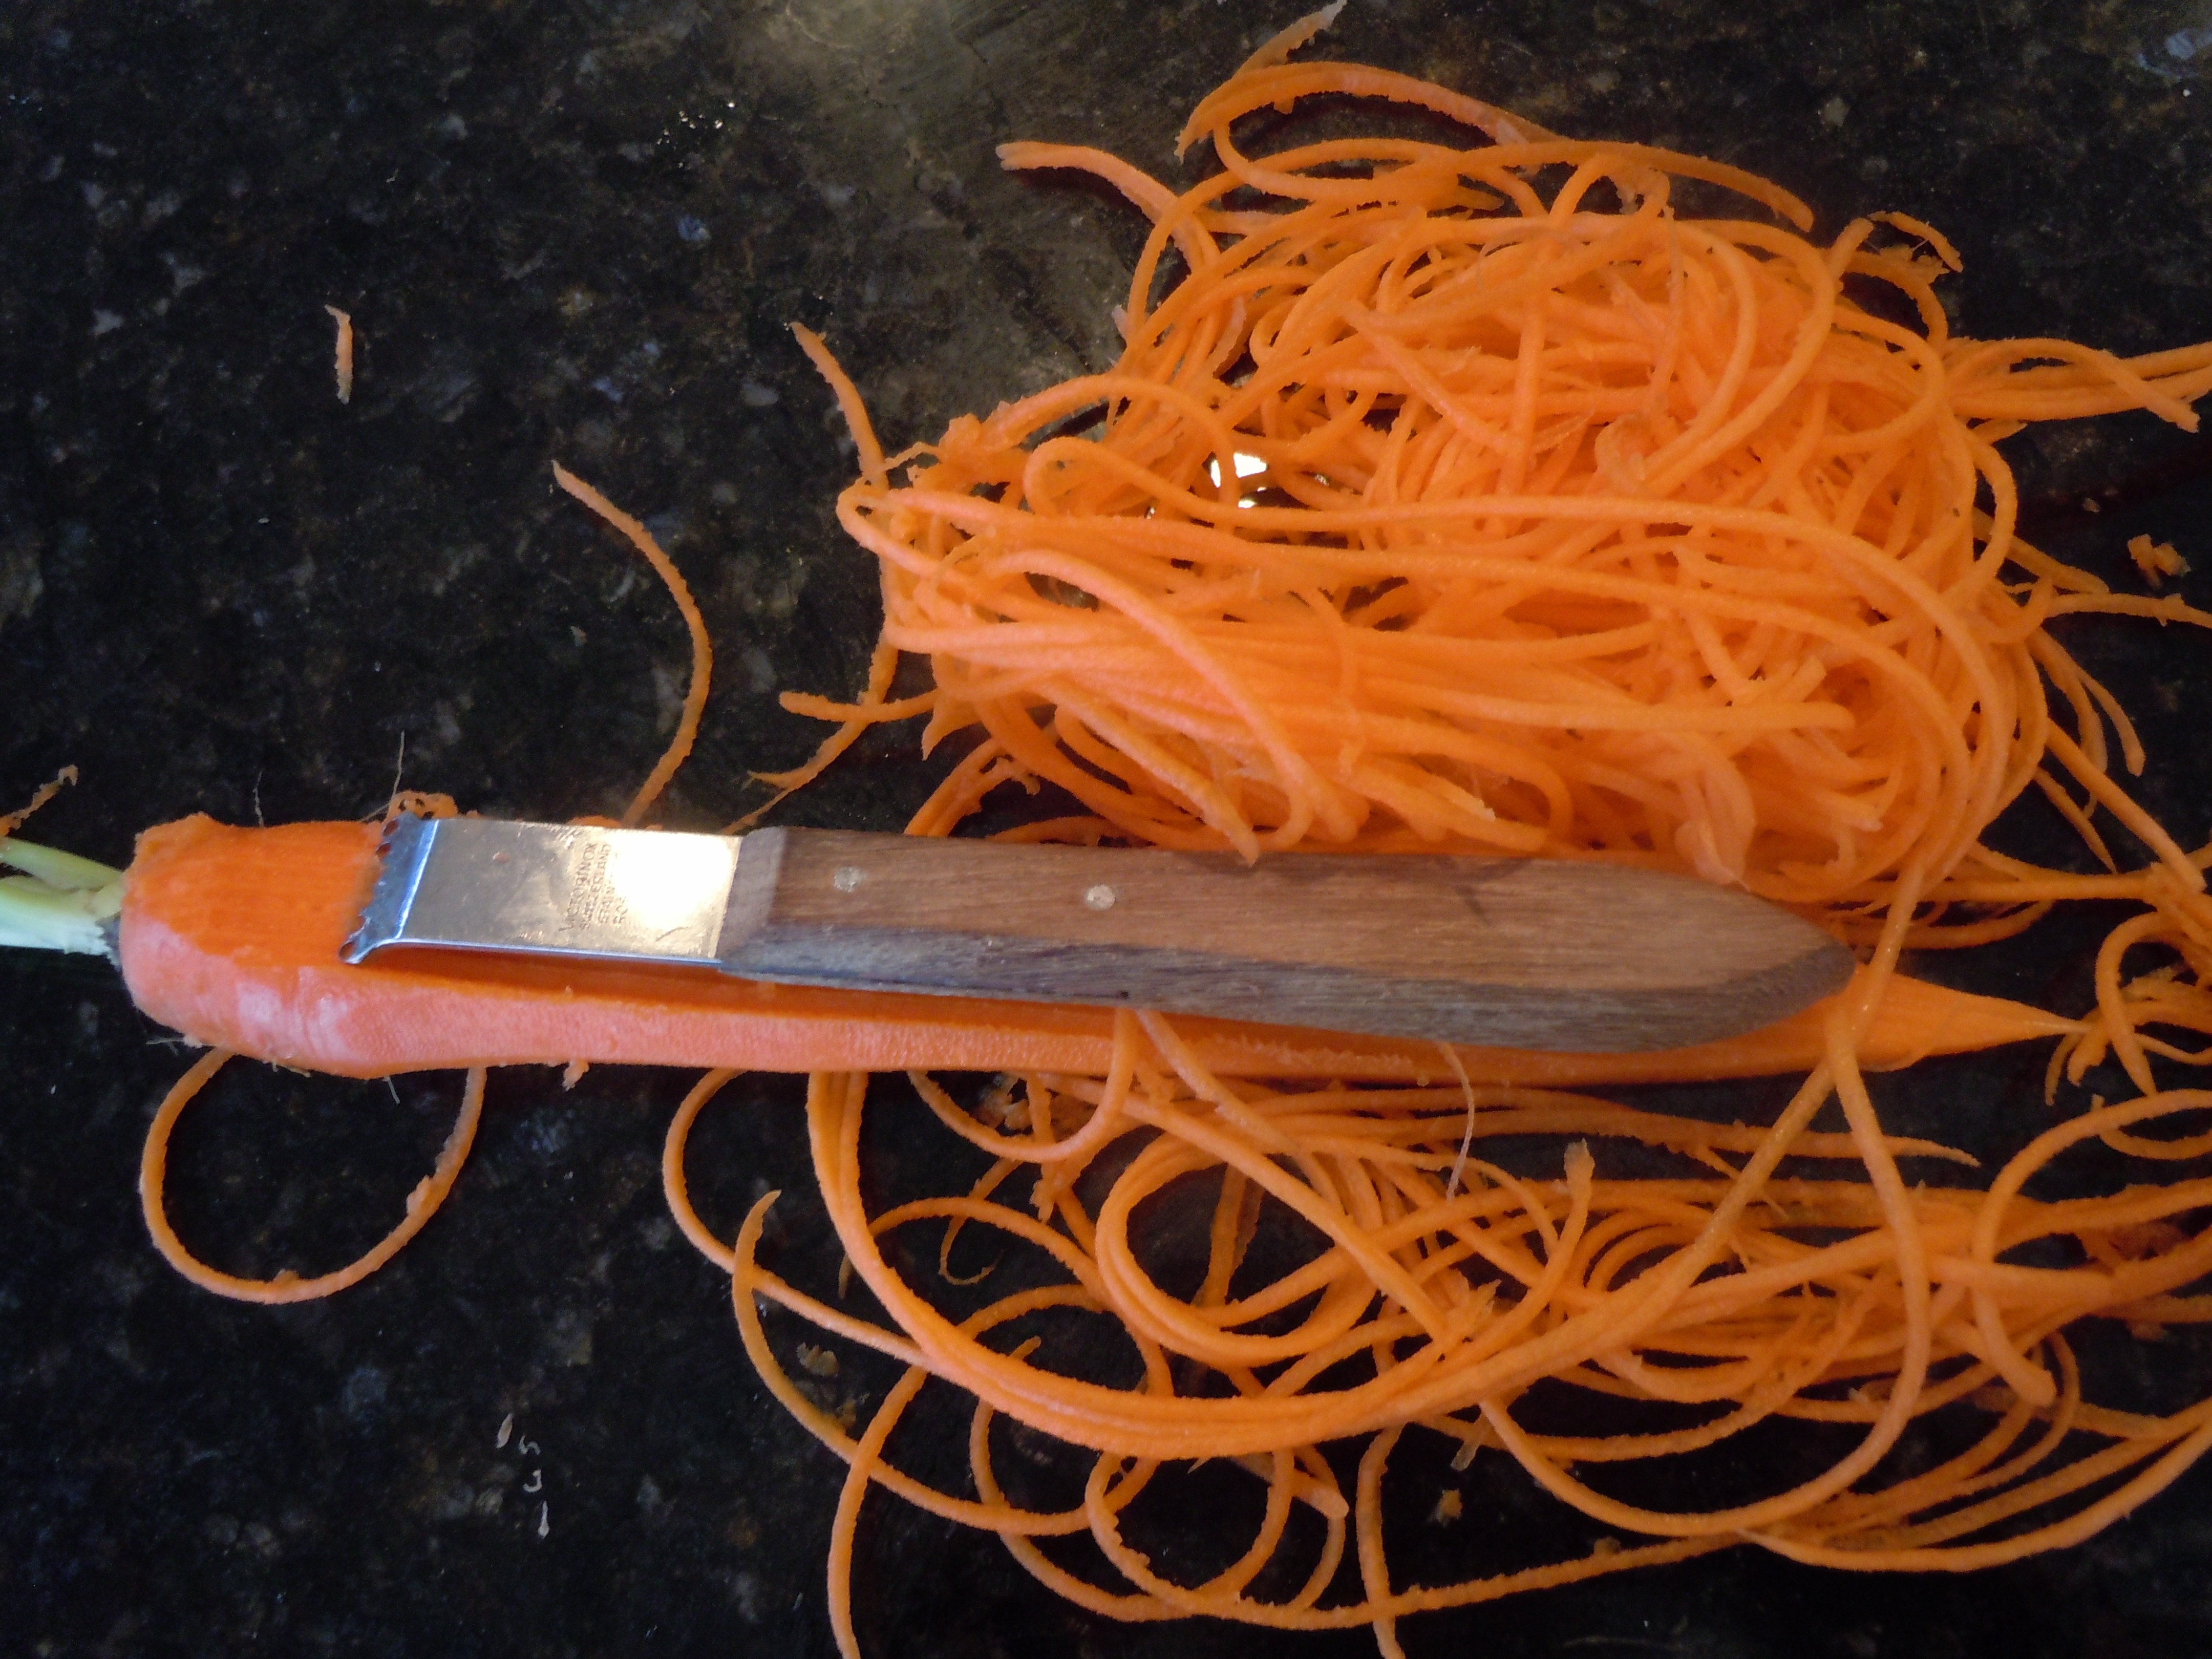
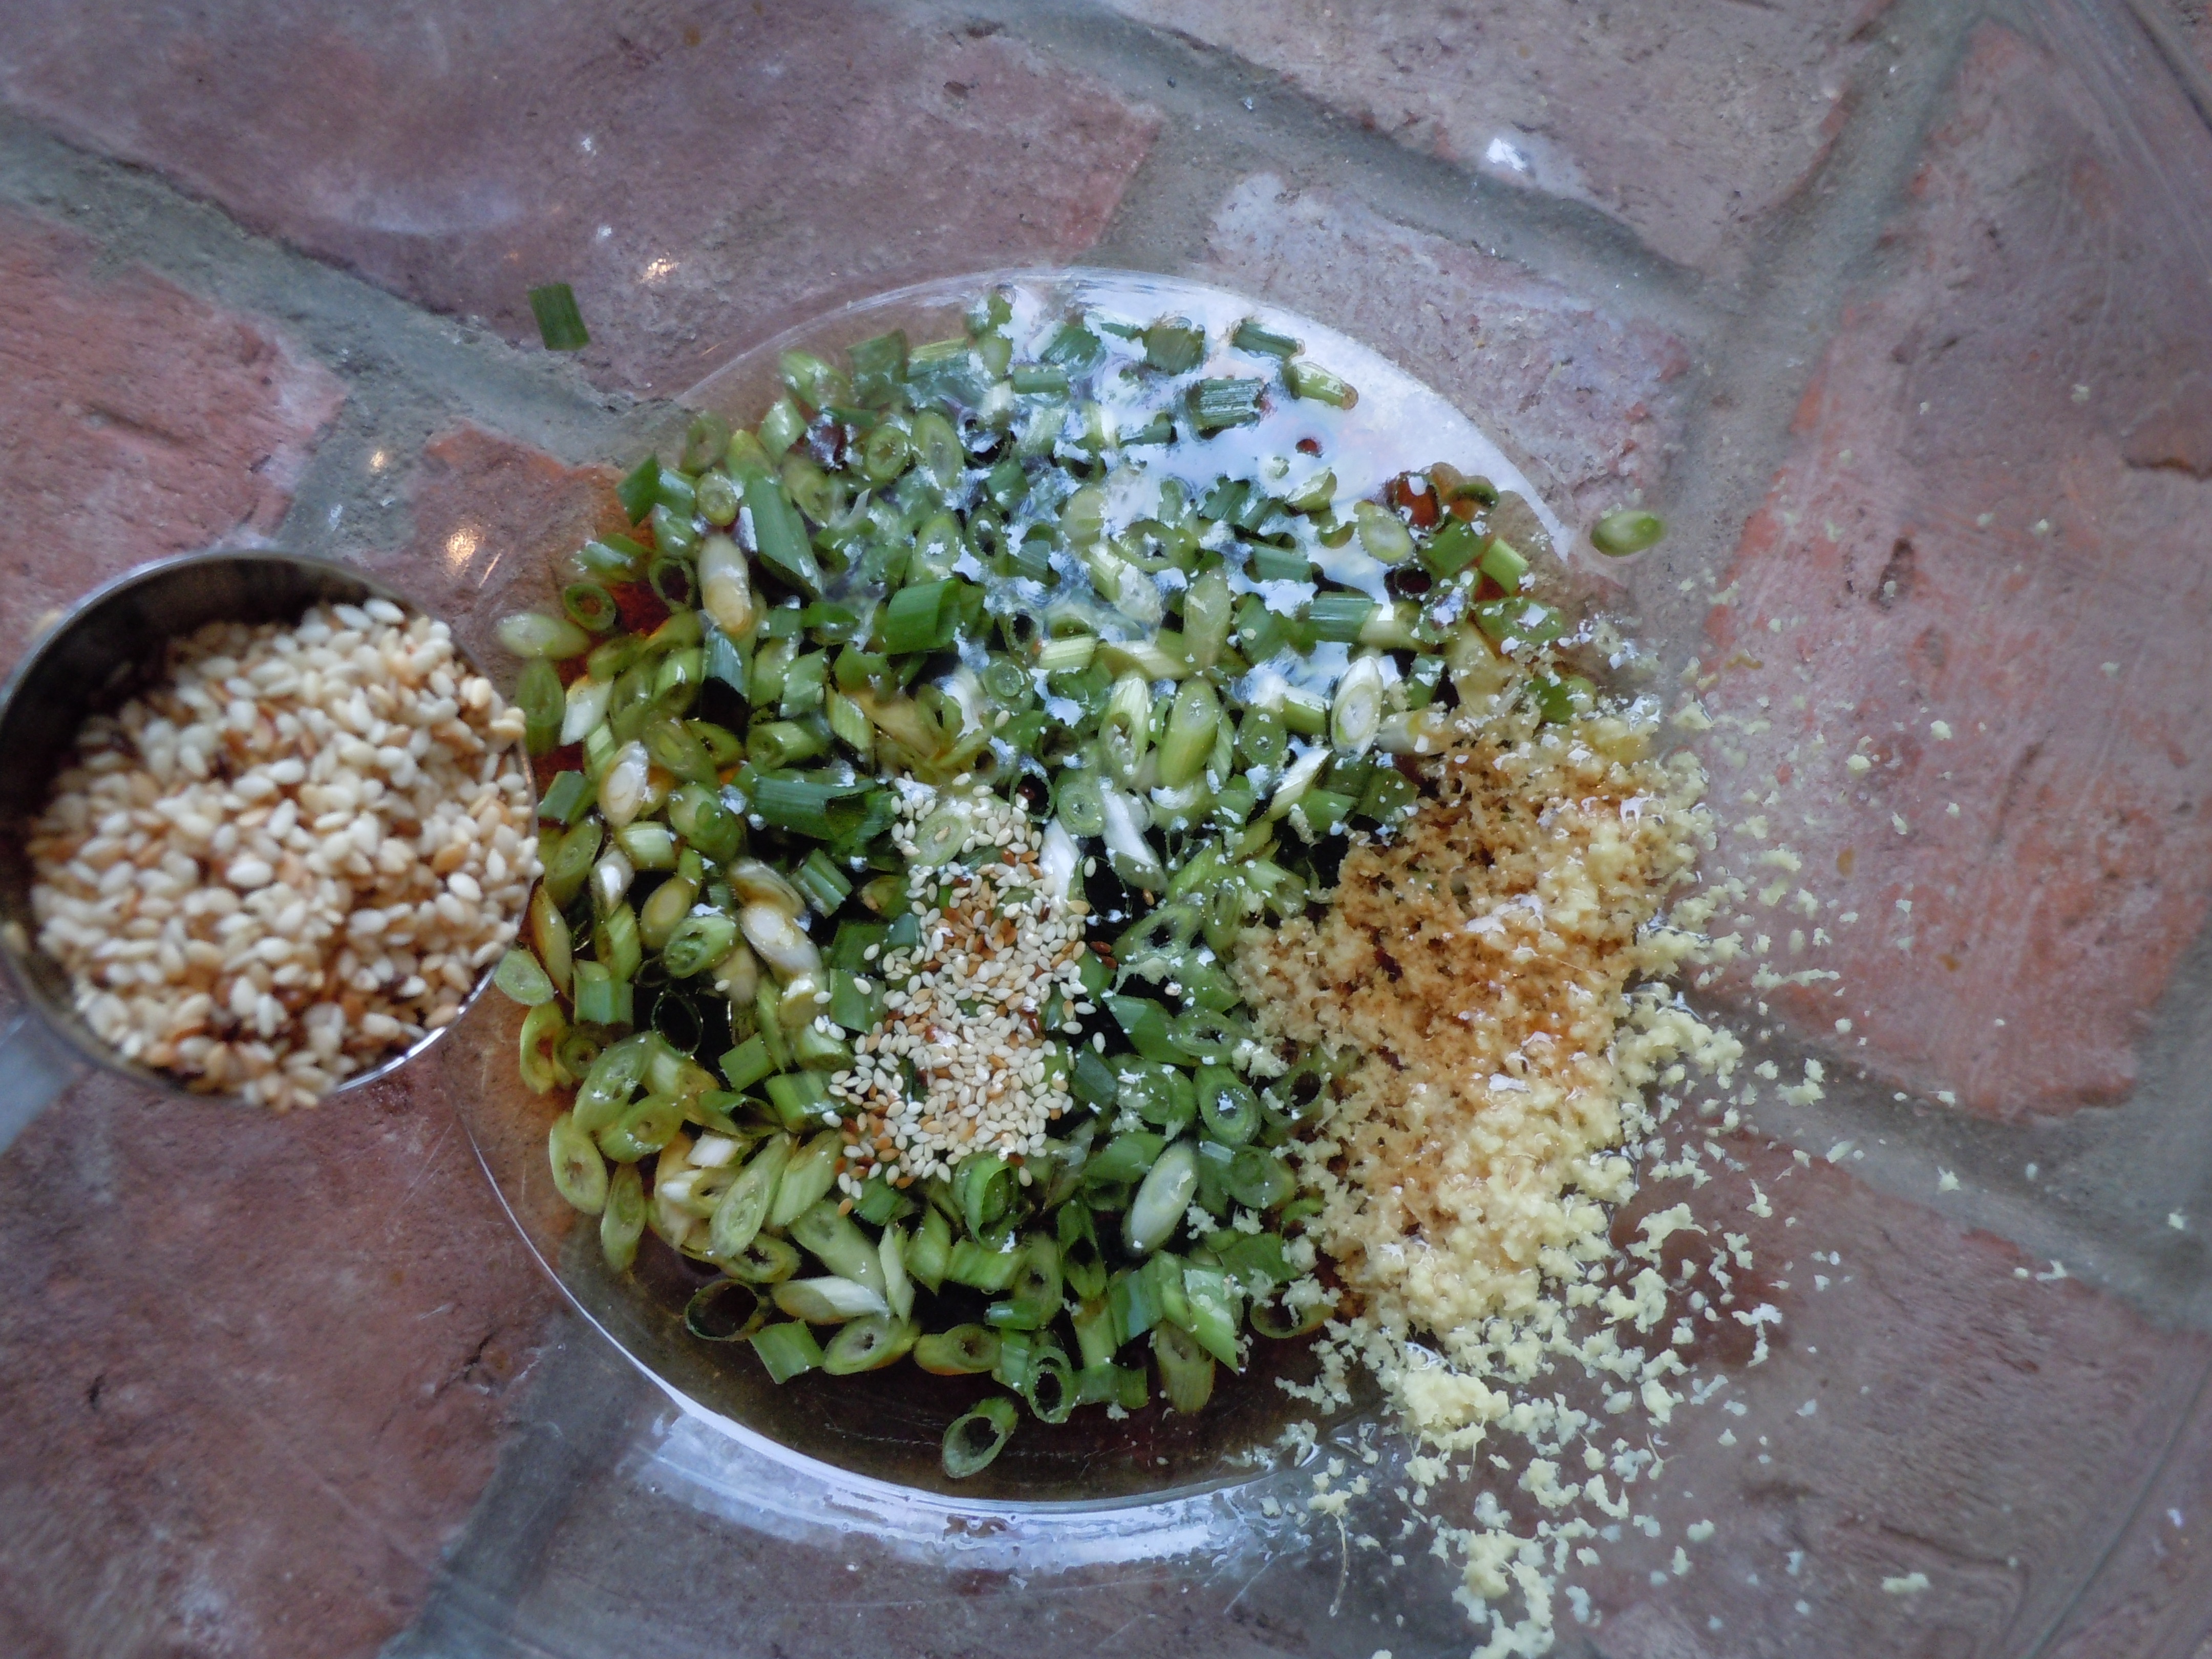
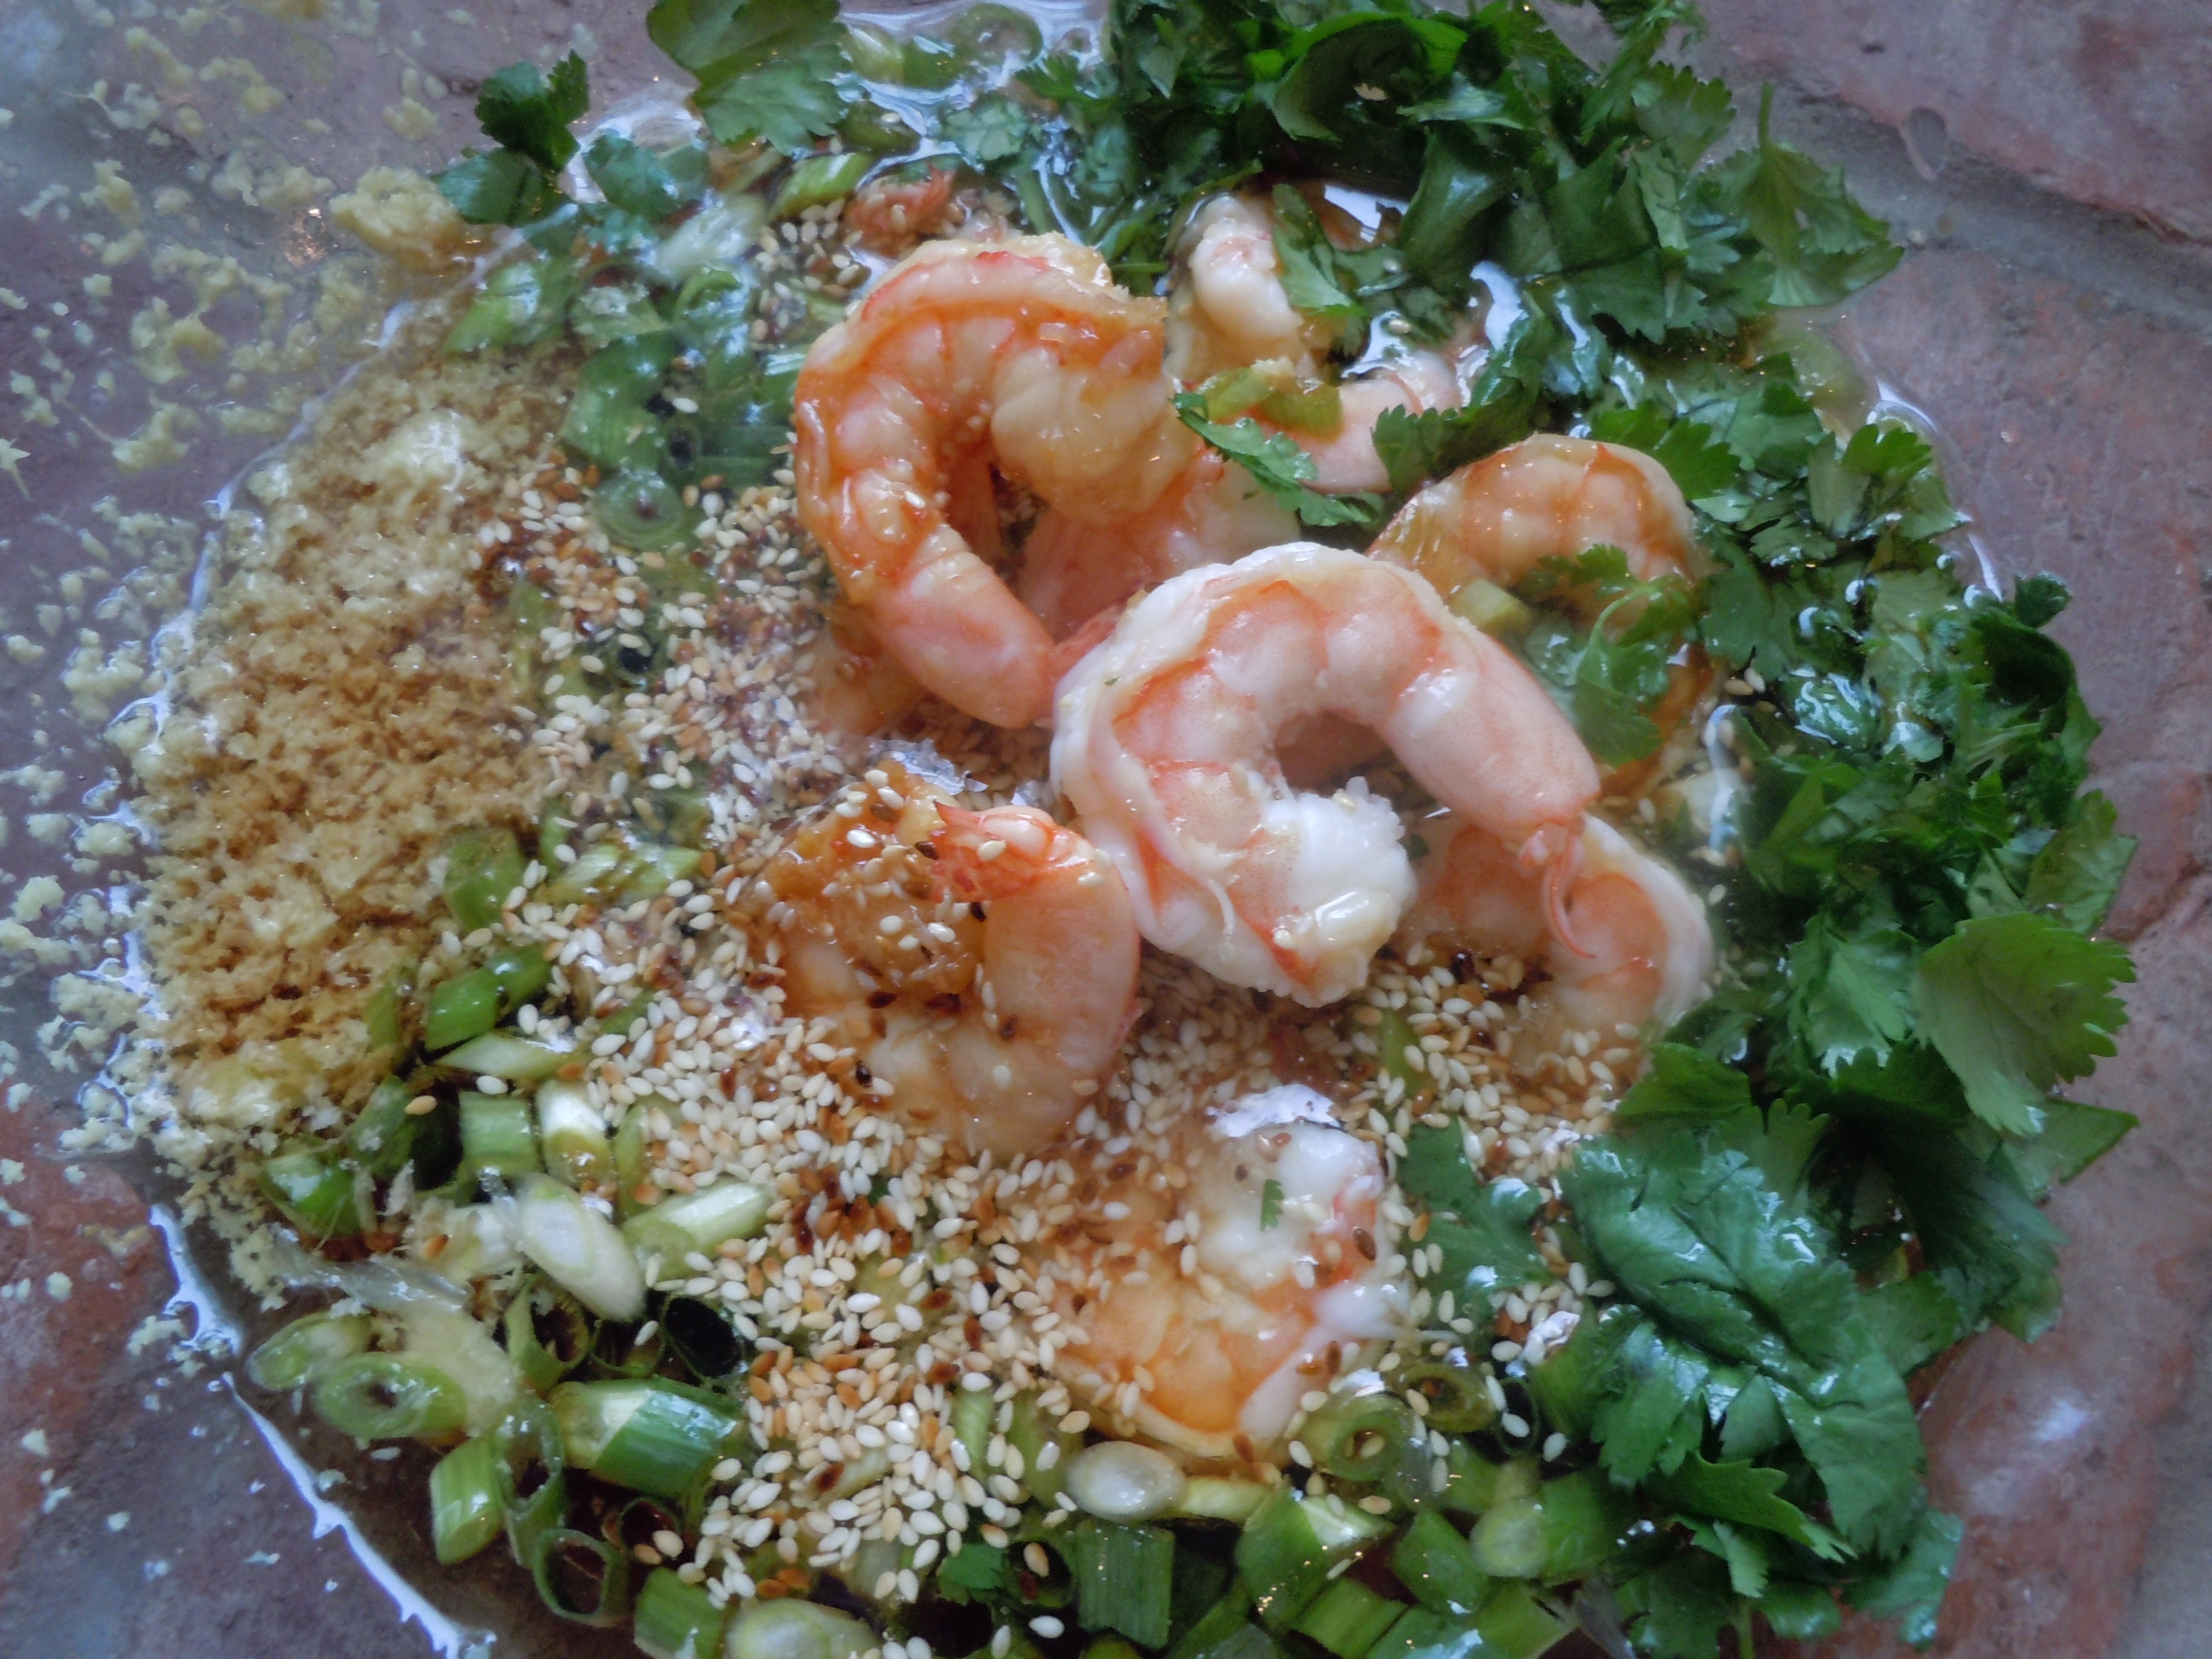
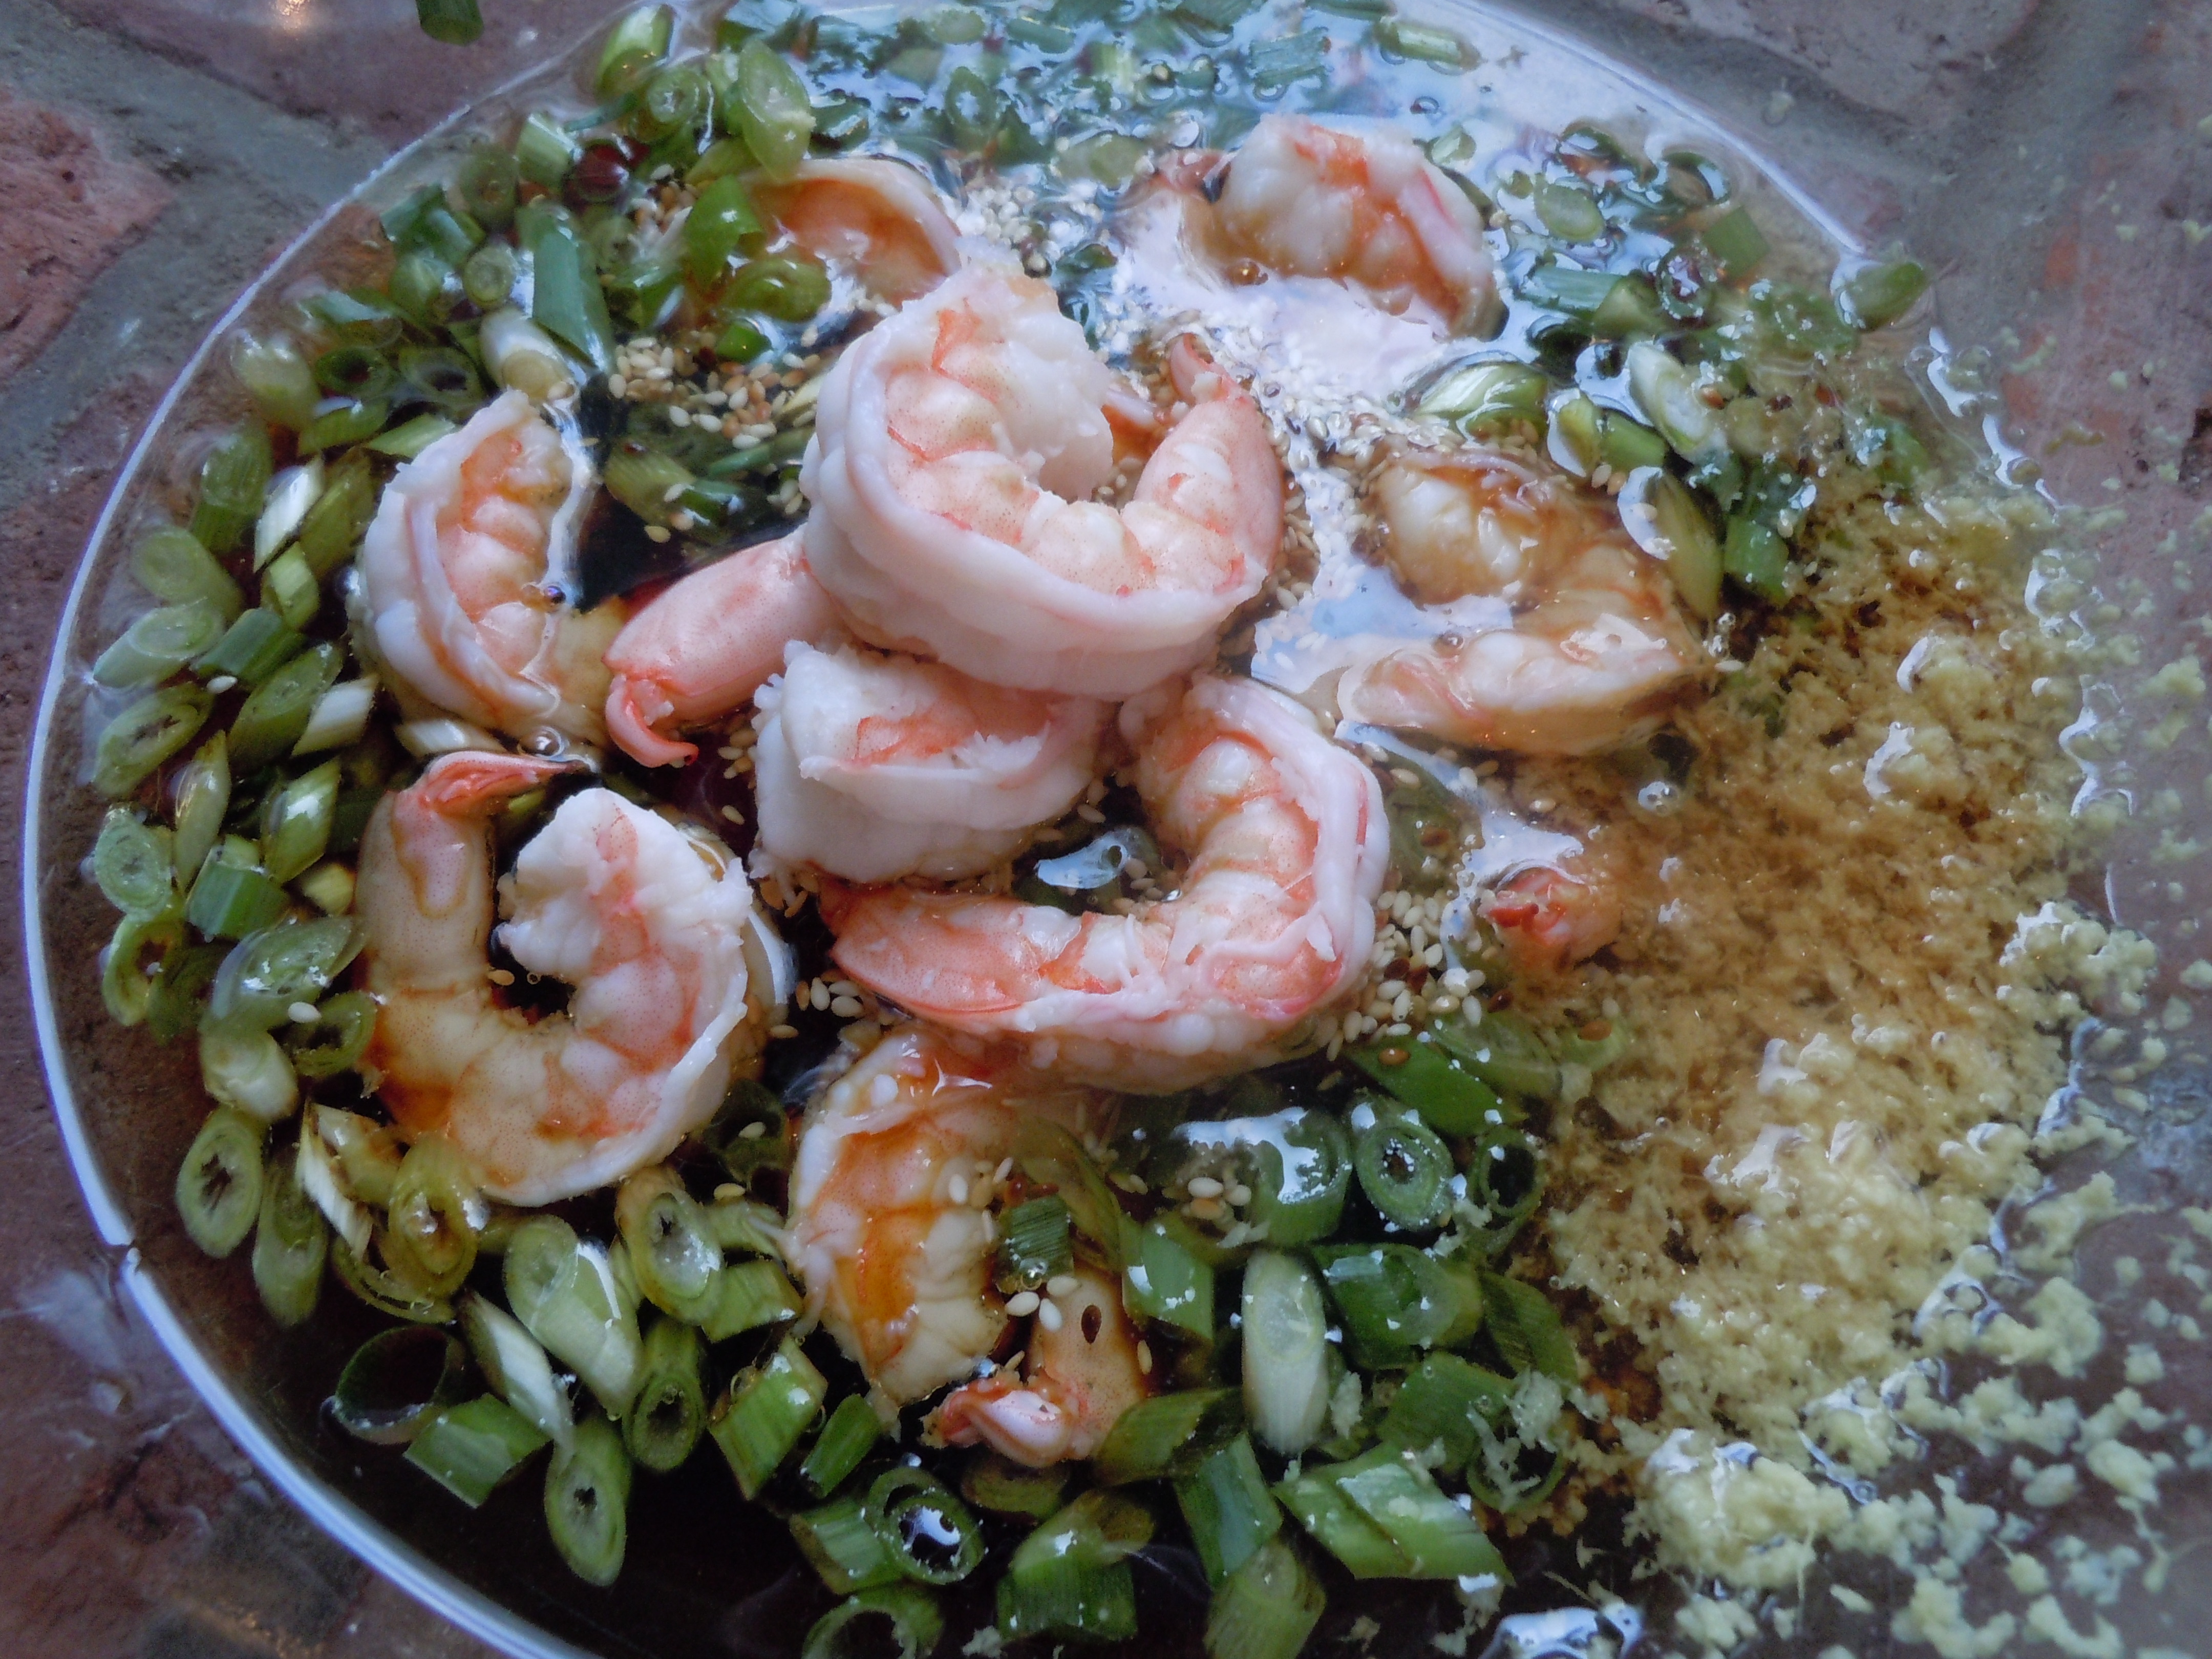
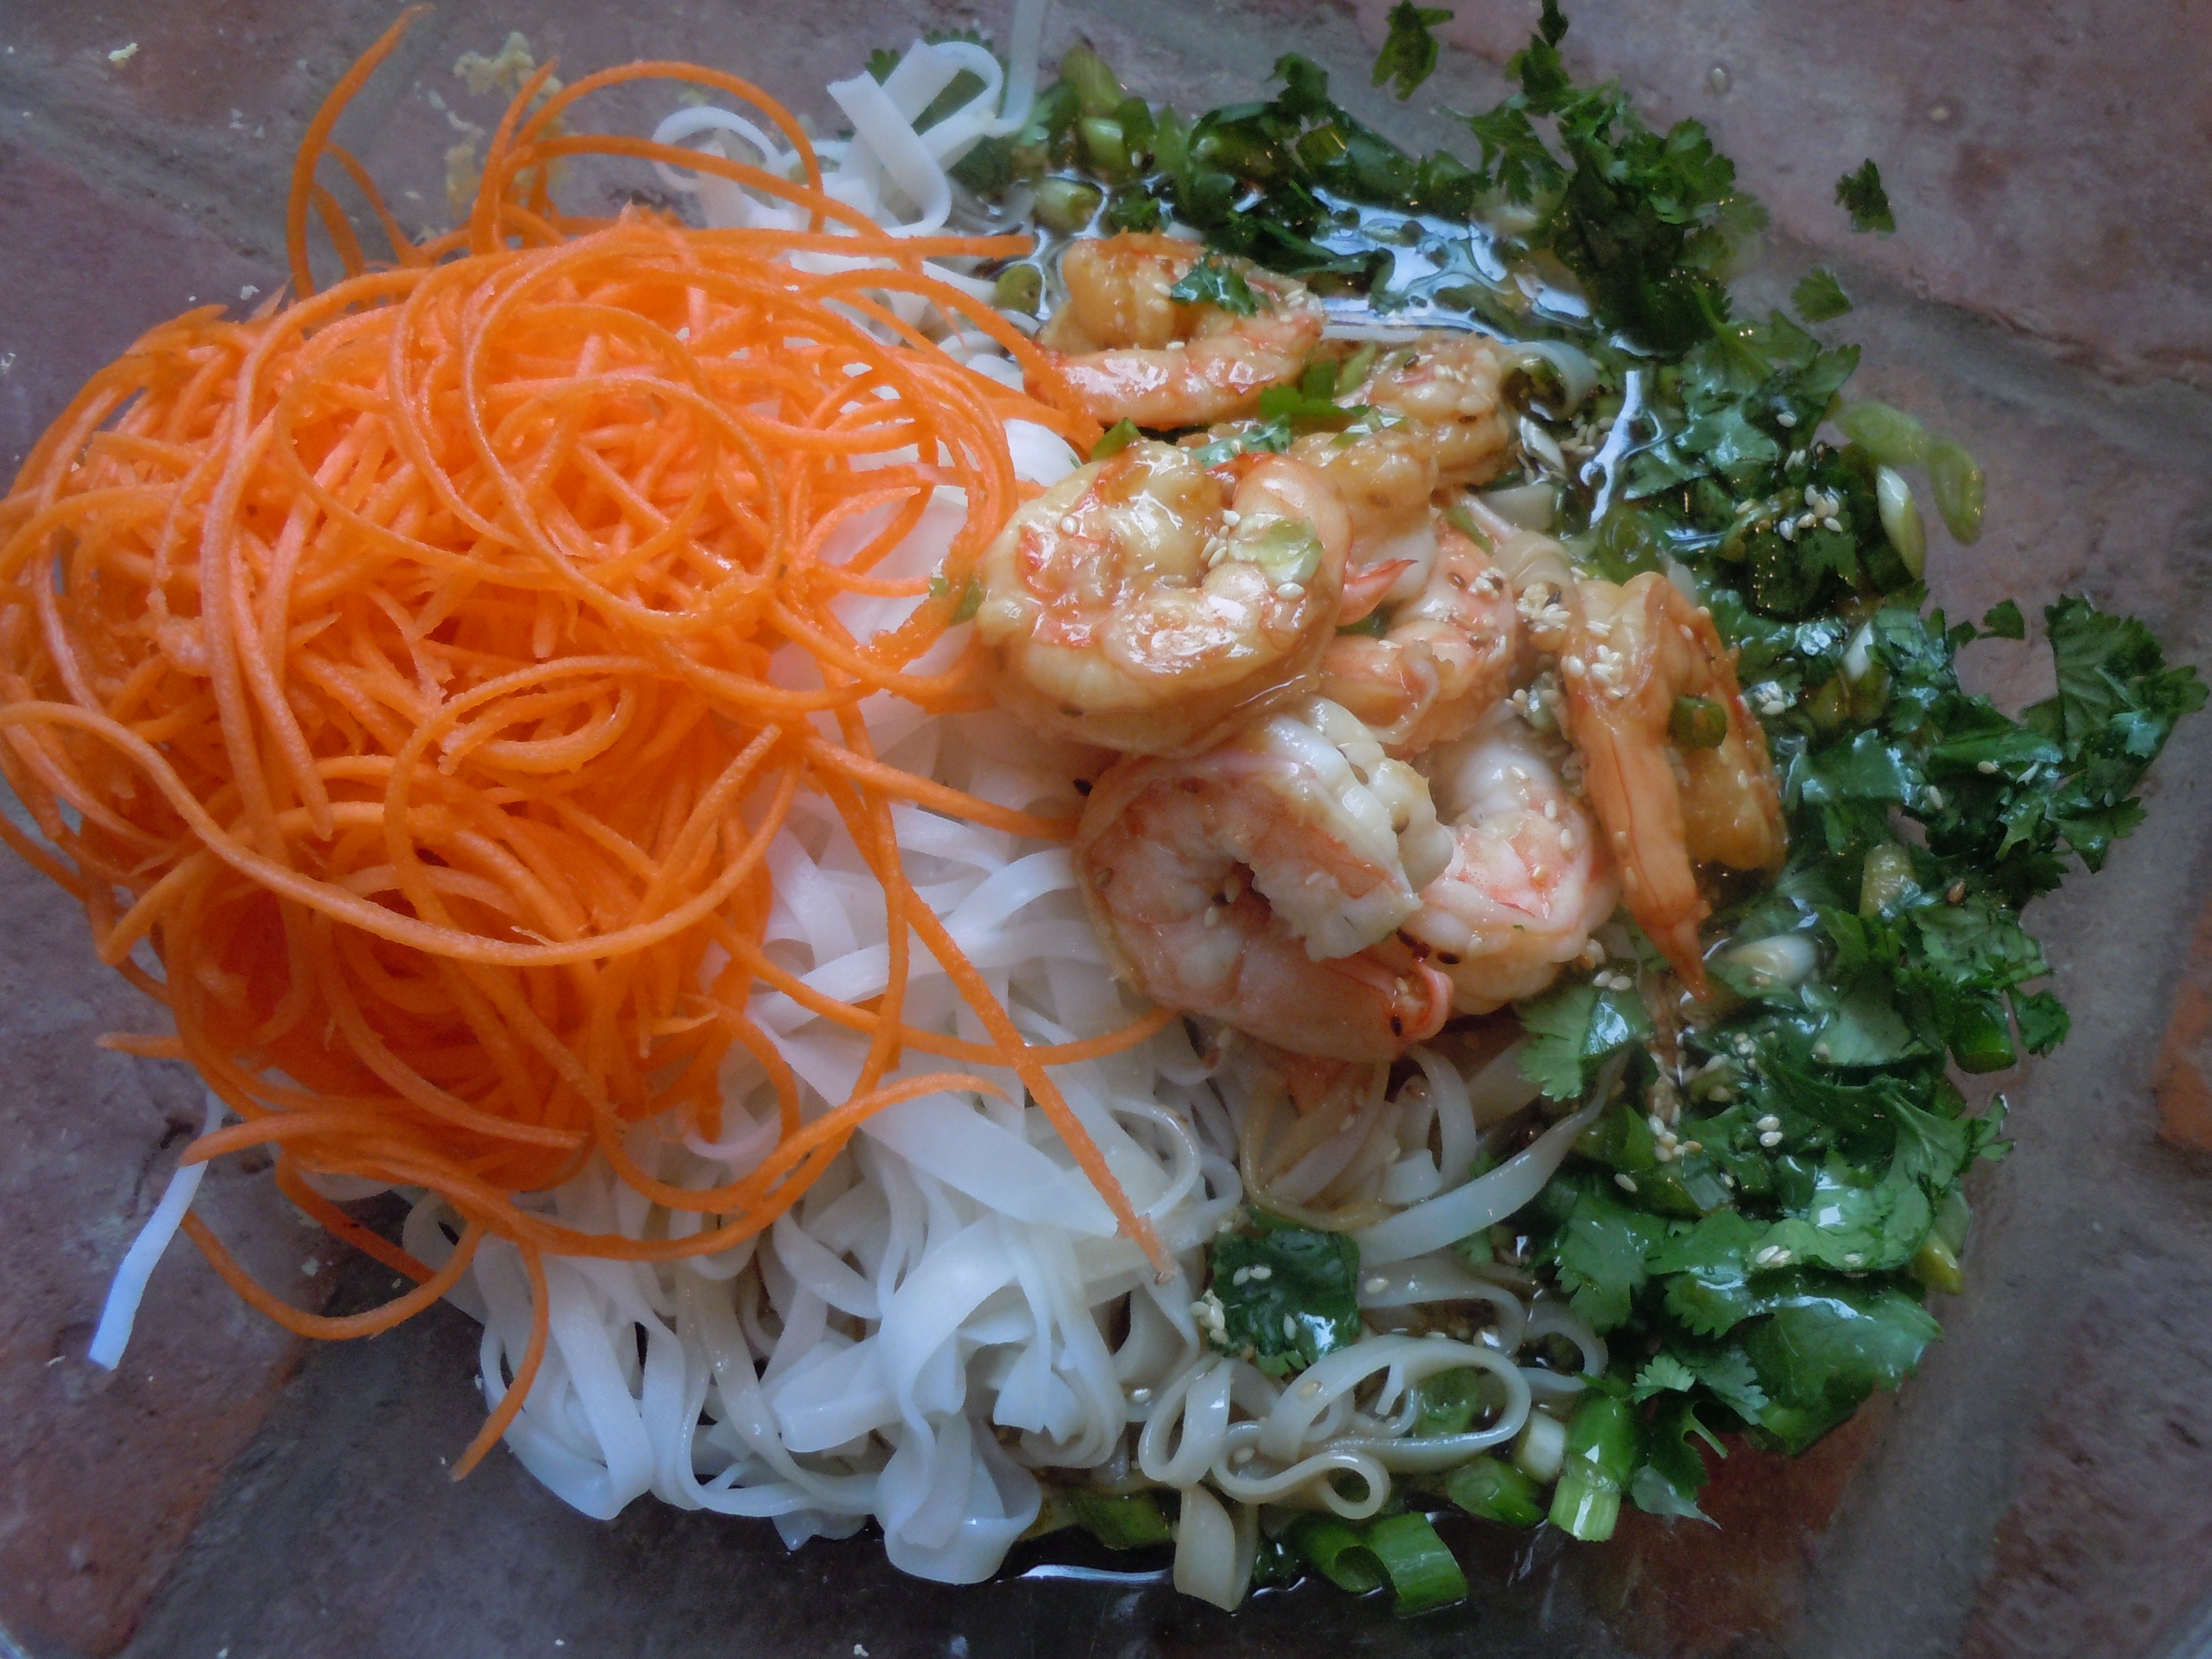
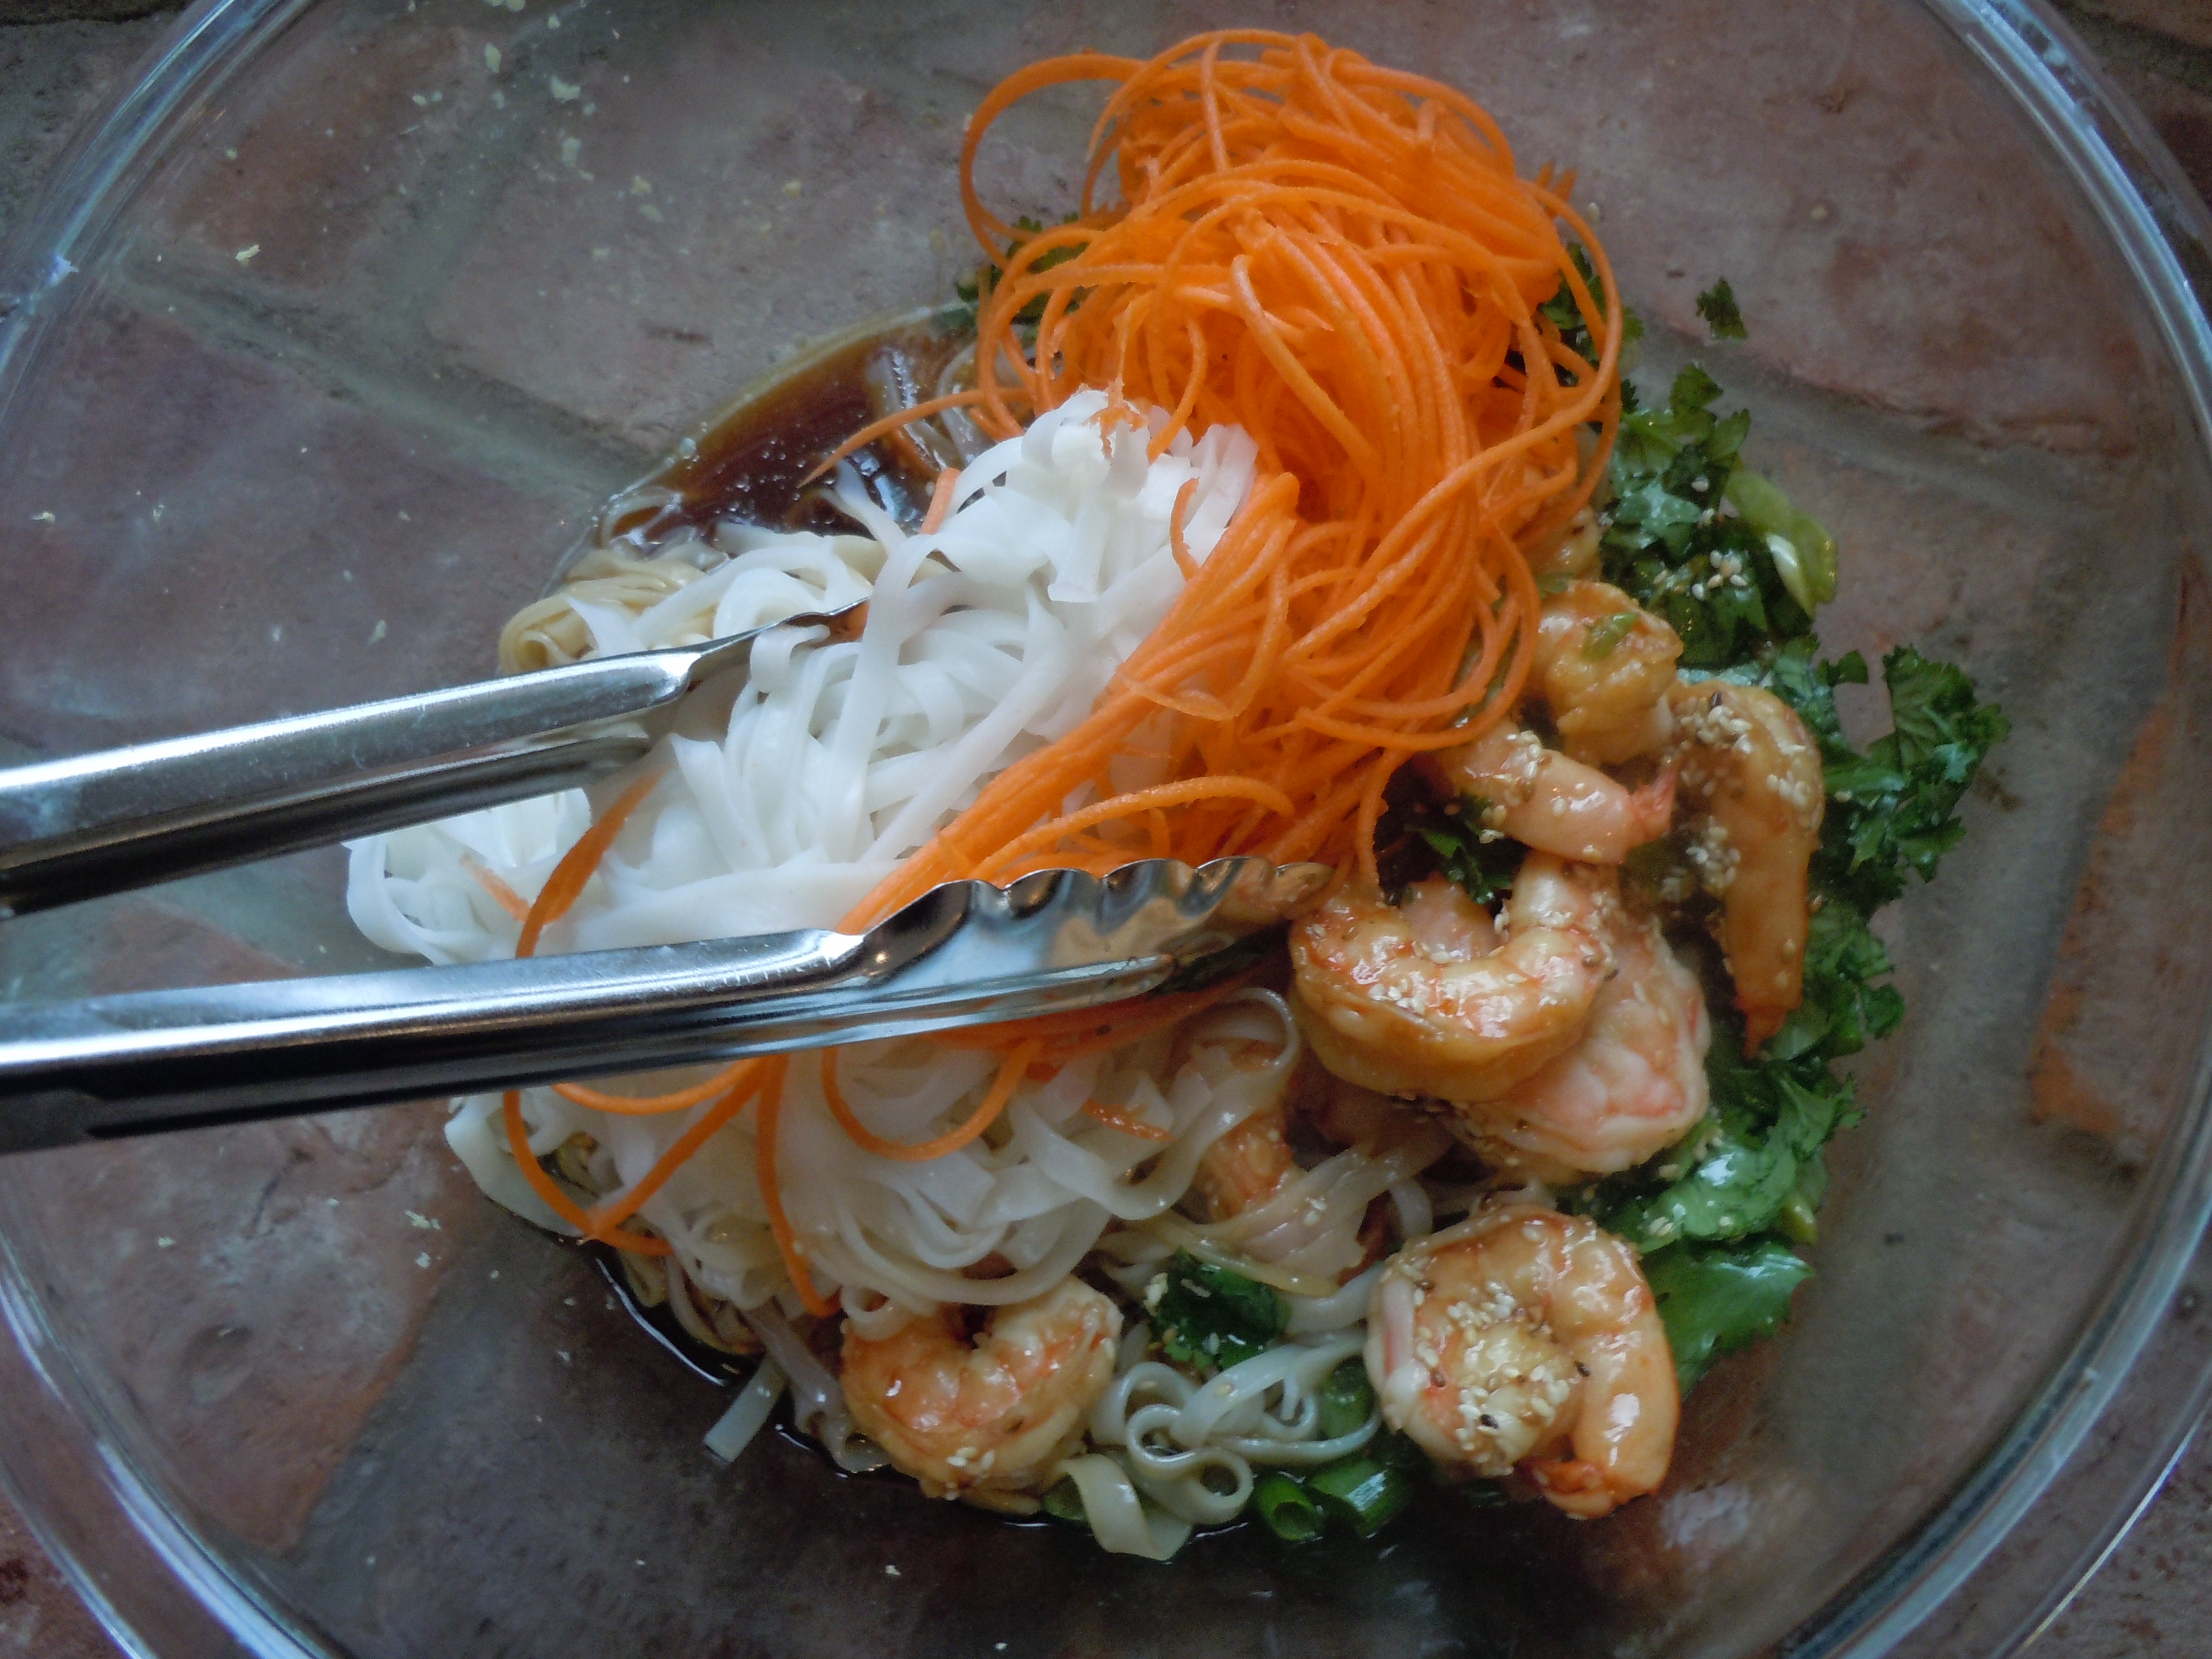
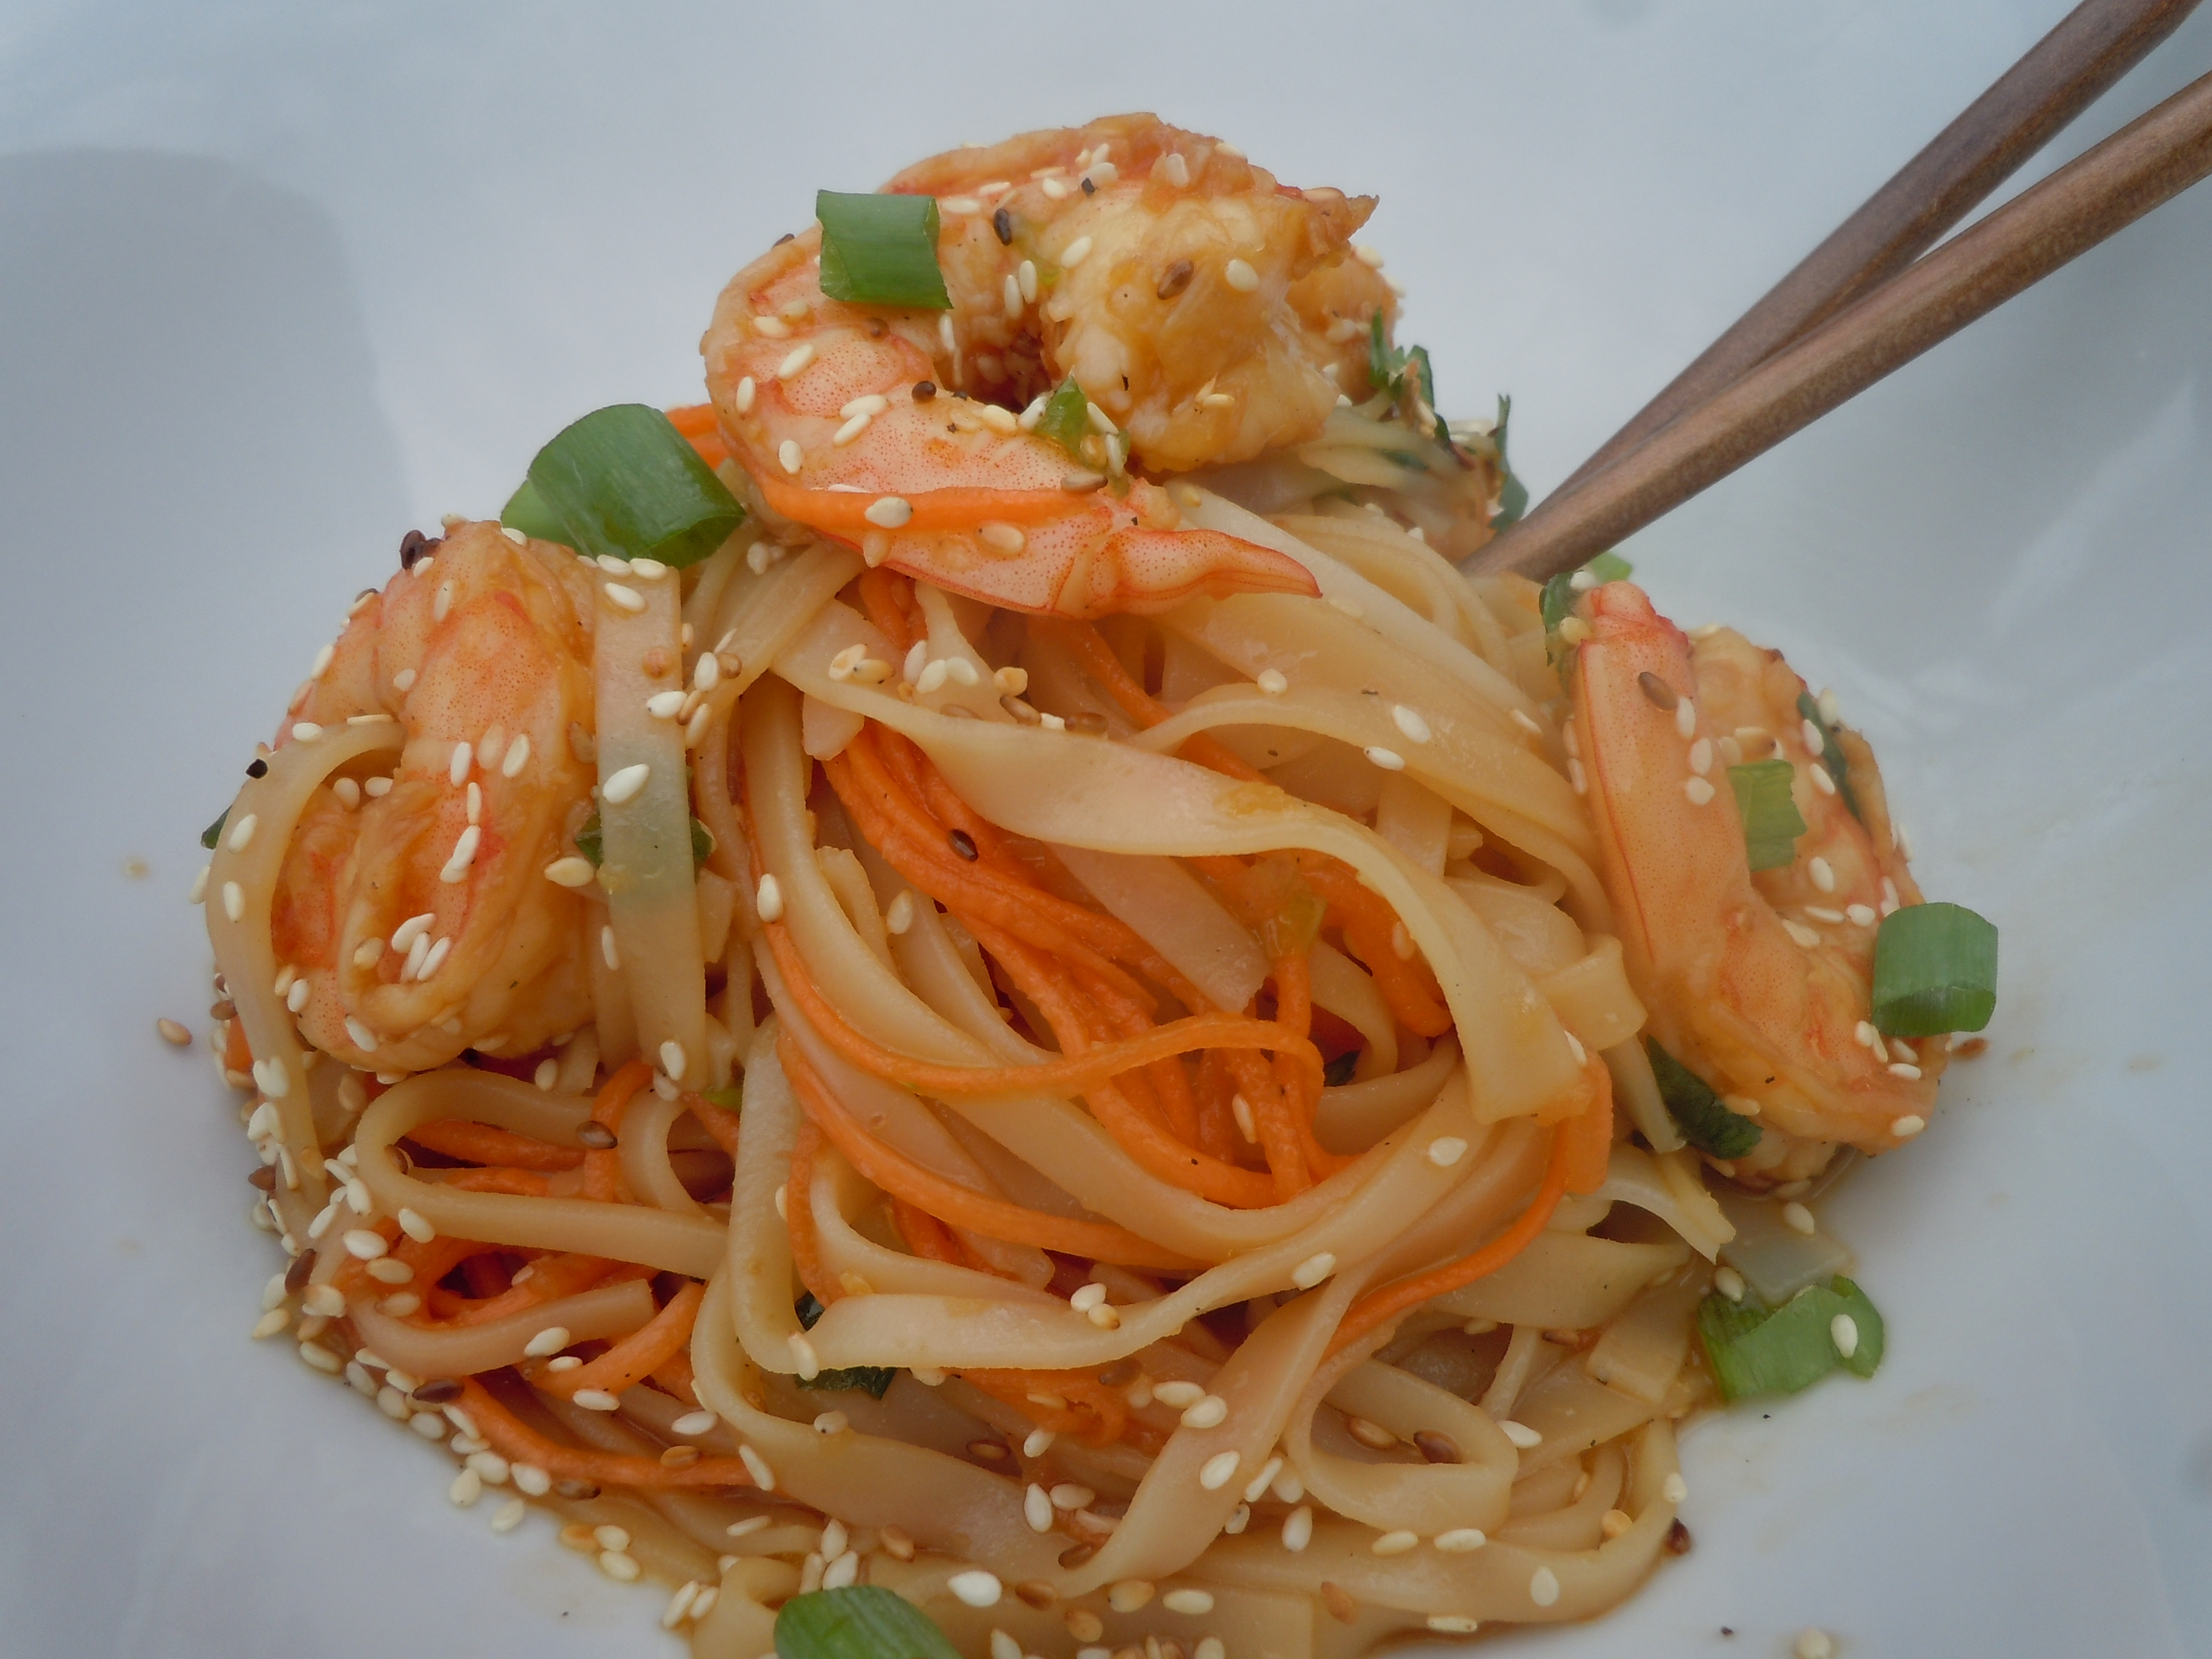
This Asian Shrimp & Noodle Salad is best when you make it the night before so all these wonderful herbs and oils can marinate the rice noodles and shrimp. Granted, sometimes it just can’t be helped because the flavors are so bright and delicious no one can wait for the next day. This recipe originated from my good friend Karen who is a true foodie! I of course have tweaked the ingredients as I do with most recipes. I used rice noodles making it gluten friendly instead of pasta which you can use as well…I love it with pasta also but I feel that using the rice noodles makes this a lighter dish. I have also added in carrots using a lemon zester which makes spaghetti like strands and I love what the color does for the dish not to mention orange is my favorite color…can you tell? When you buy the carrots be sure to buy the loose carrots with the greens still intact because they are so much sweeter then the packaged ones especially for something like this where they play one of the main characters to the story.
You can pretty much buy rice noodles anywhere but I have to tell you one of my favorite Asian markets is Hong Kong Grocery at 71 Whitney Ave., New Haven, CT. It’s on the corner of Trumble St. & Whitney Ave. and they have a Dim Sum Restaurant next door. You can get all your rice noodles, rice paper, rice wine vinegar, soy’s, a good size bag of sesame seeds and much more at the street level. Down stairs you will find the freshest, juiciest ginger you will ever have and the same for their daikon radish and garlic bulbs. I also buy some very durable and adorable Asian bowls there. It’s a great find and you should really try to stop in when you get the chance. This Asian shrimp and noodle salad would go great with some chocolate-avocado mousse, or Pavlova with fresh pineapple & berries for dessert!
Ingredients – Serves 6-8 lunch or dinners:
1 lb. rice noodles (linguine fini or fettuccine…I used a fettuccine size width in the pictures)
1 1/2 lb. medium size peeled and deveined shrimp or cooked shrimp
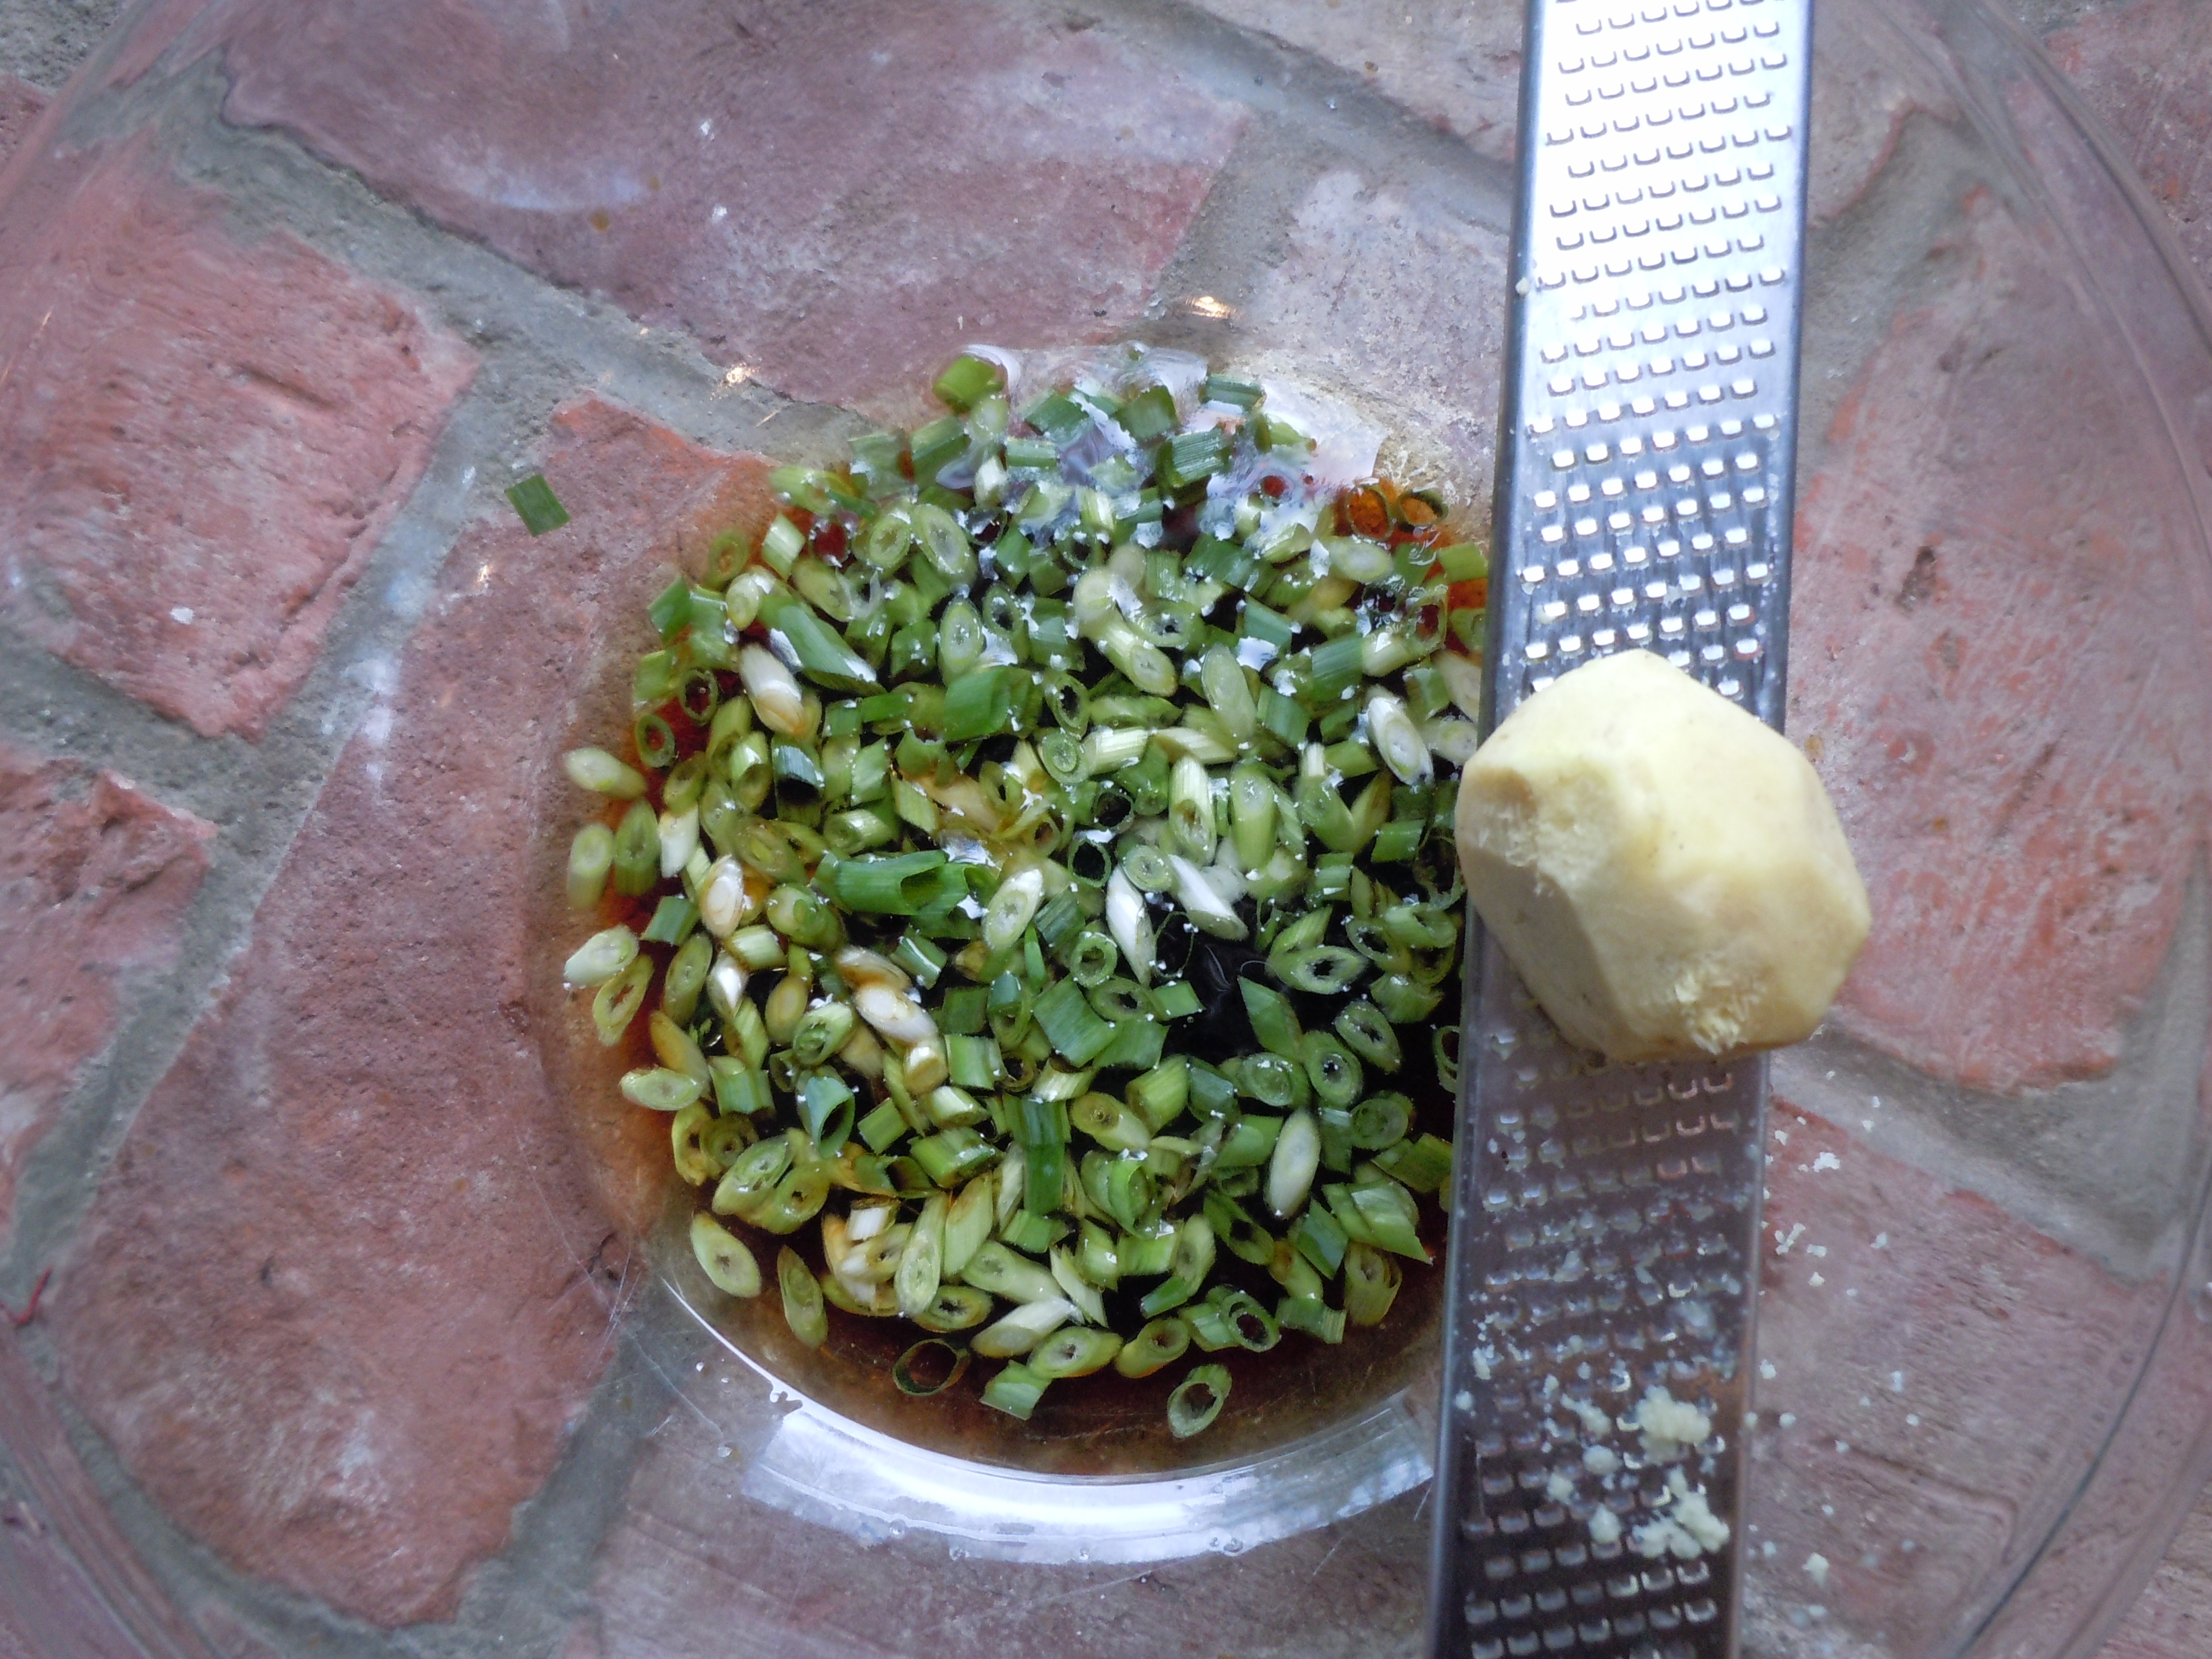
3/4 cup reduced sodium soy sauce
1/4 cup toasted sesame oil
1/4 cup “seasoned” rice wine vinegar
1/4 cup oilve oil
juice from 1/2 lime
2 Tbsp fresh grated ginger
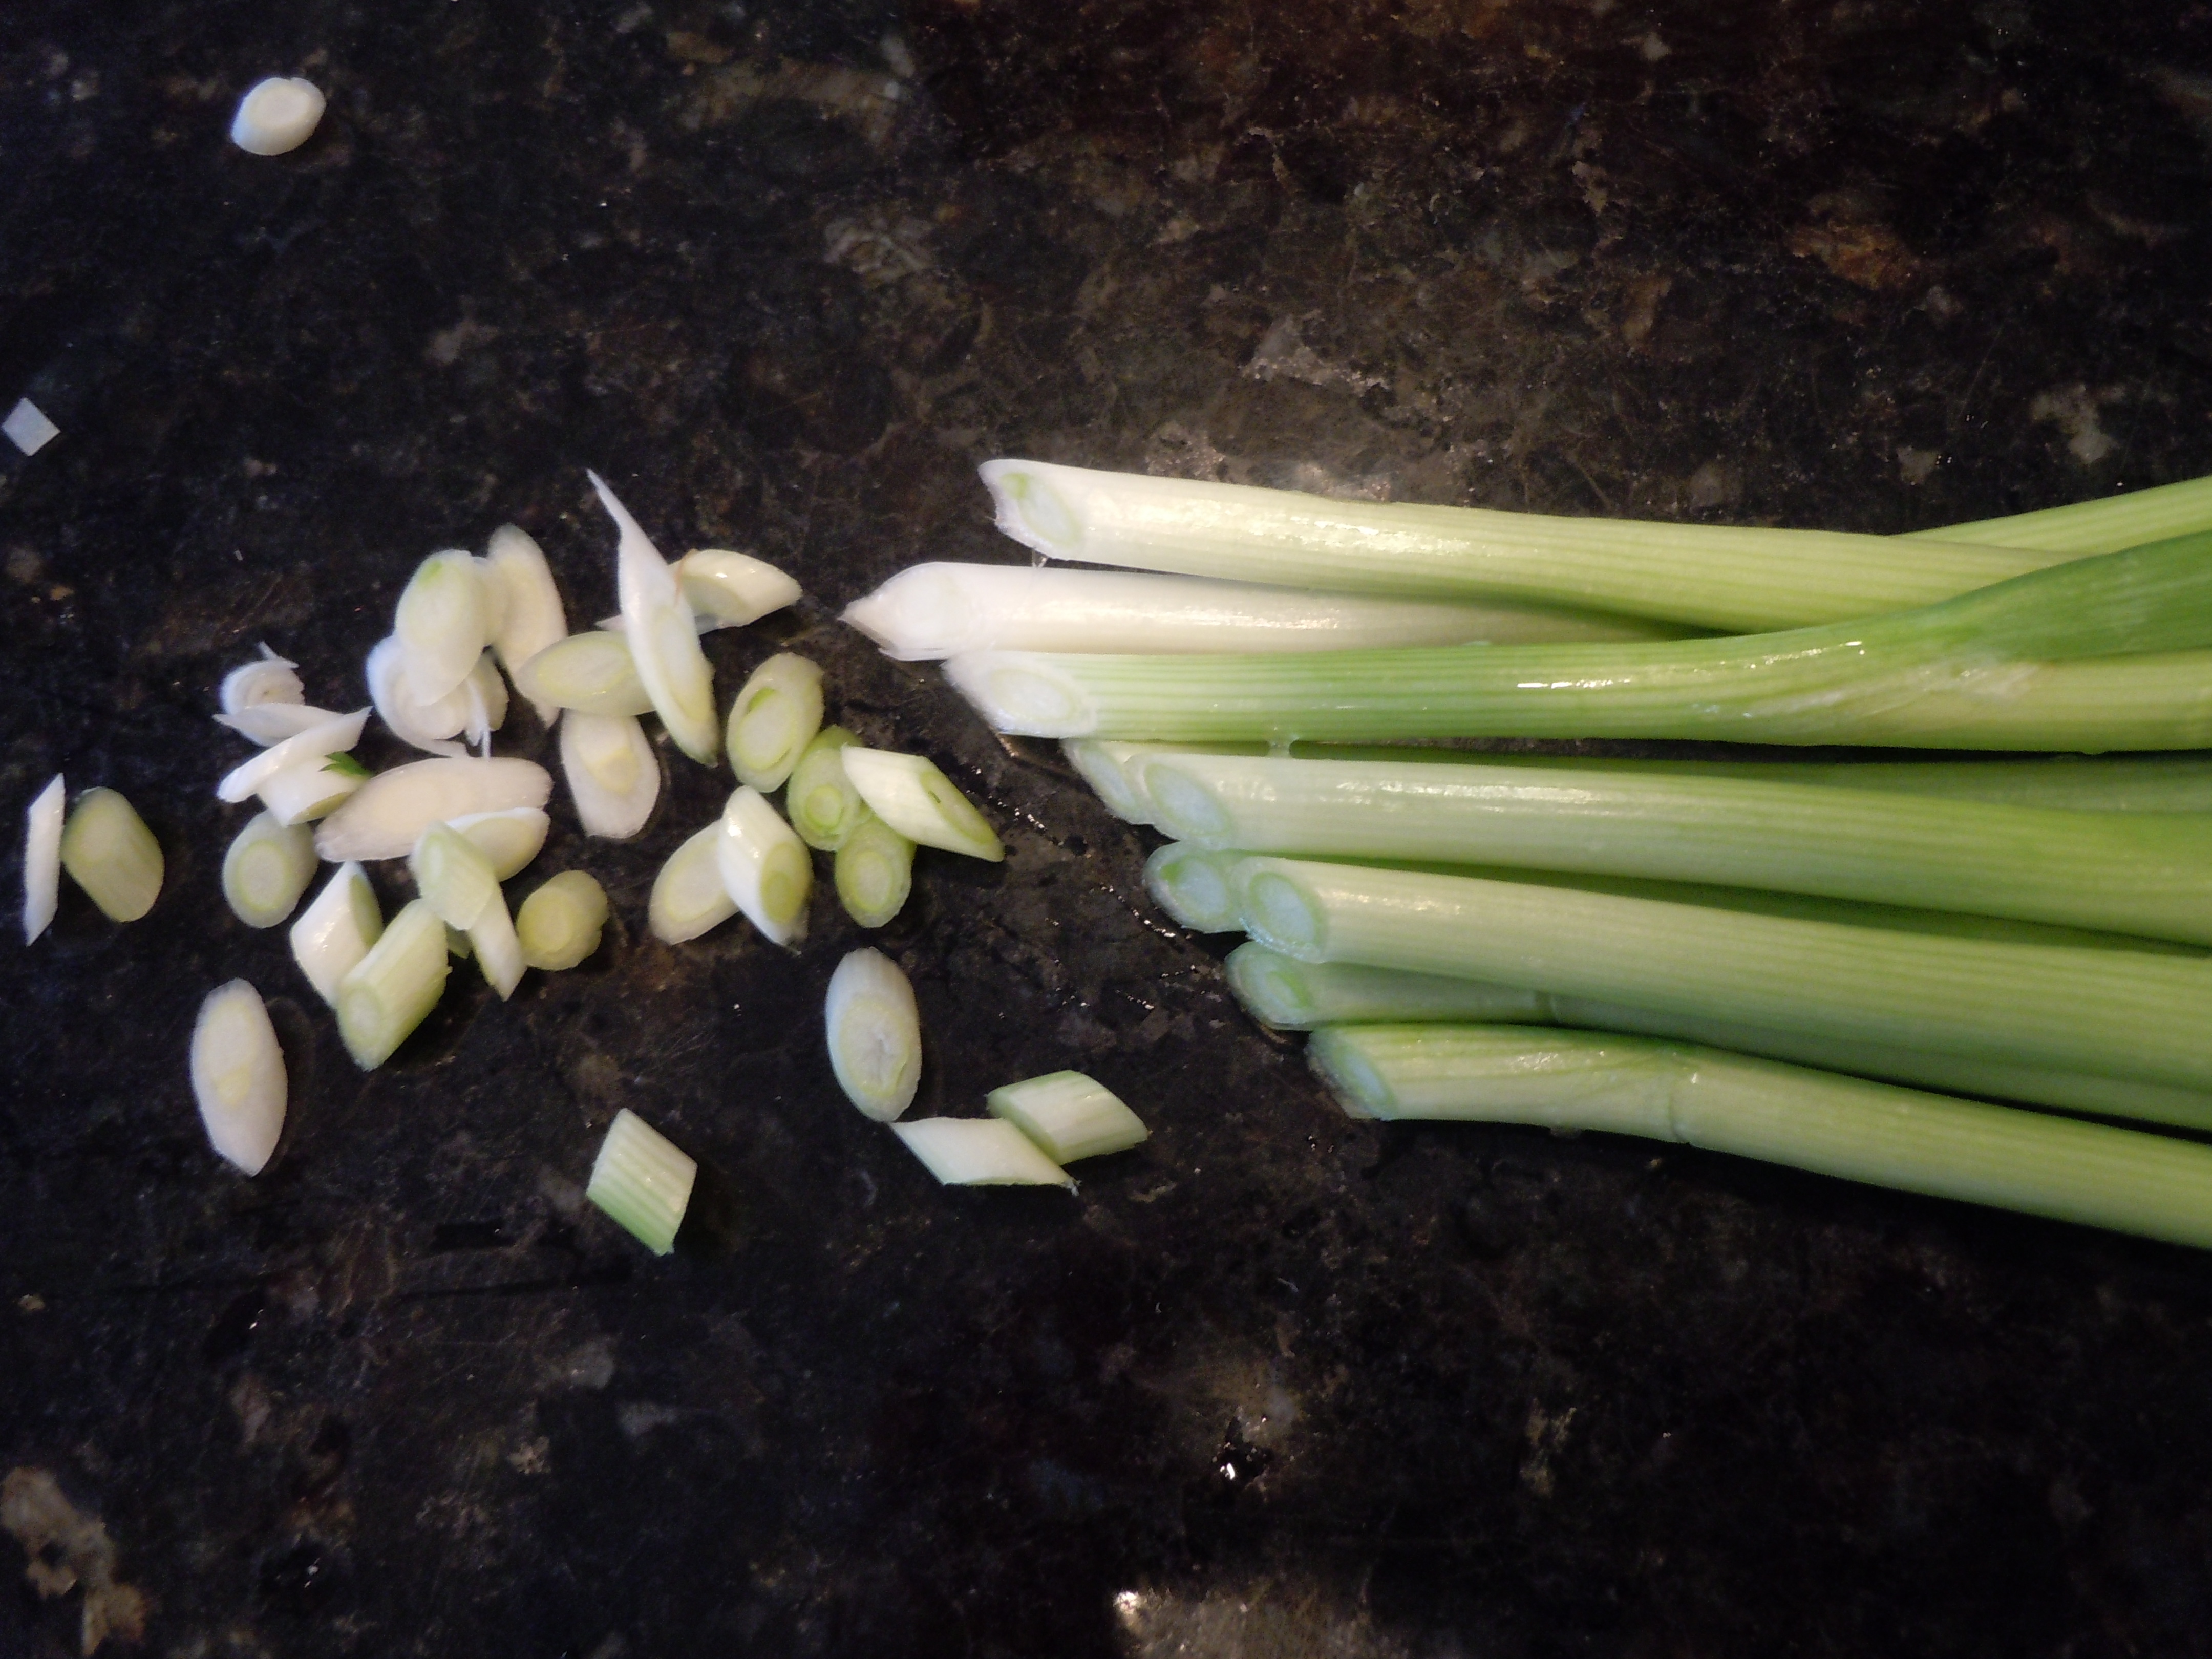
1 bunch sliced scallions (save 1/4 cup for garnish)
5 medium-small size loose carrots (don’t use the packaged ones)
1 cup cilantro (2/3 for dressing, 1/3 for garnish)
2 Tbsp sugar
1/4 Tsp pepper
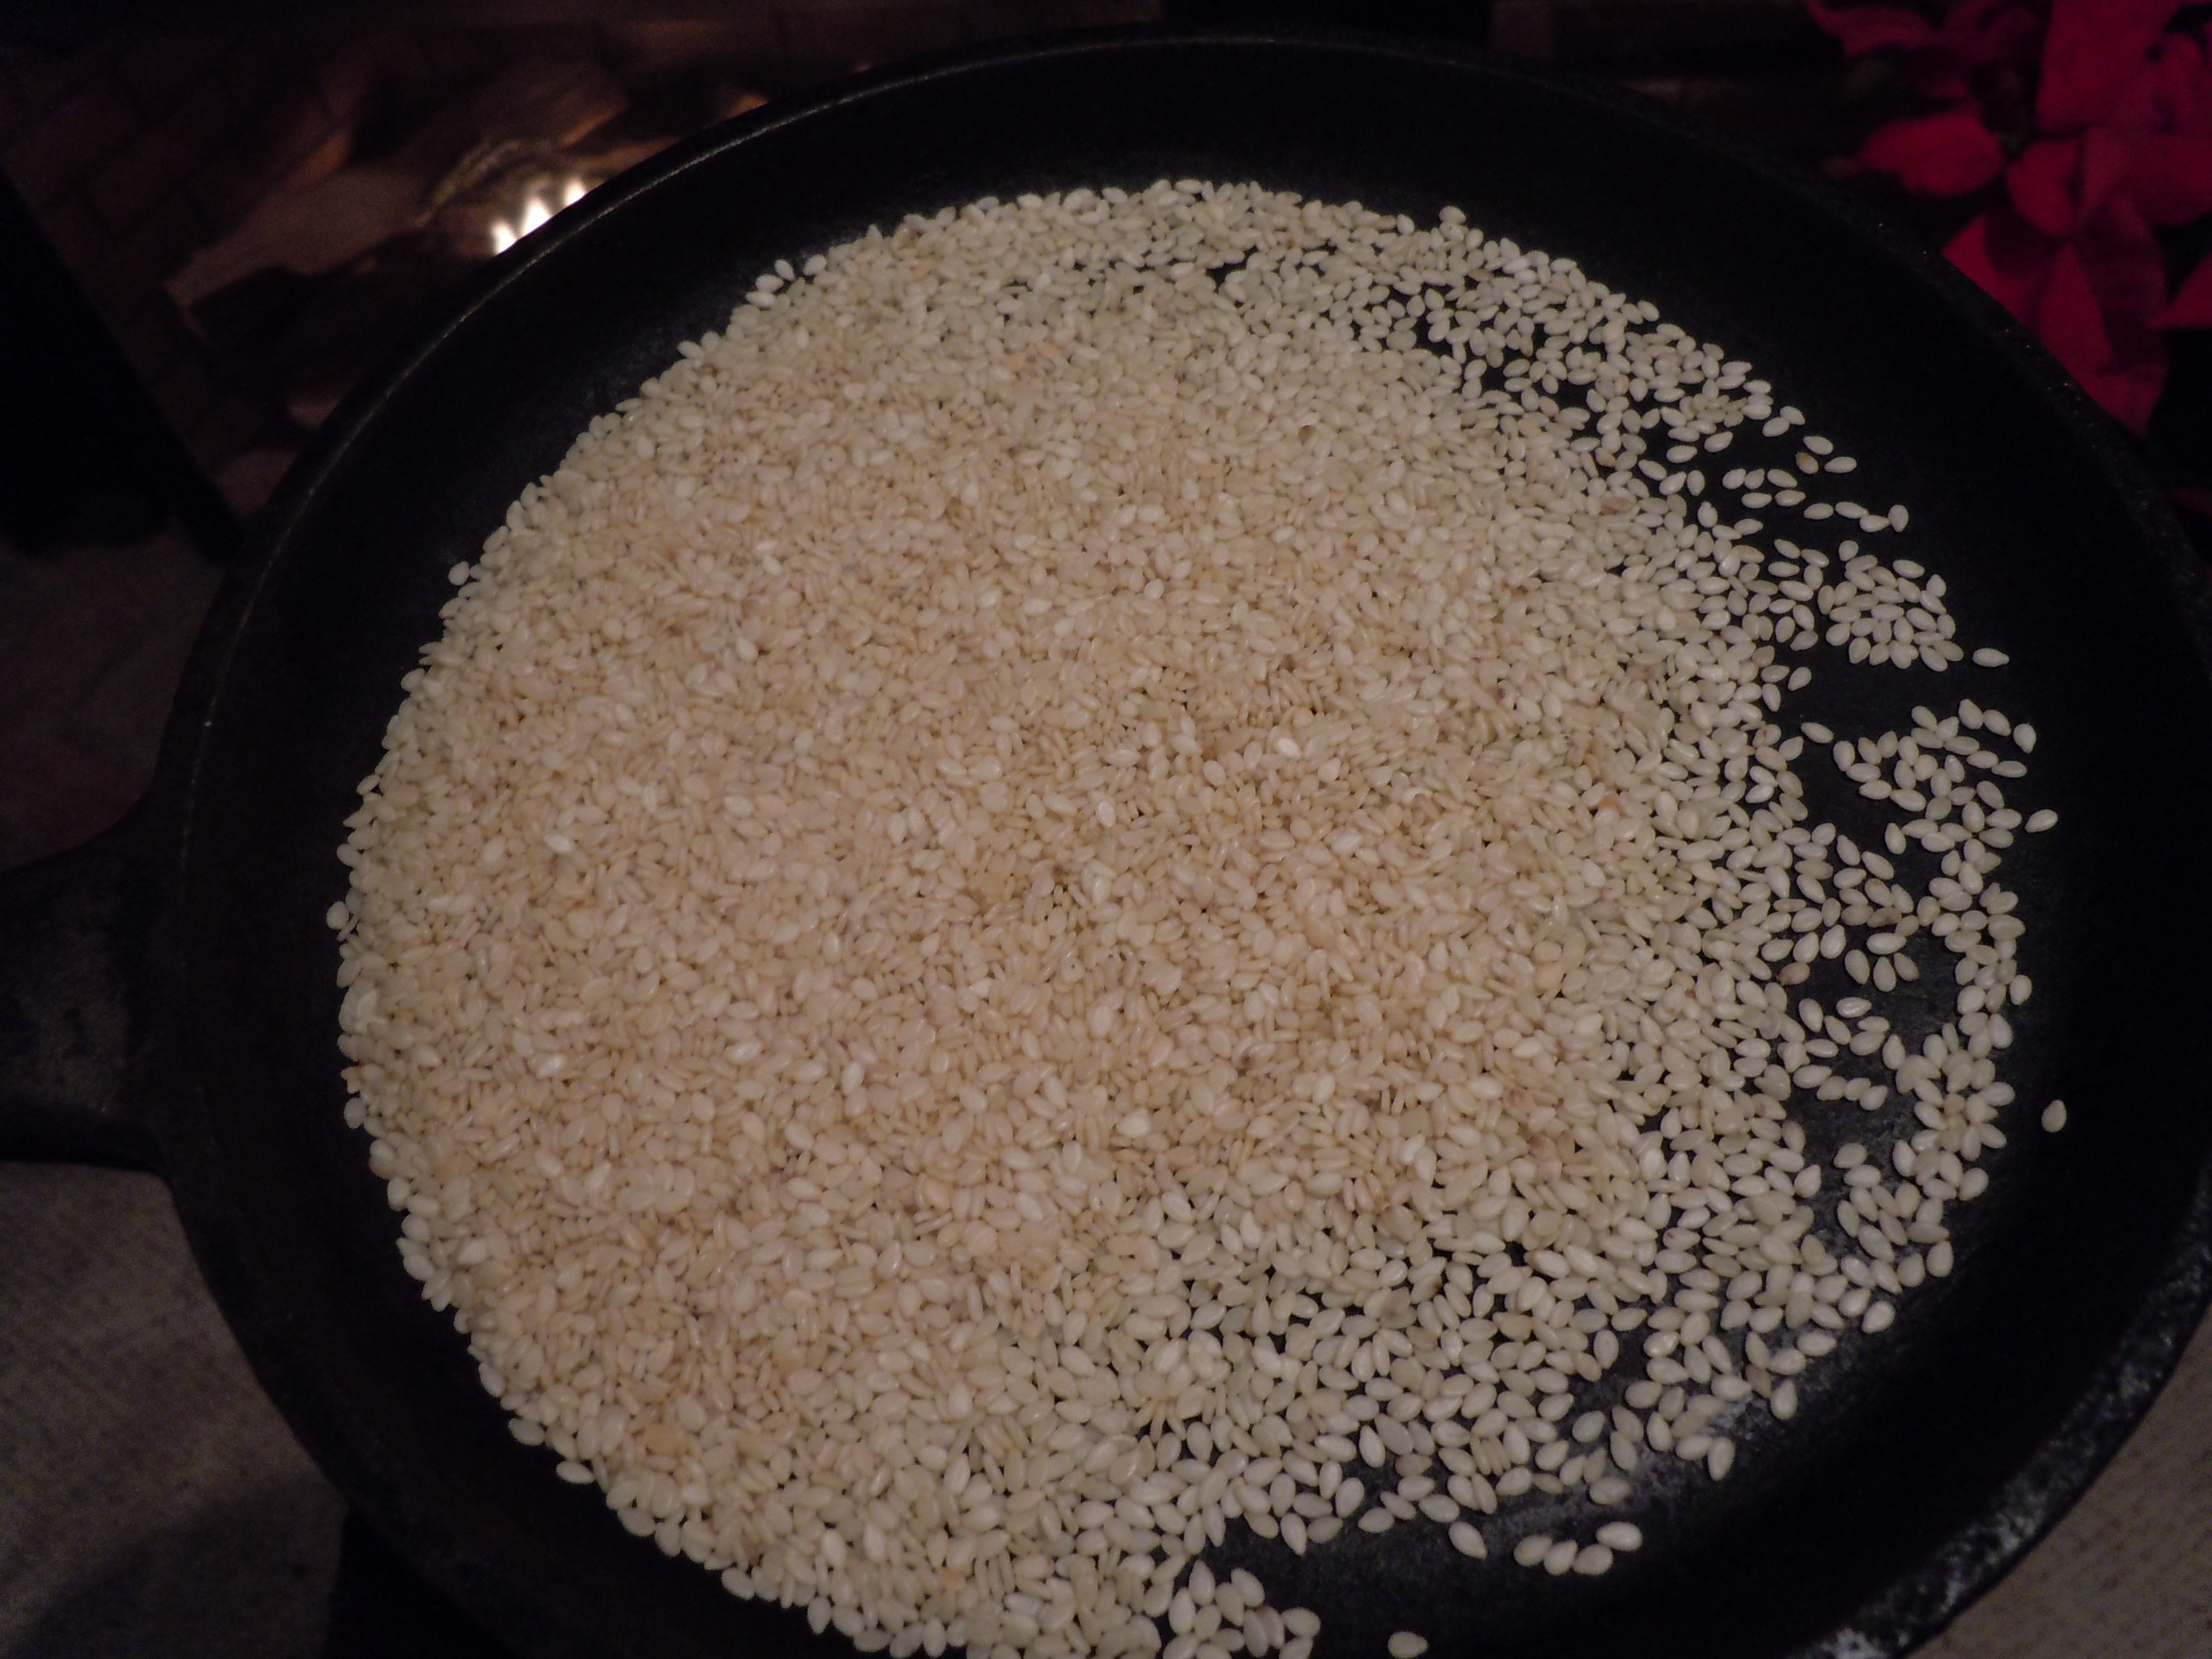
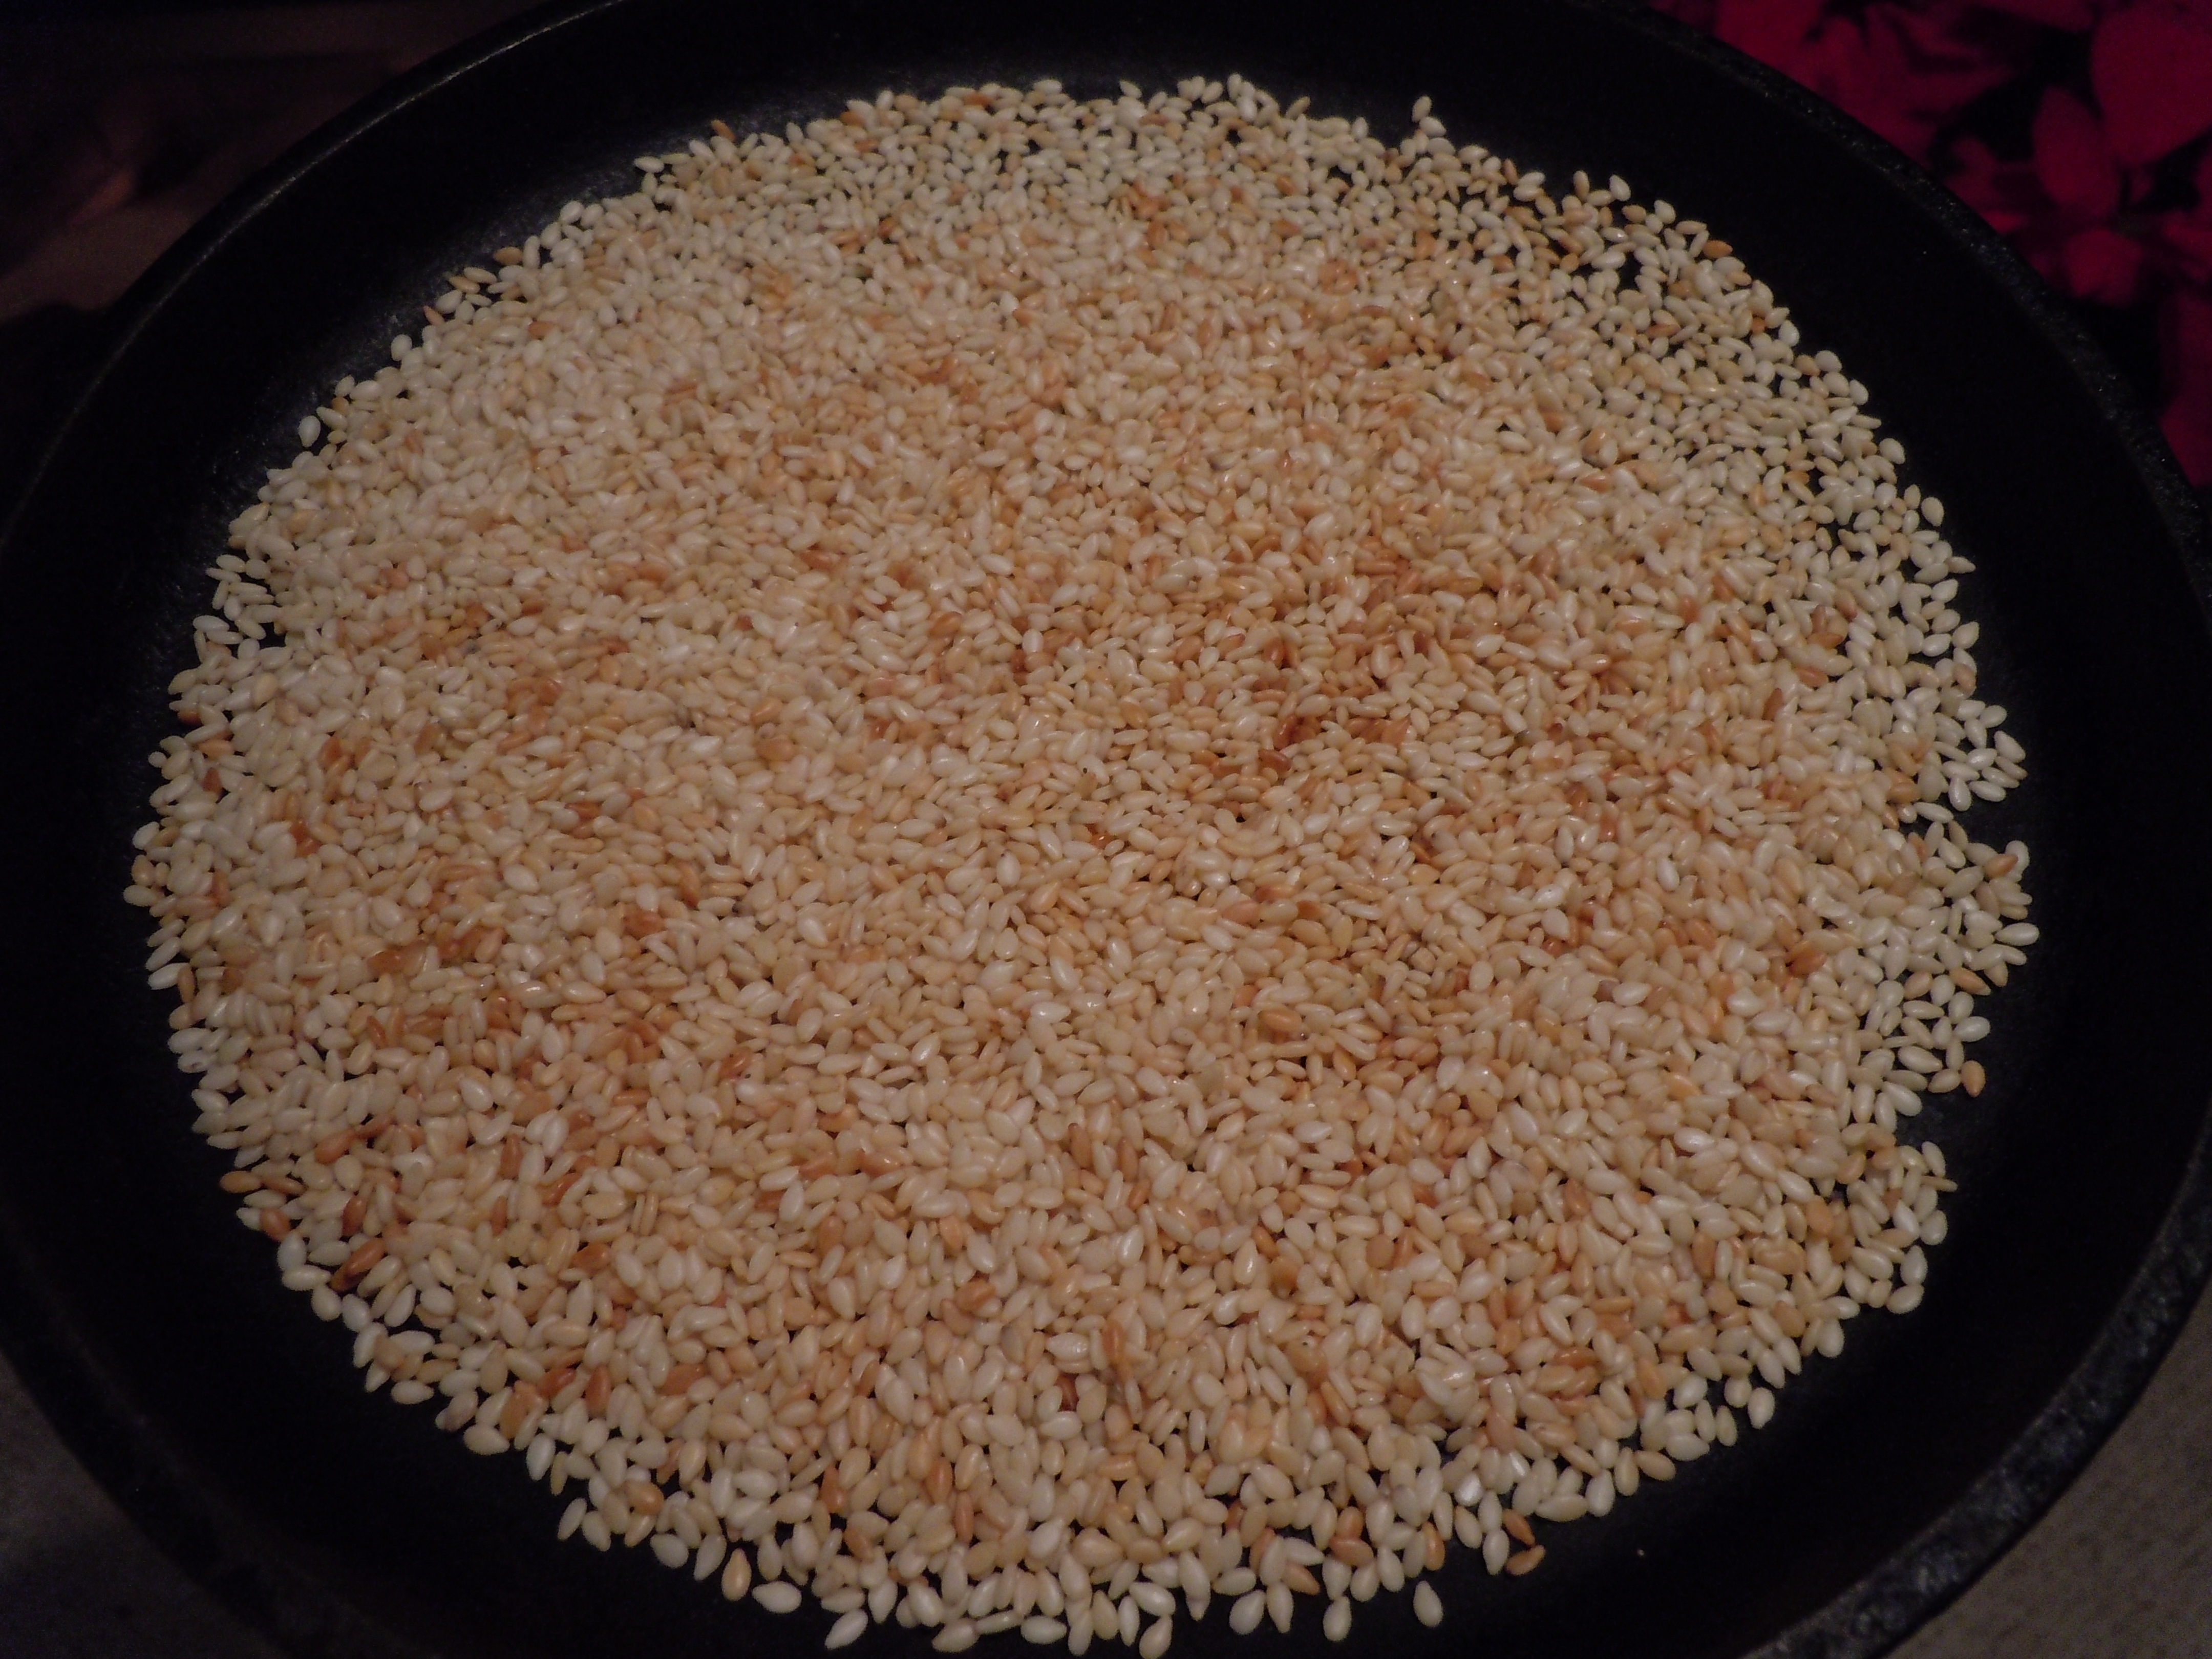
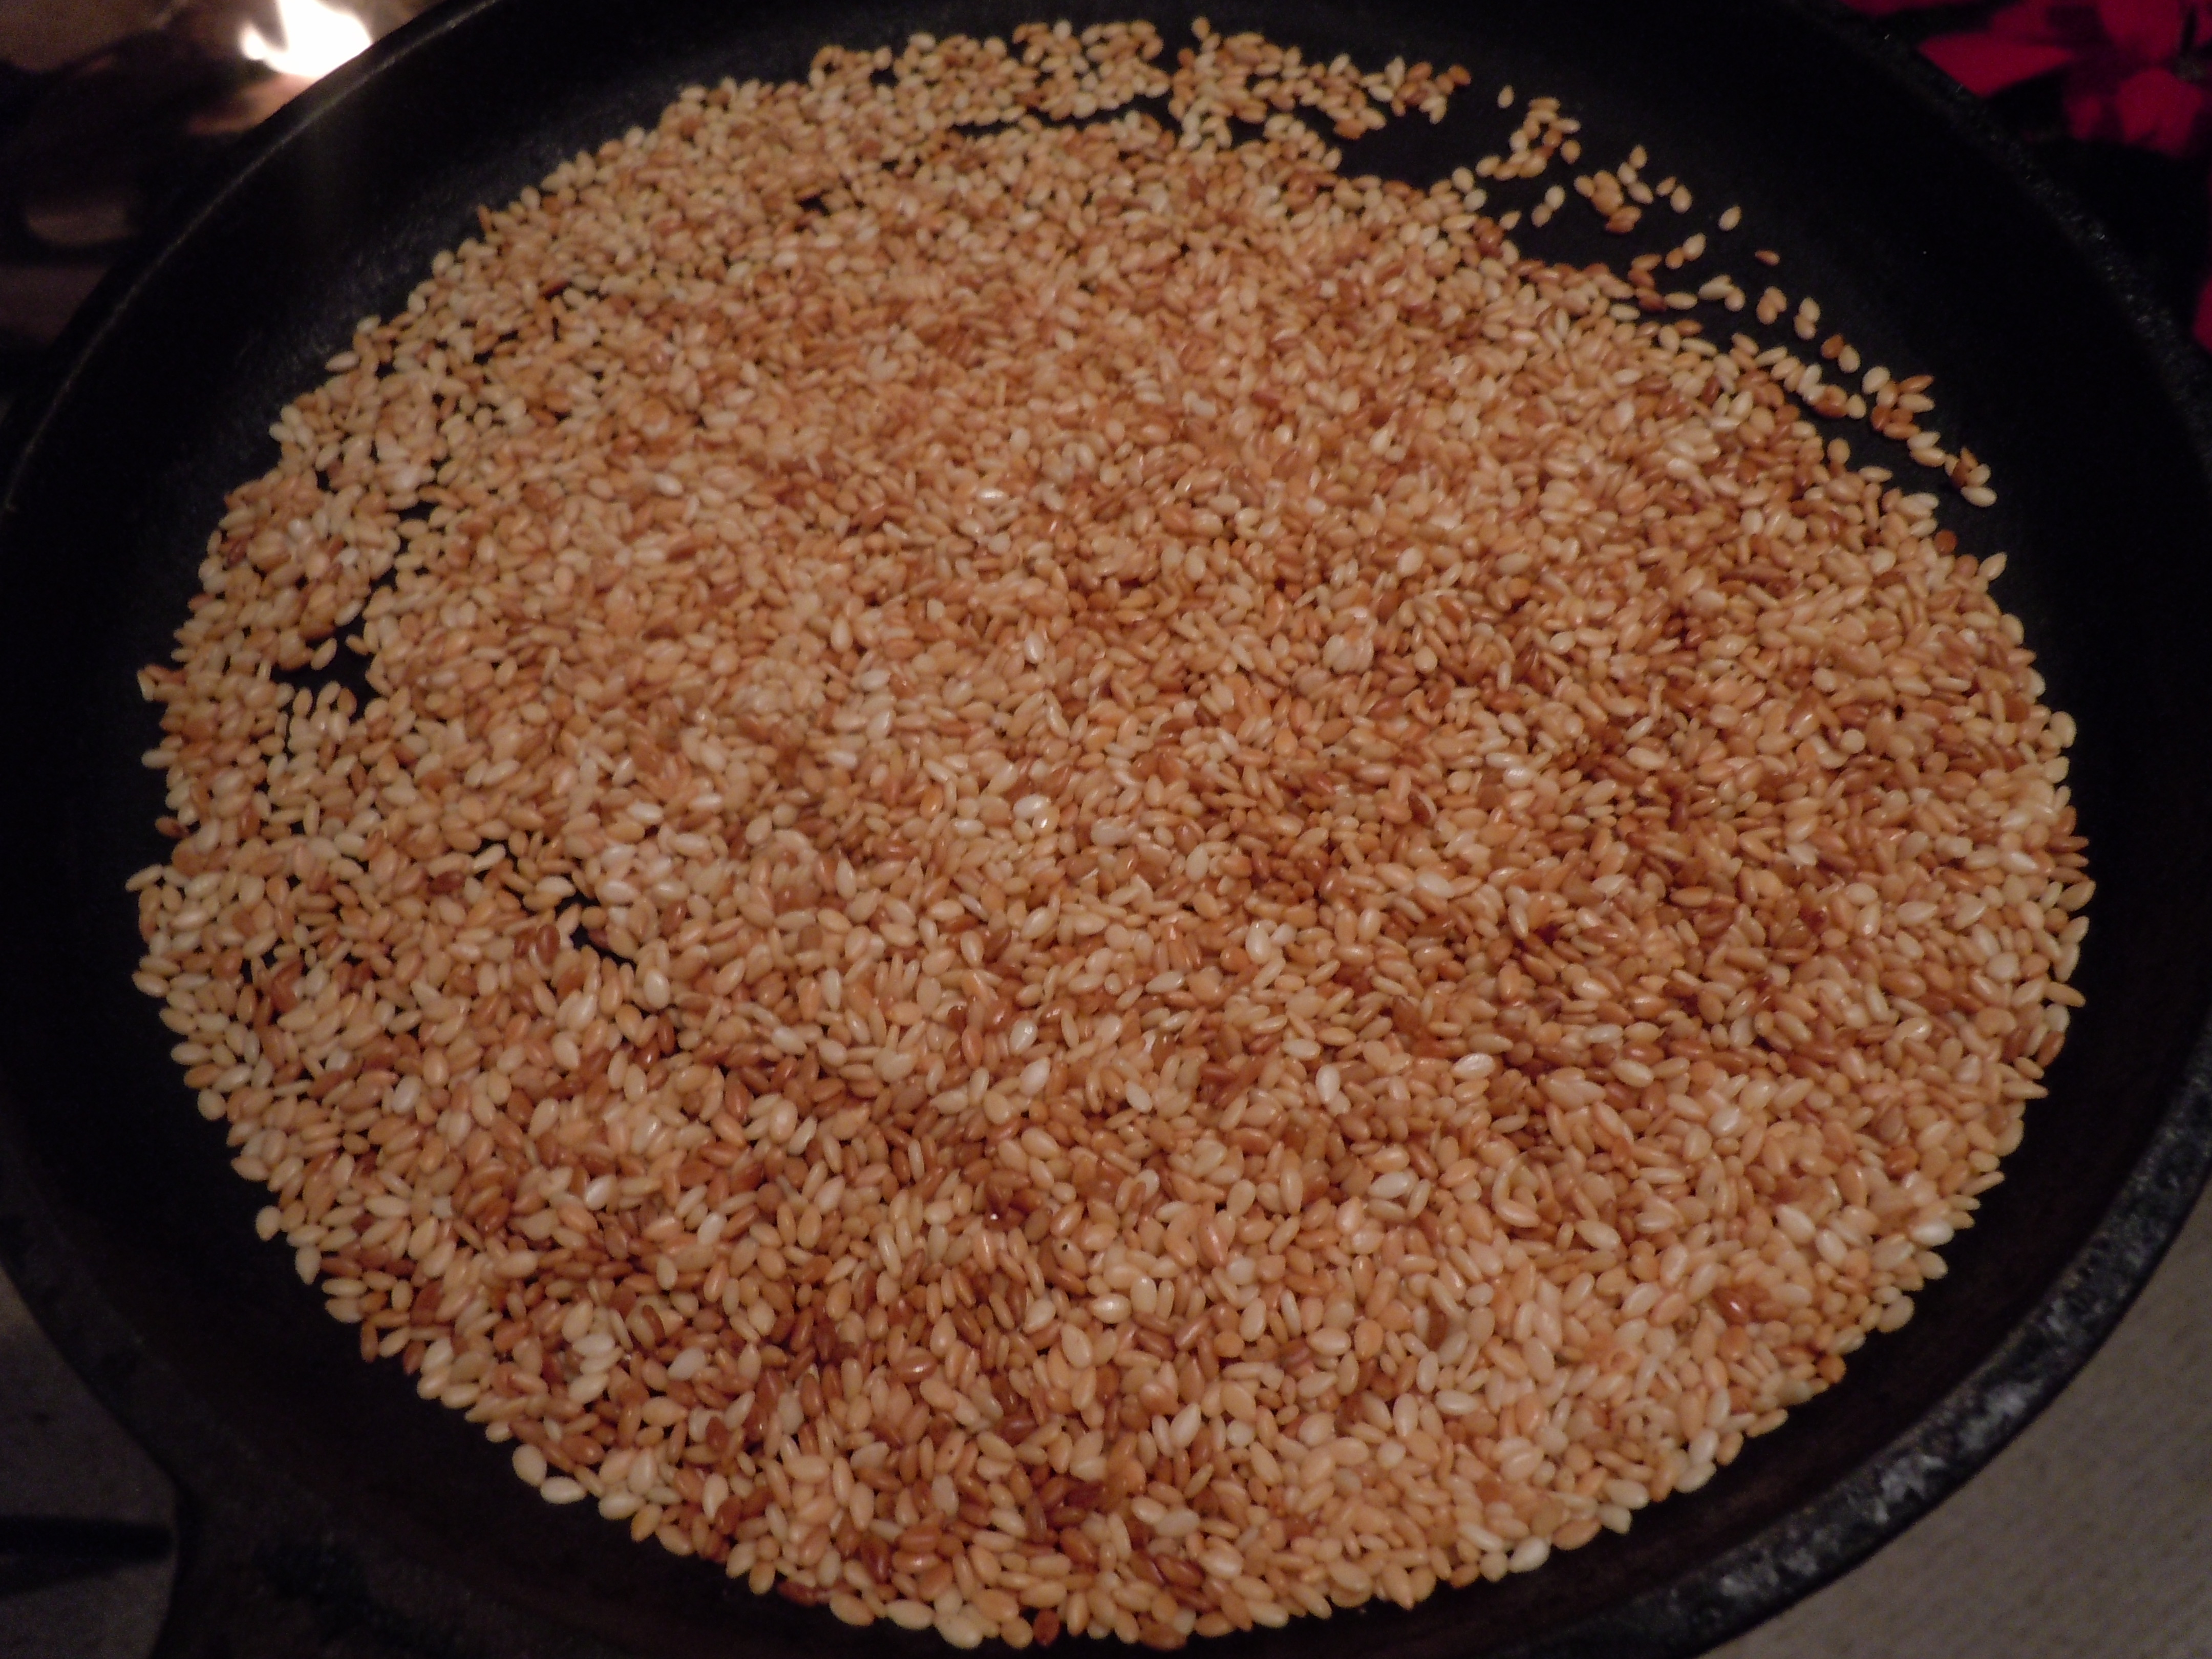
3 Tbsp toasted sesame seeds
1/2 Tsp Tabacsco or Siracha (a hot chili sauce sold right next to the Tabasco at the store) this of course if optional
Directions:
If you have uncooked shrimp bring small pot of water to a boil, then add uncooked shrimp, turn down heat and simmer for 1 minute
Drain the shrimp and run cold water over them or put into an ice bath, dry with paper towels and set aside
Toast sesame seeds on medium heat in a small pan shaking the pan periodically back and forth
This happens quickly once they heat up…it will only take about 3-4 minutes so it’s best not to leave the pan or the stove
Once the sesame seeds are golden remove from the pan, place in a ramekin and set aside
Peel and grate the carrots with a lemon zester and set aside
Follow package directions to cook rice noodles (or Pasta)
Rinse Rice noodles with cold water til cooled so they don’t stick together, set aside
In a large bowl add soy, toasted sesame oil, rice wine vinegar, lime juice, olive oil, ginger, scallions, cilantro, salt & pepper, Tabasco, 2 Tbsp toasted sesame seeds, shrimp, rice noodles and carrots and toss…so basically add everything together and toss till blended
Put into the frig for at least 2 hours, preferably over night
Serve in bowls and top with cilantro, scallion slices and a sprinkle of sesame seeds..YUM!
NOTE: You can CHANGE this up using grilled shrimp, steak or scallops!
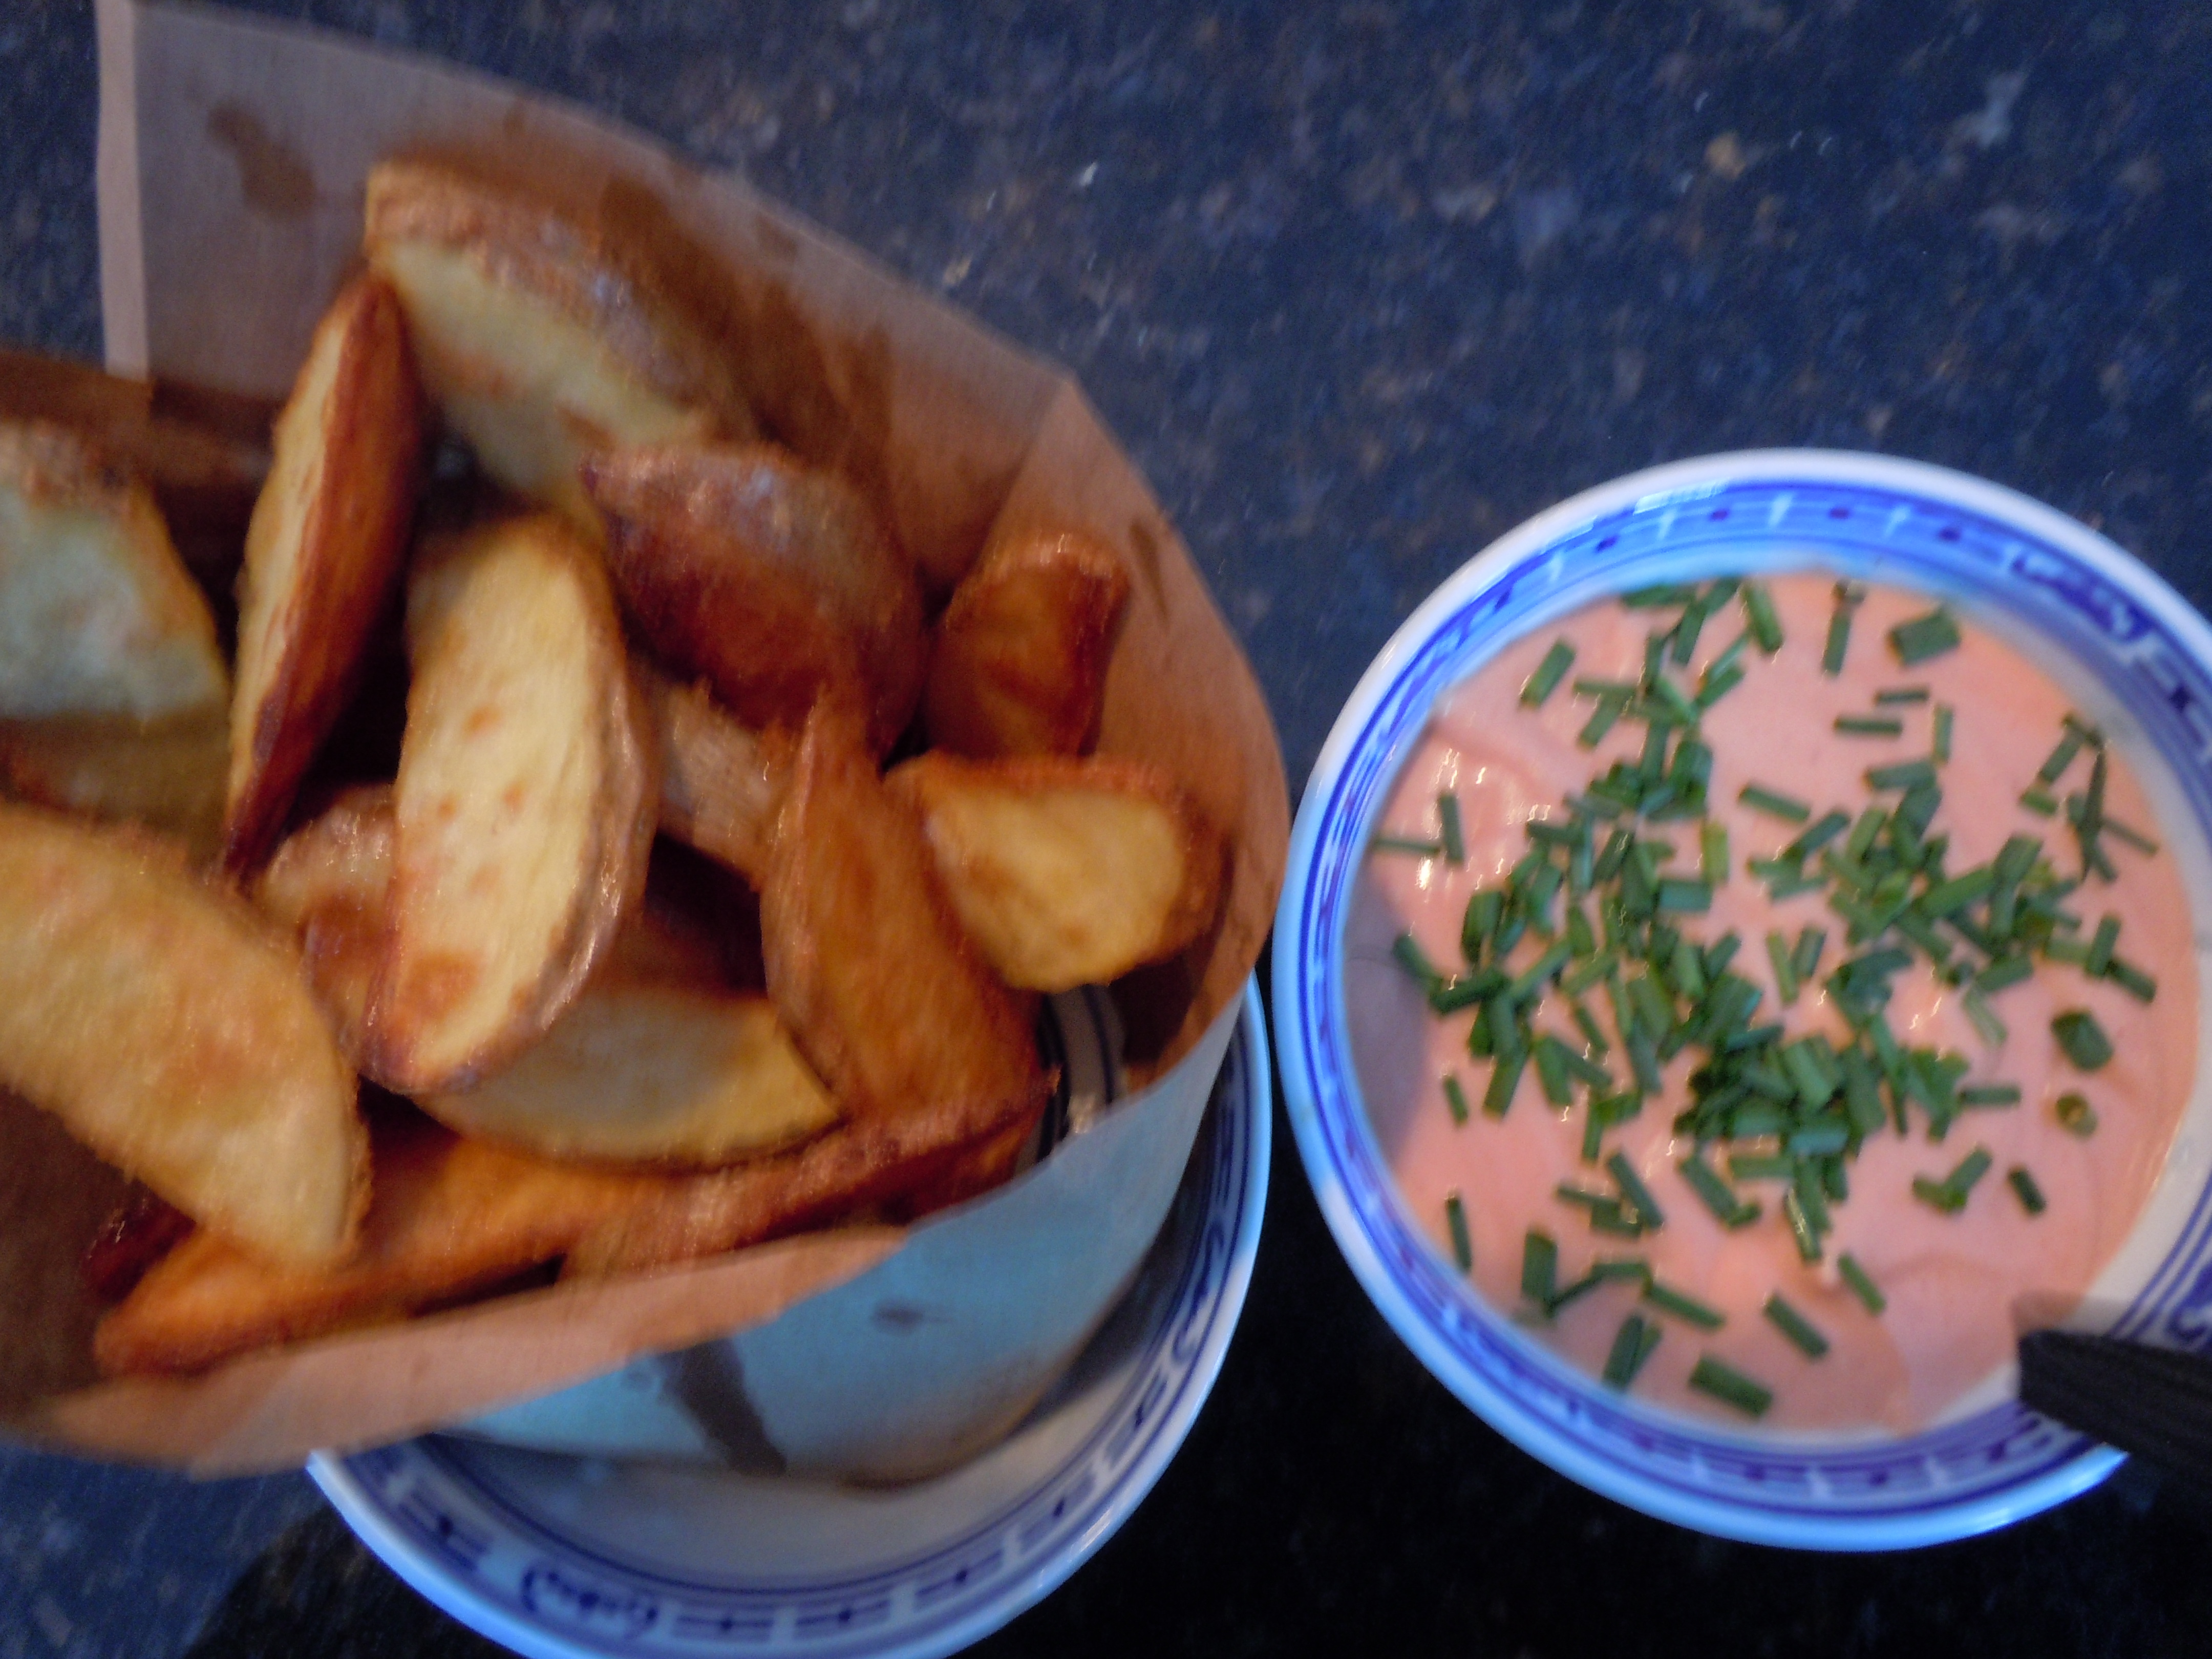
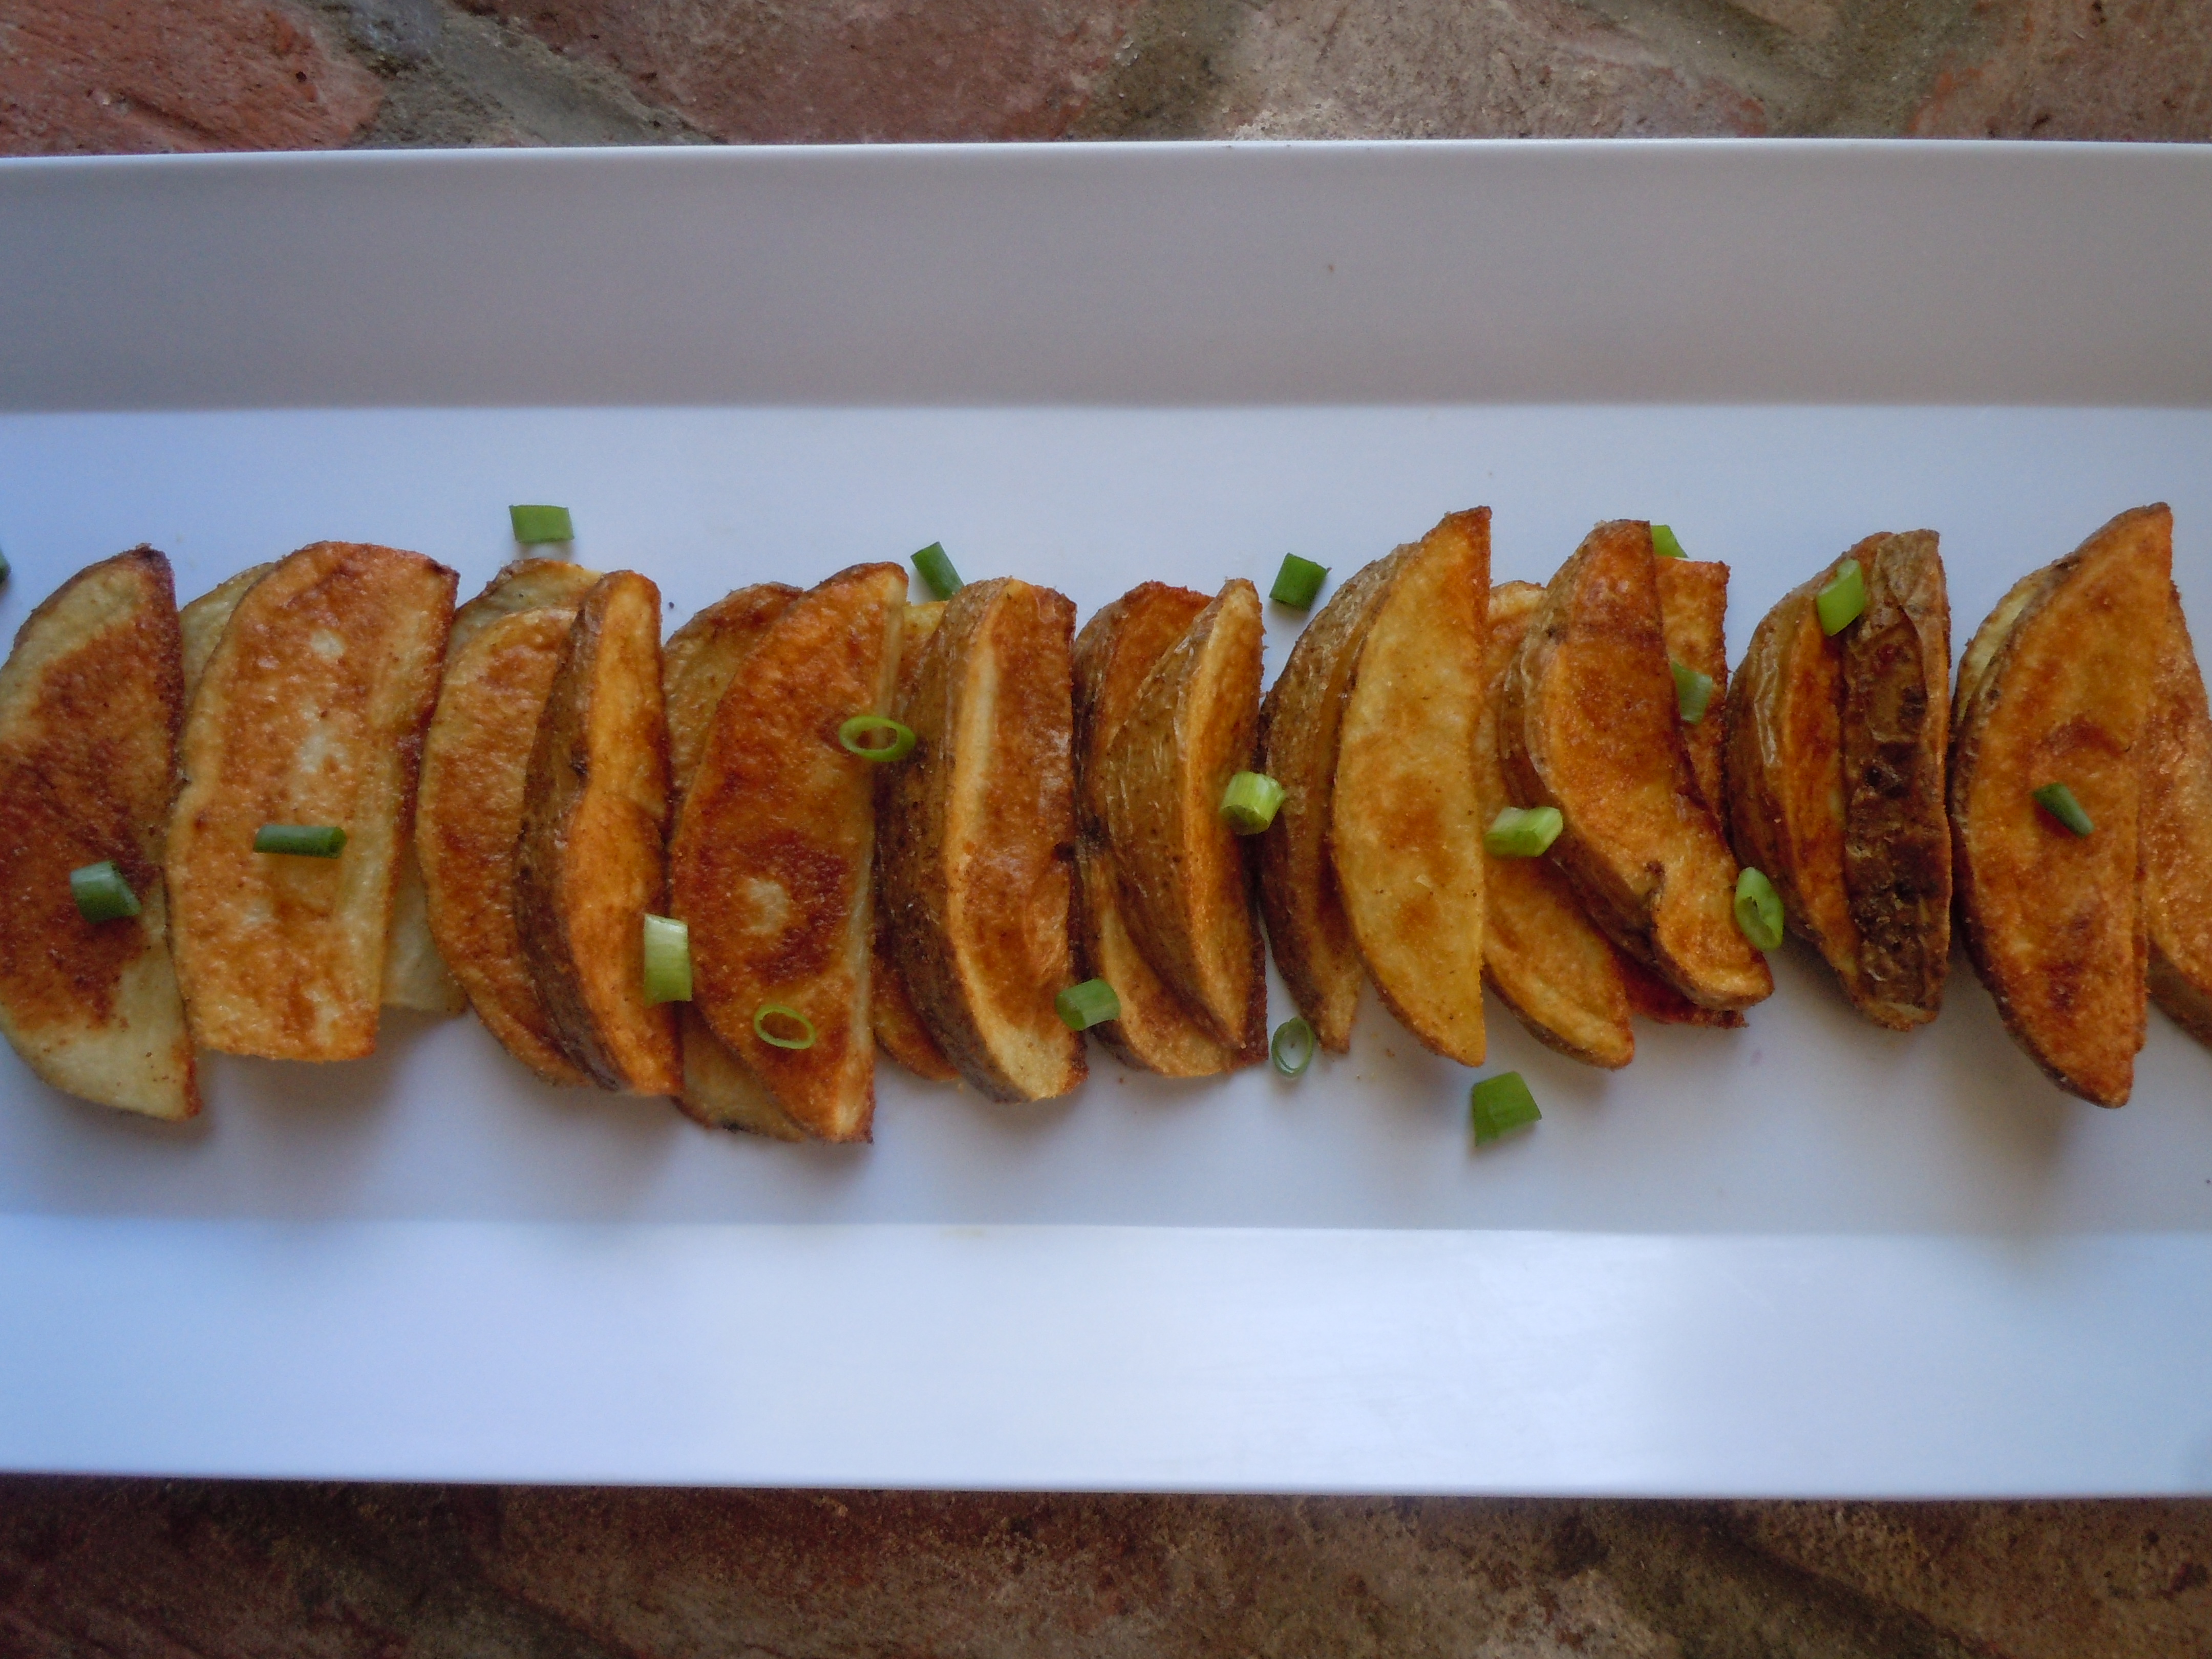
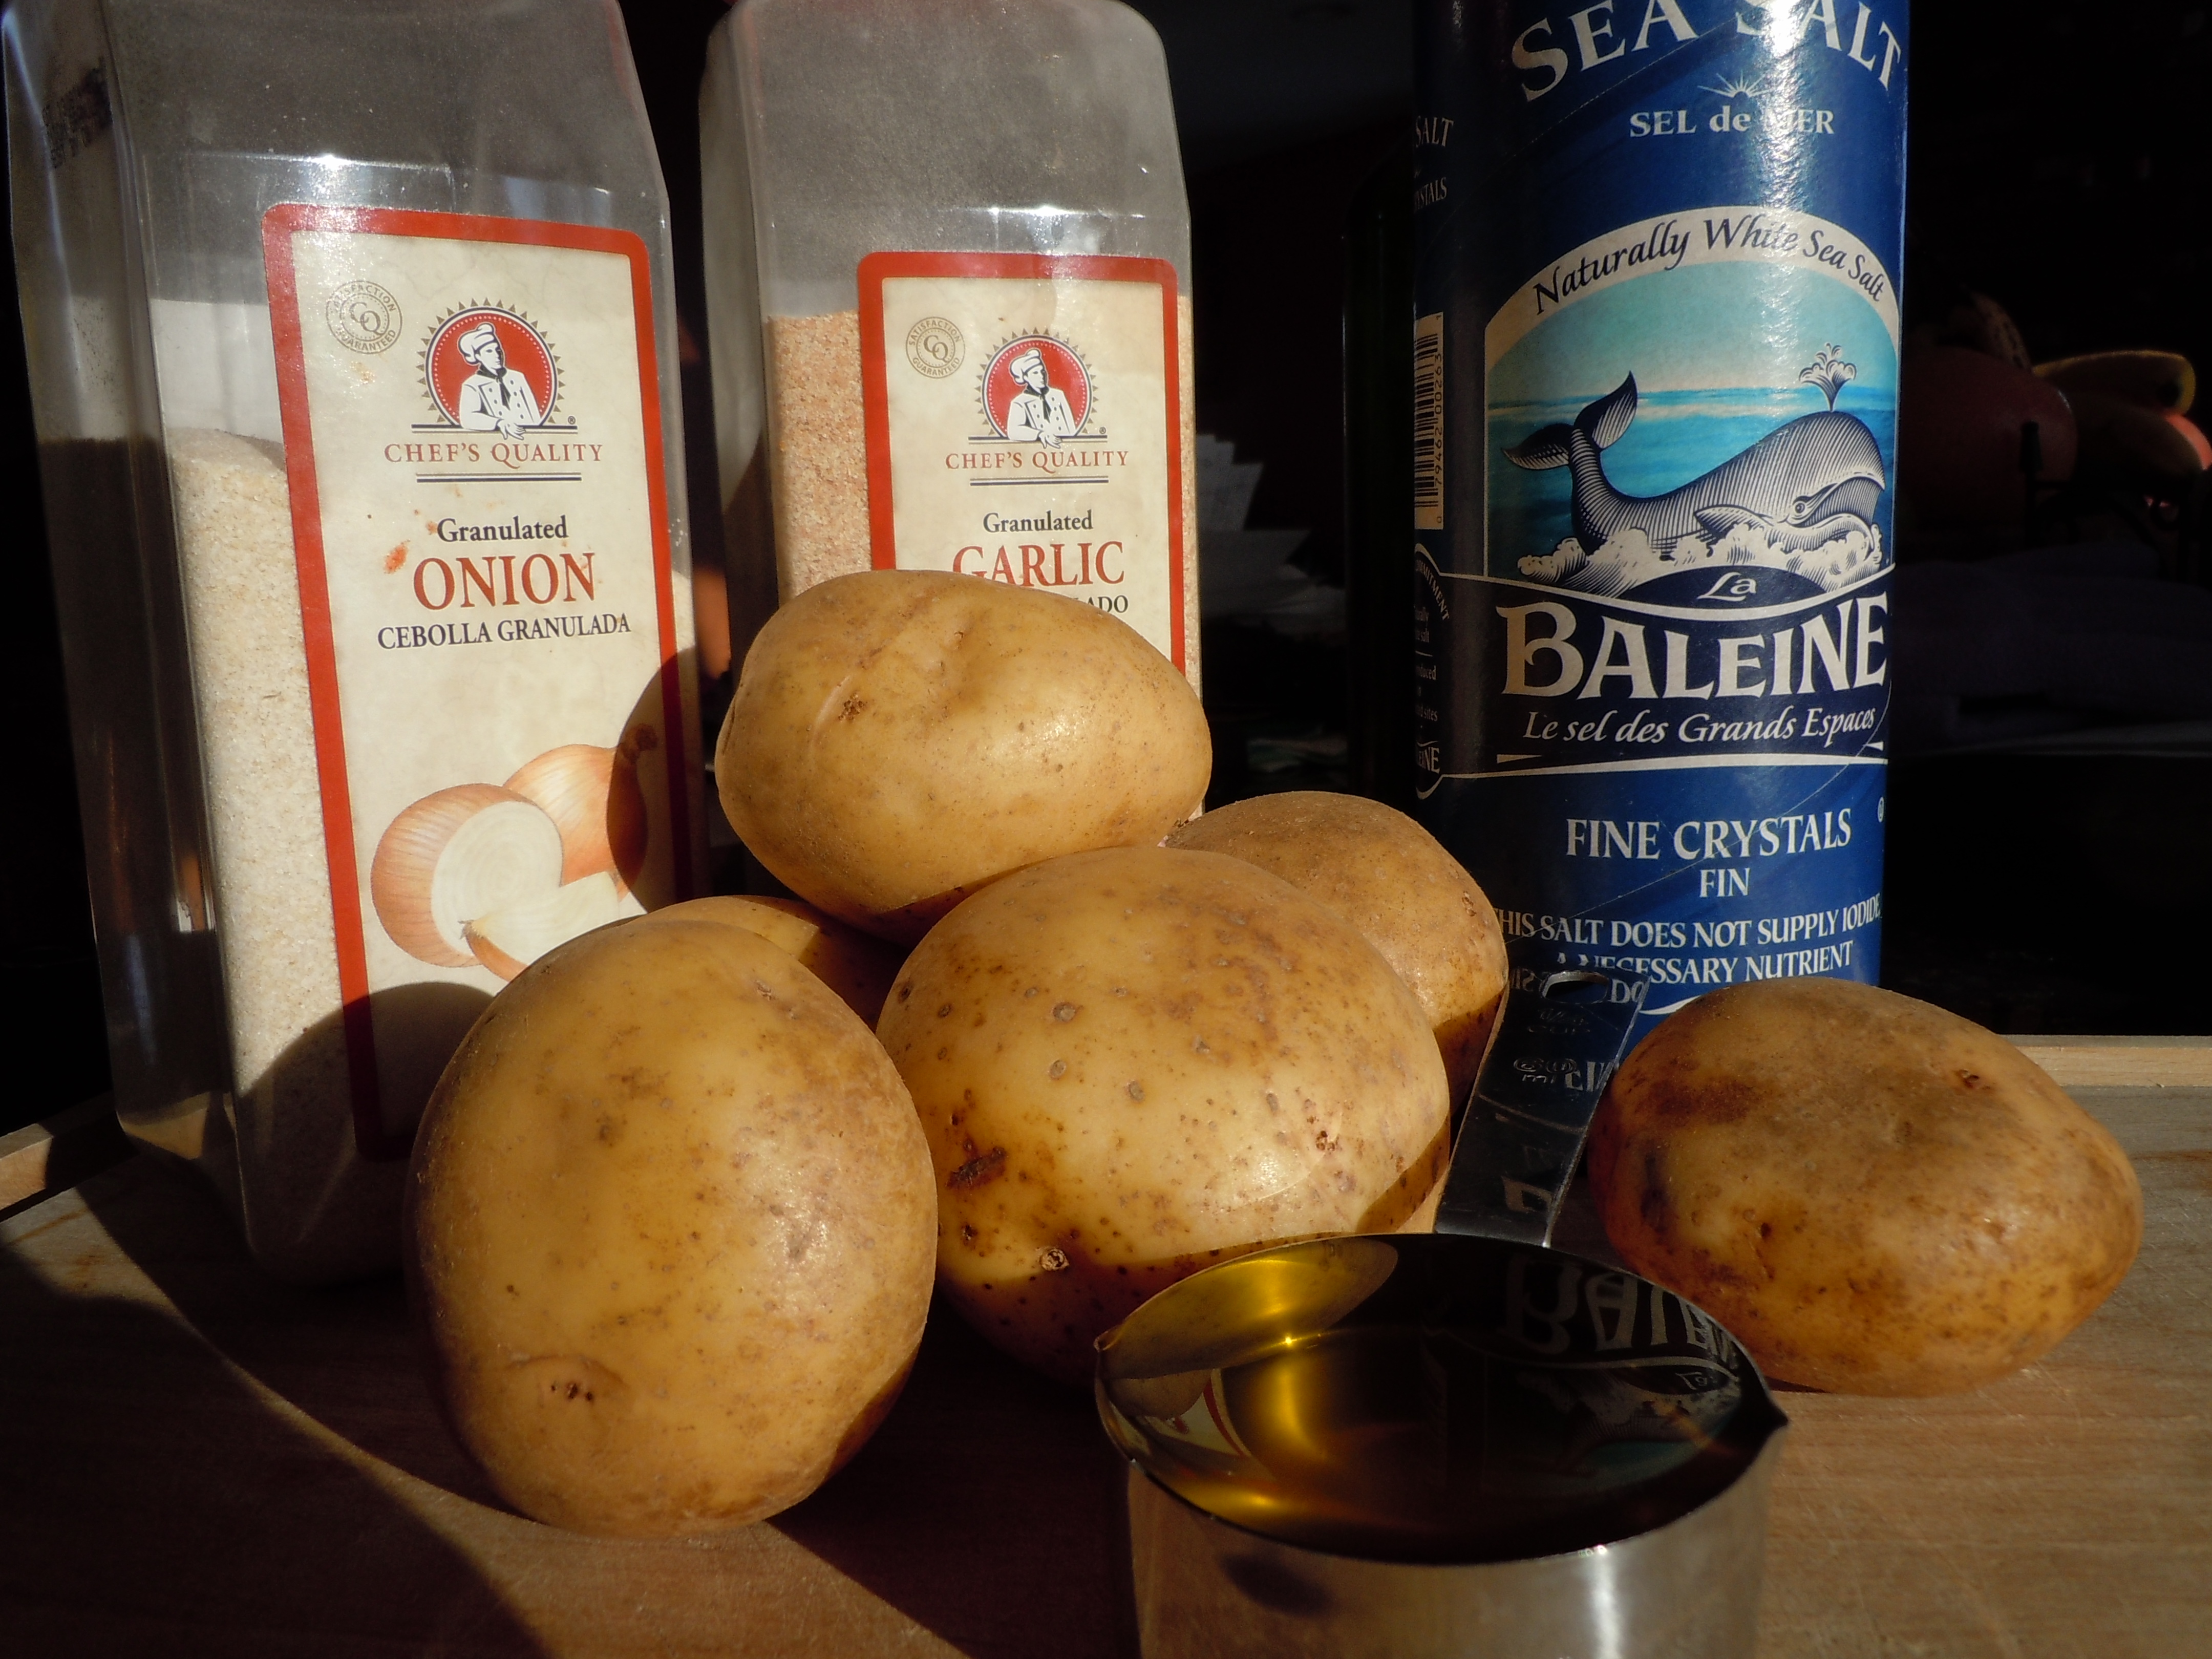
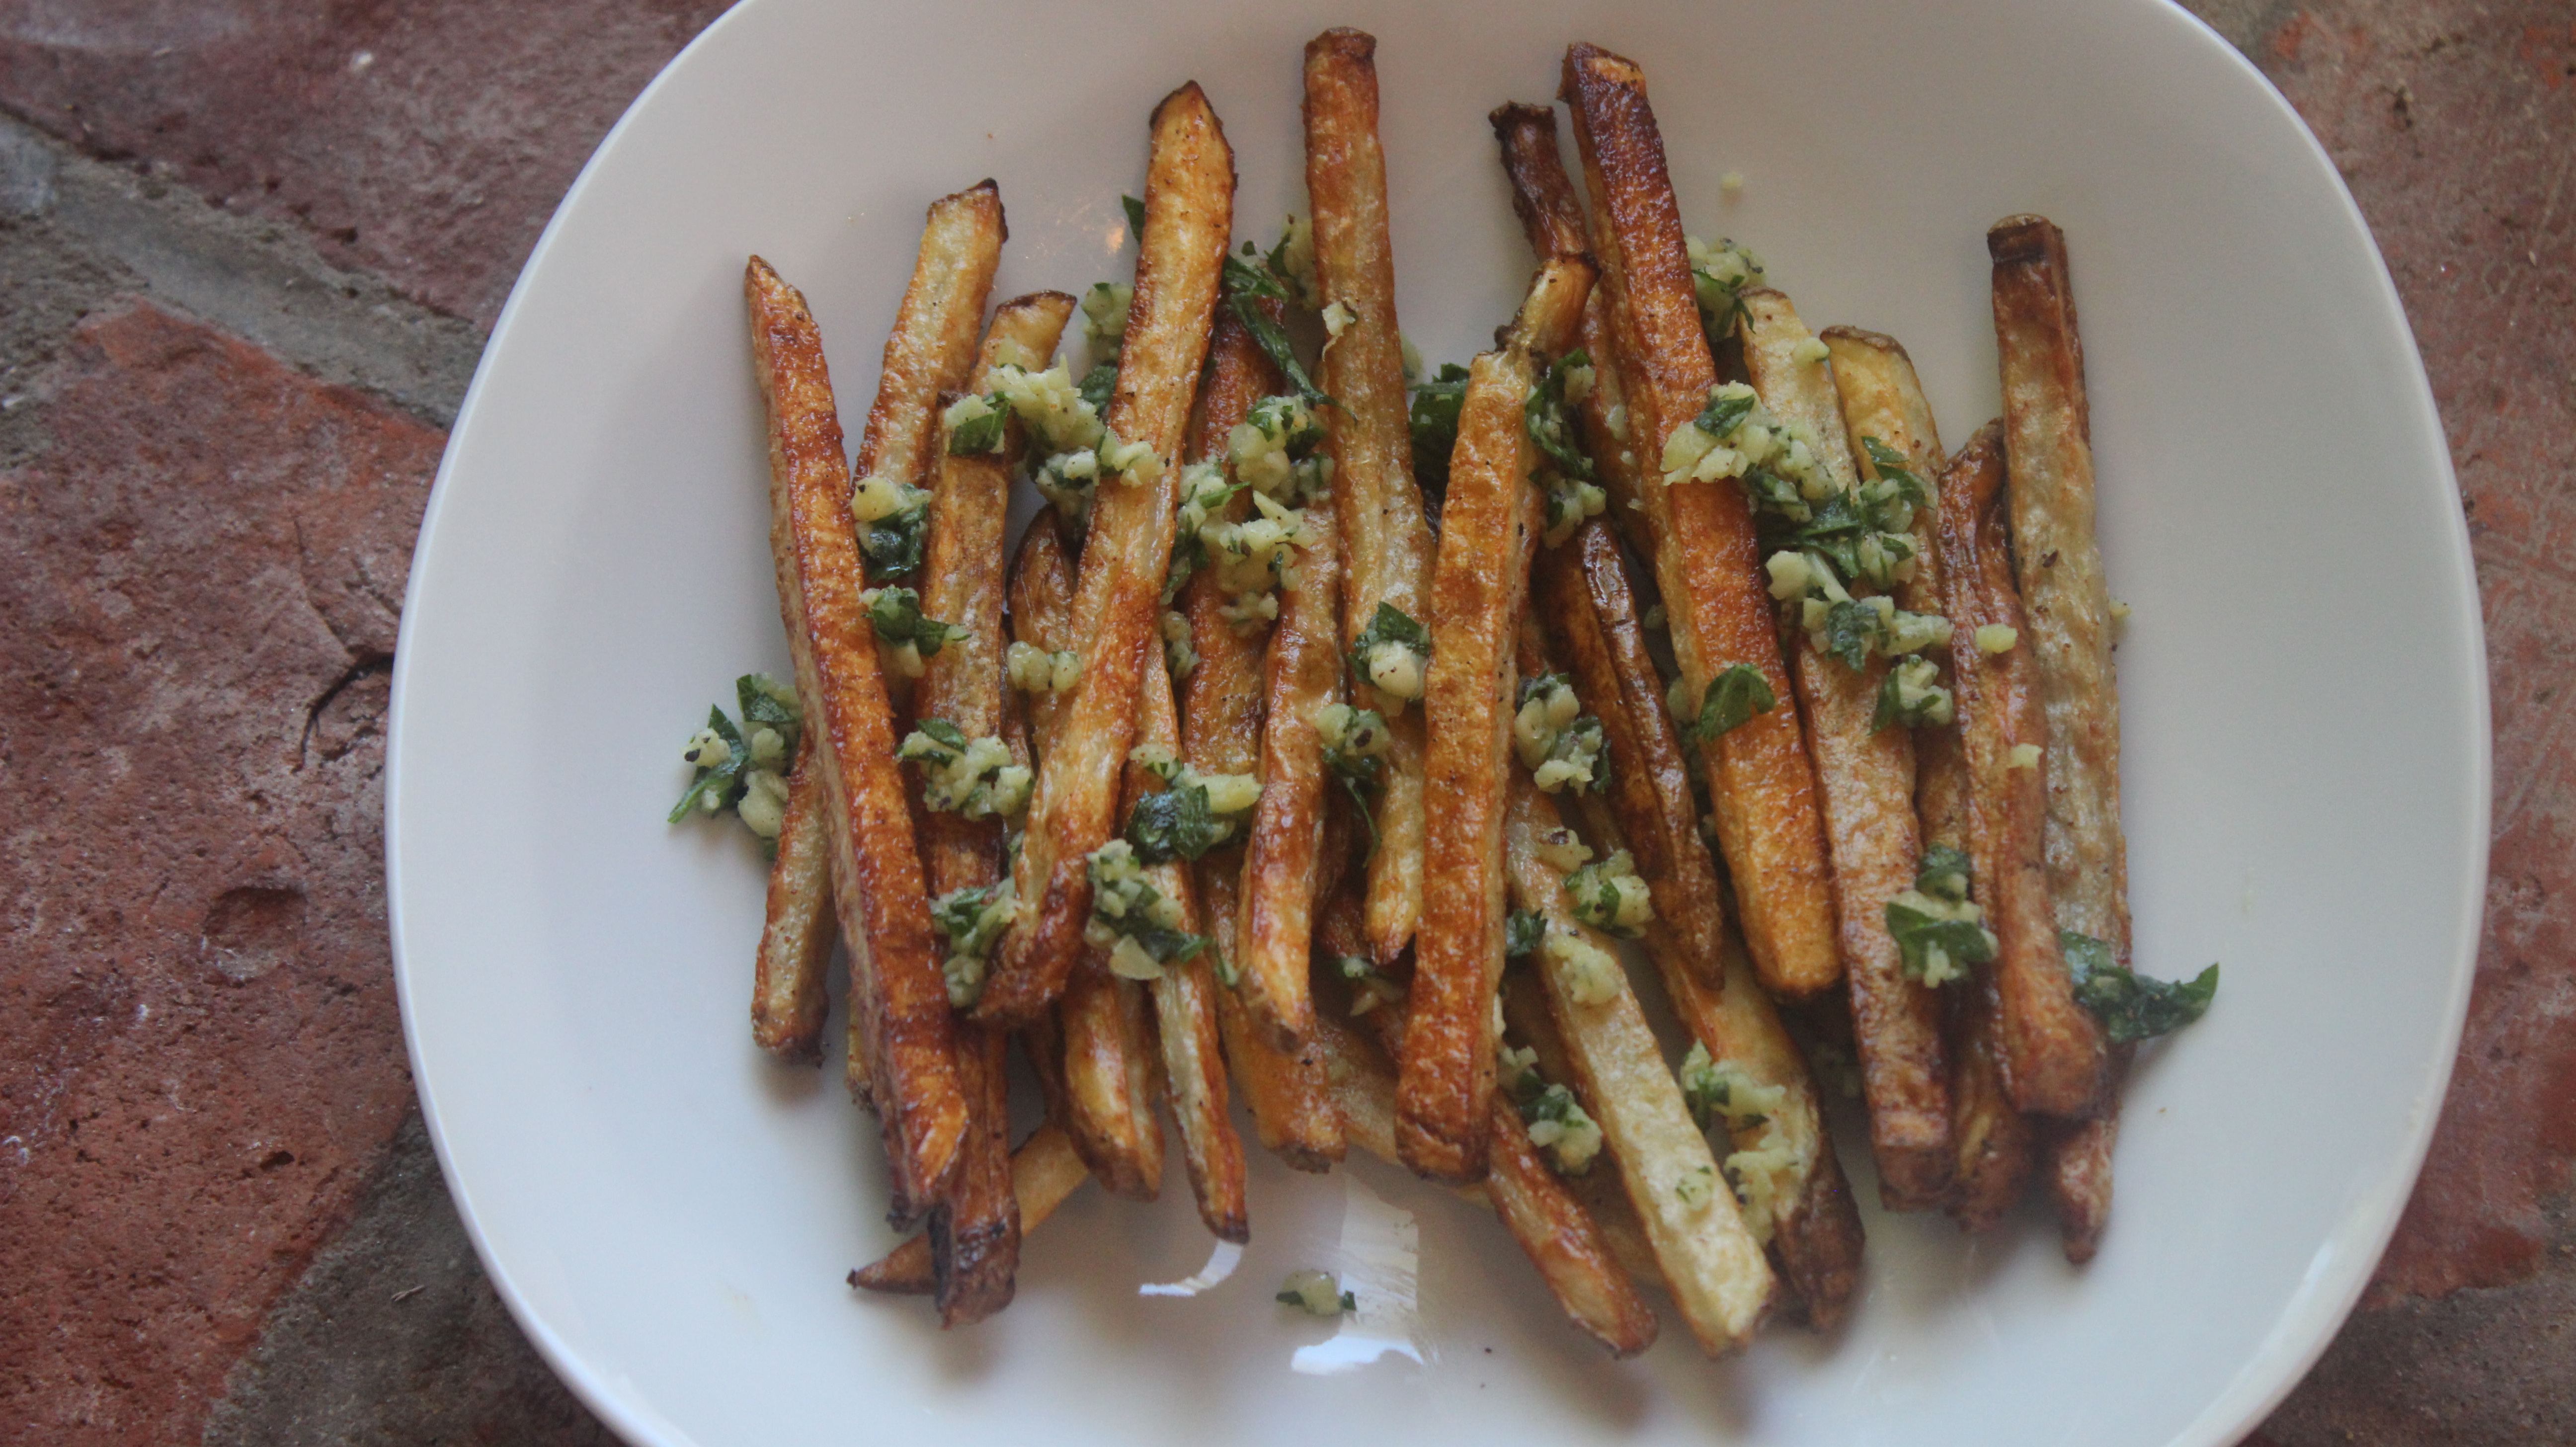
These gourmet crispy oven fries are super easy and delicious. Now that’s a combination we can all live with. I’m not into fussing around with rinsing, soaking, pre-boiling, semi-nuking, and then baking or doing a double frying. What, we don’t have anything else to do with our time! There aren’t enough hours in a day as it is so why waste our valuable time with unnecessary steps when it can be done so easily.
My gourmet crispy oven fries recipe is so easy you will think you are missing a step! I have been making these oven fries for years and I am still getting wonderful results. Granted, everyone’s oven runs a little differently so that’s why I have you check the fries at the 30 minute mark to make sure they are not getting too dark. Keeping them all the same size is key to having great fries so they all finish browning at the same time. I have also never stopped using olive oil to make these fries. Of course, I have done trial runs testing with other oils like vegetable or canola oil but the fries are always stuck to the cookie sheet in the end and that for me seems to happen because they are a thinner oil. I really like the ease of using olive oil and they get that pretty golden color that I want. You still have to use a spatula to remove the golden fries from the tray but it’s an easy release.
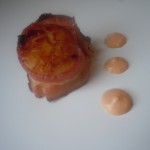
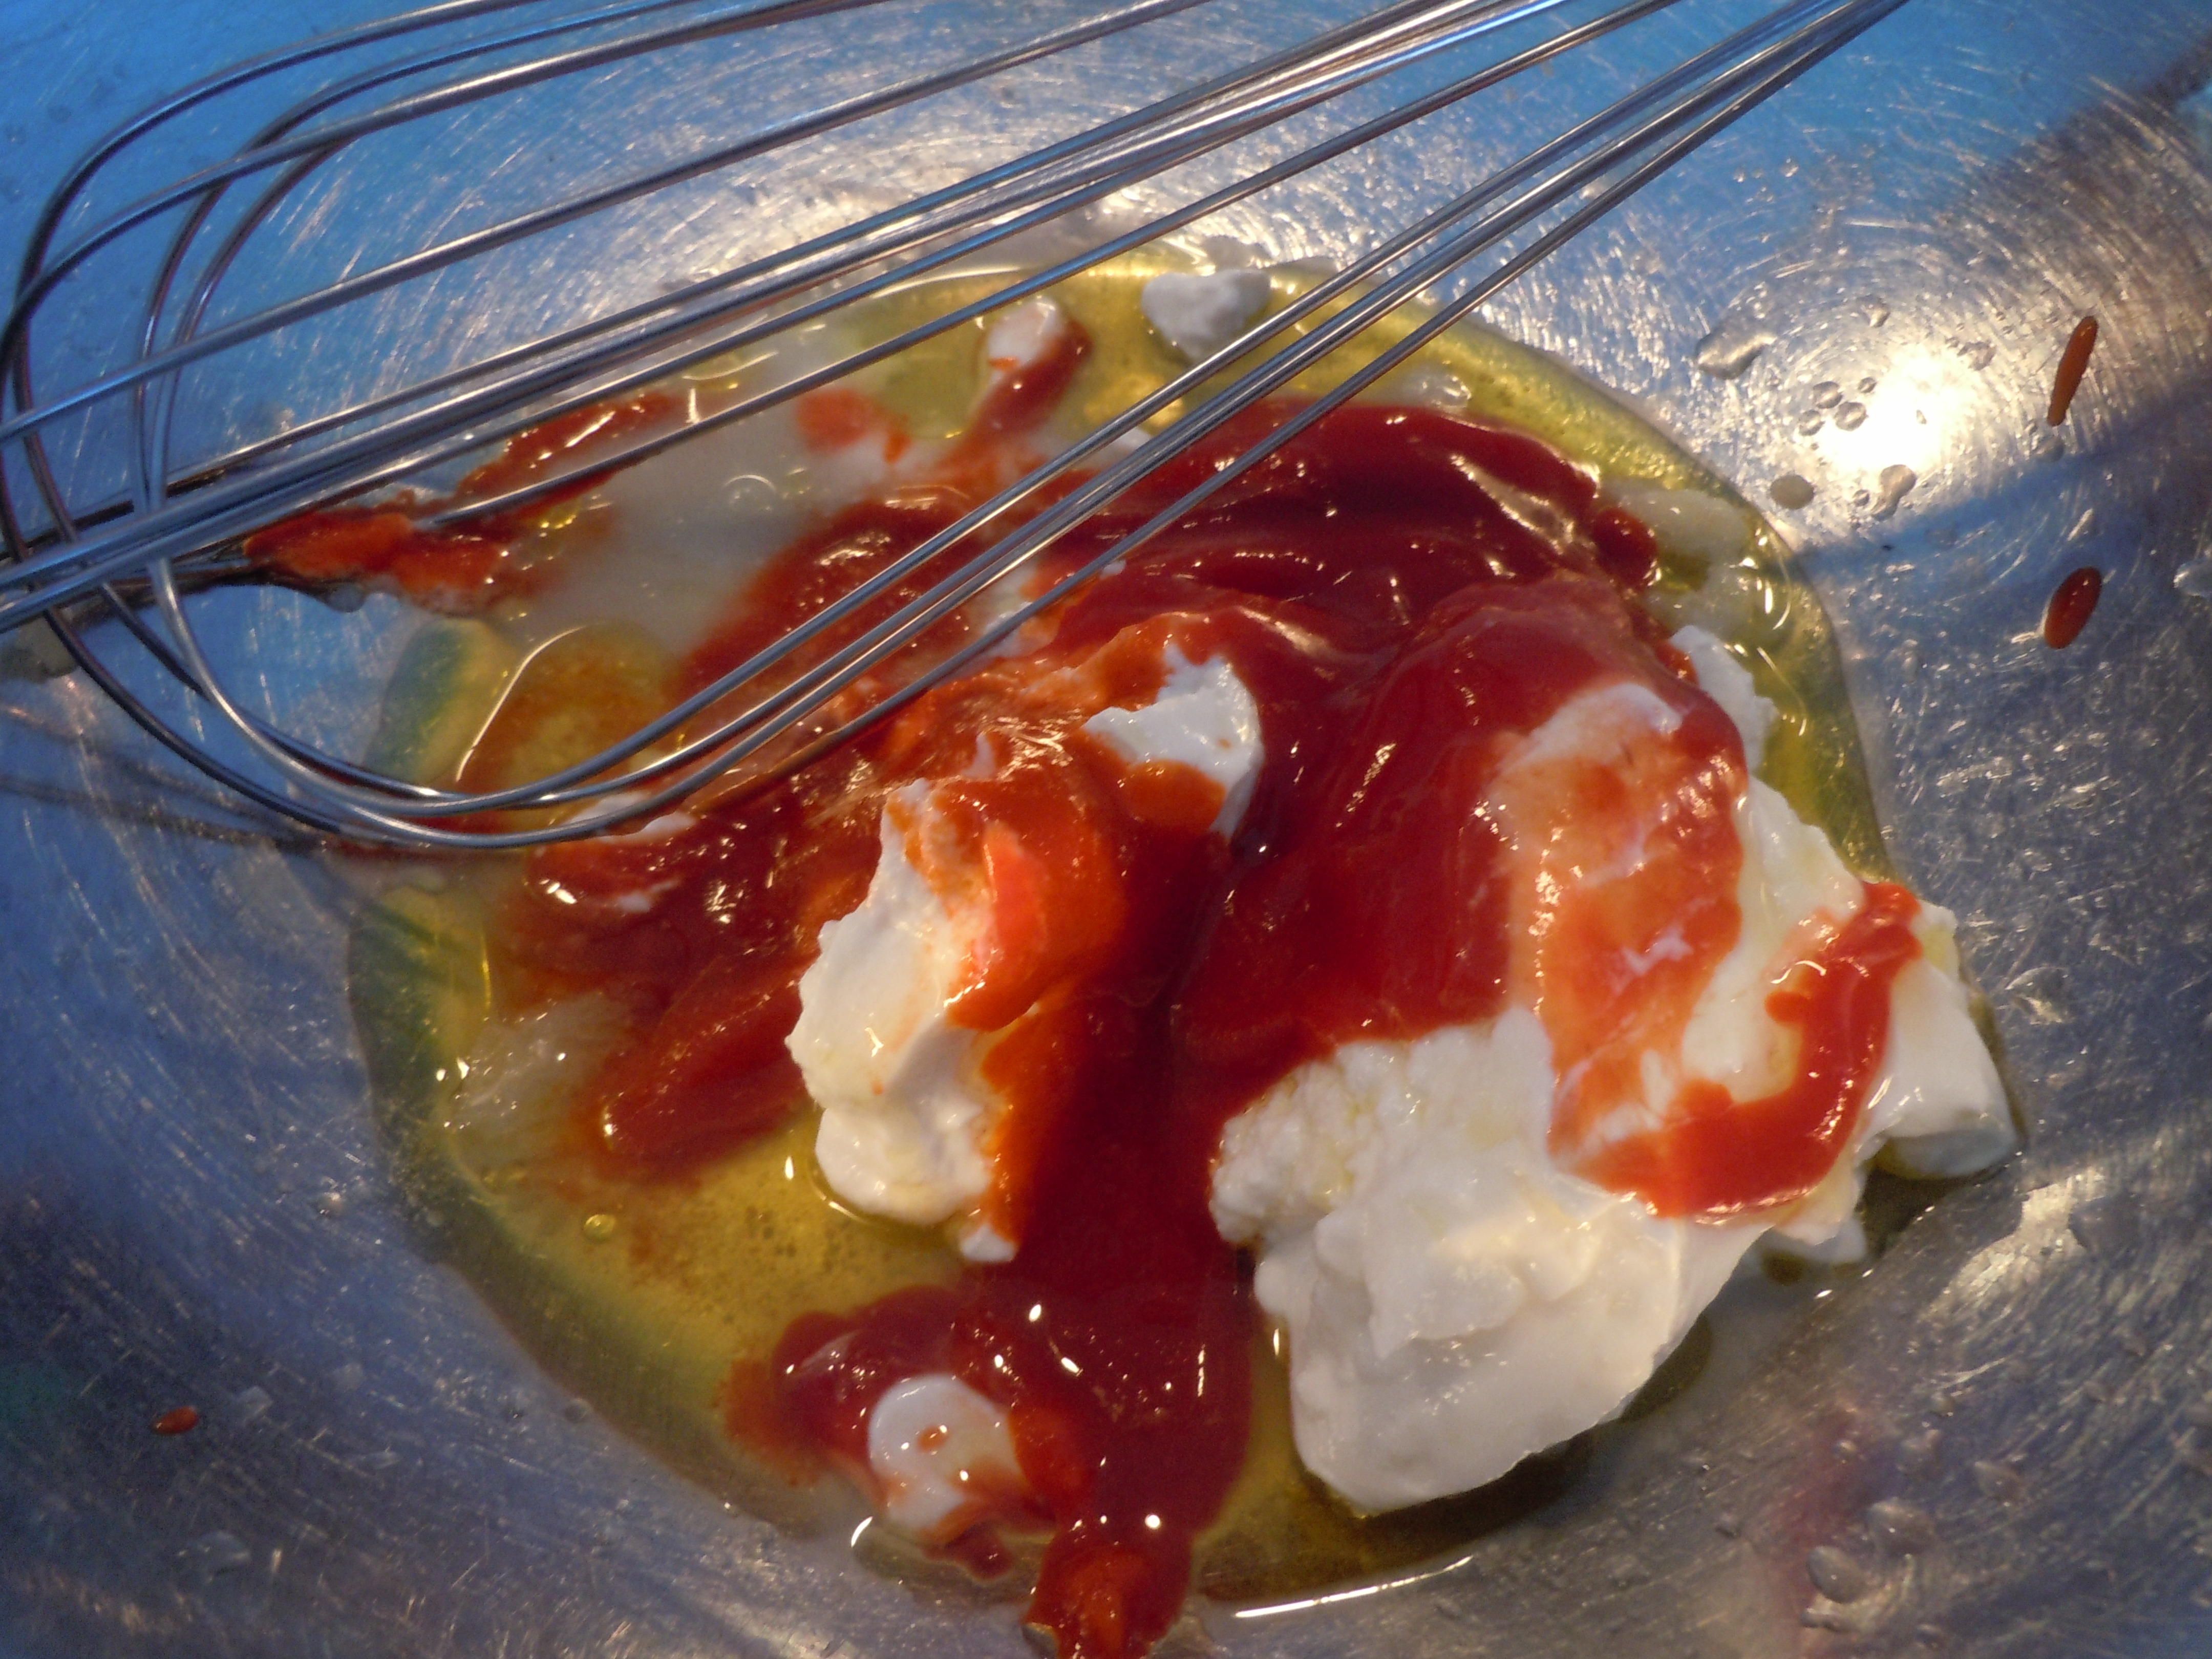
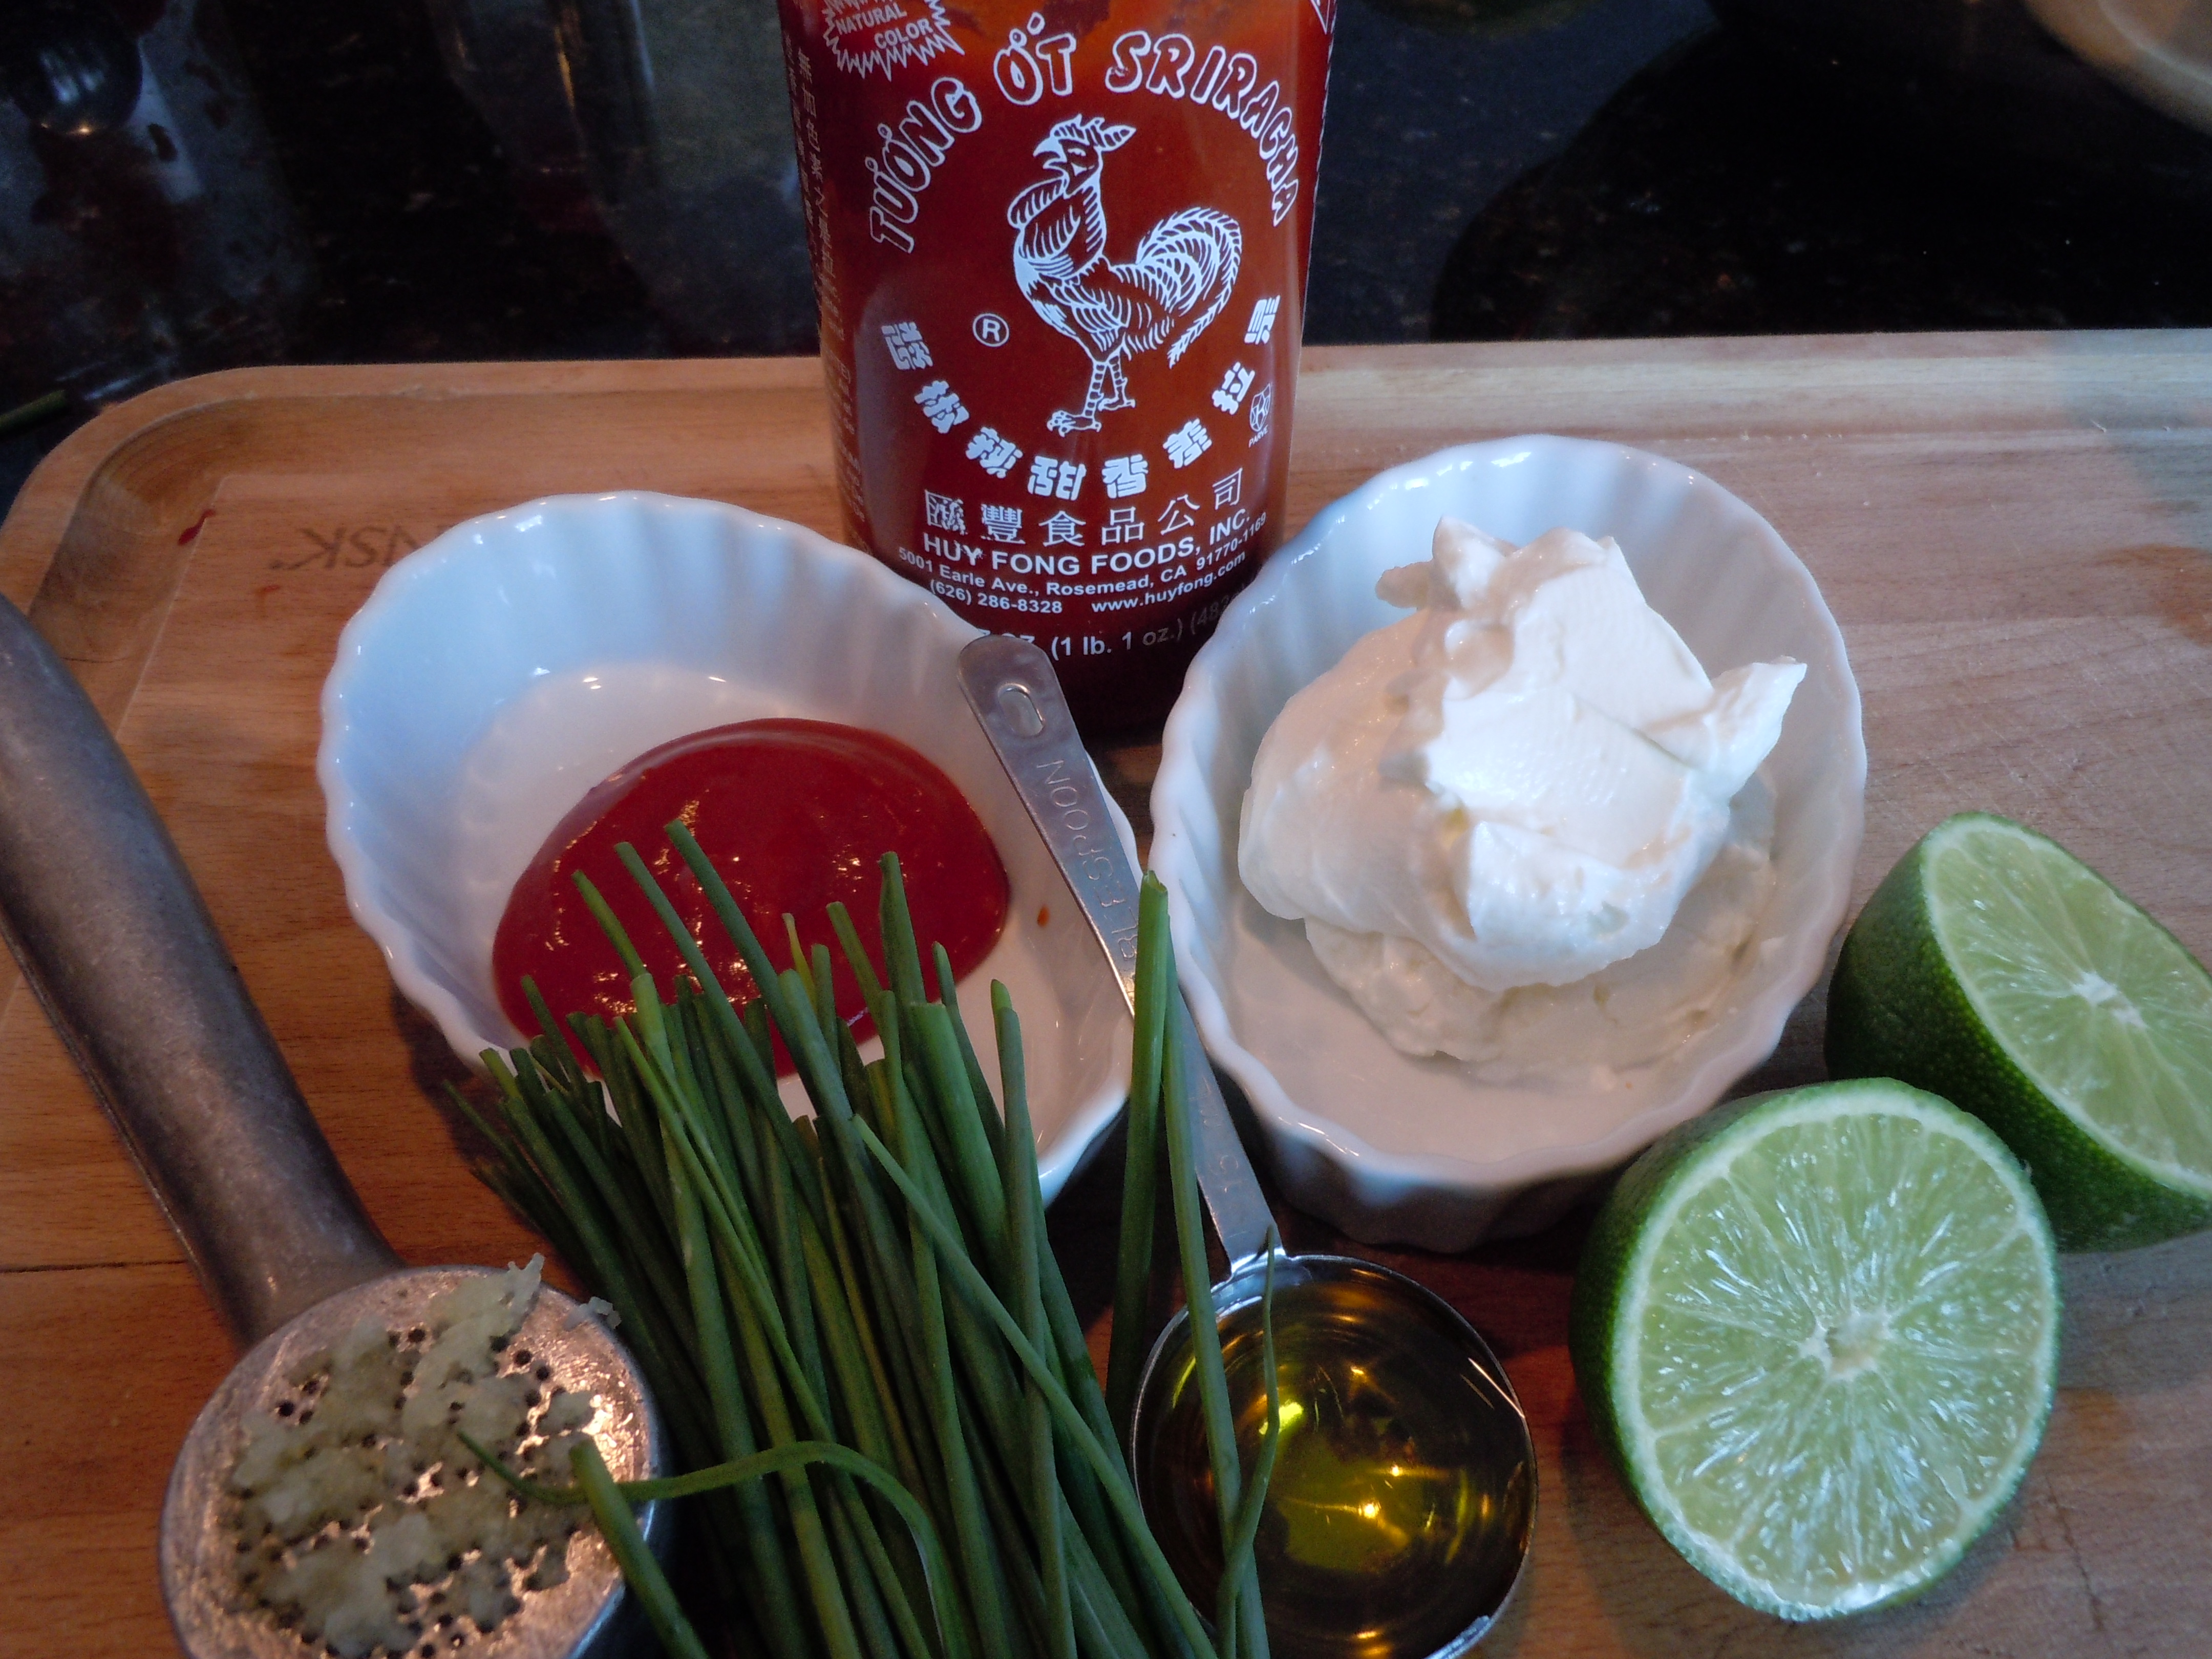
Having a homemade dipping sauce as tasty as my remoulade sauce made with greek yogurt is pretty much a no brainer for me. This sauce has the tang from the yogurt, a little sweet from the ketchup and a nice spice from the fresh garlic and Siracha…..yum. You need to try this sauce with mycrab cakes ,bacon wrapped sea scallops or mybaked coconut shrimprecipe. It’s such a nice combination and a change up from plain ketchup! This gourmet remoulade sauce is outrageous on sandwiches too especially turkey burgers or even beef for that matter!
INGREDIENTS FOR GREEK YOGURT REMOULADE SAUCE:
3/4 cup plain Greek yogurt
1/3 cup Hellman’s mayo
3 tbsp. ketchup
1 dash Siracha – OPTIONAL (Siracha is a hot chili sauce sold next to the Tabasco at the store or what ever your favorite hot sauce is!)
Juice from 1/2 lime
1 lg. garlic clove (put thru press )
2 tbsp. extra virgin olive oil
1 tbsp. rice wine vinegar (I use “seasoned” rice wine vinegar)
Freshly chopped chives to sprinkle on top of finished remoulade
DIRECTIONS FOR REMOULADE:
Whisk all of the ingredients except the chives in a mixing bowl, then top with chopped chives
Ingredients FOR GOURMET OVEN CRISPY FRIES:
4 Med. size Russet potatoes OR Yukon potatoes sliced into sticks and pat dry with paper towels
1/4 cup extra virgin olive oil
1/2 tsp salt
1 tsp garlic granules
1 tsp onion granules
FOR GARLIC FRIES: 4 cloves fresh chopped garlic and 1/2 cup fresh chopped parsley with 1 tbsp butter heated for 5-8 minutes in oven while it’s pre-heating for fries to take the bite out of the garlic or heat in a small pan on the stove on low for 10 minutes
Directions FOR GOURMET OVEN CRISPY FRIES:
Pre-heat the oven to 450º.
Slice potatoes in 1/4″ sticks or wedges – NOTE: if you cut into wedges you need to keep an eye on them because the thin pointy edges might burn before they are done
Dab with paper towels to dry excess potato moisture (starch) IMMEDIATELY or they will turn brown and layer cut up potato fries in between layers of paper towels while you are cutting
NOTE: if any of the fries do turn brown just quickly rinse and blot dry
Toss all the cut up fries onto a cookie sheet
Drizzle with 1/4 cup olive oil and sprinkle with 1/2 tsp garlic, onion and salt
Mixed with hands and then spread out into even layer on cookie sheet
Bake for 35 minutes BUT check at 30 minutes…No need to flip because the bottom gets cripsy….just leave them alone til the end
This homemade pasta fagioli dish is a traditional Italian soup where the recipe differs from family to family and region to region. Every single version is different which makes it nice because it’s very personal that way. It’s what ever you were used to having in your own home or at your relatives growing up. Originally, pasta fagioli was made without meat, then there were versions that started the dish off by sauteing pancetta and now there are so many different recipes floating around. It’s what ever floats your boat really! It’s supposed to be easy gourmet…what ever you have in the pantry and refrigerator will work.
Pasta fagioli is a savory comfort food that I just love. It consist of several universal ingredients like ditalini pasta, cannellini beans, some kind of tomato base and a liquid of either chicken, or vegetable and I have even seen water used. It’s been considered a soup which is perfect for dunking that crusty bread but there are versions that make it more like a thick saucy “pasta” dish. The liquids do evaporate quickly after the pasta is added to the pot and cooked through so you have to be careful at this point to keep an eye on that if you want it to have a looser soup-like consistency.
INGREDIENTS For Pasta Fagioli (makes enough for many…10-15 side dishes):
2 cans cannellini beans
1/2 -3/4 cup ditalini pasta ( 1/2 if you want it looser soup-like consistencey …remember it just keeps getting thicker even after you take it off the stove as the liquid evaporates)
1 qt. (4 cups) chicken stock
1 cup white wine-pinot grigio or what ever you are drinking -(1/2 to deglaze pancetta and veggies and 1/2 when you add stock
1/3 cup each diced carrots, celery and onion
3 tbsp finely chopped garlic
2 cups whole peeled tomatoes with some juice, broken up with your hands – NOTE: USE 3 cups if you are not using a cup of “leftover pork & sauce”
1 cup pork in tomato sauce OR 1 lb. sausage taken out of the casing ready to sauté OR omit all together
2 1/4″ sliced of pancetta diced up or bacon
2 sprigs of fresh rosemary and 2 of fresh thyme tied in up with string
Fresh basil -julienne to add at the end
grated Reggiano Parmigiano and some to shave for decoration
good olive oil to drizzle at the end
1/2 tsp salt -add 1/4 tsp at the addition of sauteing veggies and 1/4 tsp when you add beans and broth
1/4 tsp pepper
1/4 tsp crushed red pepper flakes if you like a pinch of HEAT
DIRECTIONS:
Add diced pancetta to a large pan and begin to sauté for 8 minutes on med heat
Add in broken up sausage to brown with the pancetta If you do not have “pork in sauce”
On med/low heat add diced carrots, onion, celery and garlic with 1/4 tsp salt (along with 1/4 tsp crushed red pepper flakes if you want a little heat) to the same pot with 1 tbsp olive oil extra – sauté til veggies are tender 10 minutes
De-glaze with 1/2 cup white wine and simmer 5 minutes
Add in beans, pork-sauce, whole peeled tomatoes, herb bouquet, chicken stock, 1/4 salt, 1/4 pepper and simmer for 30 minutes
Remove herb bouquet from soup
Take 4-5 ladles of beans out of the soup to puree for a little creamier then adding back in
Simmer 5 minutes and add in 1/2 cup ditalini pasta
Cook til pasta is cooked – approx 7 minutes
Plate up and drizzle olive oil, sprinkle parmigiano cheese and fresh basil and mangia mangia!
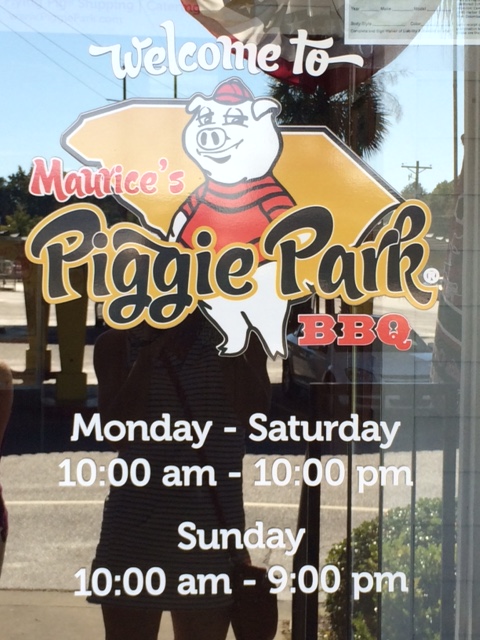
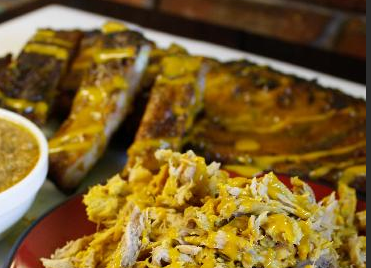
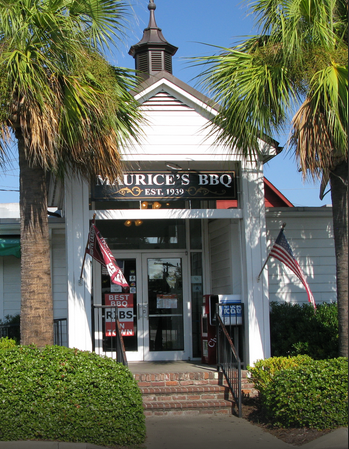
Maurice’s Piggy Park BBQ is real fine homemade gourmet BBQ with a mustard base sauce that makes you pucker, all awhile biting into a succulent piece of pork rib that just melts in your mouth. The savory hickory smoked flavor of their ribs is something you will definitely be back for with out a whole lot of time lapsing in between visits. The mustard-vinegar based sauce just grows on you and you can’t really put your finger on it so you just keep dipping into this sauce for another lick. I recently had the opportunity to eat here when my son Reilly and I met up with his tennis team in South Carolina for his National Team competition.
Well, I tell you, when I travel I want to visit places to eat where their heart and soul is served up to you on a plate. To taste different foods from other regions is one of the most wonderful opportunities we get when we travel. If you are not into this kind of thing you ought to open your self up and try to appreciate new tastes and ways to prepare foods that have become traditions for people in that region. That’s what makes the world such a diverse place with so many different flavors to soak up.
I decided that during our stay in South Carolina I wanted to accomplish a few of things before heading back. First off, was having Southern BBQ, of course! The second was to get my son, Reilly, to Carowinds Amusement Park in North Carolina which would be an easy task since we were flying in and out of Charlotte and the third was to get in a couple rounds of golf! My friend Luanne, one of the other tennis mom’s, had the same point of view as me on the whole Southern BBQ thing and tasting new foods from where ever you happen to be traveling especially if you are miles away from where you live. On one of the afternoons at tennis practice much of our group was ready to hit up Chic-fil-A AGAIN! I am happy to say that didn’t even enter my mind nor did I go there during our stay in South Carolina. I looked at my friend Luanne , we began to laugh and said lets go, lets do REAL BBQ. She had already looked it up on her phone and it wasn’t far from The Cayce Tennis Facility so off we went in my rental car.
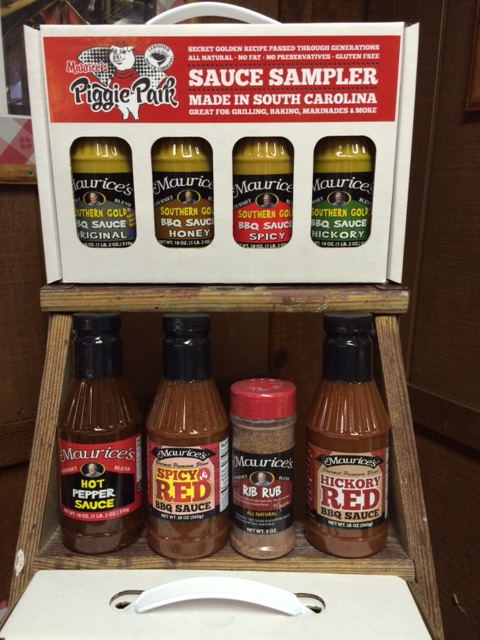
It was the tastiest meal I had on this trip to South Carolina and it totally lived up to my BBQ standards. I ordered the pork ribs, collard greens, and coleslaw and needless to say I wore much of it that mustard based BBQ sauce all over the front of my white with navy blue pinstripe cotton dress I had on. Too funny but it was definitely worth it…should have gotten a picture of that 🙂 The ribs were moist and falling of the bone tender slathered in their mustard-vinegar sauce and I can’t help but love that hickory smoked flavor. The collard greens were delicious, earthy but not too bitter and the chopped style coleslaw was a refreshing balance with the mustard sauce from the ribs. Each item complemented one another very well! I did buy a bottle of Maurice’s Piggy Park BBQ sauce to take home with me. They have quite the assortment of sauces to choose from (shown below) but I bought the one I had that day. To my surprise I was able to get the yellow mustard stain completely out of my dress before it dried.
On the last day Reilly and I headed to Carowinds Amusement Park and he had the time of his life bravely riding on several loop coasters over and over again! We actually found another gourmet BBQ eatery in downtown Charlotte which was a bonus. I was also able to get in two rounds of golf during our stay so it was a wonderful trip all around. Don’t you forget to treat yourself toMaurice’s Piggy Park BBQ when you are in Cayce, South Carolina …you won’t regret it!
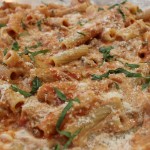
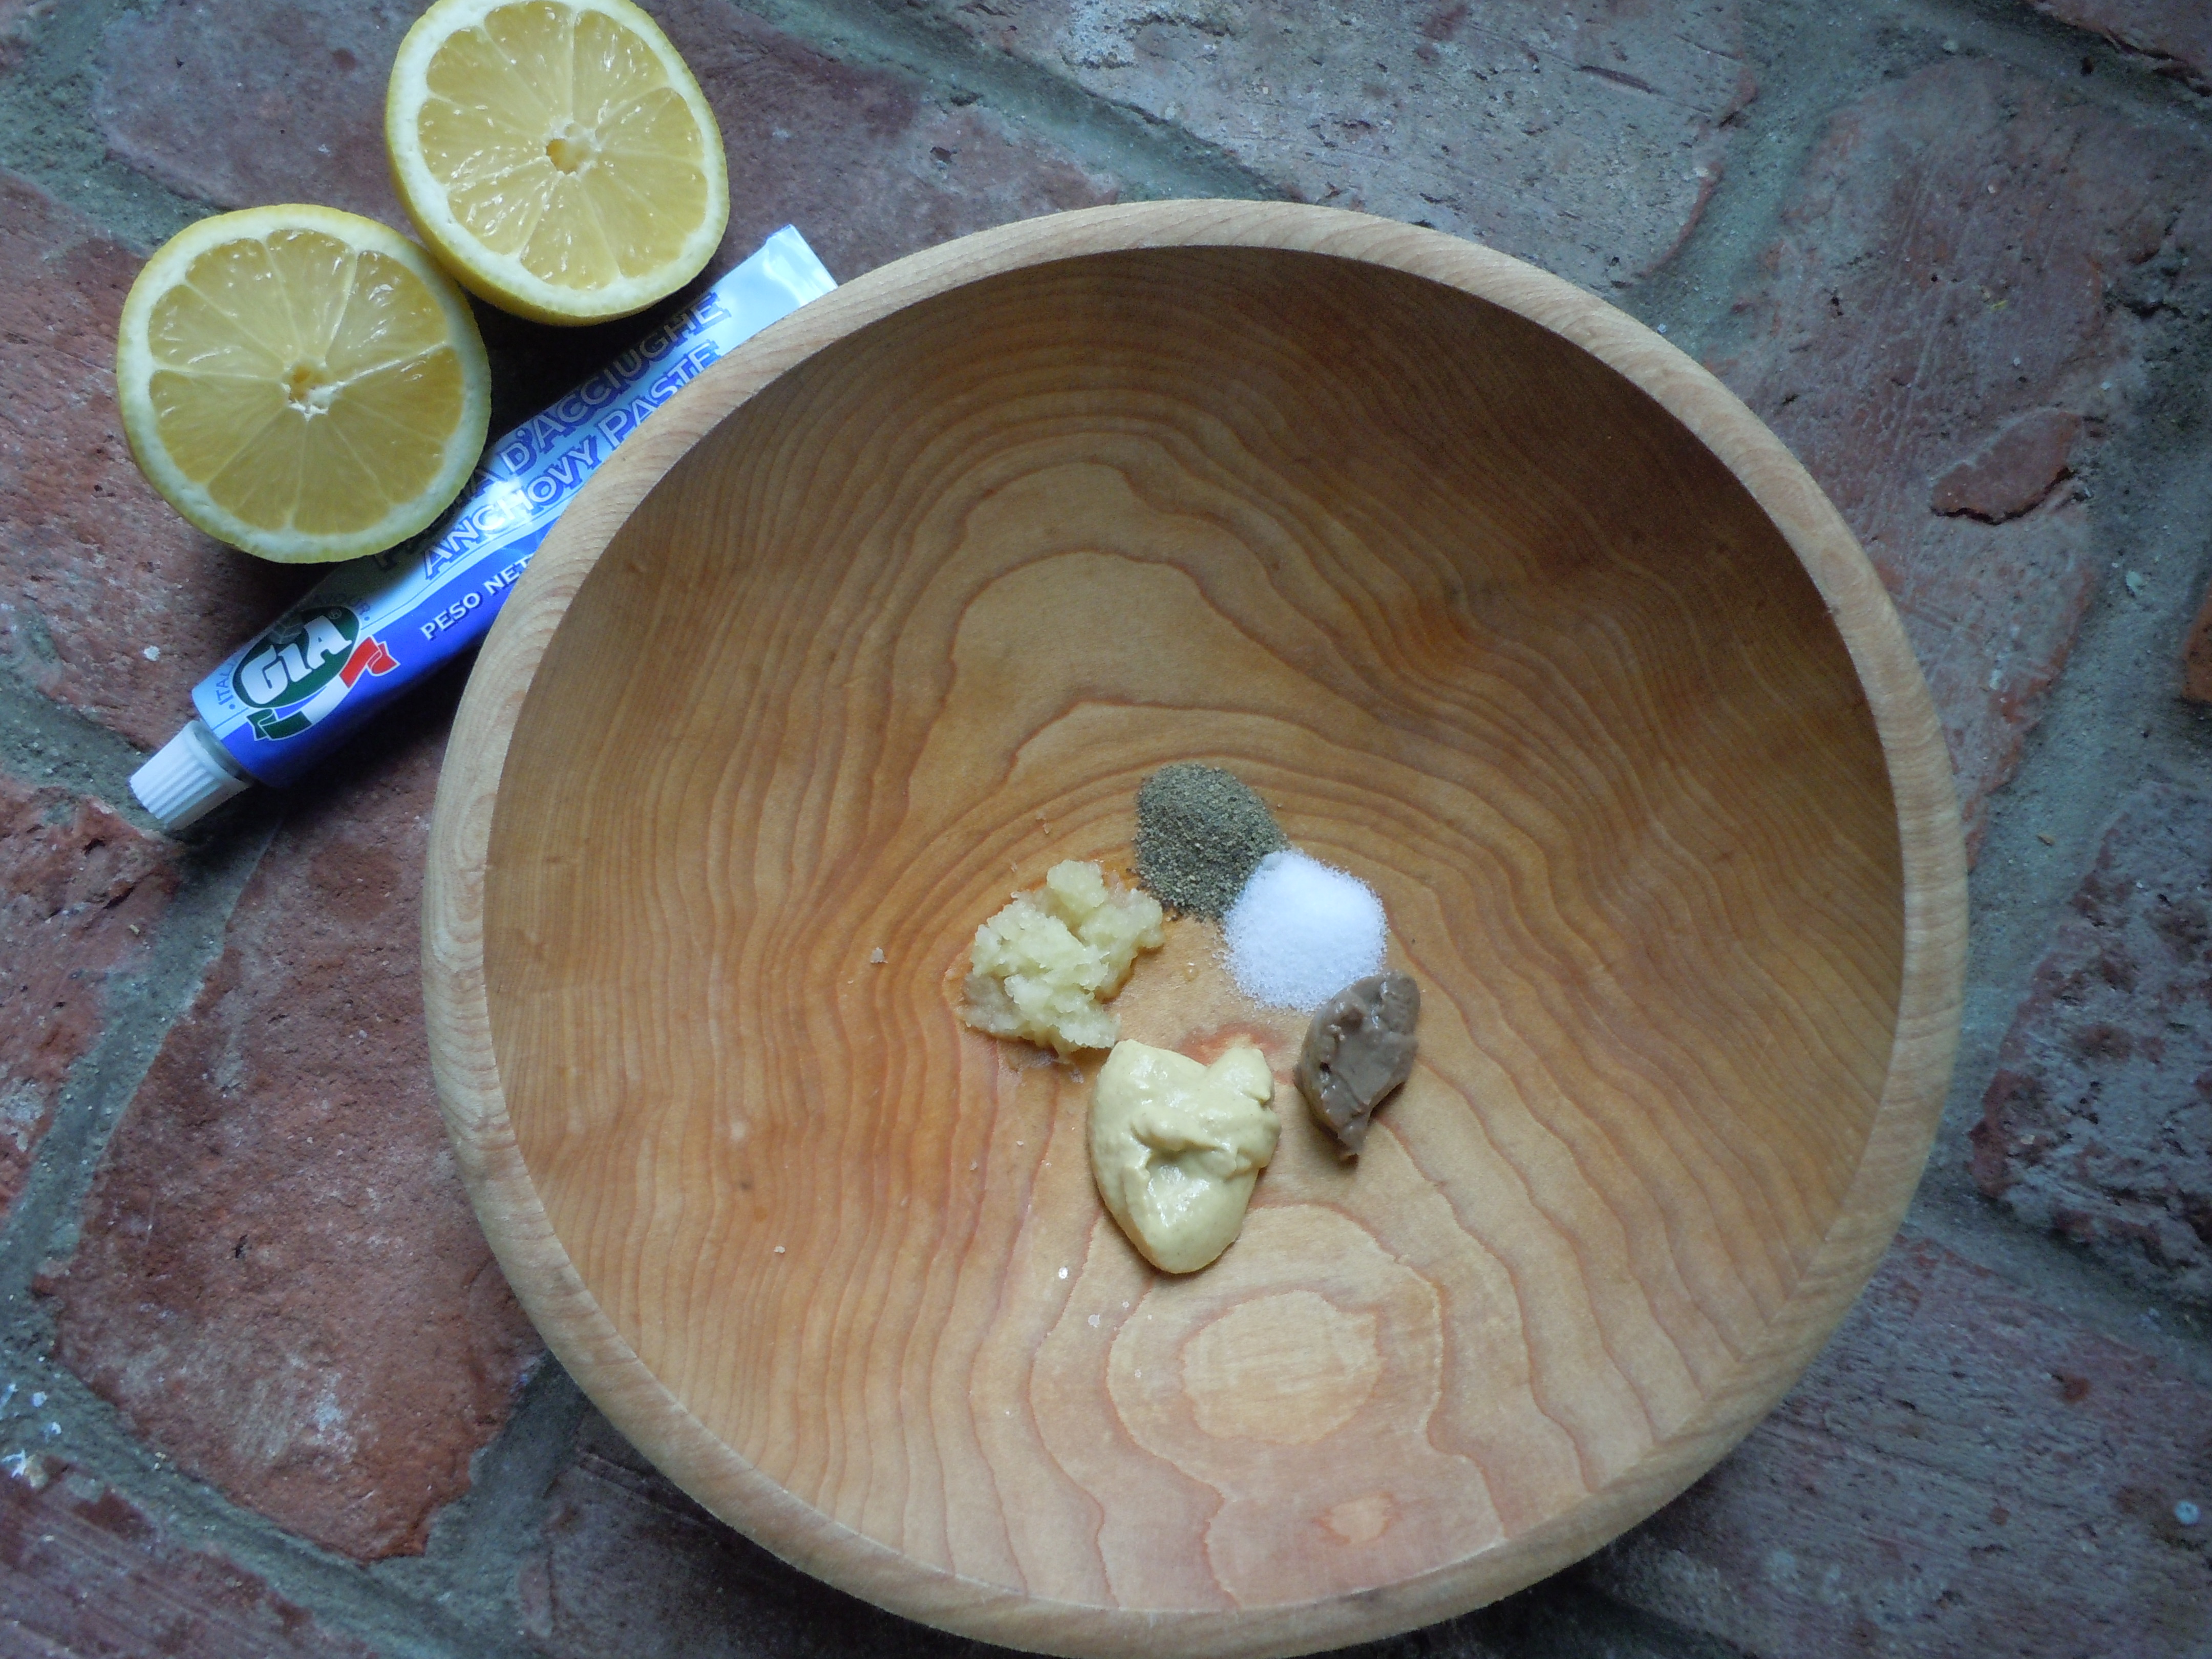
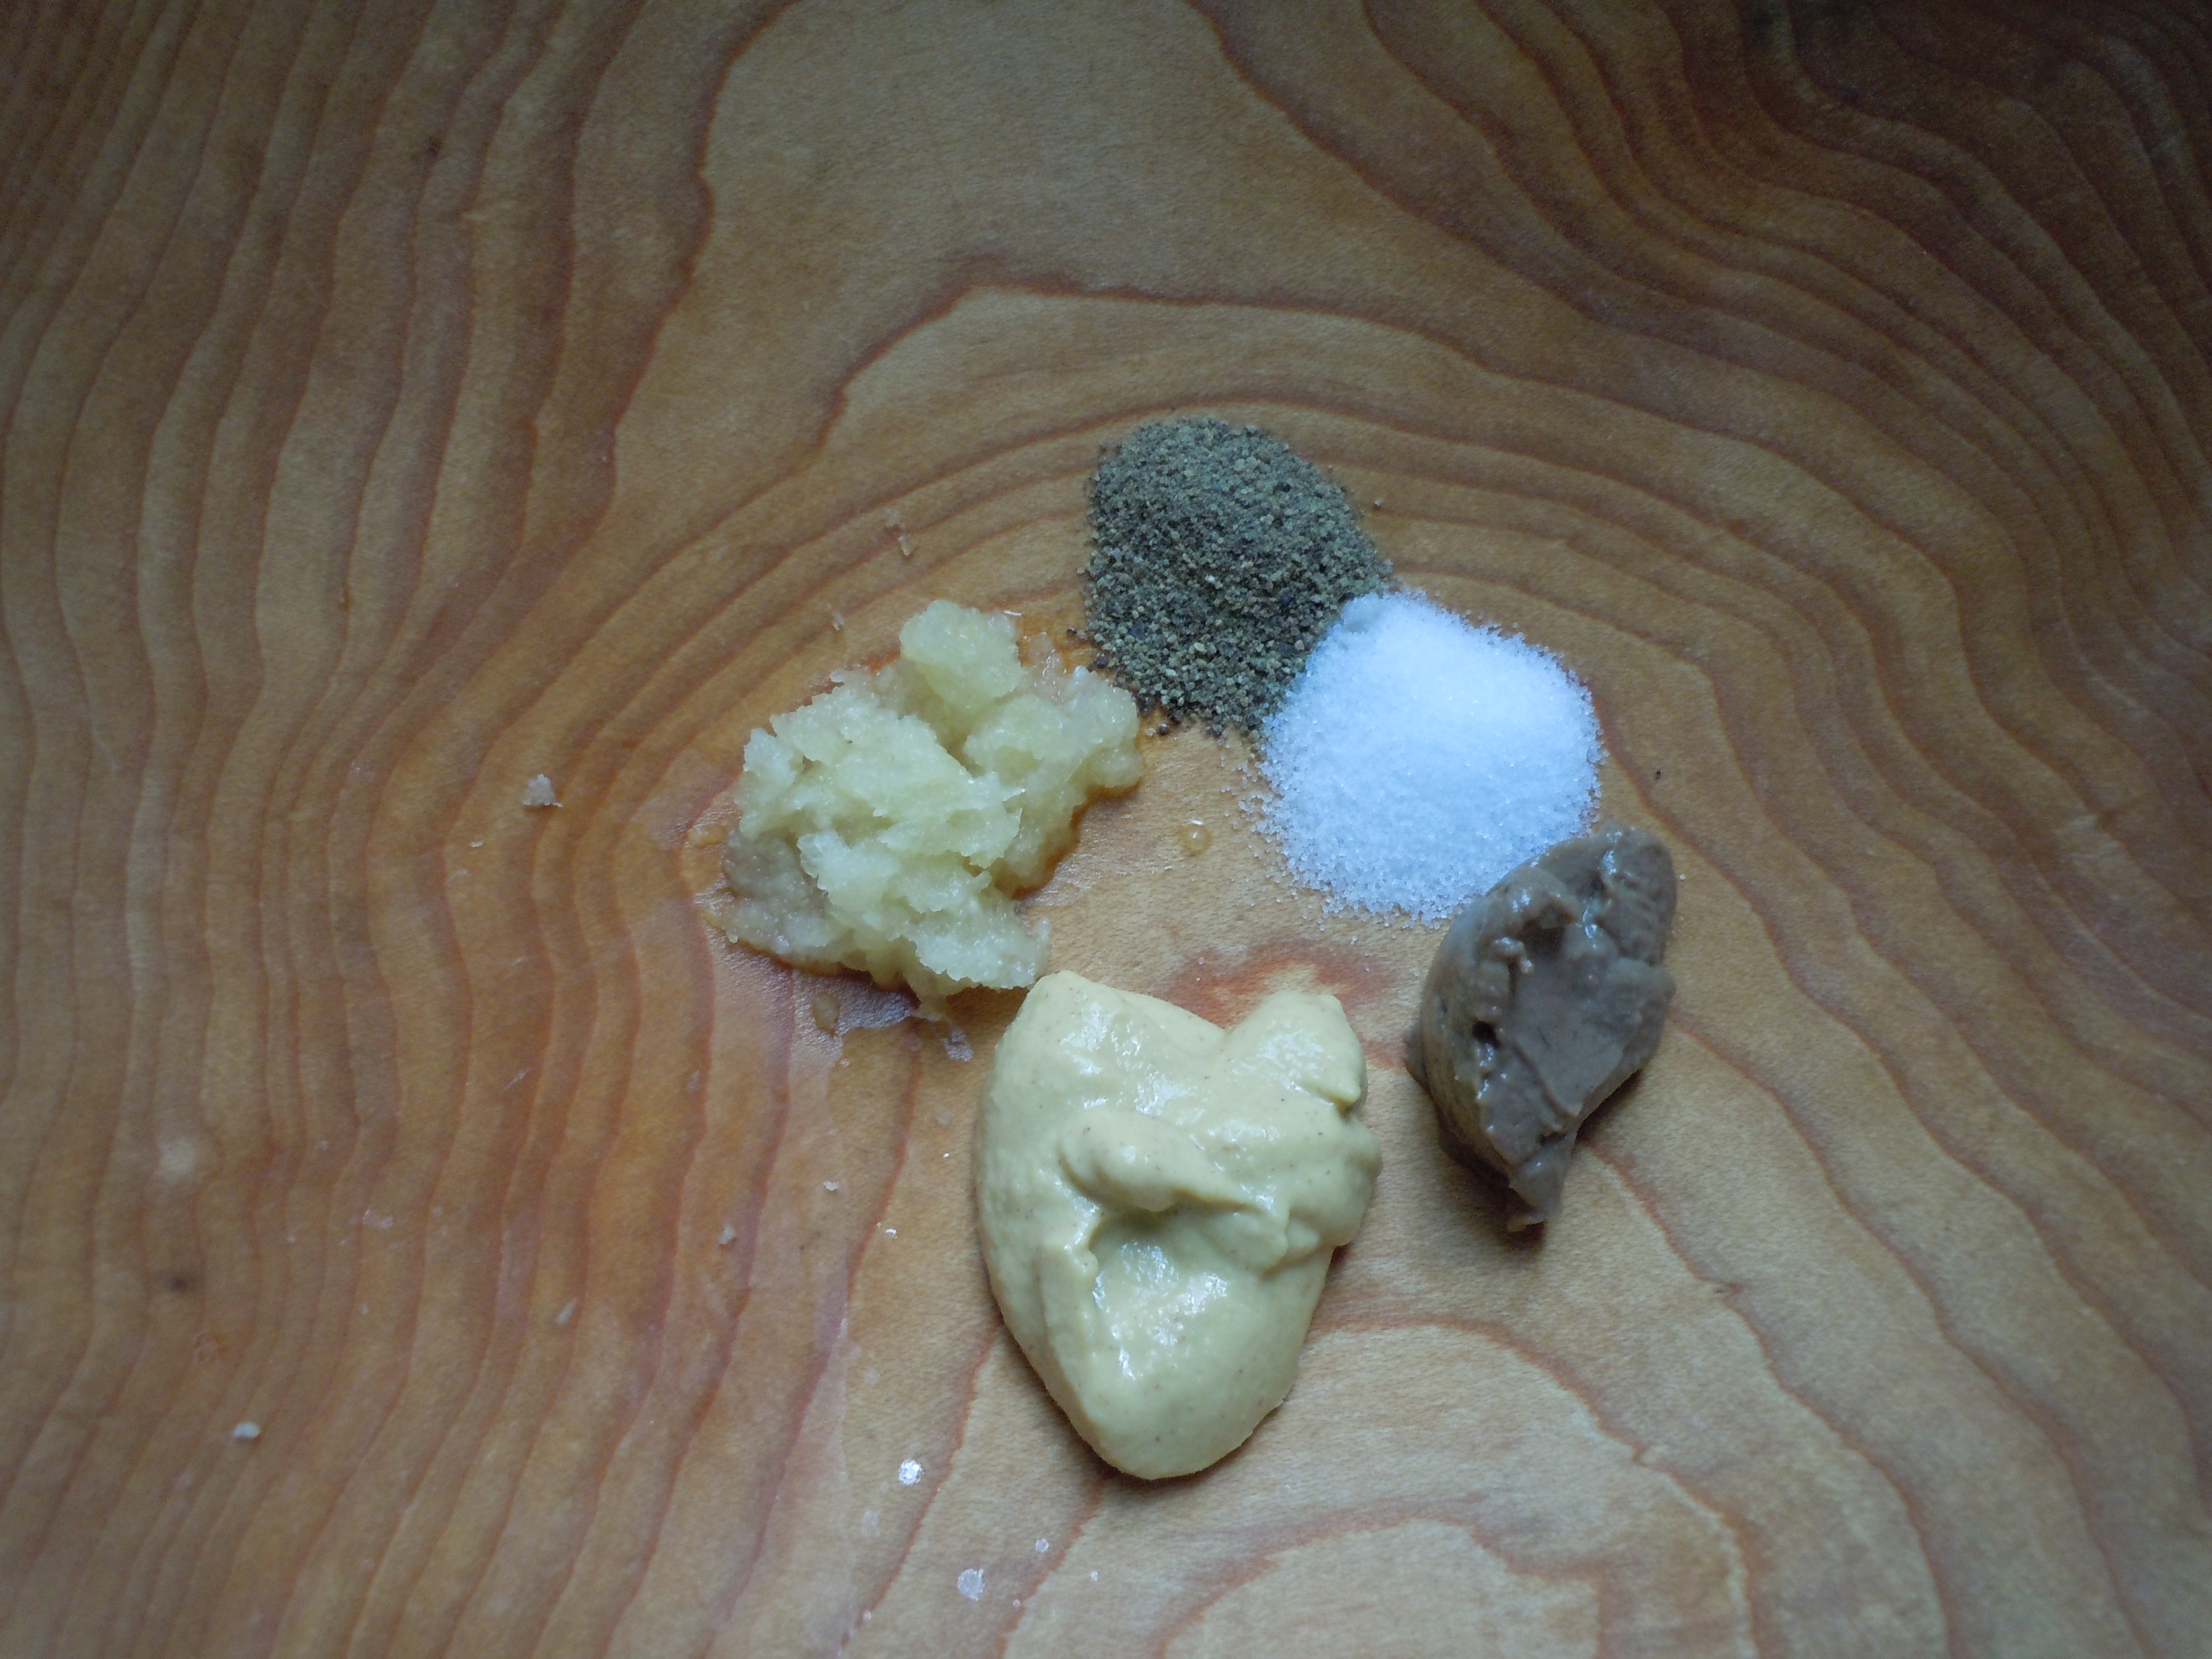
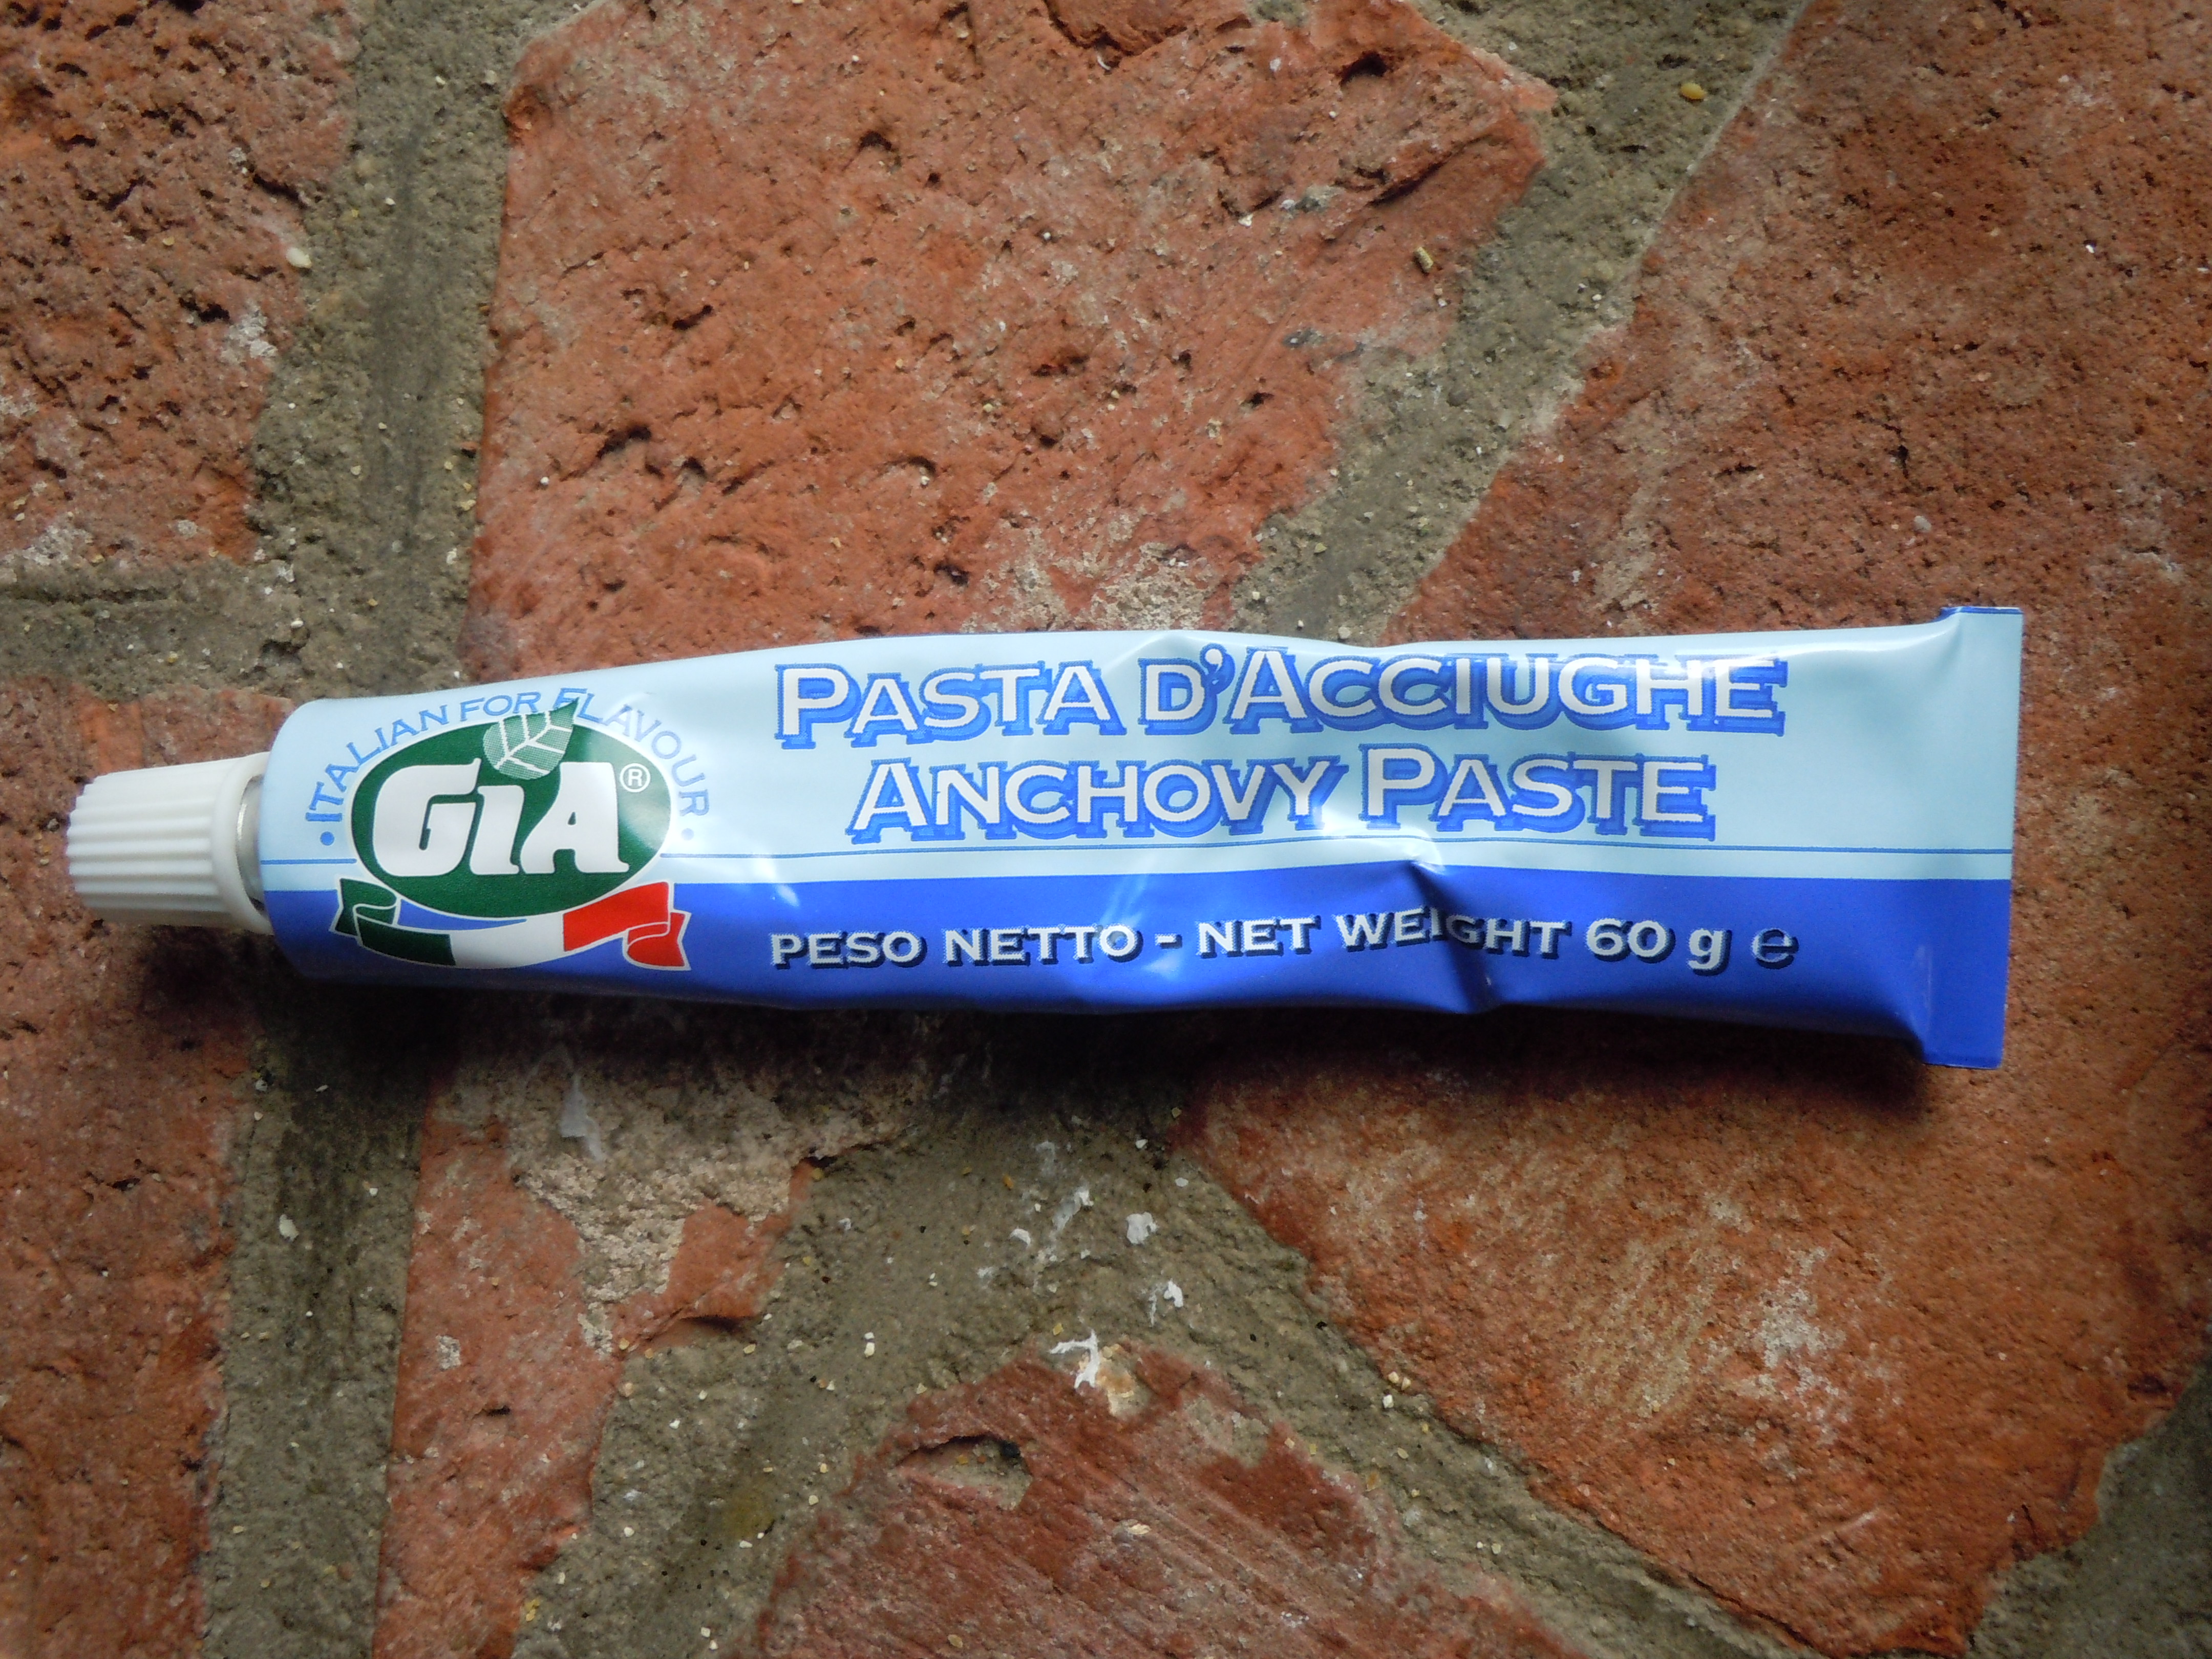
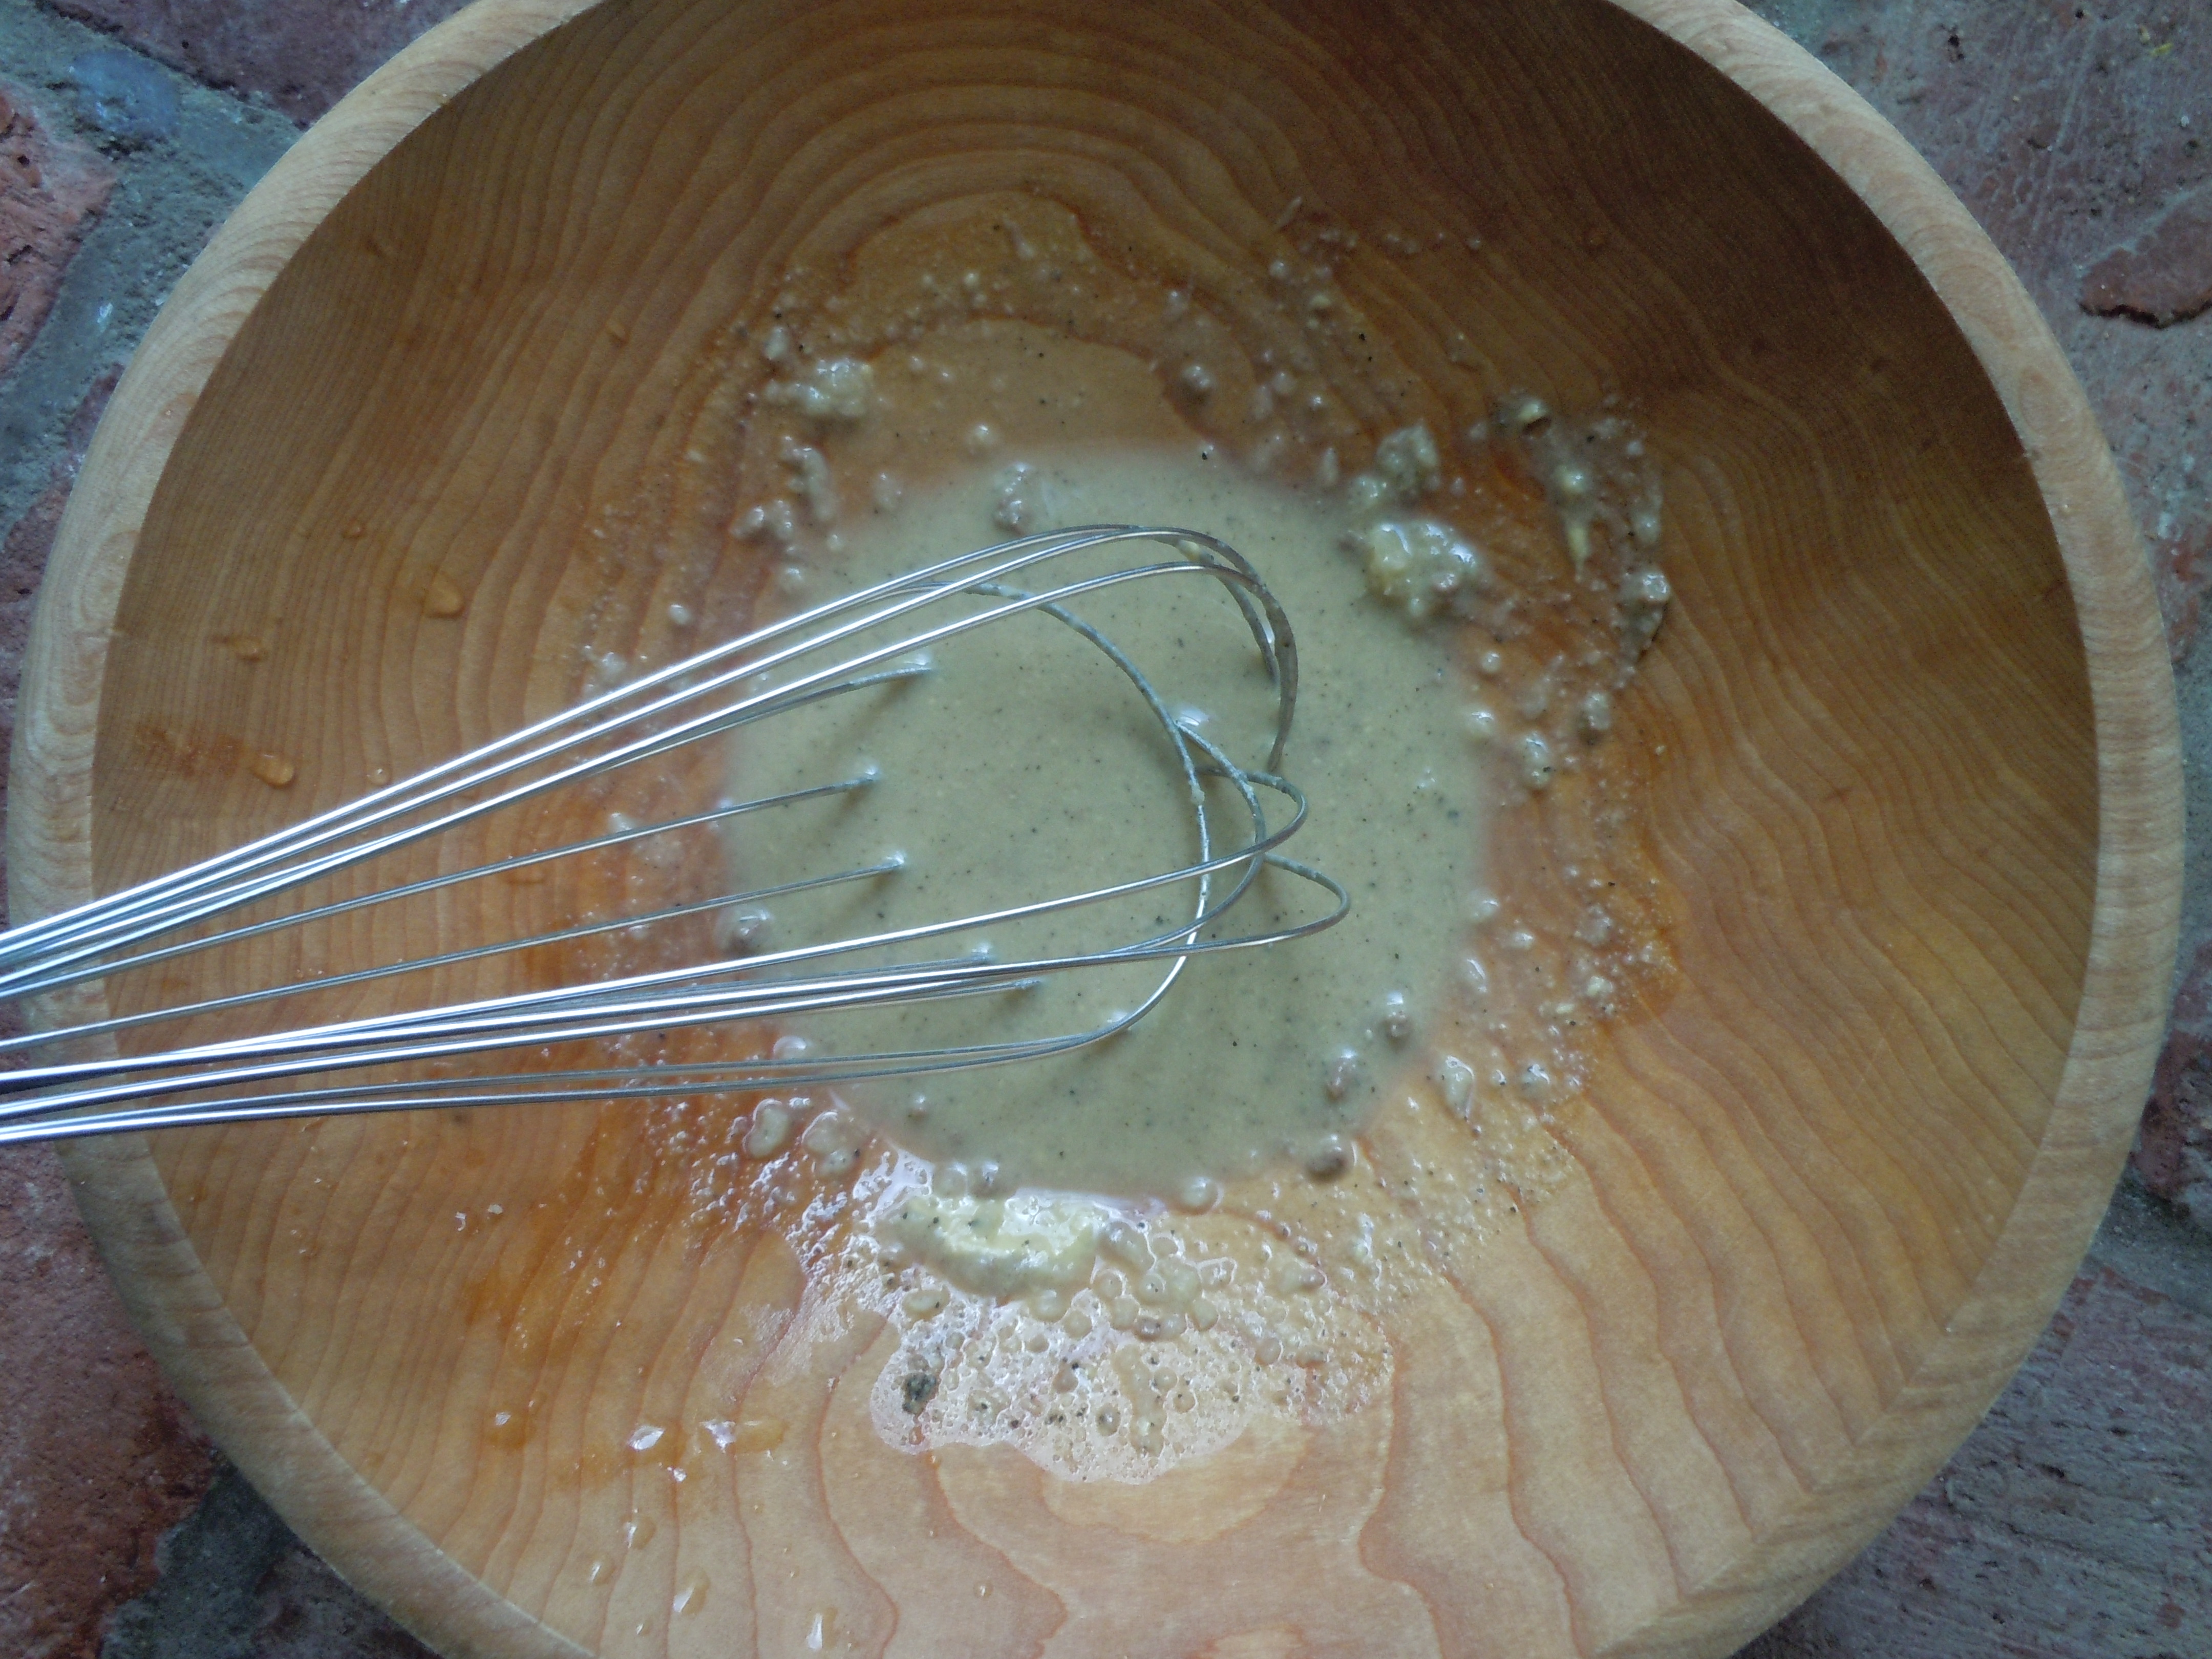
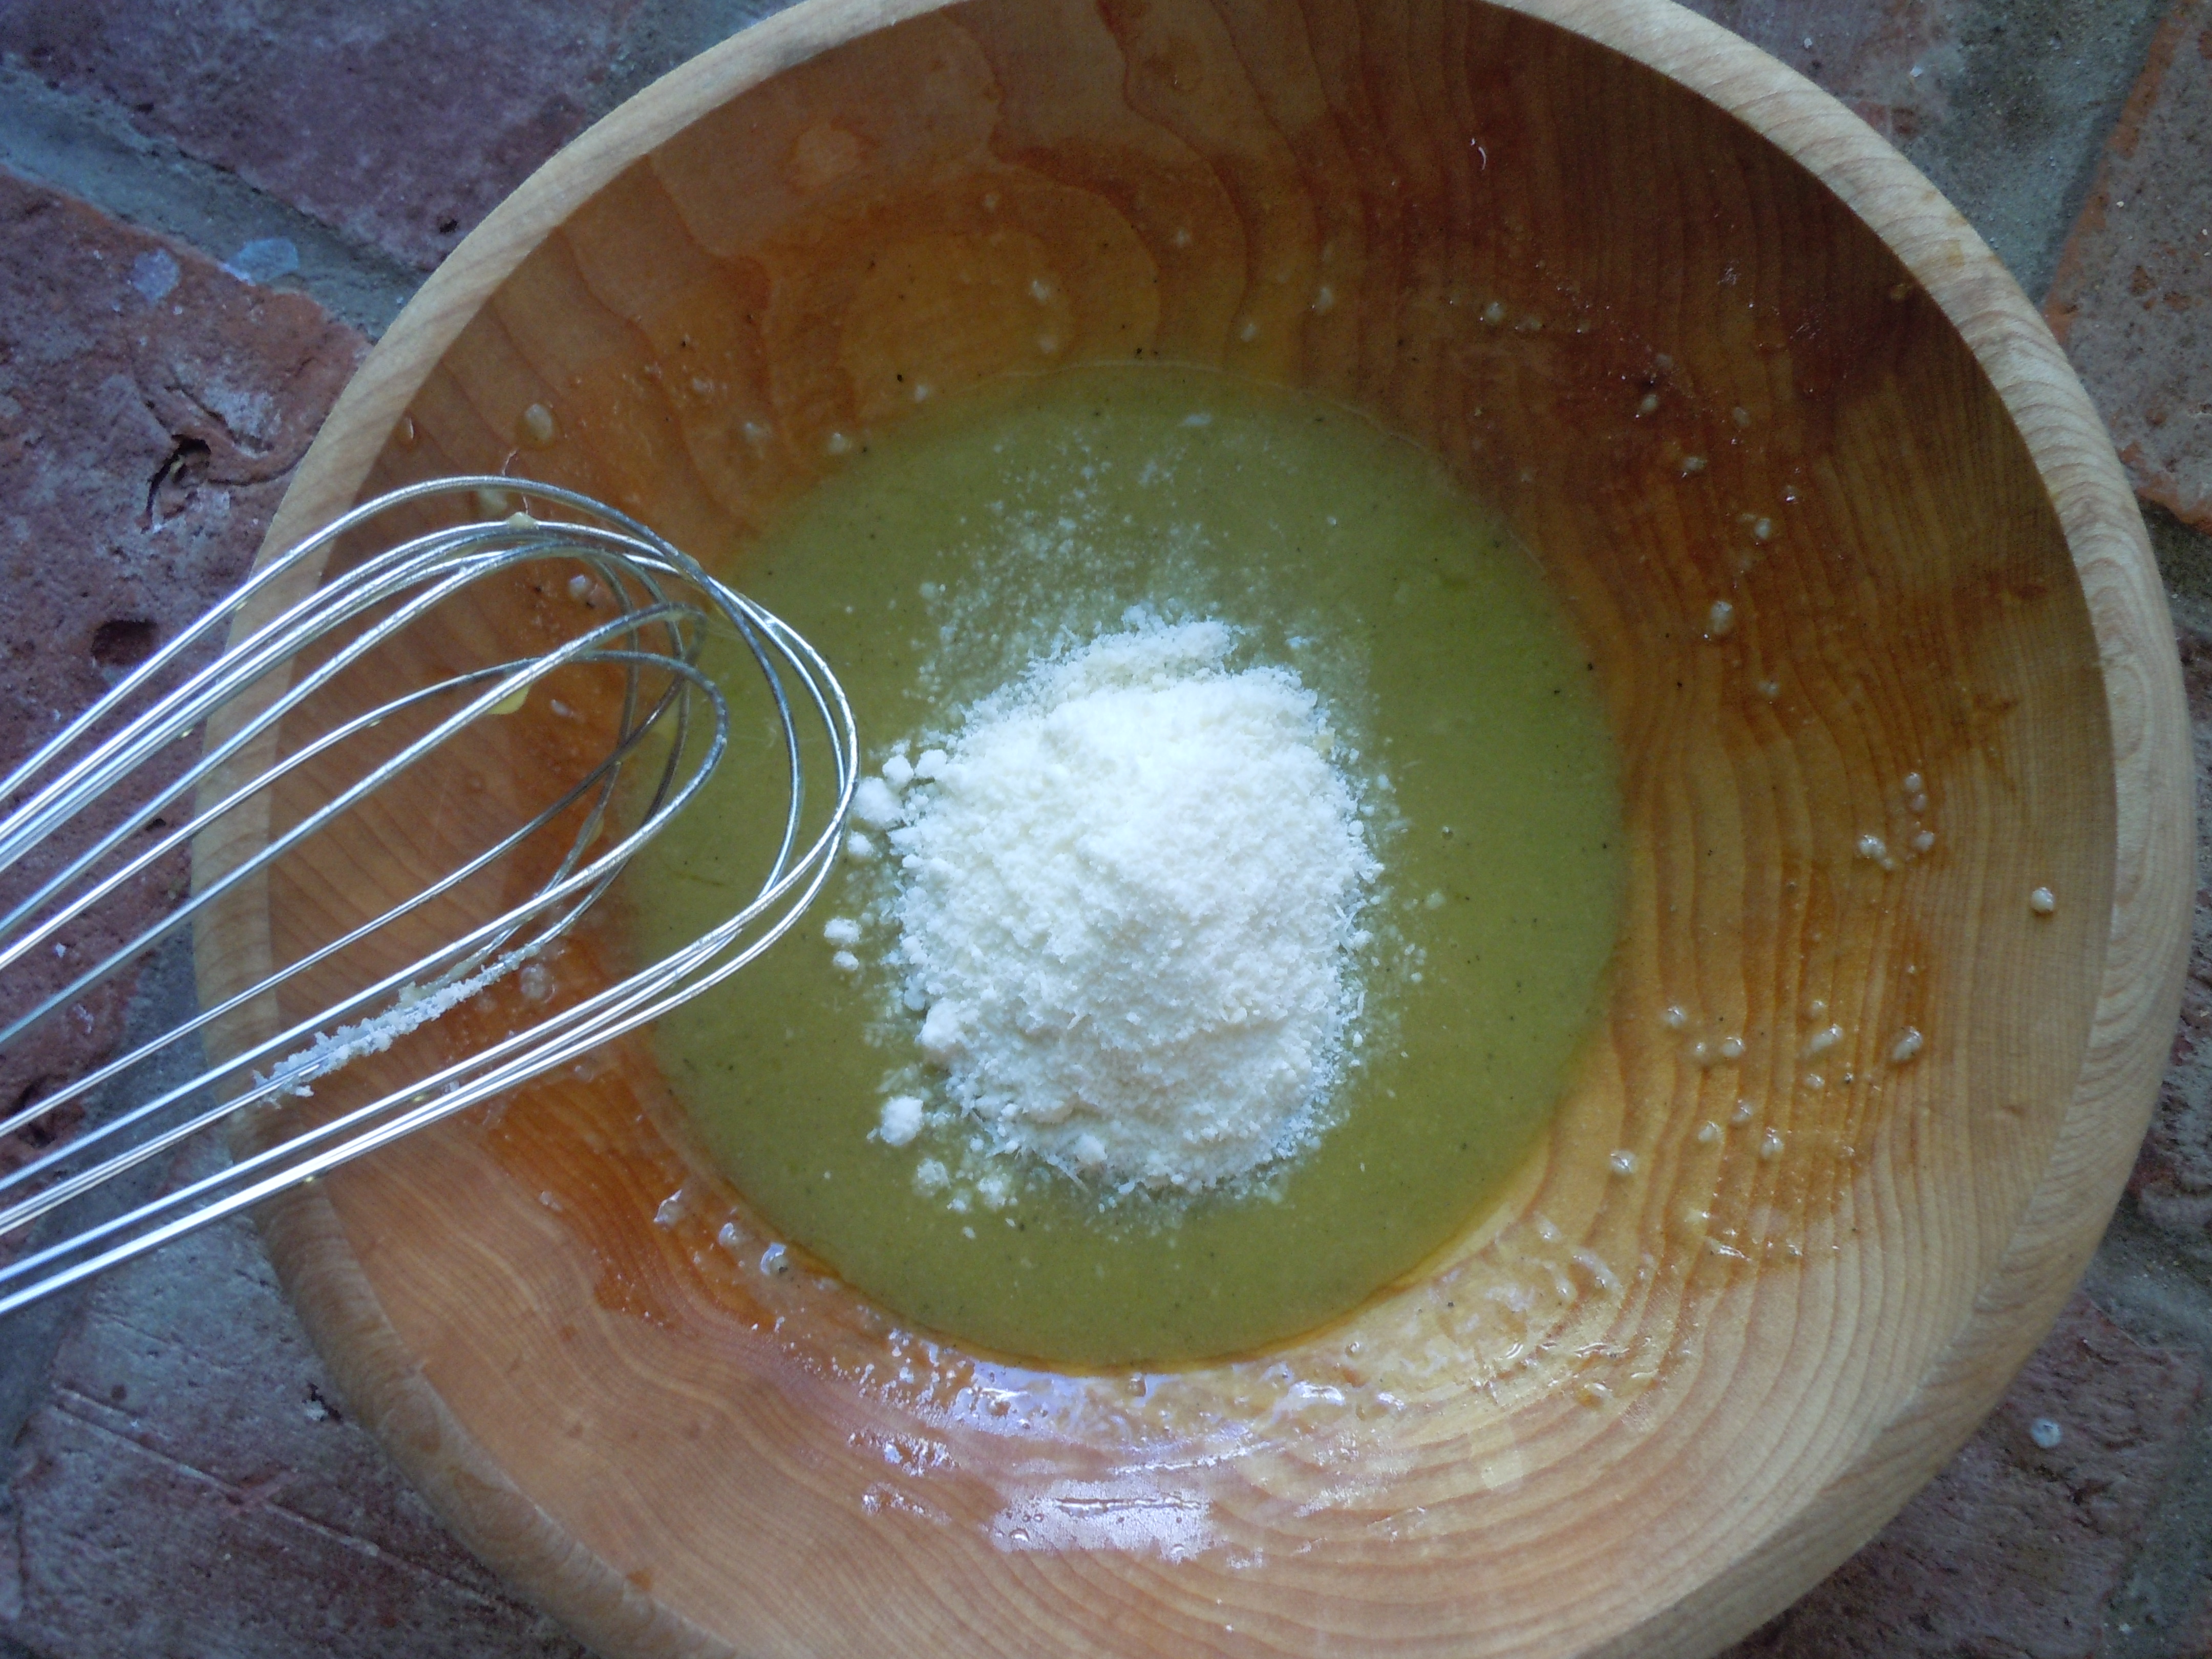
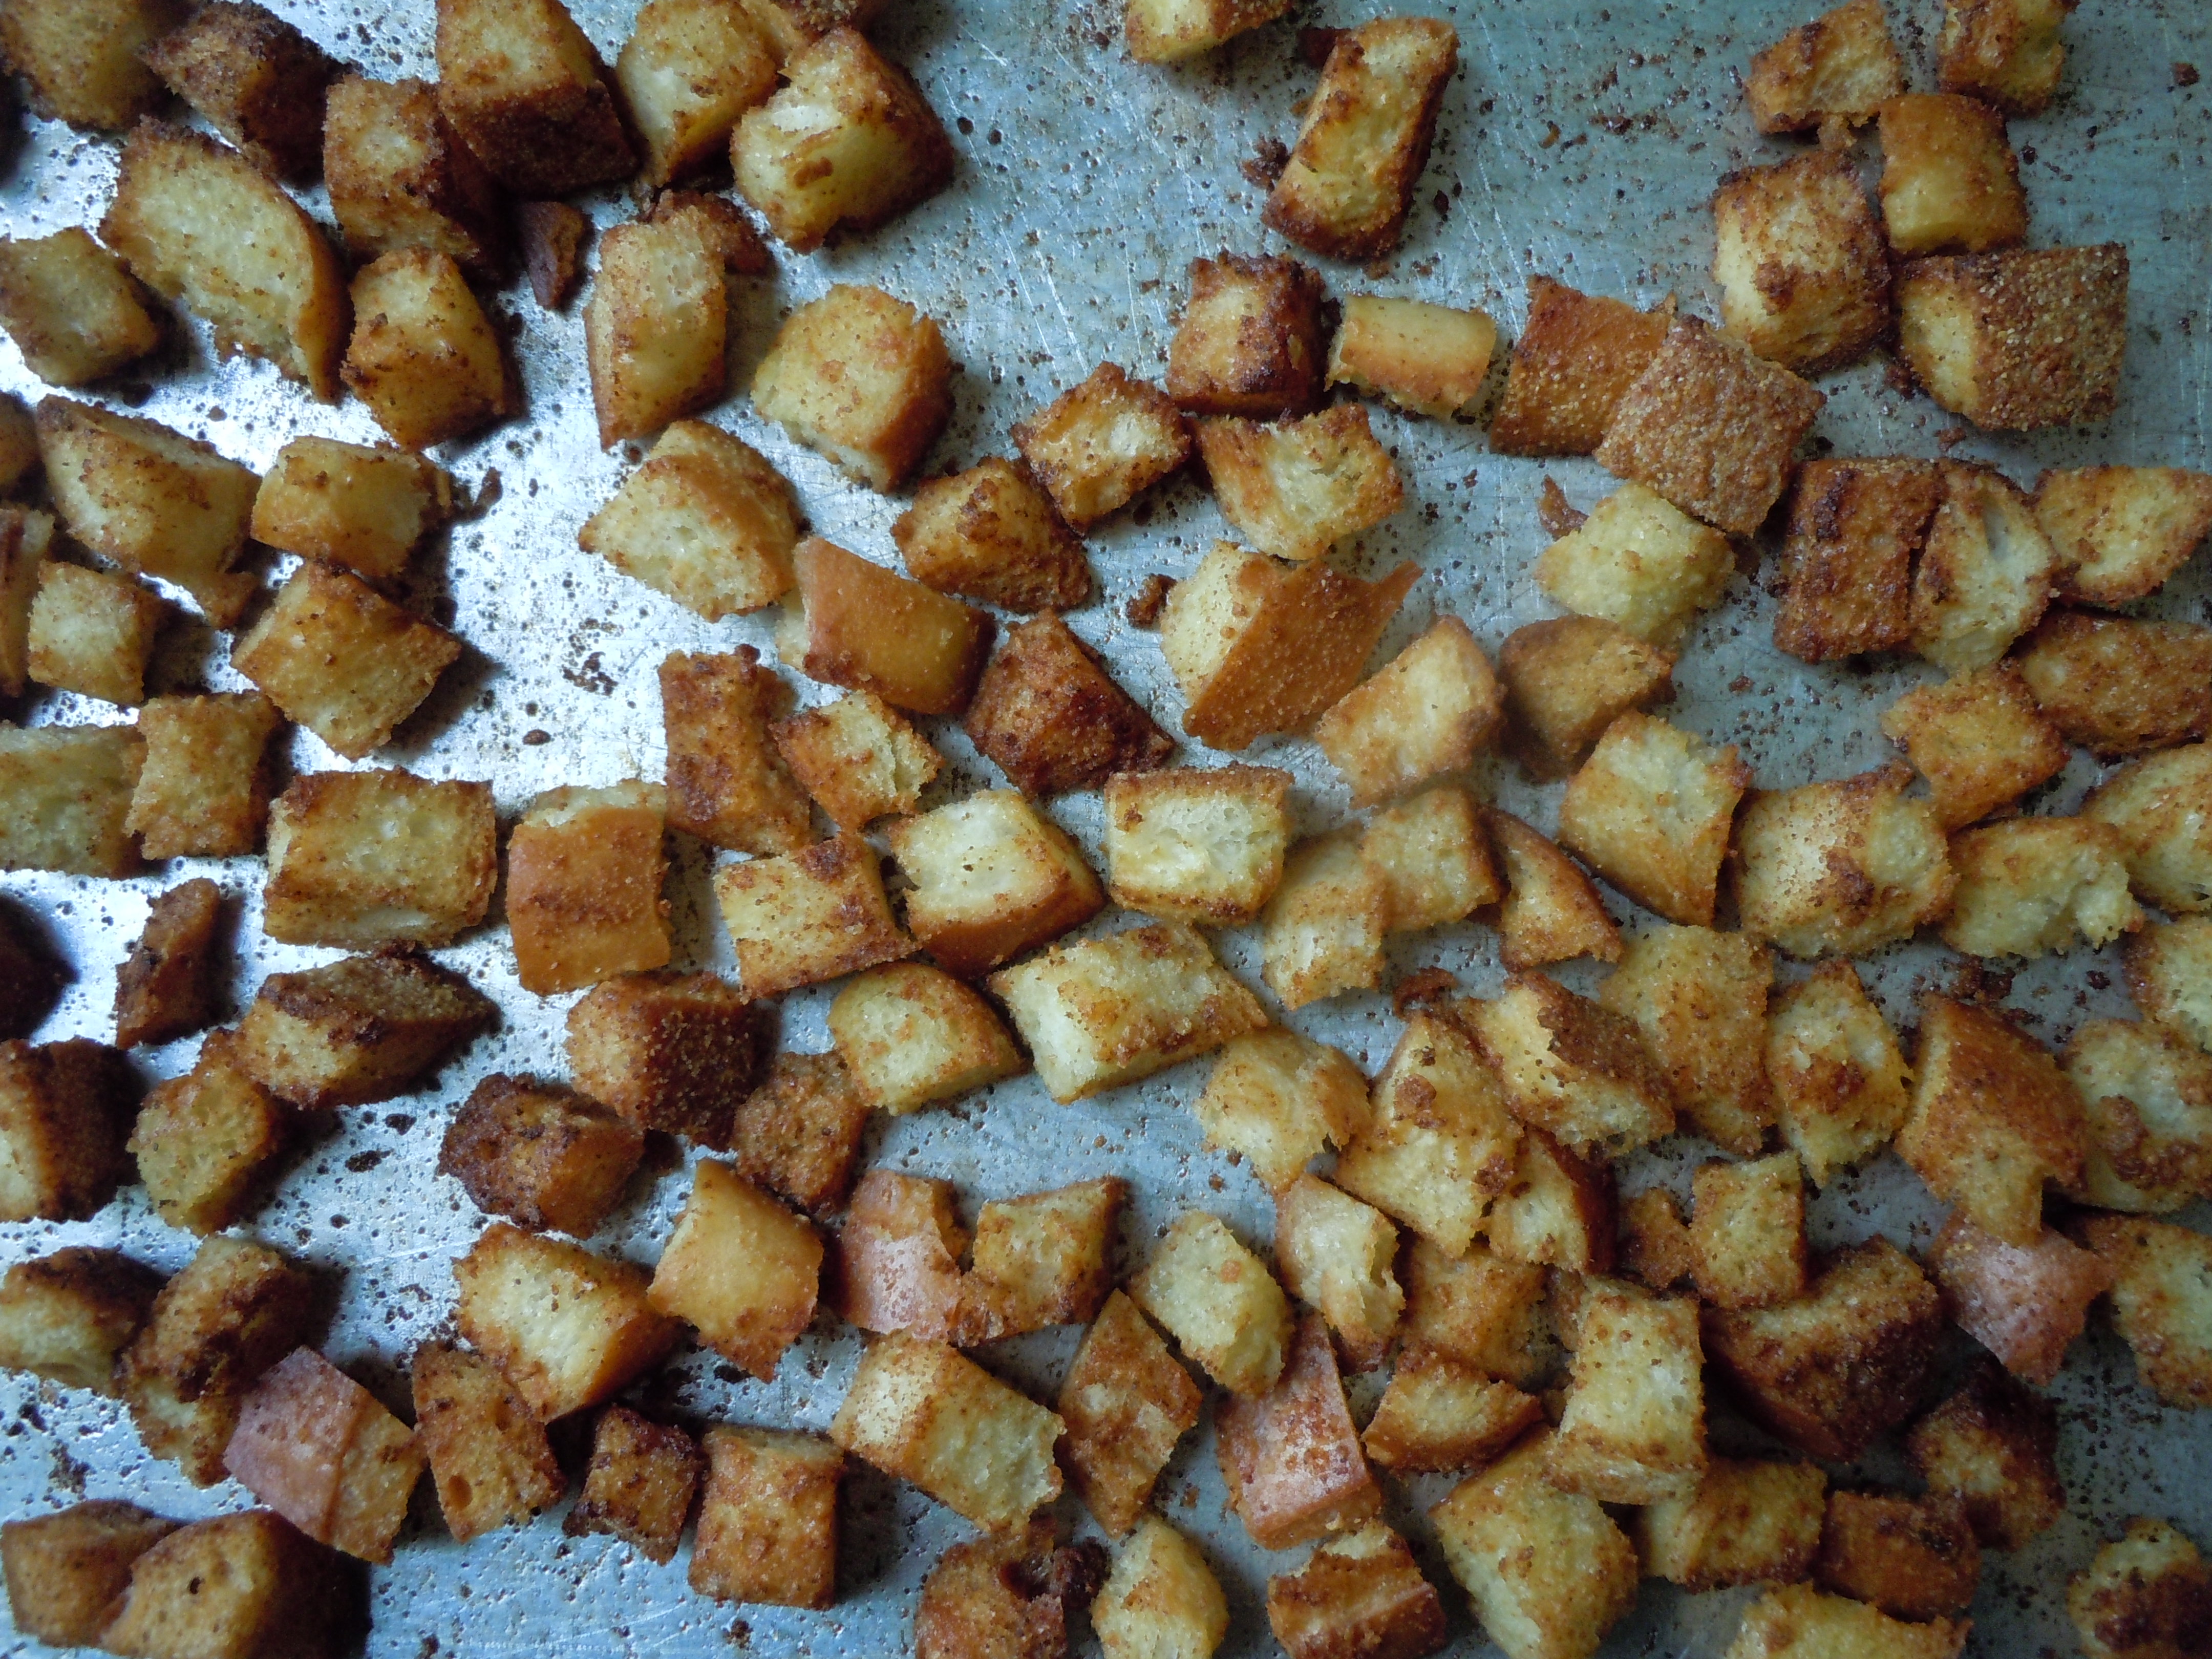
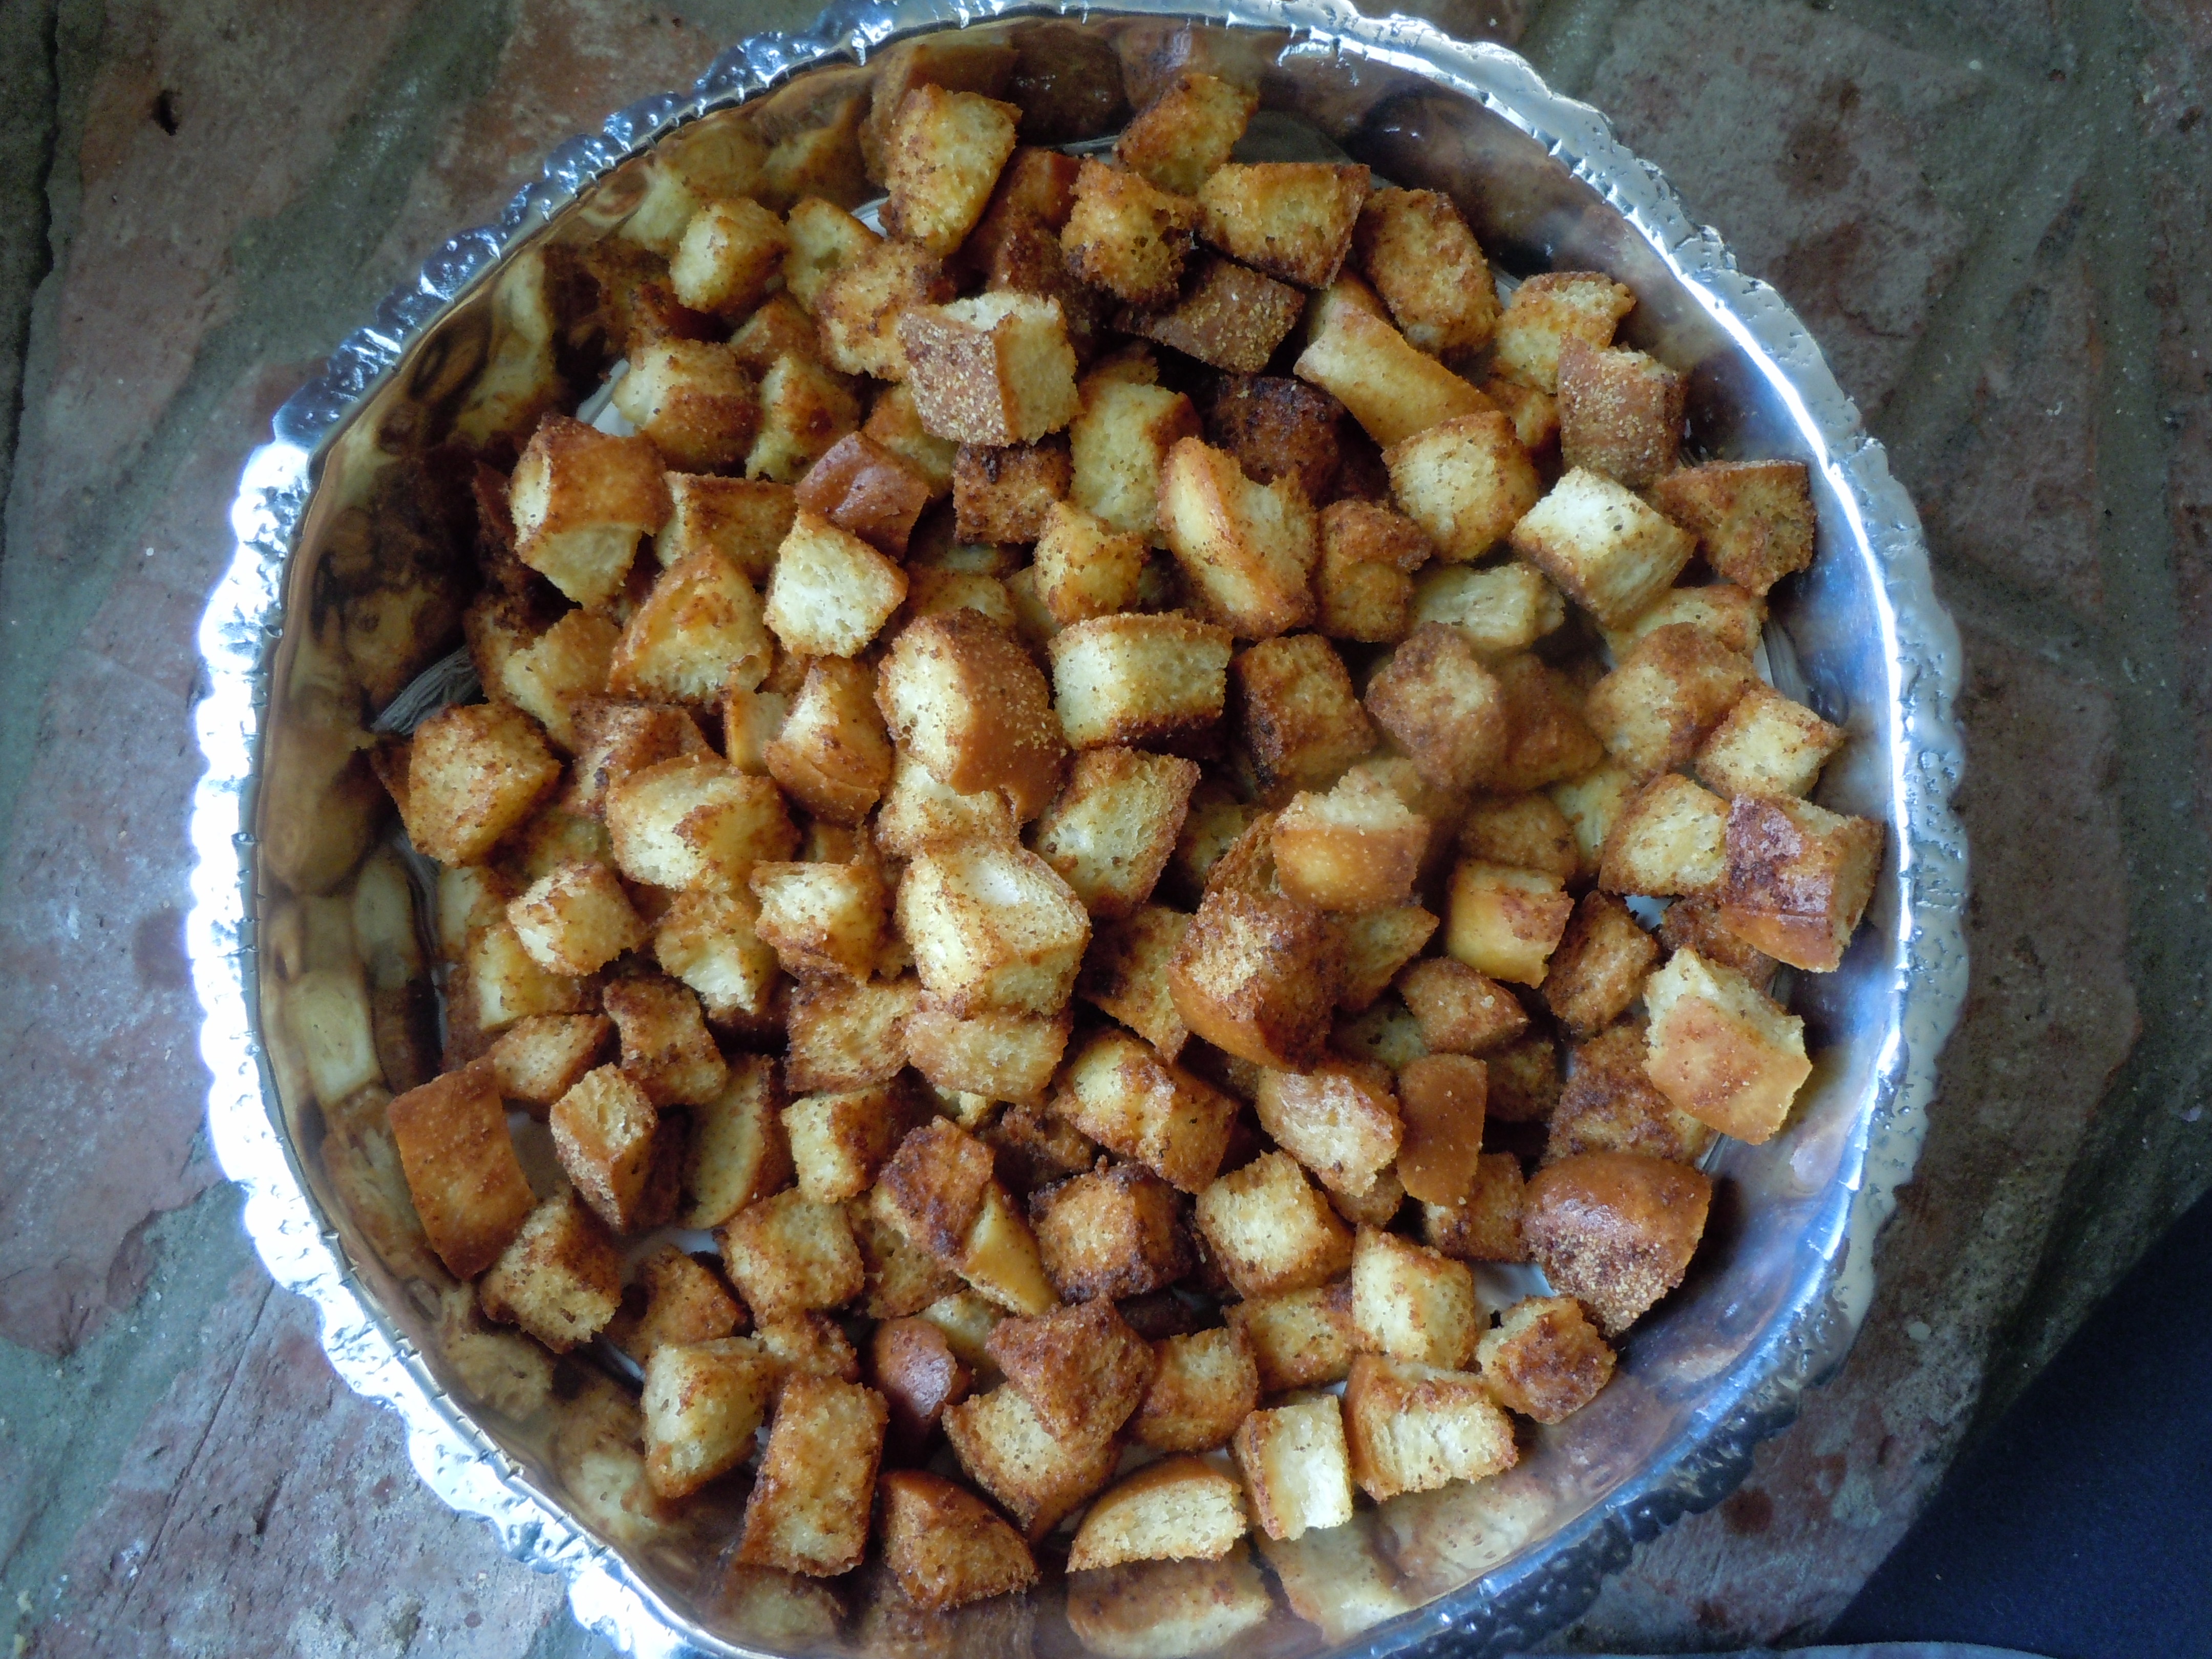
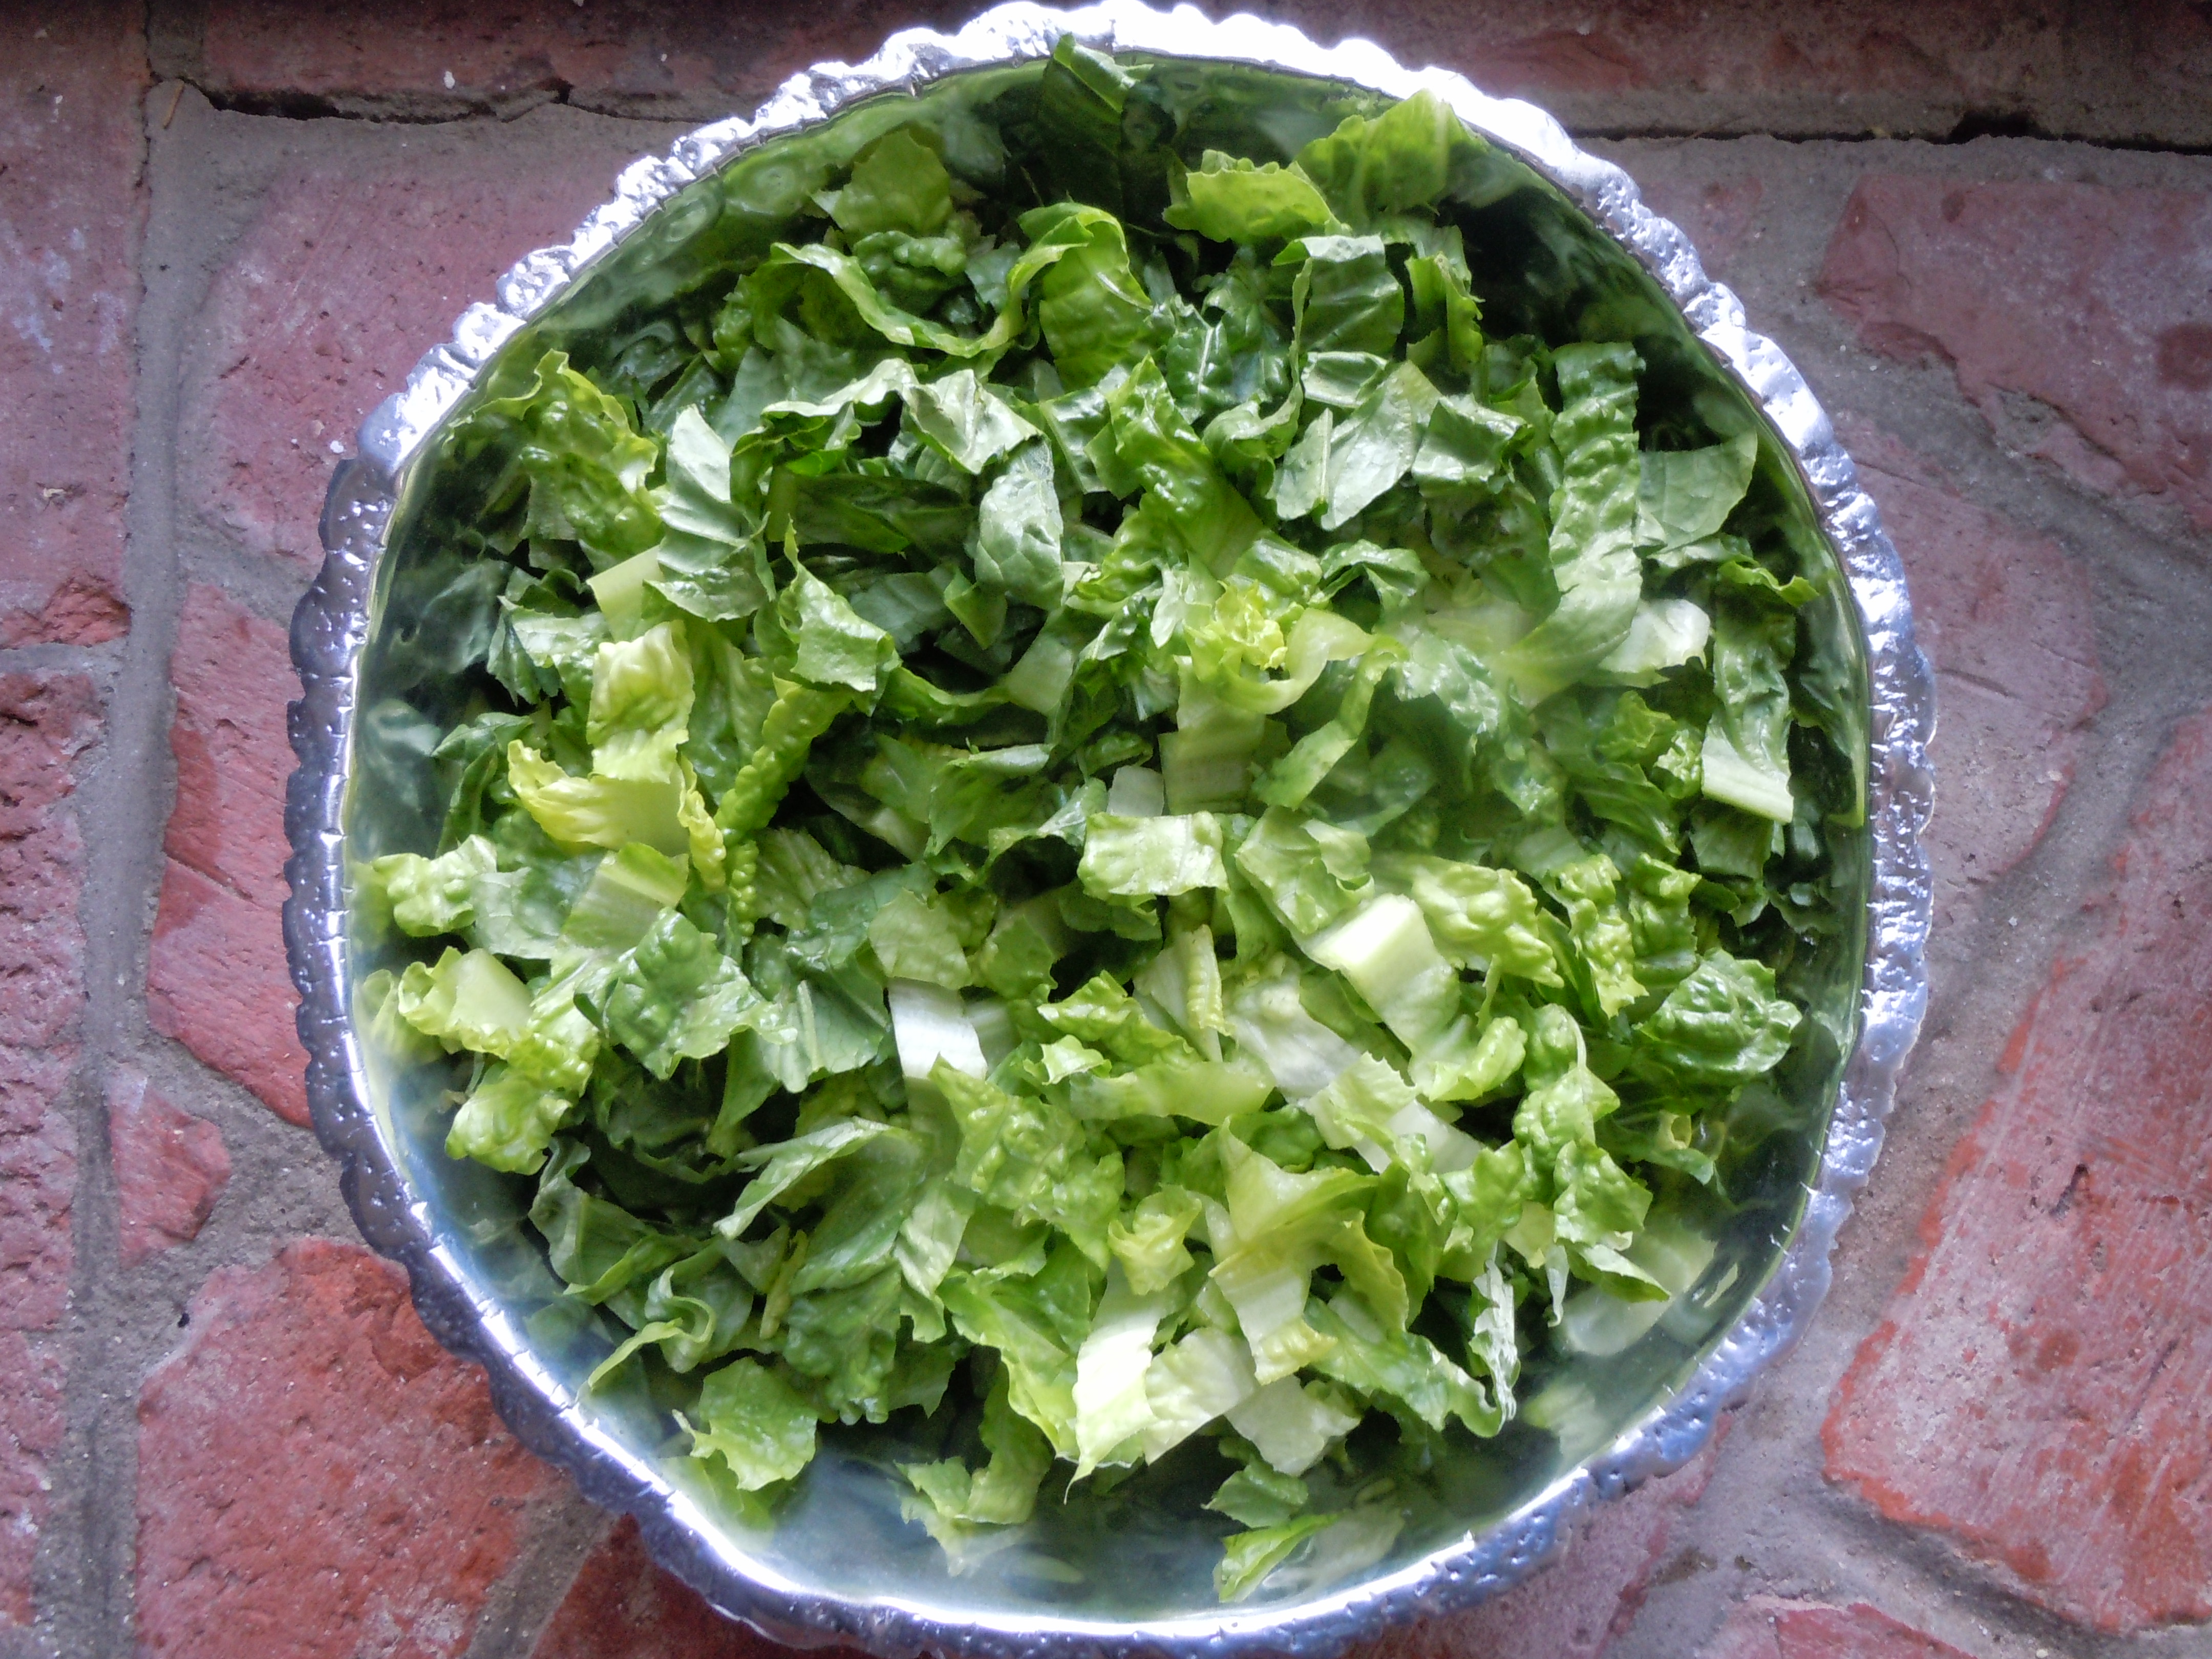
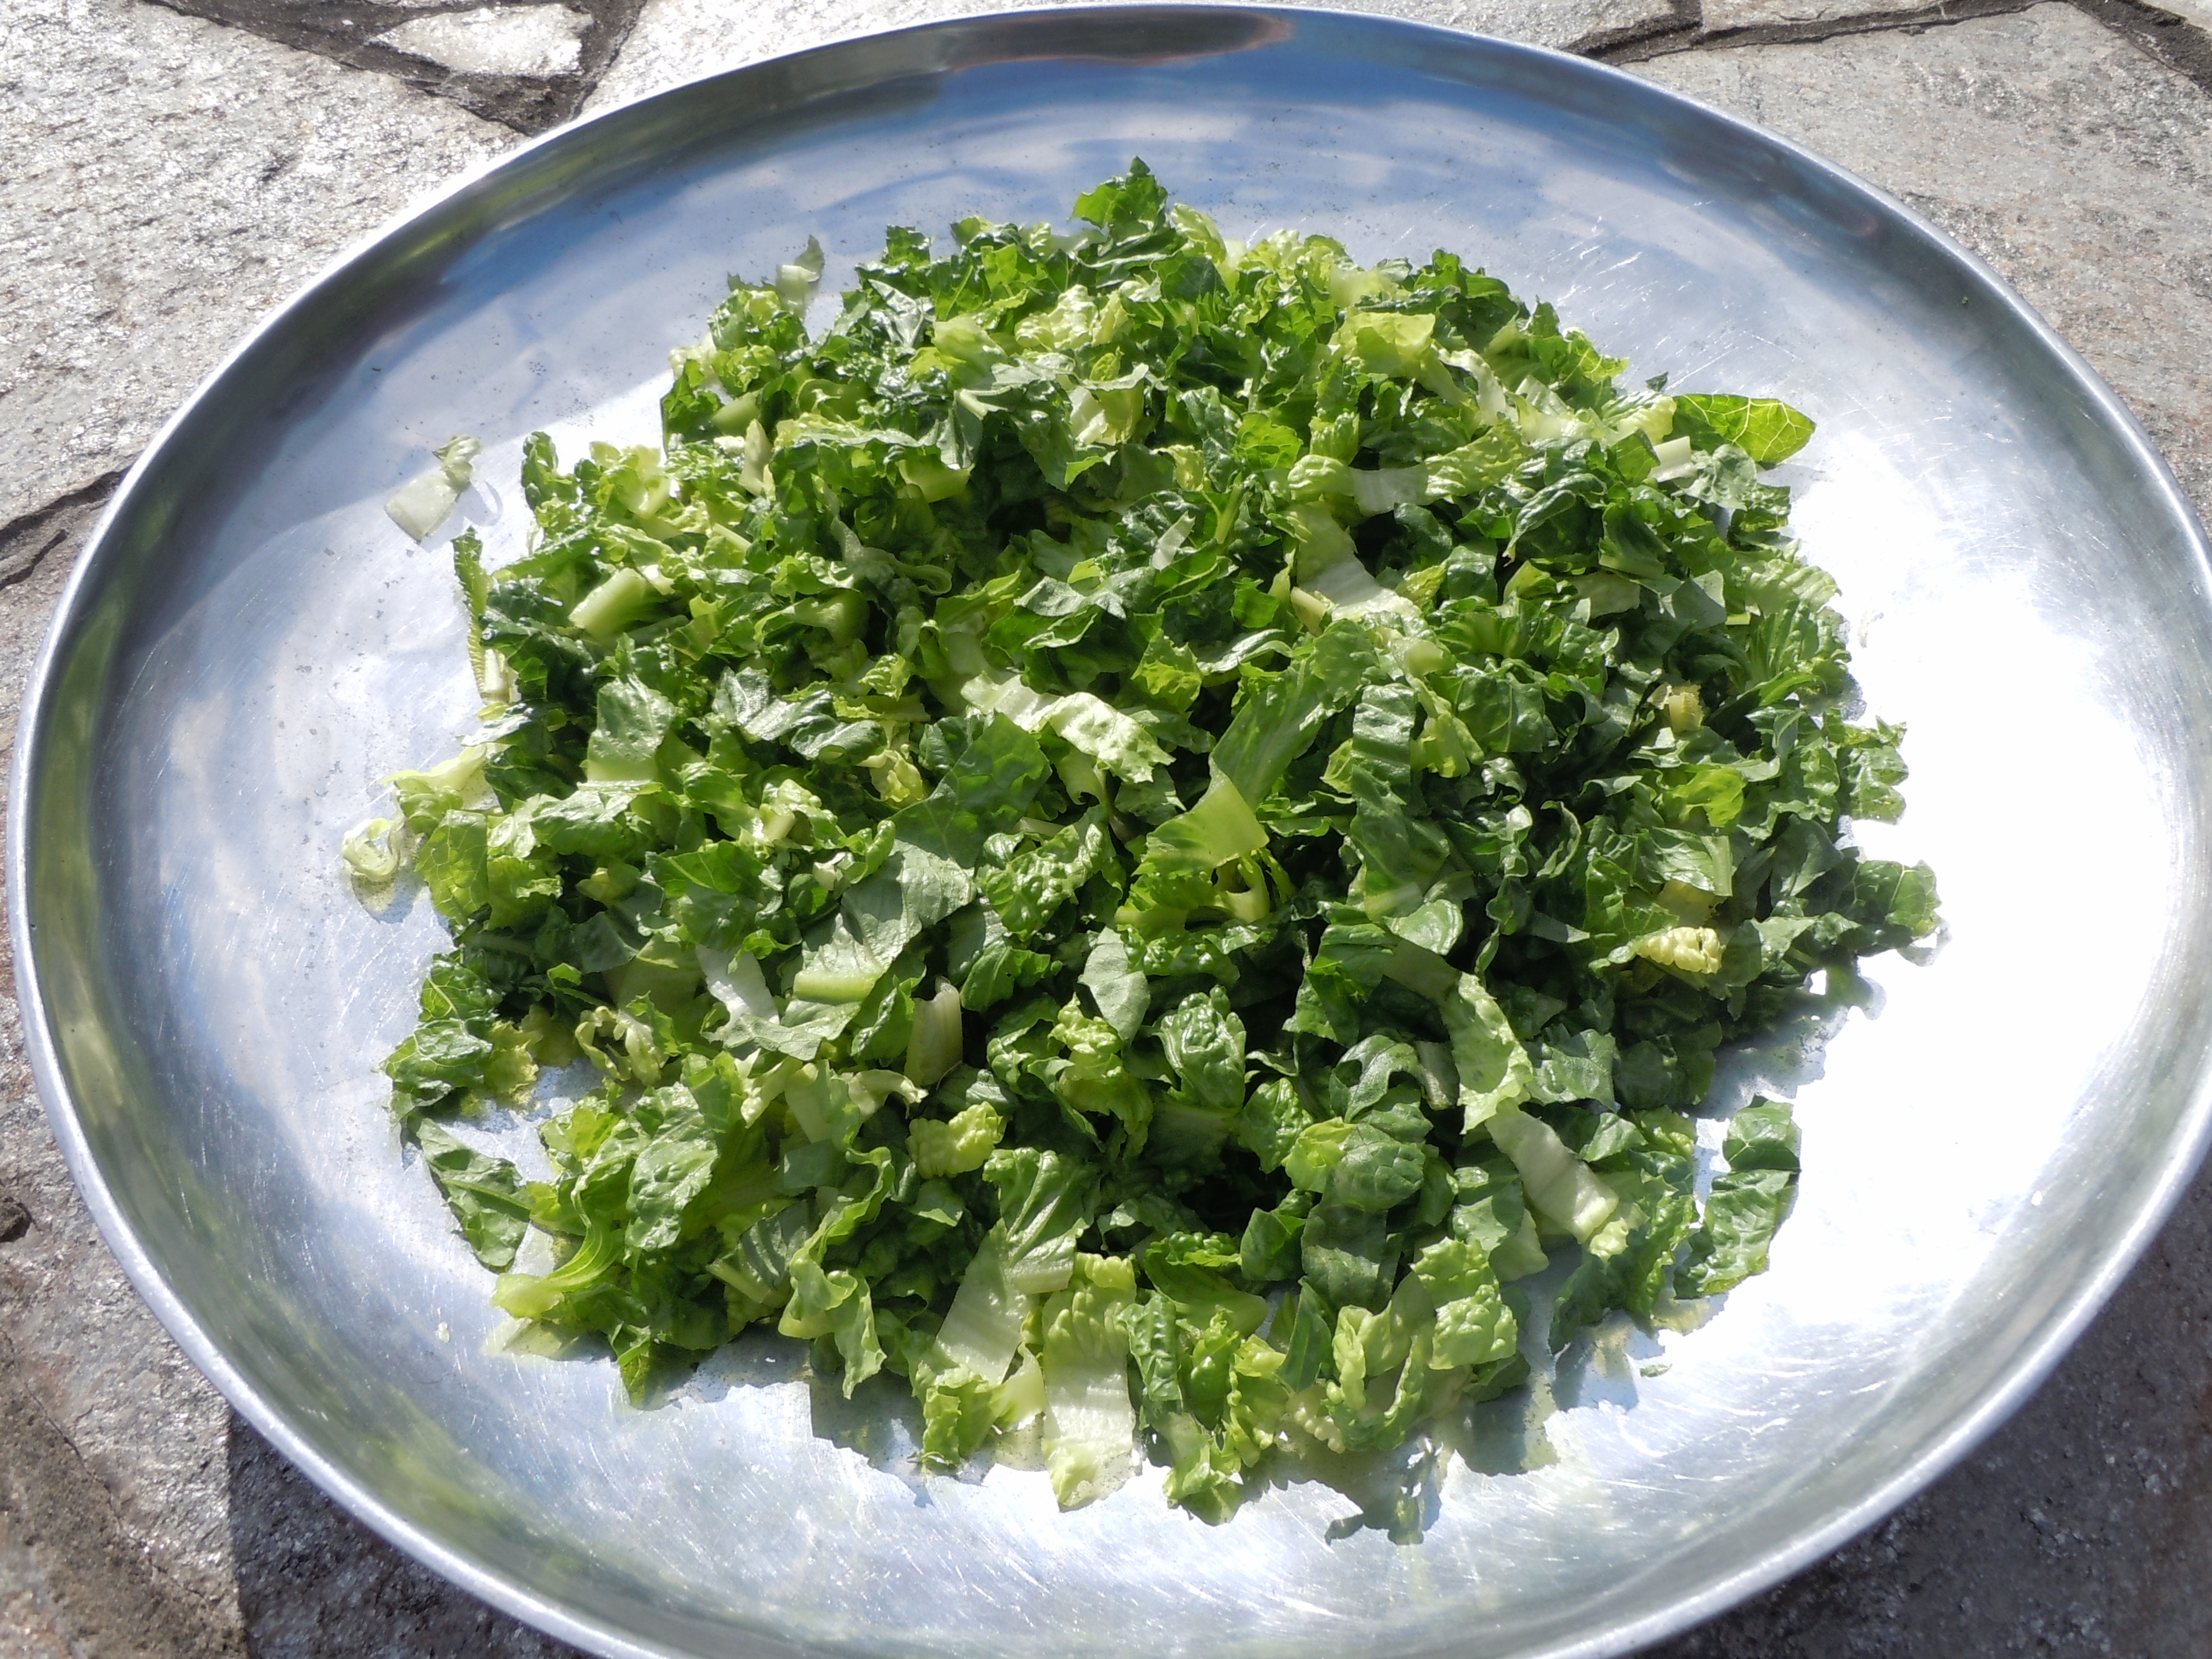
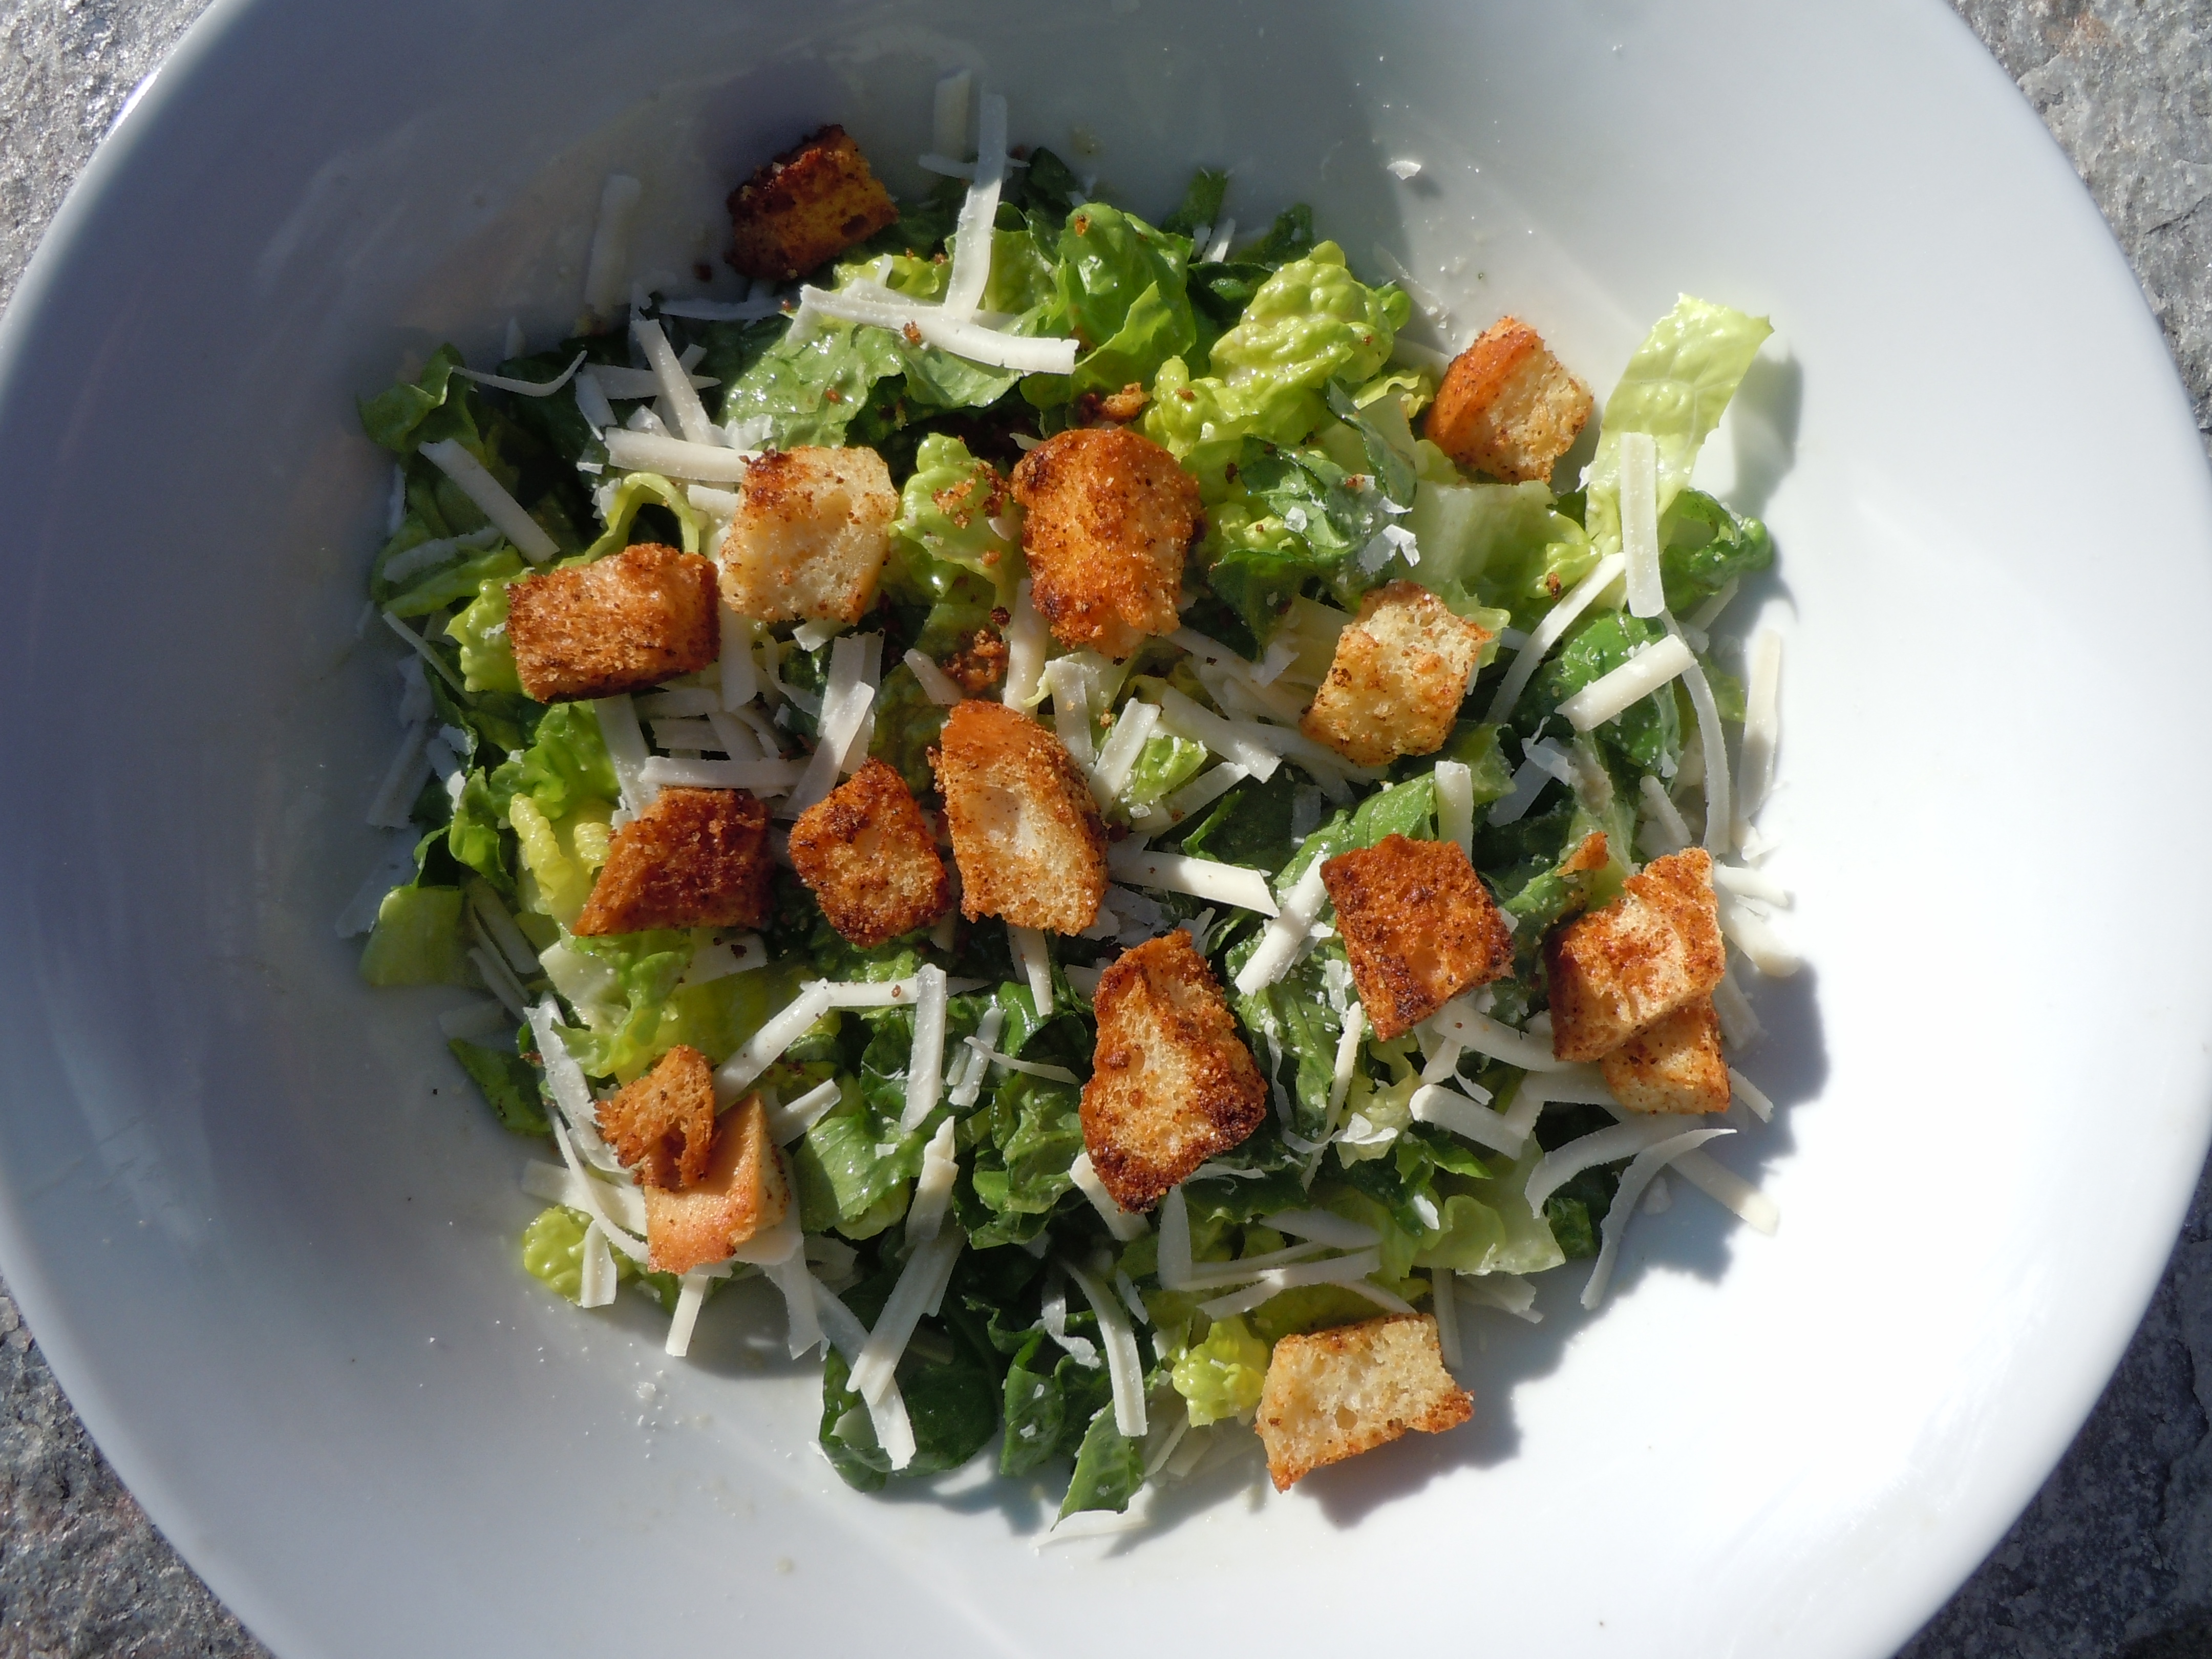
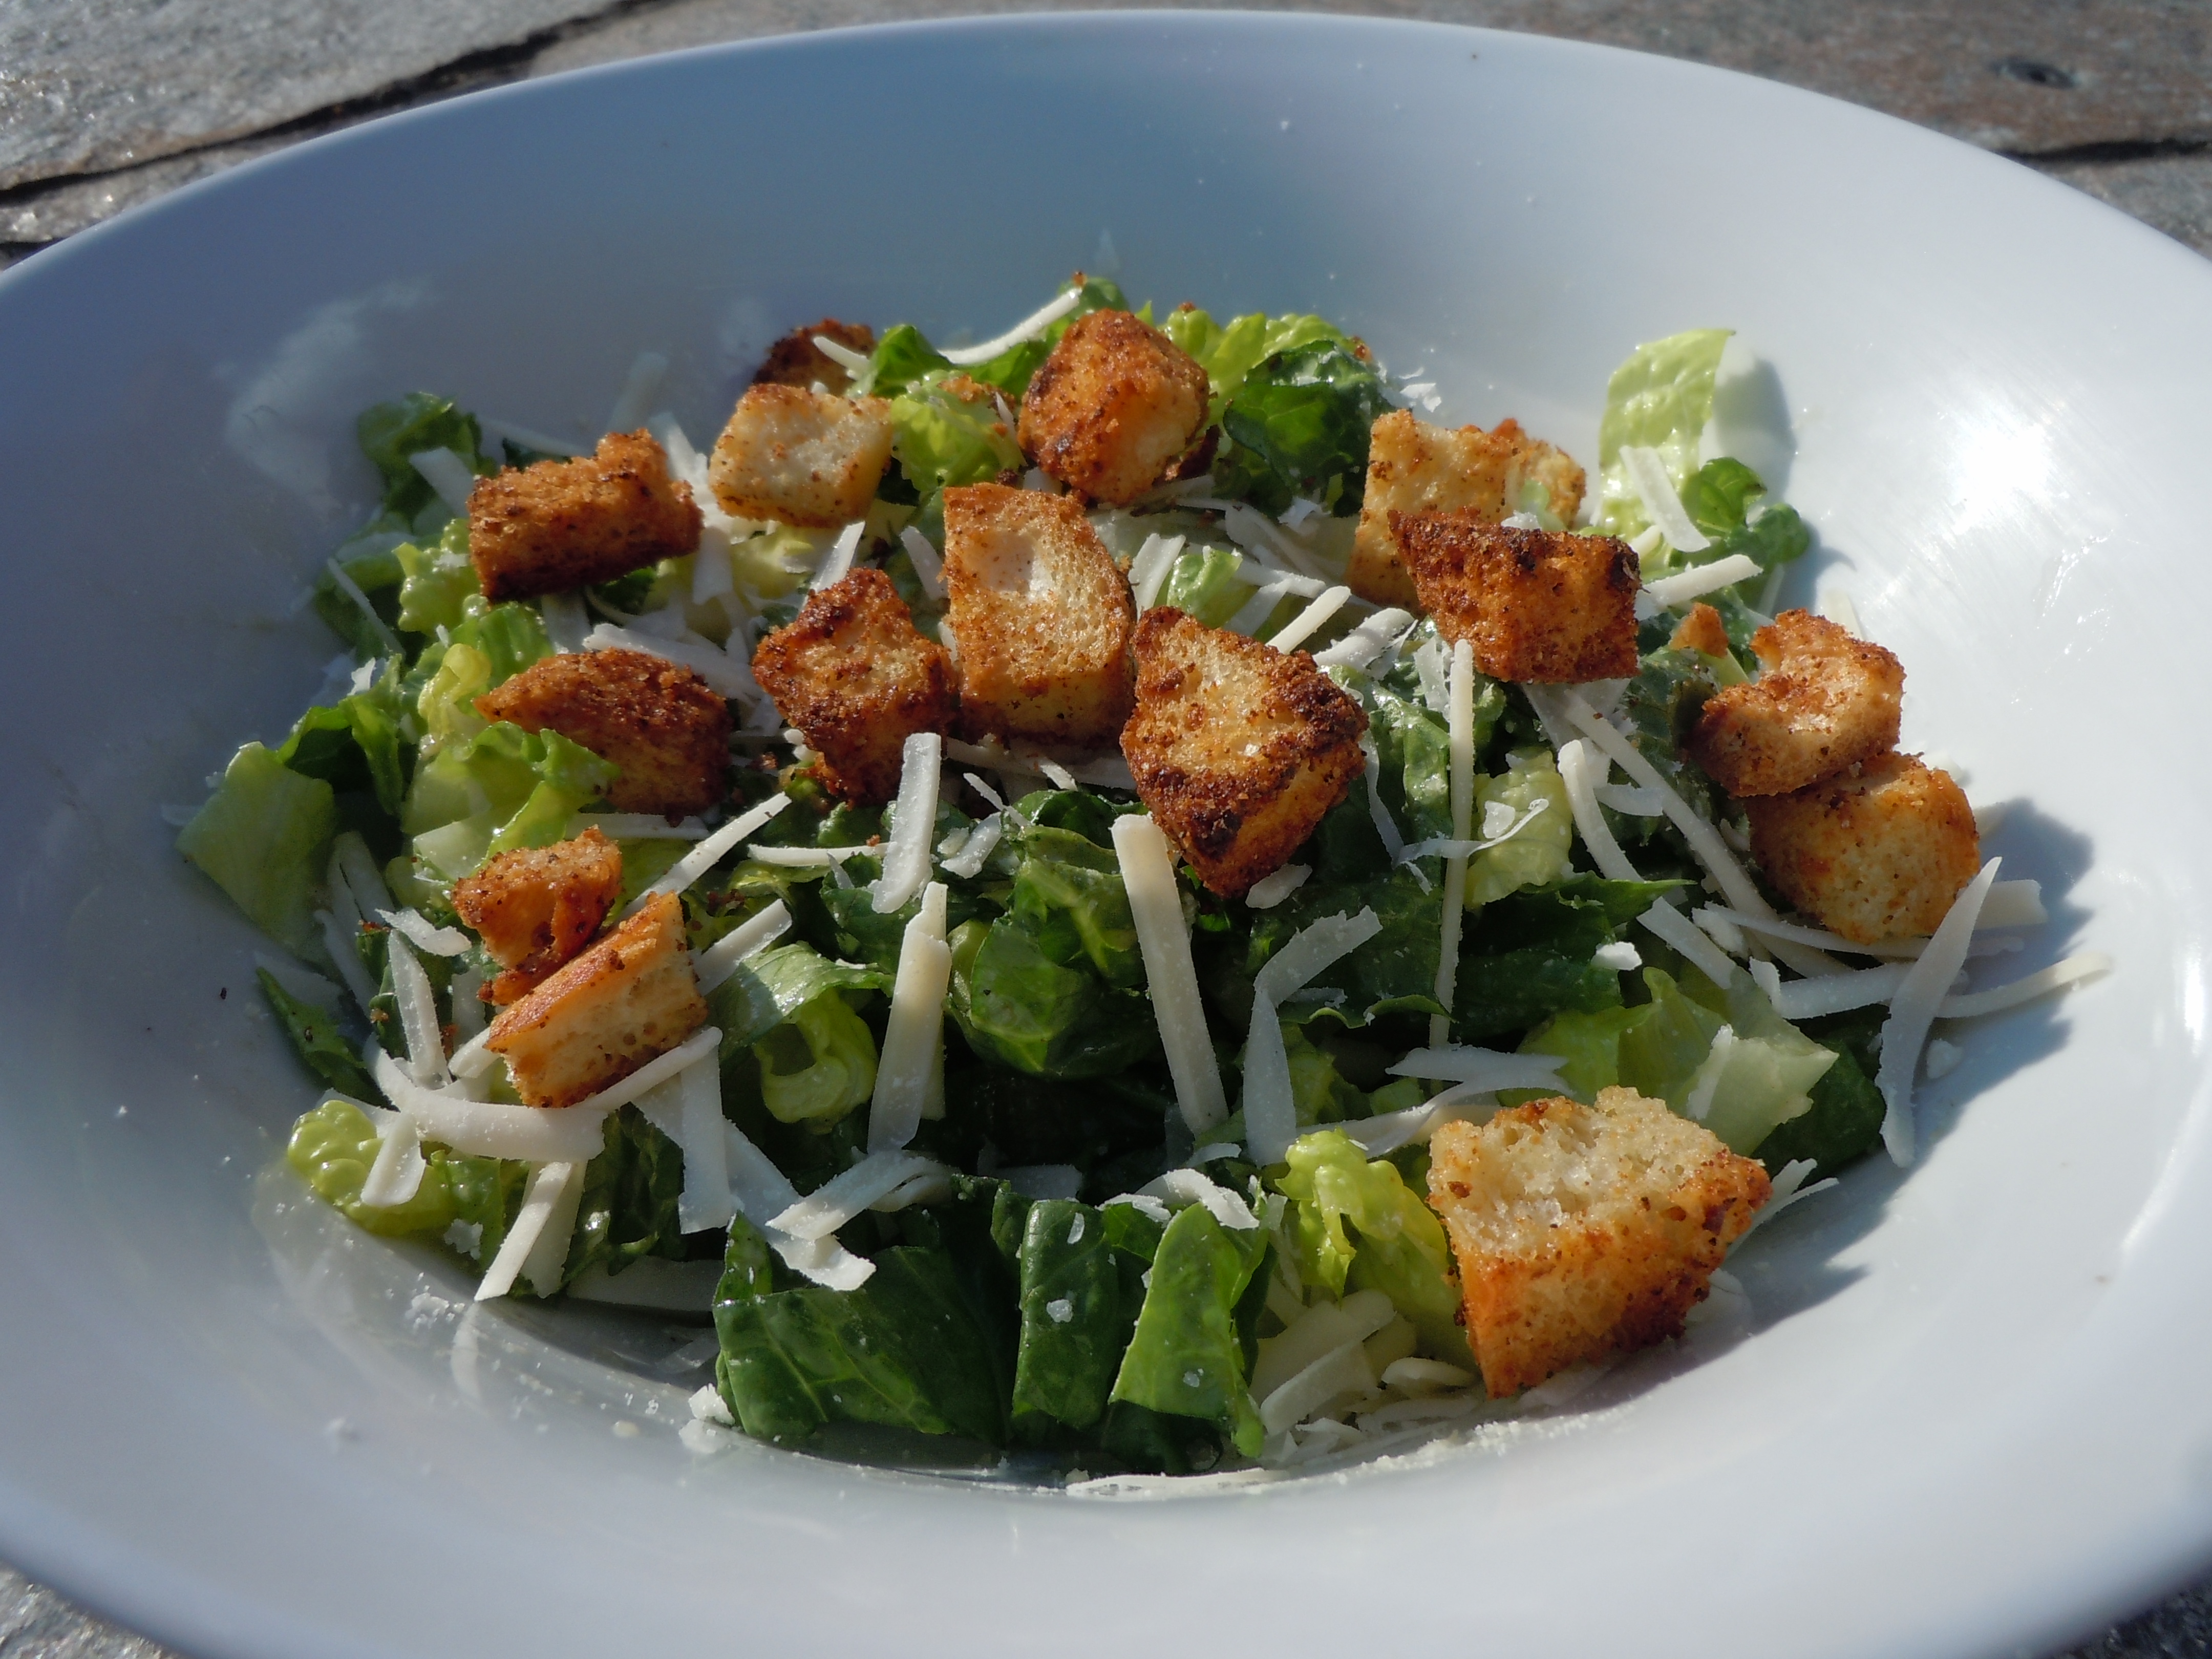
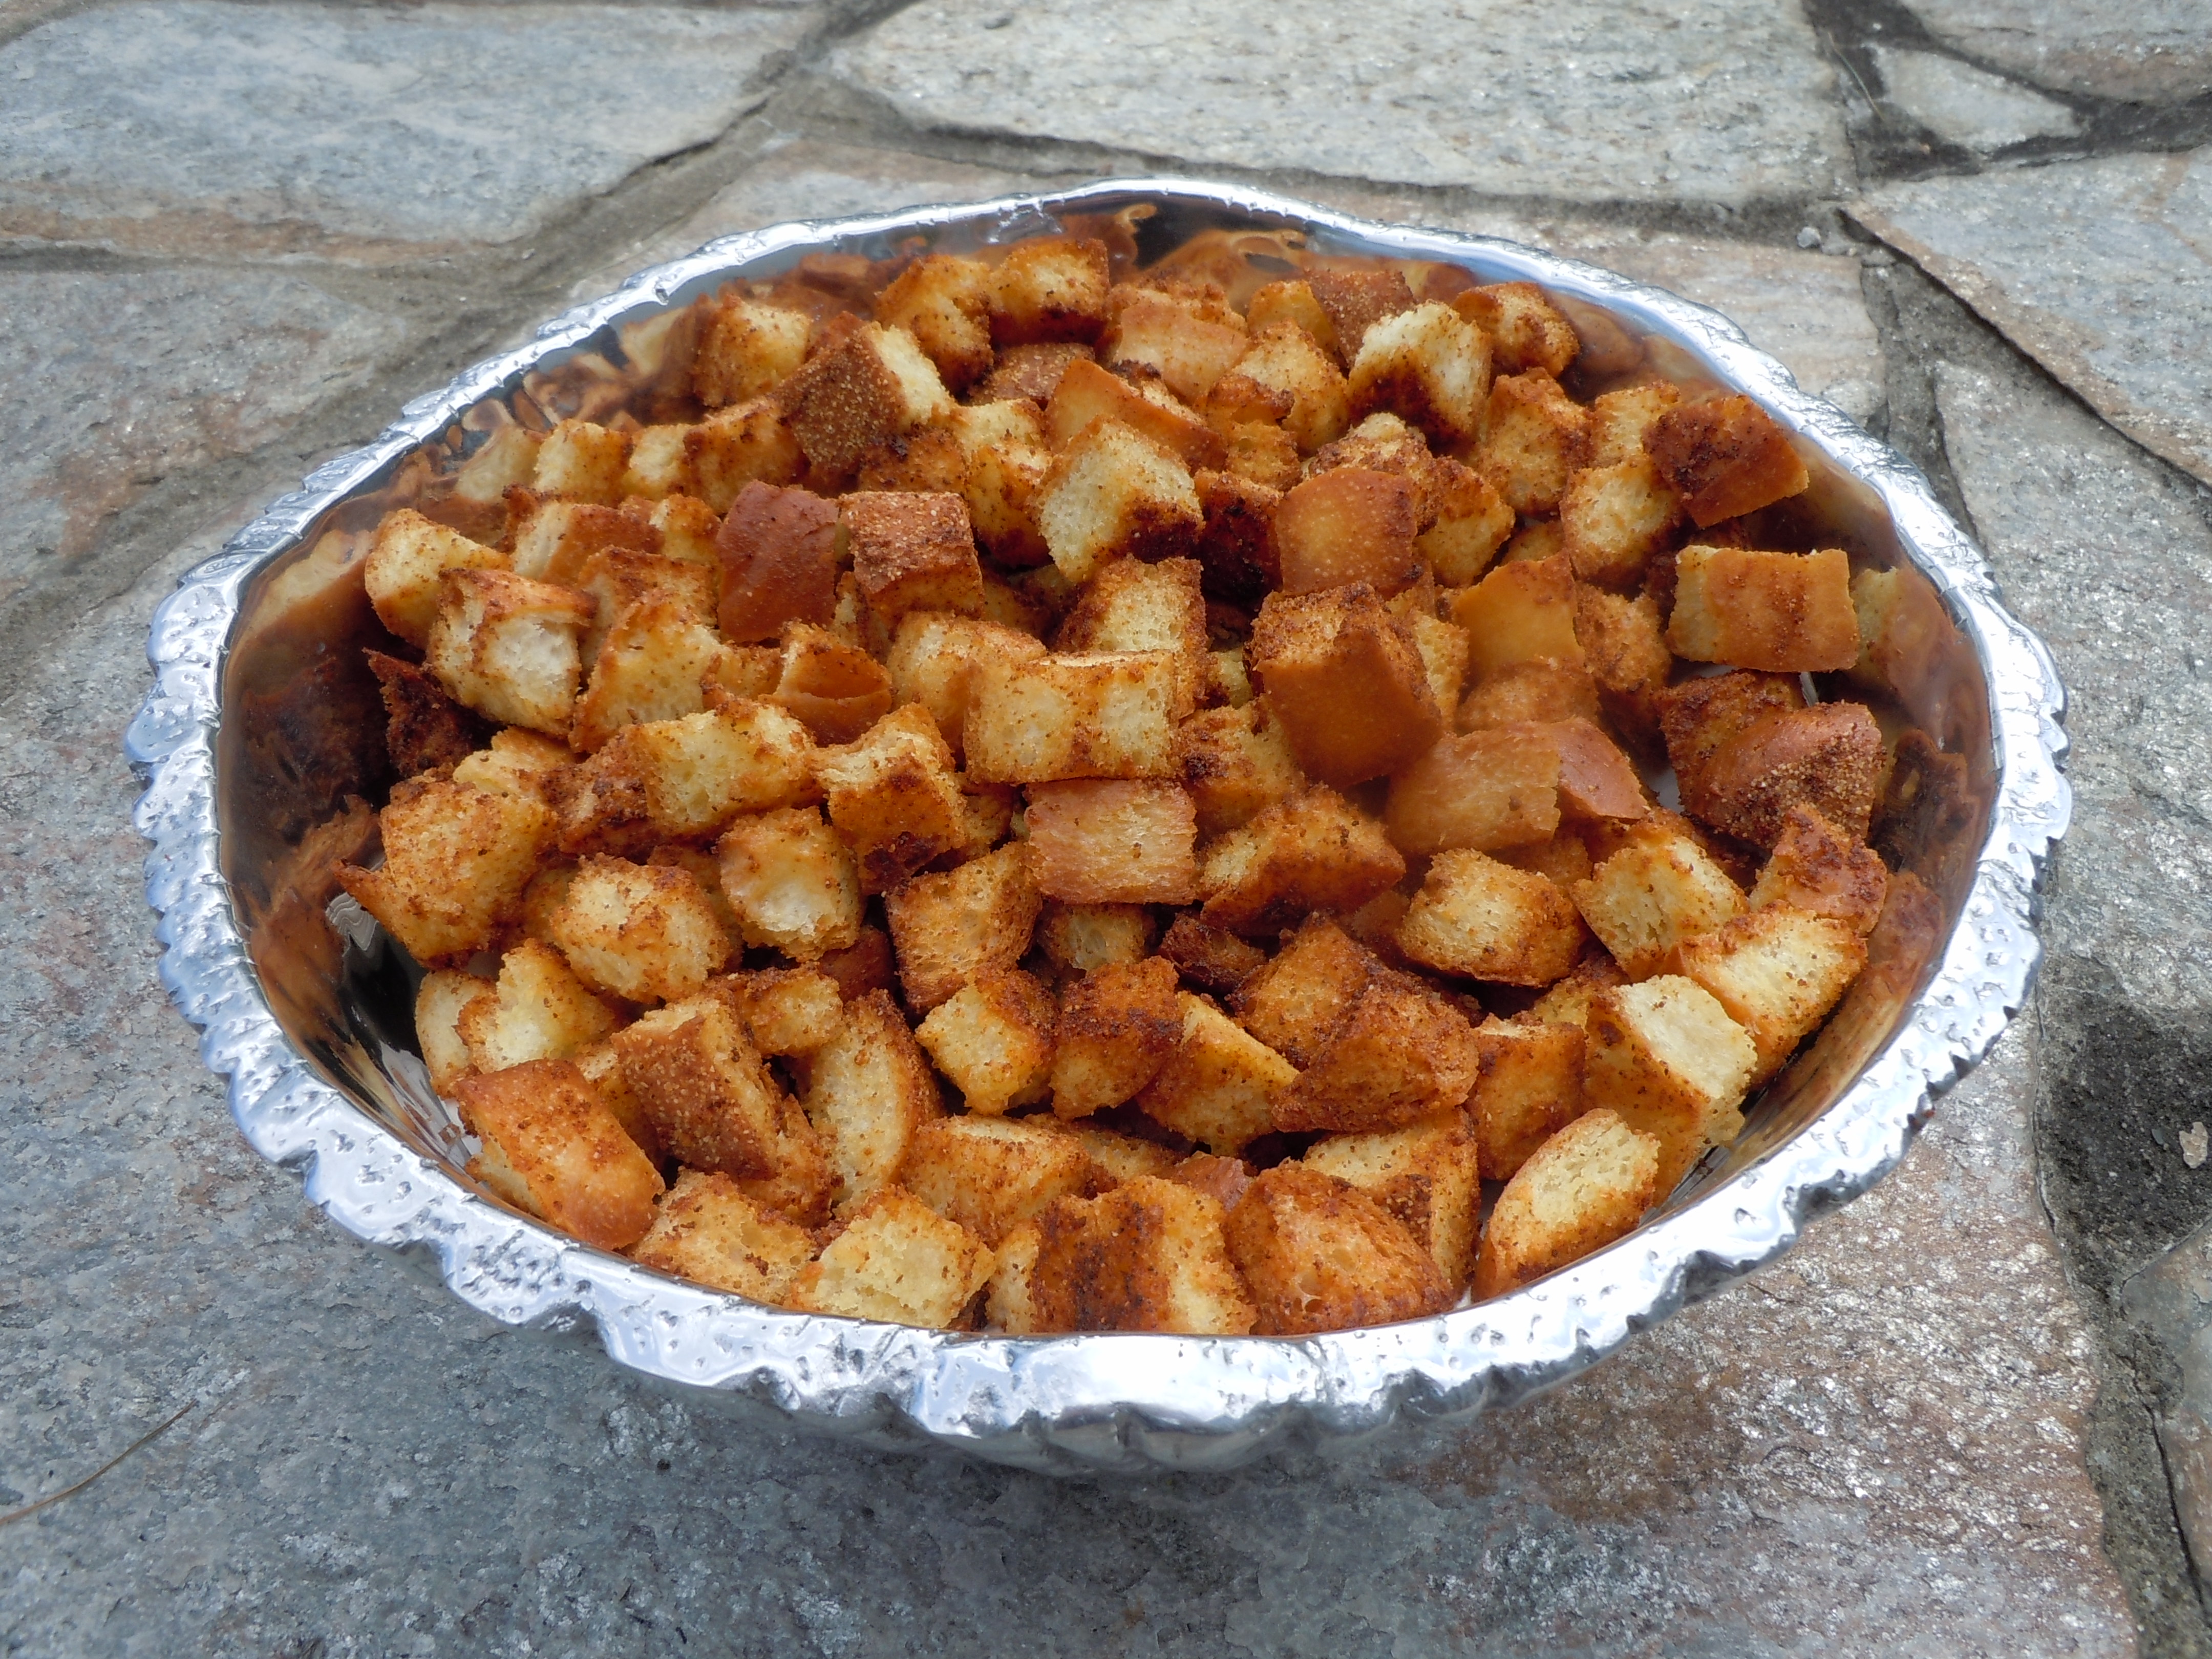
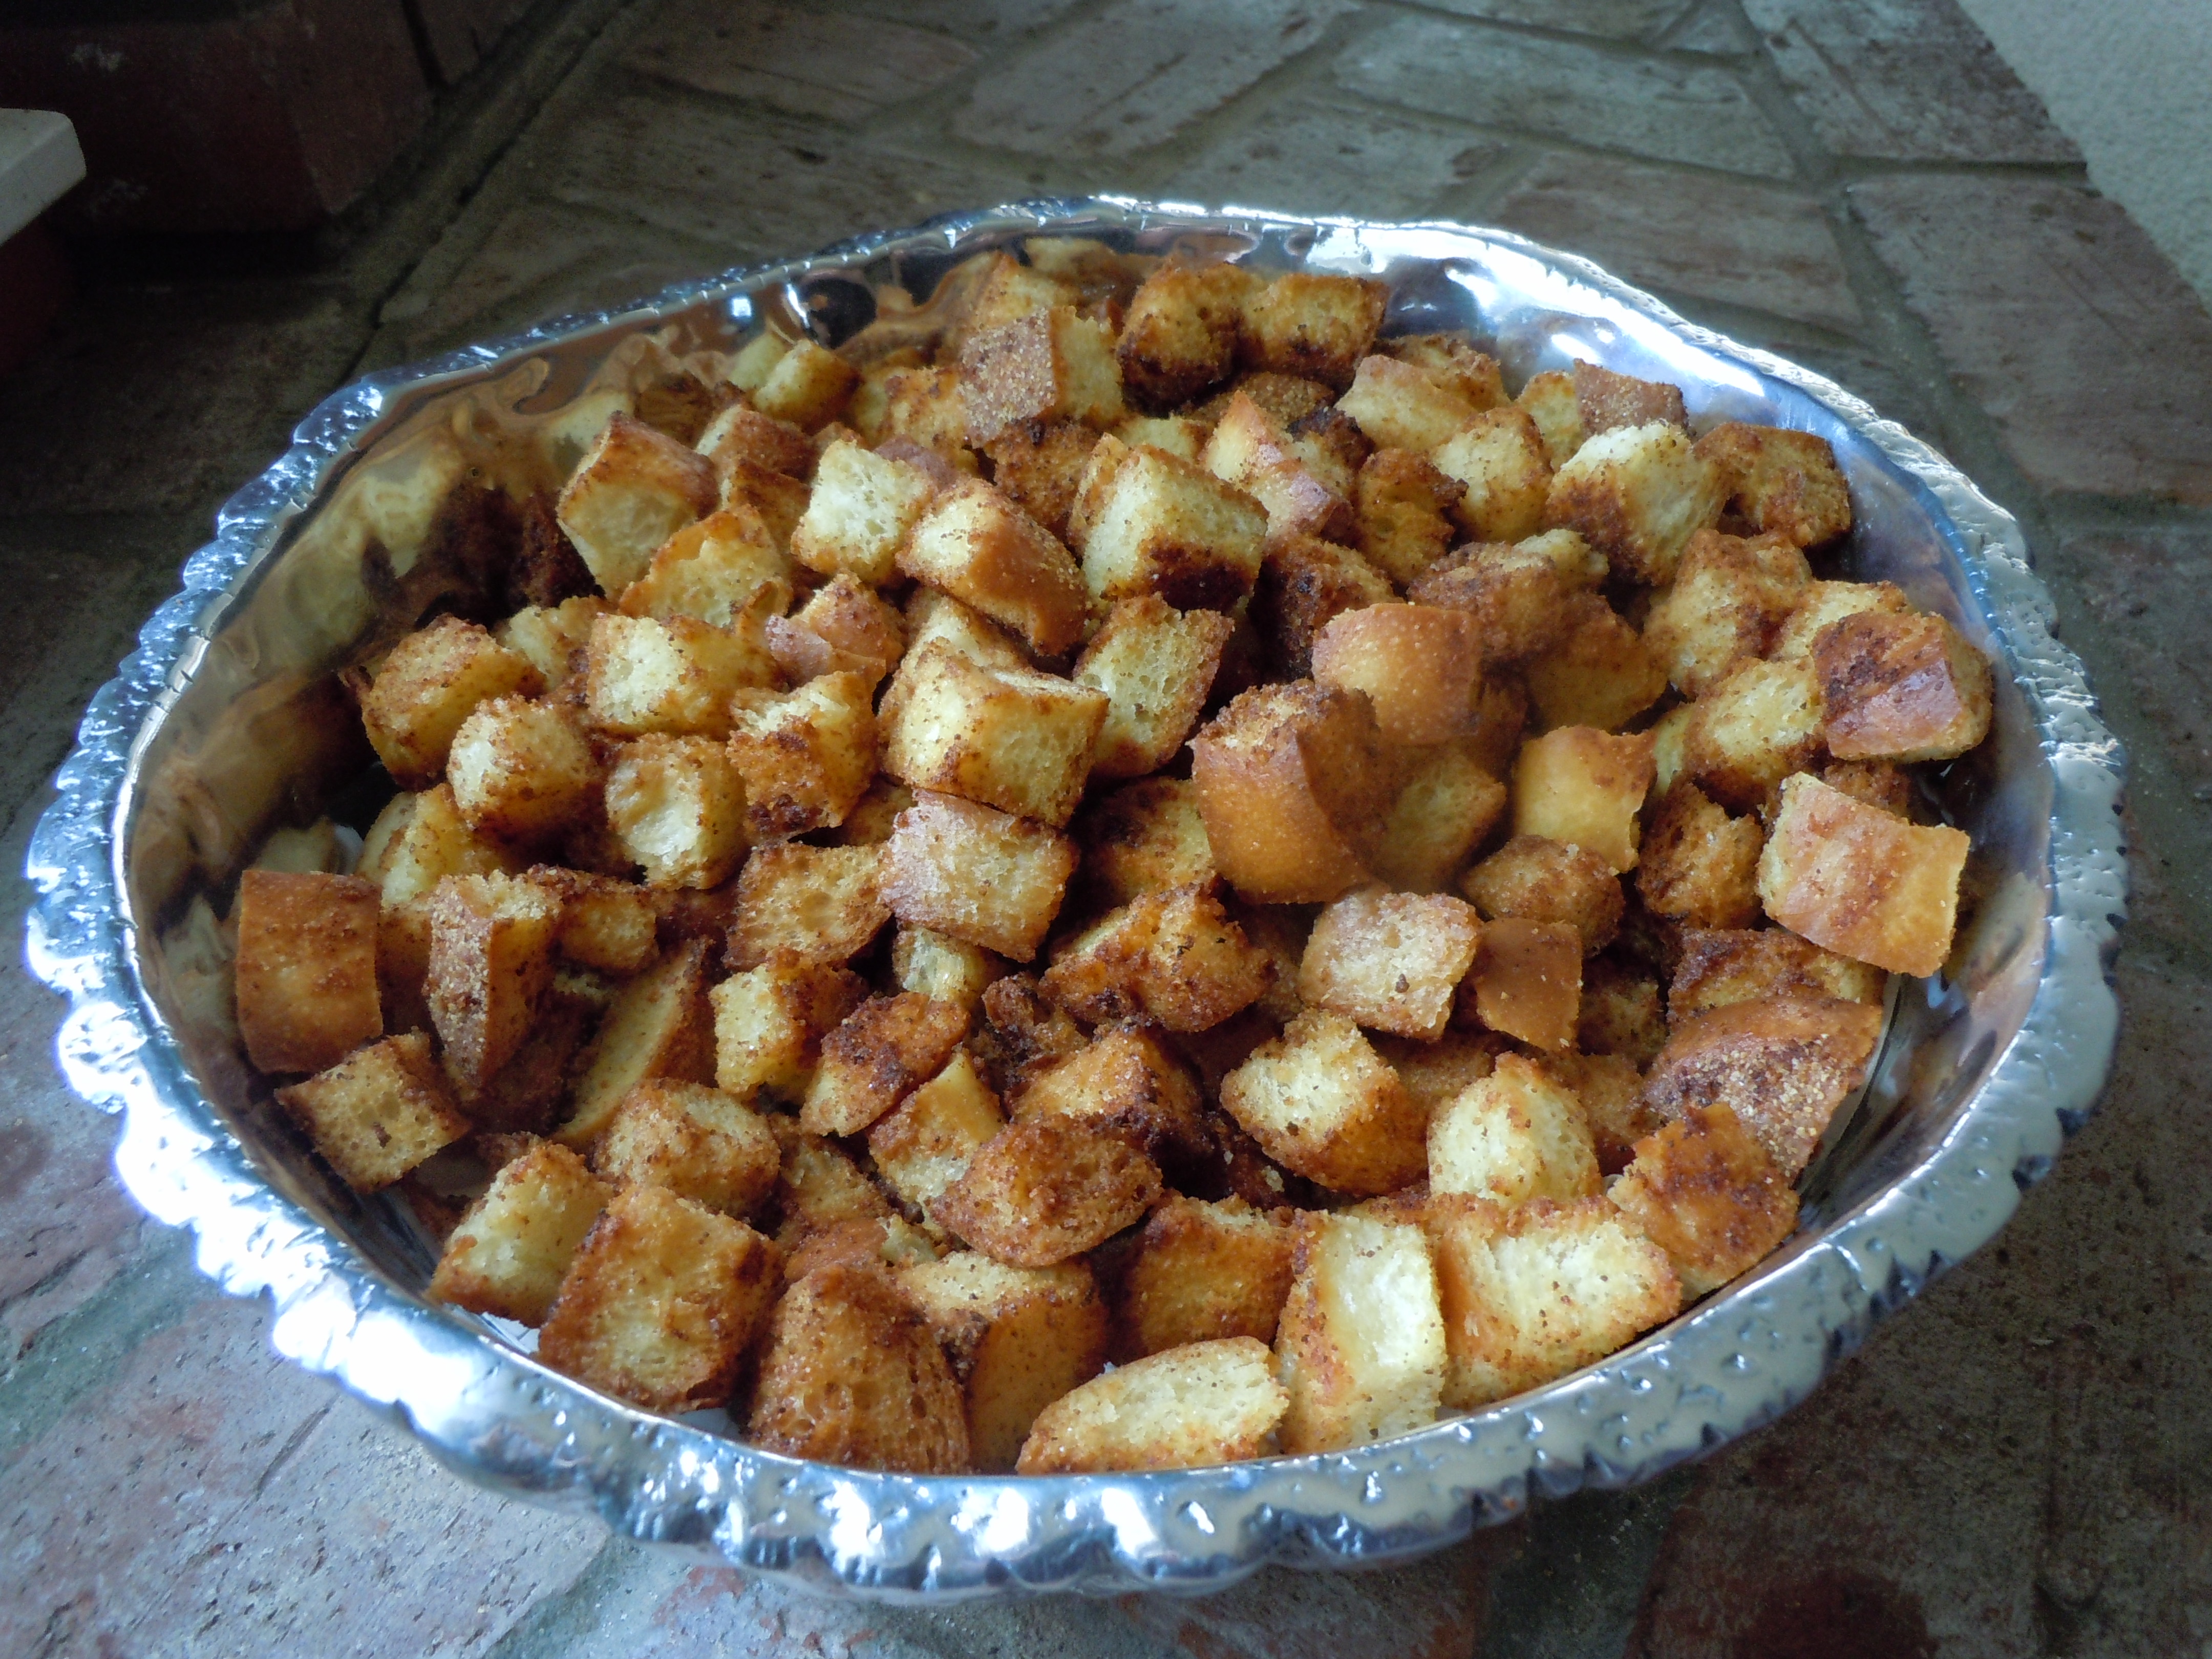
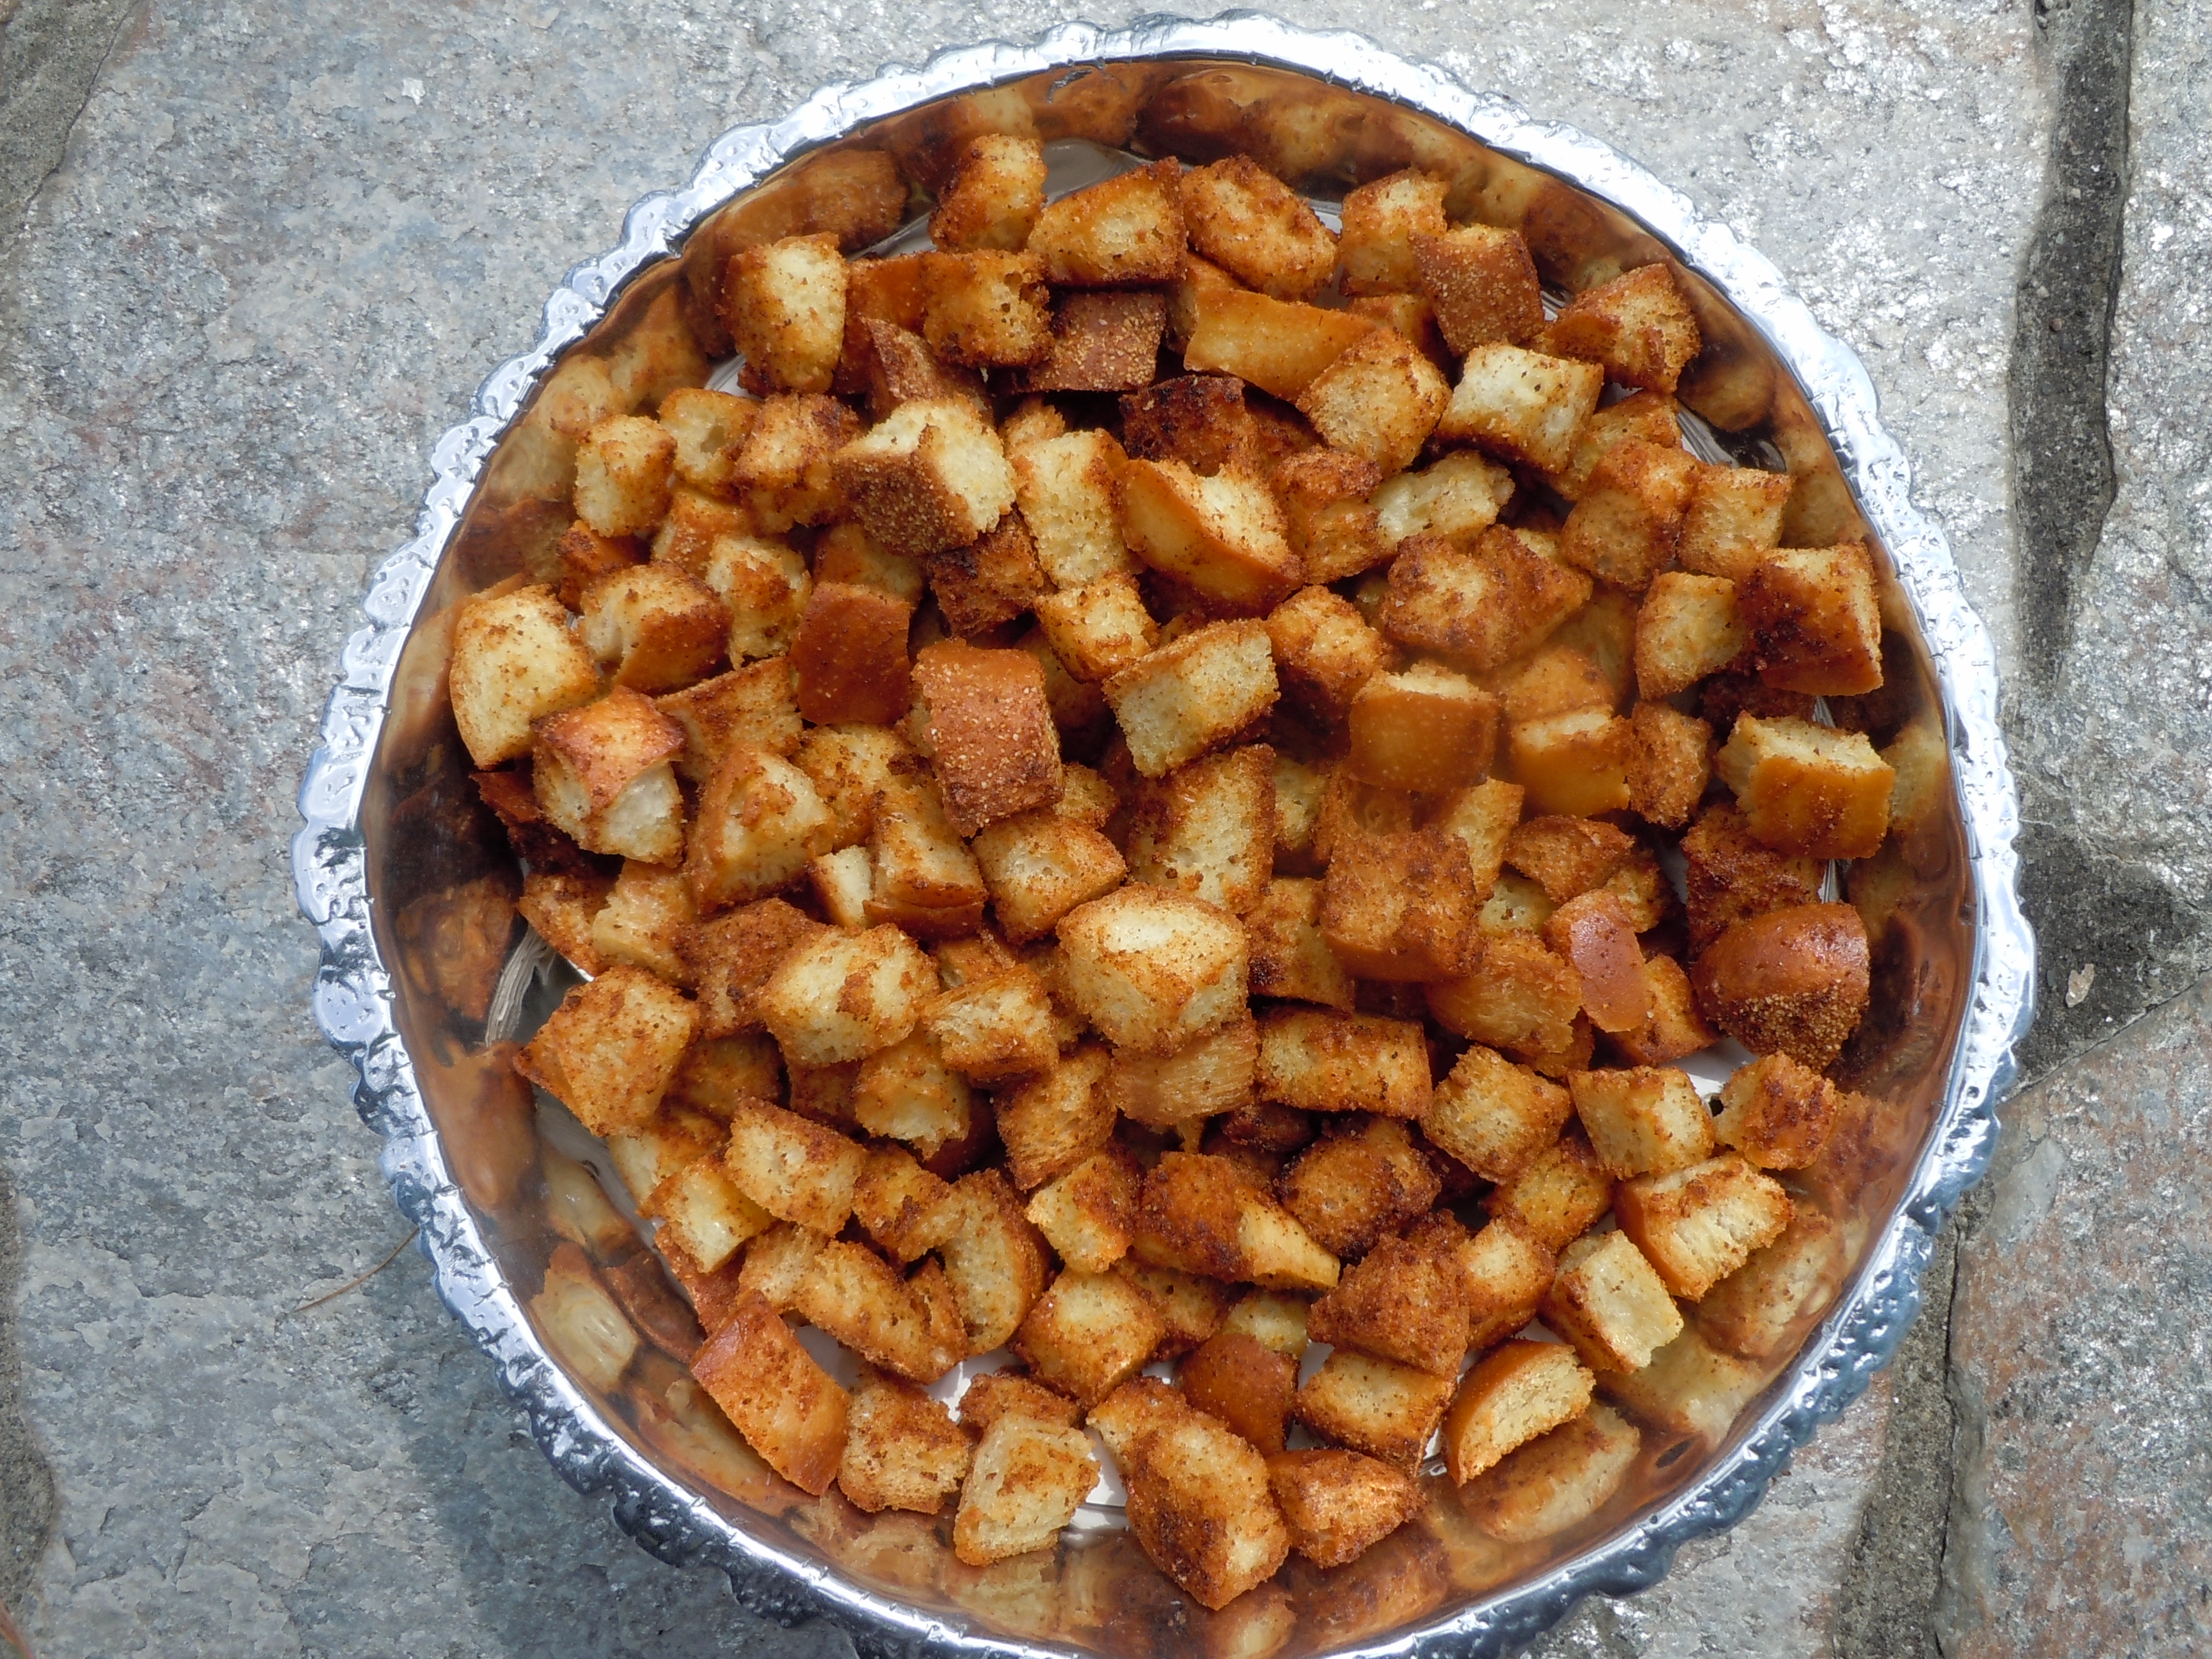
Caesar salads are probably one of my favorite salads of all time. So many wonderful flavors and textures in this combination from the crunchy garlic croutons (shown below) to the sharpness of the Reggiano Parmesano shaved on top. Then there’s a creaminess with the grated Parmesan and dijon in the actual dressing itself and a tang from the lemon and Dijon. Let’s not forget about that savory flavor in the undertones that you just can’t put your finger on with the anchovy paste and Worcestershire sauce. This Caesar salad is a winner all around!
You will really like how perfectly simple this recipe is and how you can totally make the croutons ahead of time, even weeks ahead. One of the reasons I love this recipe is the make ahead concept which makes our busy lives more enjoyable. You can make my homemade garlic croutons weeks ahead and keep them fresh in a Ziploc baggie in the freezer. Then make my gourmet Caesar salad dressing the morning of your event storing it in a container in the refrigerator until needed. Last but not least the romaine, which you can clean and cut up the night before storing that in a Ziploc baggie while taking the air out ensuring the freshness as I show you in my VIDEO. Cutting up the romaine into 1/2″ strips is key to serving this at a party or picnic making it easy to eat and eliminating the need for unnecessary utensils.
Now there’s the whole dilemma on whether or not to use a raw egg yolk. If I am having a small group of foodie friends over I would definitely add in a raw egg yolk to my Caesar salad dressing because it makes it that much more decadent. If you have never tried it with a farm fresh or organic egg yolk yet you should definitely treat yourself! When I do use an egg yolk I drizzle in the full half cup of olive oil and also add in an extra tablespoon or two of rice wine vinegar and lemon juice . Adding in a tablespoon extra of each will give it a nice balance. It’s basically to get the desired thickness you want because that added yolk offers up an extra thick and creaminess to the dressing this way you thin it out a pinch. For the most part when I make this gourmet Caesar salad for parties and picnics where I’m not sure if there will be someone there with an allergy I play it safe and omit the raw egg. And NO, I am not worried about salmonella with the raw egg because I only use farm fresh eggs directly from the farm or organic brown eggs from the food market. The ONLY time I would buy bulk white eggs from the store is when we are boiling and dyeing eggs for a holiday like Easter. You have to be picky about your ingredients, even the eggs are very important.
A large shallow dish like the one I have in the photos and in my video show is a great investment for salads like this. I have found many gorgeous platters and bowls like this at very economical prices at stores like Home Goods and TJ Max…you should definitely check out those deals! When I have many friends over for dinner I often serve the Caesar salad in that large shallow bowl and if it’s a more intimate dinner party I even plate up individual size portions which also make for a pretty presentation.
A couple dashes of your favorite hot sauce Siracha -you can find this with the other hot sauces at the super market
2 cookie trays
DIRECTIONS FOR GARLIC CROUTONS:
Pre-heat oven to 400º
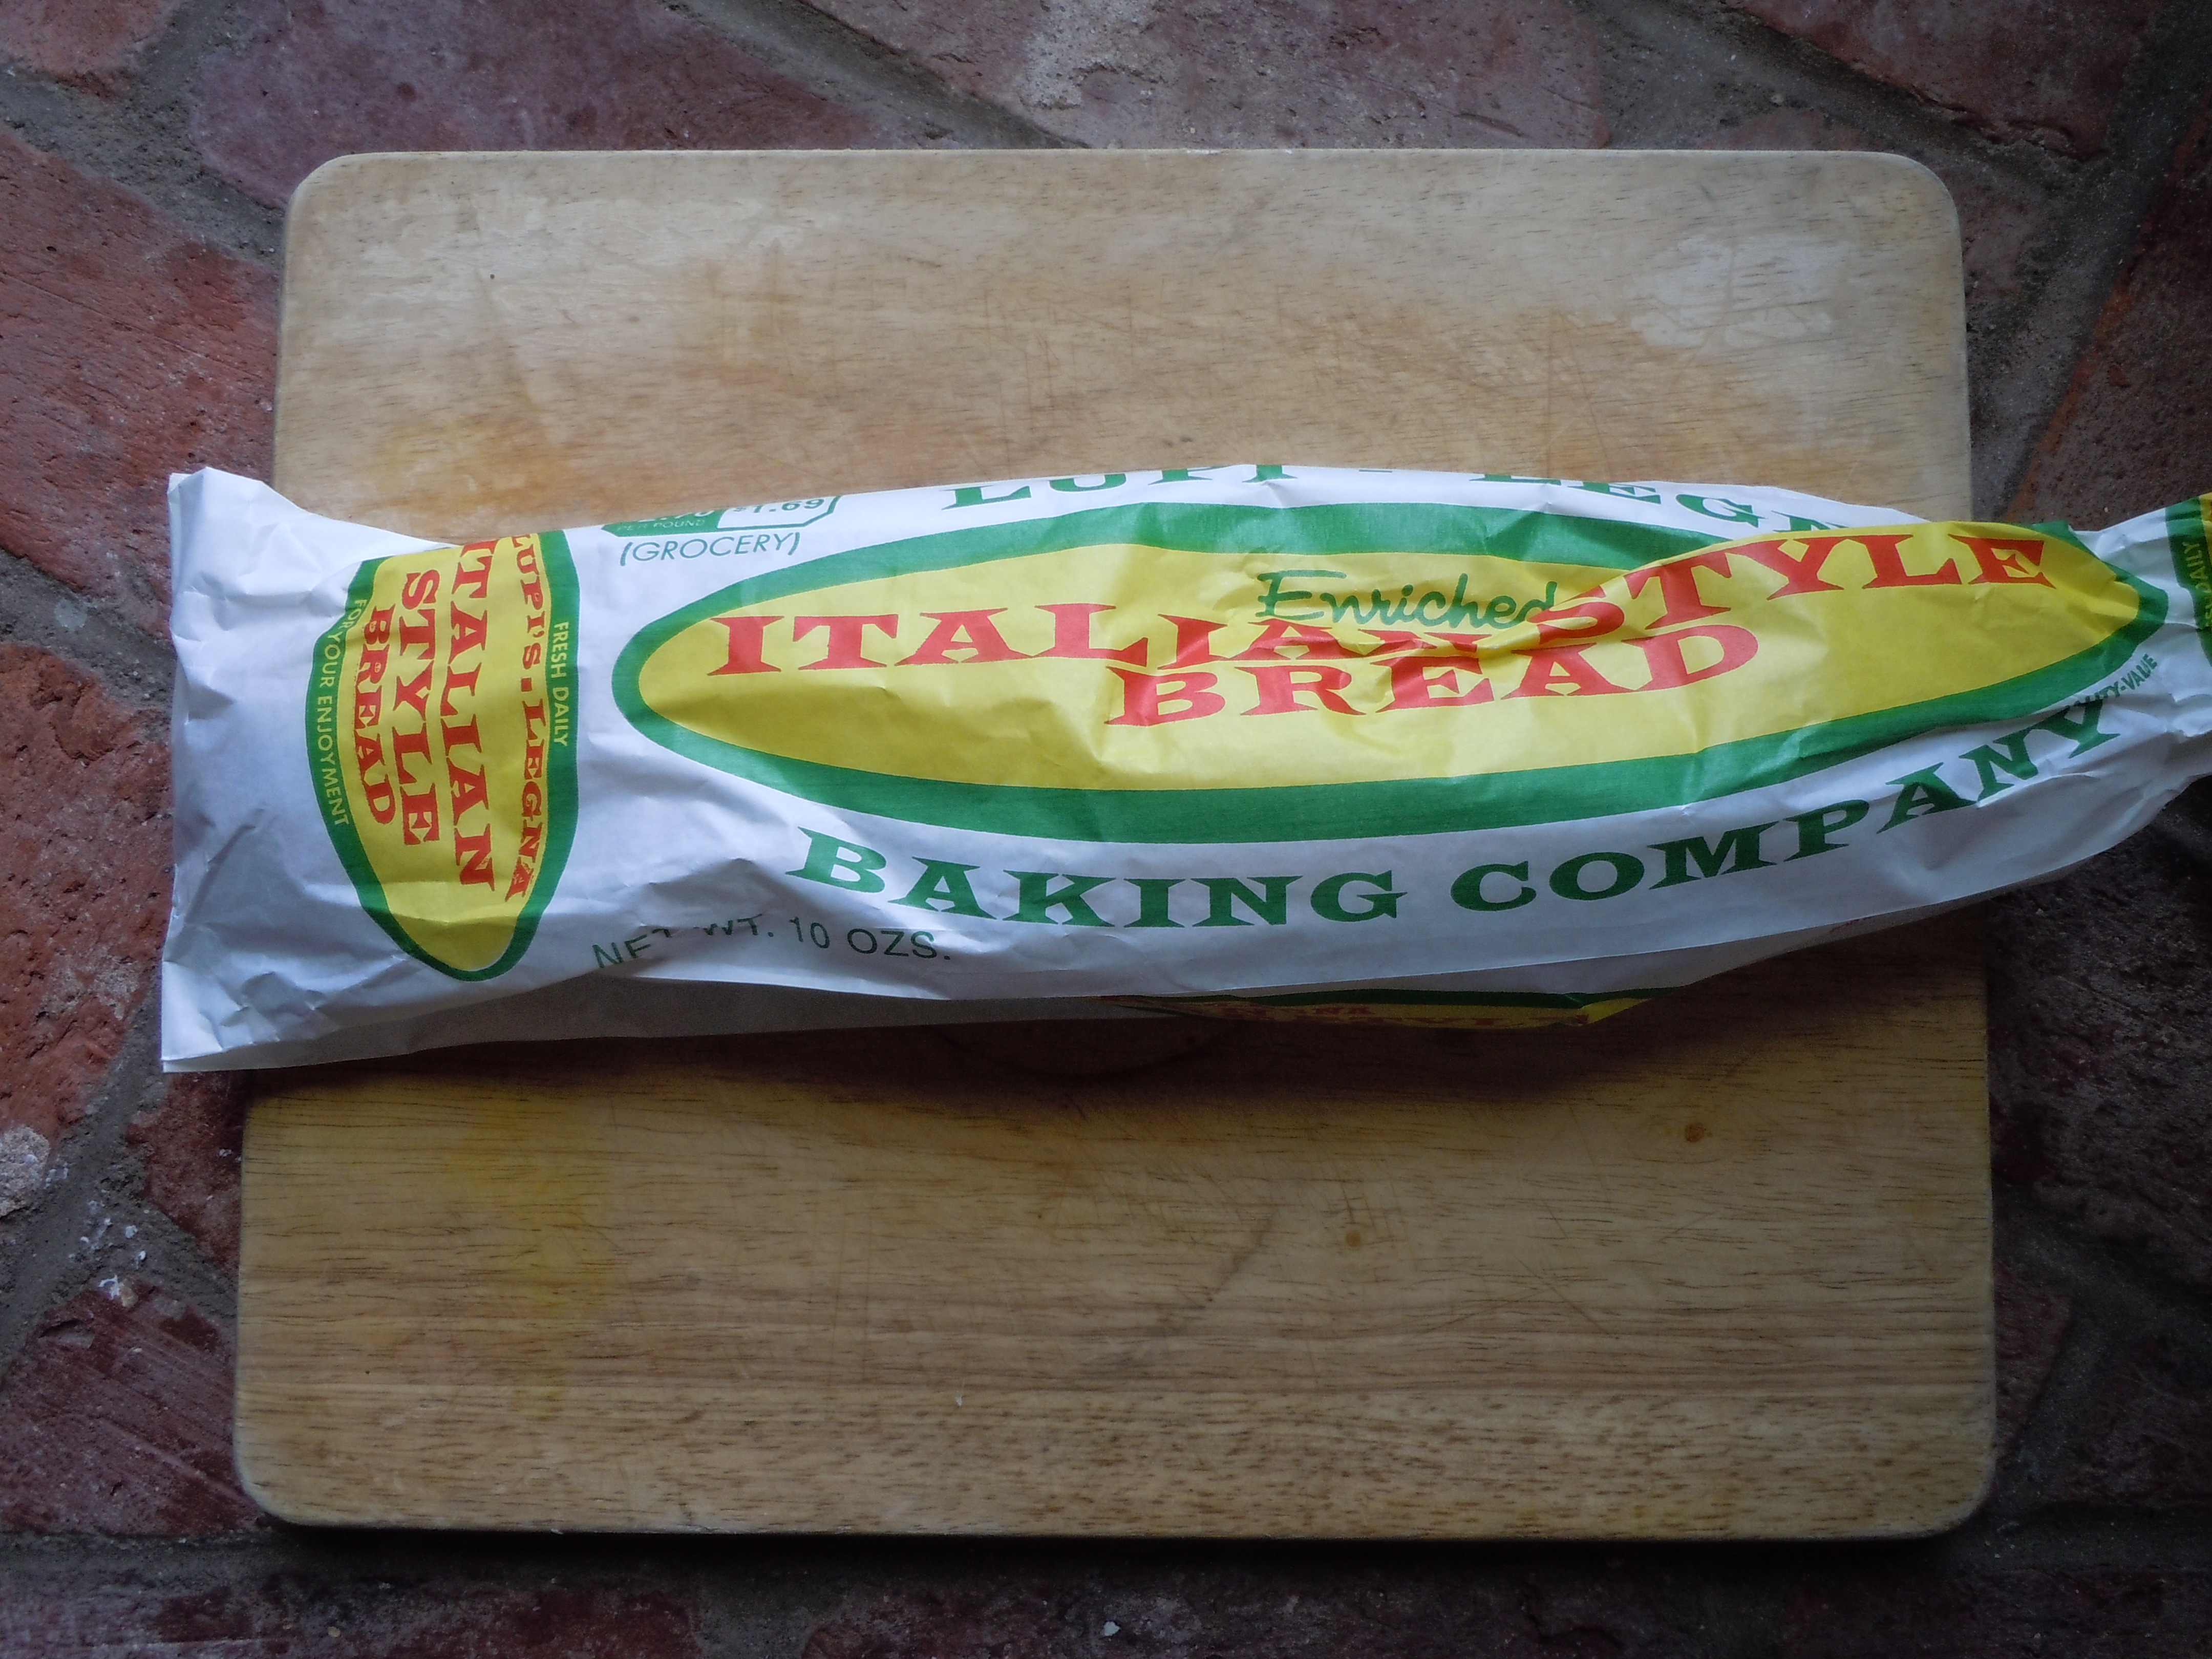
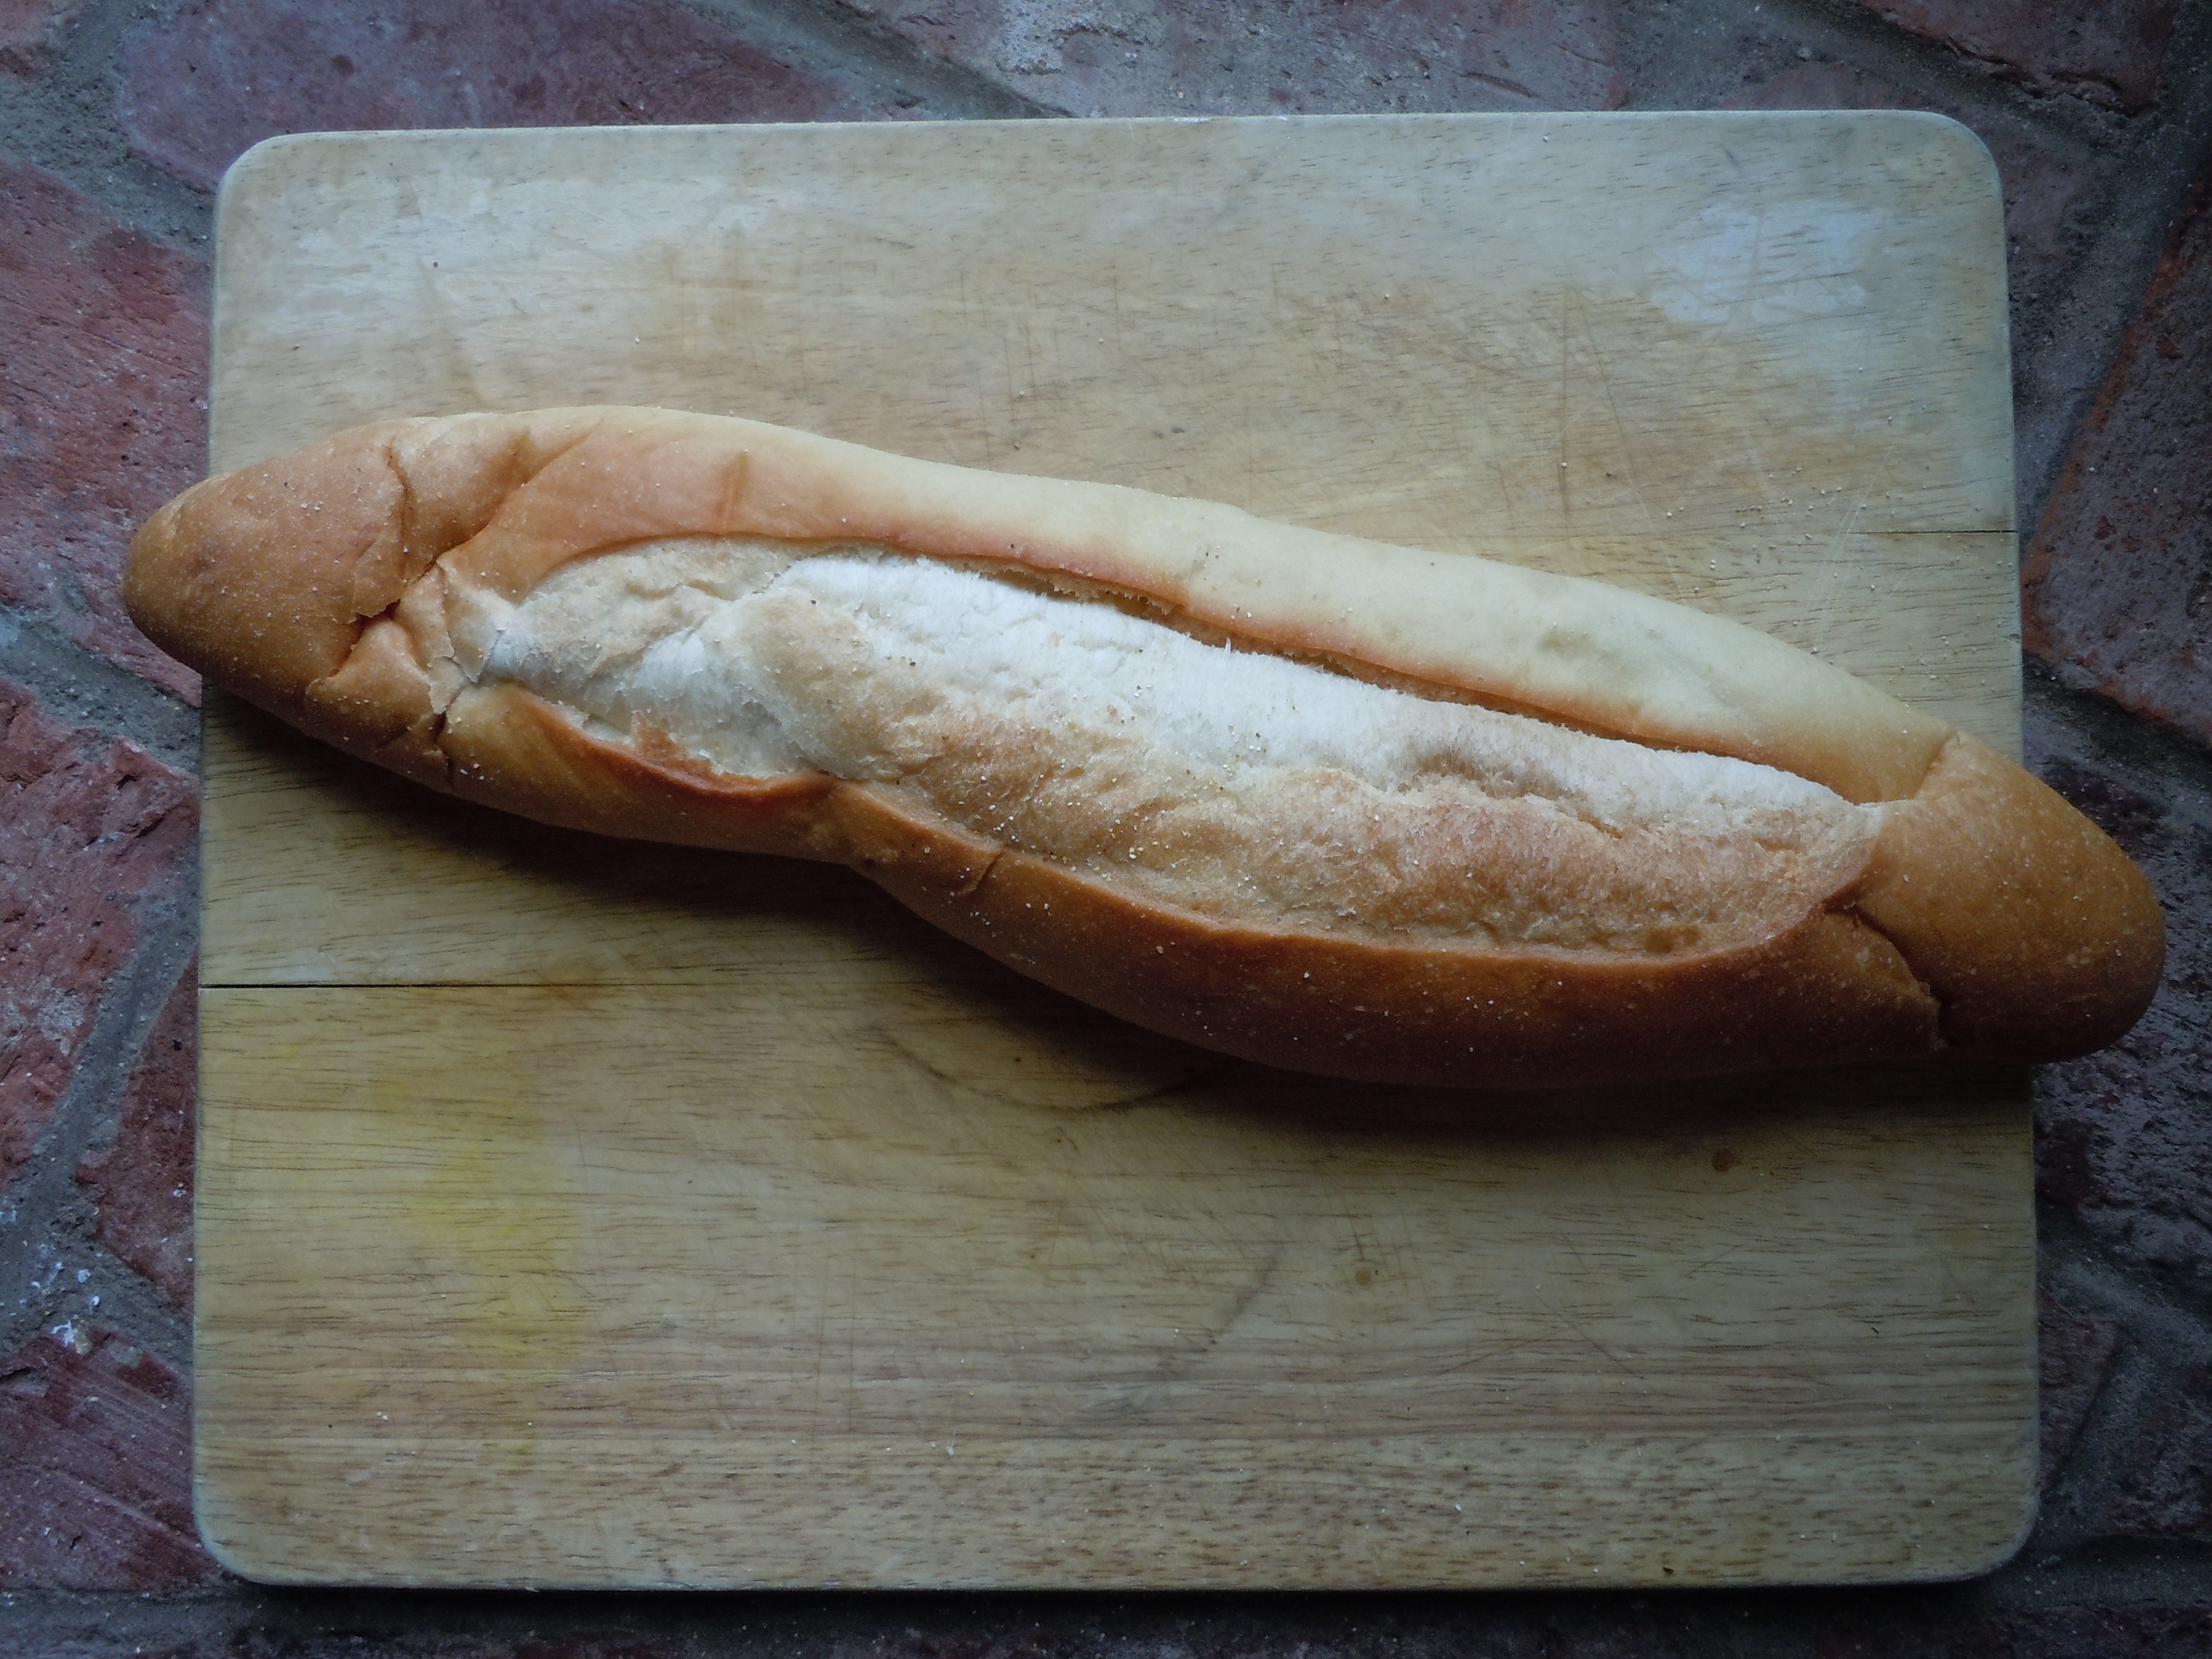
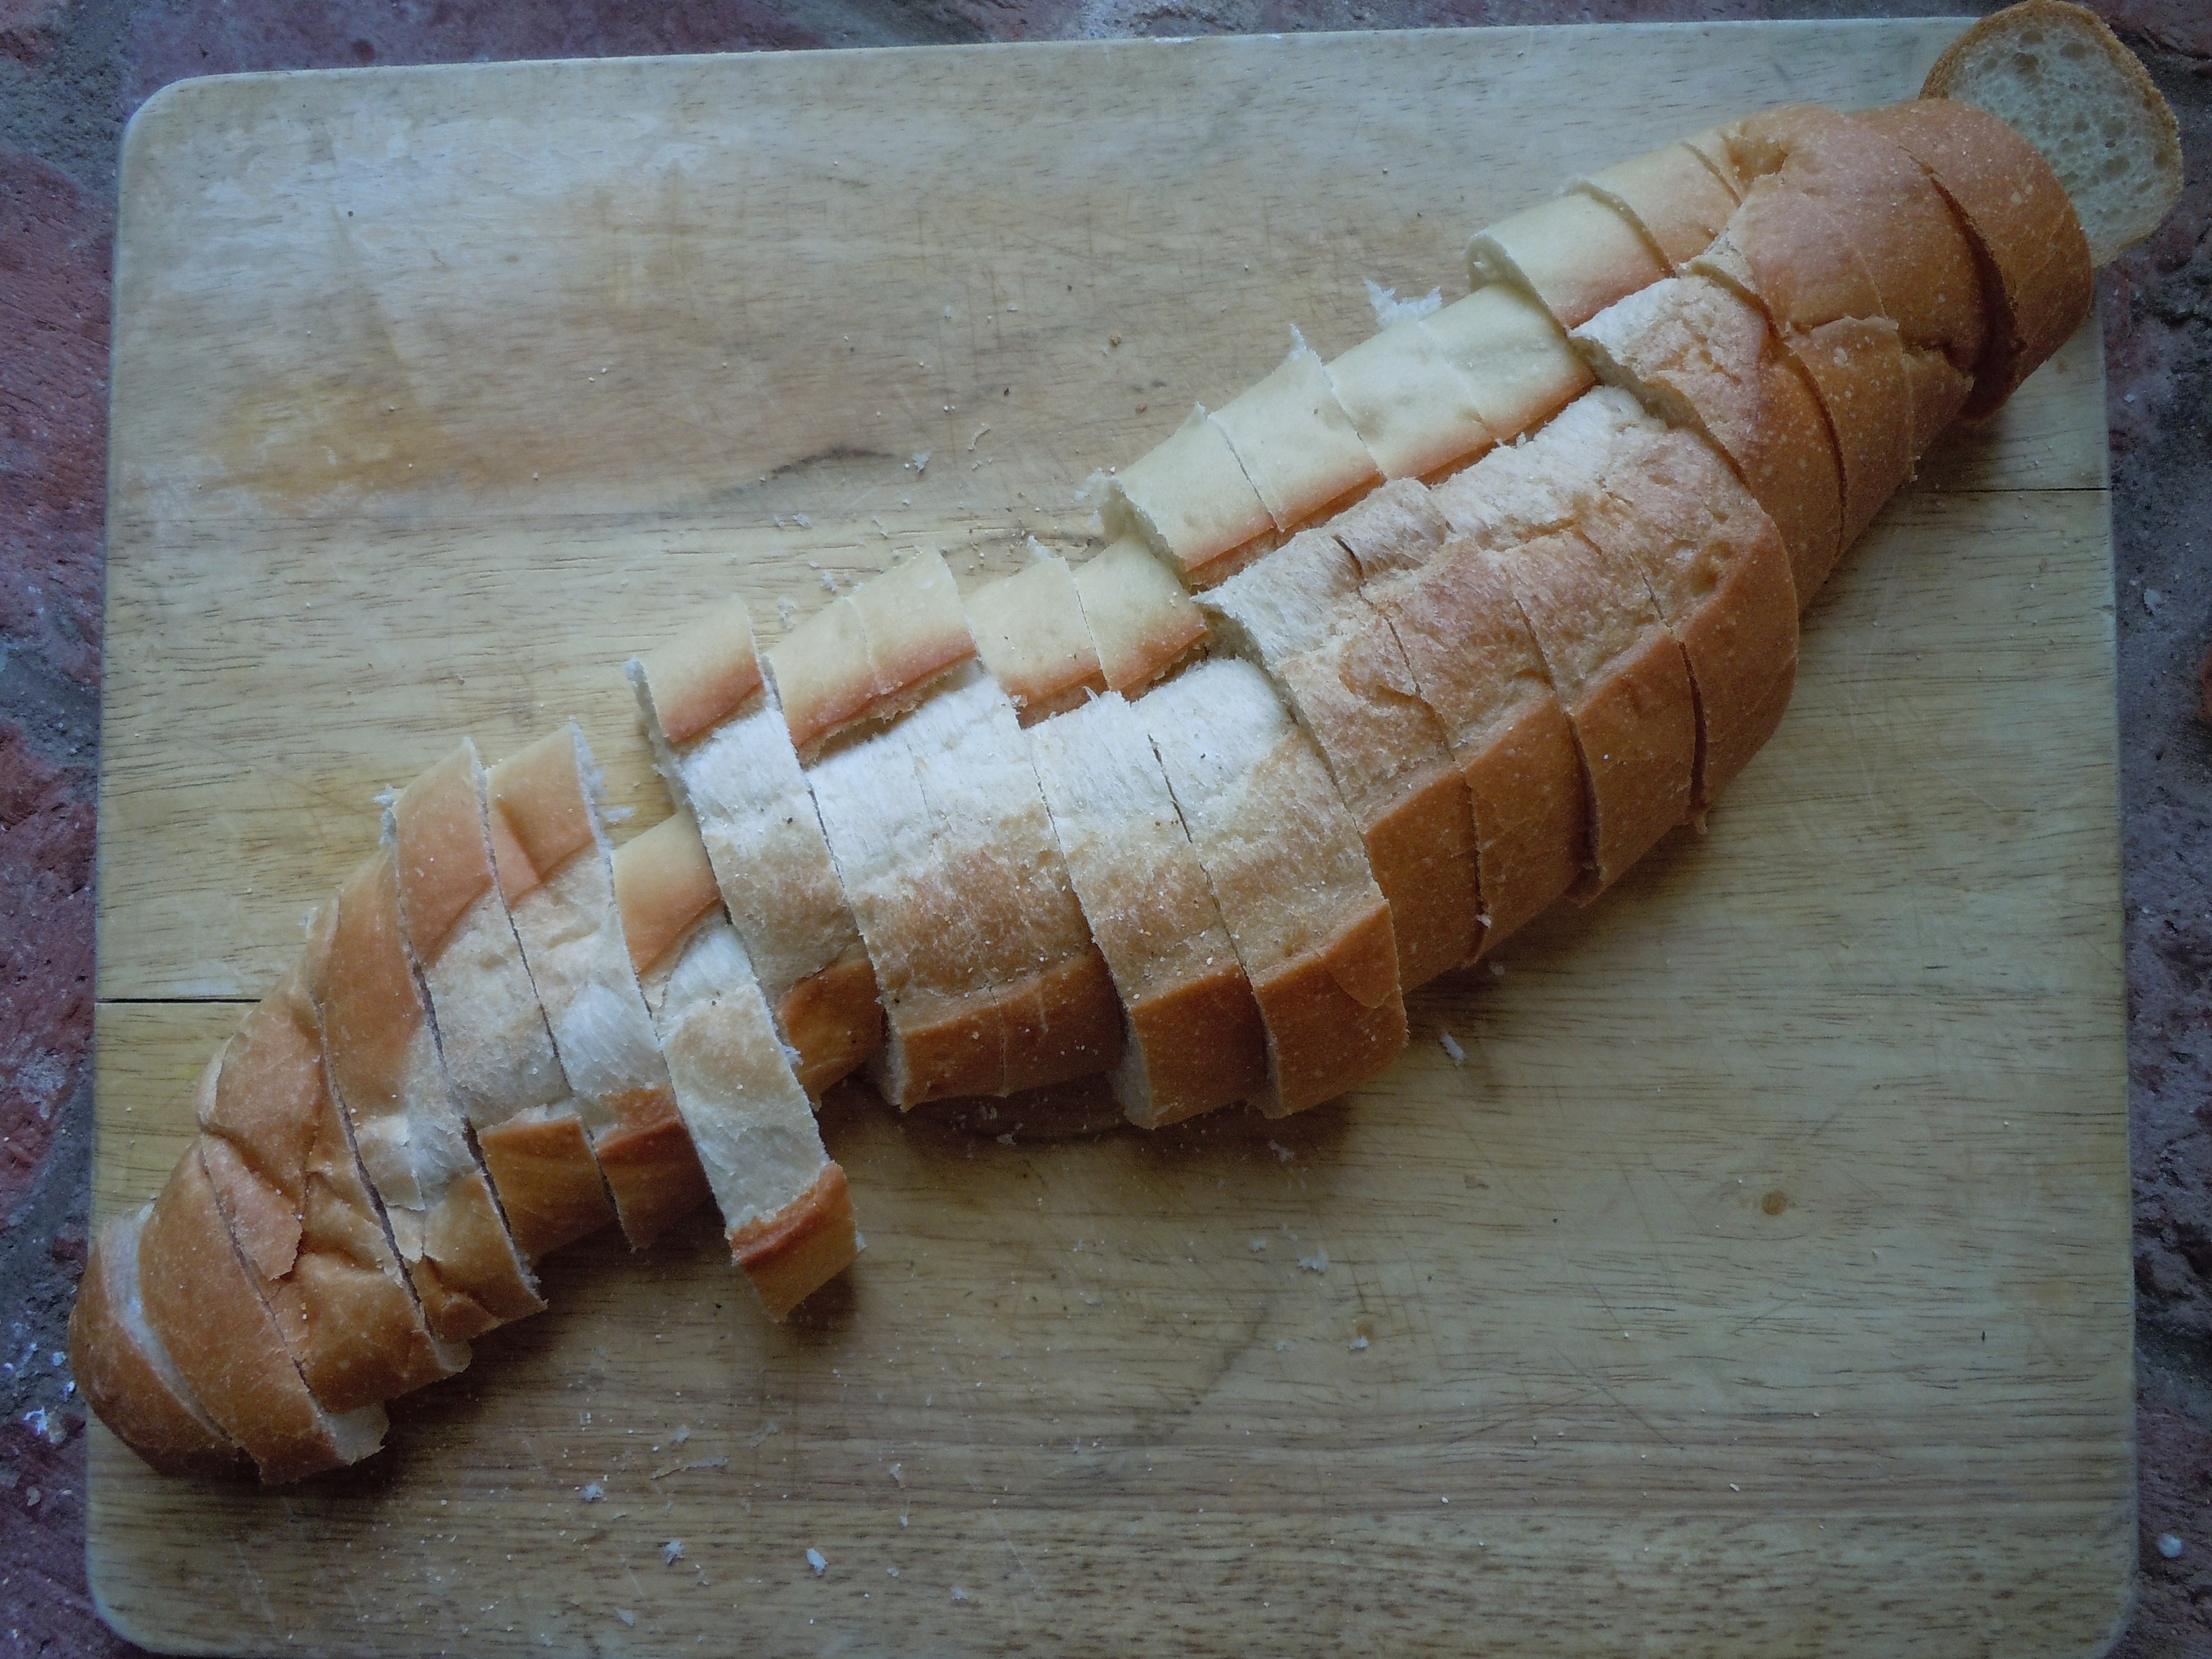
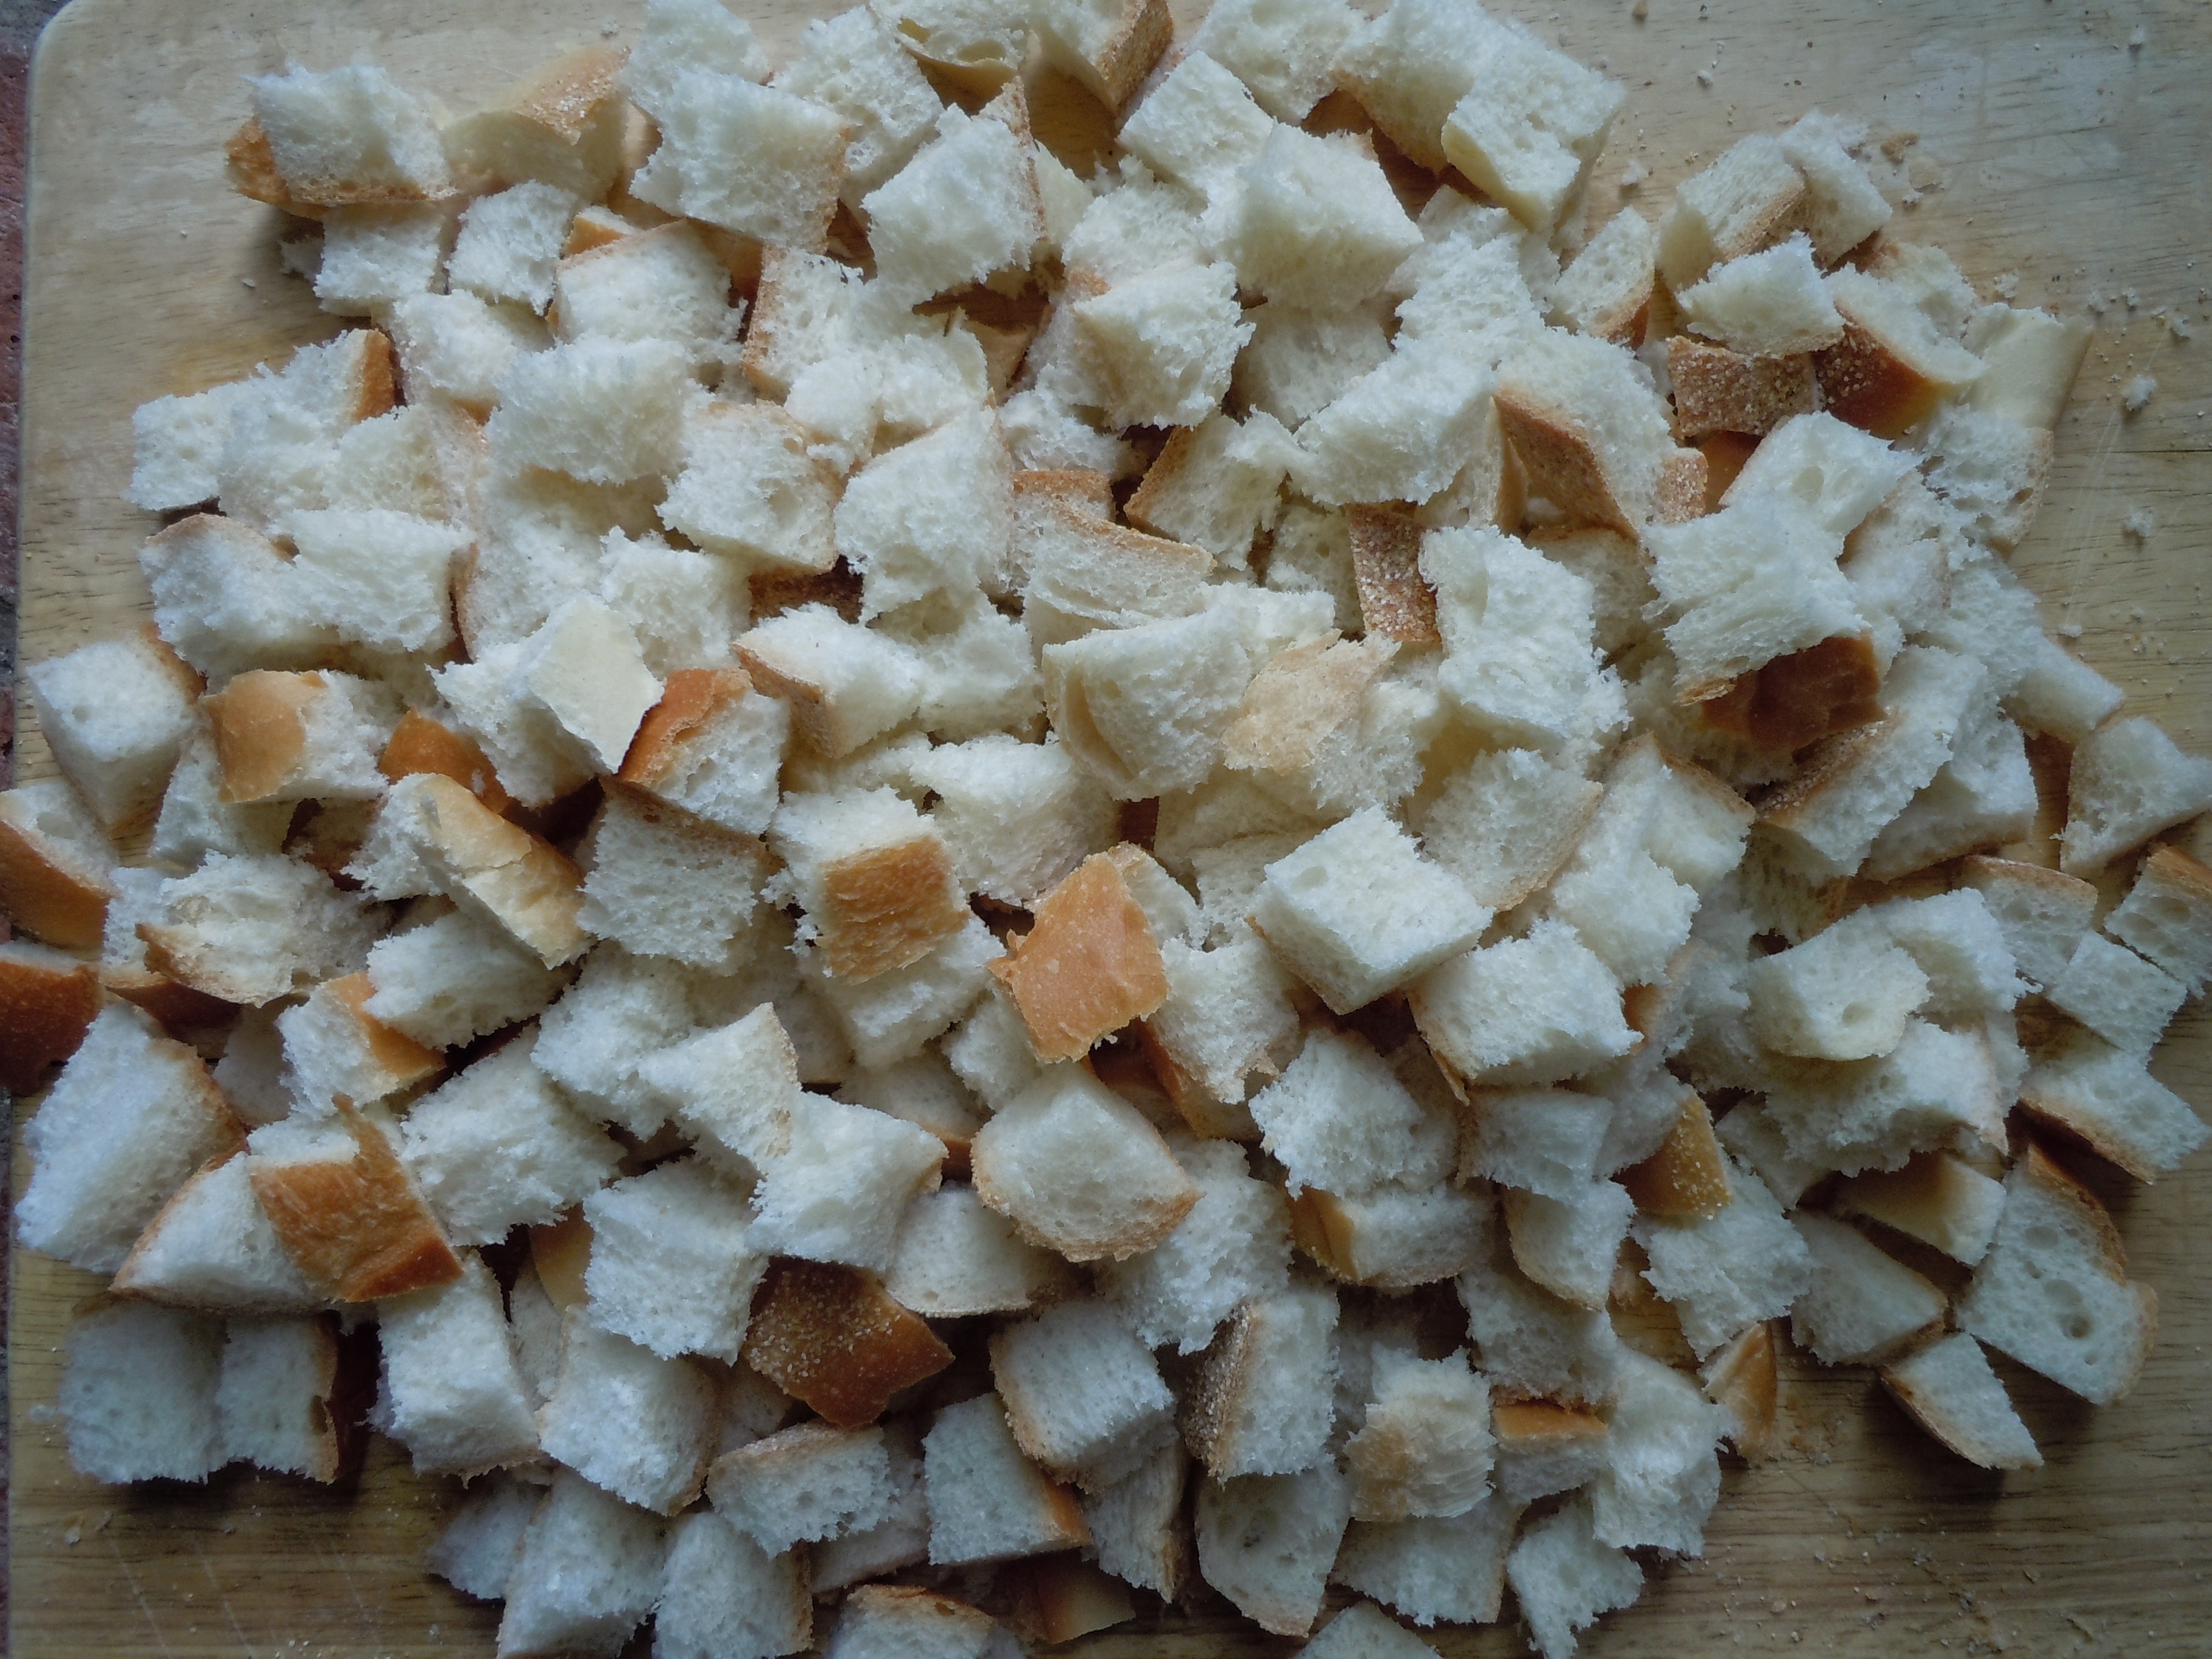
Slice bread into 3/4″ slices length wise
Then slice into 3/4″ squares, you don’t want them to be perfect – that’s what’s lovely about hand made croutons they don’t look like they came from a box
Melt 3/4 stick of butter
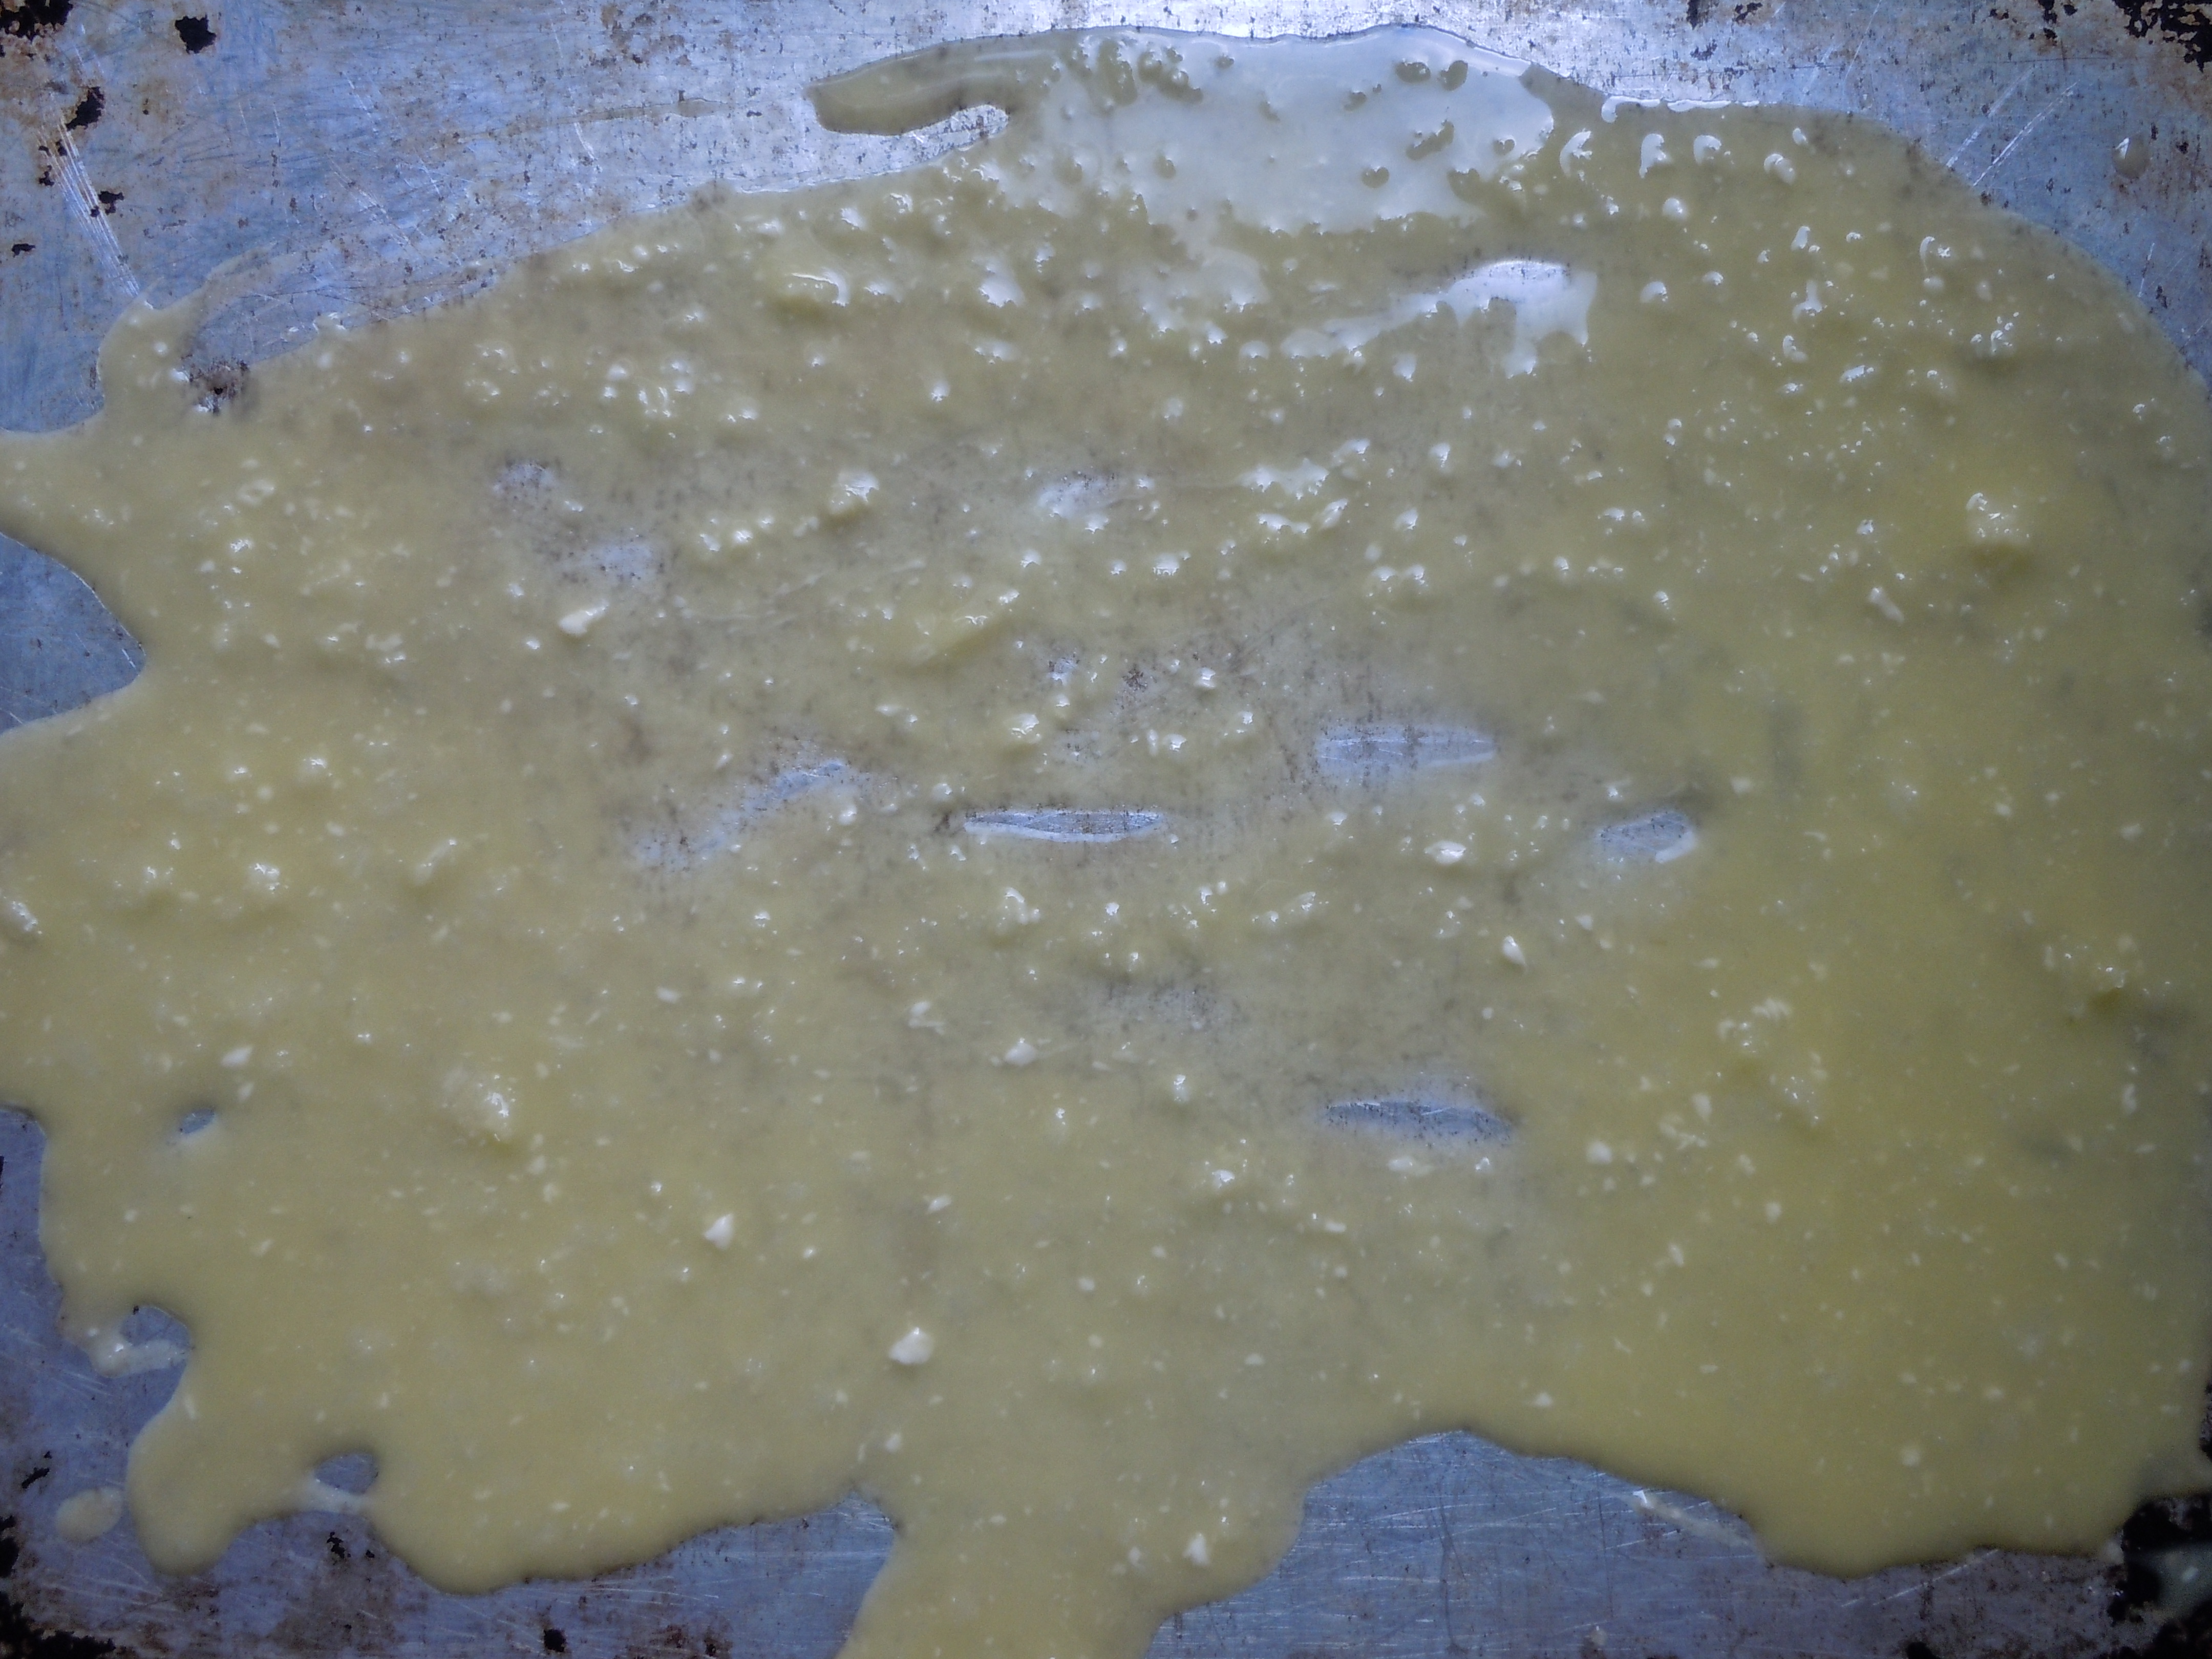
In a large mixing bowl add 1/4 cup olive oil, 3/4 stick melted butter, 4 garlic cloves thru garlic press, 1 Tsp salt, and whisk to mix
Divide this mixture into two and pour onto the 2 cookie trays spreading them evenly all over the tray
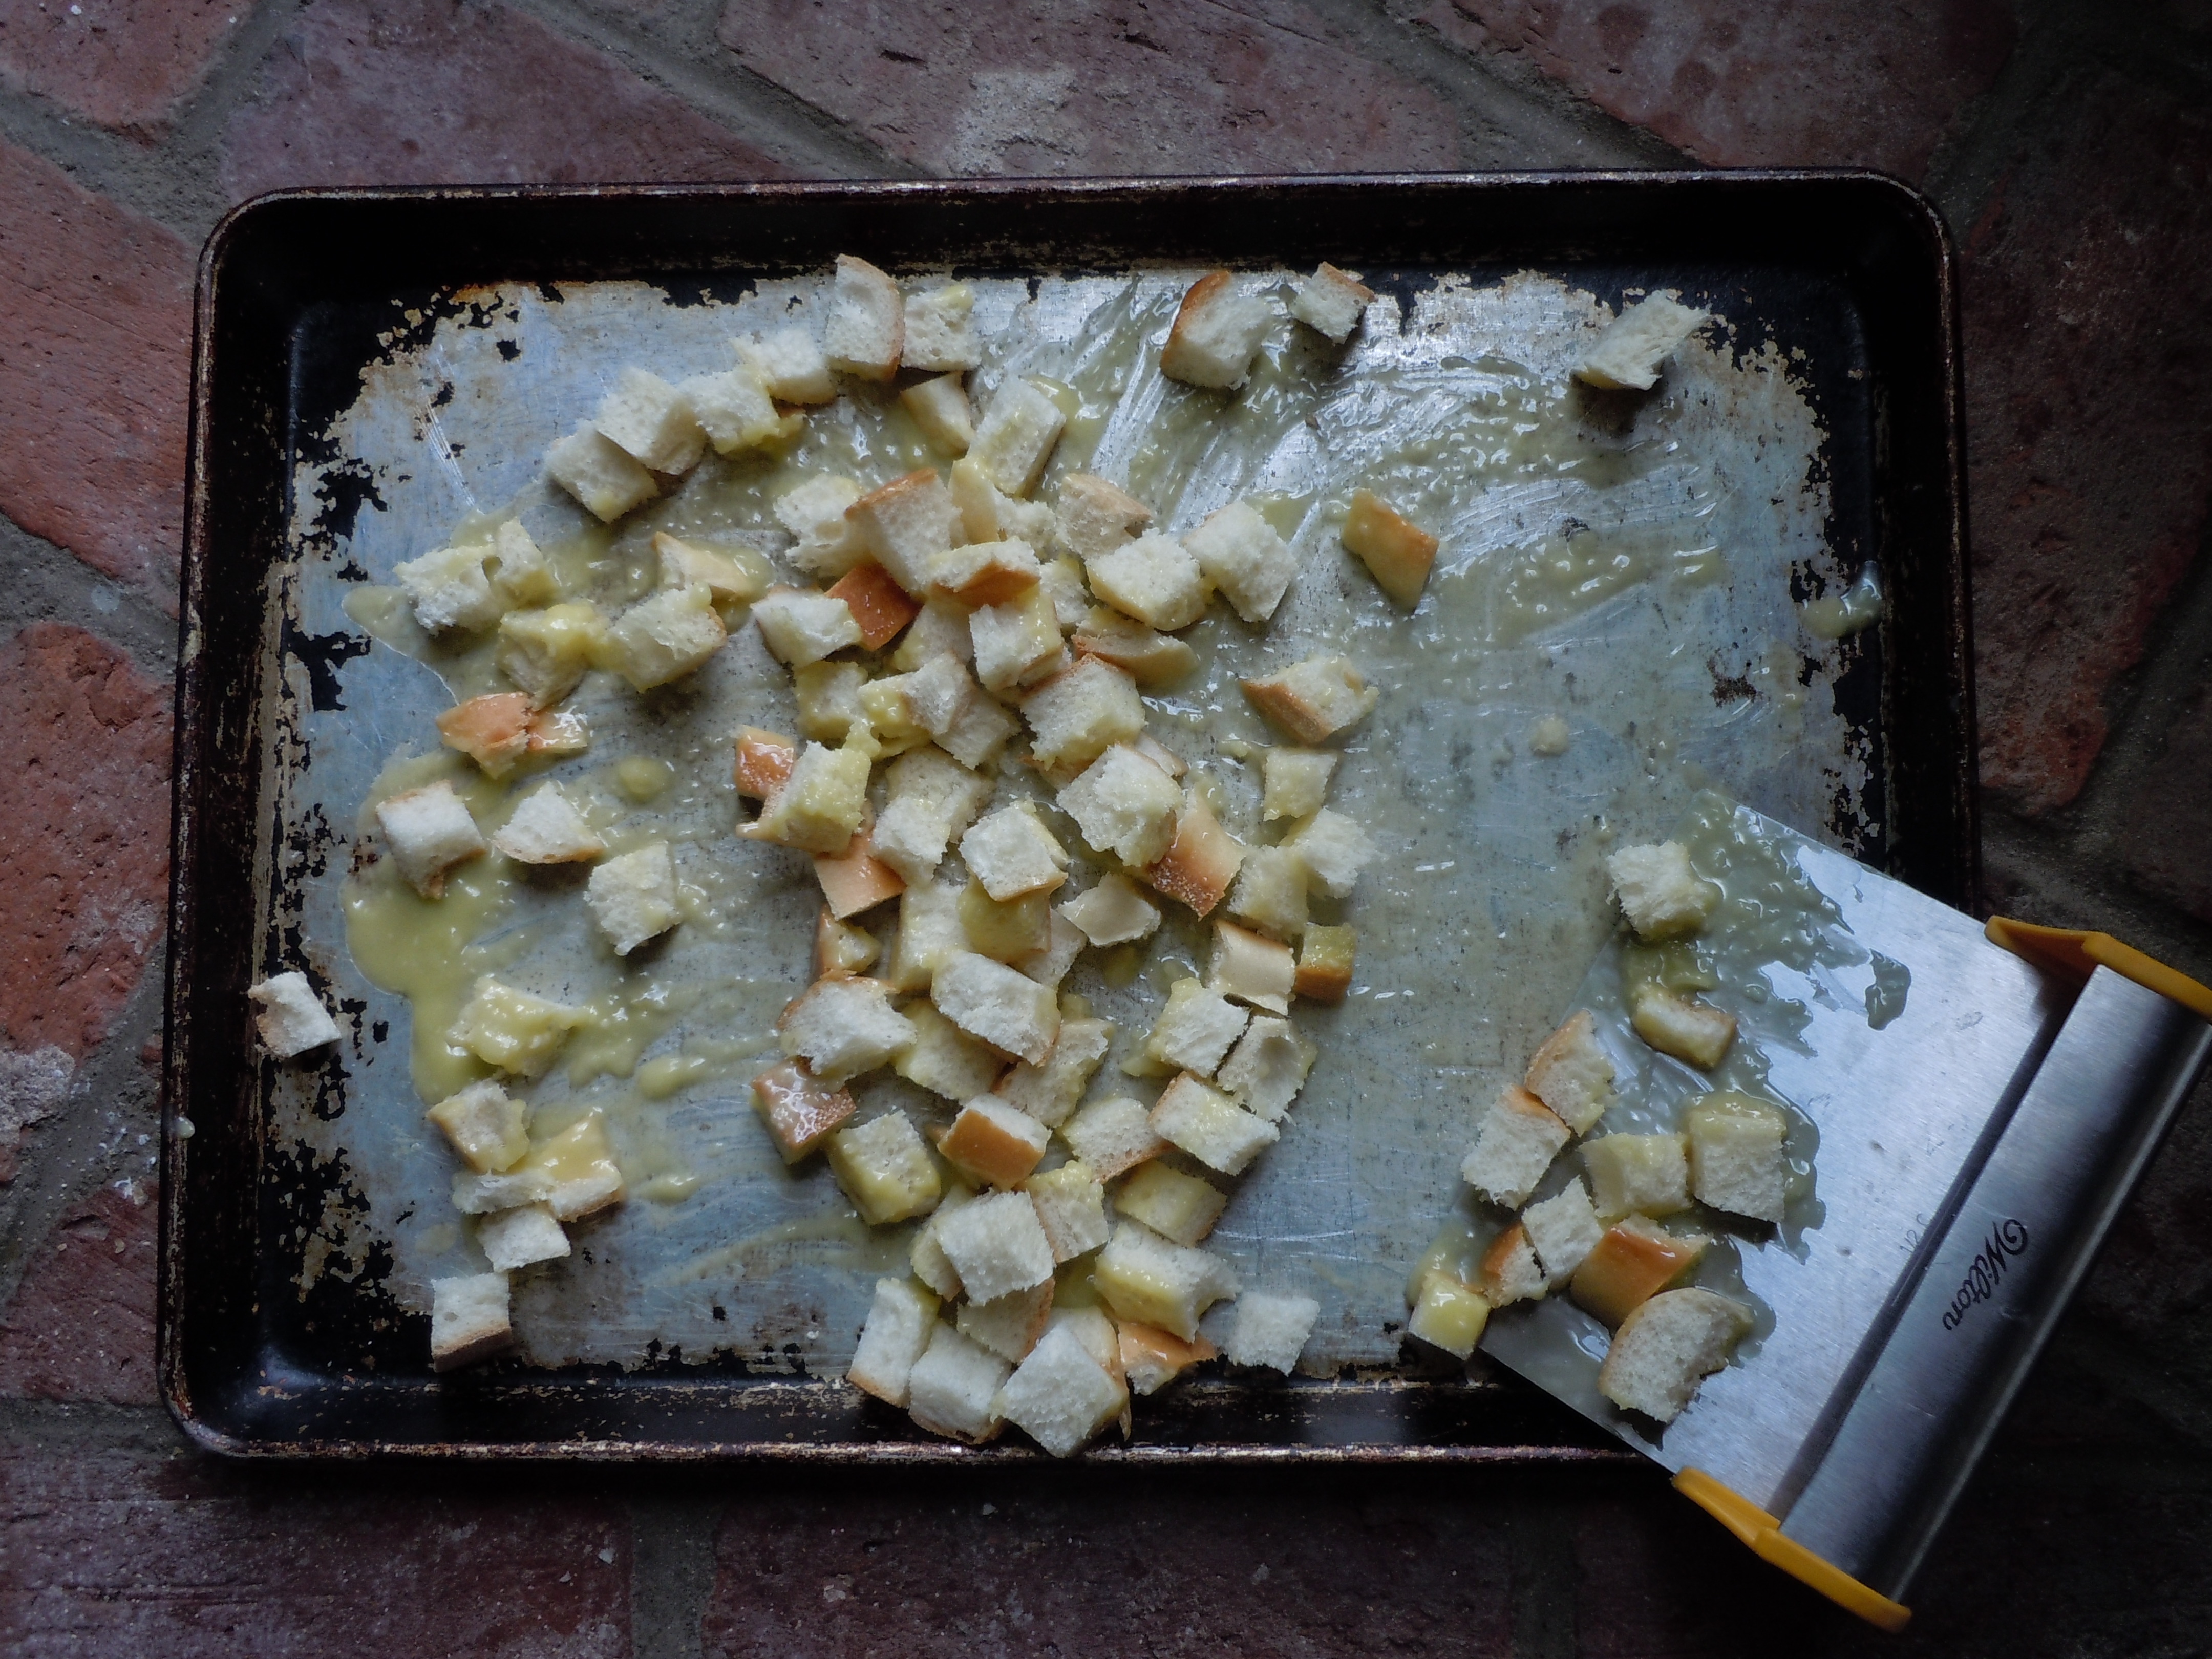
Divide up Italian bread cubes into 2 and put onto the 2 cookie trays right on the olive oil mixture
Stir the cut up bread cubes all around the cookie tray to evenly coat and soak up all of the olive oil mixture. I use a pastry scraper (see photo) to do this…a tool which I use a lot!
NOW sprinkle 2 Tsp of garlic granules on each of the cookie trays filled with Italian garlic croutons
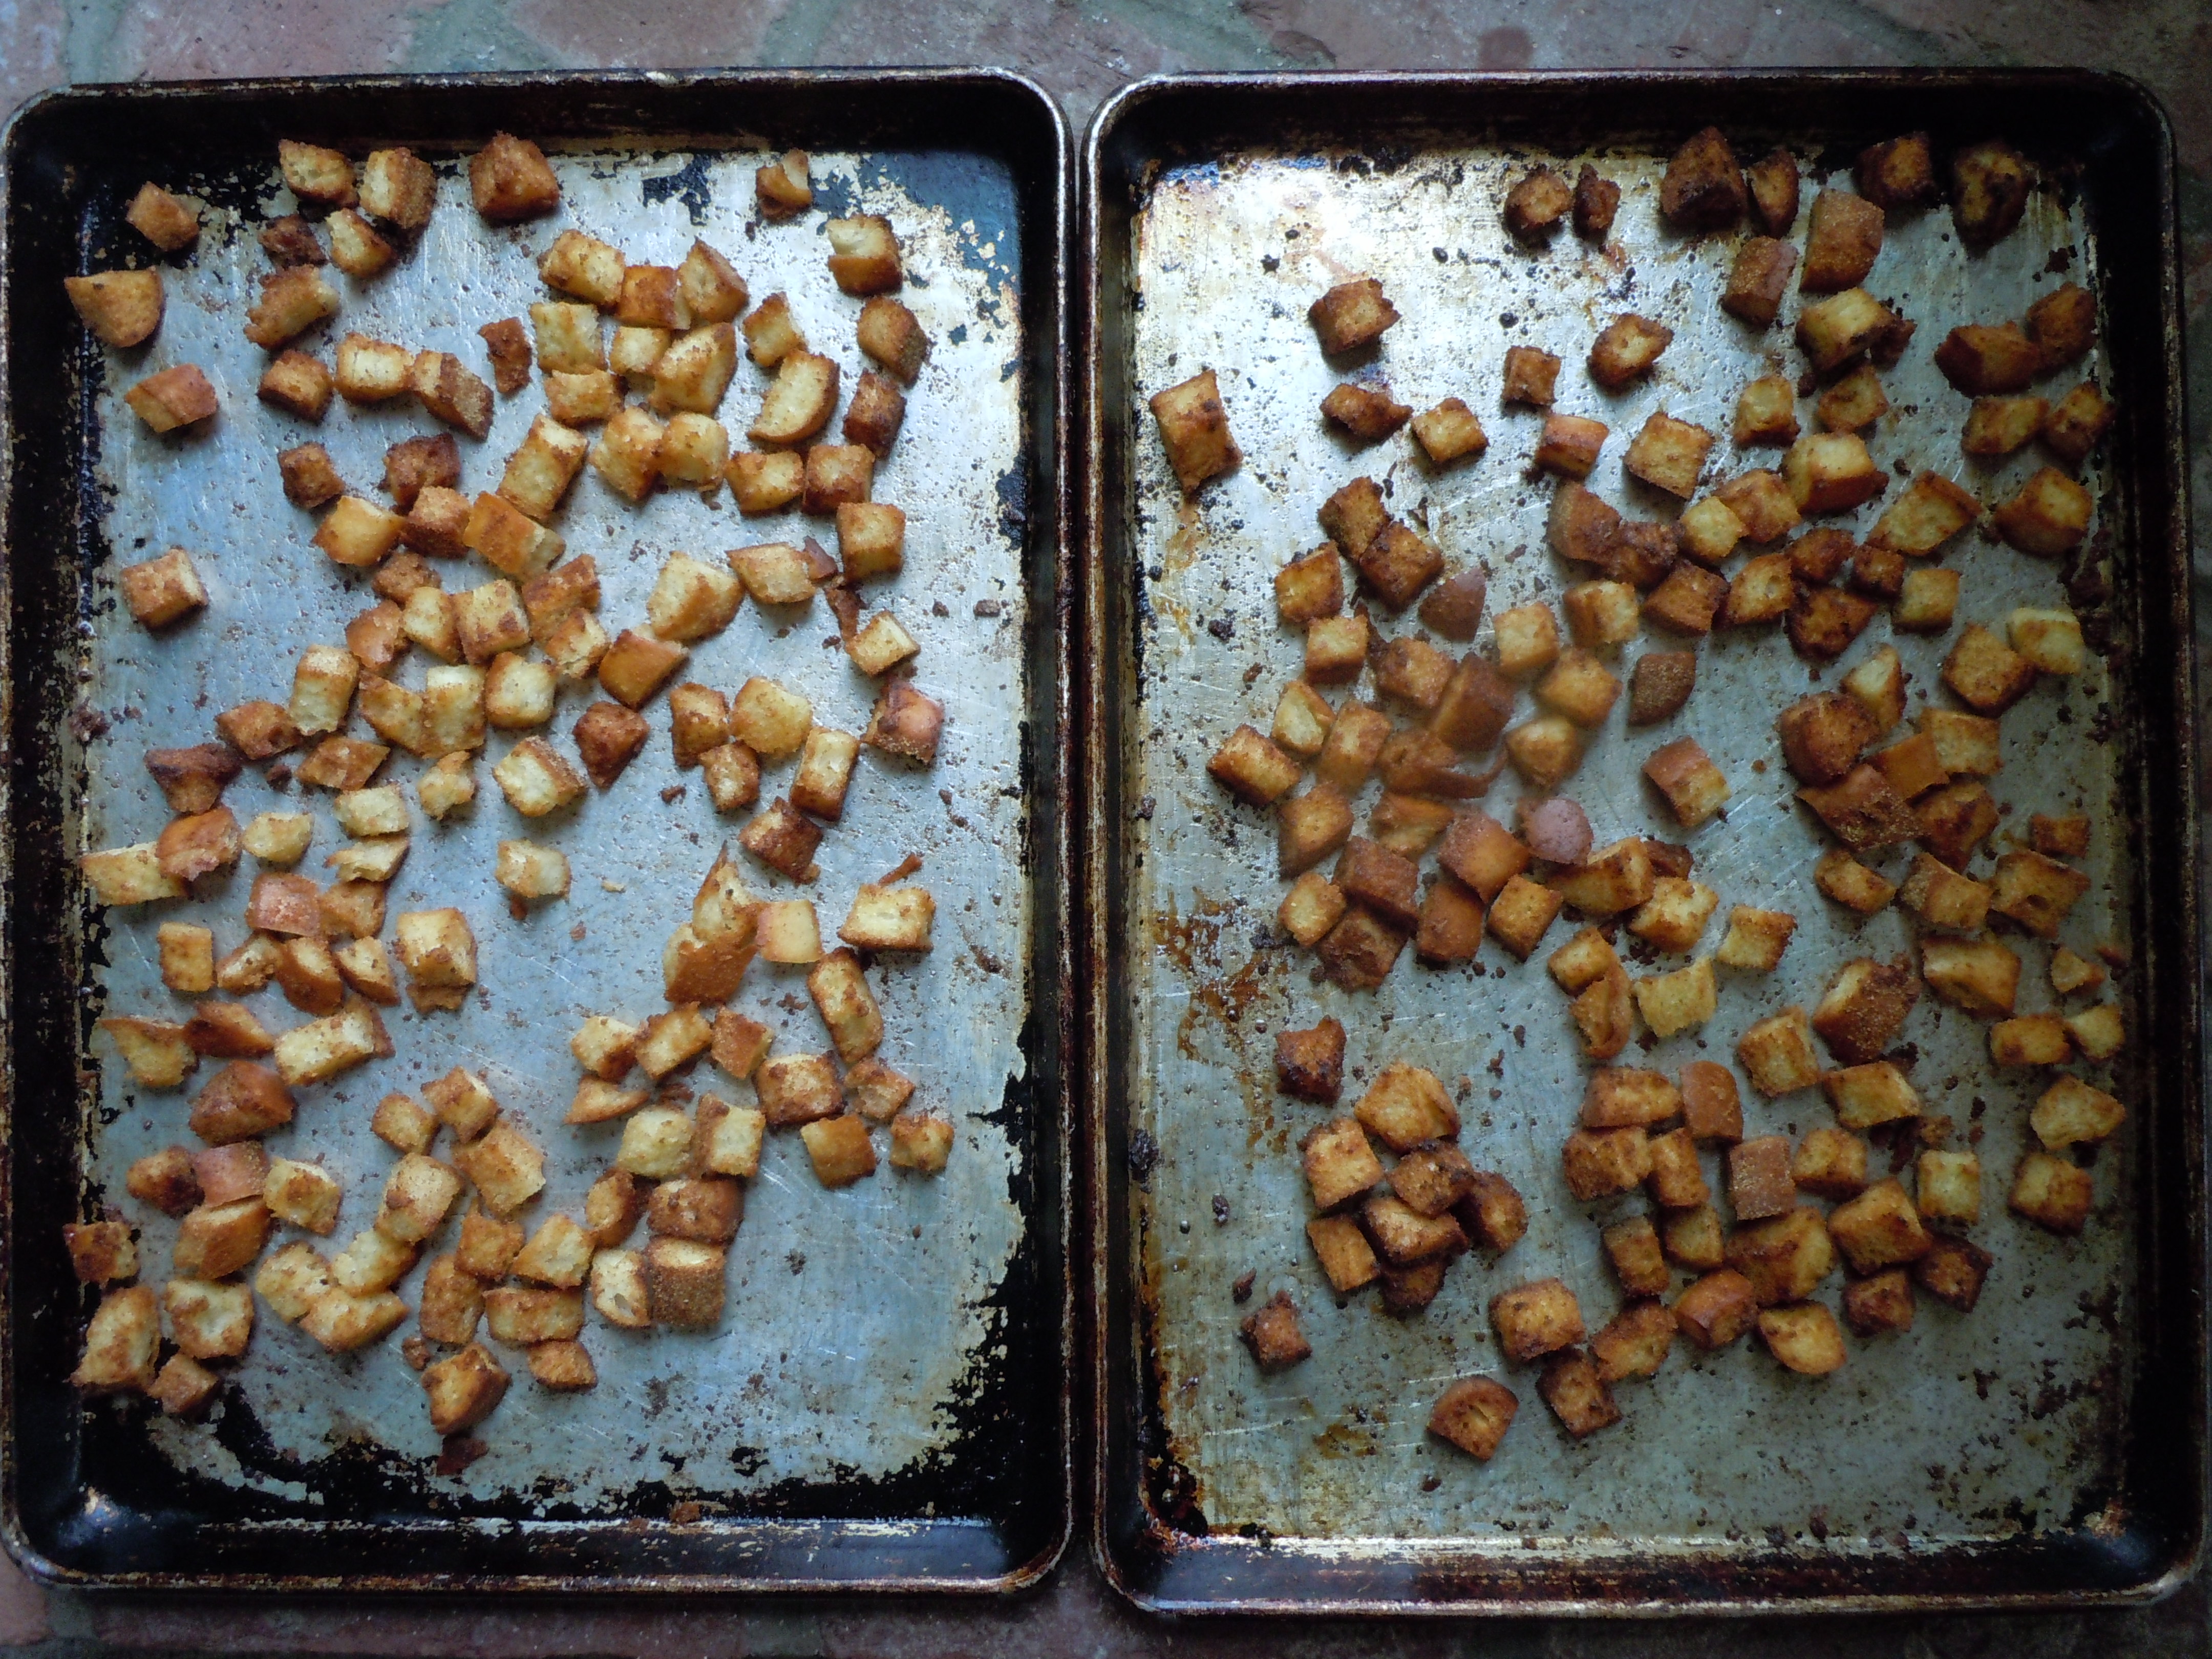
Put into the oven for 12 minutes til golden
IMPORTANT – they go quickly at the end so you really need to watch them so they don’t burn
Let the Italian garlic croutons cool before putting them into a Freezer Ziploc baggie
I usually keep them on the counter for a few days then throw them into the freezer to store and keep fresh
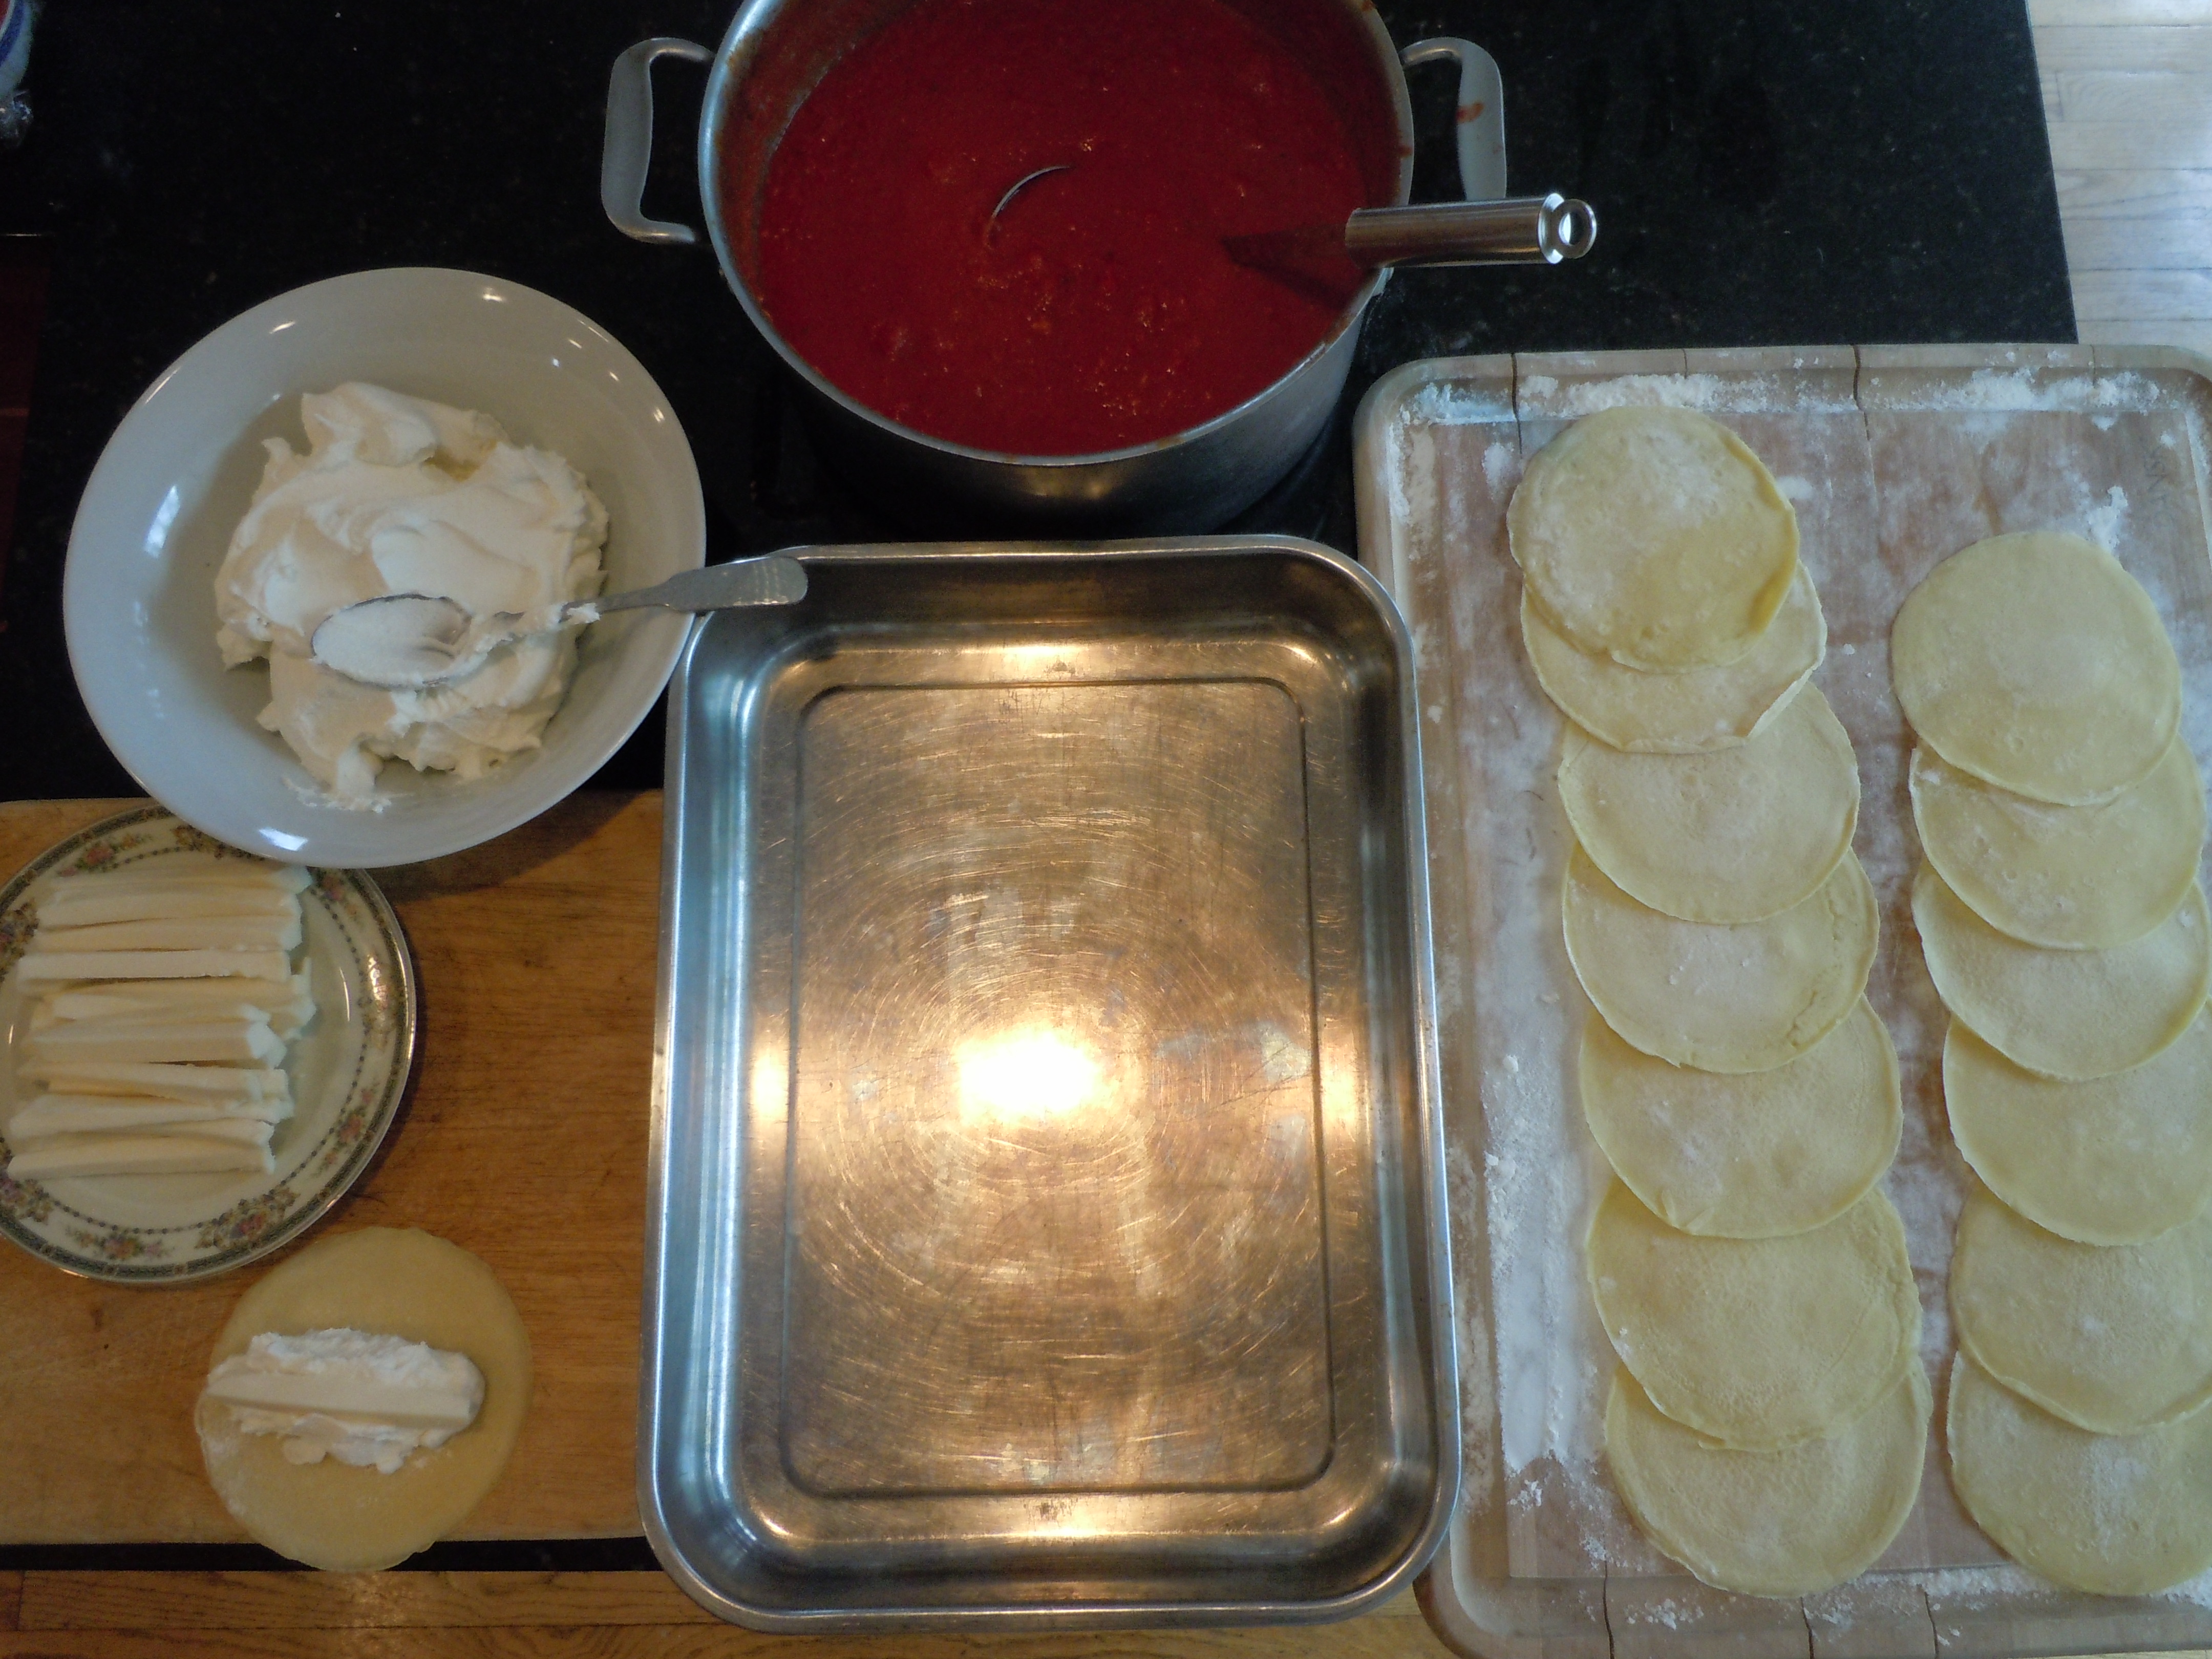
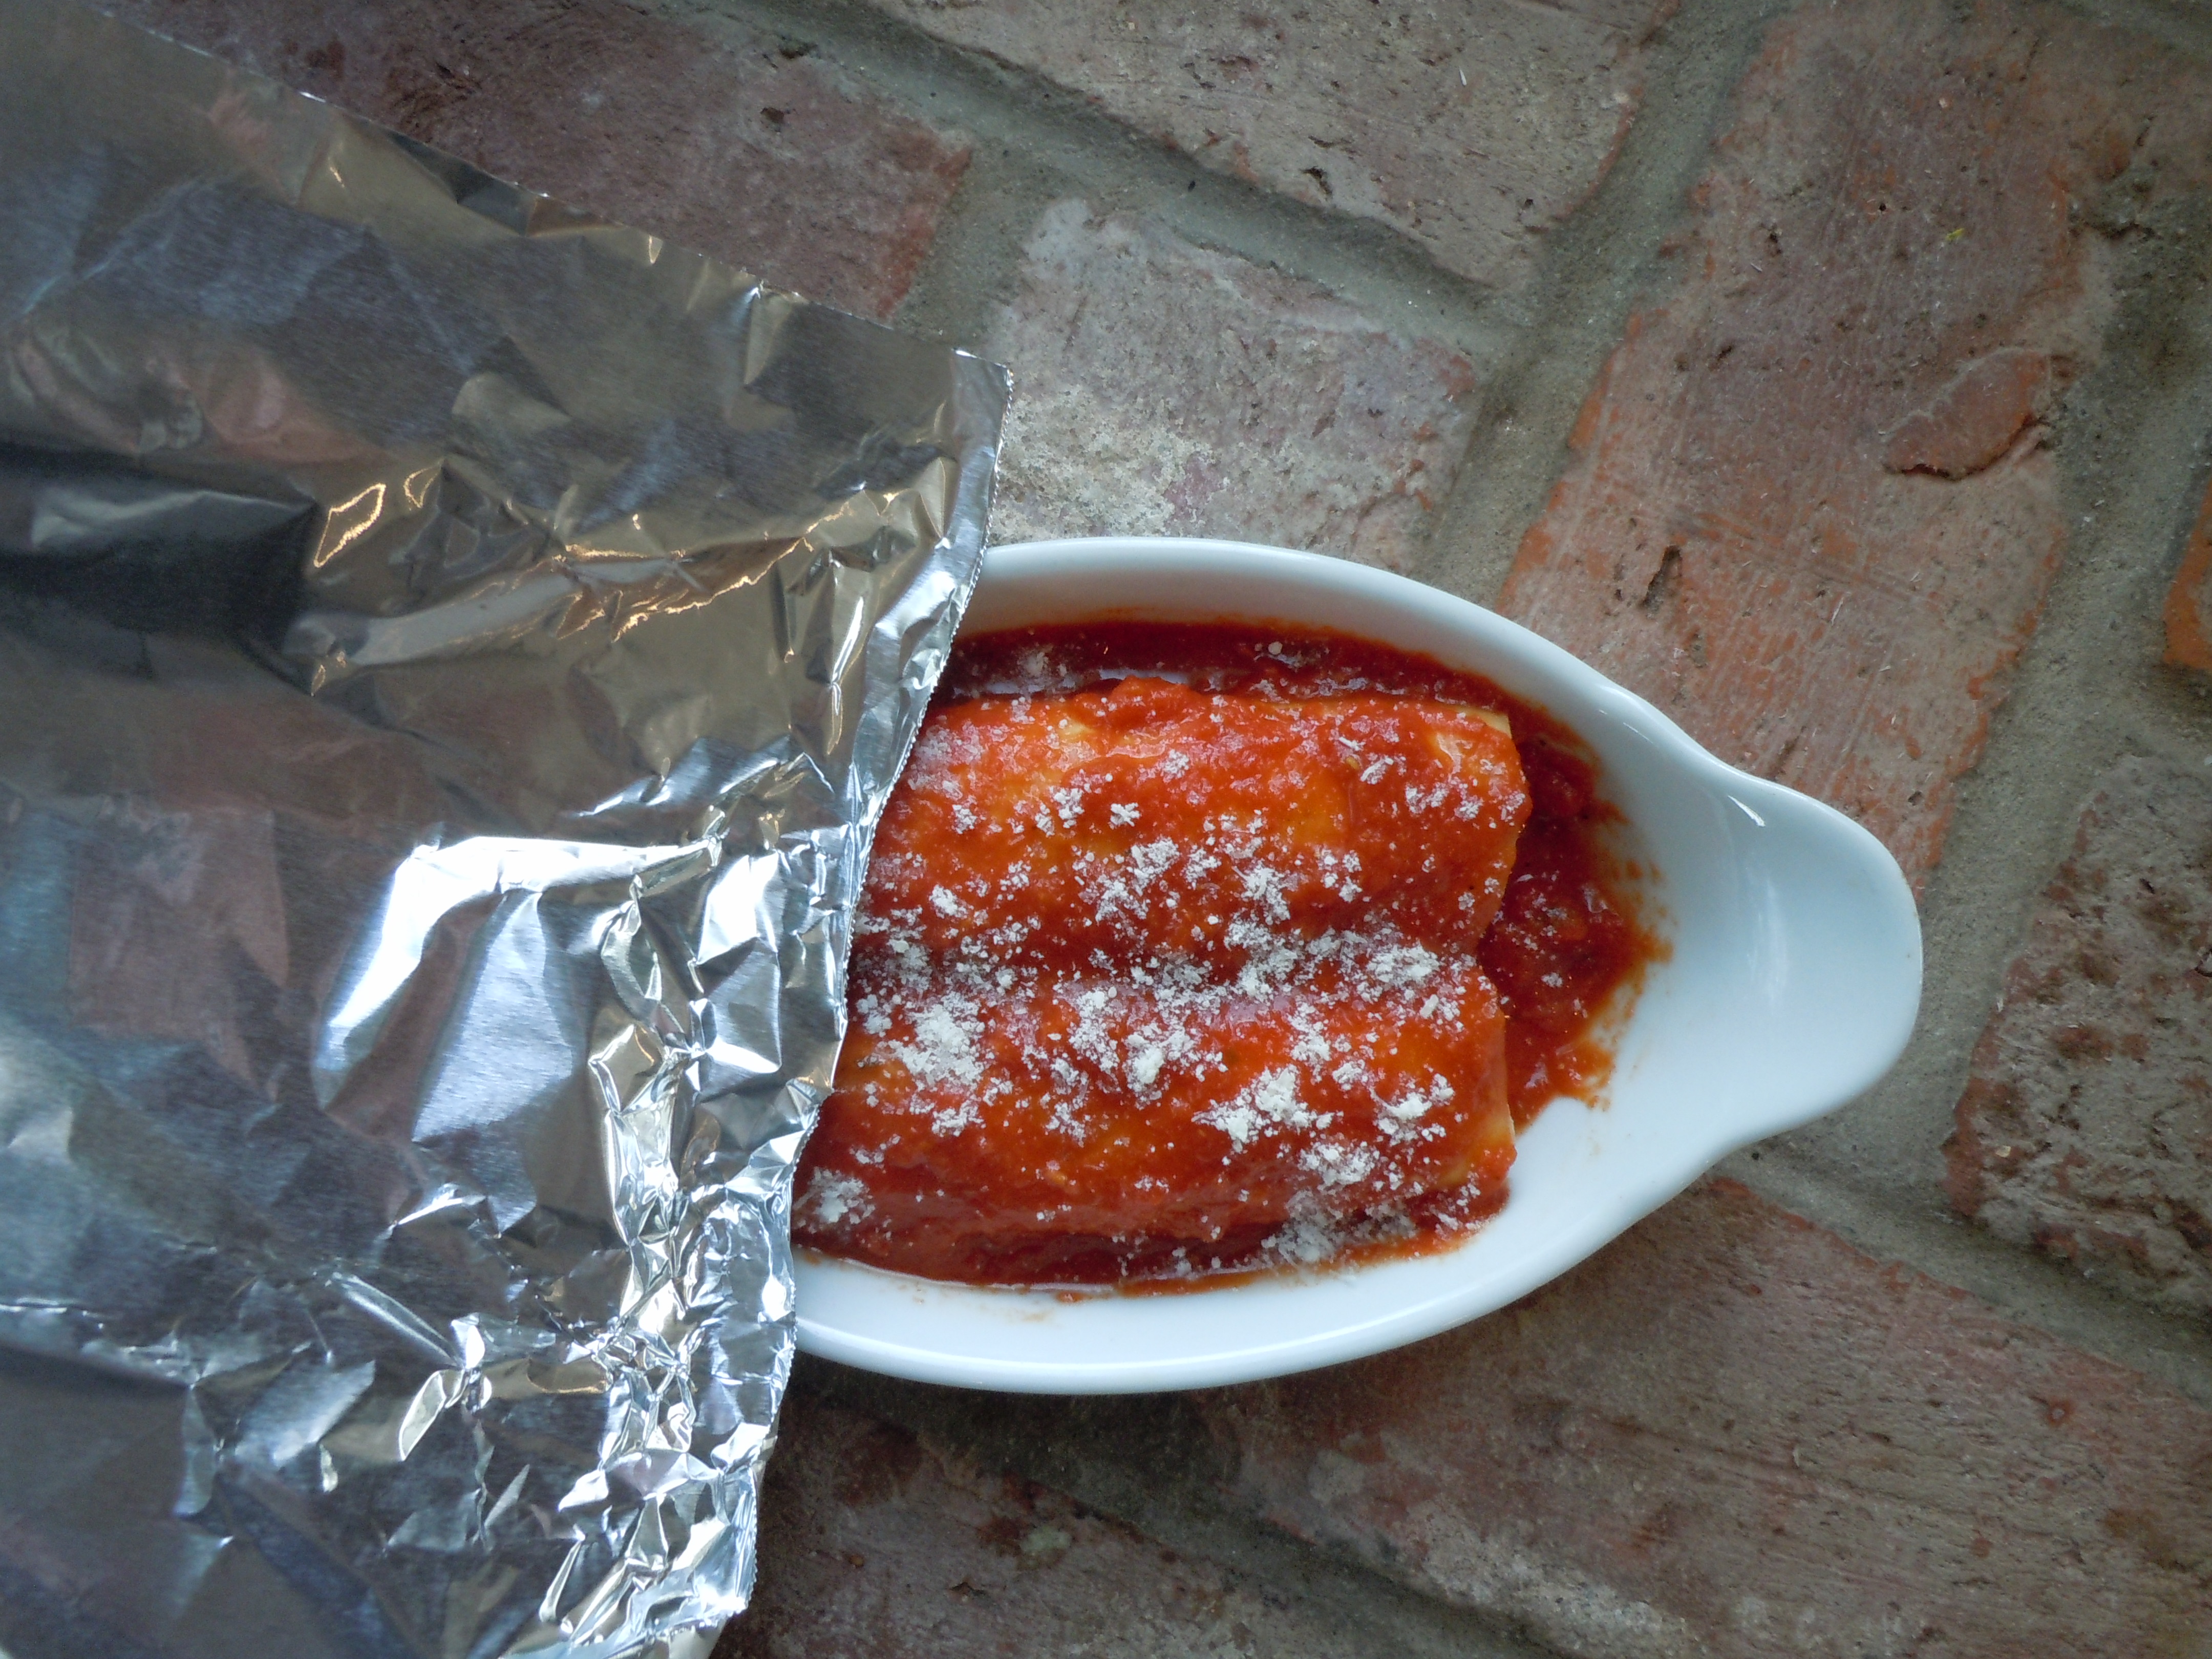
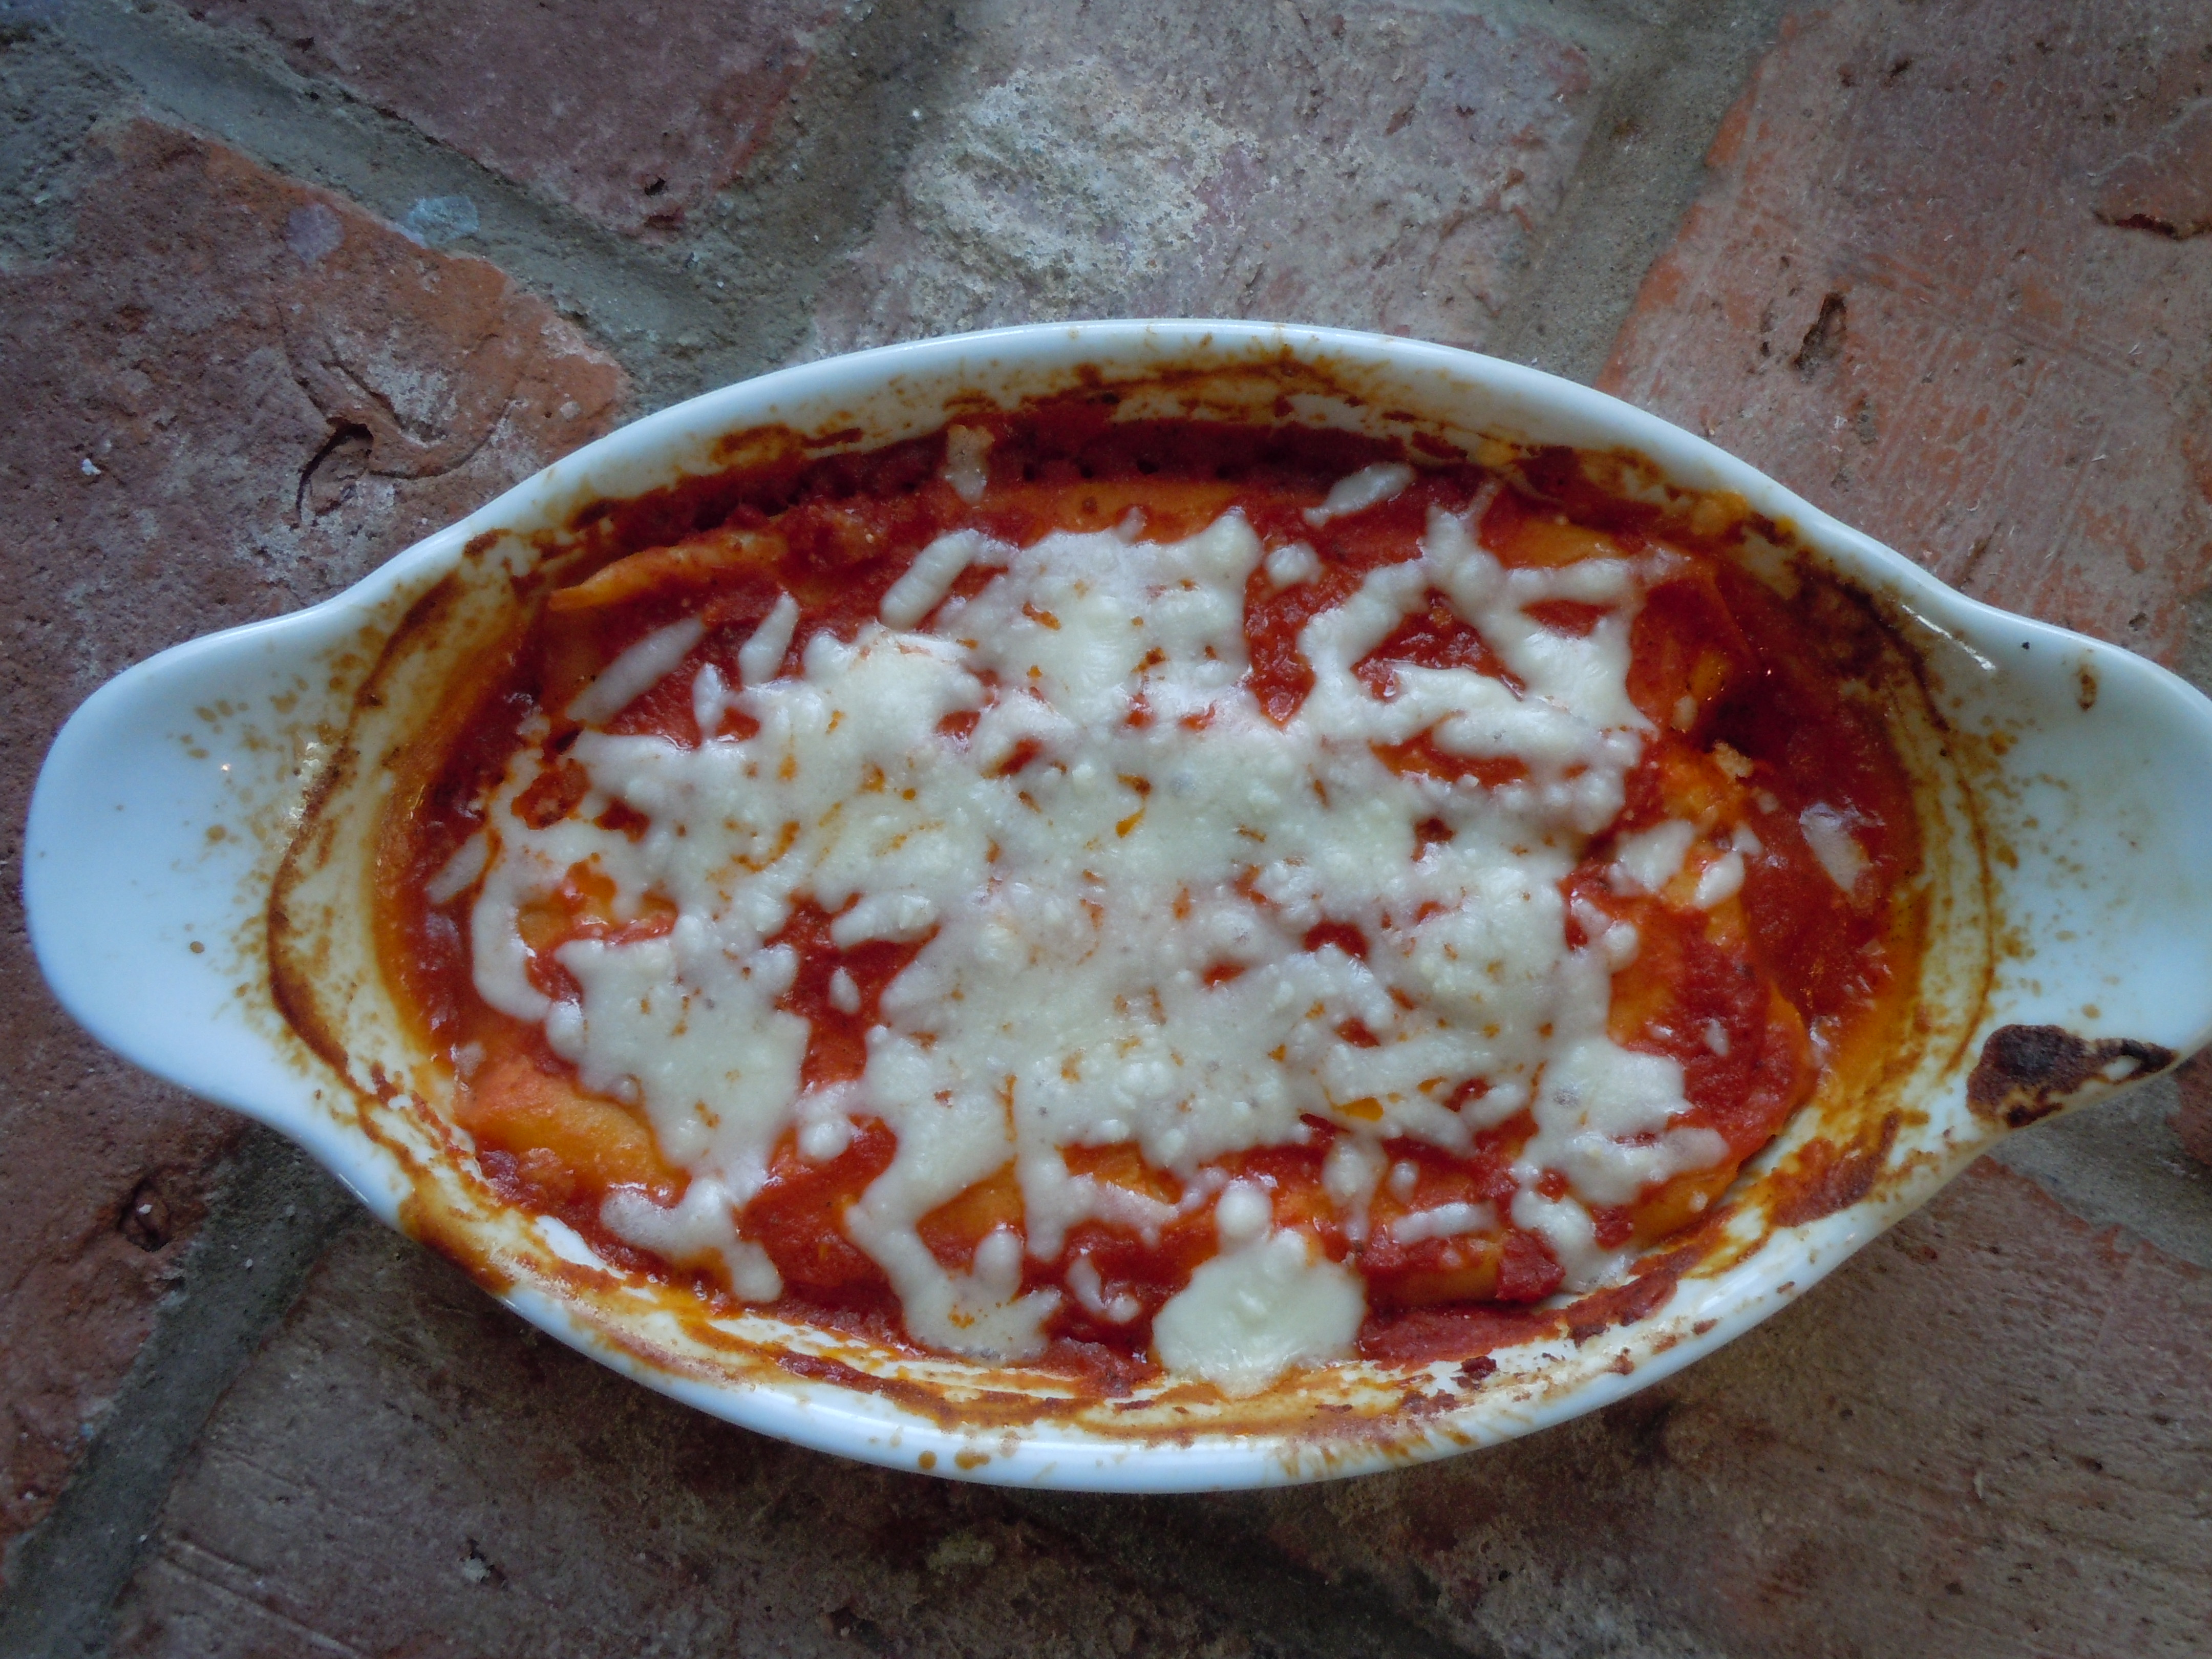
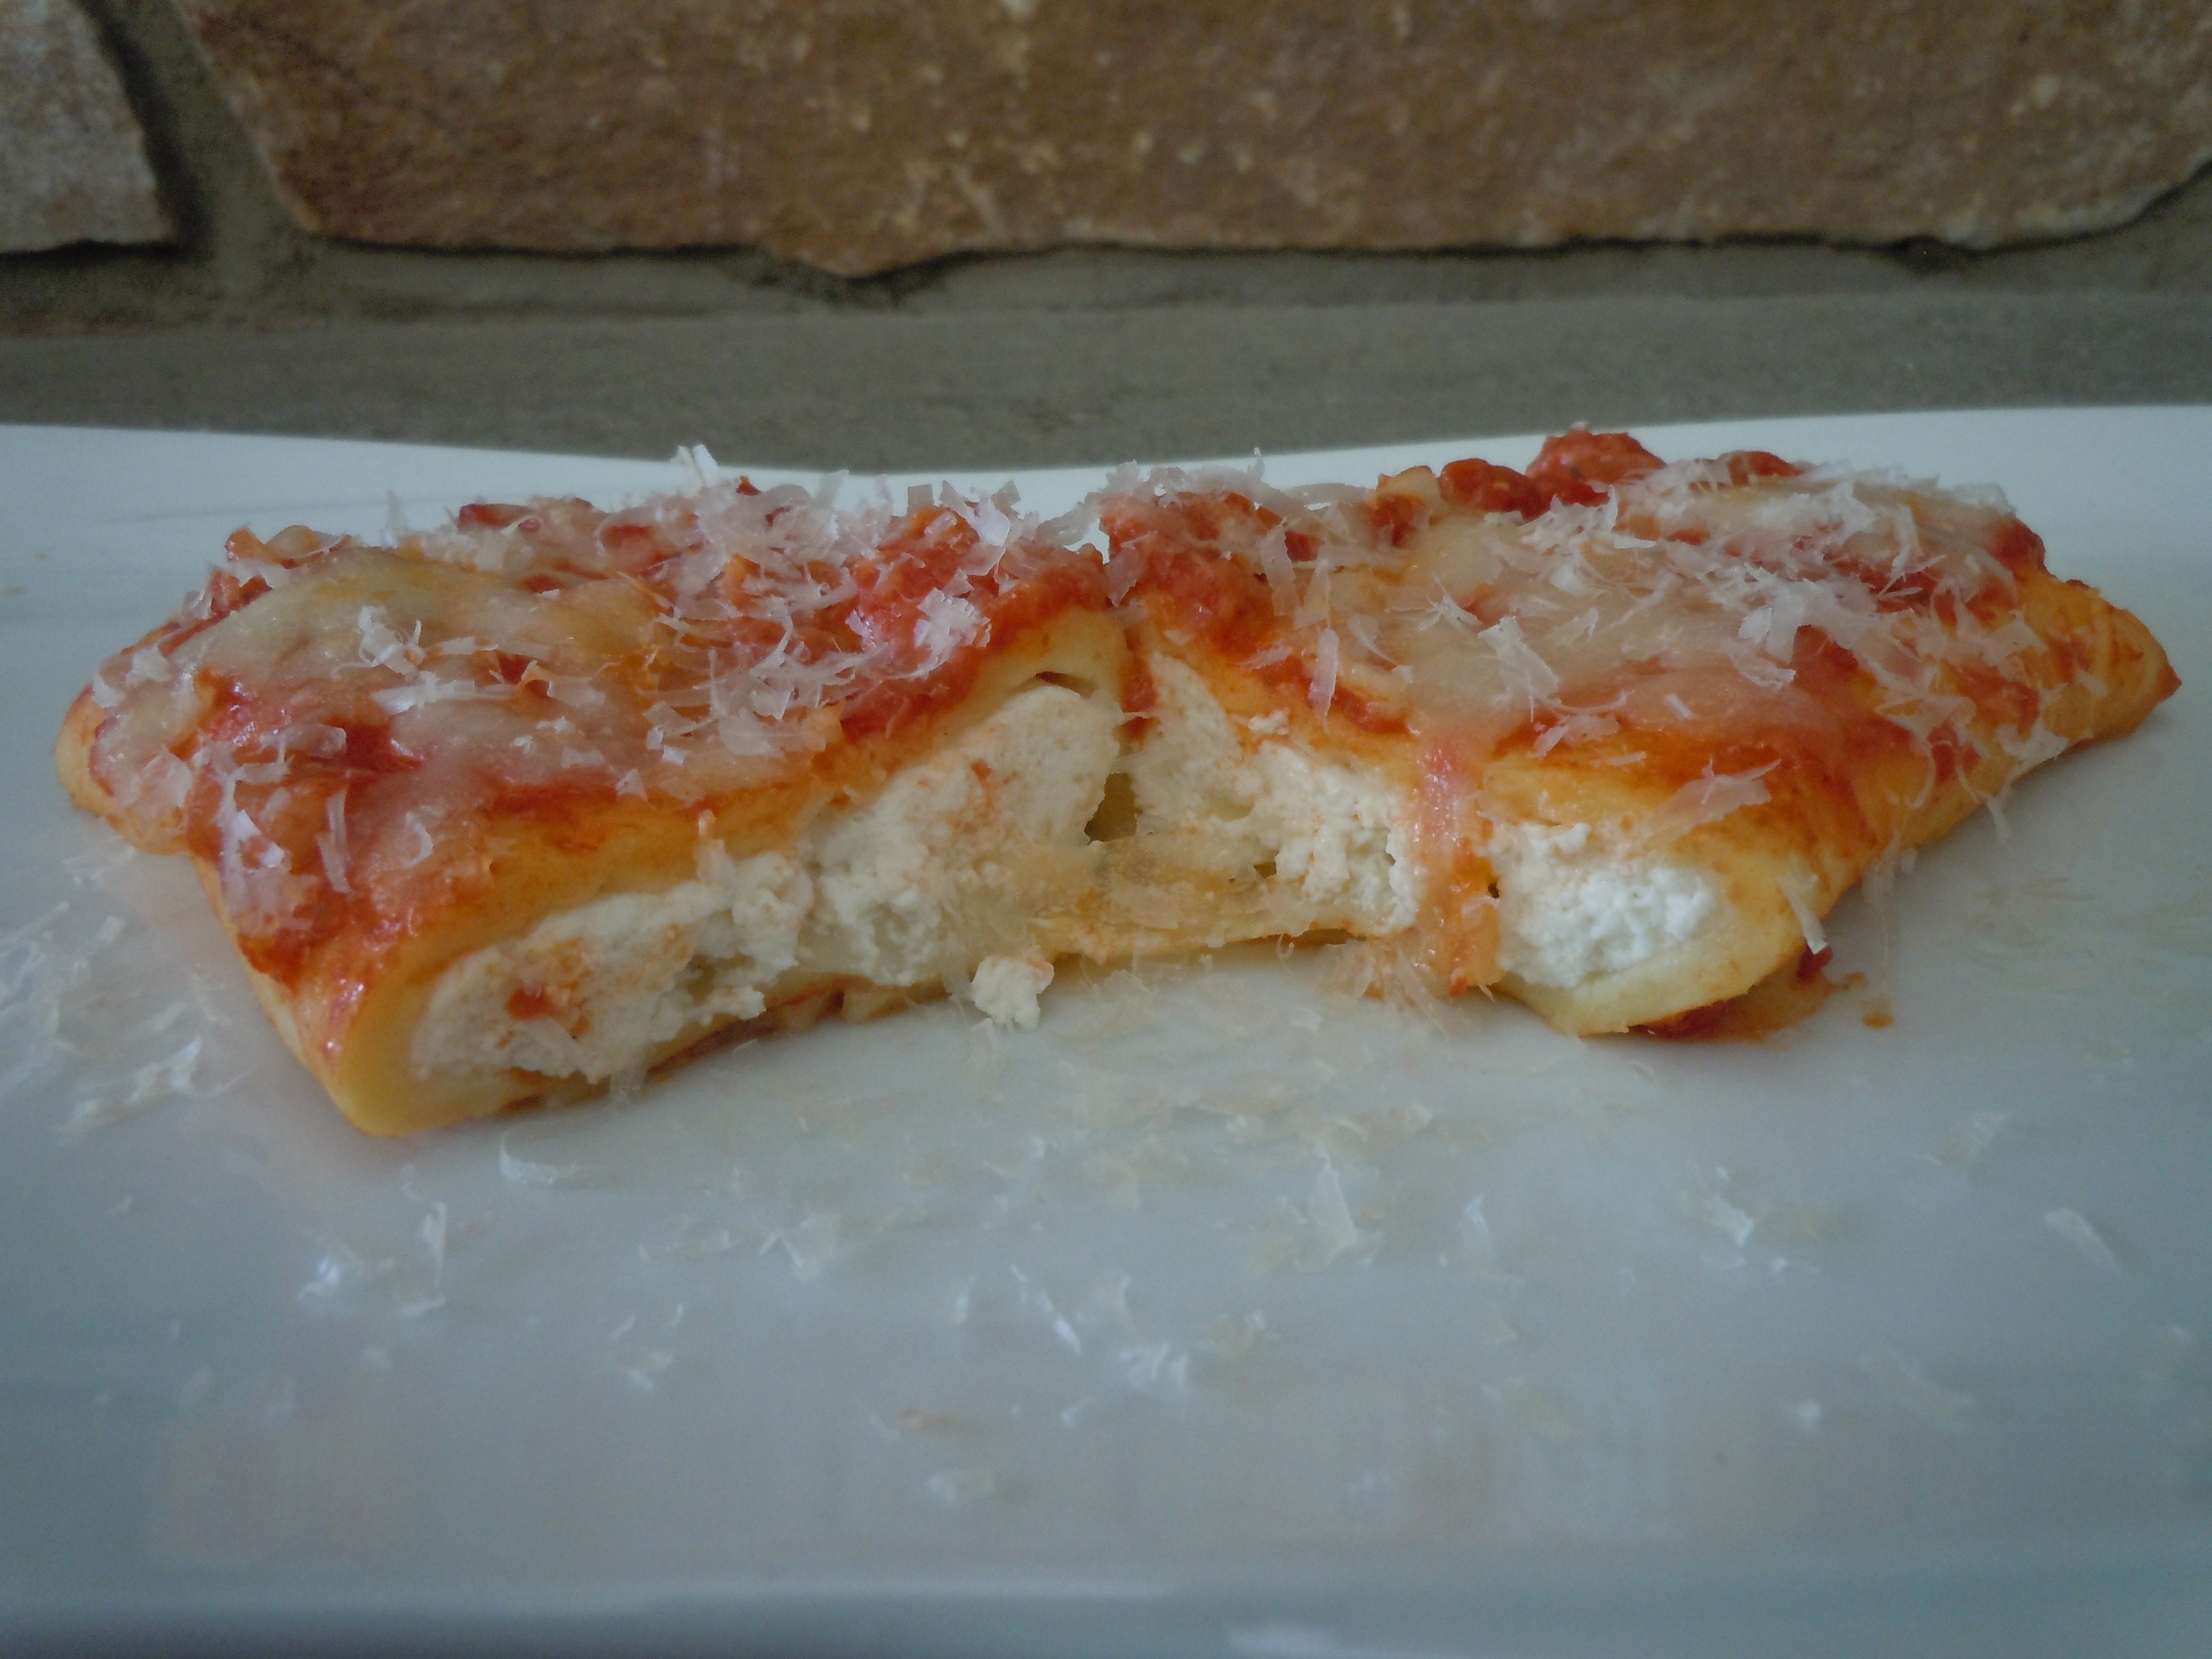
Yes, I am giving up the good’s on this one and I know you will appreciate it because this is one of my very favorite secret recipes that has been in our family for generations! My mother Maria taught me how to make these homemade gourmet manicotti when I was young and now I am thrilled to pass this very special dish on to you.
These are the BEST homemade manicotti I have EVER tasted and I know you will love them too. They are a poured pasta, a crêpe so to speak and are light and fluffy. I’m partial to Liuzzi’s homemade whole milk ricotta, and I user a mix of mozzarella’s from Scamorza, which is a slightly salted/dryer mozzarella to whole milk and skim milk mozzarella. I start off with either mytomato-basil pasta sauceor mypasta sauce 101 for the homemade manicotti. These are an especially festive and a special dish to make for the holidays.
This manicotti batter is poured like a crêpe. It’s light and airy like a crepe but definitely different in texture. The texture of the crêpe is a pasta texture, creamy and soft. These manicotti shells (crêpes) are truly gourmet and you’ll will appreciate how delicate a dish this really is when you make them for your own family and friends. My turkey meatballs would go great with this holiday dish also. A spread of spiral ham or roasted lamb with gourmet manicotti and turkey meatballs …who’s better than you?!
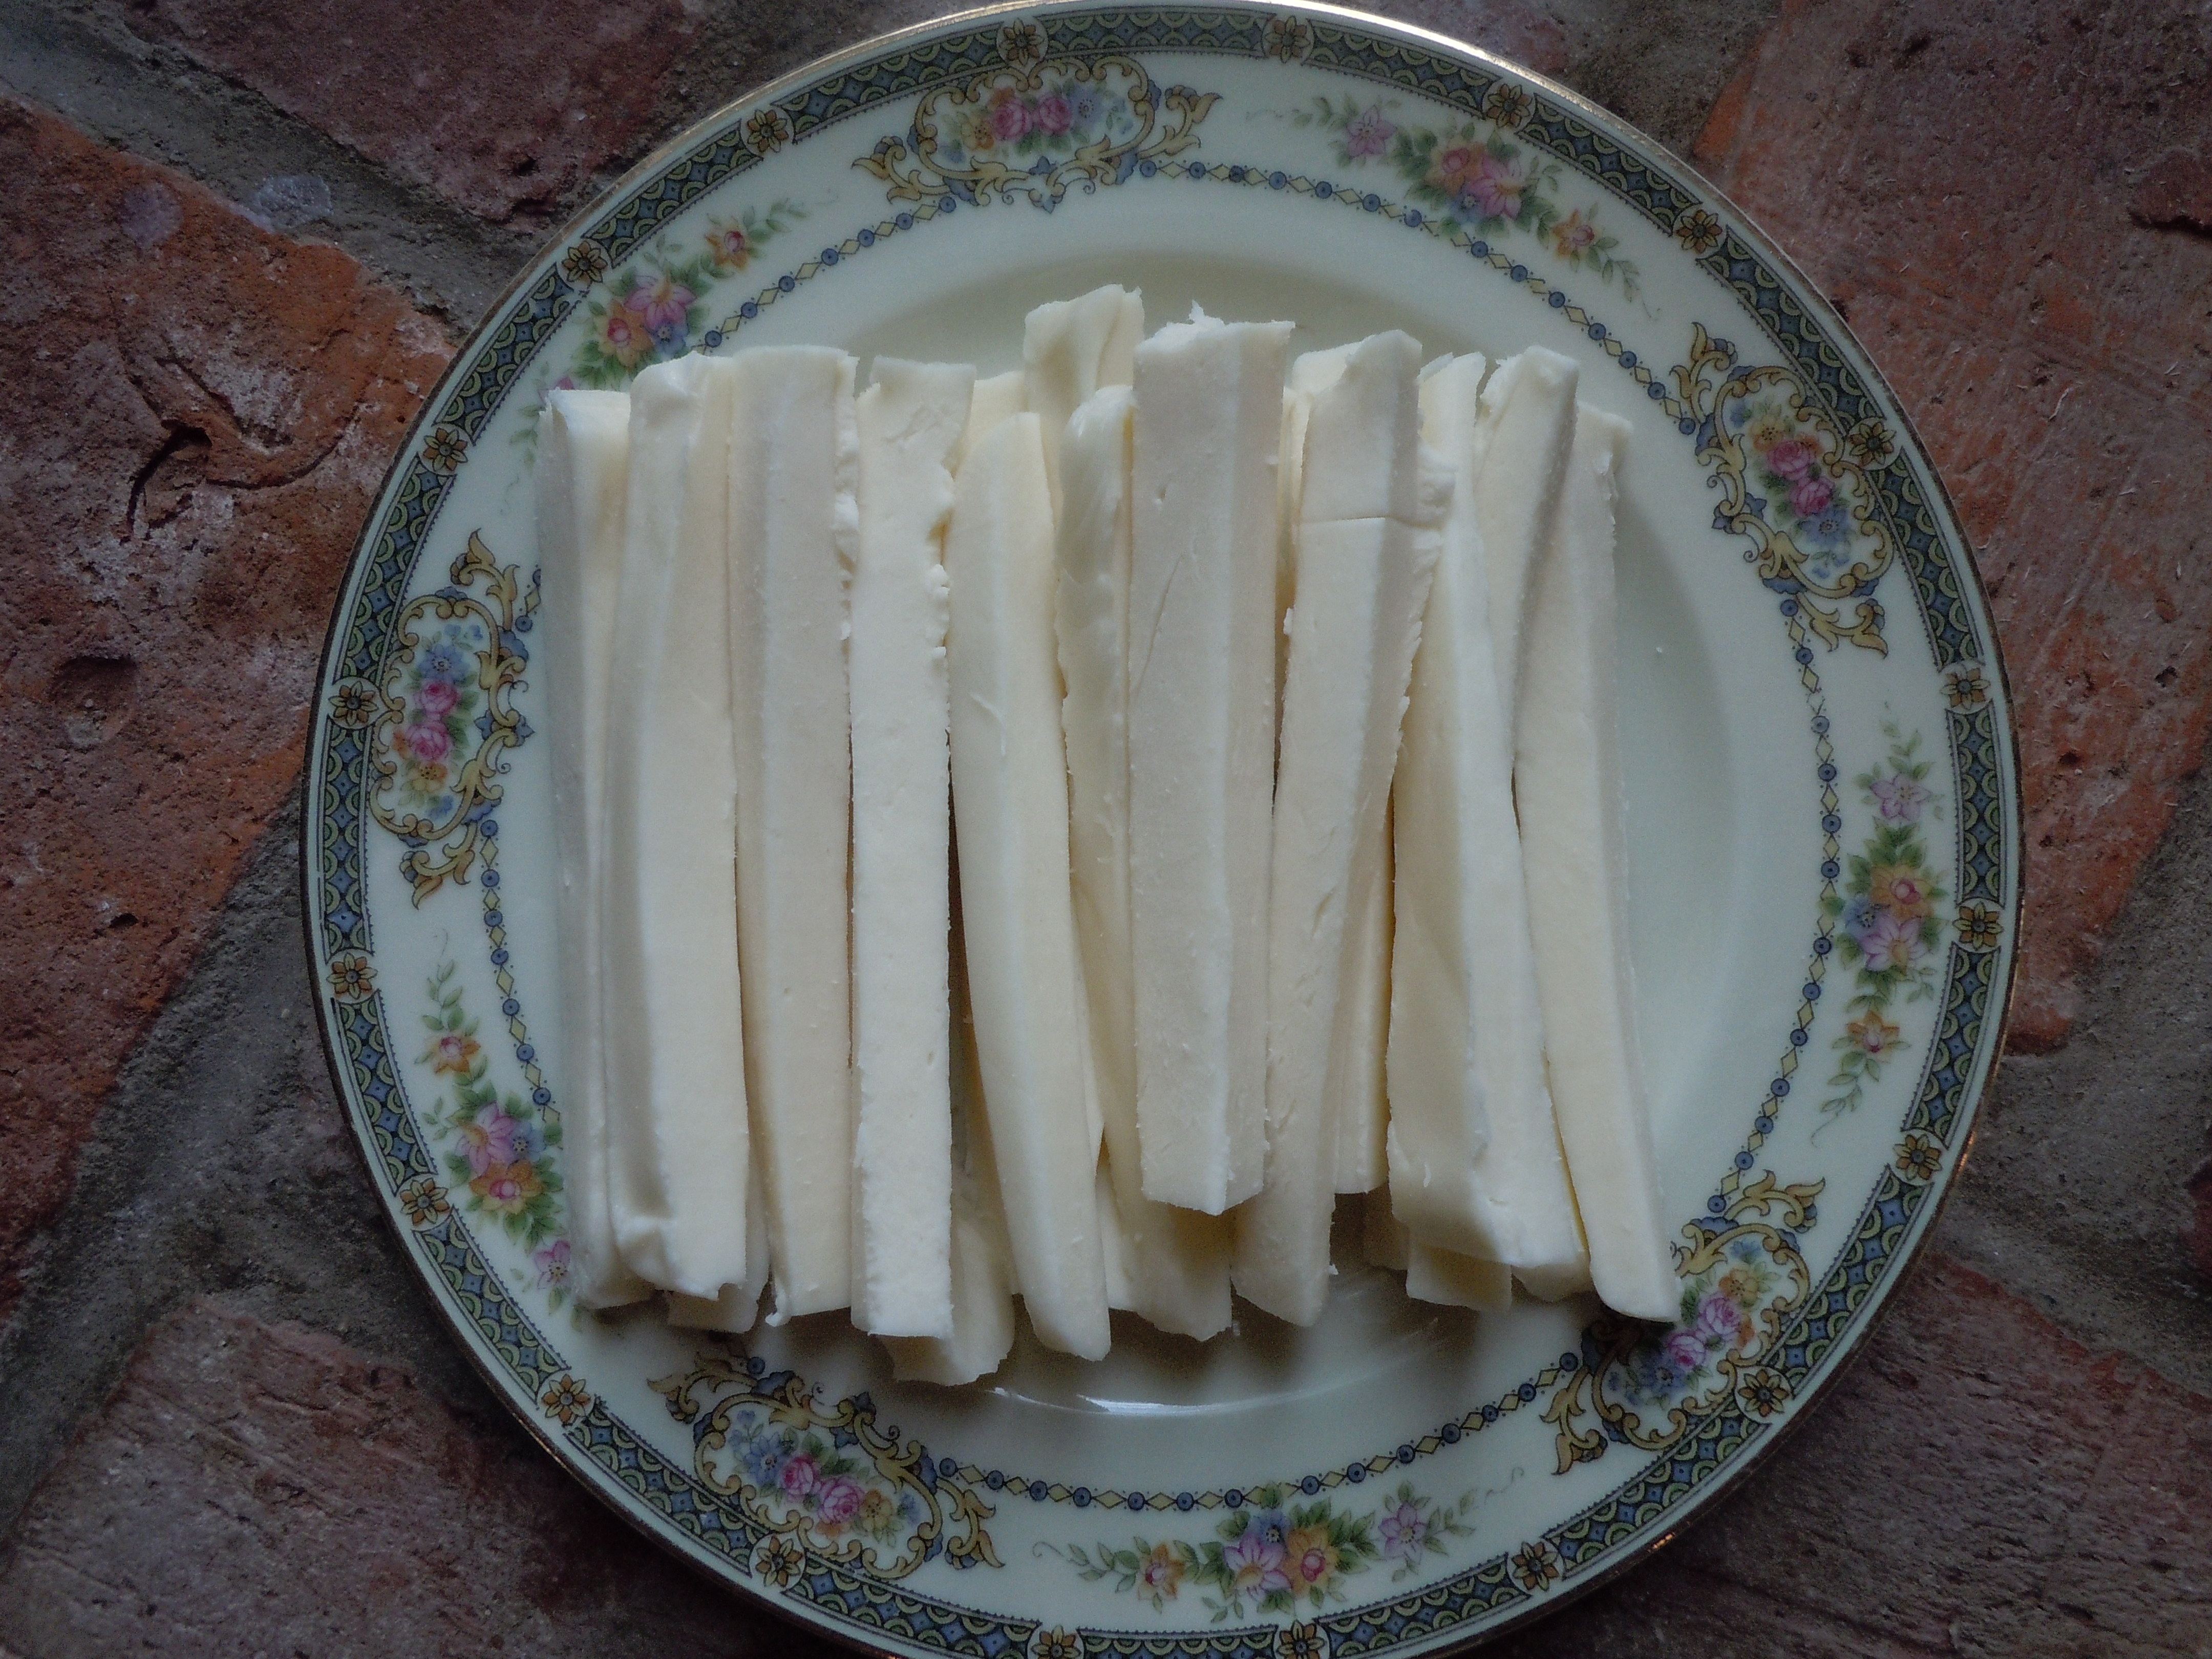
3 lbs. Liuzzi whole milk or “fina style” (a finer ricotta), or your favorite
5 0z. shredded whole milk, 5 oz. park skim and 5 oz. Scamorza mozzarella mixed together
(you can also do 8 oz. whole milk and 8 oz. part skim shedded and mixed)
5″ cast iron pan or 5″ non-stick pan
Baking pan approx. 11″ x 16″
Recipe forTomato-Basil Pasta Sauce Recipestarting the sauce off by sautéing pork chops with or with out the bone…bone adds more flavor. (Tomato-Basil Pasta Sauce recipe is a 20-30 minute simmer but for manicotti simmer sauce for 1-2 hours if possible)
You could also use my slow cooked Pasta Sauce 101 recipe instead
Directions:
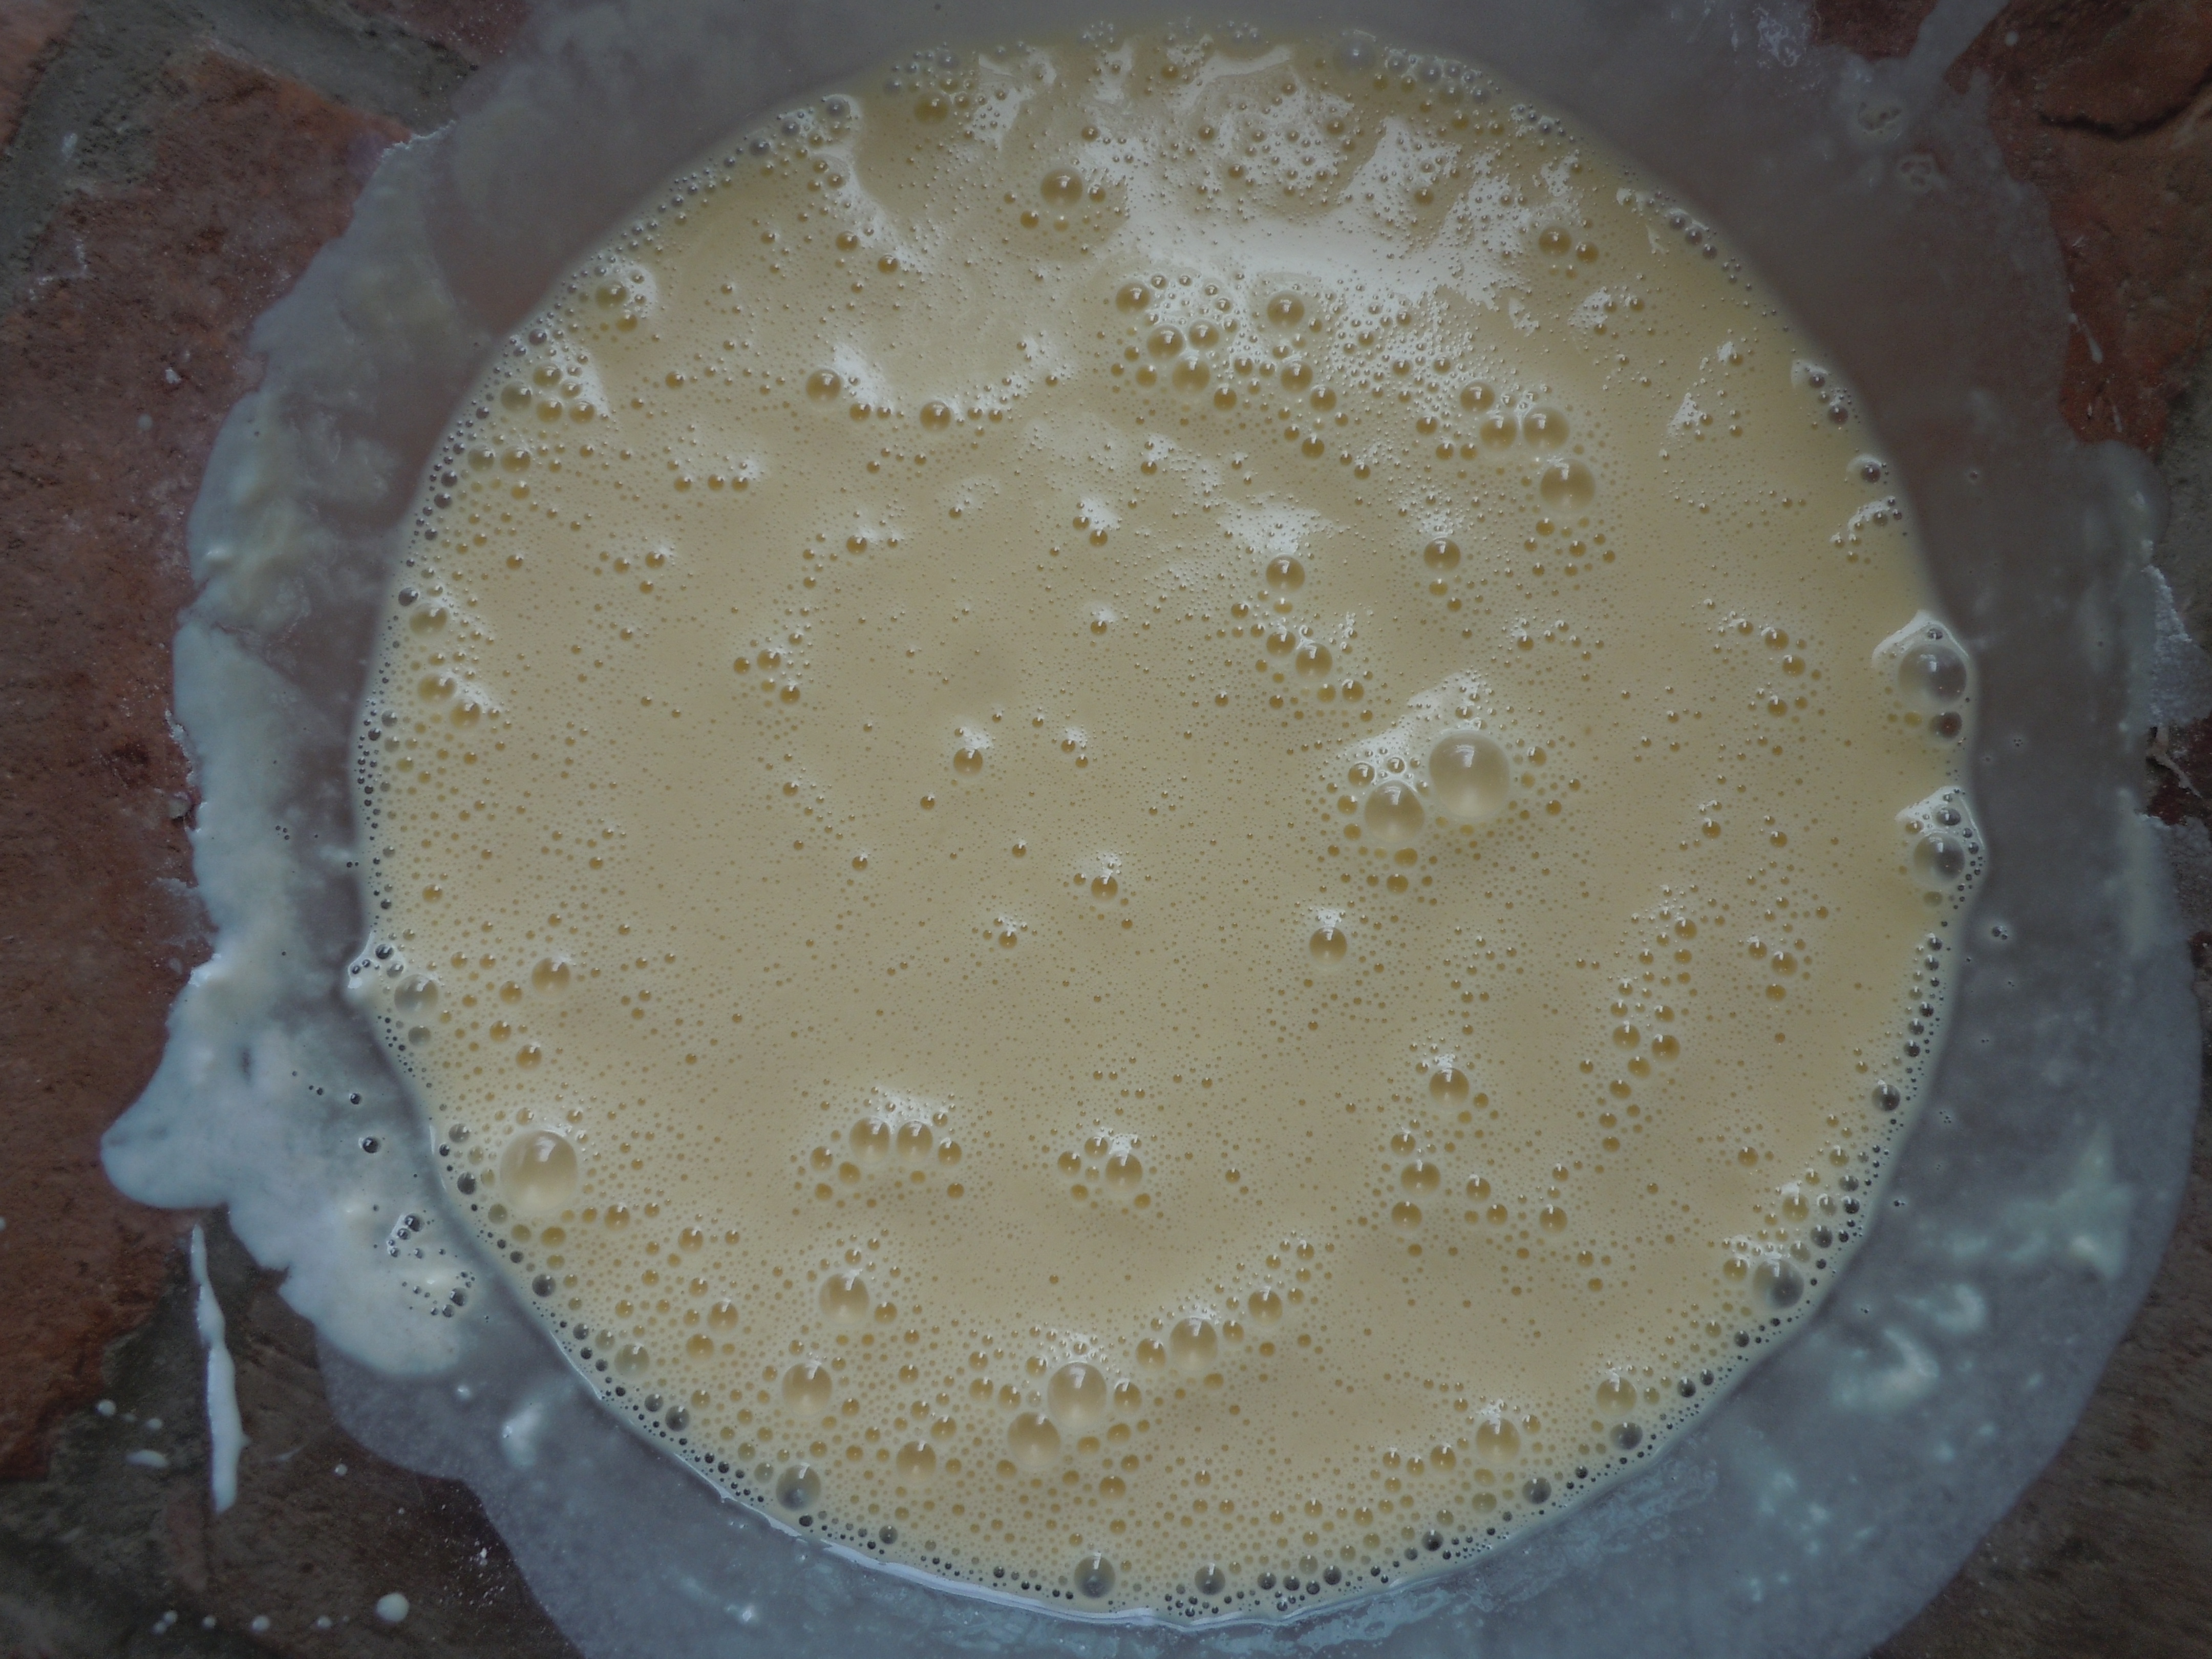
In a large bowl whisk 1 cup flour, 1/4 Tsp salt with 1 cup water (approx. 20 whisks)
Add in 1 egg at a time and whisk about 5 whisks per egg
Put cast iron pan on stove on medium/high heat (a 7 out of an 11)
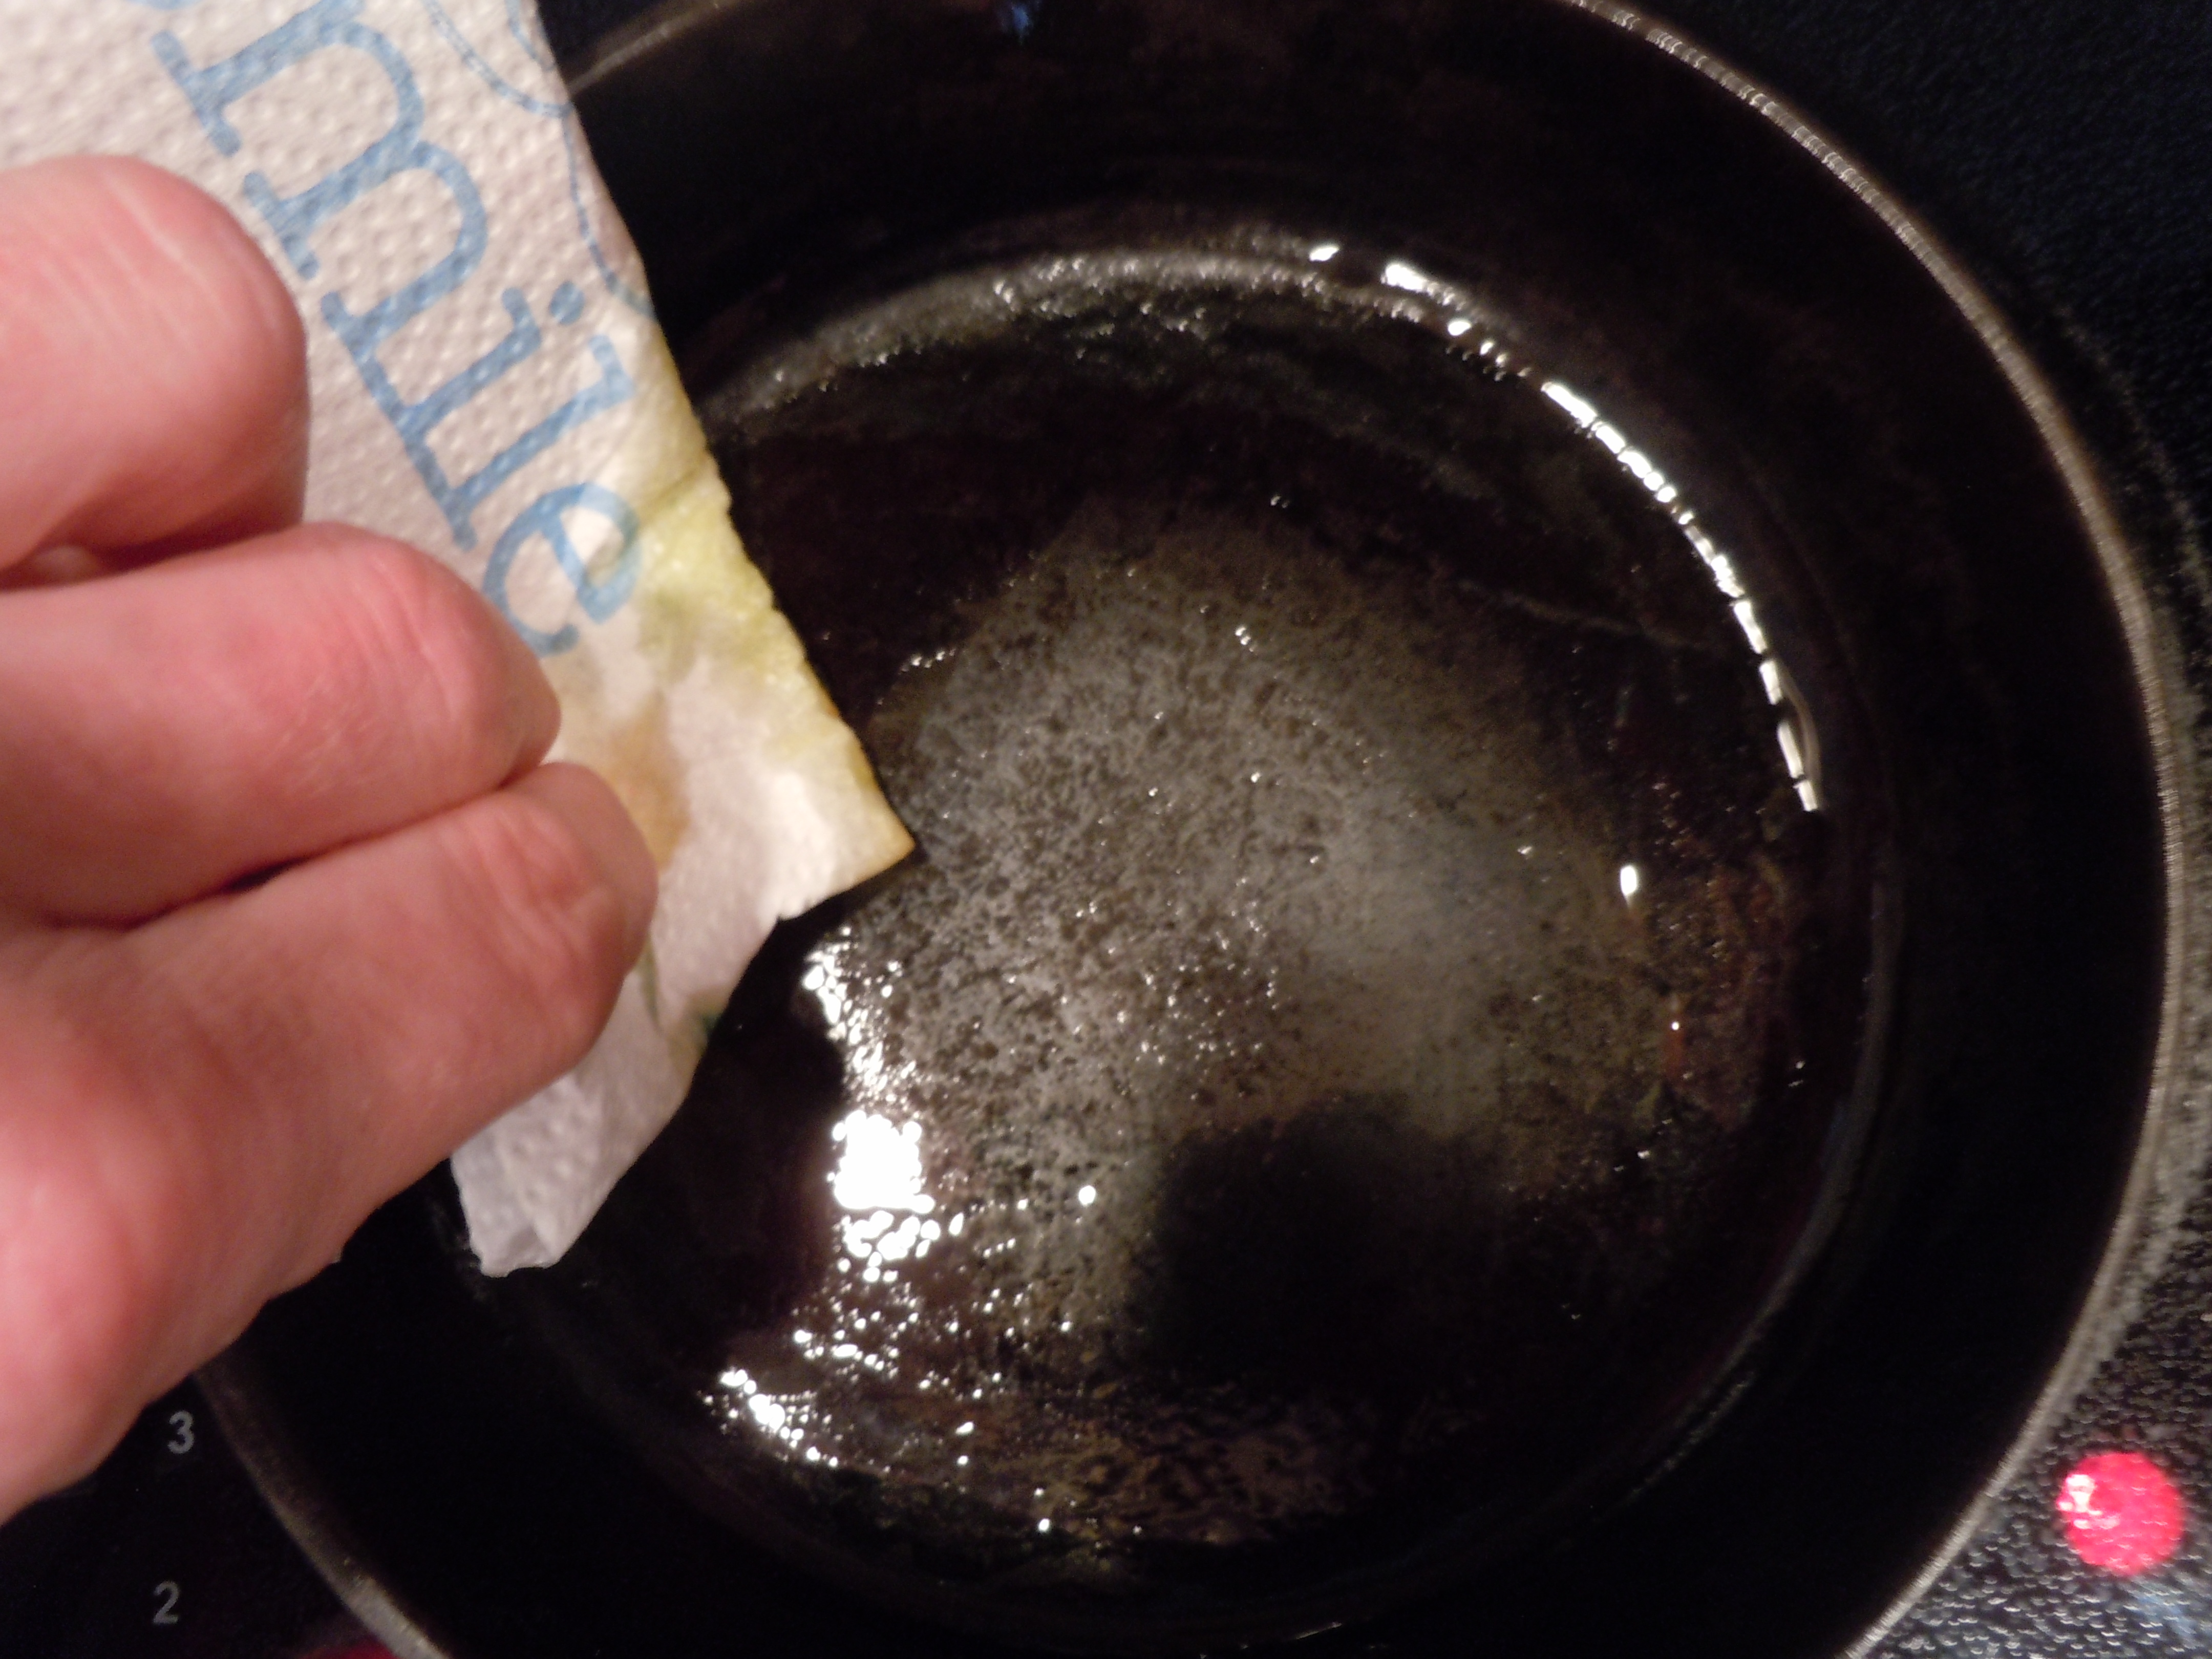
Put a couple of Tbsp of olive oil in a bowl with a paper towel
Rub pan with olive oil-saturated paper towel in between cooking poured pasta batter
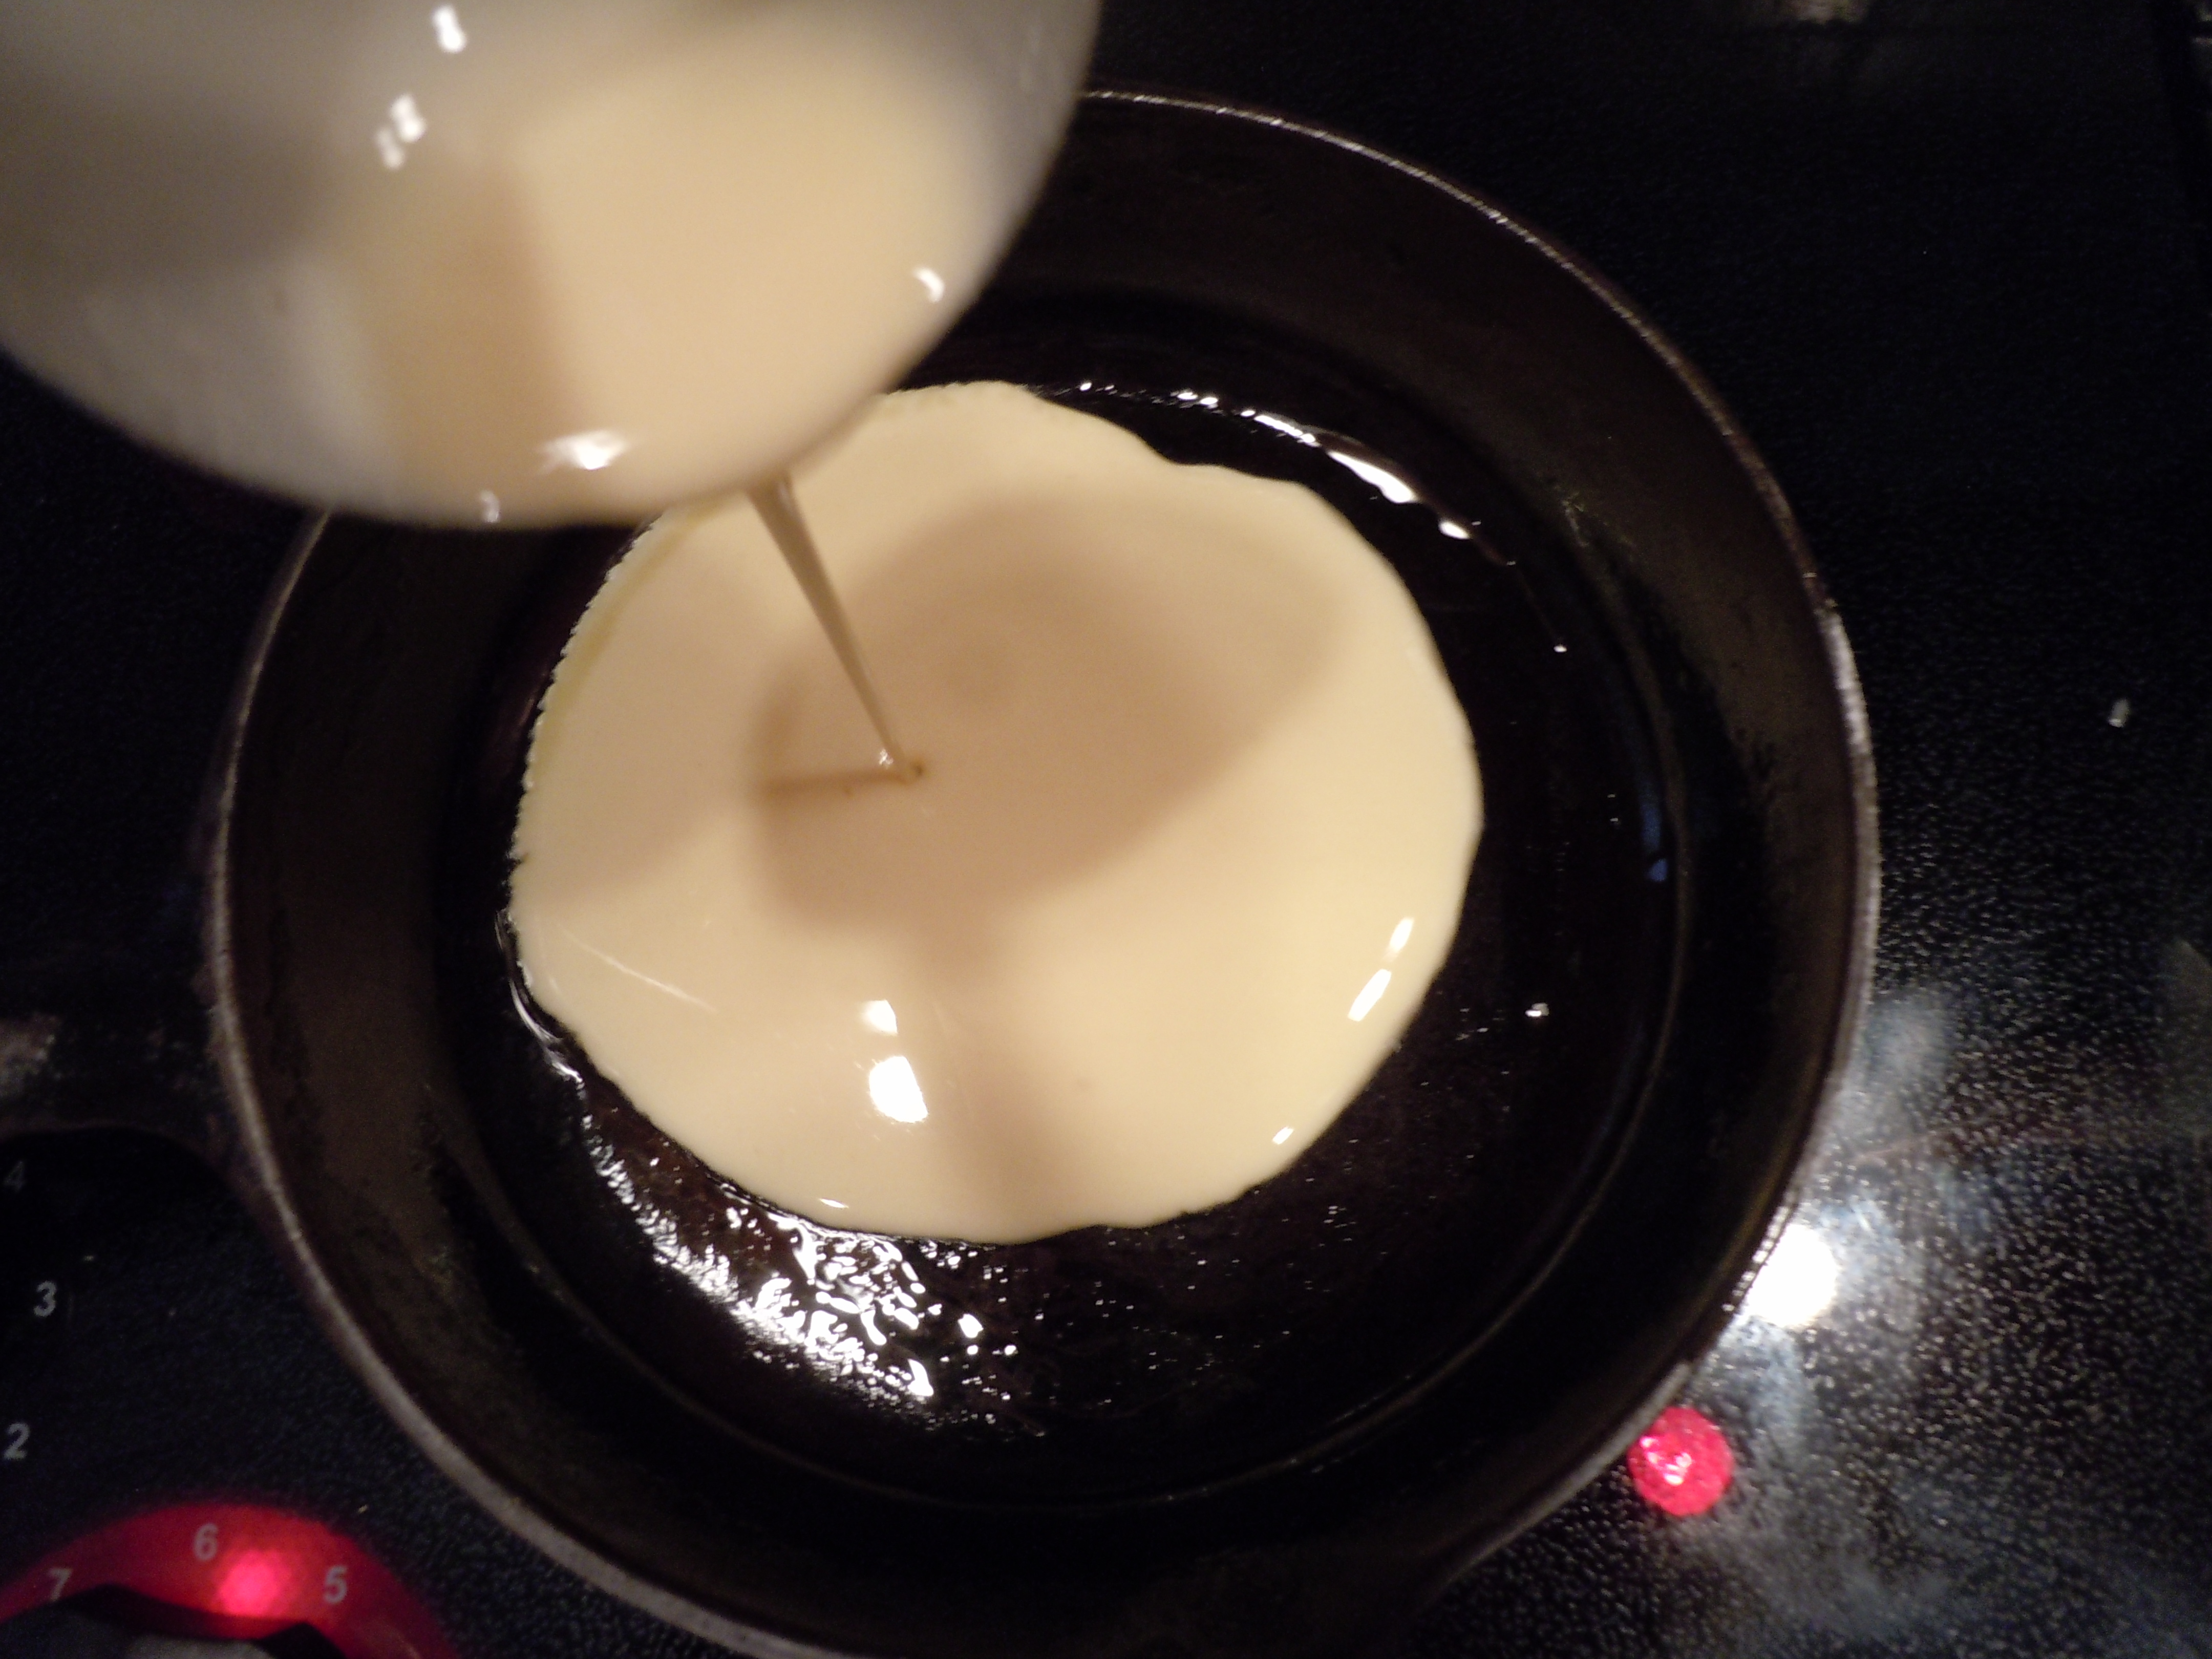
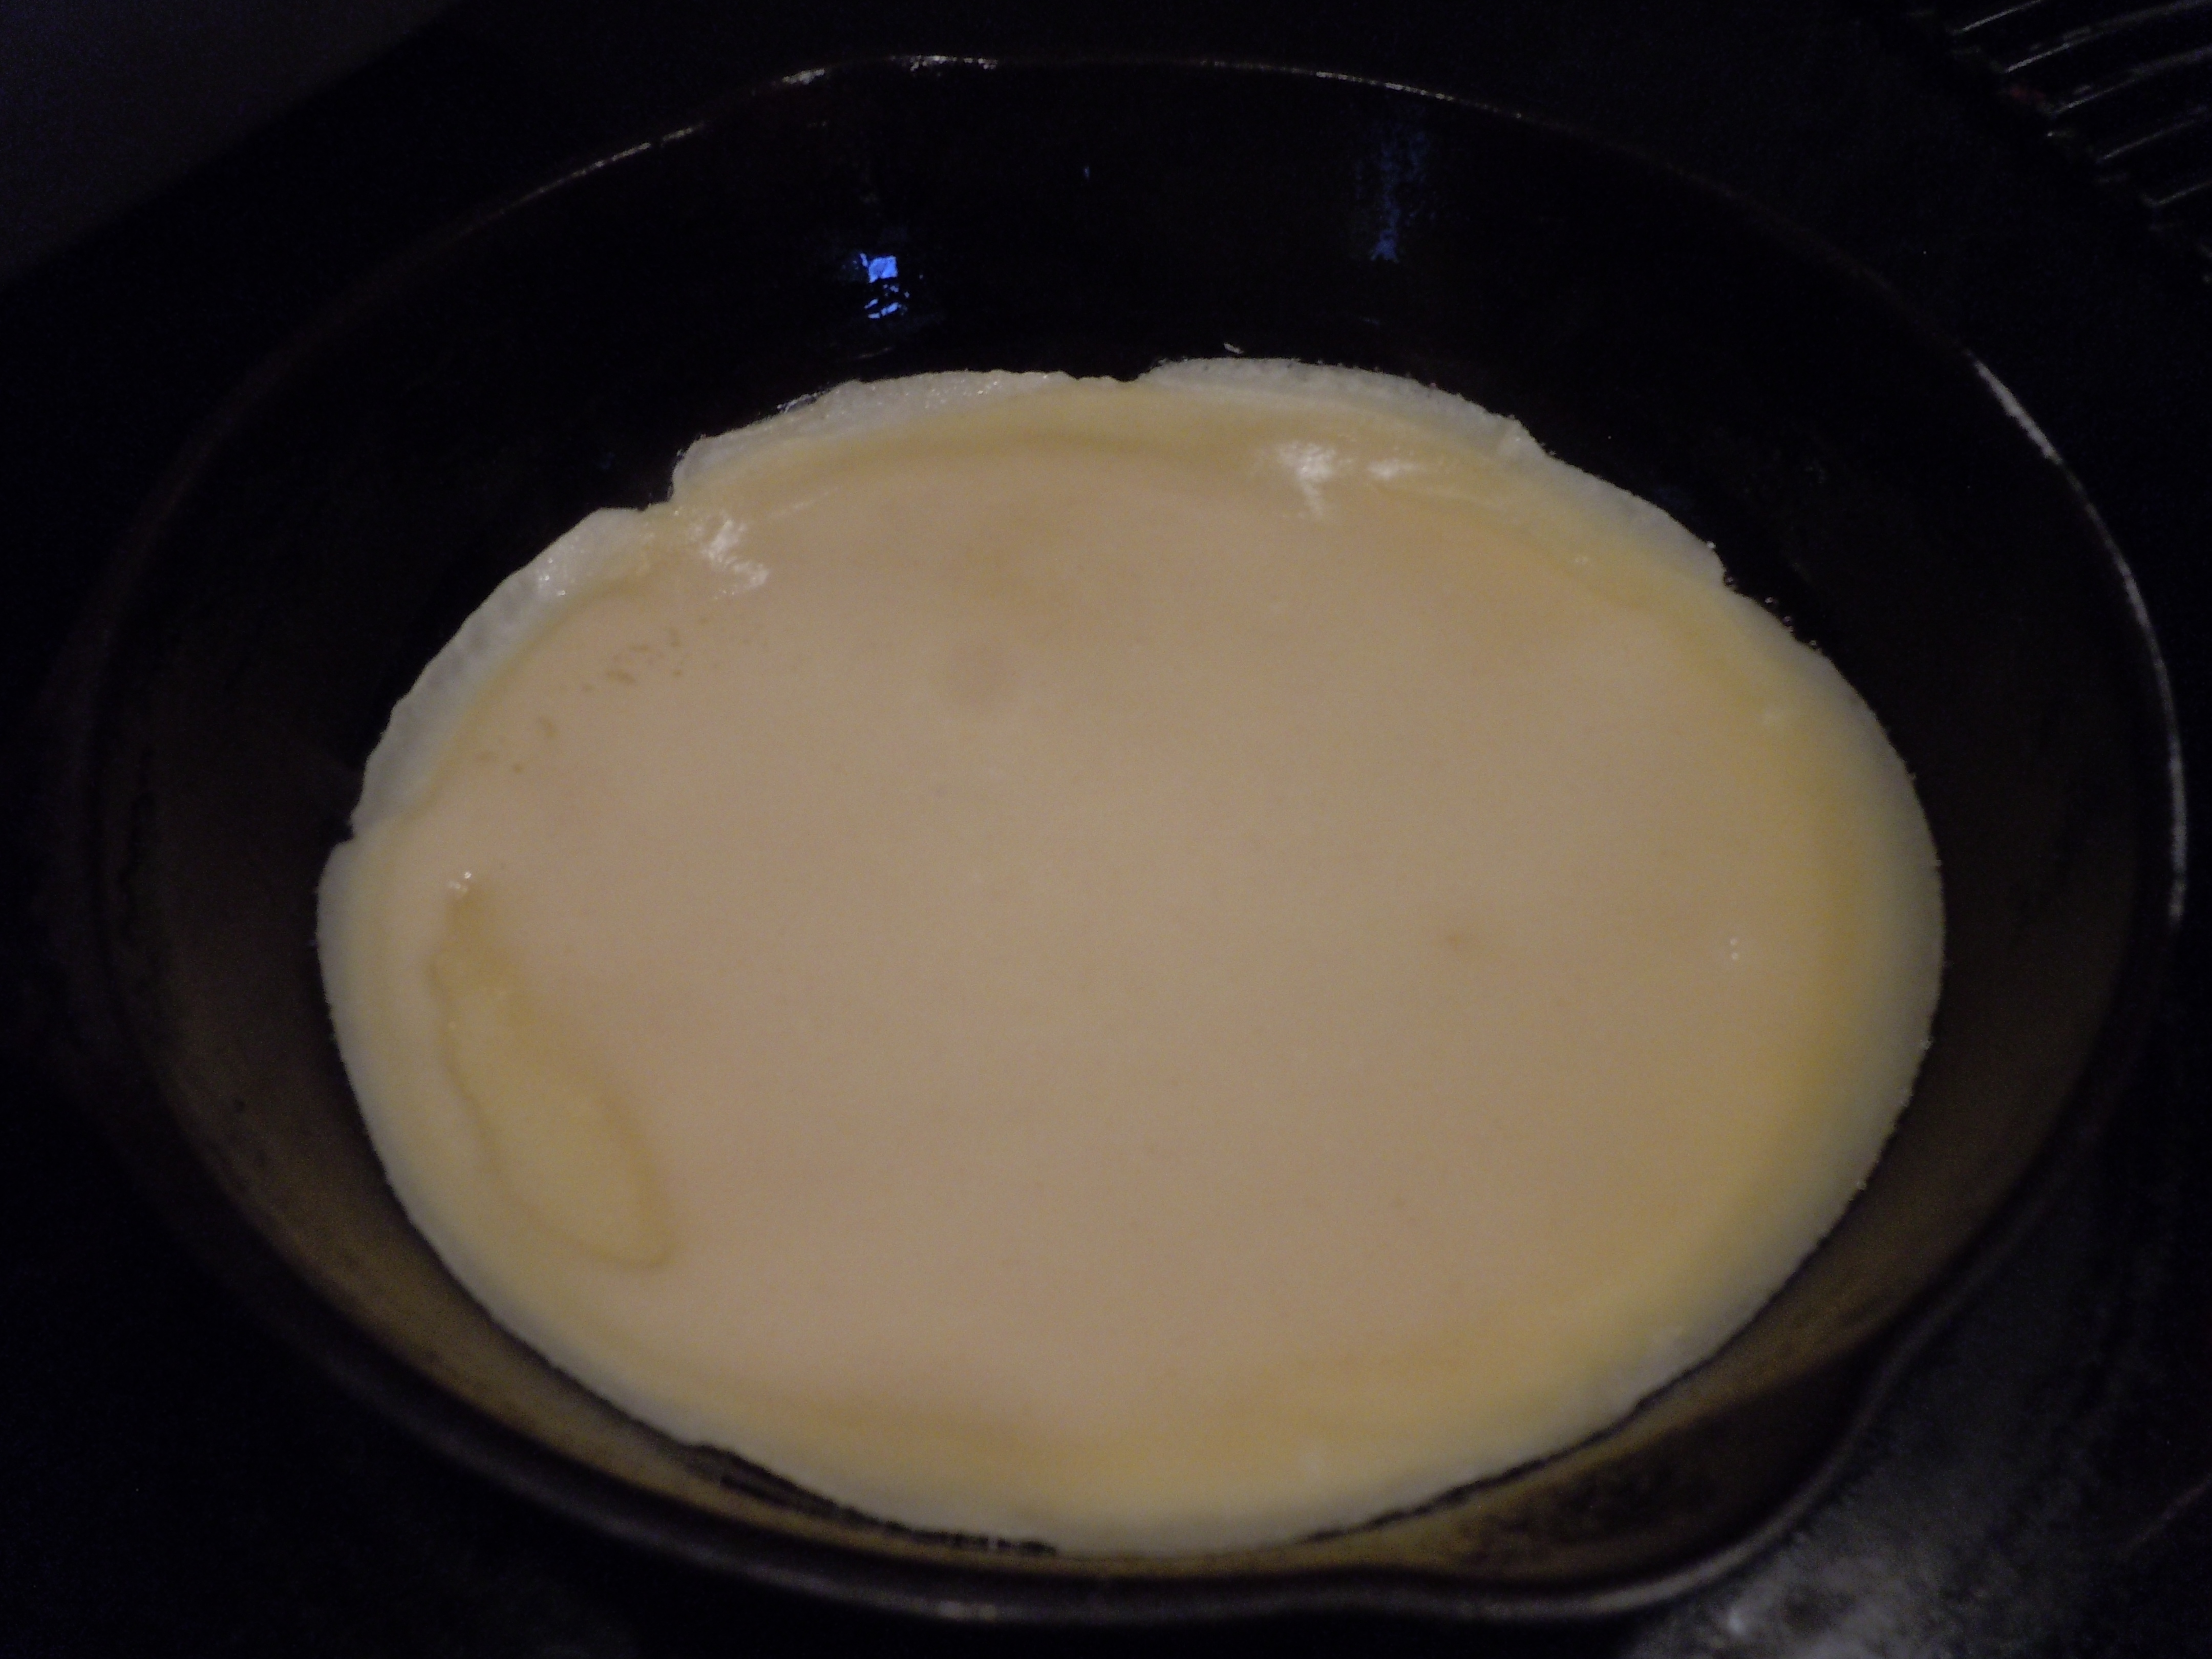
Pour in a ladle of batter into hot pan, approx. a little less than 1/4 cup laddle
Pick up pan and swirl around 3 times and place back down onto stove
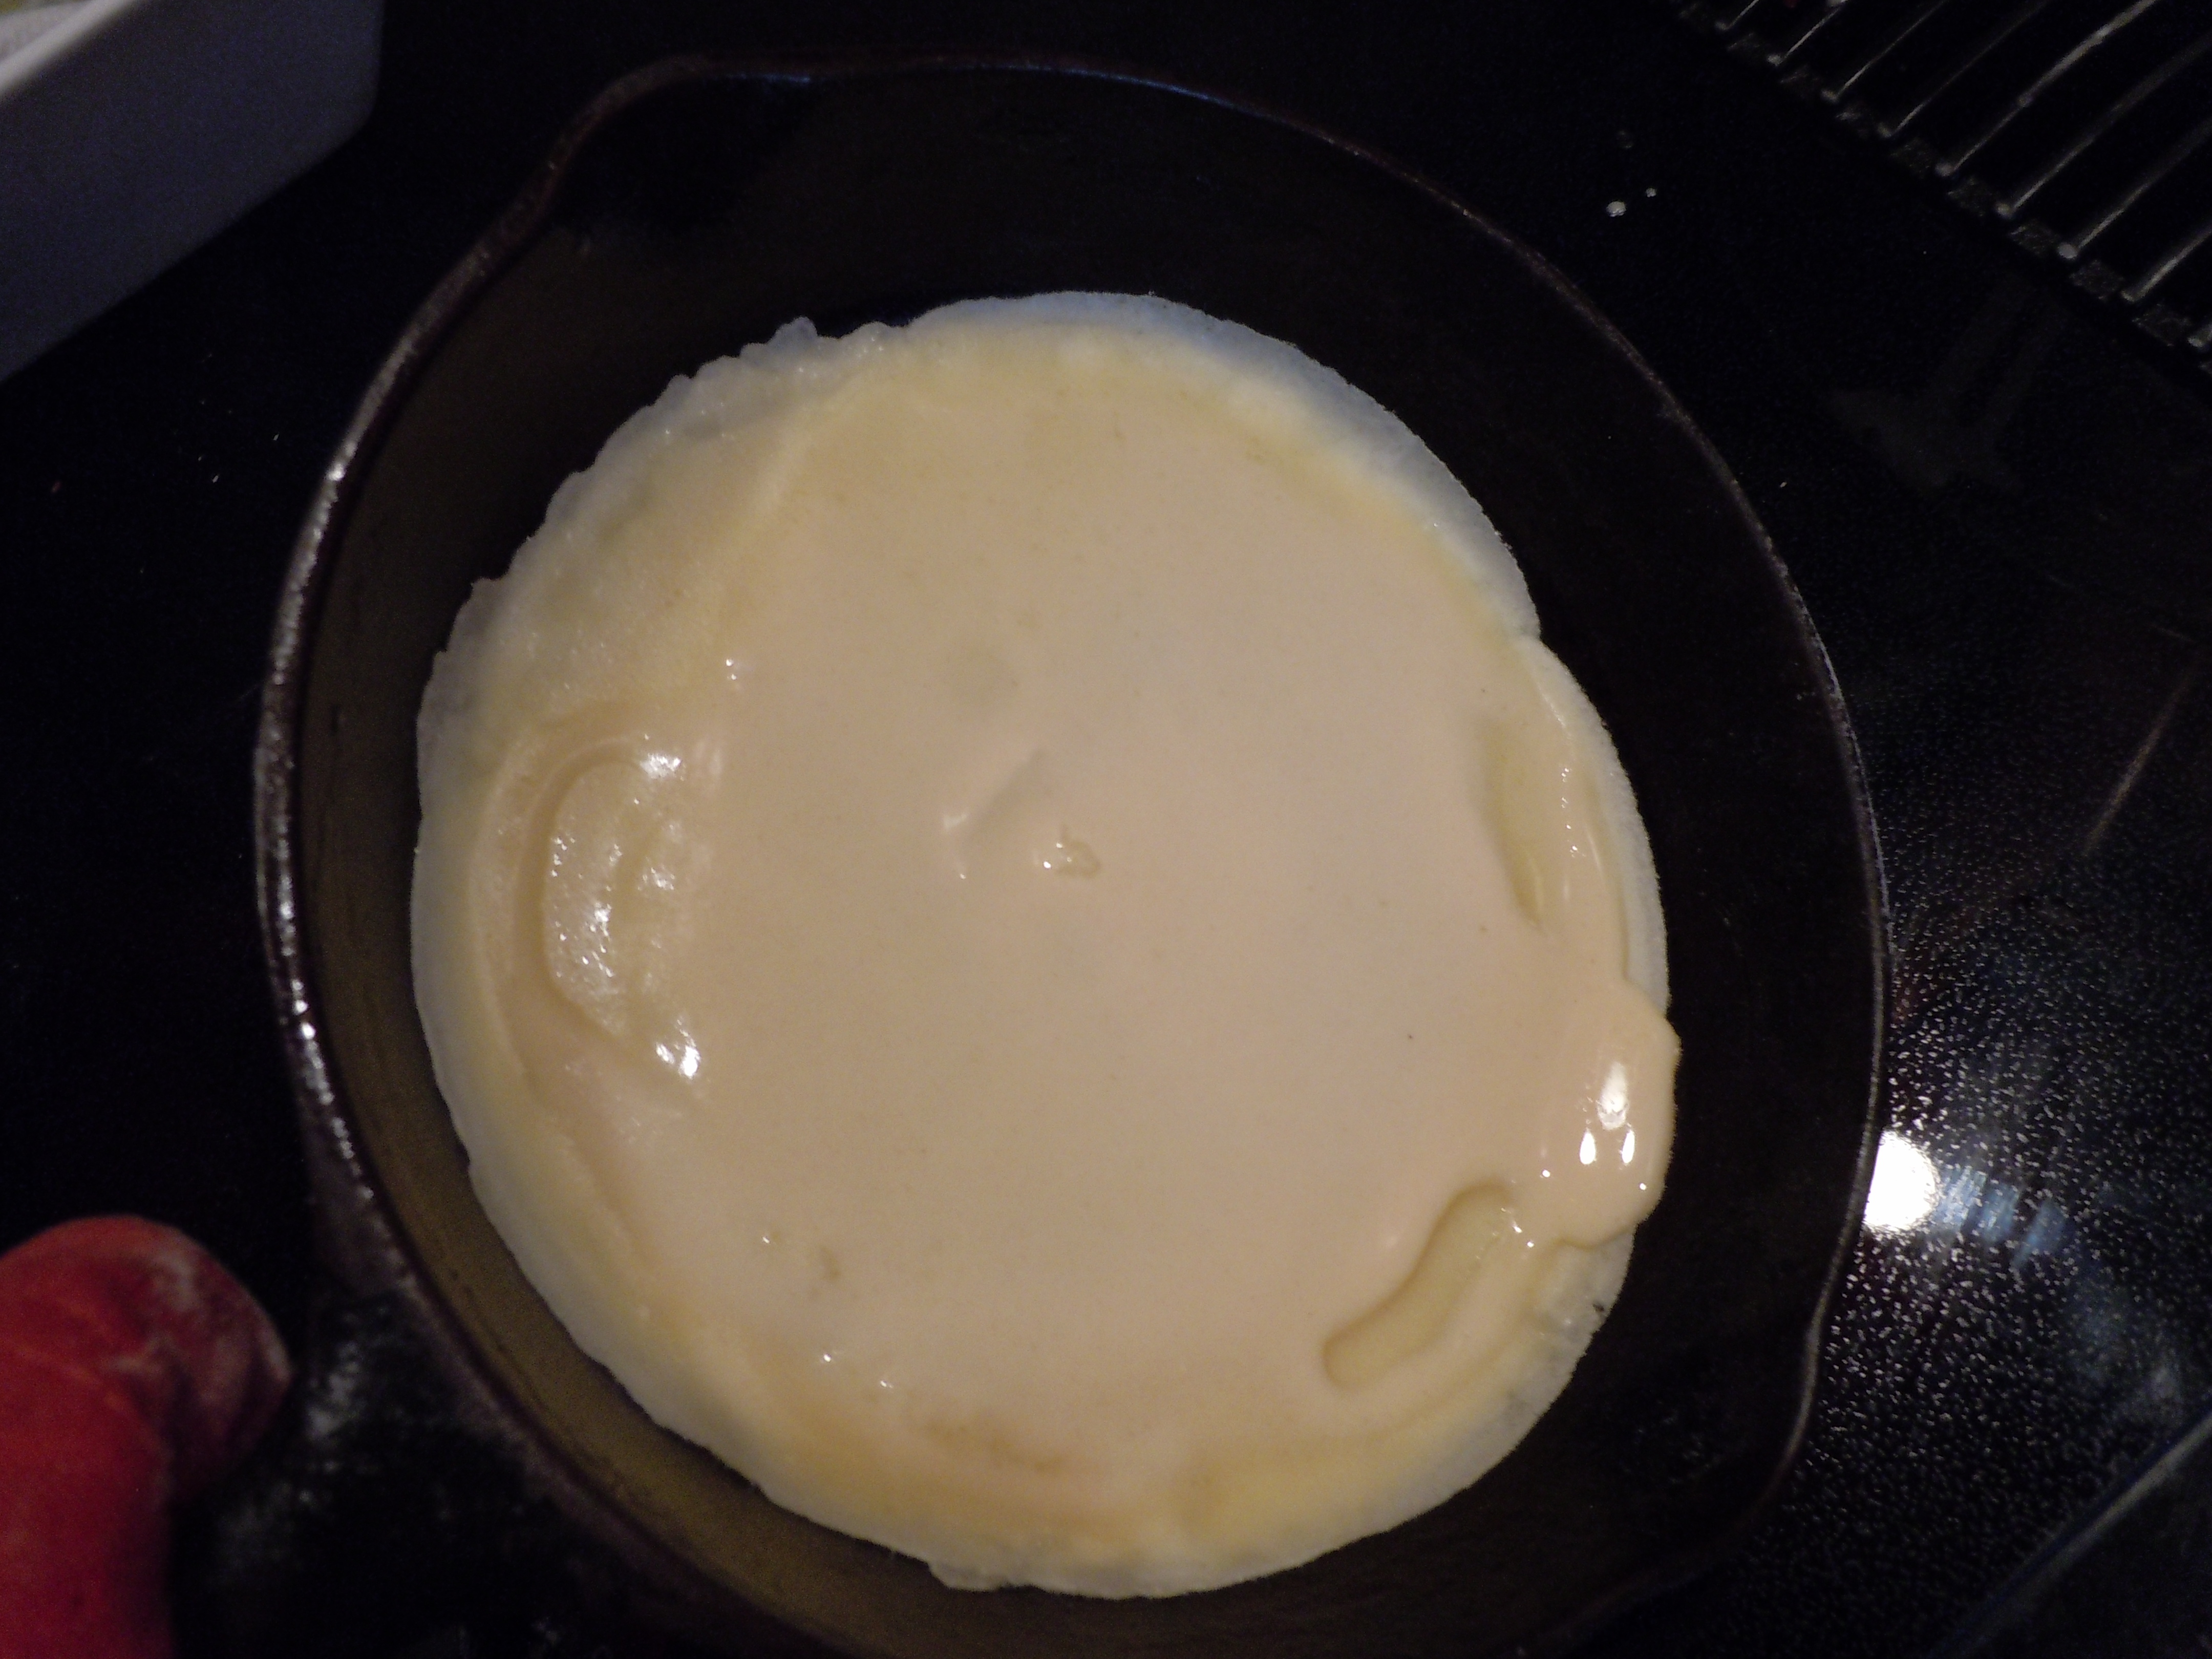
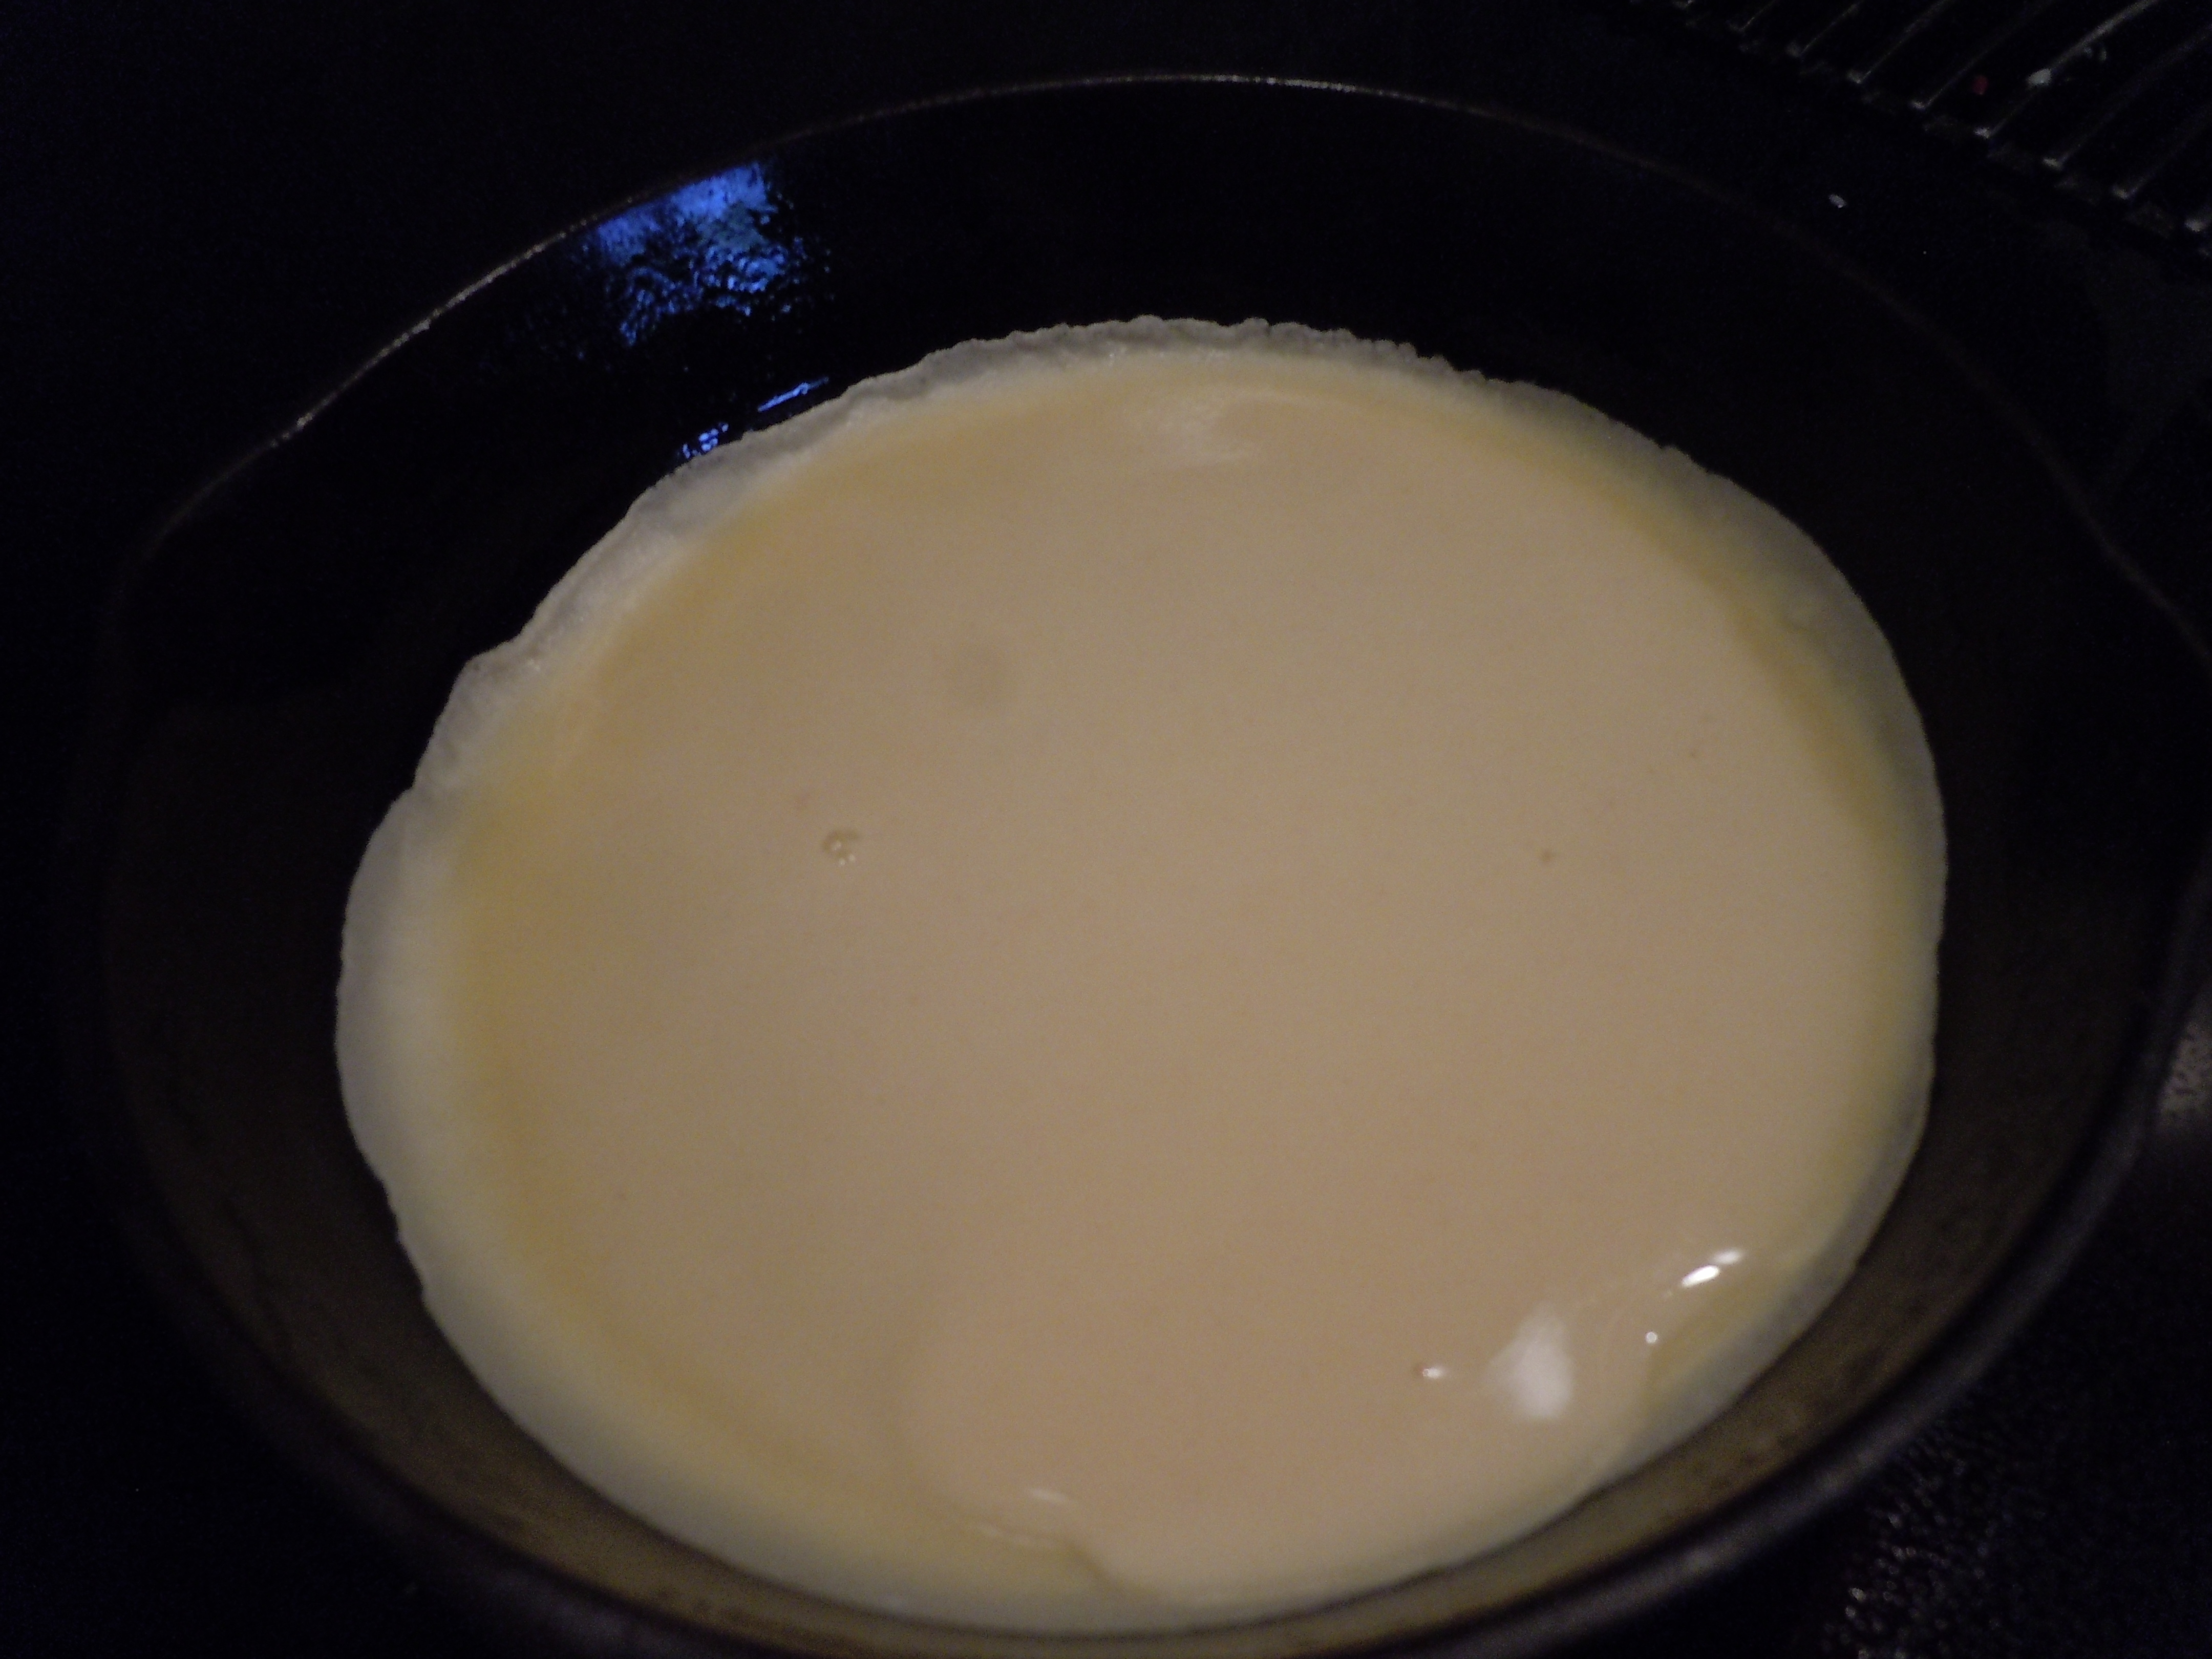
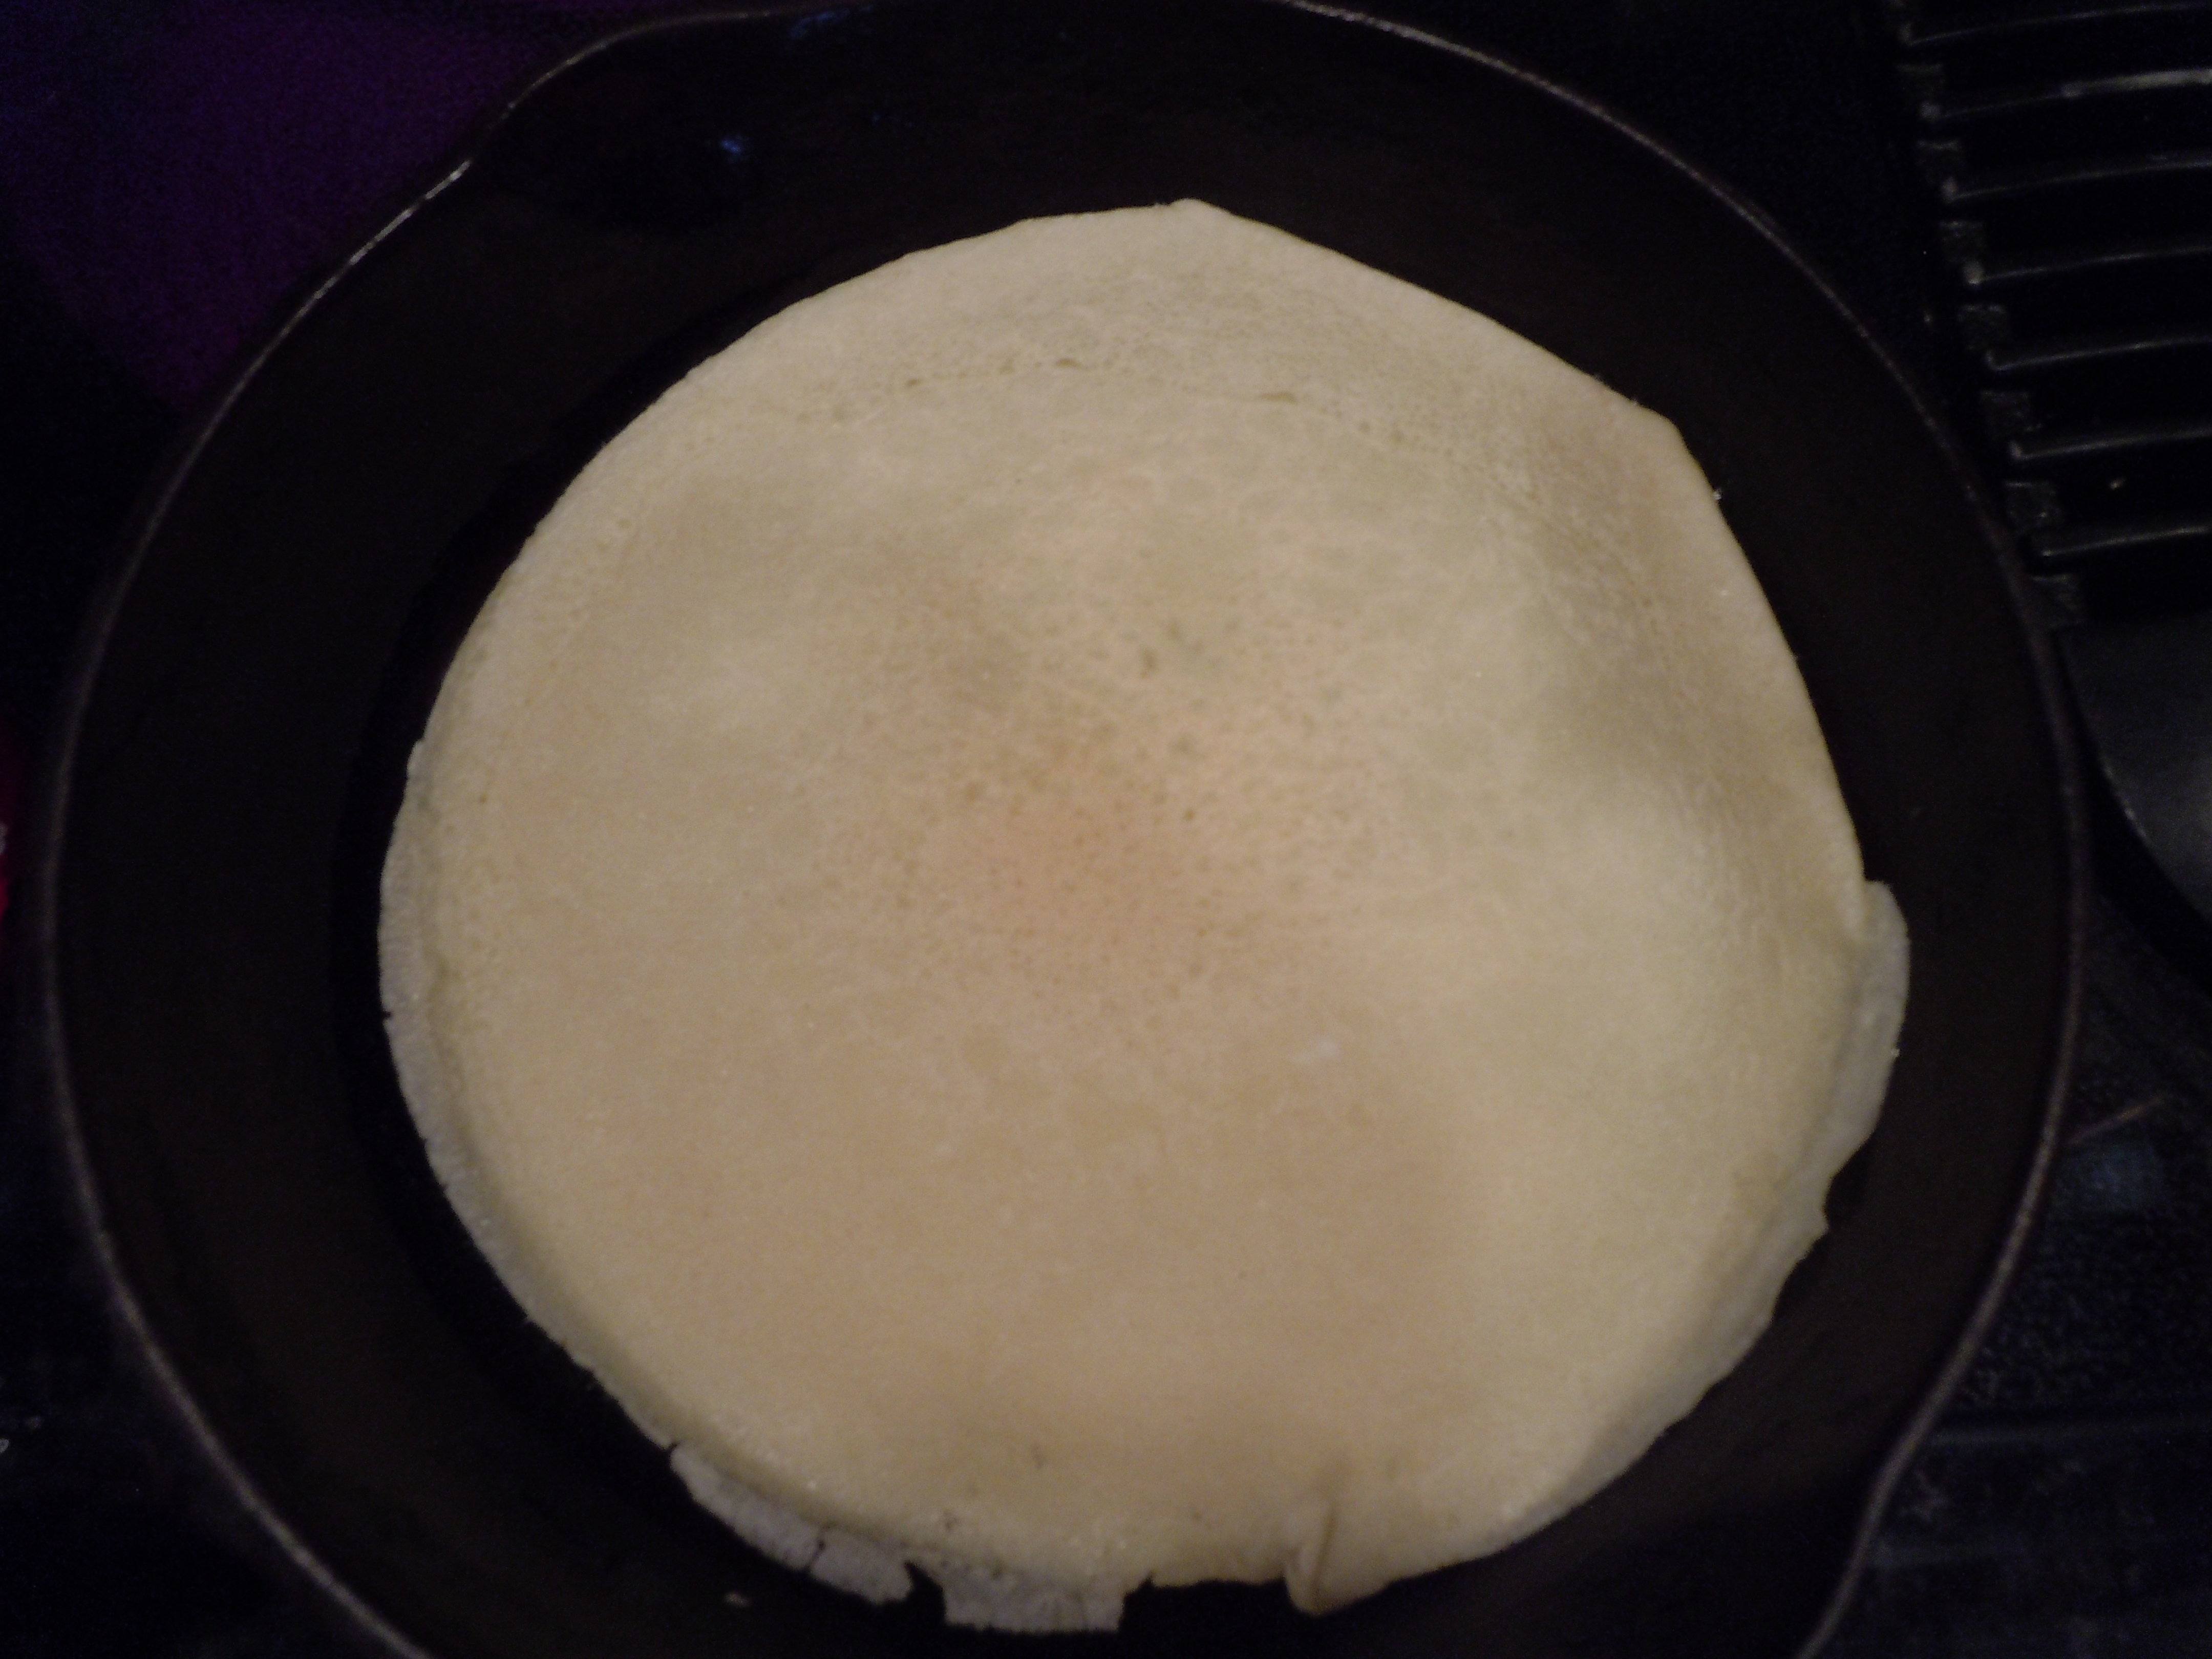
Wait about 25 seconds and flip pasta crepe over, you can use a flexible pastry knife to help you get under it…it will be easy to flip and will not ever be stuck
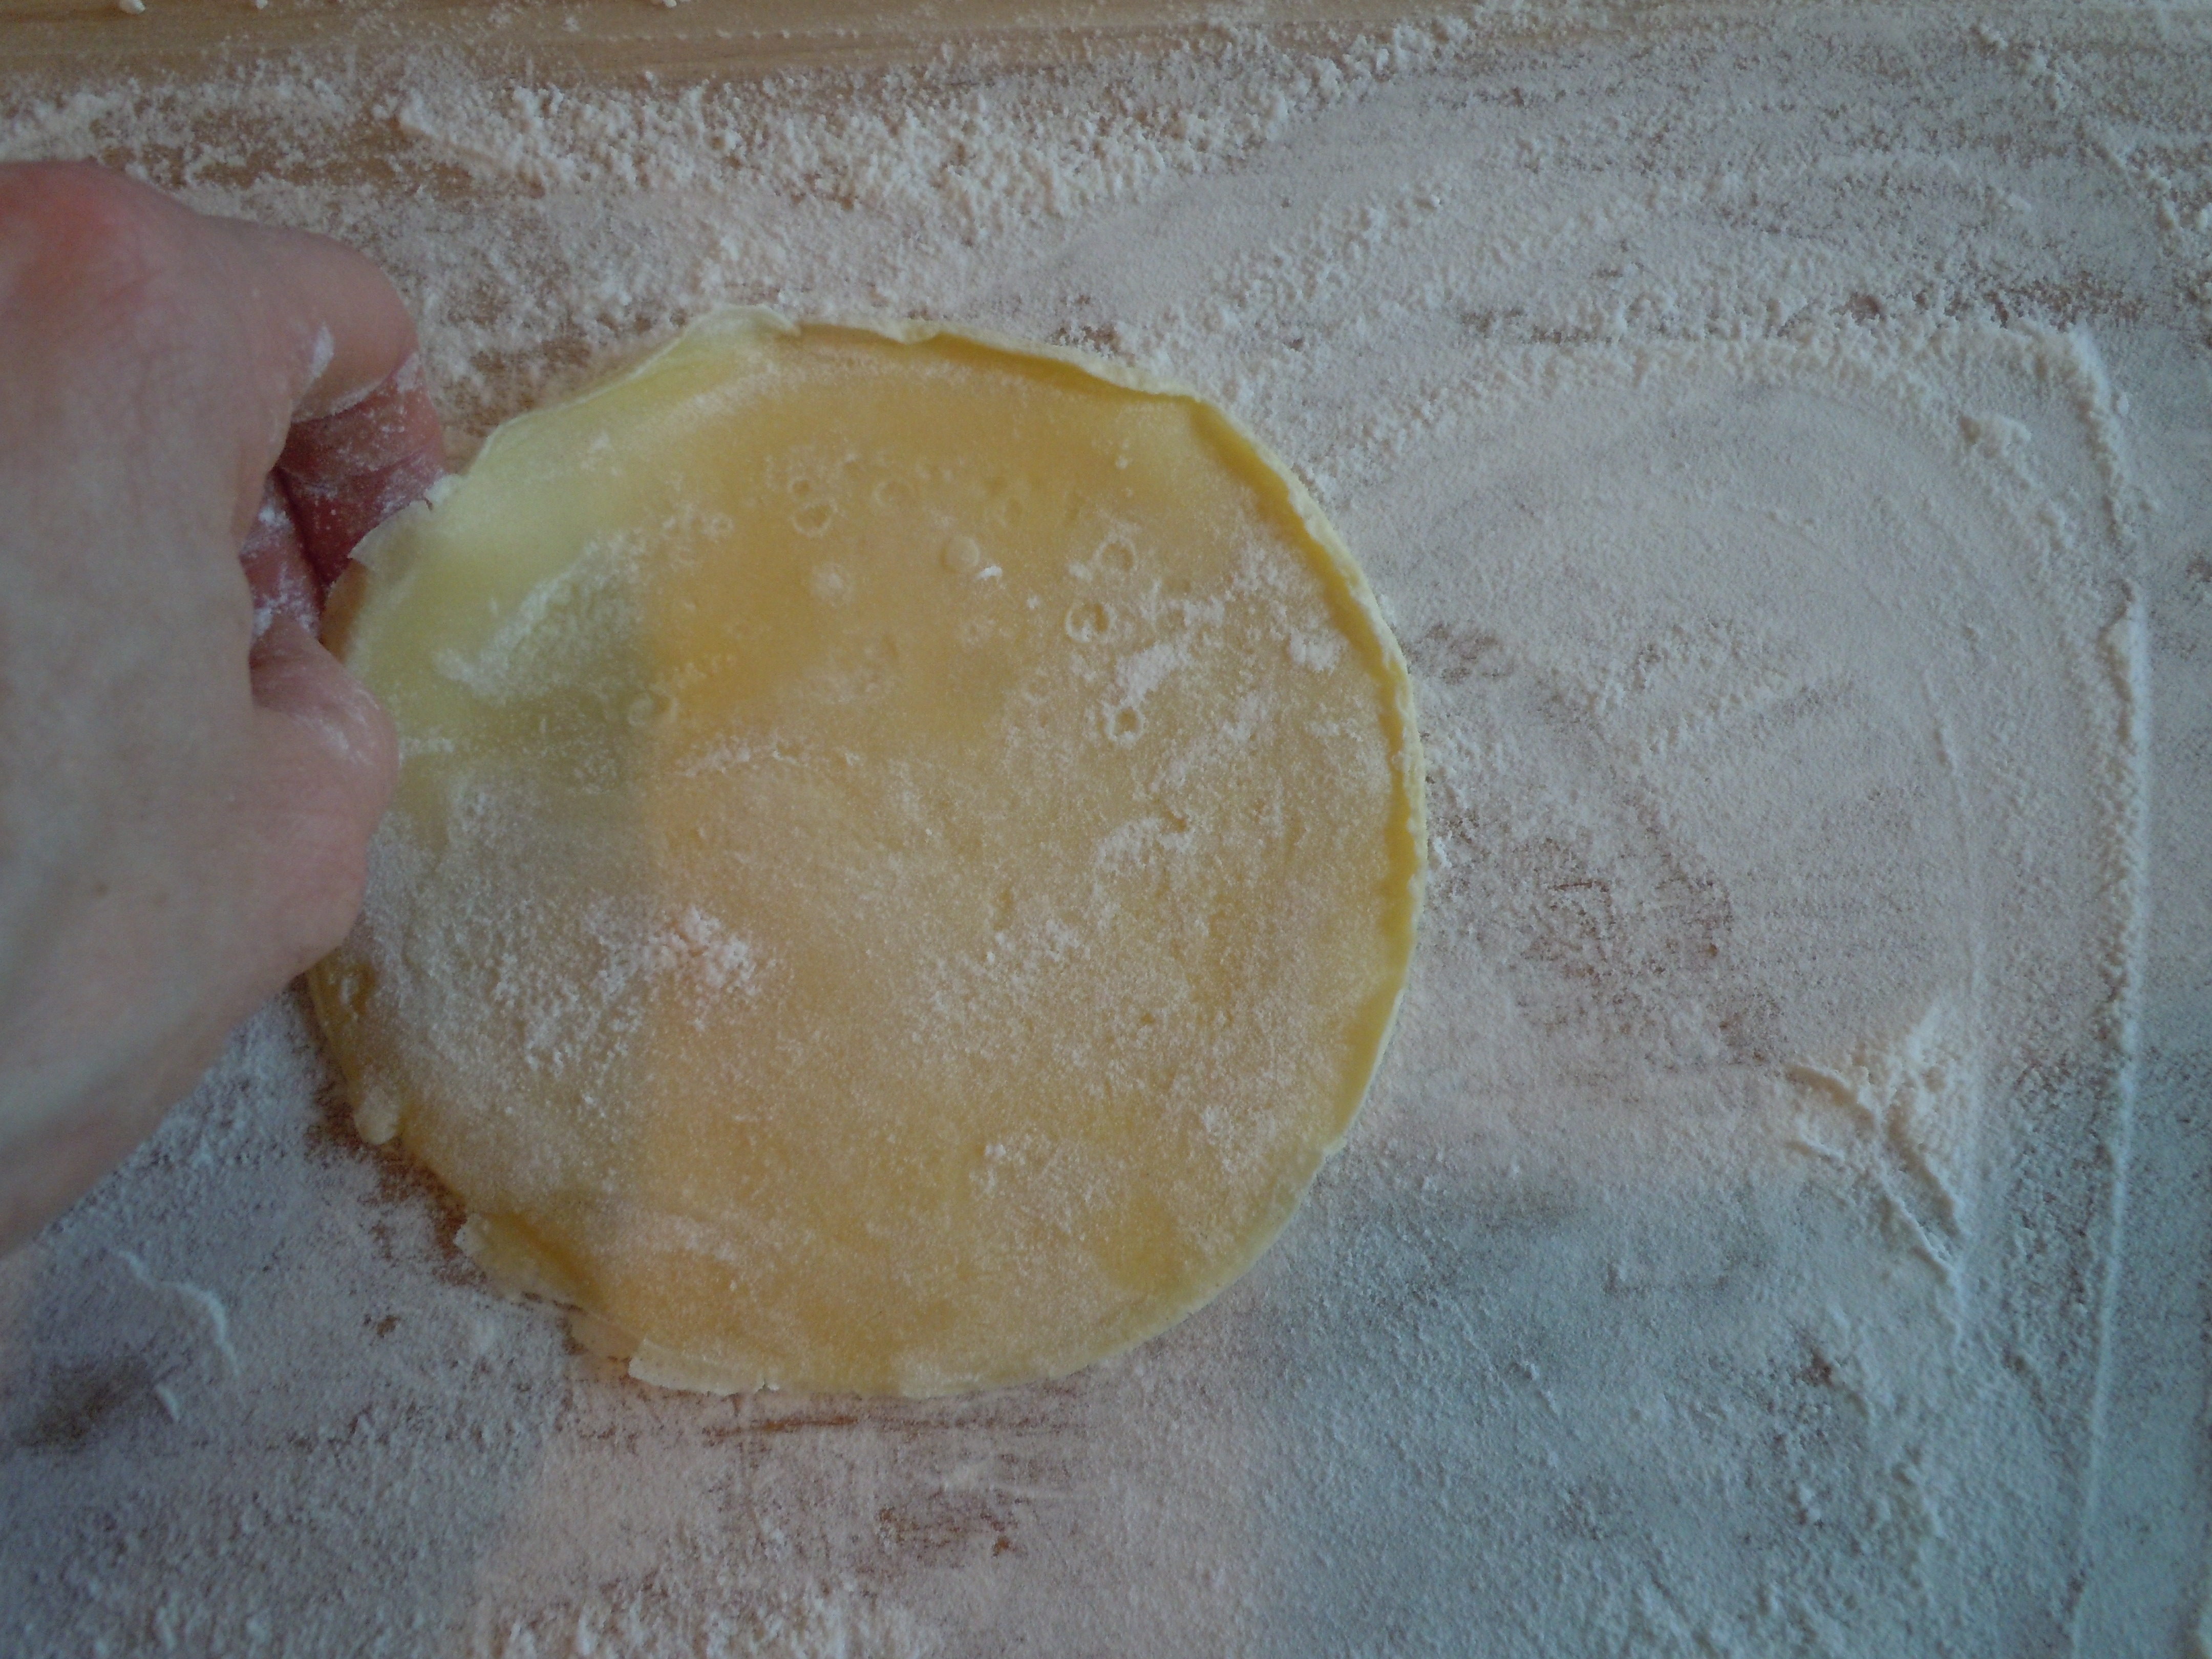
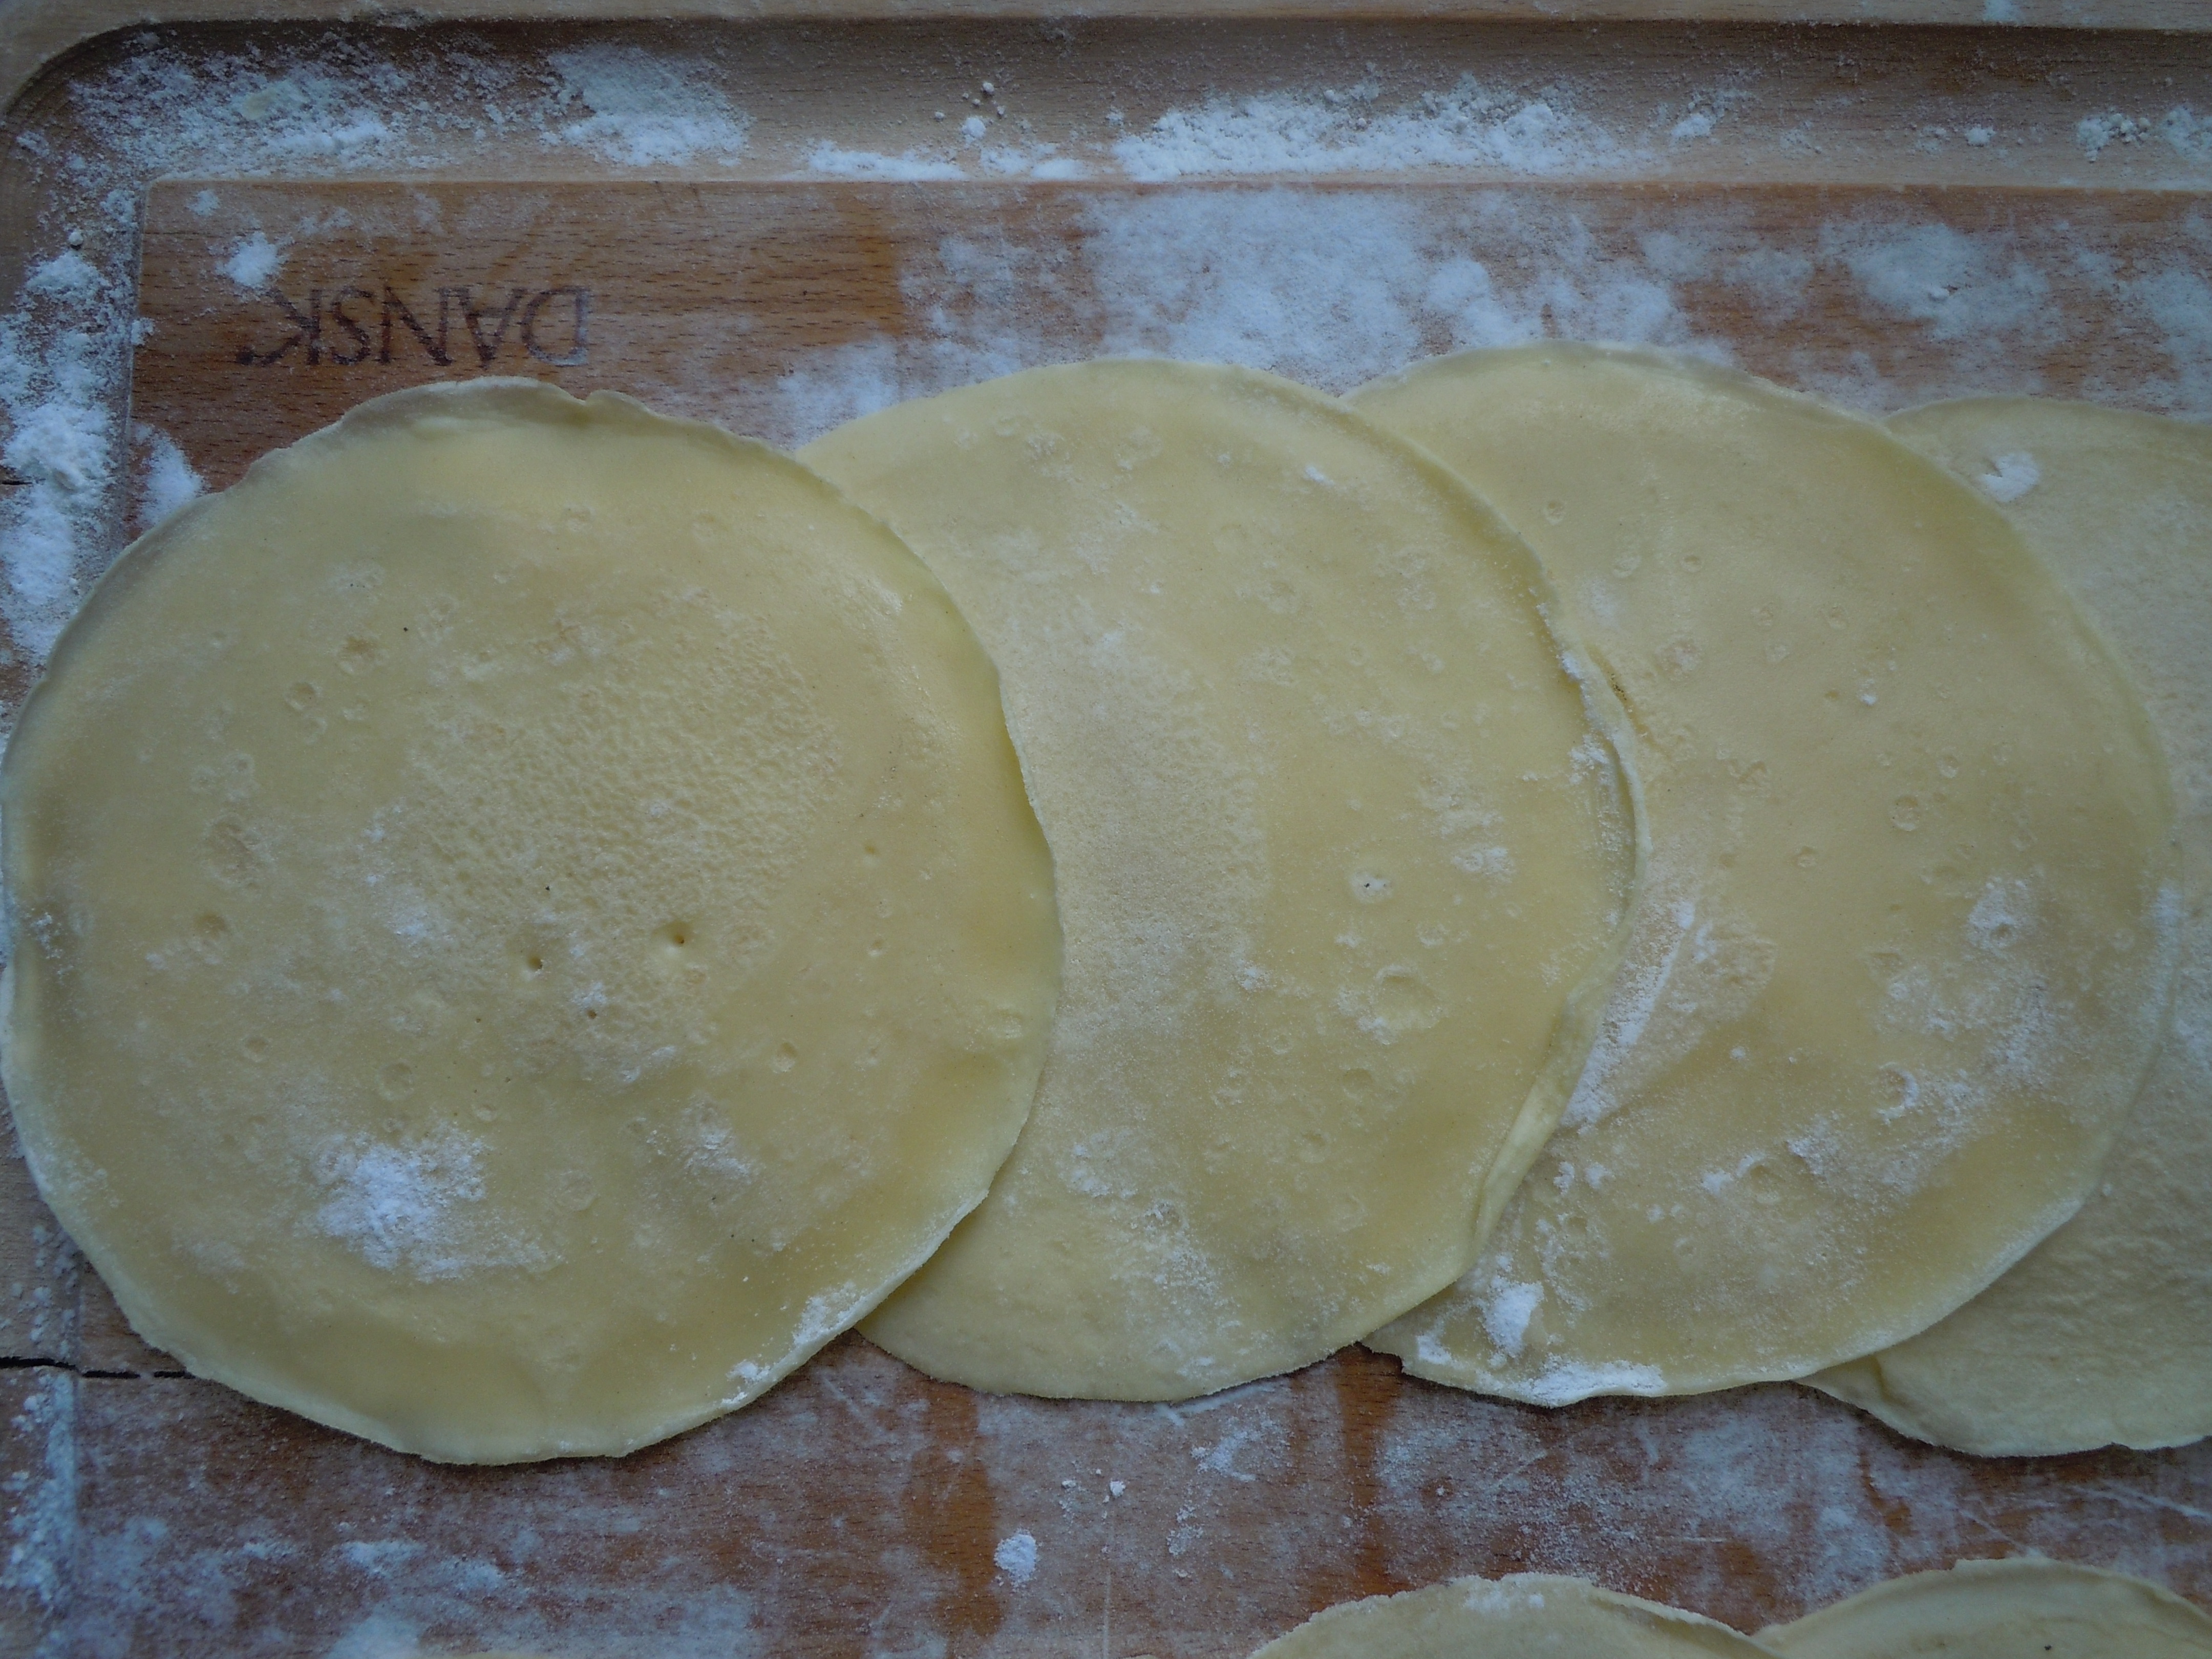
You never want the pasta crepe to be golden on the edges-that would be over cooking them…they should look like the photo above light in color
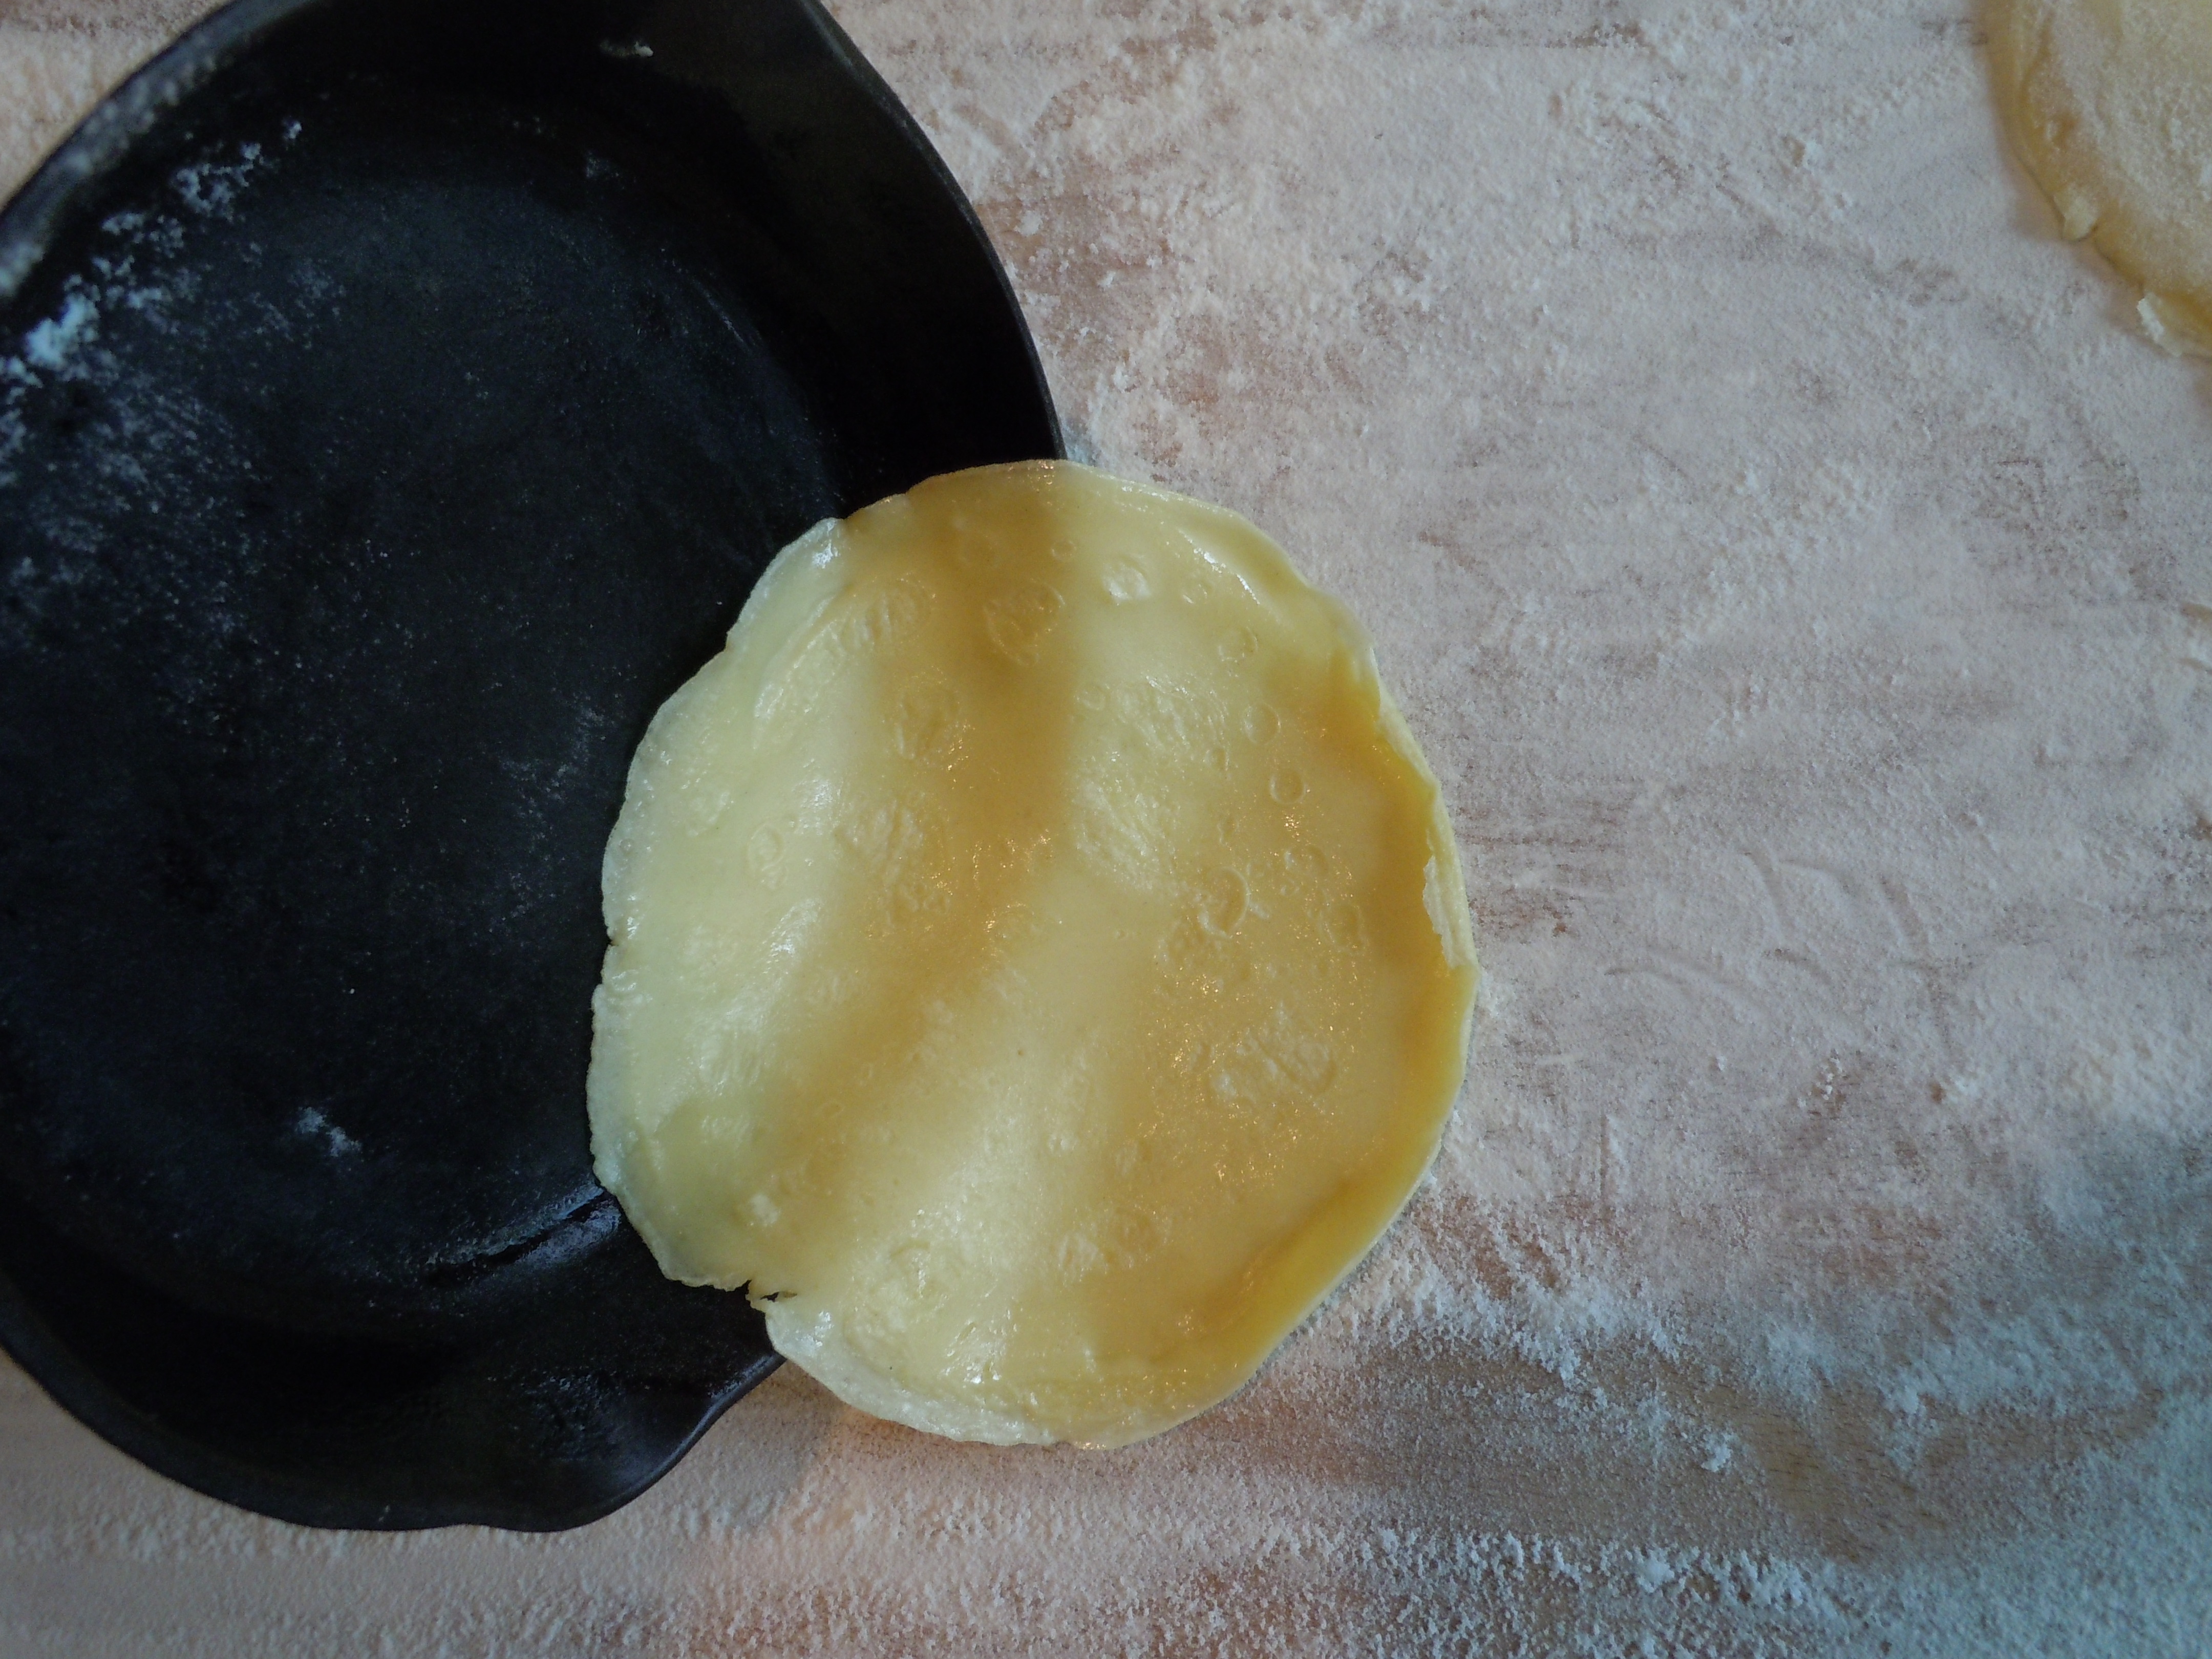
Immediately flip over onto floured board and flip a couple of times to cool a little
Repeat dredging saturated paper towel into pan to coat and then pour another 1/4 cup ladle of batter into pan.
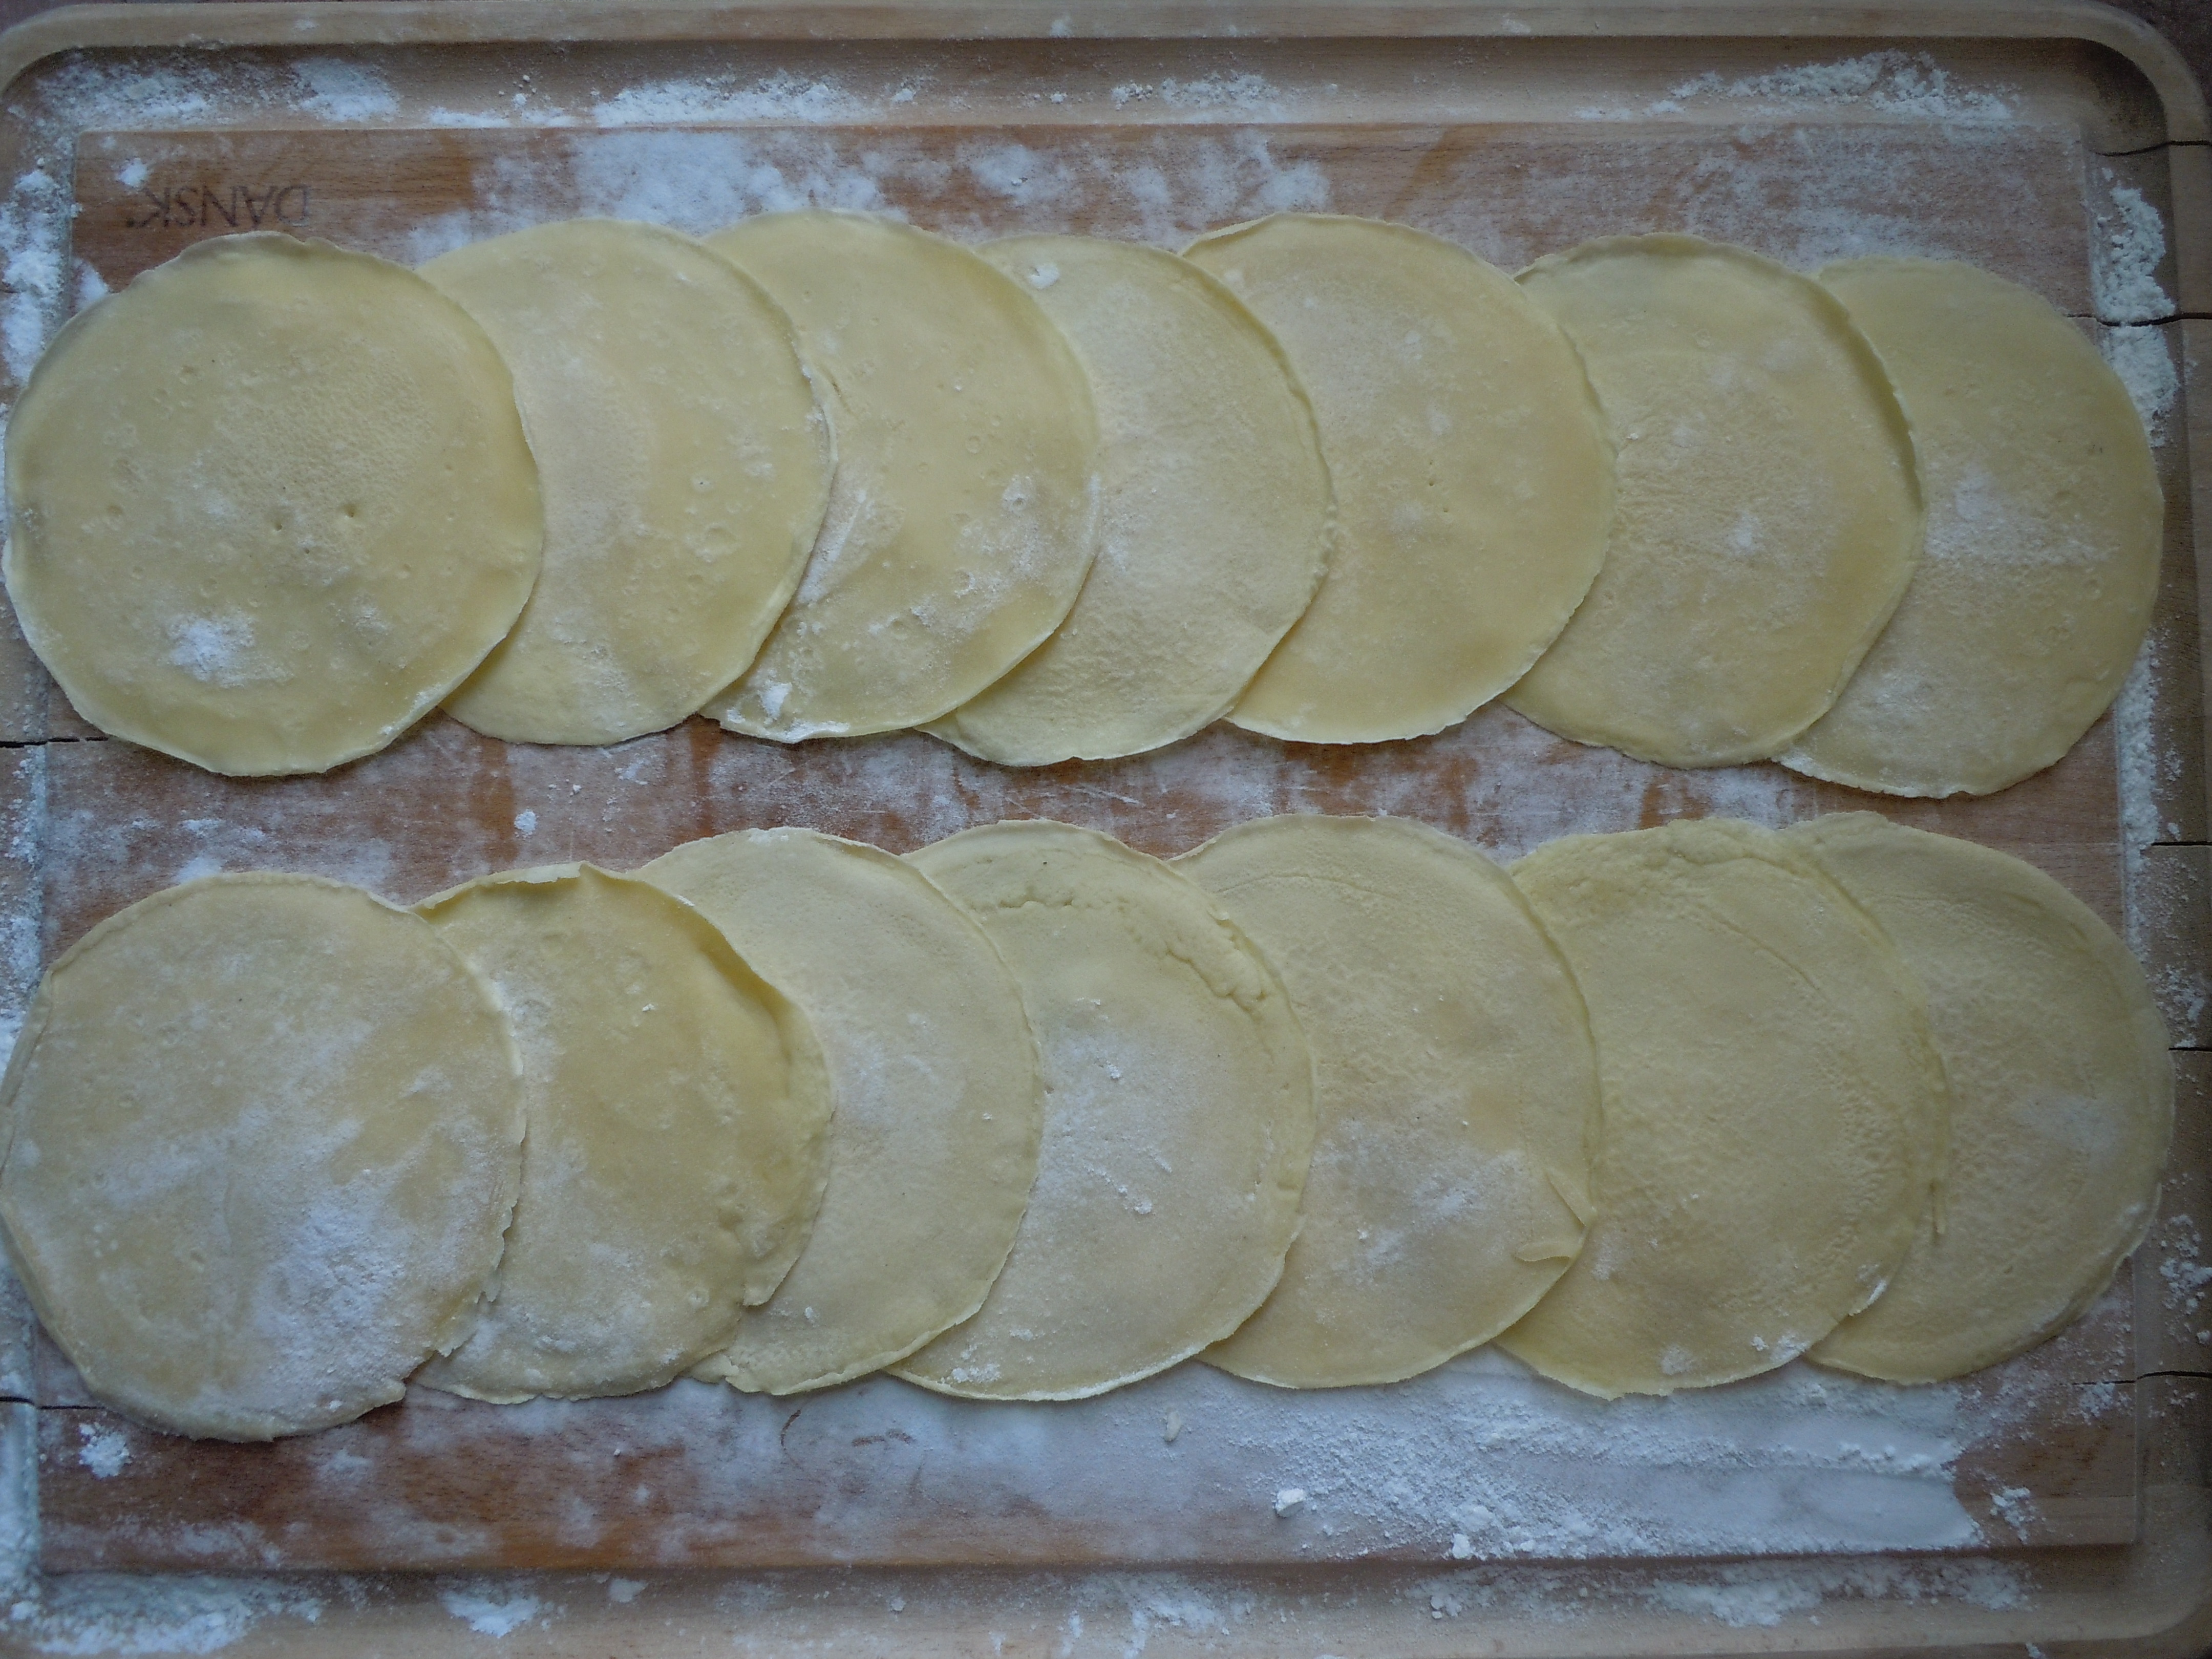
Repeat this over and over until you run out of batter…this amount will make 16 manicotti
When you are done lay out a work board to roll manicotti’s on
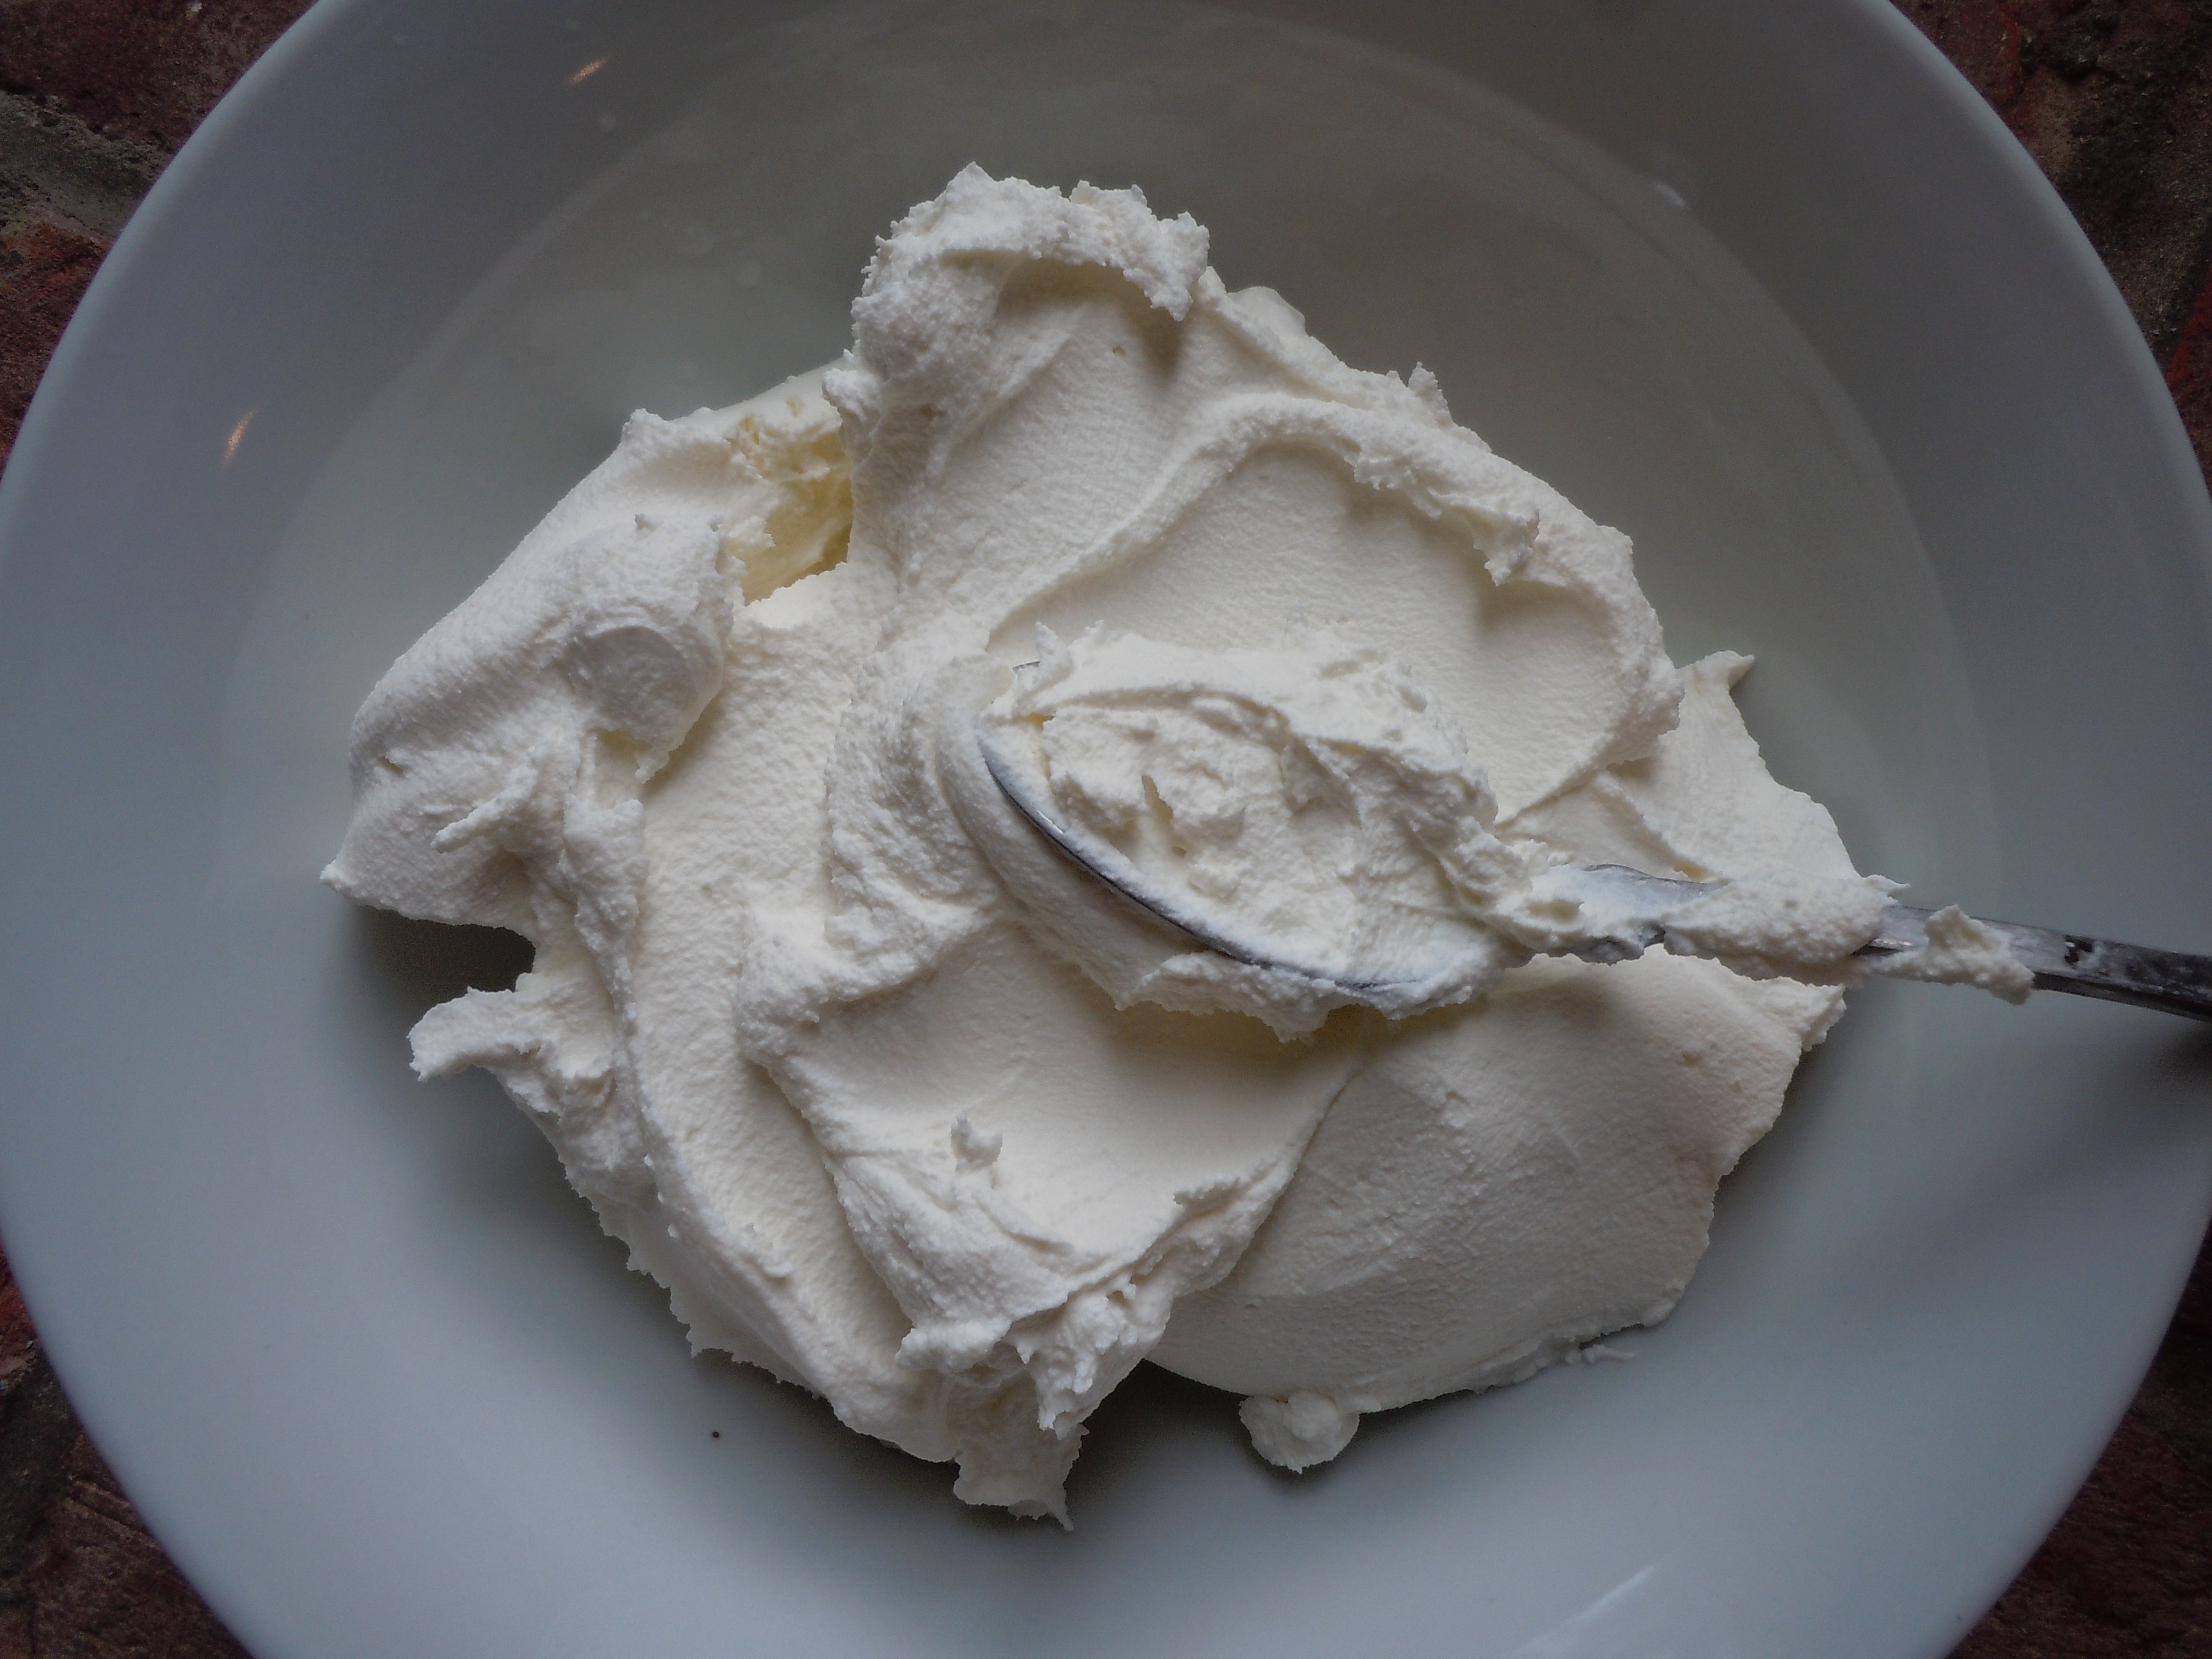
Put ricotta in a bowl so it’s easy to work with
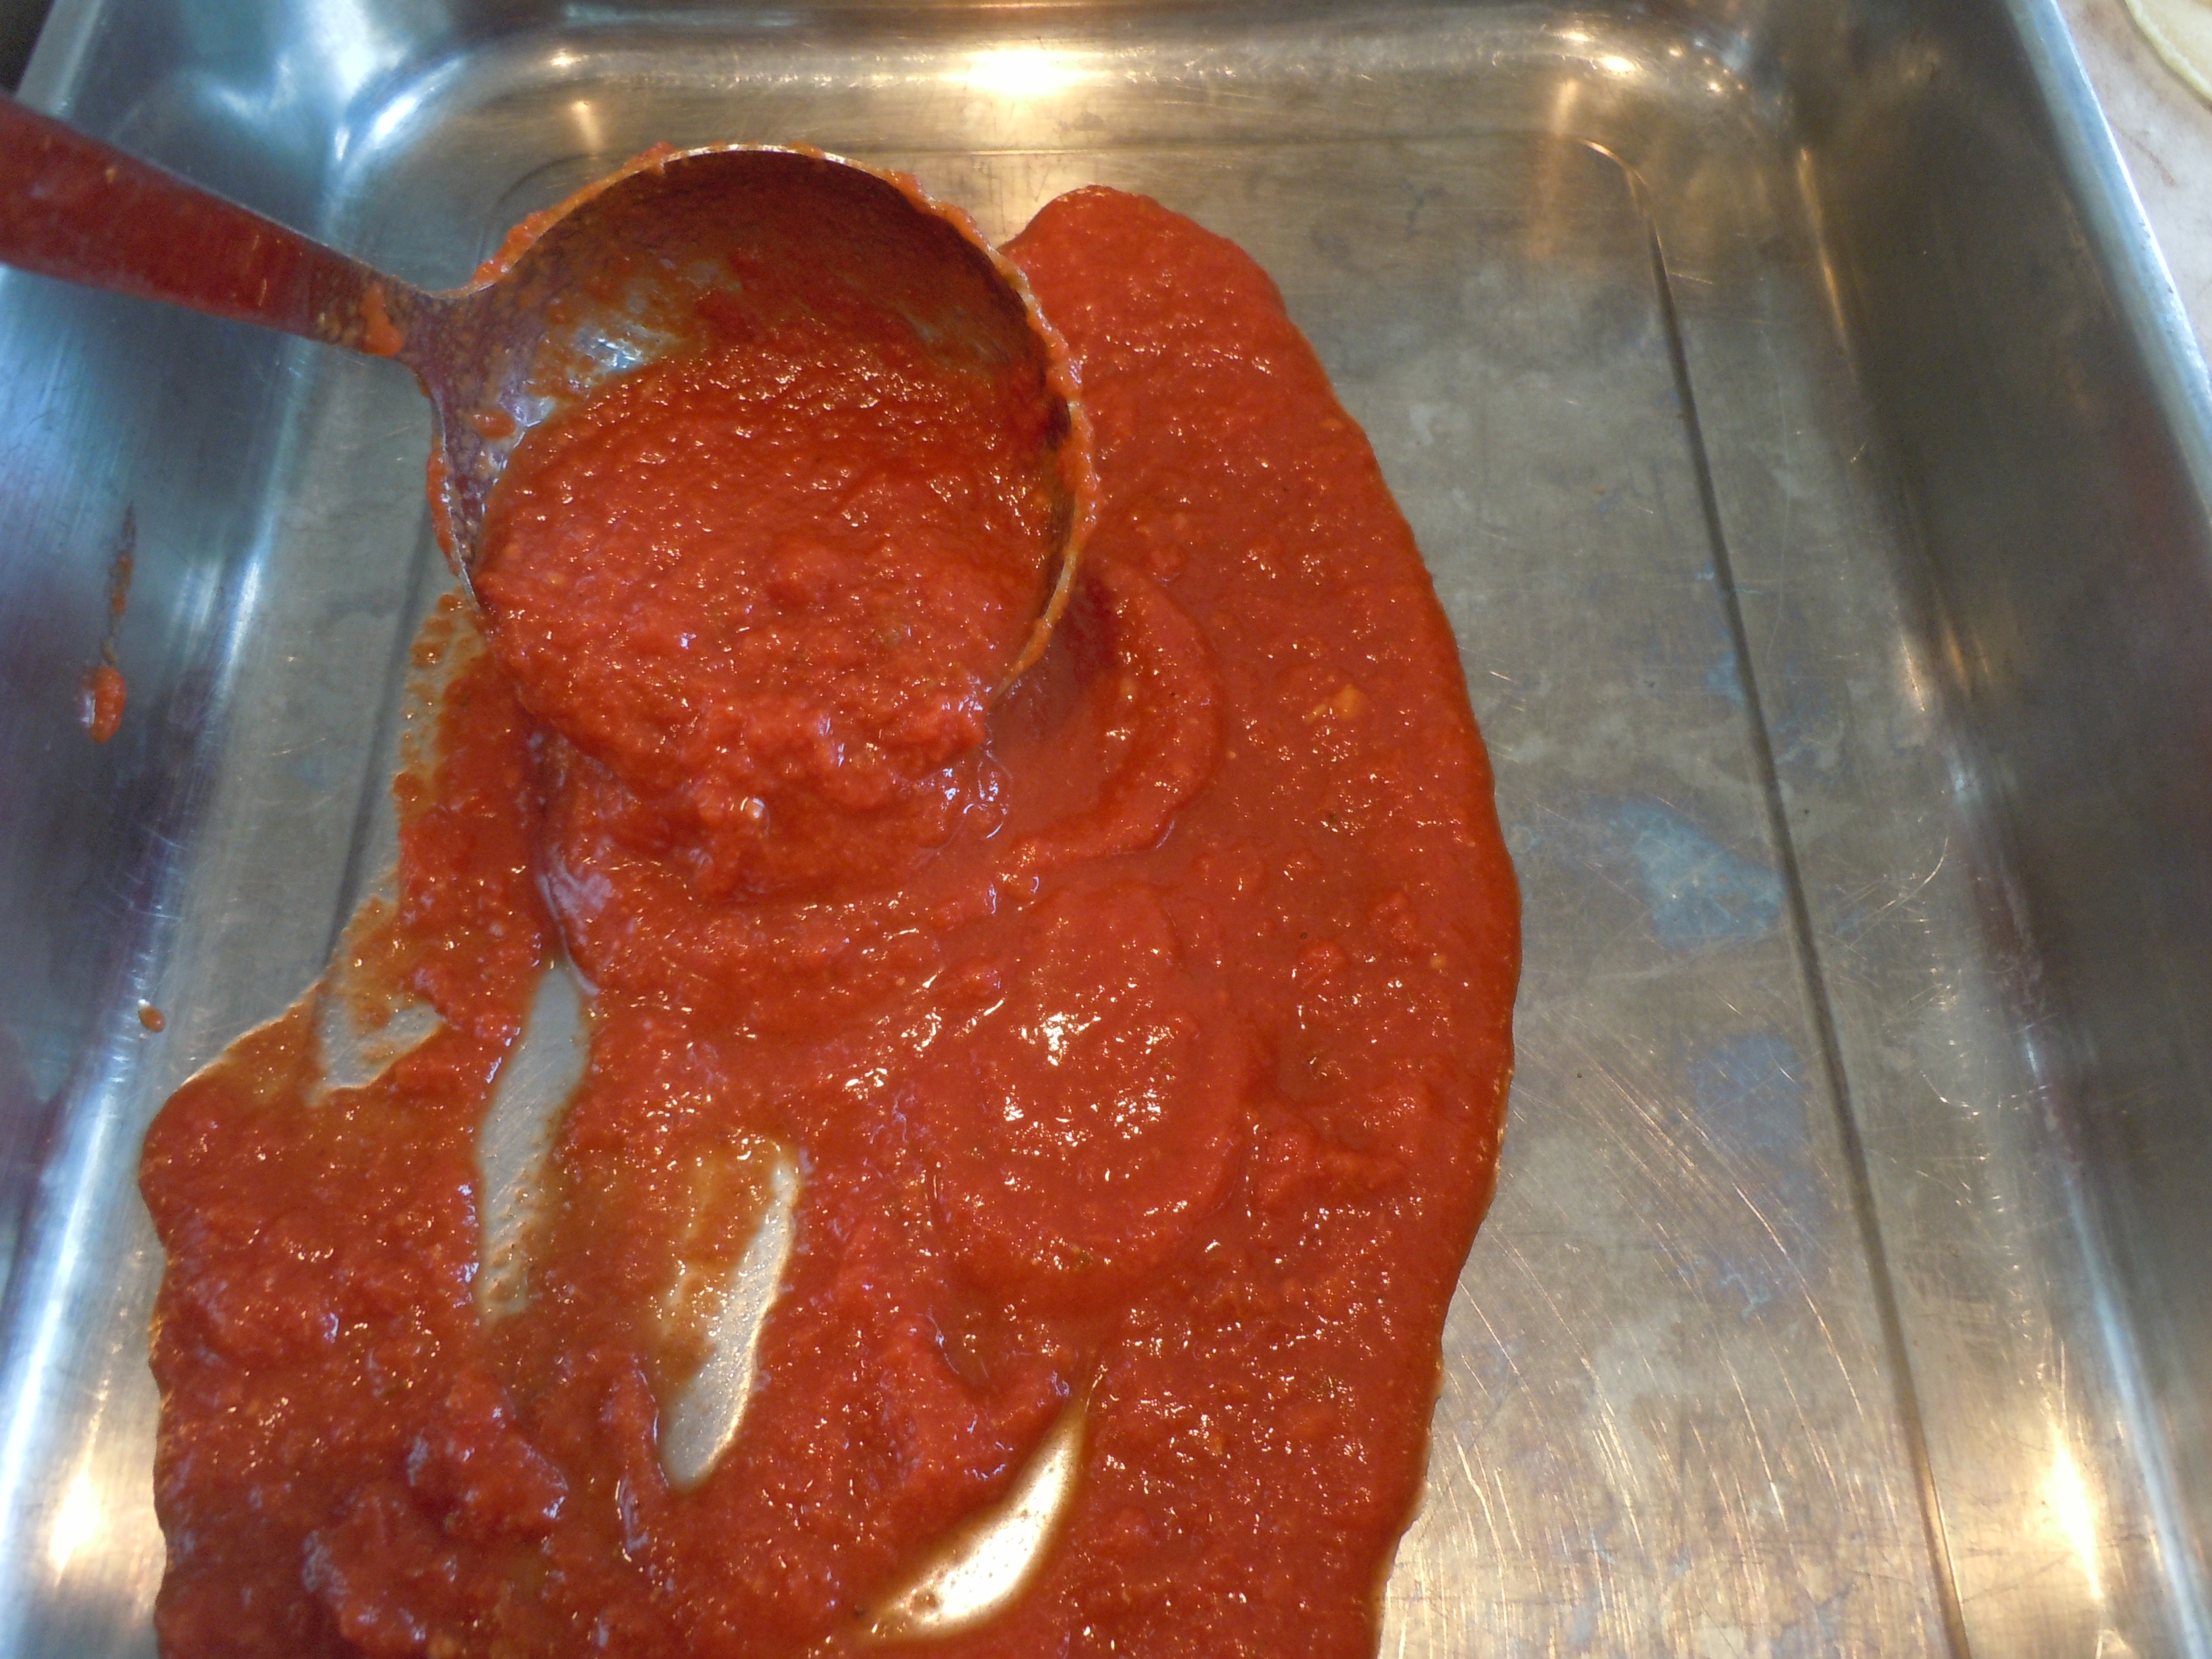
Pour about 2 cup of tomato sauce into the baking pan
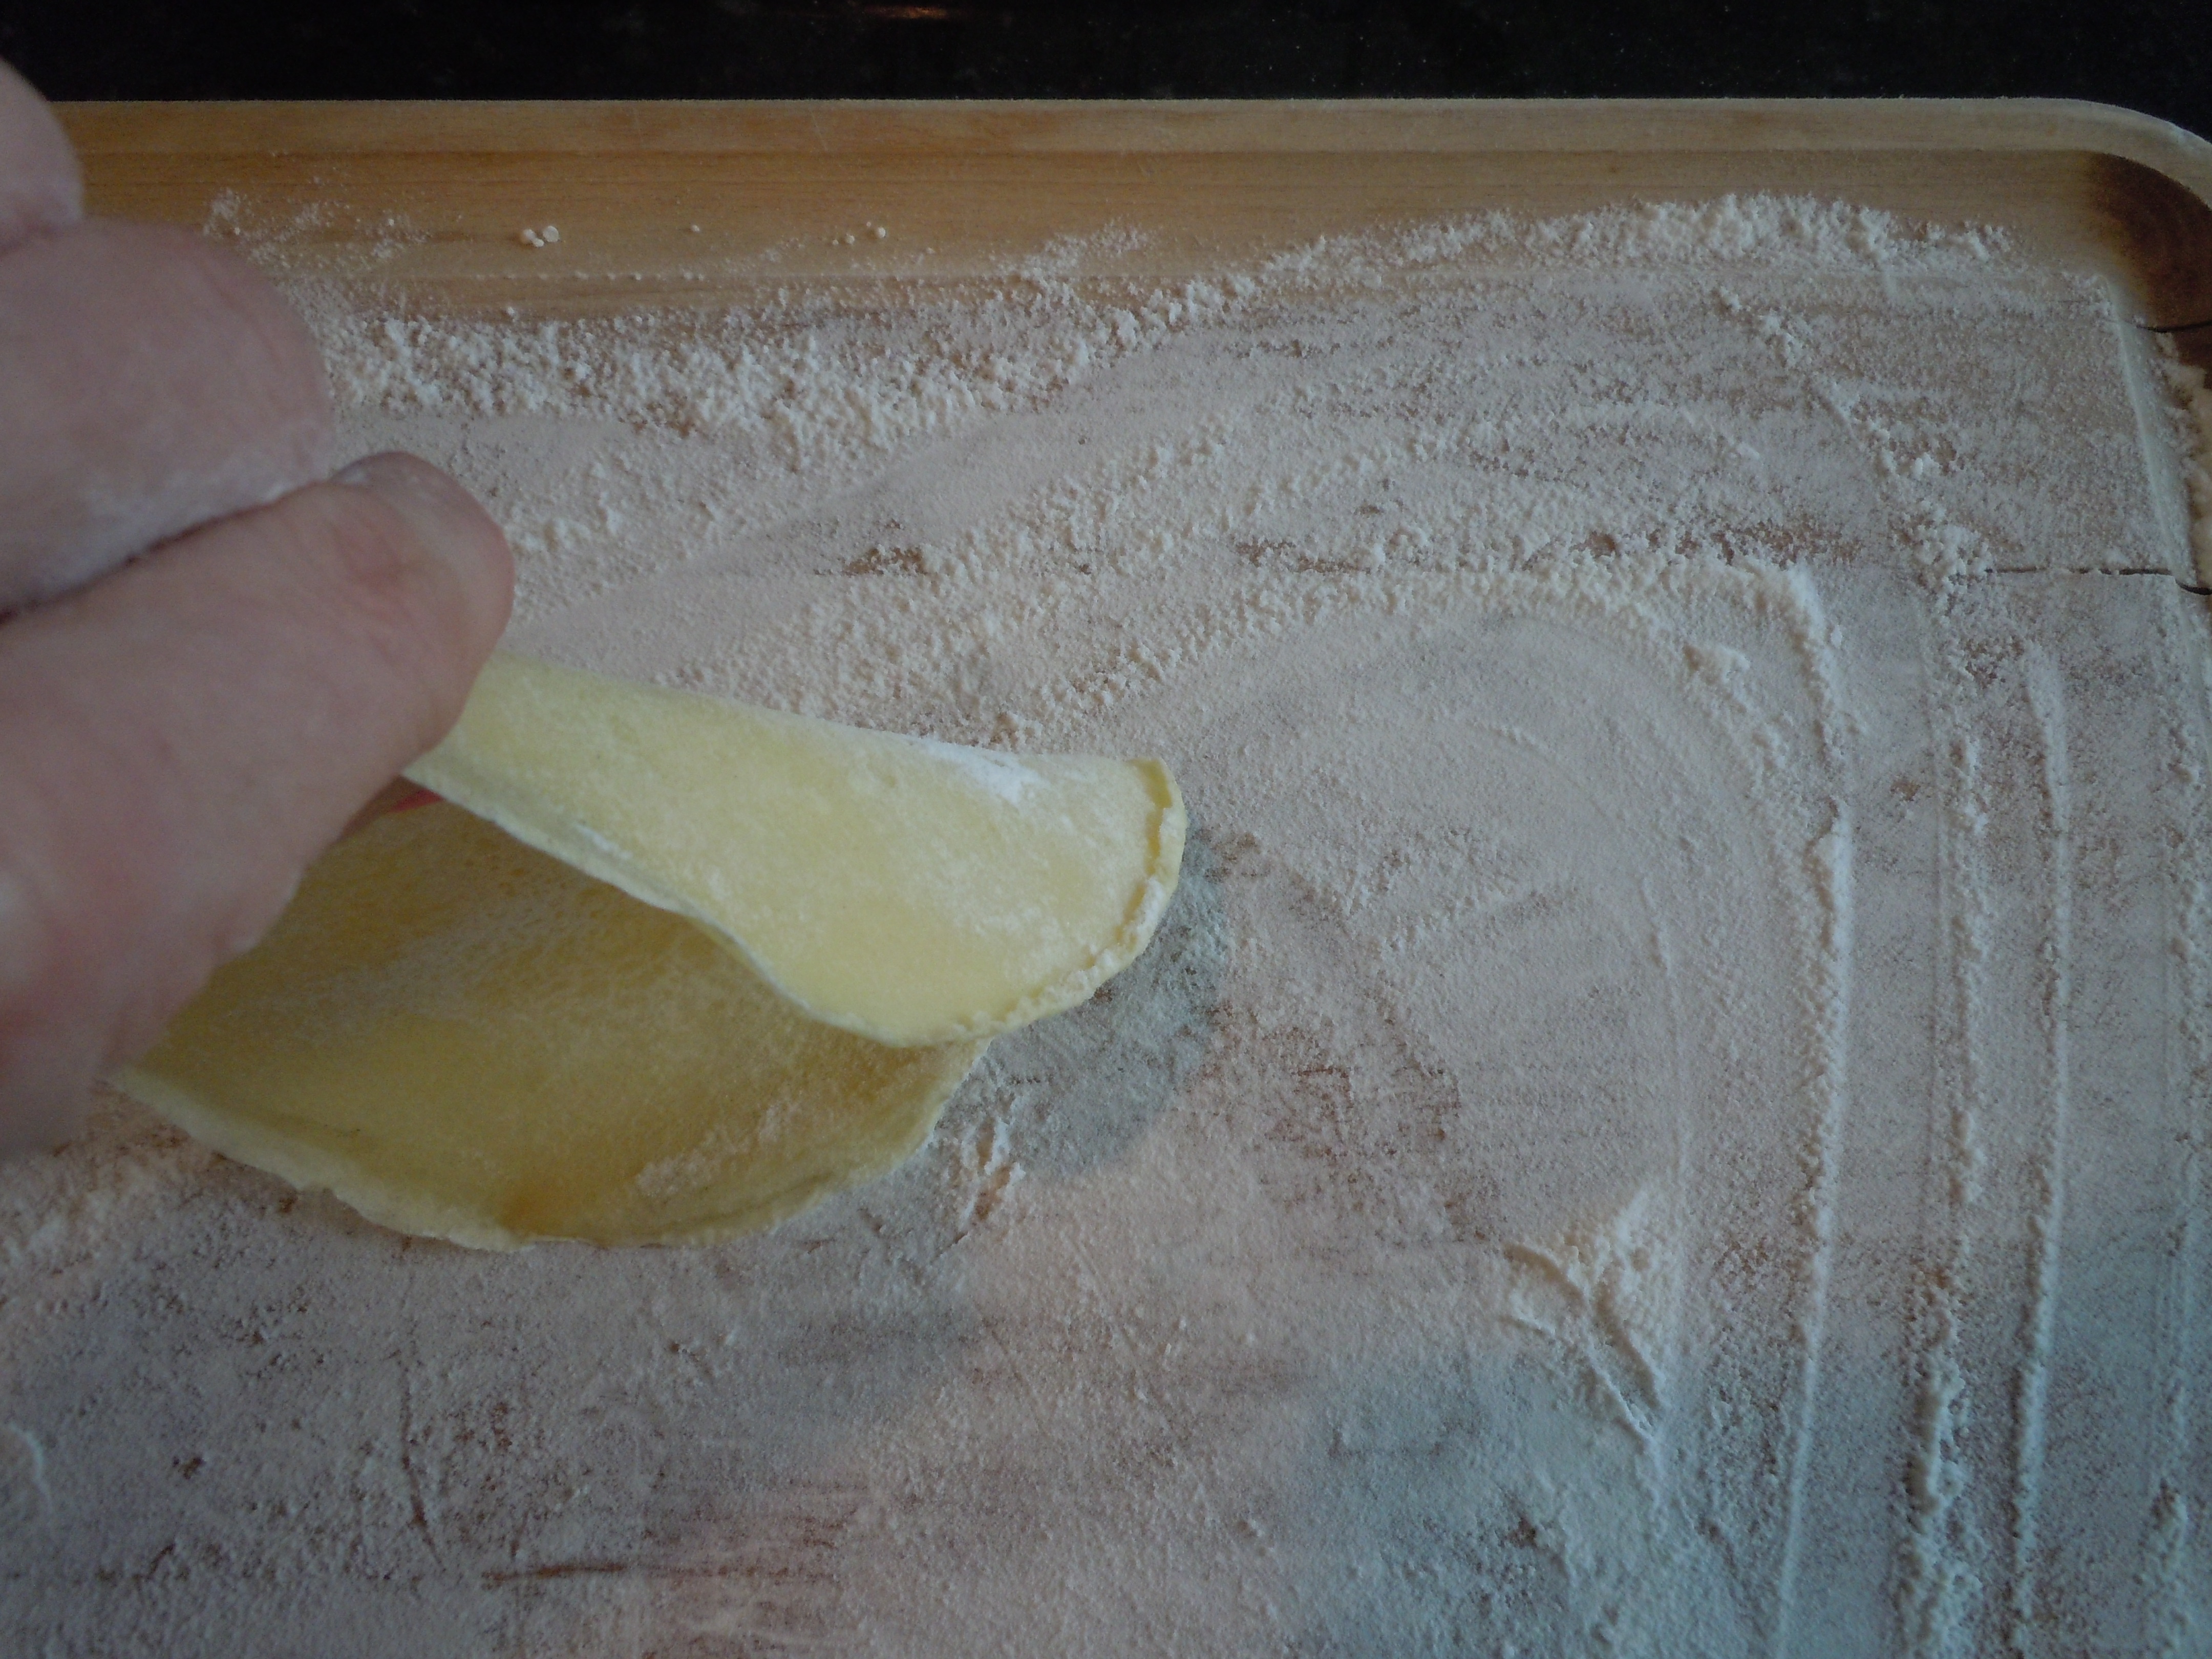
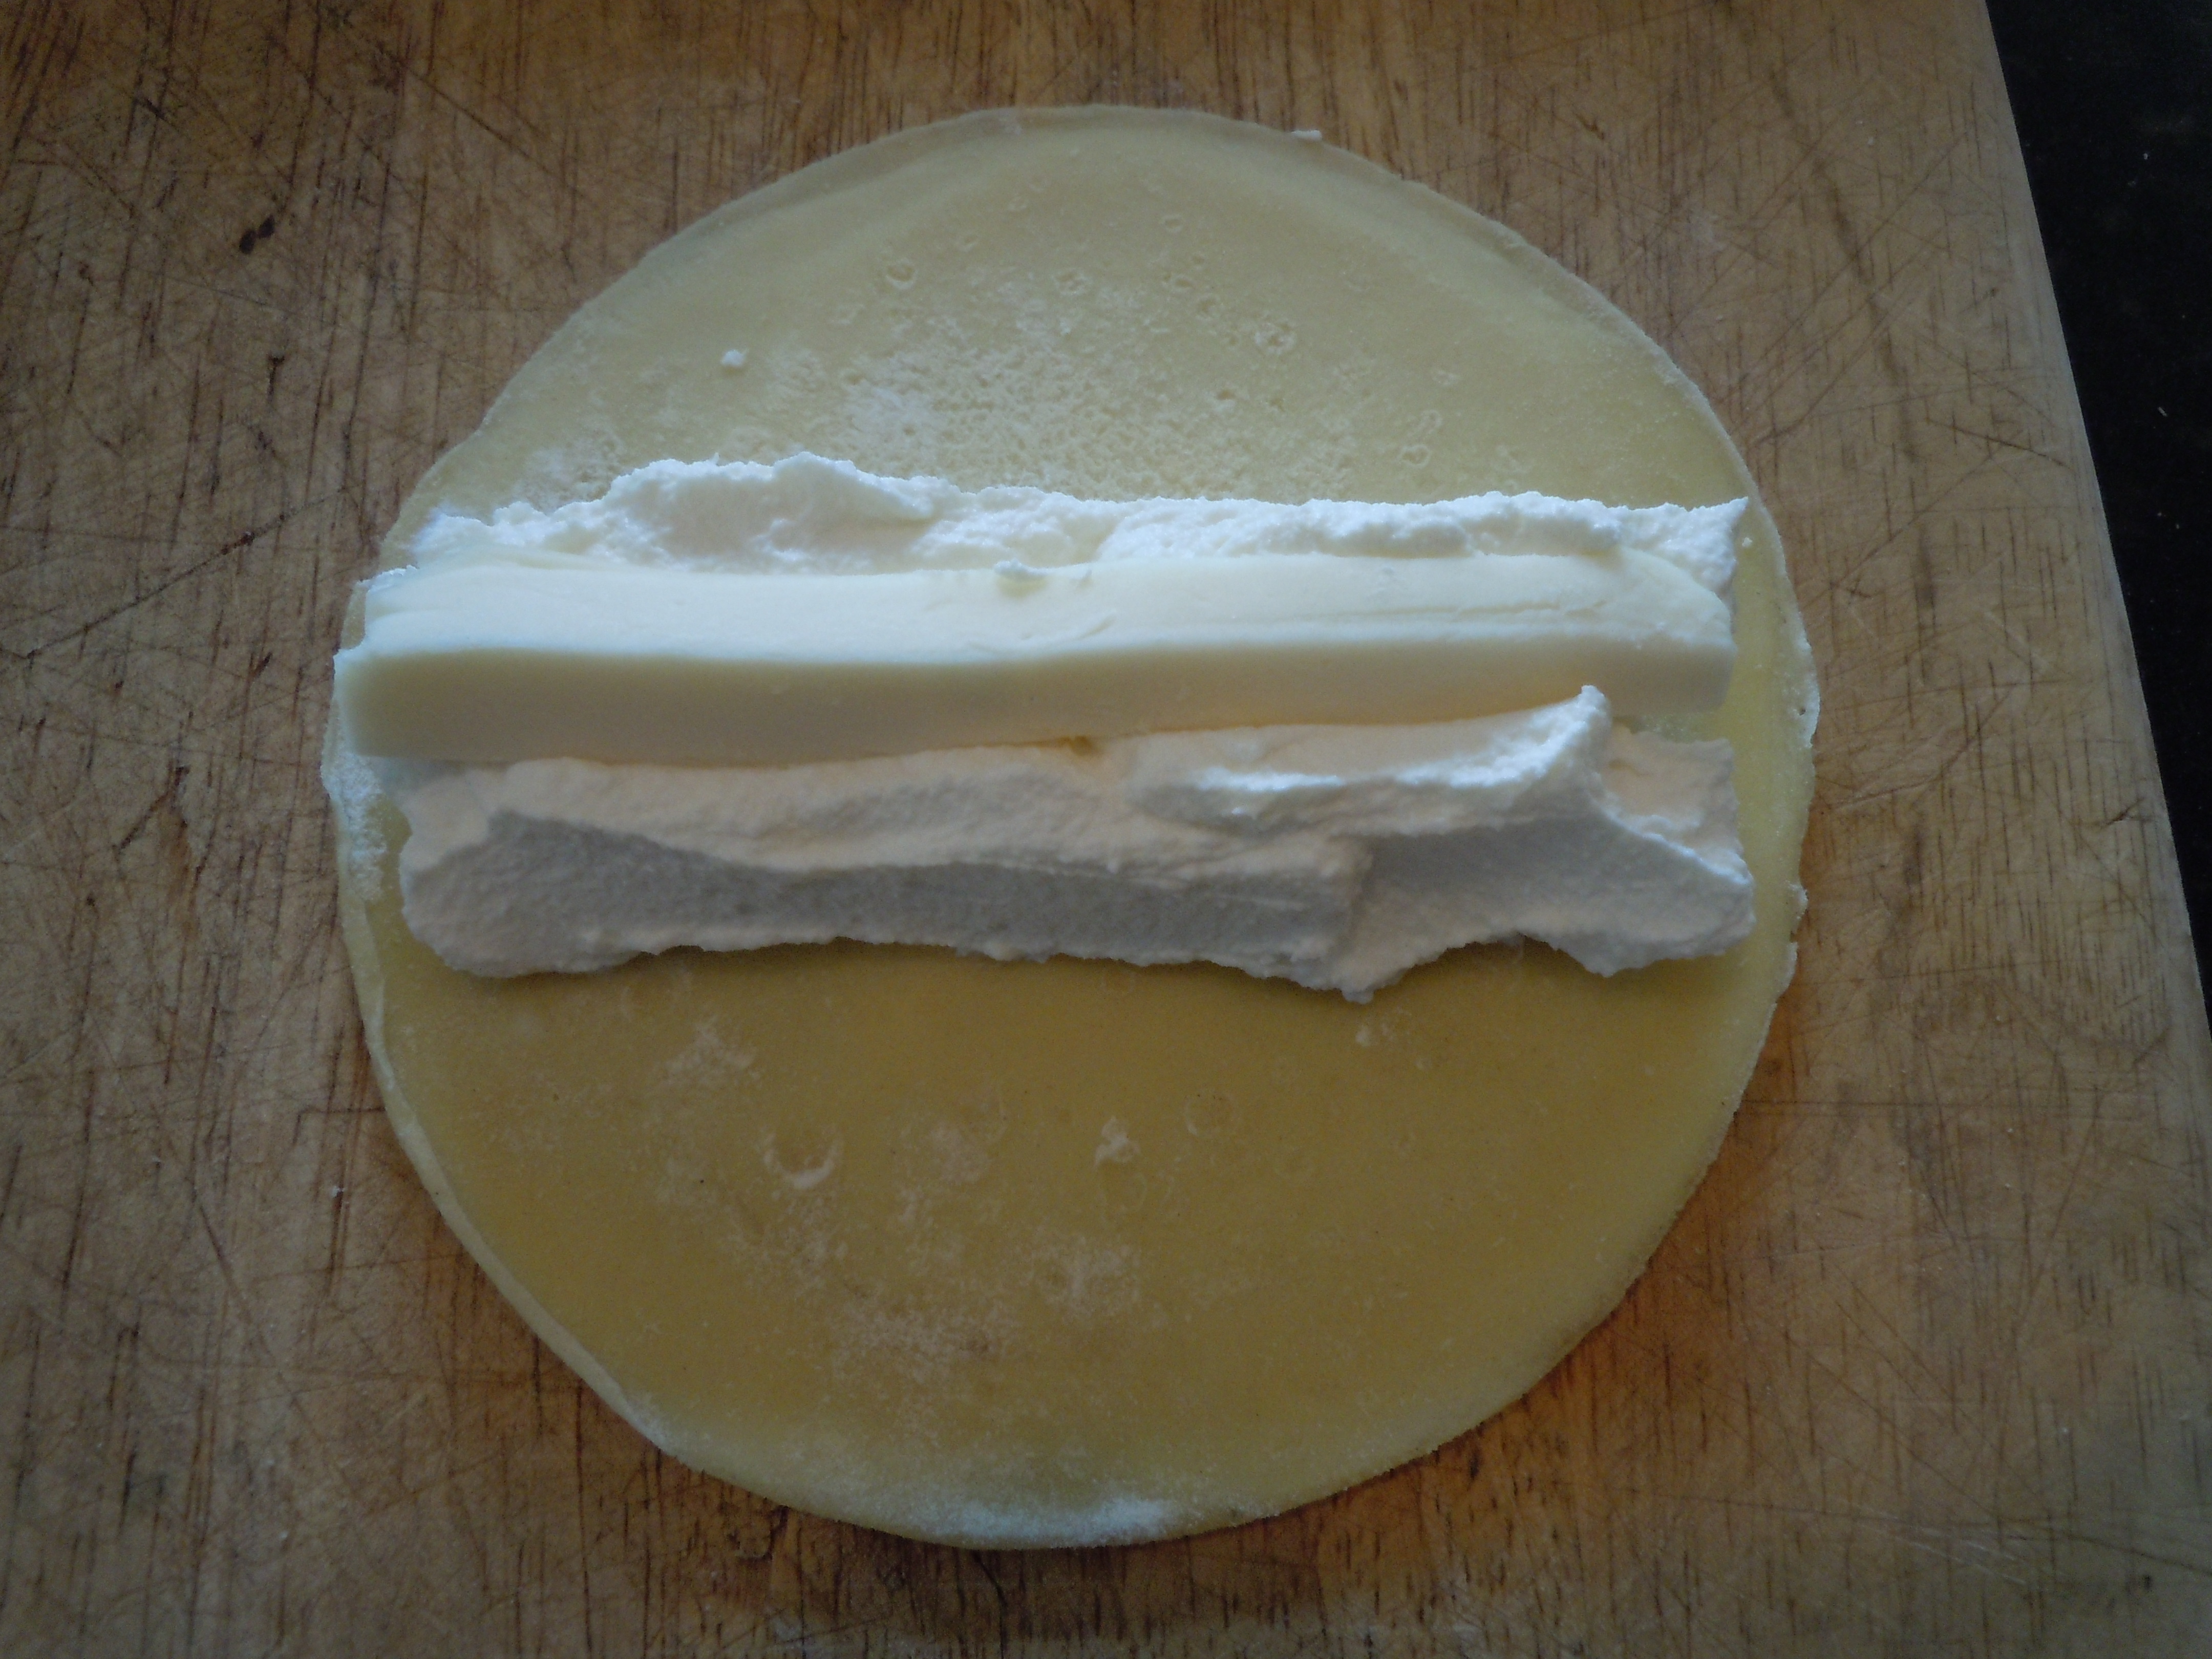
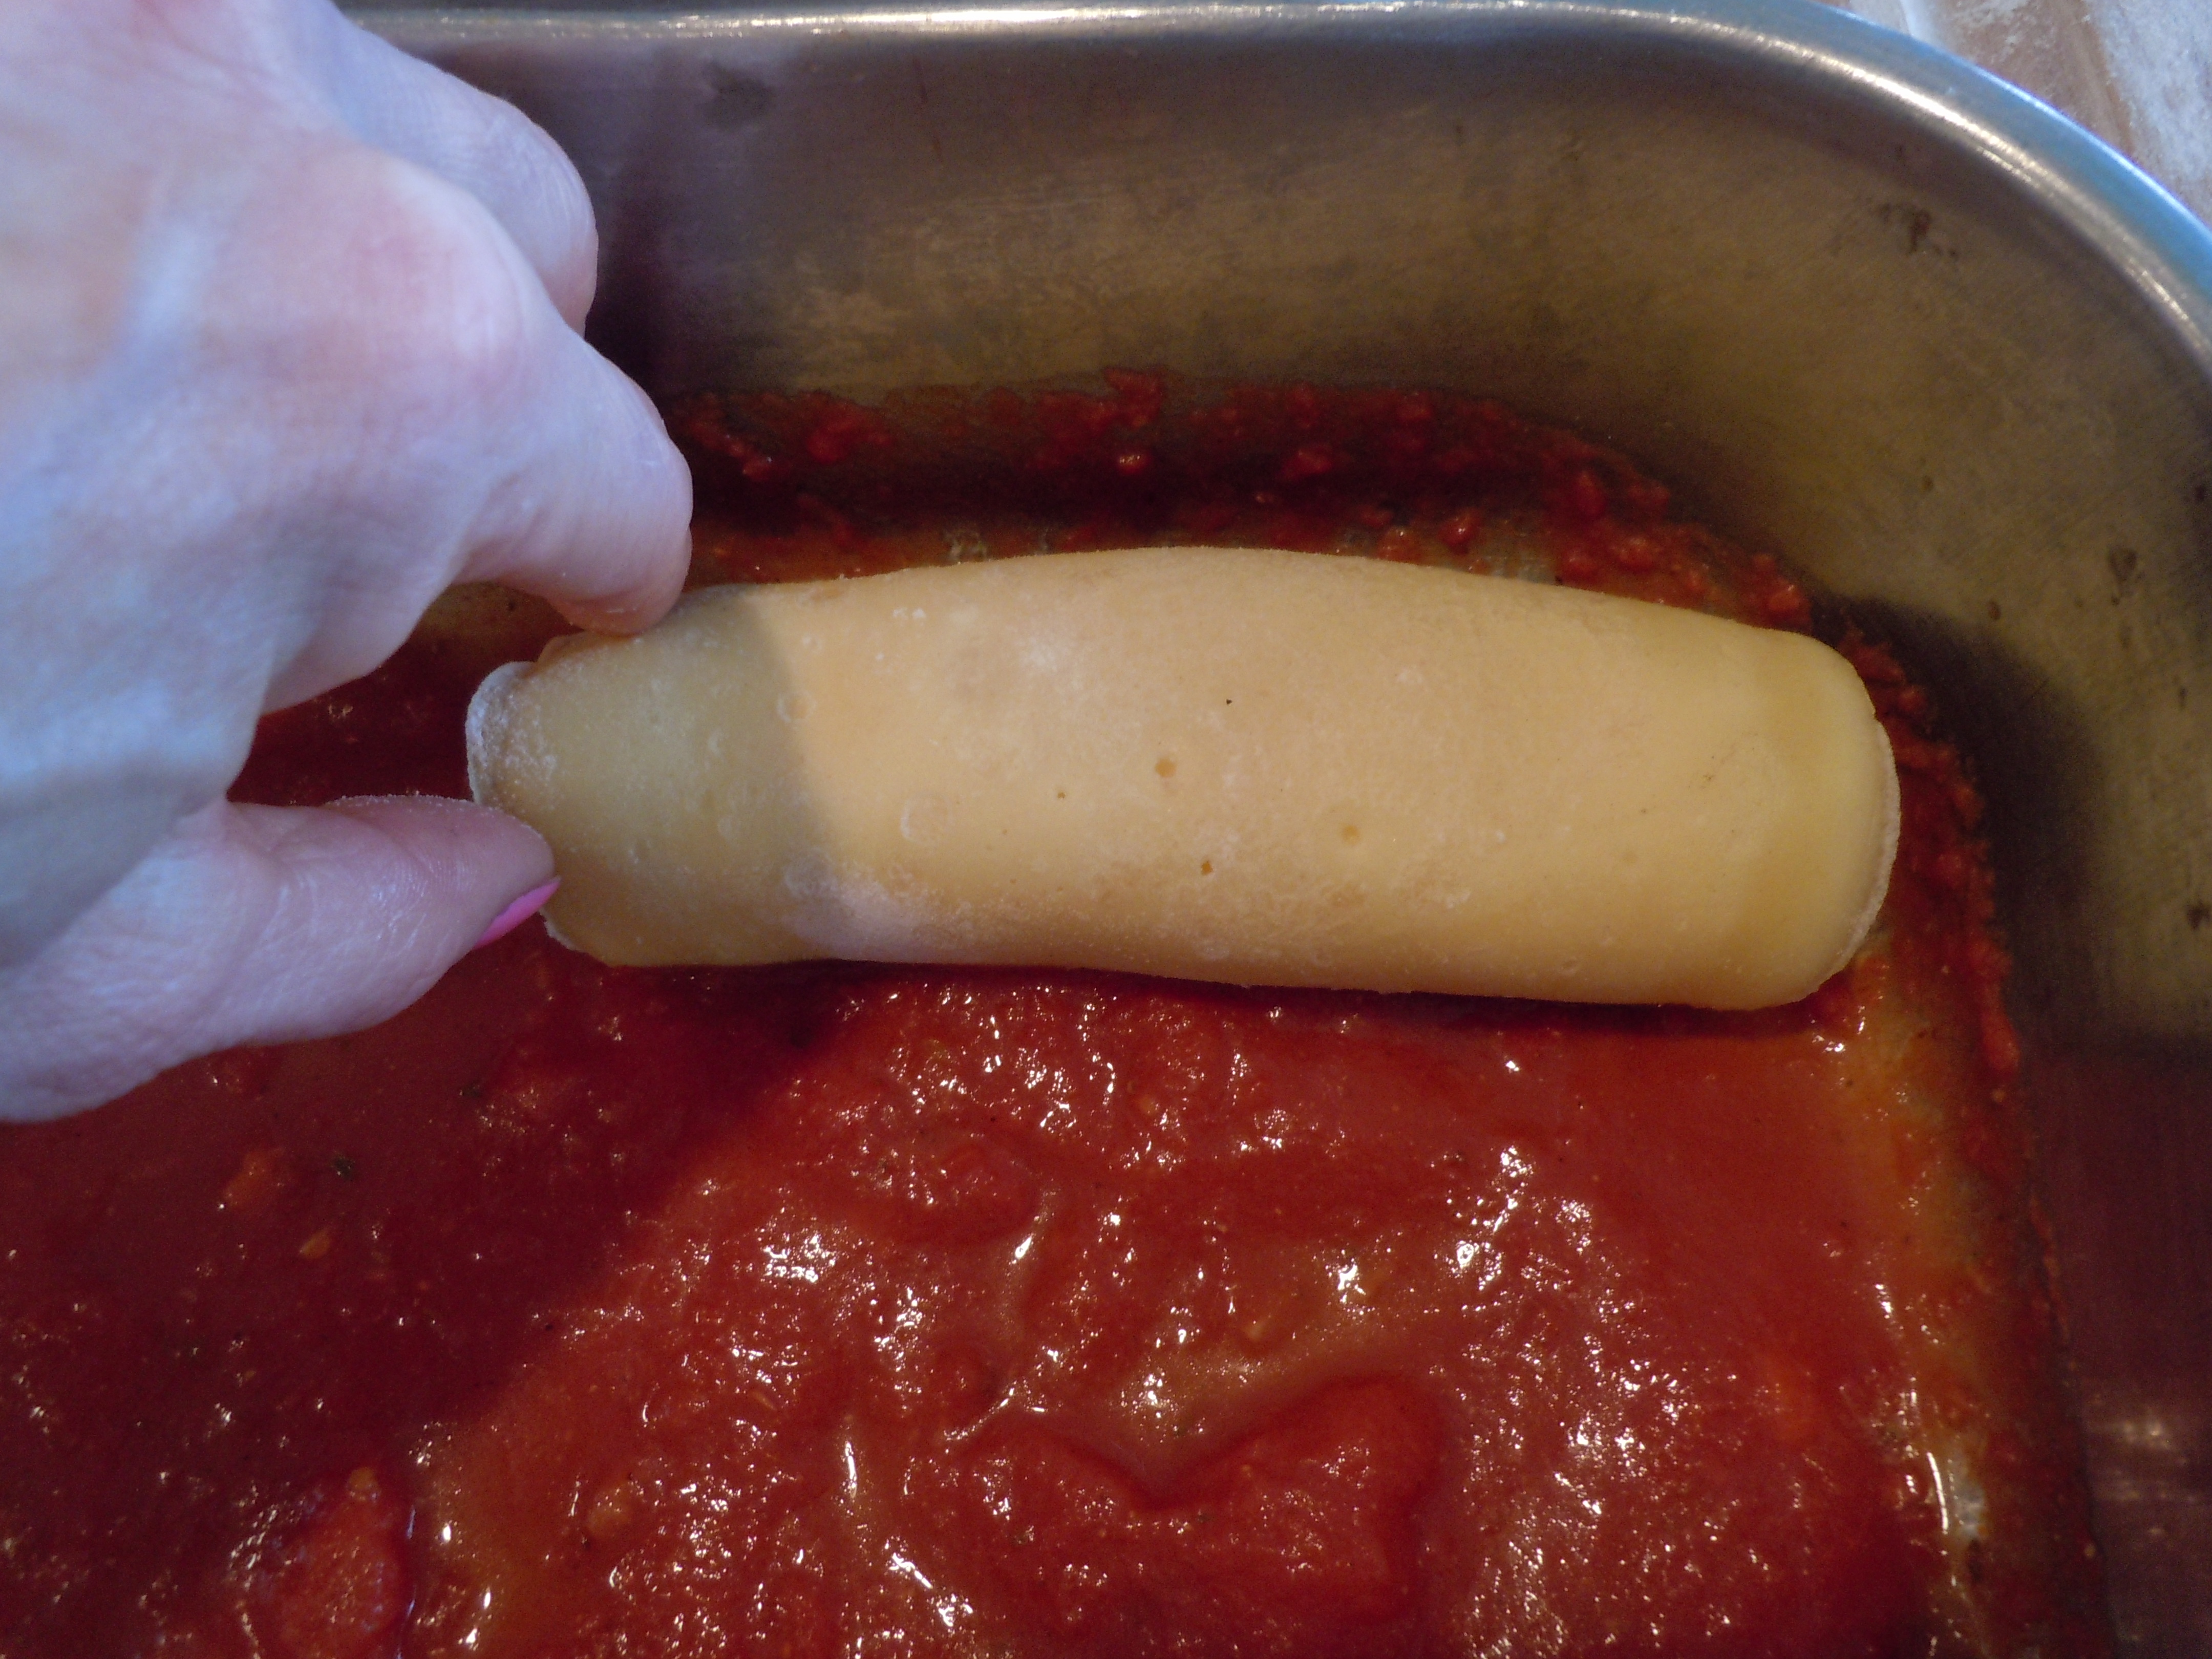
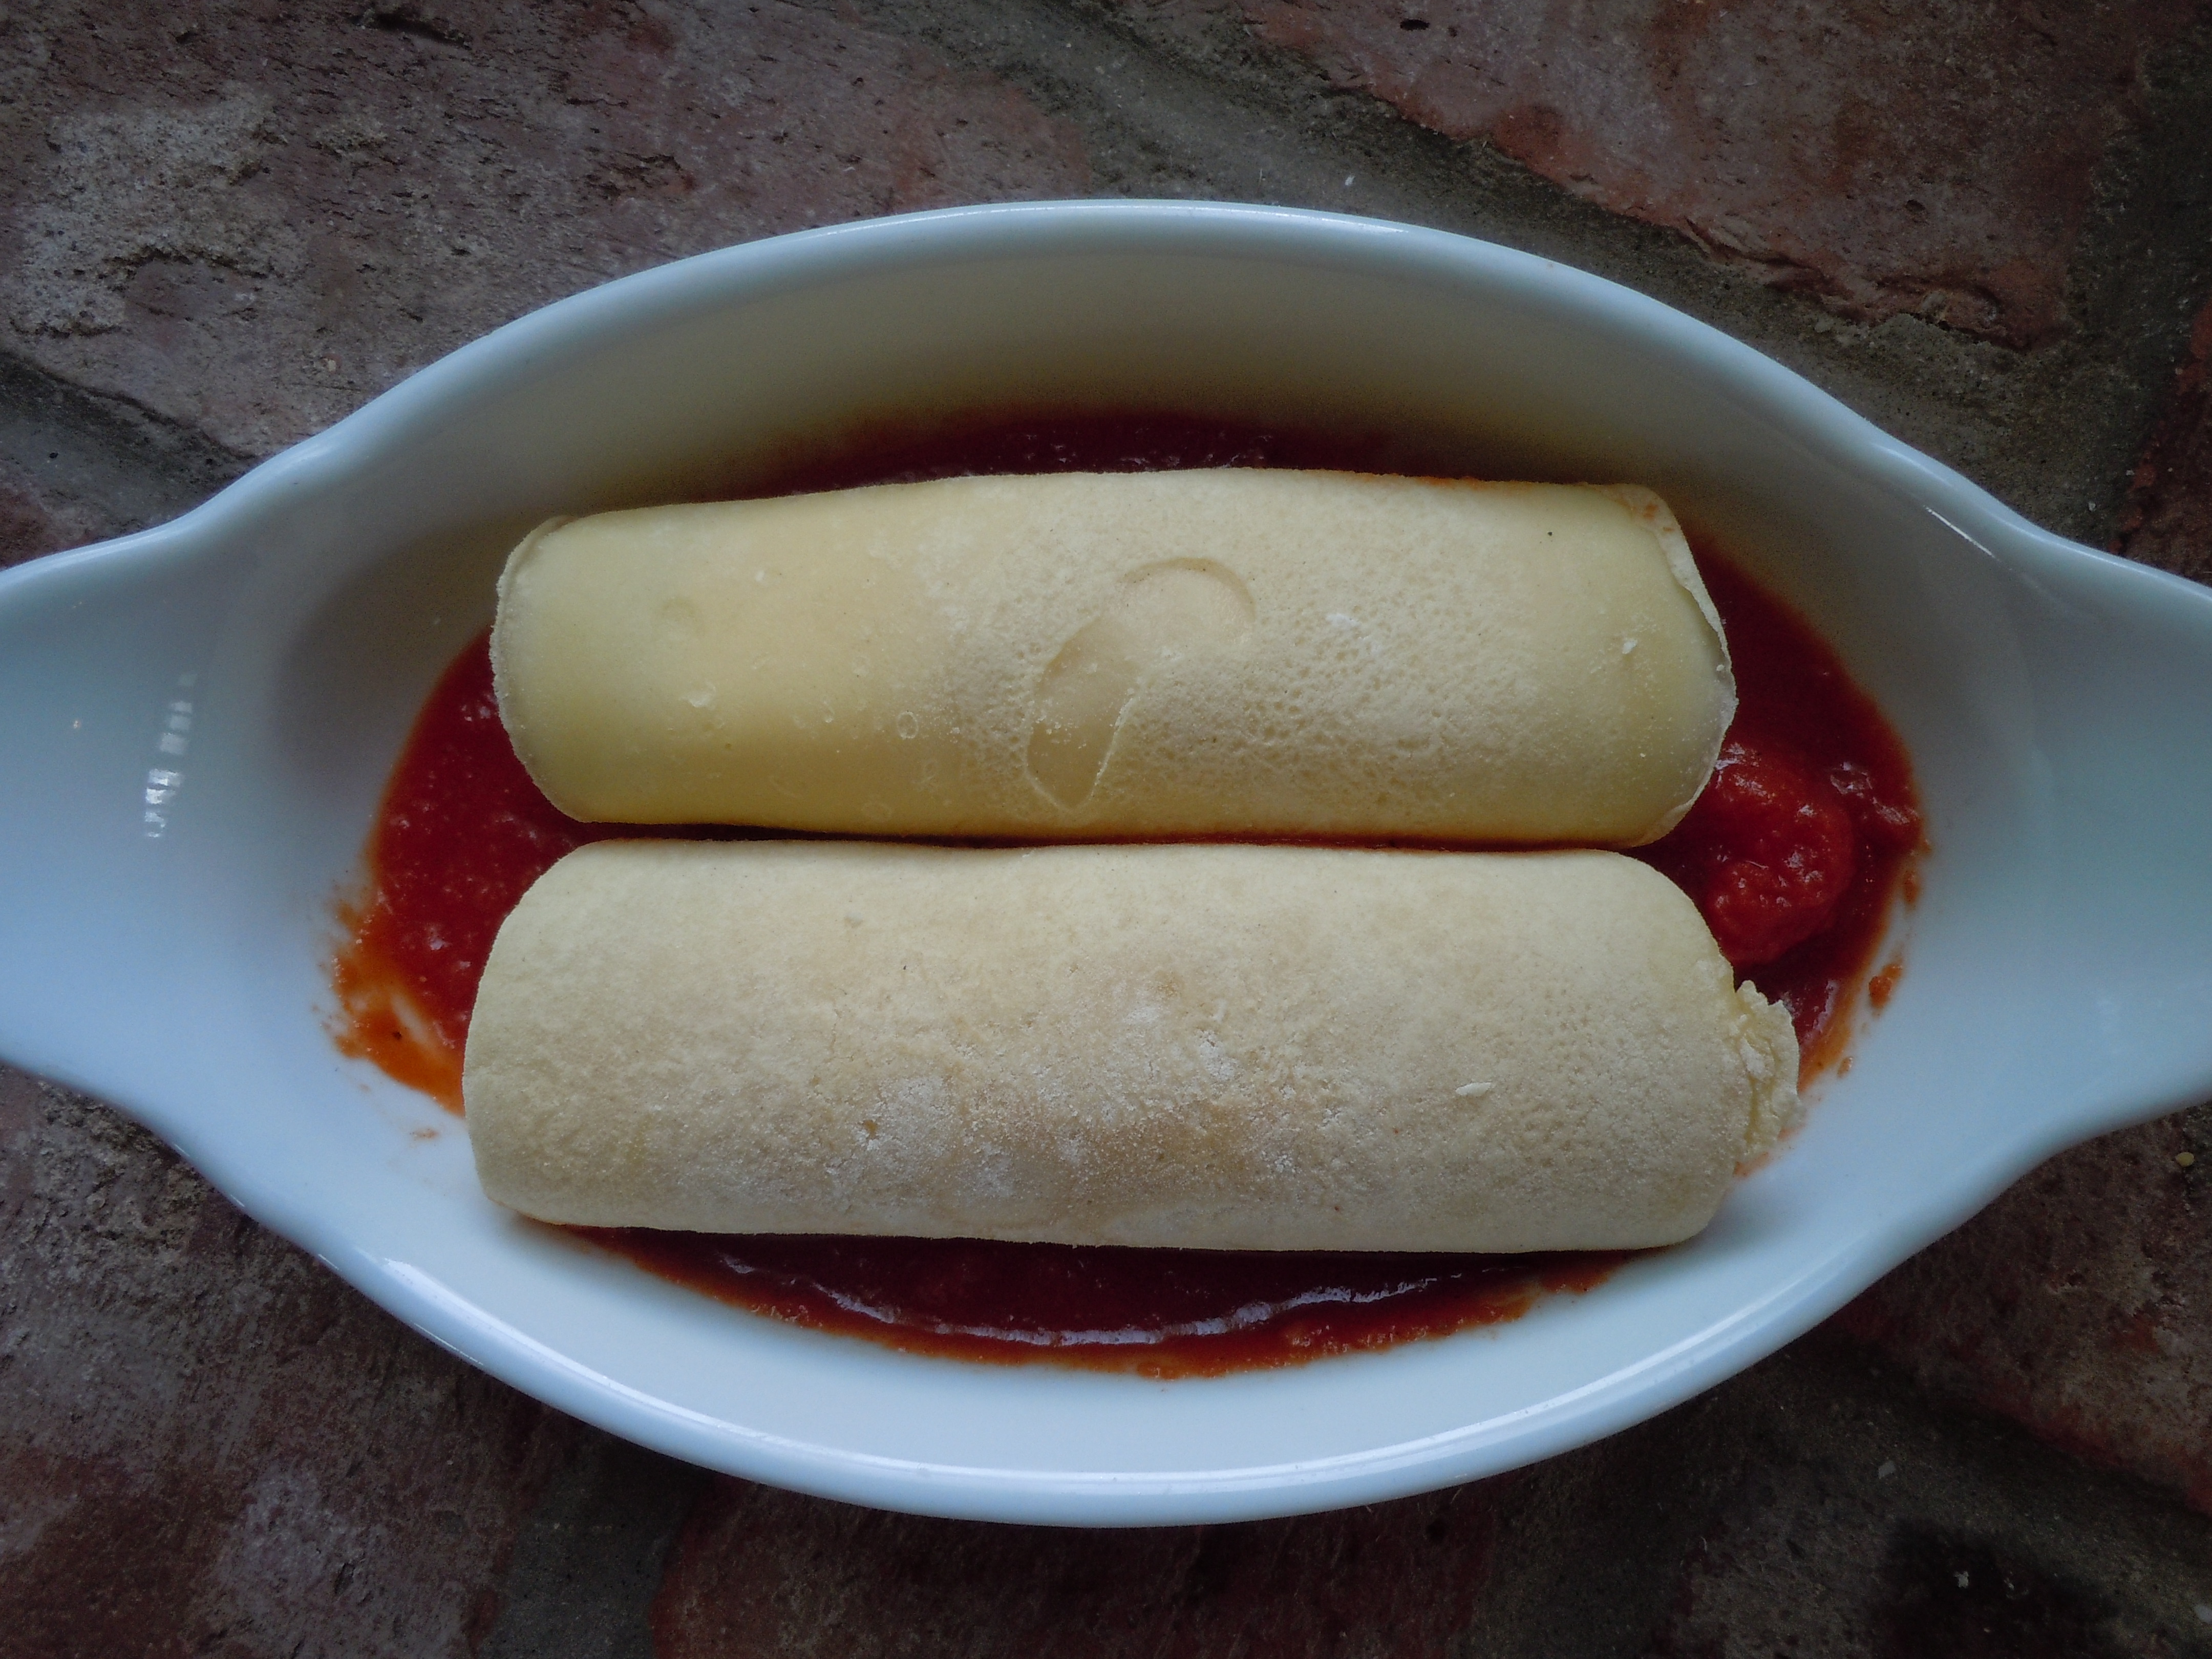
Lay out manicotti crepe and scoop 1/4 cup ricotta going across the center of the circle as shown in the photo
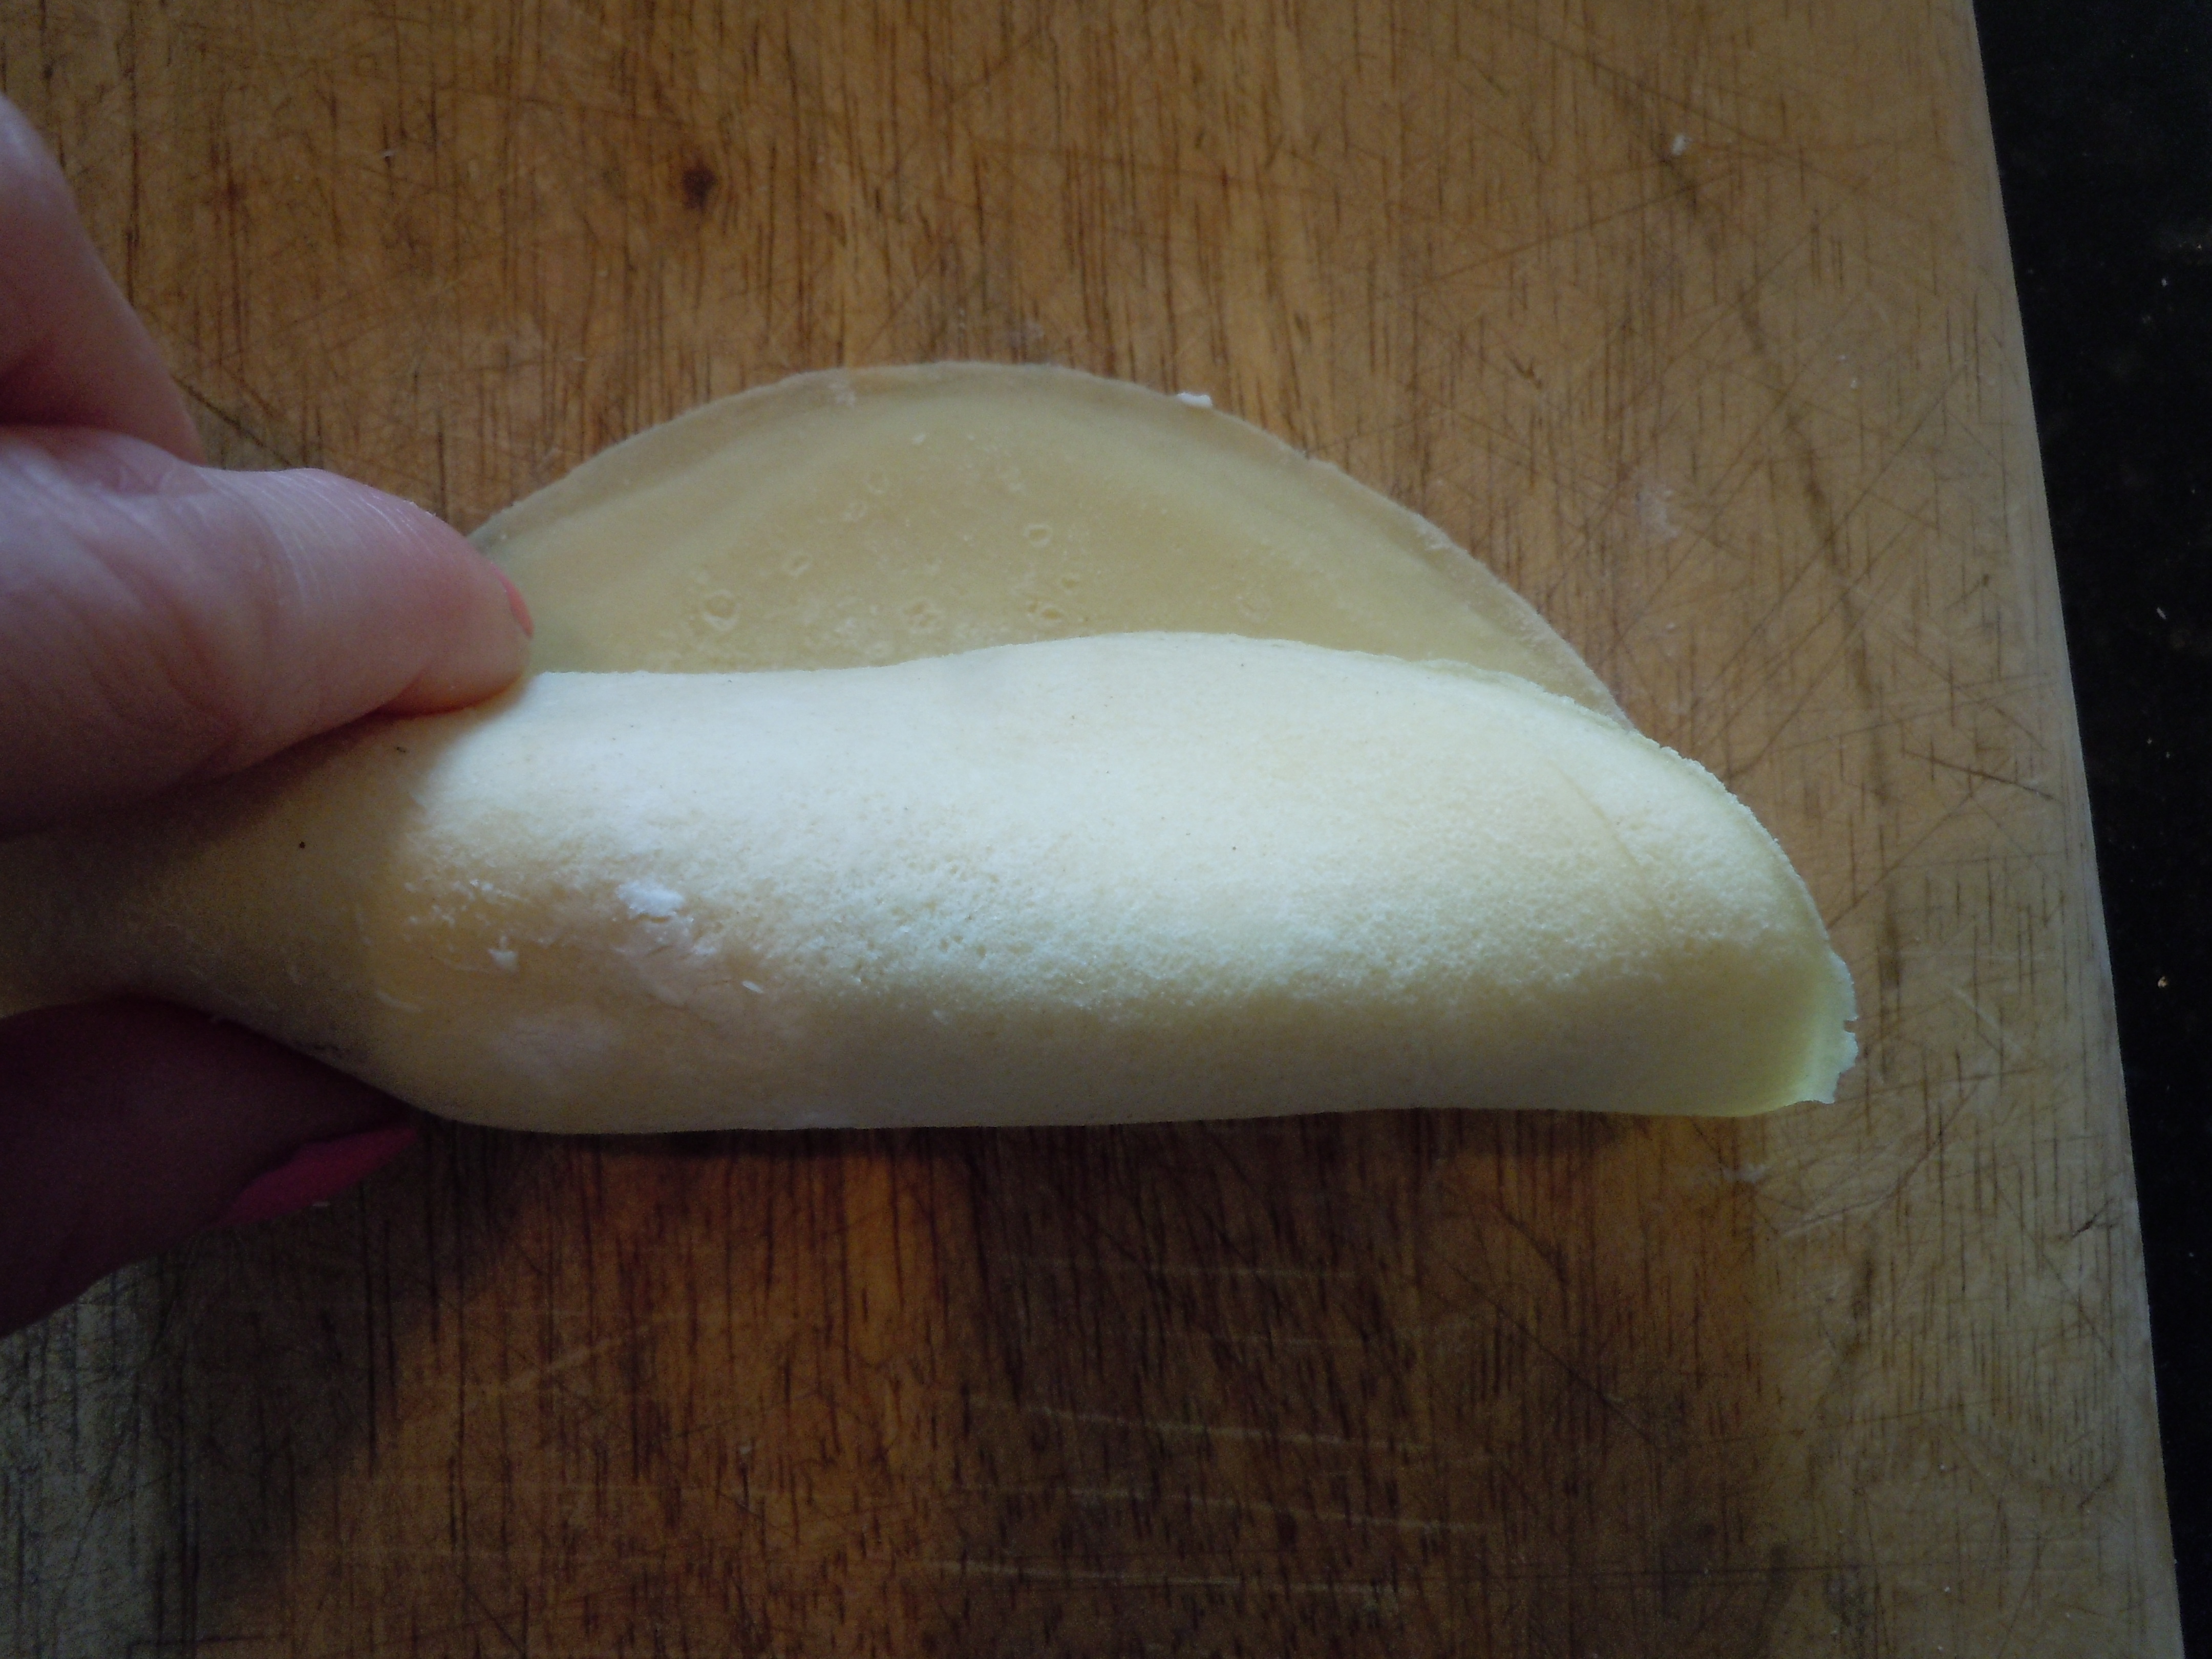
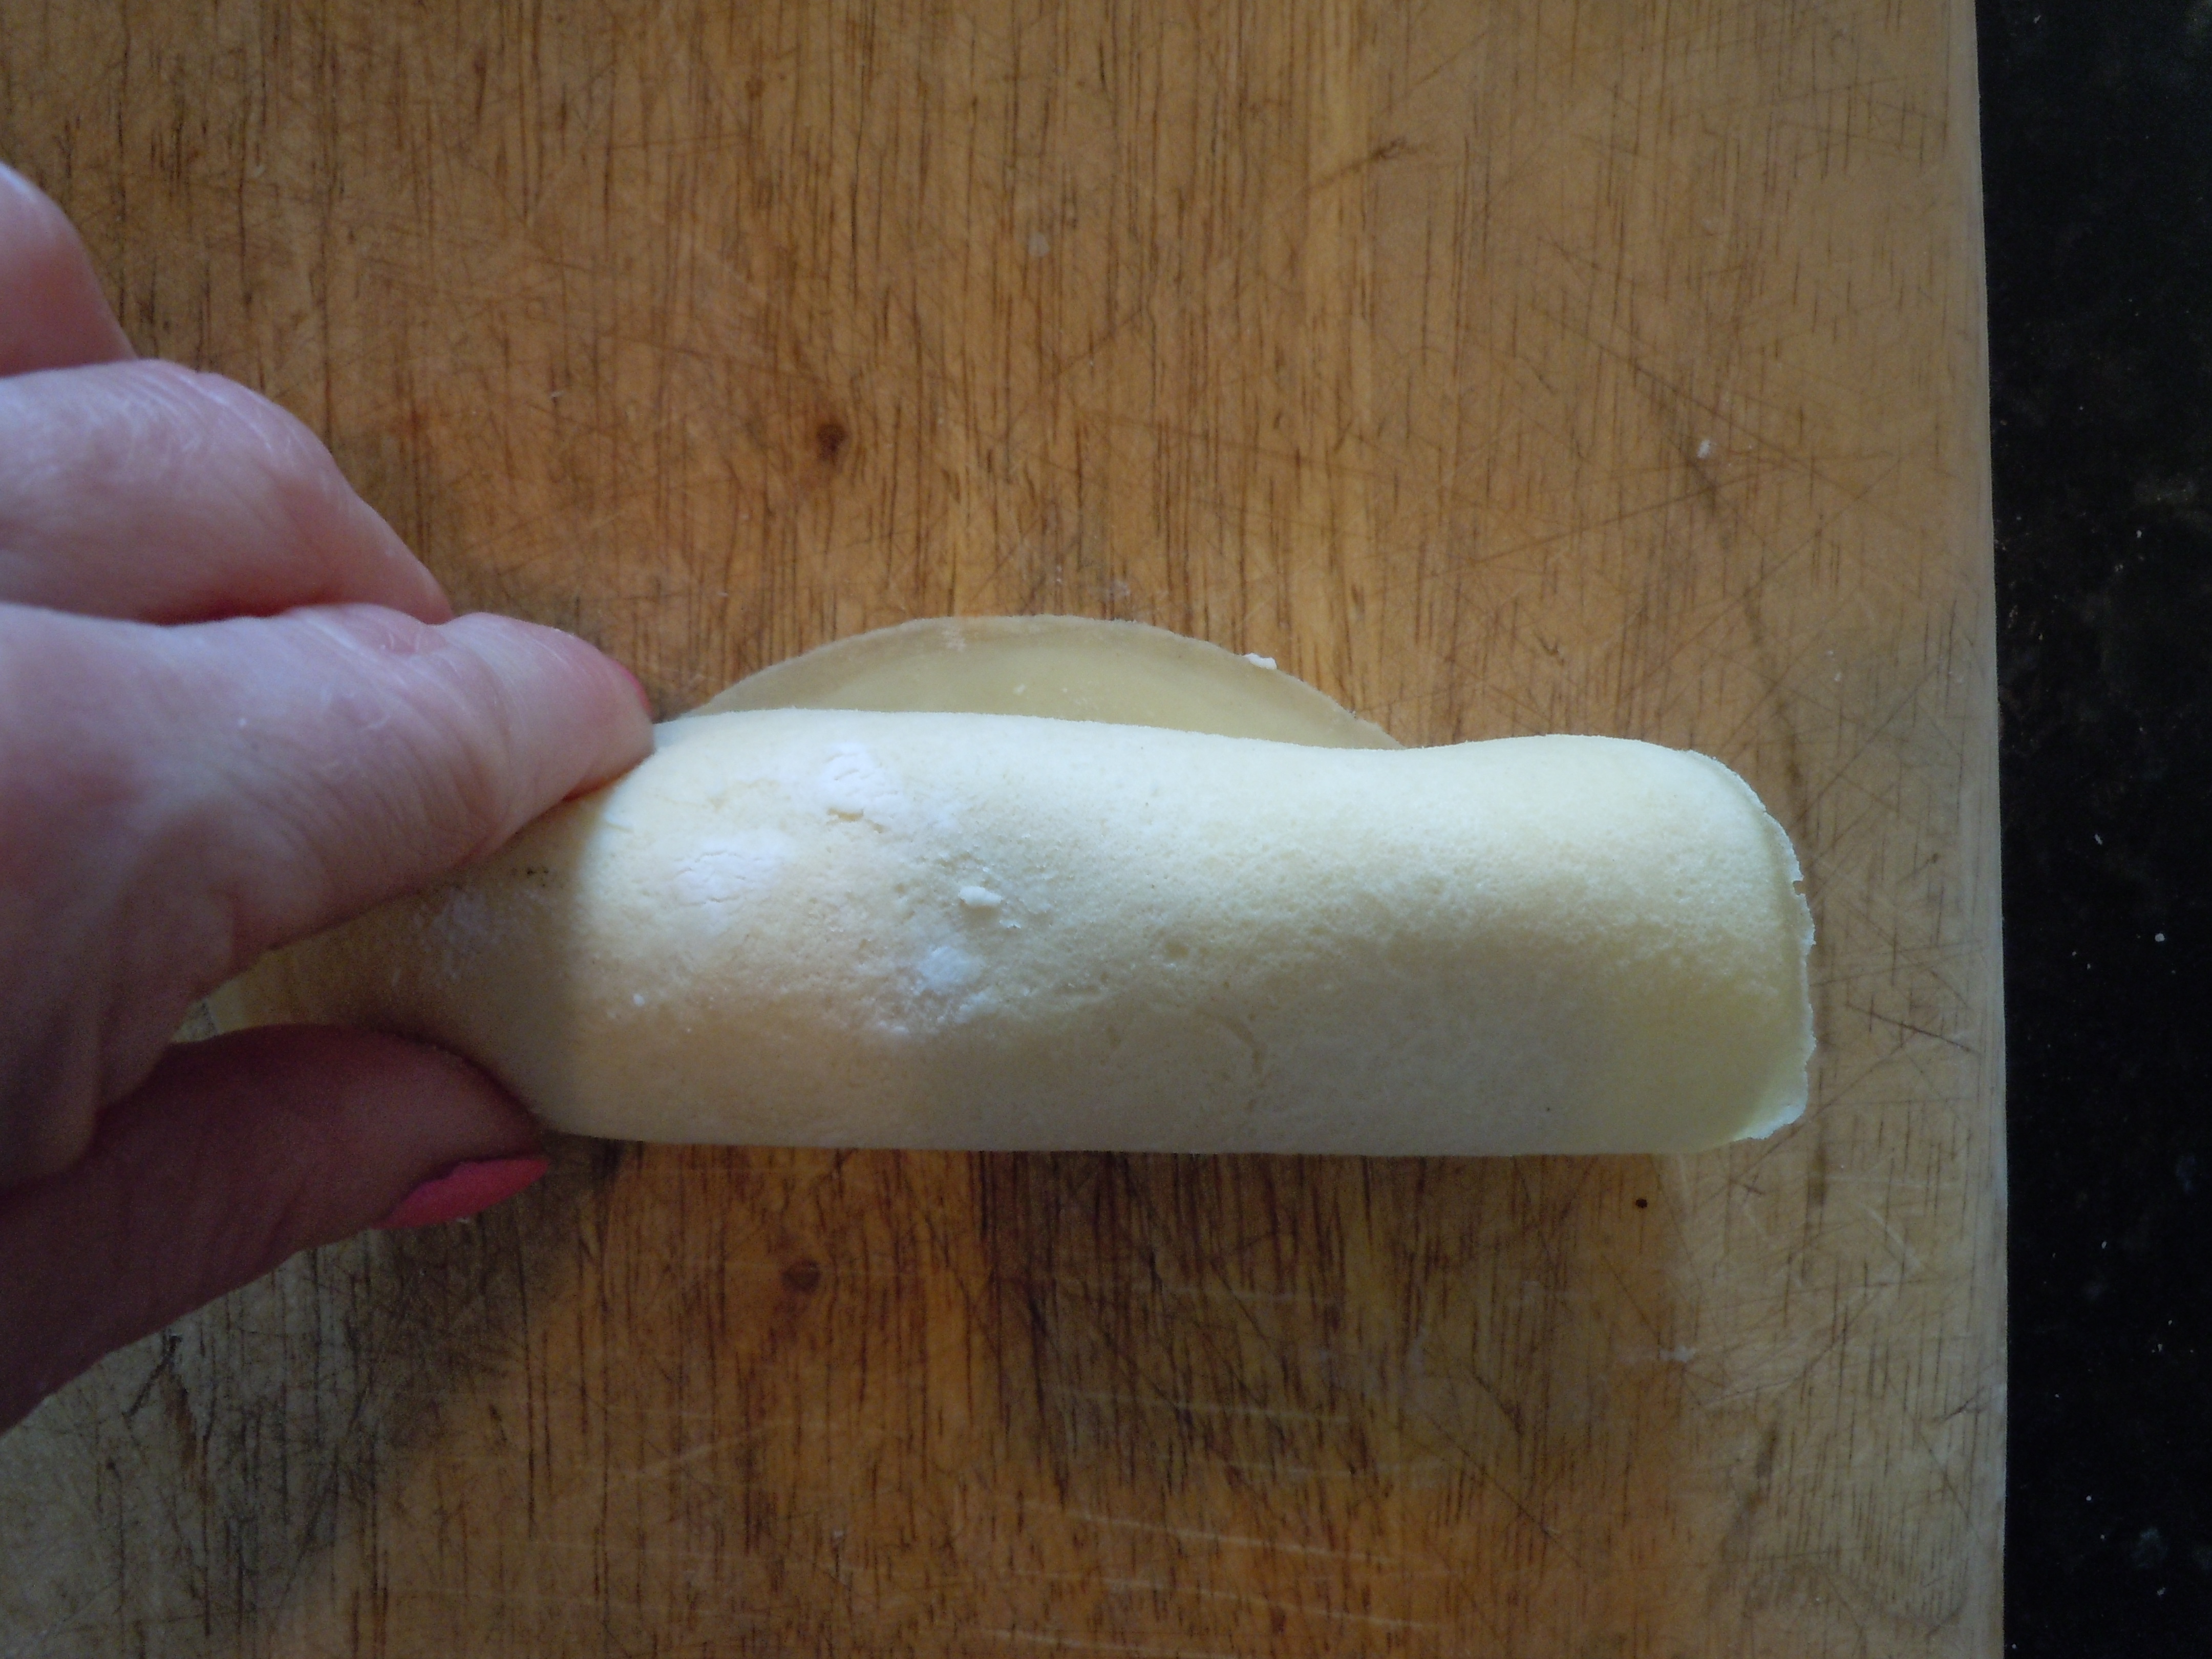
Lay a piece of mozzarella in the center and roll up manicotti
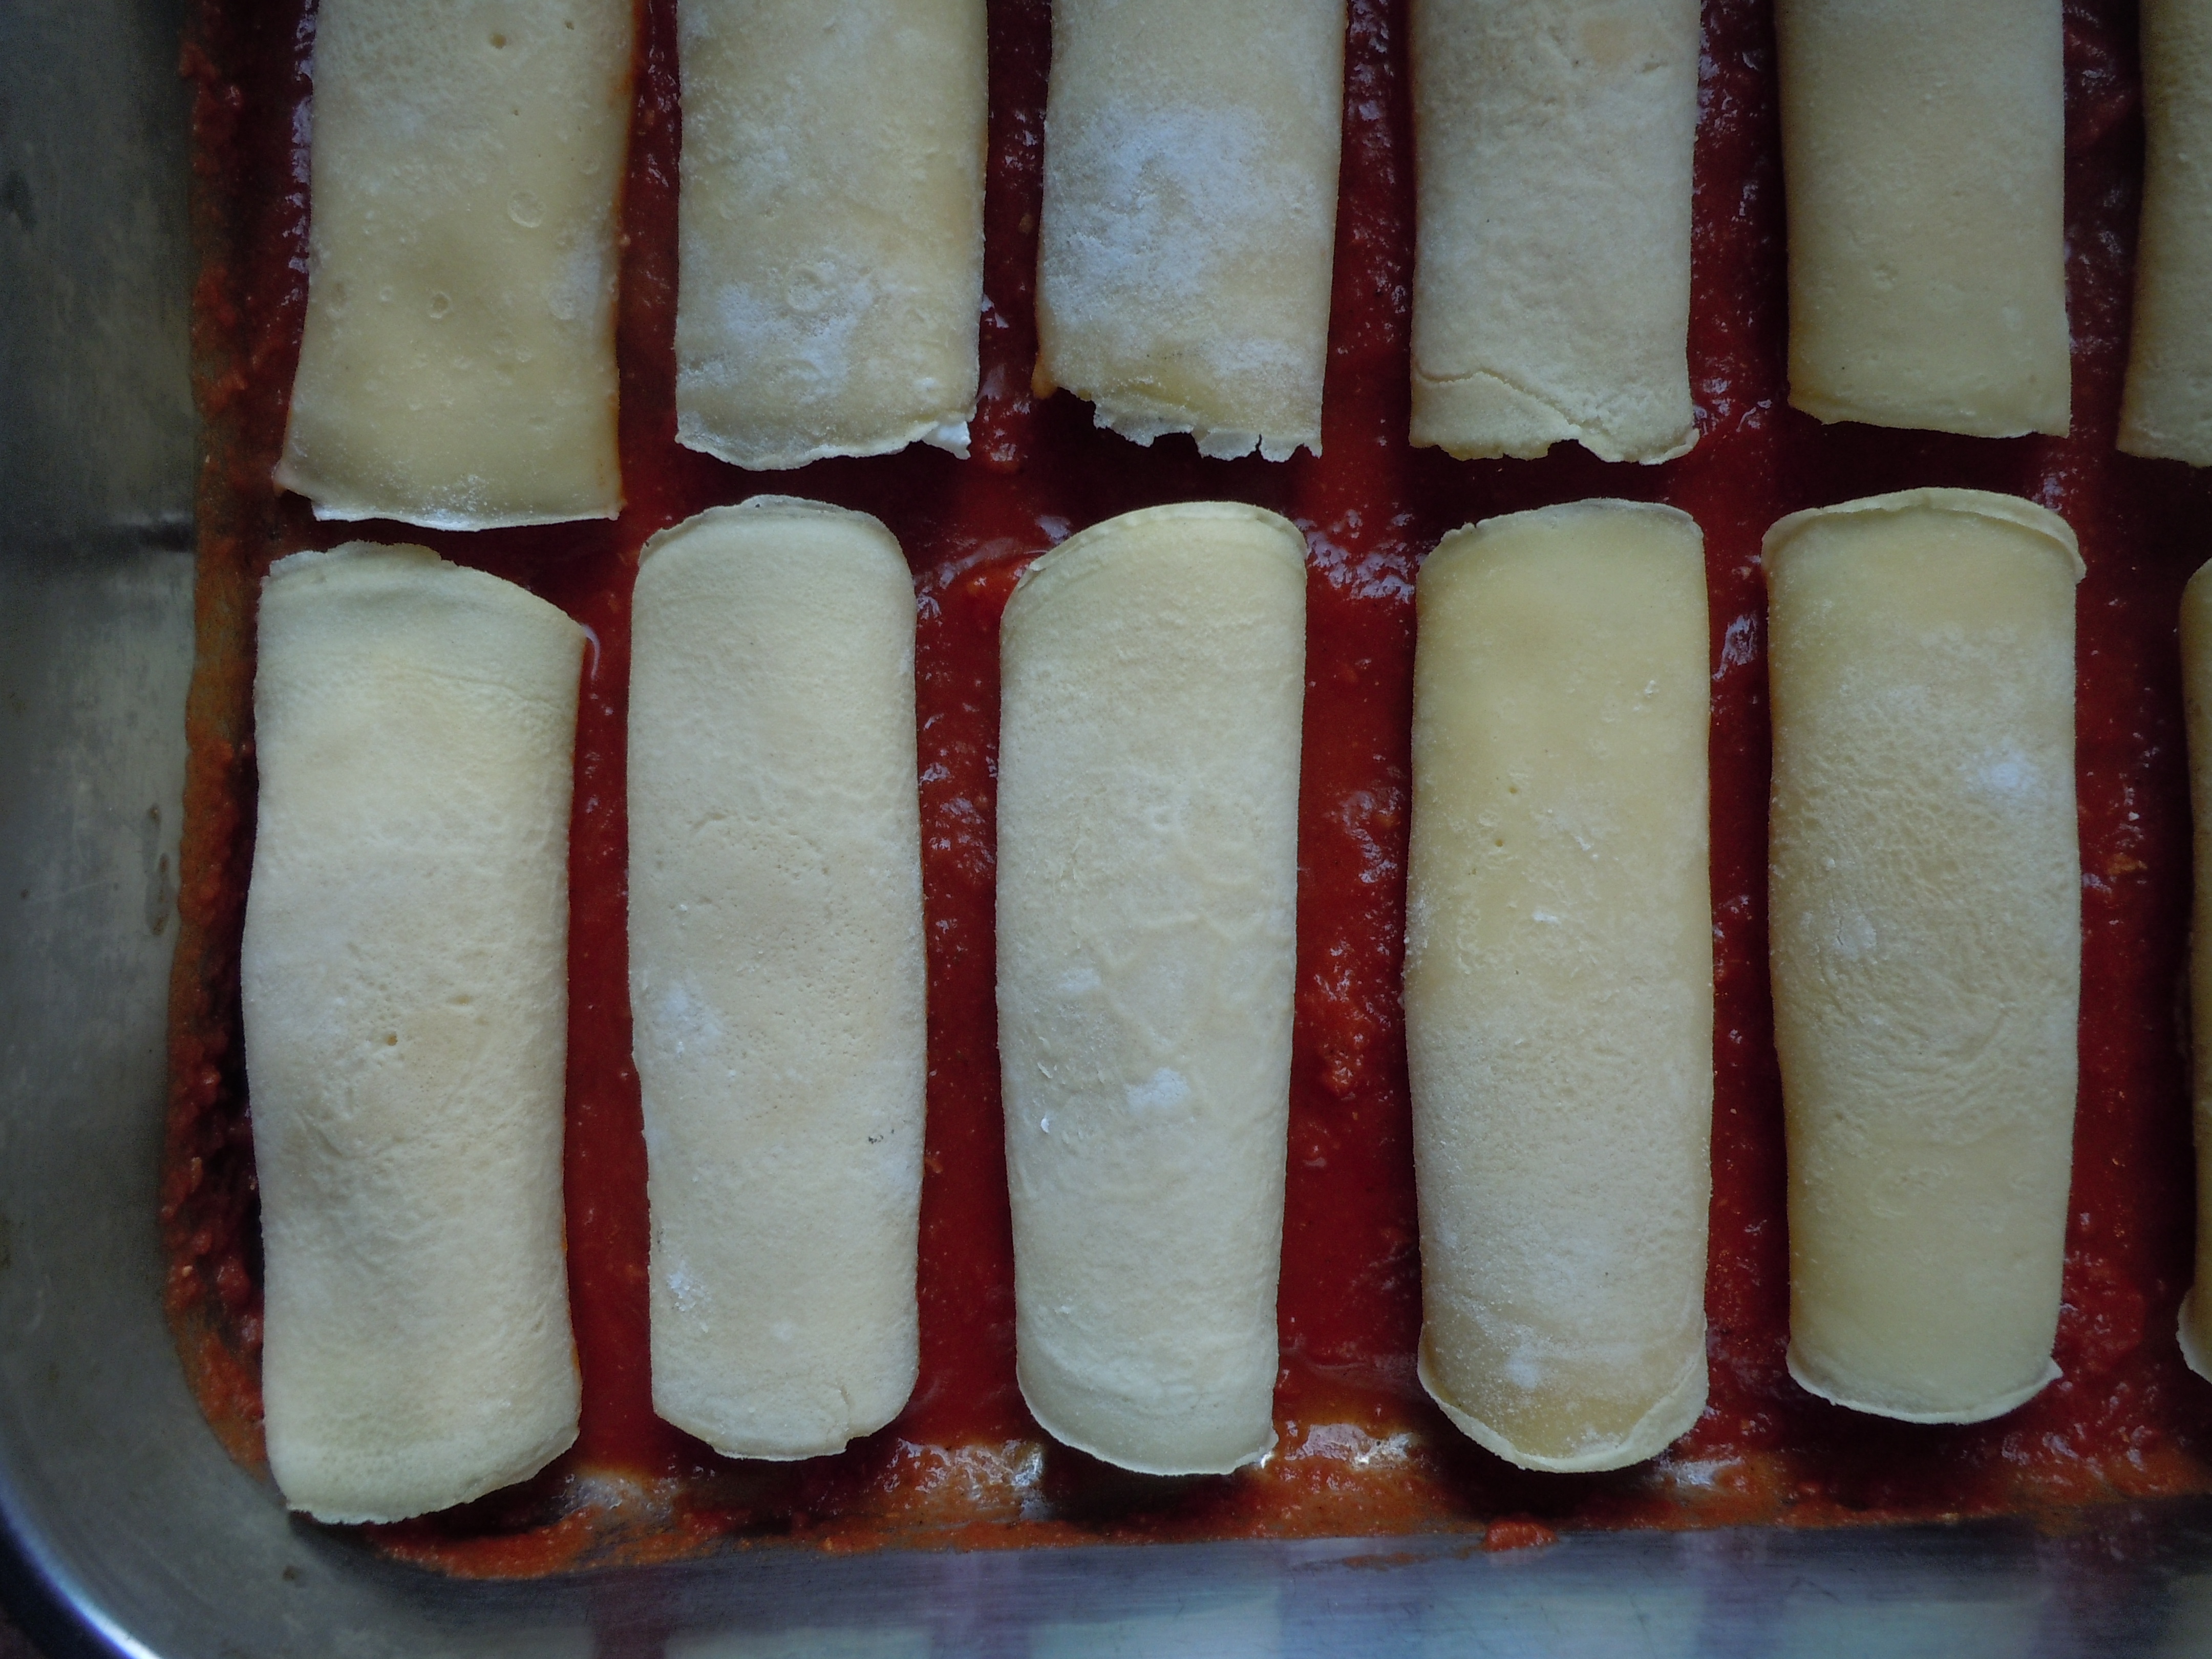
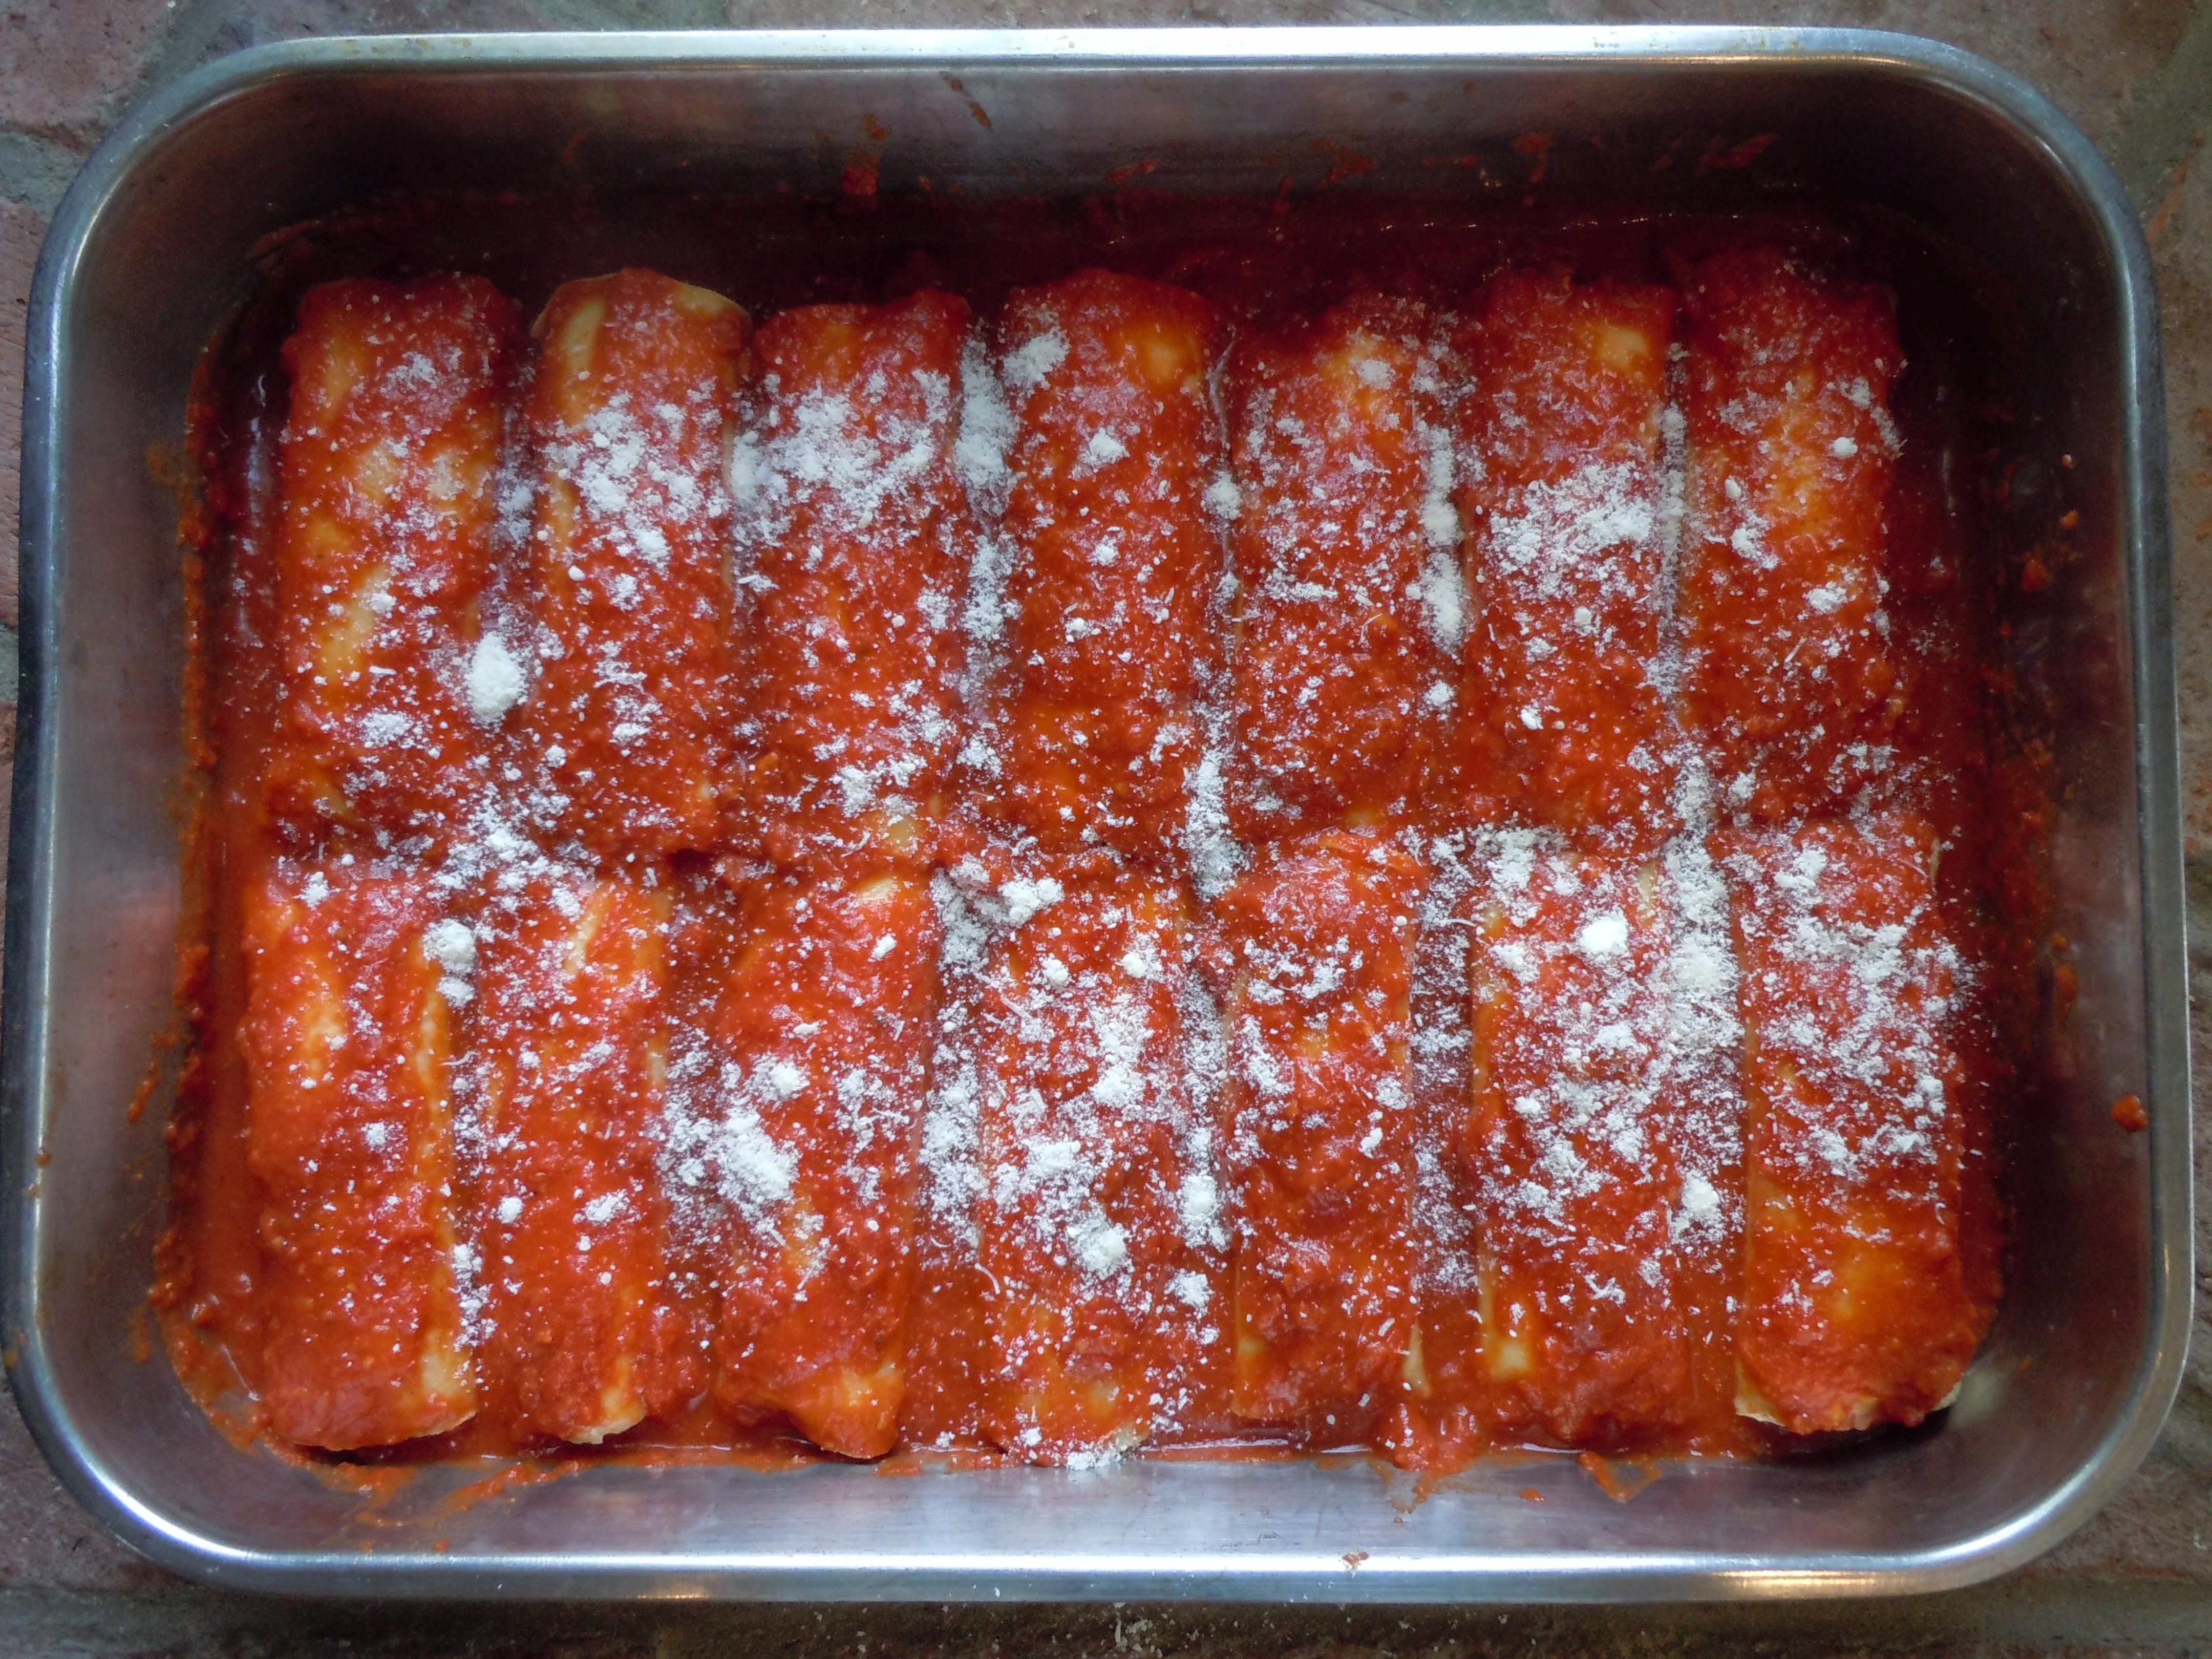
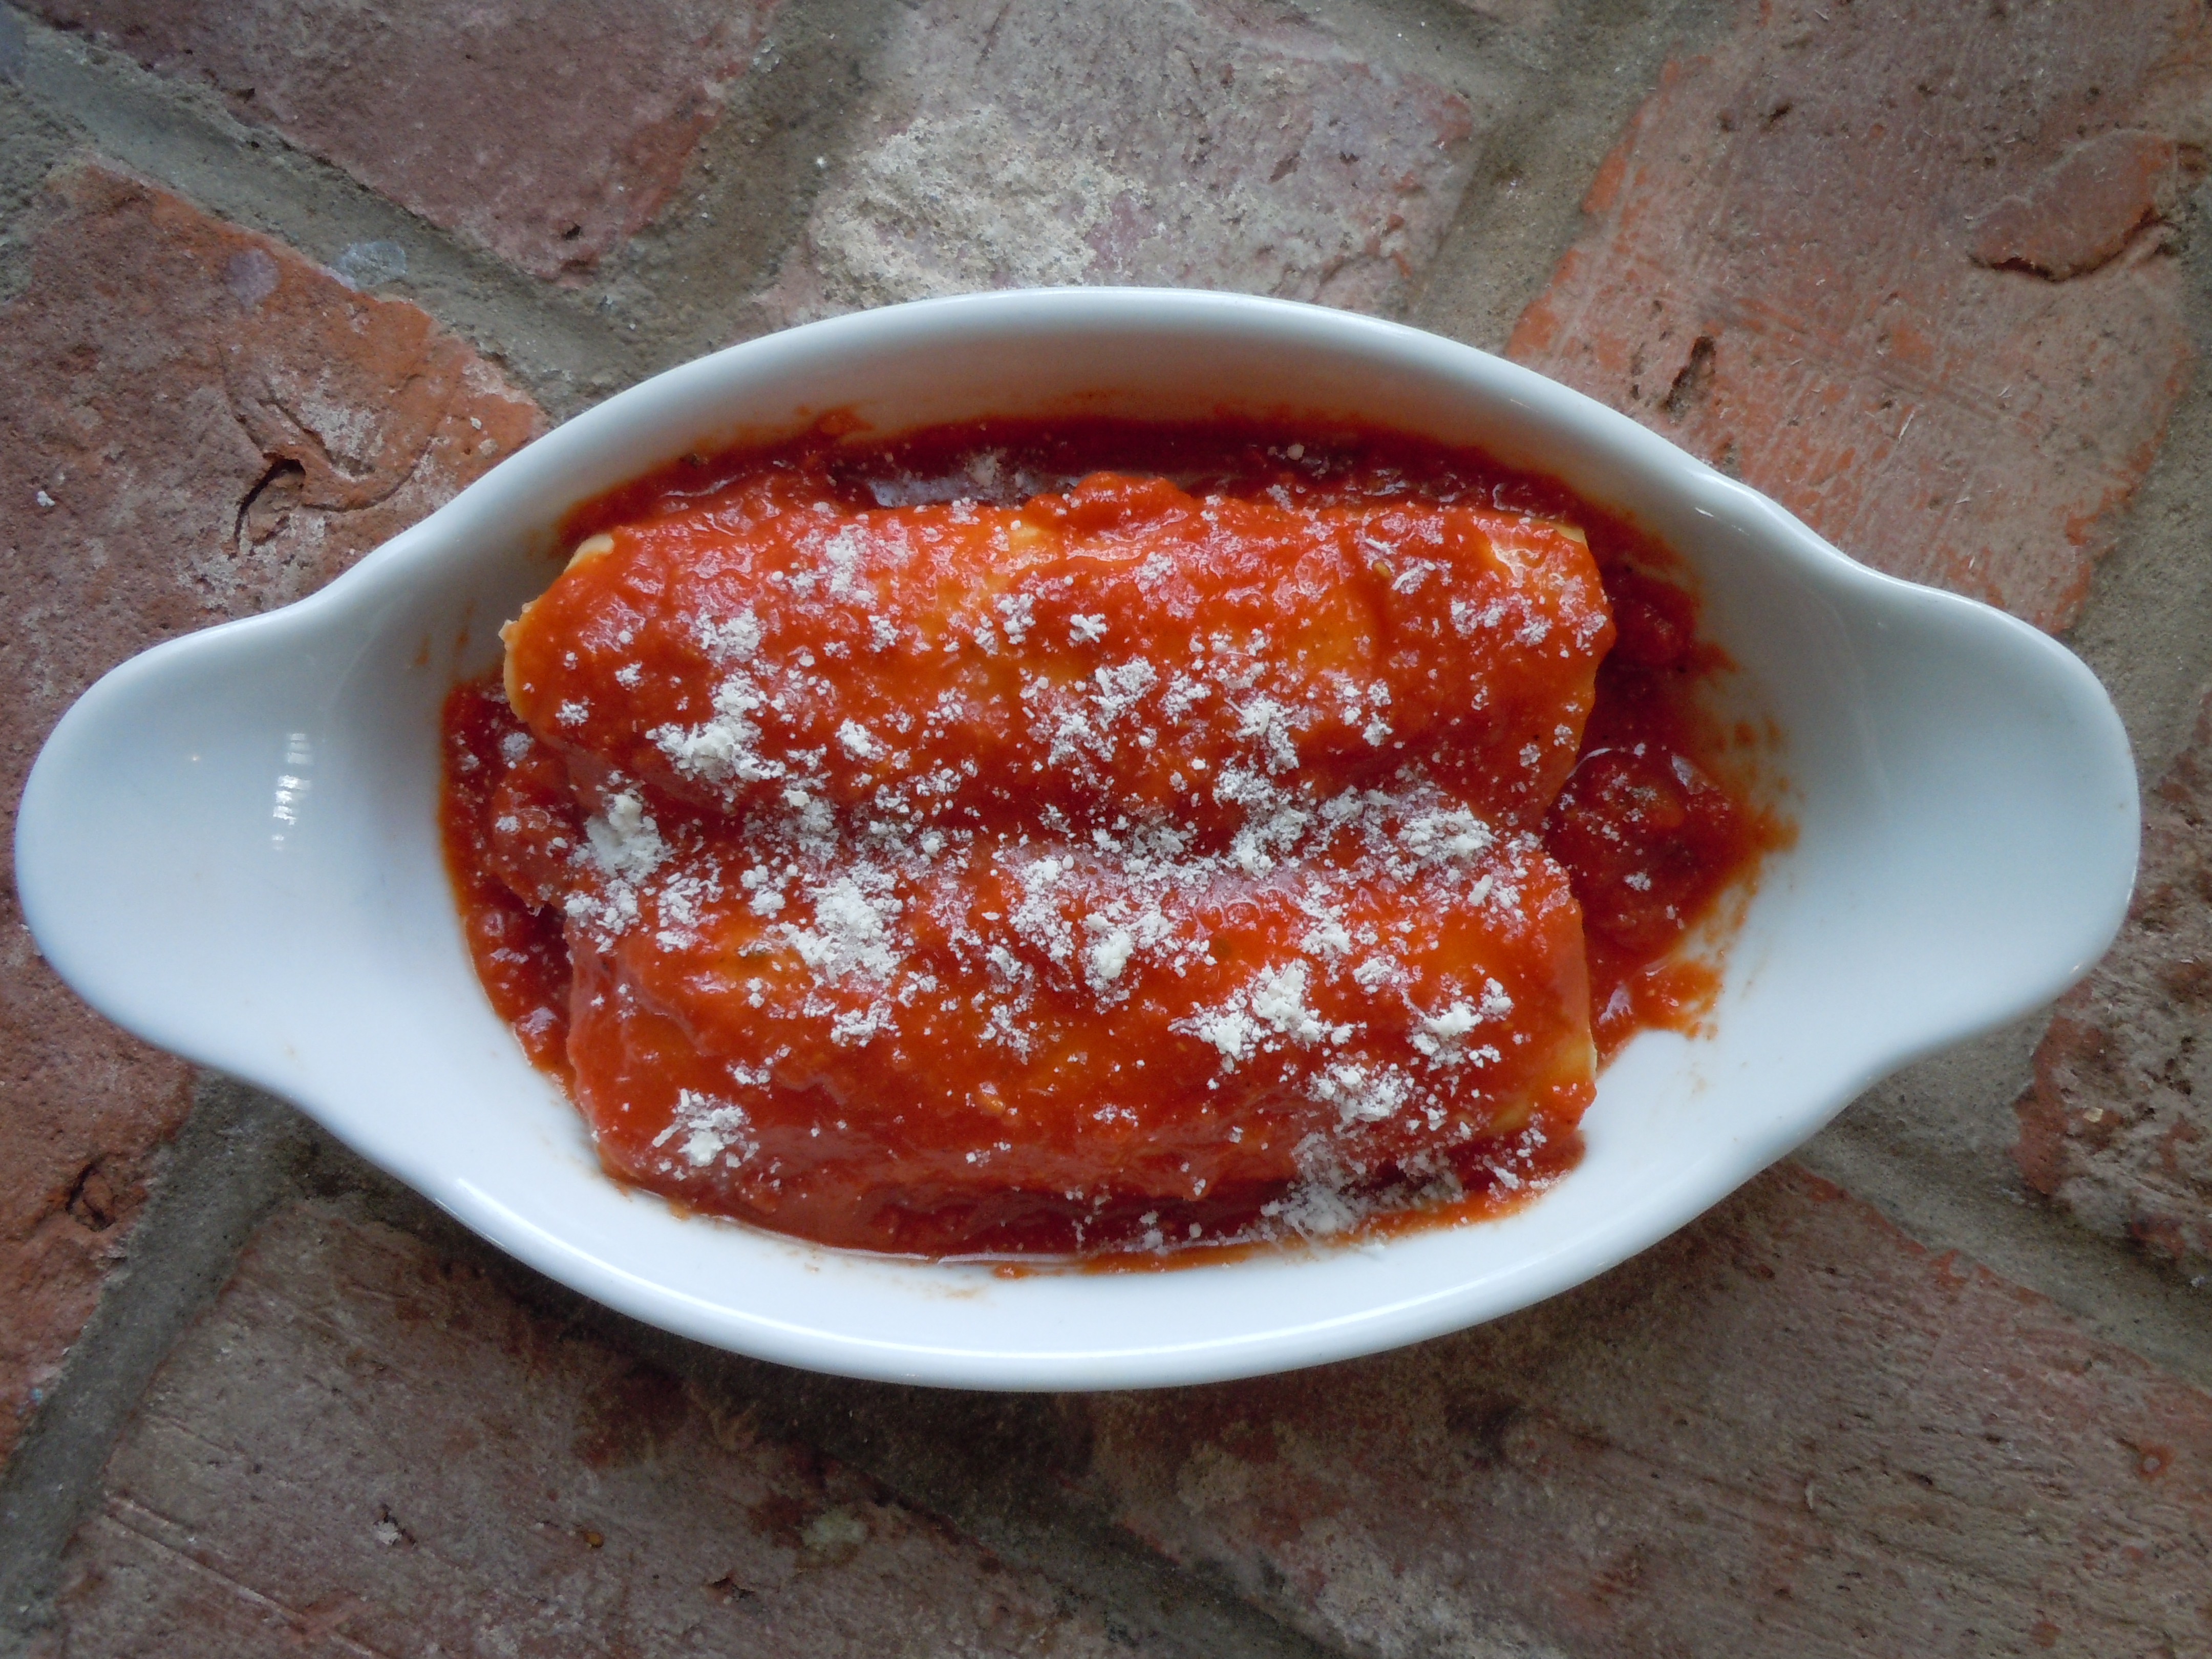
Place rolled manicotti on top of sauce in pan and continue on until all the pasta crepes are done
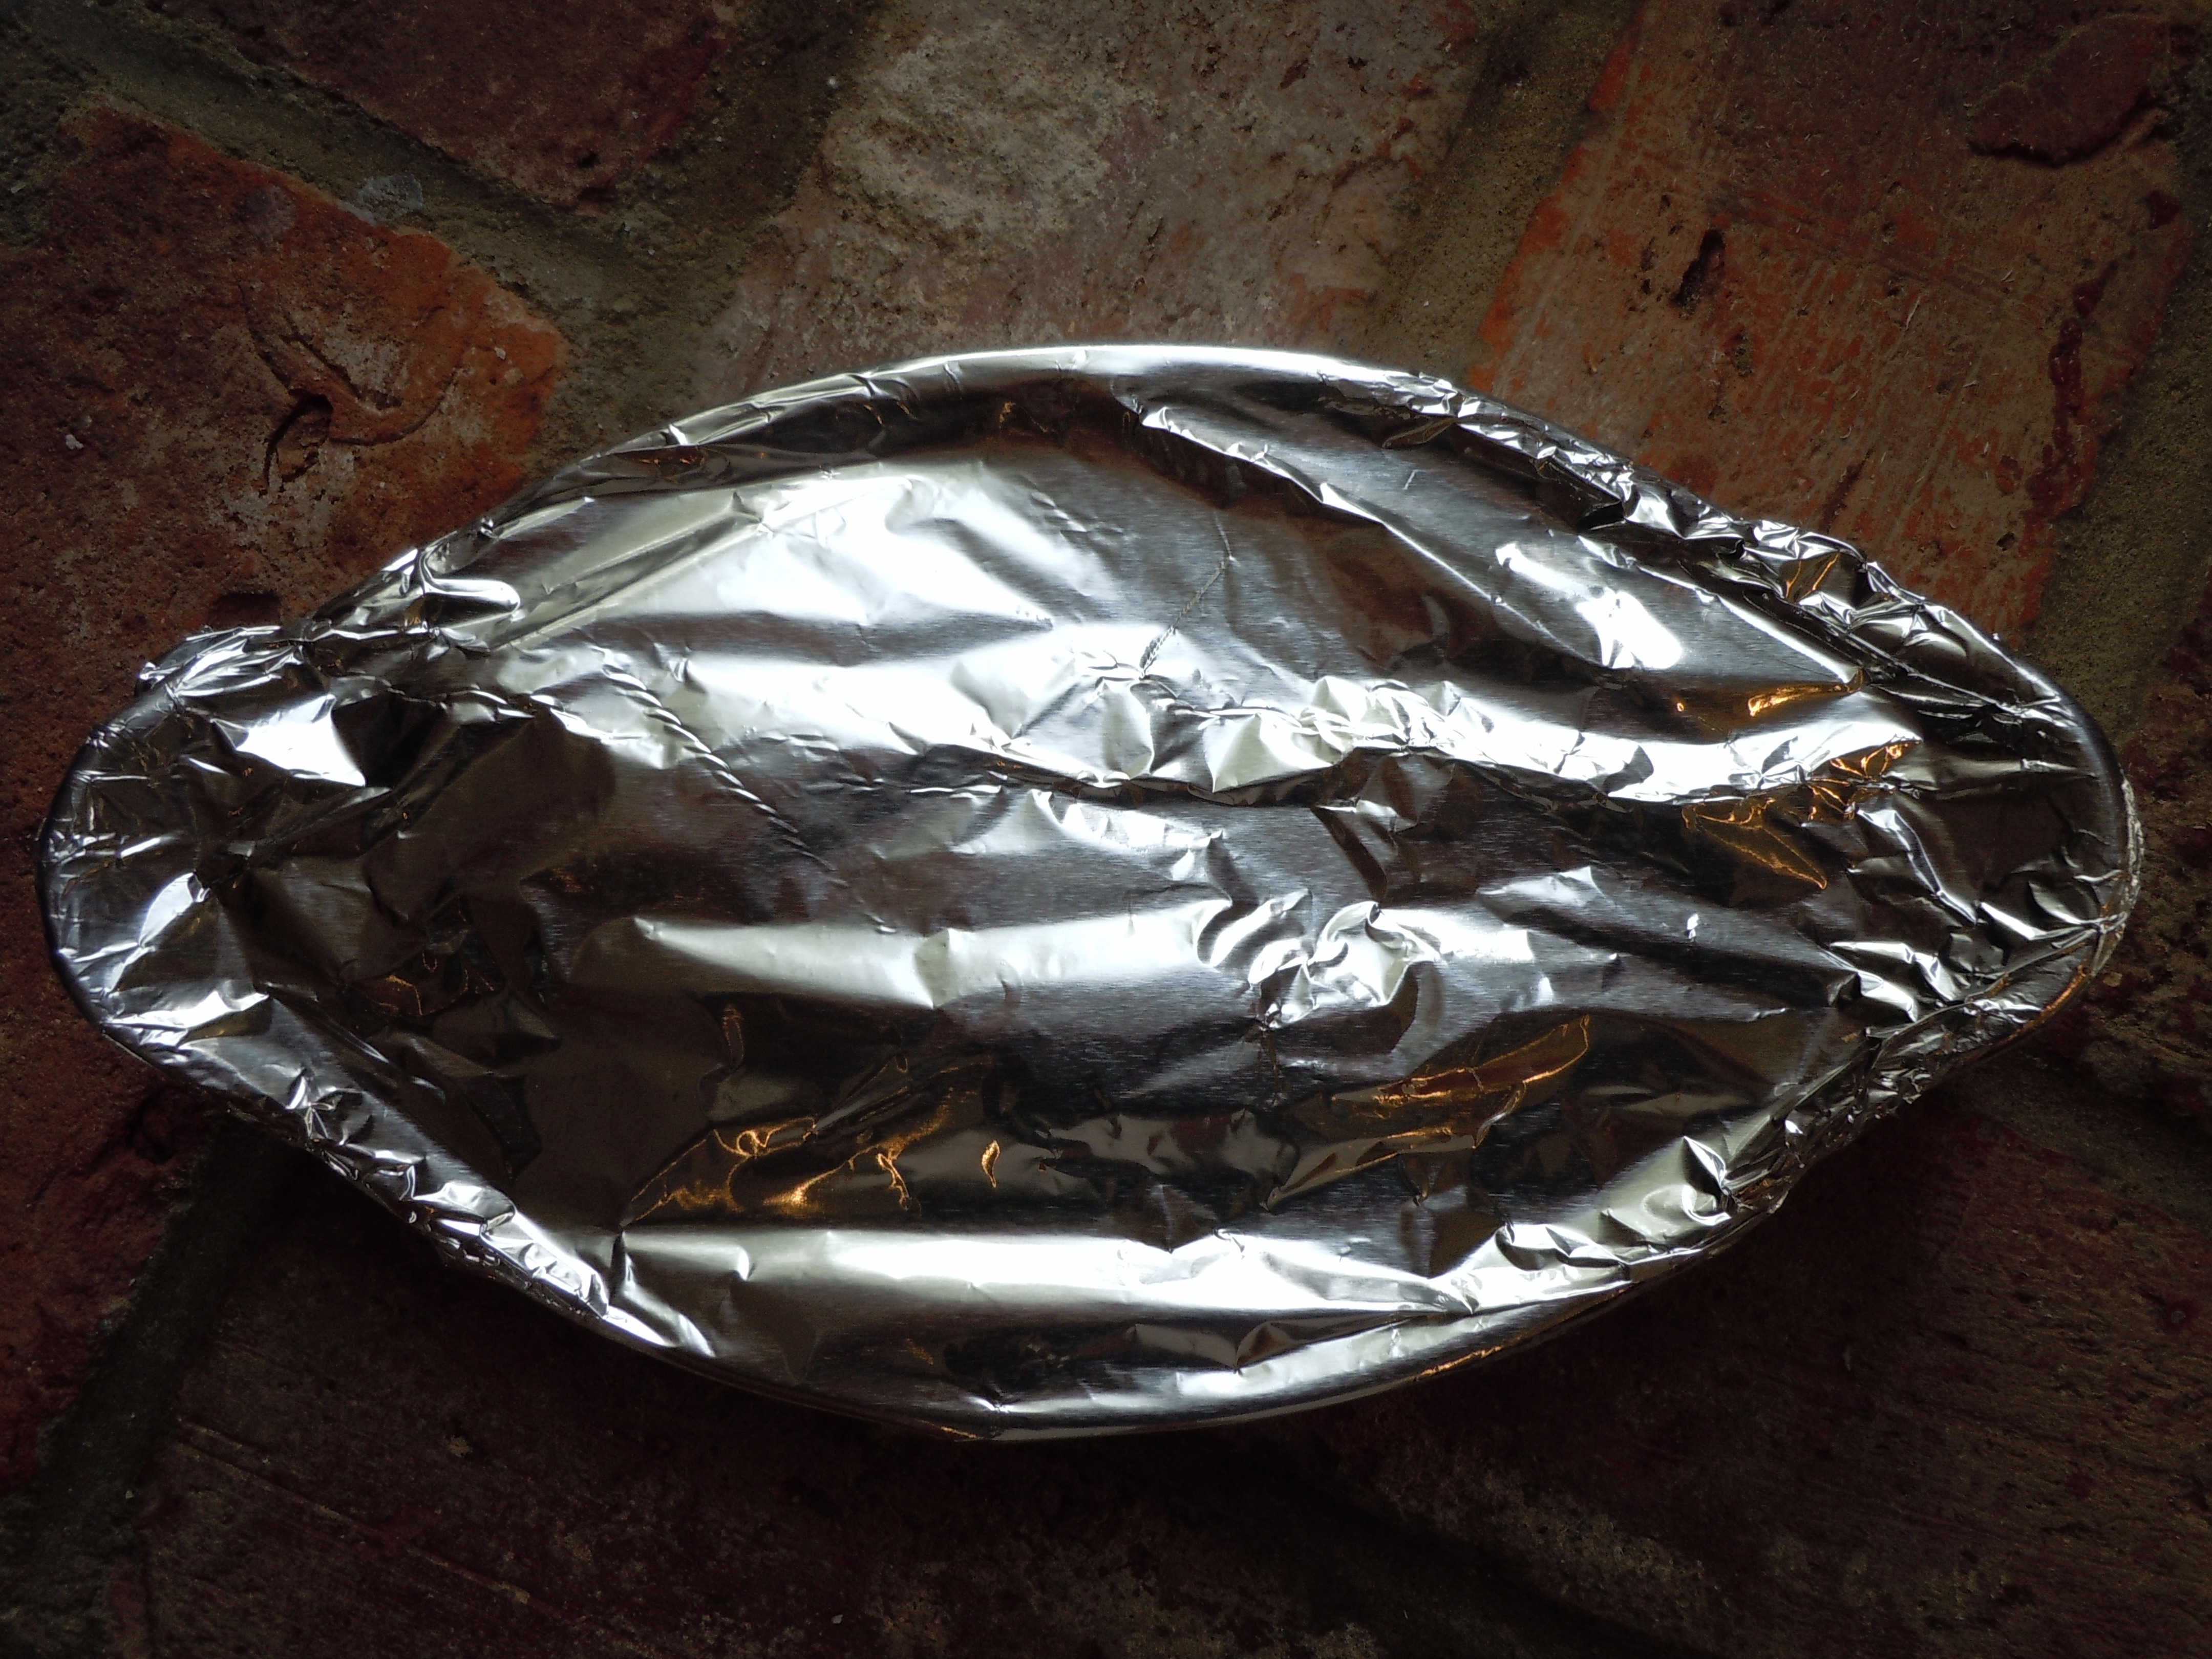
Pour another 2-2 1/2 cups of sauce on top of roll manicotti’s, sprinkle with parmesan and cover with foil
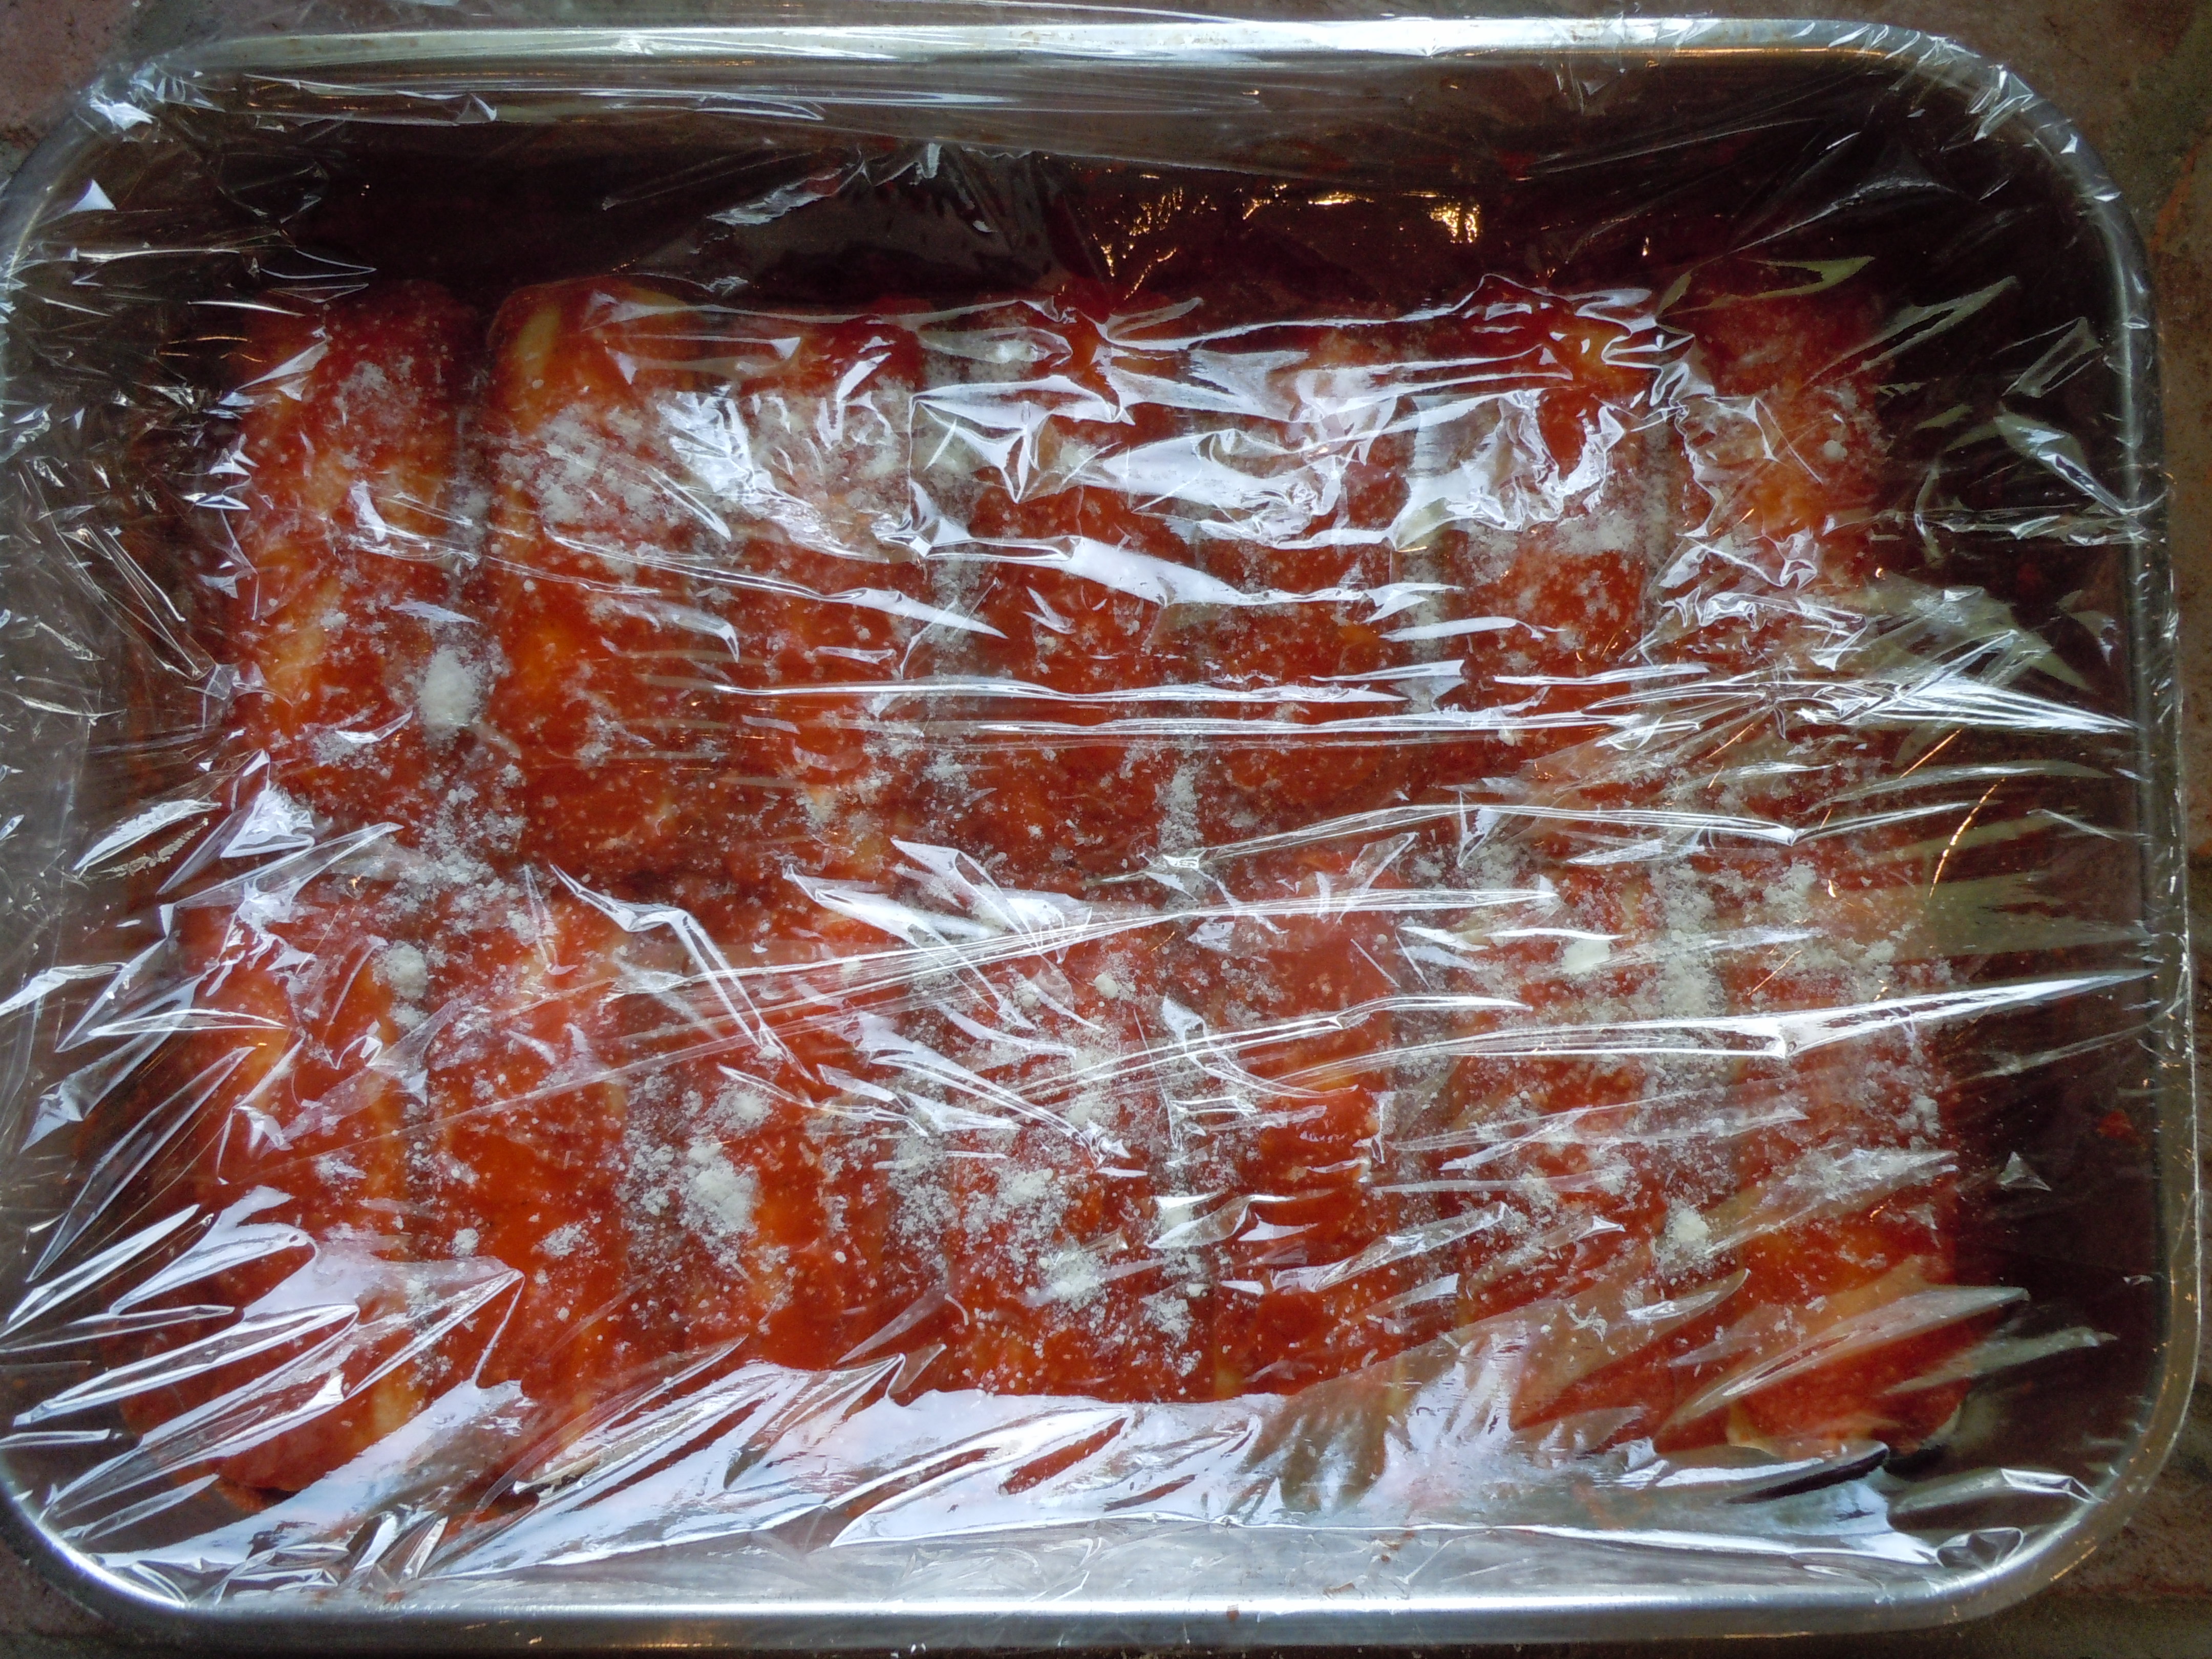
Place in frig until you are ready to bake
Or cover with saran and then foil and put into the freezer until your event is near and then pull out two nights before and put into the frig to thaw
When you are ready to bake your manicotti put into a 350º oven and bake for 45 minutes
The manicotti will be bubbly when you take it out of the oven and need to rest for 5 minutes before serving