The Traveling Epicurean

Bloody Mary Shrimp & Mango-Curry Shrimp At Nancy’s

Bloody Mary Shrimp & Mango-Curry Shrimp At Nancy’s

Bloody Mary Shrimp & Mango-Curry Shrimp in Wonton Cups

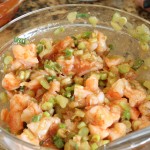
These two homemade shrimp appetizer’s are fun and delicious! Bloody Mary Shrimp and Mango-Curry Shrimp in wonton cups will soon be on your go to list for summer appetizers! My good friend Nancy passed these wonderful recipes on to me which she found at epicurious.com. They certainly have a an enormous assortment of recipes there to choose from and sometimes it can be overwhelming finding the ones you like so I feel fortunate to have a fellow foodie pass these on.

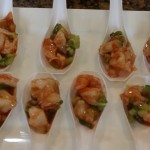
These two shrimp appetizer’s just might be the easiest and most delicious recipes you’ll have this summer. The Bloody Mary shrimp is so flavorful with all the same condiments that make up “the” cocktail including the vodka but in little nibble sizes.  Serving up this appetizer on a spoon makes for a lovely presentation too. You can find these spoons at party stores and sometimes even at Stop & Shop.

The Mango-Curry Shrimp in wonton cups is another winner with a variety of fresh flavors from the green curry sauce to the mango chutney which both come prepared from the specialty section of the grocery store totally saving you time in the prep department …Hallelujah! You know me with the mayo thing … as much as I love my Hellman’s Mayo I do like to cut the mayo with some plain Greek yogurt to give it a little tang and a wonderful fresh texture so I give you that option in the list of ingredients for this appetizer.

It was an enjoyable day shooting this show and having my good friend Nancy share with us a couple of her favorite appetizer’s that she frequently entertains with. We will definitely be back cooking with Nancy this summer and visiting her garden to pick heirloom tomatoes for that scrumptious homemade Tomato Tartan! Hope you enjoy the show and let me know how you like the Bloody Mary Shrimp & Mango-Curry Shrimp appetizer’s.

IMG_1544  IMG_1543  IMG_1567

IMG_1585  IMG_1595  wonyonshrimp_1606

bloodyshrimp  nancy3

Ingredients For THE BLOODY MARY SHRIMP:

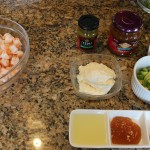
  • 1 pound medium shrimp in shell, peeled and de-veined
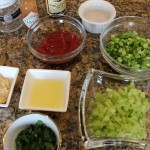
  • 1 1/2 cups thinly sliced celery (2 -3 ribs)
  • 1 cup thinly sliced scallions (about 6)

Directions For THE BLOODY MARY SHRIMP:

  1. Bring a large saucepan of salted water (2 tablespoons salt for 2 quarts water) to a boil.
  2. Add shrimp, then remove from heat and let stand in water until cooked through, about 5 minutes.
  3. Drain in a colander and cool to room temperature, about 30 minutes.
  4. Cut shrimp into thirds and transfer to a large bowl with celery and scallions.

Ingredients For THE SAUCE:

  • 1/2 cup ketchup
  • 1/4 cup vodka (preferably Absolut Peppar)
  • 1/4 cup fresh lemon juice
  • 2 tablespoons bottled horseradish (not drained), or to taste
  • 1 teaspoon Worcestershire sauce
  • 1 teaspoon Tabasco OR Siracha (also found where the tabasco is shelved at the store)
  • S&P to taste

Directions For THE SAUCE:

  1. Whisk together all sauce ingredients
  2. Just before serving, stir sauce into shrimp mixture.
  3. Spoon 2 shrimp pieces with vegetables and sauce into each soup spoon and arrange spoons on a platter.

NOTE: Shrimp can be cooked and tossed with vegetables 4 hours ahead, then chilled in a sealed bag. Sauce can be made 1 day ahead and chilled, covered. Mix the sauce and shrimp right before serving.

Ingredients For THE MANGO-CURRY SHRIMP:

  • 12 wonton wrappers (from one 12-ounce package), each cut into squares
  • Vegetable oil
  • 1/3 cup mayonnaise OR split the 1/3 cup mayo in half with Greek yogurt
  • 2 tablespoons chopped fresh cilantro
  • 5 teaspoons fresh lime juice
  • 2 teaspoons mango chutney
  • 1 teaspoon Thai green curry paste (Thai green curry paste is available at Asian markets and in the Asian foods section of some supermarkets)
  • 12 ounces peeled cooked medium shrimp, coarsely chopped
  • 1 cup Fresh cilantro leaves coarsely chopped

Directions For THE MANGO-CURRY SHRIMP IN WONTON CUPS  – Pre-Heat oven to 325º:

  1. Preheat oven to 325°F.
  2. Place wonton squares on work surface and brush lightly with oil
  3. Press each into miniature muffin cup, oiled side down
  4. Bake until wonton cups are golden brown, about 10 minutes
  5. Cool completely in tins -Can be made 3 days ahead
  6. Remove cups from tins and store airtight at room temperature
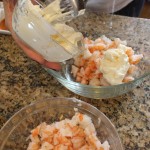
  7. Whisk mayonnaise, chopped fresh cilantro, lime juice, chutney, and curry paste in medium bowl to blend
  8. Stir in shrimp. Season salad to taste with salt and pepper. (Salad can be prepared up to 1 day ahead – Cover and refrigerate
  9. Place wonton cups on serving platter
  10. Spoon 1 tbsp shrimp salad into each cup
  11. Garnish with cilantro leaves
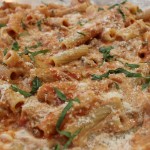
 

Gourmet Caesar Salad

Gourmet Caesar Salad

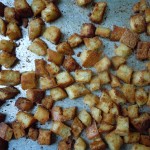
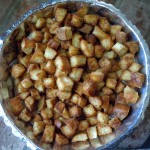
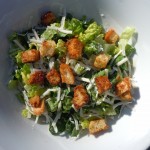
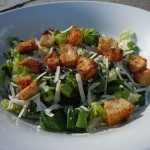
Caesar salads are probably one of my favorite salads of all time. So many wonderful flavors and textures in this combination from the crunchy garlic croutons (shown below) to the sharpness of the Reggiano Parmesano shaved on top. Then there’s a creaminess with the grated Parmesan and dijon in the actual dressing itself and a tang from the lemon and Dijon. Let’s not forget about that savory flavor in the undertones that you just can’t put your finger on with the anchovy paste and Worcestershire sauce. This Caesar salad is a winner all around!

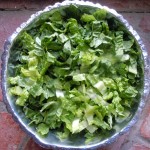
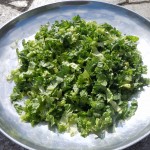
You will really like how perfectly simple this recipe is and how you can totally make the croutons ahead of time, even weeks ahead. One of the reasons I love this recipe is the make ahead concept which makes our busy lives more enjoyable. You can make my homemade garlic croutons weeks ahead and keep them fresh in a Ziploc baggie in the freezer. Then make my gourmet Caesar salad dressing the morning of your event  storing it in a container in the refrigerator until needed. Last but not least the romaine, which you can clean and cut up the night before storing that in a Ziploc baggie while taking the air out ensuring the freshness as I show you in my VIDEO. Cutting up the romaine into 1/2″ strips is key to serving this at a party or picnic making it easy to eat  and eliminating the need for unnecessary utensils.

Now there’s the whole dilemma on whether or not to use a raw egg yolk. If I am having a small group of foodie friends over I would definitely add in a raw egg yolk to my Caesar salad dressing because it makes it that much more decadent. If you have never tried it with a farm fresh or organic egg yolk yet you should definitely treat yourself! When I do use an egg yolk I drizzle in the full half cup of olive oil and also add in an extra tablespoon or two of rice wine vinegar and lemon juice . Adding in a tablespoon extra of each will give it a nice balance. It’s basically to get the desired thickness you want because that added yolk offers up an extra thick and creaminess to the dressing this way you thin it out a pinch. For the most part when I make this gourmet Caesar salad for parties and picnics where I’m not sure if there will be someone there with an allergy I play it safe and omit the raw egg. And NO, I am not worried about salmonella with the raw egg because I only use farm fresh eggs directly from the farm or organic brown eggs from the food market. The ONLY time I would buy bulk white eggs from the store is when we are boiling and dyeing eggs for a holiday like Easter. You have to be picky about your ingredients, even the eggs are very important.

A large shallow dish like the one I have in the photos and in my video show is a great investment for salads like this. I have found many gorgeous platters and bowls like this at very economical prices at stores like Home Goods and TJ Max…you should definitely check out those deals! When I have many friends over for dinner I often serve the Caesar salad in that large shallow bowl and if it’s a more intimate dinner party I even plate up individual size portions which also make for a pretty presentation. 

Not only can this bold full flavored salad hold up on its own as an appetizer but you can certainly pear it up with some crab cakeslazy mans lasagna, lobster mac & cheese, or some pulled beef taco’s and ending with chocolate eclairs would just put it over the top!

DSCN45211-300x225

IMG_5742

lobmac

IMG_3234

IMG_6379


CAESAR SALAD DRESSING 

DSCN4562 DSCN4564 DSCN4563 DSCN4565 DSCN4568  DSCN4543  DSCN4554 DSCN4555 DSCN4561 DSCN4572 DSCN4575

CAESAR SALAD DRESSING RECIPE:

  • 1 large/2 medium cloves of garlic put thru garlic press
  • 1 egg yolk farm fresh or organic brown eggs ONLY – EGG YOLK OPTIONAL
  • 1 Tbsp Dijon – Grey Poupon or Maille
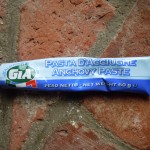
  • 1 Tsp anchovie paste
  • 1/2 tsp salt
  • 1/4 tsp fine blk pepper
  • 2 dashes of Worcestershire sauce
  • 1 Tbsp fresh lemon juice
  • 2 Tbsp rice wine vinegar “seasoned” (this comes original or seasoned …I prefer seasoned)
  • between 1/3 – 1/2 cup good olive oil
  • 1/4-1/3 cup grated Reggiano Parmesan
  • 2 good dashes of your favorite hot sauce (I use Siracha in this recipe)

DIRECTIONS for the CAESAR DRESSING:

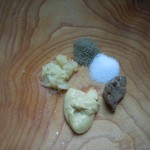
  1. In a medium bowl add garlic thru press, anchovie paste, salt, pepper and Dijon
  2. Mash these items together with  the back of a spoon to combine and form a paste in a wooden bowl
  3. Transfer paste to a large glass bowl
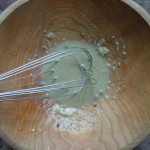
  4. Add in 2 dashes of Worcestershire sauce, dash of Siracha and rice wine vinegar/ lemon juice mixture
  5. Separate egg yolk from white and add to glass bowl (EGG YOLK OPTIONAL) and whisk immediately
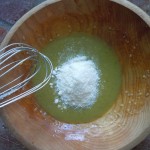
  6. Then very slowly whisk in olive oil so it emulsifies JUST DRIZZLE IN DROPS AT A TIME or IT WILL NOT EMULSIFY and you will have to start over
  7. NOTE: Adding in the egg yolk makes it super easy to emulsify the dressing
  8. Lastly, whisk in 1/3 grated Reggiano Parmesan
  9. Put the dressing into a canning jar for ease and pop it into the frig til you are ready to use
  10. Be sure to take out 30 minutes before you use the dressing so it can come to room temperature
  11. Will be good for a few days in the frig

DIRECTIONS- for Assembling the Caesar Salad:

  1. Cut ends off of romaine hearts then cut them in half length wise
  2. Wash and spin leaves
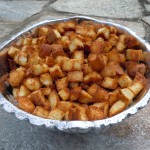
  3. Lay the leaves down on paper towels to catch any additional moisture
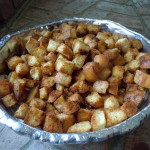
  4. Put 3 or 4 pieces at a time layered on top of one another and slice into 1/2″ strips which make it ideal for a party so there no need for a knife
  5. Here you can put the cut romaine pieces into large freezer Ziploc baggies and into the frig til you are ready to assemble the Caesar salad OR
  6. Put into a large shallow bowl, add dressing, and toss
  7. Top with shredded Parmesan and Italian garlic croutons (shown below) and mangia-mangia!

Garlic Croutons

DSCN4535 DSCN4536 DSCN4537 DSCN4538DSCN4540 DSCN4541 DSCN4542 DSCN4543DSCN4551 DSCN4552 DSCN4554 DSCN4572DSCN4549

INGREDIENTS FOR GARLIC CROUTONS: Makes 12 -13 cups of Croutons – 1 Ex-Lg Ziploc Freezer Baggie of Croutons:

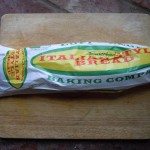
  • 1- 1 1/2  large loafs of good Italian bead (14-15 cups croutons-use 1/2 stick butter and 3 tbsp olive oil if you have 10 cup of bread cubes)
    • 4 large garlic cloves put thru garlic press
    • 1/4 cup olive oil
    • 3/4 stick butter (salted) melted
    • 4 tsp garlic granules (not powder) – Sprinkle 2 tsp per cookie tray
    • 1 tsp salt
    • A couple dashes of your favorite hot sauce Siracha -you can find this with the other hot sauces at the super market
    • 2 cookie trays

DIRECTIONS FOR GARLIC CROUTONS:

  1. Pre-heat oven to 400º
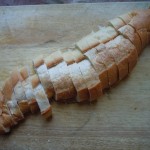
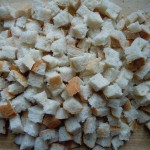
  2. Slice bread into 3/4″ slices length wise
  3. Then slice into 3/4″ squares, you don’t want them to be perfect – that’s what’s lovely about hand made croutons they don’t look like they came from a box
  4. Melt 3/4 stick of butter
  5. In a large mixing bowl add 1/4 cup olive oil, 3/4 stick melted butter, 4 garlic cloves thru garlic press, 1 Tsp salt, and whisk  to mix
  6. Divide this mixture into two and pour onto the 2 cookie trays spreading them evenly all over the tray
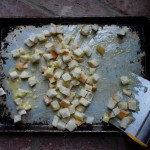
  7. Divide up Italian bread cubes into 2 and put onto the 2 cookie trays right on the olive oil mixture
  8. Stir the cut up bread cubes all around the cookie tray to evenly coat and soak up all of the olive oil mixture. I use a pastry scraper (see photo) to do this…a tool which I use a lot!
  9. NOW sprinkle 2 Tsp of garlic granules on each of the cookie trays filled with Italian garlic croutons
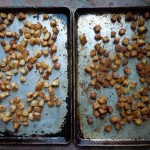
  10. Put into the oven for 12 minutes til golden
  11. IMPORTANT – they go quickly at the end so you really need to watch them so they don’t burn
  12. Let the Italian garlic croutons cool before putting them into a Freezer Ziploc baggie
  13. I usually keep them on the counter for a few days then throw them into the freezer to store and keep fresh