The Traveling Epicurean

Homemade Boeuf Bourguignon & Indian-Spiced Tomato Cream

Homemade Boeuf Bourguignon & Indian-Spiced Tomato Cream

Homemade gourmet boeuf bourguignon on day one is how this recipe begins, also called beef burgundy. On day two, we get to transform those leftovers into an outrageous Indian-spiced tomato cream dish! I find it so exciting and very rewarding to be able to get two gourmet dishes that are very different in flavors back to back like that. You are building so many beautiful layers of flavors on that first day with the boeuf bourguignon it makes it a cinch to put this Indian-spiced tomato cream together. You can literally whip up the Indian dish in 5 minutes and then just simmer for fifteen minutes until the snow peas are cooked.

The Indian-spiced tomato cream is made up of boeuf bourguignon leftovers, half and half, crushed whole peeled tomatoes, fresh snow peas, and Indian spices like curry, turmeric, coriander and garam masala, and smoked chipotle powder. I fresh grind the coriander to bring out the lovely citrus and floral aromas. I serve up this incredible mouth watering dish with fresh dill and basmati rice. The fresh dill is a must for bringing out and complimenting all those floral Indian spices.

The boeuf bourguignon is a traditional recipe with seared chuck roast, smoked bacon, dry red wine, beef stock, mushrooms, pearl onions, Yukon potatoes and baby carrots that braise for 2 3/4 hours until tender and luscious. You’ll be thinking that the boeuf bourguignon is amazing while you are dunking in a piece of fresh crusty, baguette soaking up all that wine and beef gravy that’s bursting out of every bite until the second day when you whip up this homemade gourmet Indian-spiced tomato cream sauce!  Don’t forget to watch the show and enjoy making and eating these two wonderful dishes!

INGREDIENTS FOR THE HOMEMADE BOEUF BOURGUIGNON:

  • You’ll need 1 Lg heavy bottom cooking pot
  • 3 3/4 lbs. chuck roast cut into 2″ cubes -(something that’s nice and marbled)
  • 1/2 cup slab or sliced smoked bacon in 1/4″ pieces (smoked apple bacon is lovely too!)
  • 4-5 small yukon gold potatoes cut into 4’s then into 1/4″ slices OR use PARSNIPS (you can get creative here and use you favorite things)
  • 2 bunches small baby whole carrots peeled
  • 1-2 pkgs whole crimini brown mushrooms kept whole or sliced in 1/2
  • finely chopped 1/2 cup sweet Vadalia onion, 1 shallot, 2 extra lg garlic cloves- chop together
  • 1 bag frozen pearl white onions thawed, drained & pat dry with paper towel as best you can
  • 1 tbsp tomato paste (I didn’t put any in the VIDEO because my kids don’t like it but you really should add this …it brings in another layer of gorgeous flavor)
  • 1 bunch fresh thyme
  • 2 bay leaves NOTE: MUST remove these before serving
  • 1 bottle plus 2 cups red wine- (some on the drier side)
  • 1 plus 2 cups of beef broth
  • s & p
  • Grated Parmesan (Optional….I just love Parm on my beef stew!)
  • Crusty baguette for dunking!

DIRECTIONS FOR BOEUF BOURGUIGNON – Pre-Heat Oven @ 350º/Braising  Time 2 1/2-2 3/4 hrs. Prep Time approx 45 minutes:

  1. Thaw bag of pearl onions, drain and absorb and excess water with paper towels, set aside
  2. Wipe dirt off crimini mushrooms with damp paper towel and slice in 1/2, keep whole if tiny, set aside
  3. OPTIONAL: If you have the time marinate whole chuck roast in 1/2 cup of red wine over night in Ziploc in frig…this is NOT crucial but will add a little extra flavor
  4. If you have marinated the beef pat dry with several paper towels (bounty best because it doesn’t fall apart on you) until COMPLETELY dry.
  5. Cut up beef into those 2″ cube, Sprinkle with s&p (about 1/2 tsp salt, 1/4 tsp pepper)
  6. Add 3 Tbsp olive oil to large heavy set pan and heat on med/high for 2 minutes
  7. When pan is hot begin to add 1/4 of the all 2″ cubed chuck roast
  8. There will be 4 batches of searing and browning the cubed roast, Each batch should only take 5 minutes each to brown all sides of cubed meat
  9. As each batch browns take out and set aside on a med bowl and begin searing new batch of meat
  10. You shouldn’t need to add more olive oil because of the fat rendering out of the browning marbled meat
  11. Add the mushrooms and dried off pearl onions to pan drippings and sauté for 5 minutes, then deglaze with splash of red wine (don’t need to cook thru because they are going to braise in with the potatoes and carrots at the 1 1/2 hr mark
  12. Add in bacon and cook til crispy, set aside on top of browned meat
  13. Wipe out bacon grease, add 2 tbsp fresh olive oil and add chopped  onion, shallot, garlic mixture
  14. Saute for 8 minutes til golden and whisk in 1 tbsp tomato paste
  15. When paste is heated thru add in browned beef and it’s juices with bacon into pot
  16. Add 1/2 tsp salt (to taste), 1/4 finely ground pepper, 1 bottle red wine, 1 32 oz. beef broth, 3 sprigs fresh thyme tied with cotton string, and bay leaves – NOTE: the wine and beef liquid should just barely cover meat level
  17. Bring to a simmer and skim off the foam that rises to the top with spoon or little sieve…this happens naturally when proteins begin to simmer and congeal a foams form and floats to the top
  18. After you skim off most of the foam place pot into oven for approx. 1 1/2 hrs. til you add in veggies and more wine and beef broth (total time is 2 1/2-2 3/4 hrs. til the meat is fork tender)
  19. Put 2 cups red wine with 2 cups beef broth in a small pot on the stove and keep warm (you’ll need this to add to stew at the 1 1/2 hr mark as some of the braising liquid will evaporate)
  20. At the 1 1/2 mark take braising beef out of oven and add sliced Yukon potatoes, carrots, pearl onion and mushroom mixture (after adding in veggies you will see you need to more liquid to the pot)
  21. Add enough of the the warmed wine and beef broth back into pot so the liquid just covers meat and veggies
  22. Back into oven to braise for another 1 more hour give or take 15 minutes (meat should easily fall apart at this point)
  23. Serve up with a fresh, crusty, buttered baguette and Parmesan …mangia mangia!

INGREDIENTS FOR THE INDIAN-SPICED TOMATO CREAM SAUCE:

  • 4-6 cups left-over boeuf bourguignon
  • 1 cup whole peeled tomatoes (squish with your hands to break up tomatoes)
  • 2 cup fresh snow peas OR snap peas (which ever you prefer)
  • 3/4 cup half & half
  • 1/2 tsp curry
  • 1/2 tsp turmeric
  • 1/2 freshly ground coriander
  • 1 tsp. garam masala
  • 1/4 tsp smoked chipotle powder
  • s&p to taste
  • 2 cups basmati rice uncooked (cook up following directions on bag)
  • 1 bunch fresh dill

DIRECTIONS FOR INDIAN-SPICED TOMATO CREAM DISH – Prep Time 5 minutes/Simmer Time approx. 12 minutes :

  1. Cook up basmati rice according to directions
  2. Coarsely chop fresh dill and add to rice
  3. On medium heat add 4-6 cups boeuf bourguignon leftovers to medium size pot
  4. Add crushed whole peeled tomatoes, and snow peas and bring to a simmer
  5. Immediately add half and half, and all of the Indian spices
  6. Simmer for about 12 minutes, until snow peas are done
  7. Serve with basmati and fresh dill and enjoy!

Vodka Sauce with Shrimp

Vodka Sauce with Shrimp

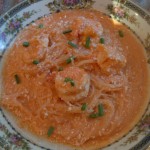
072This homemade gourmet vodka sauce with shrimp has always been one of my very favorites since first having it in Urbino, Italy at a restaurant called La Rustica thirty years ago! La Rustica was one of my favorite restaurants in Urbino where I went to college for a summer and fall semester. After cappuccinos in Piazza and before venturing off to Club 83 for some Italian Discoteca dancing we would make that special stop at La Rustica for a scrumptious plate of “penne all vodka con gamberetti”!

Yes and the surprise here is vodka sauce that’s gluten free…and tastes amazing! In my gluten-free recipe I use vermicelli rice noodles and switch out the heavy cream for coconut cream. This makes for a heavenly change and actually makes the dish a tad lighter then if you were to go with the heavy cream. The vodka sauce starts off with my homemade gourmet tomato-basil pasta sauce recipe which we add to the coconut cream and coconut milk…then the vodka, the extra dry vermouth (or white wine) and the grated Reggiano Parmesan . All these steps in the end take the Asian flair off the dish and transform it into a Roman Forum.

You just might start to crave those very delicate and flavorful vermicelli rice noodles. I suggest you give them a try and see the difference. If you can’t find the “vermicelli” rice noodles at your local market you can definitely find them at the Hong Kong Grocery off the Trumble St. exit (and Whitney Ave.) in New Haven, CT. or in most Asian markets and also in many specialty cheese shops like Fromage in Old Saybrook (you should call first just to make sure).

I have you using my quick and easy tomato-basil pasta sauce which is packed with flavors from the sautéed carrots, sweet onions, garlic and red wine and only takes 30 minutes to make. It’s a great idea to make this sauce the day before then putting together the vodka sauce will take you all of 20 minutes. I promise you will love this sauce and not think for a moment that it is gluten free. Make sure to watch the video above to see how easy it is to make this gourmet vodka sauce with shrimp.

INGREDIENTS:

NOTE; IF YOU DO NOT WANT GLUTEN-FREE  AND WANT A BASIC VODKA SAUCE JUST USE REGULAR PENNE PASTA AND HEAVY CREAM INSTEAD OF RICE NOODLES AND COCONUT CREAM/MILK AND FOLLOW THE REST OF THE RECIPE 🙂

  • 1 lb. large shrimp (approx 21-25)
  • 1 pkg. rice vermicelli noodles (approx. 6.34 oz equivalent to 1 lb. reg. pasta) OR 1lb. PENNE PASTA if you are not going Gluten-Free
  • 1 can coconut cream (14 oz. can from Trader Joes) OR 1 c. heavy cream FOR BASIC VODKA SAUCE 
  • 8 cups pasta sauce from Tomato-Basil Pasta Sauce 
  • 1/4 plus 2 tbsp. cup vodka
  • 1/4 cup extra dry vermouth or white wine (optional)
  • A few dashes of Tabasco or your favorite hot sauce (optional)
  • 1/2 tsp salt (or more to taste)
  • 1/2 c. of Reggiano Parmesan
  • Truffle oil (optional) (Star Fish Market has the best called La Truffiere Tartufo Bianco – a white truffle oil that’s amazing)
  • Red pepper flakes for garnish (optional)
  • More Reggiano Parmesan for garnish
  • Fresh chopped chives for garnish (optional)

DIRECTIONS:

  1. Make 1 pkg of RICE vermicelli noodles (the 6.34 oz. of rice noodles ends up to be about equivalent to 1 lb. reg. pasta)
  2. When noodles are finished cooking RINSE with COLD water til completely cooled and not stuck together or gummy …This step is very important especially for the “vermicelli” rice noodles because they are so thin and delicate
  3. Pour the 1 1/2  cans of coconut cream/coconut milk into a sauce pan and turn on to medium heat whisking slightly to help loosen up coconut cream
  4. Add cups pasta sauce into the cream
  5. Add 1/4 vodka and 1/4 dry vermouth and bring to a simmer
  6. Simmer for about 10 minutes on low to let alcohol burn off and thickens slightly
  7. You can add in a several dashes of Tabasco or your favorite hot sauce here …it’s OPTIONAL
  8. Whisk in 1/2 cup of Reggiano Parmesan
  9. Add 1 lb. of RAW shrimp to sauce, bring back up to simmer and cook thru til shrimp is cooked approx. 2 minutes only
  10. Begin to add in the rice noodles pasta into sauce pan 1/2 at a time to make sure you have enough sauce and heat thru
  11. Plate up the noodles and sprinkle with Parmesan, chives, red pepper flakes or blk pepper and mangia!

“Perfectly Chocolate” Whoopie Cakes Recipe/VIDEO

“Perfectly Chocolate” Whoopie Cakes Recipe/VIDEO

“Perfectly Chocolate” Whoopie Cakes Recipe/VIDEO

These “perfectly chocolate” whoopie cakes are a homemade Hershey’s Cocoa chocolate cake recipe that I have been making for 20 years now!  Once you see how easy it is the make these moist and chocolately homemade chocolate cakes you’ll never go back to the box again! Besides on my blog you can find this recipe right on the back of the Hershey’s Cocoa canister.

I was first turned on to the recipe by a mother-daughter baking team that I met 20 years ago. They were professional baking contestants from the Midwest who had won numerous times. My quest at the time was to find the “perfect” chocolate cake and their answer was to start with the Hershey’s Cocoa recipe. Not that the name itself on the back of the Hershey canister for this chocolate cake recipe wasn’t “perfect” enough I just couldn’t take the irony of it all so off I was trying out the recipe and baking this cake! It had such a lovely texture without being too dense or heavy, oh so chocolaty and moist to top it off. The amount of steps and effort put in to making this cake is pretty much equal to that of making a box cake so why would you ever resort back to making box ever again. I have made many other chocolate cake recipes but I always go back to the Hershey’s Cocoa recipe!

The Hershey’s “perfectly chocolate” chocolate frosting is one that should not be over looked either. The frosting is amazing and one of my favorite go to recipes totally blowing away that “canned” stuff with the plastic lid. When I make my whoopie cakes I use my friend Cheryl’s recipe for the creme filling consisting of heavy whipping cream and Jello brand vanilla pudding! It’s simple and easy. How great is that and what an amazing vanilla flavor. The pudding gives it a little bit of a creamy texture and the whipping cream adds in the light and airy. It’s a nice change up from the heavy whipping cream and confectioners sugar.

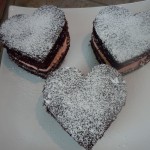
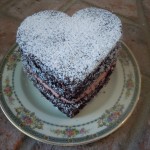
I love making a traditional 2 layer 9″ cake with this cake recipe but I also like to get a little creative on special occasions. For Valentines Day I like to use heart-shaped cookie cutters and fill them with that vanilla creme. I add in a drops of red food coloring to the creme making it as pretty as it tastes. You’ll be having fun with this one and bringing smiles to those who will be eating one of your homemade whoopie cakes with pink vanilla creme filling. You could actually skip the vanilla creme filling and go straight to the Hershey’s “perfectly Chocolate” chocolate frosting (recipe is on the back of the Hershey canister as well) and make little mini cakes…ooh so decadent! Make sure you watch my YouTube cooking show on how to make these whoopie cakes and don’t forget to subscribe on my Youtube channel so that you can receive my latest cooking show releases.

023 024  026

027  028  029

031  036  039

046  047  048

055  056  063

INGREDIENTS FOR “PERFECTLY CHOCOLATE” CHOCOLATE CAKE:

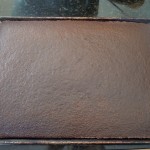
  • Need 12″ x 18″ x 1″ cookie sheet (must have sides so batter doesn’t leak out the sides)
  • 2 cup sugar
  • 1 3/4 cup all purpose
  • 3/4 cup Hershey Cocoa
  • 1 1/2 tsp baking soda
  • 1 1/2 tsp baking powder
  • 1 tsp salt
  • 2 eggs
  • 2 tsp vanilla extract
  • 1 cup milk
  • 1/2 cup vegetable oil
  • 1 cup boiling water

DIRECTIONS FOR “PERFECTLY CHOCOLATE” CHOCOLATE CAKE – PRE-HEAT OVEN TO 350º:

  1. Grease and flour cookie pan with 1″ sides – Spray Pam, lay down wax or parchment paper then butter and flour over that
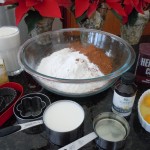
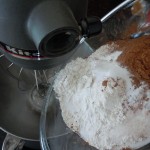
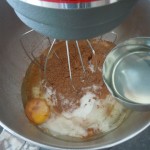
  2. Add Dry ingredients to mixing bowl on mixer
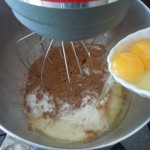
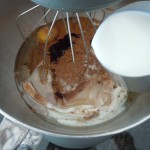
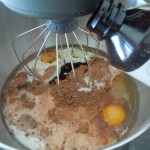
  3. Add wet next- eggs, milk, oil and vanilla
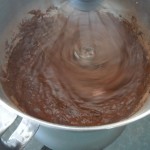
  4. Beat on medium speed for 2 minutes
  5. Take mixing bowl off of mixer and stir in 1 cup boiling water
  6. Pour into buttered and floured cookie sheet
  7. Put into oven being careful cause the batter will thin
  8. Bake for 22-25 minutes- ck the center with a tooth pick to see if it comes out clean then its done, take out and cool completely

CREME FILLING DIRECTIONS:

  1. Put 2 cups heavy whipping on a large chilled mixing bowl and begin whisk cream slowly add in 1 box Jello vanilla pudding and whisk til stiff peaks
  2. Add 5-8 drops -one at a time of red food coloring til desired pink


Homemade Zucchini Torta

Homemade Zucchini Torta

Zucchini Torta Recipe/VIDEO

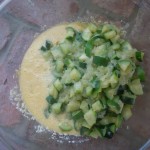
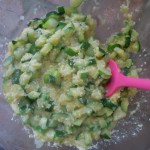
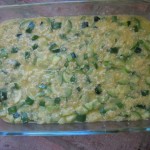
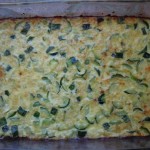
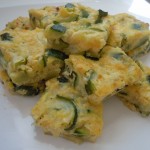
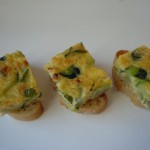
This zucchini torta is one of our family recipes! It’s NOT a frittata or a quiche…it’s a torta. The word torta is of Italian, Spanish, French and Portugese decent.  In others words, you will find different versions of how a torta is made. Even within one country the versions of torta are going to differ. For instance, in many regions of Italy a torta is more like a vegetable pie with thin layers of dough. With this Italian torta recipe there aren’t any dough layers, just an abundance of zucchini and onions. The zucchini and onions are sautéed then added to whisked eggs and cheese and baked until golden. There are only two eggs whisked with Parmesan. You will be tempted here to add more egg thinking two isn’t enough to hold it together …but don’t you do it! Not necessary, two is just enough egg to bind it together and not give it an eggy taste but a delicate flavor of the vegetables and Parmesan. This can be an appetizer served by itself or on fresh baguette slices (preferably a crusty sourdough baguette), on a crostini or with a spread of hor d’ oeuvres like baked coconut shrimp, crostinis with fresh mozzaella, pesto and roasted tomato or crostinis with smoked salmon & cream-cheese caper spread. It can also be a side dish to lunch or a dinner with sautéed chicken breast and spinach.

Make sure to watch my YouTube cooking show above that goes with this recipe and don’t forget to SUBSCRIBE on my YouTube channel so that you can receive my latest cooking show releases!

iphone pictures 1018  iphone pictures 1017  iphone pictures 1019

iphone pictures 1020  iphone pictures 1022  iphone pictures 1030

iphone pictures 1025  iphone pictures 1028  iphone pictures 1029

iphone pictures 1032  iphone pictures 1033  iphone pictures 1034

iphone pictures 1047  iphone pictures 1063  iphone pictures 1048

Ingredients:

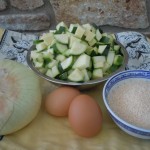
  • 4-6 Medium/large zucchini or 8 cups
  • 1 extra large sweet Spanish onion (vidalia)
  • 1 cup grated Reggiano Parmesan
  • 1/2 cup grated Pecorino Romano cheese
  • 2 extra large eggs
  • 1/2 tsp salt
  • 1/4 tsp pepper
  • 3 Tbsp olive oil

Directions:  

  1. Pre-heat the oven to 375º.
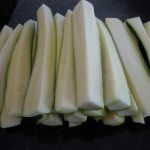
  2. Cut up the zucchini in quarters length wise and slice those strips into 1/4″.
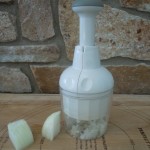
  3. Finely chop onion (use chopper if you have one).
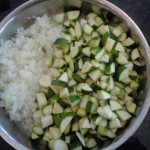
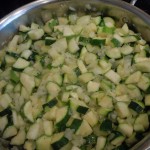
  4. Sauté zucchini and onions in a large saute pan with olive oil for about 10 minutes on medium high heat until fork tender but NOT mushy.
  5. Add salt and pepper.
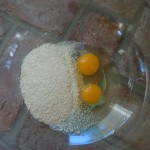
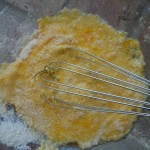
  6. In a large bowl whisk eggs and Parmesan (you’ll be adding the sautéed vegetables to this bowl).
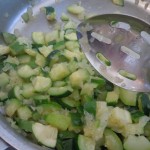
  7. Using a slotted spoon scoop the zucchini/onion mixture from the pan into the whisked eggs (you don’t need to wait for it to cool) making sure to leave behind any liquid that might have rendered out of the vegetables.
  8. Mix the vegetables with the eggs and immediately pour into a 9″ x 13″ baking dish (no need to grease the baking dish)
  9. Bake for 30 minutes or until lightly golden on top.
  10. Take out, let cool, slice and mangia!

Custardy Apple Squares

Custardy Apple Squares

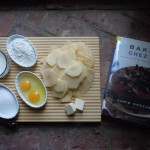
CLICK PICTURE to take you to Amazon for book

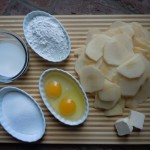
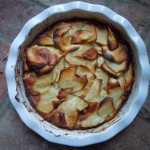
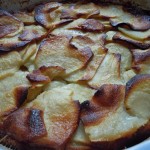
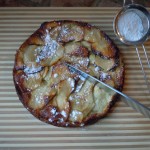
Custardy Apple Squares is quick and simple using ingredients we already have in our kitchens. There’s no precise way of layering the apples like in a tart. Here they just end up looking lovely right out of the oven. I like having this as a breakfast item, warm for sure and I think maple syrup makes a wonderful addition to the flavors of these custardy apple squares. You get a creaminess from the custardy filling and outer layers that remind you of crêpes … add in some maple syrup to close the deal and you’ll be in for a heavenly treat.

I saw this book at our Madison library and new I had to check it out and in fact I was shocked that I didn’t already own it. Dorie Greenspan is an inspiration to baking for all us. She shares her recipes and experiences that she has gathered from chefs and friends while living in france for two decades …a gal after my own heart. It was such a good feeling when I saw and read the preface to her new release Chez Moi because it reminded me of why I started my blog. Being inspired by people from different backgrounds, places, and cultures sharing recipes and experiencing new boundaries in culinary cuisine.

think you will be very happy with how easy this recipe is using such uncomplicated ingredients to boot! And if you are not a big maple syrup fan you can always dress up these custardy apple squares when they come out of the oven by spreading a thin layer of apple jelly that you warm in to the microwave with a pastry brush.

This cook book Chez Moi is a definite must for your cooking library! Dorie Greenspan shows you how elegant French baking can be accomplished effortlessly. It’s really a “go to” baking guide with so many wonderful recipes offering you everything from cannelles, eclairs, chocolate sauces and profiteroles (cream puffs) to cookies and cakes! She was also inducted into the James Beard Foundation’s Who’s Who of Food and Beverage in America. And for all you locals Dorie Greenspan lives part time in our neck of the woods in Westbrook, CT along with NYC and Paris of course. I am so happy to share this cook book with you in the hopes that you too will enjoy it as much as I have.
001  005  024

008  009  010

013  016  017

018  019  020

023  026  027

028  030  034

040  046  059

INGREDIENTS:

  • 3 Fuji apples – Fuji or Gala peeled and thinly sliced to 1/16″ on mandolin
  • 2 eggs room temp
  • 1/2 cup flour
  • 1 tsp baking powder
  • 1/3 cup sugar
  • 1/4 tsp salt
  • 2 tsp pure vanilla extract
  • 1/4 cup PLUS 2 Tbsp whole milk
  • 2 Tbsp unsalted butter melted and cooled
  • Confectioner’s sugar
  • Maple syrup OR store bought apple jelly

DIRECTIONS: Pre-Heat oven to 400º

  1. Butter 8 x 8 pan (you can line also with parchment if you want to unmold to a serving platter
  2. Peel and slice apples on mandolin 1/16″ thick
  3. Whisk in flour/baking powder mixture in a small bowl
  4. Whisk eggs
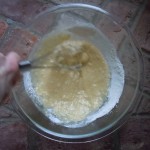
  5. In a large bowl add sugar and salt and whisk immediately for about a minute until the sugar dissolves and the eggs are pale
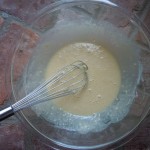
  6. Whisk in the milk and vanilla to this egg mixture
  7. Then whisk in melted butter
  8. Now pour in the dry flour/baking soda mixture and whisk til batter is smooth
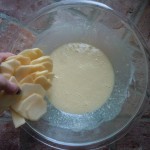
  9. Using a spatula add in sliced apples and mix to coat only but making sure all sides of the apples are coated with the batter
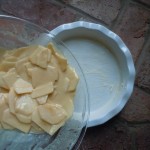
  10. Pour this apple -batter mixture into the buttered baking dish and bake til golden on top about 40 minutes
  11. Take out and allow slightly puffed apple cake to cool for 15 minutes then slice and serve or turn out onto serving dish if you are using parchment
  12. When plating a slice sprinkle with confectioners sugar
  13. Drizzle with maple syrup OR top with vanilla ice cream to make more like a dessert then a breakfast item! Either way…YUM!
  14. Best eaten same day if it lasts that long and even better warm out of the oven : )