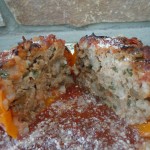
Spanakopita at Dana’s
When you bite into the buttery, flaky pastry layers with the creamy sheep’s milk feta and ricotta-spinach filling you’ll agree that Spanakopita, a classic Greek dish, is so worth the effort. We neatly fold this delicate pastry dough, with a tablespoon of this amazing spinach mixture, into triangles for the perfect little appetizer shape that just melts in your mouth. The #4 fillo pastry dough becomes this delicate shell making for an elegant nibble.
This recipe came from my good friend, Dana, who happens to be a wonderful chef. In fact, Dana and her husband are opening up a restaurant in early spring at The Goodwin Golf Course called Birdie Cafe. Dana is half Greek and half Italian so this was family tradition for her growing up making these with her mother. My great grandmother was born in Crete making me one eighth Greek. So with a hint of Greek lineage in my blood I’m thinking that’s what drives my palate towards these Mediterranean flavors that I adore so much.
Spending the day in Dana’s kitchen with our other college friend, Lynn, making these spanakopita was ideal considering we were having so much fun it didn’t seem like work at all. We didn’t even realize how much we were accomplishing. Lynn, who manage’s Sam The Clam Pub & Grub in Southington, CT introduced us to a Greek Mojito with Metaxa, a Greek liquer, that was very delicious.
The fact that you can easily make these spanakopita triangles ahead of time which freeze so nicely for future dates is ideal for parties. So start making this spanakopita now for your Super Bowl get together! Invite over a few friends to make the spanakopita and the task goes really quickly and it’s a lot of fun. Add in our Greek Metaxa Mojito’s and I think you have yourself a pre-party to the party just like the one at Dana’s.
To cut down on the time and effort and not forgo making this delectable dish you could make one big tray of the spanakopita. In a 9 x 13 x 3 (or similar size) baking dish lay down 9 full sheets of phyllo pastry dough brushing in between each layer with butter of course. Next, lay in the entire bowl of spinach filling, then 9 more buttered layers of phyllo with a finishing buttered coating right on the top. If you are baking this one tray be sure to refrigerate the the spanakopita for twenty minutes before baking it. This will firm up the pastry dough so you can run a knife through the top layers of dough cutting in only about 1/4″ to give you pre-cut lines in the serving sizes you’ll want. It makes cutting the spanakopita much easier after it comes out of the oven. Of course, a tray this size will need to bake for about 55-60 on 350º instead of the 20 minutes the triangles take. The phyllo pastry dough is very forgiving. If your sheets are larger then the pan giving you extra dough on the sides when lining the baking dish just fold them over. You won’t notice that the sides may be folded over after it’s baked because it will be all flaky and puffed anyways and still taste incredible.
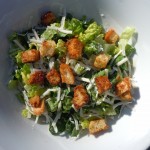
You may want to serve up some other appetizers like Prosciutto wrapped asparagus, a caesar salad with the spanakopita, turkey stuffed peppers are one of my very favorite or maybe something light like an Asian noodle & shrimp salad only to end with Pavlova or chocolate avocado mousse! To make a similar dressing to the one Dana makes in the show check out my amazing TANGERINE DRESSING here!


INGREDIENTS FOR Spanakopita – will make approx. 30 spankopita triangles :
- 1 pkg. #4 Phyllo Pastry dough or Fillo pastry dough put into frig over night if frozen
- 1 cup (1 pkg) thawed and fully drained (squeezed) frozen chopped spinach
- 2 cup whole milk ricotta
- 1 cup sheep’s milk feta cheese
- 1 lb. melted butter
- 3 scallions finely chopped white and green parts OR 2 tbsp finely chopped shallots
- 2 tbsp each chopped parsley and fresh chopped dill
- 1/4 tsp each nutmeg and black pepper
DIRECTIONS FOR Spanakopita:
- Pre-heat oven to 350º
- Take Phyllo dough out of the frig to bring to room temperature but still in the box
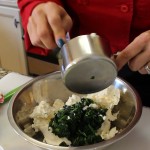
- Drain and squeeze ALL the water from chopped thawed spinach
- In a large bowl add 2 cup ricotta, 1 cup drained spinach, 1 cup sheep’s feta, scallions or shallots, parsley, dill, nutmeg and pepper – stir gently to mix and set aside
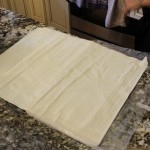
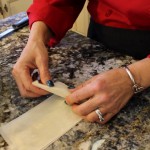
- Unroll Phyllo on counter top
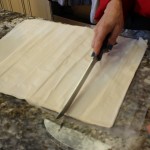
- Cut the 15″ long pastry dough with a sharp knife into 3 3/4″ pieces getting 4 across
- Start to lay out the strips 4 across a work surface – always keep a layer of saran wrap and a damp dish towel on top of the layers you’re not using
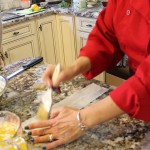
- Brush thin coat of butter in between each layer til you have 3 layers down in each of the 4 rows
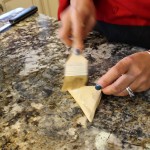
- Put 1 tbsp of ricotta-spinach mixture in the right bottom corner of the phyllo sheet – you can use a sm. cookie dough scoop to help keep the tbsp all the same size – this will help you to move along quicker
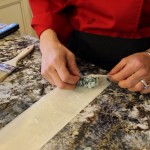
- Fold right corner over so the bottom edge lines up with the left side, like you are folding a flag
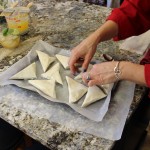
- Continue on up until you are at the top and used up all the pastry dough – brush a little butter on the last fold to seal it
- Put filled phyllo triangles onto a baking tray about 9 per tray
- Bake each tray of spanakopita triangles for 20 minutes on 350º until golden
- Be sure to let the spsankopita cool a little – the filling will be hot 🙂
- You may have 1/2-3/4 cup of filling leftovers so freeze it, roll up in pounded-out chicken breasts, stuff bone-in chicken breasts under the skin with the filling and bake or just buy extra phyllo…enjoy 🙂


INGREDIENTS for the METAXA MOJITO’S:
- 1 cup Metaxa Greek Liquer
- 1 1/2 cups soda water
- 1 fresh lime cut into wedges
- 1 fresh lemon juiced = 1/4 cup lemon juice
- 2 tbsp light brown sugar
- 4 mint leaves or basil leaves
DIRECTIONS for making the Metaxa Mojito’s:
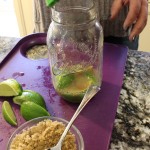
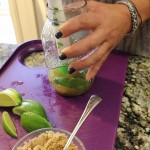
- Mint leaves muddled with fresh lime wedges and light brown sugar in a glass cocktail mixer
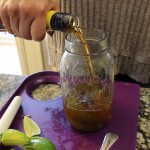
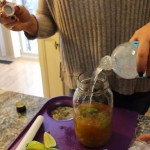
- Add fresh lemon juice, Metaxa, soda water and ice, shake and serve with mint or basil garnish…enjoy 🙂