The Traveling Epicurean

Shrimp & Scallop Ceviche


Shrimp & Scallop Ceviche

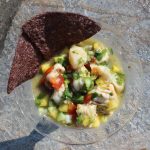
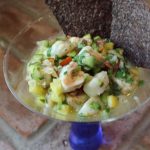
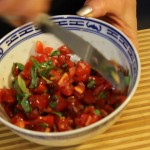
mixedcevicheMaking shrimp & scallop ceviche really can’t get an easier then this! Ceviche is a South American dish that’s usually served as an appetizer. The fish cures/cooks in citrus juice for an hour or two while you get all your salsa ingredients in order. The citrus curing juices are drained from the fish, leaving a tender shrimp & scallops to be tossed with salsa and voilà. The base of the shrimp and scallop ceviche here is my mango salsa recipe.

When I thought of making ceviche this week, sombrero popped into my head! I went to several store’s, costume store’s included which don’t exist anymore, and was out of luck. I then called my dear friend Maria who to my surprise had an authentic sombrero for me to borrow that her parents had picked up on a cruise to Cozumel, Mexico. I have to say it is a very cool hat, not to mention really beautiful. Although it has some weight to it so your neck gets a bit of a work out and you have to be careful not to knock into the walls because depth perception can be deceiving.

When I make this shrimp & scallop ceviche. or any ceviche for that matter, I like to cure my fish in lime juice and then drain that juice before adding the fish to my salsa ingredients. In my opinion, the flavors stay fresher that way. By draining the fish juice that’s released from the shrimp and scallops in the curing process it keep’s a better balance between fish and salsa. There are some recipe’s that have you toss everything into one bowl but I feel it taste’s better when you drain the curing fish juices prior to adding the fish into the salsa.

Since the texture’s of shrimp & scallops are a little different I have you cut the shrimp in 1/2 horizontally, and then dice, so the needed curing/cooking time between the two is closer. You could always change up the fish in this recipe to and go with all scallops or another favorite flaky fish. It’s all about being creative and using what’s freshest at the market!

Remember, always when preparing a fish dish, you will want to serve it the same day you make it and odds are there won’t be any leftovers! You may want to make it a party theme of appetizer’s to go along with this shrimp & scallop ceviche, and serve something like buffalo chicken dip, salmon BLT slider’s, fresh pesto, mozzarella and roasted tomato on a crostini, or shrimp & mango in wonton’s and end it with a dessert that will have everyone talking...fresh berries in a dreamy cream topping made from melted cream cheese and fluff that’s an incredible taste SENSATION!
buffdip IMG_2617 IMG_2026 wonyonshrimp_1606 IMG_2201

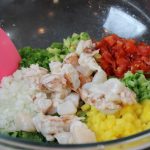
IMG_6855 IMG_6859 shrimp

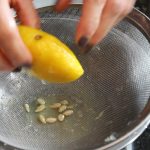
lime IMG_6878 shrimplemon

mixedceviche IMG_6905 IMG_6900

Ingredients:

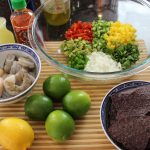
  • 1/2 lb. lg shrimp, peeled and deveined, 1/3″ diced
  • 1/4 lb of sea scallops, 1/3″ diced
  • 1/2 cup diced sweet mango
  • 1/2 cup sweet onion – Vidalia onion -finely chopped
  • 1/2 cup mini cucumber diced 1/3 cup cherry tomatoes finely chopped
  • 1/2 cup cilantro chopped (1/2 cup after it’s chopped)
  • 1/3 cup finely diced cherry tomato
  • 1/3 cup finely diced avocado
  • 1 jalapeno finely chopped without the seeds
  • juice from 1 lime – for the final ceviche
  • 1 tbsp fresh lemon juice – for the final ceviche
  • 2 tbsp extra virgin olive oil
  • 2 tbsp rice wine vinegar – (“seasoned”)
  • juice from 4 limes for the shrimp/scallop for the curing marinade
  • salt and pepper to taste
  • dash of Tabasco
  • Bag of blue corn chips (optional)

Directions:

  1. Wash and devein the shrimp
  2. Wash the sea scallops and remove little fibrous side muscle that’s attached to the scallop
  3. Pat the shrimp and scallops dry on paper towels
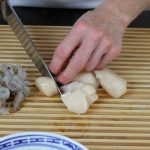
  4. Cut up the shrimp in 1/2 horizontally and then into 1/4″ pieces
  5. Slice up the scallops in 1/2 horzintally and then into 1/2″ pieces
  6. Put them into the same bowl… a non-reactive bowl like a glass bowl
  7. Roll the limes to soften them up
  8. Squeeze the lime juice over the shrimp and scallops
  9. Make sure there is enough juice so all the shrimp and scallop pieces are submersed in the lime juice and place into the frig until they are opaque…and place into the frig for 1- 2  hours
  10. NOTE: you should check the fish at 30 minutes intervals to see how it’s curing/cooking …depending on the coldness of the fish, kind and size it wil be ready at different time’s but it’s EASY – if it’s opaque then it’s done!
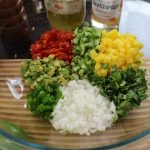
  11. Finely chop the tomatoes, jalapeno, sweet onion, cucumbers, mango and cilantro and set aside in a large bowl
  12. Drain all the liquid out from the shrimp and scallops and discard
  13. Add the shrimp and scallops to the large bowl with the salsa, add in juice of 1 tbsp lemon juice, juice from 1 lime, 2 Tbsp olive oil, 2 Tbsp rice wine vinegar, dash of Siracha, salt and pepper to taste
  14. Put back into the fridge for 15 minutes for flavors to marry
  15. Serve in martini glasses with blue chips…YUM!

Best Shrimp Scampi!

Best Shrimp Scampi!

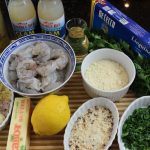
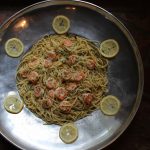
shrimpyShrimp scampi is one of those delicious dishes that’s sure to bring a smile to everyone’s face just on aroma’s alone! Shrimp sautéed in olive oil and butter with lots of garlic, shallots, clam broth, and white wine topped with fresh lemon juice, parsley and Parmesan make’s for a grand party atop a pile of linguine!
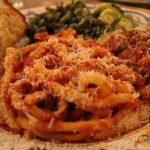
This quickie gourmet sauce I have created for you in this shrimp scampi dish is a light sauce, yet packed with flavor. The way we do this is by concentrating the juice’s released from those sautéed shrimp along with a couple of bottles of clam stock simmering for a brief seven minutes. The traditional and time consuming way to create this lovely stock would be to simmer the shrimp shells in white wine for a while like you would for a lobster bisque stock. The objective here was to take a short cut to accommodate our busy every day lives without foregoing taste by using bottled clam stock. Voilà, you have an amazing flavor base for our shrimp scampi with linguine in seven minutes.

One of my favorite way’s to serve the shrimp scampi with linguine is by offering up a Parmesan with red pepper flake’s mixed right into it. It’s nice to offer two small dishes of Parmesan, one with the pepper flakes and one without. By adding the red pepper flakes to the grated cheese guests are less likely to accidentally sprinkle on too much because it’s dispersed throughout the cheese.

You might want to try some homemade pasta to go with this wonderful shrimp scampi or even a Caesar Salad.  Some chocolate crackle cookies would be great for dessert or homemade chocolate eclairs with an incredibly easy and luscious vanilla filling. Then again there those drunk blondie bars with the bourbon caramel sauce that are to die for! Enjoy! 🙂

IMG_4327 DSCN4572-300x225 IMG_3663 IMG_6379 IMG_6622

IMG_6780 IMG_6793 shrimpwinejpg

shrimp gsrlic shrimpclam IMG_6801

shrimpy shrimplemon IMG_6805

shrimpbutter srhimp pasta shrimpeparsley

IMG_6819 IMG_6822 IMG_6818

Ingredients for Shrimp Scampi with Linguine – 6-10 People:

  • 1 – 1 1/2 lbs of peeled & deveined large shrimp (ask for a certain number of shrimp …2-5 per person depending on what other side dishes you are serving)
  • 2 bottle of Snows clam broth
  • 1/2 cup white wine – pinot grigio
  • 4 lg garlic clove finely chopped
  • 1 tbsp finely chopped shallot
  • 2 lg garlic clove smashed
  • 1/4  cup finely chopped FRESH FLAT LEAF Italian parsley
  • 5 Tbsp salted butter
  • 3 Tbsp olive oil
  • 1 lb pasta – linguine or linguine fini
  • 2 lemons
  • Reggiano Parmesano
  • Red pepper flakes -OPTIONAL
  • salt and pepper to taste

Directions:

  1. Peel and devein shrimp
  2. Bring large pan of salted water to a boil
  3. Add 2 tbsp olive oil, 1 tbsp butter and 2 lg crushed garlic cloves to large sauté pan over med/high heat
  4. When the pan is hot add in the shrimp
  5. Saute for 2 1/2 minutes per side
  6. Remove shrimp and garlic – set aside
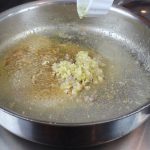
  7. Add in 1 tbsp olive oil, finely chopped garlic and shallots into the same pan and saute til soft (lightly golden) for about 2-3 minutes
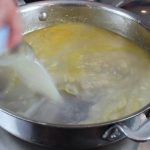
  8. Then pour in both cans of clam juice with the garlic and shallots
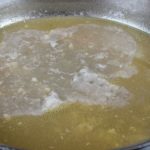
  9. Bring to a boil over high heat, turn down to a low simmer for 7 minutes
  10. Add pasta to boiling salted water and cook until aldente (don’t over cook!)
  11. Let pan with the clam broth/garlic simmer and reduce by 1/3
  12. Add shrimp back into reduced clam broth/garlic
  13. Add in juice from 1 whole lemon and 3 tbsp of chopped parsley to shrimp scampi
  14. Add in salt and pepper here to taste
  15. Simmer on LOW for 2 more minutes
  16. Drain pasta and pour out pasta into a large serving platter or bowl
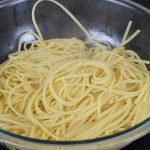
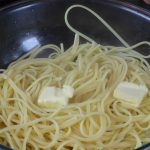
  17. Add in 4 tbsp of butter to pasta and toss, add in salt and pepper to taste …taste the pasta and make sure the pasta is PROPERLY seasoned at this point
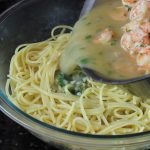
  18. Pour the shrimp scampi mixture over the pasta
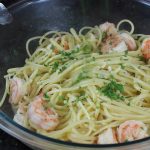
  19. Sprinkle with more fresh chopped parsley and grated cheese and serve…YUM!
  20. NOTE: Make sure that each person gets some of that tasty broth in their dish

Homemade Pan Pizza

Homemade Pan Pizza

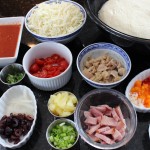
Homemade pan pizza made with different themed toppings from clams casino, to Hawaiian and Greek make for perfect party hors d’ oeuvres! Everyone seems to find their favorite flavors. When the sizzling pan pizza comes out of the oven heads turn especially when the aromas from the garlic, clams, bacon, onions and peppers fill the air!

The wonderful thing about all the different themed toppings for your pan pizza is you don’t need much in terms of quantity. The dough you make the day before, but if you forgot or didn’t have time it will still work if you make it the same day. If you make the dough the same day you don’t put it into the frig but let it proof for an hour and a half in a warm spot to develop some of that texture and flavor. The whole idea behind the “proofing in the refrigerator” is it let’s you do other things while the dough slowly rises developing a killer texture and flavor like in my delicious “Icebox Dinner Rolls”. So take advantage of this refrigerator method, you will be happy you did. 

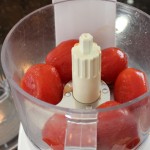
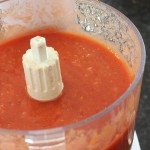
As for my pizza sauce, it couldn’t get any easier because it’s puréed only, not cooked. If you go into a pizza place and inquire about their sauce the majority will tell you the tomato sauce is raw. I know because I have done just this, but they don’t always like to give away their pizza secrets so easily. To the raw, whole peeled tomatoes I add a garlic clove that I put thru the press, salt, pepper and some Italian seasonings and then it’s puréed. Keeping the tomatoes raw really compliments all those other strong flavors from the toppings yet not seeping into the background still being a pertinent player in the pizza game!
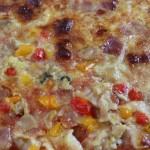
Have some fun with these pizza’s and customize those toppings on your homemade pan pizza! My favorite is the clams casino pizza because you have the best of both world’s, flavor’s and crispy, chewy edges. You can’t beat the garlic, clams, bacon and pepper combo. Drizzling on the extra clam juice not only makes it taste that much better but it let’s the crust get a little crispy while keeping the toppings moist enough so not to burn. With that in mind make sure to pour on any of the extra juices from what ever you are cutting up as when you are slicing up the cherry tomatoes. Another very important tip is to keep all the toppings, including the sauce and mozzarella, in the cold refrigerator until the last minute. This helps the toppings to cook properly giving the crust time to crisp up.

Enjoy the show and definitely think about some appetizer’s to go with these sizzling homemade pan pizza’s like my Caesar Salad, Crab Cakes, Baked Asparagus wrapped in Proscuitto, Spanakopita or my Roasted Chic Peas. All will bring a smile to your face I promise! 🙂

DSCN4572-300x225 DSCN45211-300x225 iphone-pictures-572-300x225 cookedspan iphone pictures 989

IMG_6226 IMG_6105 IMG_6123

IMG_6127 IMG_6170 rolldough

oilpan dougpan sran

IMG_6133 IMG_6145 piz

moz feta clams

IMG_6257 IMG_6258 IMG_6204

Ingredients for 1 Sheet Pan Pizza Dough – 12.5″ x 17.5″ x 1″ tray:

  • 4 cups all purpose flour
  • 1 1/2 cup warm water 105º-110º
  • 1/2 tsp sugar
  • 1 packet yeast or 2 1/4 tsp – not rapid rise
  • 1 tbsp salt
  • 3 tbsp extra virgin olive oil for the pizza dough
  • 1/3 extra virgin olive oil for the sheet pan
  • Plus more olive oil to drizzle on top of the pizza’s before baking

My Pizza Sauce – Enough for 2 Sheet Pan Pizza’s:

  • 1 can of whole peeled tomatoes (drained if the pulp is watery) pureed with 1 tsp salt, 1/2 finely ground Italian seasonings, 1/4 tsp pepper and 1 lg garlic clove put thru garlic press

Ingredients For The Toppings From The Show for 2 Trays of Pizza:

  • Clams Casino Pizza – (for 1/2 the pizza) 1-2 cans 1 cup of Snows canned clams drained except 3 tbsp of clam juice per can to drizzle over pizza,  1/4 cup of chopped peppers, 3/4 cup sliced thick cut bacon, 1 garlic clove thru press, 1 tsp chopped sweet onions
  • Greek Pizza – 3/4 cup sliced cheery tomatoes, 3/4 cup sheep’s milk feta, 1/4 cup sliced sweet onion, 1/2 cup sliced kalmata or canned black olives, 1/3 cup chiffonade basil
  • Bacon Pizza – 1 cup thick sliced bacon (for 1/2 of the pizza)
  • Hawaiian Pizza – 1 cup sliced ham, 1/2 cup chopped pineapple, 1/2 cup sliced green onions with whites too

Directions – (Pre-heat the oven to 450º right before the pizza dough has it’s final proof and make sure the rack is in the lowest possible position):

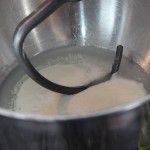
  1. Warm the stainless steel mixing bowl with warm water for 5 minutes
  2. Empty out warm water and add packet of yeast to mixing bowl
  3. Add in 1 1/2 cups of water at 105º-110º to the yeast
  4. Add in 1/2 tsp sugar and let the yeast proof for 10 nminutes
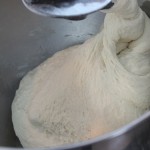
  5. Tour on knead hook and begin to add in 3 tbsp olive oil, flour and salt
  6. Keep mixing and knead with hook after it forms a dough ball for 10 minutes
  7. Take dough off of hook and onto a floured counter
  8. Knead by hand for 2 minutes and place into a large oiled bowl
  9. Cover with saran wrap and refrigerate for 18-24 hrs.
  10. When you are ready to make the pizza make sure to take out of the frig and let the cold dough sit for approx. 2 hrs. – this will make it easier to work with
  11. When the dough has sat for 2 hrs. turn out onto floured surface and begin to roll out and stretch to the size of the cookie tray
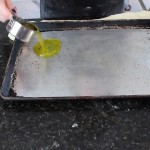
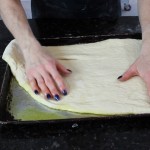
  12. Pour 1/3 cup of olive oil onto cookie tray and place the rolled out pizza dough onto olive oil
  13. Cover with plastic wrap and let sit 30 minutes
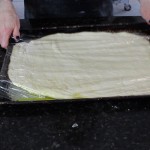
  14. Remove plastic wrap and stretch the dough if needed to the edges of the pan and using your thumb press the egde of the dough into the edges of the cookie tray to form a crust – this will become a crispy and chewy egde that you will love! 
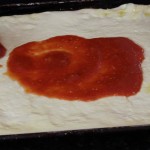
  15. Spoon pureed tomatoes onto the dough and sprinkle mozzarella
  16. Add you desired topping and give a drizzle of olive oil across the top of the pizza and put into a 450º oven for 16-20 minutes.
  17. Definitely check at the 15 minute mark as all oven are different
  18. You want  the edges dark golden and the middle is sizzling
  19. Take out and let sit for 5 minutes
  20. Using a large spatula remove the pizza in one piece to a large cutting board and slice, or slice in the cookie tray

Lazy-Man’s Lasagna! – World’s Best!

Lazy-Man’s Lasagna! – World’s Best!

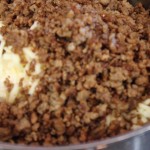
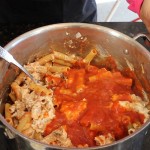
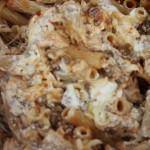
This world’s best lazy-man’s lasagna is the ultimate pasta dish because there is no fussing, layering or baking. It has all the ingredients and flavors of a traditional lasagna but without all the work! It’s done all-in-one pot and takes two minutes to put together after the ground meat is browned. It’s made with a tomato-basil sauce, homemade or store bought for convenience, rigatoni pasta, ricotta, mozzarella and a sautéed ground meat of your choice. The hardest part here is browning the meat, then it’s easy peasy from there on in.

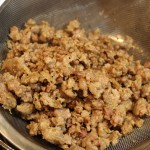
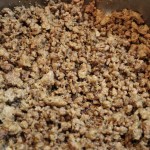
When I first had this lazy-man’s lasagna it was made with ground beef. That’s the beauty of this pasta dinner you can customize it by browning up what ever your favorite meat is. I’ve actually made it with ground turkey, beef, Italian sausage and even a meatloaf mix of meats. What ever you decide I promise you it’s going to be delicious! In the show I used my favorite sweet Italian fennel sausage from Liuzzi Cheeses in North Haven, CT. I took the the sausage out of the casing and then browned it.

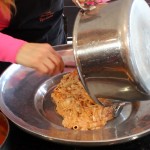
Usually, I serve up this lazy-man’s lasagna immediately after I combine all those yummy ingredients. Although, you can easily pour it out into a baking dish and top with one cup of shredded mozzarella to bake immediately or cover with foil and into the frig until you are ready. Granted, I do love to put together a tray of layered lasagna for the holidays but for those in between days when you want those gourmet flavors but don’t want to go through all the work this world’s best lazy-man’s lasagna is your dream come true.

You can check out my Live TV Cooking Segment on “CT STYLE”, WTNH – Channel 8 where I make Lazy-Man’s Lasagna in The Bender Kitchen with hosts Teresa Dufour and Ryan Kristafer!

If you are looking for something hardy and gourmet you should check out my Boeuf Bourguignon or Indian Spice Tomato-Cream with Snap Peas, Pulled Beef Taco’s with Mango Salsa, or for a lighter note you could check out my Swordfish with Black Bean Salsa or Asian Shrimp and Noodle Salad and for something sweet you just can’t beat Pavlova! Mangia Mangia…enjoy 🙂

150150boeuf IMG_3234 027 iphone pictures 1402 IMG_2283

IMG_5682 IMG_5617 IMG_5625

IMG_5637 IMG_5645 lazy

lazymozz lazymeat lazysaucejpg

lazymix lazyplatterjpg lazyparmjpg

lazybasil

Ingredients:

  • 1 lb. rigatoni pasta, zit rigati or your fav pasta!
  • My 20 minute tomato-basil pasta sauce recipe or a favorite store bought brand
  • 2 lbs ground meat OR 3 cups after browned of: ground beef, turkey, veal, pork, meatloaf mix, or sweet fennel sausage (Liuzzi makes my favorite sweet and spicy Italian fennel sausage)
  • 1 lb. whole milk ricotta (really easy to make your OWN HOMEMADE – check it out!)
  • 2 cups shredded mozzarella – 2 cups to mix into the lazy-man’s lasagna plus additional 1 cup to sprinkle on top if you are going to put the pasta into a baking dish to bake later
  • grated Parmesan
  • fresh basil

Directions:

  1. Brown the ground meat in a sauce pan on medium high heat
  2. Drain the meat to remove excess oil in a small strainer over a bowl
  3. Put the meat back into the pan on medium high heat add 1/3 cup of red wine to de-glaze the sauce pan scrapping up the little brown bits stuck the bottom of the pan
  4. Keep the browned meat on warm
  5. Heat tomato-basil sauce through – you want it hot to melt the mozzarella
  6. Cook the pasta in salted water until al dente …(Having a pinch of firmness to it so it’s not overly cooked)
  7. Drain the pasta and put it back into the same pan
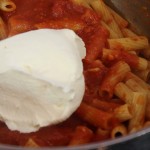
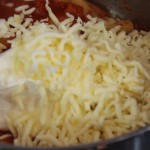
  8. Immediately add 2 cups of hot tomato-basil sauce, 1 lb. of ricotta, 2 cups of mozzarella, 3 cups of browned meat and begin to stir
  9. Add another 1-1 1/2 cups of tomato-basil sauce
  10. Mix ingredients until combined and pour out into a serving platter
  11. Sprinkle with Parmesan and julienne fresh basil…mangia mangia 🙂

Mediterranean Layered Dip with Christine & Lisa

Mediterranean Layered Dip with Christine & Lisa

Mediterranean layered dip is one of those dishes that you will love to have up your sleeve. It’s super easy, literally takes all of five minutes to make and tastes amazing! All you have to do is layer these wonderful Mediterranean ingredients in a clear serving dish. The reason it’s so quick to make is because you’re using prepared products from the market.  It will not only wow your guests with the presentation but with the fresh flavors too!

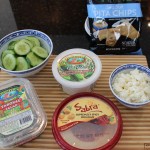
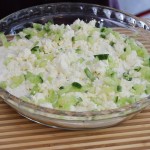
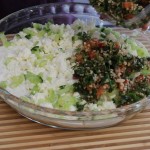
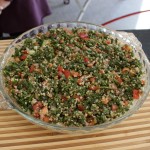
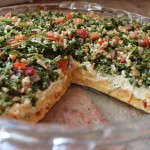
IMG_5076This Mediterranean dip starts off with a layer of hummus, and continue’s on with layer’s of Tzatziki, crumbled sheep’s milk feta, chopped up European cucumber’s, and finally a layer of Tabouleh. Scoop up this delicious dip with cucumber slice’s, and, or pita chip’s. Granted, if you have a little extra time on your hands you could make one or two of the layers that go into the dip IMG_1851homemade like my best hummus ever, or Tzatziki sauce. Since I’m such a big cheese head I definitely suggest getting decent feta from your local cheese shop, Madison Cheese. The creaminess of a good sheep’s milk feta really add’s a nice touch to the dip.
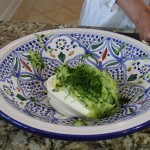
The first time I had this Mediterranean layered dip was three months ago at a friends tennis party celebrating our kids going to Nationals in South Carolina. My friend, Lisa, brought this Mediterranean layered dip to the party along with a buffalo chicken dip. Boy, did I make out like a bandit! I featured Lisa’s buffalo chicken dip recipe on my show not too long after the party and it has been a big hit, calling it “Best Buffalo Chicken Dip Ever!”. What can I say, I love a good dip!

I then phoned Lisa excited about having her come on my show to share the Mediterranean dip with all of you. Lisa was going to do the show but there was one caveat, she wanted her friend Christine to come too. You see this Mediterranean layered dip recipe wasn’t her recipe. She borrowed it from Christine. So we went directly to the source and had Christine come over to do the show also! 

What fun we had making the Mediterranean layered dip. You can’t go wrong here especially when you have other things to make for your get together. As Lisa say’s in the show, she keeps the ingredients to the dip unopened in her refrigerator at all time’s, just in case! I hope you enjoy this dip many times over. If you need another easy appetizer you should make my baked sweet potato fries & Green Goddess Dip or just go straight to the desserts and try my chocolate crackle cookieschocolate avocado moouse, perfectly chocolate chocolate cake or an applesauce-caramel sundae that will knock your socks off! 

IMG_3966 IMG_3663 iphone pictures 755 IMG_2793 IMG_4085

IMG_5388 IMG_5416 tatzdip

fetadip cucumberdip tabdip

IMG_5422 IMG_5433

Ingredients:

  • 1 container of prepared hummus OR my homemade best hummus ever – You can get the “spicy” BUT it’s very spicy in the prepared hummus so I like it better with the reg. hummus
  • 1 12 oz container of your favorite Tzatziki OR homemade tzatziki
  • 1 12 oz container of your favorite prepared tabouleh
  • 1 cup crumbled sheep milk’s feta – you can it buy pre-packaged but good sheep’s milk feta from you local cheese shop is amazingly creamy 🙂
  • 1 cup chopped European cucumber- (1/2 of the cucumber sliced for dipping and the other 1/2 chopped for one of the layers)
  • 1 bag pita chips
  • 8-10″ clear serving dish with 2″ sides

Directions:

  1. Begin putting the layers into the clear serving dish
  2. Start with the hummus spreading evenly on the bottom
  3. Next, spread the layer of Tzatziki
  4. Then crumble the sheep’s milk feta over the Tzatziki
  5. Then a layer of chopped up cucumber
  6. Lastly, a layer of Tabouleh
  7. Serve with cucumber slices and pita chips
  8. You can keep the Mediterranean layered dip like this in the refrigerator for up to one day ahead … enjoy 🙂

Holiday Appetizer’s

Holiday Appetizer’s

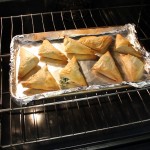
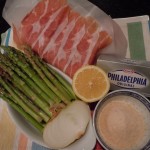
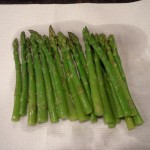
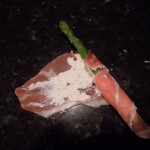
iphone pictures 572The first holiday appetizer I have for you is my baked asparagus wrapped in Prosciutto that has a smear of a cream cheese, sweet onion and Parmesan spread on the Prosciutto. These Proscuitto wrapped Asparagus are one of my favorite appetizers and can be a topping to a salad or a pretty side vegetable to lunch or dinner. I first had these delicious little bundles at my sister-in-law’s, Anita’s house, twenty years ago.  She is an amazing chef who’s always cooking up a storm. They can totally be made a day ahead, placed on a cookie tray and stored in the frig until you need them. The asparagus is blanched and shocked in an ice bath to stop the cooking and to keep that vibrant green color before they are wrapped with Proscuitto. You want to make sure you buy “Proscuitto di Parma” for this holiday appetizer because it’s the best and most delicate in flavor.  There are other tasty Prosciutto’s out there but they won’t be as tender as the Parma and may get too salty or waxy after baking.
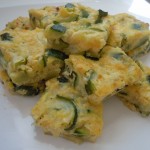
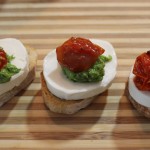
The second quick and easy, gourmet tidbit i have for you are my holiday crostinis with Gorgonzola, fresh chopped tomato, basil and garlic that bakes for seven minutes. These take the same amount of time as the asparagus-Prosciutto appetizer’s. How convenient is that? You can buy already crumbled Gorgonzola at the market in small plastic containers. A little chopping of cherry or grape tomatoes and basil and voilà! The crostinis are beyond simple to make and you can check out that recipe by the hyper-link.

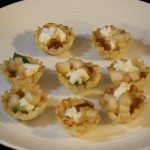
The last wicked easy and delicious holiday appetizer I have for you is something a little sweet. It’s a dollop of goat cheese, fig jam, fresh chopped pear and a mint leave all in a pre-baked fillo shell. Yes, I said pre-baked!!! Can you believe that one? This one you serve at room temperature so all you need to do is thaw the pre-baked shells which takes all of two minutes. It just can’t get any easier than that.

You can totally be flexible with these perfect little holiday appetizer’s too. If you don’t like Gorgonzola switch it out with some cubed up fresh mozzarella to top the crostinis and tomato-basil mixture. As for the pre-baked phylo cups, you can always swap out the goat cheese for a slice of brie if that’s more your taste.

I hope these last minute holiday appetizer’s help you out for your party! I wish you all a joyous New Year! You can certainly swap out or add in other hors d’ oeurves if you are feeling ambitious like baked coconut shrimp, zucchini torta, roasted chick peas, or smoked salmon on crostinis with cream cheese-caper spread. Enjoy 😉

iphone pictures 448

iphone pictures 1063

iphone pictures 970

iphone pictures 777


Baked Asparagus Wrapped in Prosciutto

iphone pictures 538 iphone pictures 601 iphone pictures 529

iphone pictures 532 iphone pictures 534 iphone pictures 540

iphone pictures 544 iphone pictures 546 iphone pictures 545

iphone pictures 552 iphone pictures 554 iphone pictures 560

Ingredients:

  • 20 large asparagus (the bigger the better)
  • 1/4 lb Prosciutto di Parma sliced thinly
  • 4 oz cream cheese room temp (Philadelphia)
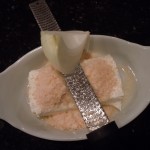
  • 1 Tbsp grated vidalia onion (yellow or white is fine too)
  • 1/2 cup grated Parmesan cheese
  • 1 Tsp fresh lemon juice

Directions:

  1. Pre-heat the oven to 400º.
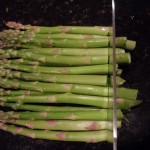
  2. Hold the asparagus with your fingers in the middle and on the end and bend.
  3. The asparagus will break where it’s supposed to.
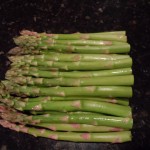
  4. Line them up and cut evenly across the bottom so they are all at a consistent length.
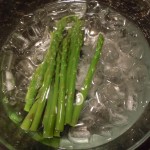
  5. Bring salted water to a boil and add in asparagus …Blanch 2 minutes
  6. Drain and put into a ice bath.
  7. Dry the asparagus with paper towels.
  8. At this point you can pop them into a zip lock and into the frig until you are ready for them.
  9. Mix together in a small bowl the room temperature cream cheese, grated onion, Parmesan and lemon juice just til combined
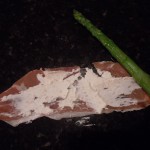
  10. Take a piece of Prosciutto and smear 1 Tbsp of the cream cheese mixture down the length of it.
  11. Place the asparagus on a bit of a diagonal (see photo) and roll up.
  12. Place onto an ungreased cookie sheet and bake for 7 minutes – you are heating thru only
  13. Use a spatula to remove from pan and be sure to flip them over when you plate them to see the lovely caramelization on the under side.
  14. Optional: Drizzle a little olive oil, a fresh squeeze of lemon and some shaves of Parmesan on top for a little extra!

iphone pictures 545

 TIP:  Using a micro-plane grater or rasp to grate the onion is a wonderful culinary tool which actually started out back in the day as a wood planer for woodworkers!


Baked Crostinis with Gorgonzola, Fresh Tomato, Basil & Garlic

gorgon mixgorgan crostitoma

withgorg gorgtray IMG_4768

Ingredients:

  • 1 french baguette sliced into 20 – 1/4″ pieces
  • Crostini Recipe
  • 1 cup chopped cherry or grape tomatoes
  • 2 tbsp fresh julienne basil
  • 1 garlic clove put thru garlic press
  • dash salt and pepper
  • 1 small container crumbled Gorgonzola cheese 4 oz. OR diced up fresh Mozzarella

Directions:

  1. Pre-heat oven to 400º
  2. Top crostini with tomato-basil mixture and a tsp of crumbled Gorgonzola OR Mozzarella
  3. Bake for 7 minutes

Goat Cheese, Fig Jam, Fresh Pear and Mint in Pre-Baked Fillo Cups

fillocup withjam endgoat

Ingredients:

  • 1-2 pkg of pre-baked fillo cups (if you can’t find these just buy pre-formed pastry cups that you can quickly bake)
  • 2 oz. goat cheese OR wedge of your favorite dbl cream brie…Saint Albray for example
  • fig jam
  • 1/2 cup fresh chopped pear
  • Wedge of fresh lemon
  • fresh peppermint leaves

Directions:

  1. Chopped the pear and give a squeeze of a wedge of lemon
  2. Thaw the pre-baked fillo cups
  3. Place fresh mint leaf into cups
  4. Place a dollop of goat cheese or slice of brie into the cup
  5. Top with 1/2 tsp of fig jam
  6. Then top with diced fresh pear
  7. Serve room temperature


Amazing German Pancake!

Amazing German Pancake!

This amazing German pancake is an awesome dish to make for your holiday guests! It’s festive and quite spectacular when your guests see how your pancake has puffed to enormous heights when you take it out of the oven. Not only does it make for a wonderful presentation but it’s made with little effort and can be served for breakfast or as a dessert!

A German pancake is really a giant popover. “Dutch baby” is another name for this pancake and rumor has it that the reason behind this name came about when a chef’s young child couldn’t pronounce the German word for German, “Deutsche”. Supposedly, this mis-pronunciation lead German Pancakes to the alternative name “Dutch Babies”. A couple other names that this German pancake has been called are “Dutch puff” and “Bismark”.

My kids get very excited for that moment when this amazing German pancake comes out of the oven! It has a bit of a custard like texture inside yet very light. We love eating these pancakes and have come to the conclusion that they taste like something in between a pancake, french toast and a crêpe!

My Vermont friends turned me on to this recipe years ago and I have been making them ever since. It’s fun for me to play around with recipes and see what works best so to this recipe I have added another egg, some vanilla and a little cinnamon. You can add grated nutmeg instead if you prefer. Originally, these homemade pancakes were served with lemon and confectioners sugar. I like to served them with confectioners sugar, real maple syrup, fresh blue berries and a dollop of my favorite “Wild Blueberry Preserves” by Bonne Maman, a product of France (sold right in our local market at Stop and Shop). German pancakes are so easy to make, taking on the same amount of time as making ordinary pancakes. The wonderful thing here is you are not glued to the stove pouring batter every few minutes.

Using cast iron is the way to go here because it holds in the heat evenly distributing it throughout the pan but I have made them in other oven proof pans and it comes out great. Some recipes have you pre-heating the pan in the oven, pulling out the rack, pouring in the batter, then pushing the rack back into the oven and in my opinion, this is a disaster waiting to happen since the batter can easily swoosh over the sides causing the oven to smoke ! The easiest way to start these homemade German pancakes is on the stove top and then into the oven for the duration. The finished product will make you will feel like a french pastry chef all day. This could also make for a great dessert to an impressive dinner with entrees like turkey stuffed peppers, pulled beef tacos & mango salsa or yogurt-chicken kabobs & tzatziki. Enjoy!

tur IMG_3234 iphone pictures 387 IMG_1897 IMG_1826

iphone pictures 1093  iphone pictures 1094  iphone pictures 1099

iphone pictures 1102  iphone pictures 1097  iphone pictures 1098

iphone pictures 1108  iphone pictures 1111  iphone pictures 1114

iphone pictures 1155 IMG_4539 iphone pictures 1118

Ingredients for Traditional German Pancake:

  • 5 extra LG eggs (or 6 large)
  • 1 cup Milk – cold
  • 1 cup all purpose flour
  • 1/2 Tsp. salt
  • 1/4 Tsp cinnamon
  • 1 Tsp. vanilla
  • 4 Tbsp butter  -cut up into 4 Tbsp (1/2 stick) COLD

Ingredients for savory German Pancake:

  • 5 extra LG eggs (or 6 large)
  • 1 cup Milk – cold
  • 1 cup all purpose flour
  • 1/2 Tsp. salt
  • 1/2 cup swiss cheese OR cheddar
  • 1/2 cup thin diced ham OR sauteed mushrooms
  • 1/3 cup green onion OR sauteed sweet onion
  • NOTE: If you are going the cheddar, sauteed mushroom & onion route add 1 cup fresh baby spinach too!
  • 4 Tbsp butter  -cut up into 4 Tbsp (1/2 stick) COLD

Directions:  

  1. Pre-heat oven to 425º
  2. In a medium bowl whisk dry ingredients together
  3. Begin to whisk in milk, vanilla and eggs into dry ingredients just until combined …Note : it puffs more if your milk and eggs are cold!
  4. Put 10″-12″ cast iron pan on stove top on low heat for 1 minute –THIS WILL WORK IN ANY 10″-12″ OVEN PROOF PAN –
  5. Turn heat up to high on cast iron pan, wait 1 minute til pan is hot but not smoking, then add 4 Tbsp of cut up cold butter
  6. When the butter gets frothy add the batter, do not stir
  7. Immediately take off heat and put into oven for 22 minutes until golden and puffy
  8. NOTE: if you are doing “SAVORY German Pancake” …after you remove from heat top with your extra ingredients, do not stir, and place into oven for the 22 minutes
  9. When you take it out of the oven transfer to a plate with a spatula and sprinkle with confectioners sugar.
  10. Slice into wedges and serve with maple syrup, warm fresh strawberry jam/sauce (Recipe BELOW) and whipped cream! …mmm!

Ingrediesnts and Directions for EASY STRAWBERRY JAM/SAUCE:

  • 1 lb. hulled and chopped fresh stawberries
  • 1 cup white sugar
  • 1/4 cup fresh sqeezed lemon juice
  1. Finely dice strawberries and add to a wide 8″ sauce pan with 1 cup sugar and lemon juice
  2. Over med/high heat bring to a rolling simmer
  3. Keep an eye on the mixture, keep simmering for 15 min. – make sure it doesn’t boil over
  4. Skim off white foam that accumulates around the edges while simmering as this will make the jam cloudy (its just air bubbles that form in the jamming process)
  5. Remove from heat and serve warm with German pancake
  6. Jar the remaining strawberry sauce and refrigerate as it will thicken into a jam as it cools! It will stay good for 2 weeks in the frig.


My MasterChef Sauces

My MasterChef Sauces

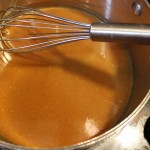
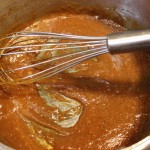
masterchefpicThe creation of these MasterChef sauces. a spicy, sweet and sour mango and a ginger-peanut sesame sauce, all began while surfing the net a few weeks ago, I accidentally ran into the MasterChef homepage advertising “Casting calls are coming soon to a city near you”.  My kids, Reilly and Bella were there at the time and enthusiastically shouted, “you should do it”! I think what sealed the deal was reading the “Come and meet the MasterChef casting team for your chance to be on the show!” The excitement started to seep in and I began to seriously consider going to the New York City MasterChef open call. If anything, I knew it would be a step in the right direction and a great learning experience let alone the adrenaline of it all!

After sending in their required online pre-registration form and printing out the nine page hard copy form to be submitted at the casting call I thought it would be a good idea to look over the FAQ page. The FAQ’s certainly had a list of what to do and what not to do. The “to do’s” started off like this:  First, bring one prepared dish to serve to their food judges. Second,  we would be given 3 minutes to plate our dish at their casting call location and for some reason I had initially thought I had 5 minutes to plate so that was a bit of an eye opener! Third, there wouldn’t be a kitchen to cook or warm our dish up so we were to come prepared! Fourth, we are to supply our own dishes, utensils, etc.

The “do not do’s went like this:  no air mattresses, no alcoholic beverages, no animals (unless health related), no candles, no cans or bottles (except water bottles), no chairs that do not fold (i.e. lawn chairs, chaise lounges, molded plastic chairs), no digital or still cameras, no fireworks, no hair dryers, no illegal drugs, no tents, no video, cameras or camcorders of any kind, no weapons of any kind, no children under the age of 13 years are allowed at the audition venues. There you have it!

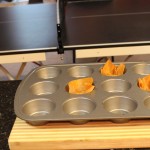
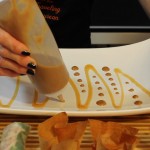
Well OK,  I had a little organizing to do and a plate to figure out for my MasterChef casting call debut! I really wanted to wow them! The part about the “NO kitchen” and “come prepared” got me to thinking that a cold dish of some sort might be a wise way to go! An appetizer is probably the most logical then, right? Yes that’s it, it came to me.  I would make my “Fresh Shrimp and Chive Rolls” with the new MasterChef sauces that I have created which I can decorate the plate with. A julienne of daikon radish, carrots and a sprinkle of toasted sesame seeds with micro herbs for some pizzaz would add in the finishing touches. I also thought I needed to add in some height so I came up with baked egg roll shells that I form in a cup cake pan. I got this idea from my “Bloody Mary shrimp and Mango-Curry Shrimp in Wonton cups at Nancy’s Show” except I decided to use egg rolls shells instead of won-ton because they are a little bit lighter.

Now that I knew what I was going to make I thought I would practice my plate decorating with my MasterChef Sauces by shooting it in this weeks show so I could share this fun experience with all of you! It was definitely a lot of work to do this and go to the casting call but I did it! It was an awesome experience being there and the “MasterChef team” was pretty dynamite. They had everything down to a science and moved around with ease offering up a very warm welcome to all the competitors. I am super glad that I took Reilly and Bella’s advice on going for this.

I kicked you know what with my dish and the plating. I went there and did exactly what I set out to do with my presentation with 8 or so seconds left before they yelled “TIMES UP”! That part I have to say was such a RUSH because it reminded me of chopped!!! I was then the first to be called back in with 8 others for that first plate presentation part from our first group of 30 plating competitors.  I might be over thinking all of this a little, but I was so tired from preparing the food and shooting the show I feel as though I forgot to prep myself on what exactly to say about “me” when they pulled us 8 into interview. Although, I had them laughing a bit. I got the feeling what was more important to them was the person who said the right things in that second interviewing, more character not food ability. Gods only knows I do have lots of that so if it doesn’t work out this time I NOW know what they want next time around! I still have to wait until the end of October to see if I hear from them (they are still traveling to other states). I had an incredible time and will keep you all posted. Thank you all for your support, it means a lot! Hope you enjoy “My MasterChef Sauces” Show! 
IMG_3462 IMG_3468 IMG_3472

IMG_3474 milkpean  IMG_3489

IMG_3506  IMG_3508  mangosieve

IMG_3514  saucesqueeze  squeeze

eggrollcups  juienned  microherbs

rolls

Ingredients for Ginger-Peanut Sesame Sauce:

  • 3 tbsp smooth peanut butter (Teddy’s All Natural)
  • 1/4 cup soy sauce
  • 2 tbsp toasted sesame oil
  • 1 1/2 tbsp vegetable oil
  • 1 tbsp rice wine vinegar
  • 1 tbsp red wine vinegar
  • 1/2 tsp wasabi powder
  • 2 tbsp sugar
  • 1/2-1 tsp Siracha (can find this next to Tabasco products)
  • 1 whole lime
  • 1 tbsp corn starch dissolved in 3 tbsp pineapple juice – Use 1 1/2 tsp of this 
  • 1 tbsp fresh grated ginger
  • 2 tbsp half and half

Directions for Ginger-Peanut Sesame Sauce:

  1. Add all of the ingredients to a large bowl (EXCEPT corn starch mixture) and whisk
  2. Squeeze only 1/2 of the lime in at this point
  3. Add to medium pan over medium/high bring to a low simmer – whisking constantly this will be about 2-3 minutes
  4. When this begins to thicken turn down to med/low and add in 1 1/2 tsp of corn starch mixture and keep whisking- this will be about 3-4 minutes
  5. Remove from stove and cool
  6. When cooled add in 2 tbsp half and half and a squeeze of the other half of the lime and whisk briefly til smooth
  7. Add to ramekins for a dipping sauce or put into squeeze bottle to decorate plate with

Ingredients for Spicy, Sweet and Sour Mango Sauce:

  • 1 cup pineapple juice
  • 1/2 cup mango
  • 1/4 cup red wine vinegar
  • 1/4 cup sugar
  • 1 tsp ketchup
  • 1 tsp fresh grated ginger
  • 1 tsp Siracha
  • 1/8 tsp salt
  • 2 tbsp corn starch dissolved in 3 tbsp water
  • 1 lemon

Directions for Spicy, Sweet and Sour Mango Sauce:

  1. Add all of the ingredients to a large bowl except the corn starch mixture
  2. Whisk til combined – use juice from 1/2 lemon here
  3. Add to a medium size pan over med/high heat and bring to a low simmer to melt sugar – 3 minutes
  4. Add in corn starch and keep whisking at a low simmer til the mixture is transparent again and thickened – 5 more minutes
  5. Mash Mango pieces into sauce with a fork
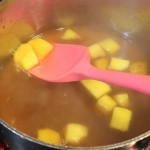
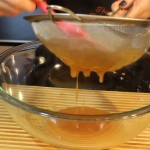
  6. Remove from heat and press thru a sieve into a bowl and let cool completely (can add a little squeeze of the other half of the lemon if too thick)
  7. Pour into ramekins for dipping or put in a squeeze bottle to draw on plates …have fun decorating!

Pulled Beef Taco’s & Mango Salsa


Pulled Beef Taco’s & Mango Salsa

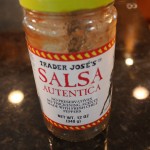
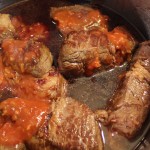
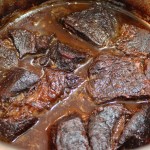
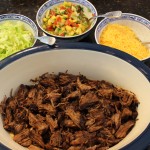
Just wait until you taste the flavors in this pulled beef taco dish that ONLY uses three ingredients! Yes, that’s right we only use three ingredients… red wine, Trader Joe’s Autentica Salsa and a chuck roast that braises in the oven for two and a half hours with the cover off. I almost feel like we are cheating here by only using these three items because it seems as though something this amazing in taste, similar to Boeuf Bourguignon, should involve way more effort and ingredients. I think it’s important here to use the oven instead of a crock pot because the dry heat helps to caramelize the beef really building on all those layers of flavors.

This is the perfect dish for having groups of friends over because it’s a total make ahead dish. You can even make my mango salsa the day before. If you are really in a pinch for time you could always buy fresh made salsa at the store. I personally like to make this homemade pulled beef the morning of the party so that the house fills with all the aromas of the braising chuck roast, red wine and tomatoes. Really gets the juices flowing!

You can use your favorite hard taco shells to serve up the homemade pulled beef, corn and flour tortilla’s or even serve it on a bed of lettuce with shredded cheddar cheese and my mango salsa! I would also offer sour cream and Siracha in the side fixin’s and just let people go to town making their own creations. How fun is that?
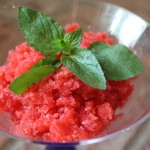
You may just want to make my decadent Hershey’s Perfectly Chocolate Chocolate Cake for dessert! You won’t believe how EASY it is to make! You could also try my Chocolate Crackle Cookies that melt in your mouth. Then there always Fresh Berry Granita or Berries in a Dreamy Cream for dessert too. You’ll be able to actually relax and have lots of fun with your family and friends.

IMG_2793 IMG_3663 IMG_2375 IMG_2201

IMG_3110  IMG_3140  IMG_3127

IMG_3132  IMG_3135  IMG_3173

IMG_3223  IMG_3234  IMG_3144

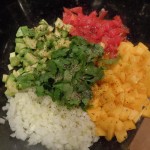
mangosalsa

Ingredients for the Pulled Beef Taco’s:

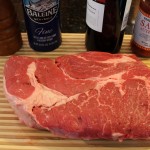
  • 3 1/2 lb. beef chuck roast (look for some good marbling)
  • 1 bottle of red wine – Cabernet Sauvignon
  • 1 bottle Trader Joe’s Salsa – Autentica
  • 3 tbsn olive oil

Directions:

  1. Pre-heat the oven to 350º
  2. Slice  the chuck roast into 6 pieces
  3. Salt and pepper the pieces
  4. Add 3 tbsn of olive oil to a large pan on med/high heat and begin to add the beef pieces
  5. Turn up the heat to high and quickly sear all sides til browned – this takes 10 minutes
  6. Add in 3/4 of the bottle of red wine (be careful of steam here) and the whole jar of salsa
  7. Bring to a simmer and pop into the oven for 2 1/2 hrs.
  8. Every hour turn the beef pieces over so the other sides can caramelize
  9. At 2 1/2 hours take the braising meat out of the oven and begin to remove the beef to a dish wear you can start to pull apart the beef pieces
  10. Tilt the braising pan to the side so that you can skim off the fat that rendered out of the meat
  11. Pour the left over juice onto the pulled beef and serve with taco shells and my mango salsa…enjoy!

Ingredients for the Mango Salsa:

  • 2 lg mangoes chopped 1/4″ cubed – (about 1 1/2 cups)
  • 1 avocado chopped 1/4″ cubed (1 cup)
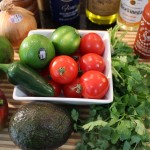
  • 2 med/lg size tomato’s or 5 small tomato’s chopped 1/4″ cubed (1 cup)
  • 1/2 Vidalia onion (or yellow) FINELY chopped (1/2 cup)
  • 1 FINELY chopped jalapeno (2-3 tbsn)
  • juice from 1 lime
  • 2 Tbsp olive oil
  • 1 Tbsp rice wine vinegar
  • 1/2 cup coarsely chopped cilantro
  • a dash of Siracha (optional)
  • S & P

Directions:

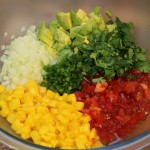
  1. Add all of the ingredients to a large bowl and mix thoroughly.
  2. We really love to eats this salsa with blue chips too
  3. I have also served this salsa up on the tips of endive leaves, and or with a cooked shrimp on top of that ….yum!
  4. I must warn you this salsa is highly addictive……consume at your own risk! LOL

iphone pictures 718  iphone pictures 732  iphone pictures 721

iphone pictures 722  iphone pictures 724  iphone pictures 738

iphone pictures 739  iphone pictures 740

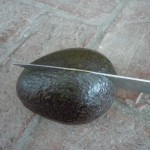
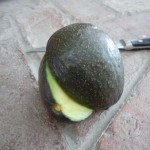
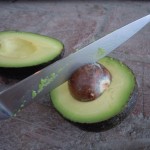
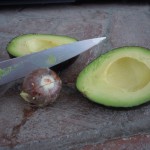
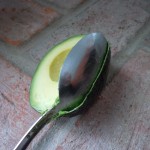
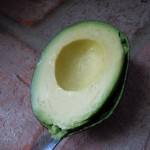
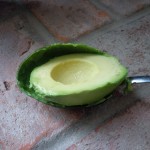
TIP:  There is an easy way to get the pit out of a avocado which I have displayed in the pictures above.  After running the knife around the flesh of the avocado against the edges of the inside pit… put the knife down and twist the avocado halves and pull apart. Then stick the knife into the pit and do the same thing holding on to the knife with one hand and carefully twist the avocado pit and it will pop right out.  Then knock the pit off onto the board away from your hands.  This can be a little tricky the first time so I would advise that this would be for an adult to try.   Finally, Insert a large spoon and scoop the avocado along the edge of the avocado skin to remove avocado flesh.

Cold Cucumber Soup

Cold Cucumber Soup

This homemade cold cucumber soup is out of this world! It has texture and flavors that won’t stop! Not one of the flavors in this soup over powers another, it’s the perfect balance. You actually find yourself trying to distinguish between them only because you are aware of all the fresh vegetables and herbs that went into this amazing cold soup.

Being a born and raised East Coaster I have to say I have never been a big “cold soup” kind of person. With our unbearably cold winters we have here I really appreciate a very hot bowl of soup to warm the bones. So when ever I’m making this cold cucumber soup I’m slightly biased going in, not willing to give merit where it is due, until I take my first spoonful and it all changes!

My cold cucumber soup completely stands on it’s own and is very satisfying not to mention the medicinal qualities that cucumbers offer. Cucumber’s can reduce puffiness, help to eliminate toxins in your body and we all know that slice’s of cucumber over your eyes can help to reduce dark circles! Some of the vitamin’s cucumber’s offer are A, C and folic acid and minerals of potassium and magnesium.  All and all this homemade cold cucumber soup is a win win situation.

This homemade cold cucumber soup would be great for lunch with a side sandwich or grill up some shrimp like I did in the show. One of my favorite accents to this soup are seared scallops cut in half and placed right in the center on the soup. You can check out in my “Seared Scallop Show” to see exactly how to make the scallops.

King crab meat is also a lovely topping to this cold cucumber soup and was a big hit when I presented this soup this way to the tasting judges at my second MasterChef open casting call in NYC this past March (2016)! All of the MasterChef casting call judges didn’t have any critique for my soup during the tasting phase…they just said “they really, really loved it!” When I made my cucumber soup for the MasterChef casting call I added fresh fennel to the recipe to change it up and give it that je ne sais qua…that extra special something!

This cold cucumber soup is an amazing way to start your dinner party or even have for a luncheon. If you are thinking of other course’s to add to your soup you should check out my stuffed mushrooms, yogurt chicken kabobs, bolognese sauce with homemade pasta and end with my perfect chocolate cake that will rock your world! Enjoy 🙂

mushrooms IMG_1897 025 IMG_4327 IMG_2793

IMG_2859  IMG_2880  blendsoup

pureed  IMG_2902  IMG_7236

IMG_7242 IMG_7223

Ingredients:

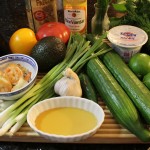
  • 2 European cucumbers peeled and cubed – 4 1/2 cups – you do not need to remove seeds with the European cucumbers
  • If you are using regular cucumbers, peel and slice down the middle and remove the seeds scooping them out with a small spoon and cut into chunks
  • 3 ex-lg green onions or 5 small sliced in 1″ pieces from green tips to whitish green stems
  • 1/4 cup of diced cherry tomatoes OR diced heirloom tomatoes
  • ½ an avocado cut in chunks
  • 1 jalapeño chopped (take out seeds)
  • 1 lg garlic clove put through garlic press
  • 1 cup plus 2 tbsp Greek Yogurt – whole milk
  • 1/3 cup fresh dill
  • 1/4 cup fresh mint leaves
  • 1 Tbsp of honey
  • 1/4 cup of seasoned rice vinegar
  • juice from 1 lime
  • 1/4 cup olive oil
  • 1/2 tsp salt – to taste  – (NOTE: I said 1 tsp in the show but I meant to say 1/2 tsp!)
  • 1/4 tsp finely ground pepper

         -FOR COLD CUCUMBER & FENNEL SOUP …ADD:

  • 1 cup cut up fresh FENNEL  …for a change up try this with the FENNEL – YUM!
  • chopped fresh chives for garnish
  • seared scallops , cooked Lobster, Shrimp, or Crab to top the soup in the center

Directions:

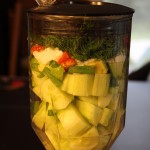
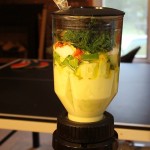
  1. Add all the ingredients in the list above to your blender except olive oil
  2. Begin to puree while slowly pouring in olive oil through the opening at the top
  3. Continue to puree for 20-30 seconds
  4. Be patient, all the vegetables in the cucumber soup will begin to slowly puree
  5. Stop and scrape down any herbs or vegetables stuck on the side’s and pulse for 10 more seconds
  6. Chill in the refrigerator for 1 hour
  7. Serve with a sprinkle of dill, finely chopped tomato, cucumber and avocado
  8. Top the center of the soup with seared scallops – room temperature cooked lobster, king crab meat, or shrimp AND then a drizzle of extra virgin olive oil