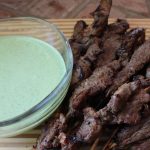
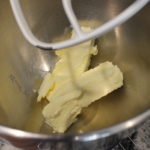
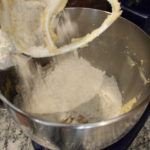
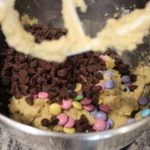
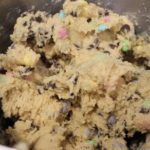
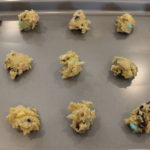
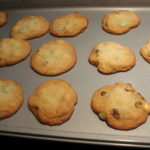
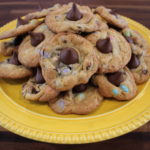
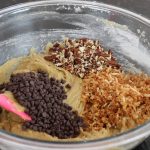
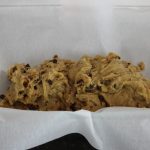
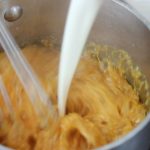
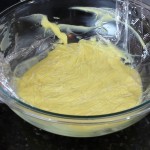
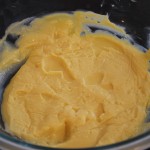
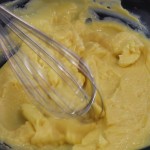
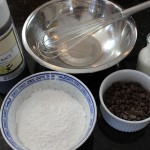
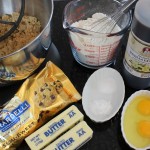
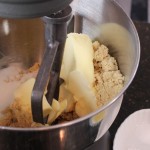
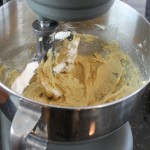
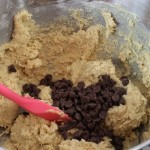
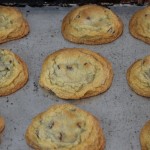
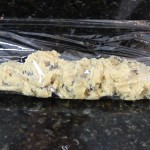
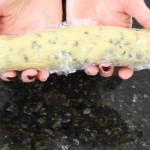
Eileen’s Famous Chocolate Chip Cookie will undoubtedly become one of your favorite cookie recipes after first bite! This scrumptious cookie has 3 kinds of chocolate, stands tall and is slightly chewy in the middle. The recipe makes 30 plus cookies and believe me, you’ll be lucky to have any left over if you’re making these for a party.
My kids and I have been devouring Eileen’s cookies for years and getting you this recipe was on my bucket list! Eileen herself, receives cookie requests throughout the year for parties, benefits, fundraisers and backyard BBQ’s. This is an easy and uncomplicated recipe as you saw in the “how to” video above where Eileen’s daughter, Molly, has mastered the recipe!
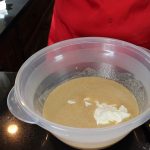
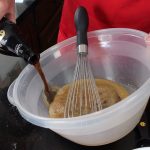
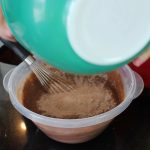
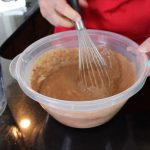
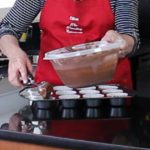
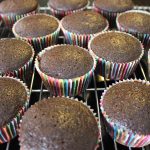
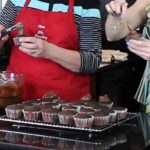
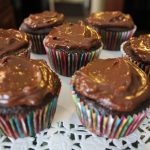
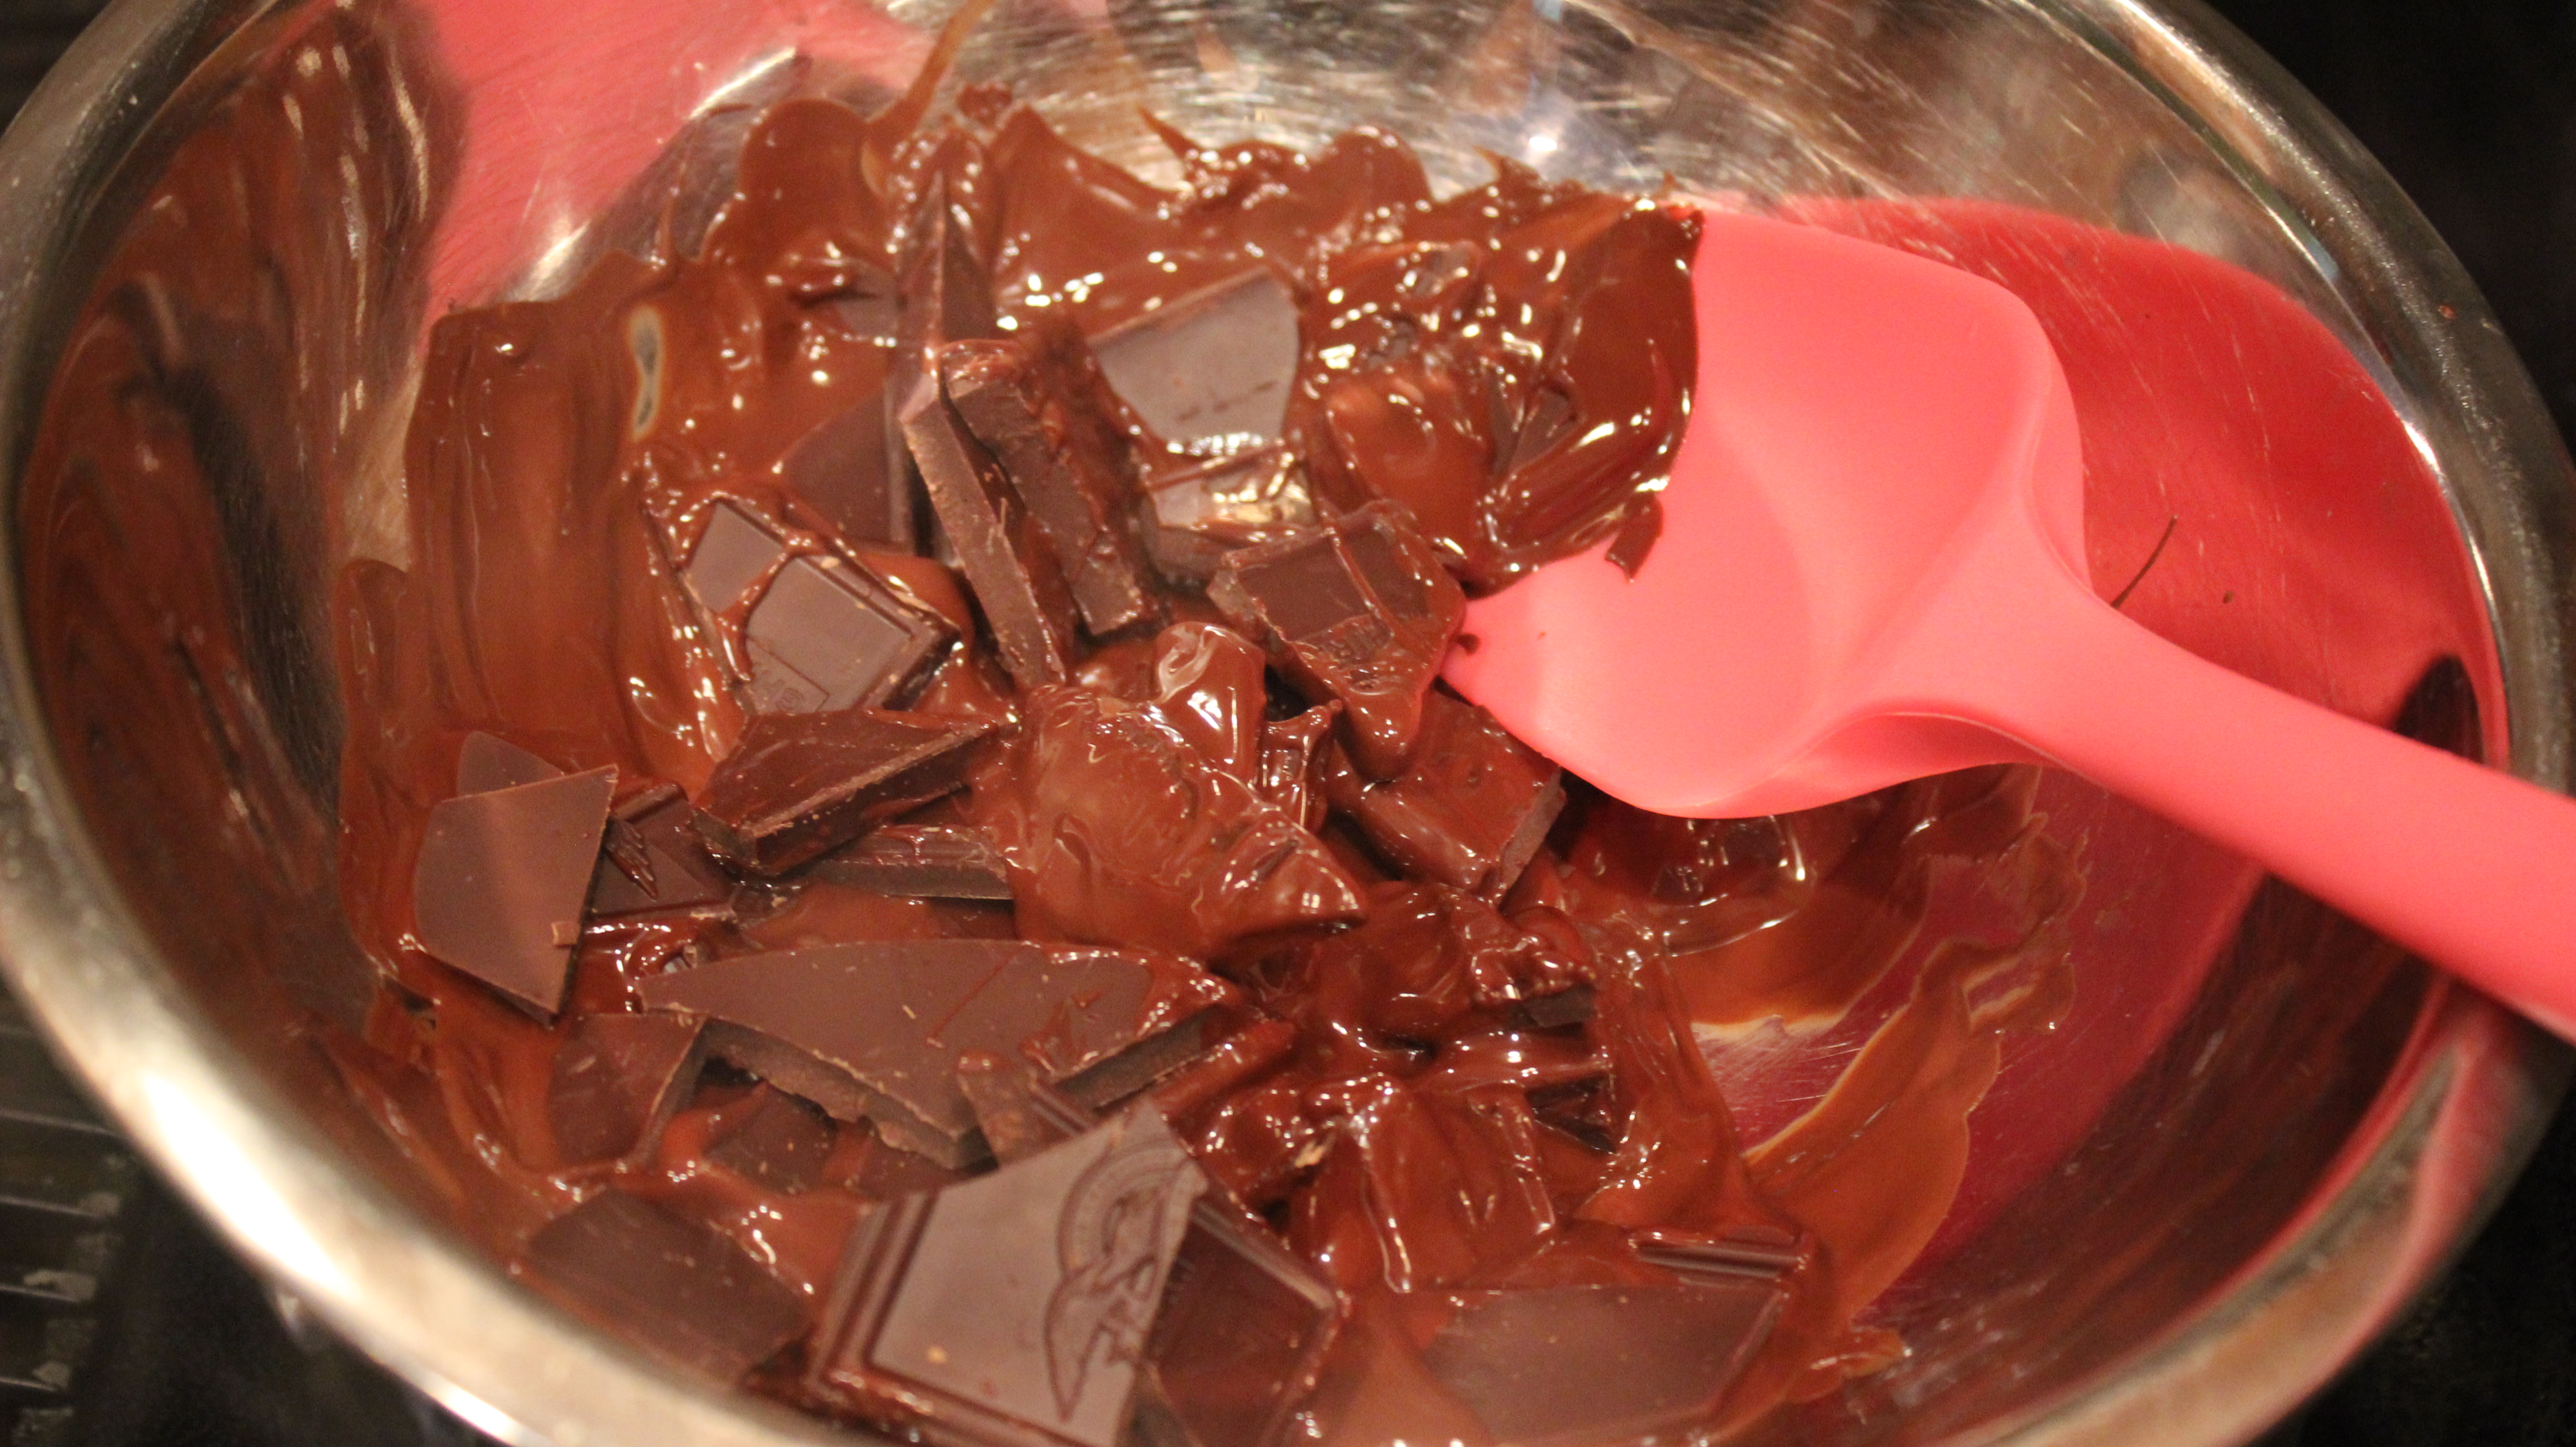
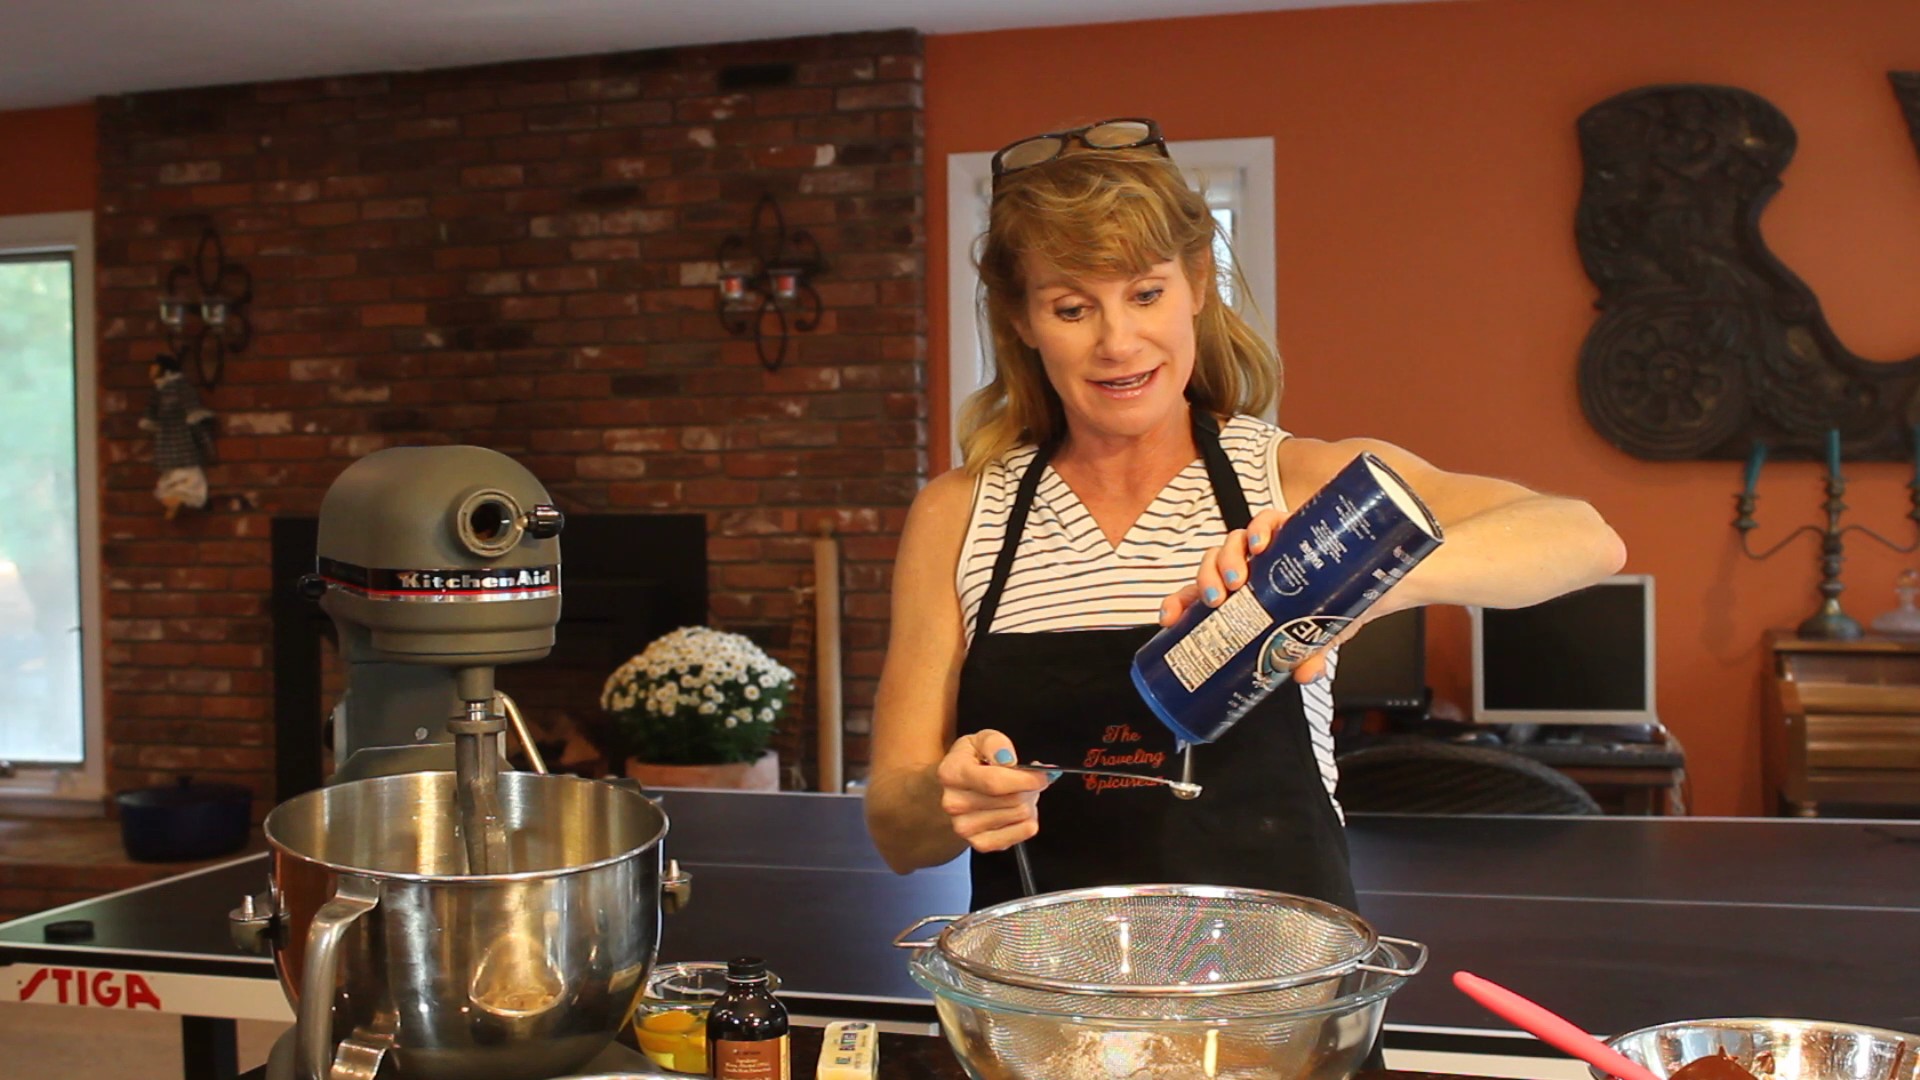
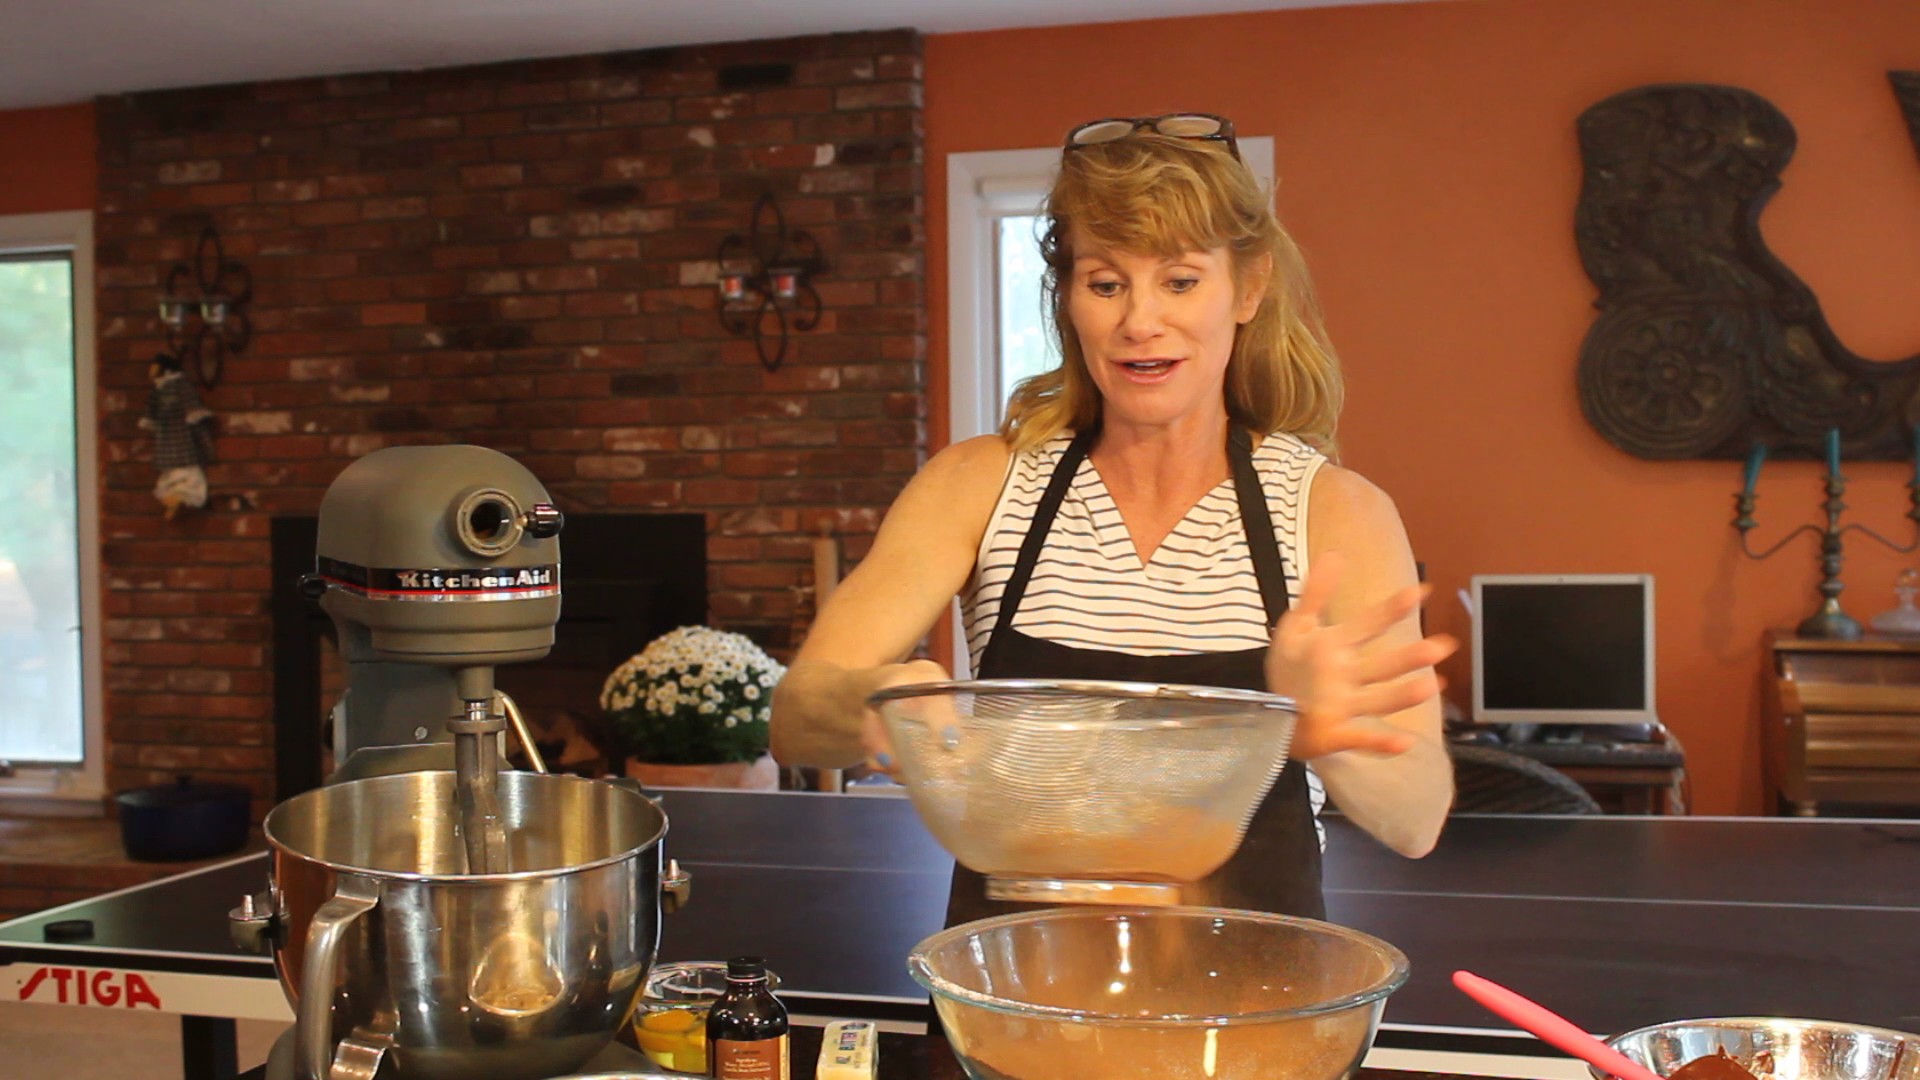
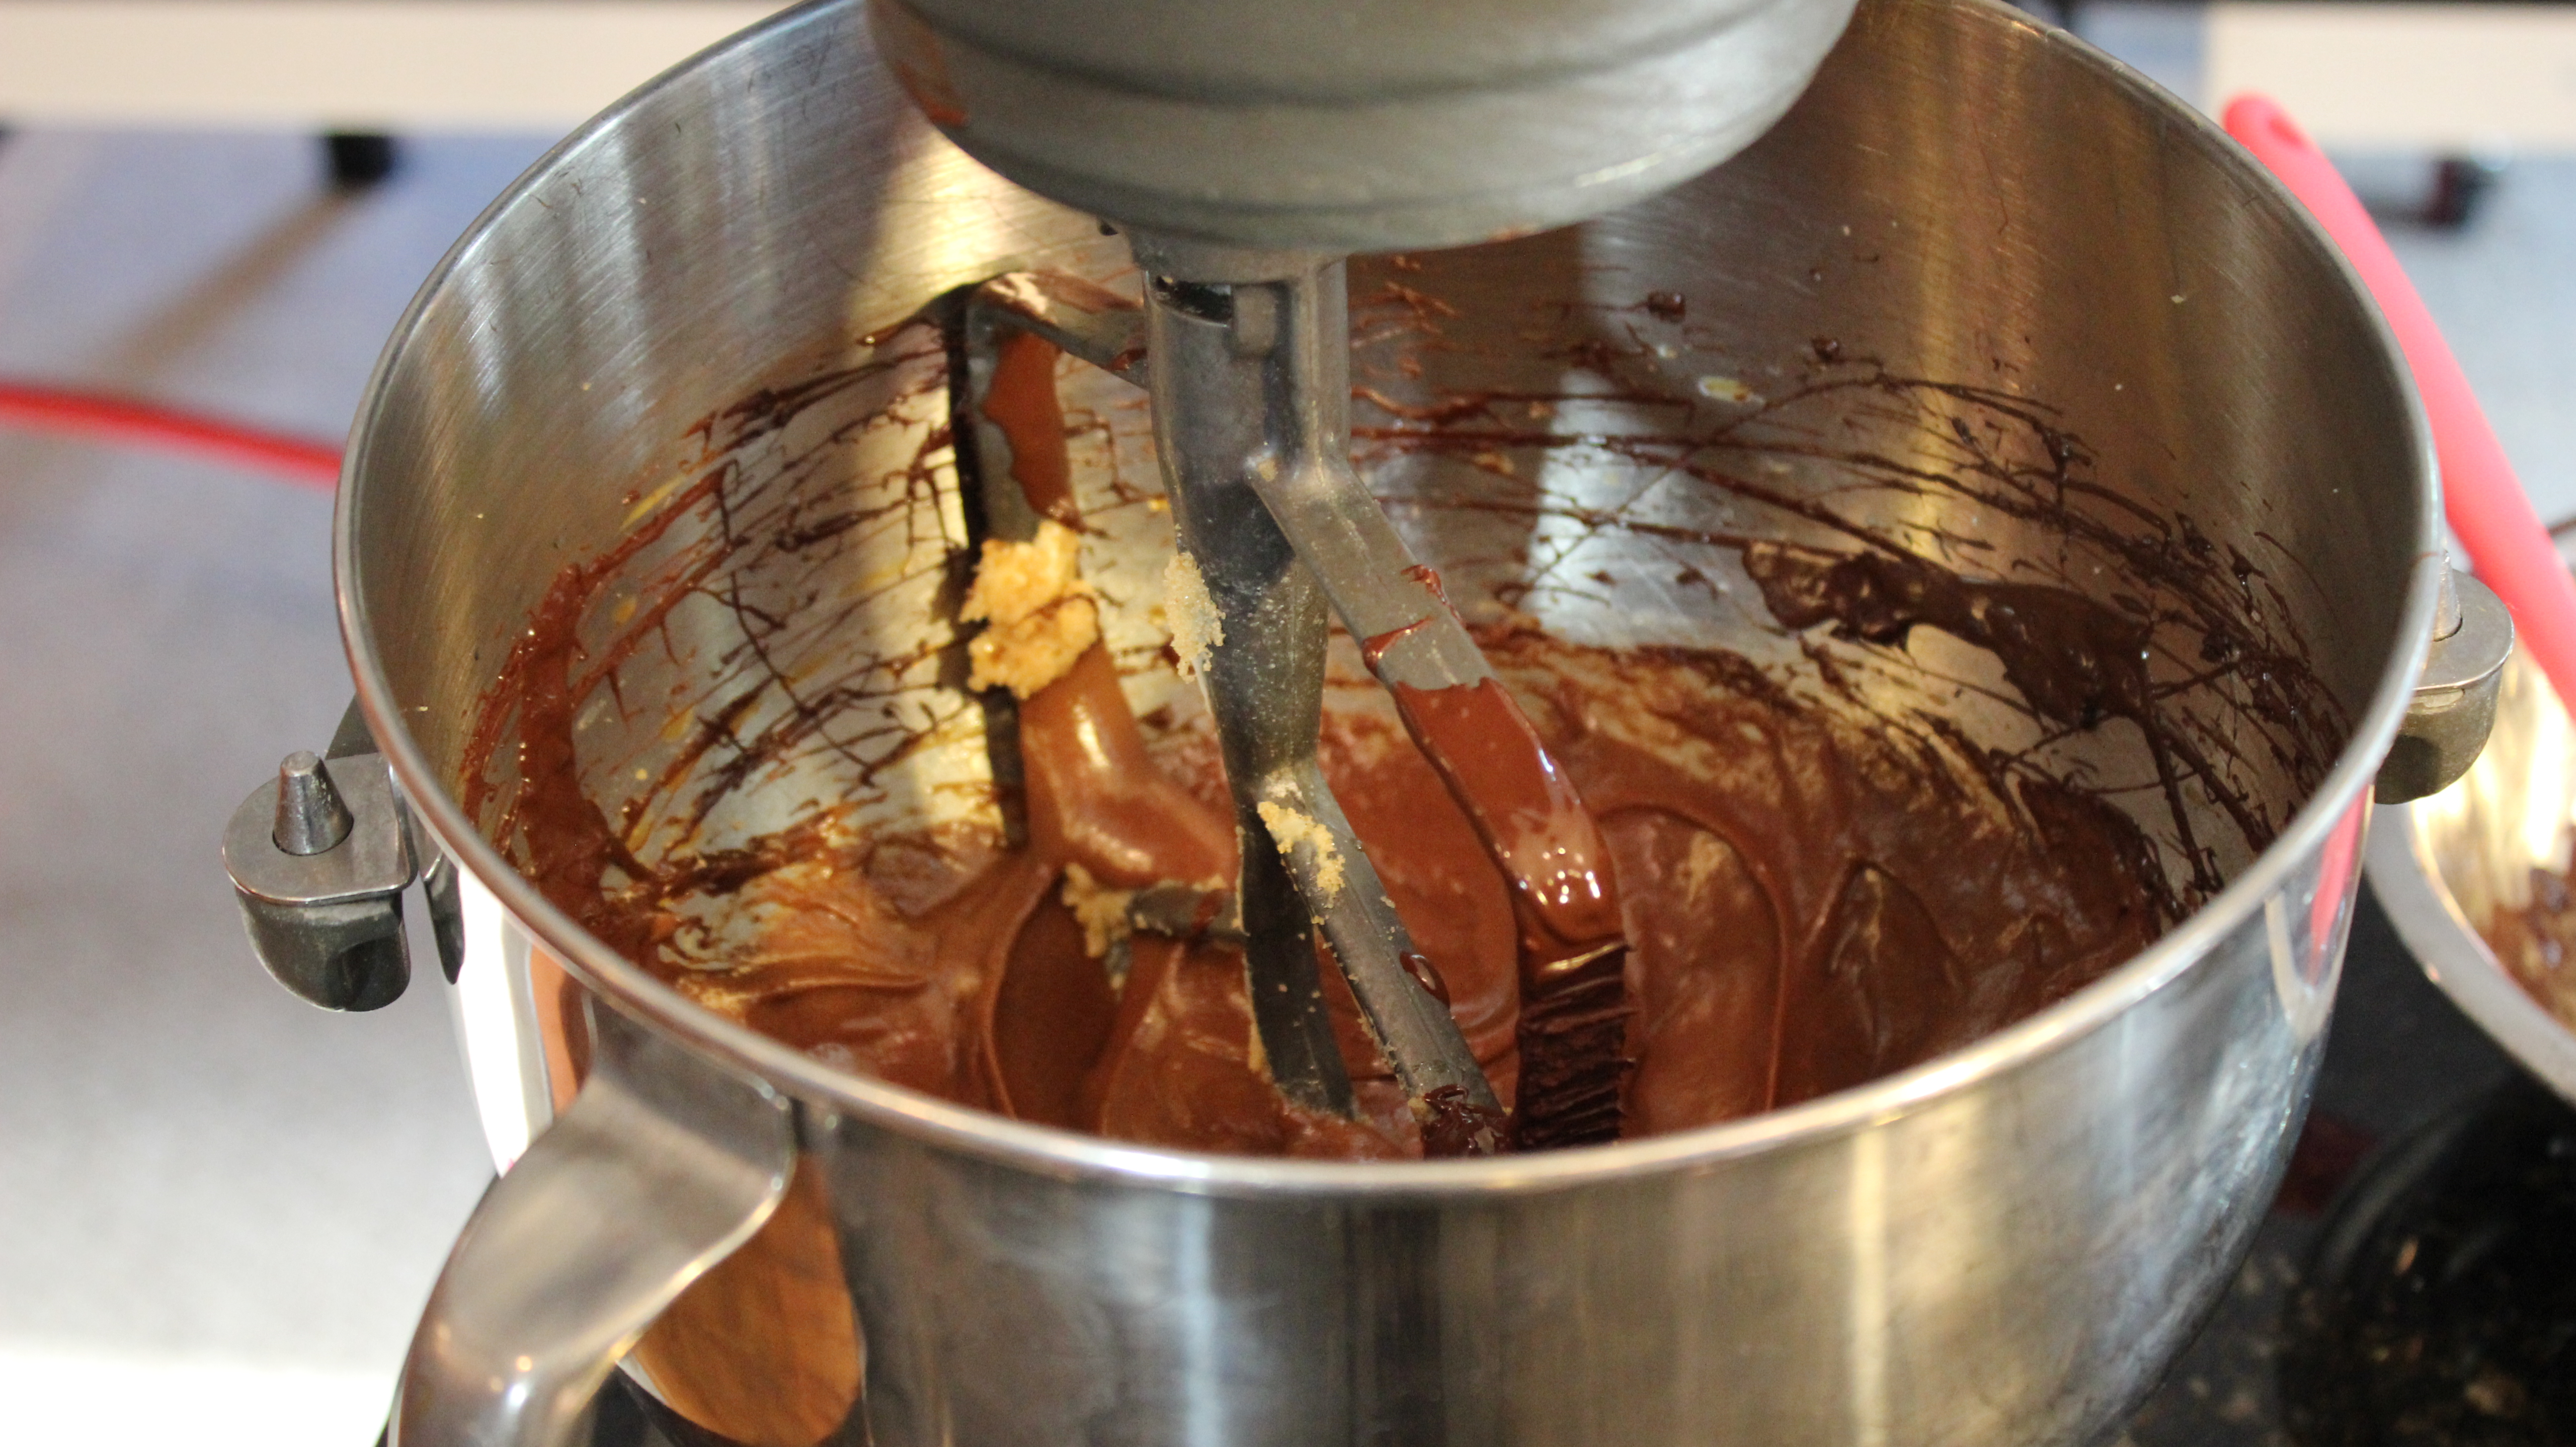
Guinness chocolate cupcakes are moist and full of flavor with a whole bottle of guinness in this delectable batter! Topping these cupcakes with a rich Viennese Chocolate frosting brings it to another level of gourmet chocolate indulgence.
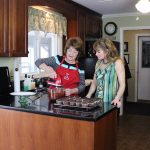
Just recently, I had a wonderful day meeting and baking with Ellen McMahanon, a true recipe afficionado, where she turned me on to her amazing Guinness chocolate cupcakes. Ellen has been collecting her precious recipes most of her life making very detailed notes of dates, with whom and where she was when acquiring a new favorite one. With hundreds of favorite recipes at her fingertips she still remembers the details like she was there yesterday!
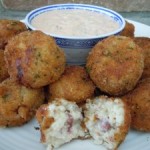
You are definitely going to want to try these Guinness Chocolate Cupcakes with the Viennese Chocolate Frosting and the timing couldn’t be more perfect with St. Patrick’s Day right around the corner. Looks like you may need a super awesome appetizer that will make use of that left over corned beef too like my Arancini Reuben Balls with Homemade Thousand Island Dressing … always has everyone raving!
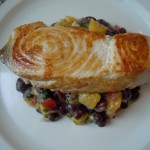
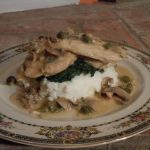
You could stay on the road to gourmet with myChicken Piccata for the main event before serving these Guinness Chocolate cupcakes with Viennese Chocolate Frosting! Or go for the Lobster Mac & Cheese if you’re looking for fish. Now that we’re talking fish you can really turn some heads with my Swordfish and mango-black bean salsa ! One of my other favorites are the Salmon B.L.T. Sliders with homemade aioli. Which ever one you choose it will be great with these rich Guinness Chocolate Cupcakes!
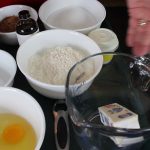
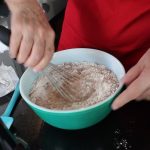
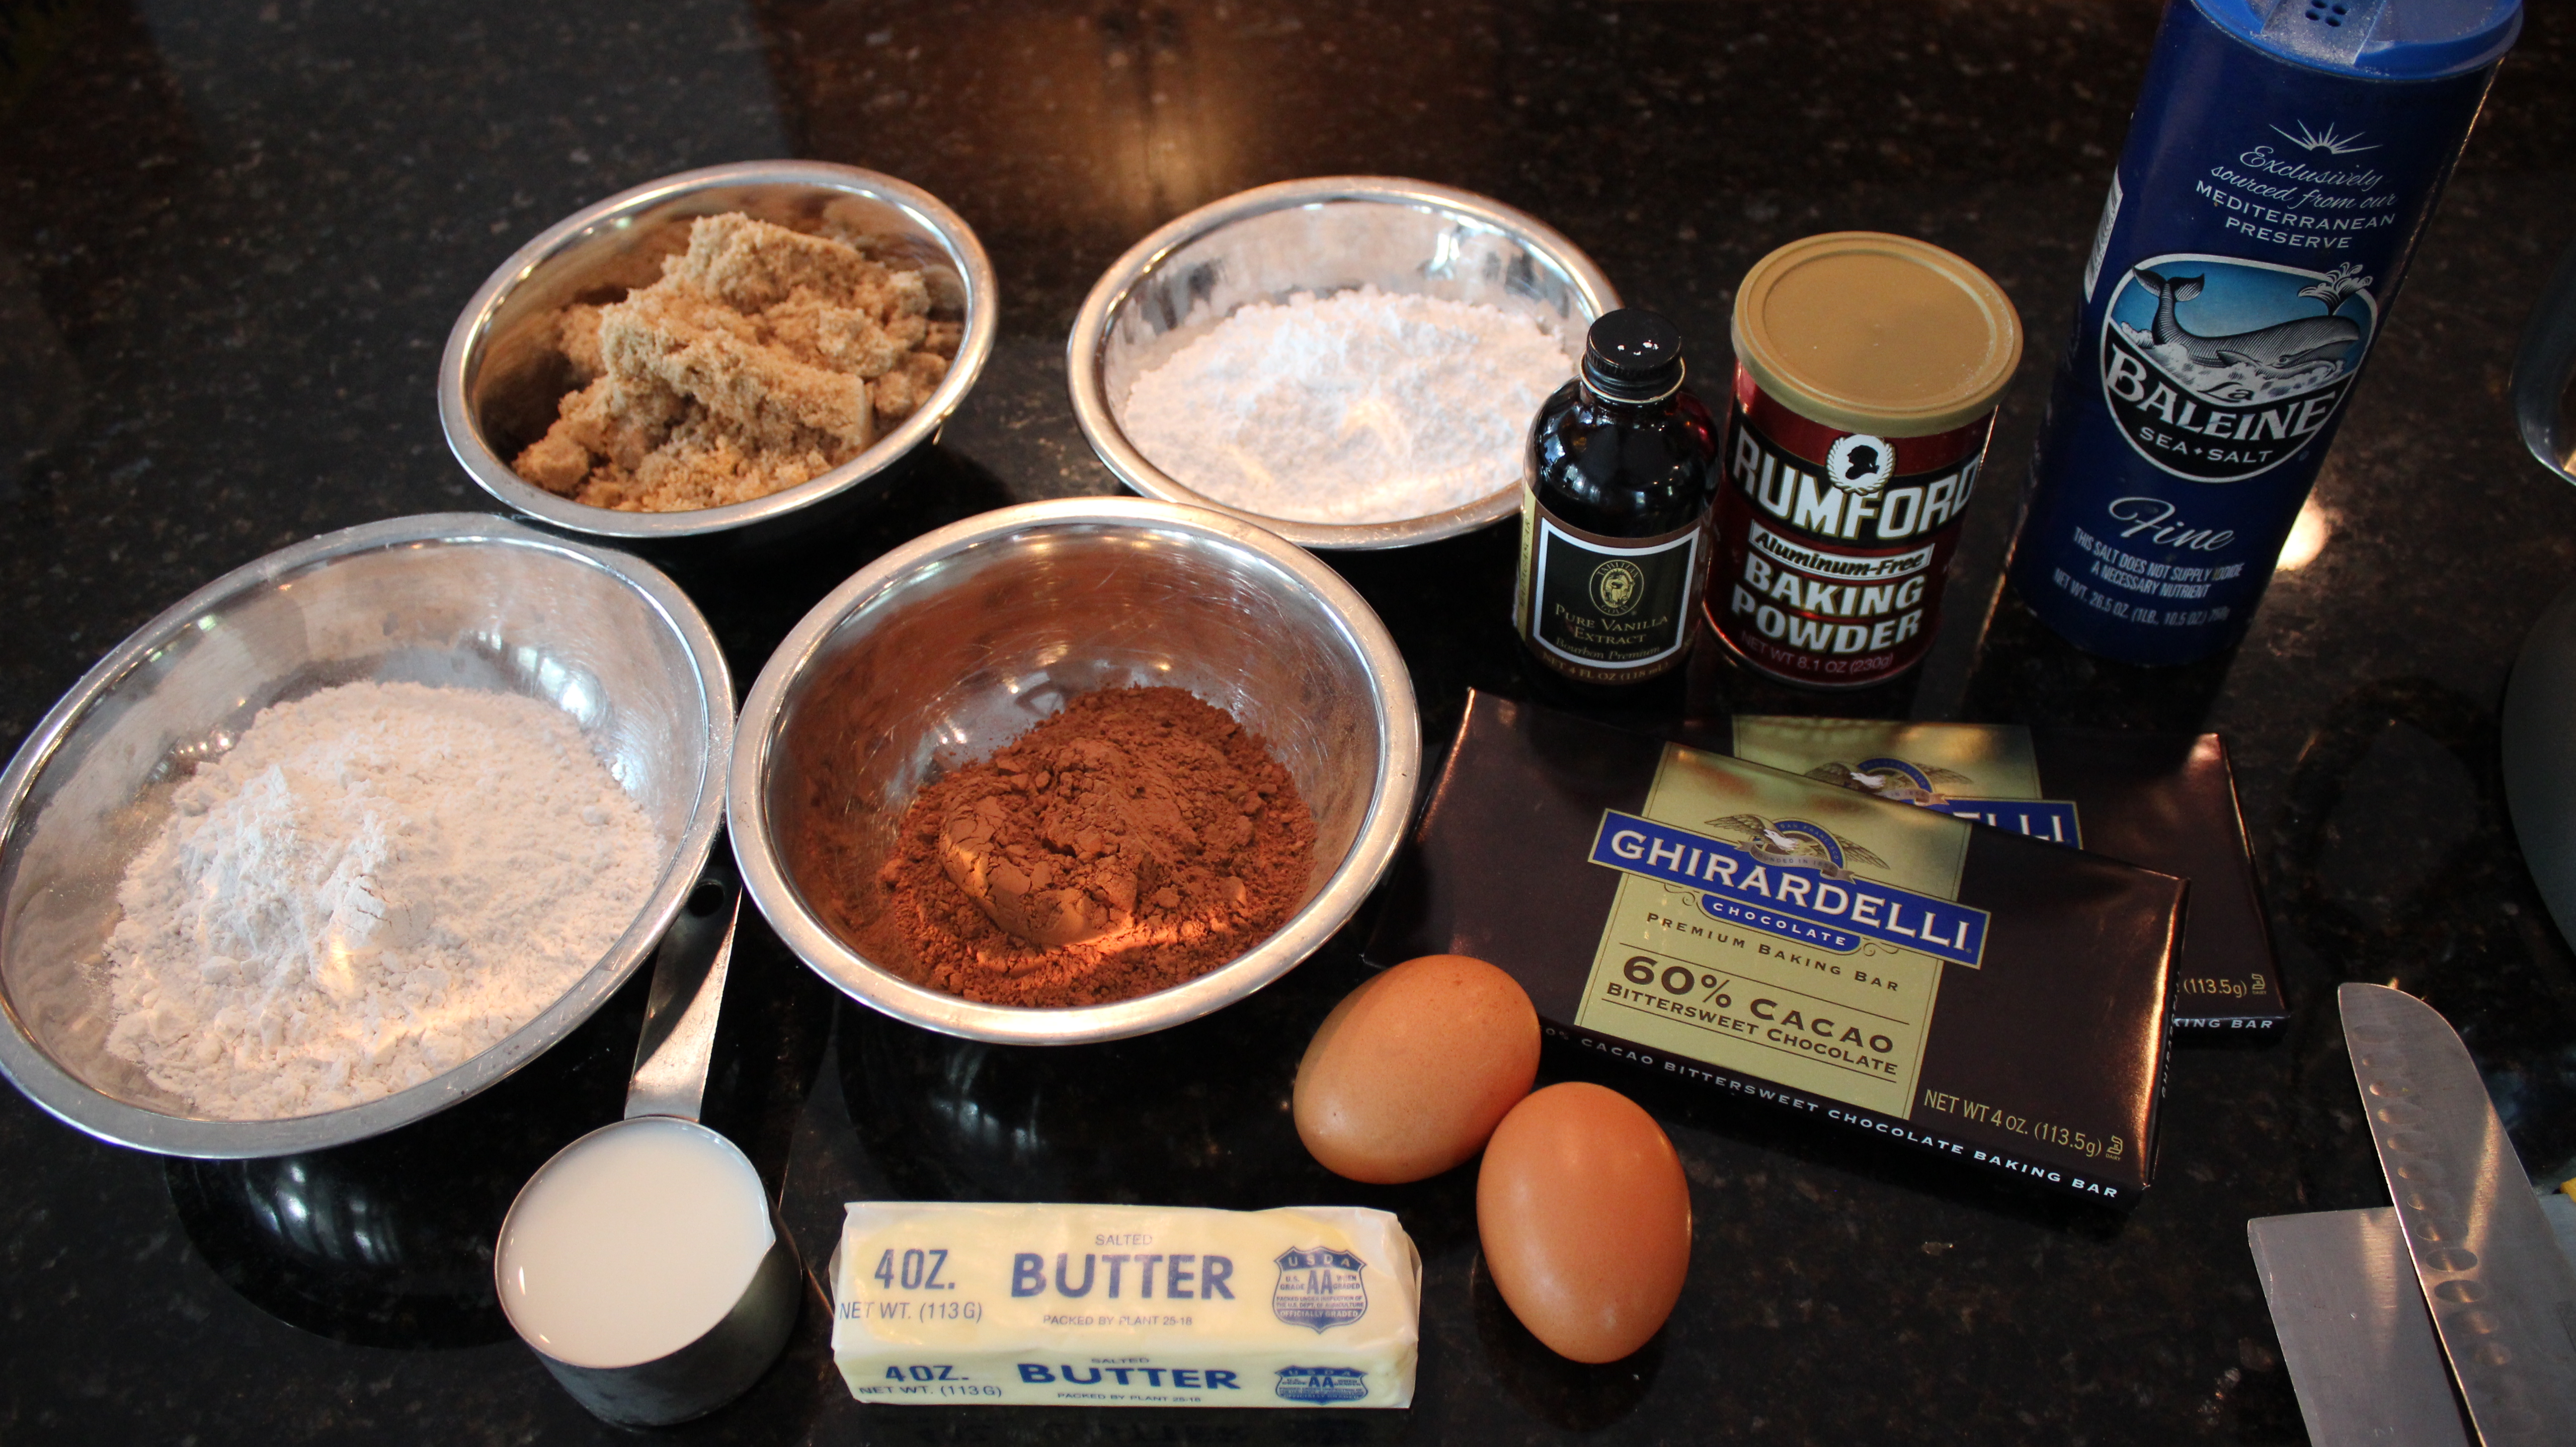
INGREDIENTS:
3/4 cup dutch cocoa
2 cups sugar
2 cups flour
1 tsp baking soda
pinch of salt
1 stick of butter (1/2 cup butter) melted and cooled
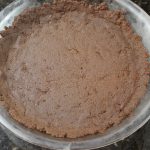
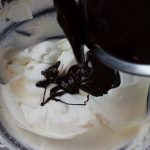
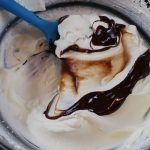
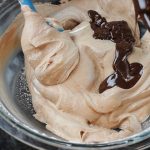
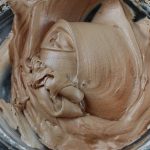
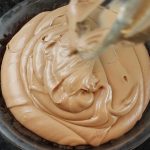
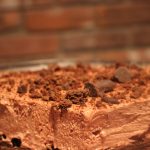
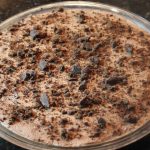
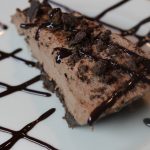
This Girl Scouts thin mint chocolate mousse pie is absolutely delicious! The oh so chocolaty mousse is light and lucious and melts in your mouth. The texture’s of the pie are undenialbly one of my favorite aspects of the pie. It goes from the cool, silky mousse to the crunchy cookie crumble in the crust with subtle hints of mint.
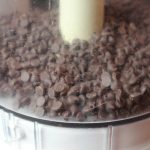
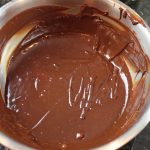
Although you do bake the thin mint crust for a mere 8 minutes, this is a no-bake, no fuss, chocolate mousse filling. The crunchie crust is made with puréed Girl Scout Cookies, butter and sugar. In the same food processor that the thin mint cookies were just puréed, the chocolate mousse starts off with mini semi-sweet chocolate chips, vanilla, and a pinch of salt. Then boiling heavy cream is streamed into the opening at the top to melt the chips as they spin into a smooth and creamy chocolate delight. This chocolate is cooled to room temperature and folded into whipped heavy cream for the finale. It’s one of those special dessert’s that’s so uncomplicated you’ll find yourself making it more than just once.
Having my daughter’s Girl Scout troop in my kitchen making this thin mint chocolate mousse pie was so much fun! We are very fortunate for our wonderful leader, Jen Swenson, who is generous with her efforts and time with the troop. It’s one of those precious things in life that the girls will treasure always.
Those of you who love the good ole mint-chocolate flavors will go crazy for this dessert. Those of you who aren’t partial to that flavor combo might be surprised how suble and sweet the thin mint crust is …tamed by the butter maybe! And like I told Maisy in the show, you can always just eat the chocolate mousse middle!
If you are looking for some appetizer’s to start off this Girl Scouts Thin Mint Chocolate Mousse Pie extravaganza you should try my Salsa 101 or Best Guacamole Ever! Maybe you are more in the mood for Zucchini Torta or a main dish like one of my all time favorite’sStuffed PeppersorChicken Piccata…both dishes you’ll add to your week day meals once you have your first bite! Enjoy! 🙂
Ingredients for Girl Scouts Thin Mint Crust Pre-Heat oven to 350º :
28 Thin Mint Girl Scout cookies – 1 3/4 sleeve …(a few left over for nibbling on)
5 tbsp butter
2 tbsp sugar
10″ pie plate, or 9″ spring form pan, OR 9″ pie plate & cups for the extra chocolate mousse you will have
Directions for the Girl Scouts Thin Mint Crust:
Melt 5 tbsp butter, set aside
Add 28 cookies to the food processor and pulse 3-4 times until they are a fine crumb
Pour in melted butter and 2 tbsp sugar and pulse 10 seconds to combine
Turn out crumb mixture into a 10″ pie plate, or 9″ spring form pan
NOTE: If you only have a 9″ pie plate NO WORRIES just add the excess chocolate mousse to cups or glasses, topping with cookies crumble and set the same in the frig for 4-6 hours or even freeze for a later date!
Press cookie crumb mixture all along the bottom and up the edges of the pie dish forming the crust
Put the pie crust into a 350º oven for 8 minutes
Take out and completely cool
Ingredients for Chocolate Mousse:
3 cups heavy cream – 2 cups for whipping the heavy cream/ 1 cup for melting the chocolate chips in the food processor
1 tbsp vanilla
pinch of sea salt
1 bag mini semi-sweet chocolate chips
Directions for the Chocolate Mousse:
Wipe thin mint cookie crumbs out of food processor and add mini chocolate chips
Add vanilla and pinch of salt
Add 1 cup heavy cream to small sauce pan and bring to a boil
Place cover on food processor, turn on and slowly add hot cream thru opening at top
Keep it running for about 20-30 seconds until chips are melted and creamy
Empty out into a bowl to cool, only cool to room temperature NOT COLD because the chocolate will solidify and it will be difficult to fold into the whipped cream
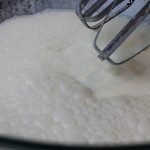
When chocolate is close to room temp add 2 cups heavy cream to a large glass bowl with 1/4 cup sugar and begin to whisk with electric beater
Whisk the cream until stiff peaks, 3-5 minutes
Fold 1/2 cup at a time of the room temp chocolate into the whipped cream until there’s none left
Pour out chocolate mousse into the COMPLETELY cooled baked pie crust and smooth out top with a offset spatula
Sprinkle thin mint cookie crumble over the top and place into the frig for 4-6 hours
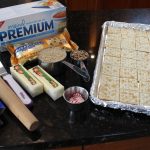
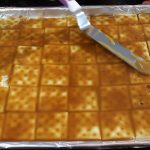
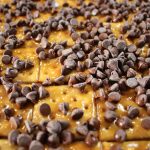
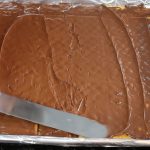
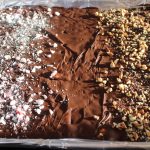
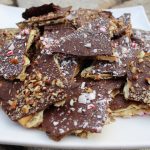
This Saltine Christmas Bark is the perfect holiday treat made in mere minutes. You get the best of both world’s, sweet and salty plus a crunch from the Saltine cracker base! It starts with crushed peppermint candy (my favorite), or pecans, then a layer of creamy chocolate leading into the slightly chewy toffee which all sets up on a crunchy saltine cracker! Oh my goodness, bring it on!
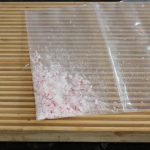
The fun part about making this Saltine Christmas Bark is breaking up this giant slab of goodness into randon size pieces. You kind of feel like an artist deciding how big and even the shape of the final outcome! Plate them up and voilà your masterpiece. These also make great holiday gift’s that you can fancy up in decorative celophane candy bags with ribbon.
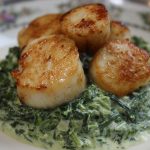
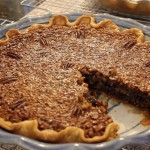
Let your holiday Saltine Christmas Bark making be extra special with my Bolognese Sauce, a scrumptious recipe I developed thru inspiration from a favorite pasta dish where I went to college in Urbino, Italy. If you’re now thinking Italian you should try my chicken Piccata, a savory white wine, capers and mushroom sauce that’s delectable. Maybe Lobster Mac N’ Cheese is more your style! Or you could be looking for a “Steak-House” Creamed Spinach that pairs up nicely with steak or fish! Since we are so close to the holidays what better time to make the most amazing chocolate pecan pie ever!
Ingredients:
2 pkgs saltine
1 cup butter – 2 sticks
1 cup light brown sugar
2 cups “mini” semi-sweet chocolate chips (if you can’t get “mini” the regular size is fine)
5 pepermint candies – finely crush peppermnt candy in a Ziplock with a rolling pin – My Favorite!
1 cup finely chopped pecans, walnuts, m&m’s, or …what ever you want to sprinkle onto the melted chocolate chips
Non-stick aluminum foil – regular foil works too!
12 x 17 Cookie tray
Directions:
Pre-heat oven to 400º
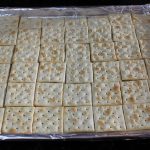
Cover cookie tray with aluminum foil
Arrange 48 crackers on your cookie tray, you may have to break or cut some in 1/2 to get to the edges
Chop up pecans, walnuts or macadamia nuts and set aside
Put candy canes in a ZipLock baggie, cover with a dish towel and give a few hits from your rolling pin to crush the candy to small and powder-like pieces, set aside
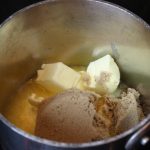
Over medium – Med/high heat add 1 cup light brown sugar and 1 cup butter to a deep sauce pan
Stir in the beginning ONLY to combine then leave it alone
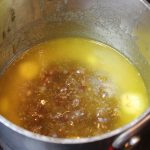
Bring to a boil and TURN DOWN to medium and let boil 3 MINUTES
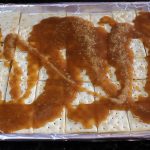
Immediately pour over laid out saltine crackers and spread the toffee with an offset spatula so it covers every saltine
Then pop into oven for 5 minutes
Take out and the toffee will be bubbly, IMMEDIATELY pour “mini” semi-sweet chocolate chips all over the top (if you can’t get “mini” the regular works just as well)
Let the chips sit for about 5 minutes to soften up
Using your offset spatula spread the softened chocolate chips covering all the toffee
Immeduiately after spreading chocolate take your crushed candy cane and nuts and begin to sprinkle over the wet chocolate
NOTE: You want to sprinkle toppings BEFORE the chocolate sets so it STICKS to the top
Pop the whole cookie tray into the fridge for 45 minutes – 1 hour to set OR freezer for 20-25 minutes if you are in a rush
Take out of fridge, remove foil and begin to break up the saltine Christmas bark into what ever size you like…mangia mangia!
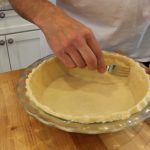
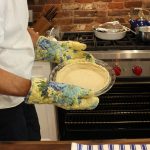
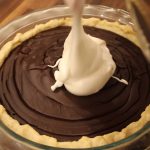
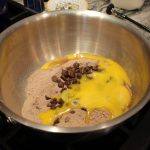
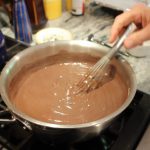
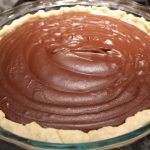
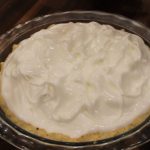
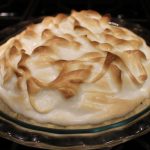
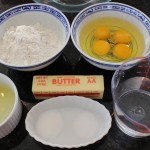
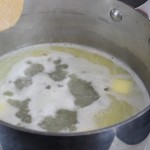
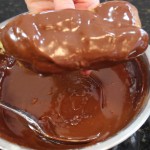
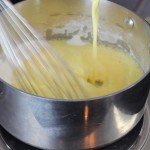
“Death by Chocolate Meringue Pie” is the perfect title for this recent cooking show taped at my foodie friend’s, David and Eileen’s house. When you taste this most chocolatey mousse-like filling topped with fluffy peaks of meringue you will think you have died and gone to heaven! This wonderful chocolate meringue pie recipe came from David’s mother, Alice, and has always been a family favorite for the holidays! With four boys in his family growing up, David said his mother was always welcome to the idea of having more cooks in the kitchen. You could only imagine that with four boys you’re going to need more then just one pie. David and his brothers happily learned at an early age how to pitch in and get this task done.
David uses the “chocolate fudge” flavor of Jello brand, the cook and serve, not the instant. Come to find out, this “chocolate fudge” flavor can be a difficult category to find. But using Jello brand’s “chocolate” flavor is the next best thing, so don’t fret. Make sure to keep an eye out for the “chocolate fudge” flavor next time you are at the store and shoot me an email if you strike “fudge”!
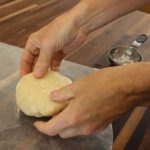
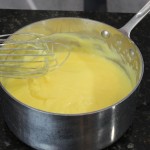
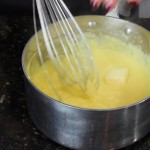
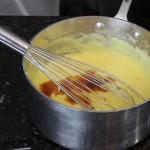
What takes this Jello cook and serve chocolate fudge pudding to a completely different universe, into a rich, chocolate mousse-like texture is the addtion of egg yolks, sugar, butter and pure vanilla extract. You will find yourself eating each bite of chocolate meringue pie very slowly just to savour every luscious bite. Part of this decadence comes from the rich, flaky crust made with a special lard David gets from Firefly Farmers in Stonington, CT. You can purchase their products at the Stonington, Waterford and Bozrah Farmers Markets. It definitely makes a difference in your pie crust to use both butter and lard like in my Perfect Pie Crust in 5 Minutesbut using this lard that David use’s really puts the crust over the top!
Last but not least is the meringue that tops this incredible chocolatey filling and brings the whole pie together. Whipping the egg whites to soft peaks is important to achieve the elegant curly cues you can create when dipping a spatula gently into the surface of the meringue. Then off to the oven briefly until those beautiful peaks turn golden.
This wonderful chocolate meringue pie recipe could have easily remained a family secret but David and his mother were gracious enough to share it with us. The only option I see here is for you to get busy and make this luscious dessert for your next holiday! Don’t forget to share the YouTube link to the show 🙂 ENJOY xxoo
Ingredients for David’s Pie Crust – 1 Crust for lg Deep Dish Pie Plate (measurements below are 3/4 of full recipe):
1 1/2 cups flour
1/4 cup lard frozen, grated
1/4 cup butter refigerated, grated
3/4 tsp salt
approx. 2-3 tbsp ice cold water
FULL PIE CRUST RECIPE – 2 Crusts:
2 cups flour
1/3 cup lard or crisco
1/3 cup butter
1 tsp salt
3-4 tbsp ice cold water
Directions for Pie Crust – Pre-Heat Oven to 400º :
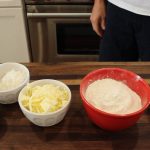
Measure lard or crisco and put into freezer
Grate lard or crisco and butter and place in separate bowls back in the frig til you are ready
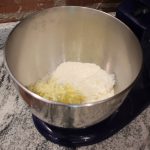
Add flour, salt, lard or crisco, and butter to food processor or mixer and begin to mix with paddle attachment slowly
Then slowly add in 1 tbsp at a time while mixing, you may need to add another tbsp of water to have dough come together
When dough comes together in 1-2 minutes turn dough onto wax paper forming into a disc shape and place into the freezer for 15 minutes
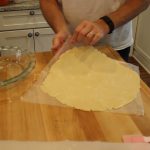
Begin to roll out dough between wax paper until its large enough to fit pie plate
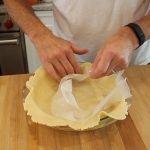
Gently peel over top layer of wax paper flipping over into pie dish
Gently push edges in all around and remove the other piece of wax paper
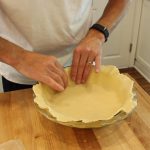
Scallop the edges of pie crust
Prick inside walls and bottom of crust with a fork
Place into a 400º oven and bake 10-15 minutes until slightly golden around the edges
Let pie crust cool and begin to make the chocolate filling
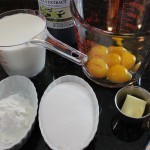
Ingredients for Chocolate Filling:
2 boxes COOK and SERVE Jello brand “chocoate fudge” or “chocolate” pudding – NOT INSTANT
NOTE: I can only find “chocolate” so I mix “bittersweet chocolate chips & semi sweet chocolate chips heaping 1/4 cup of each and this tastes exactly like “chocolate fudge” brand of Jello 🙂
4 egg yolks
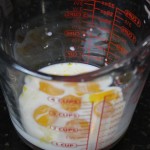
3 1/2 cups WHOLE milk
1/2 heaping cup semi-sweet chocolate chips
2 tbsp sugar
2 tbsp butter
1 tsp pure extract vanilla
1 pre-baked pie crust cooled
Directions for Chocolate Filling:
Separate 4 egg yolks from whites and place into separate bowls (yolks for filling and whites for meringue)
Add 2 boxes of chocolate fudge pudding mix to medium size sauce pan
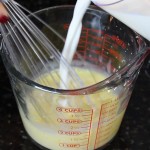
Add in chocolate chips, 4 egg yolks, sugar, 3 1/2 cups of milk over medium heat
Continue to whisk while bringing ingredients to a boil, it will thicken quickly
When it thickens take off of heat
Whisk in 3 tbsp of butter and 1 tsp vanilla
Pour into the cooled pre-baked pie crust and let cool just a bit to a warm TEMP but NOT COLD– DO NOT put into the fridge because you DON’T want to put whipped meringue on a COLD pie, it will cause meringue to weep 🙂
Ingredients for Meringue:
4 egg whites
8 tbsp sugar – 2 tbsp per egg white
1/8 tsp cream of tartar
Directions for Meringue – Pre-Heat Oven to 375º :
Whisk egg whites until soft peak begin to form then start to add sugar 1 tbsp at a time
Keep whisking unitl you get soft – stiff peaks – in between peaks – NOT STIFF
Pour onto WARM chocolate pie filling
Begin to smooth meringue over to touch edges of the pie crust making sure meringue seals all along the edge of the pie crust
Once the meringue completely covers the chocolate filling begin to dip spatula in and out of meringue creating curly cue peaks
Place chocolate meringue pie into 375º oven until peaks are golden approx 10-15 minutes – if the meringue is undercooked the it will weep
Take out and let meringue cool, slice and mangia mangia!
MERINGUE TIP: Do not put whipped meringue on a COLD pie, a warm filling is better than COLD. Be sure to cook meringue through because undercooked meringue will weep 🙂
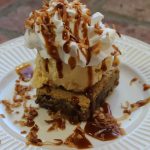
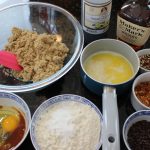
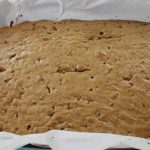
Drunk blondies are a dessert that will have you and your guest’s reminiscing for days! These drunk blondies are a buttery, chewy cookie bar made with bourbon, butter, toasted coconut, pecans and semi-sweet chocolate chips…could it get any better then that! They get even more decadent when you serve them with vanilla ice cream, homemade bourbon caramel sauce, whipped cream and extra toasted coconut to top it off. In fact, I wouldn’t serve them any other way. You will feel like you are in dessert ecstasy!
The recipe for these mouth watering cookie bars actually originates from the Back in the Day Bakery CookBook by Cheryl and Griffith Day. I Found this recipe on a fellow food blogger, Adam Robert’s website, called Amateur Gourmet. I haven’t had a chance myself to buy this cookbook but it’s high on my list! Adam serves up these drunk blondies with a bourbon caramel sauce from Food and Wine but I have my own which I love that I share below.
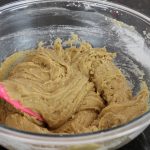
The Drunk Blondie bars couldn’t get any easier to make. You don’t even need a kitchen aid or electric mixer to make these just a large bowl and spatula or wooden spoon! It literally take’s all of a few minutes to combine the brown sugar, eggs, vanilla, bourbon, toasted coconut, pecans, chocolate chips and flour mixture. Then off into a baking dish lined with parchment for easy removal.
This is a great dessert if you entertain a lot because is it’s a total make ahead project. You can make the drunk blondies up to 3 days ahead and the bourbon caramel sauce up to a week ahead. The toasted coconut you want to make the same day or night before. You may burn the toasted coconut on your first try because that cooks faster then you think and you only have 6 minutes of toasting time. Don’t worry, just toss out the first round and throw in a second batch. You will be that much more knowledgeable and ready for the toasty quickness in the next round! Be sure to toast up extra coconut too, because it makes for an incredible addition at the end to sprinkle on top of your drunk blondie sundae’s!
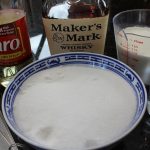
As for my bourbon caramel sauce I have you heat up the heavy cream. This is a necessary step that some recipes don’t even mention. It’s important to do this because adding cold cream into a boiling sugar mixture will most likely seize up and get temporarily lumpy. There’s no worries here though. If this does happen just put the pan back on the stove, keep whisking and it will become a smooth caramel sauce in a matter of seconds!
Hope you enjoy the amazing drunk blondie sundae’s with ice cream, bourbon caramel sauce and toasted coconut. If you are putting together a whole meal you could start with an appetizer like crab cakes, spanakopita triangles, my famous Caesar salad, salmon BLT sliders, or move right to a main course like mybolognese sauce right from Urbino, Italy made with homemade spaghetti!
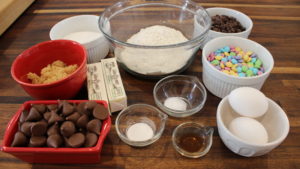
Ingredients for Drunk Blondies – Makes 12 – 24 bars
2 cups all purpose flour
1 teaspoon baking powder
1/4 teaspoon fine sea salt
2 sticks unsalted butter – melted
2 cups packed light brown sugar
2 large eggs room temp
2 teaspoons pure vanilla extract
3 tablespoons Bourbon
1/4 cup chopped pecans
1 cup (1/2 cup is for sprinkling over the dessert at the end) sweetened flaked coconut, toasted in a 350º oven on a cookie sheet until fragrant and golden brown – about 5 minutes…NOTE: you need to stir every 2 minutes with a spatula and then shake the tray to distribute evenly ….watch it carefully- it burns easily
1/4 cup mini semisweet chocolate chips
Directions – Pre-Heat Oven to 350º:
Position a rack in the middle of the oven and preheat the oven to 350 degrees F
Grease a 9-by-13-by-2-inch baking pan and line with parchment, allowing the ends of the paper to hang over two opposite edges of the pan
In a medium bowl, whisk together the flour, baking powder, and salt; set aside
Put the butter and brown sugar in a large mixing bowl and stir with a spoon until smooth
Add the eggs, vanilla, and bourbon, and mix until thoroughly combined
Stir in the flour mixture, followed by the pecans, coconut, and chocolate chips
Pour the batter into the prepared pan and smooth the top with an offset spatula. Bake for 20-25 minutes, until the top is golden brown
Remove the pan from the oven and let cool completely on a wire rack
Cut the blondies into bars
The blondies will keep in an airtight container at room temperature for up to 3 days.
Tip: The easiest way to toast coconut is in the oven. Position a rack in the lower third of the oven and preheat the oven to 350º. Spread the coconut on a baking tray and bake for 6 minutes, tossing every couple of minutes. Keep a close eye on the coconut, because it can burn easily.
Ingredients for Bourbon Caramel Sauce:
1 3/4 cups sugar
1/2 cup water
1 tablespoon light corn syrup
2 tbsp butter
1/3 cup bourbon
1 1/2 cups heavy cream HEATED – If you don’t warm up the cream the temperature change will temporarily seize up the boiling water-sugar mixture…BUT don’t fret because all you need to do if this happens is put the pan back on the stove while whisking CONTINUOUSLY and it will all come back to a nice smooth sauce!
Directions for Bourbon Caramel Sauce:
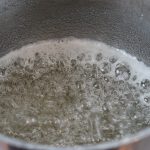
In a medium saucepan, bring the sugar, water and corn syrup to a boil over high heat
You can stir the sugar-water mixture at first just to combine then DO NOT STIR after
Cook until the sugar is dissolved washing down the sides of the pan with a wet pastry brush…just once
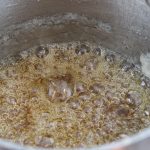
Continue cooking without stirring until an amber caramel forms – from 5-8 minutes
When it turns the pretty light amber color add in the butter and keep whisking
BE CAREFUL NOT TO GET BURNED HERE because the mixture will rise up a little here at the butter/cream stages
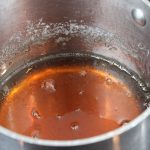
Remove from the heat and carefully stir in 1/2 the cream while STILL WHISKING – it will foam up here quite a bit so whisk it down slightly, then add in the rest of the cream and butter
if it seizes up NO WORRIES all you need to do if this happens is put the pan back on the stove while whisking CONTINUOUSLY and it will all come back to a nice smooth sauce!
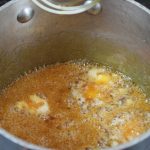
Let cool for 1 minute and then stir in the bourbon
Put the pan back on the stove and TURN DOWN the heat to medium and simmer any where from 3-15 minutes…how ever thick you like the sauce (it won’t get any darker at this point either just thicker)
Let the caramel sauce cool slightly and serve warm or at room temperature
NOTE: as the sauce cools it will thicken anyways
The caramel sauce can be refrigerated for up to 1 week.
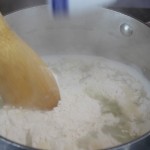
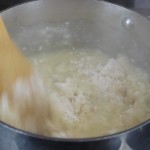
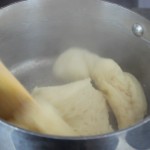
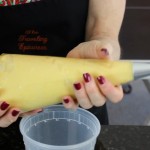
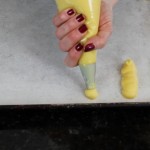
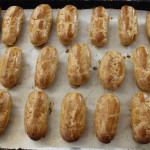
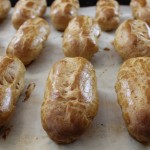
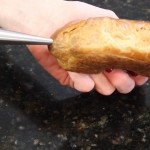
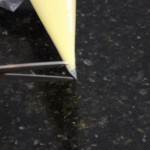
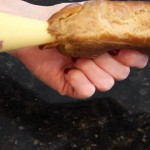
Making Chocolate eclairs with The French Club this week made for an incredibly fun afternoon! The Chocolate eclair shells made from pâte à choux, a french pastry dough, is a cinch to make and so delicious you may find your self wanting to make them this weekend.
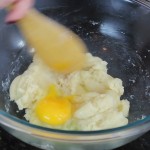
The method I use to make the pastry cream is simplistic and straight forward. This method for making the pastry cream I got from one of Martha Stewart’s chefs, Thomas Joseph. I wanted to show you an easier way to prepare the custard then your traditional tempering of the eggs method, especially if you have never tried to make this before. The actual recipe for the pastry cream is from my own collection and playing around with recipes over the years.
As for the pâte à choux dough, what can I say, but wow! Although, this is a French dough with French ties it is also noted that Catherine de Medici left Florence in 1533 to marry the Duke of Orleans who later became Henry II, King of France. She brought with her the entire court which included her chefs! Smart woman is all I can say. A few years later her head chef, Panterelli, invented a hot paste-like dough and called it pâte à Panterelli. Of course, the recipe has evolved some what since then and with a couple of names changes too but with the same idea. It’s a dough with a paste like texture that use’s heat and moisture-steam for a raising agent instead of the baking powders that we use so much today.
These chocolate eclair’s are easy to follow and so worth the effort. You should really give it the ole college try because your family and friends will be thanking you! In between making the pastry cream and the pâte à choux you may want to prepare some other great dishes like lobster mac & cheese, pulled beef taco’s and mango salsaor some homemade pastaandTurkey meatballsthat are simpler then you think! And for a nice salad you could check out my Caesar salad with homemade croutons …that’s always a crowd pleaser!
Ingredients for the Pâte à Choux: :
1 stick of unsalted butter
1 cup water
1 cup flour – all purpose
1 tsp sugar (only for desserts) (not for gougeres)
1/2 tsp salt
4 lg eggs
1 egg + 1 1/2 tsp water whisked together – for egg wash
Directions for the Pâte à Choux:
Preheat the oven to 400º degrees
Line a cookie tray with a piece of parchment paper – when you are done making the pate a choux squeeze out 4 dime size pieces of dough on each corner of the cookie tray, then place parchment over that – to hold in paper in place while you form eclairs
Bring the water, butter, salt and sugar to a rolling boil over medium-high heat in a medium size sauce pan
Stir in all of the flour and continue to stir vigorously with a wooden spoon for about 1 1/2 minutes – which will start to make a film on the bottom of the pan
Turn out flour-egg mixture into a large glass bowl and stir to cool for 1 minute
Crack eggs into a bowl to make sure there are no shells
Begin to add one egg at a time into the dough and keep mixing with a wooden spoon
The mixture will look broken up at first but no worries because it comes back together
After each egg is absorbed into the flour mixture ADD another egg and repeat stirring
Spoon the Pate a Choux dough into a pastry bag … I don’t even use a tip here
Cut about 3/4″ off the end of the pastry bag
Twist down the open end of the bag a little to keep dough enclosed and to put pressure on the cut off end
Squeeze out 3-4″ x 3/4″ rows of Pate a Choux dough to form eclairs making sure they are about 2″ apart
Brush with egg wash and smooth with your finger if needed to smooth any bumps
Put into 400º oven for 15 minutes
Turn down to 350º for another 25 minutes
Turn oven off and open door 5″ but leave eclairs in the oven to dry out another 10 minutes
Ingredients for the Pastry Filling:
2/3 cup granulated sugar
1/4 cup cornstarch
Pinch of salt
2 cups half and half room temperature
6 lg eggs yolks room temperature
2 tablespoons unsalted butter
1 teaspoons pure vanilla extract
Directions for the Vanilla Custard Filling:
In a medium sauce pan add sugar and corn starch and whisk to combine
In a medium bowl whisk milk and egg yolks until combined
Whisk in milk and egg mixture into sugar and corn
Turn heat to medium and bring to a bubbling simmer, so the mixture can begin to THICKEN
As soon as it begins to thicken whisk 5 SECONDS more and TAKE OFF HEAT continually whisking, after 5 seconds put BACK ON heat for 5 SECONDS and IMMEDIATELY take off heat
DO NOT BOIL ON HEAT FOR MORE THAN 10 SECONDS after this point or the texture will become grainy
Add in butter and vanilla while still whisking
Strain the custard into a glass bowl
Stir to cool slightly and cover directly onto custard saran wrap OR Pour into a prepared tart shell, then into the frig and when cooled and thickened top with fresh sliced fruit and voilà another dessert! …just saying 🙂
Place into the frig for atleast 2 hours up to 3 days
Take the thick pastry cream out of frig and whisk til smooth -5 seconds and the texture will become smooth and ready to place in the pastry bag to pipe
Ingredients for the Chocolate Dipped Toppping:
4 oz. semisweet chocolate chips
1/2 cup heavy cream
1 cup confectioners sugar to desired thickness
Directions:
Heat the cream to a small sauce pan and bring to a boil
Pour the hot cream over the chocolate chips and vanilla in a medium size bowl and let it melt the chocolate for 2 minutes
Whisk the cream and chocolate until smooth
With a whisk slowly add in confectioners sugar while whisking until smooth
If the chocolate gets cooled and too thick to dip heat for a minute over double boiler
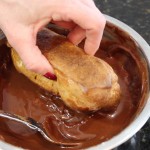
Dip the tops of the eclairs in the warm chocolate glaze
Set on a cookie tray
Place into the frig uncovered for at least 1 hour to set the glaze
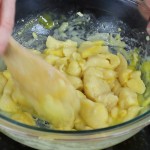
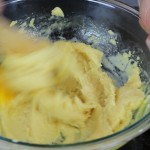
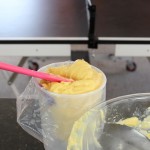
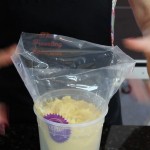
MasterChef open casting calls and chewy chocolate chip cookies are the highlights of my blogging today. With exhausting life events that have taken place over the last three weeks I was some how able to produce my chewy chocolate chip cookie show for you and show up to my second pre-registered casting call for MasterChef.
Three weeks ago we received horrific news that my brother-in-law, George, passed away at the age of 57 from a heart attack. It was both devastating and unexpected. He was taken from us much too young and will be deeply missed by many. George lead an incredible life having the opportunities to accomplish many wonderful things that so many people wouldn’t have even had the chance to experience.
Bella and Reilly visiting with Brody
While dealing with the loss of Uncle George our King Charles, Brody, was hit by a car on Wednesday. I had just finished shooting my chewy chocolate chip cookie show when we got news of the accident. My kids and I were running between two vets for six hours for the later part of the day.
Brody didn’t have any broken bones, but a deep open gash on his upper right leg and bruising across his chest causing a profuse amount of swelling. They don’t stitch wounds like this so he got four staples and spent the next few nights at the vets for care and observation. Brody was heavily sedated on Thursday so I began to edit my chewy chocolate chip cookie show and was then able publish it to my YouTube Channel.
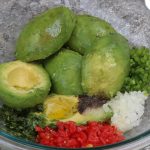
A second task now out of the way. My first task, was accomplished earlier in the week on Tuesday making a test run of my “Cold Cucumber-Fennel Soup” for the MasterChef three minute plating part of the casting call. I wanted to make sure the flavors were exactly how I wanted them with the new addition of the fennel to the soup. I was then off to pick up the King Crab legs from Altlantic Seafood in Old Saybrook. This crab will be set up on top of the cucumber-fennel soup in the center with a eatable garnish of fresh dill. The cold soup will also have a drizzle of Sicilian extra virgin olive oil, and fine dice, a brunoise, of avocado, tomato and cucumber scantly decorating the top of the soup around the king crab.
Friday morning was upon us and I was now making the a final batch of my Cold Cucumber-Fennel Soup for the MasterChef open call. Just as I was finishing, Brody’s vet called and wanted me to come for a visit with Brody. I put the soup into the refrigerator and headed right out. I felt that the hour I spent there with him helped so much I brought Reilly and Bella back at six o’clock that night right after picking up the rental car for New York City. I decided on driving this time to MasterChef because the five plus hours of train rides the last time was too draining.
The Veterinary hospital was forty-five minutes away so the kids and I were home by 8:45 Friday night after the visit with Brody. I then finished organizing the ice, the cooler, and chopped up the eatable garnish for the soup. Then I worked on finishing the eight page application to the MasterChef open casting call. Finally, I went to sleep at midnight and that 4:30 am alarm came way too fast.
MasterChef on Camera Shooting in Times Square
On Saturday morning, the MasterChef crew wanted contestants there at 8:00 for morning filming, so that’s what I did. They filmed us in groups in Times Square chanting “MasterChef”. They then did individual on-camera pieces with every single contestant stating what we did for a living, where we were from and a finish on a “I’m your next MasterChef”, with much enthusiasm! Myself and a few others were then asked sign release forms.
After two hours at Times Square we all went back to the hotel to wait our turn to enter into the “plate-up” room. We met the tasting chefs and the first set of interviewers walking around with clip boards discussing your life and what kind of person you are. Well, I’m ecstatic to say the judges loved my Cold Cucumber-Fennel Soup! My number was announced first once again, as it was in the first open casting call that I attended back in October of 2015. Our group of 9 was on to the next interview part of the casting call and the remaining contestants from our group were dismissed.
At this point it was noon and my energy level was deteriorating fast even after having a coffee at 4:30 am, a mini can of coca cola at 8:00 am and a 1/2 of a coffee at 10:30. But once again, I am there ready to forge on. Worries of Brody are also going through my mind. The anticipation and excitement of picking him up after I leave NYC which also included dropping off Bella to her Tennis match, the rental car, picking up Reilly and then heading to Piper Veterinary to get our boy home!
Oh yes, we are back at the MasterChef interview room facing the last judge with his seductive English accent, a kind of 007 look to him, is now asking me to tell him about myself. What! Really? OK, everything I was hoping to express to him just went out the window and I’m thinking “just try and be your funny self Michel” and all will be okay, but that is not how it worked out. Although I was hopeful that I may still have a chance to get to thru this “personality” phase to my dismay I was not. I know more of me was expected in that last phase then I was capable of giving this time.
Well, I did make a kick ass dish once again and actually enjoyed this round of MasterChef open casting call much more then the first time. You can’t always plan your life events! Life happens as they say and you have to roll with the punches and enjoy every minute. Definite kudos go out to that MasterChef casting call team who were there working their tails off for a good twelve hours. There’s always another chance at the next casting call later this year when MasterChef comes back to NYC!
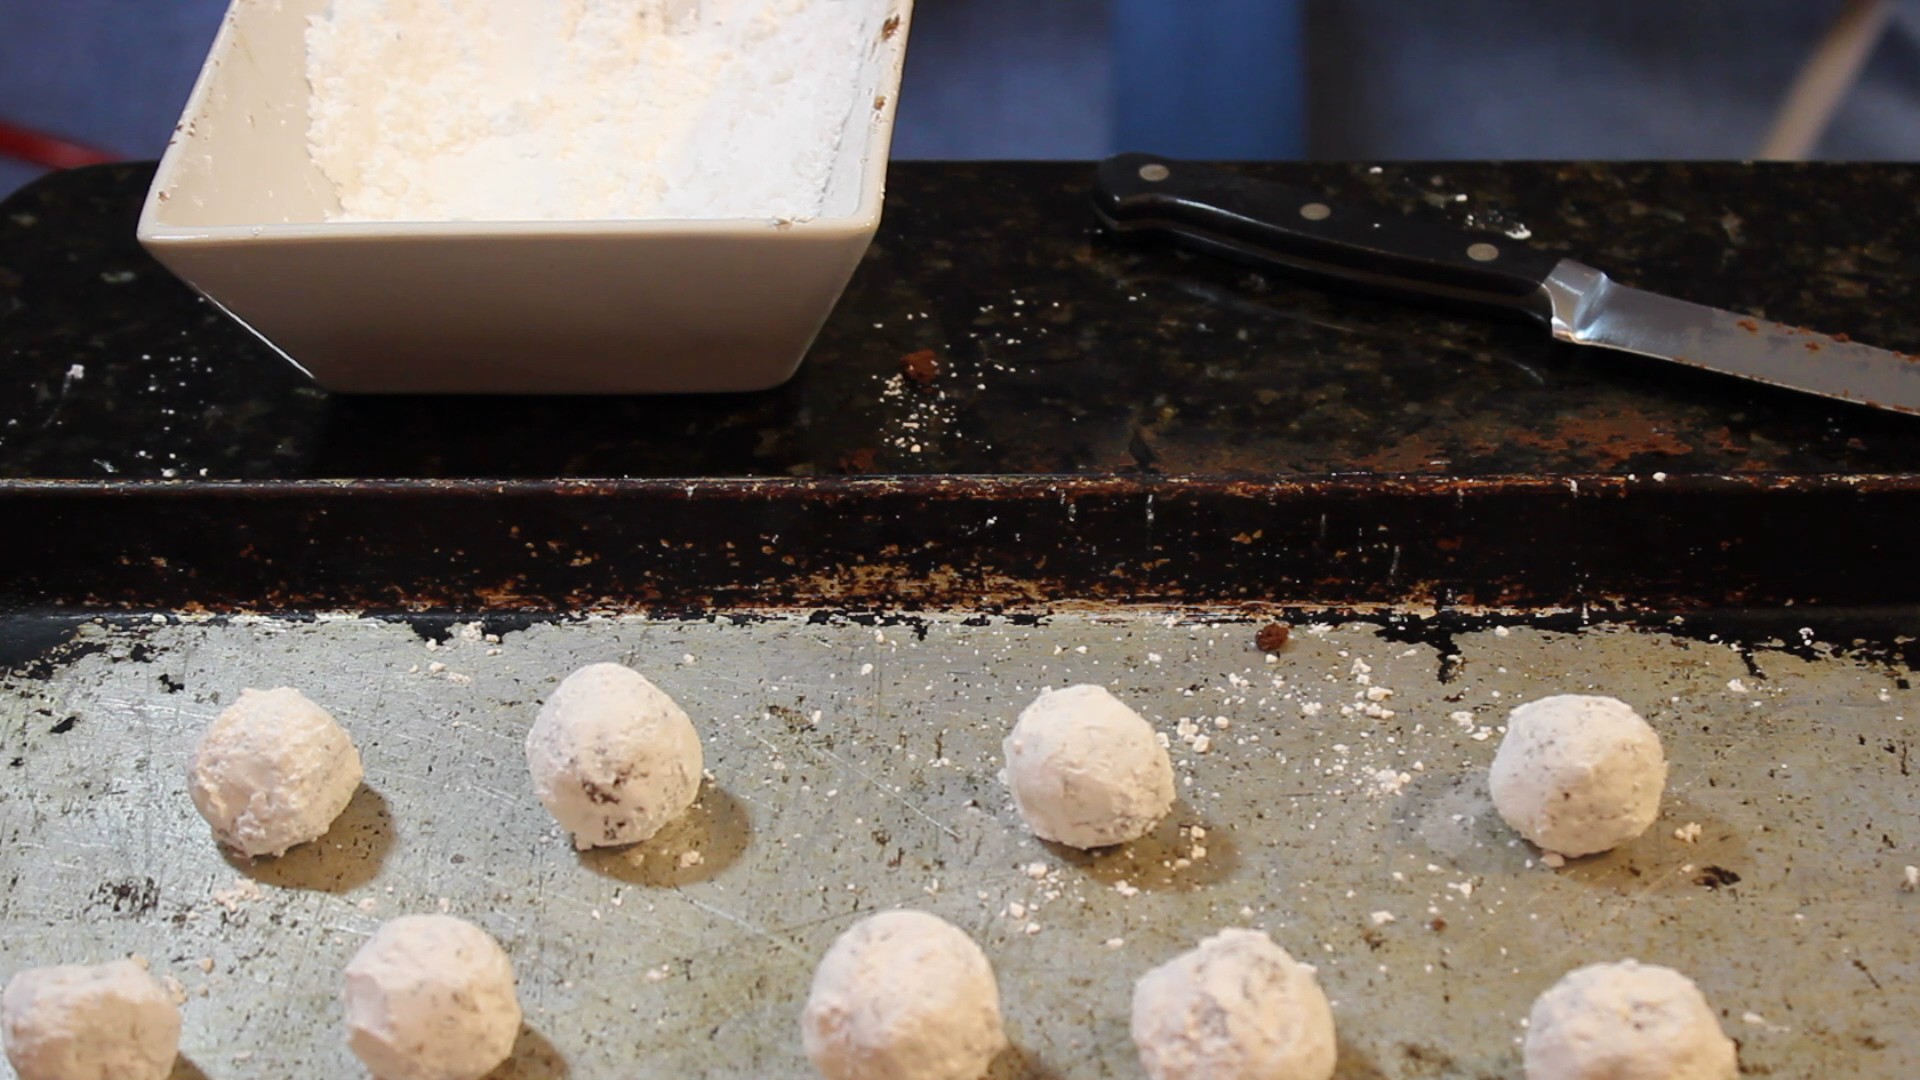
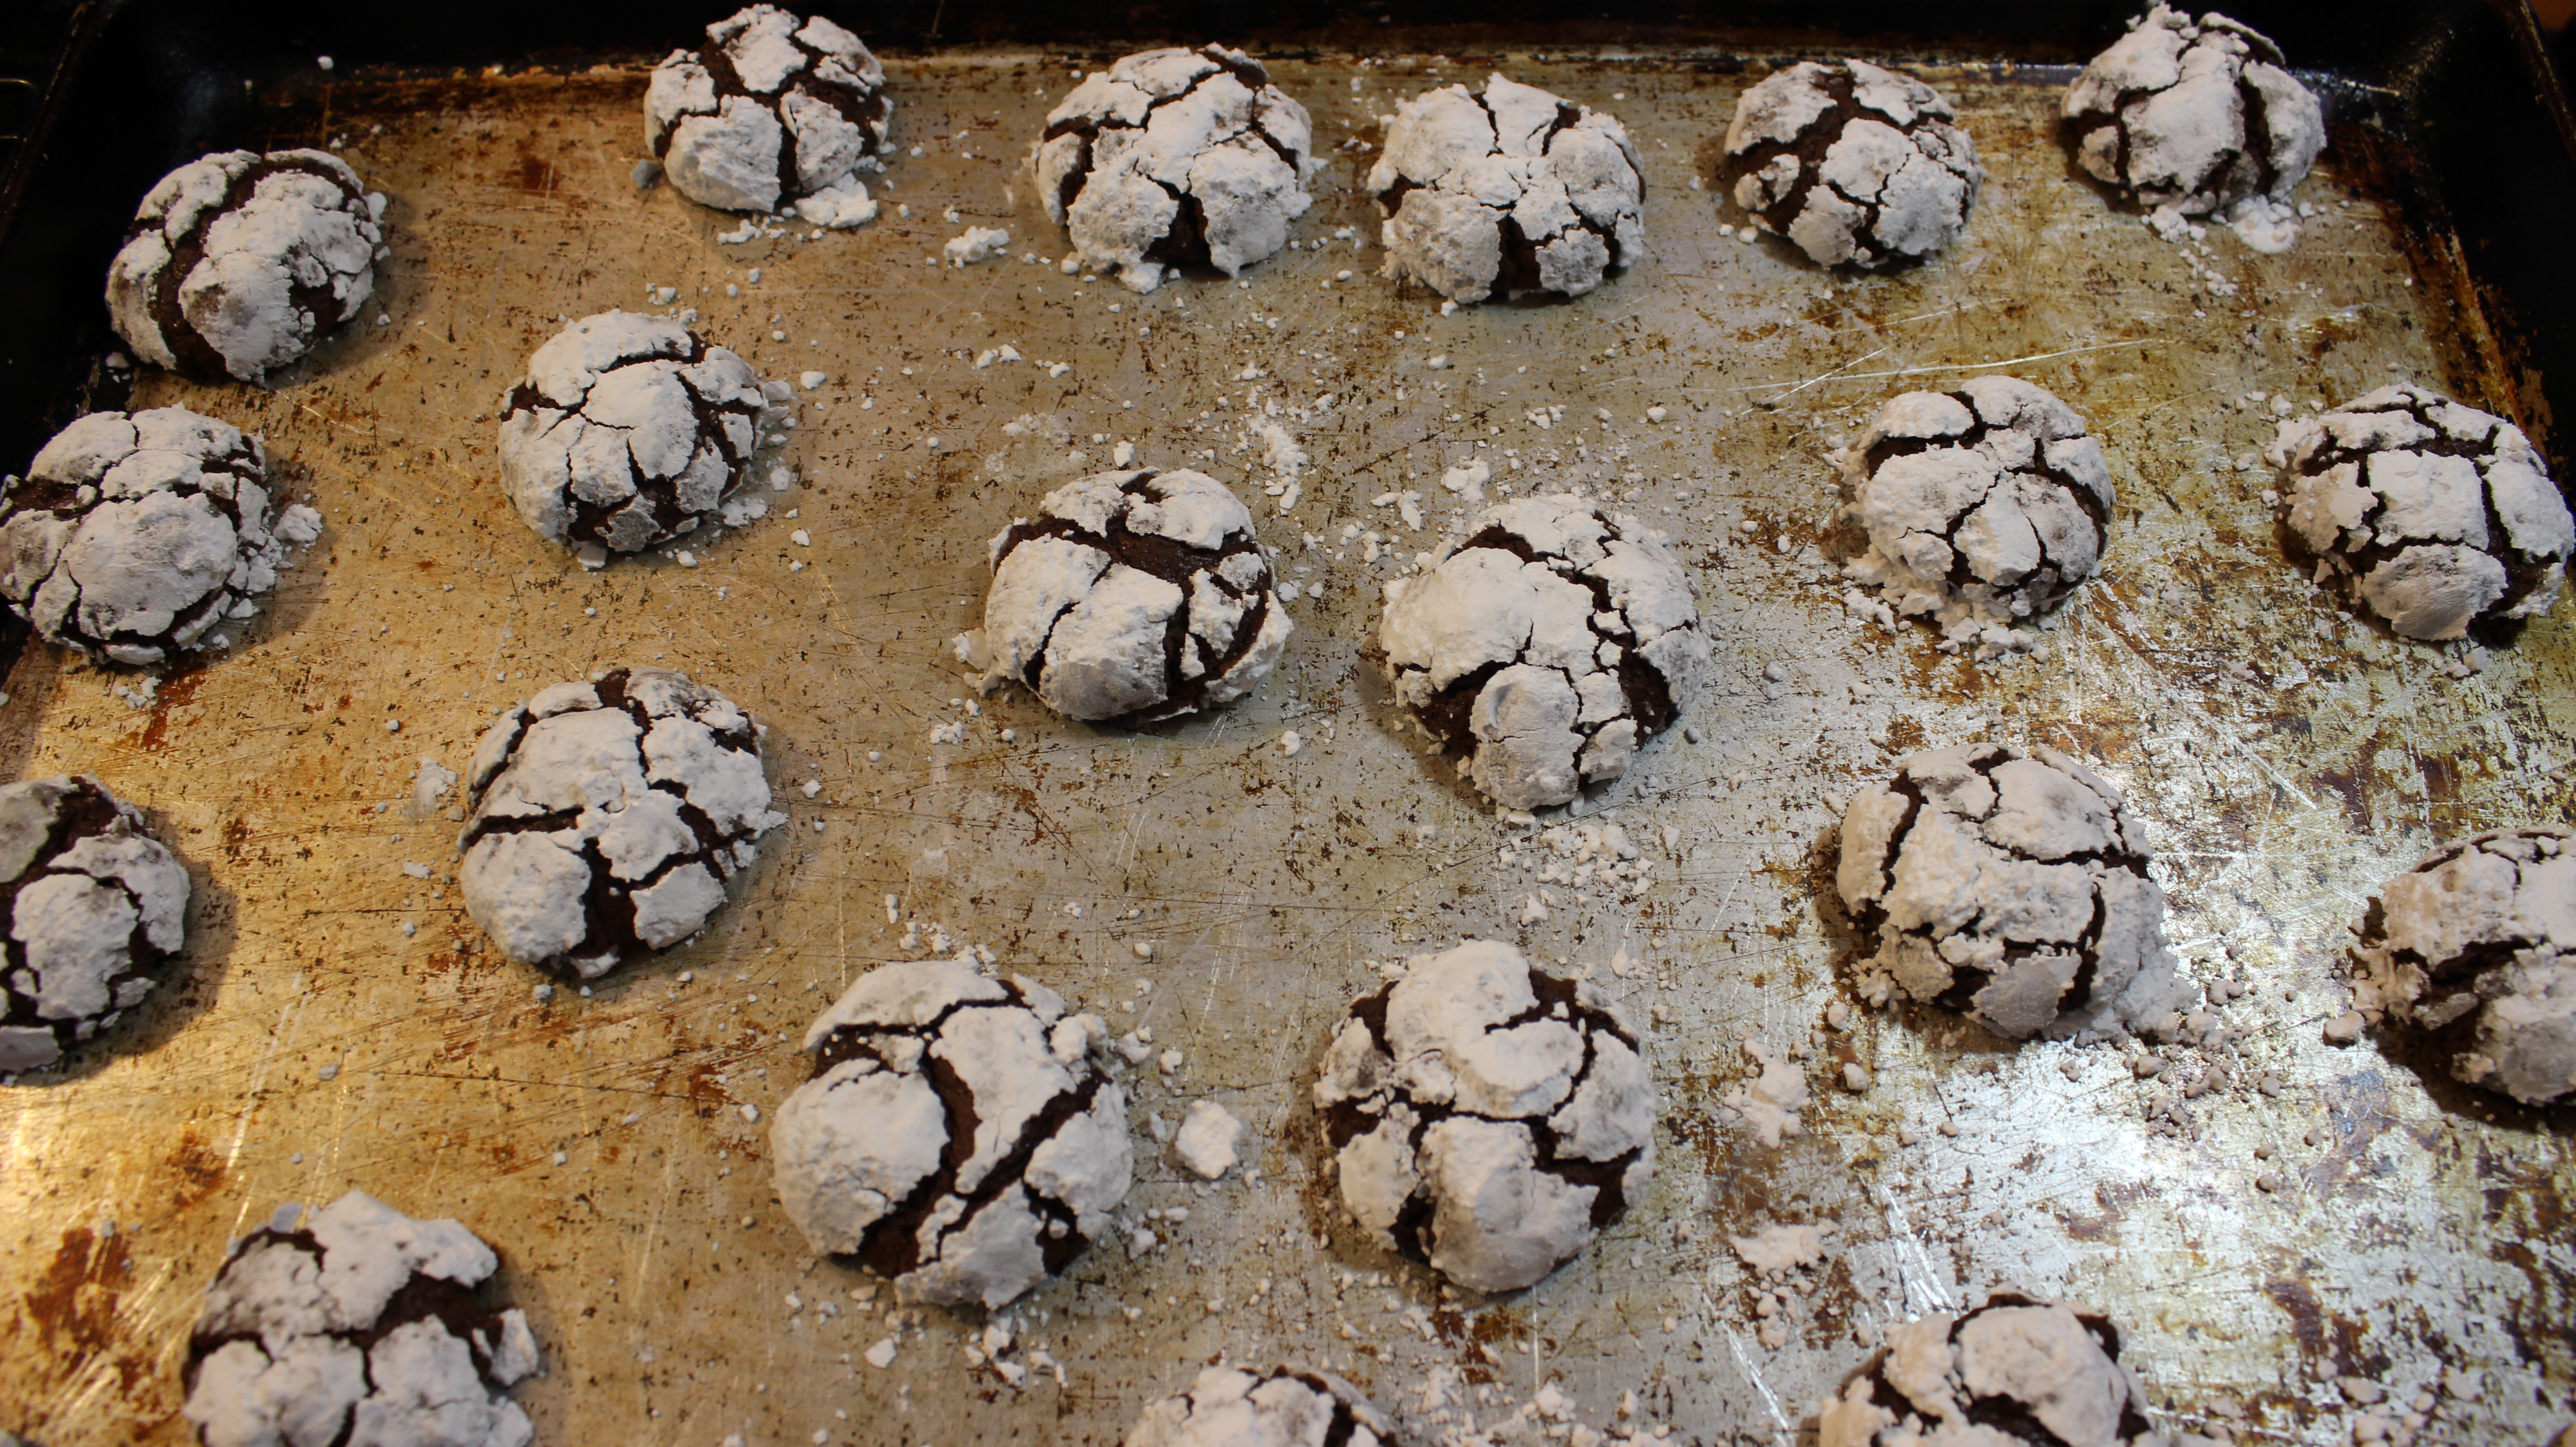
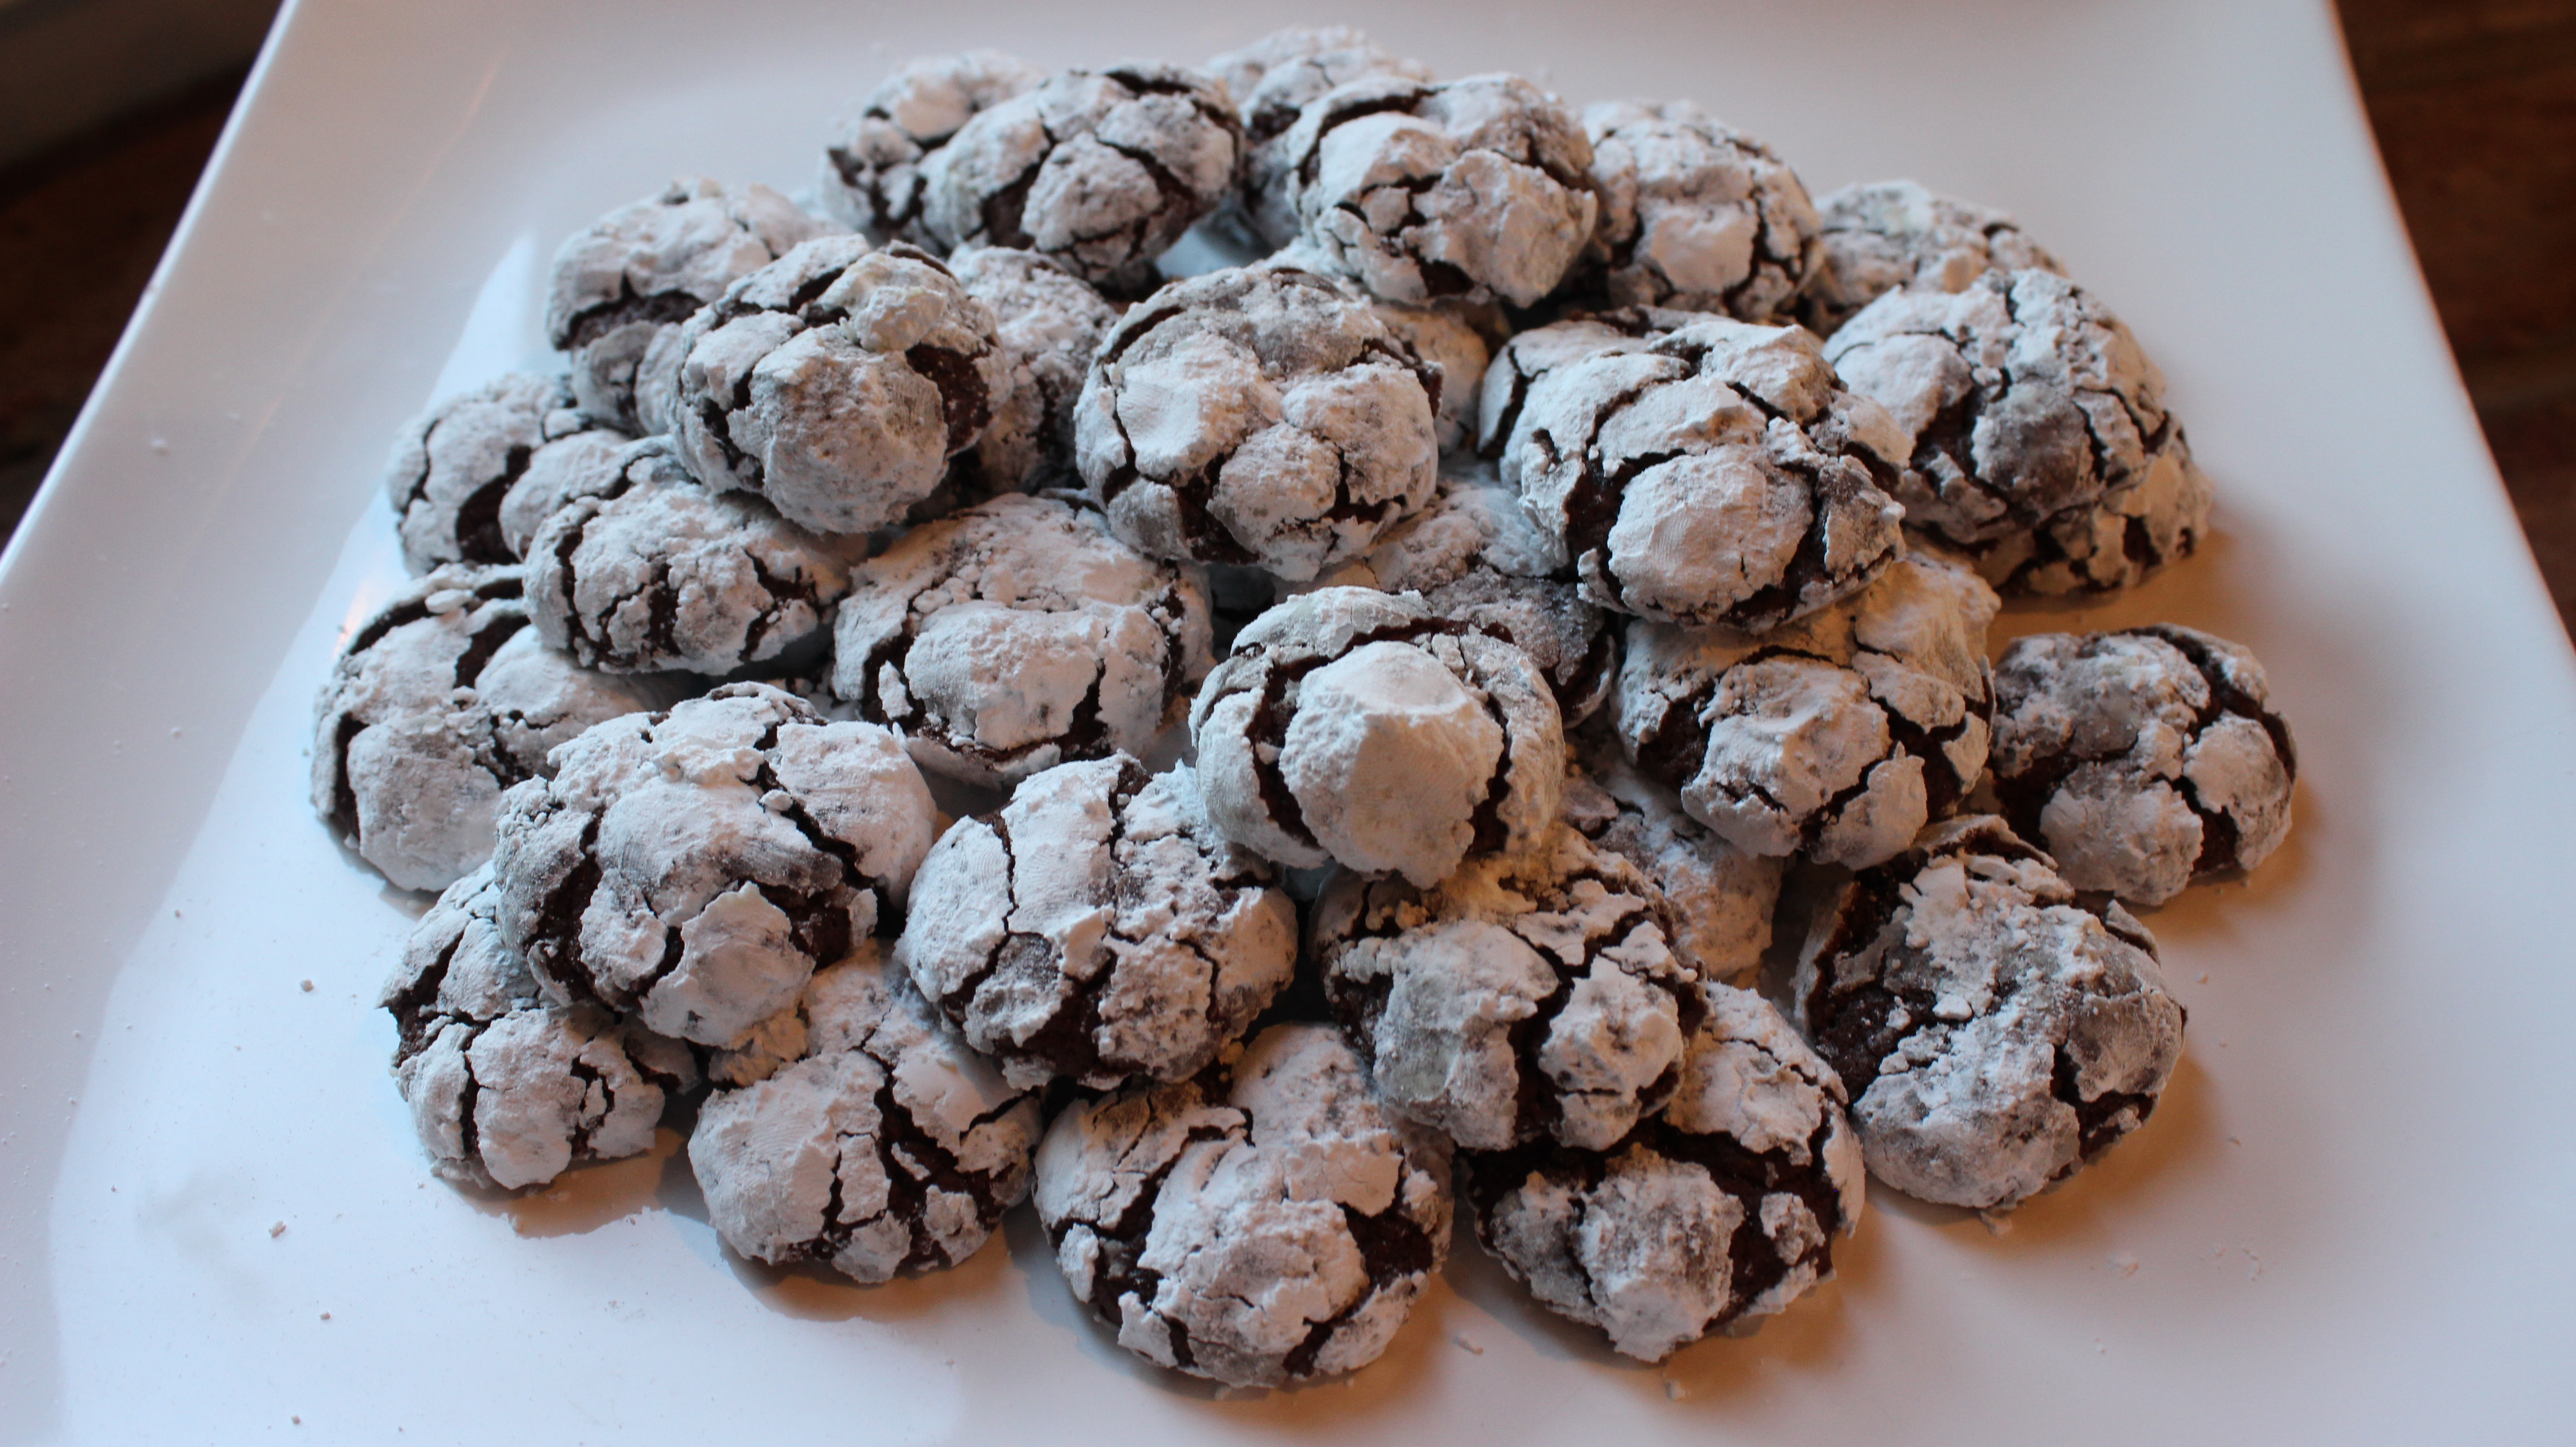
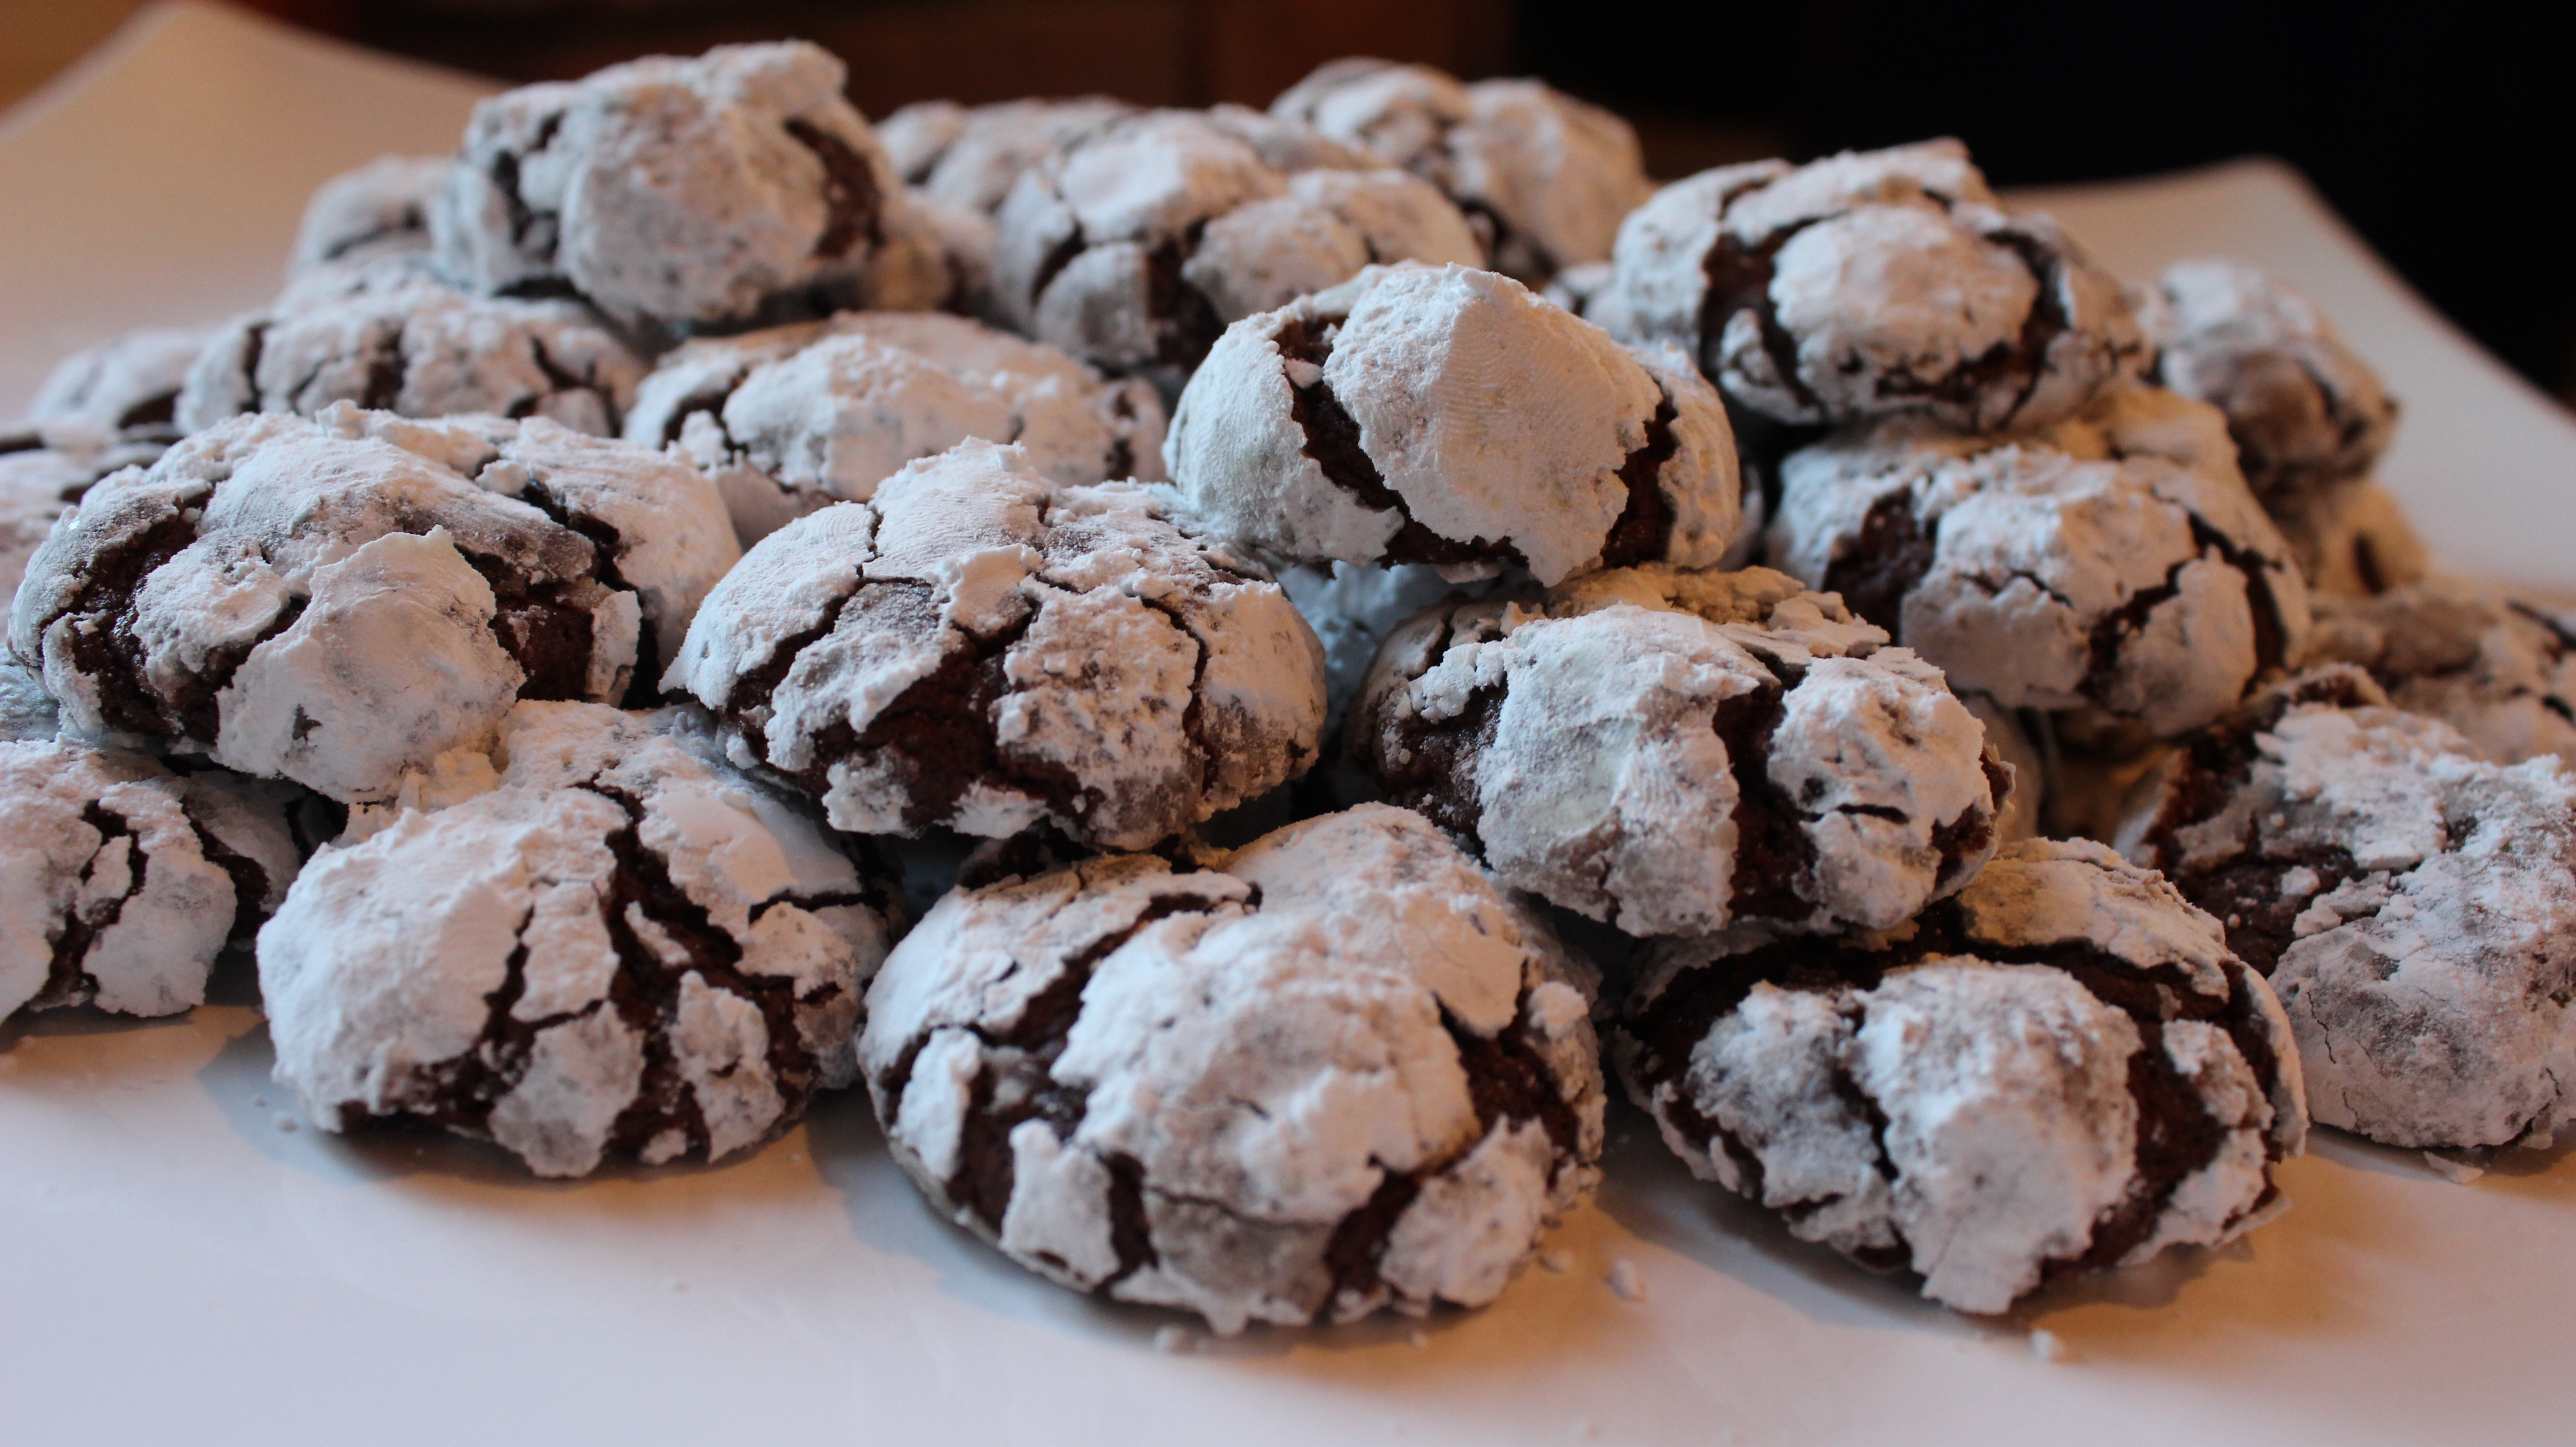
These homemade chocolate crackle cookies will make you feel like a baker of fine cookies. The snowy white confectioners sugar and the chocolaty brown cookie dough make a beautiful contrast when the cookies bake in the oven and make all those crackle lines. Now the inside is some what of a surprise when you first bite into it. By the looks you might think its a crunchy cookie. Then you sink your teeth in and that velvety texture hits your tongue, feeling lighter then you thought and then the chocolaty silkiness just melts away.
I have been baking these incredible chocolate crackle cookies for at least ten years and for the life of me I can’t remember where I got this recipe from. All my life I have always written down recipes that looked irresistible whenever I was in a waiting room with an assortment food or cooking magazines. So I unfortunately cannot give credit where credit is due. I did of course change the recipe a pinch with the baking time and chocolate used. It originally said 12-15 minutes but I only bake them for eight minutes with a five minute waiting period before I move them off the cookie sheet to a cooling rack this way they can solidify a bit more. Shortening the cooking time gives them softer, gooier center that melts in your mouth rather then a slightly firmer cookie. I use the confection on my oven because the bottom of my oven runs really hot on “bake” not being conducive for even cooking. The hot air circulates in confection mode in my oven giving a more consistent outcome. As for the chocolate, the recipe had called for Verona chocolate which might be difficult to find last minute so I have been using my Ghiradelli bittersweet or Perugina chocolate bars and those are both scrumptious!
This homemade gourmet chocolate crackle cookie just may become a holiday tradition for you and your family too. Easy to make, oh so chocolaty and melts in your mouth! What more could you ask for in a cookie? Hope you enjoy the show 🙂
Ingredients:
1 1/4 cup flour
1/2 cup cocoa powder
2 tsp baking powder
1/4 tsp salt
1 1/2 cups confectioners sugar
1 stick of butter softened to room temp
1 1/3 cup light brown sugar
1/3 cup milk
2 lg eggs
1 tsp pure vanilla extract
8 oz. bag of a bittersweet chocolate chips- Ghiradeli
Directions – Pre-heat oven to 350º to bake cookies :
Sift flour, cocoa, baking powder and salt and set aside
Place bitterswewet chips in a pan over double boiler and melt – you can use a microwave – heat 20 seconds and stir and 10 more seconds and stir but be very careful not to burn the chocolate in the microwave
Cream room temperature butter with light brown sugar in your Kitchen Aid mixer
Add in 2 eggs, one at a time and beat well after each addition
Add vanilla and melted chocolate and beat briefly til combined
Alternatively, begin to add dry sifted ingredients and 1/3 cup of milk all awhile mixing
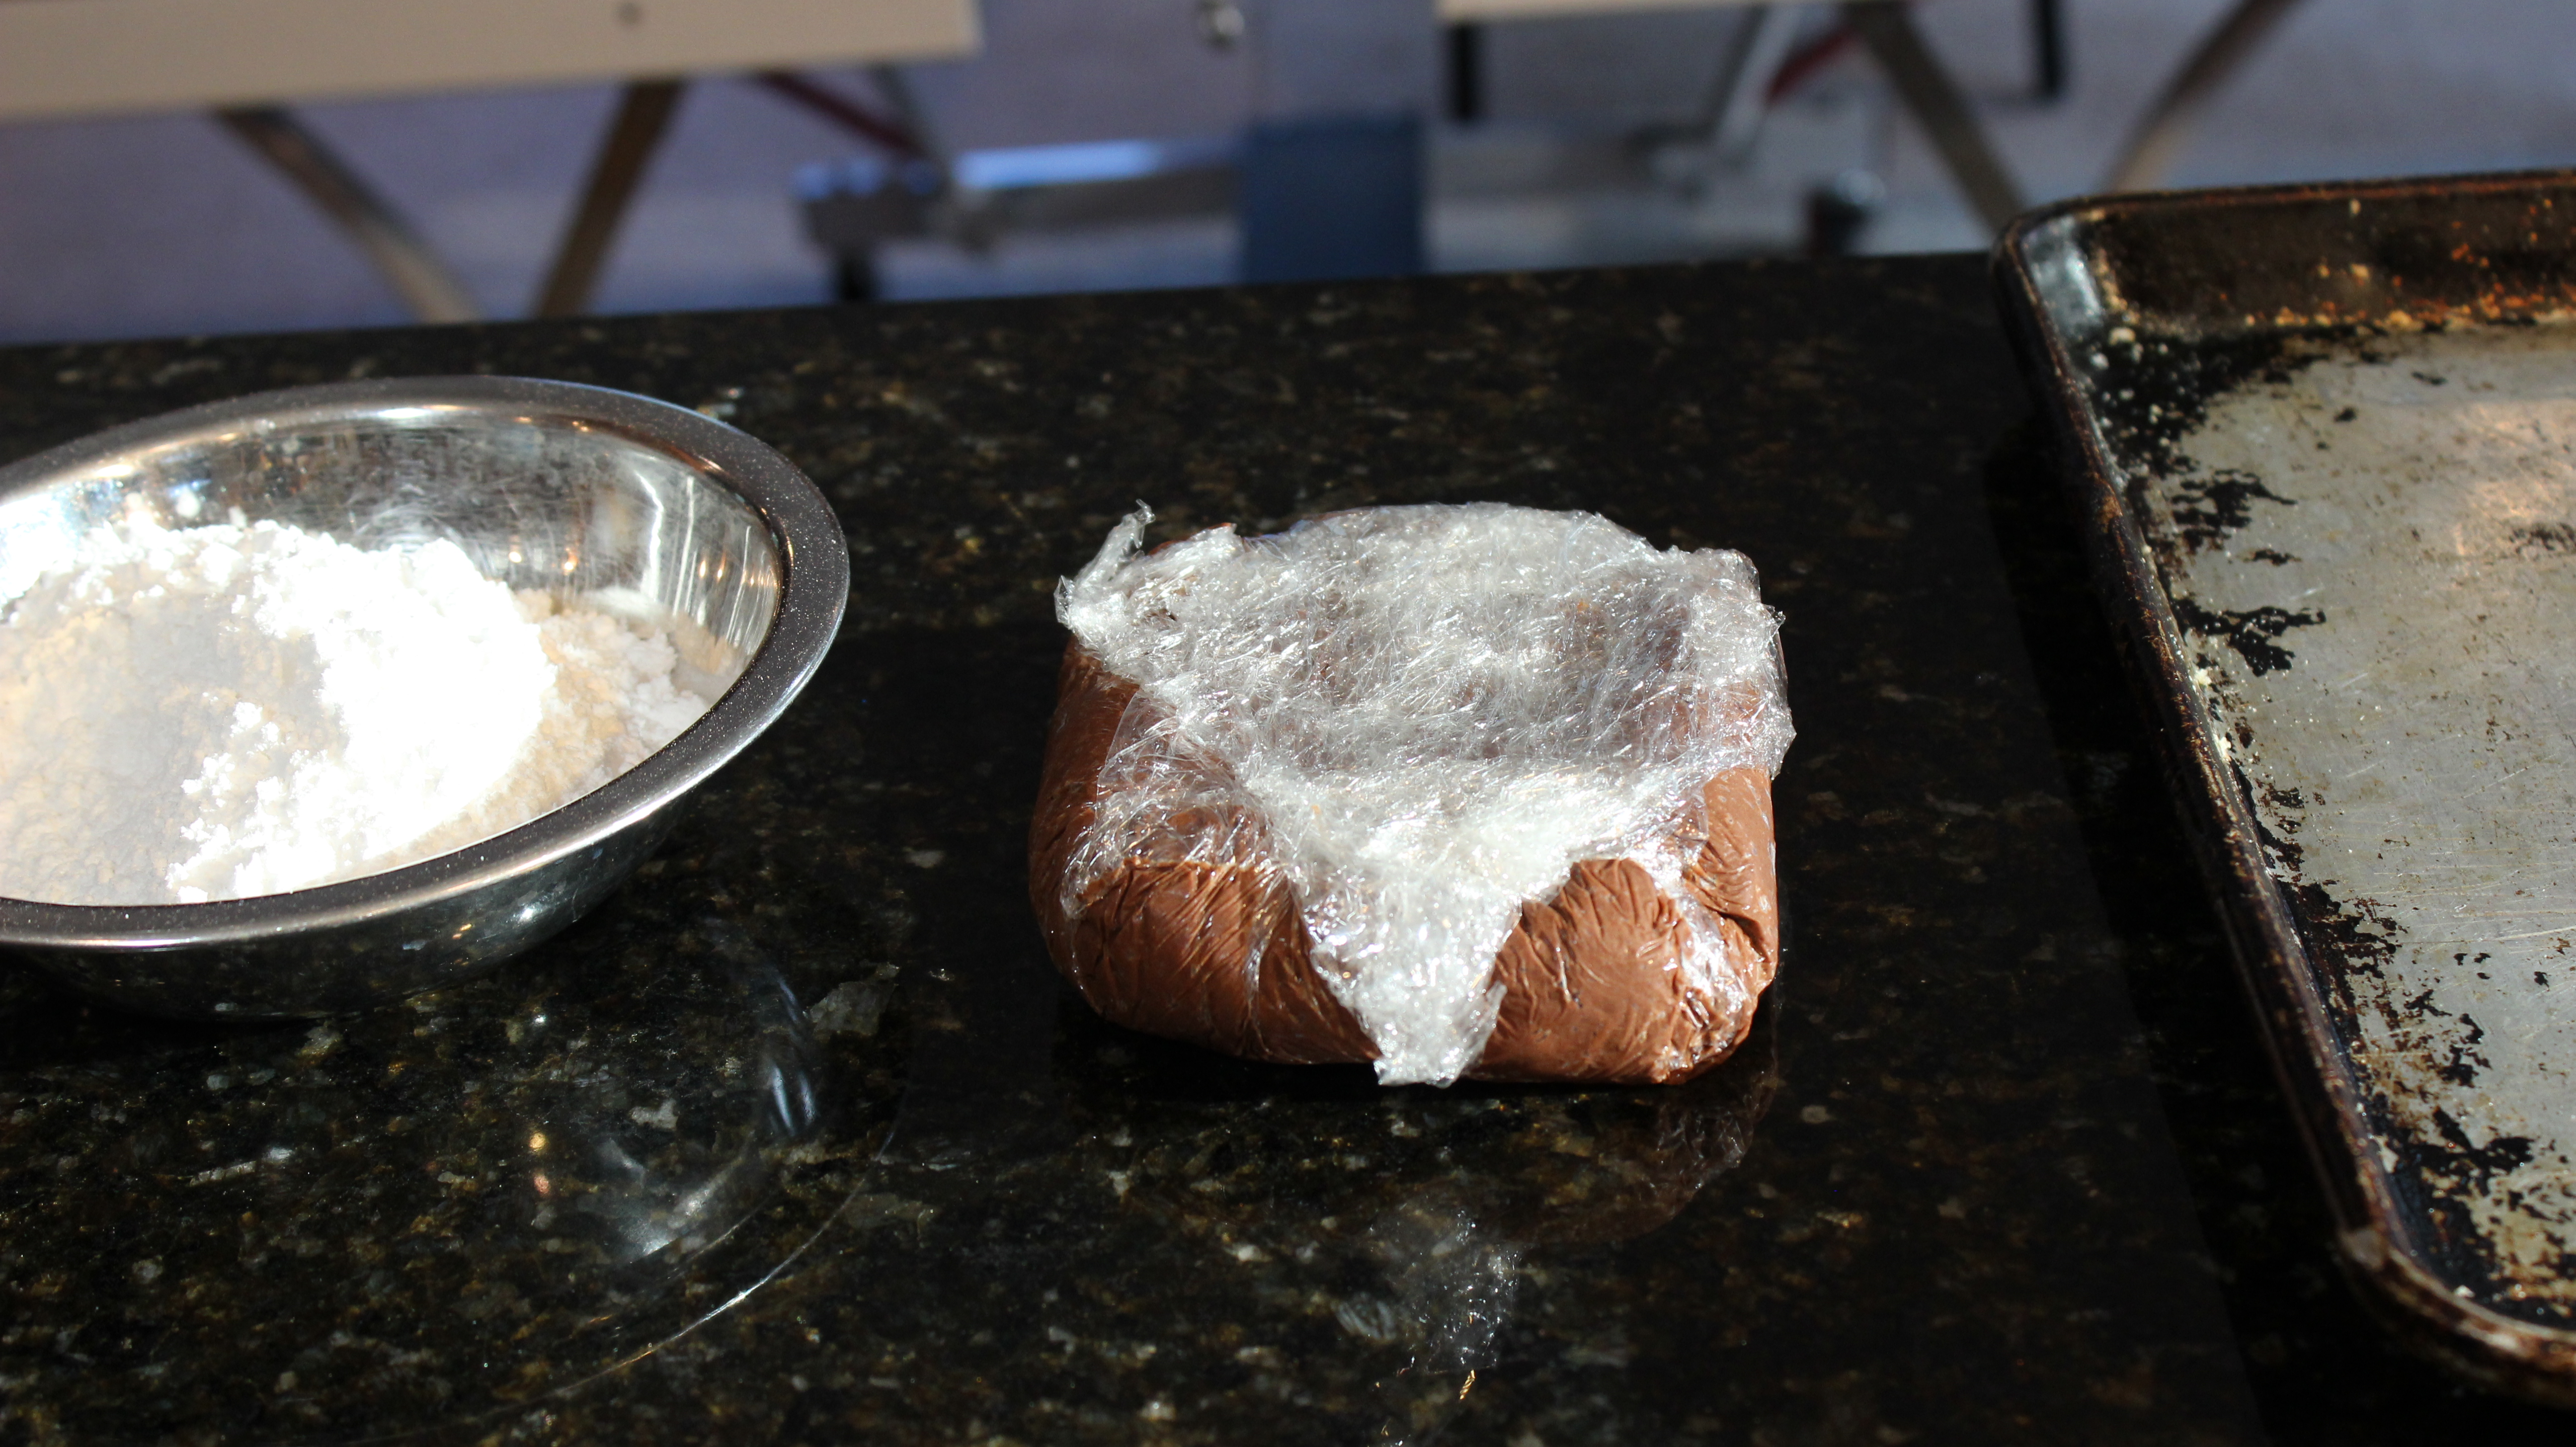
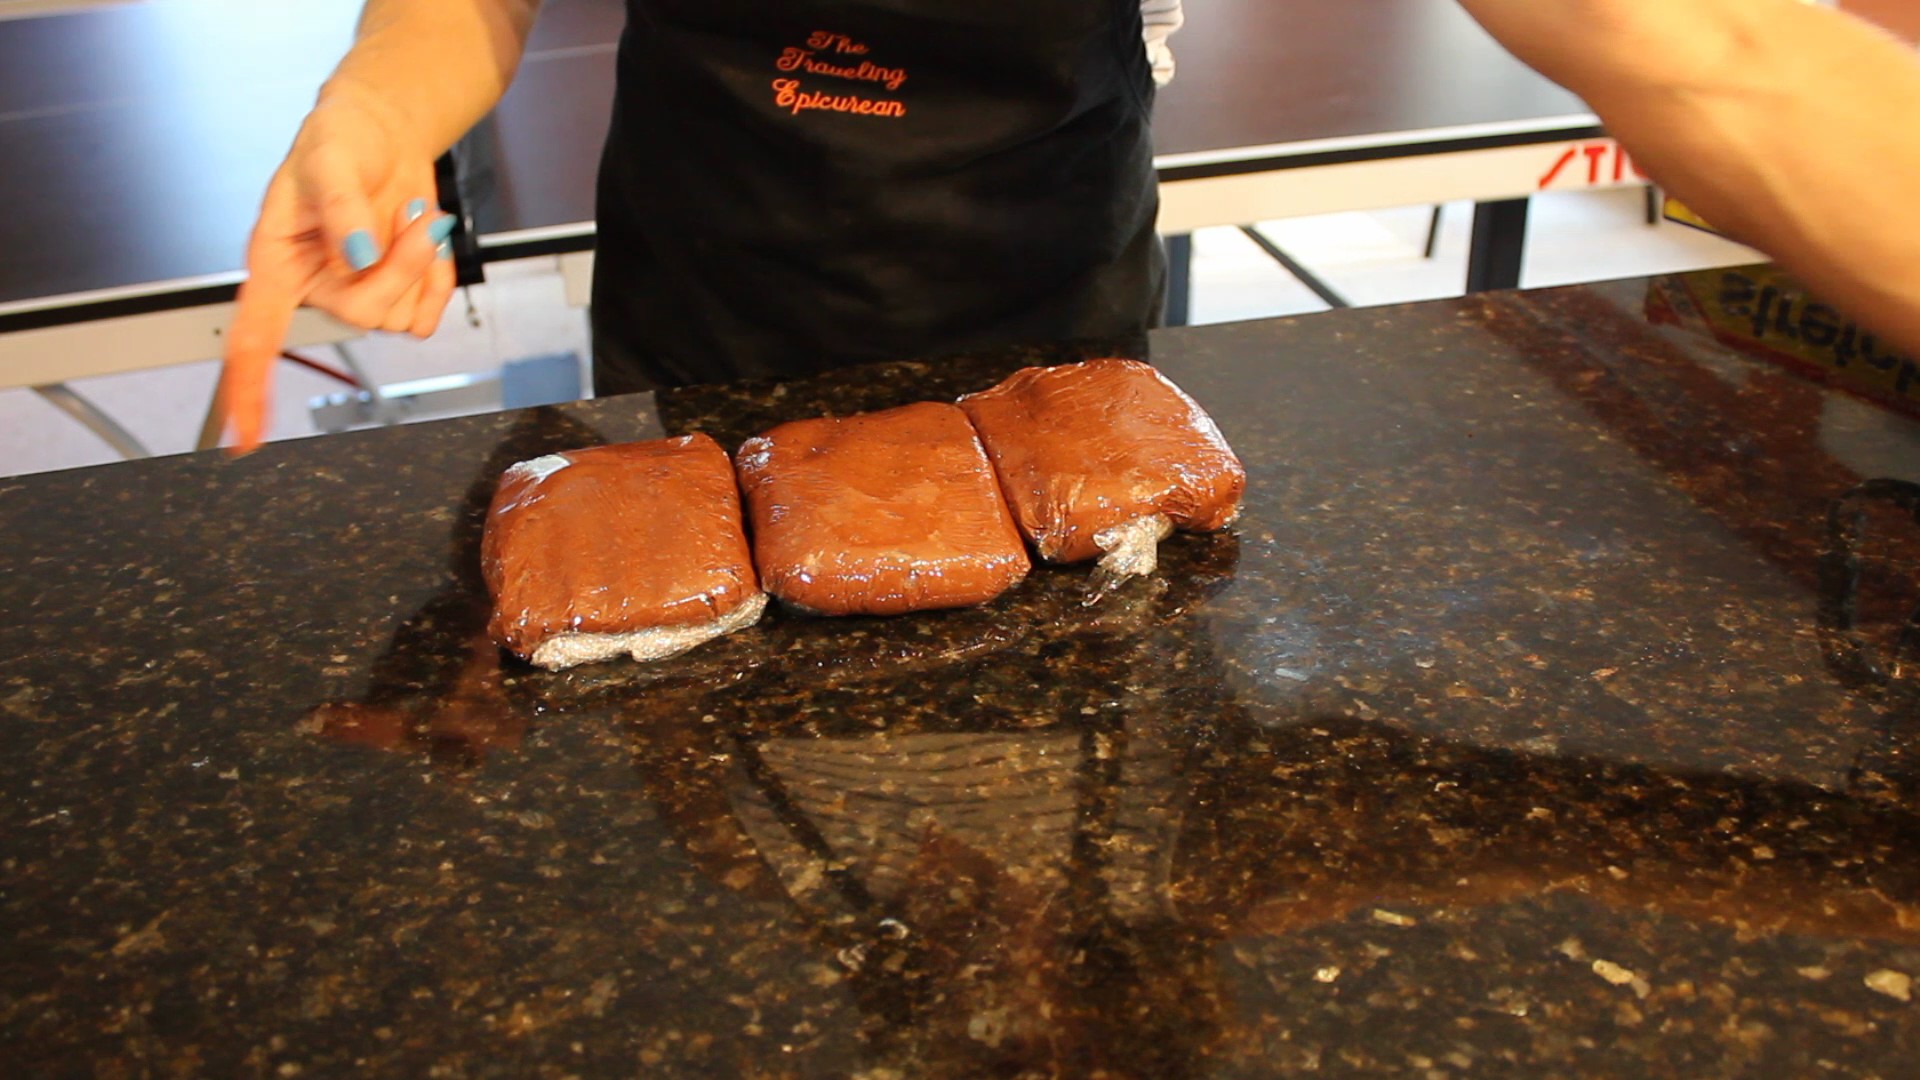
When completely mixed turn out dough onto 3 pieces of saran wrap
Fold up in saran wrap and shape dough into disks, chill at least 2 hrs. – overnight
You can also freeze at this point for a later date
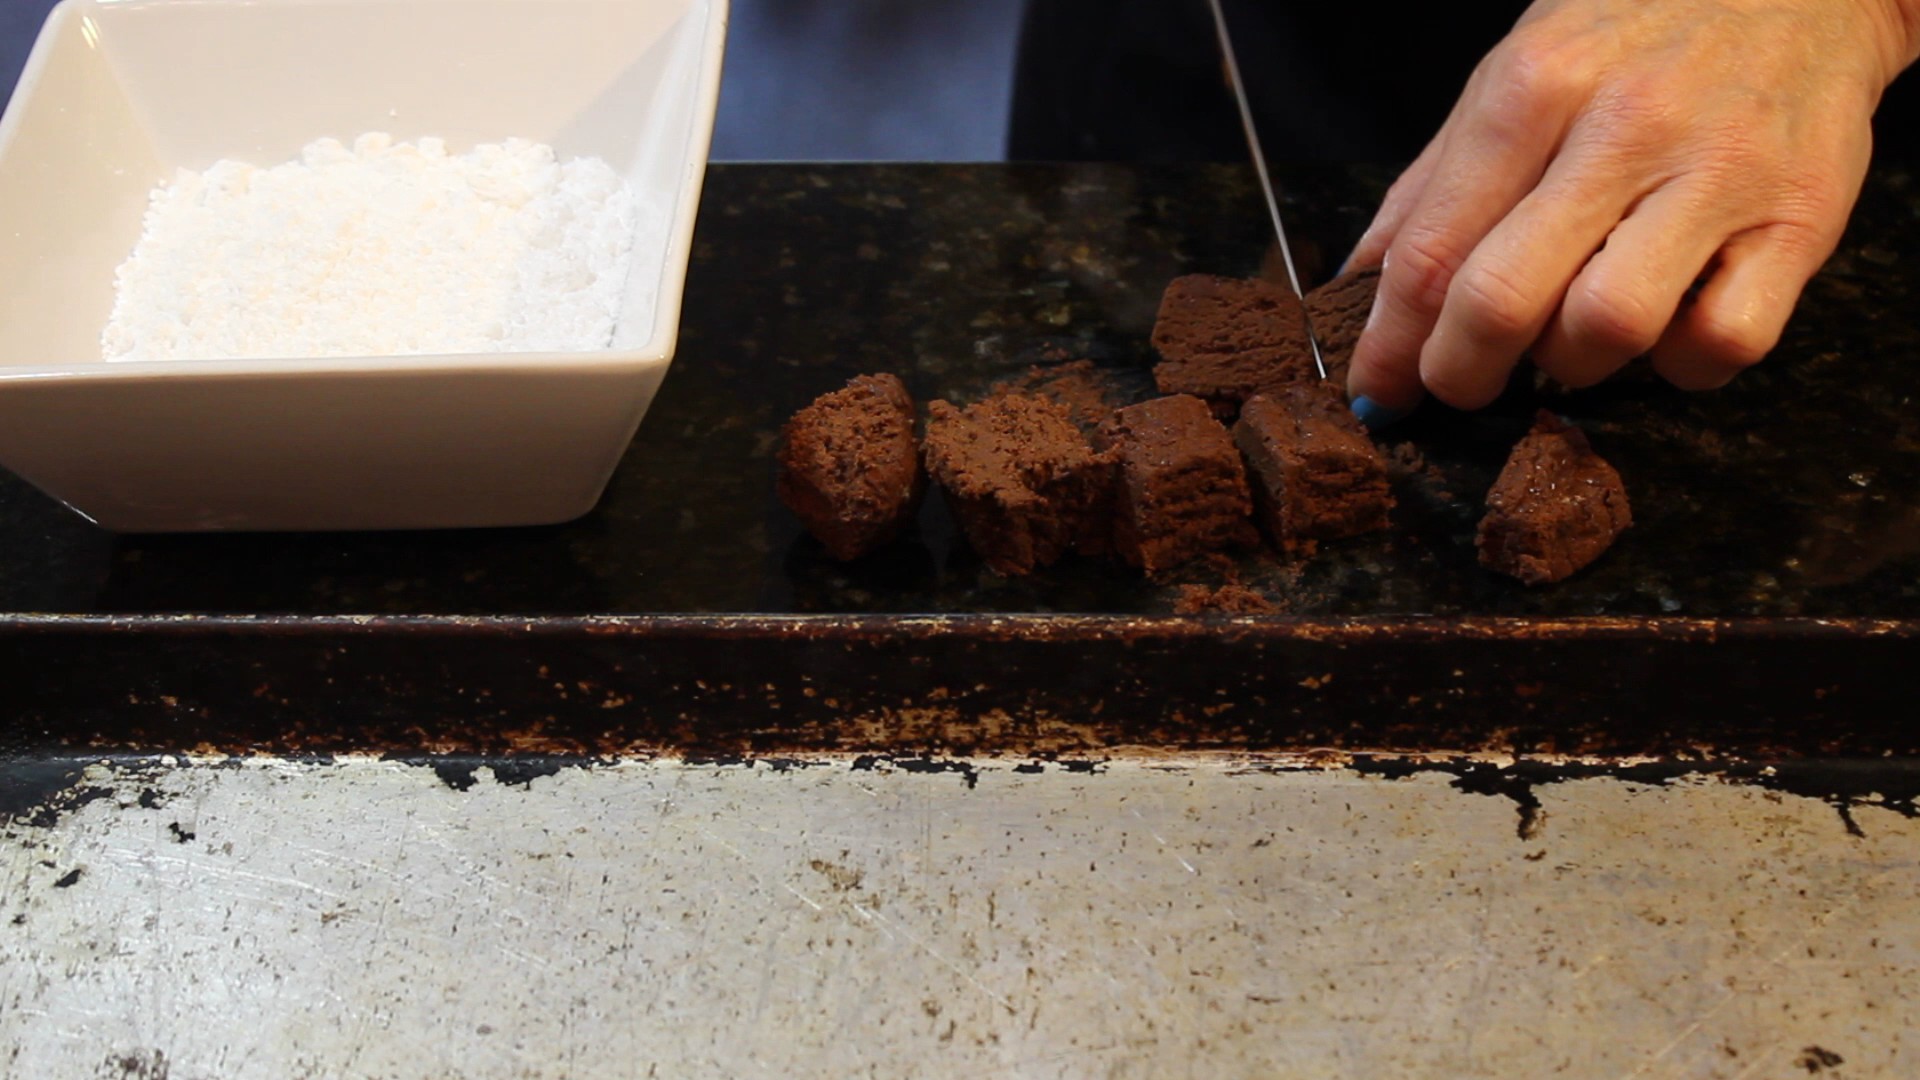
Take dough out and cut into 1″ pieces
Roll each of the pieces into balls
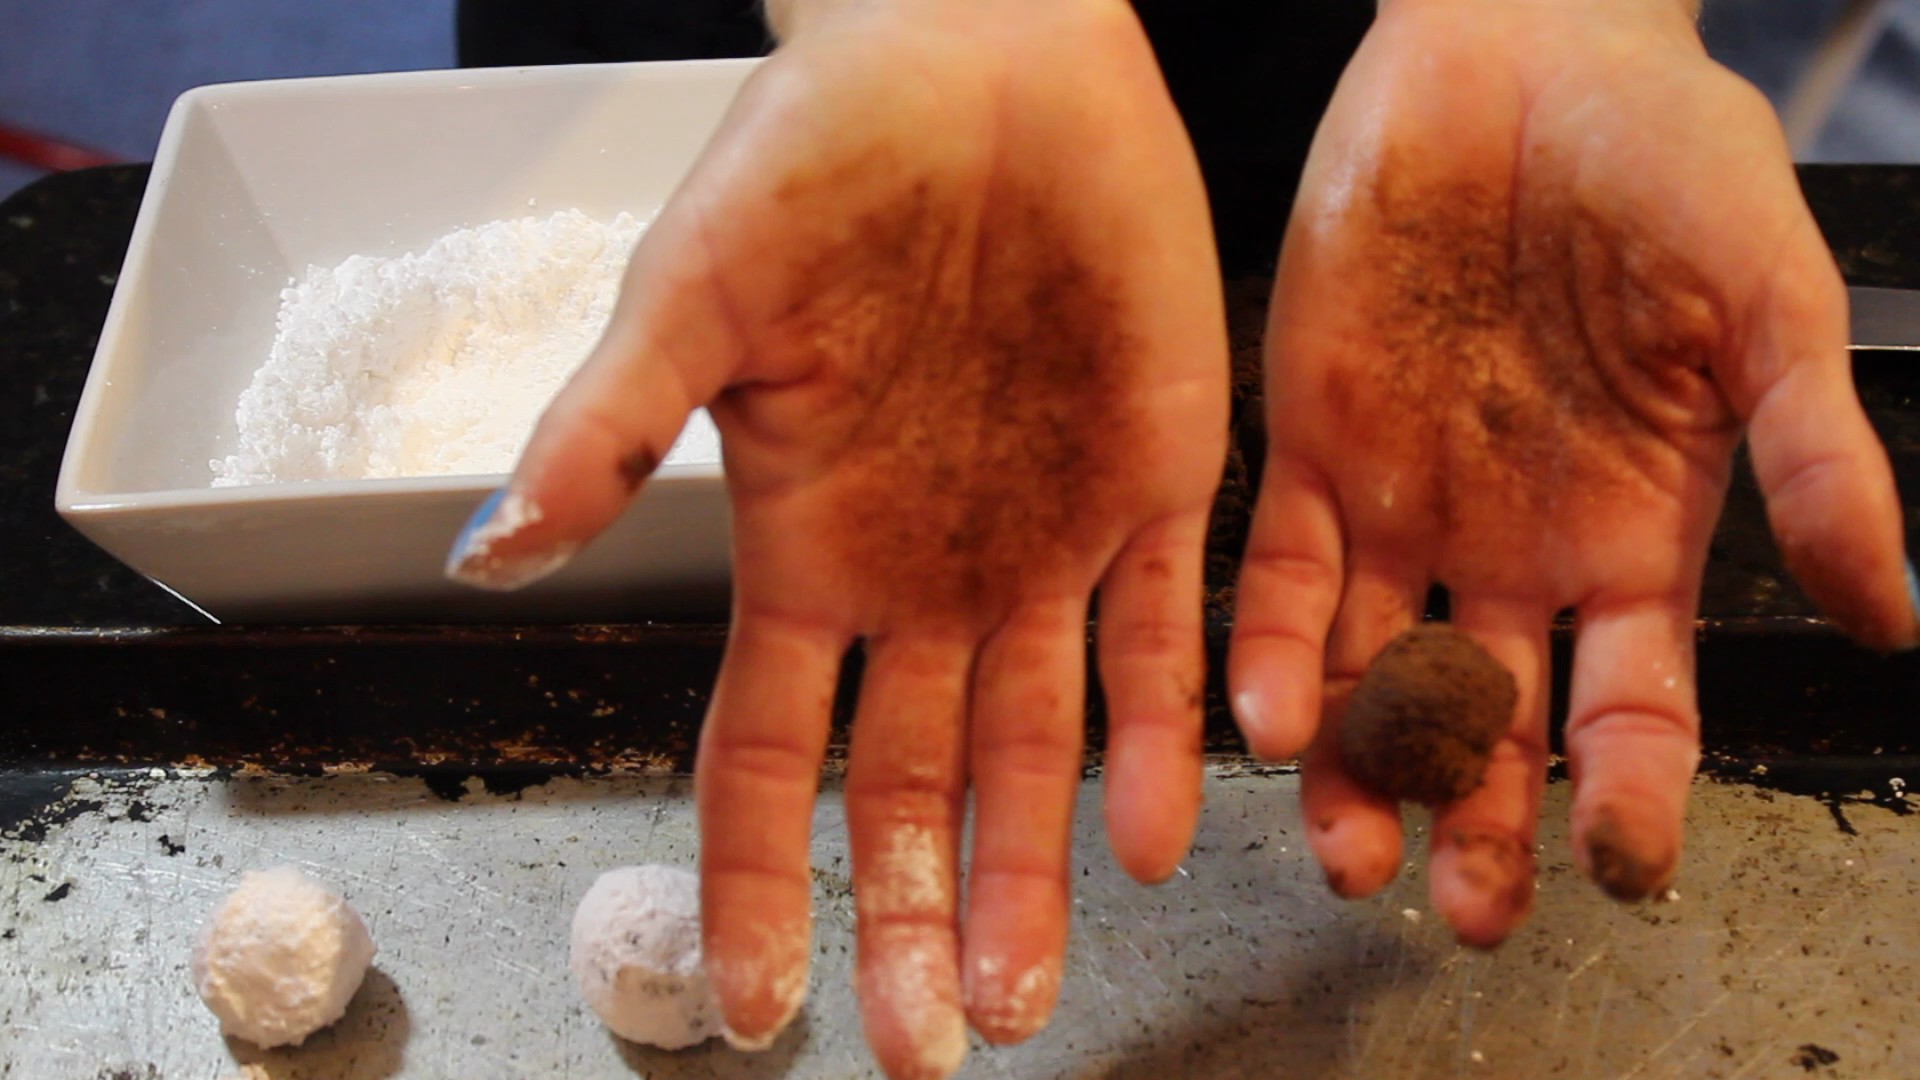
As you shape the dough into balls place them into a bowl full of confectioners sugar and roll around to completely coat
After the balls are coated place them onto cookie sheet 2″ apart
You will need to periodically rinse you hands to remove the dough accumulating on them
NOTE: The dough rolls into balls the easiest when your hands are rinsed and a little damp
Bake for 8 minutes on 350º
Remove and let cool on the cookie tray for 5 minutes before you transfer the cookies to a cooling rack
Let cool completely before to stacking on serving plate
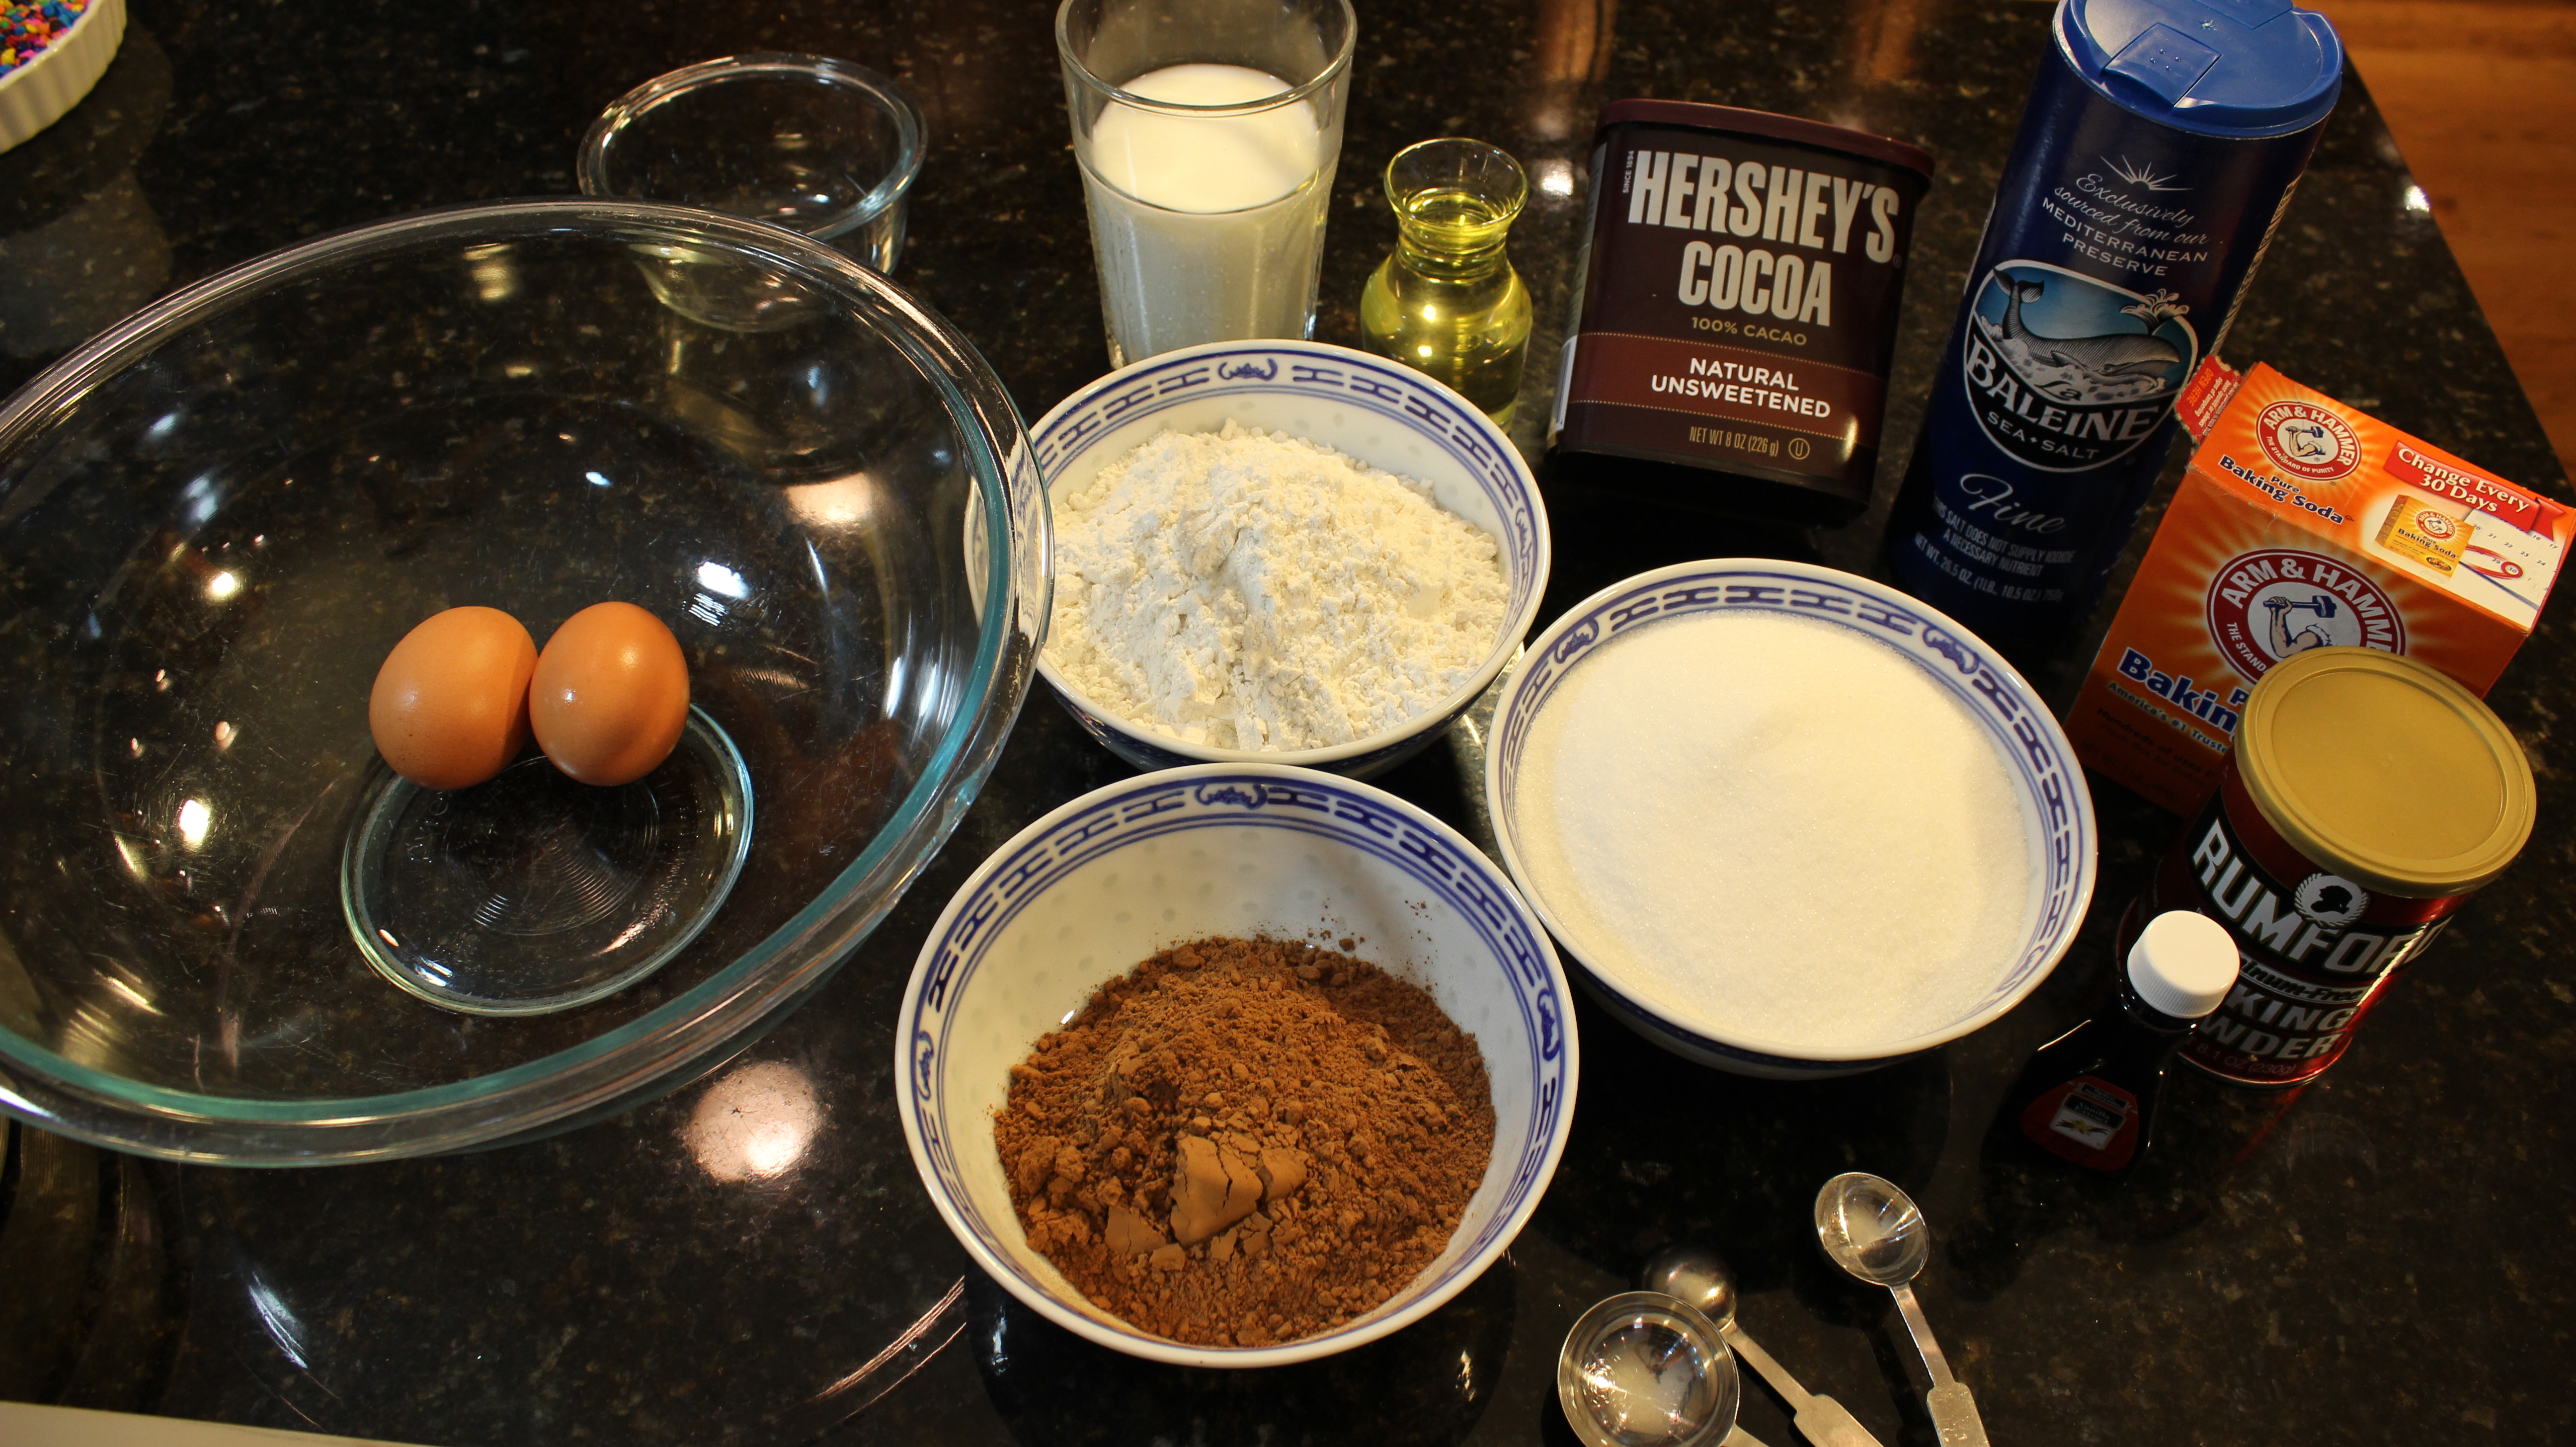
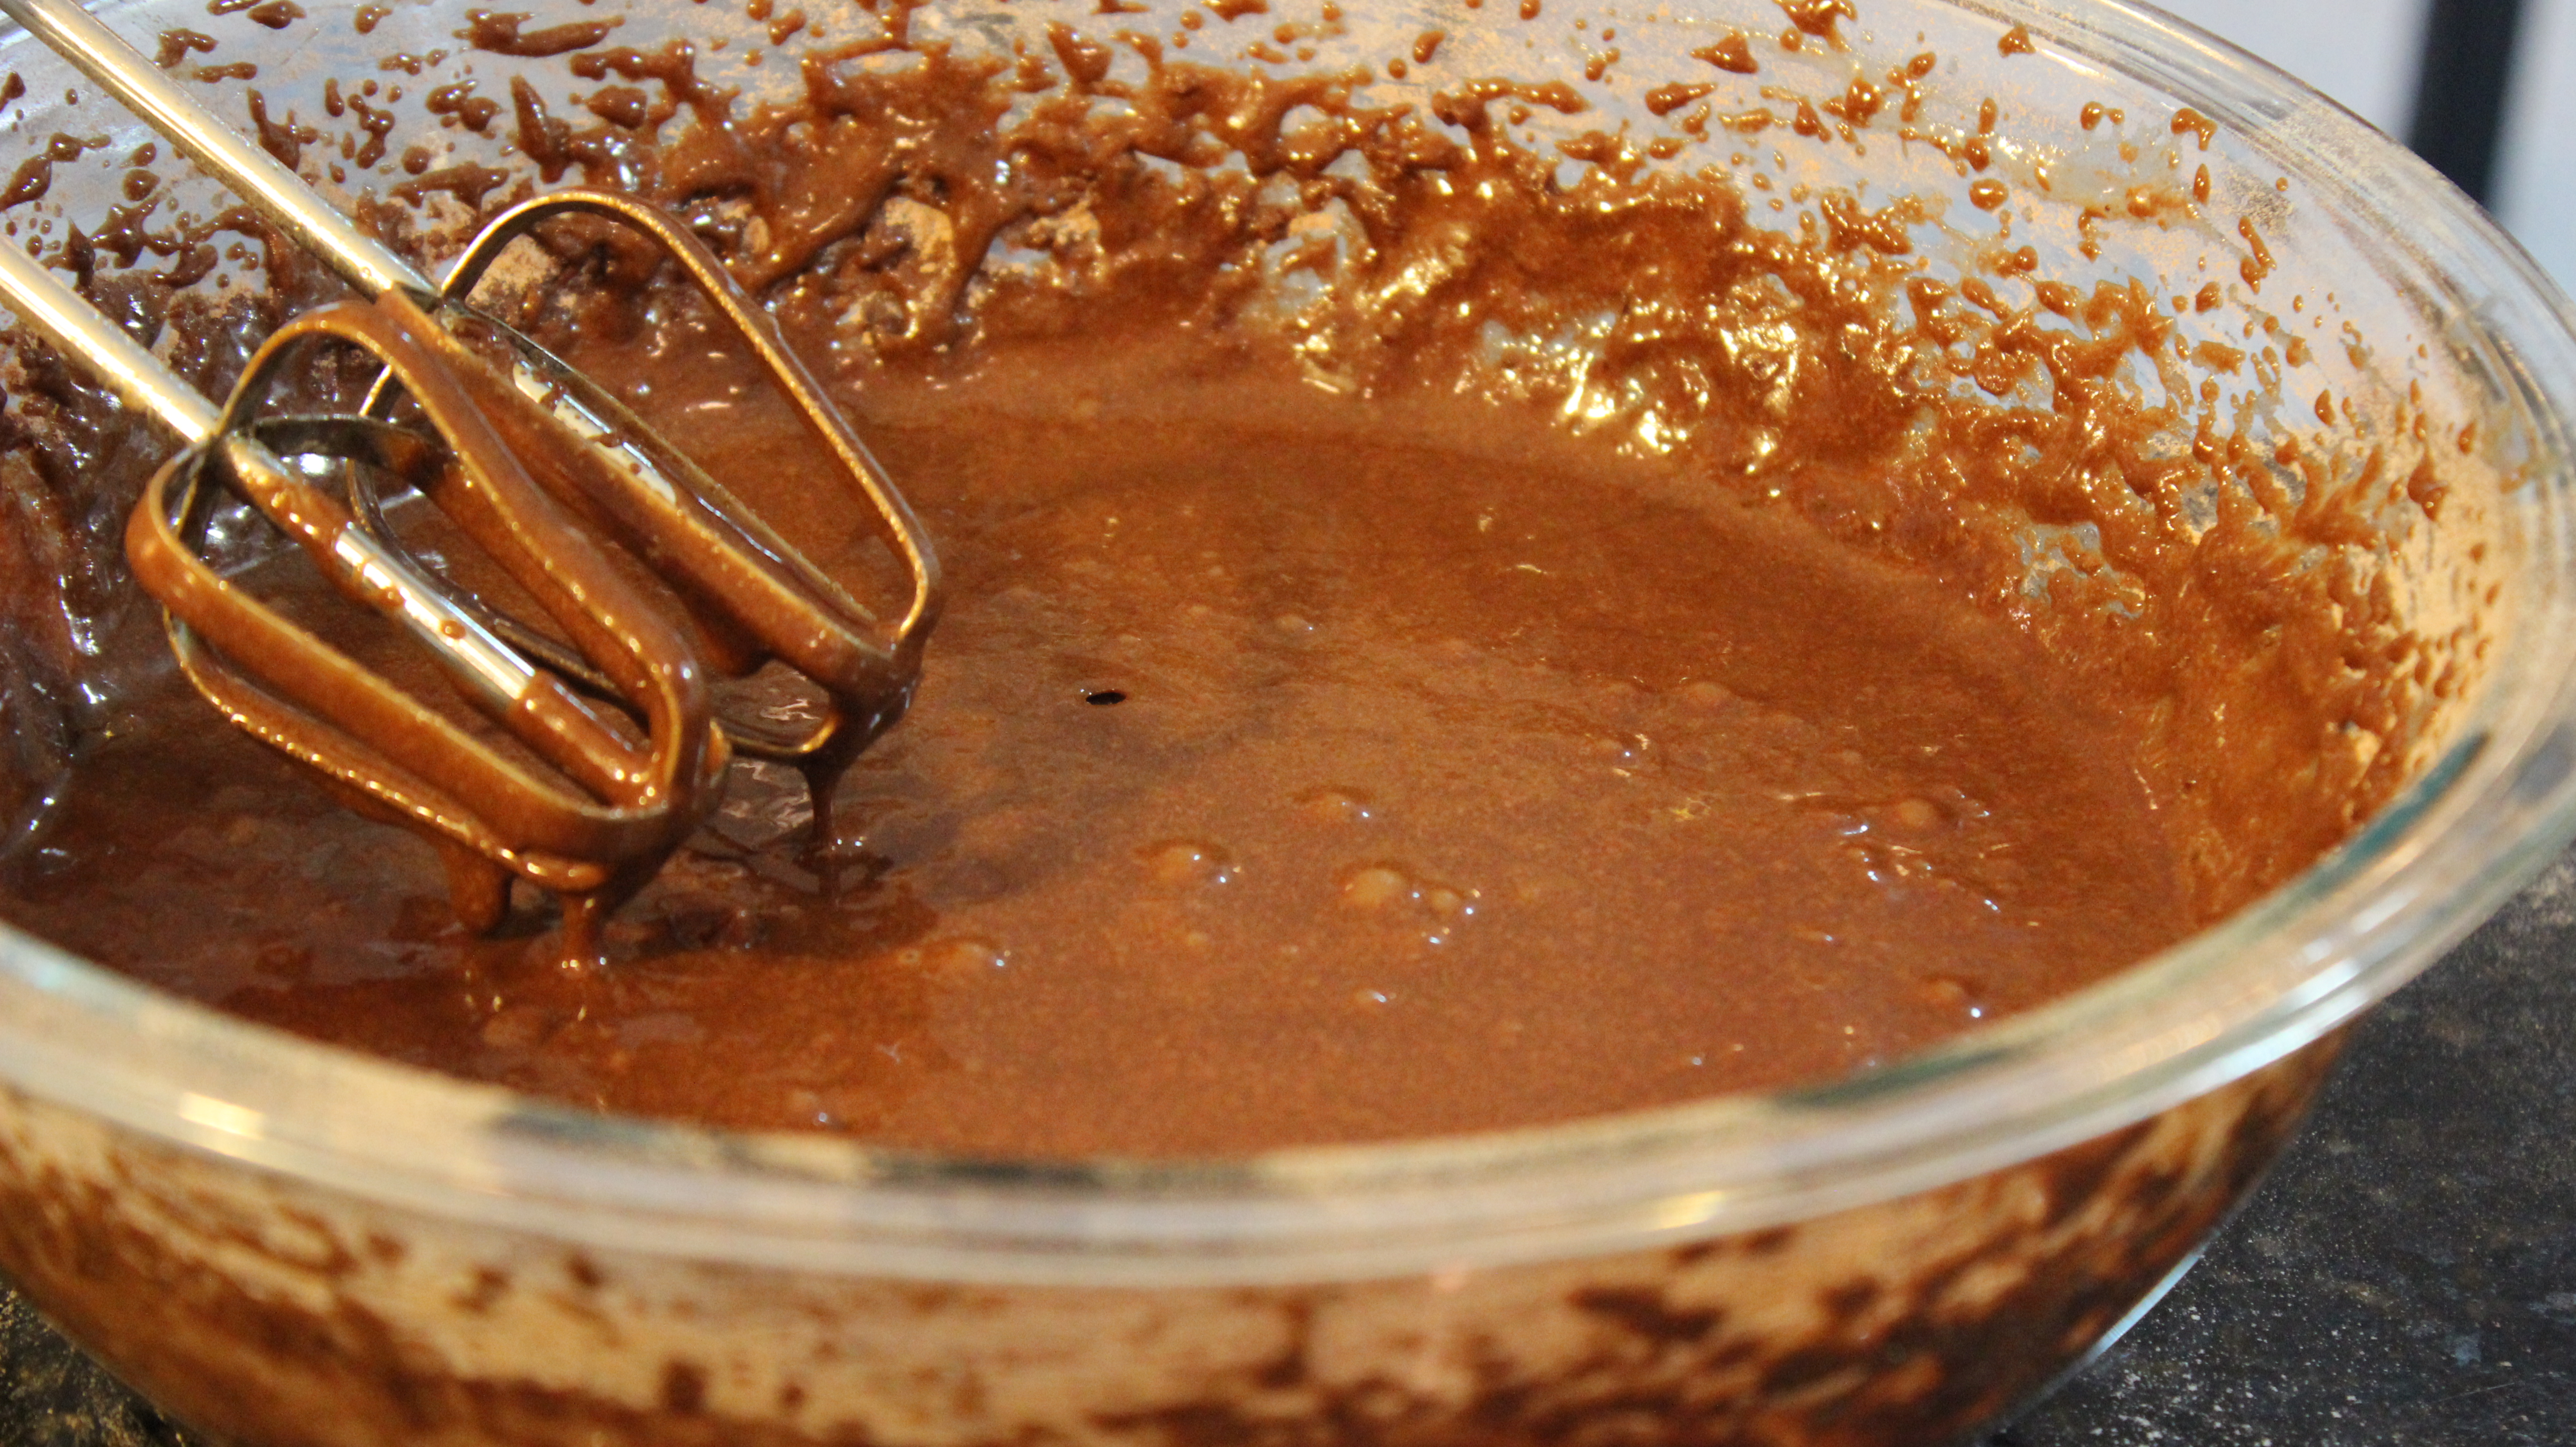
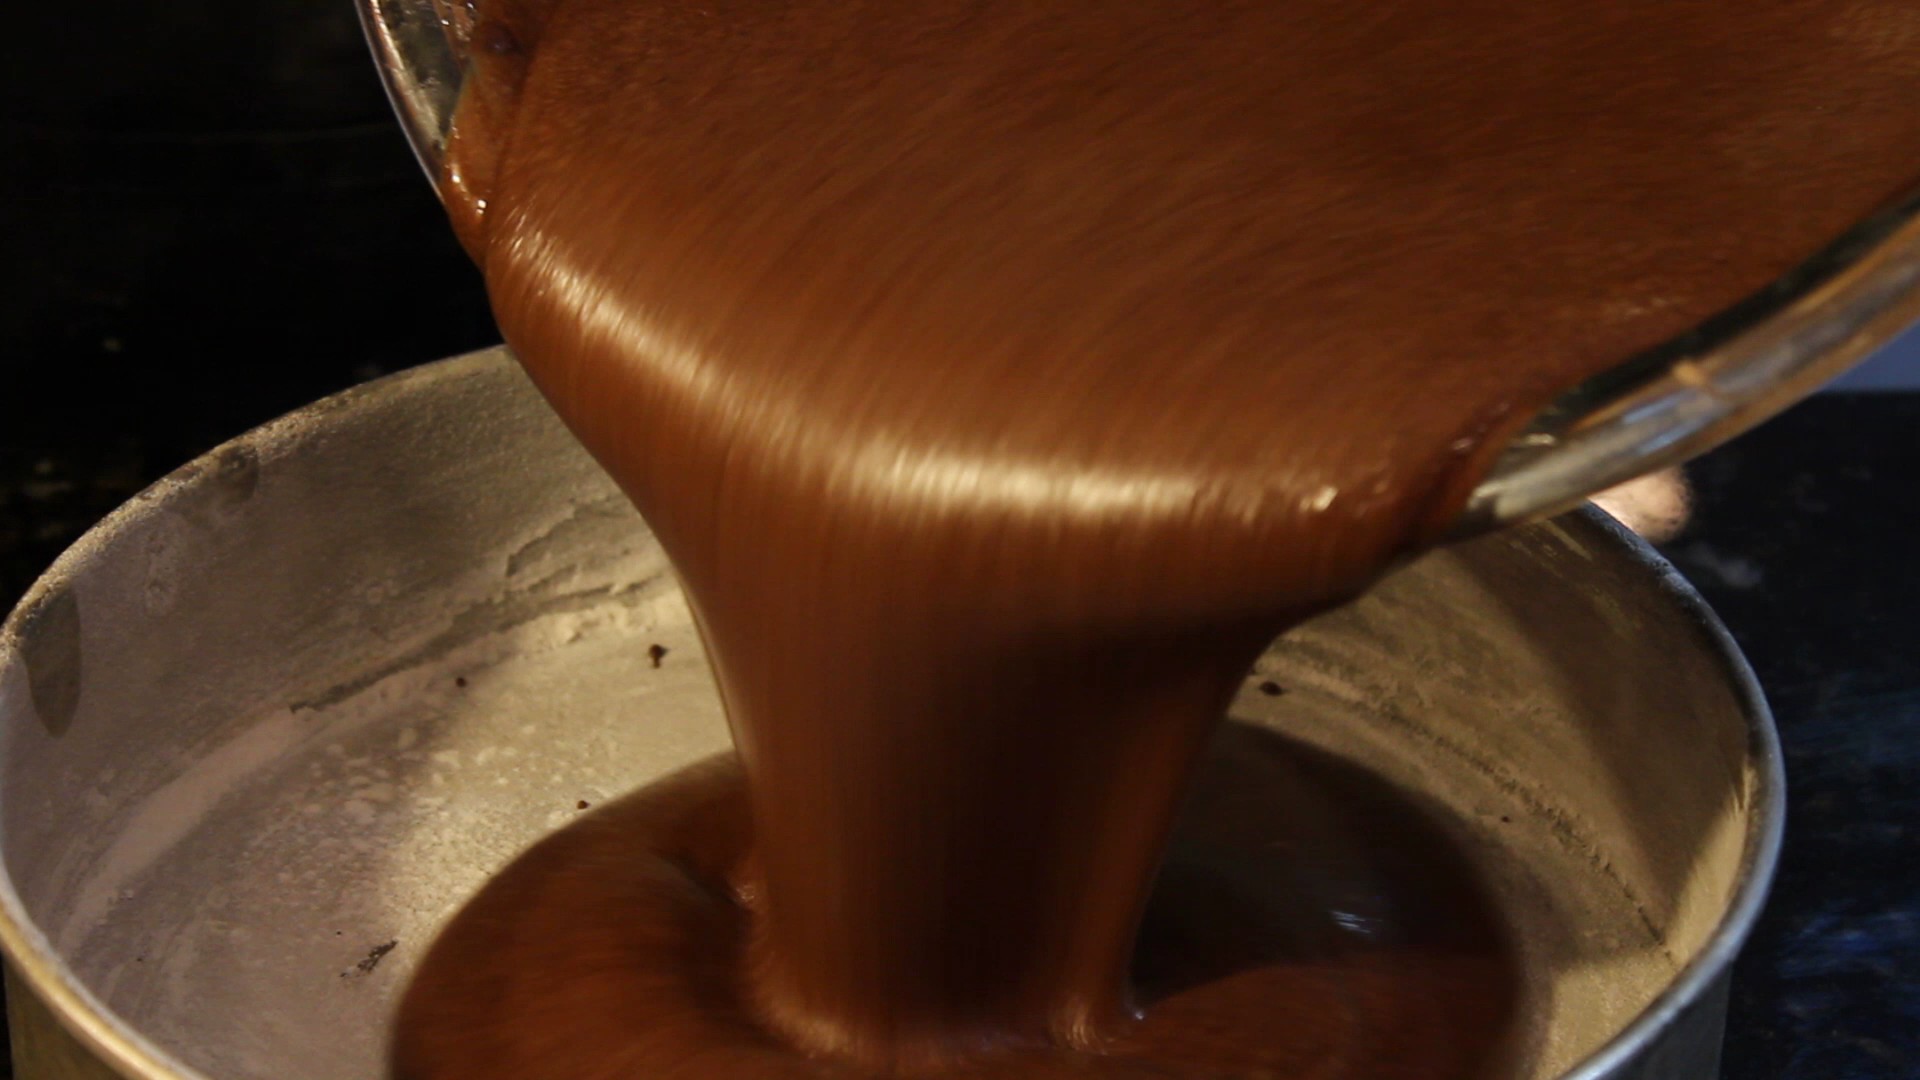
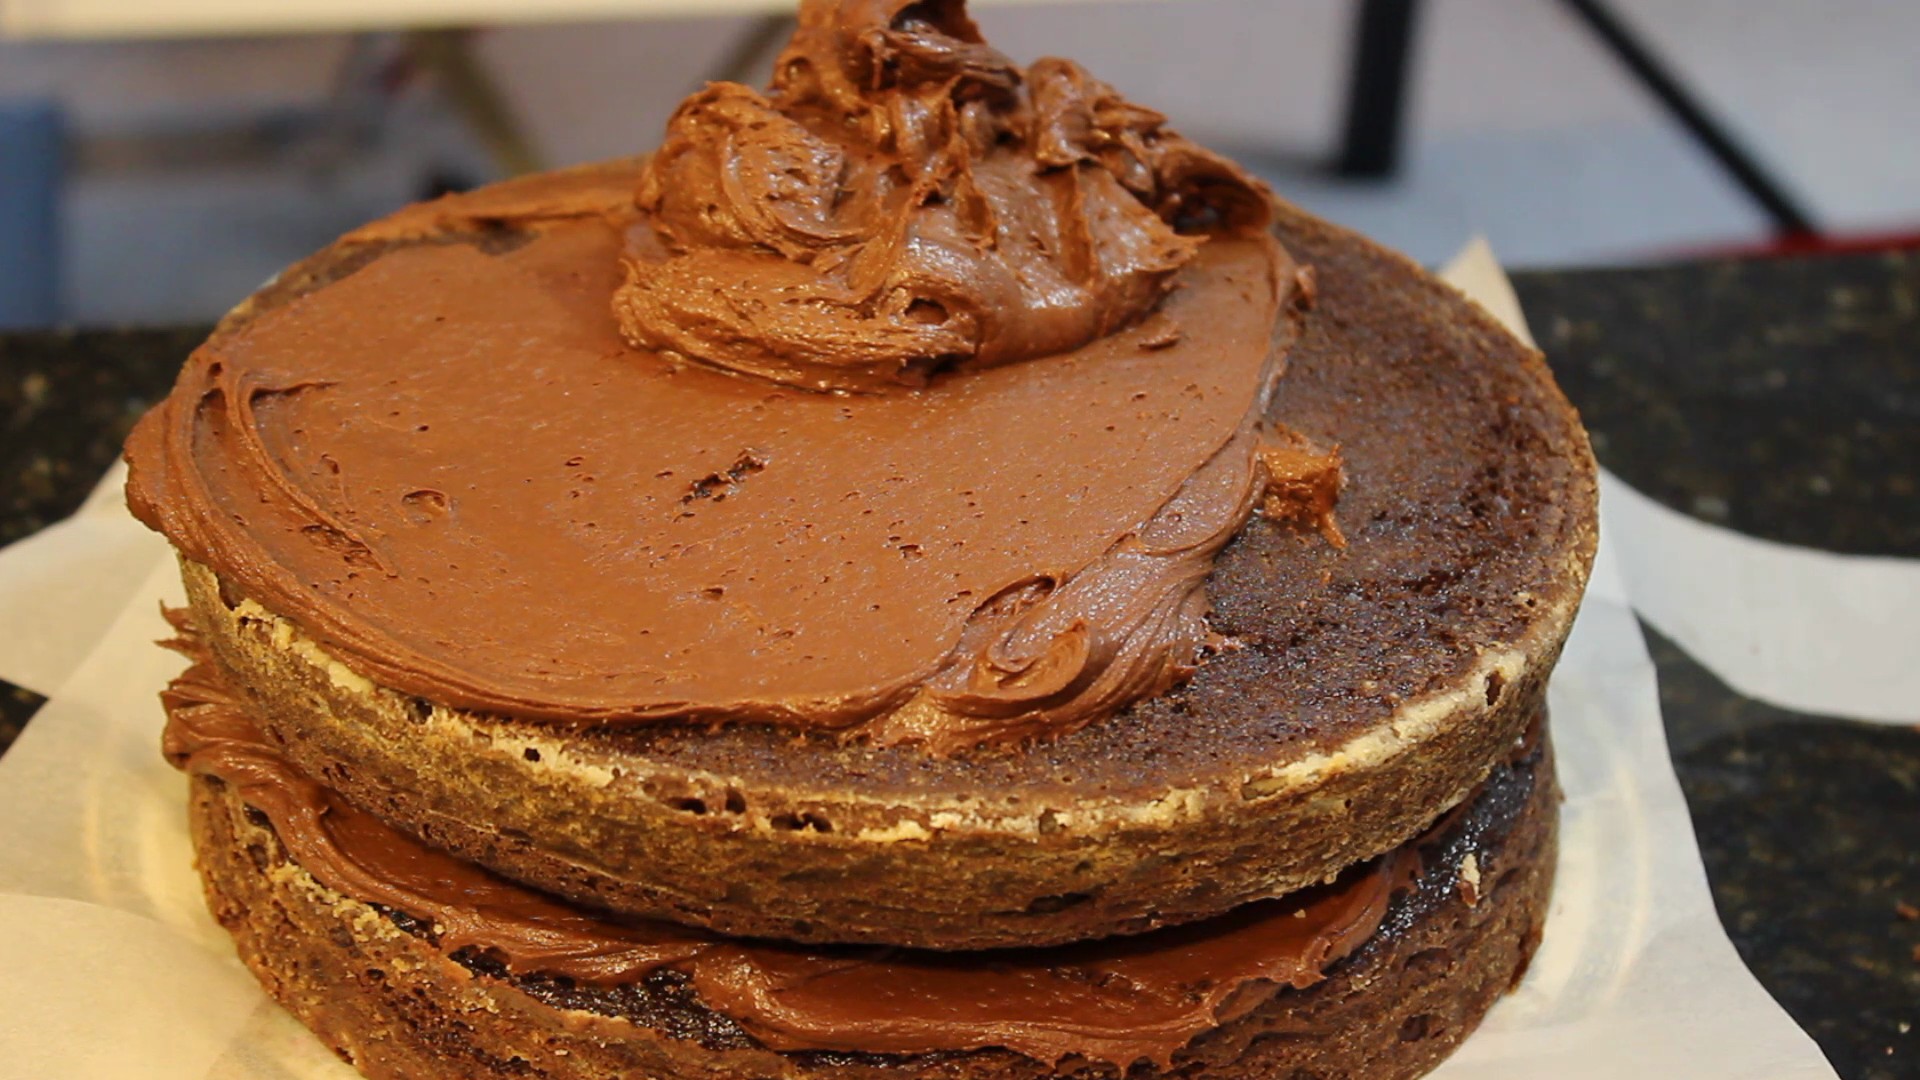
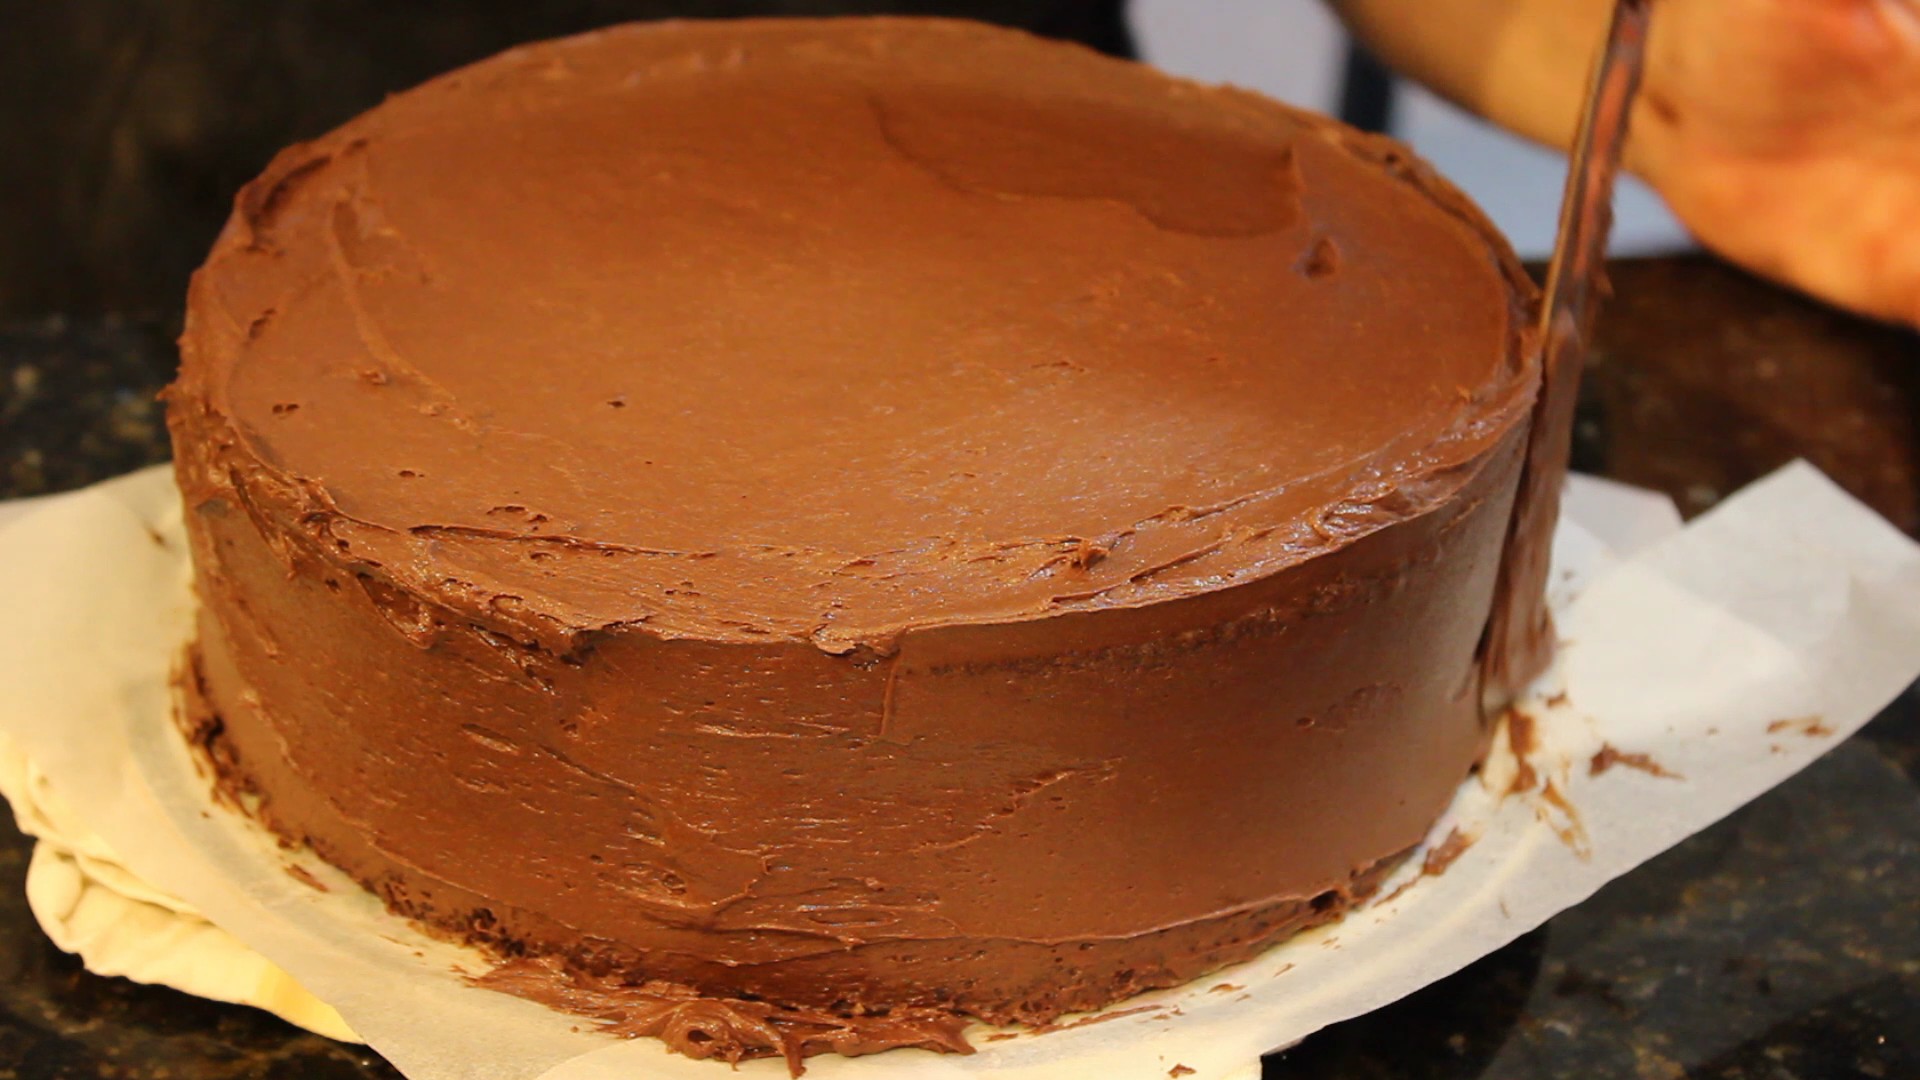
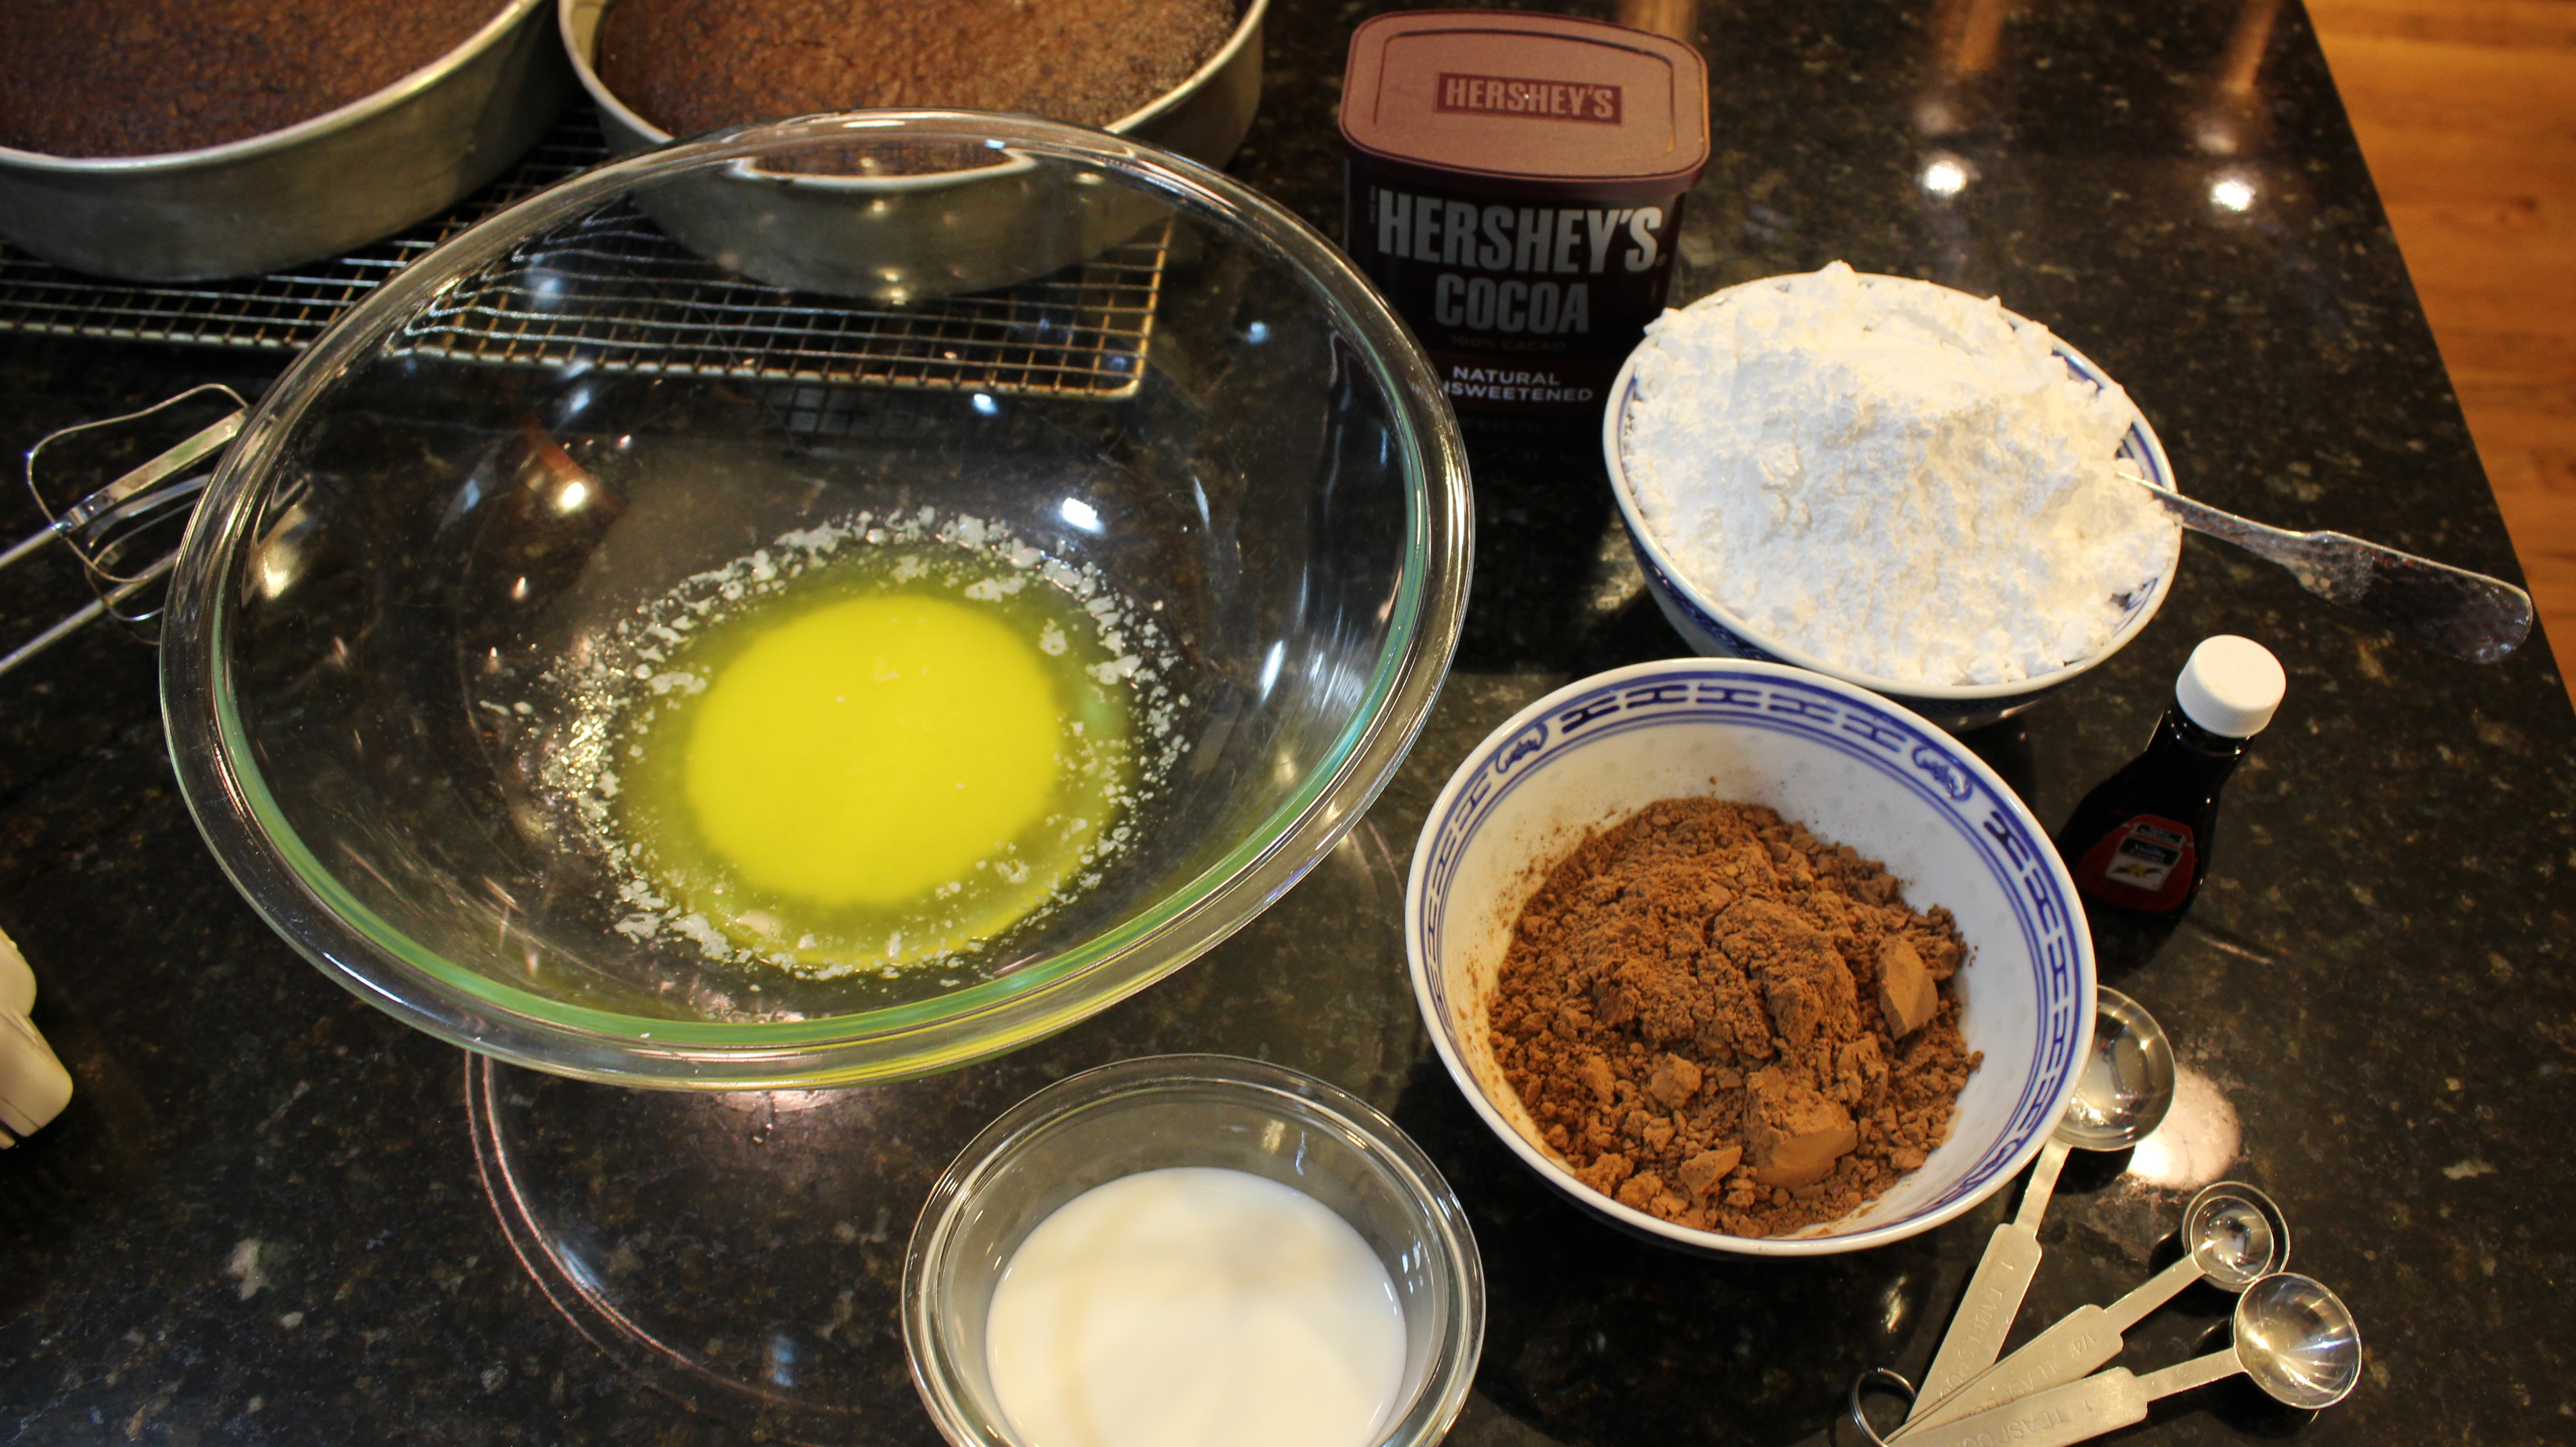
The name “perfectly chocolate chocolate cake” pretty much sums it up right there although you won’t know how easy it is to make this homemade gourmet chocolaty cake until you give it a go! This incredible cake and frosting made from Hershey’s Cocoa Powder I have been making for almost 20 years now! Once you see how easy it is to make these moist and chocolaty homemade cakes you’ll never go back to the box again! Besides on my blog you can find these recipe’s right on the back of the Hershey’s Cocoa canister.
I was first turned on to the recipe by a mother-daughter baking team that I met about 20 years ago. They were professional baking contestants from the Midwest who had won numerous times. My quest at the time was to find the “perfect” chocolate cake and their answer was the Hershey’s Cocoa recipe. Not that the name itself on the back of the Hershey canister for this chocolate cake recipe wasn’t “perfect” enough I just couldn’t take the irony of it all so off I was trying out the recipe and baking this cake! It had such a lovely texture without being too dense or heavy. It was oh so chocolaty and moist to top it off. The amount of steps and effort put in to making this cake is pretty much equal to that of making a box cake so why would you ever resort back to making box ever again. You know me, I test other recipes to make sure I have the best and I always go back to the Hershey Cocoa recipe!
The Hershey’s “perfectly chocolate chocolate frosting” is one that should not be over looked either. The frosting is amazing and one of my favorite go to recipes totally blowing away that “canned” stuff with the plastic lid. I am really excited for these recipe’s to become a couple of your favorites too. You may find your friends and family requesting “your” perfectly chocolate cake for their next visit! I hope you enjoy the show!
1 1/4 tsp baking soda -(Hershey recipe calls for 1 1/2 tsp)
NOTE: I like to use 1 1/4 tsp baking powder & 1 1/4 tsp baking soda instead of the “Hershey” recipe that calls for 1 1/2 tsp for both because this produces a cake that is a little more moist because it doesn’t rise fully, and sometimes I even use 1/2 tsp baking powder & 1/2 tsp baking soda for a cake that has more of a pudding texture (not too dense or heavy either …just pudding like) Have fun!
1 tsp salt
2 lg. eggs
1 cup whole milk
1/2 cup vegetable oil
2 tsp pure vanilla extract
1 cup boiling water
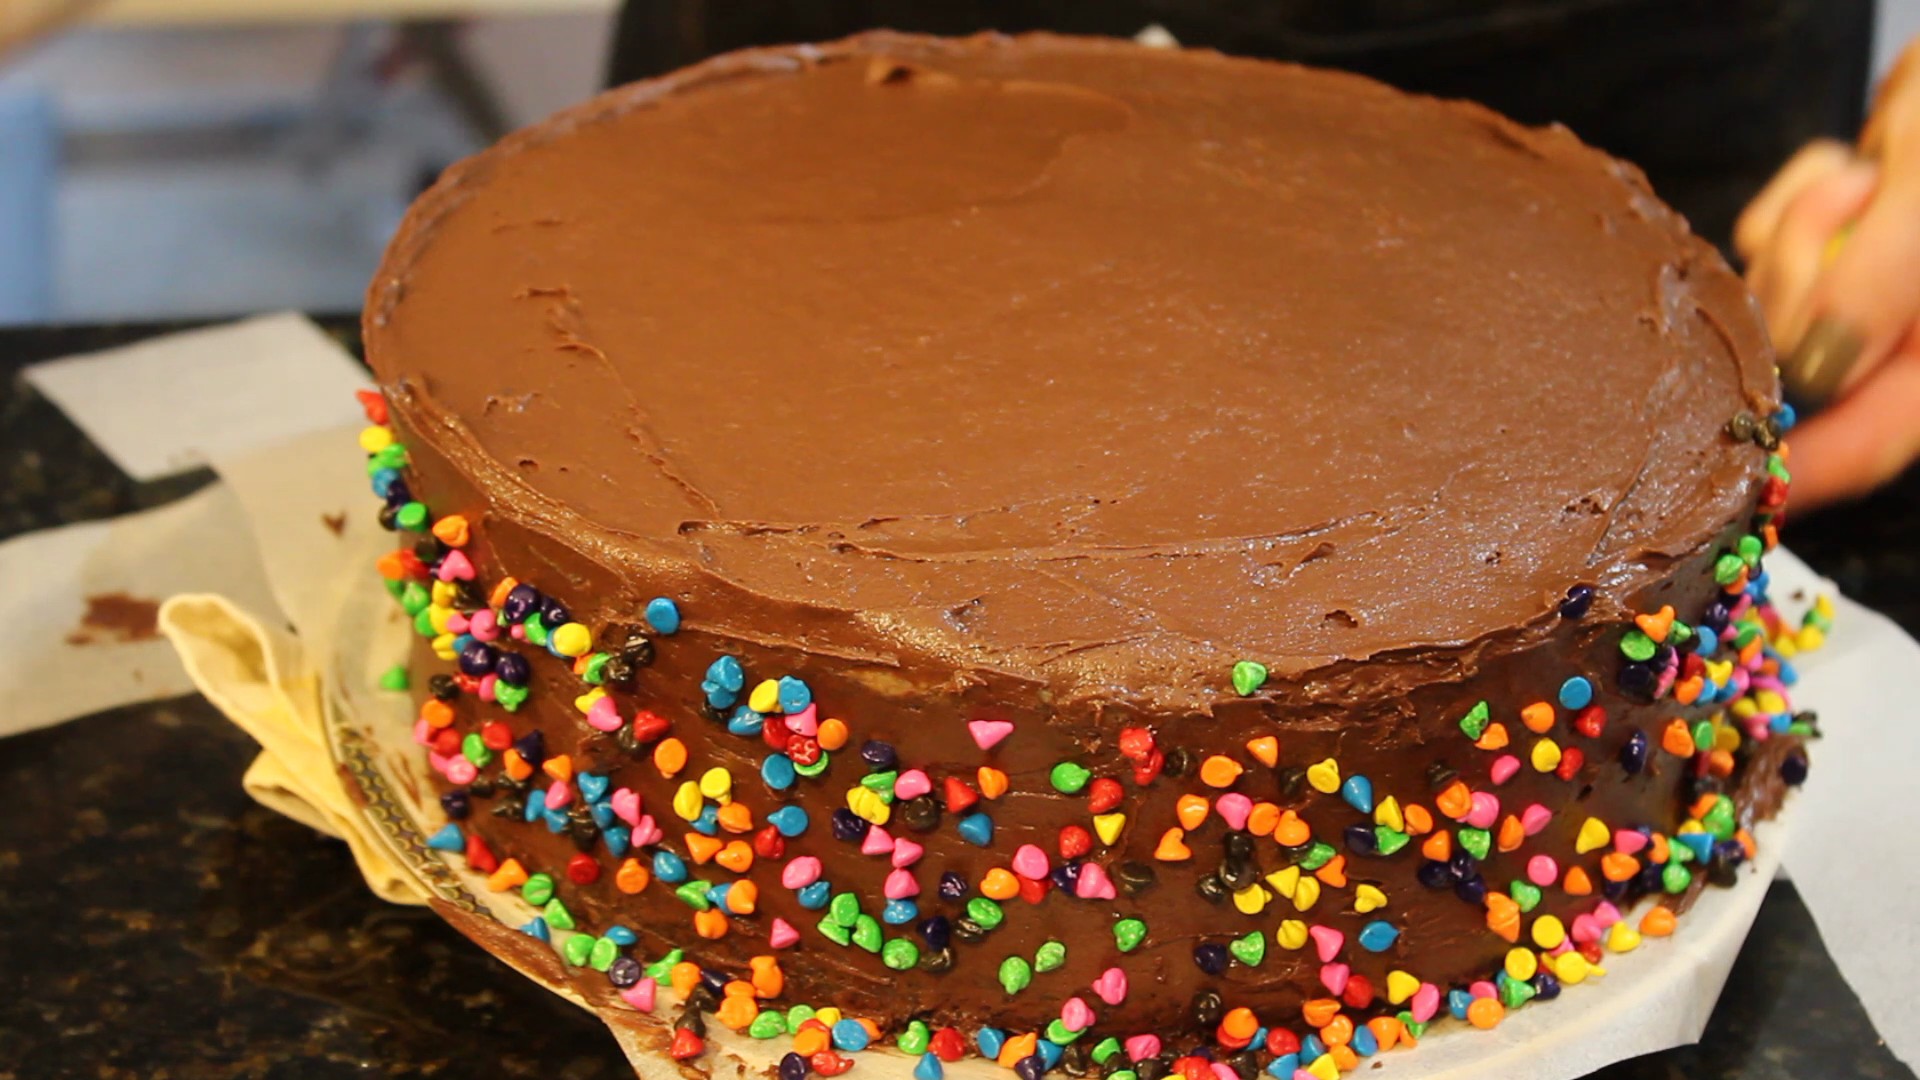
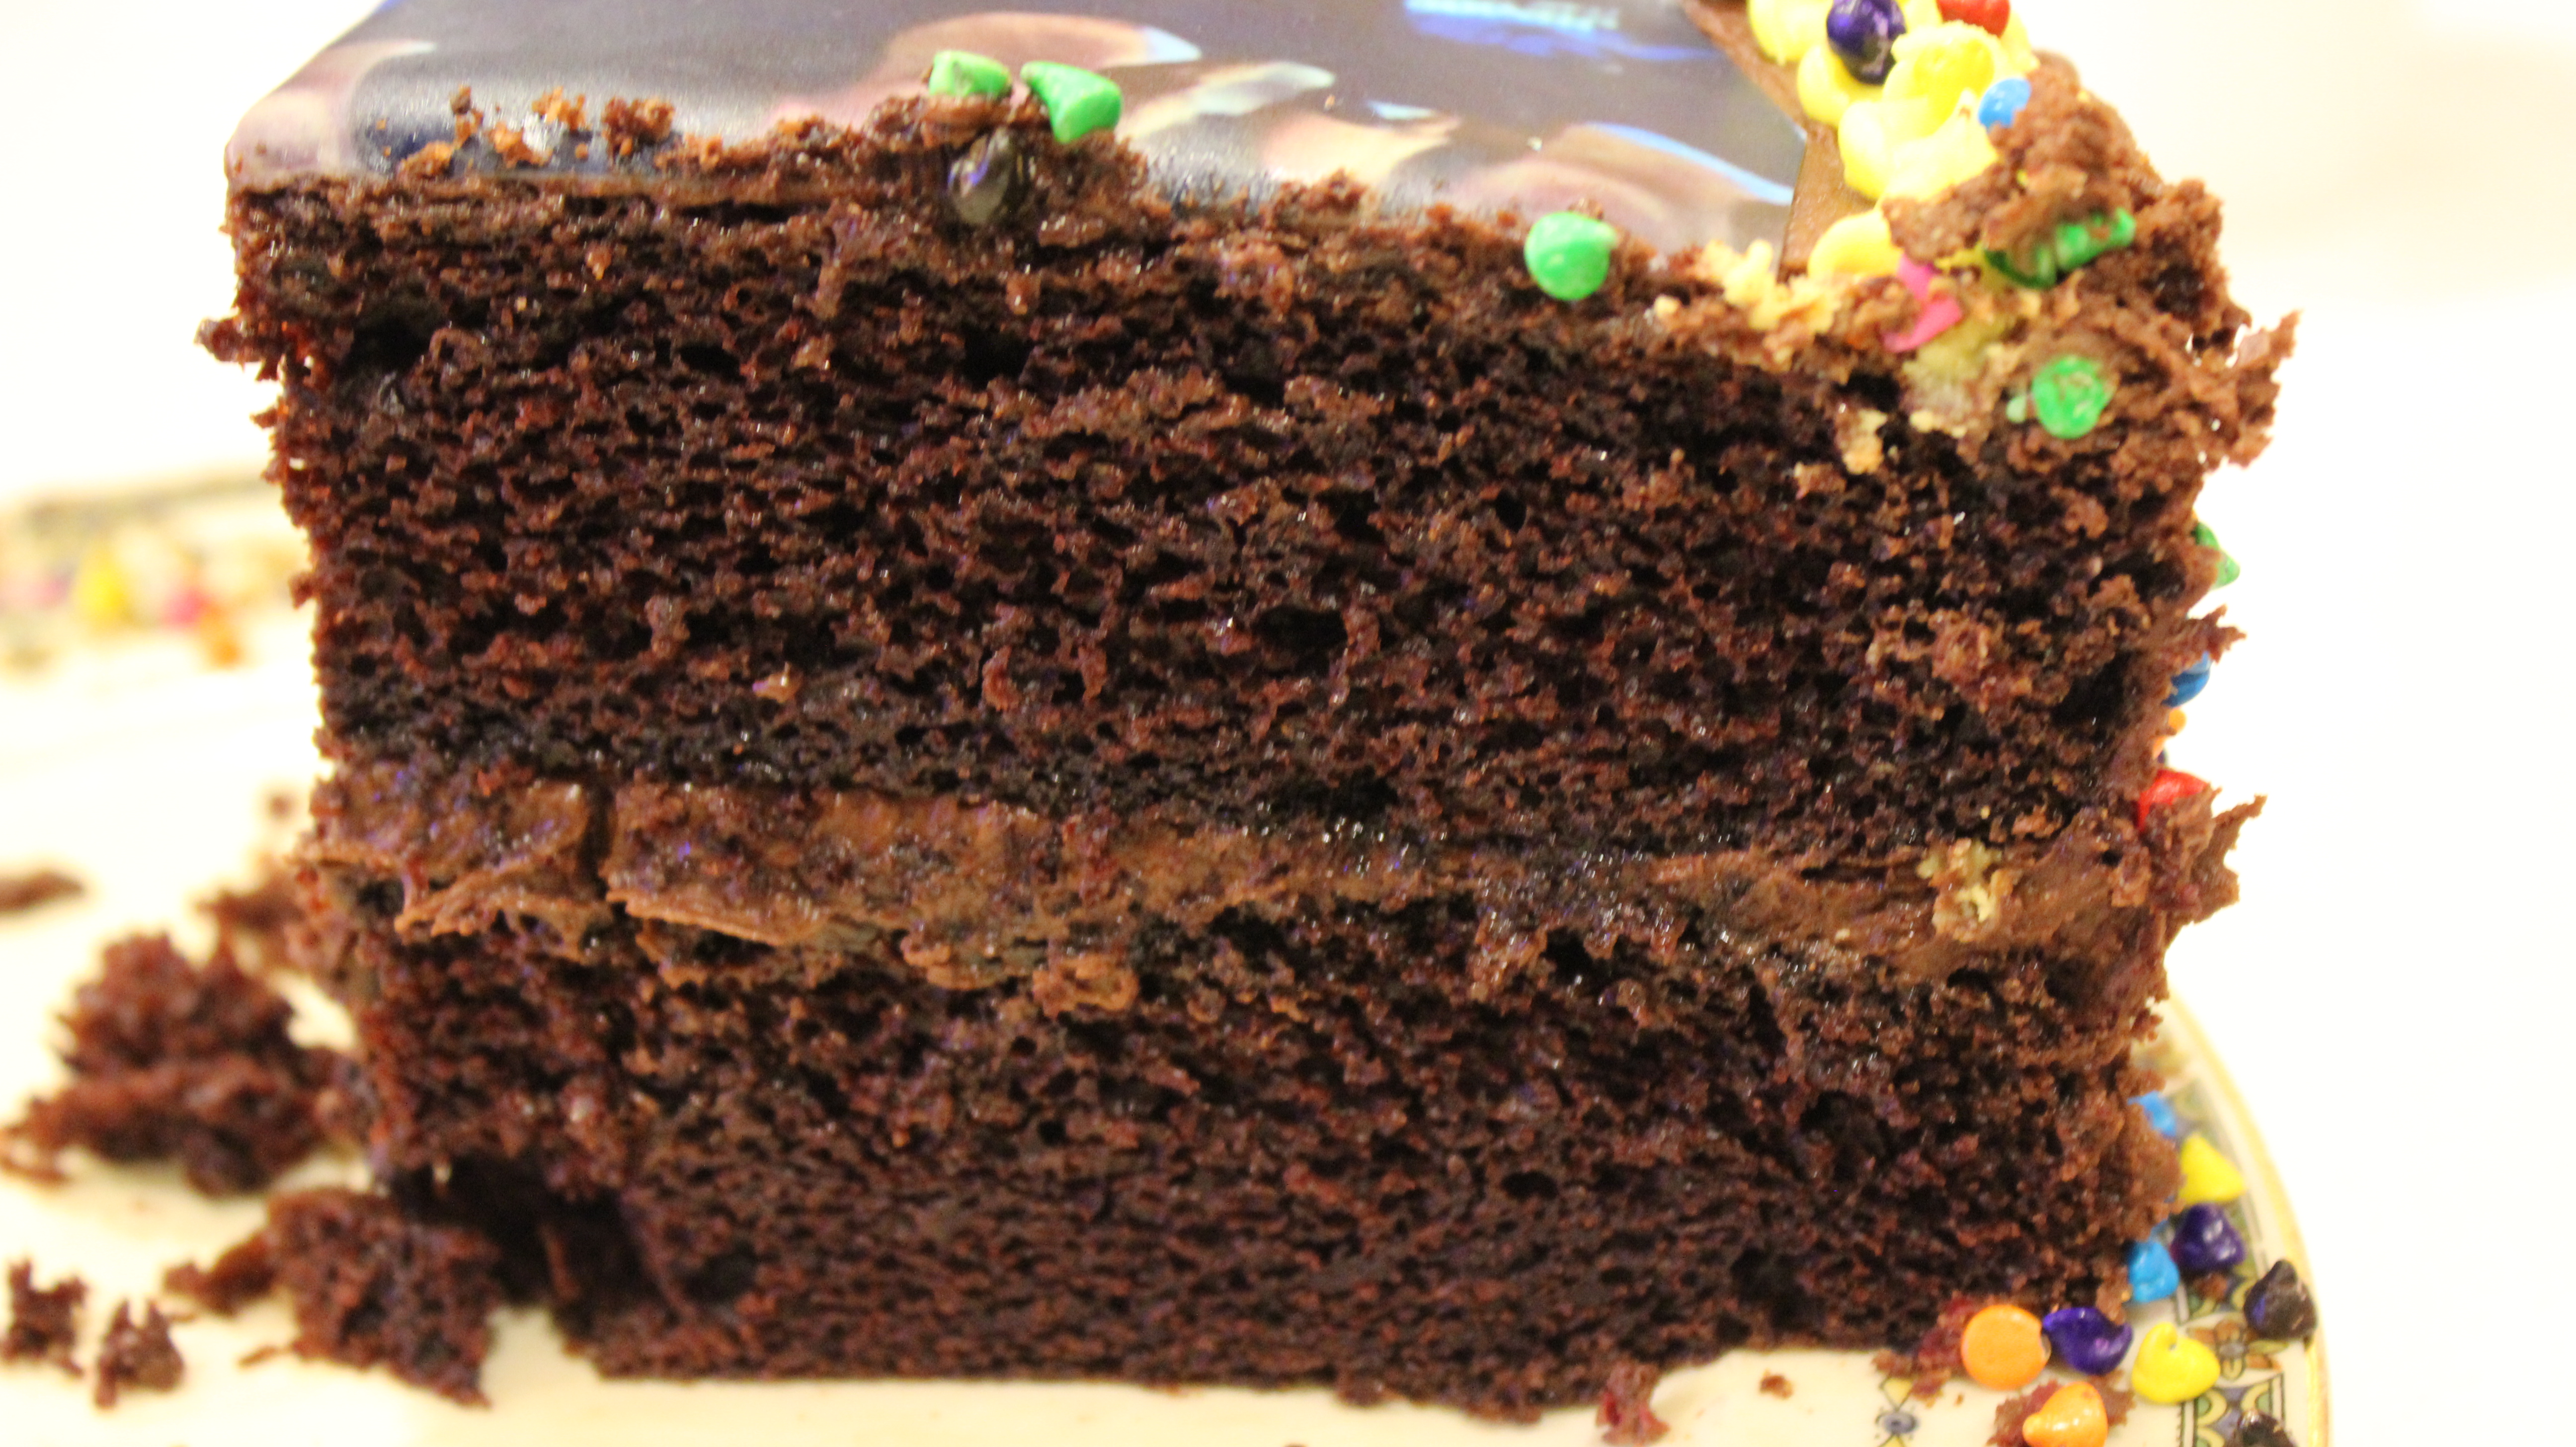
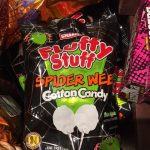
TO MAKE GHOST CAKE THIS IS WHAT YOU’LL NEED:
Find at “Michaels Stores” No. 1-3 Find at “Fresh Market” No. 4
Ghost peeps
Eatable eyballs
Cookie Icing to write on small Hershey chocolate bars for tomb stone’s “RIP”
Spider web stretchy candy (stretchy cotton candy-like) – stretch all around base & in between chocolate bar tomb stone’s
Confectioner’s sugar sprinkled on top to look like a dusting of snow!
Hershey chocolate bars-small ones-write on back “RIP” with Icing in bottle SHOWN ABOVE
Glue candy eye’s and anchor tomb stone’s to cake with the cookie icing
Directions for Cake…NOTE- I Bake My Cake On Convection:
Pre-heat oven to 350º
Grease and flour 2 – 9″ round baking pans
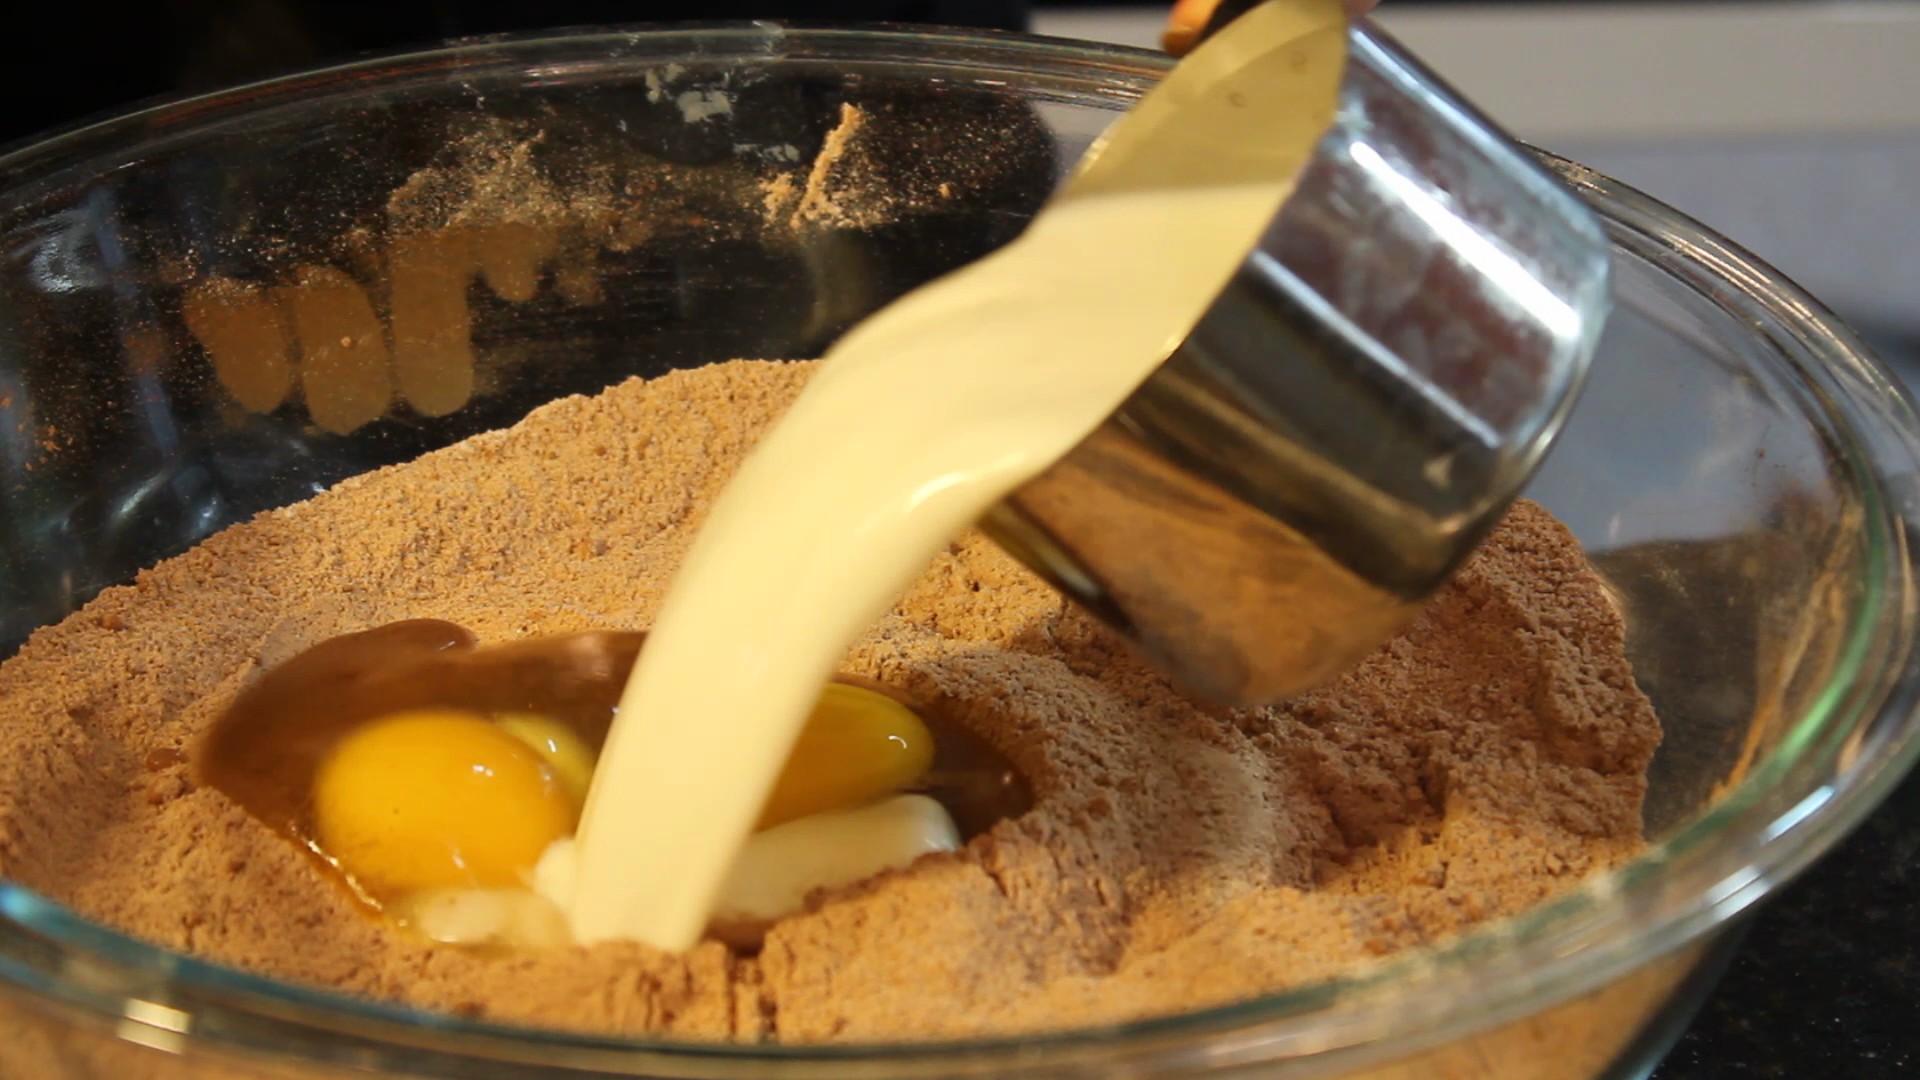
Add all dry ingredients to a large mixing bowl and whisk to combine
Add in eggs, milk vanilla and oil and beat on medium speed for 2 minutes
Stir in 1 cup boiling water til combined (batter will be thin)
Pour evenly into cake pans
Bake for 30-35 minutes –NOTE: I ALWAYS take the cake out at 30 minutes!
Remove from oven and cool 10 minutes
Remove cakes from pans, place on cookie racks to cool completely before frosting
I cool for 1 hour then immediately frost the cake
Ingredients for Frosting:
1 stick of butter melted
2/3 cup Hershey Cocoa
3 1/2 cups confectioners sugar (powdered sugar)
1/3 cup plus 1-2 tbsp milk
1 tsp pure vanilla extract
Directions for Frosting:
Melt butter and add to lg bowl
Add in Hershey Cocoa and vanilla and whisk til smooth
Alternate adding in a tbsp of milk and 1/4 powdered sugar while beating on medium speed til smooth
When texture is smooth add in more milk and powdered sugar until all is gone and it’s the thick creamy consistency you want


 You are definitely going to want to try these Guinness Chocolate Cupcakes with the Viennese Chocolate Frosting and the timing couldn’t be more perfect with St. Patrick’s Day right around the corner. Looks like you may need a super awesome appetizer that will make use of that left over corned beef too like my
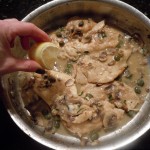


 Drunk blondies are a dessert that will have you and your guest’s reminiscing for days! These drunk blondies are a buttery, chewy cookie bar made with bourbon, butter, toasted coconut, pecans and semi-sweet chocolate chips…could it get any better then that! They get even more decadent when you serve them with vanilla ice cream, homemade bourbon caramel sauce, whipped cream and extra toasted coconut to top it off. In fact, I wouldn’t serve them any other way. You will feel like you are in dessert ecstasy!


 Making Chocolate eclairs with The French Club this week made for an incredibly fun afternoon! The Chocolate eclair shells made from pâte à choux, a french pastry dough, is a cinch to make and so delicious you may find your self wanting to make them this weekend.

 MasterChef open casting calls and chewy chocolate chip cookies are the highlights of my blogging today. With exhausting life events that have taken place over the last three weeks I was some how able to produce my chewy chocolate chip cookie show for you and show up to my second pre-registered casting call for MasterChef.


 The name “perfectly chocolate chocolate cake” pretty much sums it up right there although you won’t know how easy it is to make this homemade gourmet chocolaty cake until you give it a go! This incredible cake and frosting made from Hershey’s Cocoa Powder I have been making for almost 20 years now! Once you see how easy it is to make these moist and chocolaty homemade cakes you’ll never go back to the box again! Besides on my blog you can find these recipe’s right on the back of the Hershey’s Cocoa canister.